HOLIDAY DONATION DRIVE - SUPPORT MSW - DO YOUR PART TO KEEP THIS GREAT FORUM GOING!
×

.jpg.9661a2c9e16913814c19c3c5f3400b8e.jpg)
ronkamin
-
Posts
100 -
Joined
-
Last visited
Content Type
Profiles
Forums
Gallery
Events
Everything posted by ronkamin
-
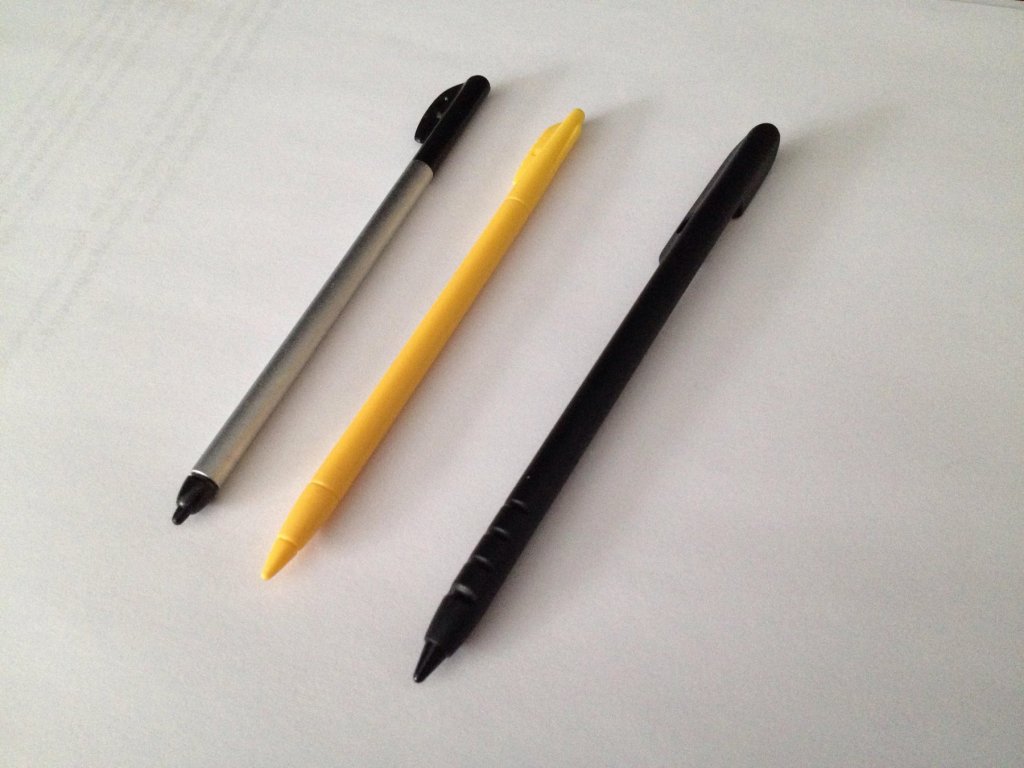
.thumb.jpg.1da981e493a7fe8bed83bce0fbcfa3c4.jpg) Yeah the photo would be stylii
Yeah the photo would be stylii -
Mike, Thanks for the tip on the Tamiya tape. I have been using blue painters tape (Blue Hawk) and been brushing the clear coat parallel to the tape, overlapping the tape by 1/4" and letting it dry overnight before I put on the finish coat. I'll give it a try putting it on perpendicular to the tape. As for burnishing the tape I use a stylus, these were used on older touch screen computers, I have a few left over from my working days. The tips are about 1/8" diameter and made from plastic. I just run it on the edge of the tape to made sure it is sealed tight.
-
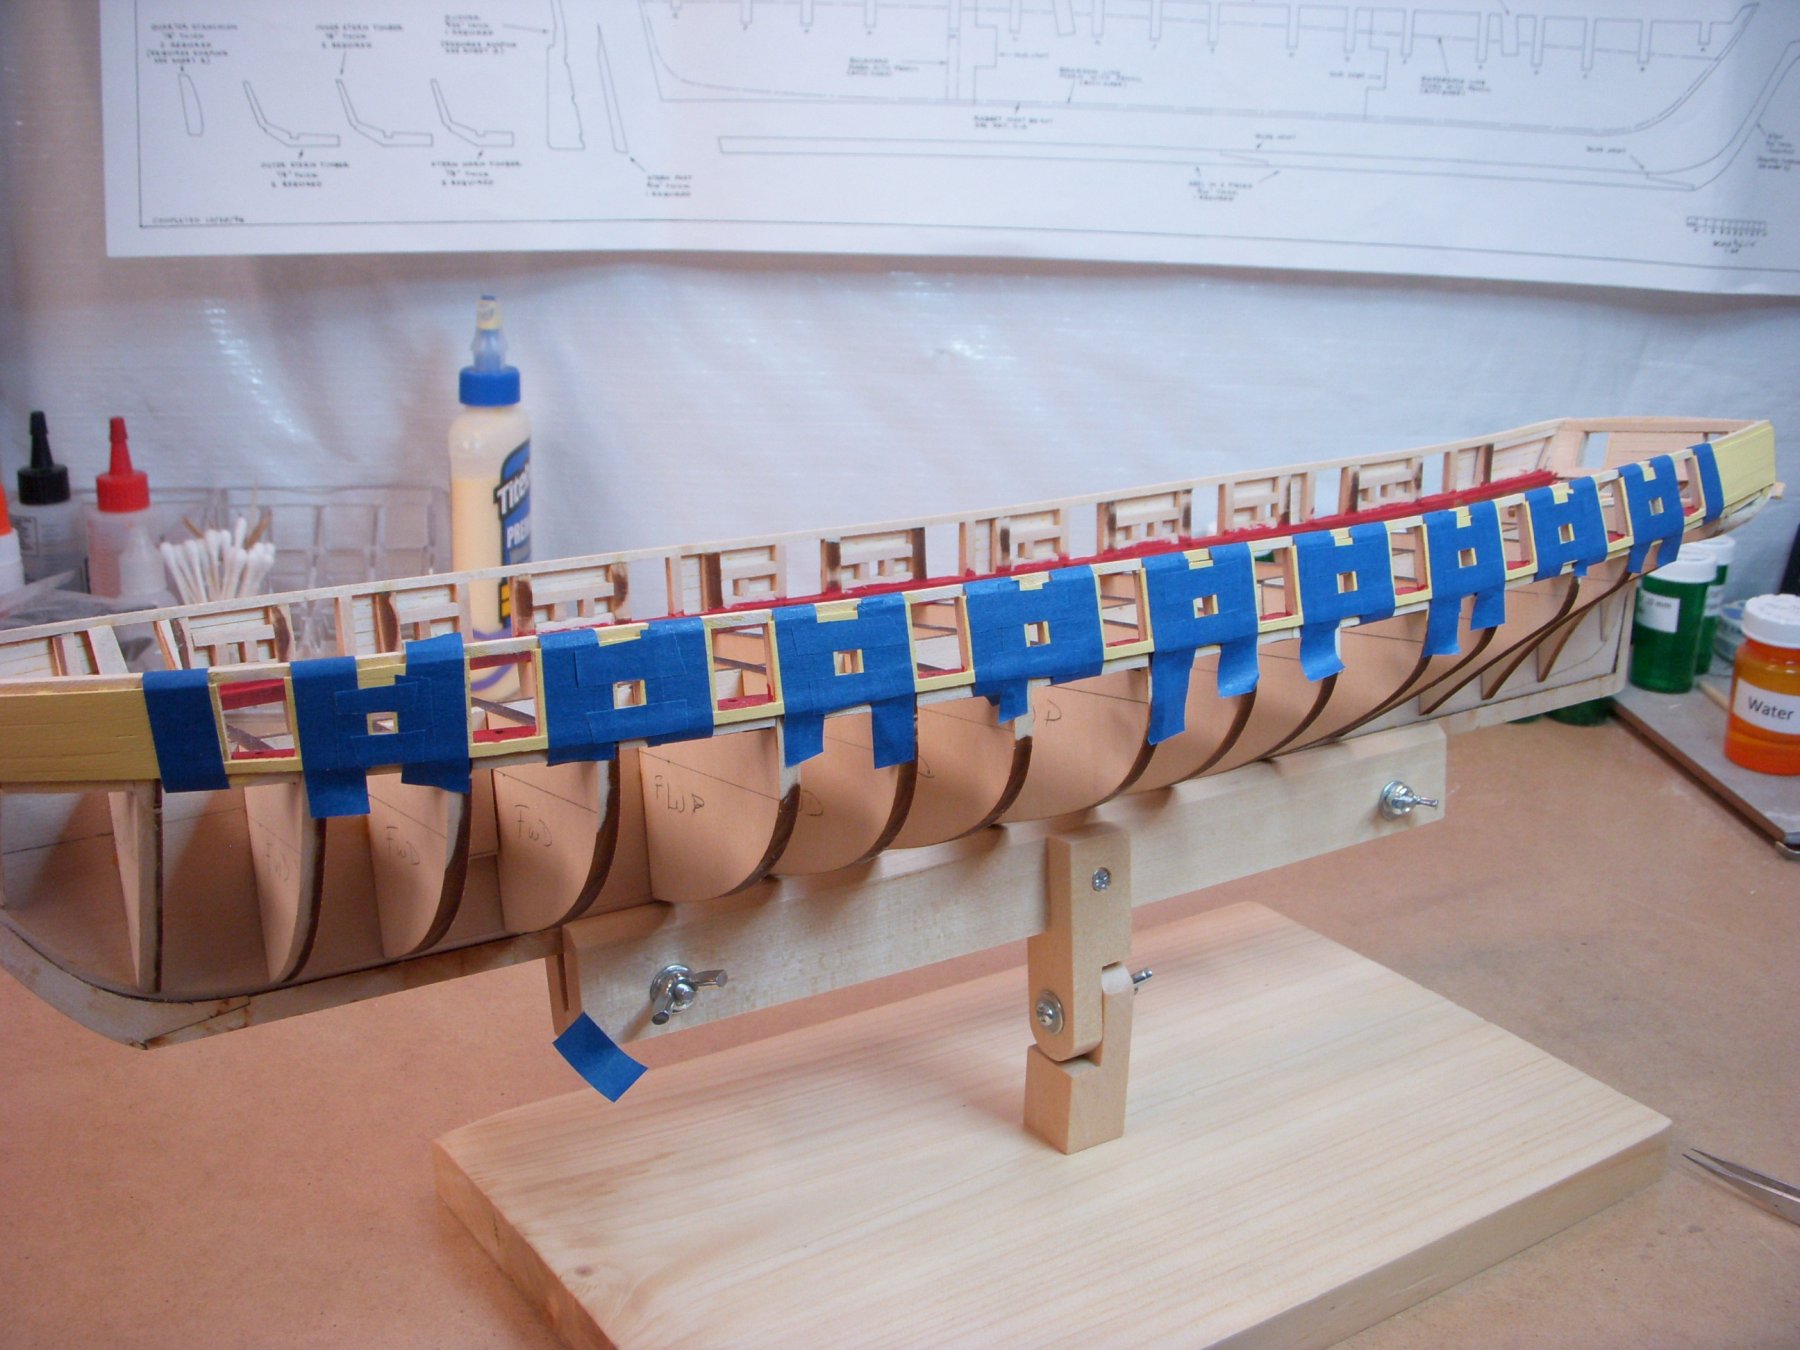
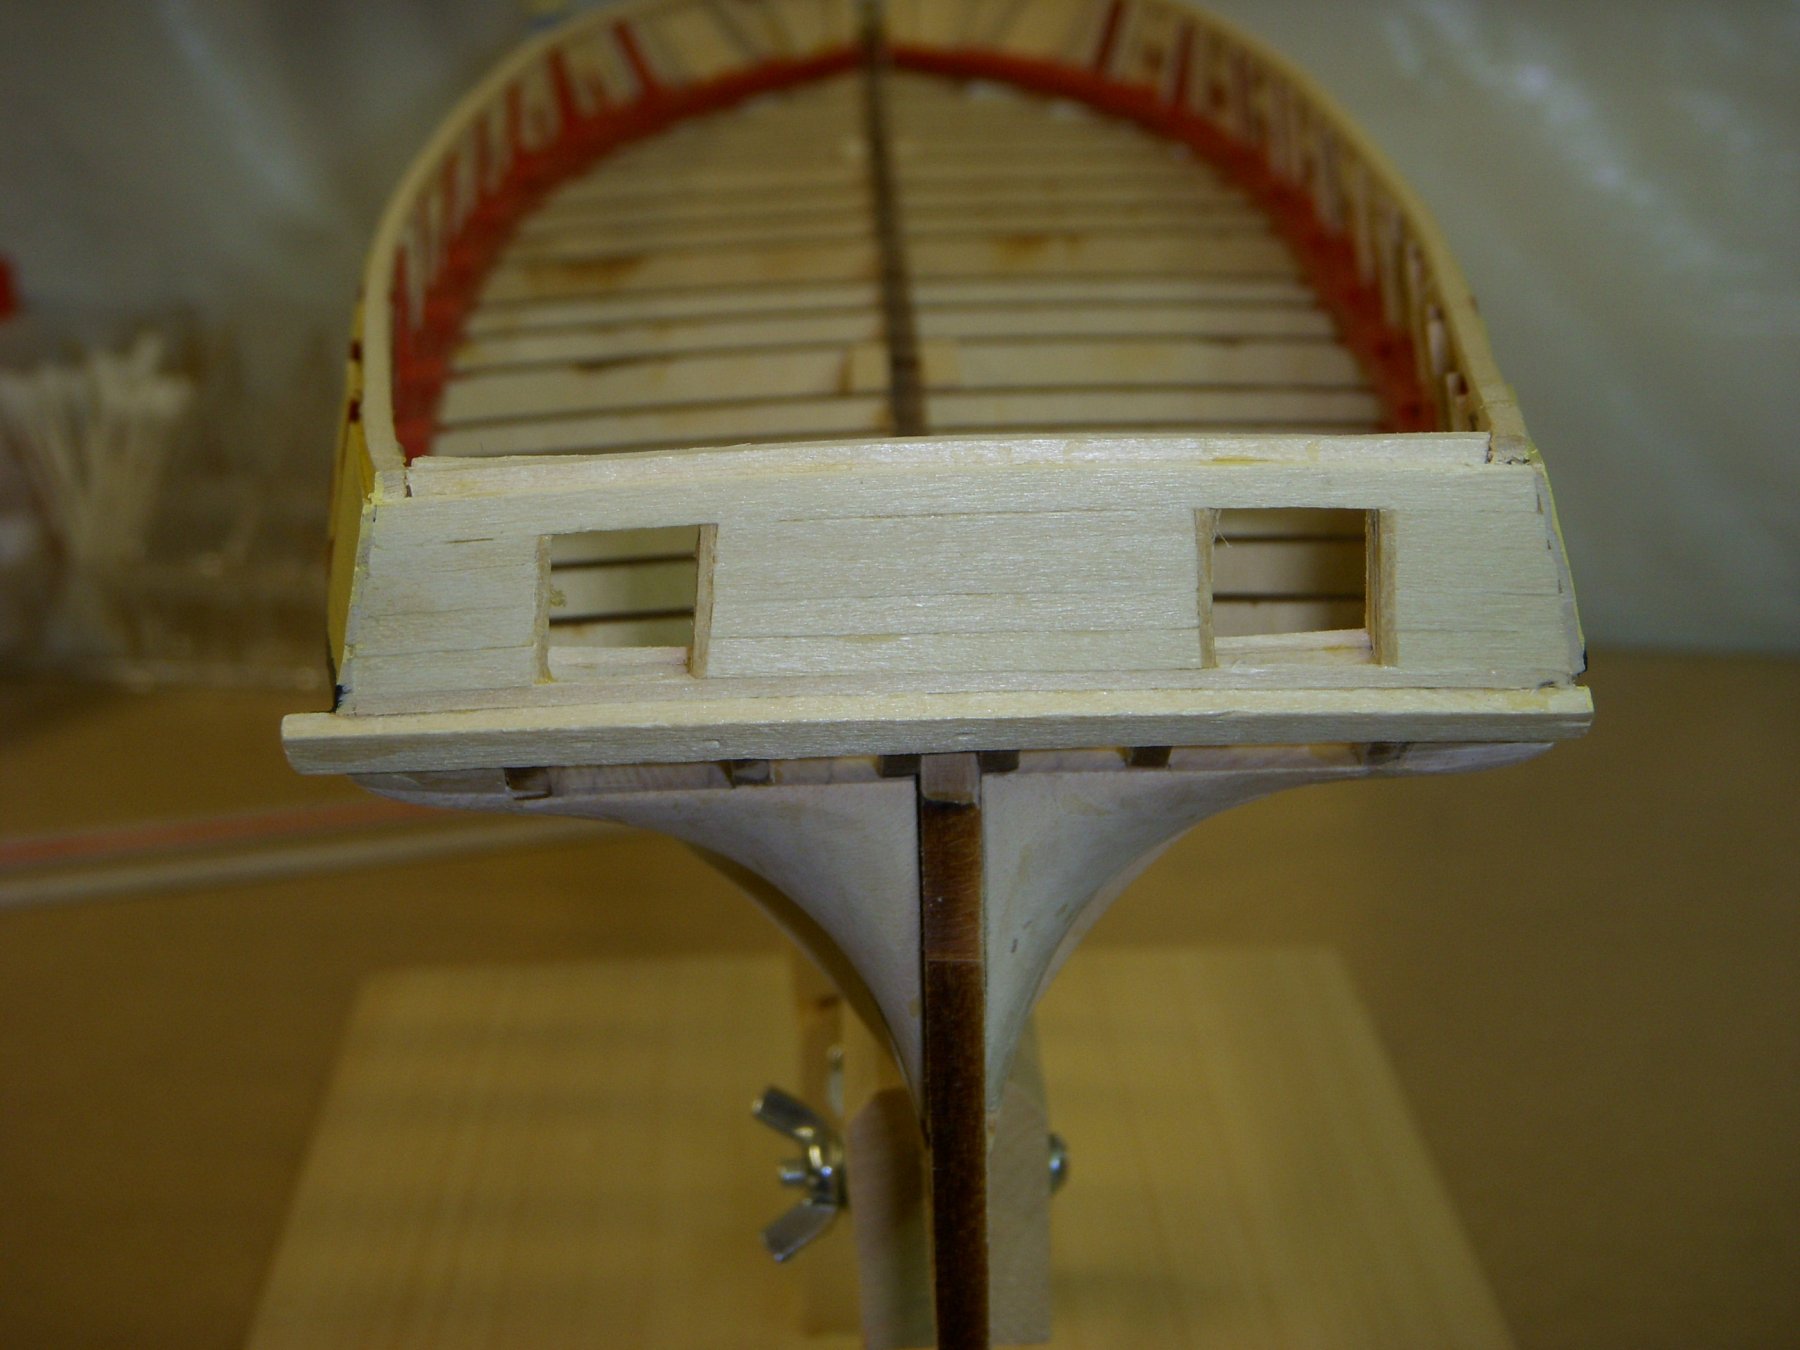
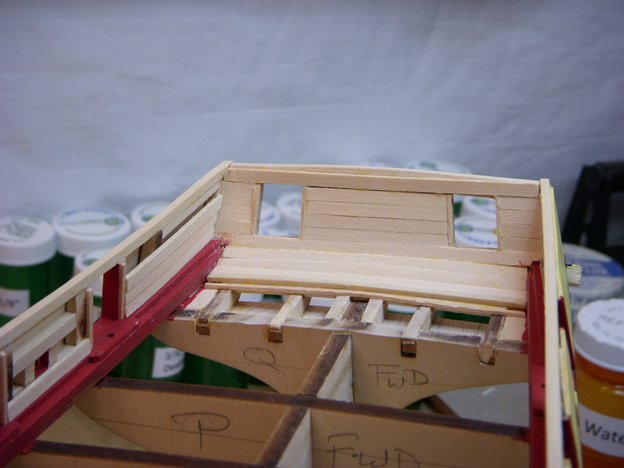
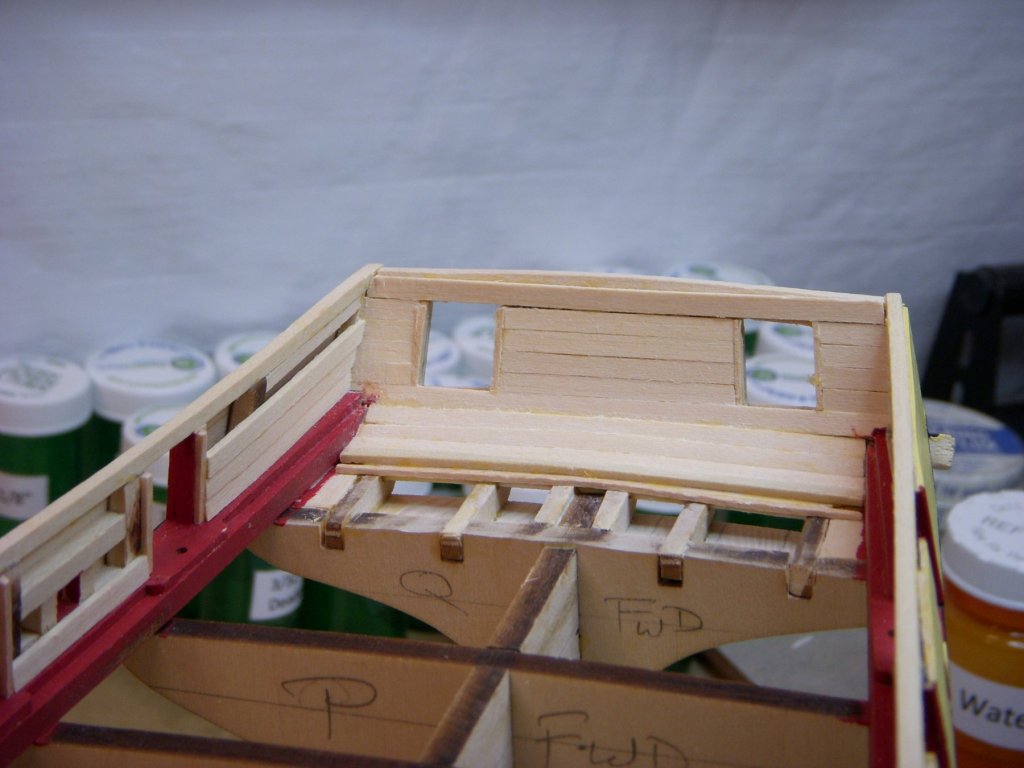
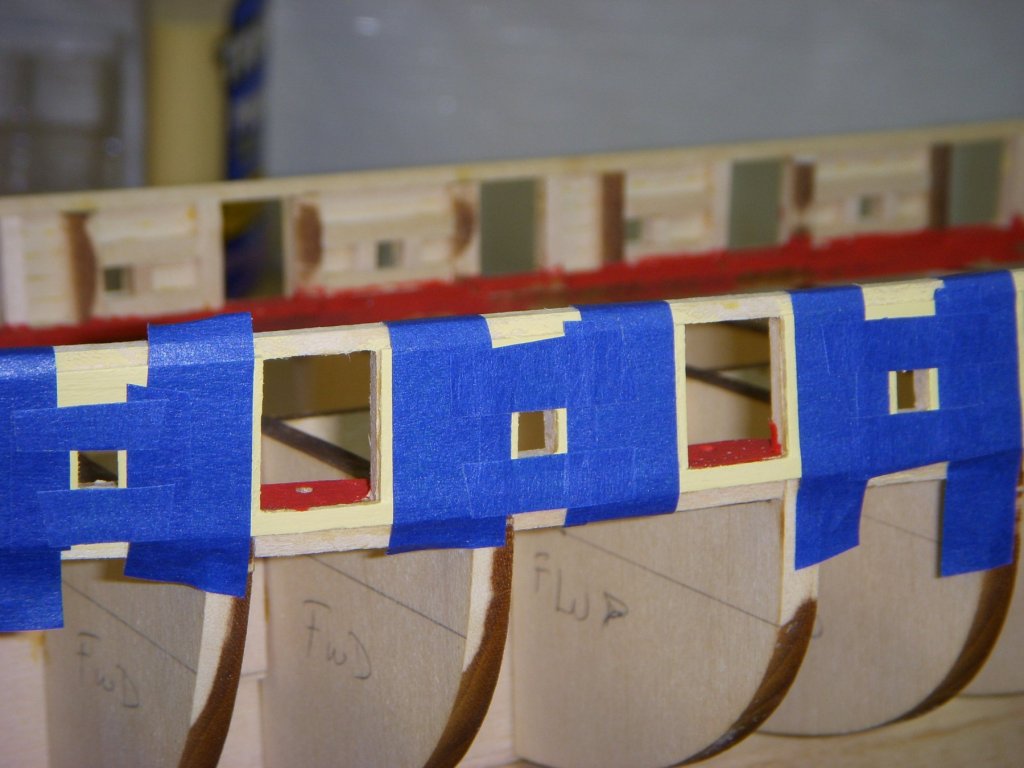
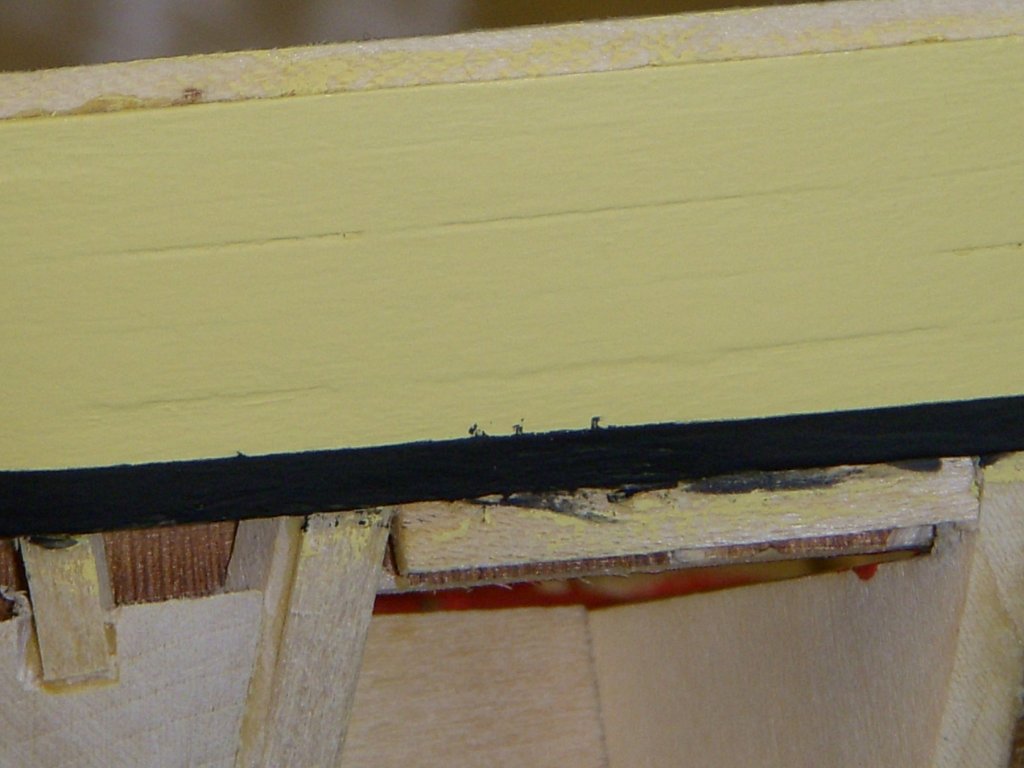
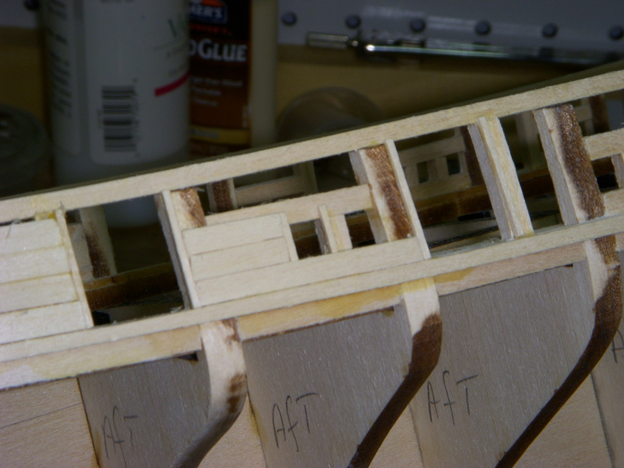
I finished planking in the transom and the ceiling on the inner transom. I believe it turned out well. I planned on painting the bulwarks by hand, no masking, but quickly realized my hands are not as steady as they used to be. So I painted the main area yellow and the masked off and painted the gun ports and the sweep ports. I burnished the masking tape and put a coat of clear coat prior to painting, but still had some minor bleed under the tape when I painted the hull plank under the gun ports. It’s minor enough to be able to do a touch up. I believe it came out pretty good. Now on to installing the ceilings.


-
That was opinion for many years. I figured I would give it a try and see how it works out. I am always willing to try out new ideas.
-
In the past when I painted over raw wood the job looked rough. I spoke to a couple of wood workers and they said never paint over raw wood, either use a sanding sealer or a primer. They said Acrylic paint raises the grain of the wood. I though I would give the sealer a shot and see how it turns out.
-
Well I finally finished planking the bulwark, both port and starboard. I did an initial sanding and am ready to put on the sanding sealer and do a final sanding prior to painting. I plan on painting the outer bulwark and transom then start planking the inner.
-
I believe I solved my own problem. I did check a couple of build logs and found that the second plank is notched. Duh should have realized that myself. Well back to planking tomorrow.
-
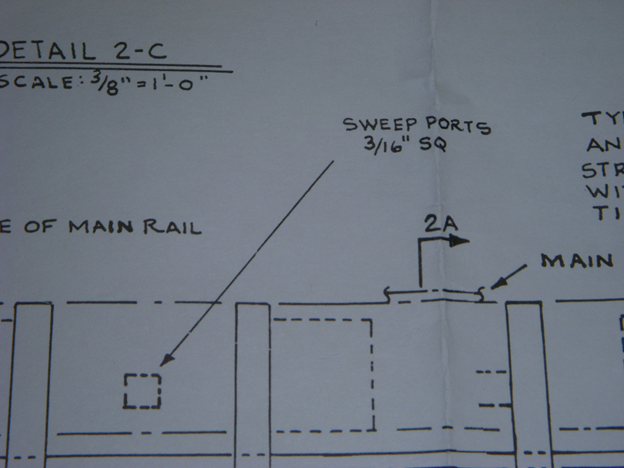
Found the next problem with the kit. The drawing sheet 2 says the sweep ports are supposed to be 3/16" square. When you start putting on the bulwark planks, the opening in the planks is larger than the framed opening. The planks are 1/8” wide, and it take two planks up the side of the sweep opening which is only 3/16” tall. So now the upper framing showing by 1/16”. I need to think about this before I proceed. Ron


-
Mike Some of your tips I have lived through. On my first build, the Phantom I made a number of newbie mistakes. I went out and bought paint brushes 10 for $, big mistake. The bristles were hard and fell out while painting. Went out and bought a few good quality brushes, what a difference. The detail brush with only a few bristles really made a difference. The old brushes are now just collecting dust on the work bench. Second mistake was buying artist acrylics. Paint was thick so they needed to be thinned, tried distilled water and alcohol. Thinned out OK, but coverage was poor. Finished the project but was not happy with the results. When I started my second project the Pride of Baltimore, I went with model paints, what a difference. Tried several brands and found the Vallejo paints fitted my needs. My second revelation was finding this site, I found so many tips and hints that made the built a lot easier. Enough of my background, I have been looking at how to attack the planking of the bulkheads. I was looking at how to get the gun port frames in the proper position and size to paint without the planks in place. I think I will plank the whole outside then paint. Then continue with the inner planking. I am a not a big fan of masking, I only do it at the water line on the hull. In the past I have had good luck painting freehand, I guess I have pretty steady hand. Thanks for the tip of burnishing and putting a clear coat prior to putting on the final color. I really appreciate all the hints, I am by no way a master at this, I consider myself an expert beginner. Ron
-
Great idea. I was planning on planking the bulkheads, priming and then painting. Painting the frames first may be the way to go! That means I need to smooth out the inside of the bulkheads and put on the framing before moving on. Thanks for the tip.
-
Yes the gun and oar openings have a 1/32" frame. That is my next project, then the planking butts against it.
-
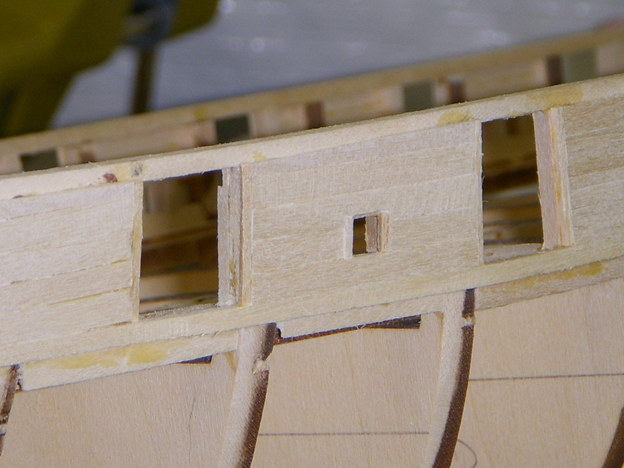
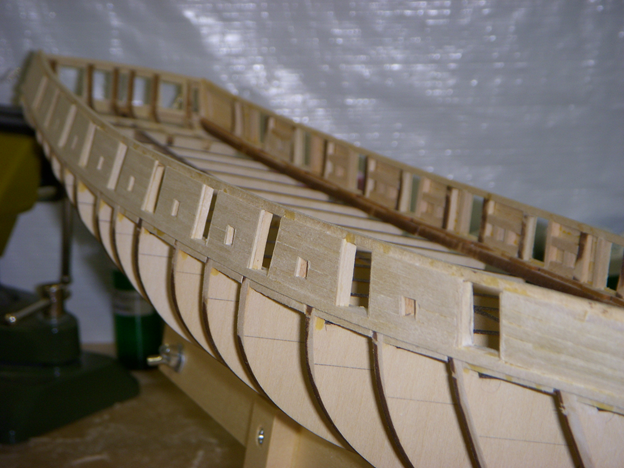
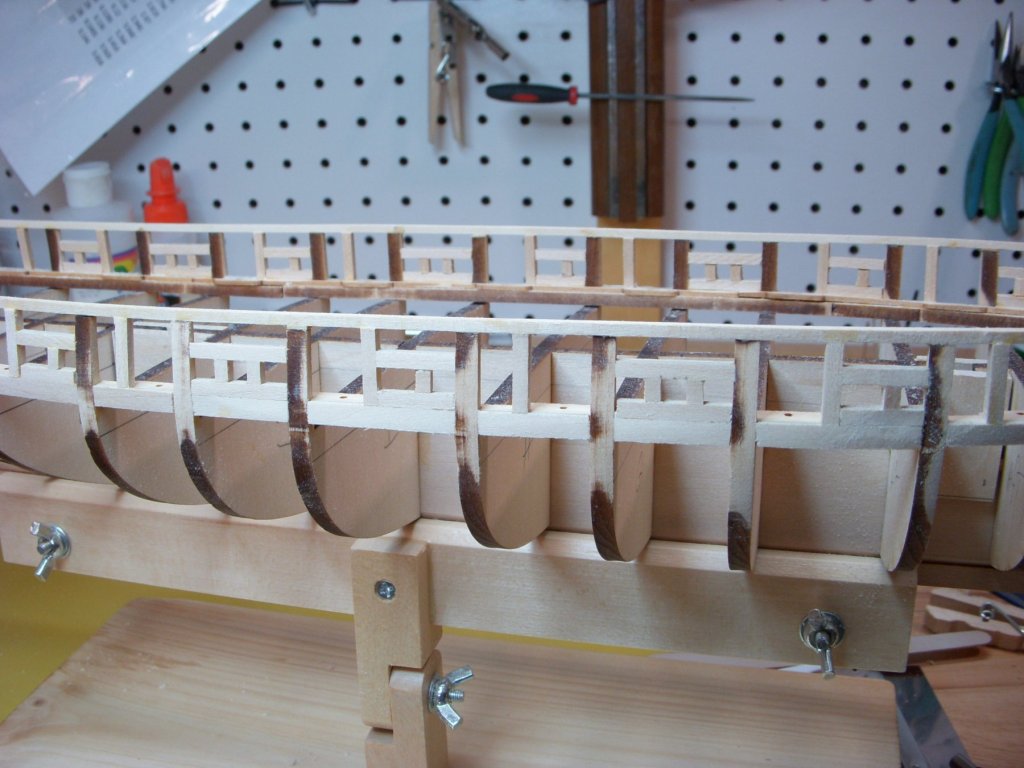
The framing around the Gun ports and Sweep ports has been completed. I also faired out all the framing and am ready to start the planking of the bulkheads.

-
Thanks for the tip regarding the gun ports. I will keep this in mind as I assemble them.
-
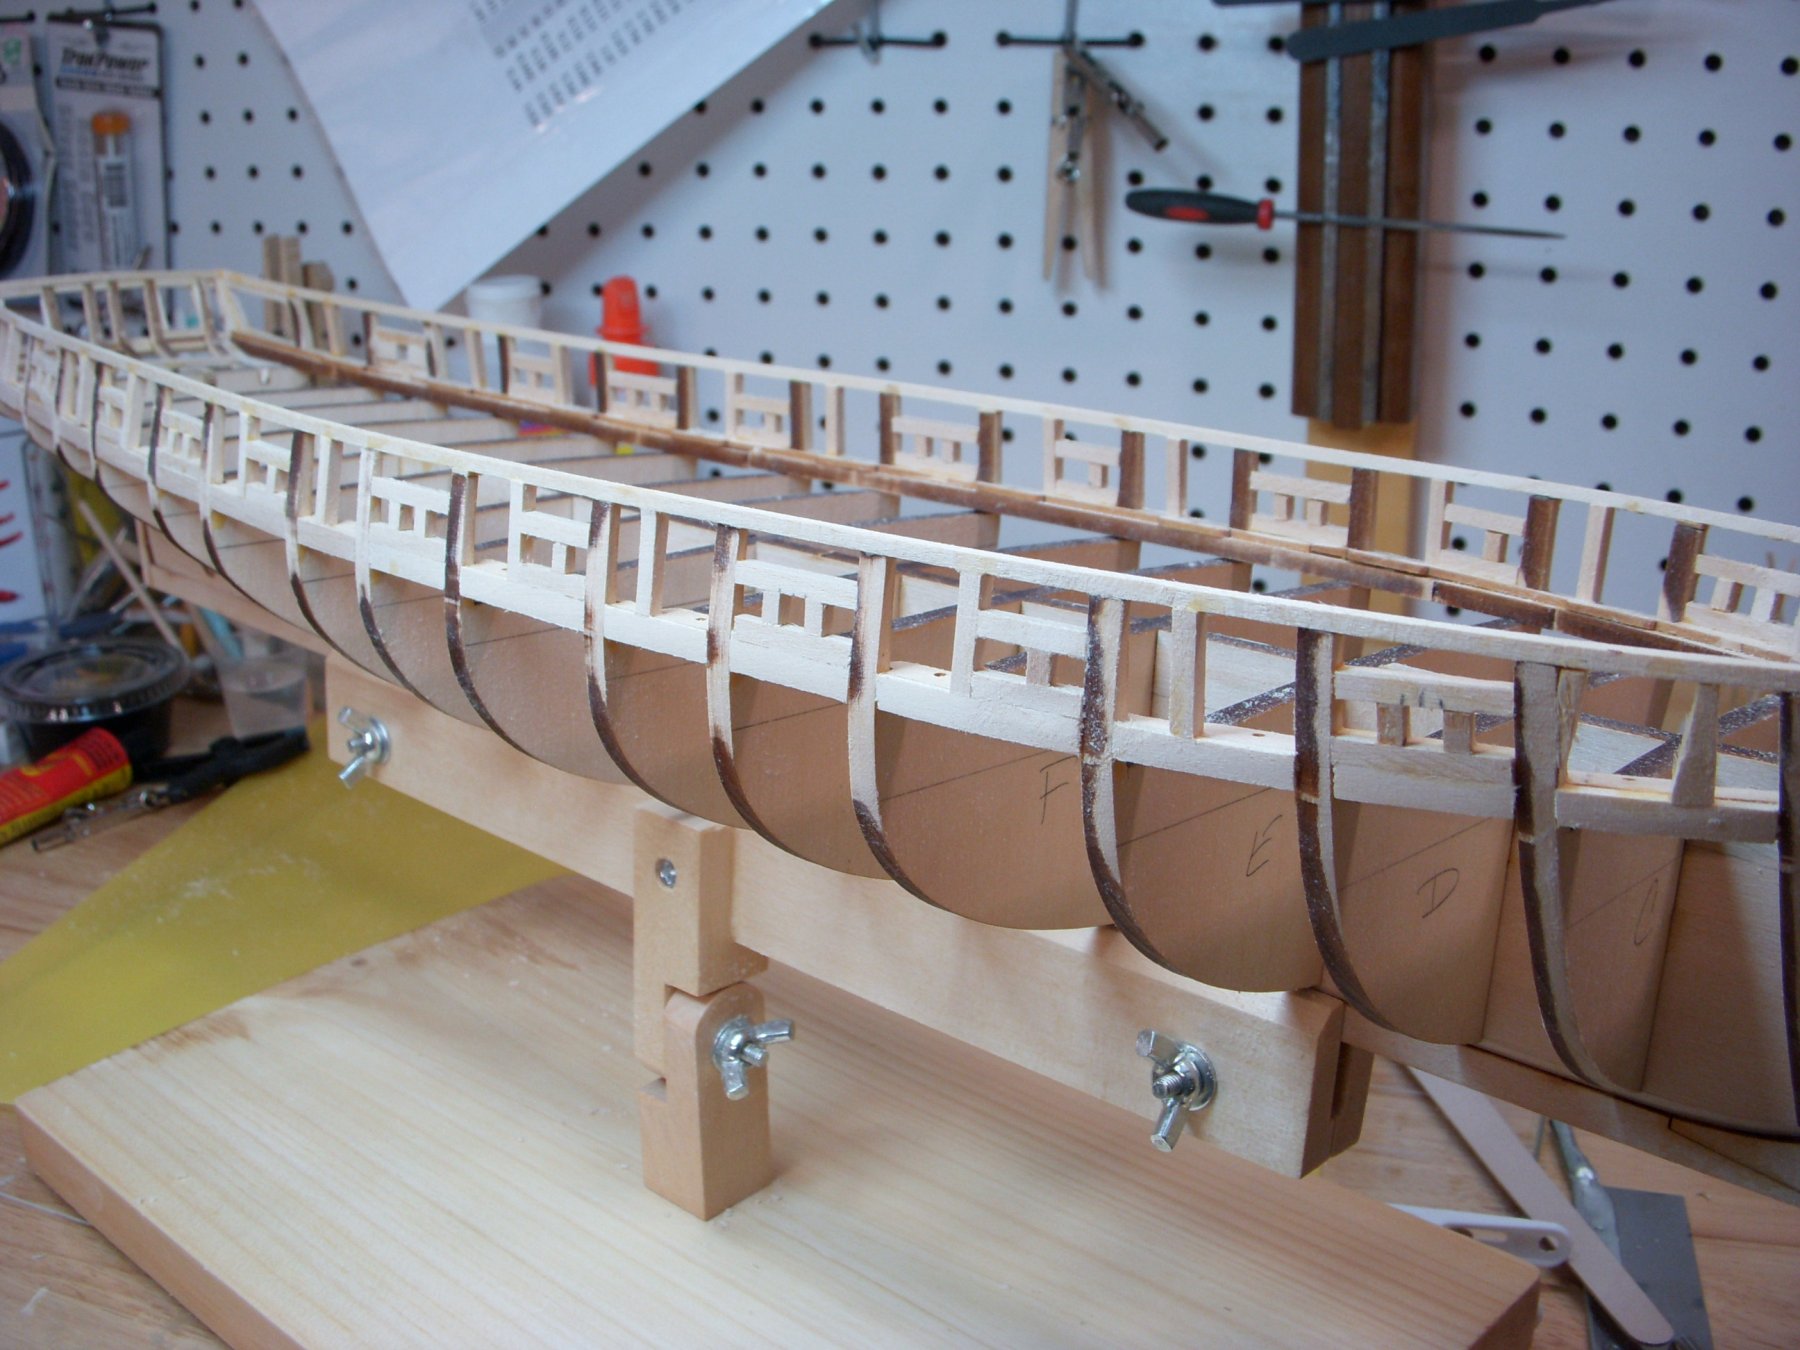
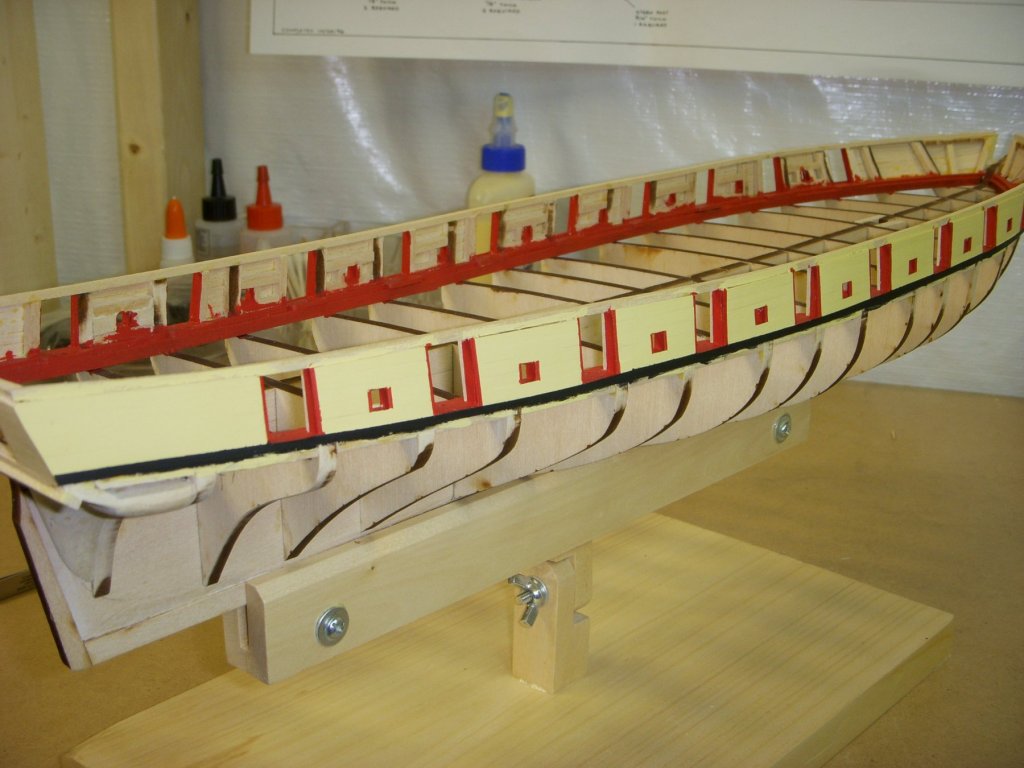
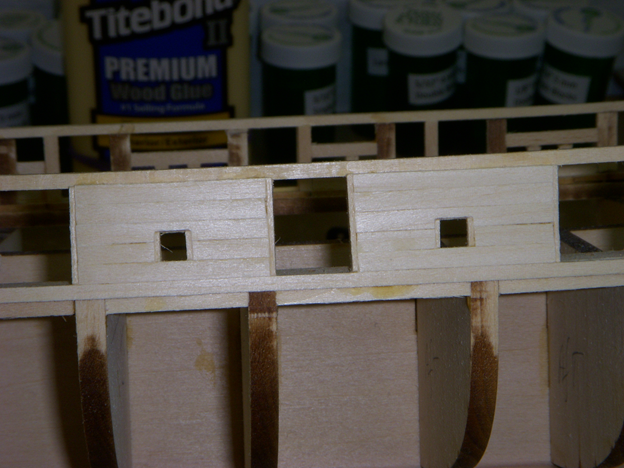
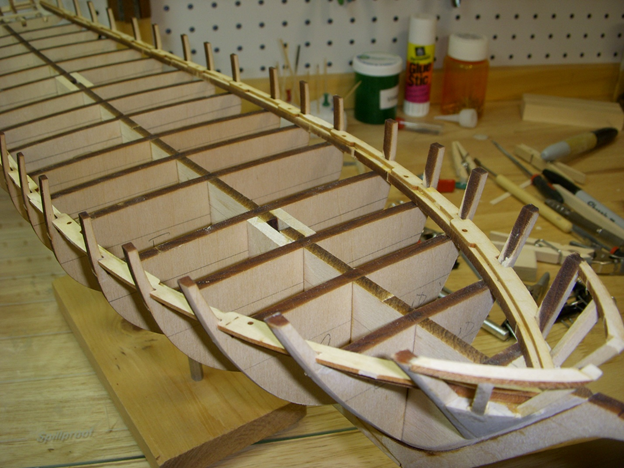
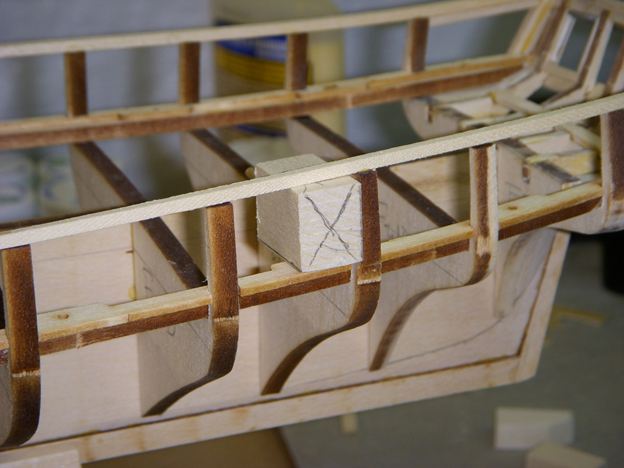
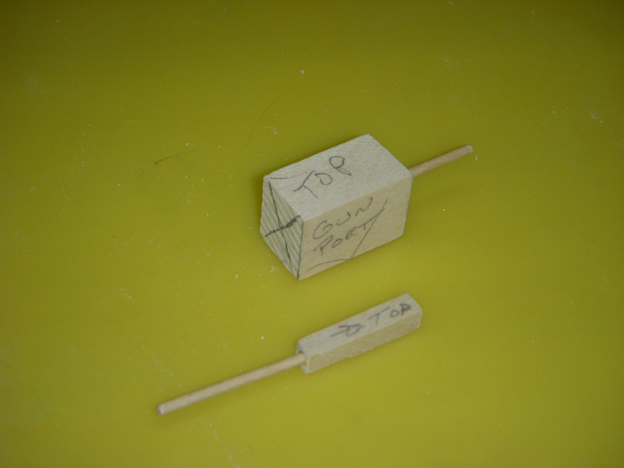
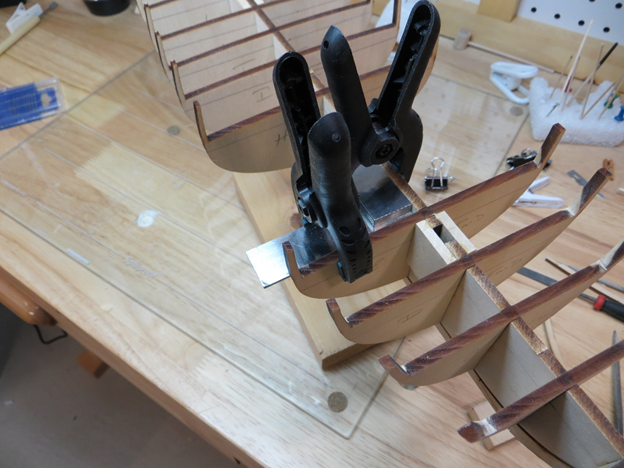
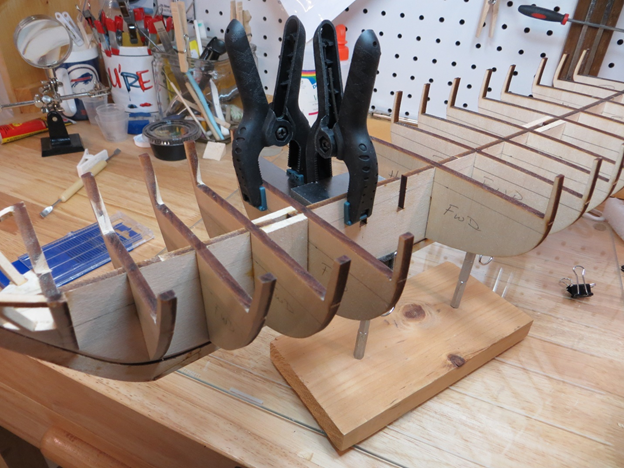
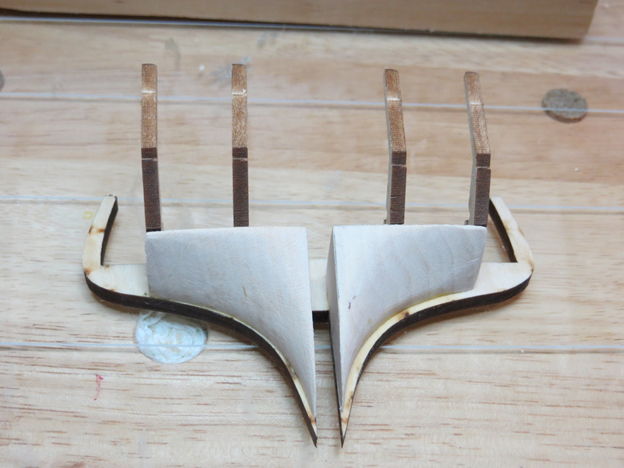
I completed installing all the bulkheads including the stern assembly. I then started installing the planksheer and waterway. This went fairly smoothly, although I had to trim a few of the notches on the water way since the notches seem to be a little narrow. Here is a pic of the planksheer and waterway completed. The instructions say to install a 1/16” and a 3/64” stringer on either side of the timberheads, this does not leave enough room for the gun ports. There is only 5/8” between the planksheer and the top of the timber heads, and the gun ports are shown to be 5/8” high and ½” wide. After reviewing a few other build logs I decided to install a 3/32 x 3/32 strip on top of the timberheads. This gives me enough room to frame the gun ports. Here is a picture with a gun port tool inserted between the planksheer and the installed rail. I made a tool for both the gun port and the sweep port so that I could ensure I would frame them all the same size. These tools were made from scrape wood.
-
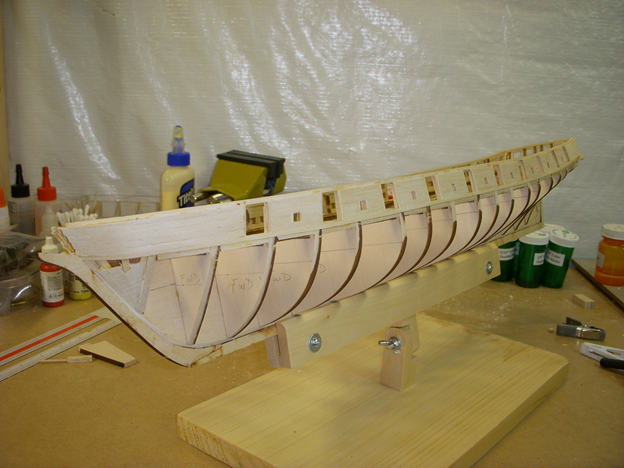
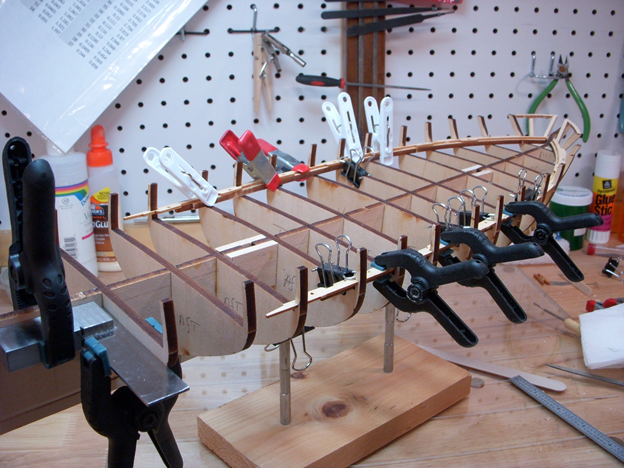
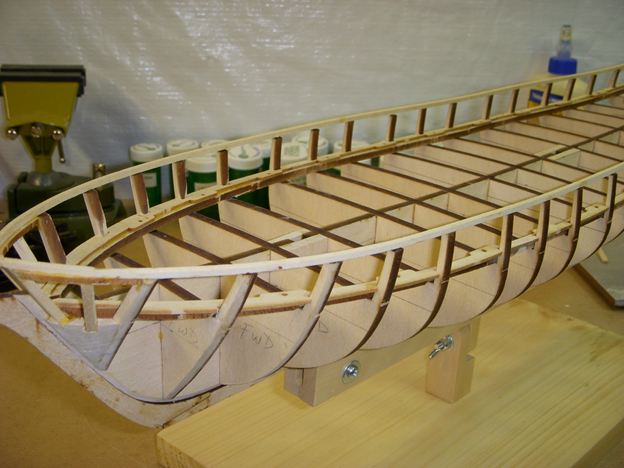
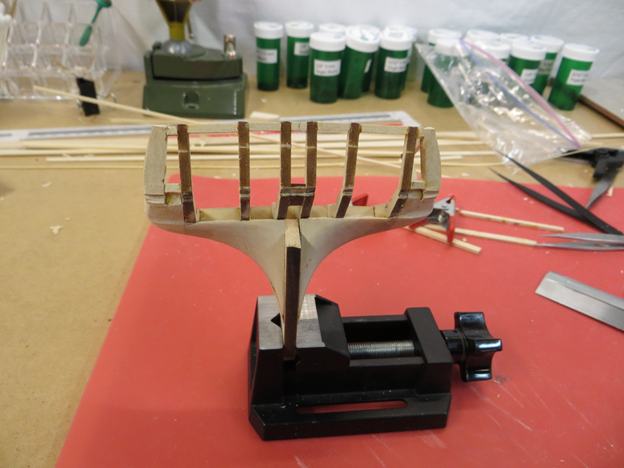
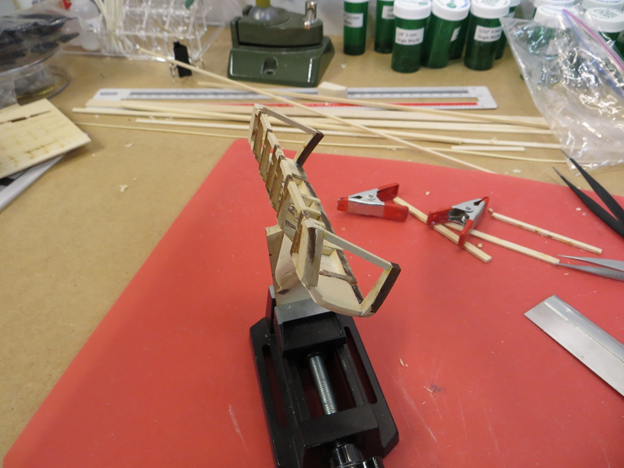
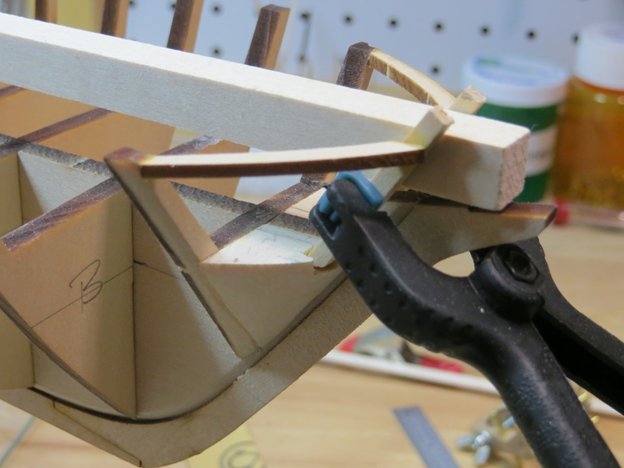
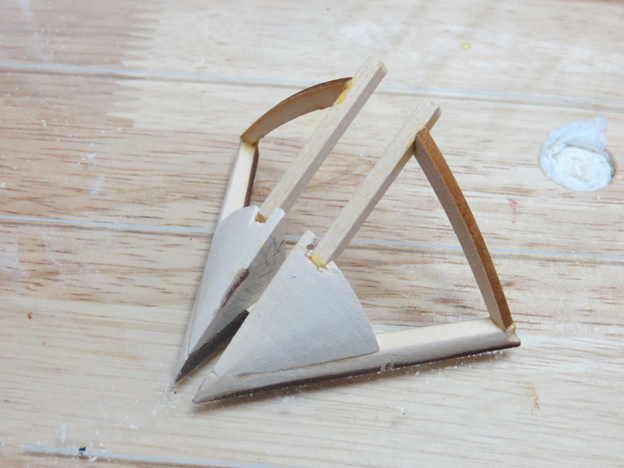
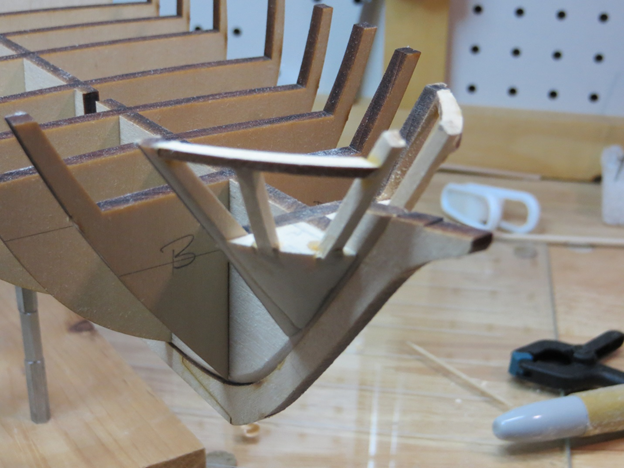
After thinking about the problem I decided to dis-assemble the stern and start over. Working gingerly, I was able to dis-assemble the whole assembly with only breaking one stern timber. I was able to glue this piece together, and it matched the drawing pretty well. I decided to use this piece instead of trying to make a duplicate. Shown below is how far along I have progressed. I am pretty happy how it turned out so far. Everything seems to be lining up. In the meantime, I am starting to install the bulkheads. I am using my small square to ensure everything is square and true.
-
My mistake. I reversed the inner and outer timbers. I was able to remove one of the outer timbers in couple pieces and it was actually an inner timber. Major mistake on my side
-
Major setback today. I was putting the final filler blocks and Quarter Stanchions onto the stern. I realized nothing was lining up. I traced the problem back to when I installed the inner, outer and horn timbers. I installed them with a slight angle up and not 90 degrees to bulkhead Q, so the rear rail was almost 1/4" too high. I am now in the process of disassembly to see what parts can be salvaged. It looks like everything is usable except the inner, outer and horn timbers. I will check back with Model Shipways if I can procure new ones. They have been pretty good in the past.
-
Thanks for the hints to check out the build logs of @xken and @mikiek.
-
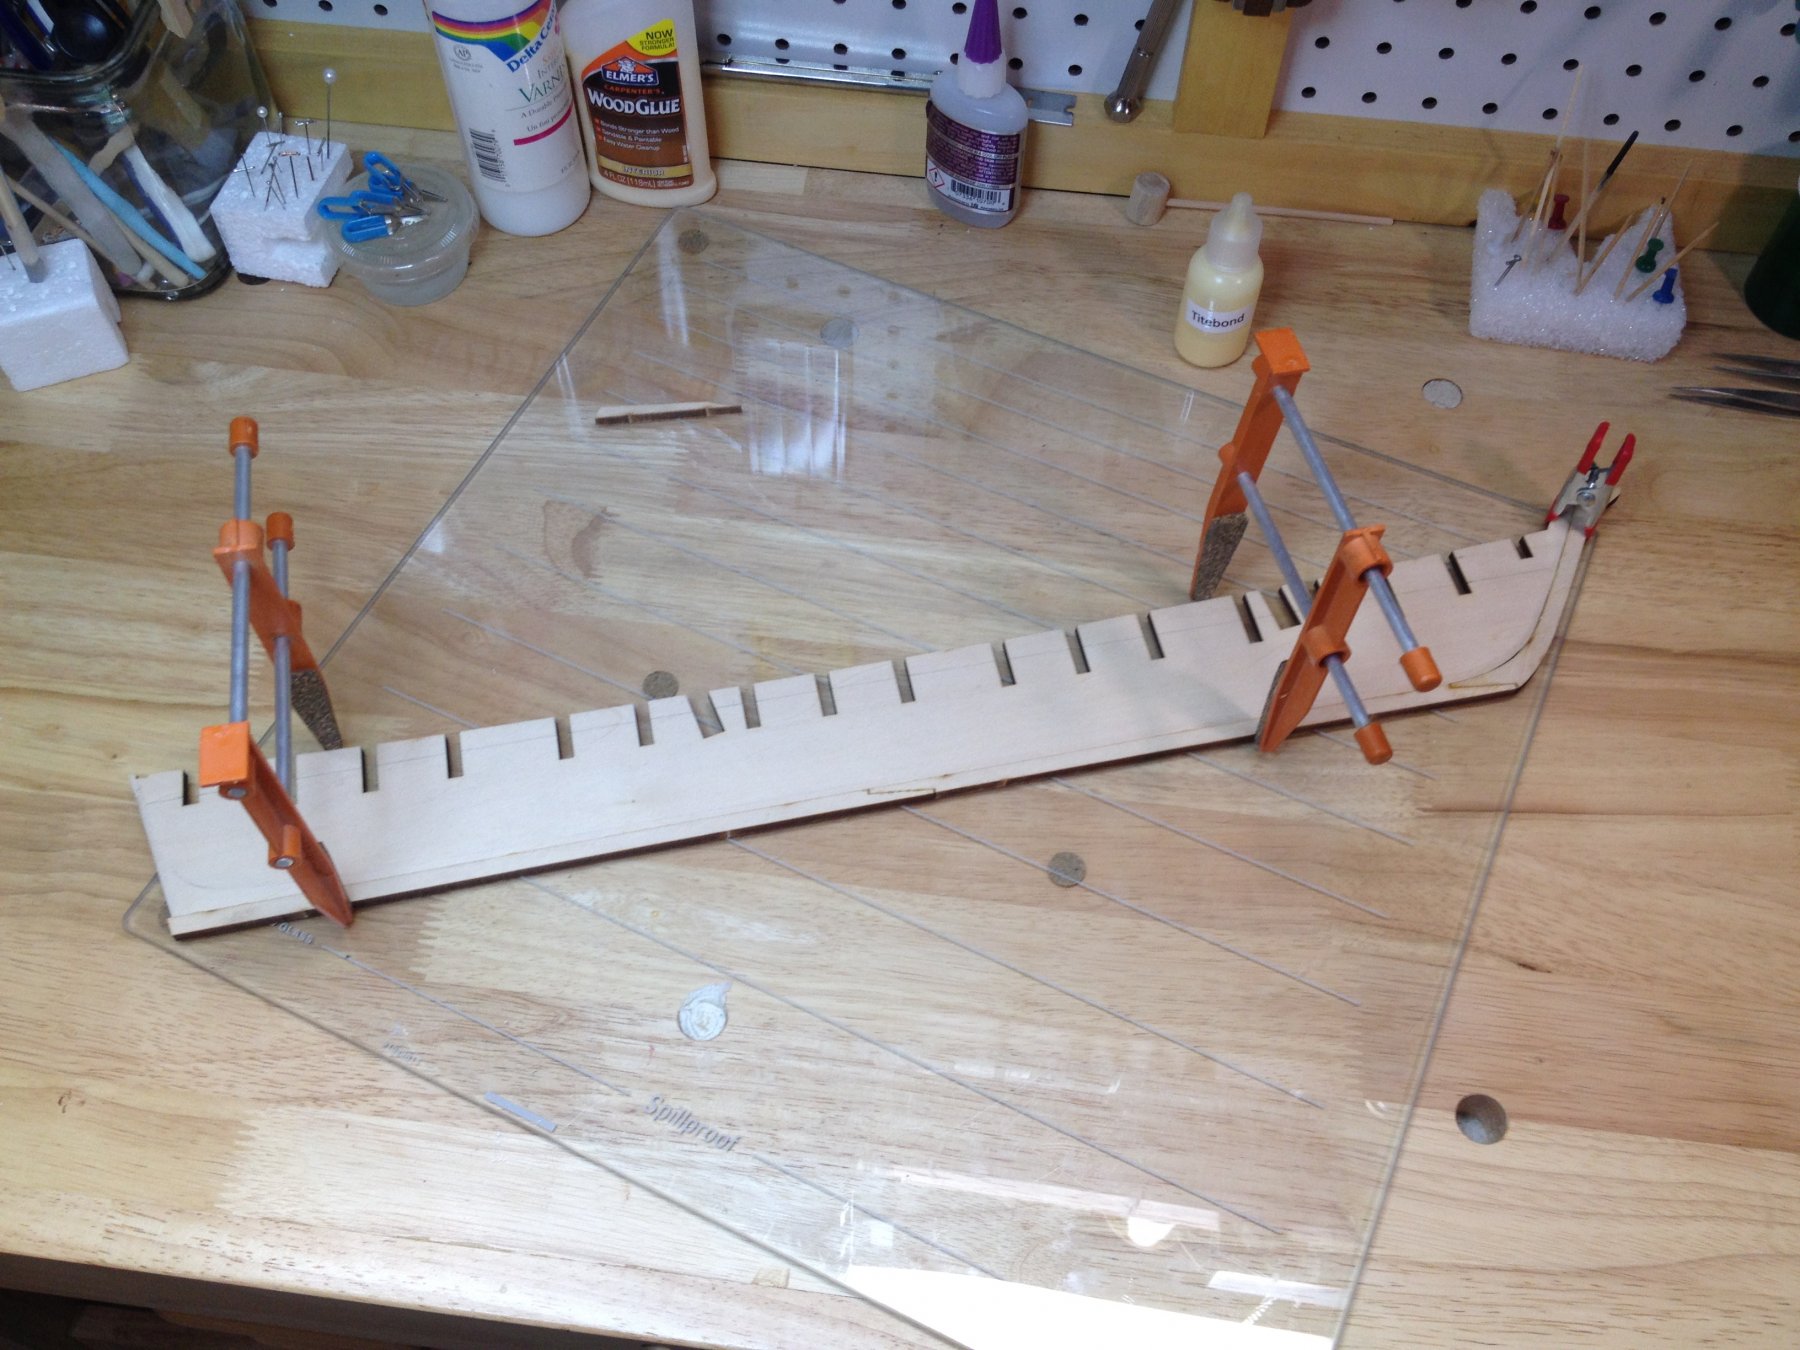
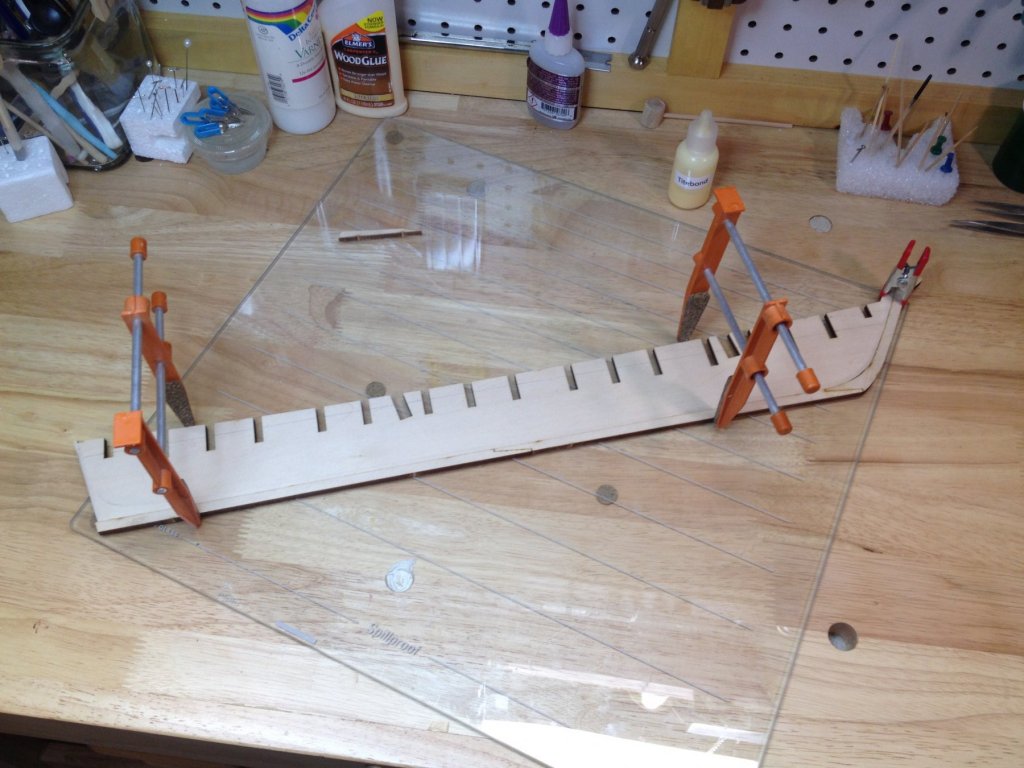
Well I started the assembly this week. Attached the keel and the stern post to the center keel. I used a piece of safety glass to ensure the parts were true and flat, I re-purposed an old refrigerator shelf for this. One more point I removed the rabbet before I attached the keel. I found out from previous builds it was easier to do this way. Once this was done I proceeded to carve out the front filler blocks, and assemble the Knighthead Timberhead and Top frame I am now in the process of carving out the rear filler blocks. Tis is fairly time consuming since I am using basic hand tools, hand saw knife and sandpaper.

-
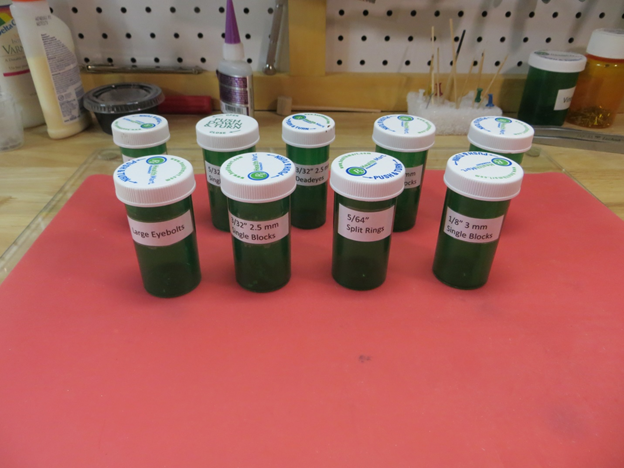
After building a couple of ships I decided to actually create a build log. I have built and learned a lot building the Phantom and the Pride of Baltimore both from Model Shipways. The Admiral bought me the Brig Niagara, also from Model Shipways for Christmas. I went down to the workshop this morning and started to open the box and did and inventory of the parts, all there. I then repackaged all the small parts. From history I ended up either loosing the parts or droping them to never be seen again. I am re-purposing some old medication bottles to store the parts. It normally takes a while for me to complete a ship so it may be a while before I have an update. The Pride of Baltimore took me over two years to complete. I enjoy the build so I take my time.

-
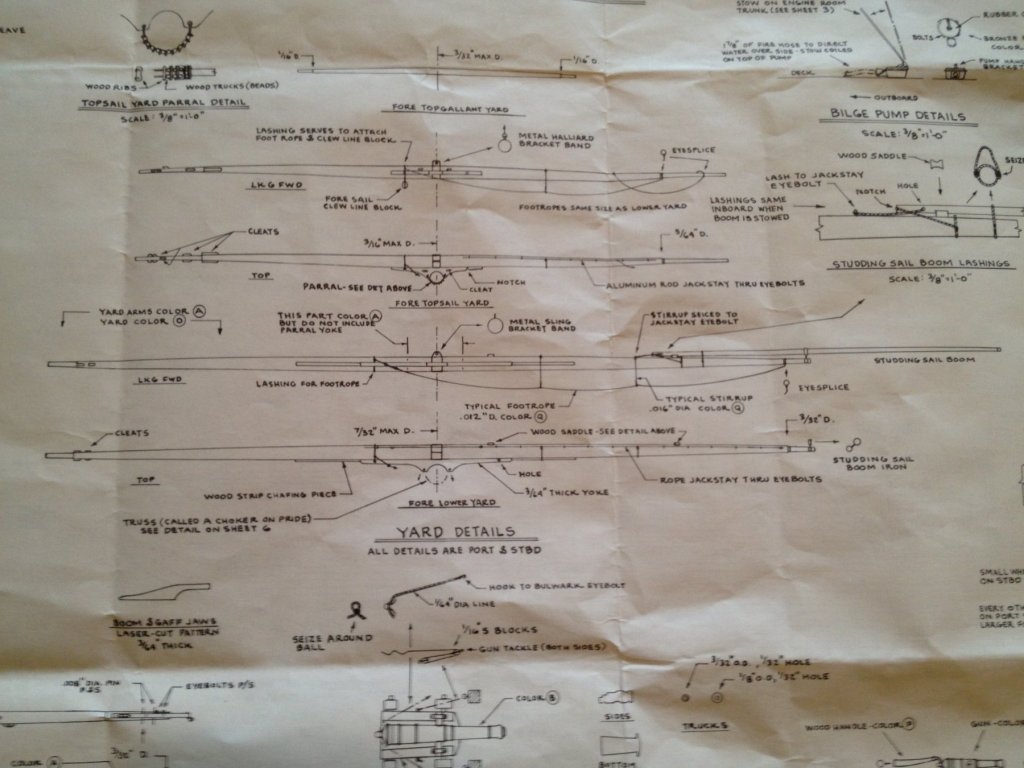
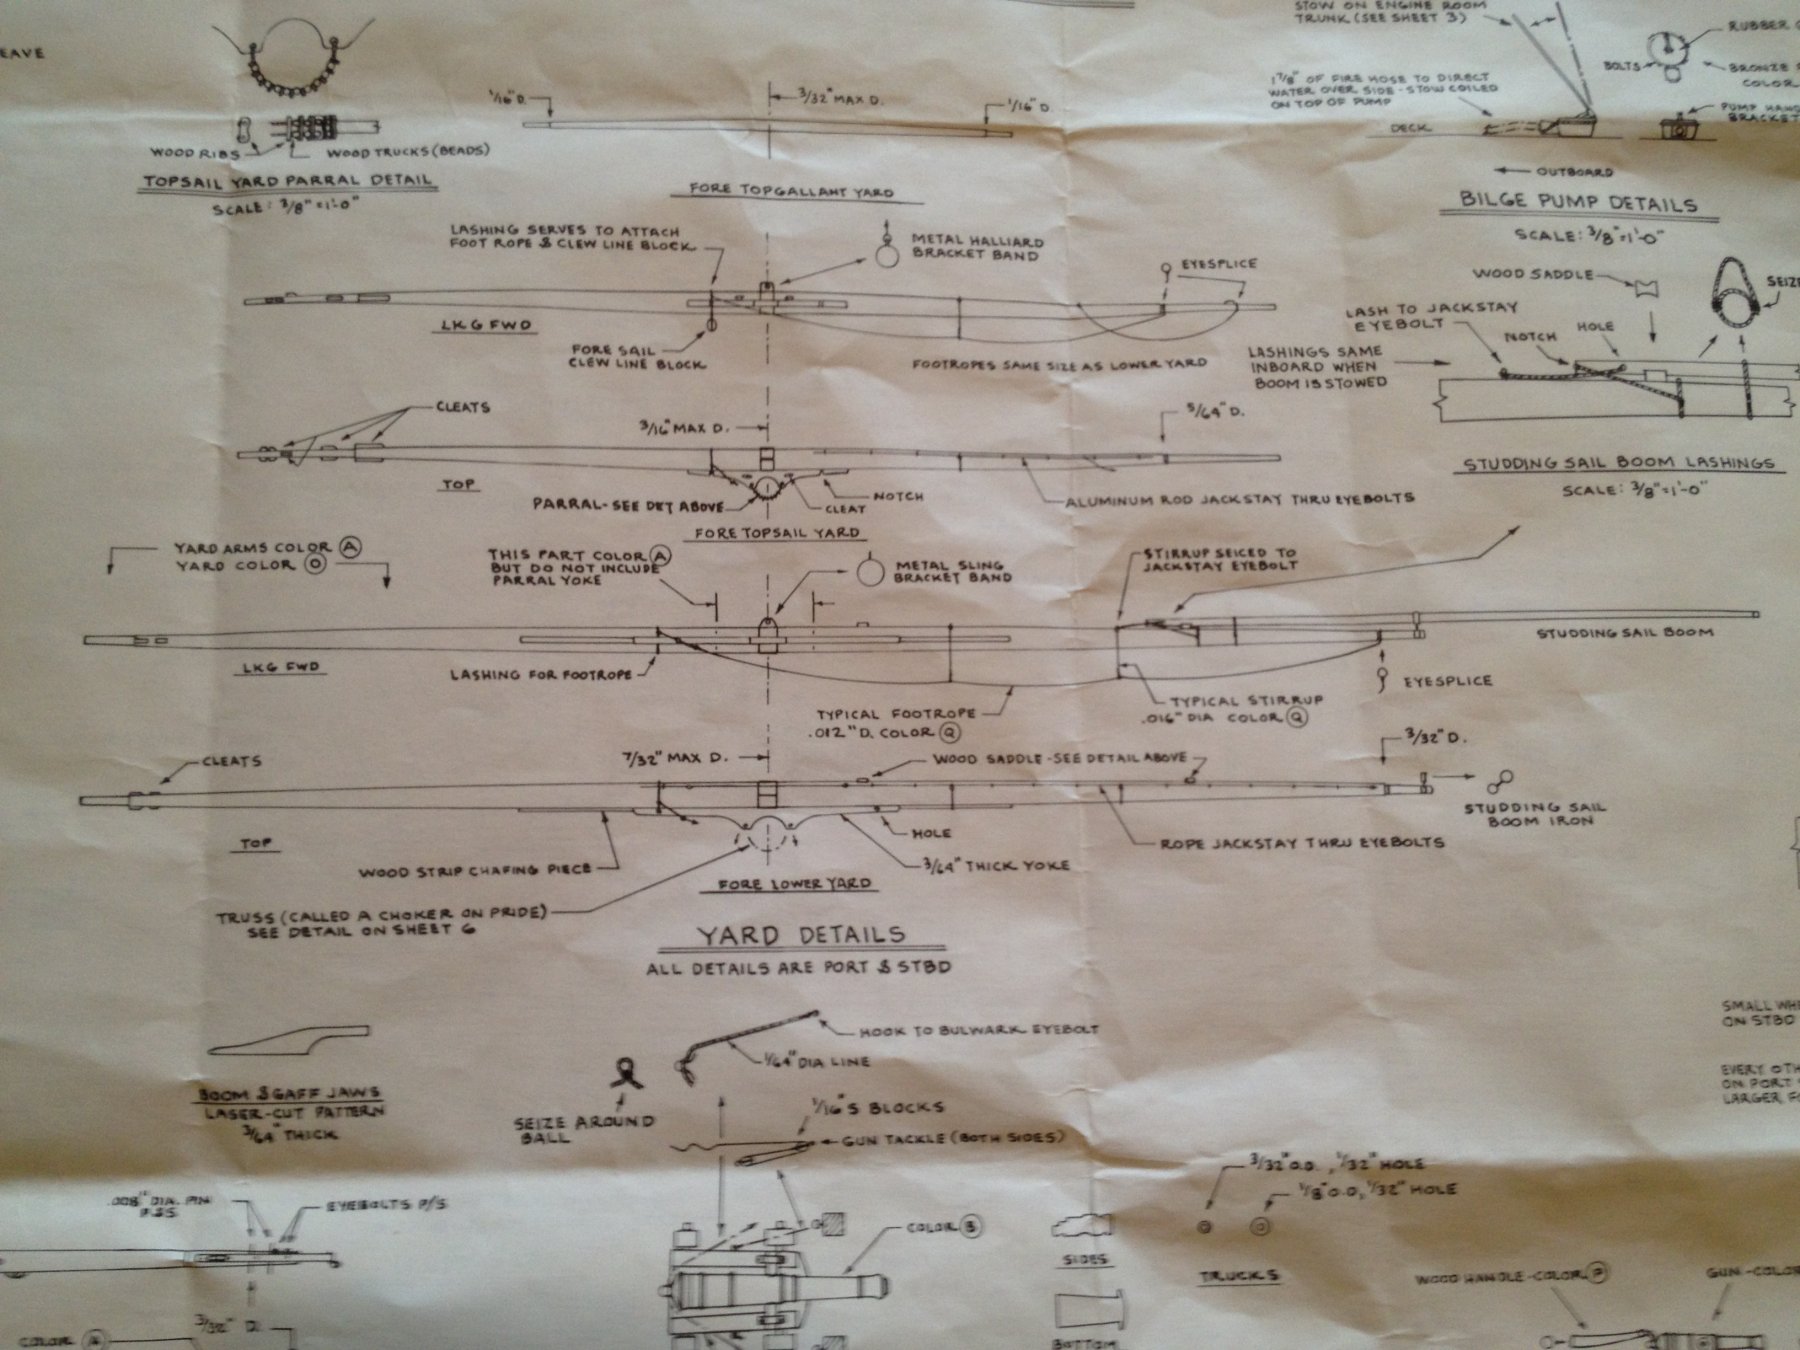
Questions regarding the Studding Sail Boom
ronkamin replied to ronkamin's topic in Masting, rigging and sails
I need to get my eyes checked, I totaled missed the note on the plans that stated that details are for port and starboard. Thanks again for the input. -
Questions regarding the Studding Sail Boom
ronkamin replied to ronkamin's topic in Masting, rigging and sails
Thanks, that makes sense. I will follow the plans and install the one as shown on the plans. -
I have been working on my Pride of Baltimore II from Model Shipways for over a year and have run into a question that I have not been able to find an answer. The plans show a Studding Sail Boom on the starboard side of the Fore Lower Yard, and not the Port side. The picture on the front of the instruction manual looks like there is one on both sides. I have tried to search the WEB for pictures of the ship but none show this clearly, Does anyone one know if only one Boom is used or do I modify the plans and install one on both sides?