chuckL
-
Posts
8 -
Joined
-
Last visited
Content Type
Profiles
Forums
Gallery
Events
Everything posted by chuckL
-
Hello Richard - I do plan on bringing a frame in later on. Just didn't want to do that while we were getting going on the club build of the longboat.
-
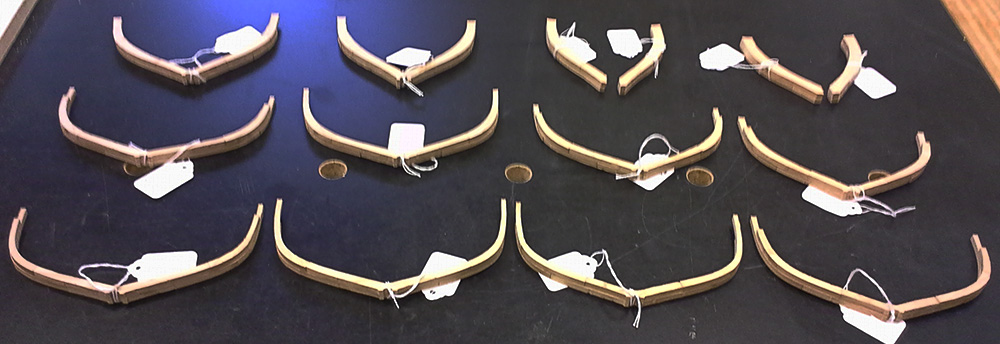
Hello all, I have finished the frames for the PH kit. While it has taken me the better part of two months to do this, I know of a number of other modelers that have completed this step in about half that time. Yup, I'm slow but modeling is about the journey for me. The photo below shows all of the frames assembled with the upper left of the picture being the forward frames and, like reading a book, the lower right frames are the aft frames. At this point the frames are still pretty rough. The next step is to bevel the edges in preparation for putting the frames in the construction jig. Once all that work is done faring the hull is when the final step in cleaning up the frames occurs. I really like the idea of progressive step to shaping the frames with no one step being a big "bang" step. The frame furthest to the left in the third row from the top is the dead flat. "Inside" that frame is a 6" ruler to give you a sense of size. I have really enjoyed assembling the frames. Definitely wets my appetite for a scratch build down the road.
- 20 replies
-
- 5
-

-
- patrick henry
- lauck street shipyard
- (and 1 more)
-
Still working on assembling the frames for the aft half of the boat. Have a couple of other projects going so it is taking longer then most would take to do this work. Should be done with the frame assembly in the next 10 days or so... Enjoying the journey. Assembling the frames has been fun.
-
The first reference to this type of stylized frame I know of is by Harold Hahn as part of his upside down hull construction approach. The Patrick Henry kit changes things up a little. While retaining the stylized frames of Harold Hahn, the assembly jig is right side up. This is nice because you do not have the wasted wood that an upside down construction has. The Patrick Henry as an AVS (Armed Virginia Sloop) is armed with swivel guns and cannons. A gun ship she is!
-
Hey Richard, This is one cool kit. I am having a lot of fun building it and would recommend it as a great kit to build....
- 20 replies
-
- 1
-
-
- patrick henry
- lauck street shipyard
- (and 1 more)
-
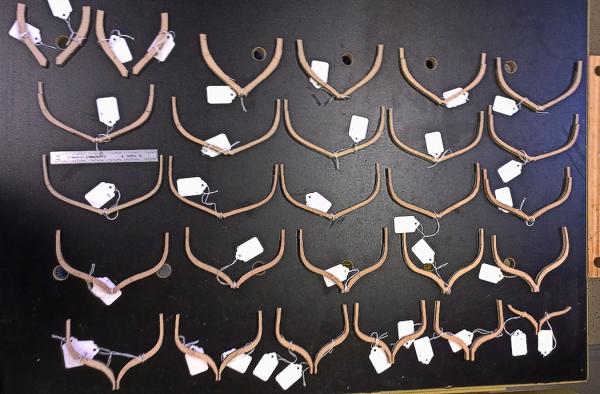
I continue to make progress. The photos show the assembled frames from the dead flat forward. I use price tags as labels for each frame. My writing is barely legible and trying to write on in the notch at the base of the frames is not so easy. Plenty of room on the price tags. Each full frame is made up of 9 pieces while the half frames are made of 10 (5 per side). I have multiple projects going that I rotate through. I always look forward to working on the PH as it is really a fun build! Really enjoying this journey...

- 20 replies
-
- 6
-
-
- patrick henry
- lauck street shipyard
- (and 1 more)
-
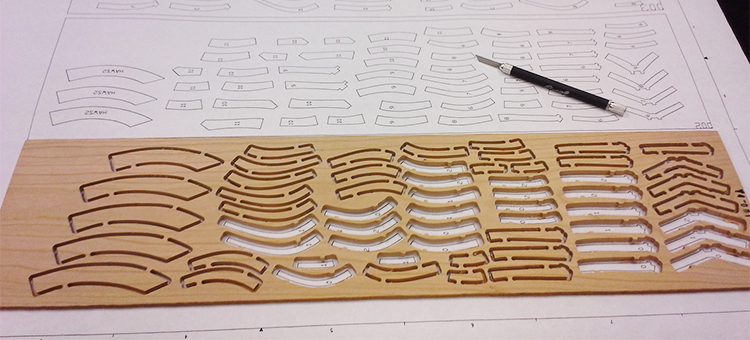
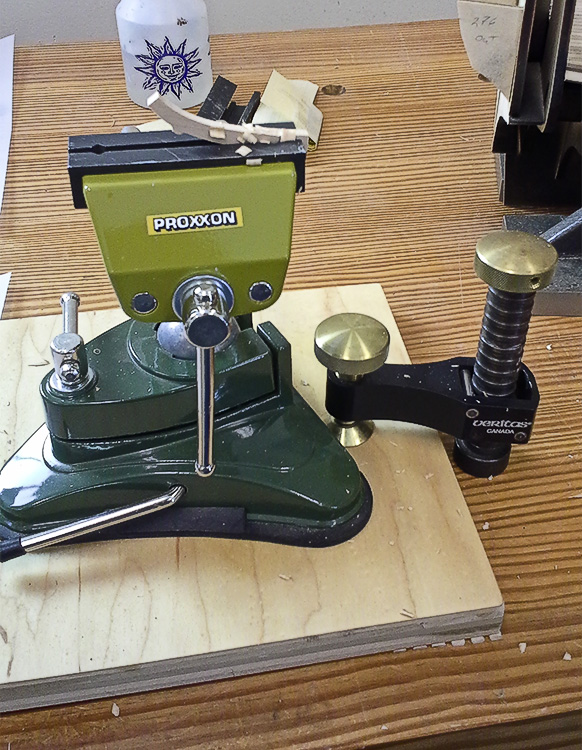
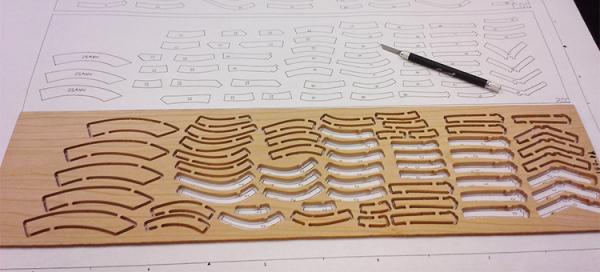
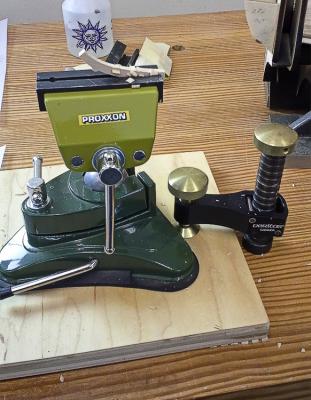
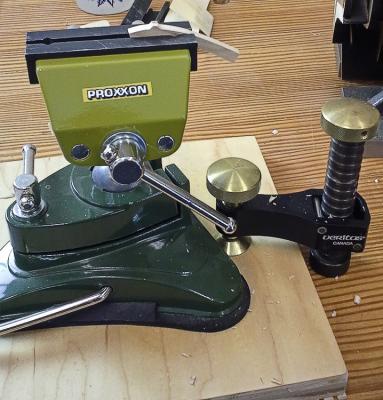
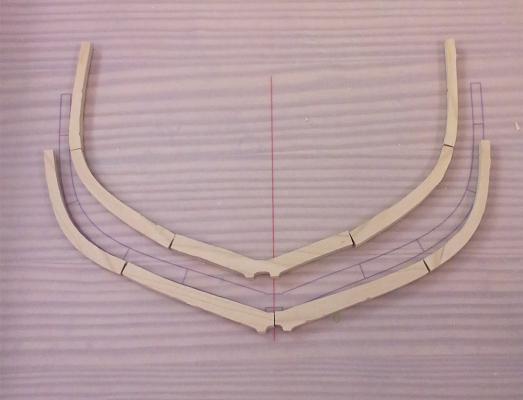
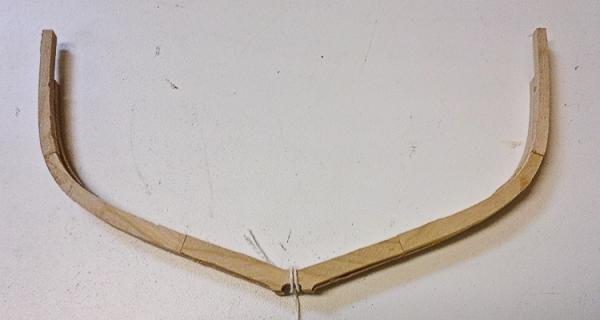
All of the frames are stylized in a manner similar to what Harold Hahn used in his upside down framing approach. BTW - the PH uses an upright jig for framing. There are 9 pieces to most frames with the exception of half and cant frames. Included in the kit are plans that show the layout of the parts on the billets. In the first picture you can see a cherry billet placed on top of the plan. The #13 razor saw I use for cutting the parts out is also included in the picture. Each part has two tabs holding it into the billet. Once the part is removed from the billet the two tabs need to be trimmed off. The next two picture shows parts in a vice for trimming. I use a #10 knife for this. While some might hold the piece in their hands to trim the tab off, I found that placing the piece in the vise made for safer and more accurate trimming. Next the parts are assembled on a copy of the frame plan from then PDF files included. The fourth picture has the parts for the frame planed on top of the plan. When building the frame the pieces to the top of the picture are placed on top of the actual frame pattern and end glued. Then the pieces at the bottom of the picture are placed on top of the other pieces making a two layered frame. Because the end glued joints are overlapped between the two sister layers the frame is very strong when the glue has dried. The last picture is of a completed frame. The string is for a label I use to keep track of which frame is which. Very little cleanup work has been done at this point because the next step is to bevel the frames. As part of the beveling the frames will start to be cleaned up moving towards their final appearance. Once all the frames, keel, stem, and stern are assembled in the jig the last step is fairing up both the inside and outside of the frames. This is the stage in which the frames will be brought to their final state. There are close to 30 frames that need to be created. My next post will be a few weeks out while I get that work done. Stay tuned, more to come.
- 20 replies
-
- 6
-
-
- patrick henry
- lauck street shipyard
- (and 1 more)
-
Hello all - I have begun to build the Patrick Henry kit and will be updating this build log as I go along. The Patrick Henry is a hypothetical Armed Virginia Sloop (AVS) name after a well know son from Virginia. My initial thoughts on this kit start and end with the words quality. While there are multiple options for the frame wood, I selected the cherry wood option. The cherry billets included in this kit are outstanding as is all of the wood planks. All of the billets are CNC milled instead of laser cut and as a result do not have any laser burn (yah!) and the cuts are straight instead of angled as with laser cut. Other parts are 3D printed. While I was skeptical of 3D printed parts based on much of the "not ready for prime time" comments, these parts are beautifully detailed. The plans are printed directly from the CAD plans used to design this kit, not copies. Color is used to help distinguish different parts making it easier to understand the lines as opposed to the more typical black & white copy. A CD is included with PDF files of all the patterns that will be needed to build he kit (the frames as an example). I did read through the instructions before starting to build the kit to become familiar with the approach. The instructions are detailed and easy to follow. The only changes to the kit that I plan are some changes of wood, only because of color, not quality. All of my frames and deck framing will be the cherry that came with the kit. The kit comes with cherry for some of the outside planking. To add interest I will change some of that cherry to another wood. As I go forward there will probably be a few other changes in wood. My next post will on making frames, the first step in the build.
- 20 replies
-
- 3
-
-
- patrick henry
- lauck street shipyard
- (and 1 more)