MORE HANDBOOKS ARE ON THEIR WAY! We will let you know when they get here.
×

(2).jpg.a27525da3c49bada3d200718e0a34e4b.jpg)
herbgold
-
Posts
61 -
Joined
-
Last visited
Content Type
Profiles
Forums
Gallery
Events
Everything posted by herbgold
-
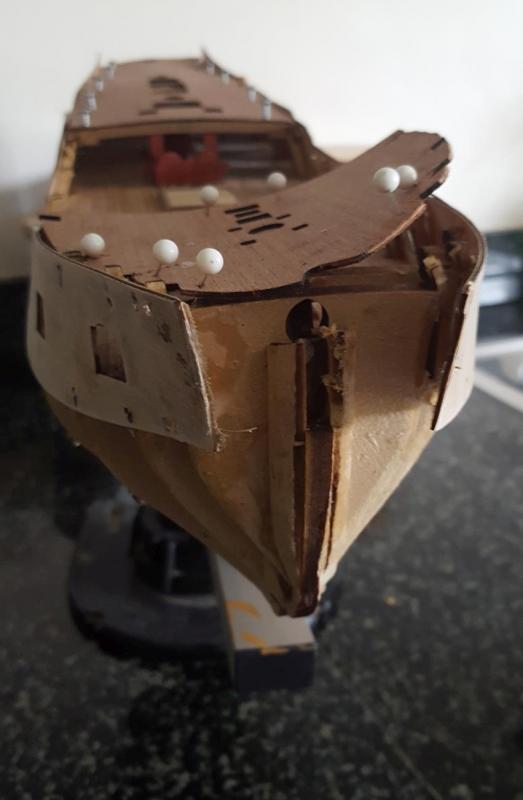
(2).thumb.jpg.912c5f2f71767b6eecf3db45057e51a5.jpg) You haven't seen the stern, Mike!
You haven't seen the stern, Mike!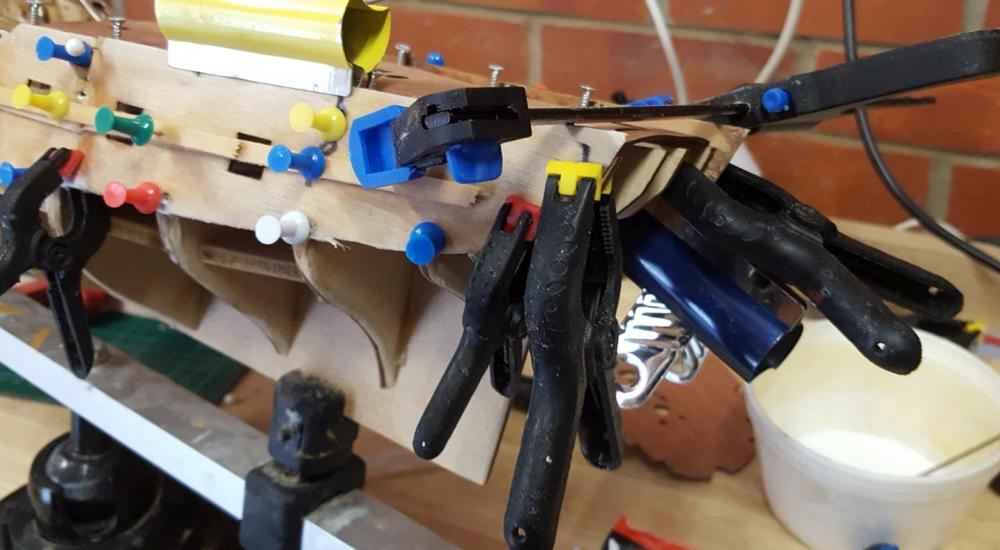
-
Finally took the plunge today (we've had a few other things on our minds here in the UK) and soaked the strips again, and glued and pinned them. Definitely better than the first time, much tighter against the bulkheads and I've managed to get the reverse curve, more or less.
-
Today's attempt - a little better, I think. One problem now is that, because I stupidly used screws for the first attempt, the tops of the bulkheads have splintered... and the mended starboard gunport is bending where I attached a new bit of ply....but we'll get there, or somewhere near there!

-
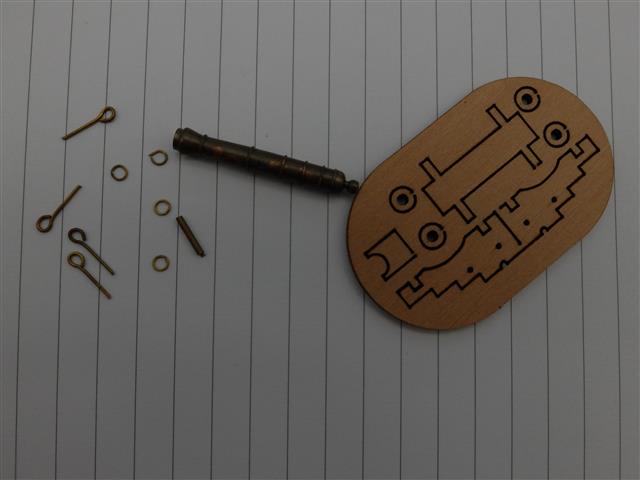
They're Mantua fittings, Mike. I got this: 30543 Cannon with carriage kit 40mm at Cornwall Model Boats, here: http://www.cornwallmodelboats.co.uk/index.html
-
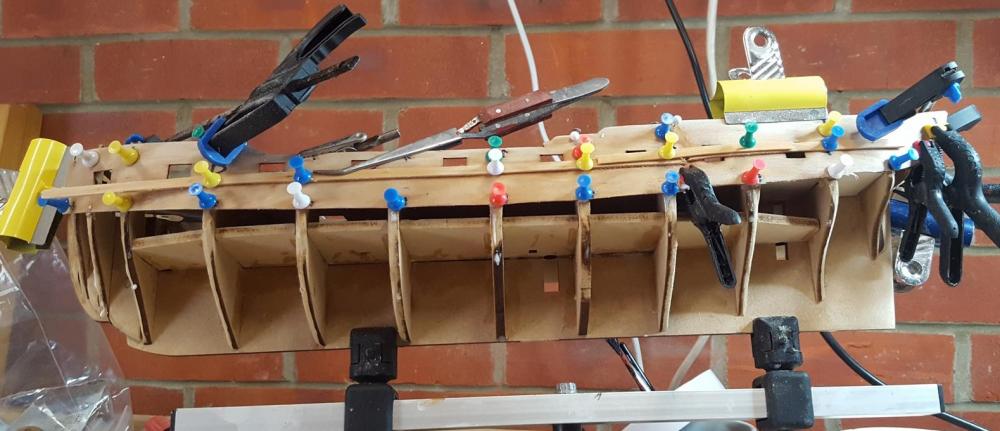
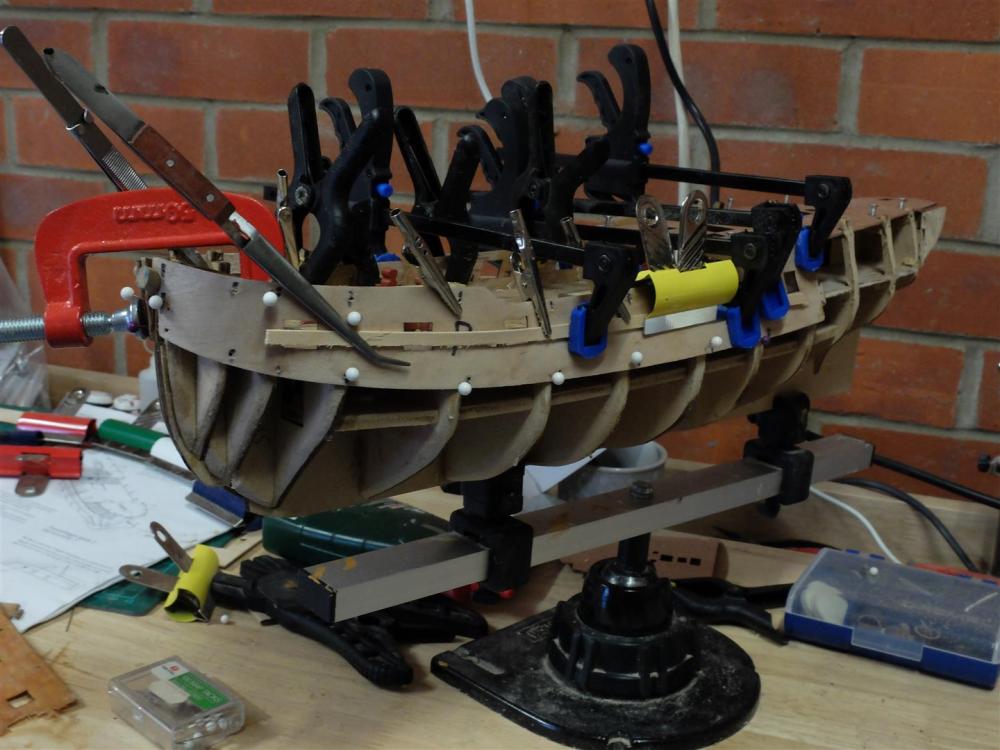
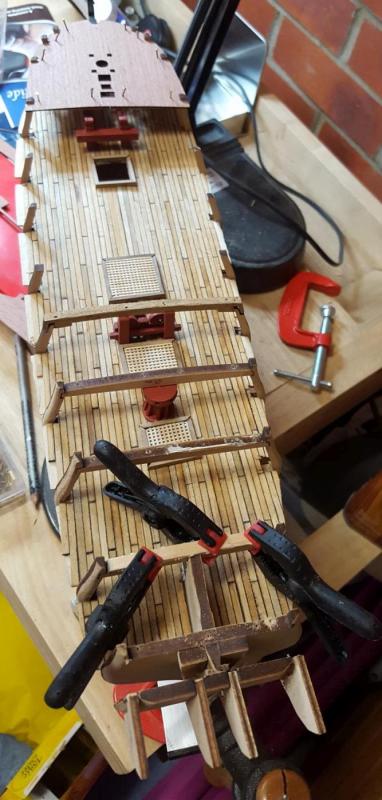
SpyGlass, I used the kettle a bit more subtly and got the strips off without too much trouble. Have soaked the strips again and pinned them back but not glued them. Plan to unpin them tomorrow and repeat. Using just about every clamp I have, as you can see!
-
That's very kind of you, Cobr@, but I'd just bought a set of guns from the Cornwall Model Shop a couple of weeks ago, not so much for the quality of the guns themselves but because the supplied gun carriages were so fragile. This is what the replacement looks like.
-
Yes, you're right!
-
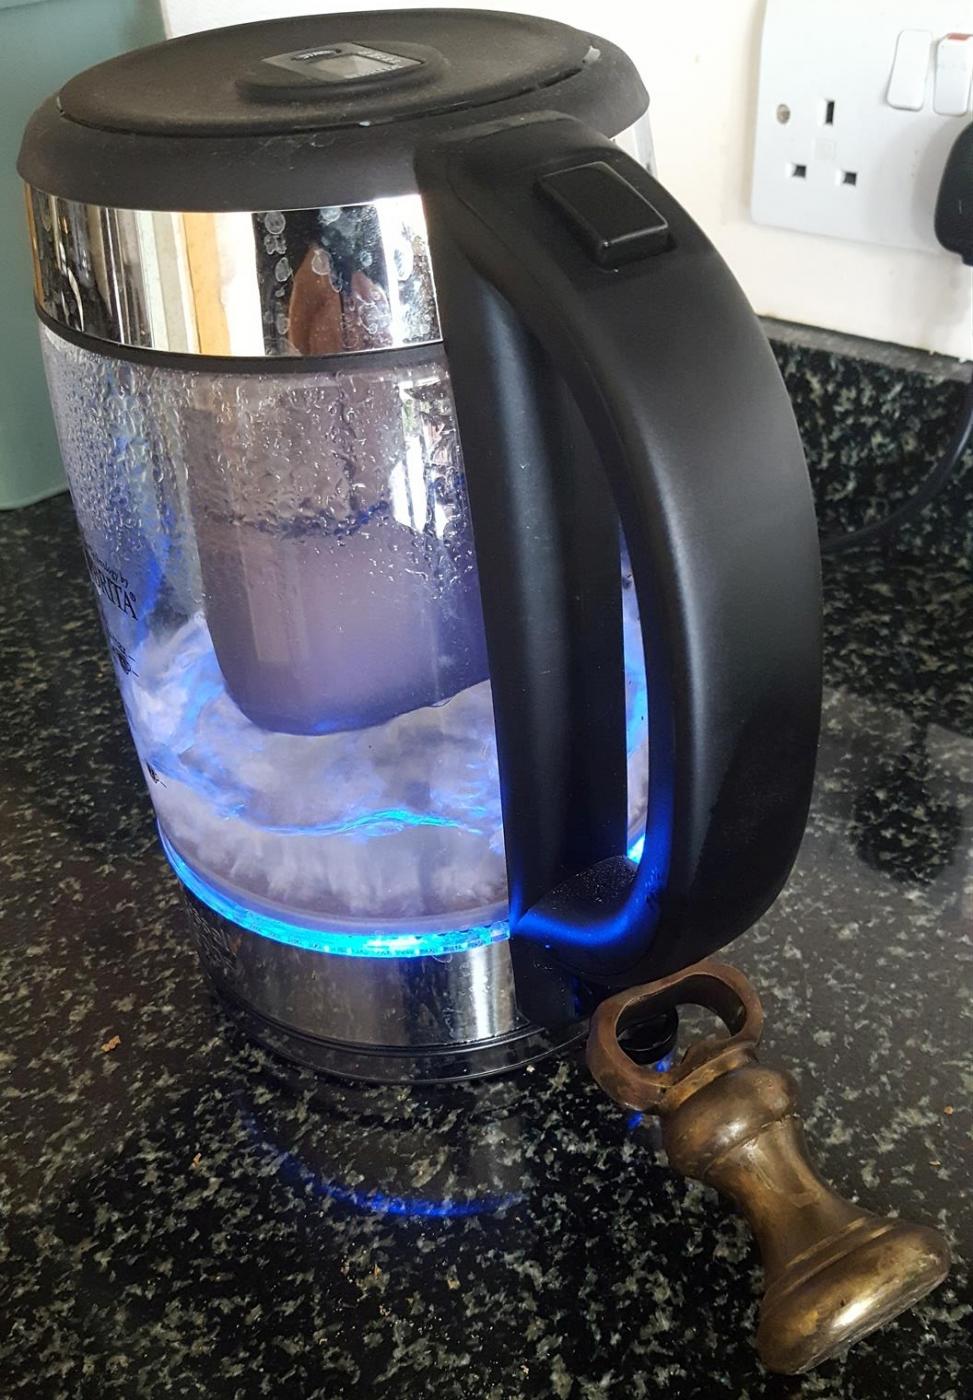
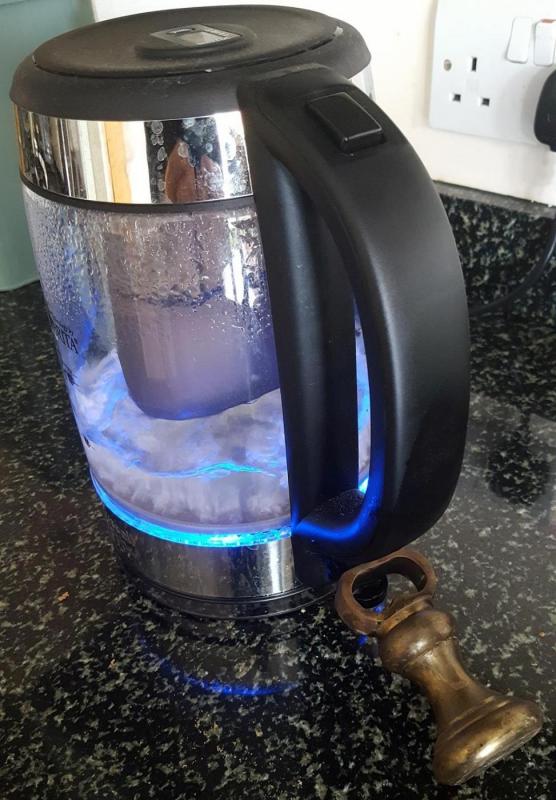
My wife is out having her hair done this morning, so I thought I'd risk the family kettle. I'm pleased to report that the steam method works! (See attached - also admire the subtle engineering of the Steam Cutoff Lever Defeat Mechanism (world wide patents pending). Thank you, SpyGlass - I will continue the disassembly early next week.
-
Many thanks, SpyGlass... I'll give the kettle a go today - although my wife isn't keen on the idea!
-
To which I would add another or two because no, not really. I think I would risk destroying the tops of the bulkheads.
-
Yes, the green container labelled "Evo-Stik Wood Adhesive Interior". According to the safety sheet, the Evo-Stik Adhesive Cleaner contains: ACETONE10-30% CYCLOHEXANE<1% ETHYL ACETATE 10-30% HYDROCARBONS C6-C7 ISOALKANES, CYCLICS <5% N-HEXANE 30-60% NAPHTHA HYDRODESULFURIZED LIGHT, DEAROMATIZED; <0.1% BENZENE 10-30% NAPHTHA HYDROTREATED LIGHT, <0.1% BENZENE 10-30% N-HEXANE <1% I presume none of this is iso-propyl alcohol? Once again, thank you very much for your help - I can't get over how kind and helpful people on this site are!
-
Evo-Stik 191 Adhesive Cleaner - here P.S. Meant to thank you!

-
Well, very frustratingly, the solvent I've been waiting a week for doesn't do anything to loosen the glue. I'd been using Evo-Stik - "stronger than the wood itself" - which was probably a mistake. The only way I feel I can progress now is to sand back the sides of the strips as much as possible to attempt an "S" curve, and do some repairs at the bow and stern. At least port and starboard strips are level!
-
Thank you again, Mike. Off to buy some solvent (I guess if the fix fails I can always drink it...) Will report back after this holiday weekend (in England).
-
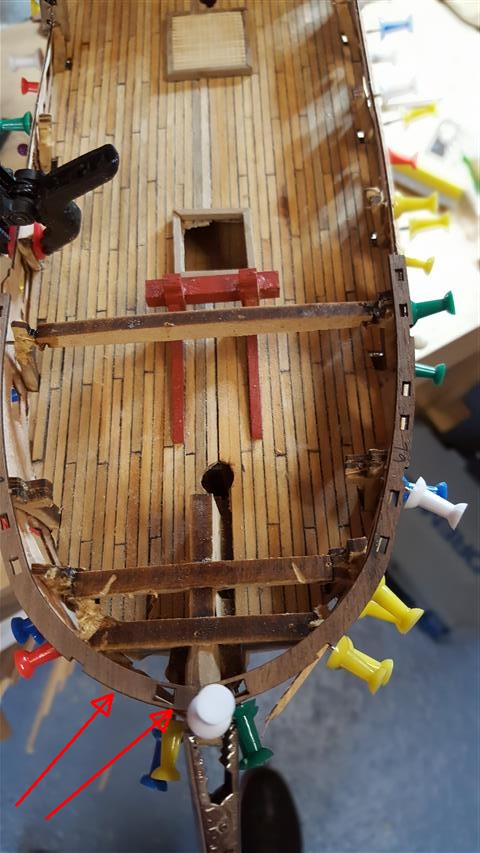
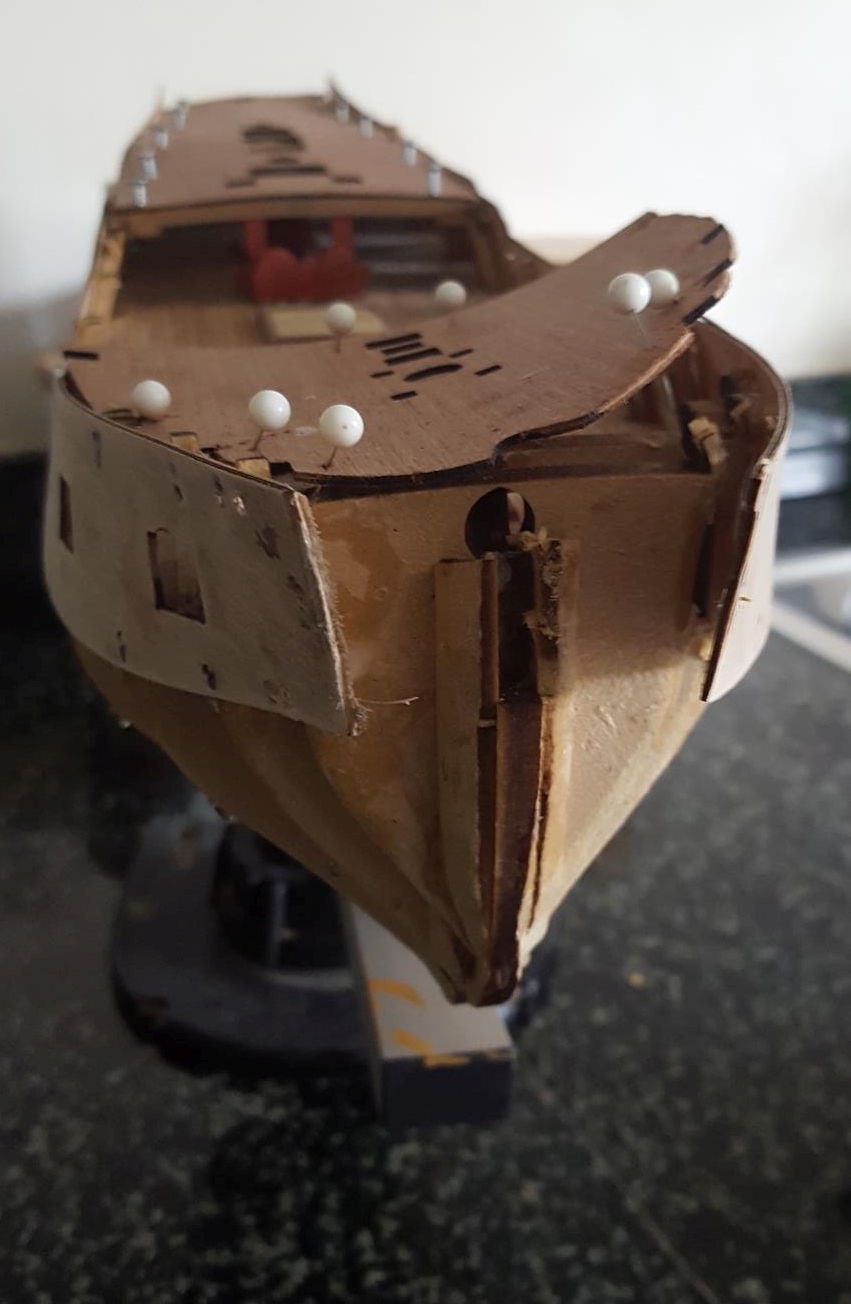
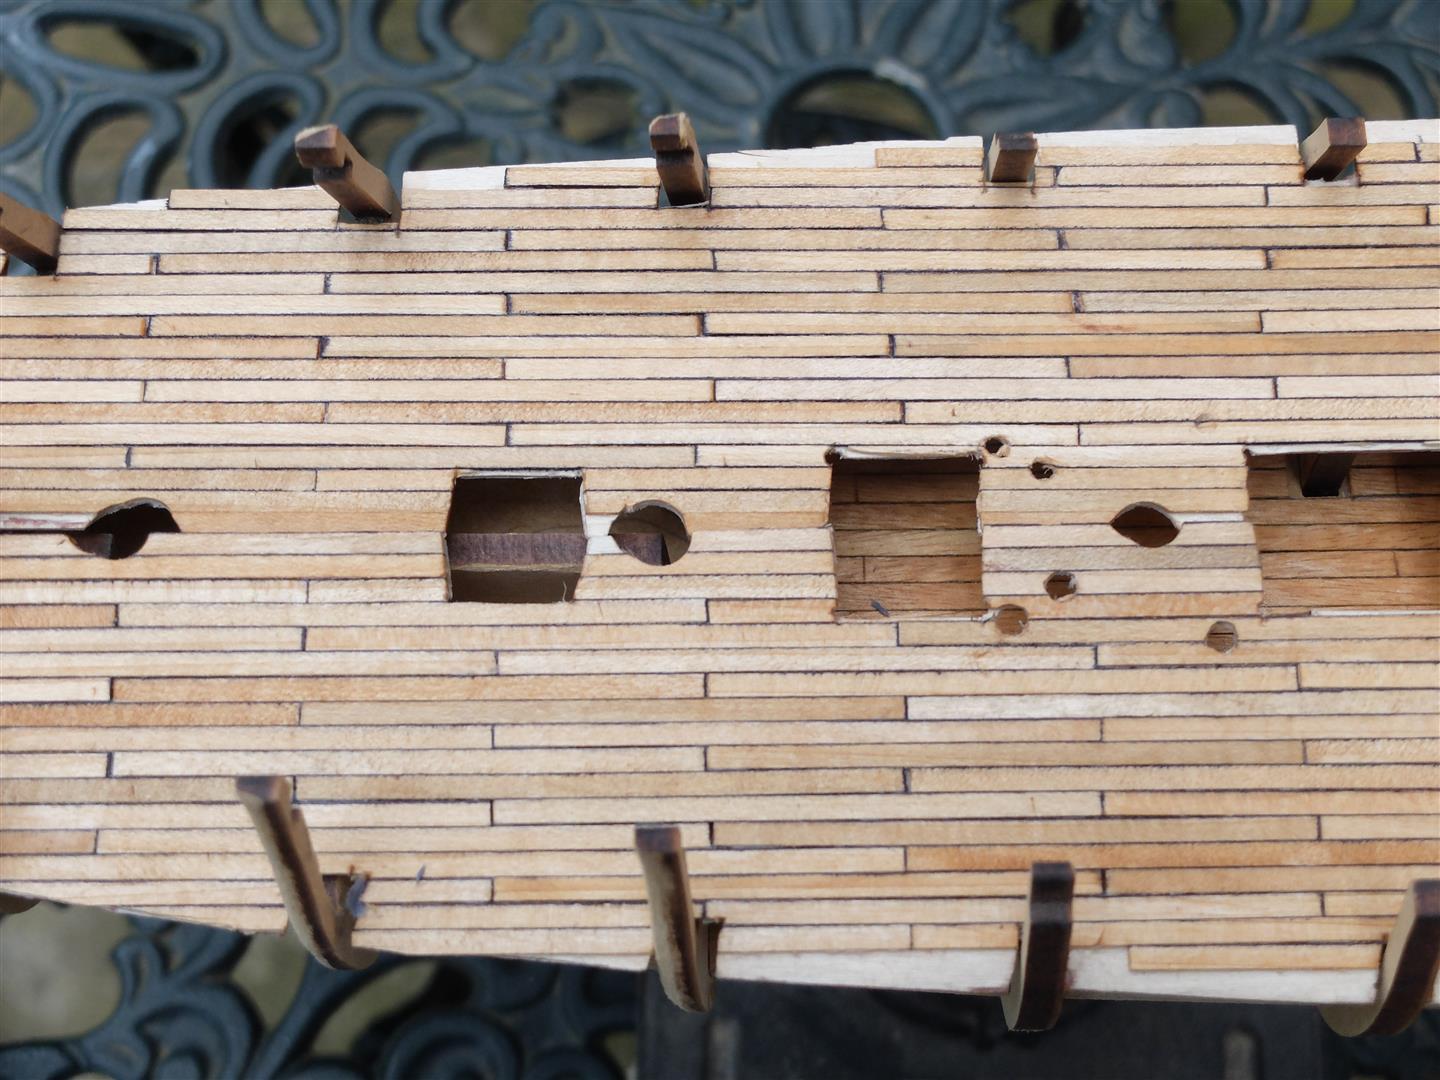
Thank you both too, Mike and Martin. As I see it, there are two problems with what I have done: 1. Because I used the stern part of the jigsaw joint as a datum line as per the instructions, everything is too too far forward (and I think the strips are too long). Exhibit A shows that very clearly 2. What I hadn't noticed was that the strips should have a vertical curve (or S-curve, or "recurve") as well, My strips are completely missing that. Exhibit B. Perhaps these photos will be useful in a "how not to do it" practicum! Off shortly to buy some solvent, and will remove the strips and follow your advice.


-
Thank you VERY much, SpyGlass - a complete practicum in how to attach those wretched gunports. I need to reread (and re-re-reread, probably) what you say, but I will do as you say and (1) take the strips off (2)soak and bend, soak and bend, soak and bend (3) line up as you suggest. I will need to come up with some repairs to the bow-most 1/2 inch or so of one of the strips, as it broke off as I was trying to force it. But I will worry about that later. Thank you again.
-
Thank you, Martin, that's kind of you, but I think I will remove and re-fix that offending grating. I spent today fixing the gunport strips, which like many others here I found a hateful job. I think I have it more or less right - at least port and starboard are tolerably even. I did rather comprehensively mess up the bow, and will have to use filler, I think. Oh, and the 60 half-inch screws were the only means I could find of getting the strips to stay where I wanted them - everything else just pulled straight out of the bulkheads. P.S. Oh dear. It's amazing how much more one sees from a photo than from the real thing. The gunport strips, however admirably symmetrical port and starboard that they may be, are both about 1/4 inch too far forward, as can be seen from the unwelcome appearance of the edge of a bulkhead through the foremost gunport. Which explains a lot about the messed up bow. Sigh.

-
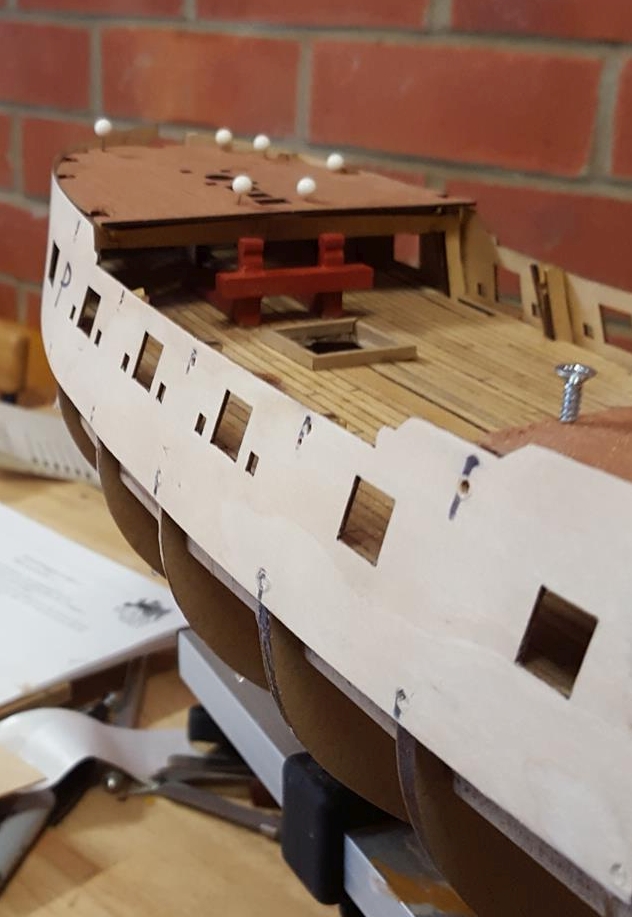
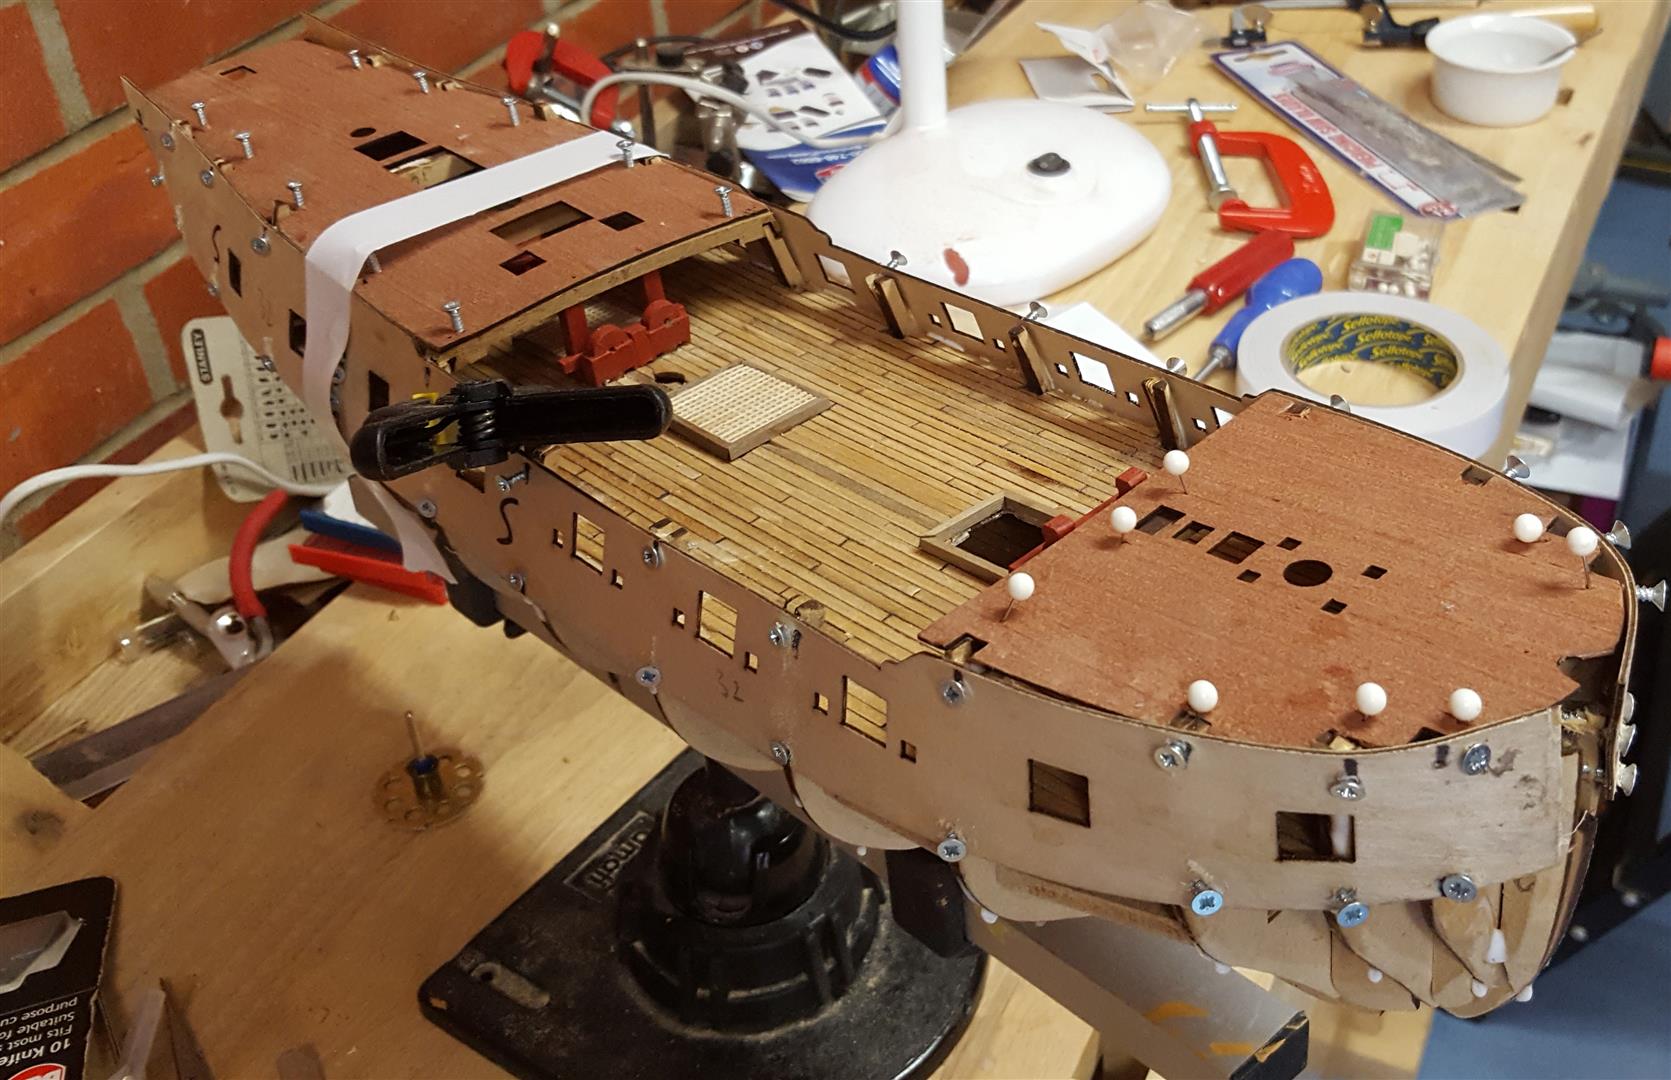
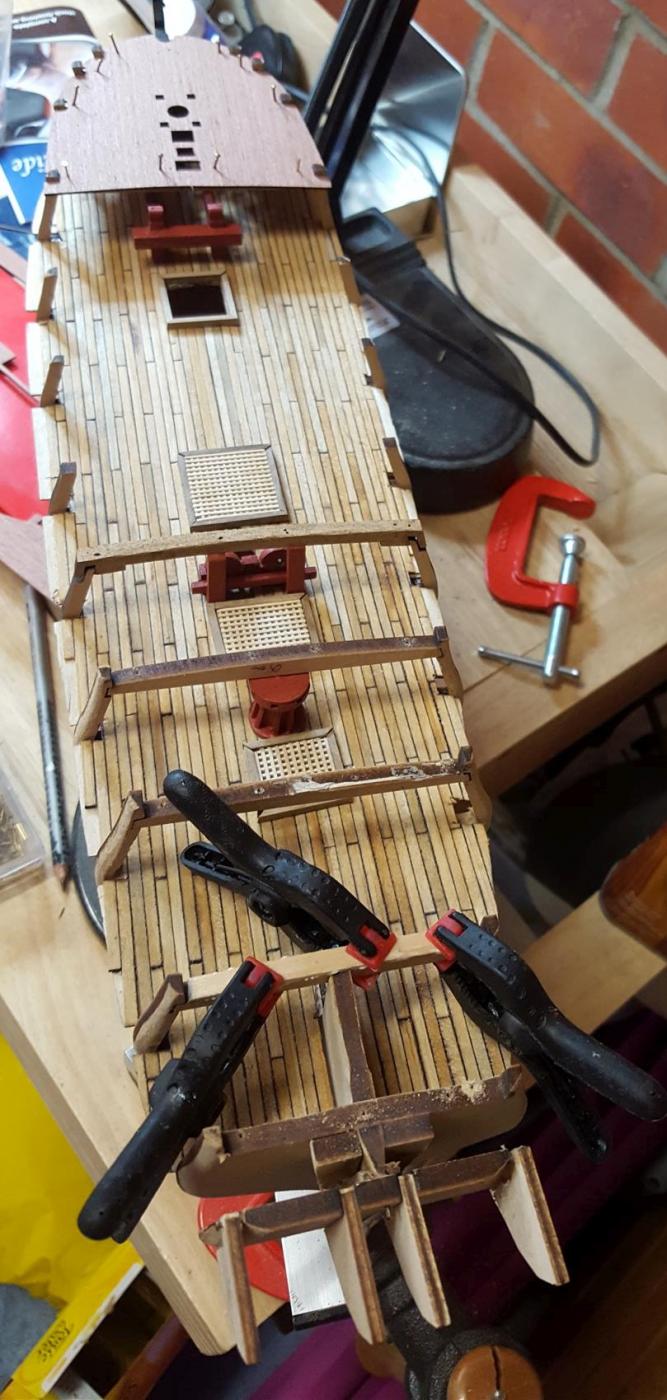
Well, I'm modestly pleased with progress in the last couple of days. I've attached the gratings and made up and attached the capstan and the other deck furniture and fitted the beams for the upper decks. I'm now trying to find a way of pinning the upper decks in some non-permanent way without the @~*"! pins popping out. P.S. I've just noticed from the photo that the aft-most grating is rather badly skewed. It doesn't look so bad in real life. Honest.
-
That would have been a good idea, SpyGlass, I wish I'd thought of that. But no, I had to do it the hard way - threw away the rubbish ply deck (after I'd planked it - badly! - made another deck from proper 1mm ply, planked it (somewhat better) with separate 3" strips of limewood, cut apertures for the gratings (badly)... that's where I am now. So in answer to your question - I will now have to fit the gratings on top of the planking with the apertures open. P.S. Sheet 6 - got it!
-
Got it - the booklet shows a hatchway with ladder there but I can't find it on any of the plans. Thanks for your help. P.S. I'm fitting all my gratings on top of the deck simply because I don't have the skill to do a neat job with the cutouts.
-
Well, it's been a while since I was last here! I decided that my original gundeck planking was so bad (even my beloved said it wasn't very good, and she's usually very encouraging) that I've remade the whole thing on "proper" 1mm plywood and 1mm x 3mm lime strips. It still isn't great, but a lot better than my first attempt, after I put some tung oil on it. I've planked it with 3inch strips, which I was quite pleased about, but the ends of the strips don't quite line up. Photo attached - I haven't finished the cutouts yet. I haven't done treenails - beyond me. I have a question, learned brethren. I'm trying to work out the sequence of the rectangular cutouts on the main gun deck, from what seems like rather inadequate diagrams. As far as I can see, from bow to stern, it goes: 1. hatchway or grating??? 2. grating 3. grating 4. hatchway or grating??? I think 4 is a grating (and I'm not too bothered as it won't be very visible when it's covered over with the quarterdeck), but what is 1? I'll go away now, but not for so long, I hope.

-
Terry, if it's any help, Supply was the first ship model I built (and so far the only one I've completed). I used a lot of guesswork, especially when building the stern, as I found the instructions to be pretty wretched. But then I didn't have the benefit of the very helpful people here!
-
Back to work after far too long a gap. I'm still just about to fit the gun deck! I need to make better progress than that.
-
Ah. Good point, SpyGkass. I will fit the deck first and then plank round the hatches - and worry about fitting them later.I think I'm over-analysing this!
-
Thank you, Spyglass. It IS the "duff ply" and I will try to strengthen it. To me, the great advantage of planking the deck before I fit it into the hull is that I will be able to plank end-to-end and then cut through the hatchways etc from the underneath - just seems easier that way rather than having to measure carefully after fitting it.