Artificer
-
Posts
34 -
Joined
-
Last visited
Content Type
Profiles
Forums
Gallery
Events
Everything posted by Artificer
-
 Rosmarie Your build is coming along very nicely, I really like your copper plating. Using the tape and overlapping the plates was a good idea. Dave
 -
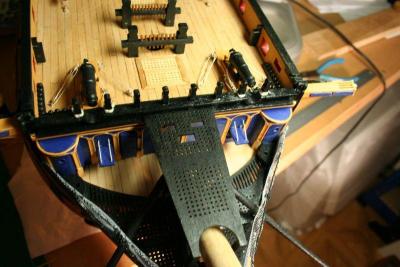
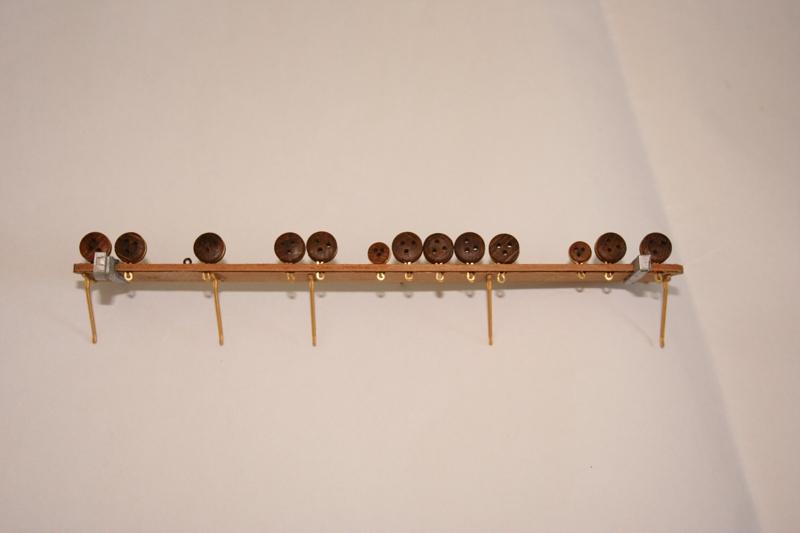
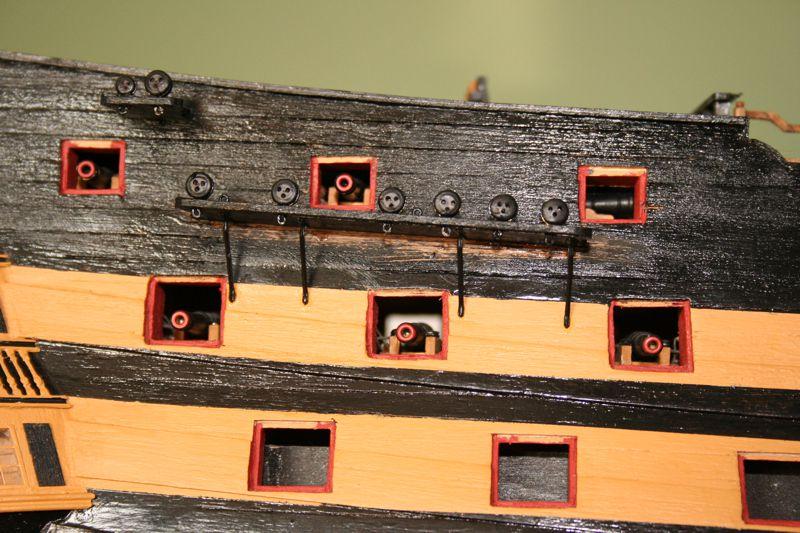
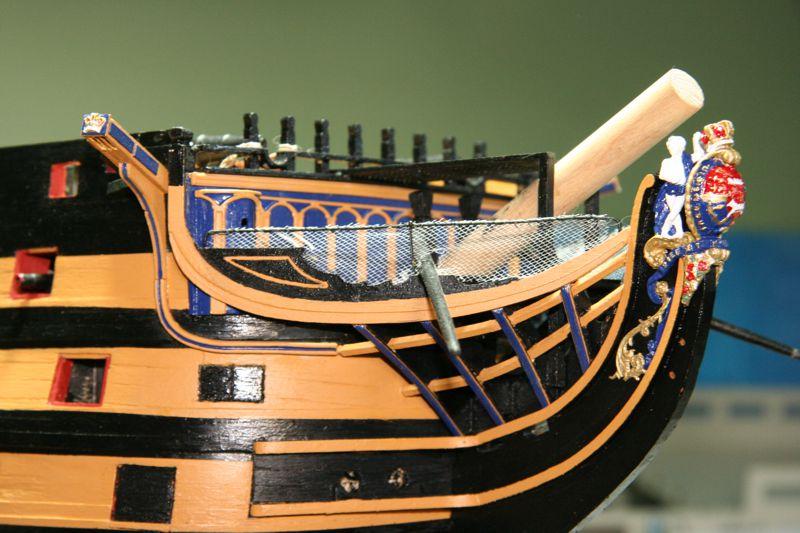
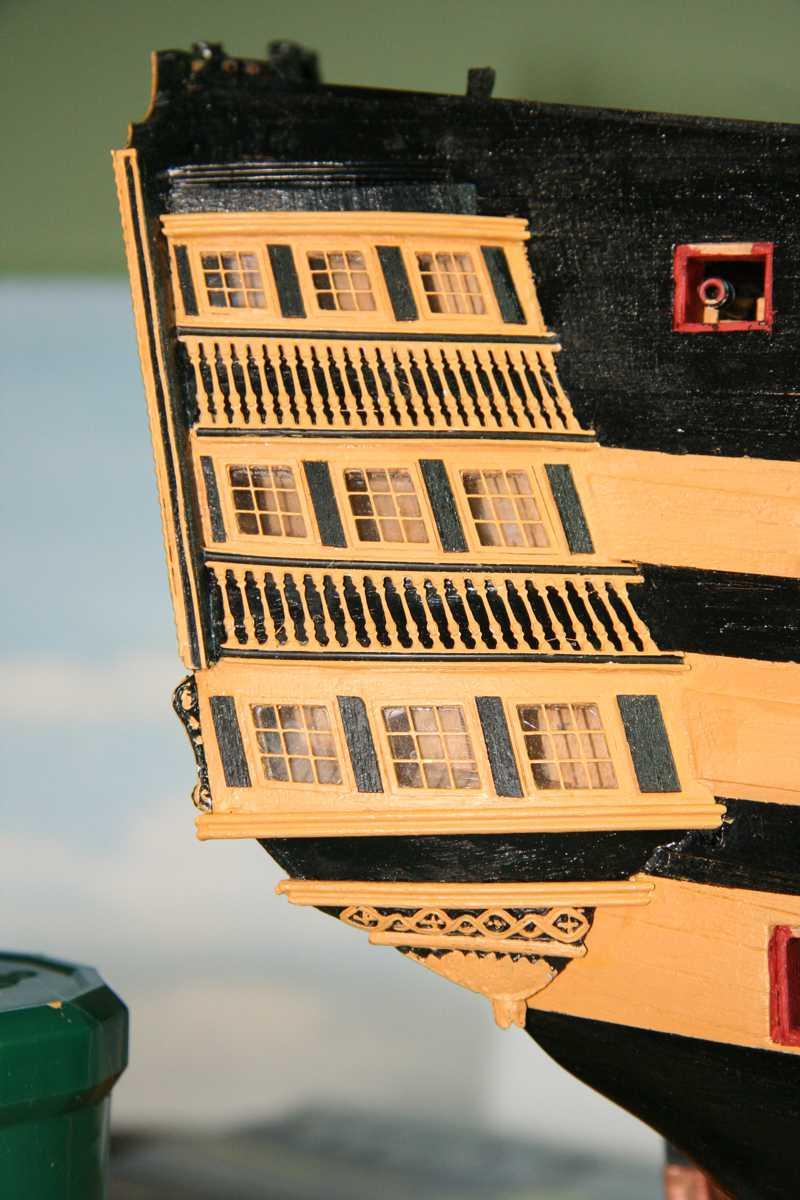
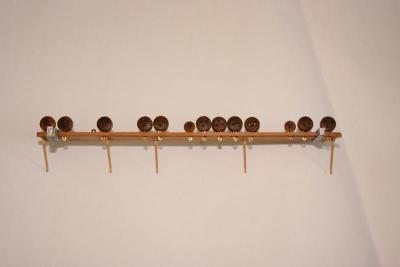
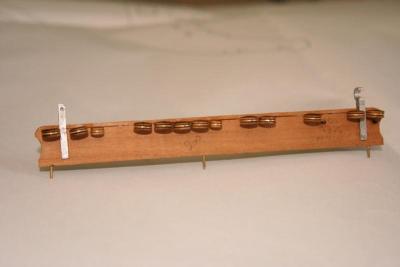
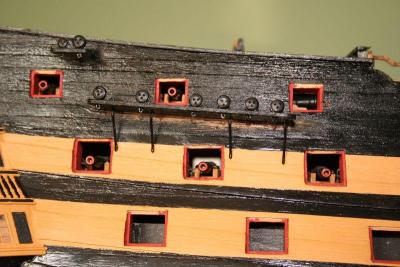
Rosmarie / Colin Many thanks for your kind words, they are very encouraging. Here is a quick update. I am currently working on the starboard channels and have attached some photo's. These three photo's show the starboard main channel as constructed, I have secured pins in the back to make the attachment to the hull a lot stronger. For anyone who is yet to complete these on their Victory build I have a tip which may help. Before I attached the deadeye strops, I drilled a small hole (0.5mm) in to the corner of the respective cut-out, this then accomodates the tags on the strop and when a little CA glue is applied makes the strop very strong. The last thing you want is for a strop to pull-out when rigging. Once the whole assembly is painted, it is then attached to the hull with CA glue and the pins. The following photo shows the starboard mizzen channel attached to the hull. The pins make the joint strong and the whole assembly has no movement. Dave
-
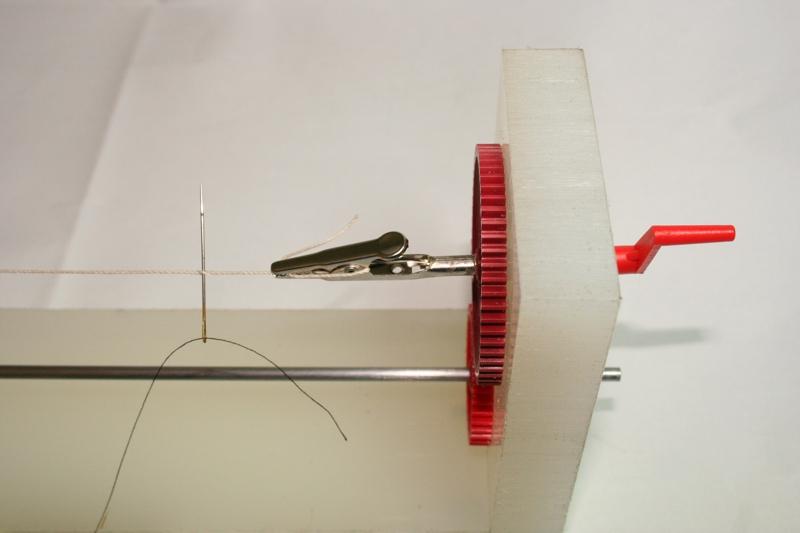
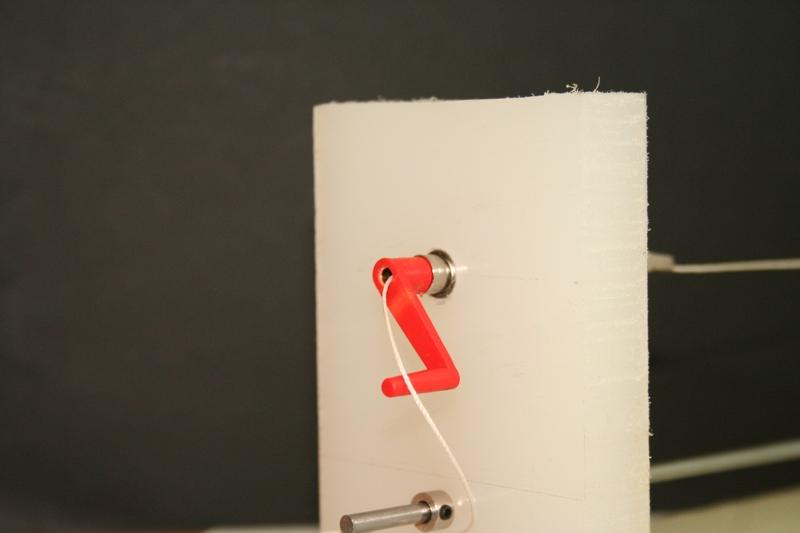
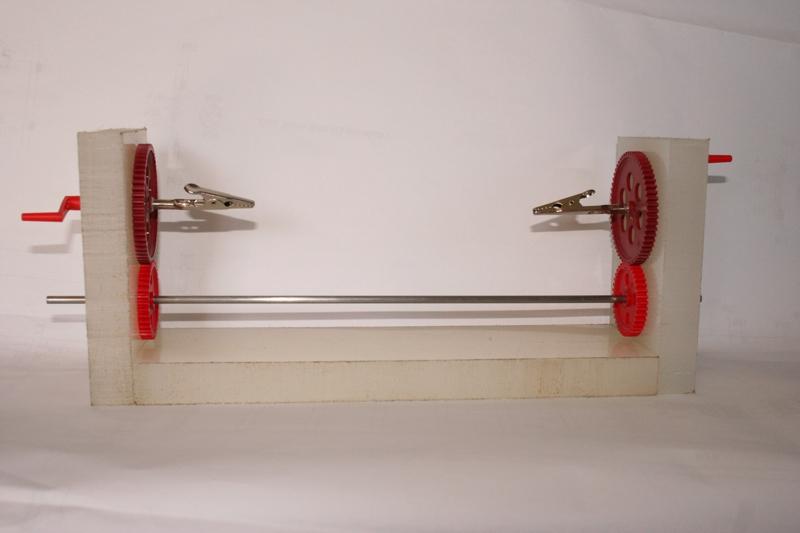
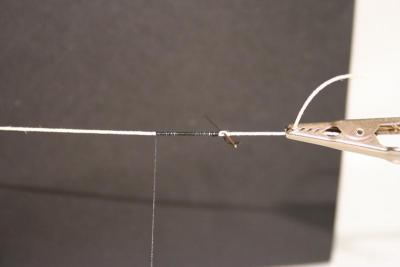
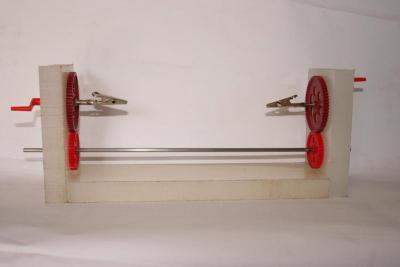
Sinan I have attached some photo's which may help explain how the serving jig works, it really is very simple. The thread to be served (white in photo) is attached between the two aligator clips, as tightly as possible. the first end of the serving thread (black in photo) is attached to the line to be served. I have used a needle as when the serving is complete I can pull the needle through with the thread to secure it. The shafts at both driving ends are hollow, this allows the thread to pass through and stops it form wrapping around itself. The crank handle is then turned in the required direction and the serving thread wraps around the line. One the desired length of serving is achieved the ends are glued and the line removed and is ready to be put in to position on the model. Hope this explanation helps. Dave


-
Mort, Brian and Patrick, many thanks for the comments, I am currently working on the channels and will post more photo's in due course. Dave
-
Tony The purpose of serving a rope is to protect it in areas subject to wear, the most obvious example is where the shrouds pass round the head of the mast. Here is a link to Wikipedia which might help explain 'serving'. http://en.wikipedia.org/wiki/Worm,_parcel_and_serve The ropewalk is a machine used to produce lengths of rope whilst the serving jig I built is used to serve the ropes. I remember that Gil's build log showed very clearly the serving on his shrouds. Sorry for the lack of information but I think the link will make things clear. As an aside, my late father was a keen archer and would use a small device to serve his bow strings. With a bit of enginuity one of these may be adapted to suit the ship modeller. Hope this helps. Dave
-
As I get closer to the 'sticks and string' phase of my Victory build I found commercial serving jig very difficult to come by here in the UK. I decided to build my own using 20mm ploypropylene sheet, plastic gears, 4mm silver steel shafts and some bearings. The frame is held together with machine screws instead of being glued. The operation is via a hand crank at present but I may add motor drive in the future to allow two free hands whilst operating. I have carried out trials and it operates well.

-
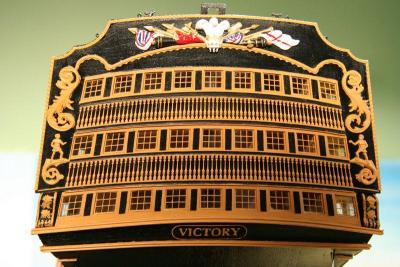
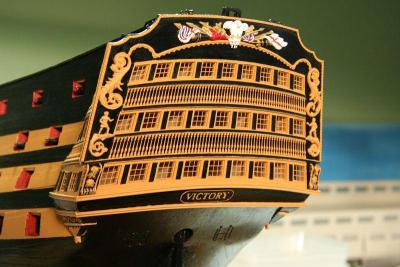
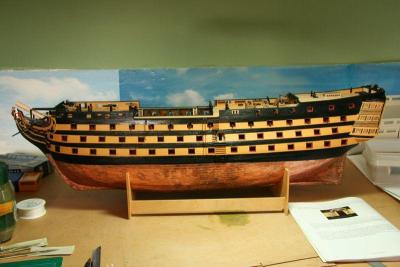
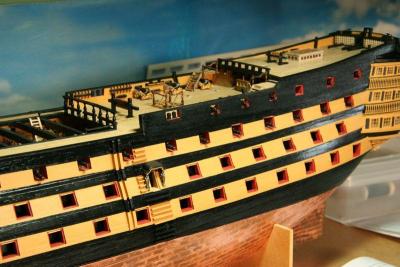
I didn't start a build log when I started the build 6 years ago and a loss of the photographs put a stop to a retrospective log. I have decided to put a view photo's of the current status and intend to update when advances in the build are made.