HOLIDAY DONATION DRIVE - SUPPORT MSW - DO YOUR PART TO KEEP THIS GREAT FORUM GOING! (Only 24 donations so far out of 49,000 members - C'mon guys!)
×


StuartC
-
Posts
91 -
Joined
-
Last visited
Content Type
Profiles
Forums
Gallery
Events
Everything posted by StuartC
-
 Ian It was £20 plus £5 postage from www.monkmanfoundries.com can't recommend them highly enough. Hi Foxy, I've been really lucky with the support I've been getting, loads of pictures sent, which has helped tremendously. However if you have got any more pictures drawings etc let me know. You can never have too much
 -
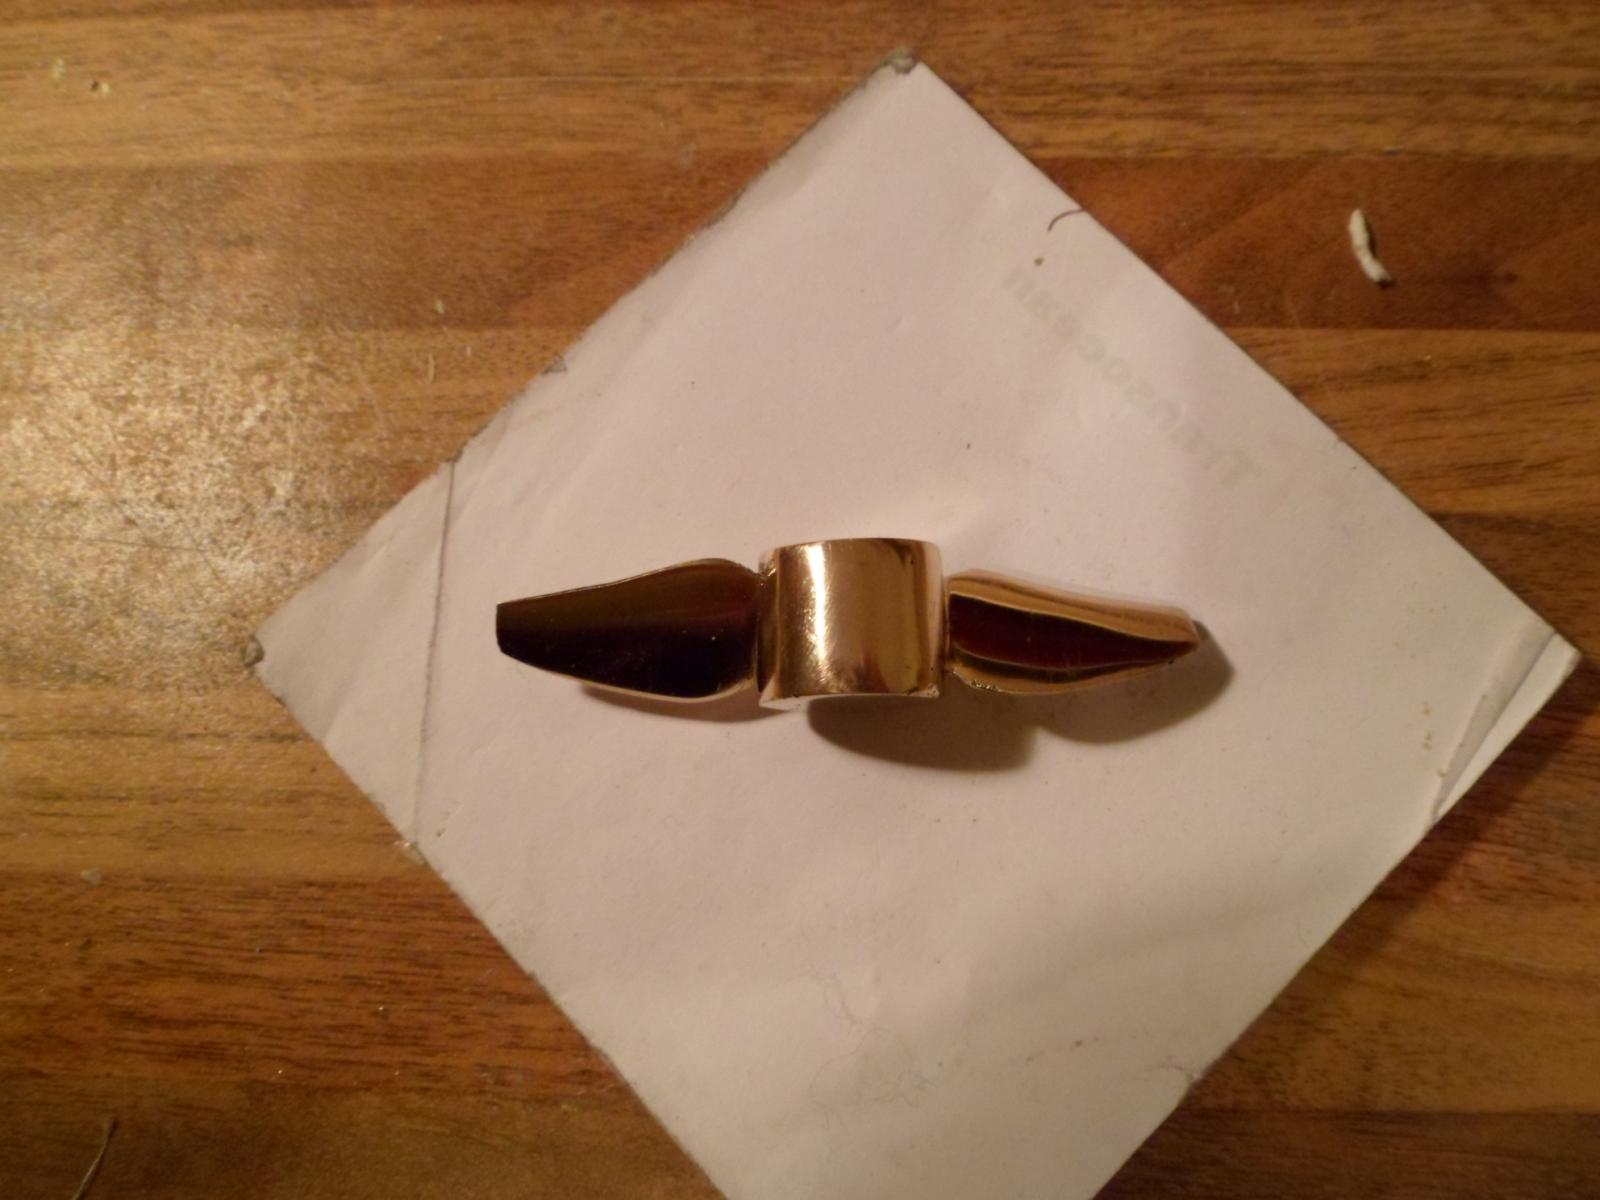
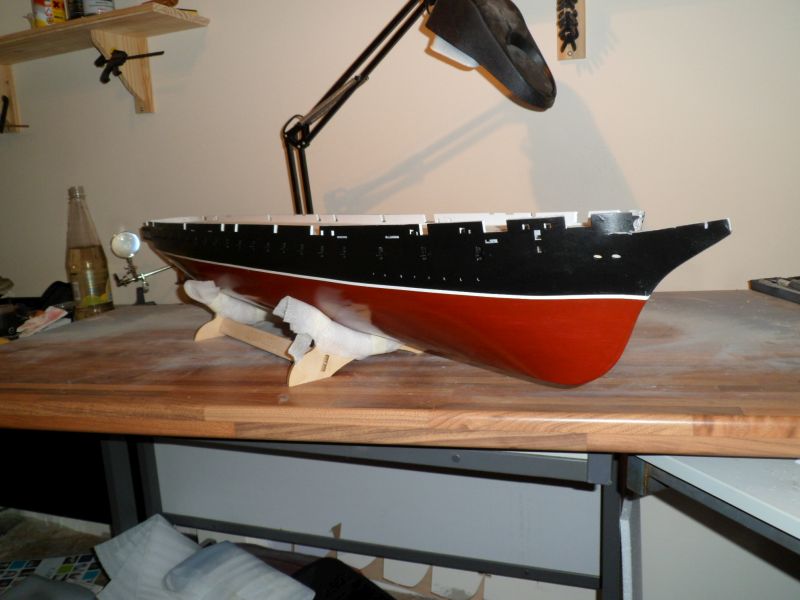
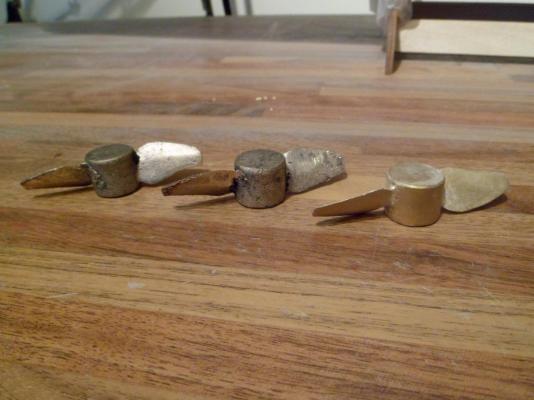
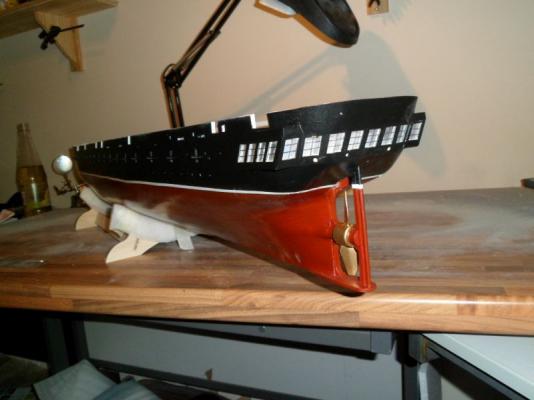
Really glad I decided to get the prop cast in brass, what a difference it makes to the overall look

-
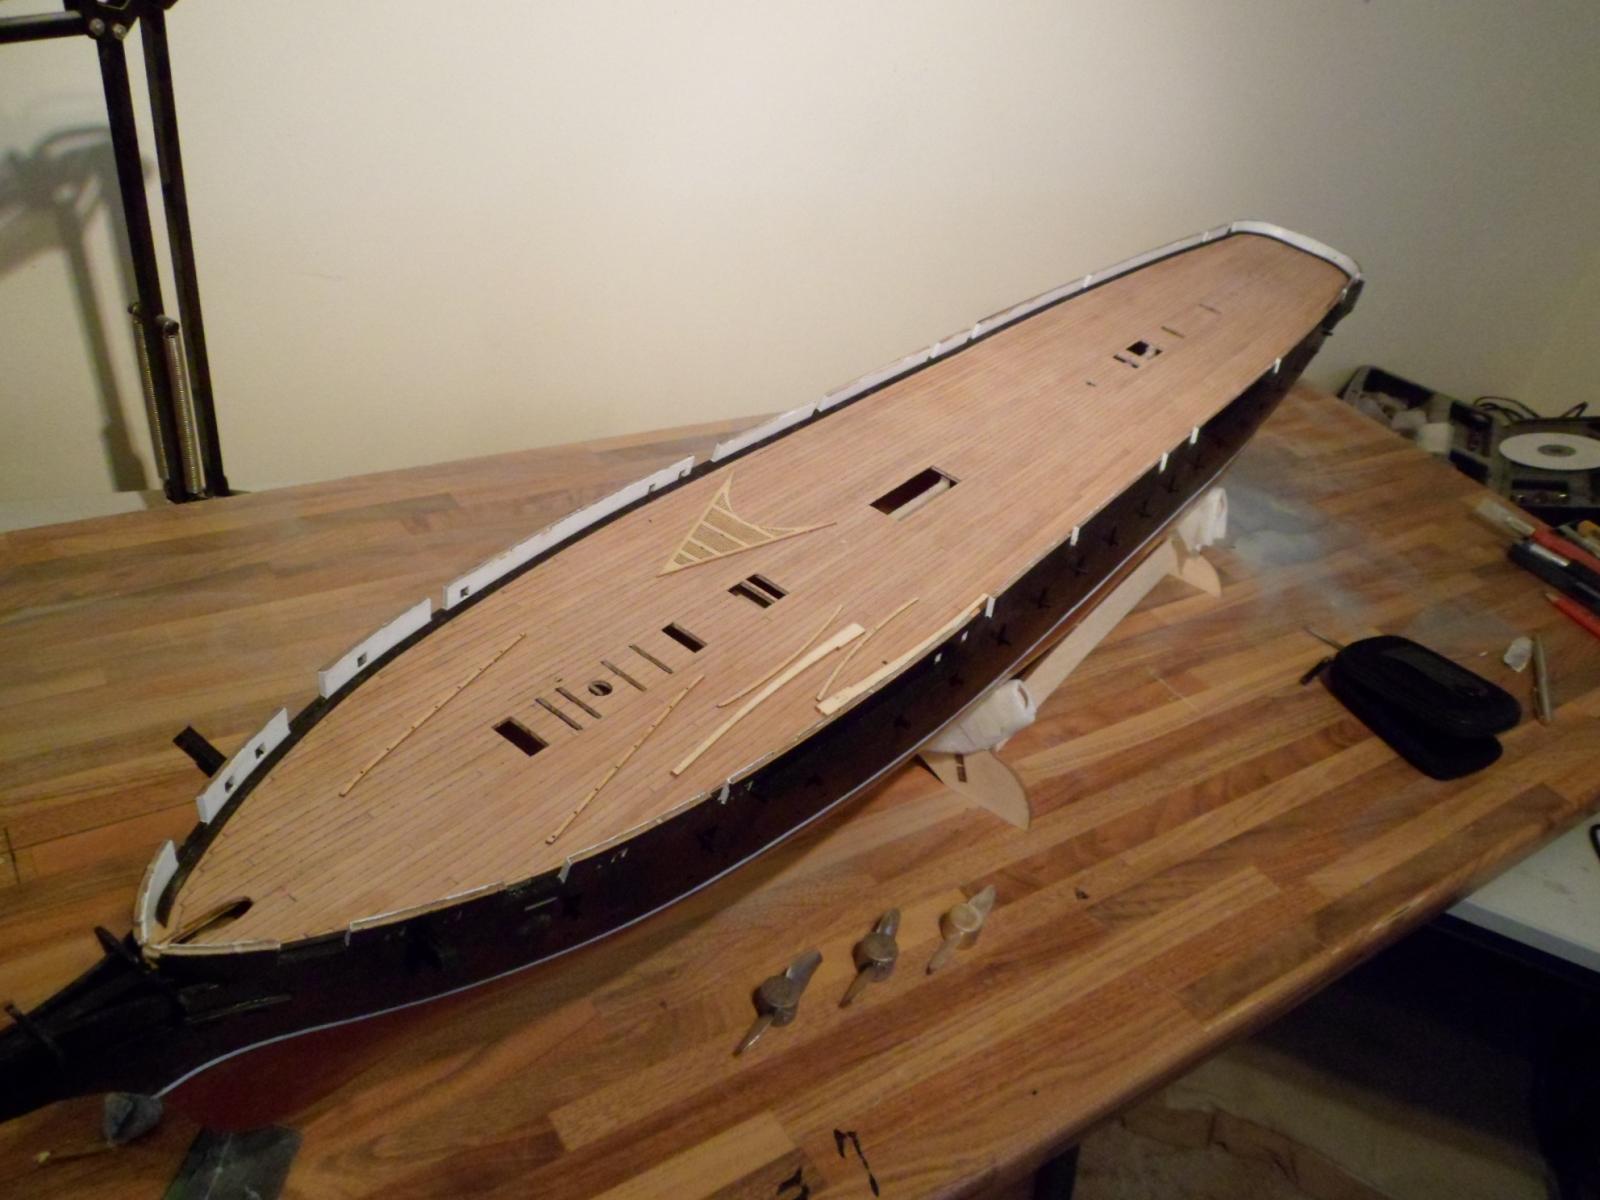
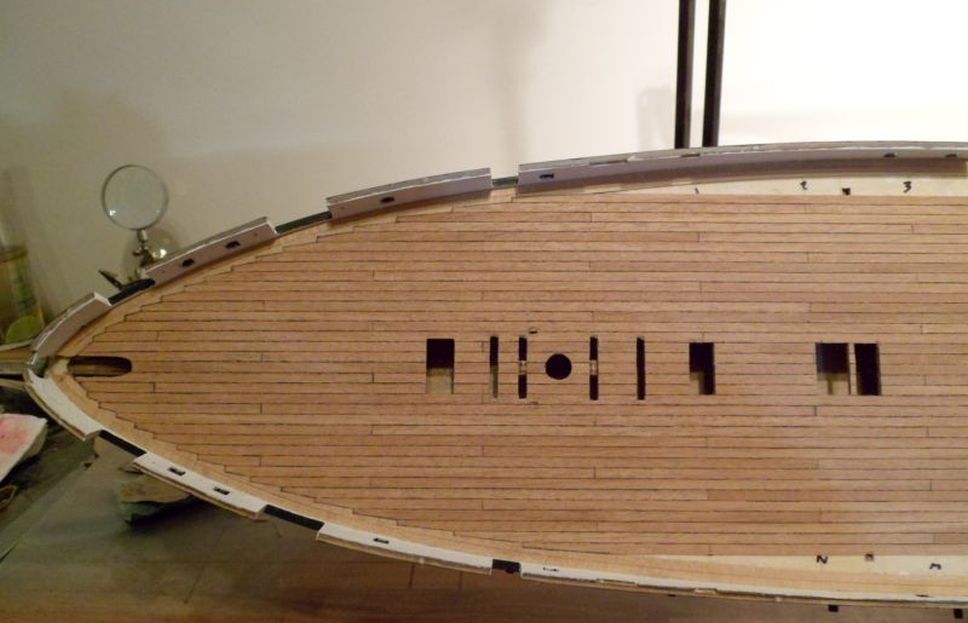
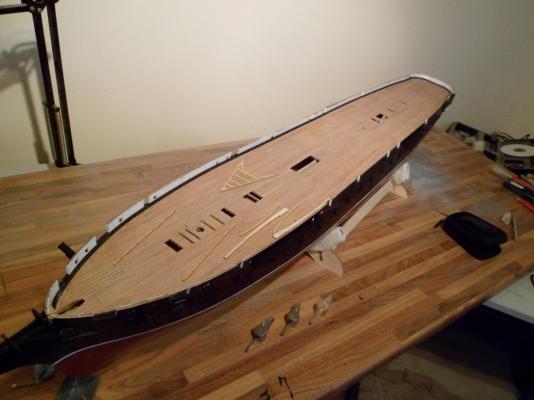
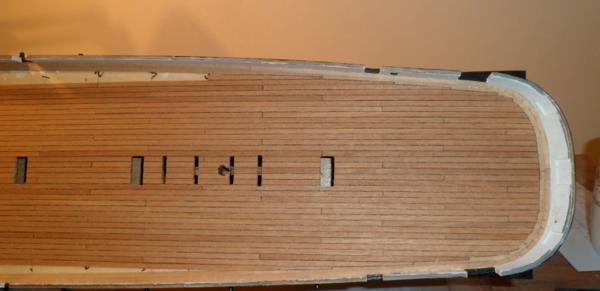
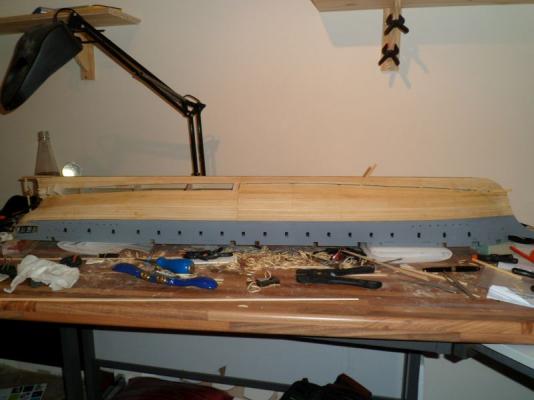
Finally finished planking the deck, couldn't get hold of the same wood - annegre-, got absolutely no response from Billings, so I gave in and used the off cuts to make up the required planking. Fortunately once sanded down the joints are all but invisible. From there I've fitted the deck trim. Whilst that has being going on I have been tremendously lucky to stumble upon www.monkmanfoundries.com, spoke to a chap called Steve, who said they could cast brass propellers for me. Talk about service, sent the wooden version to them on Monday, just received today (Saturday) not one, but two castings, for the same price. Steve said that this was in case anything went wrong whilst I was polishing the finished product. What a player
-
Hi Glyn, The caulking on my timbers is the most basic method of all, a black marker pen run down the side of one of the pieces. I found this a bit too heavy on the smaller models I've done, and on them I used pencil. I forgot to post about the prop. I found a foundry that will do bespoke castings, I am providing the wooden version. For an unpolished casting in brass, the cost is £20.00 ish, for a polished version would be another £20.00 Regards Stuart.
-
I've hit a bit of a hitch. As I was nearing the end of doing the deck ( I swear I've lived in bedrooms with less floor space), I kept on ignoring the obvious, with the endlessly optimistic "of course they have provided enough wood". After trying to contact Billings all week with no response to emails, I've ordered what I hope will match what is already laid

-
Just a quick update. Having studied the pictures of the deck, I decided to go ahead and use a margin plank, so I can get the correct looking edging. Studied the various forums for information, got what I needed, having a go.

-
Hi Glyn, Went and had a look in prop shop, and a few others, unfortunately I cannot find anything suitable. However I have found a place that will do custom brass castings. I've already made the wooden version, so I sent an email off asking for a price. I'll let you know the cost once I've recovered
-
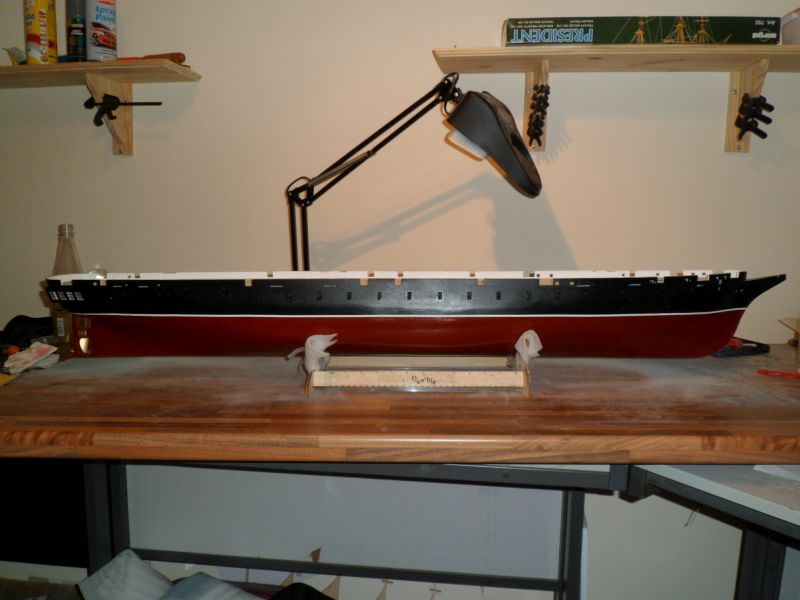
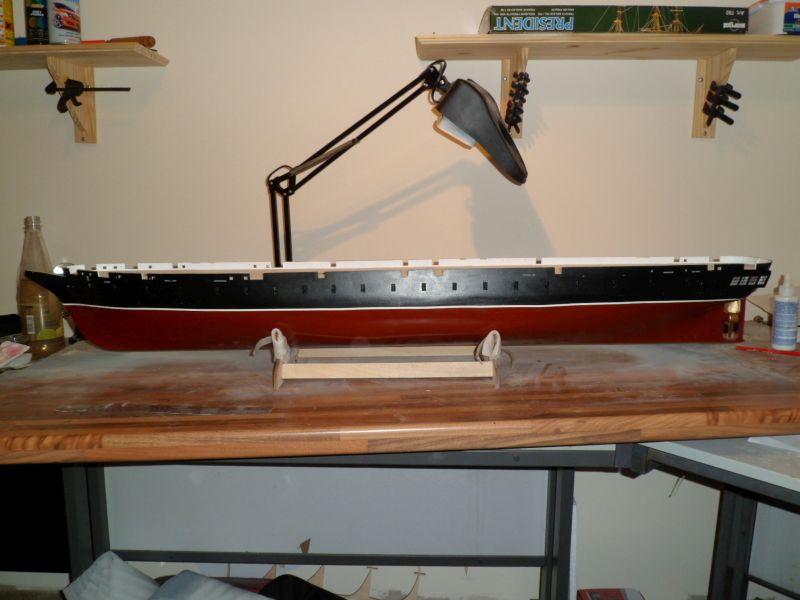
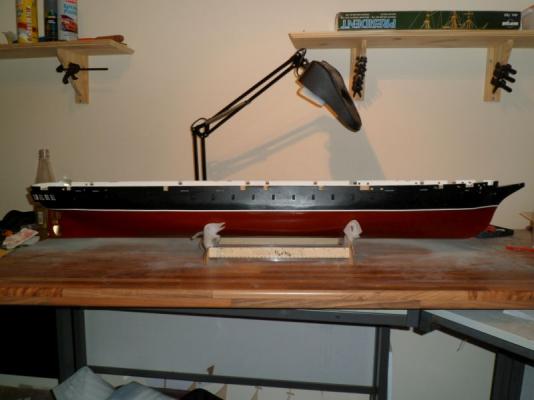
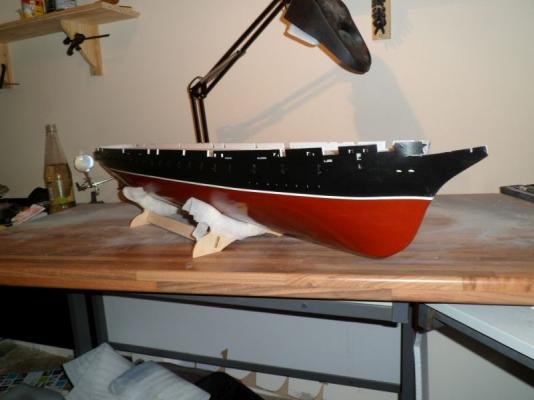
Brian - It's brush painted, but I have also sprayed the red section with a coat of clear lacquer to give it some protection. I must hold my hand up though, and admit the the white stripe is car detailing tape. It does not matter how many times I have tried, I just cannot paint it by hand. PS. A big thank you to everybody who has sent pictures of the real Warrior, it is a big help to be able to go over the details from various angles.
-
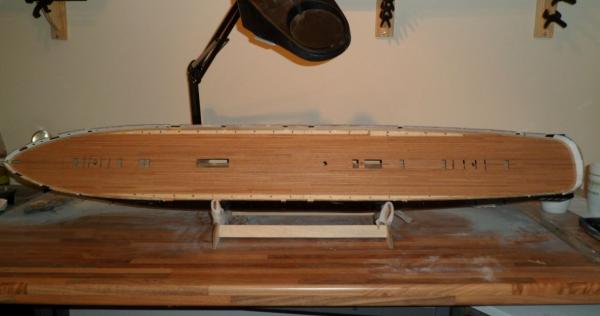
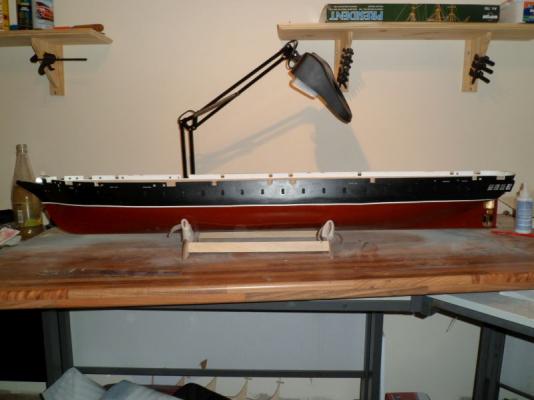
Hi Peeps, Good progress this week. The hull is now painted and I have fitted the propeller (temporary push fit). The propeller provided with the kit conforms to the actual thing, However I would really like to fit one made of brass, I do not have the facilities, knowledge, etc to cast one myself, and the only thing I can find on line are modern props that just do not look right. The prop I have now is 70mm, I thought of buying a larger model in brass and filing it down to the correct look. However (again) the largest I could find was 72mm, and that does not give me enough wiggle room. Any suggestions?
-
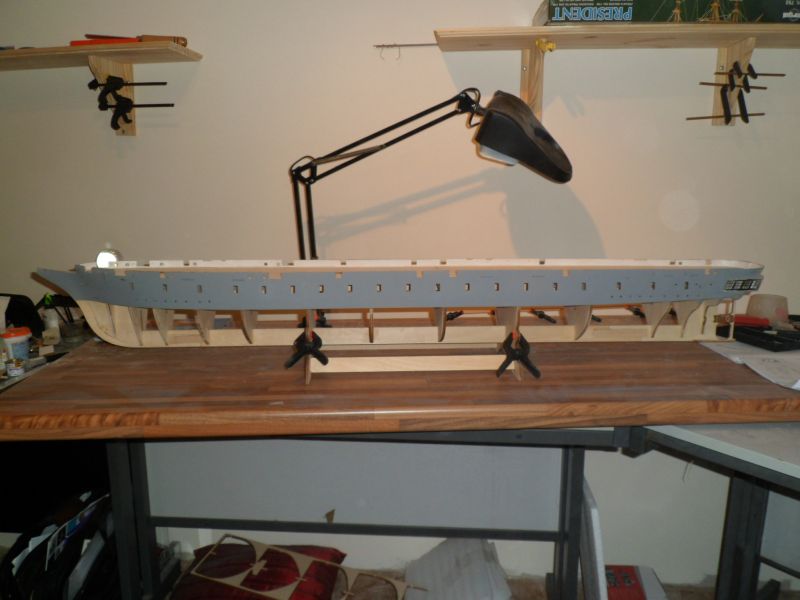
After a week of filling and sanding she's now primed and marked up, ready to be painted.

-
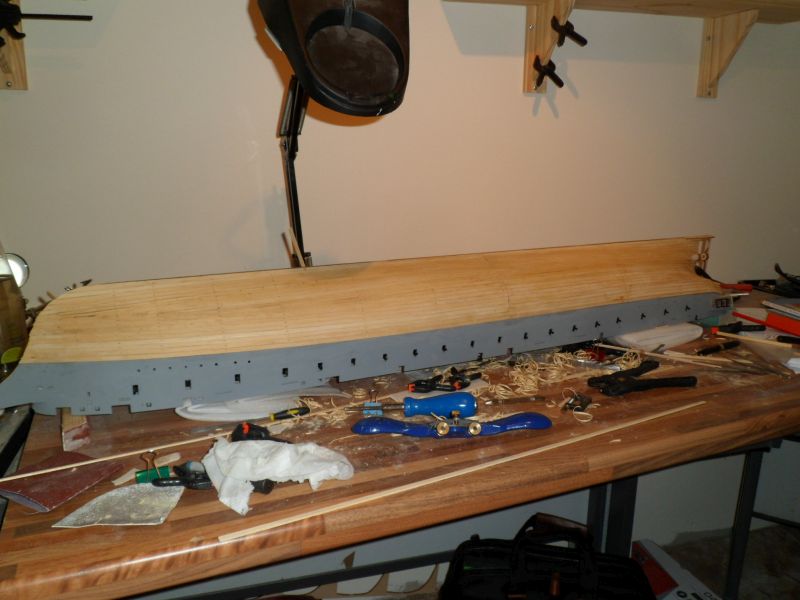
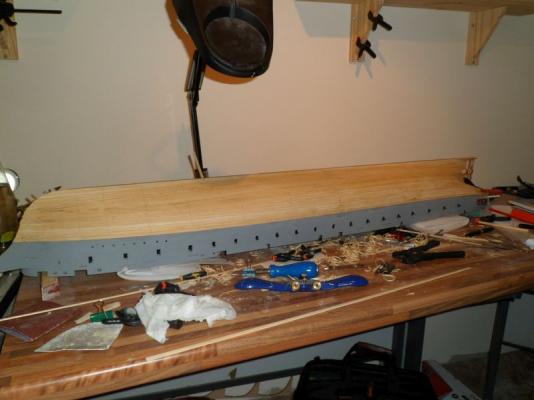
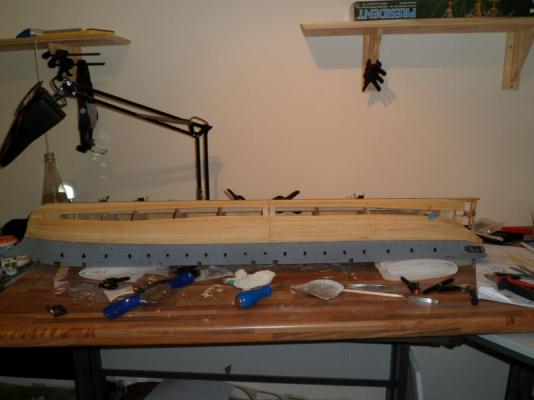
Finally managed to get back to work on her. As you can see I've now completed the starboard side planking, and just about there on the port side. Thanks everybody for the interest shown, it's been a surprise as to how much motivation it gives you. Lots of filling and sanding to come next.
-
Jase, got a bit tied up job hunting and going on holiday. However as you can see I am progressing with the planking, which I must admit, seems to be taking for ever.
-
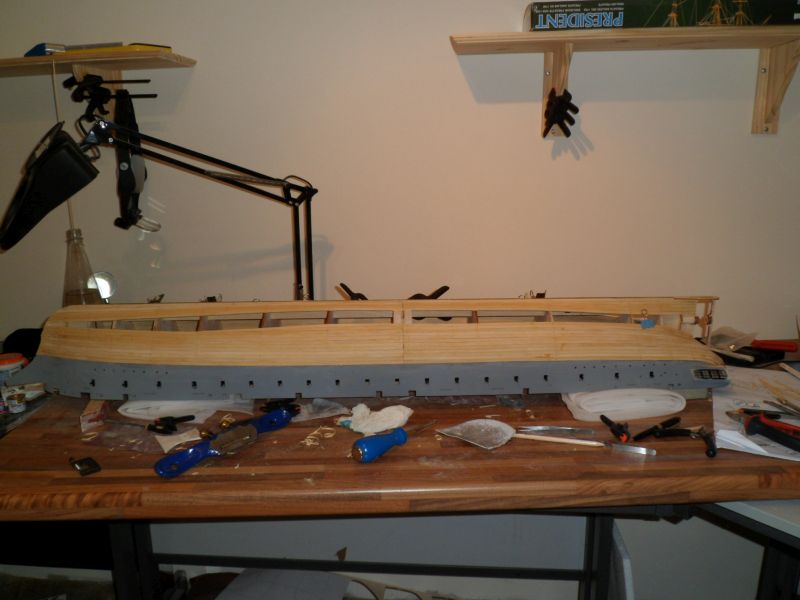
As you can see the "teeth" for the starboard side are now made and installed. I decided that I preferred the uniformity of having the same barrels all the way down the side, not historically accurate, but for me more aesthetically pleasing.
-
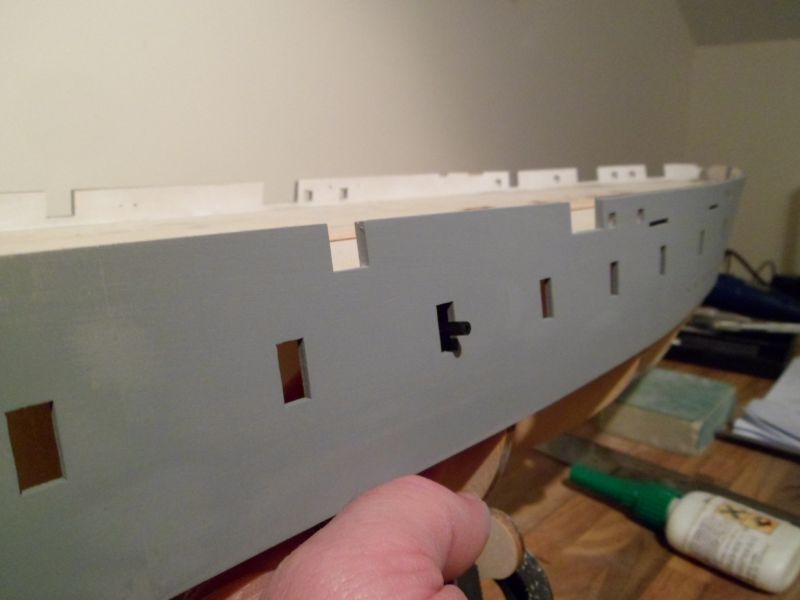
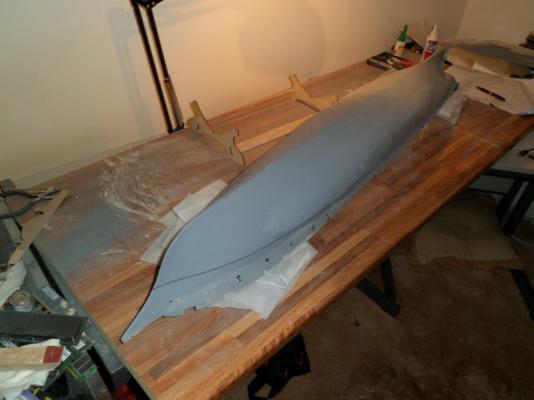
Hi Dominic, I haven't thought about the finish of the deck at all yet, as I decided to put off laying that until I had completed the hull. However as you will see below I have now filled, sanded and primed the upper part of the hull. The reason for this is I have decided to fill all the gun ports, not leave them empty as the kit would have me do. I have made a test barrel simulating the Armstrong 110pdr breech loading guns, I based the dimensions of this barrel on the brass versions provided with the kit for the upper deck. Having decided to arm her, I thought it best to get the upper sanding and priming done now, so that I wouldn't knock all the barrels out again, if I did it later. As you may have guessed, there isn't a definitive plan for the build, it is tending towards the "suck it and see" method.

-
Sid, The law of sod said that I would be based in Portsmouth whilst she was restored in Hartlepool. Then when I moved back up to the Boro, she went in the opposite direction . I will eventually get to see her. Cheers
-
Hi Tim, No problems,leave it in, Glyn sent me a whole pile of pictures, but the more the merrier as far as I'm concerned. Cheers, Stuart
-
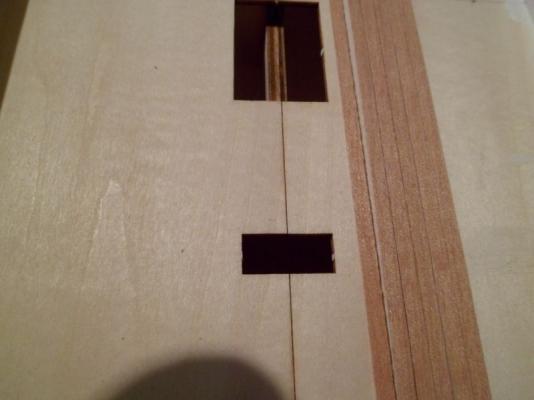
Glyn, Your a star, the pictures you've sent are an absolute god send. I've attached a picture of the planking provided for the decks, the colour in the picture seems to have remained true to the actual strips.
-
Scott, It's going on a rather large shelf in the living room, however the boss does not know this yet.
-
Glyn, cheers for the picture, the mast is a lot less orange than the pictures I've seen, makes much more sense. The wood that is supplied for the deck is a dark wood, possibly walnut. This could well be true on the original build, as I've read that they laid a hardwood deck during the restoration at Hartlepool, but this went rotten due to standing water and had to be replaced. This time they have left an air gap under the wooden deck to allow the wood to breath. Stuart. Ps. Only 4 weeks to wait
-
Hi Andy, Thanks for the offer of the pics. I'm just trying to get the paints together, but Billing say that the funnel etc is yellow in the colour scheme. However every picture I've seen shows them being more orange. Could you please verify on your next trip Cheers Hi Bettina, Yes was fortunate enough to receive exactly that book for Christmas myself. your right it really is a useful reference. Hoping to get down south and see the real thing later this year. Hi Brian, Hmmmm, please see the attached, this is the instructions. At least they have avoided poor translation issue .

-
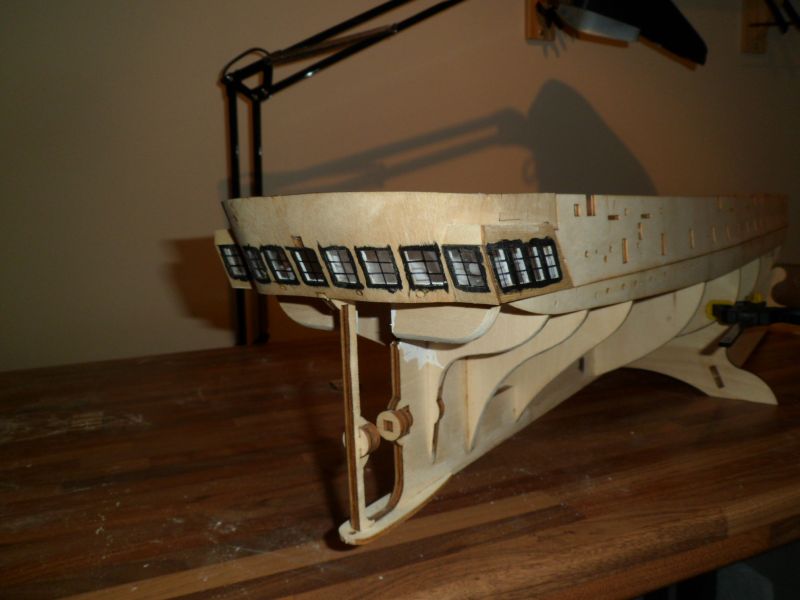
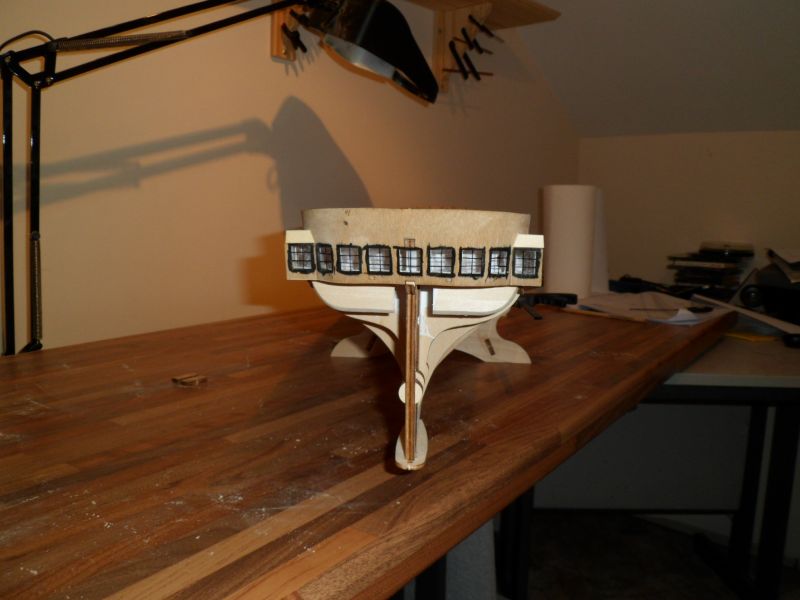
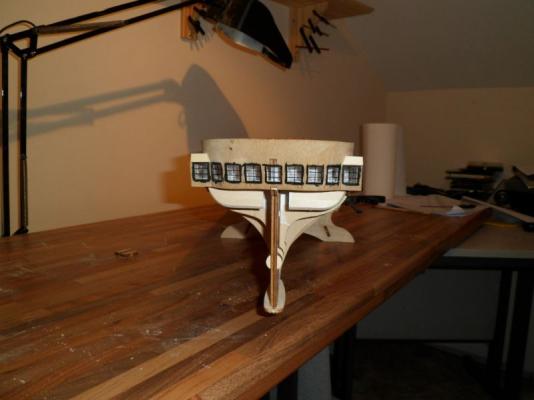
As you can see I've now completed the installation of the stern gallery. I decided to do the usually RN routine on a metal ship, and painted everything, that didn't move internally, white. There was no detail that could be added internally, due to the fact that the gallery only contains the trunk for the hoist-able propeller. Next step is to add the internal lining of the bulwarks.


-
I thought about simulating plating, but looking at all the pictures of the ship I can find, there is nothing until you get close up to simulate. Luckily my in laws live in Portchester, so I intend to go and have a look later in the year. But again from the pictures when she was in dry dock, the only thing to simulate would be what looks like "clinkering" (I think thats the term) around the bow / keel below the waterline. Stuart
-
Hi John, Do you mean simulating the hull being plated in the finished effect or actually plating using wood?.
-
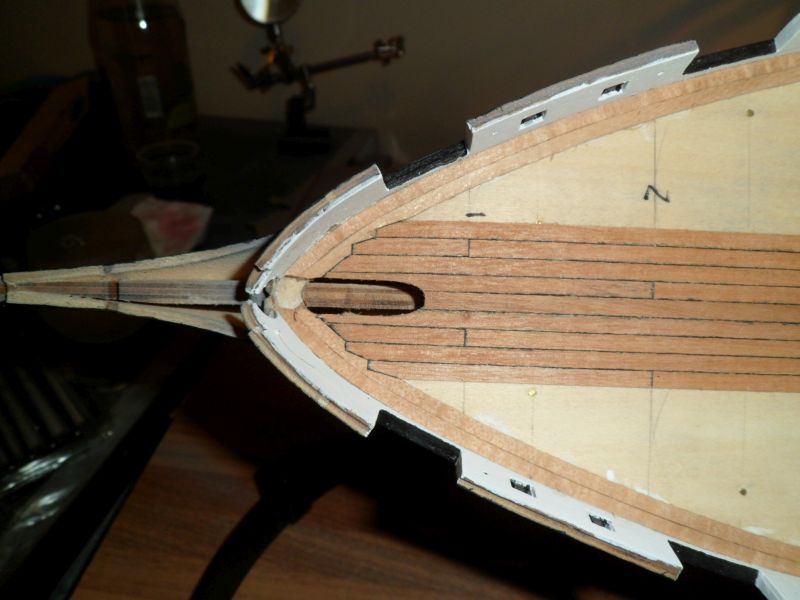
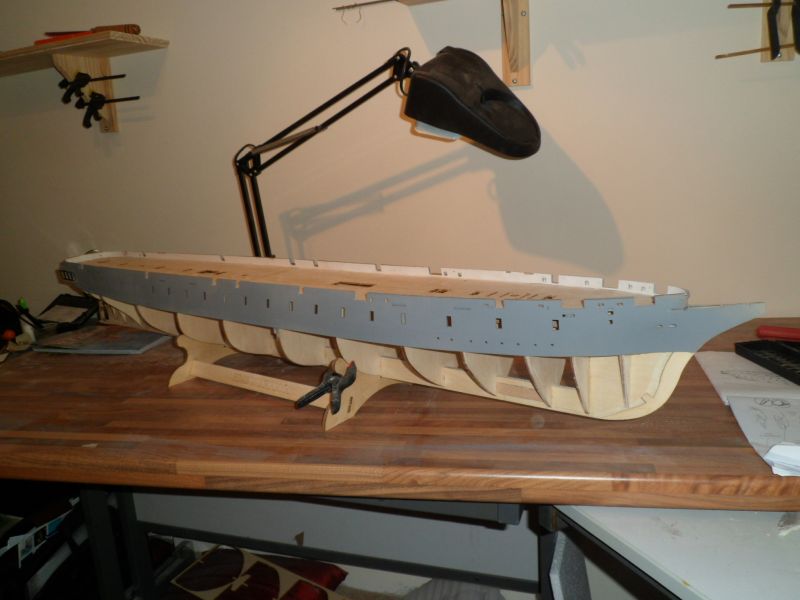
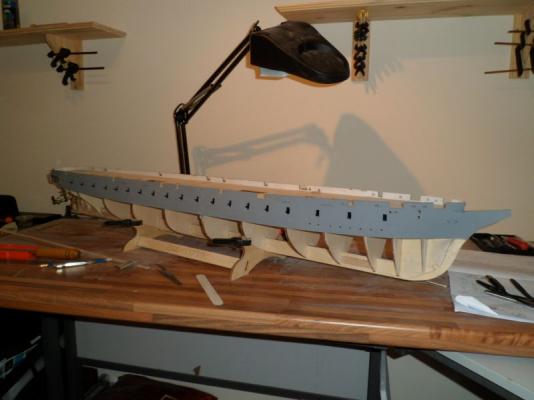
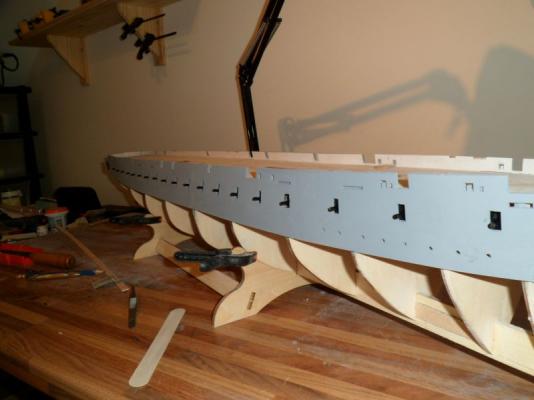
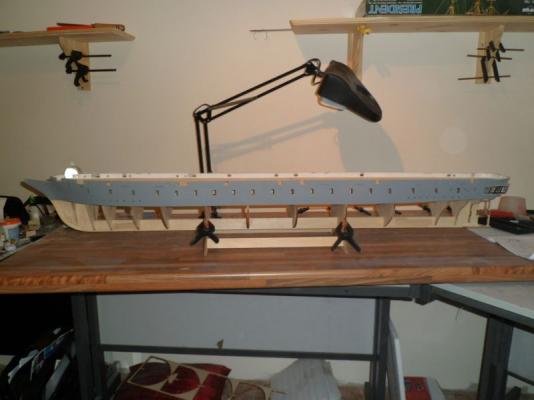
Decided to go on without laying the deck till later on. It's taken some time to get them exactly as I wanted them, but the main side pieces are now on. Now on to the stern.


-
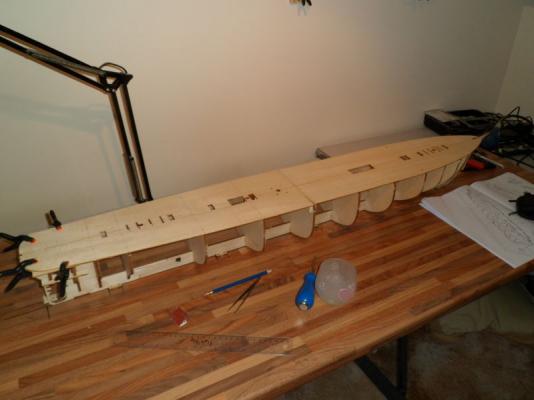
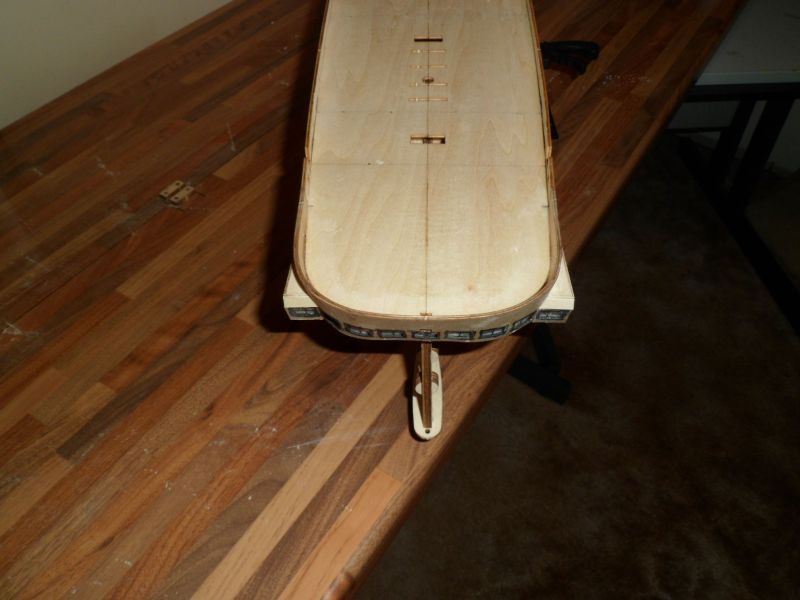
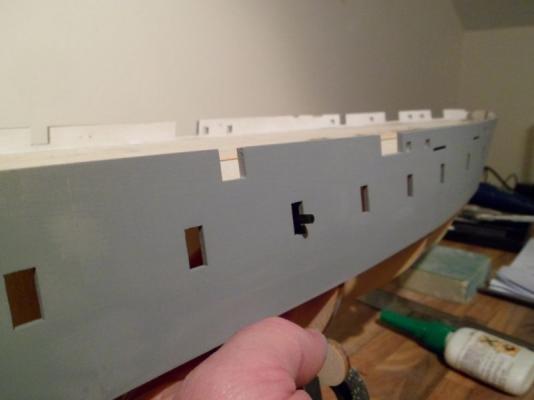
Time to ask for a bit of advice please. As you can see from the pictures I am in the process of adding the deck pieces, however after this, the instructions shows the next step to be adding the sides. The two builds I have previously done, were the type where you cut off the top of the frames once you had completed the first planking, and then planked the deck. However I have noticed in most cases in the build logs, that if the opportunity to plank the deck arises before the sides go on, it is taken. My question is, can anybody think of a reason why I should not plank next, prior to fitting the sides?