HOLIDAY DONATION DRIVE - SUPPORT MSW - DO YOUR PART TO KEEP THIS GREAT FORUM GOING! (83 donations so far out of 49,000 members - C'mon guys!)
×


StuartC
-
Posts
91 -
Joined
-
Last visited
Content Type
Profiles
Forums
Gallery
Events
Everything posted by StuartC
-
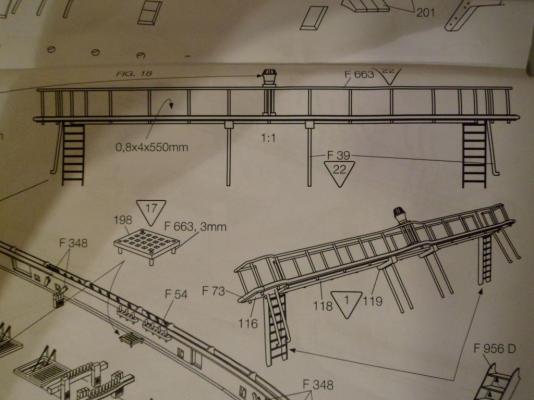
 Quick update, the solution I have found is Jewelers honeycombed solder board. Absolutely perfect
 -
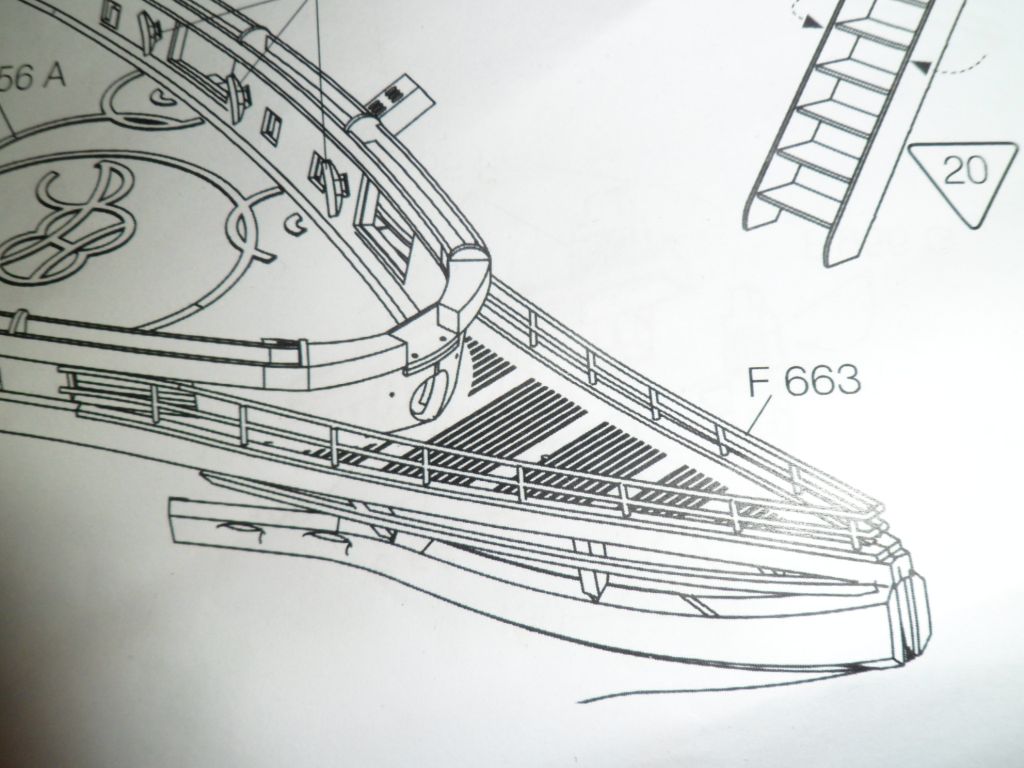
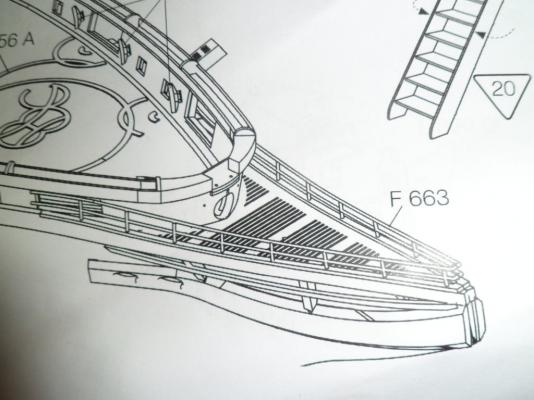
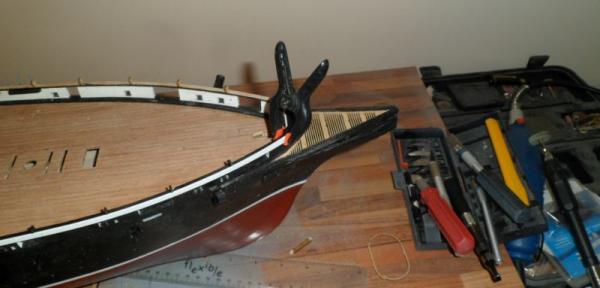
Alright people, I need to ask for help as I'm stuck. Below you will see a picture of the instructions for the guardrail (Part F663 being 0,8mm brass wire). I am trying to set up to solder the bits together, the problem I'm having is that everything I use to hold the parts in place acts as a heat sink, I have ordered a soldering board but I don't think this will resolve the issue. I am using a gas powered soldering iron with the blow torch attachment, so I have plenty of heat, it's just that it is being soaked away from where I need it. I need to resolve this issue as the Bridge structure is made the same way. All help gratefully accepted.
-
No I've had no problems, but the ones I have are just pots with screw caps and I haven't had them long enough to dry out.
-
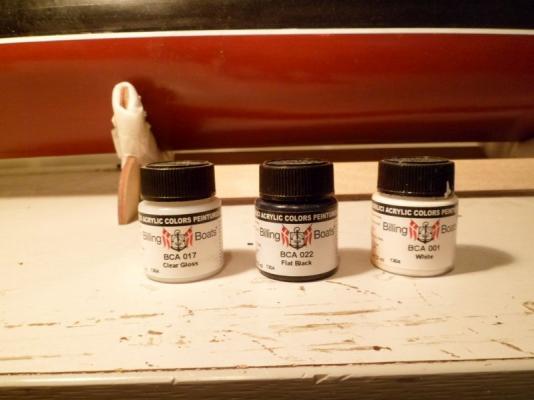
Forgot to mention, I get my Billings paints of ebay (surprise,surprise)
-
Thanks far clearing that up, as Grant says obviously I knew that I was just playing along Hi Popeye, makes perfect sense when you think about it, blind luck wins out again
-
Cheers Nils, I'll never say no to a bit of encouragement Grant I've just had an attack of hindsight, if I had planned this better I should have inlaid the brass at the time I was laying the deck, then any damage could have been easily repaired.
-
Hi Jbwok, When I did that area I used sand paper wrapped around a pencil, that allowed me to flare the shaft area into the main body and generate a straight smooth junction. Cheers, Stuart.
-
Hi Grant, If you look at the actual Warrior the brass work is inlaid, and as much as I would like to do this I've had to take a bite of reality pie, and recognize the fact that the damage I could cause to the deck far outweighs any benefit I would get from trying to inlay the brass. In short it will be stuck on top.
-
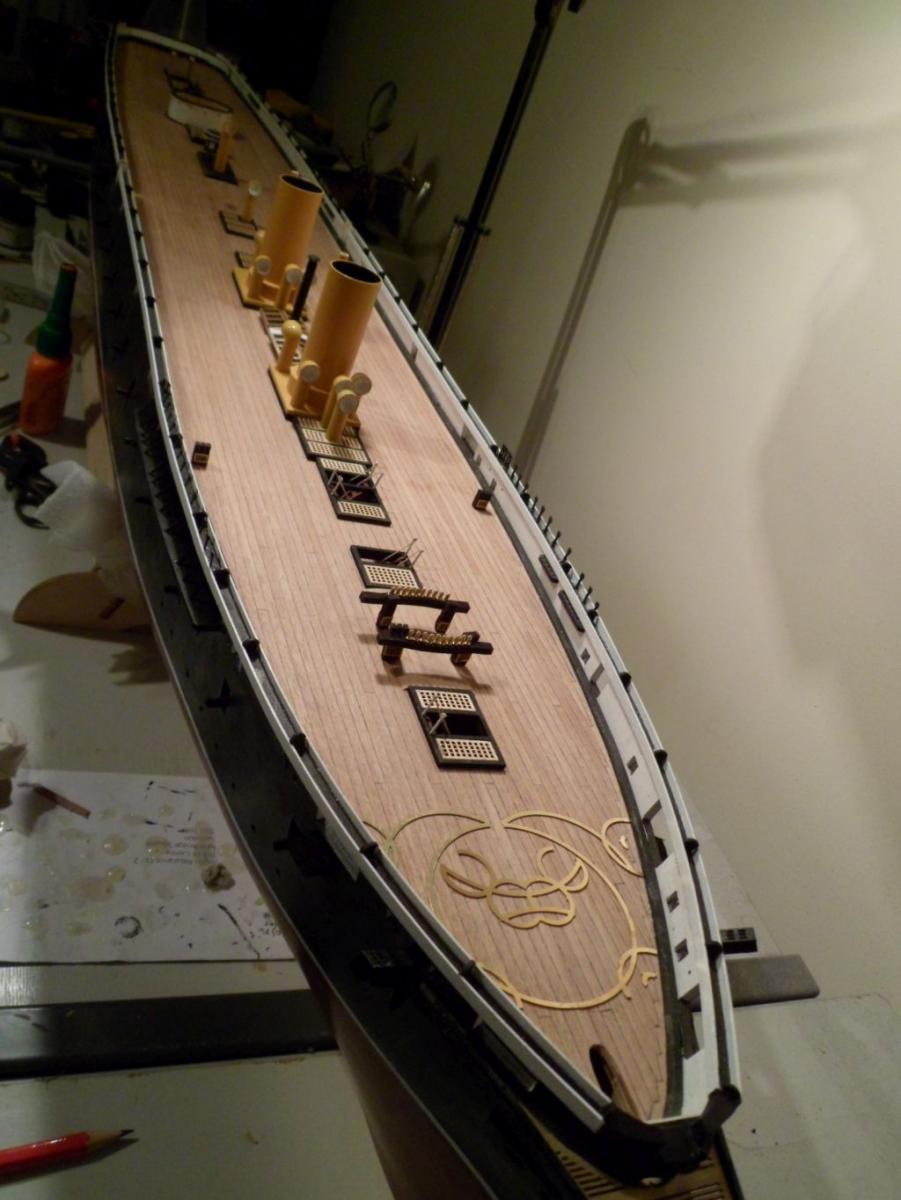
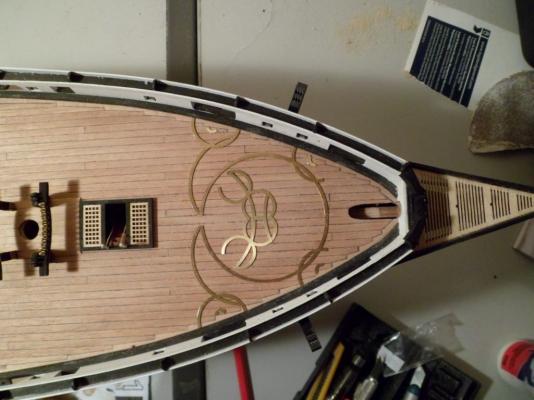
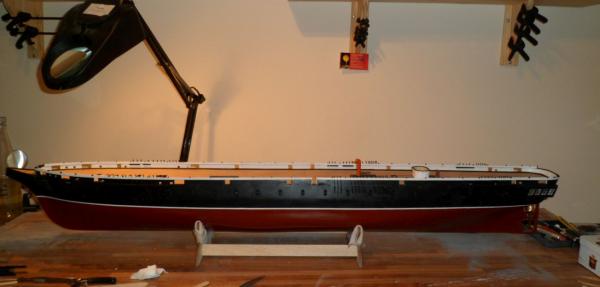
Hi All, It's been a while, but I've finally made some progress. Finished the vent pipework, ladders etc., and can now start laying the brass on the deck, I was impatient to see it so it is just laid on.

-
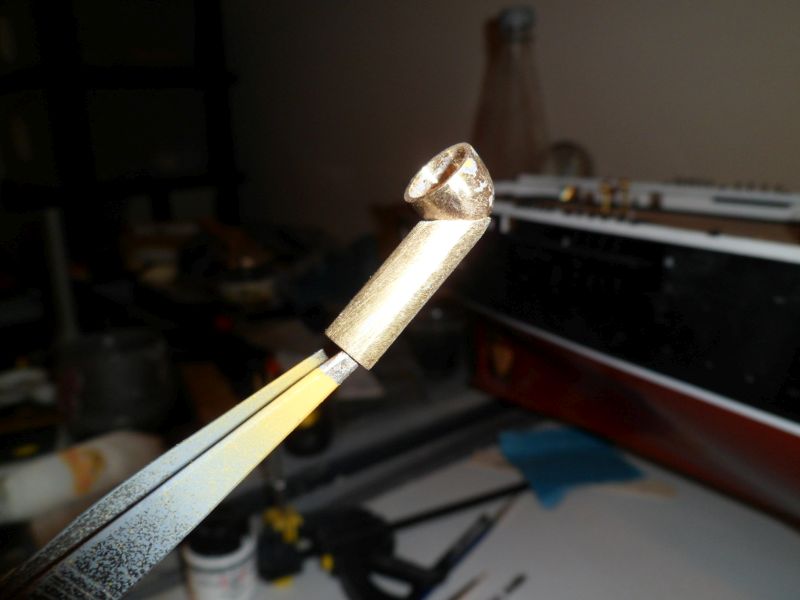
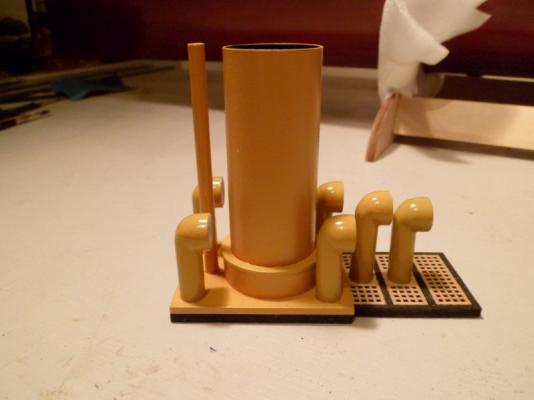
There are times I amaze myself, if you look at this photo of one of the vents, and the fact that both parts are made of brass and given the choice of joining them by either a - tape b - glue c - solder I managed in an addled state to pick b, yes b. Not only that I have stuck with choice b for an inconceivable length of time. Finally in the words of a famous man " I had a dream" that it would be great if you could join two bits of metal together using another type of metal that would melt at a low temperature. I decide to call this metal solder......wait a minute that's been around for ages. So can anyone please explain to me why the xxx I picked glue!!!

-
If I was working in a garage in Scotland I'm pretty damn certain I would have put things on hold to. You'll start to build again soon, fortunately it's not a race as has already been said, because Warrior won't fit in my luggage
-
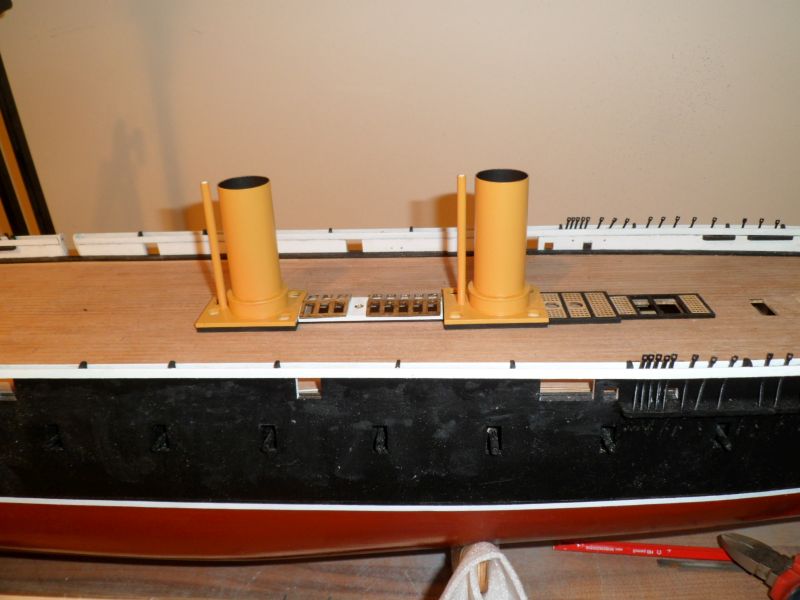
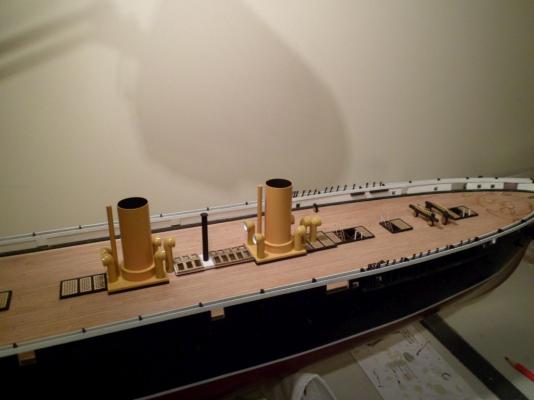
Going steady away at the moment. Adding the funnels has made it seem like a leap forward in progress. Hardest part was finding what I considered to be the right colour. In the end Vauxhall mustard yellow did it for me.

-
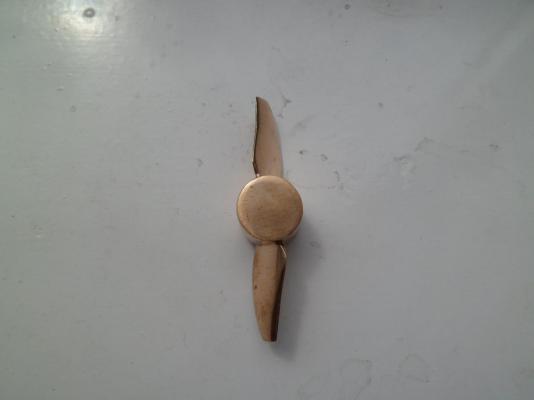
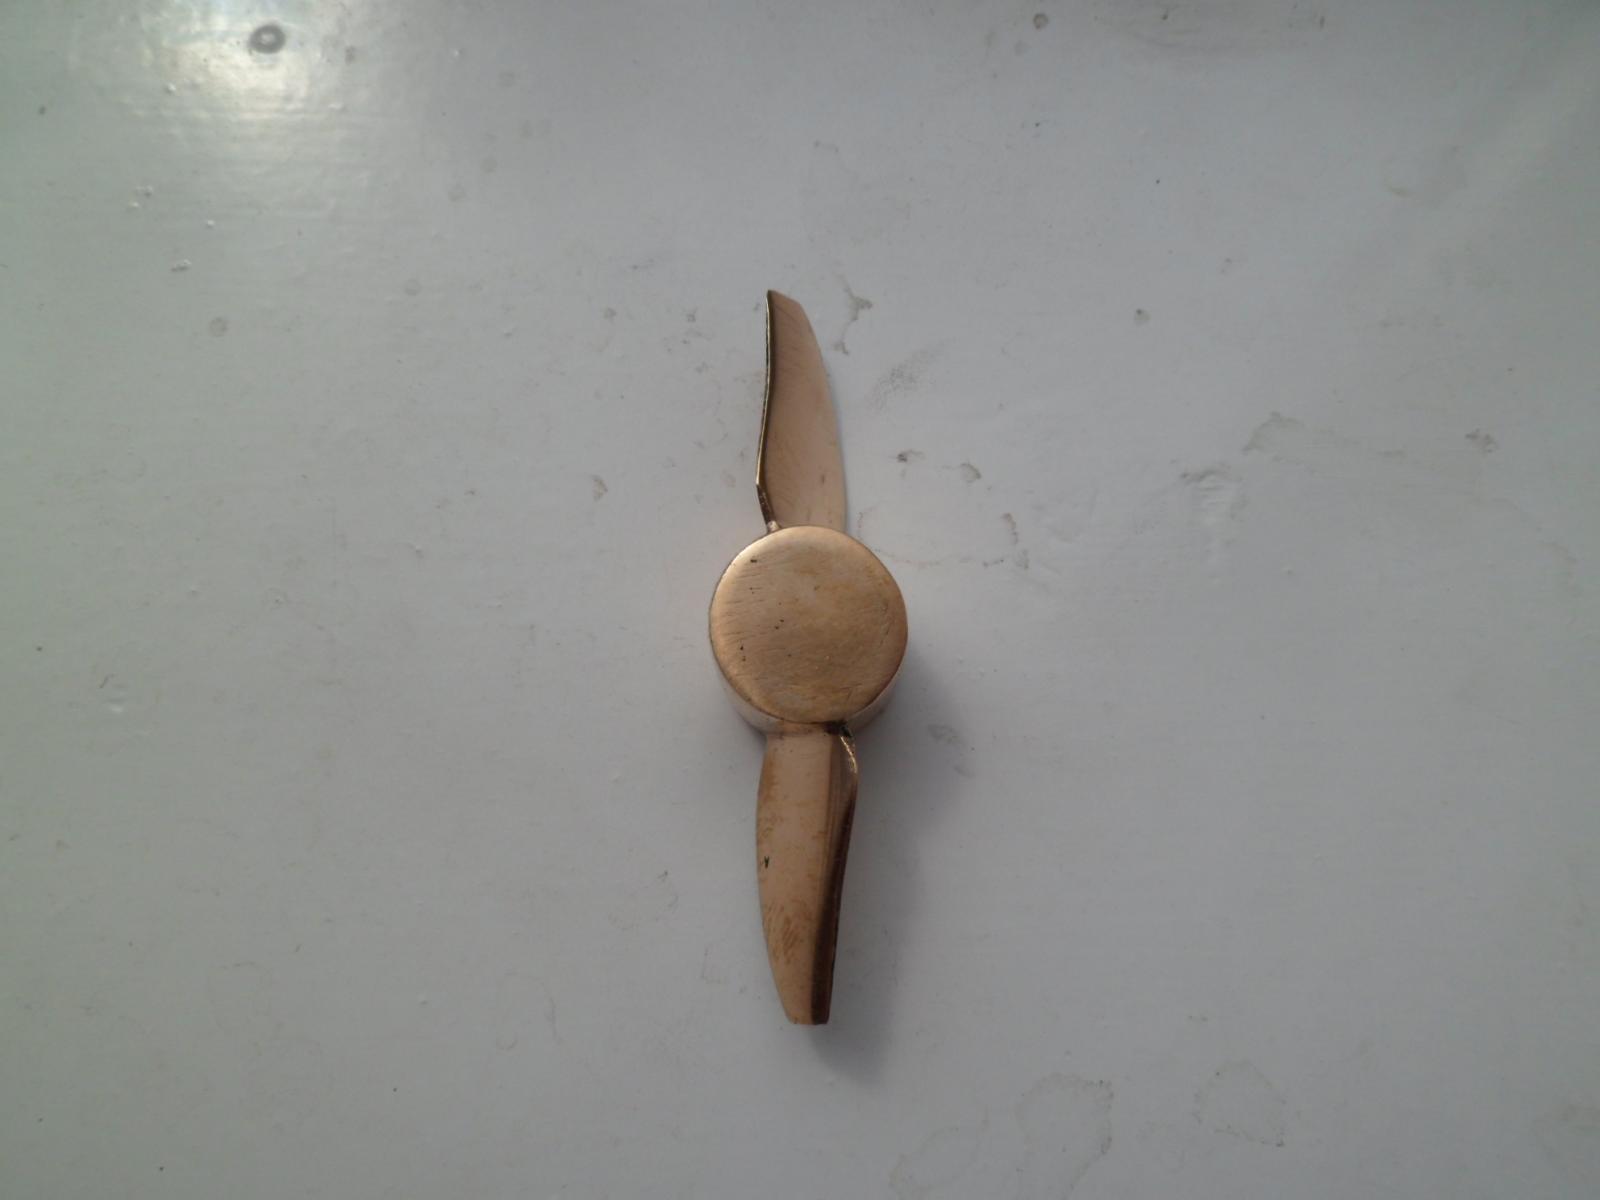
Hi Glyn, Yep, just measured and it is 70mm. I looked at buying a pre-made prop and trying to adapt it. The problem I found was that the examples I found were: 1. Not cheap 2. Even at 75 or 80mm, there wasn't enough material to adapt. 3. Was never sure that the hub would fit correctly. Taking all of this into account, I decided to get one cast from my assembled version. The two big advantages were that I got exactly the design and fit I wanted, and amazingly enough it worked out cheaper. Basically an all round winner. I never looked motorising it, are you going for the modern solution or the whole steam plant?, either way I can't wait to see how you get on. Cheers, Stuart.
-
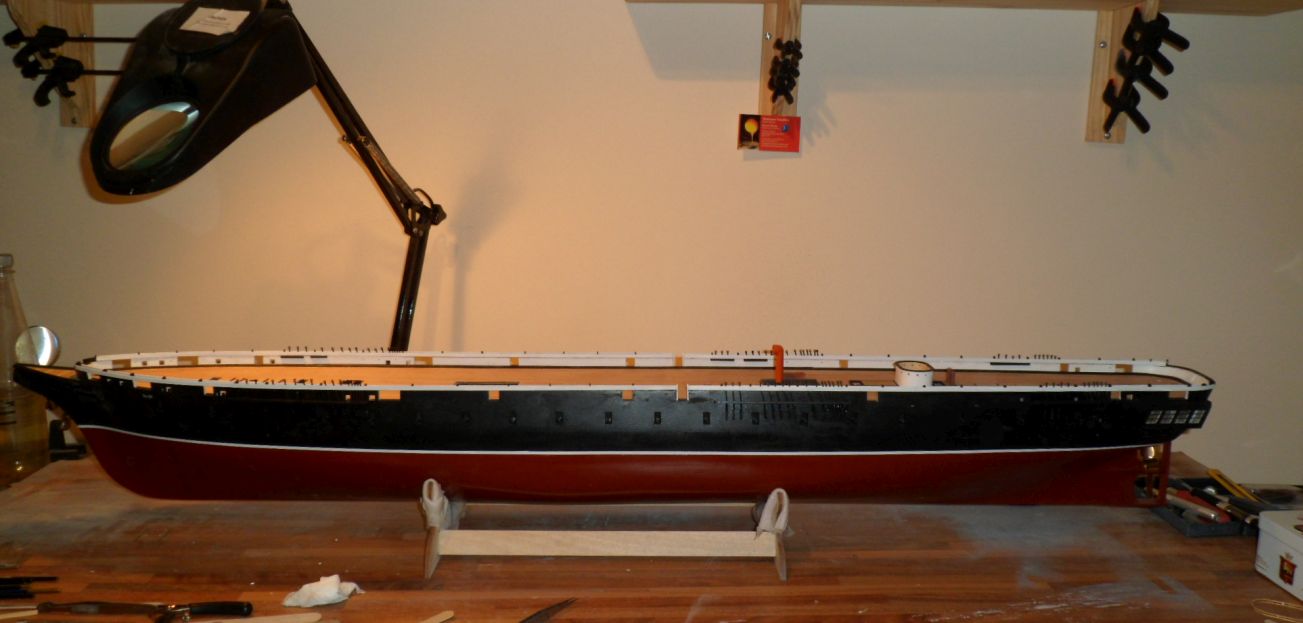
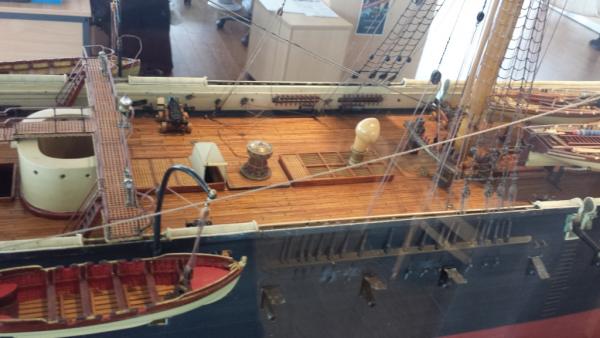
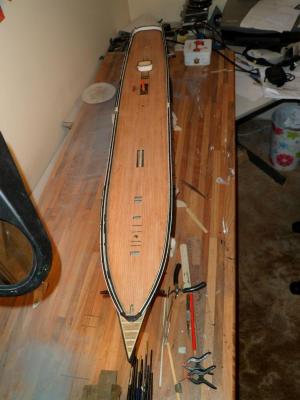
Hi all, Nearly a year gone (bar 3 days) since I started, unfortunately things have really slowed up recently on the build, as I've come off the employment scrap heap. Great being back at work, but it really gets in the way of my hobby. Anyway this is the state of play now on the upper deck.
-
Hi jbwok, Well done mate, you'll get a lot of really useful help now you've got your build log. Cheers, Stuiart.
-
Hi jbwok, Got your PM. Thanks for the offer, but don't worry about it. It's packed up and should be on it's way this week as long as the admiral remembers to post it. Cheers, Stuart.
-
Hi Jbwok, PM me your details, I've still got the rough second prop. As per the first one it will take a lot of filing and sanding, but it's worth it. I'll send it to you when I get chance, I'm off to Athens on business, but you should get it before too long Regards, Stuart.
-
Hi jbwok, If you like filler this is the model for you, the planking is purely a base. I filled and sanded for hours to get the finish I was after. If you look at a lot of the build logs with copper plated bottoms, they have a filler top coat to allow for a good finish. There is no shame in filler I came to the same solution as yourself for the gun ports, I made back boxes about 8mm deep, which I attached prior to doing the planking. Here are a few pictures I was sent
-
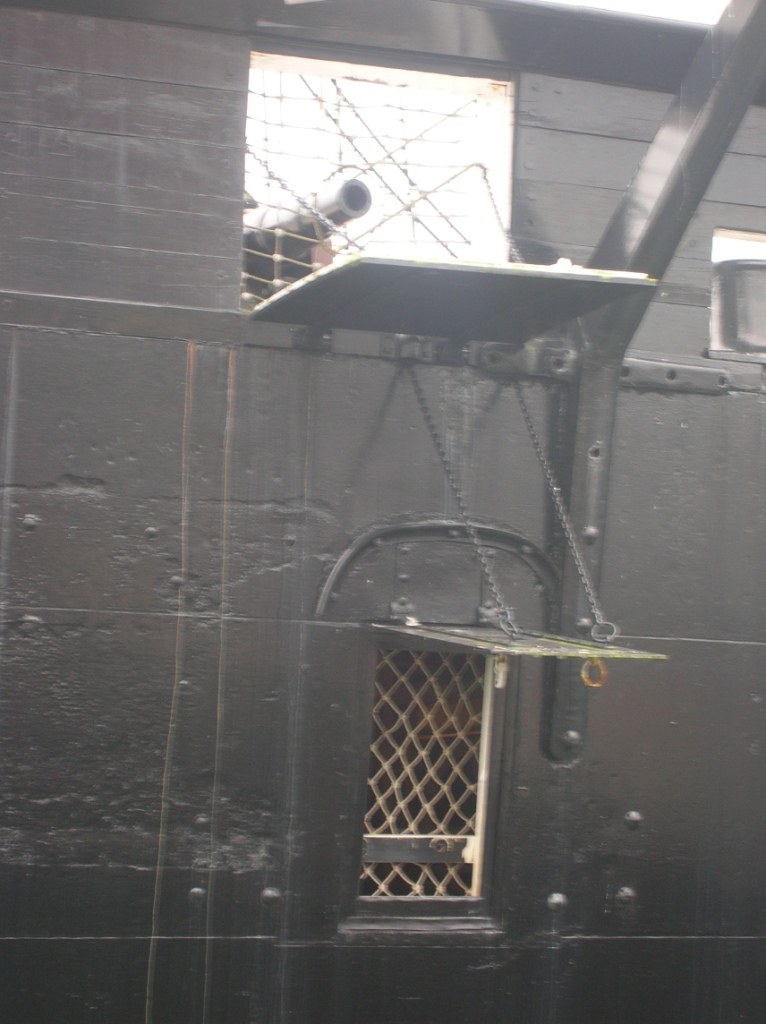
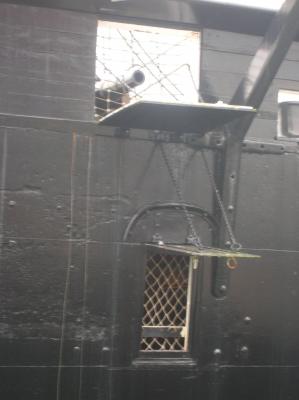
Hi jbwok, I based the protrusion of the muzzles on some photographs taken by someone who had visited Portsmouth Dockyard, and found a very early model of the Warrior in the museum . They also sent me a whole pile of pictures of the actual ship, both of which I have found to be extremely useful. If you want, I will forward them on to you, or I could just post the pictures of the museum model here. As far as the model is concerned there isn't a lot of detail that could be added. One thing that was suggested would be to simulate the plating, but I personally didn't do that, as from any distance it just wouldn't be visible, I'm finding that most things added to the hull once painted black just seem to disappear anyway. Having said that I really like the lines she has, but it is never going to be as detailed/busy as the Victory or any other model of that ilk. If there is anything I can help with let me know, but as this is only my third model I don't have the vast experience of quite a few of the members who post on here. Try starting a build log, as you can see from reading them, this crew are a really friendly bunch and will give you any pointers they can. Cheers, Stuart.
-
Cheers for the encouragement gents. I've been really bogged down with the chain plates. I thought they were all secure hmmmmm....they all sprang. So I've spent the last couple of what seems like years, drilling and pinning them back in place. Lesson learned. Back to the deck fittings
-
Hi Jase, I should really read the full post, and not just the PM before replying. I see now you are not quite based down south . My inlaws live in Portchester, and I keep promising to get down there, but life keeps on getting in the way. There's always next year. In the meantime thanks again for the offer. Cheers Stuart.
-
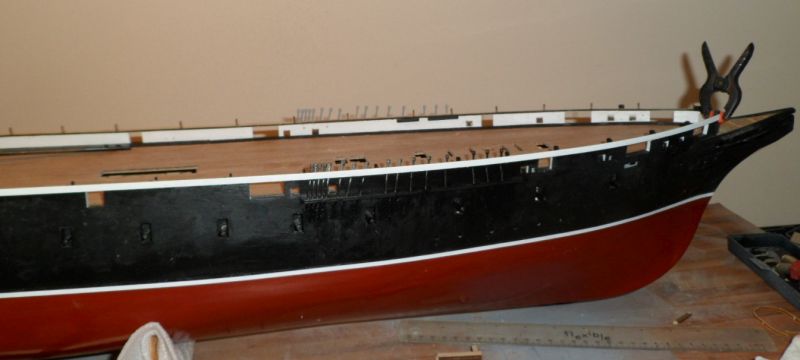
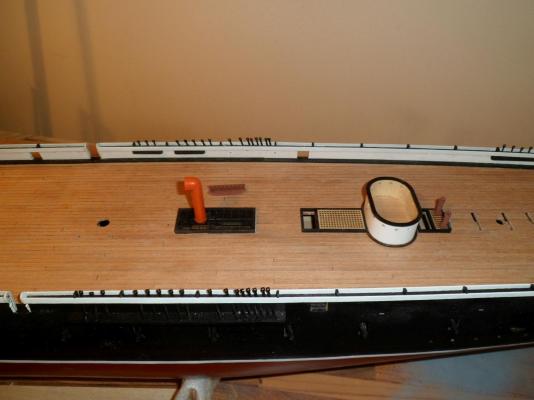
Hi Peeps, Really got bogged down with the hammock stowage, the little dividers kept snapping off as I attached the outer and inner lining. However that's out of the way, as you can see I've now started with the deck fittings.
-
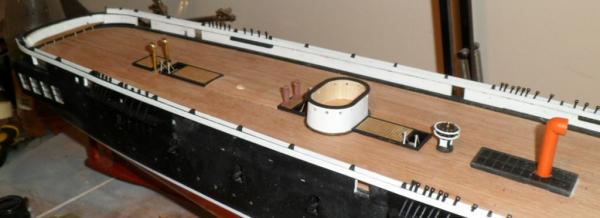
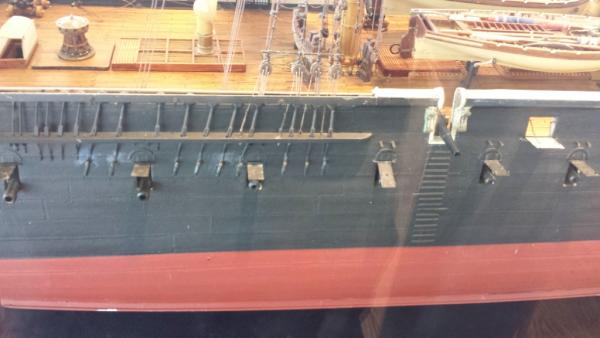
I haven't been posting any updates, because I thought I would wait until there was some noticeable progress. However I have added hundreds of bits, painted them black, and they all seem to disappear . So this is where we are, initial bow fitting complete, chain plates on and hammock stowage's in progress

-
Hi John, Fortunately it is a perfect push fit. Stuart
-
Hi Brian, As per your request Cheers