Peterhudson
-
Posts
97 -
Joined
-
Last visited
Content Type
Profiles
Forums
Gallery
Events
Everything posted by Peterhudson
-
 These are the snaps of the boxwood work. Easy to stick and very receptive to a scalpel! Sanding to come to achieve the smoothness (although not too smooth, the ships weren't made of glass). P
.thumb.jpg.2dffbd652c05157d8cd10d464ad194b2.jpg)
.thumb.jpg.18e4173df92fb90067501ba308294d91.jpg)

-
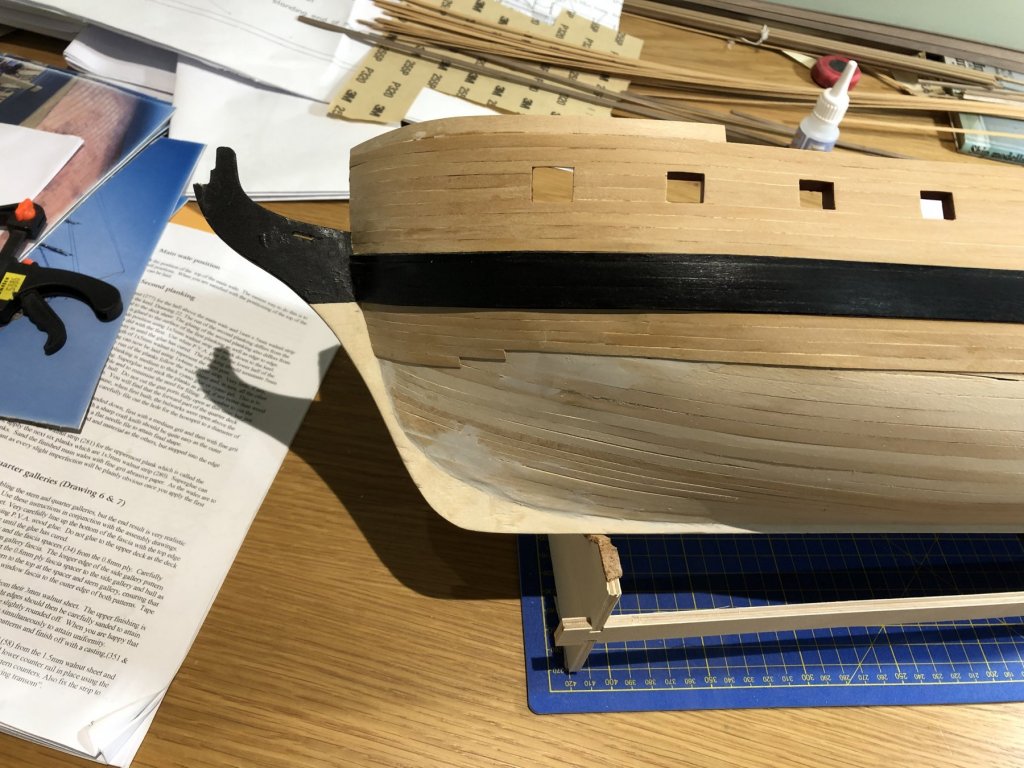
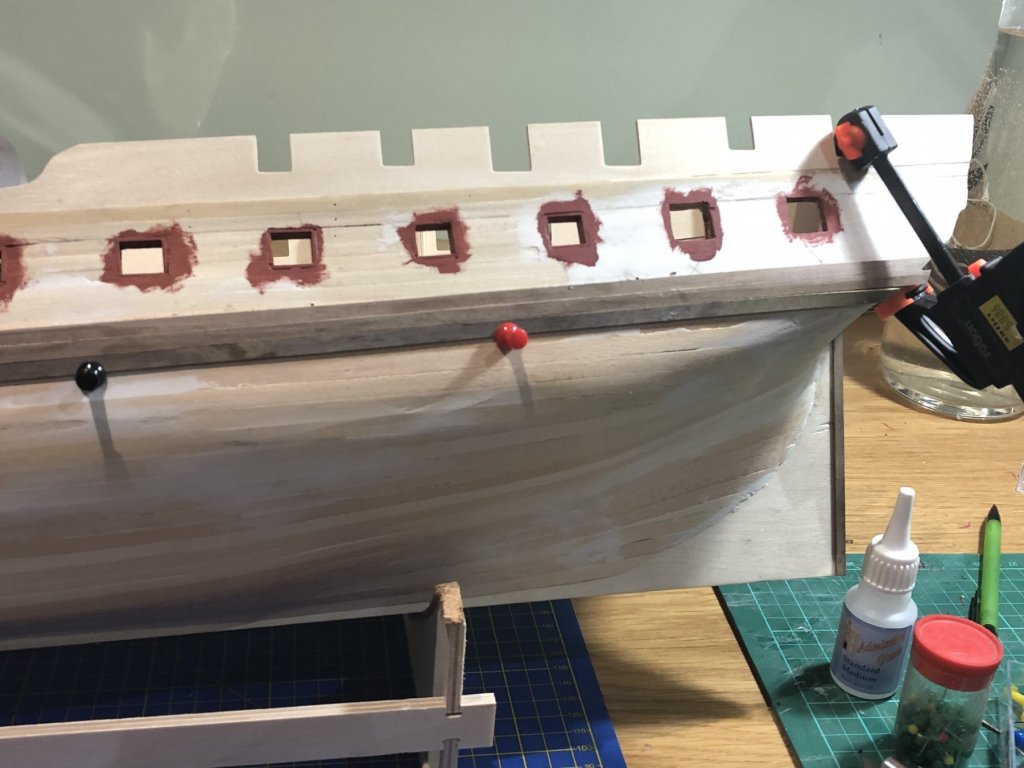
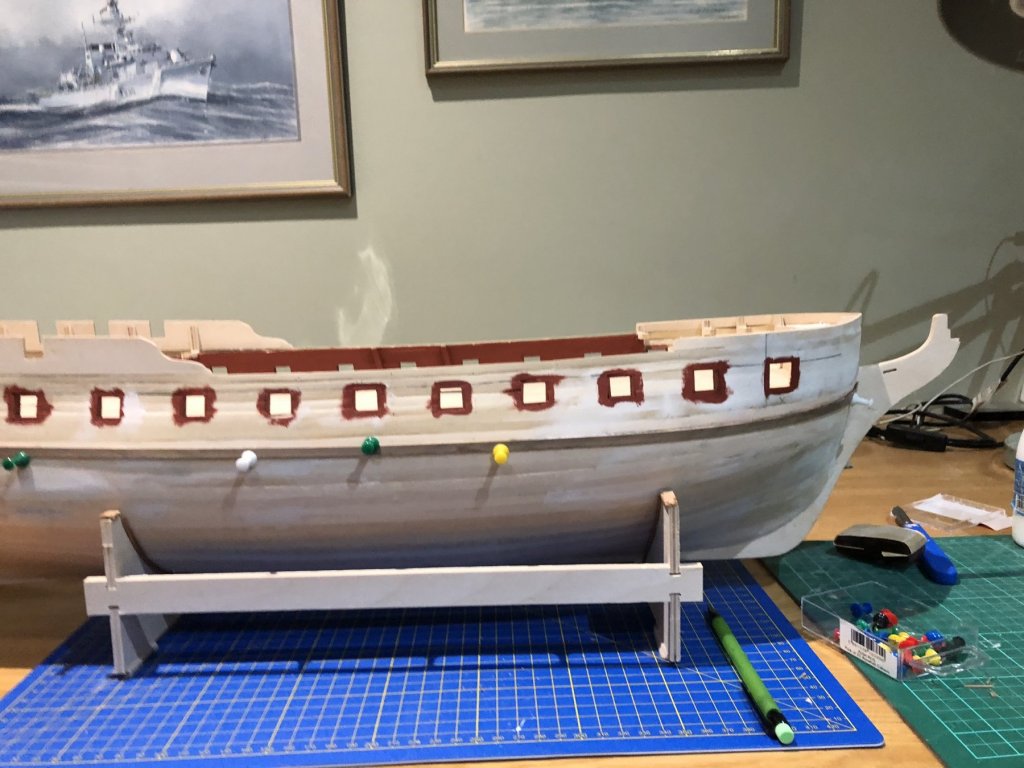
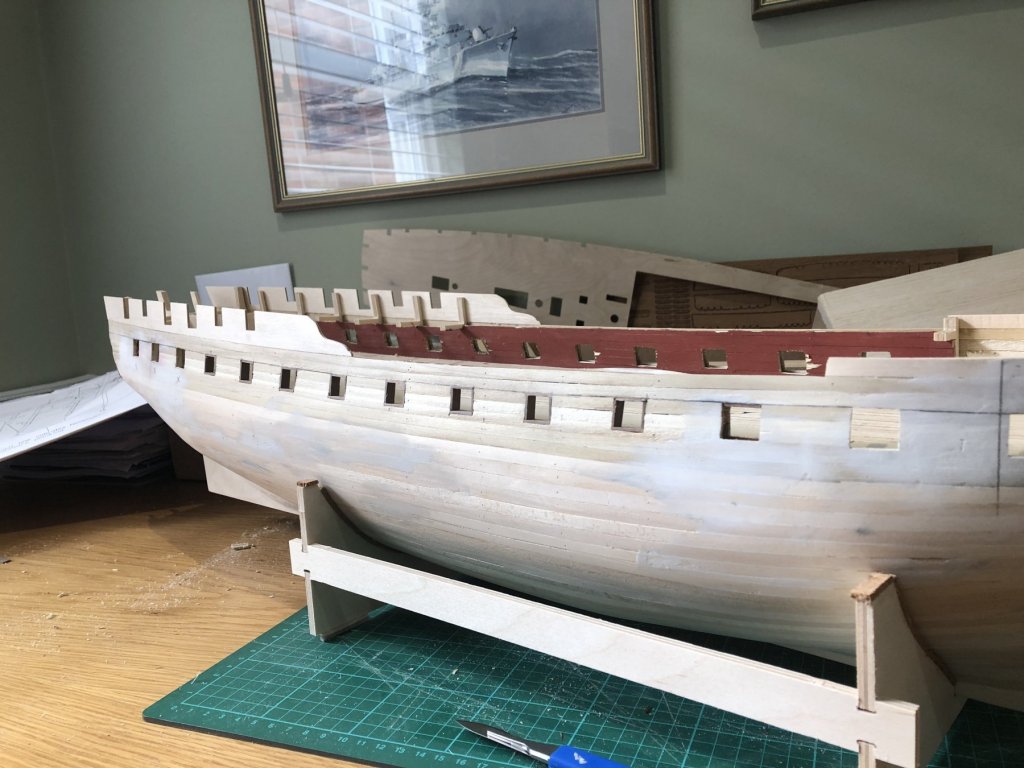
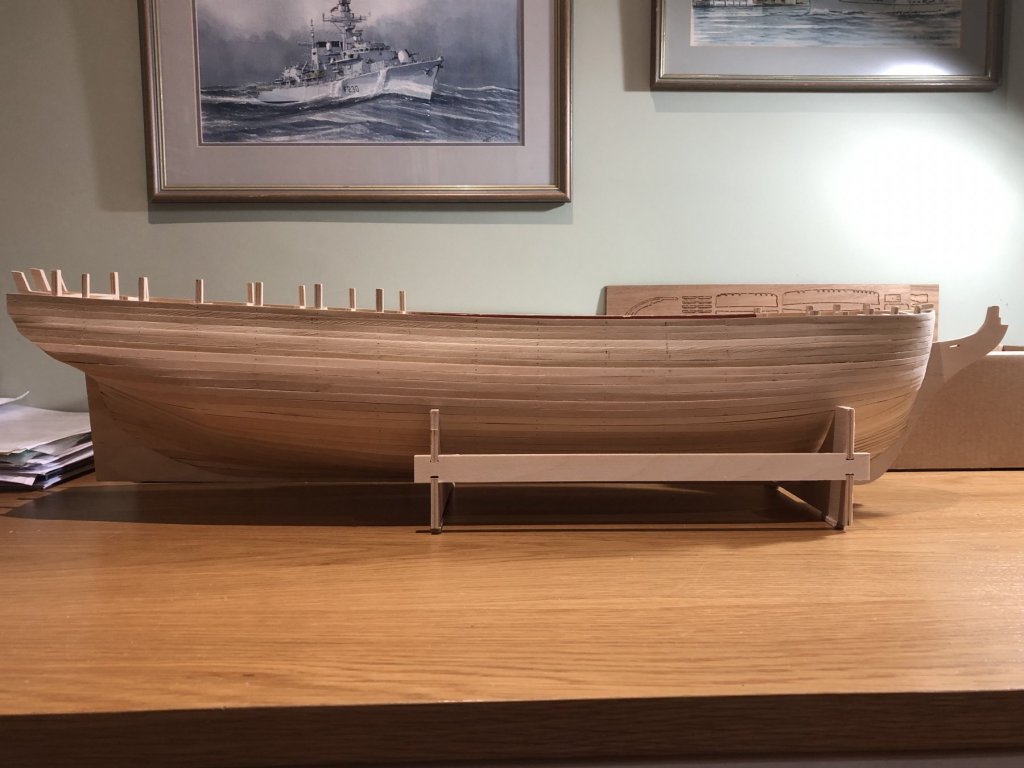
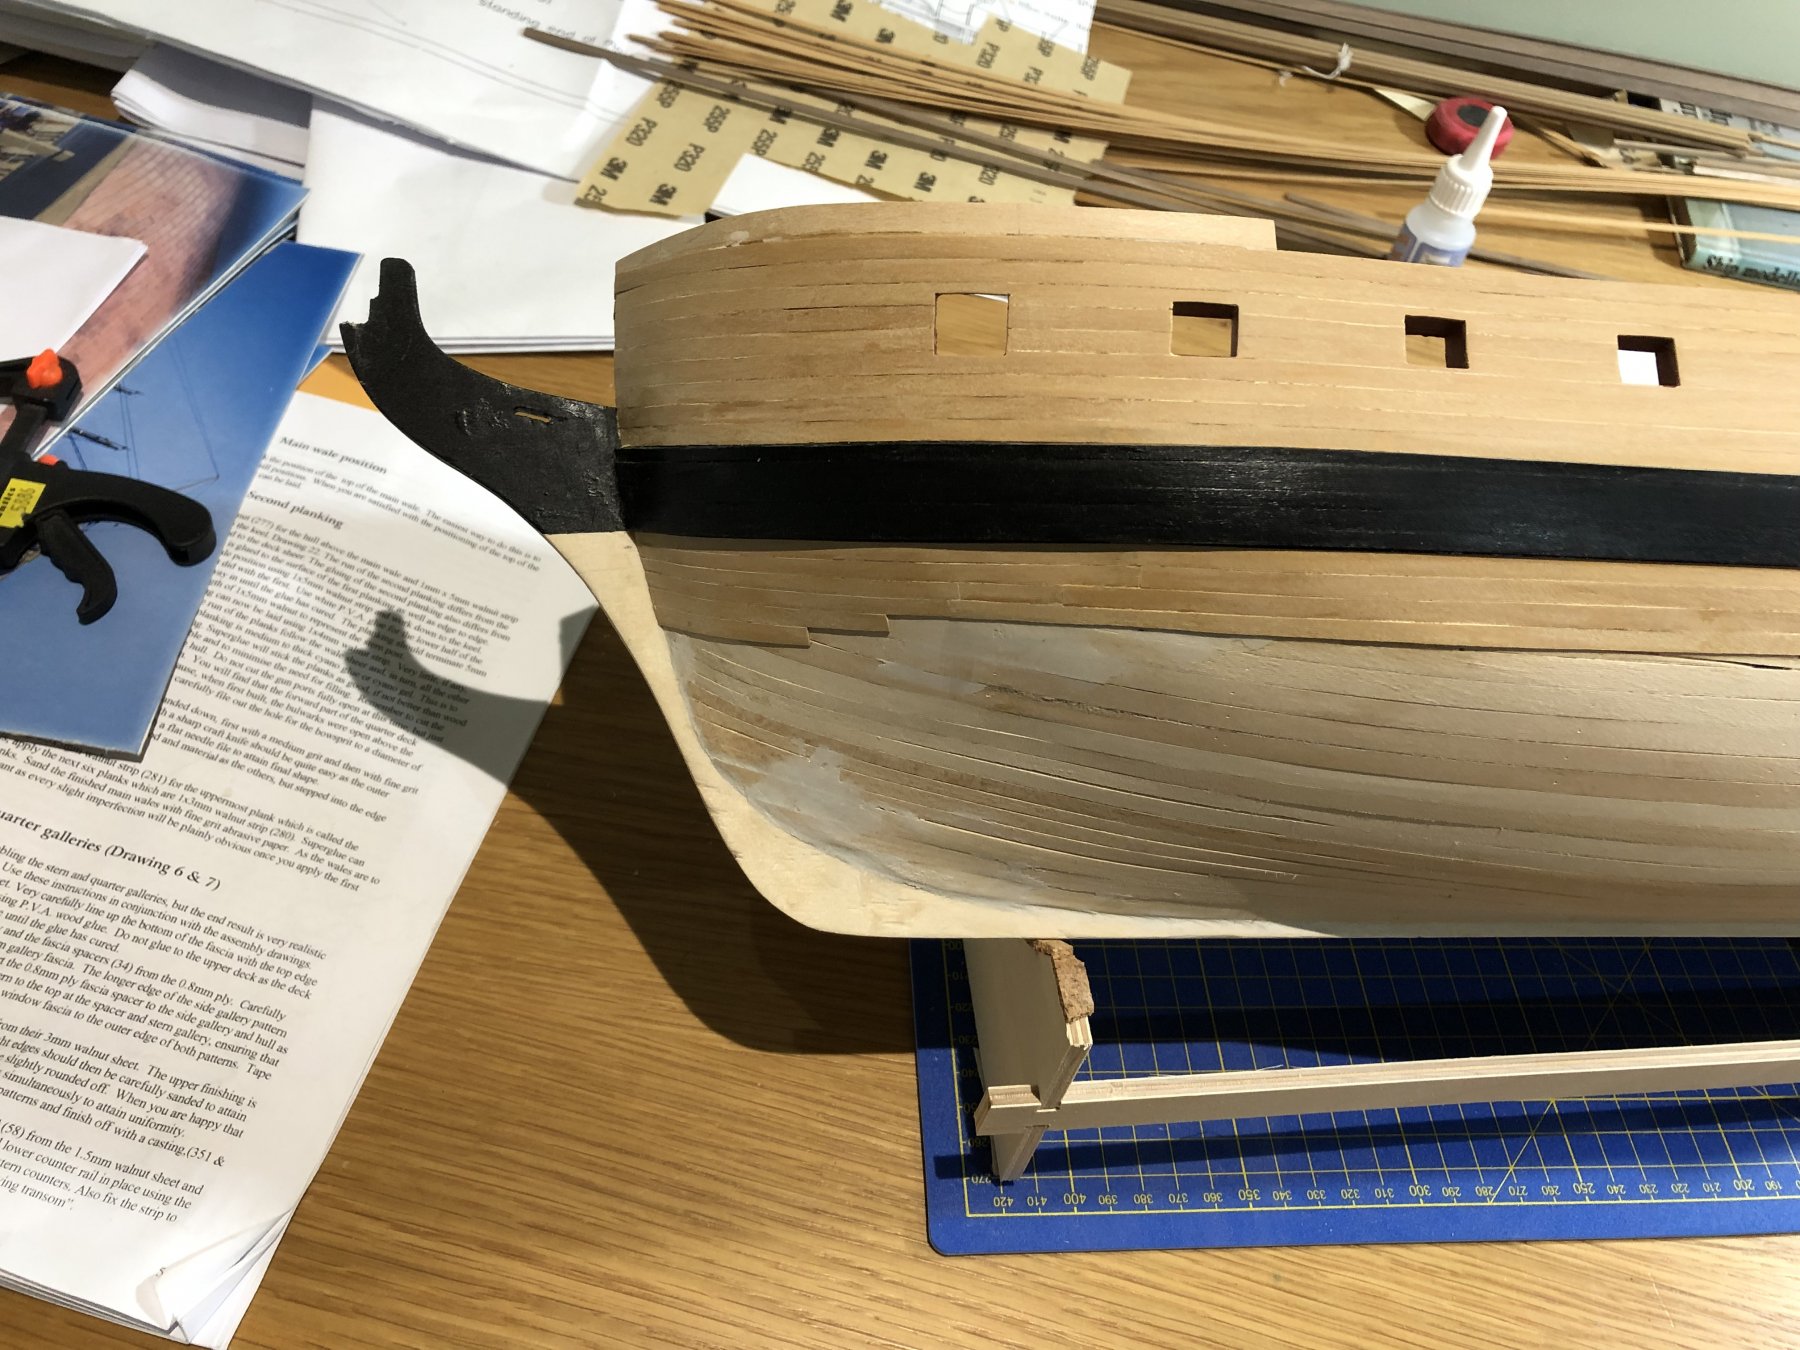
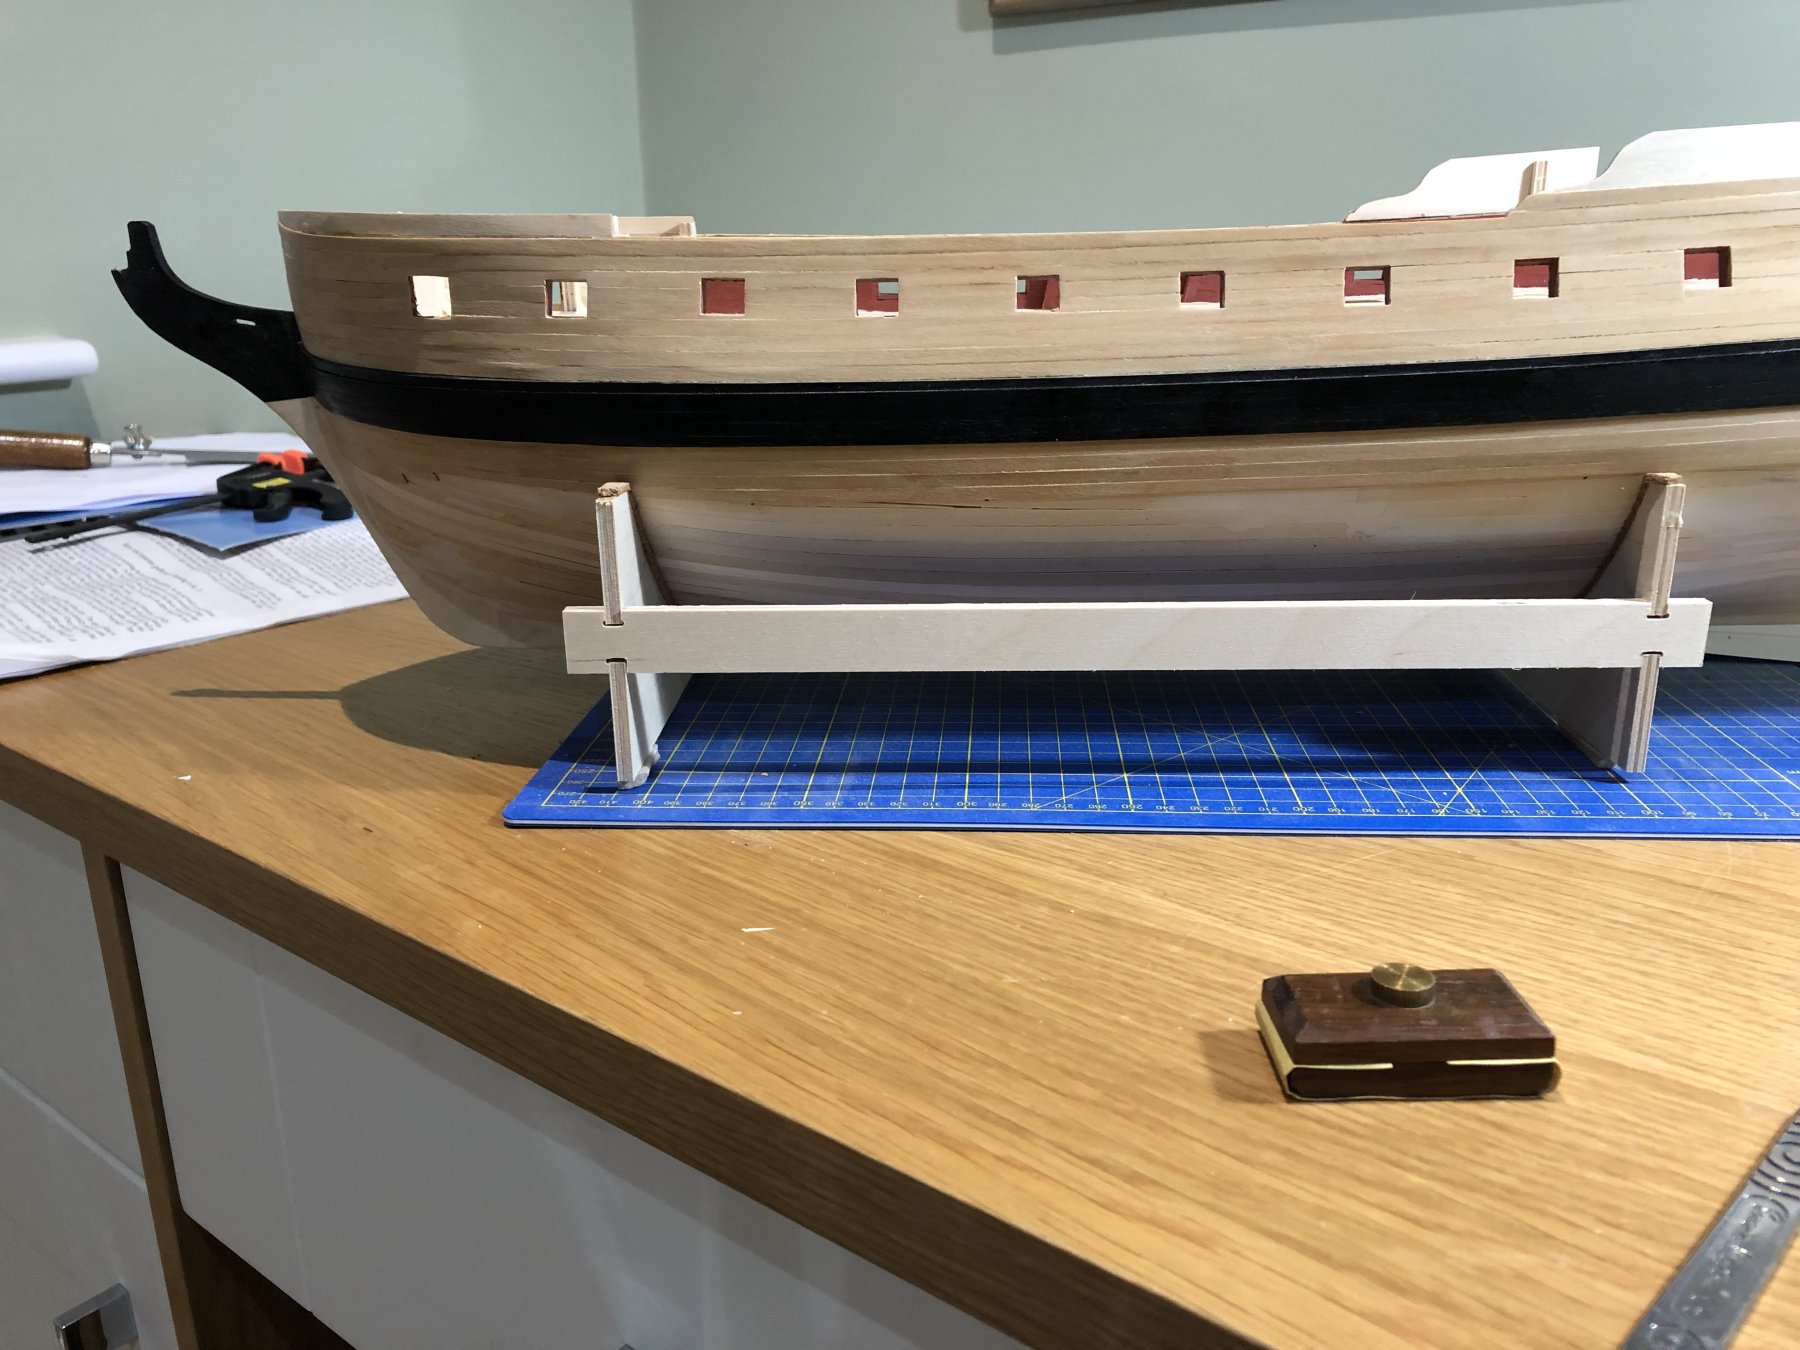
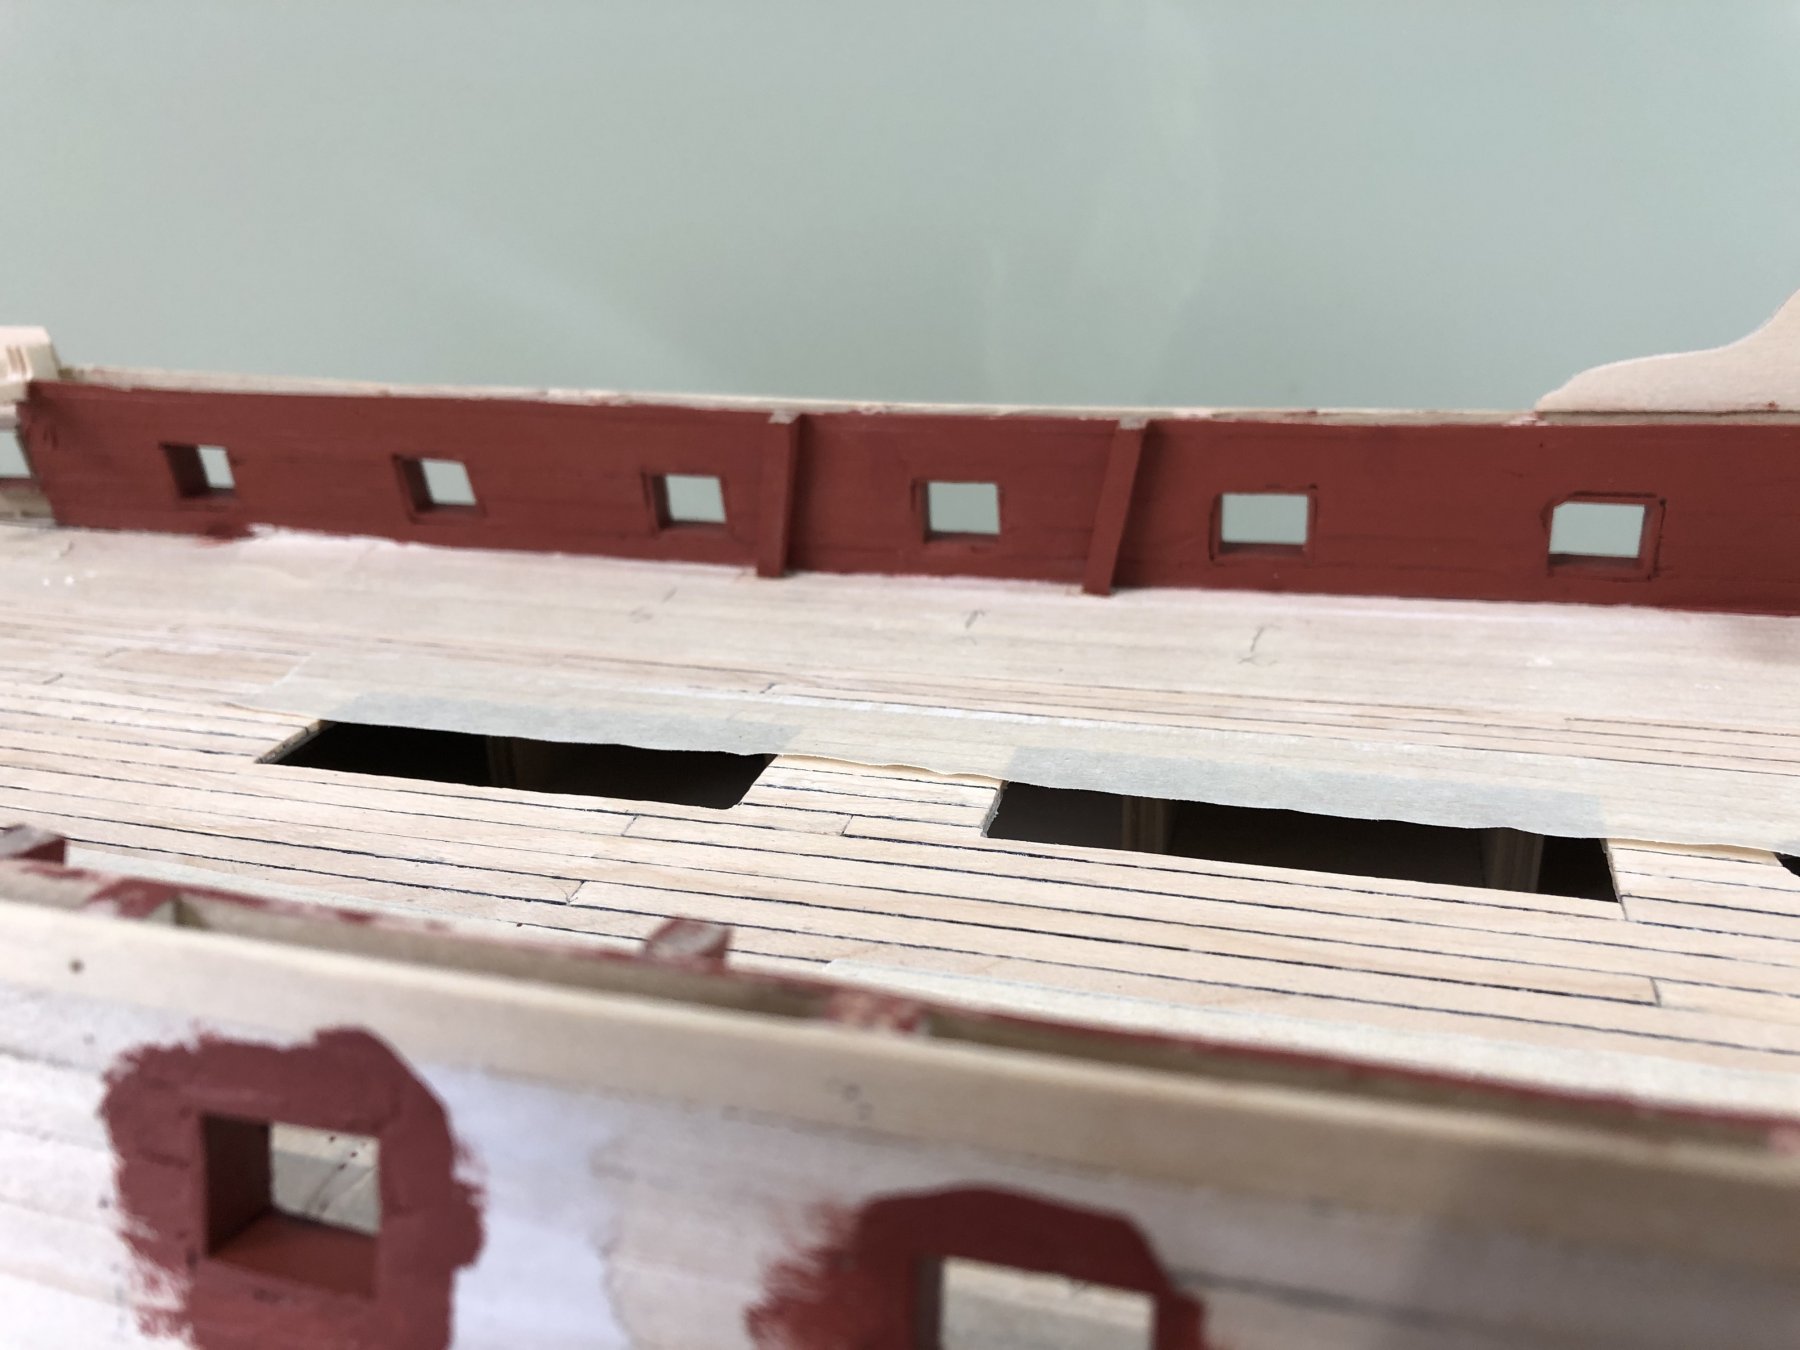
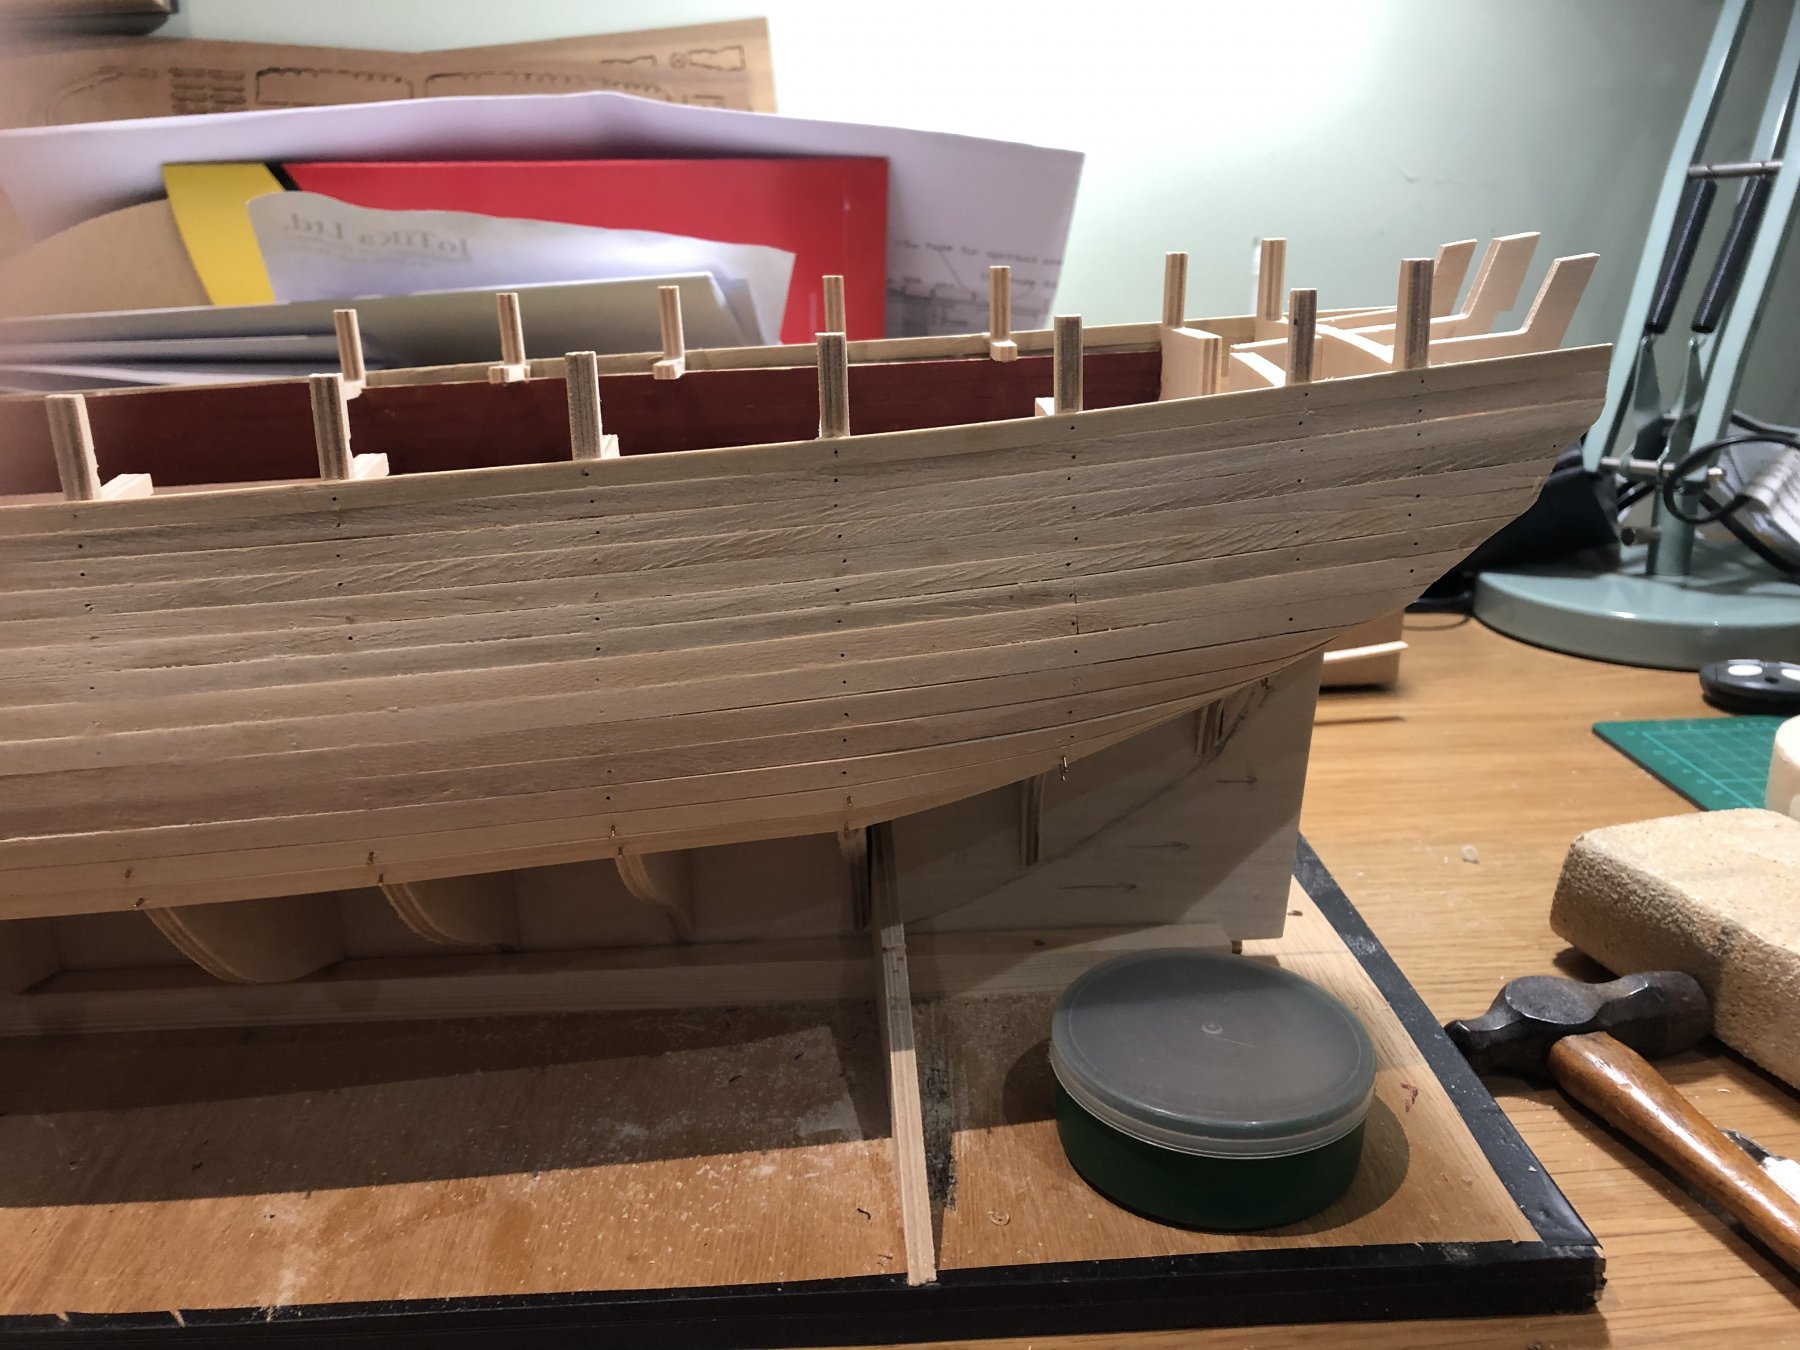
I have been away for a few weeks; odd how work seems to get in the way of modelling but I suppose the joy of this hobby is that you can dip in and out, catch an hour here and an hour there which allows some momentum to be maintained. When I was last in the forum, I was mulling over whether to use Boxwood or Walnut to second plank the upper works of the ship - after much cogitation, I decided to go boxwood. Thanks to really helpful advice from Rob, I managed to secure some decent, none too yellowy, strips in two thicknesses (why is it so expensive?) which I have been slowly fixing to the hull. First I had to finish the Gun wales which were then painted. I agree with another contributor that the Admiralty paint leaves an excessive shine so will go over them very lightly with gunmetal black to town them down. I am not entirely content with the line - I tried to measure from the plans, I tried to align by eye, I mapped it to the waterline etc etc but it still seems a little low on the hull and seems to be a it distorted around the stern. I will have to make do with this and when I get to the transom, think carefully at how I bind all this together - if I was doing it again, I would lift it about 5mm up and ignore the plans. I guess a little filler is going to be used. The stern areas sits, glaring at me; almost giggling 'wait until you get to my area!!' - so I will concentrate on the hull then look carefully at the rear section. I have then been slowly sticking on second planks, needs to be done carefully but is very time consuming. I am learning the good and bad aspects of cyno glue....be quick to clear and sand off any excess. I am still not clear on lined and non lined gunports: once the second planking is complete I will return to the 4 unlined ports on each side and see what happens there!! The box wood does looks good and once sanded, relevant parts painted and the rest sealed should be pleasing to look at. I now have to work out how to marry the differing wood thicknesses on the lower hull: boxwood 4.7 x 0.7mm; walnut 5 x1.0mm - I don't want a bulge when it comes to the copper plates; I guess sanding is the order of the day! I have begun tapering the planks around the rudder head and then down to the eventual waterline - this is another area where I suspect there will be joyless moments ahead! Anyway here she is. I am reasonably pleased: taking my time and thinking very carefully before I commit anything to glue. Peter
.thumb.jpg.bd75be9edbc5c93d48d1a13a8561f8c9.jpg)
.thumb.jpg.6be9c51a1d25faabf11677ad562ccb7c.jpg)
-
Jason - thanks, I've been tracking your excellent work - so I think the flow of expertise is in one direction!
-
Rob. Thanks - I haven’t been active over the last week or two due to work however, I have ordered the alternative boxwood as you suggested and will get back on point once it arrives. Most grateful for your advice. Peter
-
Rob - most grateful, I'll ring them tomorrow to order some. The Euromodels wood looks a little like artificially coloured smoked haddock, as seen in many supermarkets - when smoked naturally, it doesn't come out yellow! I presume these where the 0.7mm thick strips that you refer to in your blog. What width did you settle for in the end? Peter
-
Thank you Keith; I do remember the yellow scale rules at school. I think I will proceed with the boxwood, it is for the upperstructures only and, when the various layers of paint are applied, I think the mellow straw colour will be quite effective. Thanks for the wood guide! Peter
-
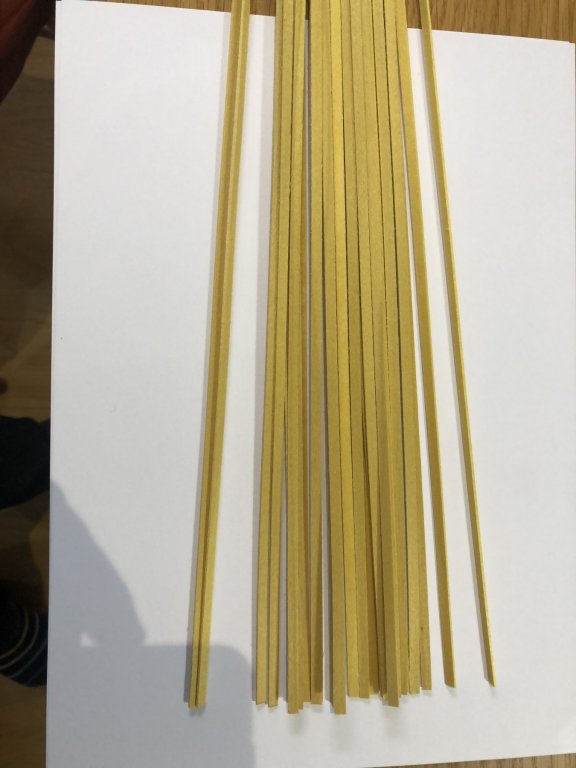
Keith You were kind enough to offer to help! A word of advice please. I have been building a kit model of DIANA and also looking at the other chaps building the same model for inspiration/help. I have decided to follow several of them and to use Boxwood for the upper structures (above the waterline) on the second planking phase. I have used or seen boxwood before yet everyone speaks very highly of it so I bought a bundle of 1x4mm strips: they seem very yellow to me and not the pale tone I was expecting. My ignorance? what do you think - is this normal? Numpty question but I want to be sure! Peter

-
Rob et al: thank you for the helpful advice. I have just looked at Beef Wellington's JASON and agree that it is stunningly impressive...one day, my son, one day! I have received my boxwood strips and enclose a photo. I haven't used this type of wood before so am not familiar but to me it seems a little yellow raher than the smooth pale in your photos and those of Beef Wellington or is that my ignorance? I ordered them from EuroModels who describe them as boxwood1x4mm strips? Am I being unnecessarily cautious? In the interim, I will finish the Wales. Hmmm - not sure about this wood. Peter
.thumb.jpg.51c376fd96592f56b7d779cf794f47d9.jpg)
-
Busy week at work so a much less productive week on the model - I managed a few hours over the weekend. I was at the stage where I needed to place the gunwale in the correct position - easier said than done - and start second planking. The instructions directed that, from the plan, one should measure down from the various gunports then mark up the line and affix the gunwale: easy peasy. Well no actually, the gunports are a mixture of lined and unlined ports and the plan/instructions make no reference to where the measurement should be from - 1mm here and 2mm there is bound to result in a badly positioned piece of wood. I fiddled around and ended up with a variety of wavy lines which looked odd; I even stuck one down which had to come off - not right! So I reverted to good old plagiarism and looked at both Ray's and Rob Durant's (HMS ETHALION) after which I used the instrument so vital to all Georgian master shipwrights: the Mark 1 eyeball and 'ur-int' - the feeling in ones' water! I have now fitted it to on both sides and ….doesn't look too bad but still a tadge low for my liking. Whilst looking for clues I did come across Rob's log on his build of HMS ETHALION - extraordinarily good. I take my hat off to him for his attention to detail, precision and logical build sequence, all succinctly explained and photographically recorded: something for me to aspire to in the decades ahead; brilliant...read his not mine!! As I read through his account, I began to appreciate the emphasis he had placed on the beauty of boxwood for the parts of ships' sides visible above the waterline - it does look very rich and crisp. So I have ordered a pile of 1x4mm boxwood thus will await delivery before commencing the next stage. The various blogs are very helpful so will peruse them whilst I await the postie...oh and I will go to work! Everyone seems to worry about the stern arrangements so I might have a look at that although not sure what I can do if it is out: we'll see. A few photos. Speak next week. Peter then

-
I see what you mean - the glue will help; I guess she will be back online soon. I am not as far ahead, just working the gun ports at the moment before mulling over how to start the second planking. I have started a build log - HMS DIANA peterhudson. we can swap dits! Peter
-
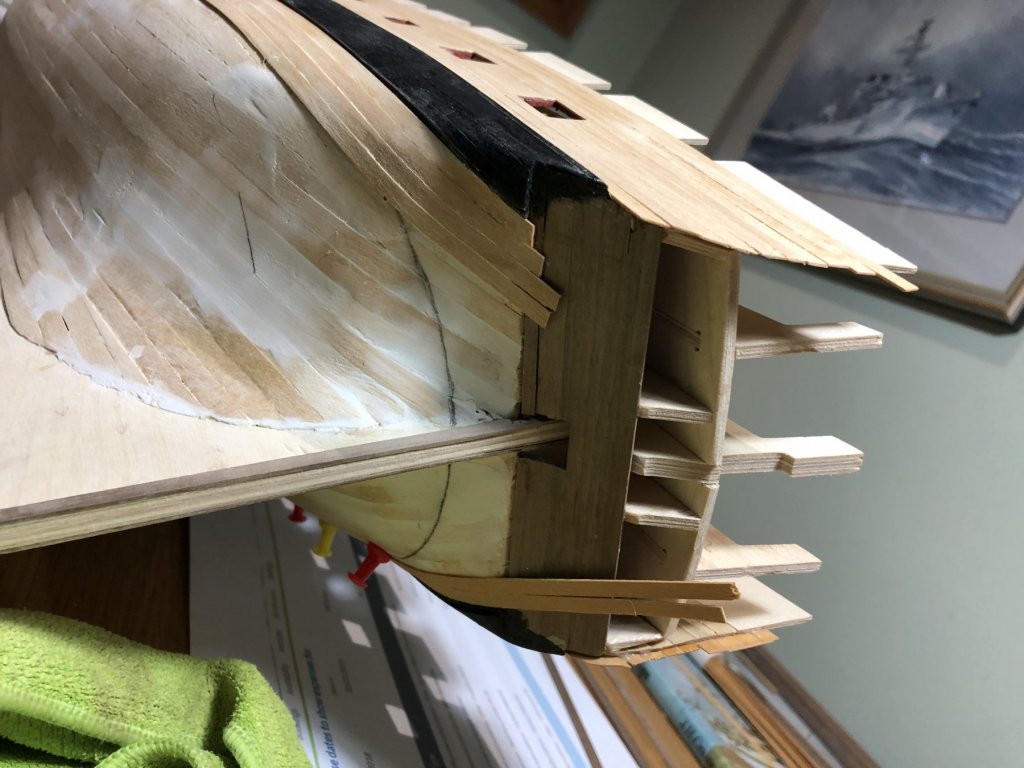
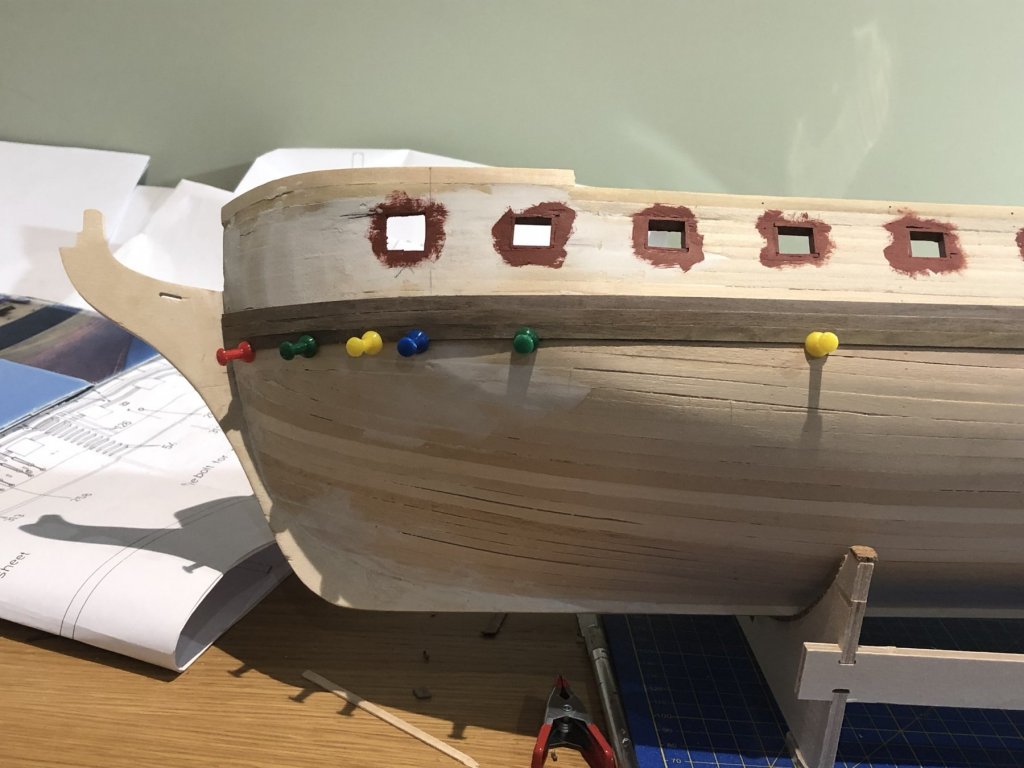
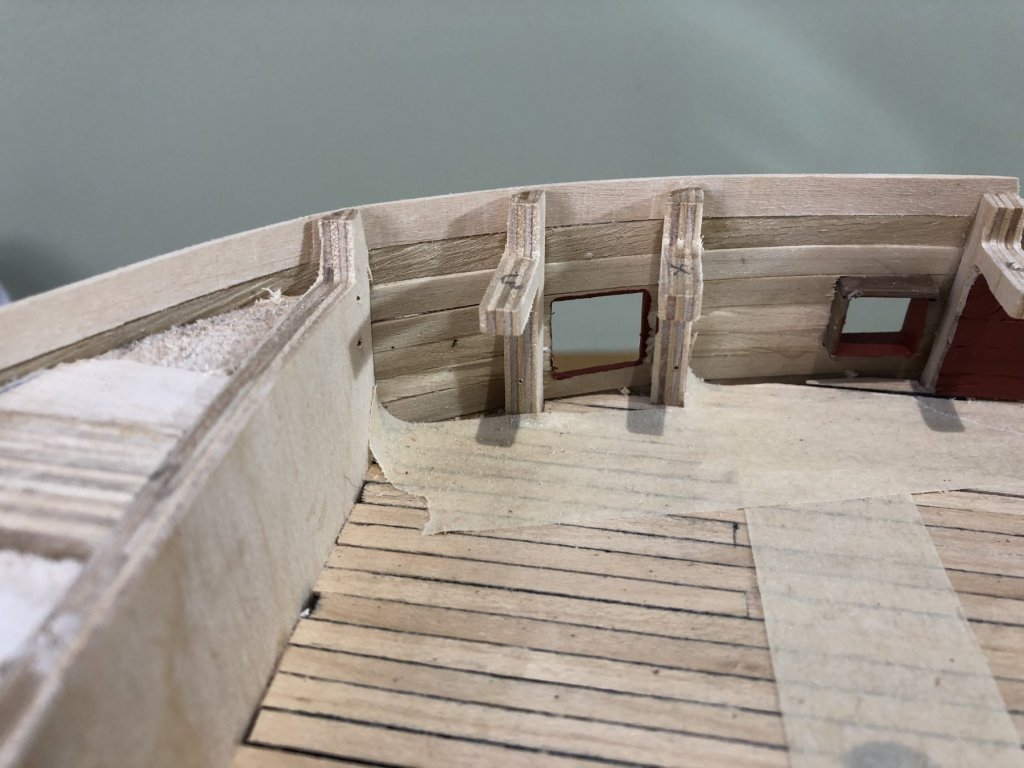
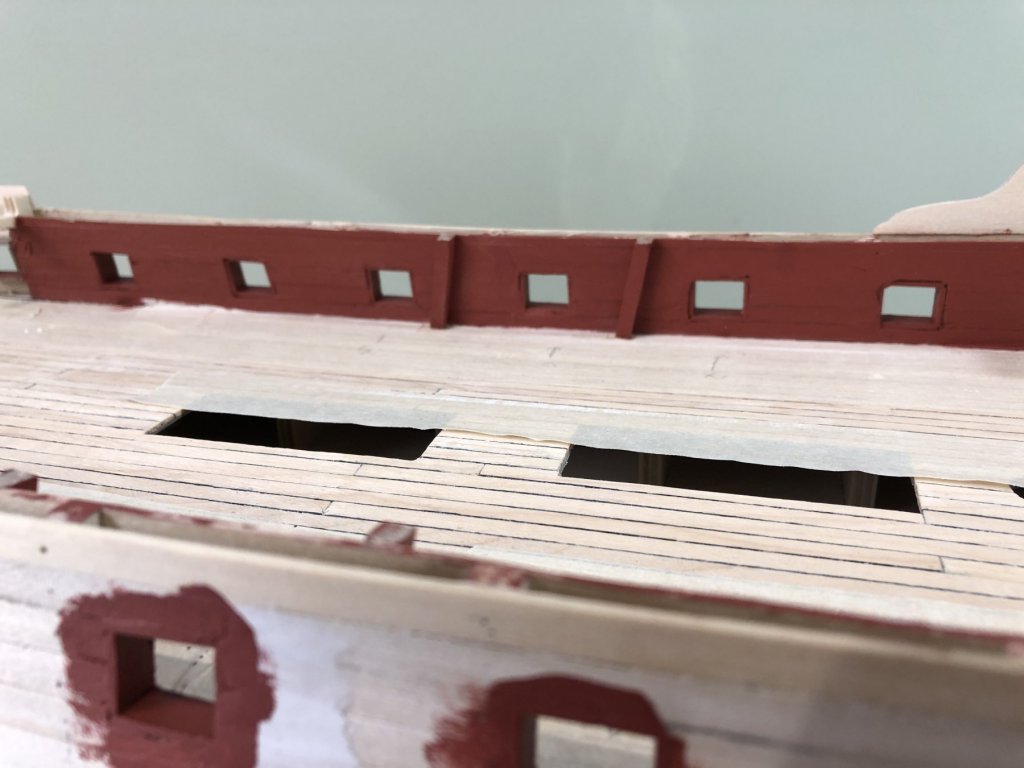
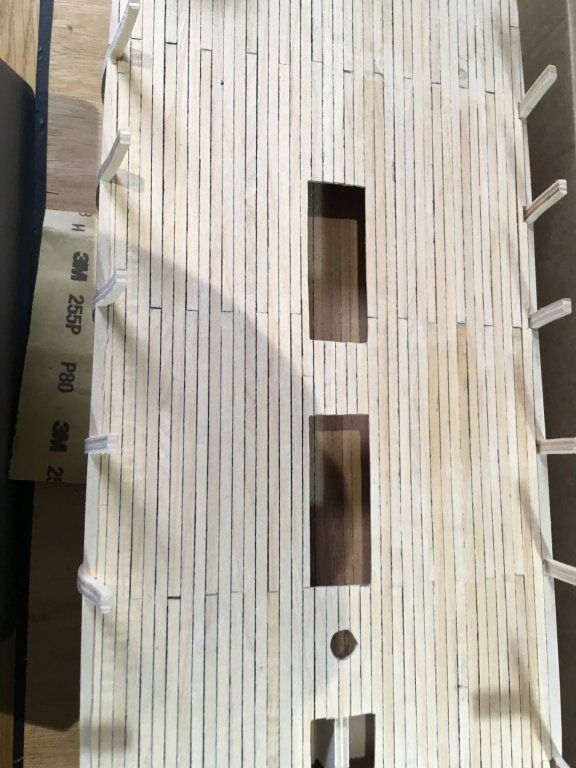
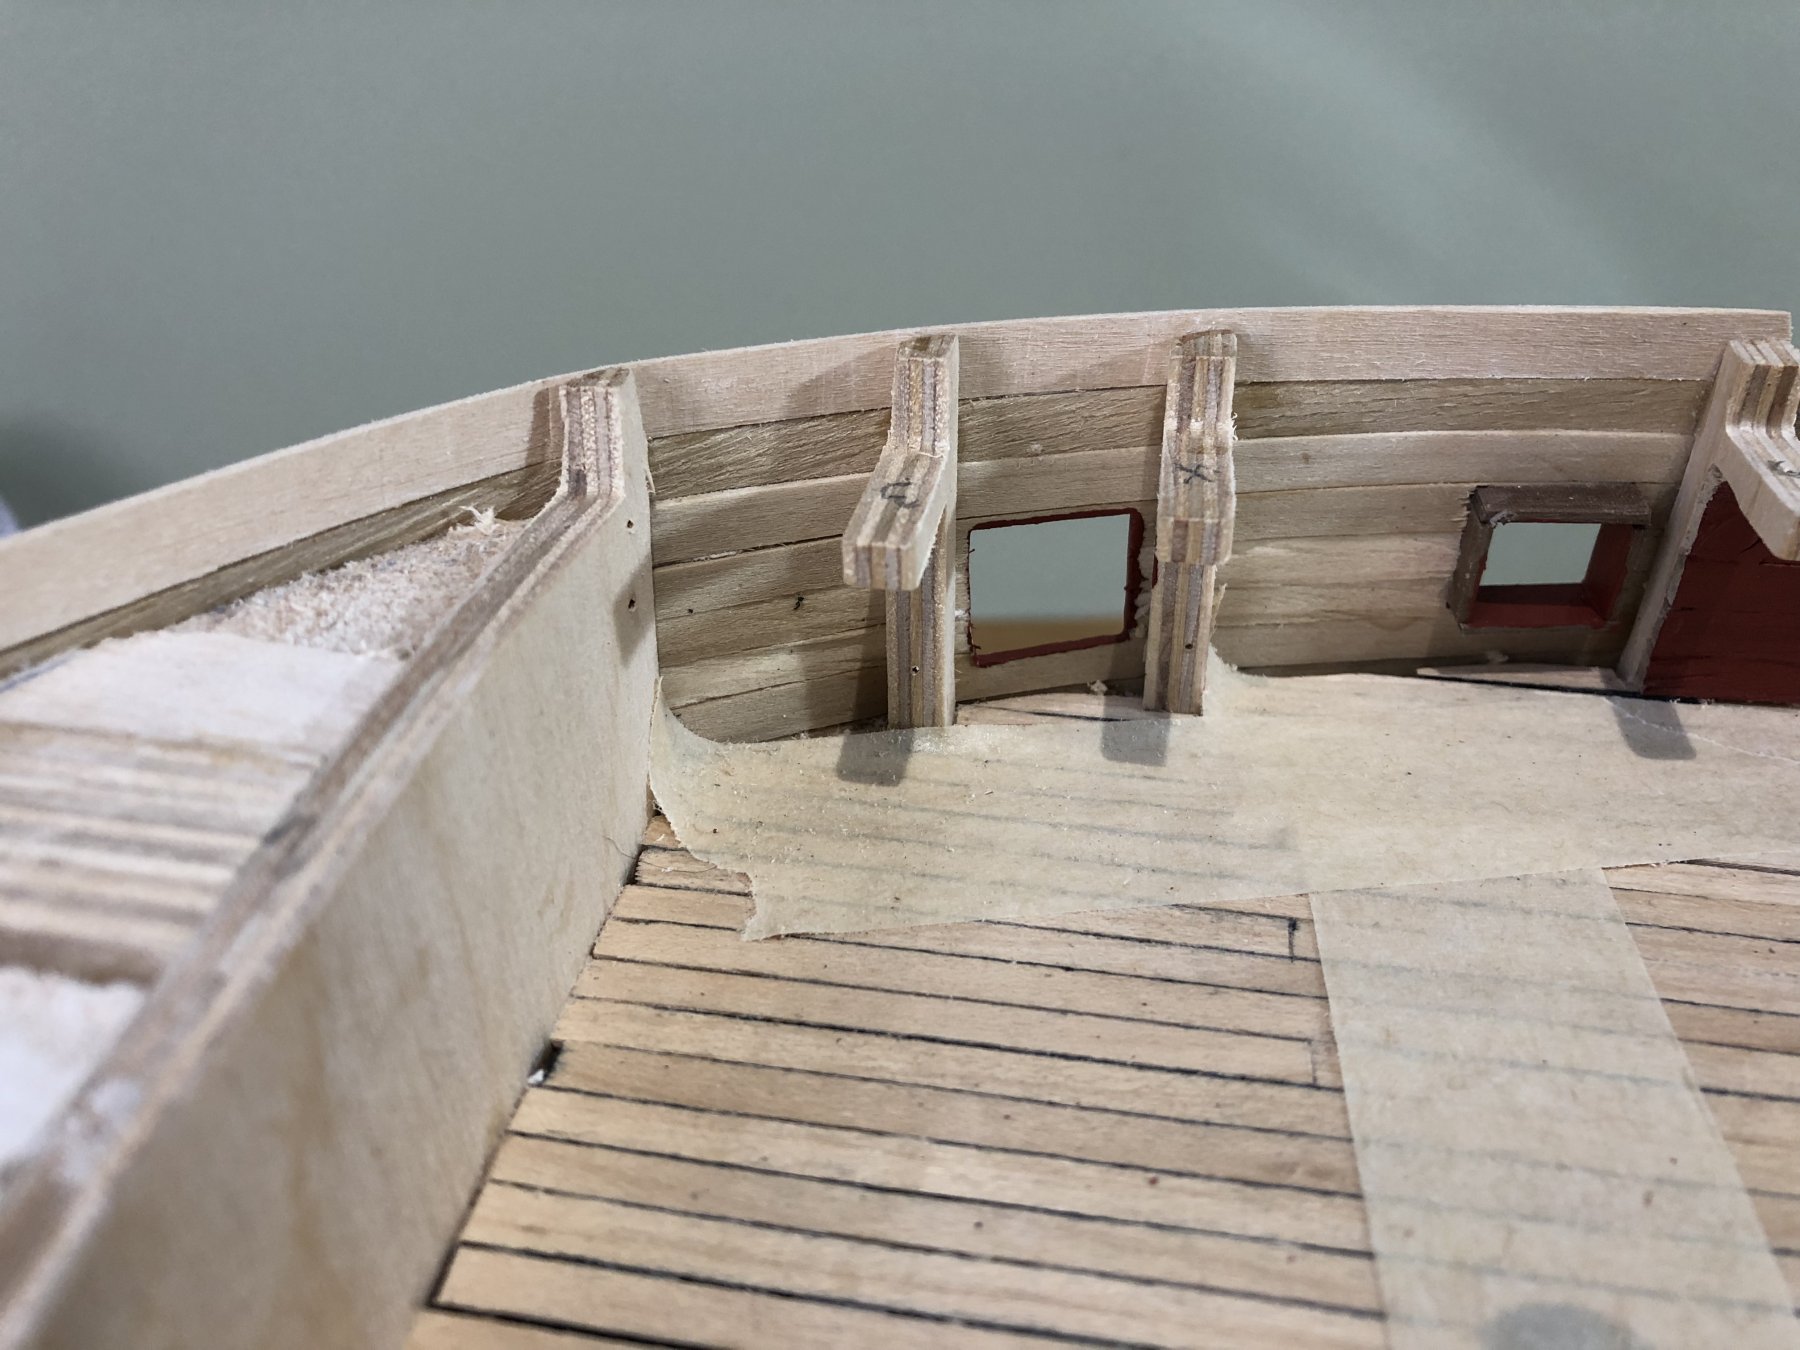
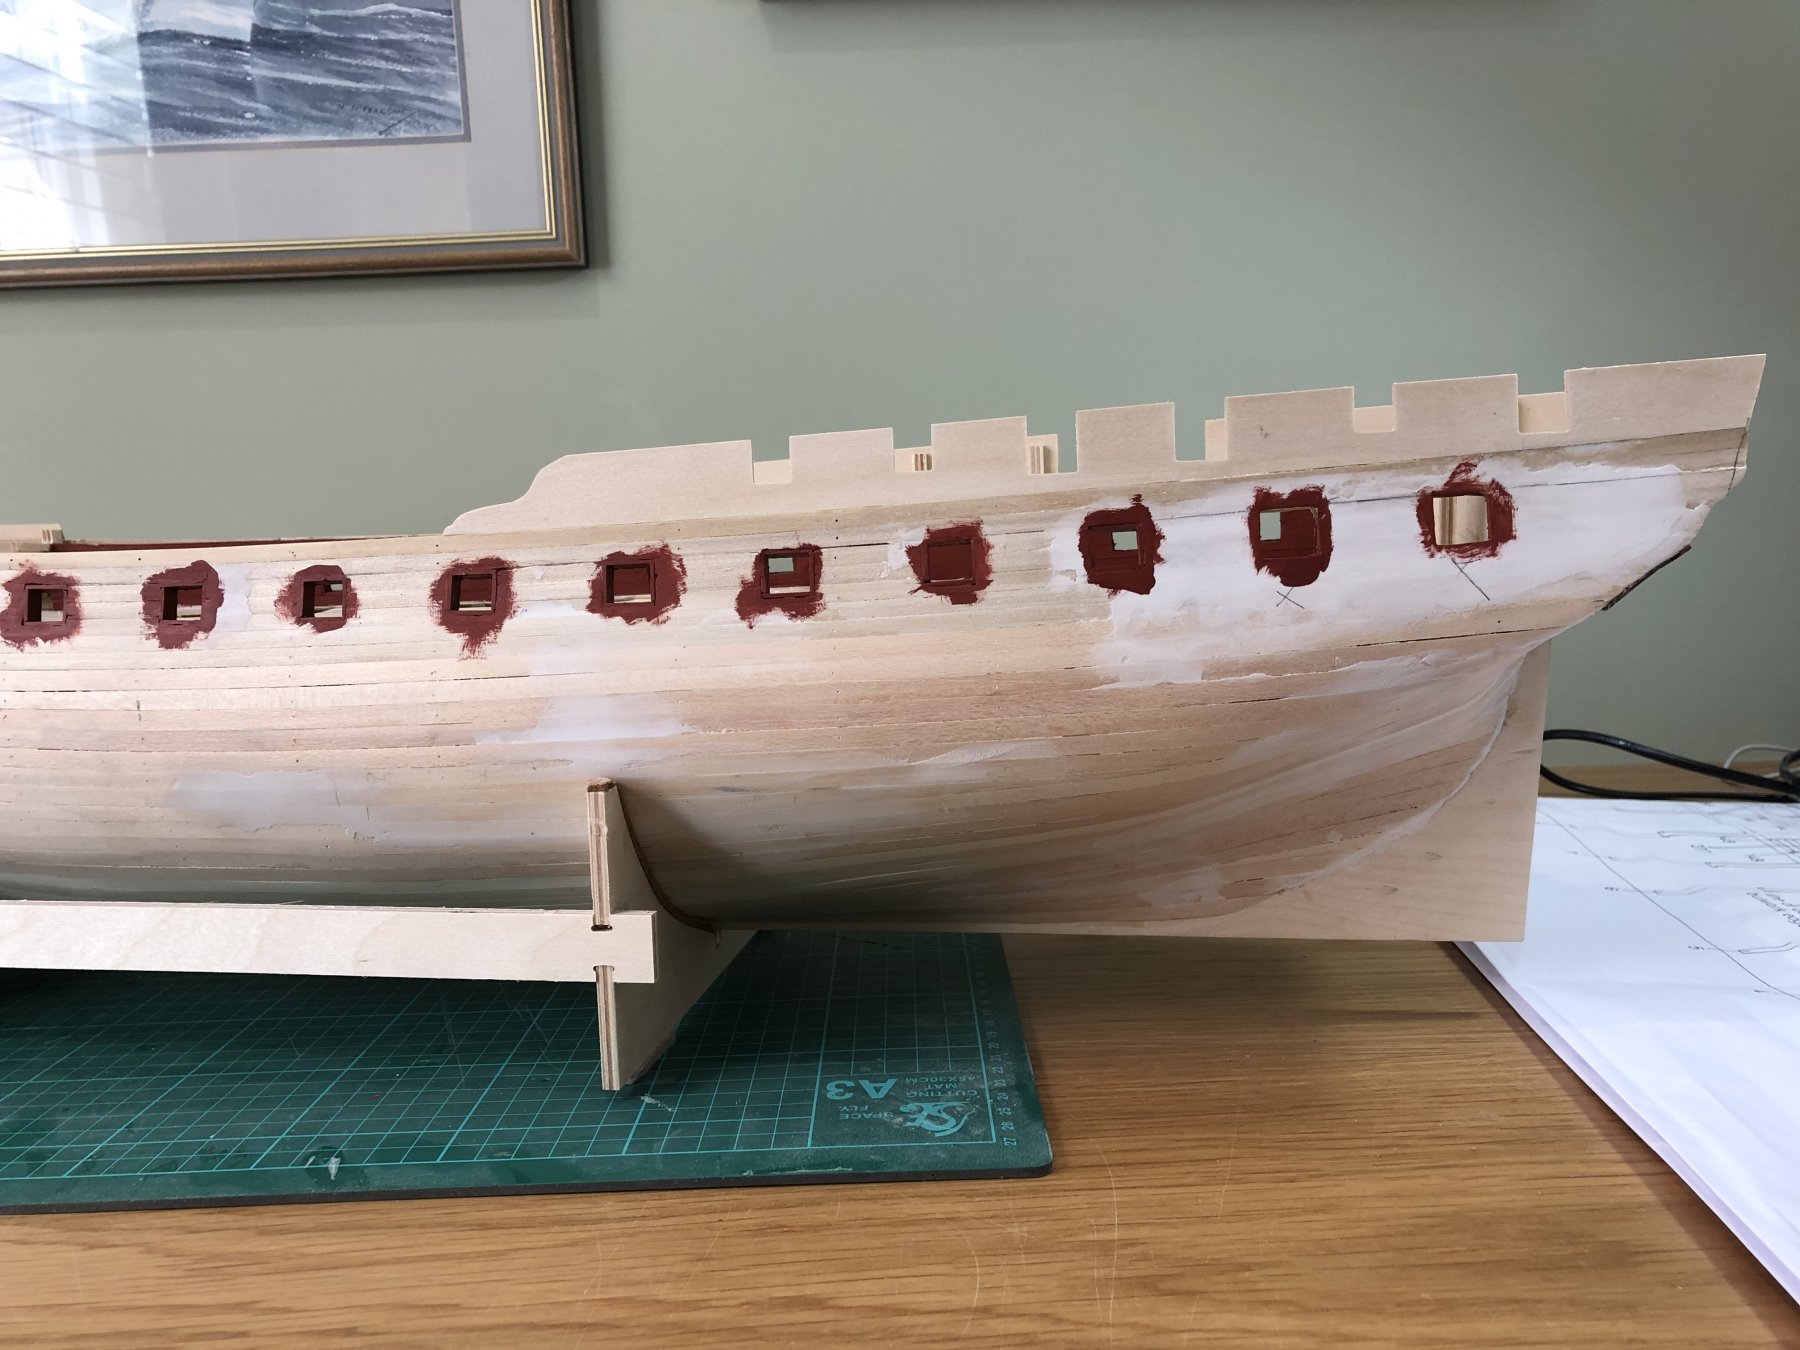
I then sanded, filled in the gaps with wood fill, shaped the bow and the stern areas and then re-sanded! It took some time however it was worth it. I then attached the quarter deck bulkheads and the final planks around the bow. Then I looked and looked and looked at how to do the gunports. I followed Ray's advice and marked them out using the kit's template to check alignment with the frames and, just as it did with Ray, the forward gunports straddled the frames which is unhelpful. I redrew them using the two stern most gunports as reference points and reduced the gap to 30mm from 32mm which cleared the frames. Be very careful about the positioning. I cut them out using a1.5mm drill which perforated the inside the gunports, cleaned them up with the surgical knife and then a flat file. They were lined and then painted; I will put lids on the first three and the last one on each side so they have not yet been lined. I need to touch up around some ports on the inside with filler to make sure the bulk heads are smooth. OK - that's me upto date. I will now ponder how to start the second planking and try and work out what a main wale is and how to position it and why! that's next weekend's job! Peter

-
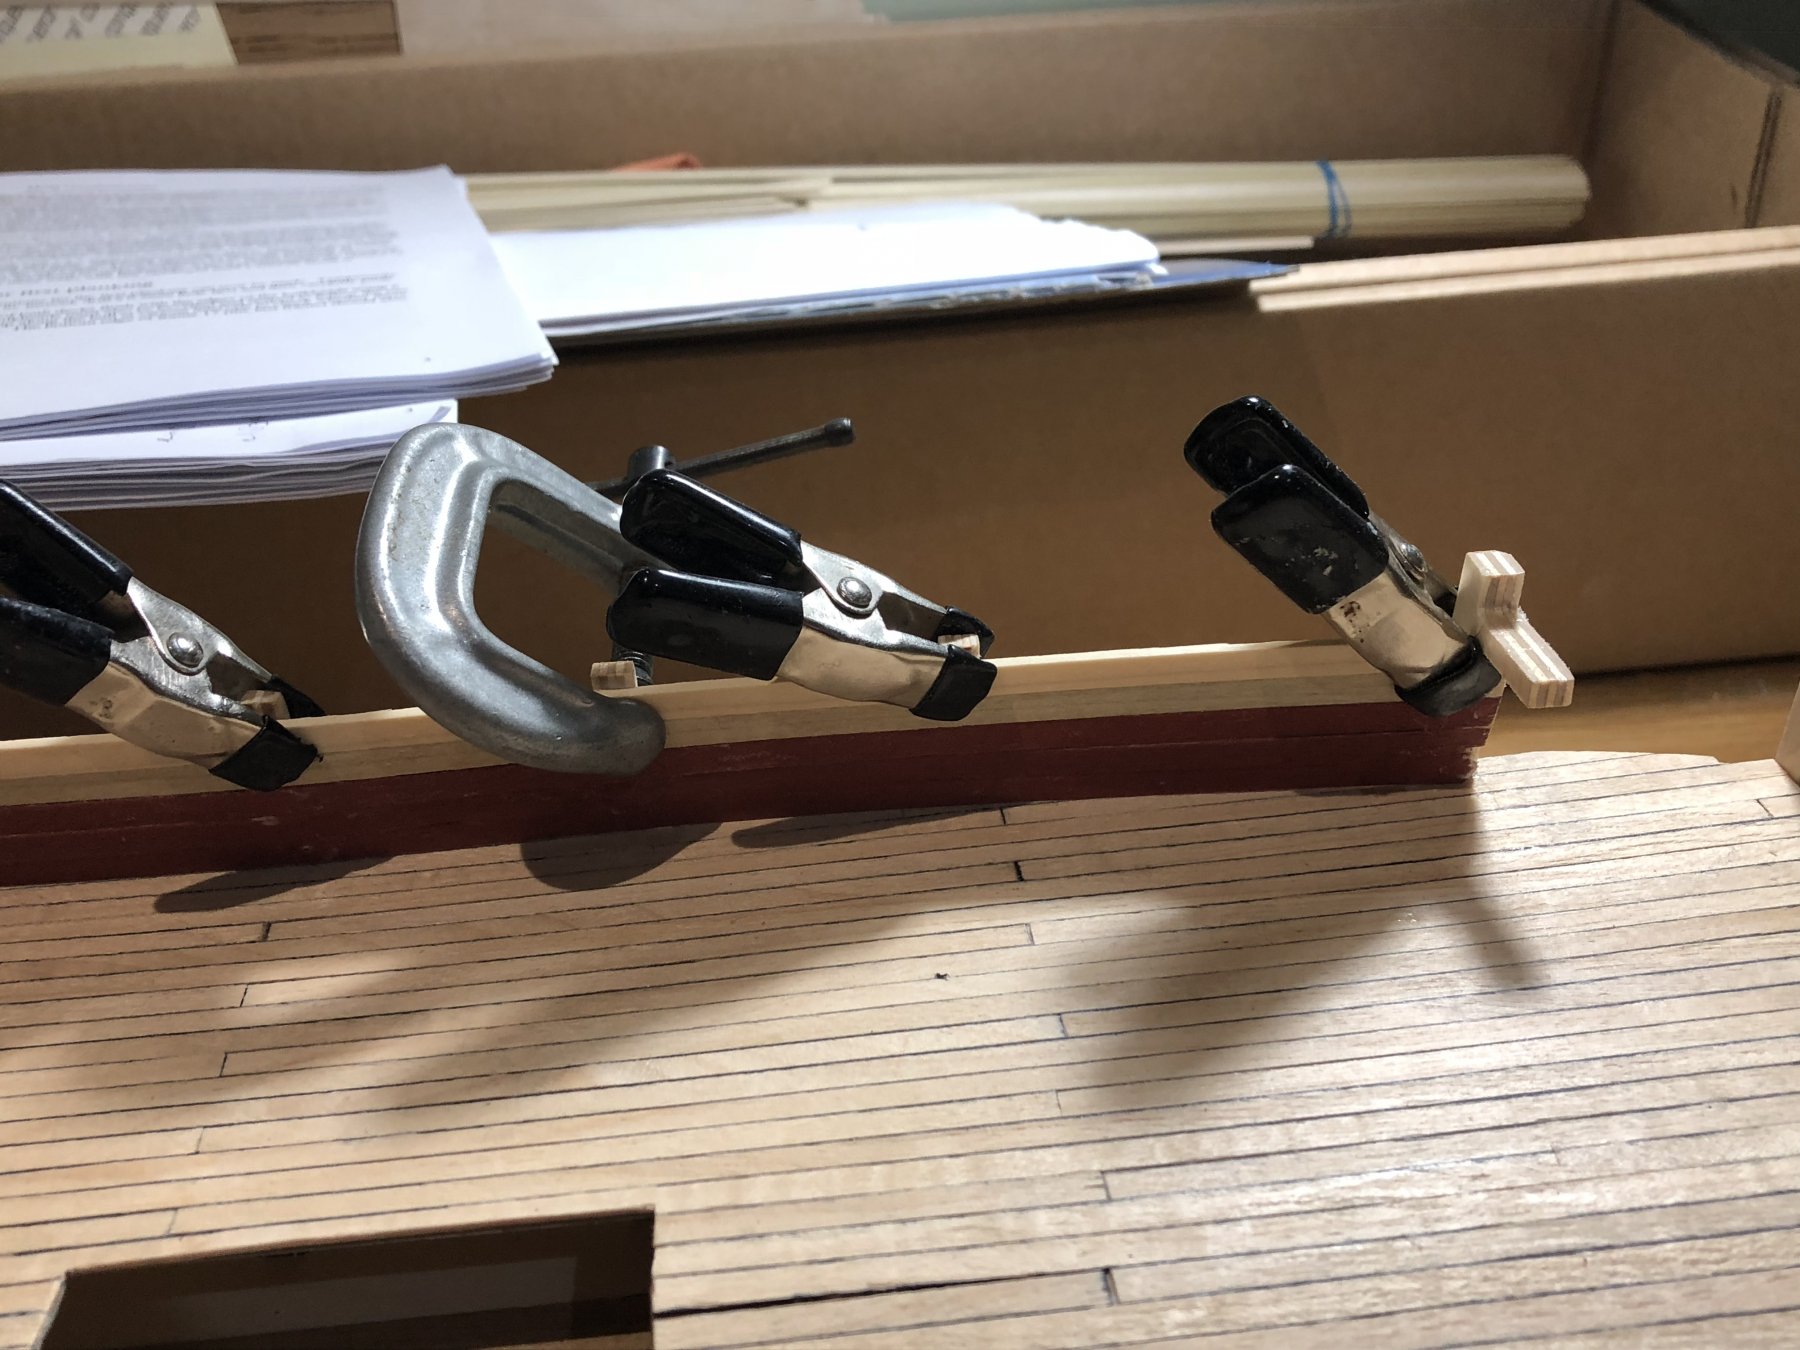
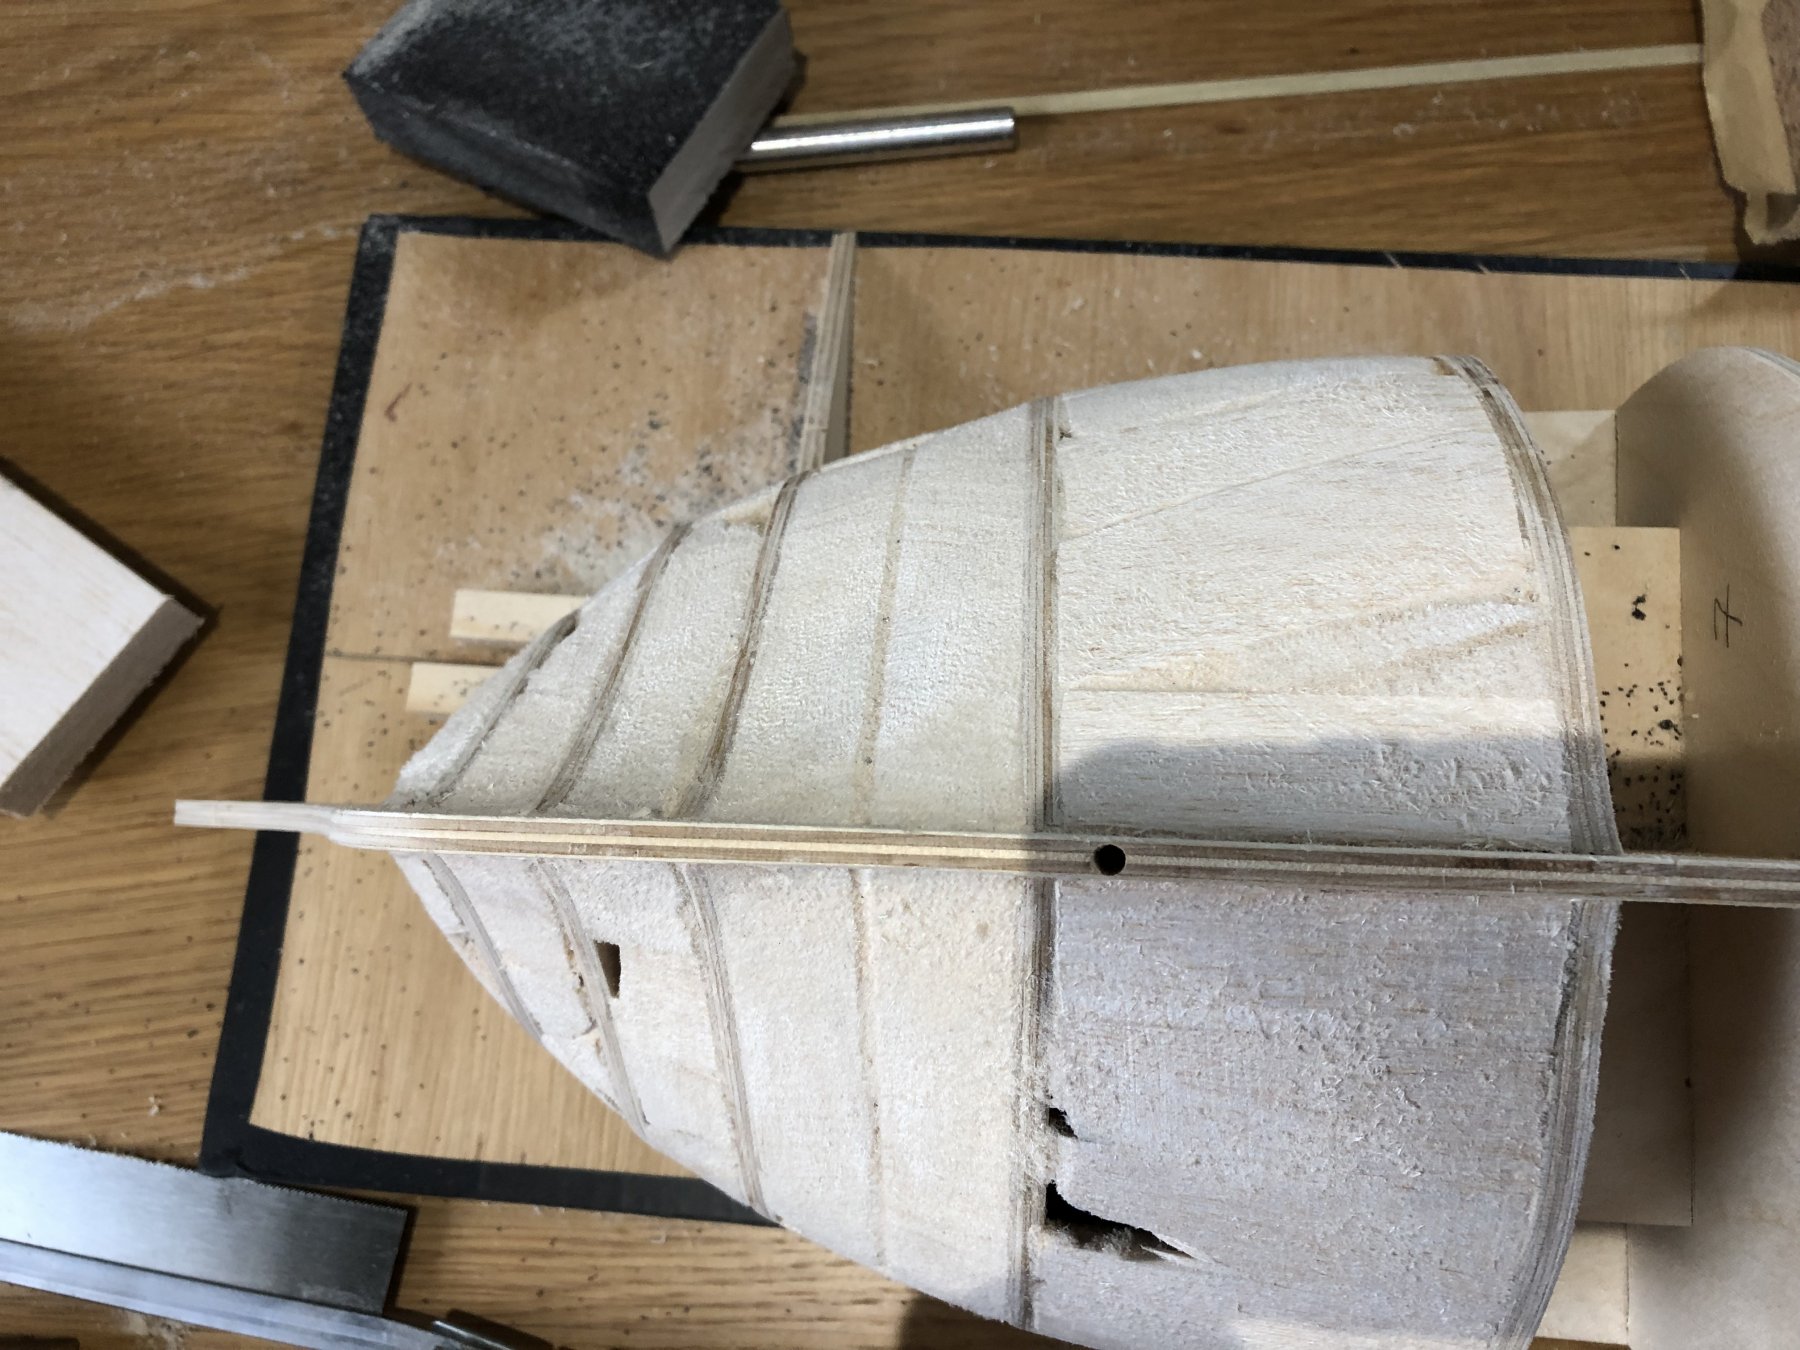
With the balsa in place and the sanding done I placed the maindeck on the and aligned against it when I started the planking process. The instructions make reference to 5x1mm limewood strips but the kit actually comes with 6x1mm. Not too great an issue except when checking the position of the gunports which use the bottom of the second plank from the top as a reference point: 10mm or 12mm from the top? I measured against the plans which show 10mm so I bought a few 5mm strips and fitted those before using the 6mm for the rest of the hull - we will see how the gunports line up. The team at Caldercraft were non-plussed! I haven't done much planking so this took time and I found the stern area tough especially twisting and fixing damp wood, during which it was clear I hadn't sanded my frames enough and I could discern a few creases in the planking as they bent over the frames. I tried to correct the flaw but I'm not sure it is as intended! Really sand and double check the frame lines before committing the planks; I had done the sides/bow but not enough the stern and for which I should have used some soaked planks to double check - the crucial area. Hey ho. Peter

.thumb.jpg.ca5652330d255616b6745baacf90151e.jpg)

-
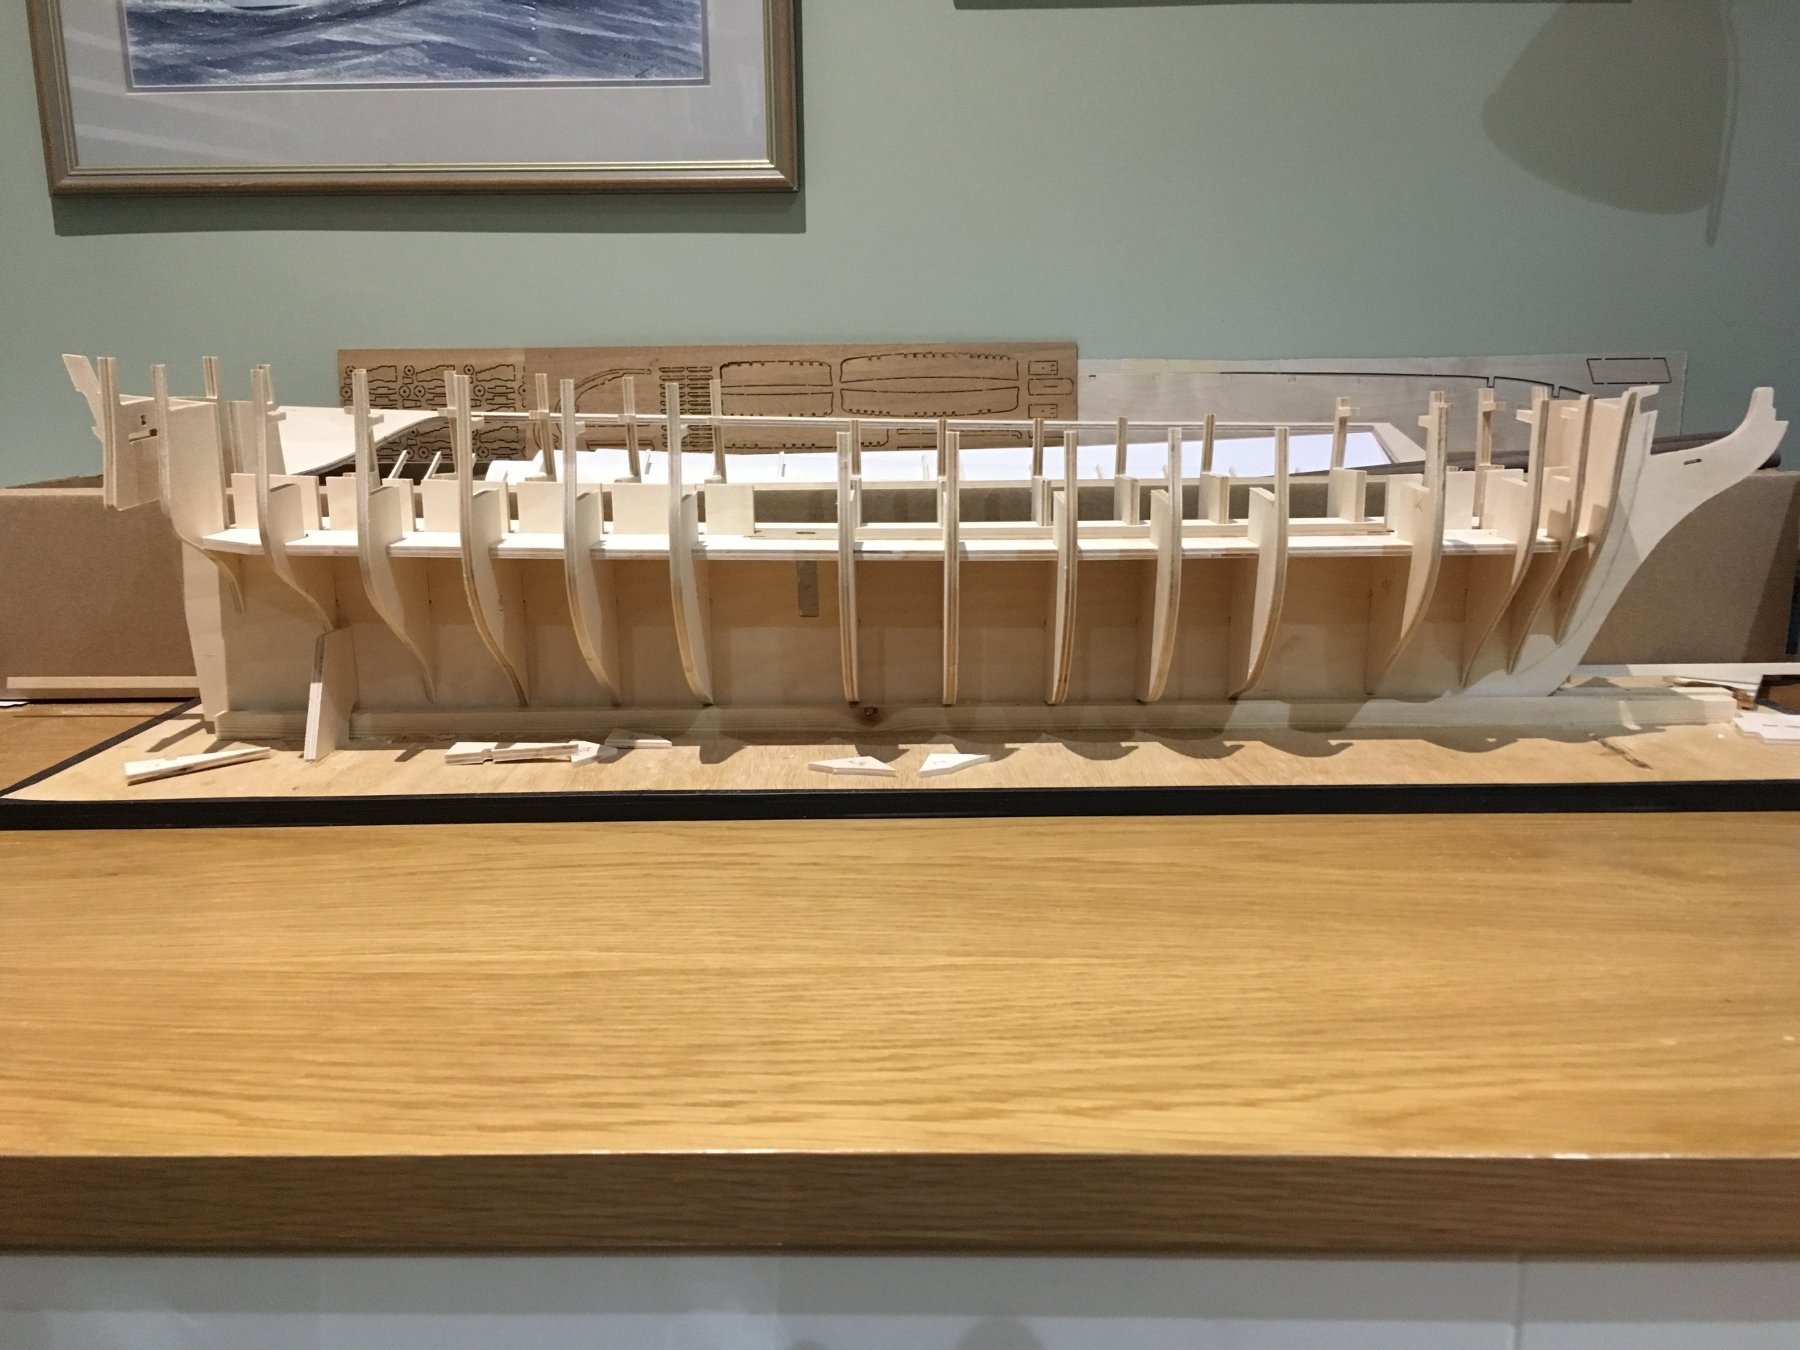
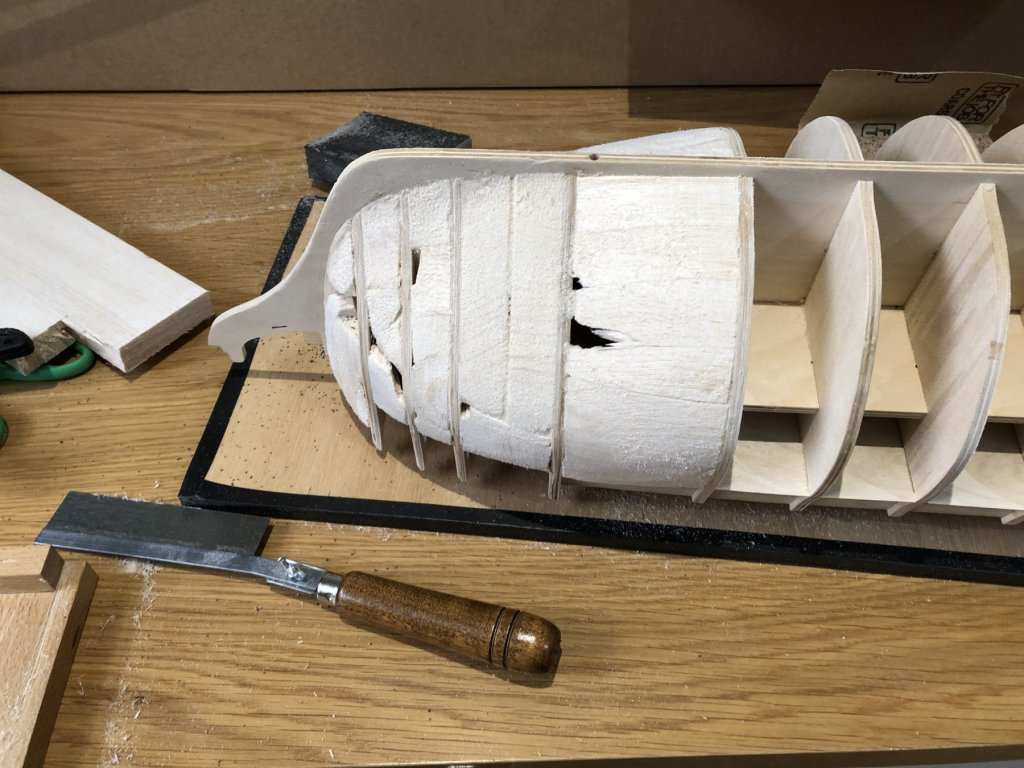
Once all that was complete I balsa filled the bow and stern areas to make the correct hull shape before I started planking the hull. I hadn't done this before; there is clearly an art to this as I over packed the basla which made it awkward to file/sand into shape, I had to frequently lay planks around the bow to the check the lines and shape; I am not sure I got it right...look it up if doing it for the first time! I also repaired the centreline crack which appeared on the gundeck - I had cut the plysheet in half to fit it into the hull shell, then glued it, then planked it however, the glue had clearly not been strong enough! All is well now. I also applied a matt varnish to protect - doesn't look as bad as it does in the photo - story of my life! Peter

-
Once the bits were replaced and I had sanded, I did the gun deck planking (with nothing like the finesse of Ray!) and then started the inner gun deck bulkheads. The top planks needed a little planning to get it to fit under the deck supports but nothing too challenging.
.thumb.jpg.5605ef3daacc5414bbdcdcbae4bd766a.jpg)

-
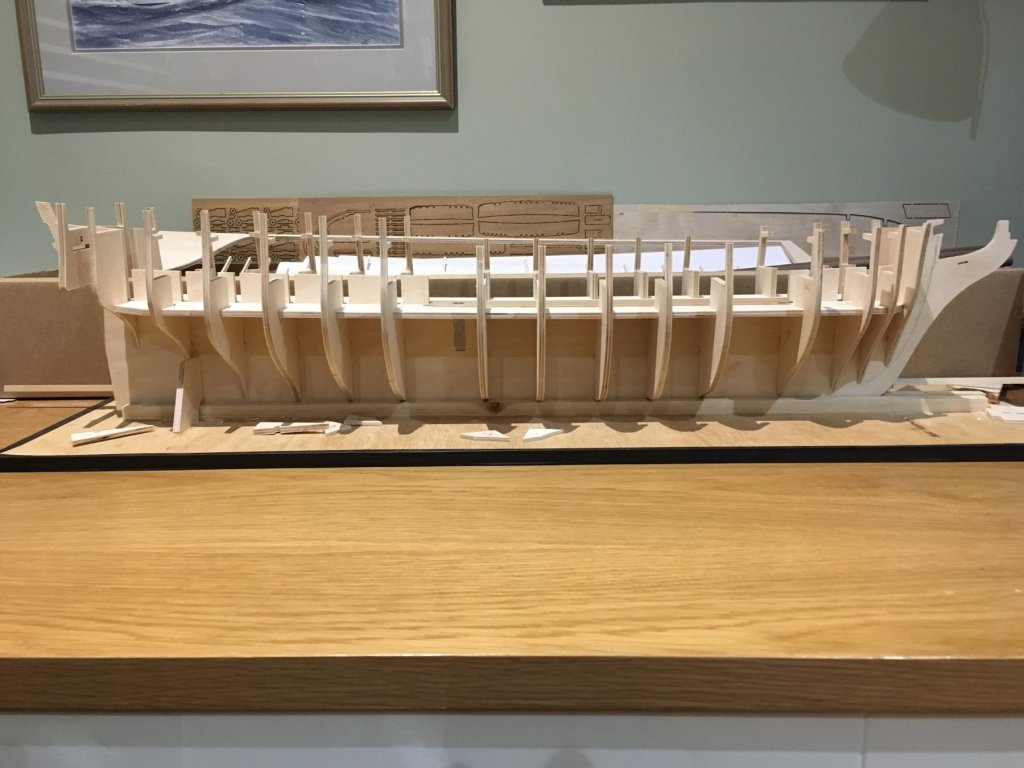
Hello. I am comparatively new to modelling. I have made a few kits in the past: HMS SUPPLY by Caldercraft being the most adventurous, however I felt it was time to stretch myself a little and thus I have scaled up to the DIANA model: bigger, more complex (thus new skills required) yet also one that should give lots of fun. I have joined the site and been encouraged to start a build log so that if...when...I become stuck, I can seek advice from members much more experienced than me. This is the aspect I am most grateful for as I will inevitably drive myself up a modelling cul de sac and need help to get out! I have read all of Ray's log which gave an excellent blow by blow account of when he built a DIANA model a few years ago, what an impressive end result and this has spurred me on although sadly some of the photos wont display so I'll have to use my own nouse. I know can't replicate that quality but I am up for the journey; wish me luck as I head out on what will probably take me 18months or so; I have a busy job so have to fit in an hour or two here and there. I have already started so this log skips the first two months of work. 'Here's one I prepared earlier' as they say; I have kept some photos so I will add these int o give some of the back history and then some observations of my approach highlighting the bits that didn't go so well. OK - the first major step was to set the frames and chamfer the edges - first snag was the quality of the cutting which was a bit hit and miss. The team at Caldercraft kindly replaced them all.

-
Thank you Keith and indeed the rest of you who offered to help - be careful, I might well take you up!. I think I will start a build log and keep you all upto date. peter
-
John - good to be here. P
-
Mark Thank you for your advice: slow and steady will be my maxim and I will not be afraid to ask for guidance! Peter
-
David: how is she going? I have almost caught up with you, made similar mistakes but learned from your endeavours. It would be good to see how things are at the moment. Peter
-
I am reasonably new tot he website and have been dipping in and out as I start to make HMS DIANA (Caldercraft); in the past I have made HMS SUPPLY and smaller boats: this is the first big frigate. I am therefore here looking for tips!! . I have completed the hull and the first planking and about to embark in cutting the gunports but...I am nervous... so looking for guidance and advice. the website is excellent but hard to navigate around and find stuff you need. Peter
.jpg.17b30d825cb09a274ff446ac1560bfd1.jpg)
.jpg.d2f1cb48698498709aeda053130417c6.jpg)

.jpg.4145a584c45f1bcb86dce173678ddd7c.jpg)
.jpg.8cf35bb087b51fb1565c57840c88cf3f.jpg)


.jpg.8ff8389906f2008a1b56324c89792d27.jpg)


.jpg.f69717f1632d64958bc0ce5756f3a4ee.jpg)

.jpg.a31eab0cae66104820247ce625deb38f.jpg)