MORE HANDBOOKS ARE ON THEIR WAY! We will let you know when they get here.
×


DmitriyMarkov
-
Posts
61 -
Joined
-
Last visited
Content Type
Profiles
Forums
Gallery
Events
Everything posted by DmitriyMarkov
-
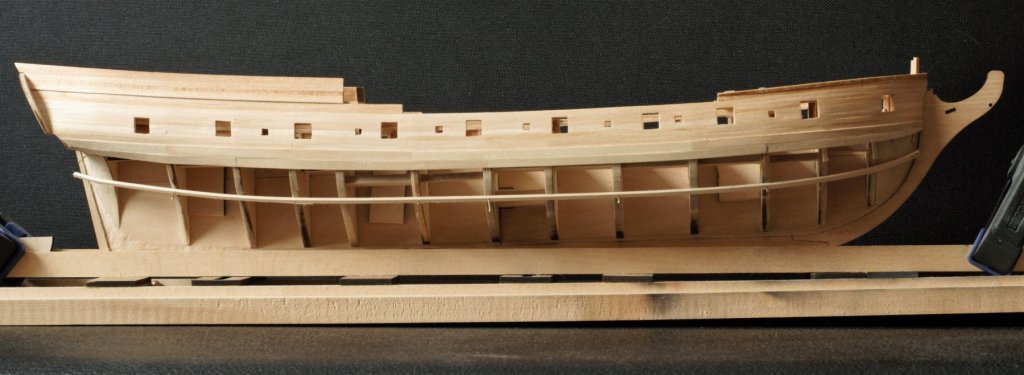
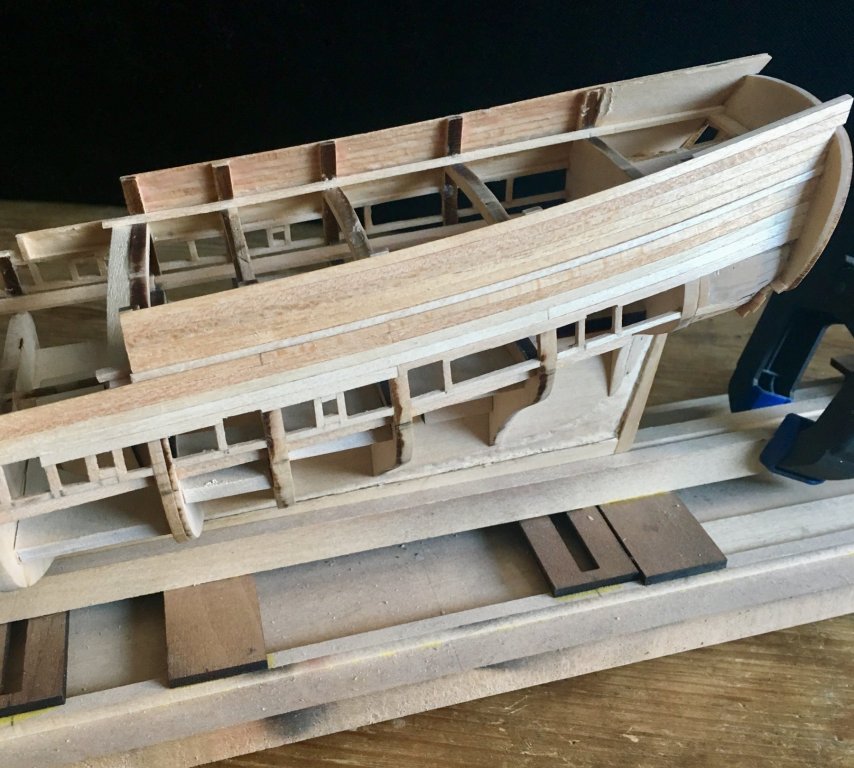
Thanks for your kind words, gentlemen! I try to do my best simply following the instructions which are very useful for me. I also follow the rule of considering every single plank as a single project - it helps (but not always :-) ). Lines of the ship which allow planking layout without any stealers do help as well. I still haven't decided yet would it be single-layer basswood or double-layered planking. Colleagues in Russia are trying to convince me to choose second way and to use pear over basswood, while my intent was to paint the model and so I try to do hull planking as flush as I can using kit basswood and if it goes ok I'll prime the hull and paint it and then I'll do deck planking with a light pear and I'll get some boxwood for carvings and detail. But first, I have to finish hull planking - the result of this process would show which way to go then. I'll try to show some progress some hours later.
-
Nearly present moment.


-
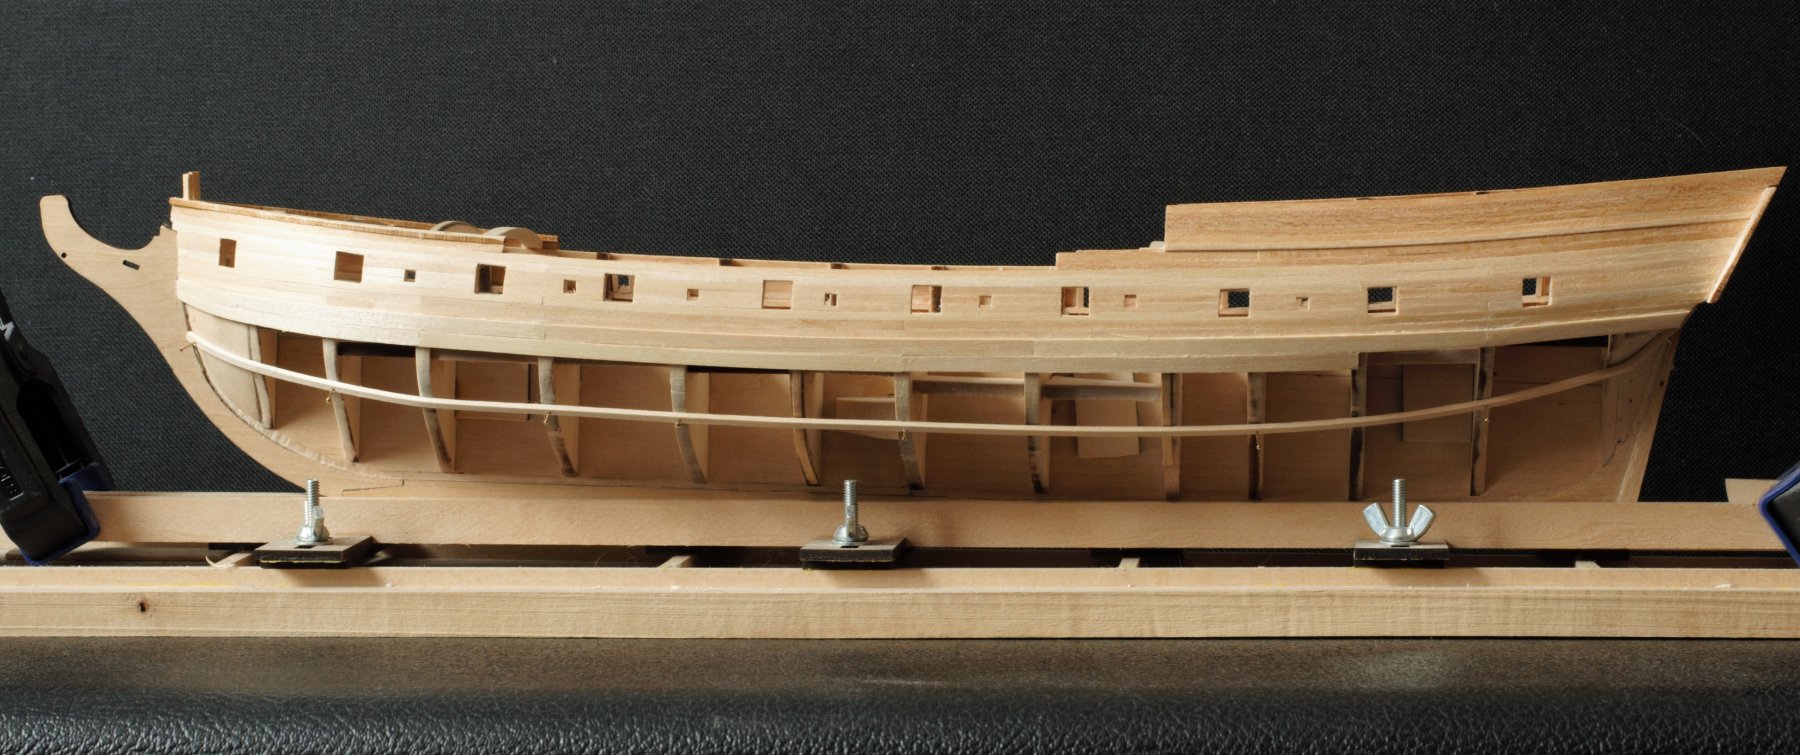
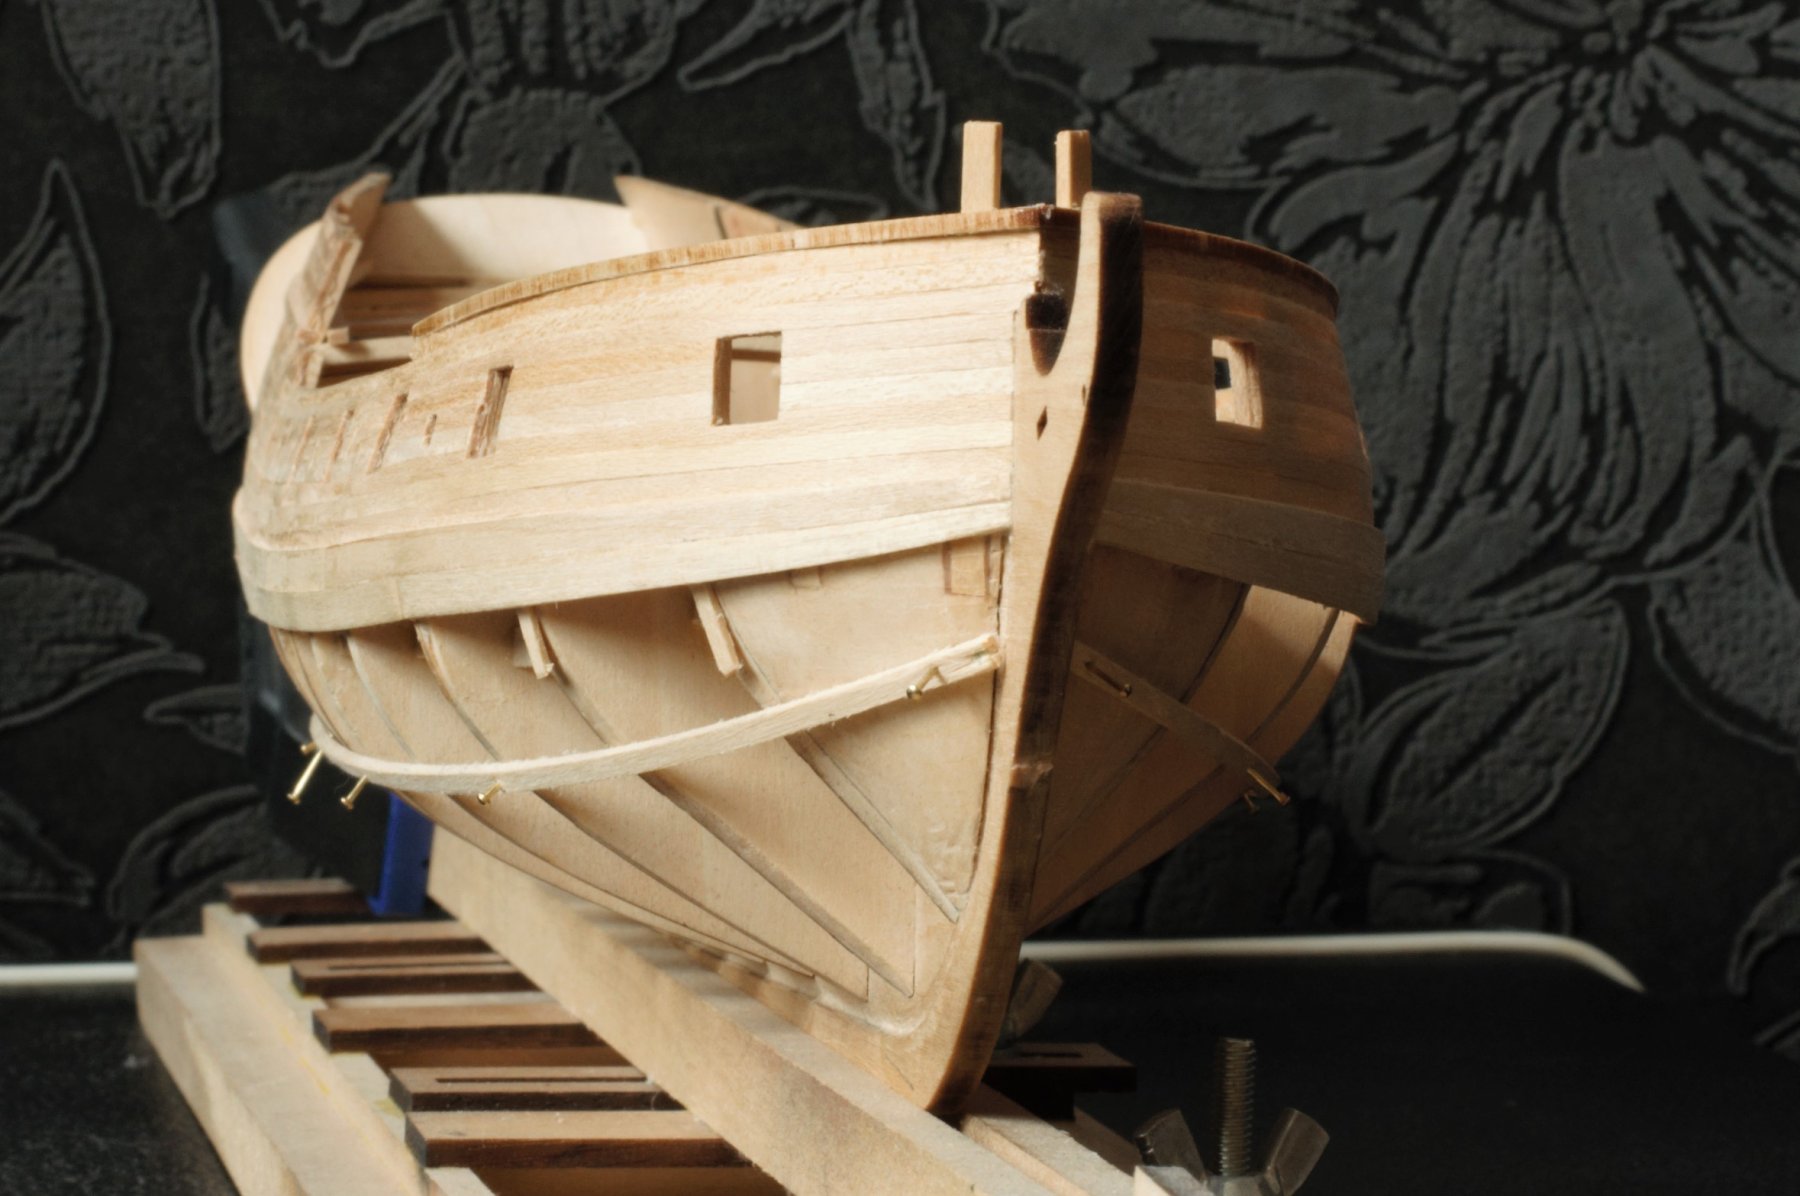
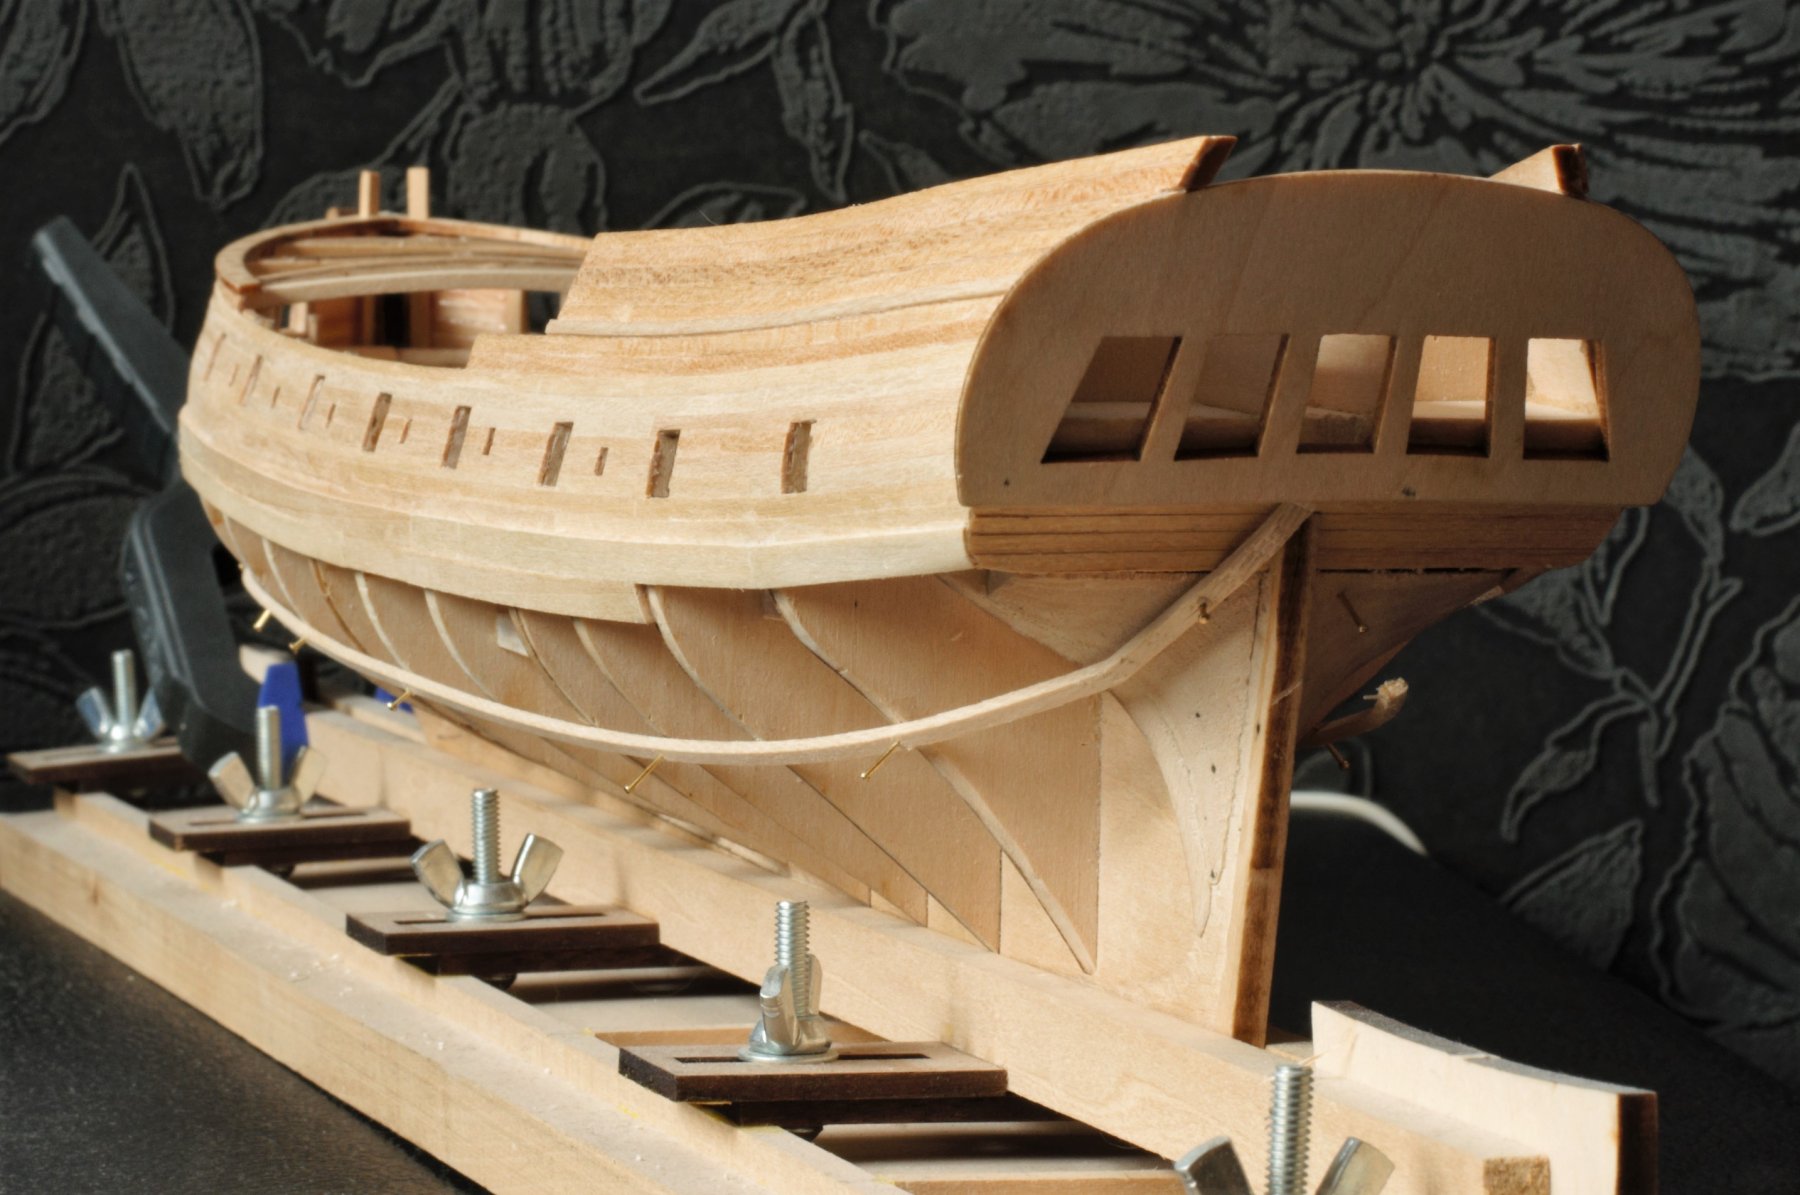
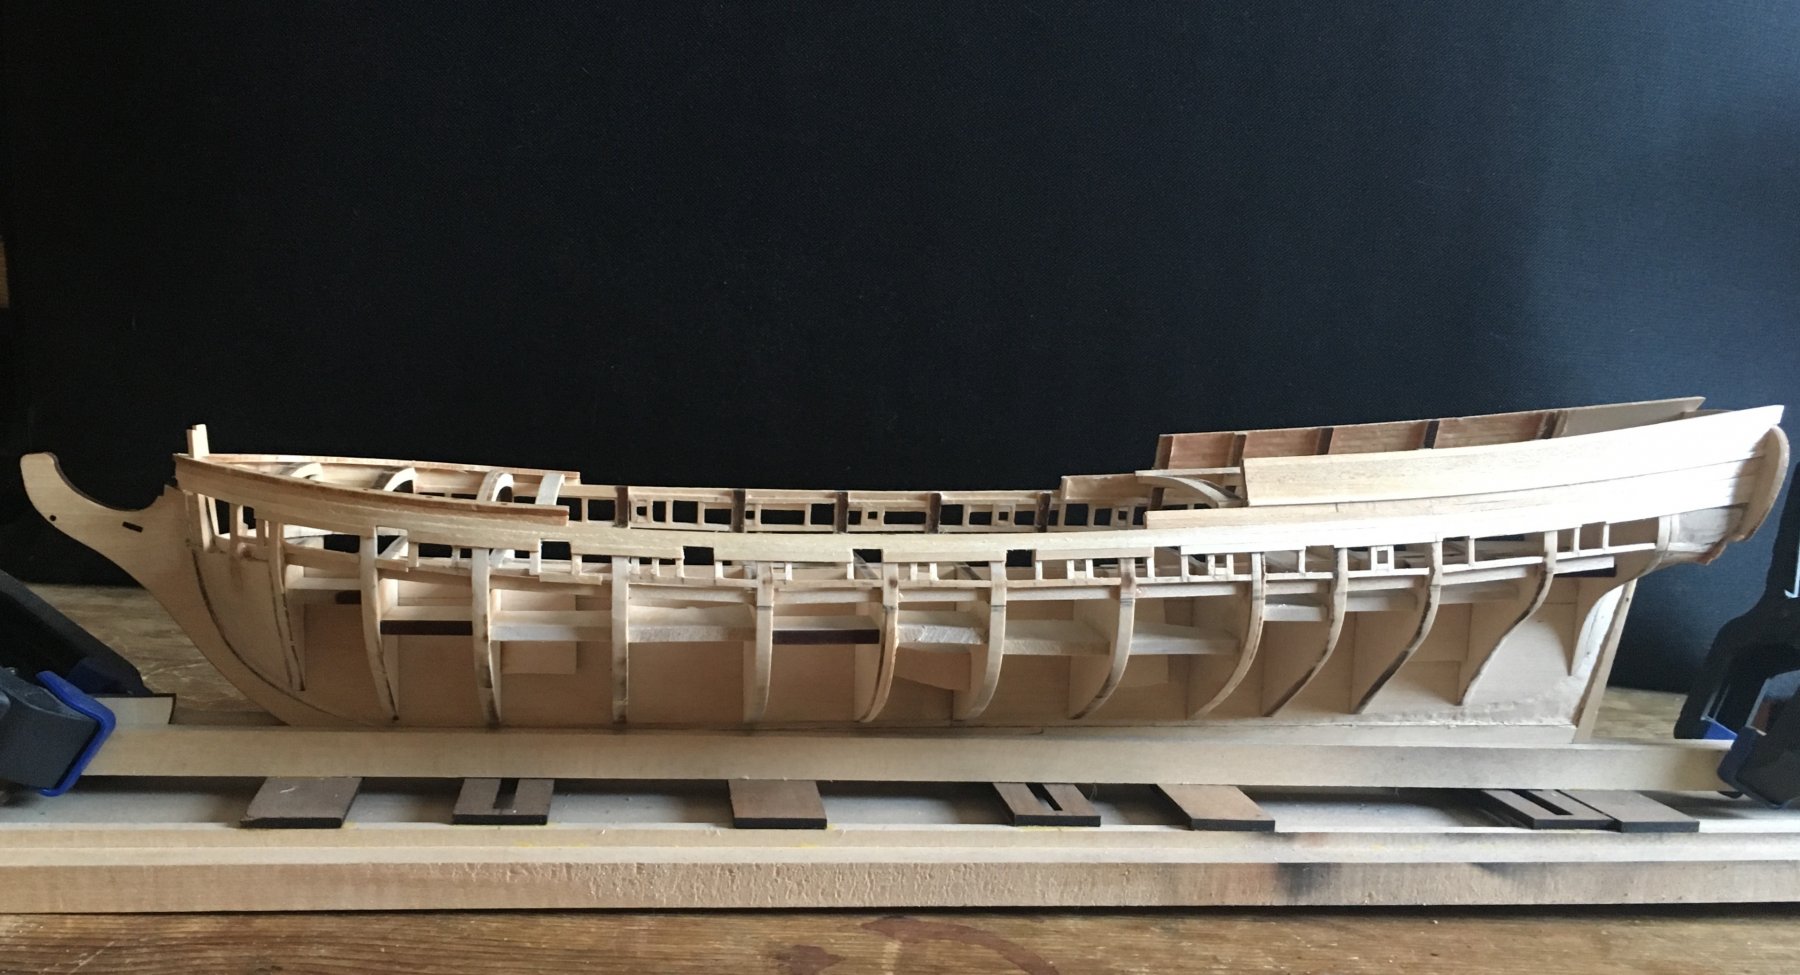
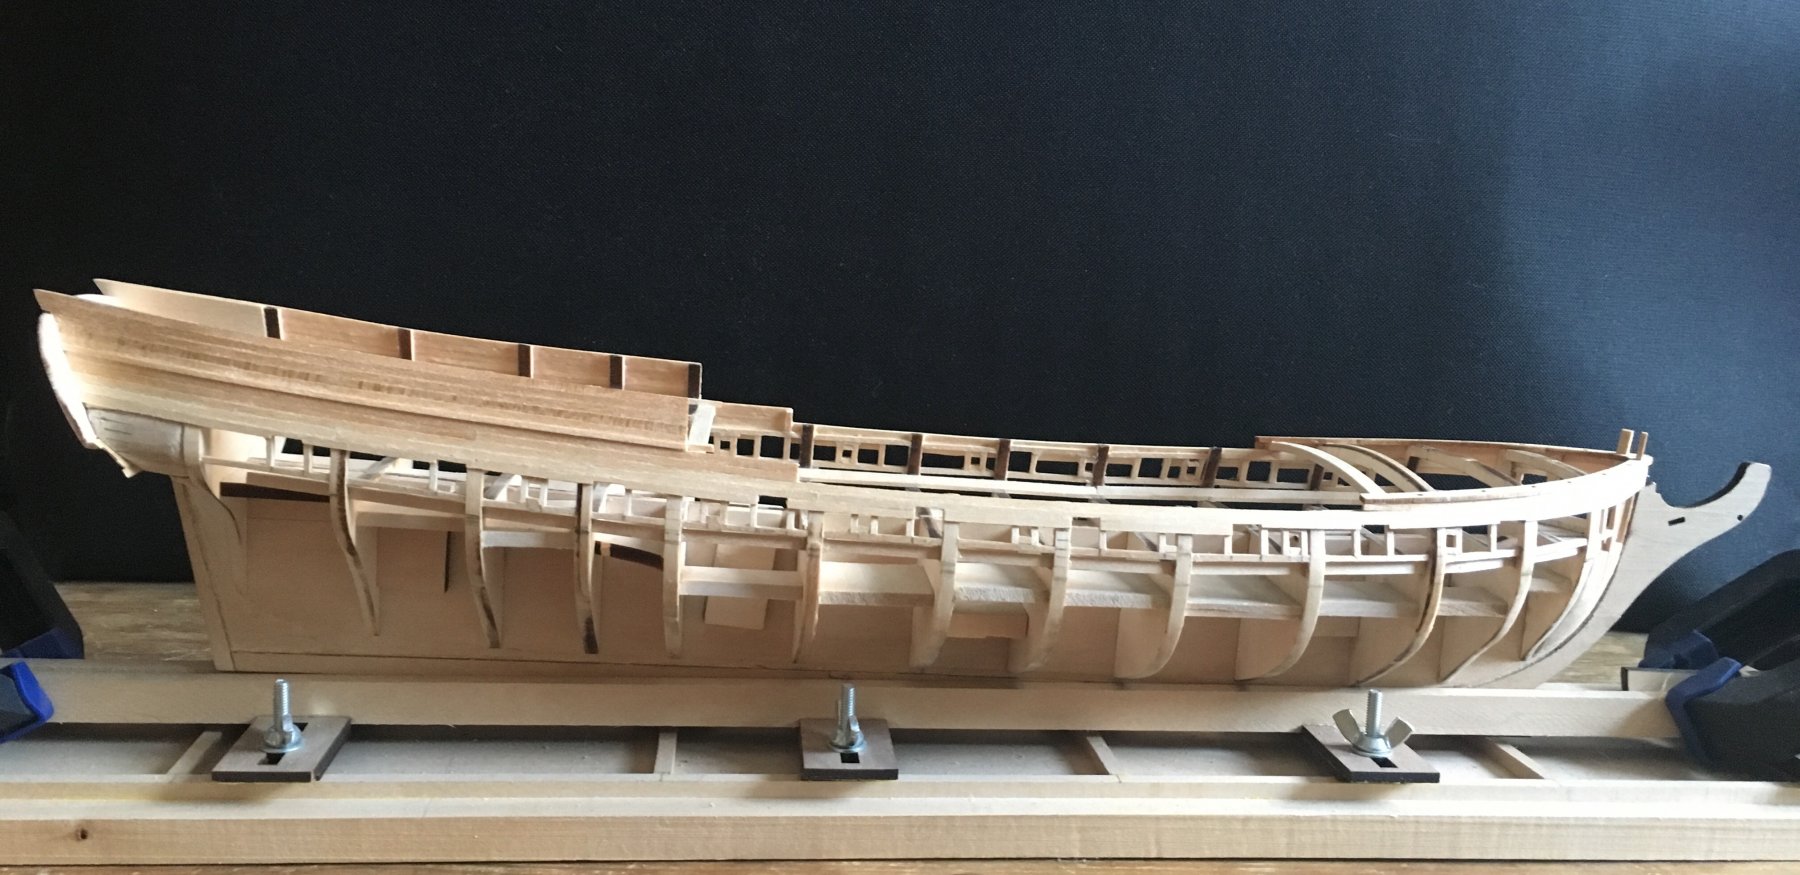
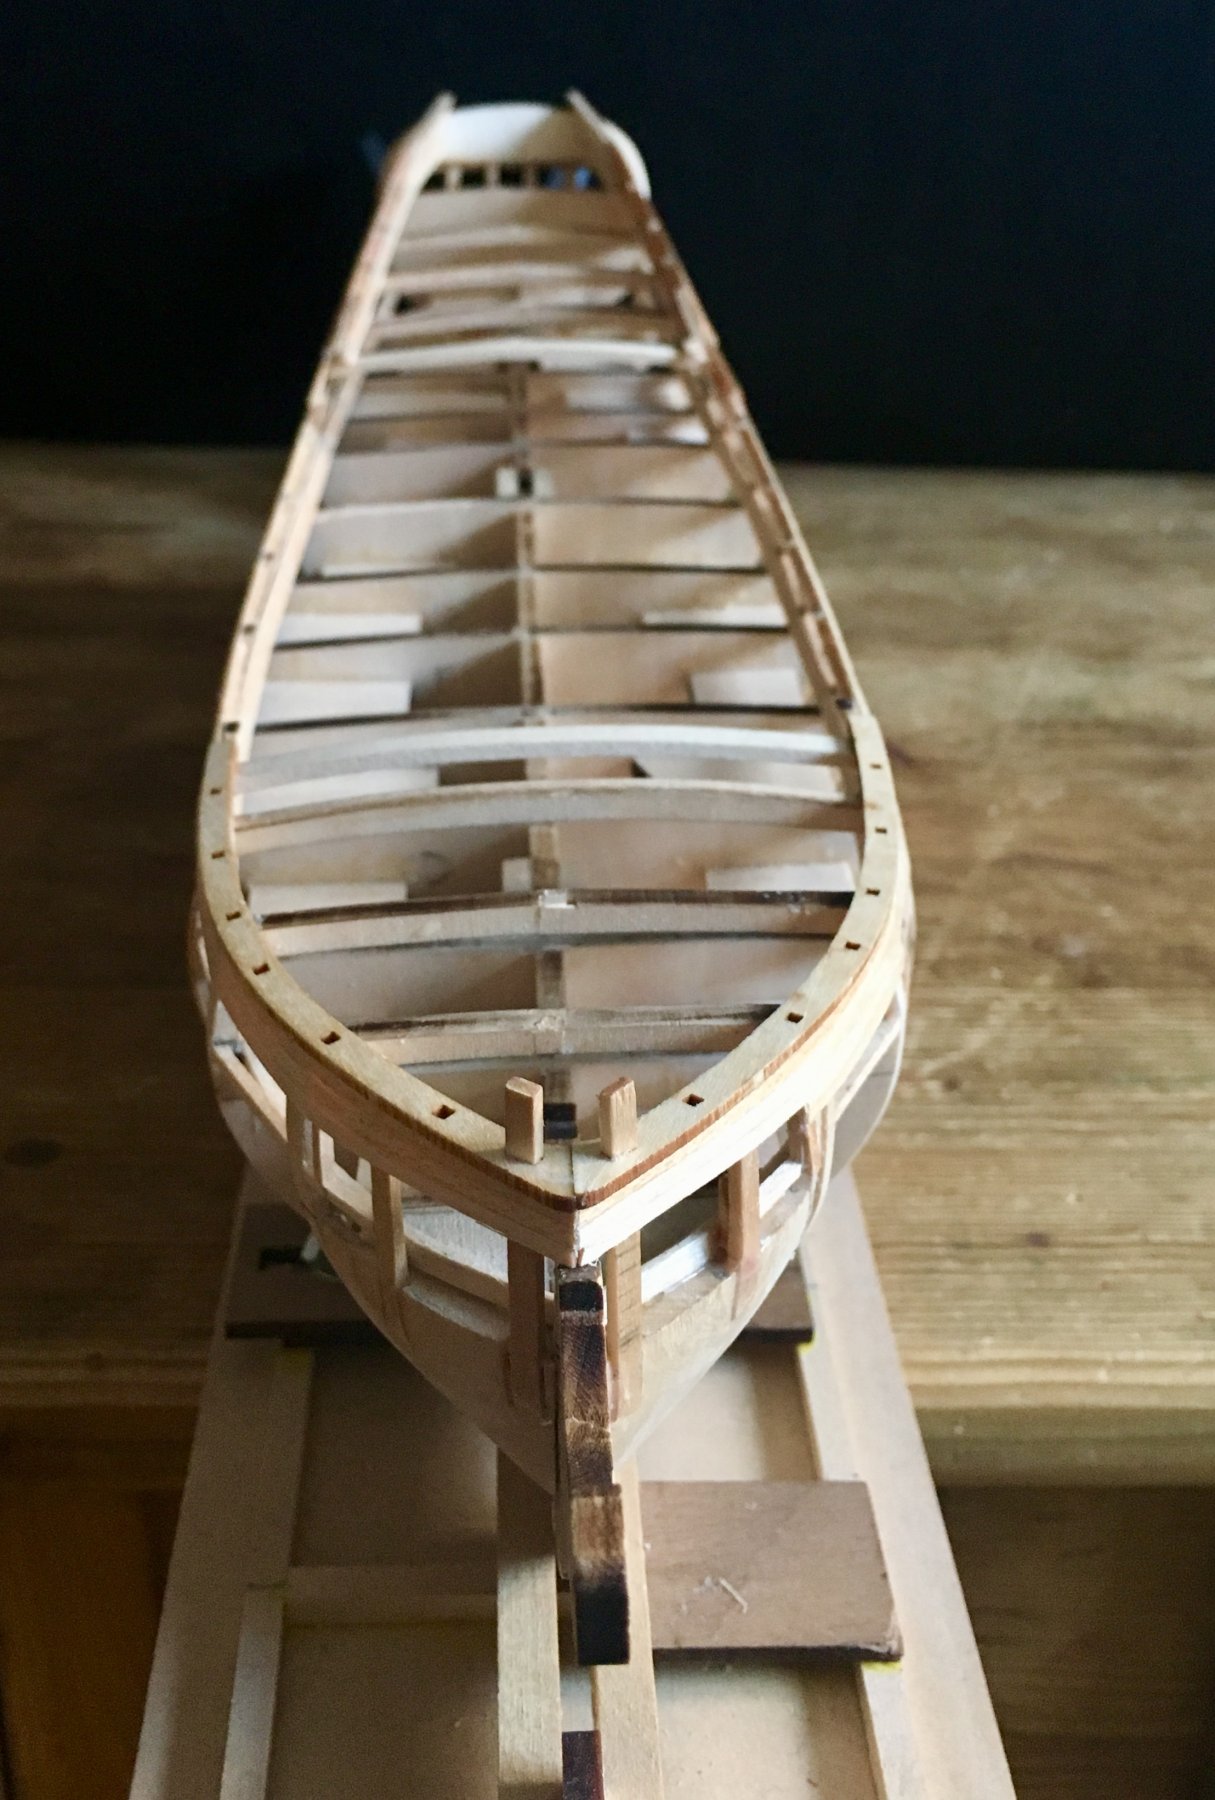
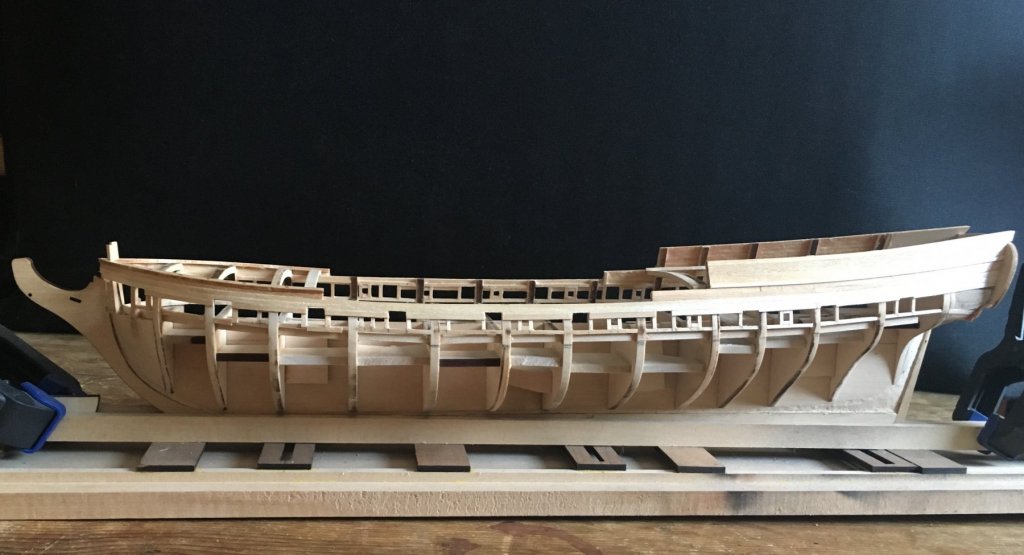
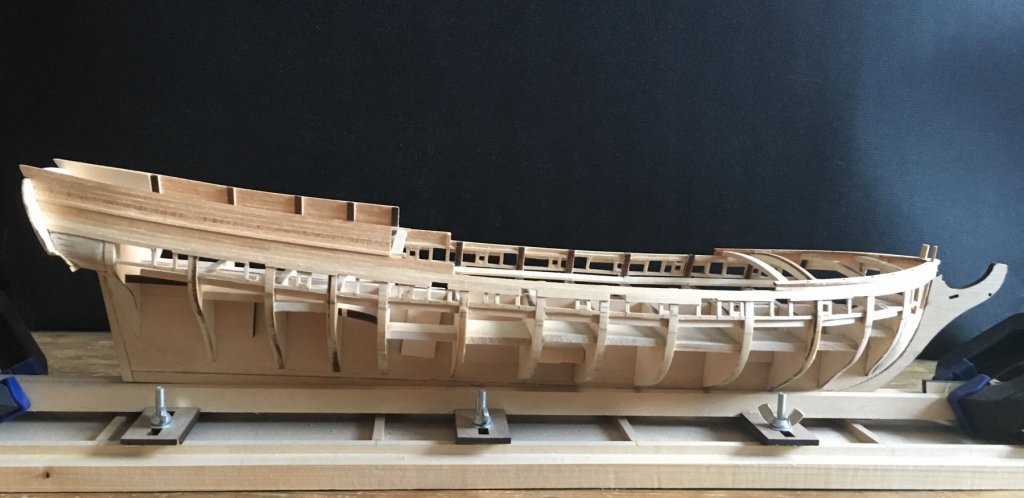
Planking started.

-
Here's a bit more


-
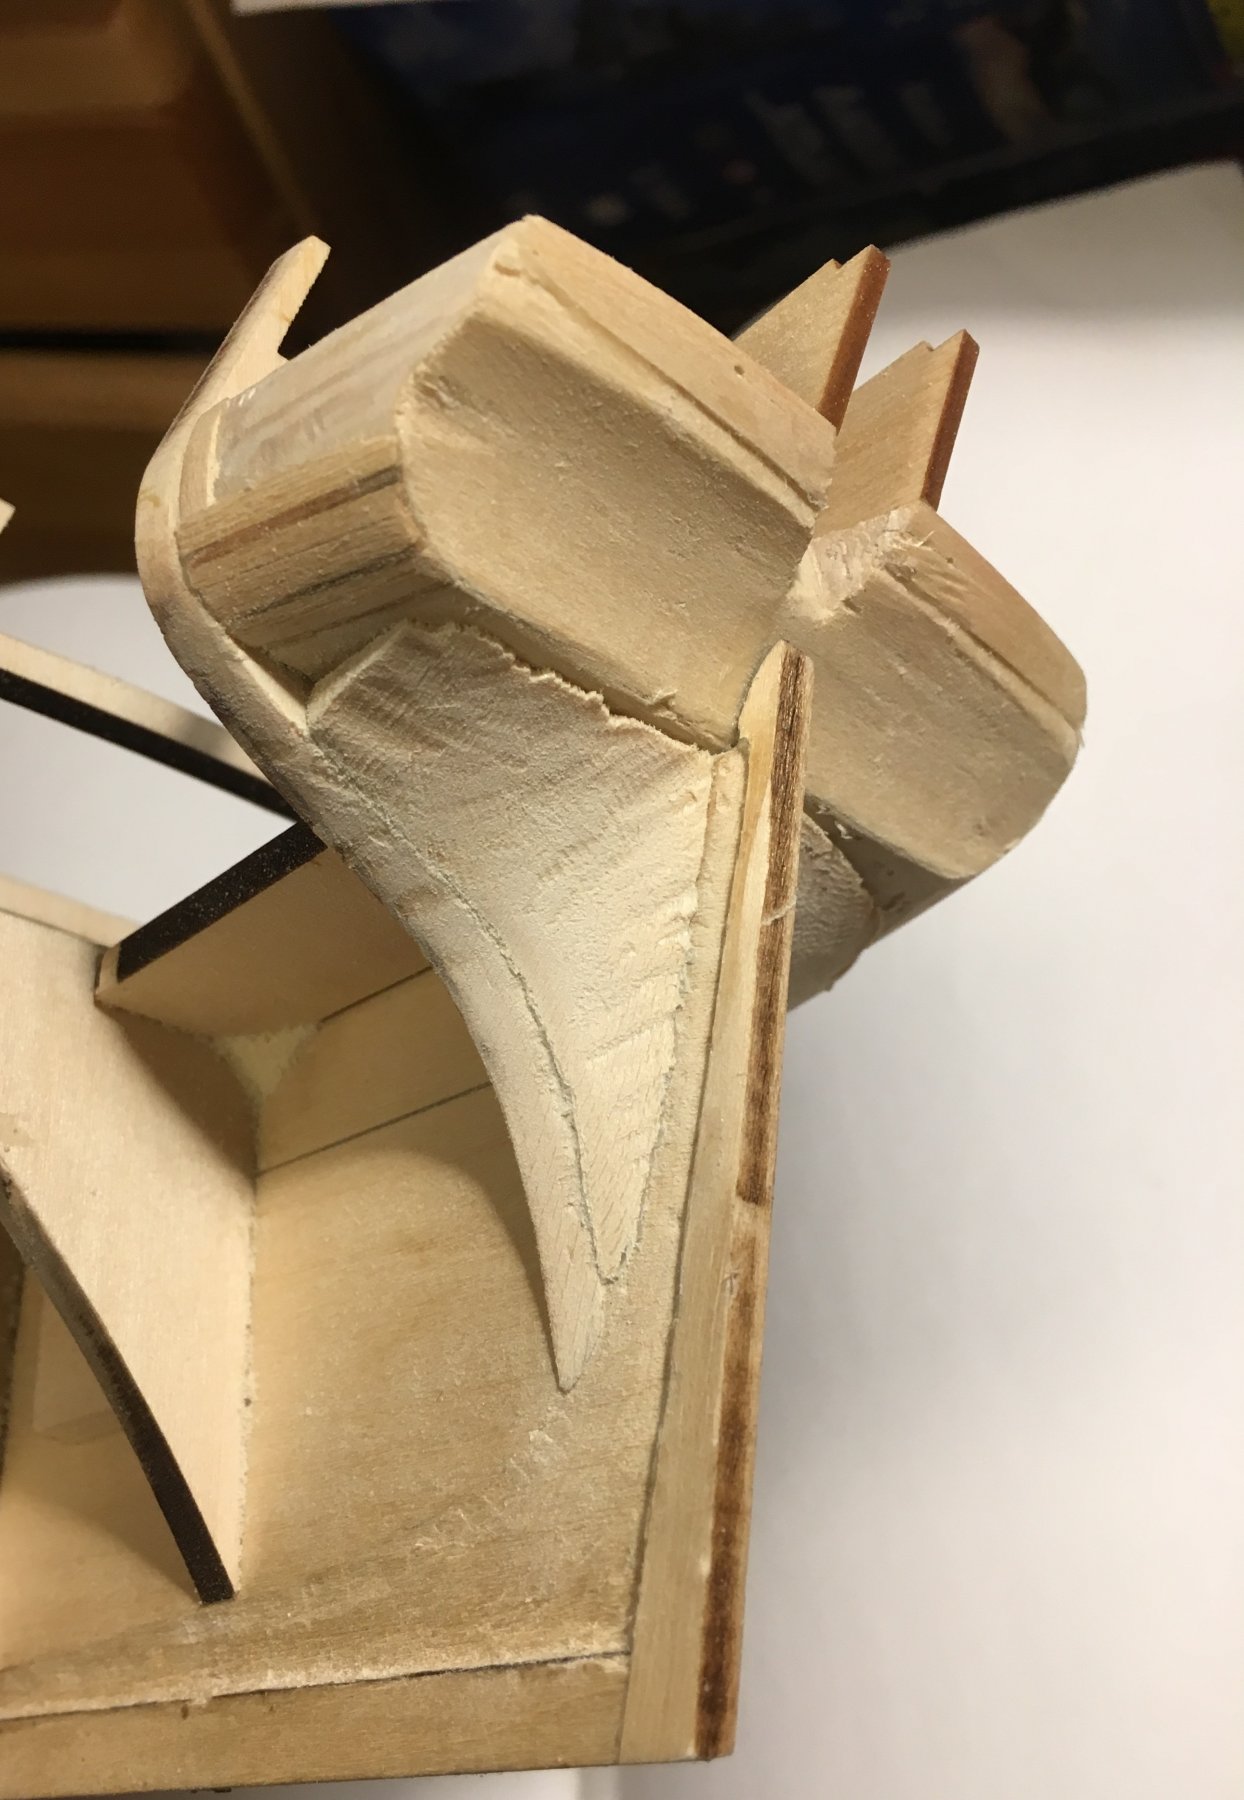
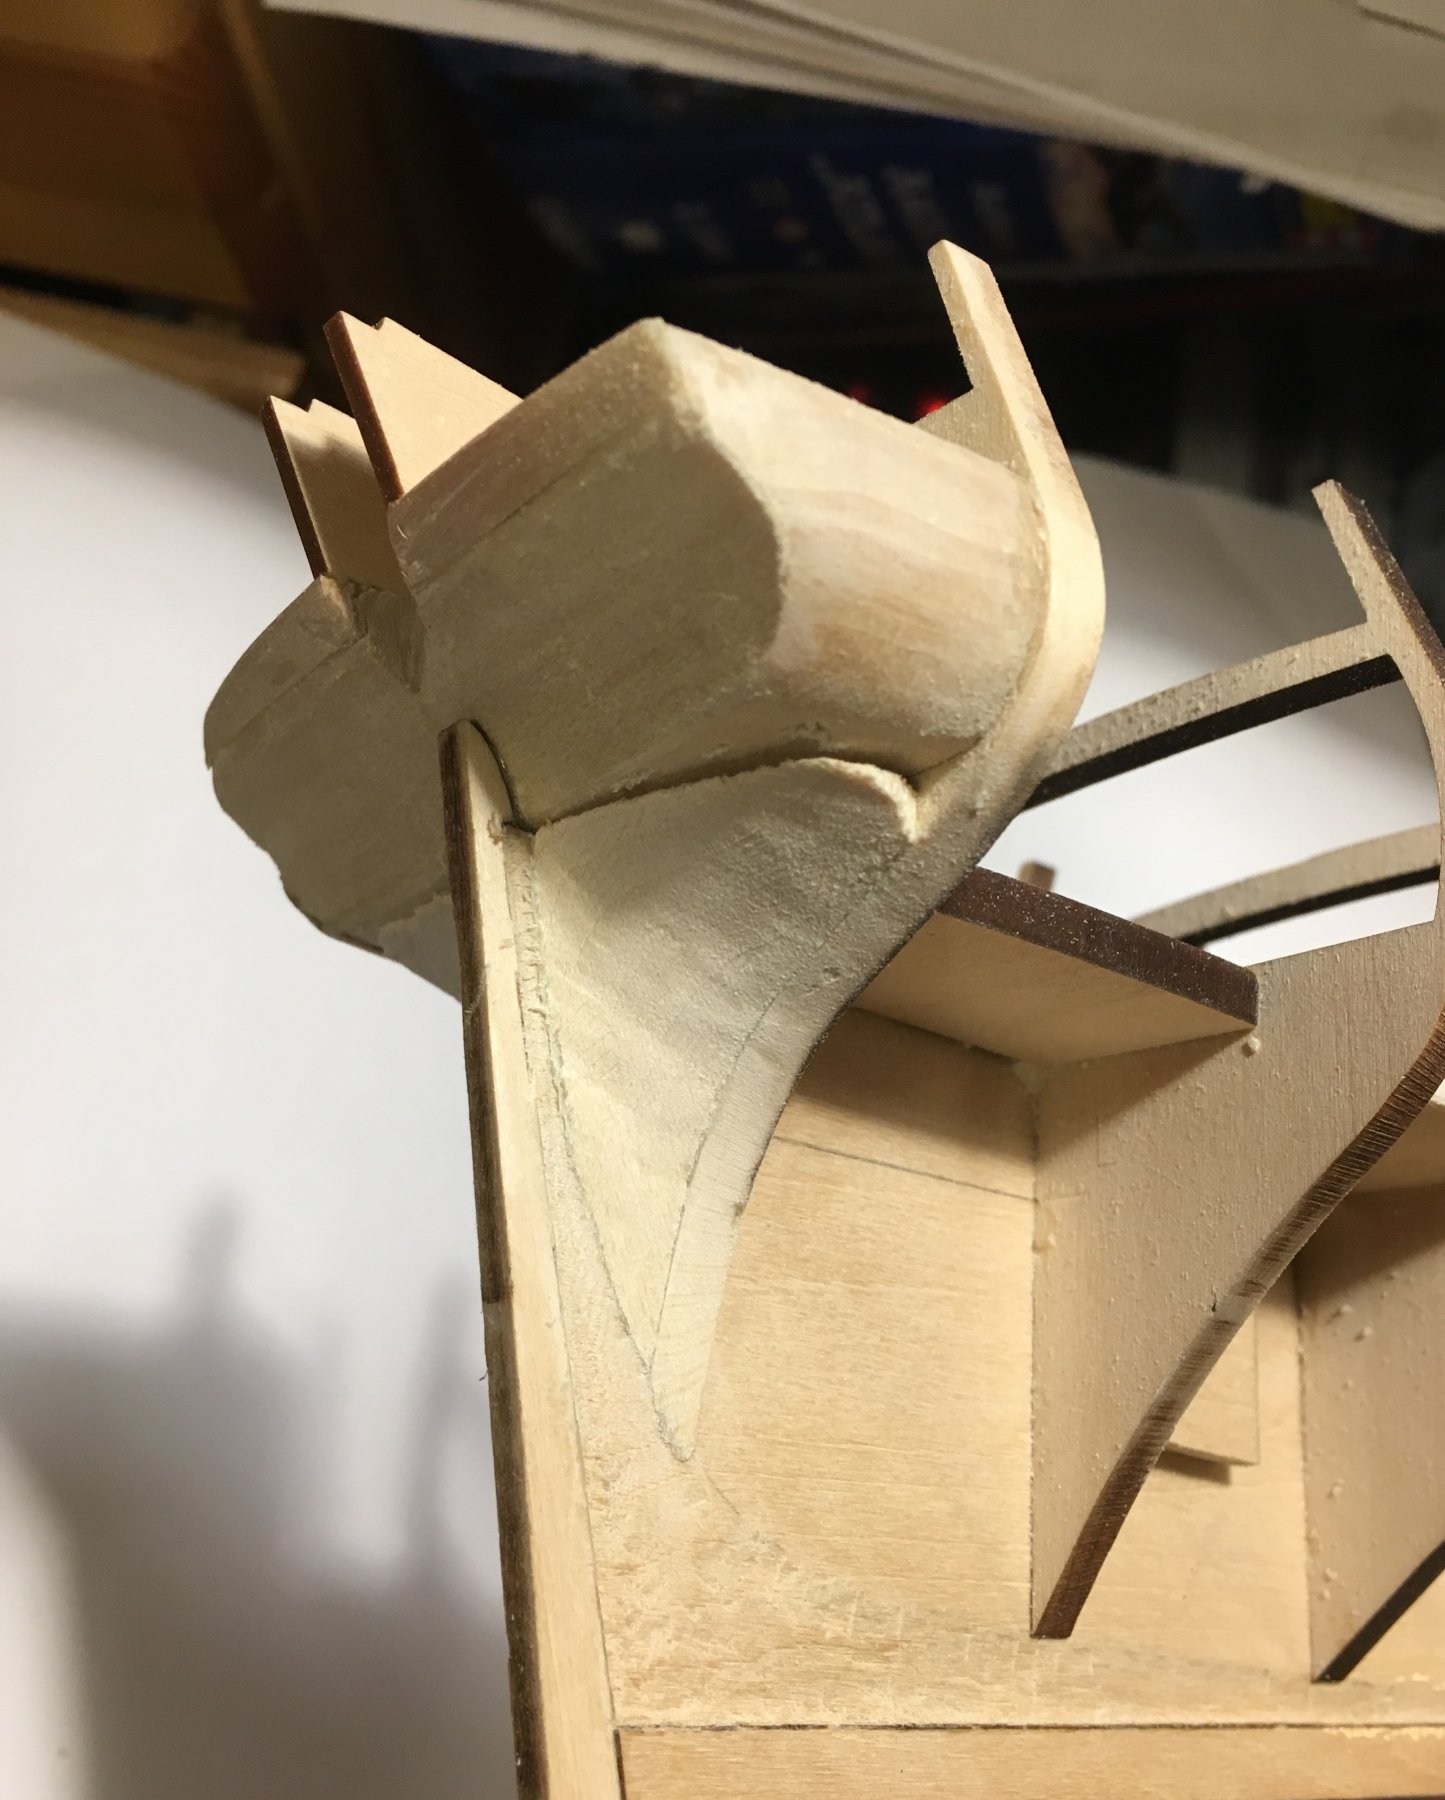
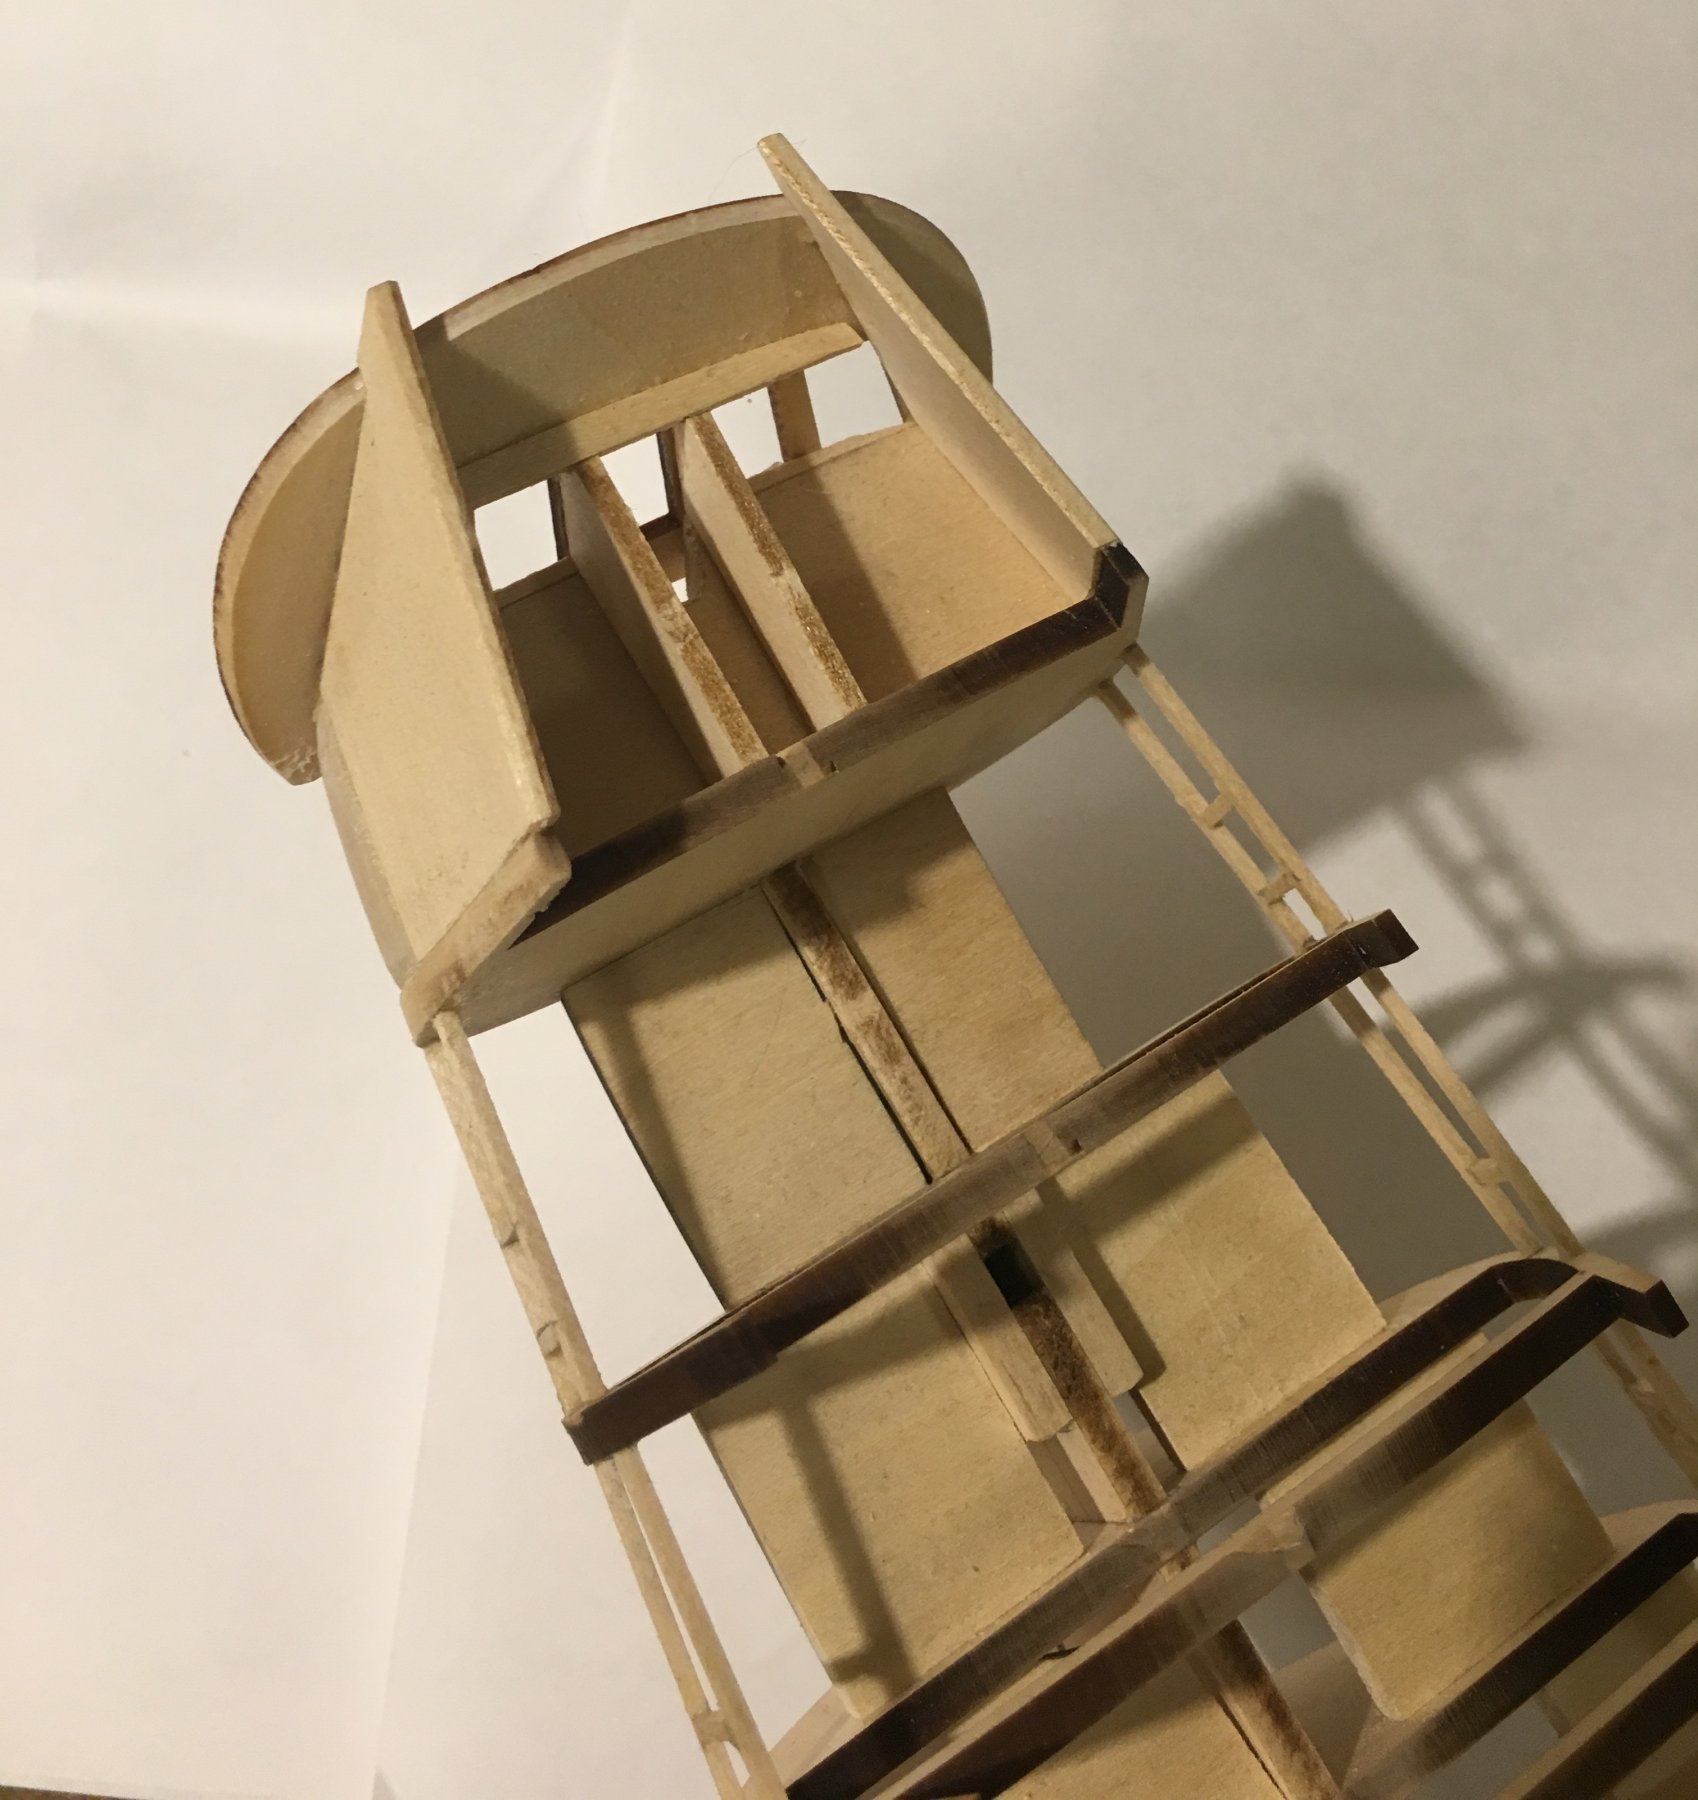
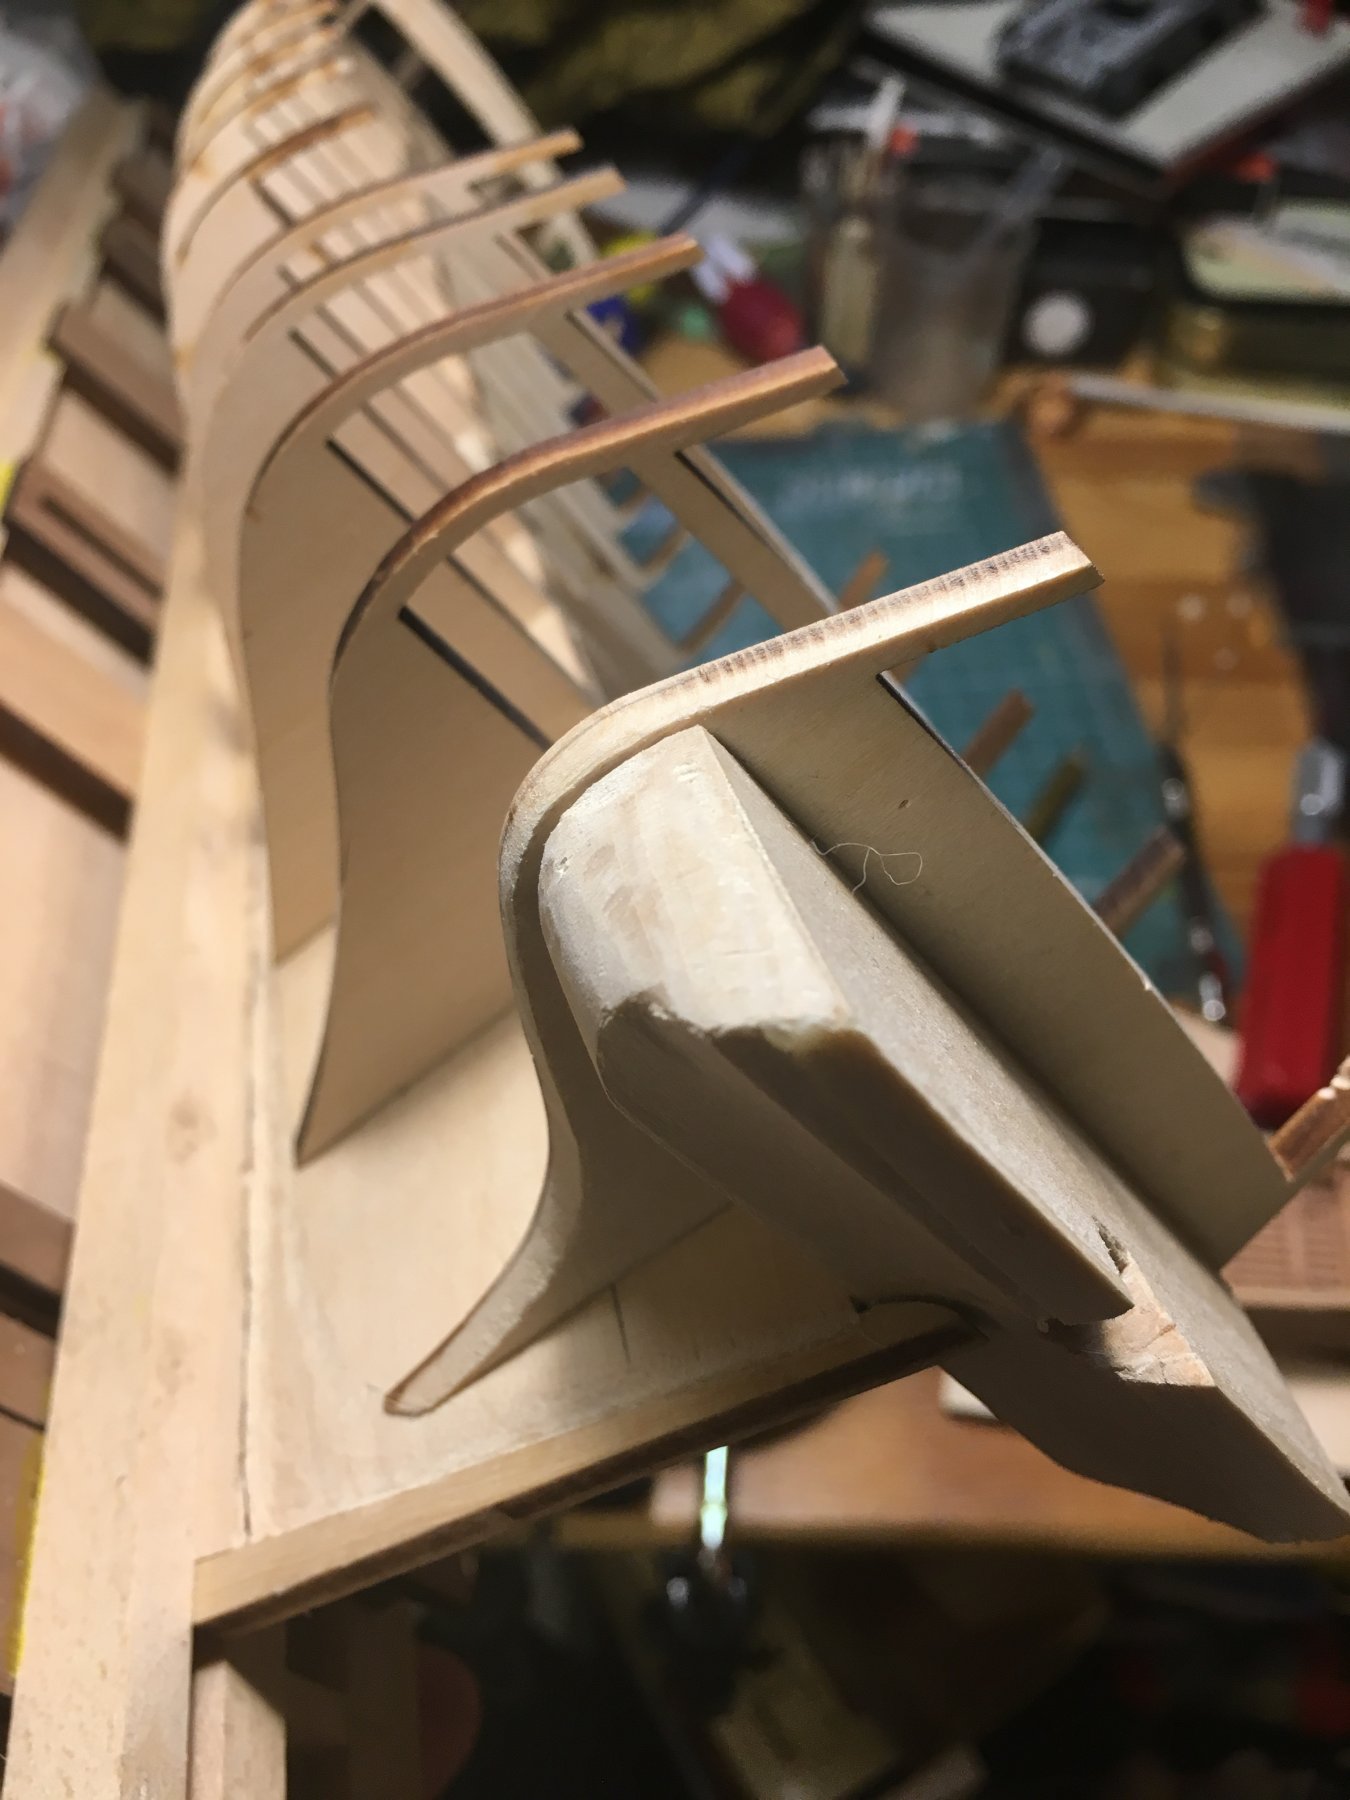
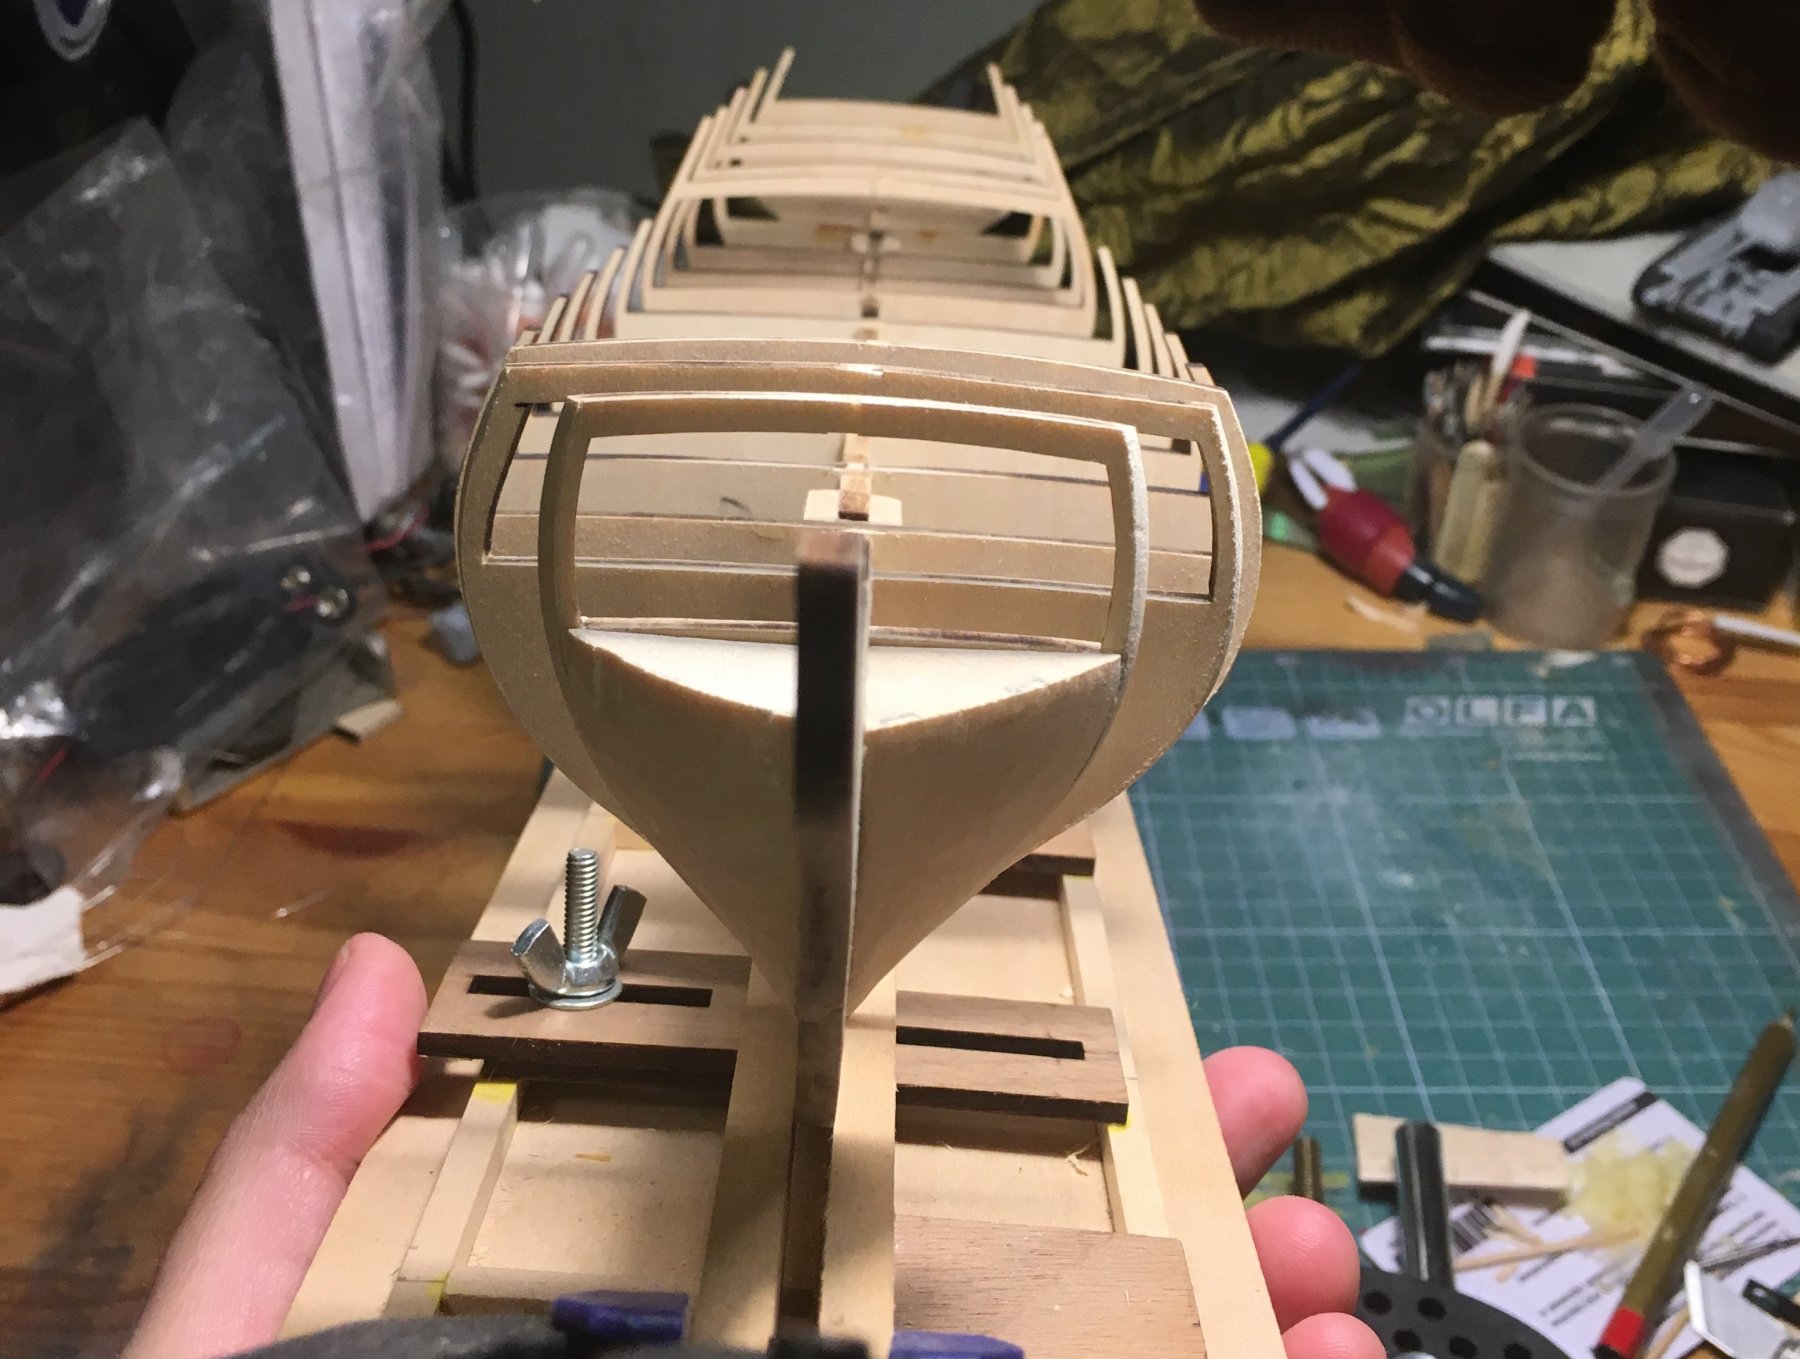
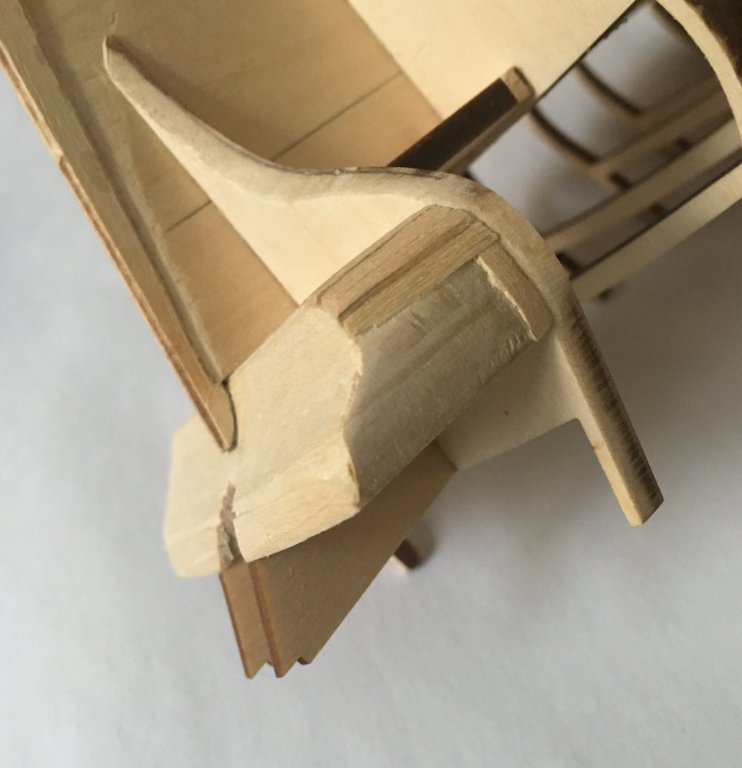
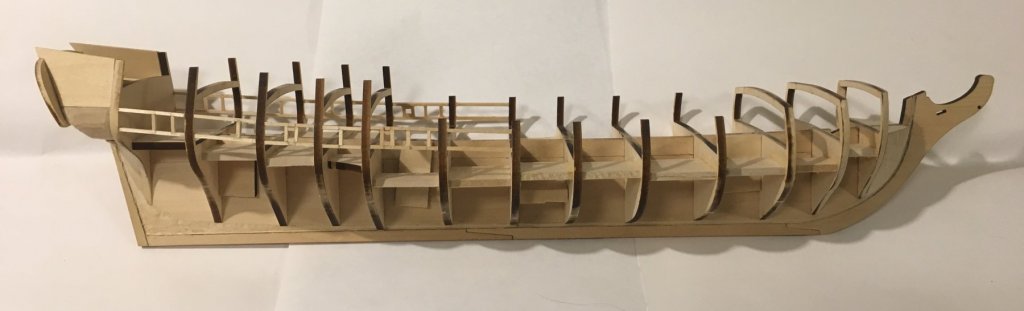
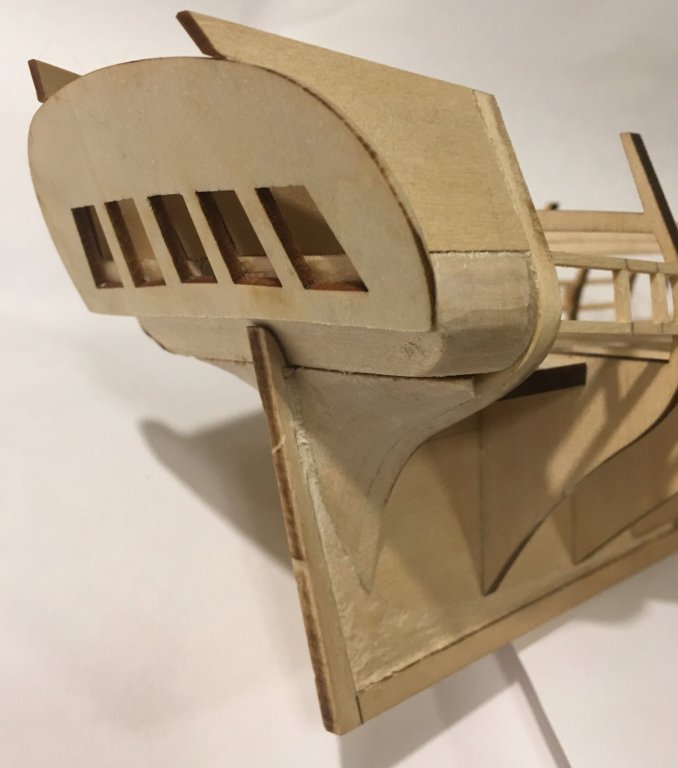
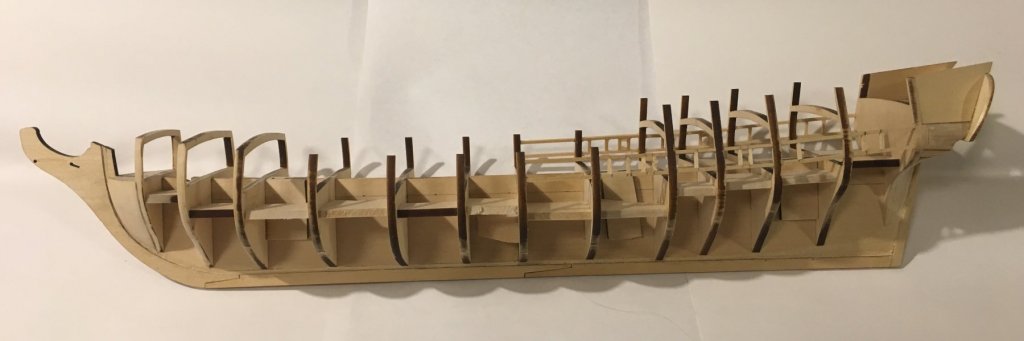
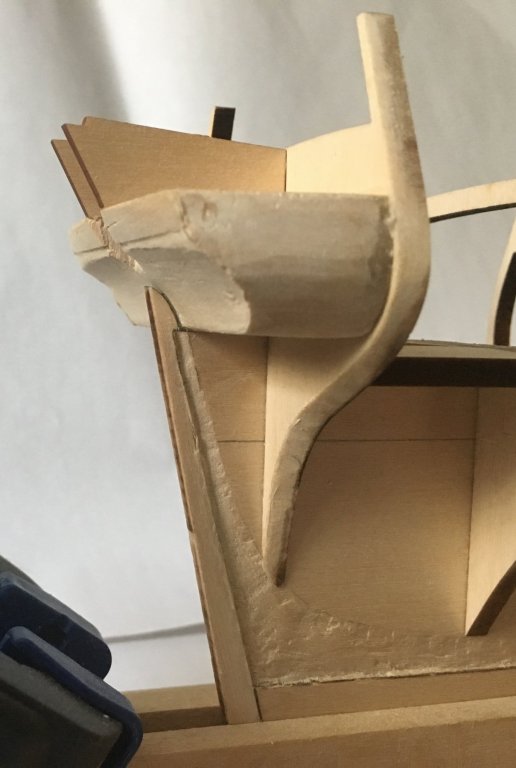
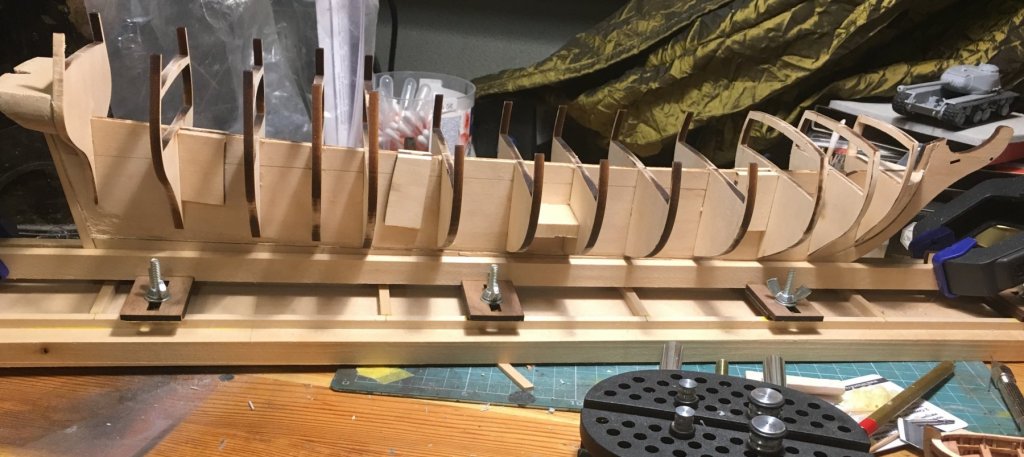
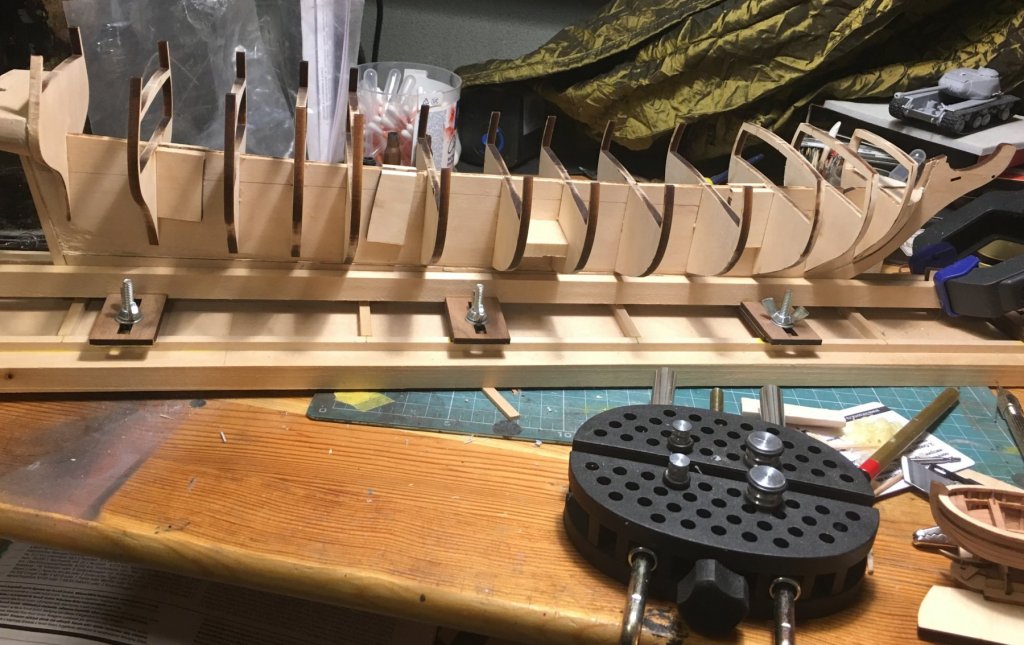
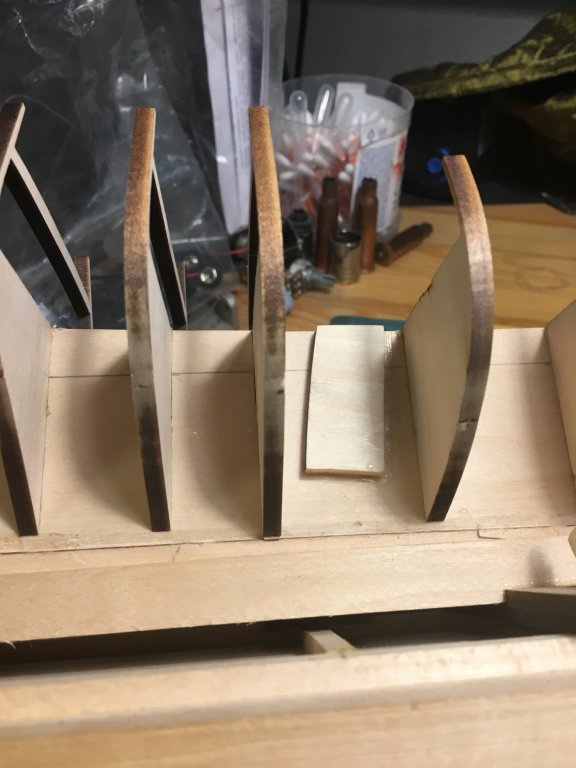
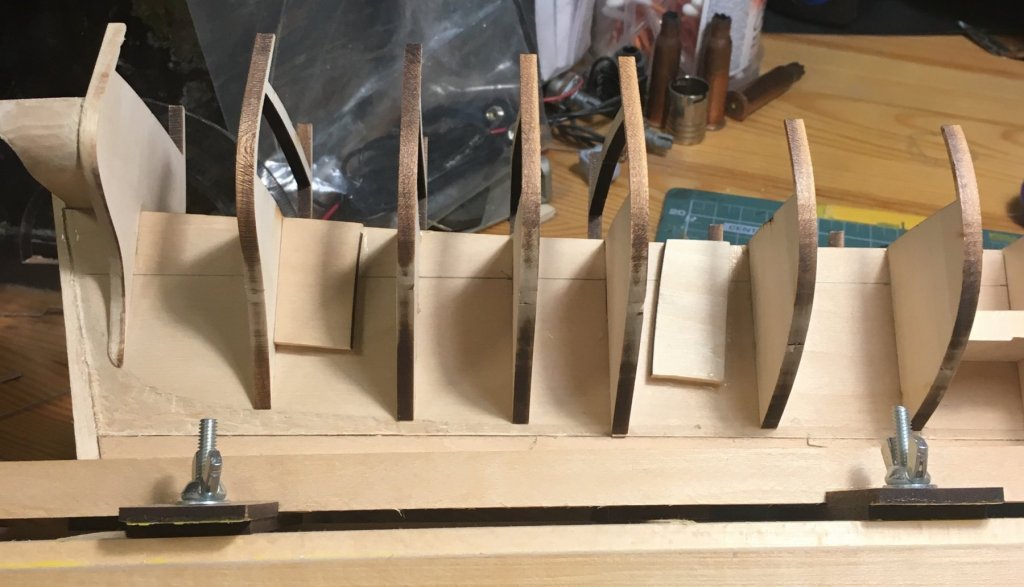
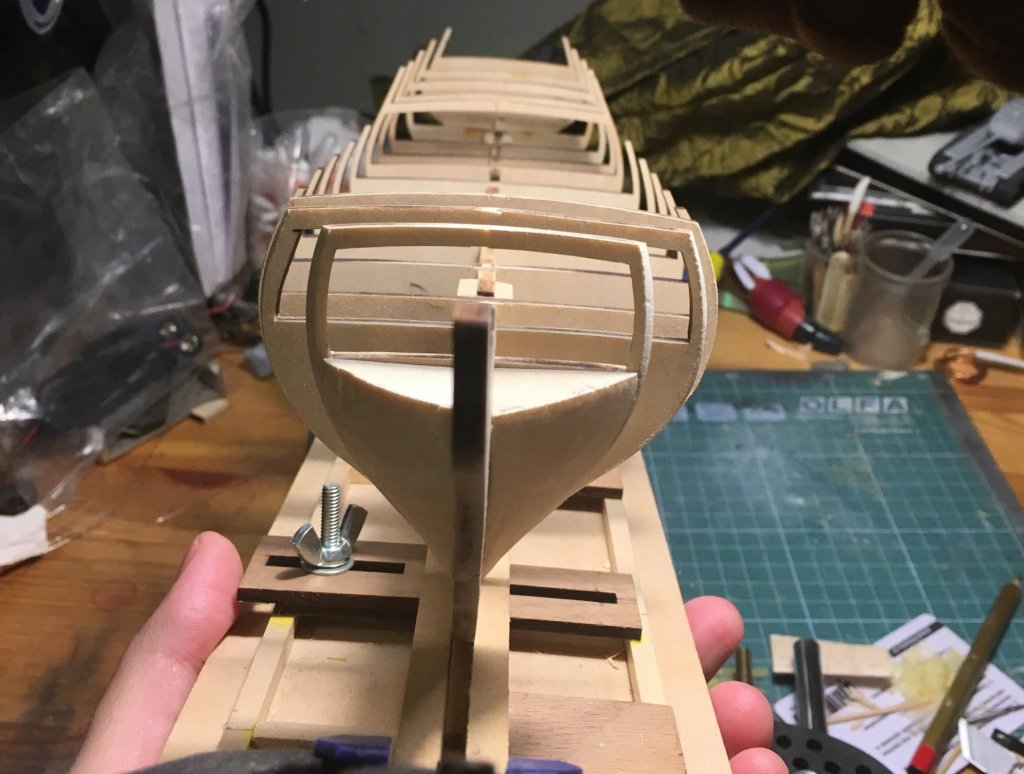
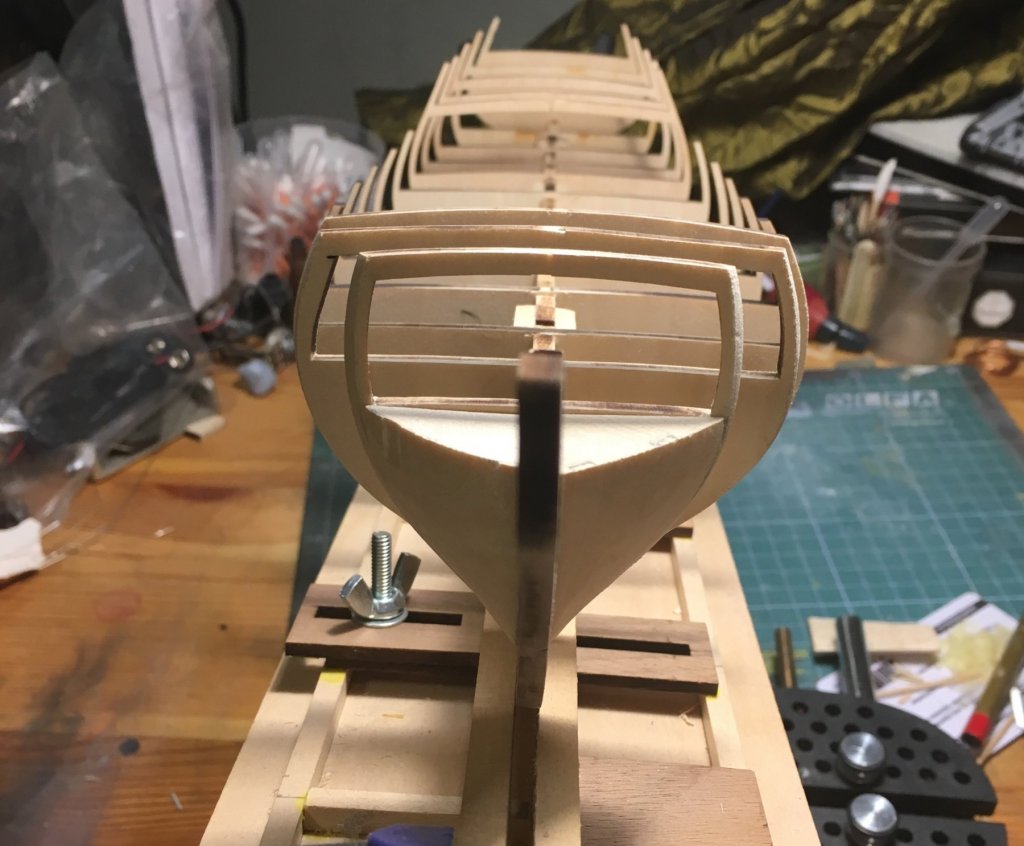
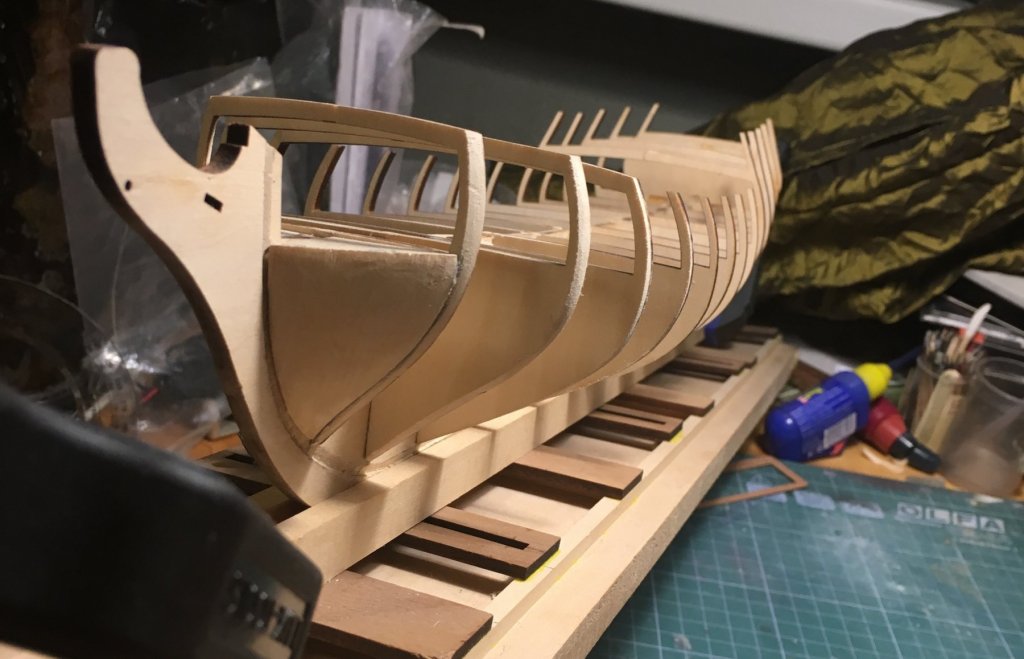
Greetings, dear colleagues! This is my first log on this forum and I'm happy to start publishing in such a great community. Now a few words on history of the build: I've bought this kit about 15 years ago and until 2017 it was laying on a shelf waiting for it's turn to be built. I've searched through all the logs based on this kit both here and in Russia to see what other people do with it. Sad to see that most builds are unfinished - I cannot say why, since in my opinion it's a very attractive prototype - a small ship-rigged vessel that looks like a frigate (from afar), scale provides an ability to detail the model a bit and it does not take too much space to keep and display. Well I opened the box (I like the box of my kit - the white one - with great polygraphy - better than those that they pack their models into these days) and first two moments caused a bit of puzzlement - instruction says to glue the halves of kiel frame and false kiel details and to cut the rabbet afterwards. Strange, but that works - I've done that exactly the way it's described in instruction and all went well! Next puzzle were the frames - I use the rule of measure seven times and glue/cut one time - and it saves me always - I've dry-fitted the frames according to plans and nothing fitted at all. I've said a lot of good Russian words towards "manufacturers who cannot cut a few well-shaped details with a laser" but then I've figured out to attach the frames to the drawings - and everything was clear: the letters engraved on the frames are wrong! So I've restored the right consequence of frames and there were only some cases of asymmetry of frames to deal with and the basic structure was complete. Now I'm in a process of planking and it goes very slow - about a strake per weekend 🙂 The thing that terrifies me the most - is planking of decks. I have an intention to make it right - with cuts into waterways in the nose part and with correct flow of planks but I still do not fully understand the theory of this process. So here are the pics of process form the beginning until present moment:

-
cdogg keep up nice build ! I agree with Vivian Galad - better try to use wood instead of castings - it's not so difficult but dramatically improves the overall look of the model. On my Scottie I used self-made wallnut columns and racks ( after honest attempt to use kit-supplied parts has failed ) and I plan to make wooden belaying pins as well. Best Regards! Dmitriy
- 98 replies
-
- 1
-

-
- baltic ketch
- corel
- (and 1 more)
-
Hi again! Yep, the drawings in manual are smaller than real details (( My pics are here : http://gallery.shipmodeling.ru/main.php?g2_itemId=13999 Well, I must confess I've used a cast detail ;-) I was very impatient those days ! Nevertheless, I think it won't be too difficult - You'll need callipers and some scrap planks. The transom detail has a frame in it's base - so take the measurements of all ribs and make a frame of same size. You will lack decorations - but You can always add them later made from poxypol or Tamiya Epoxy Putty. Or You may even try to carve them from balsa.
- 98 replies
-
- 1
-
-
- baltic ketch
- corel
- (and 1 more)
-
Hi, Casey! I am currently building this kit as well - started in 2005 ;-) Now I am at the stage of rigging If I were to start again, I would throw out all the castings and scratch-built the transom. Don't use cast deadeye chain plates - better make them from wire instead. Also check and double check the hull lines as bulkheads in my kit were beyond the border of Good and Evil - only one or two of them were symmetrical - had to add a lot of shims and still haven't done the hull job well... Adding balsa fillers between bulkheads can be of some sense as those little blocks glued to the deck didn't help in my case. - the deck is very thin and it does not prevent the whole frame from getting twisted. Anyway, I wish You best luck with this project and would follow it. If You have any questions on the Scotland kit I would be glad to help. Best Regards Dmitriy