EinsteinTaylor
-
Posts
95 -
Joined
-
Last visited
Content Type
Profiles
Forums
Gallery
Events
Everything posted by EinsteinTaylor
-
Ended up getting the FL55 laser to go with my Genmitsu CNC. Amazon had the laser for about $150. This is just a dry fit while I’m playing with the sizing and spacing but I think I’ve found a solution that is going to work.

-
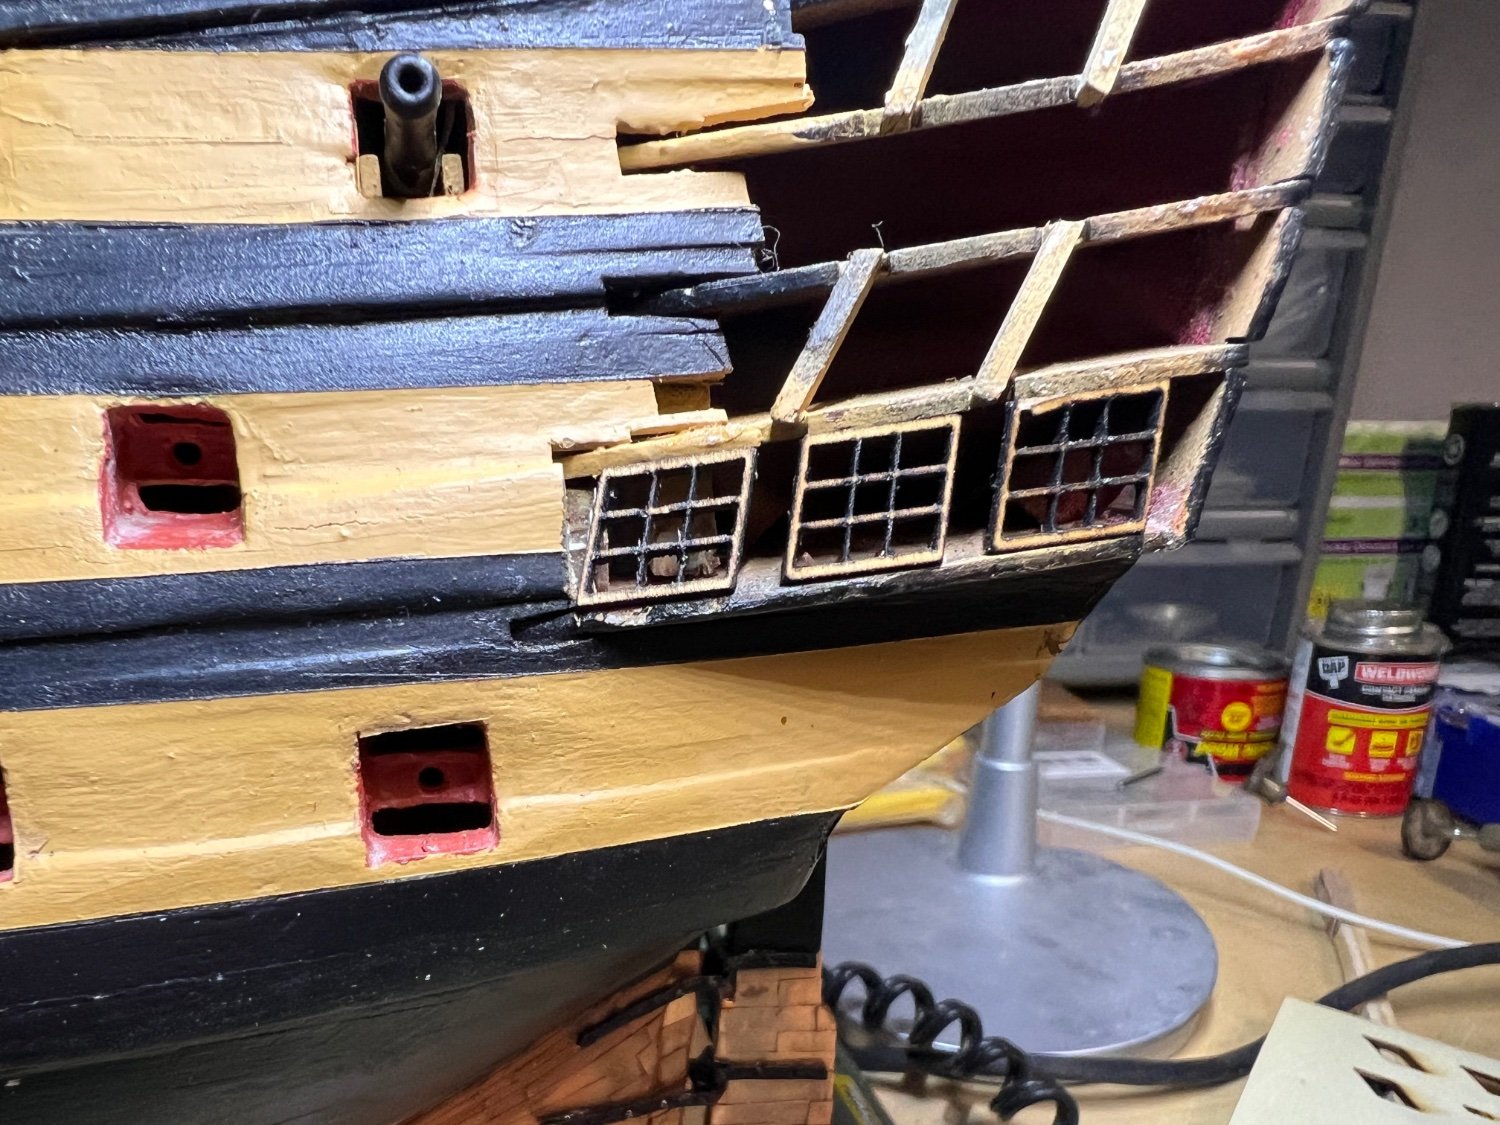
I’m not sure if this is the best section for my question so please feel free to move or point me elsewhere if need be. I have been building the Mamoli Victory kit on and off for several years now and I’m stuck and looking for advice. Through a couple of moves I have lost the little paper window kit things that they intend for the stern gallery windows. I have no intention to use those but wanted to use them as a template for making something else. Now that Mamoli is no more I can’t source those and even if I could I’m not sure I’ve got the hands to craft proper windows. I'm wondering if anybody knows where I can source aftermarket windows for this kit. Laser etched, 3D printed, anything like that would work. Or any other tips somebody might have. I’ve been stuck on this for a while and would really like to push this kit over this speed bump.
-
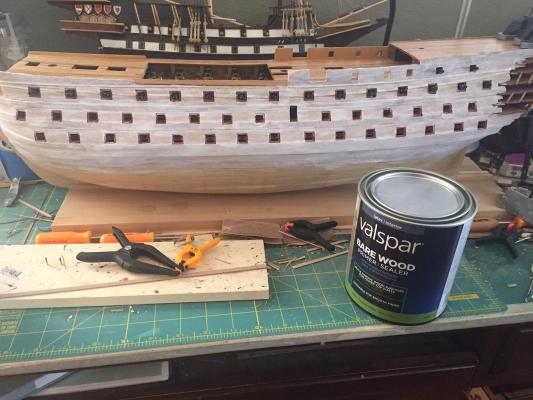
Priming the hull
-
I haven't actually disappeared. Between grad school, a new baby, and a new job, my time had been limited. The baby is now a year old, and my masters degree is finished so I'm back at it and of course seeking suggestions. I have finally finished the second planking above the waterline. Currently I am filling and then going to sand everything. My question is at what point do you recommend painting the hull? My thinking right now is to do the copper plating first, and then mask and paint before starting work on the bow and stern gallery but thought I would ask here first.
-
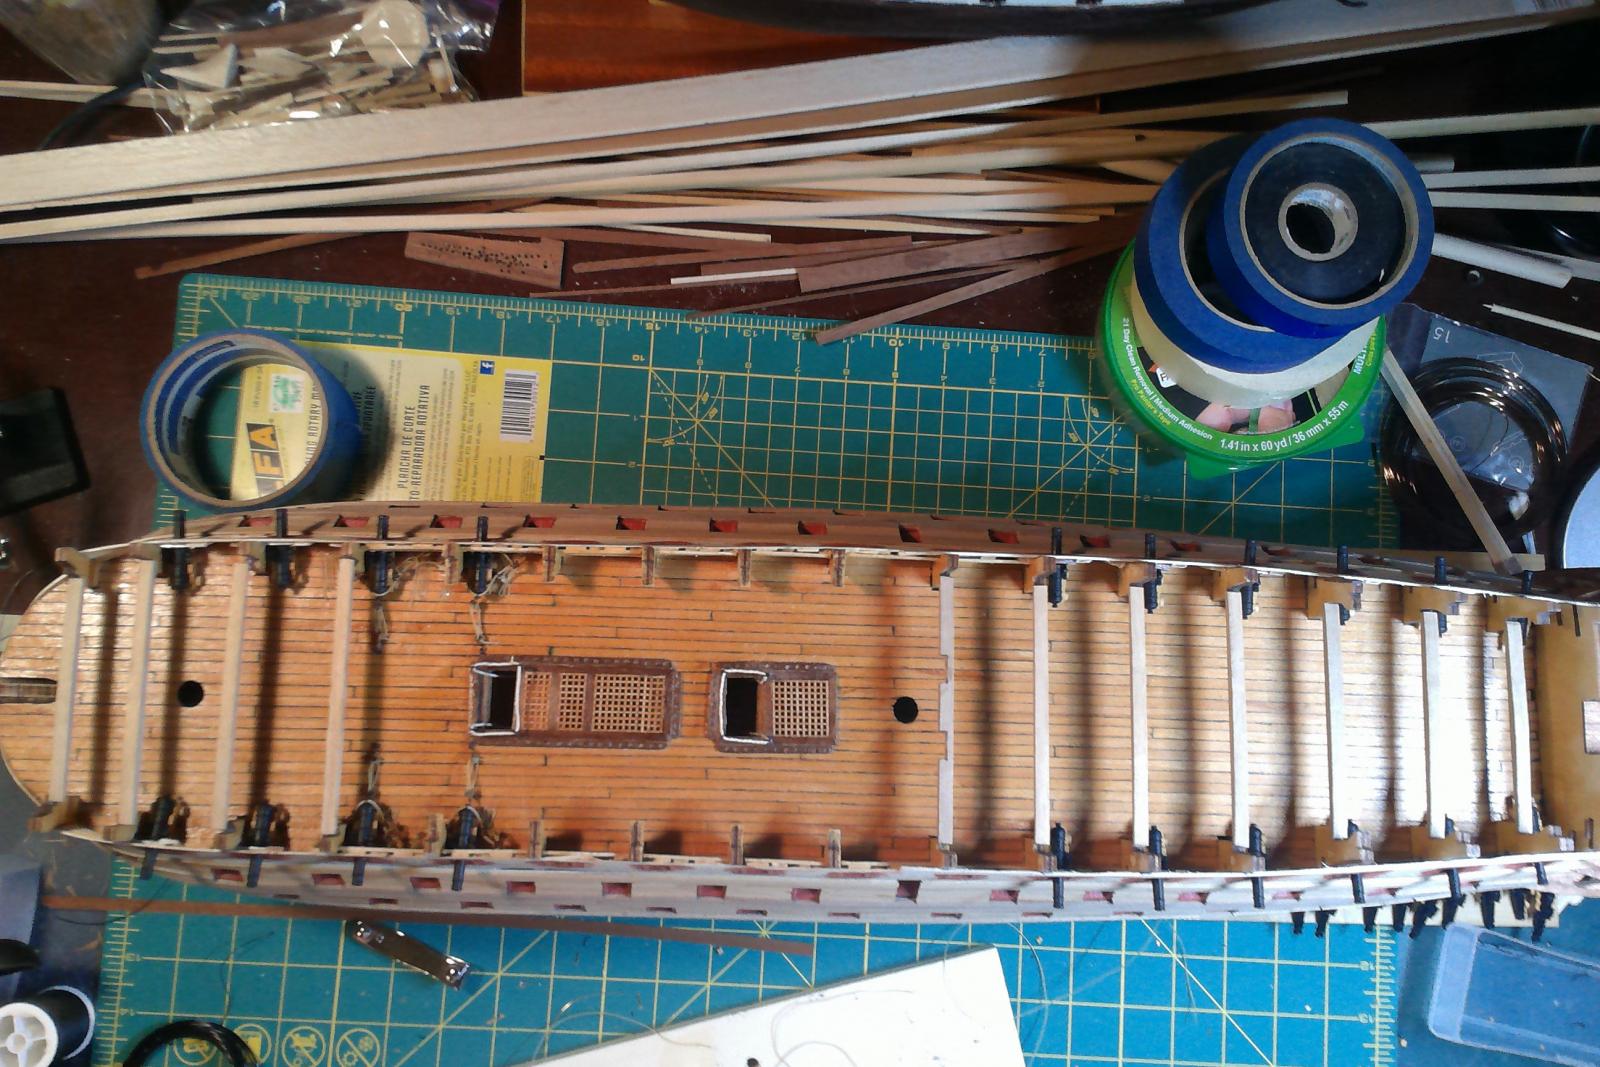
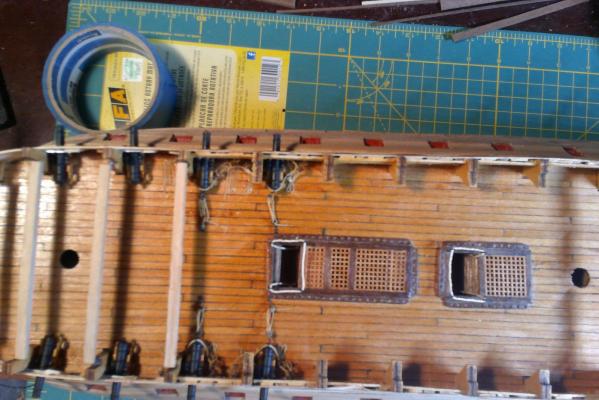
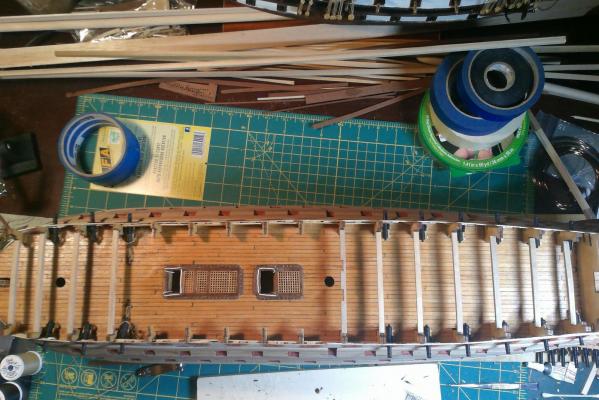
Still making progress slowly but surely. Don't have a picture right now but last night I finally finished all of the first planking for the entire hull. I have the quarterdeck and poopdeck glued on(making sure to place the guns that are covered up first). I'm about 70% finished with second planking so I'm coming very close to a major milestone.
-
Thanks! I was almost certain that would be the answer but wanted to check with those that had come before.
-
Question about planking the quarterdeck. The instructions are showing the quarterdeck not being planked until after the poop deck is on. That seems like it would make it difficult to plank and sand evenly. Should I plank that deck before placing the quarterdeck or will that cause me problems later?
-
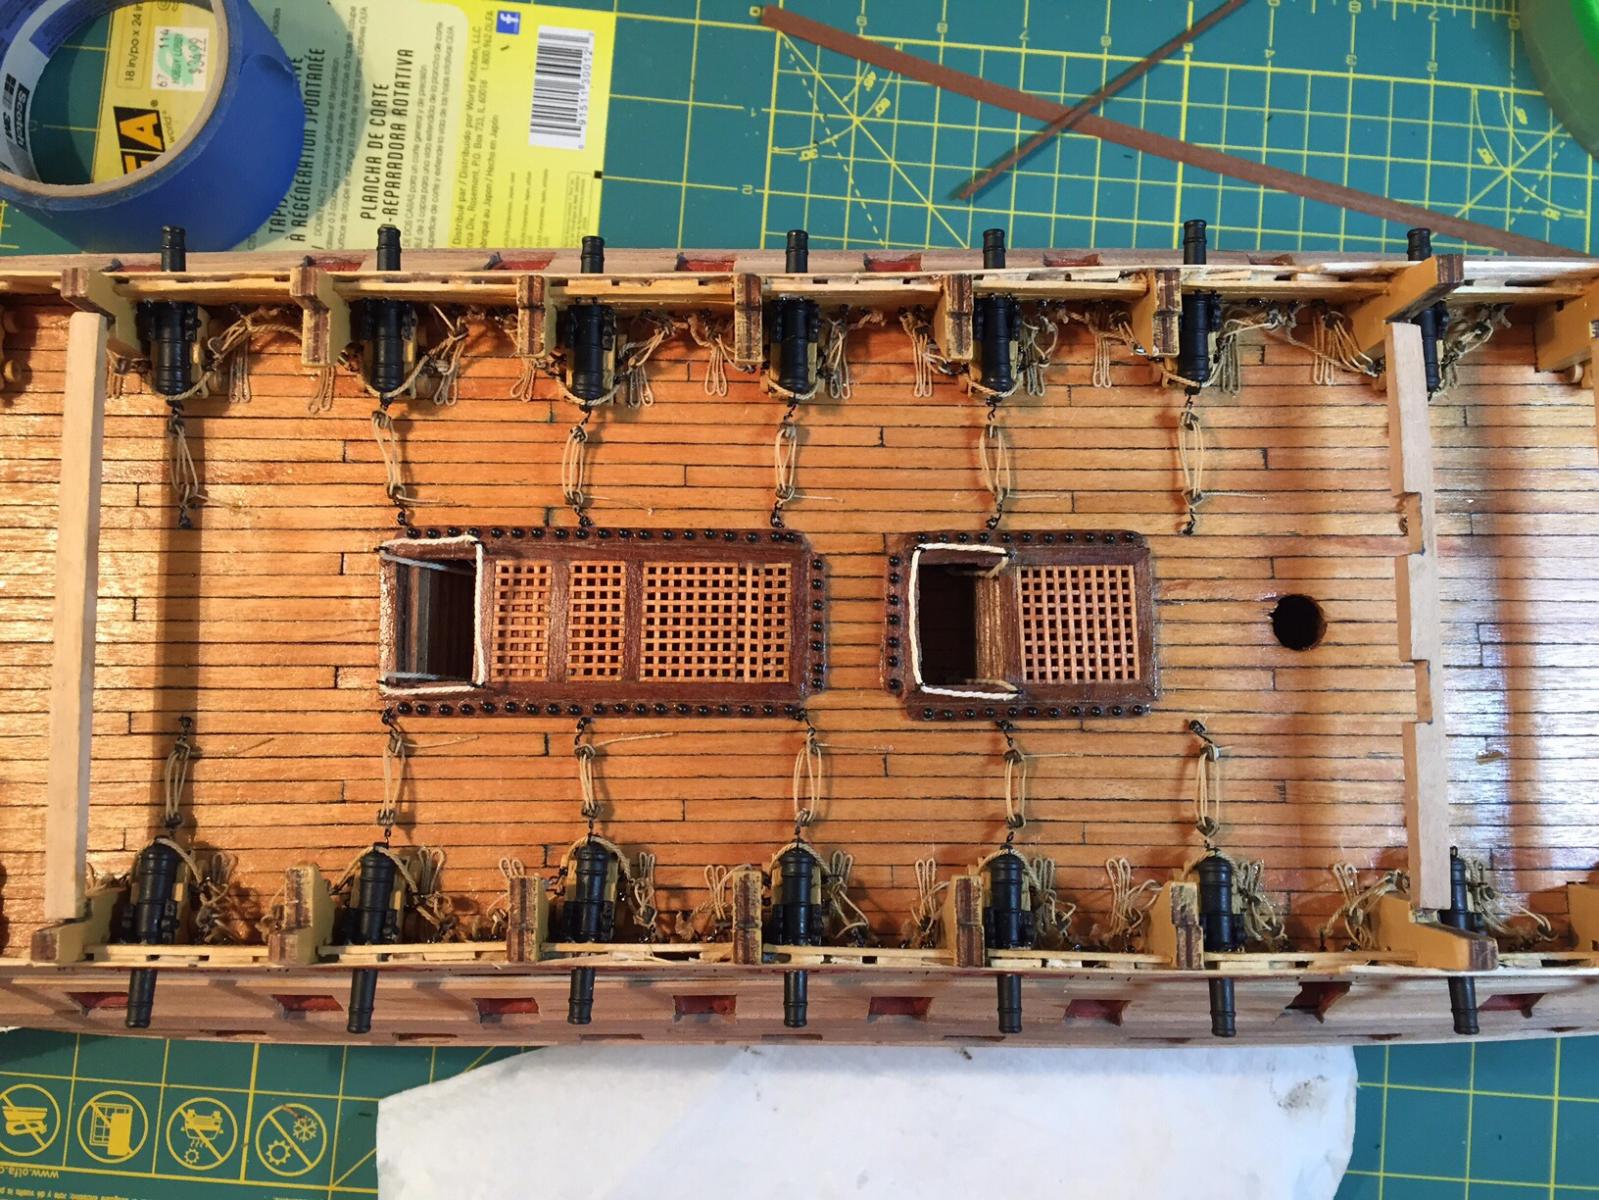
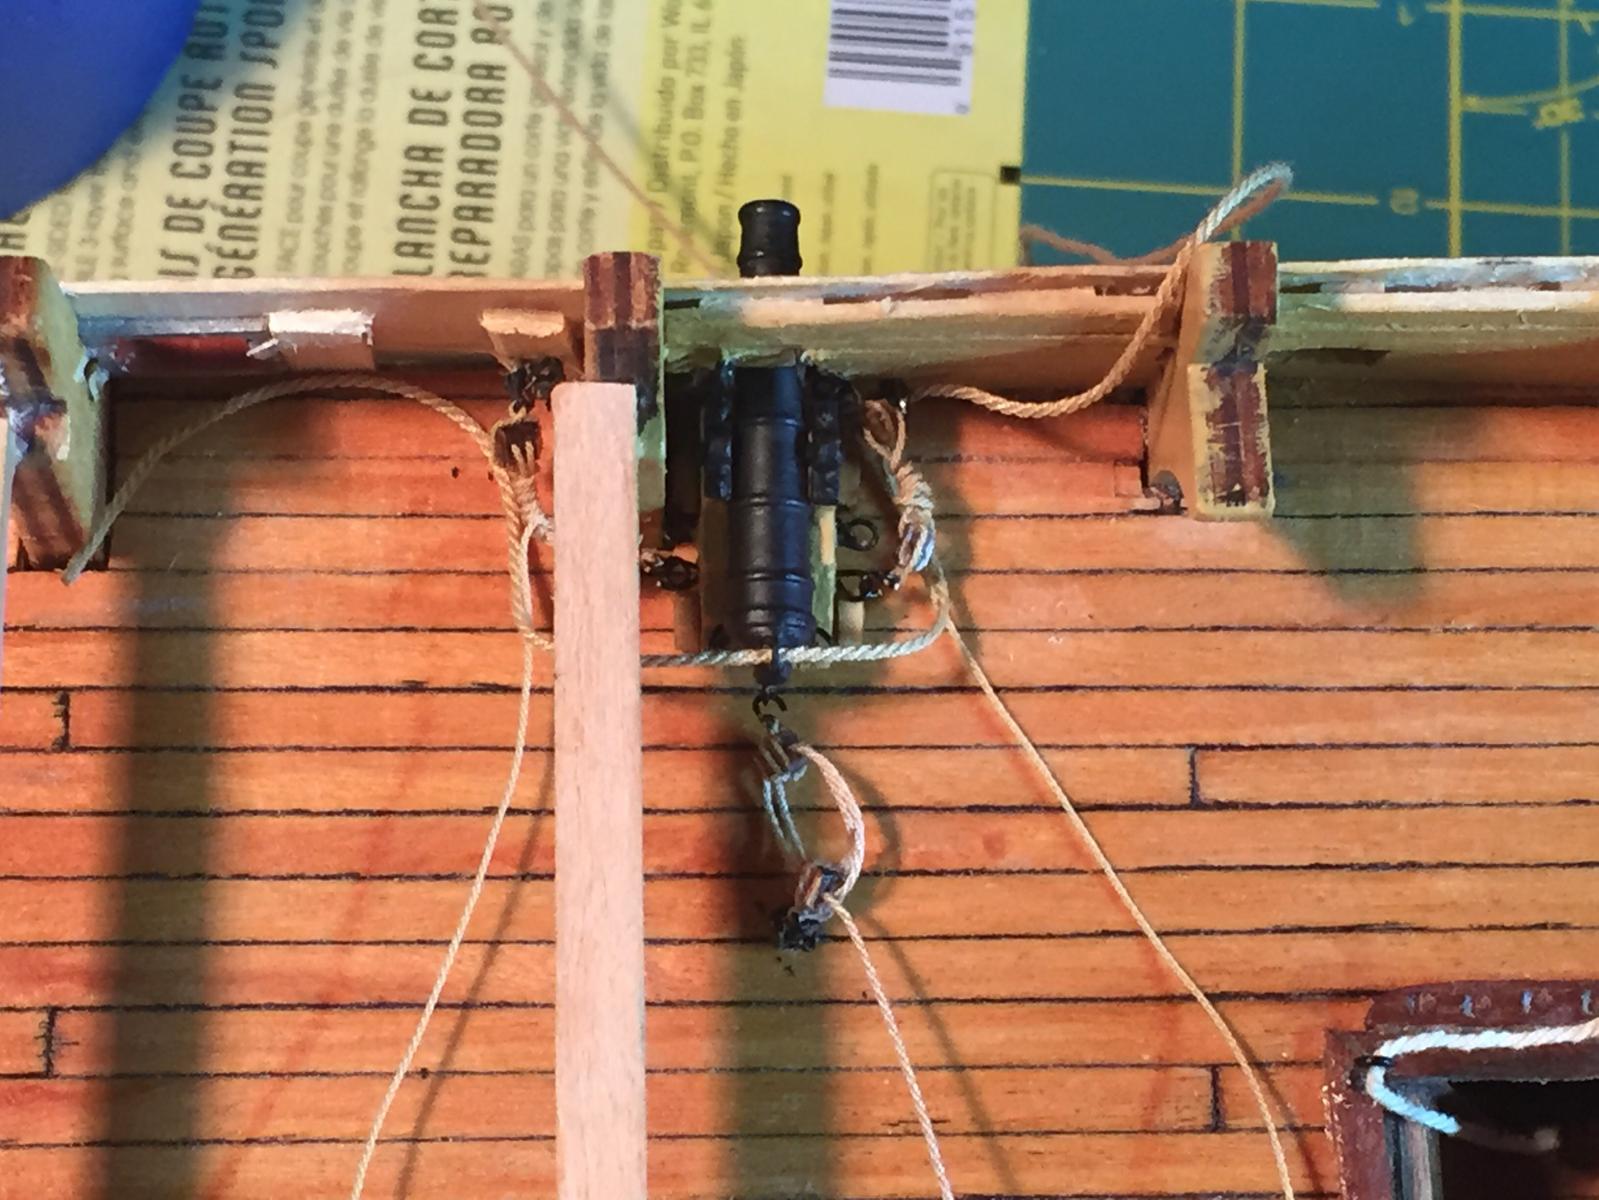
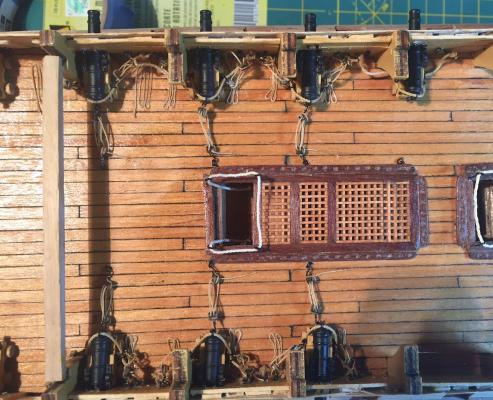
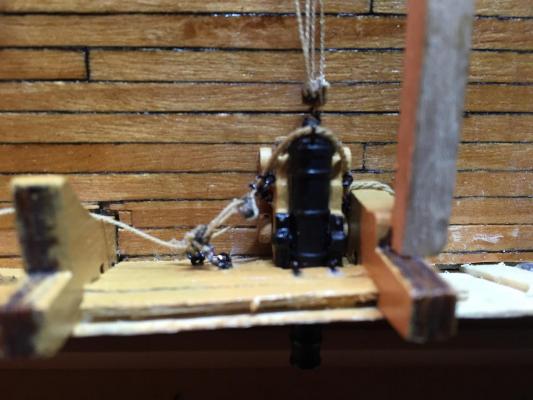
Have finally finished rigging all the guns that will be visible on the main gun deck. Starting to study plans for the quarterdeck. I know I will be bashing the cabins quite a bit to try and get them looking more authentic than what Mamoli provides for.

-
Yeah a lot of it is covered up, that's for sure. That's why a lot of my guns aren't rigged since they are completely covered. I've been pondering what to do on the Quarterdeck guns. I think I want them all run out just to complete the effect on the model, but I haven't decided about the train tackle. I feel like I'm obligated to put them on since I did on these guns, but I worry about that tackle taking up a lot of space on the quarterdeck and making things look cluttered.
-
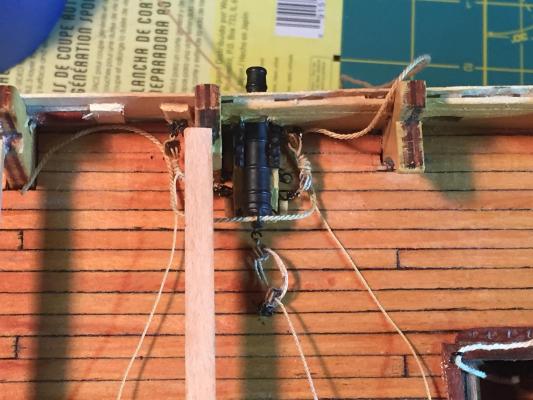
Quick progress photo. Had to stop to make more hooks.
-
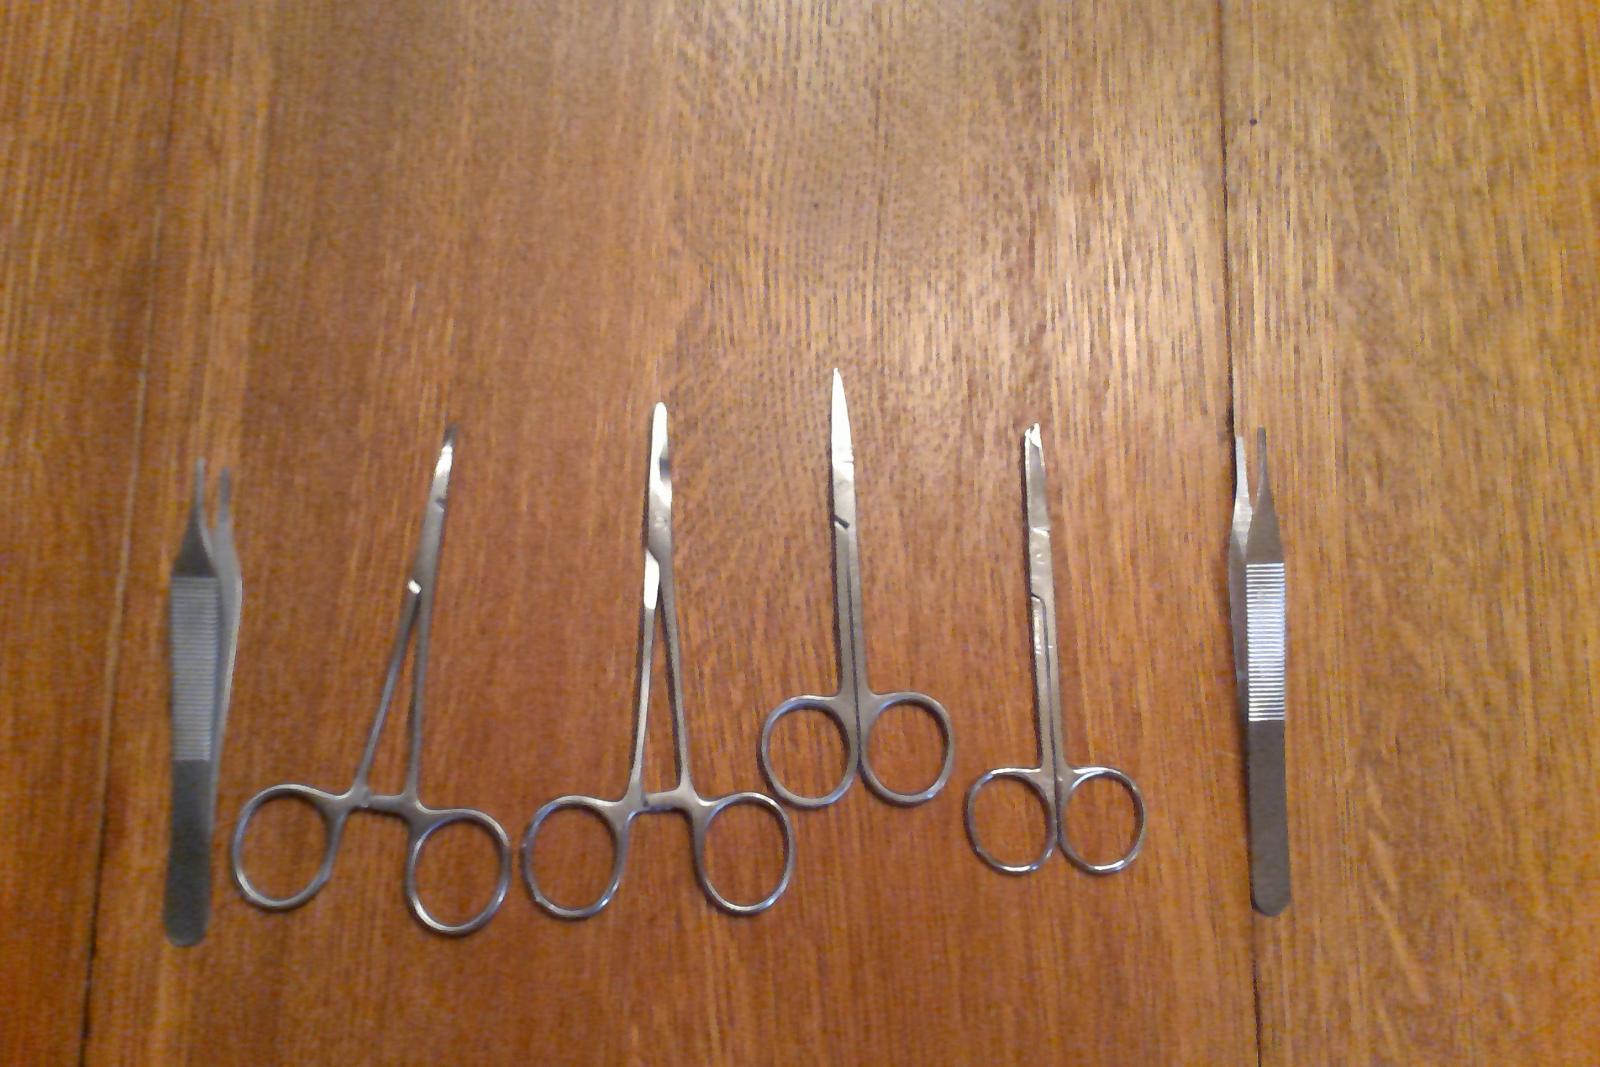
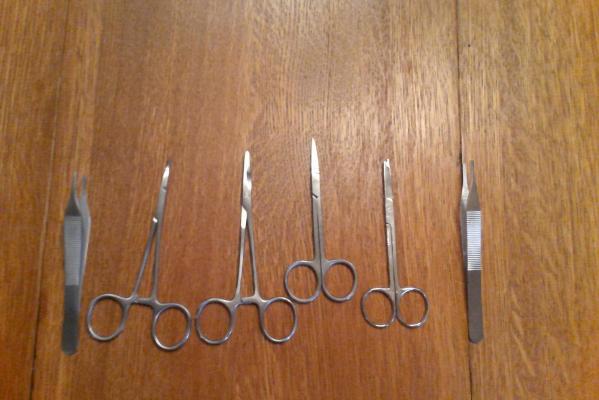
Not much to report. Fairly tedious going at this point. Making rope, making eye bolts, making hooks, etc... Couple more pictures to prove I'm still at it. Also learned that a very useful set of rigging tools can be had from a suture kit. The suture removal kit also has some useful tools. There is a story that actually involves sutures and one of my kids behind how I came to be in possession of the kits but I highly recommend them, and surprisingly they can be gotten quite cheaply online.

-
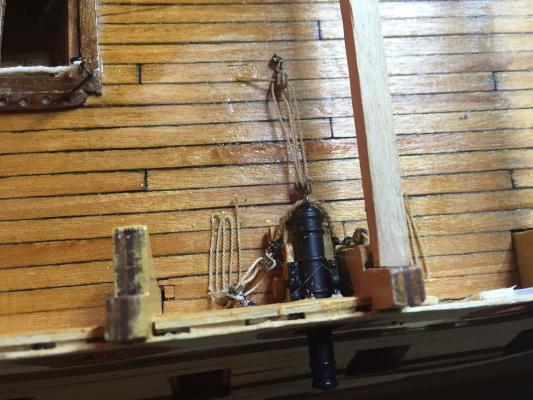
Merry Christmas to you as well Grant and to all the MSW'ers here. I got the two guns from Cornwall to replace the two that Mamoli shorted me on. They are close enough that you shouldn't be able to tell which is which once the quarterdeck is on. I have glued in all "hidden" guns and am working on putting all the eye-bolts and so on on the visible guns. Thanks again to everyone for all the feedback on the gun rigging.
-
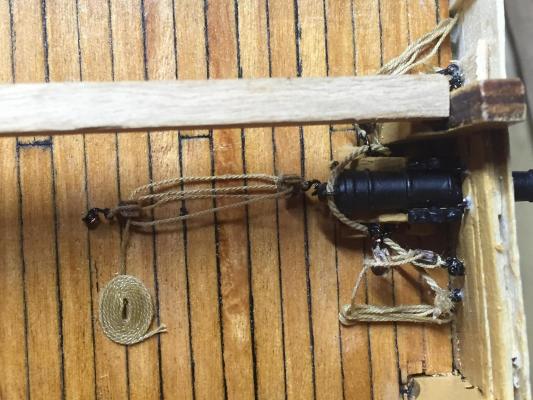
Redid the side tackles to more closely resemble the real thing. Removed the coil on the rear tackle. Also corrected an error that was probably not visible but was driving me nuts. Thoughts? Brutal honesty?
-
On that recoil rope it actually doesn't have that slack on it on the real thing from the pictures I have seen. It looks like it is just tied with a simple overhand knot. My assumption is so that it can easily be loosened after firing.
-
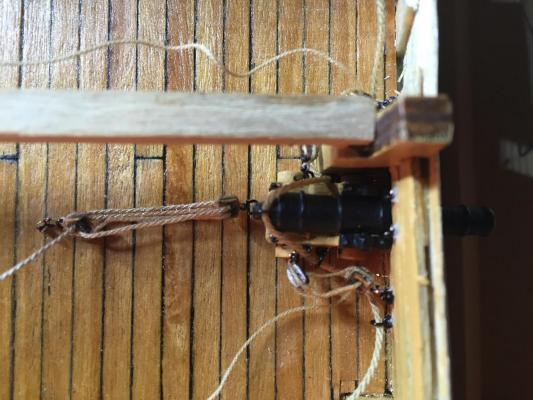
I was able to take a 3mm single sheave block and make it into a double sheave block to see what kind of difference it made. What do you think?
-
I greatly appreciate the feedback. I'll take a look at Syren. I was able to get 2mm blocks for the single sheave but the smallest double sheave I could find were 3mm but maybe I just didn't look in the right place. I used my razor saw to cut the ends off of the 3mm block to try and shorten them up some. Thanks so much for the feedback.
-
Yeah I just don't think I'm feeling it. The nice part about scratch building those parts is you don't lose kit pieces if you change your mind. What do you think of the rest of the gun? Brutal honesty is perfectly fine if needed. Always trying to get better.
-
I'm having second thoughts about the rope coil on the rear tackle and considering popping it off. Any opinions?
-
After many attempts the first gun is in place. Much better than where I started. Thanks for all the help from everyone here.
-
I have not but I totally see what you are saying. Does the starboard tackle look closer? I have a few different threads I'm working with to see what gives me the best rope.
-
Thanks for all the comments. Shrunk the ring bolts way down. Also spaces them a little further from the carriage.youll have to picture it with deck coils since it's not glued down yet but any comments will be appreciated.
-
Just realized a bonehead blunder. With the guns run out the side tackle would not be frapped but would instead be laid up next to the carriage. Good thing nothing has been glued yet.
-
I think you're exactly right about the ring bolts. I've been doing some prototypes and think I have a technique with my round nose pliers that will let me get a much smaller eye. I would love it if you guys could check back tomorrow and provide any feedback.
-
I think you're right. I think I'm going to pull that out closer to midhsip.
-
Everything just kind of lain in loosely to see what it might look like. Of course the recoil rope will be ran through the rings in the final placing. With the frappings tightened and the tails coiled it might work. Don't know. Thoughts?