


p_balag
-
Posts
18 -
Joined
-
Last visited
Content Type
Profiles
Forums
Gallery
Events
Posts posted by p_balag
-
-
First wooden build? WOW Very impressive work my friend. How do you take on such a project as a first? I wouldn't have the nerve. I guess you just do it.

+1
Hi Richard
Amazing for a first wooden build...

I am sure to learn a lot from your build... I will follow it very closely!

Cheers
Bala
-
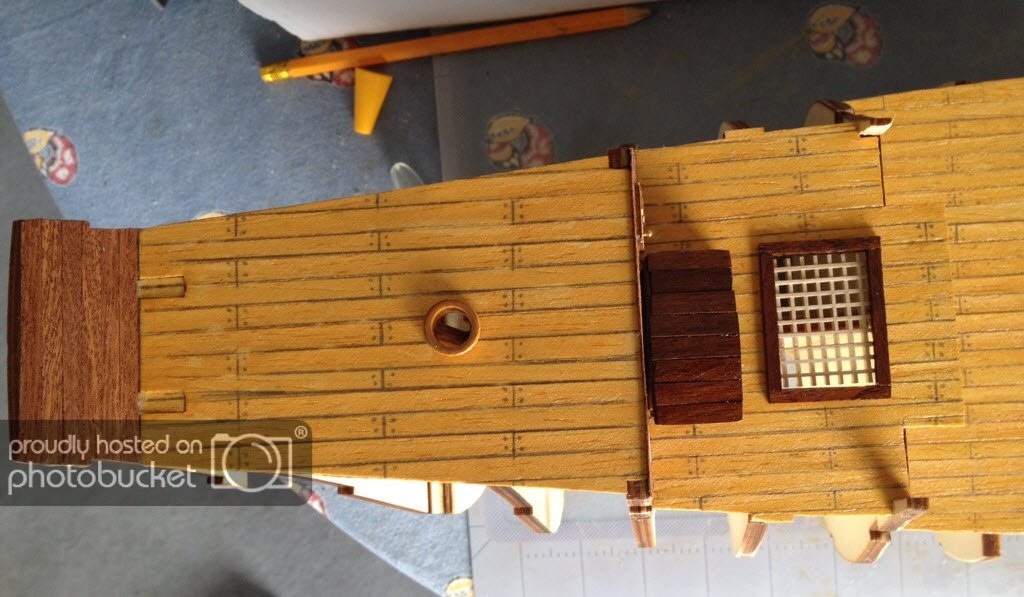
Haha...
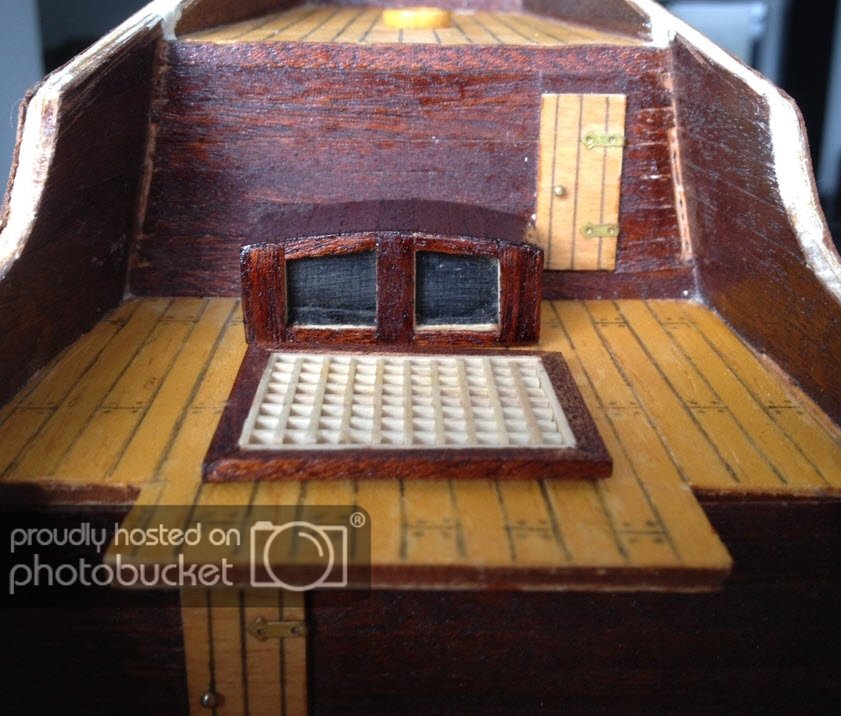
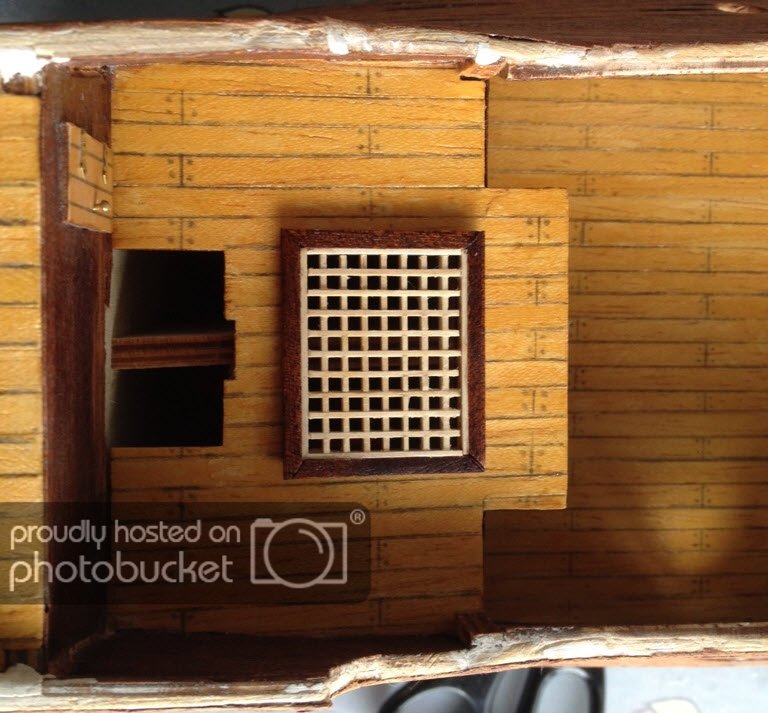
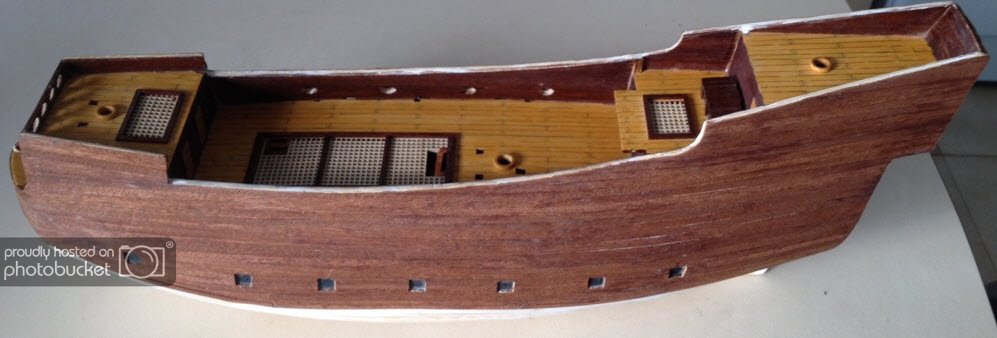
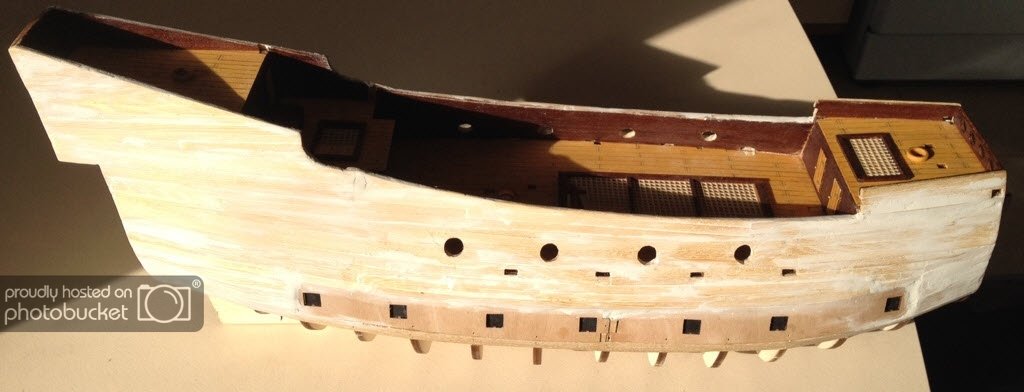
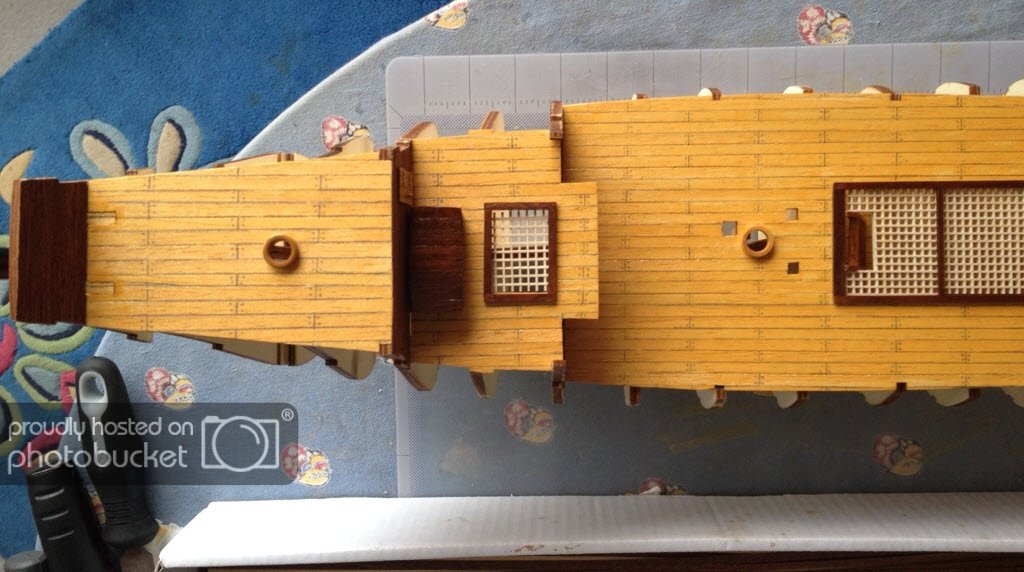
Well... the Wheelhouse is ready.. and this time I am really happy with the outcome...

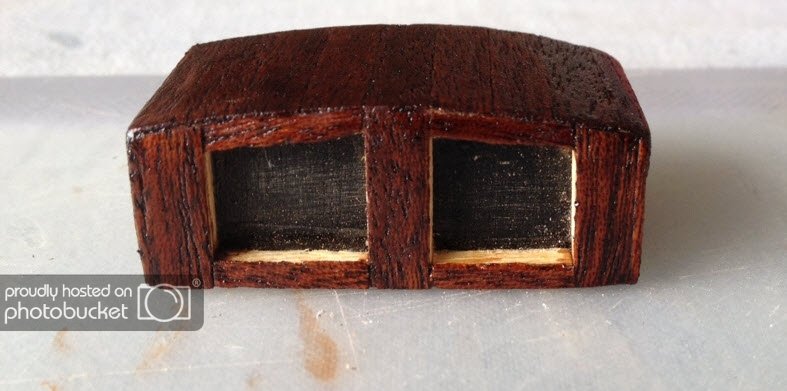
I placed it and the gratings to take the photo but not yet glued it in place
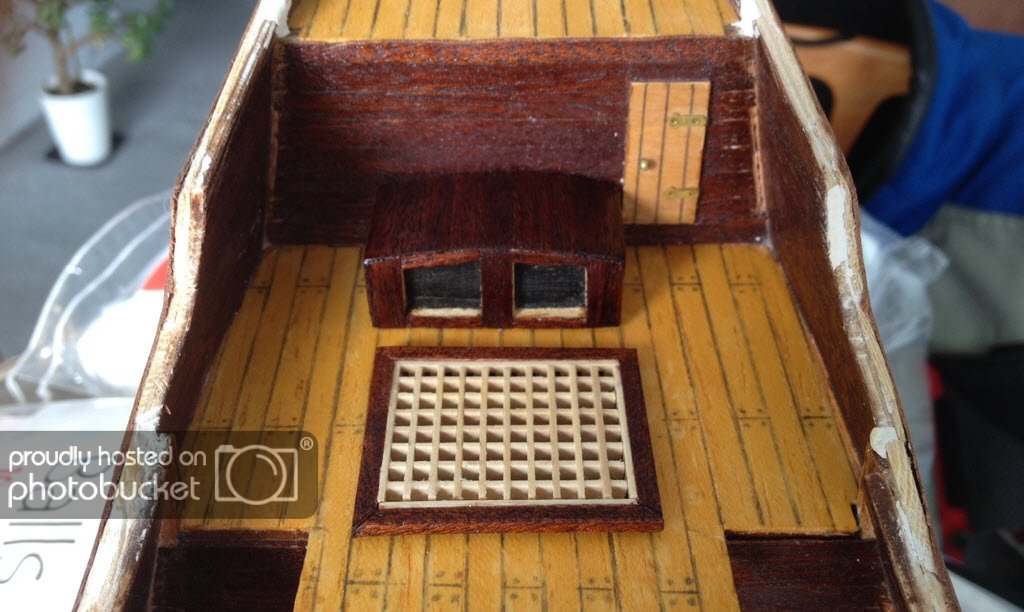
I think the ladder could be a tight fit... so might glue them in place after i do the ladder...
For some reason the grating looks warped coz i have not glued it...
Sorry for the poor iphone photos
Cheers
Bala
-
Hi Bala,
I thought I bring you a visit.
You've got the help from a lot of great builders so I'm just sitting here and will follow you.
Ok a tip then.
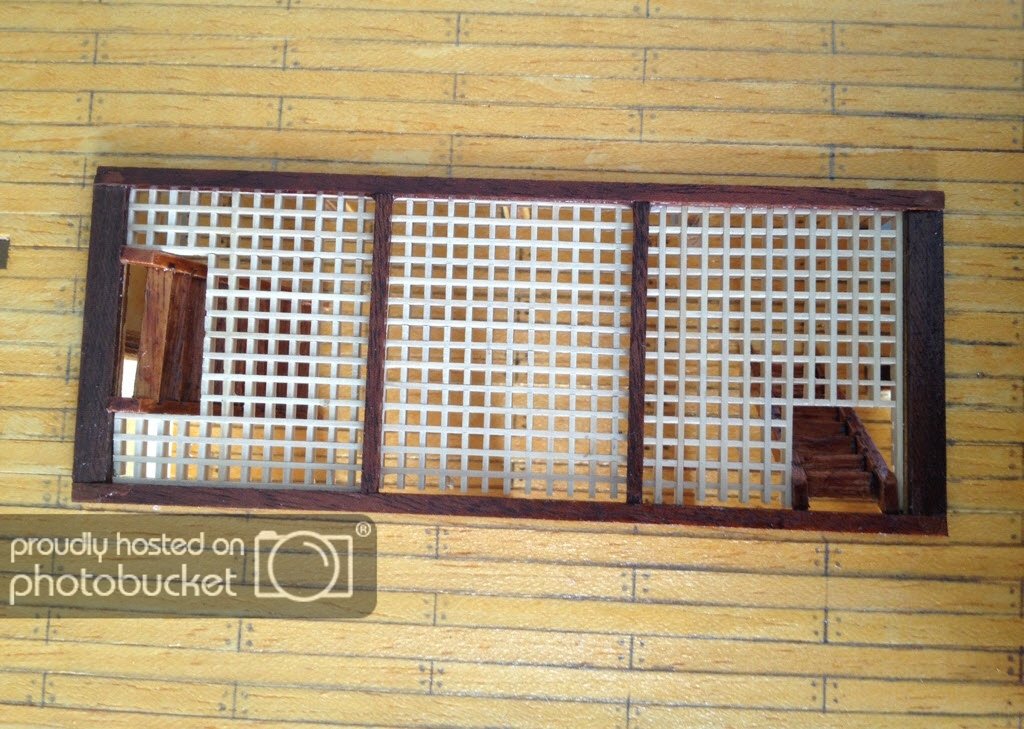
When you are making the gratings, when you have putting them together and you like what you have done, lay them in a bath of deleted PVA !
Then you know for sure that they are not falling into parts again.
The same with the stairs.
When I'm building the Corsair from OcCre i didn't do it and I have to re-do it several times.....
The final result of the grating looks fantastic !
Keep on going like this and you should be proud of what you have done.

Hi Sjors
Thank you for following my build.... and I assume you mean Diluted PVA...
It is such a good tip!! I will follow it.
I agree with you. We dont want the gratings falling apart!!!
Cheers
Bala
-
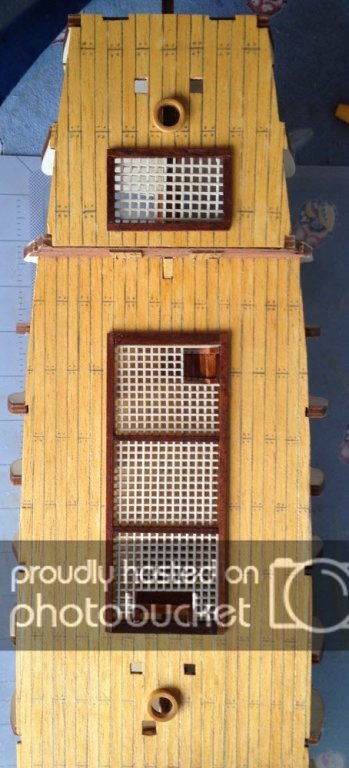
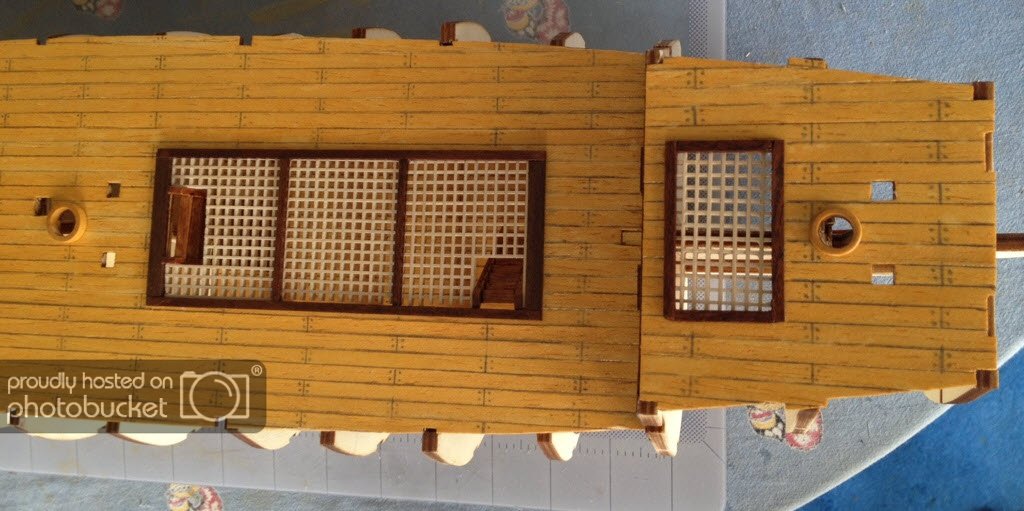
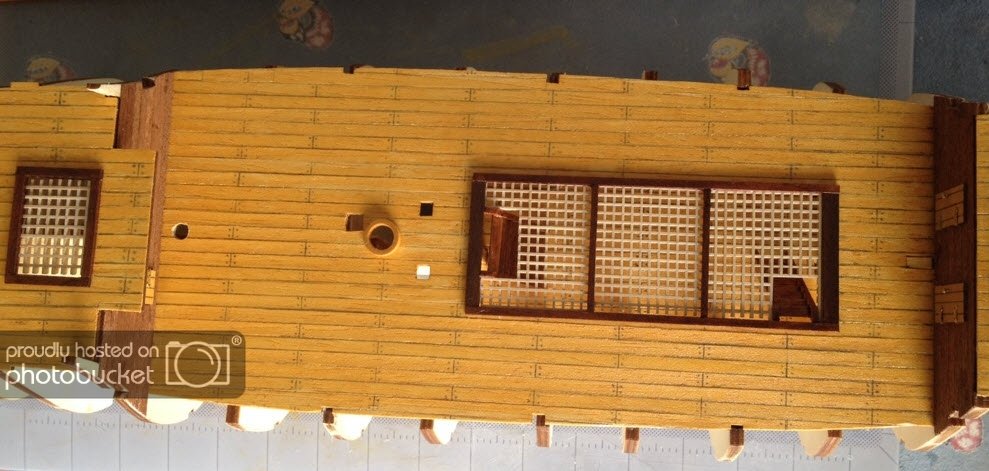
hmmm....
So I have now done the grates and frames for them again.....
I am happy with them... better than before for sure!!!
I have not glued them in place yet...
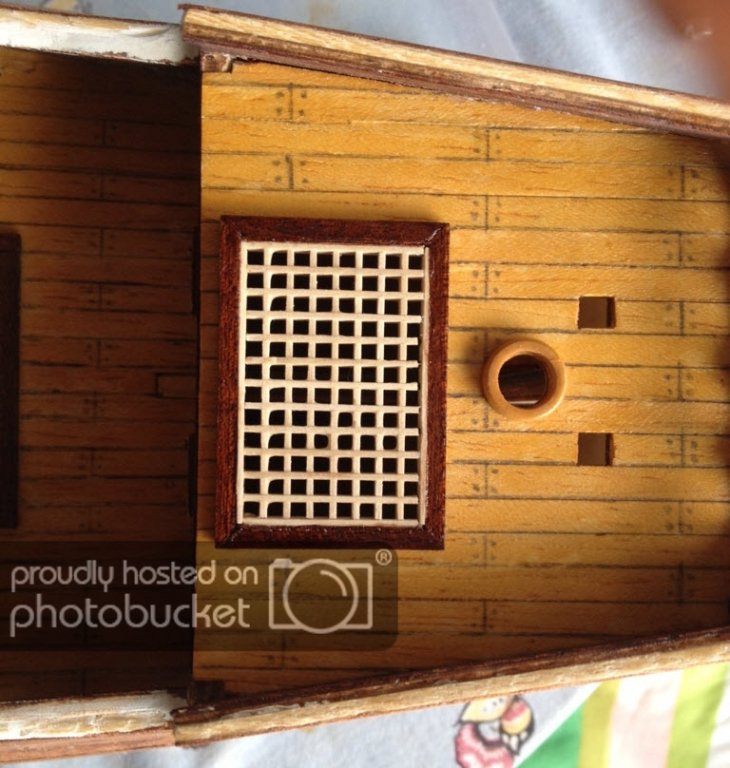
So you can see all the three decks with their gratings...
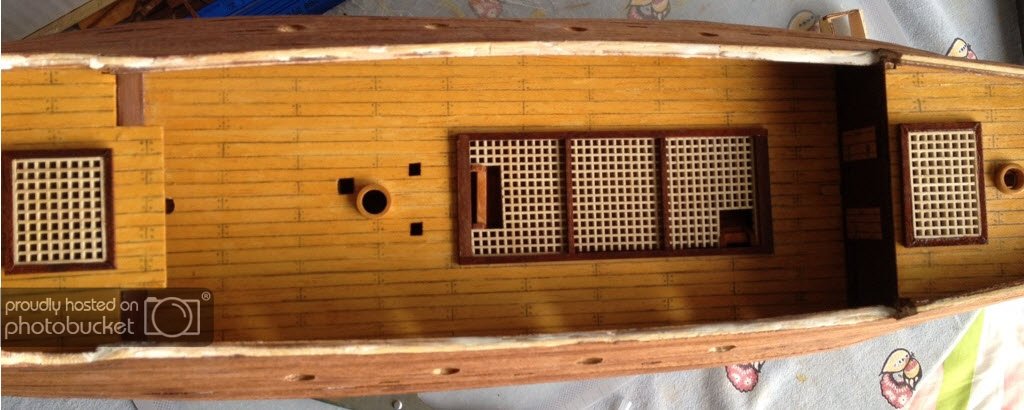
I am working on the wheelhouse... once it is done, I plan to glue them all in place...
So whatdoyathink??

Cheers
Bala
-
Bala,
Better to re-do something than to regret not doing it.
Well Mark....
I did build my courage up and look what I did...
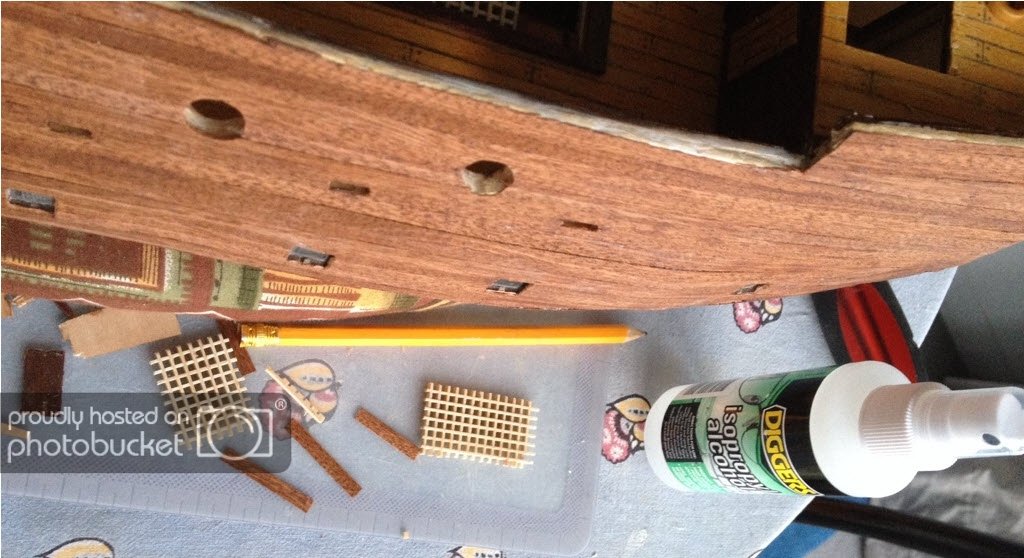
I removed the Gratings....
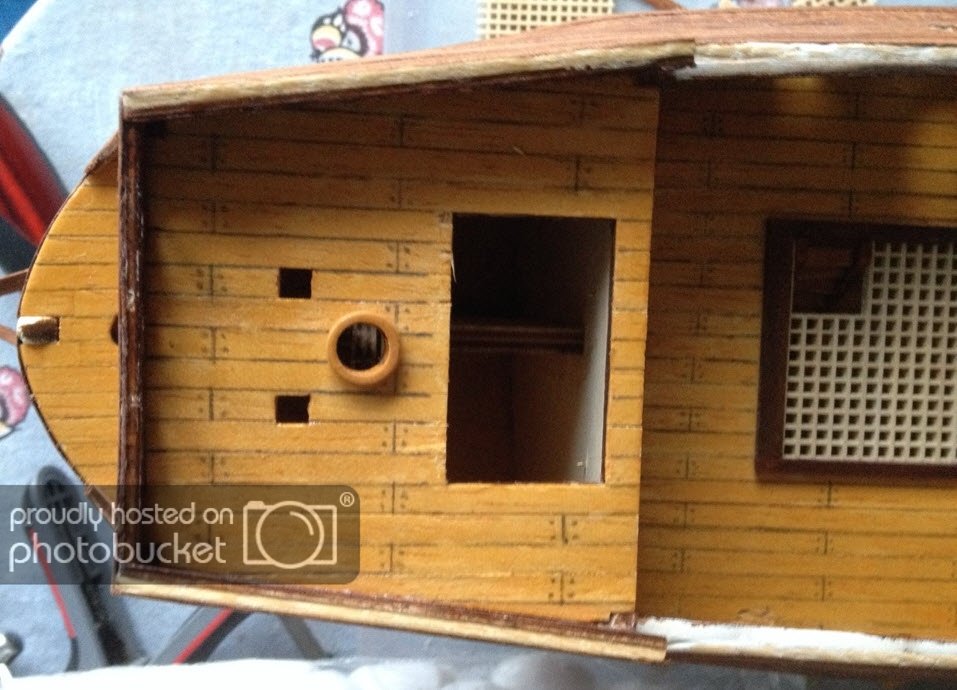
and the Wheelhouse
Thank you for encouraging me to do this... I was very afraid... but now that I have done it, Maaaaate.. Isocol is soooo coool!!!
I never thought you could "undo" what you have done and re-do it...
It has got to the extent that I plan to build the wheelhouse frame from scratch using the left over bits!! Fingers crossed!
For those of you who are using windows computers... This is "Ctl+Z" and "Ctl+Y"
However, I plan to leave the gratings in the main deck as-is...
To be continued.....
Cheers
Bala
-
Bala,
As the others have said, you're off to good start but do slow down a bit and enjoy the journey. As for bits and pieces that you have glued on, they can be unglued.. if you're using PVA (wood glue), use 90% isopropyl alcohol. If you're using CA, use some acetone. It'll take some time and repeated applications of the solvent generally to undo the parts.
Also, look over other build logs, even if it's not a ship you're building. There's a lot of good info on MSW not only in build logs but in the other areas.
Hi Mark
Thanks for your suggestion mate.. who knows? I might get the nerve up to isopropyl the gratings and re do it. I am currently using only PVA...
Let me keep looking at the ship a couple of days more to get my courage...
Coz the more I look at it and am unhappy, more courage to plunge right in!! hehe...
Cheers
Bala
-
Hi Gil!
I have just quickly gone through your build and I have to say, like everyone else here, your skill is just amazing!
But over and above this, you have taken your time to photo and explain in detail the steps as well
..You have no idea how valuable this information is... especially to a NOOB like me..
I thank you for this thread! I will read it in detail and hope to learn from it..
Cheers
Bala
-
-
Your welcome Bala. I do have a dvd of someone building the Perseverance. It does have a lot of hints you can use in general. You can have it if you want it. I found it useful, and still use some of the methods. All you need to do is send me a pre adressed postage paid cd packet and it's yours.Matt
Hi Matt.. Thank you for the offer... I will accept it. Please PM me your addy and I will organise the cd pack...
Cheers
Bala
-
Hi Bala. I think your'e going a little too fast, and in the process missing a few details. The first thing I would say is make sure every piece you place on the model fits before you glue it. From what I can see, you need to stop and fix a few things before you proceed. The bow section need a lot more shaping as there is a bump where the planks curve around the bow. There is also a hollow section along the false keel that needs more shaping, or the Keel part that fits on the outside of the hull will not fit. The plywood parts you glued on should be shaped flush to the false keel. Sanding the hull after the first layer of plankind is very important to remove bumps and hollows on the hull. To minimise these, fairing, or sanding the bulkheads is also important before you put the first layer of planing on. Not enough time on these two steps before second planking, result in obvious bumps and hollows on the finished hull. A little more attention on the grates to square them up without any gaps wouls make them look a lot better.
There's some nice work youv'e done so far. A little more time spent thinking ahead will help prevent major pproblems later.
Remember, this is your build. Do it the way you want. I hope this helps.
Matt
Hi Matt
You are right... thank you for your comments.... I have rushed along a bit... in hindsight, i wish i had been a little bit more patient in fairing the bulkheads and took bit more care with the first layer of planking, it would have helped me a lot...
I agree with you on the gratings... i wish i had the mitre box before, I could have cut the edges properly and attached them correctly. same for the wheelhouse as well. pity they are glued now... and I cant remove and redo them...

I will take you advice on board and slow down a bit more and try the parts before I glue them on.
Thanks again
Cheers
Bala
-
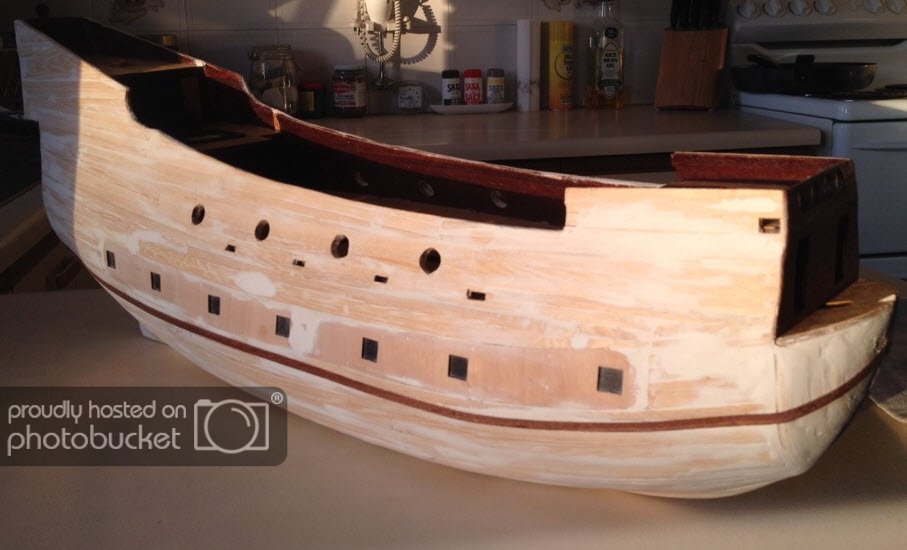
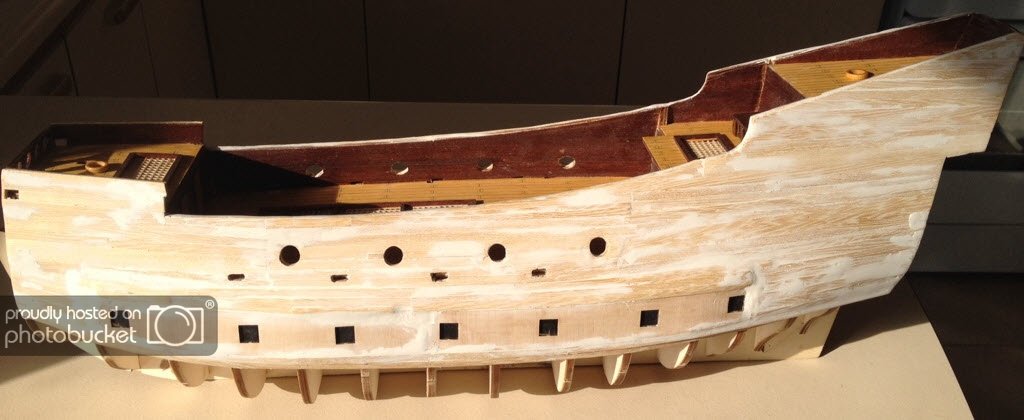
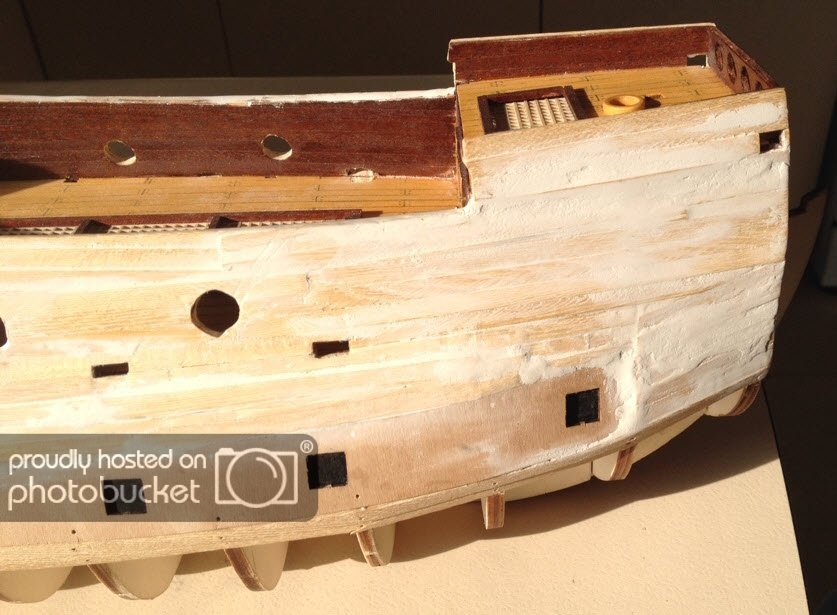
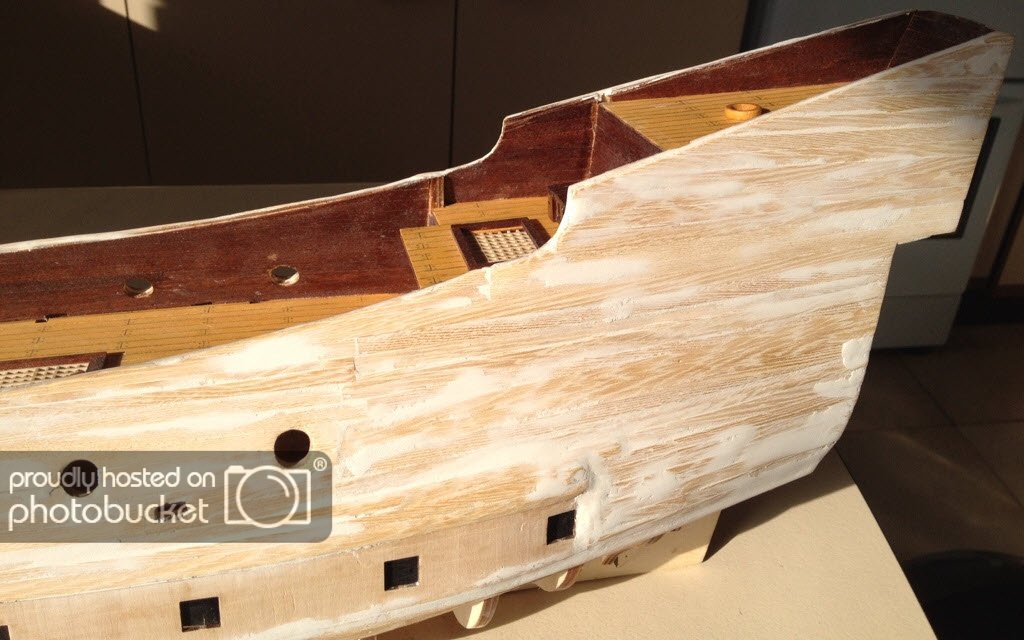
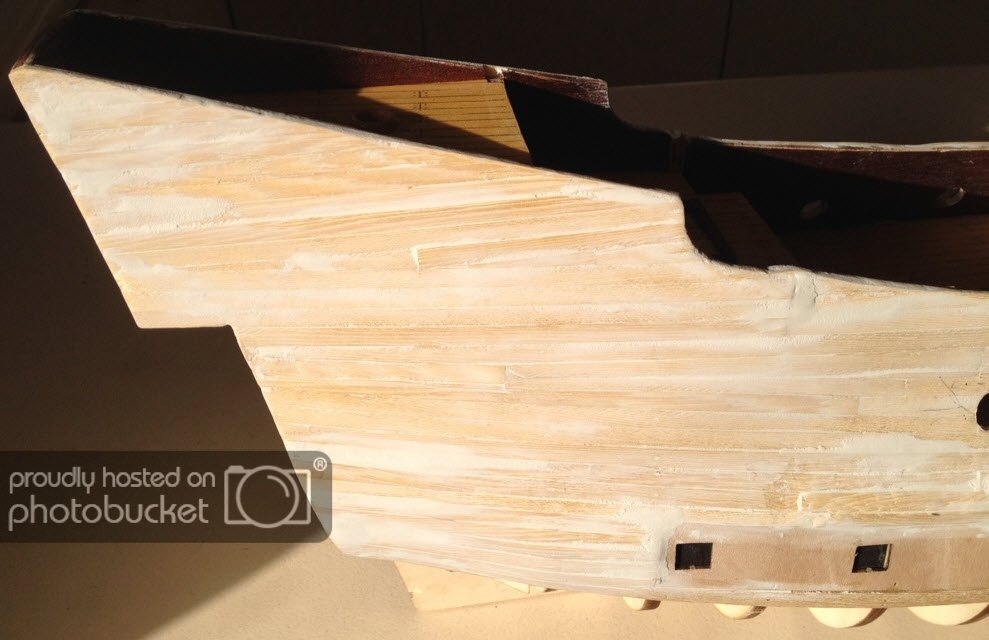
I pained the false gun ports black and glued them in place next.
The planking of bottom half of the ship was better then the top... I had learned a lot more by then on how to pin the strakes in place, let them dry and then pin/glue them in place...
I had achieved more symmetry in the bottom half as well... no bulges or dips... but still a bit of wood fillers was used to get a smooth finish.
The bow was completed next. well have to tell you, was a bit of working to glue the flat bits in place and then chisel away till a rounded finish was achieved... I felt a good sense of accomplishment from this section.
Then the first plank of the second planking was laid... YAY!!!
I then laid the second planking in the stern...
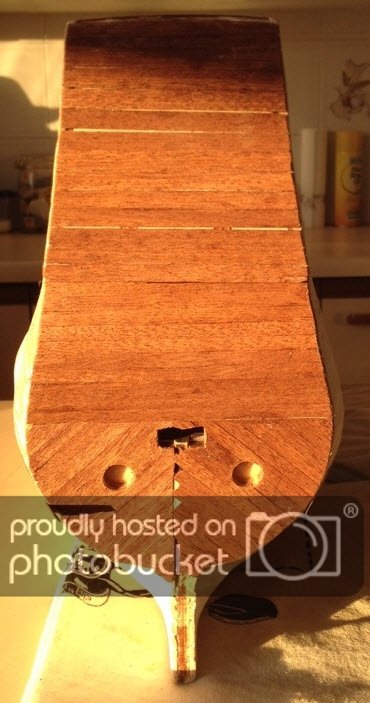
Note to self (again!!)... do not glue planks after dark!! you can see the gaps here.... Then I "fixed" them in the morning... in daylight!

good news is.. the second layer has helped cover more of the mistakes in the first layer of planking.... hehe...
It was a bit hard to get the planking done near the bow...
Thanks for the tip on part no. 85 Matt.. helped me in getting the rounded shape using your tip...
So this is how far I ave got to....
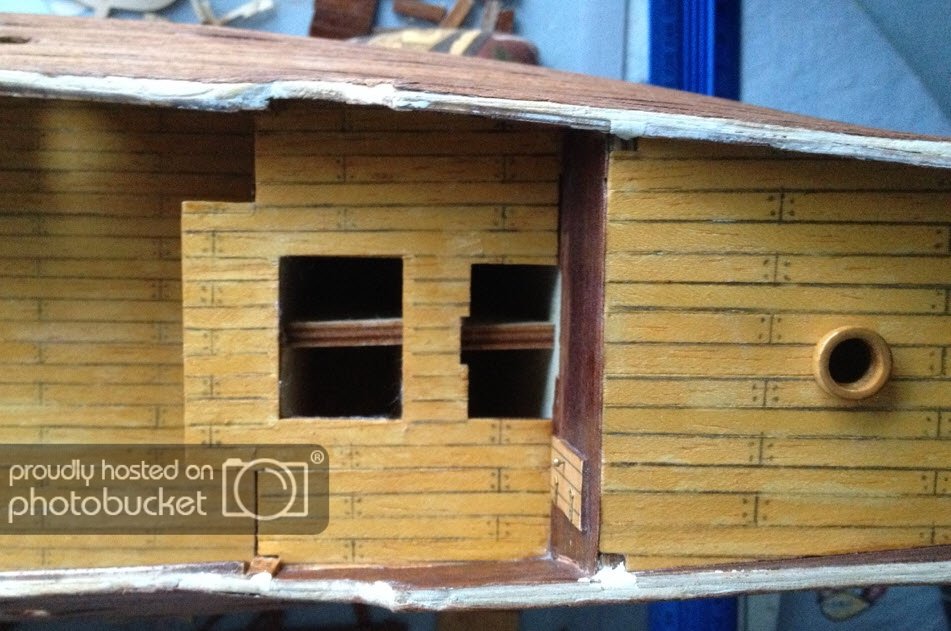
I then cut out the openings for the waterways and deck gun ports...
Next is planking the bottom half of the ship...
Plan to start it this weekend.. but before that, thought at least I will get up to date with my build here in my thread...
Cheers
Bala
-
Hi Matt
Mate! all I can say is... your skills are amazing and you make it look so simple....
Only when someone like me is building the same kit will be able to appreciate what you can do... compared to how i am managing!! hehe...
No doubt, I will follow your build like a hawk!!! (in a good way)...
Cheers
Bala
-
Oh.. BTW.... just wanted to let you all know.... the photos are from my iPhone 4S... no macro camera.. so please bear with me for the quality of the photos...
-
From all the lessons learned in this forum and books, I soaked the strakes before lining the hull...
Pinning them in place before gluing them..
Not to self - for the next project.... make sure I spend more time fine fling the reinforcements and edge of the frames for good contact of the strakes...
I finished the planking for the top half of the ship on the port and starboard sides.
You can see that I also sanded and applied the wood filler to smooth the surface....
Still could not get rid of the slight bulge just around the gun ports..
I could not figure out how to cut the holes for the deck gun ports and the waterway holes.. all I had was a 6mm chisel and scalpels/cutters!!
Off to the local hardware store and got myself a rotary tool kit for $39.00 YAY!!!!
You can see the finish (or lack of it!!!) in the bow section...
and the stern
Lot of chiseling and sanding still to come....
Hehe
Cheers
Bala
-
Moving on....
after going through the kit... I was perhaps a bit impatient to get going and therein lies the mistake....
I will not even bother numbering my mistakes.. cos there are too many!!! hehe..
I started with the false keel and assembled the frames...
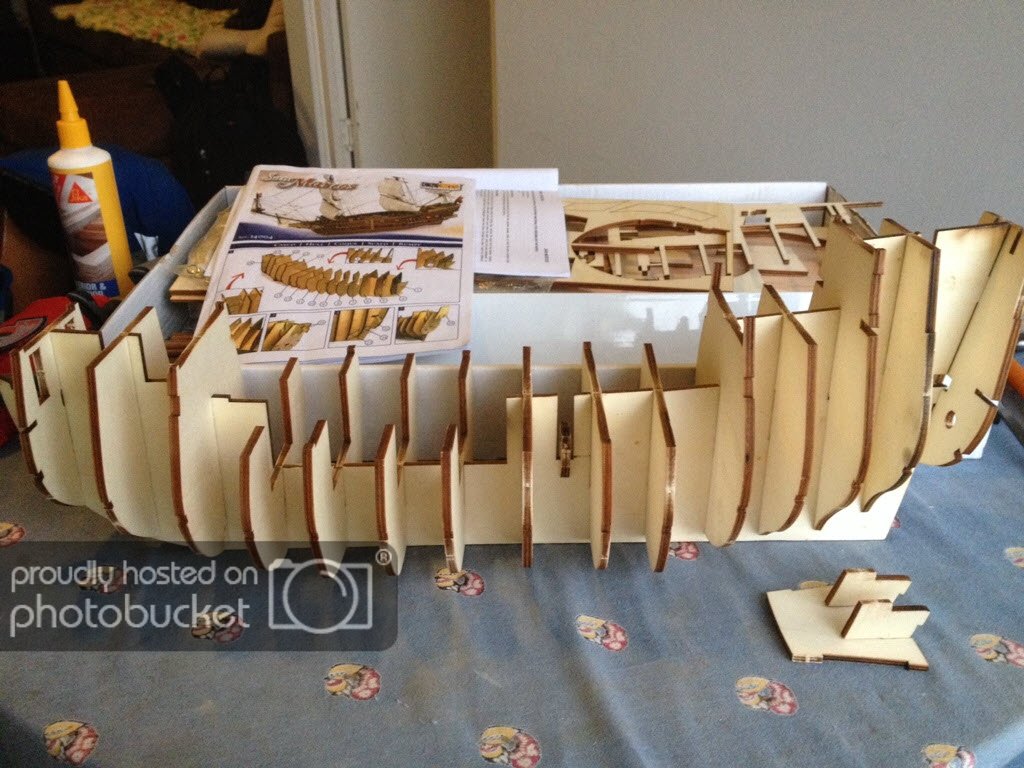
My assumption here was that all the laser cut pieces would magically 'fit' with the false keel....Dhuuuuu... no such luck...
Each of the frames had to be sanded a bit and chiseled out to fit the frame...
Lucky for me, I did not glue the frames in place at this time...
I then started on the different decks.... absolutely enjoyed planking the decks...
After gluing the planks, sanding it and applying the varnish, it looked beautiful...
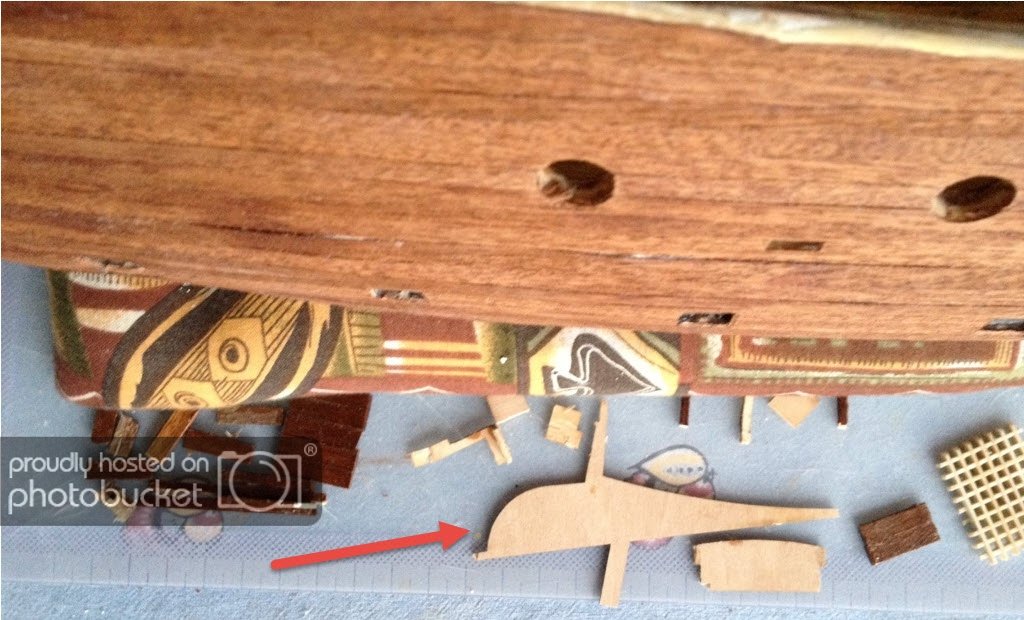
I finished the wheelhouse frames as well...
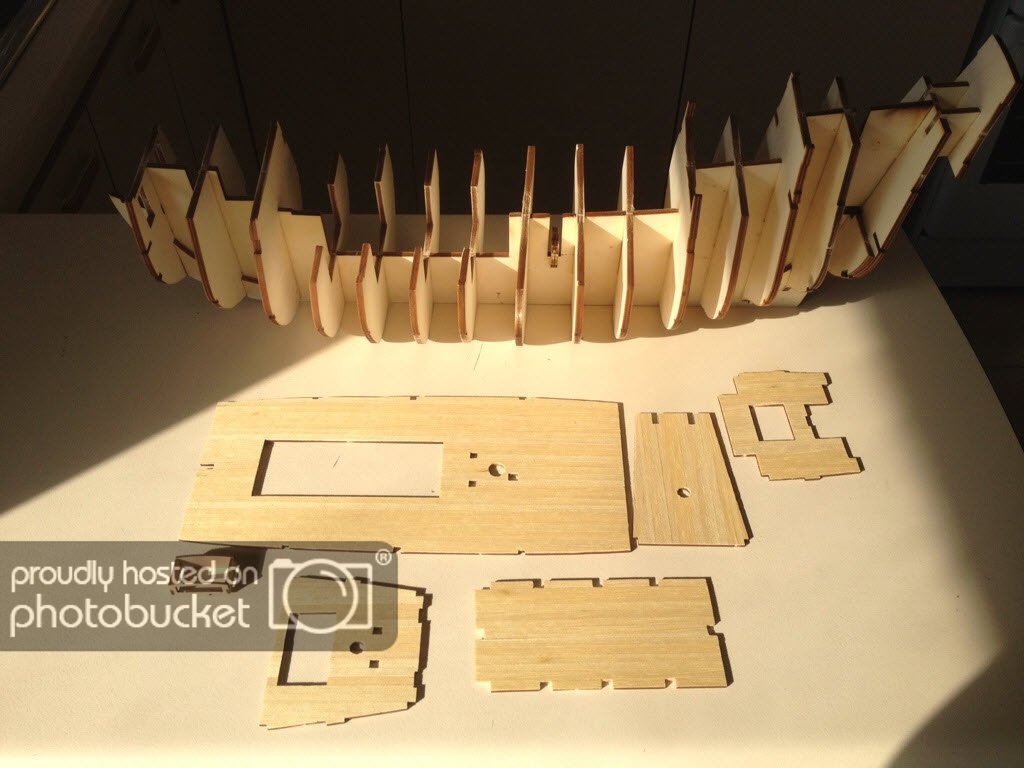
I then glued the frames in place and the decks in place.
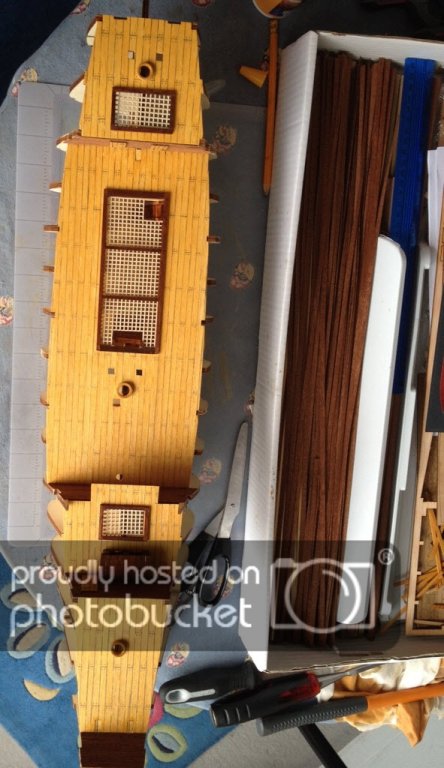
I penciled the planks and the tree nails as well.
I was observing how matt had done the gratings and frames for them... I could not get how his edges were so precise while I could not get them to fit???
Ahem... a mitre box could be a bit helpful with the frame edges.... dhuuuu... off to ebay to buy one... but the sad news is... I could not undo the work so far.. so the gratings and the frames will stay....
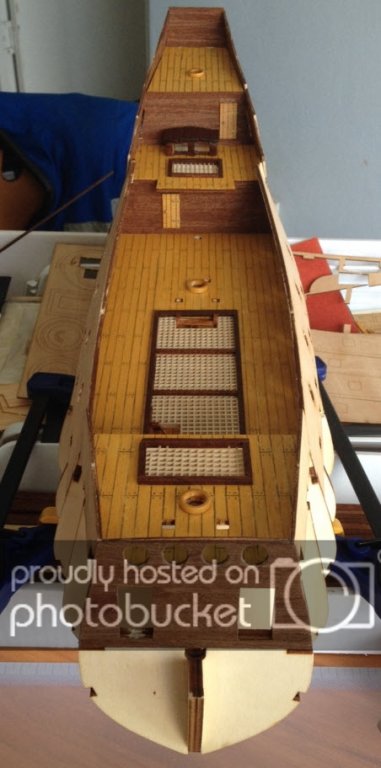
All set and ready for the first planking....


- avsjerome2003, Aussie048 and WackoWolf
-
 3
3
-
Hi Bala.This is a nice kit. Feel free to let me know if I can help. Enjoy,(emphasis on enjoy) your first build.
Matt.
Thanks Matt
You are too kind...
you are opening the flood gates by offering to help me!!!! Hehe.. now be prepared for my annoying questions...`
Cheers
Bala
-
Hi Everybody
I am new to MSW and ship modelling altogether.
During my younger days I have built a few Aircraft and Ship models in plastic... but nothing in this scale.
In recent times, I have had some health issues and found myself having a lot of time in my hand but at the same time cannot do anything to exert myself too much. Hence I was looking at some model building again and came across this kit for a song!
The original owner had purchased San Marcos 1-2 years ago but didn't get on to starting the build. He ended up selling it and I picked it up for around 70% discount....

I then started trolling the interweb and found this amazing website and forum... man!!! I was totally thrown by the level of skill and knowledge in this forum.
After all the initial shock (of what I have got myself into!!) wore off, I started reading as much as I could on wooden model ship building. I bought Ship modelling simplified by Frank Mastini.
I also came across mathew building the same kit inn this link!
http://modelshipworld.com/index.php?/topic/3990-san-marcos-by-mathewp-occre-scale-150/
Well, I have to be frank with you, he made it look like a walk in the park!!! Gave me all the encouragement I needed and hence I started the build in all honesty during the Christmas Break!!
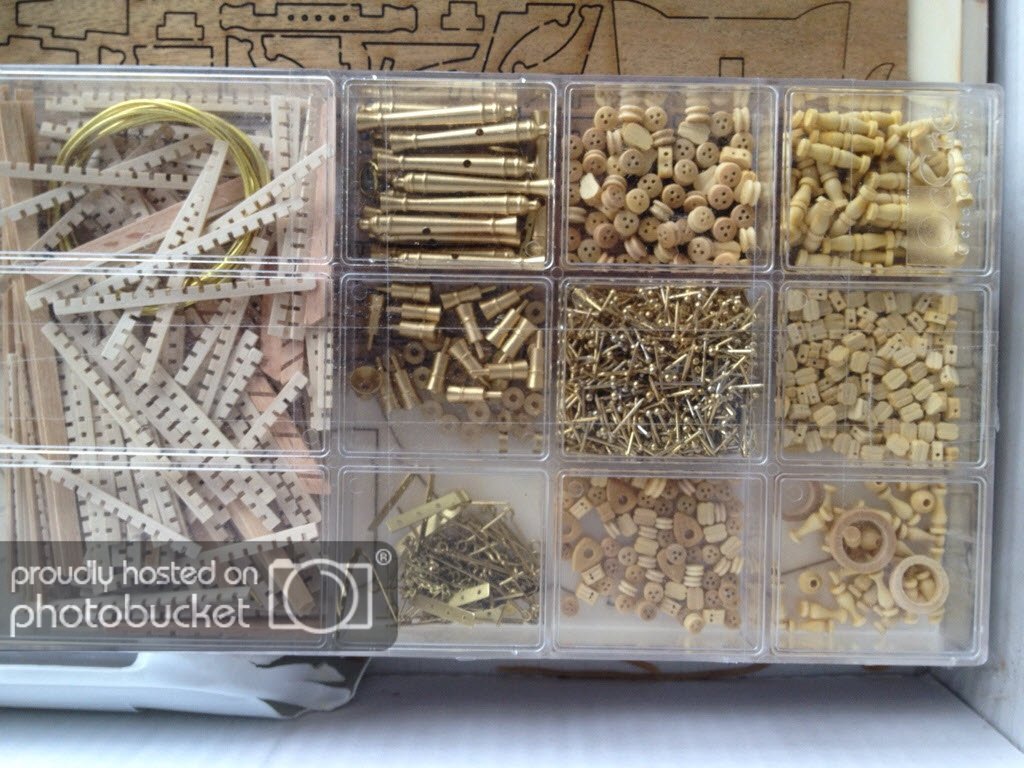
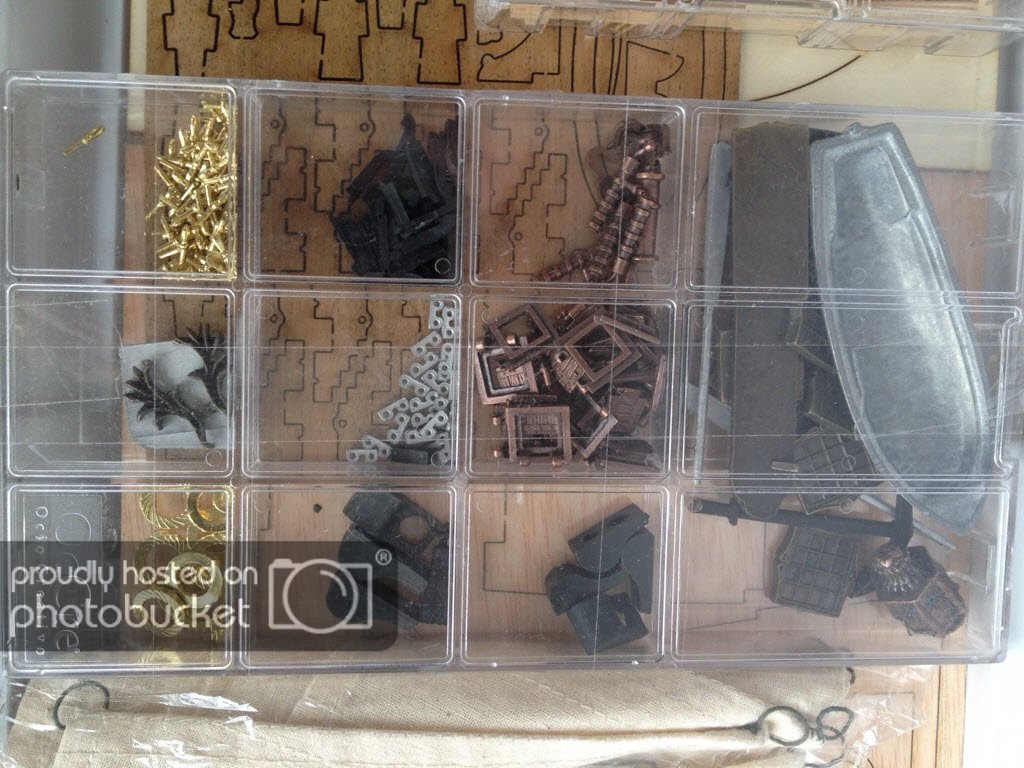
Here are some of the photos of the kit:
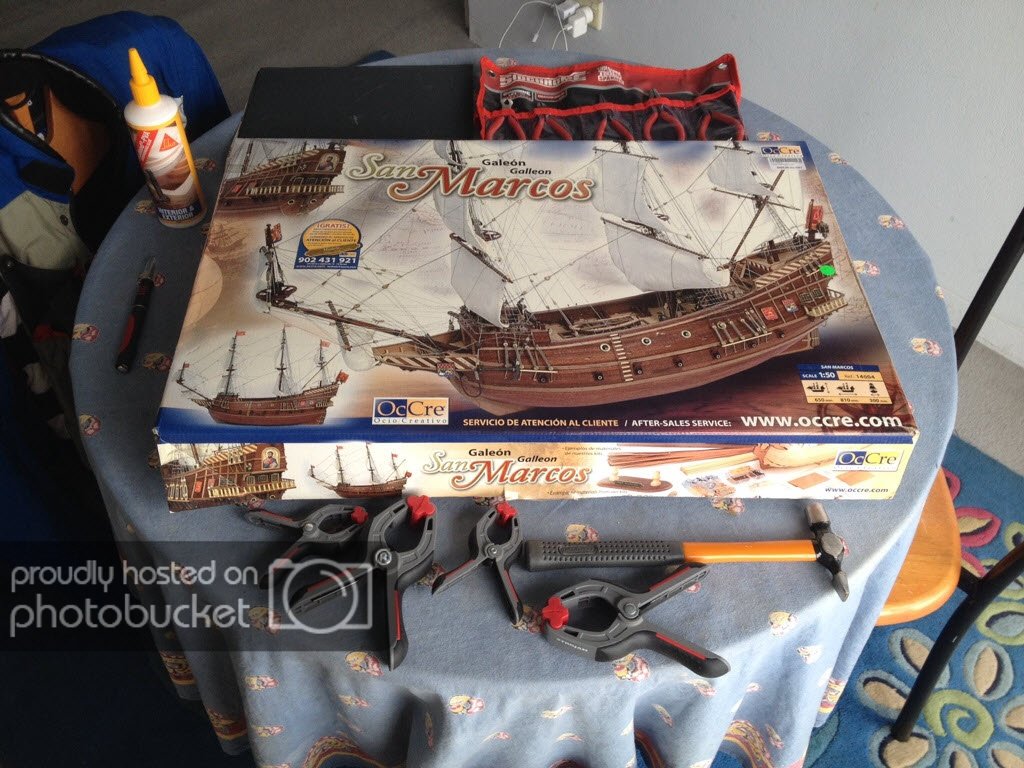
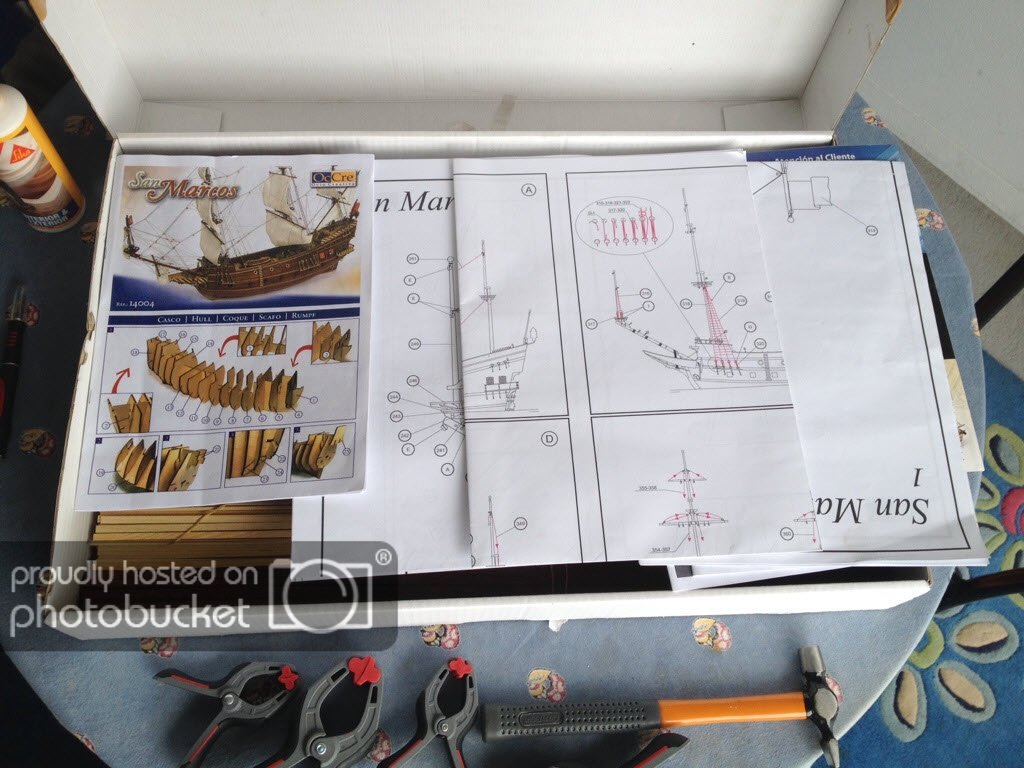
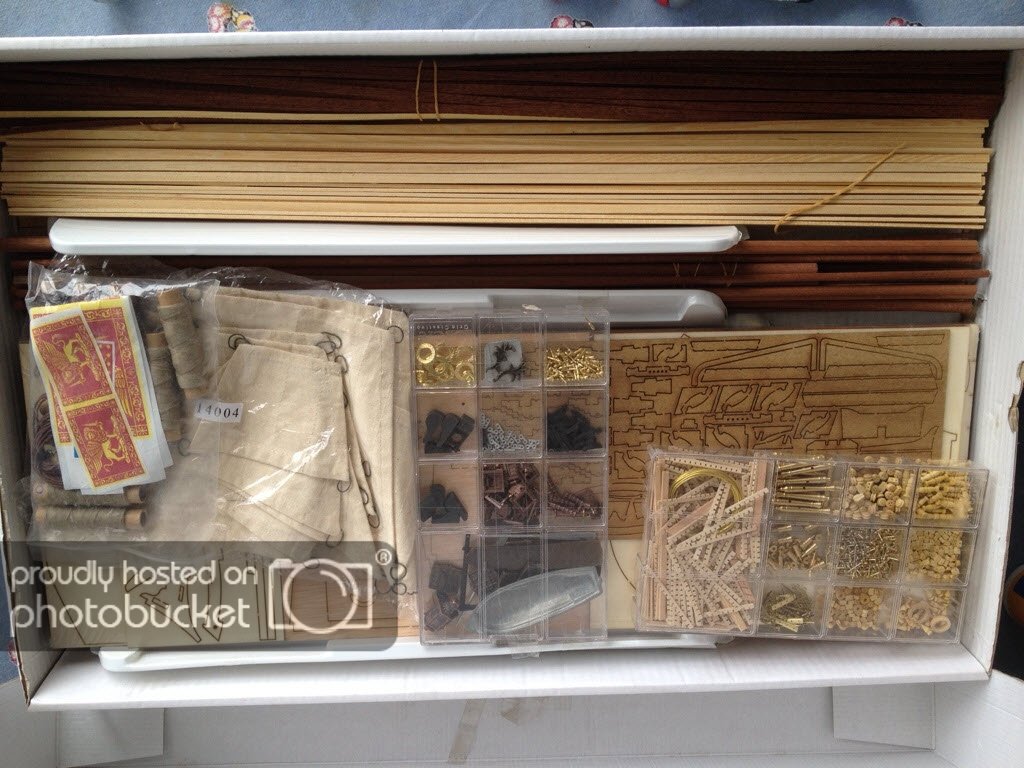
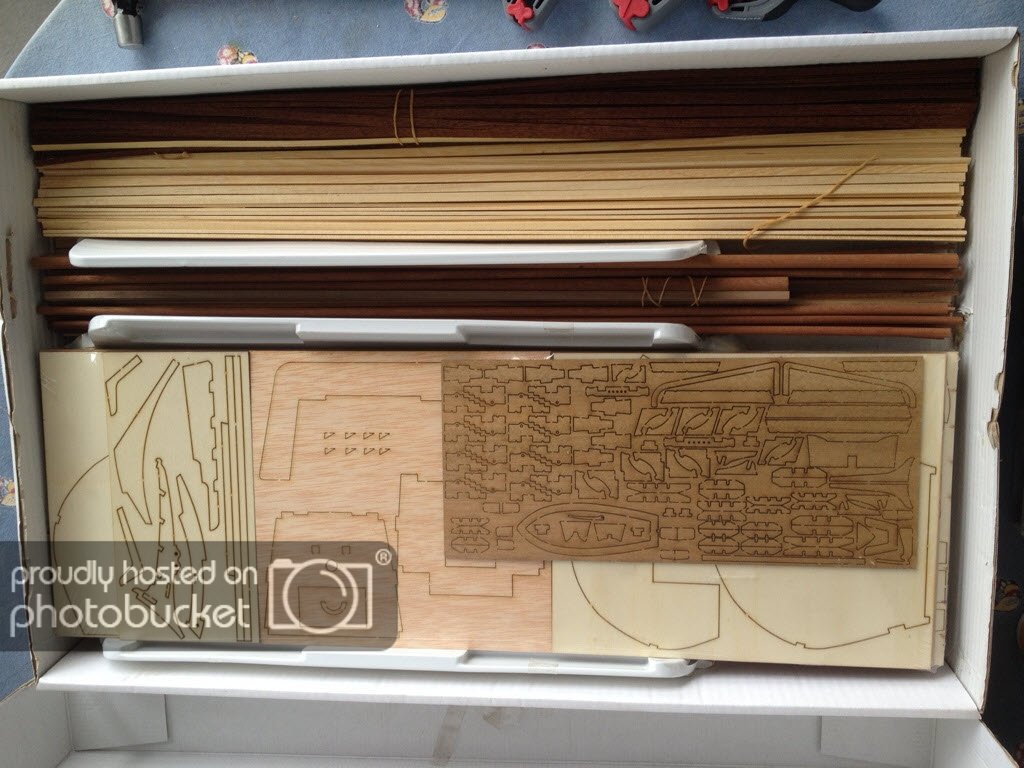
As you can see, I live in a small unit in Sydney and hence my dining Table is my shipyard
I also started slowly collecting tools for this hobby as I went... I will also show you some of the regrets of not having some tools in the early part of the build..
My build and Mathews could probably be seen in parallel... one to learn how to do it and the other to learn how NOT to!!! Hehe.. You be the Judge...
But the bottom line is, so far, I have learned a lot, I love the feel of wood and working with wood... I believe it is the perfect hobby for me given my current situation, I believe I don't have the right tools... and I will go on collecting them as I learn... and go...
So, please join me in my first wooden model build and I hope you enjoy it as much as I do as I go ahead...
Cheers
Bala


HMS Victory by Glenn-UK - Caldercraft - 1/72
in - Kit build logs for subjects built from 1751 - 1800
Posted
Hi Glenn
Great build.....
I will follow it closely
Cheers
Bala