WRed27
-
Posts
29 -
Joined
-
Last visited
Recent Profile Visitors
1,027 profile views


-
 SiriusVoyager reacted to a post in a topic:
Flyer by WRed27 - Constructo - Scale 1:100 - First wooden ship build
SiriusVoyager reacted to a post in a topic:
Flyer by WRed27 - Constructo - Scale 1:100 - First wooden ship build
-
ccoyle reacted to a post in a topic:
Flyer by WRed27 - Constructo - Scale 1:100 - First wooden ship build
-
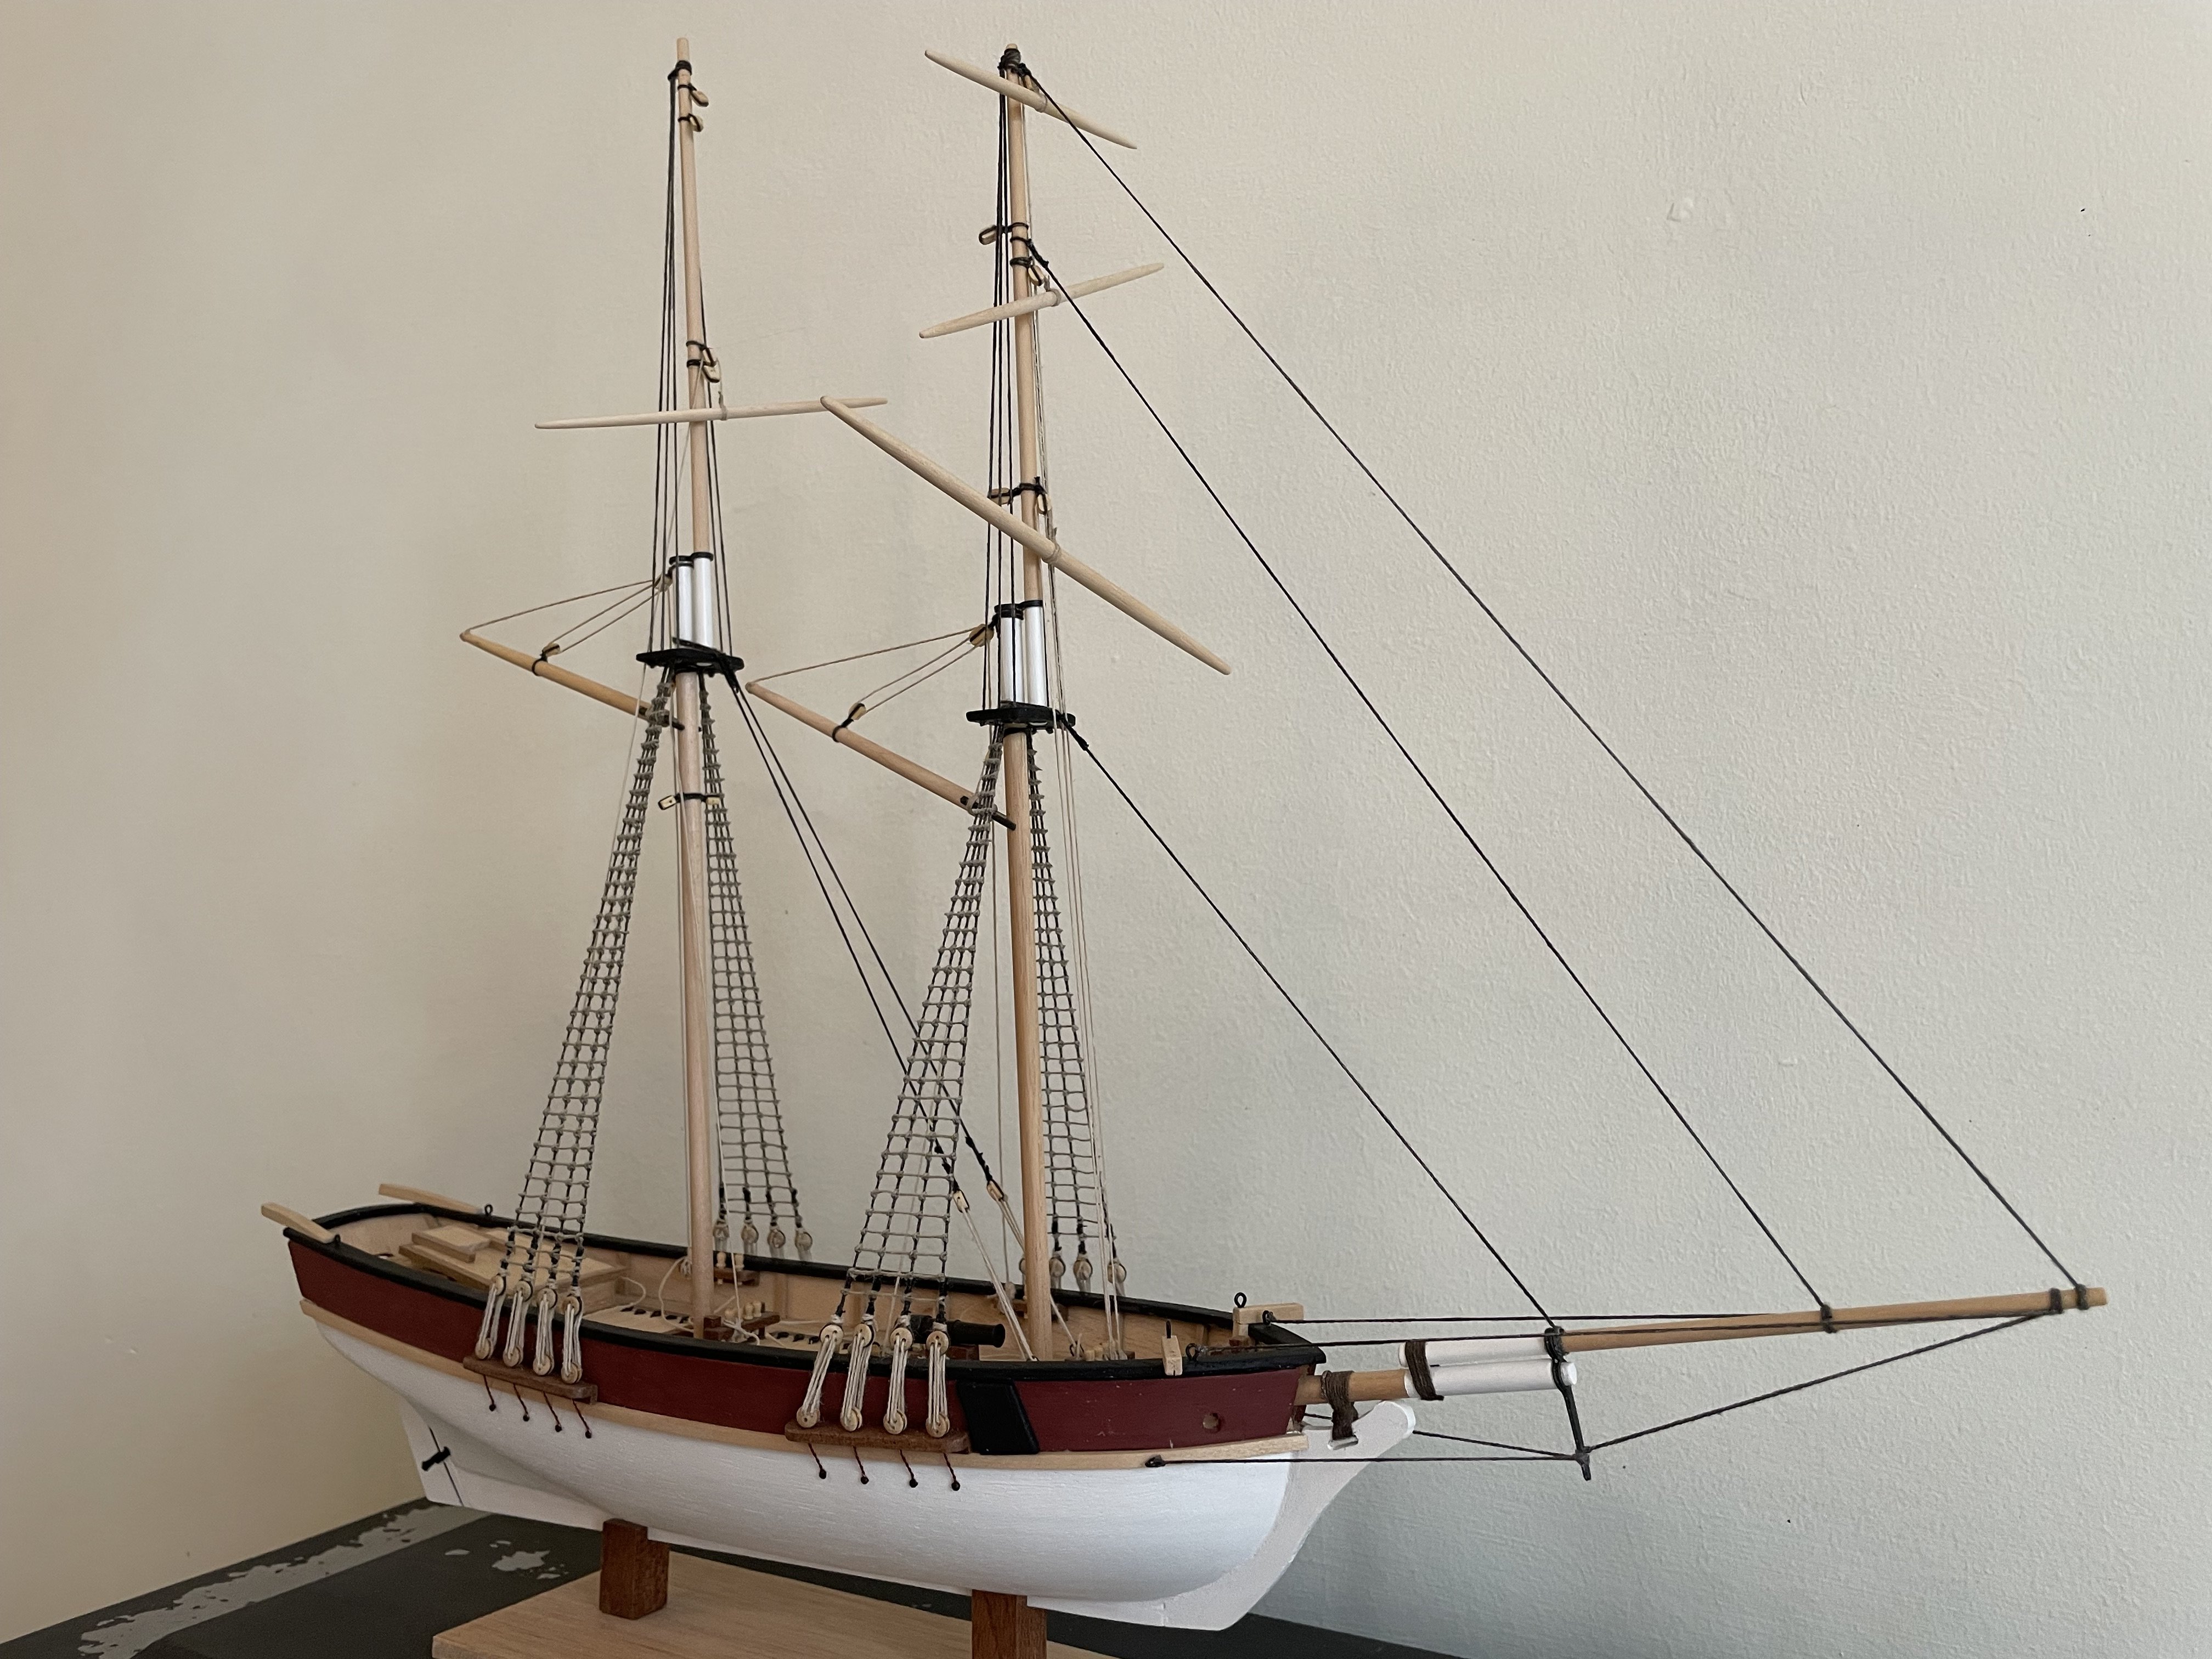
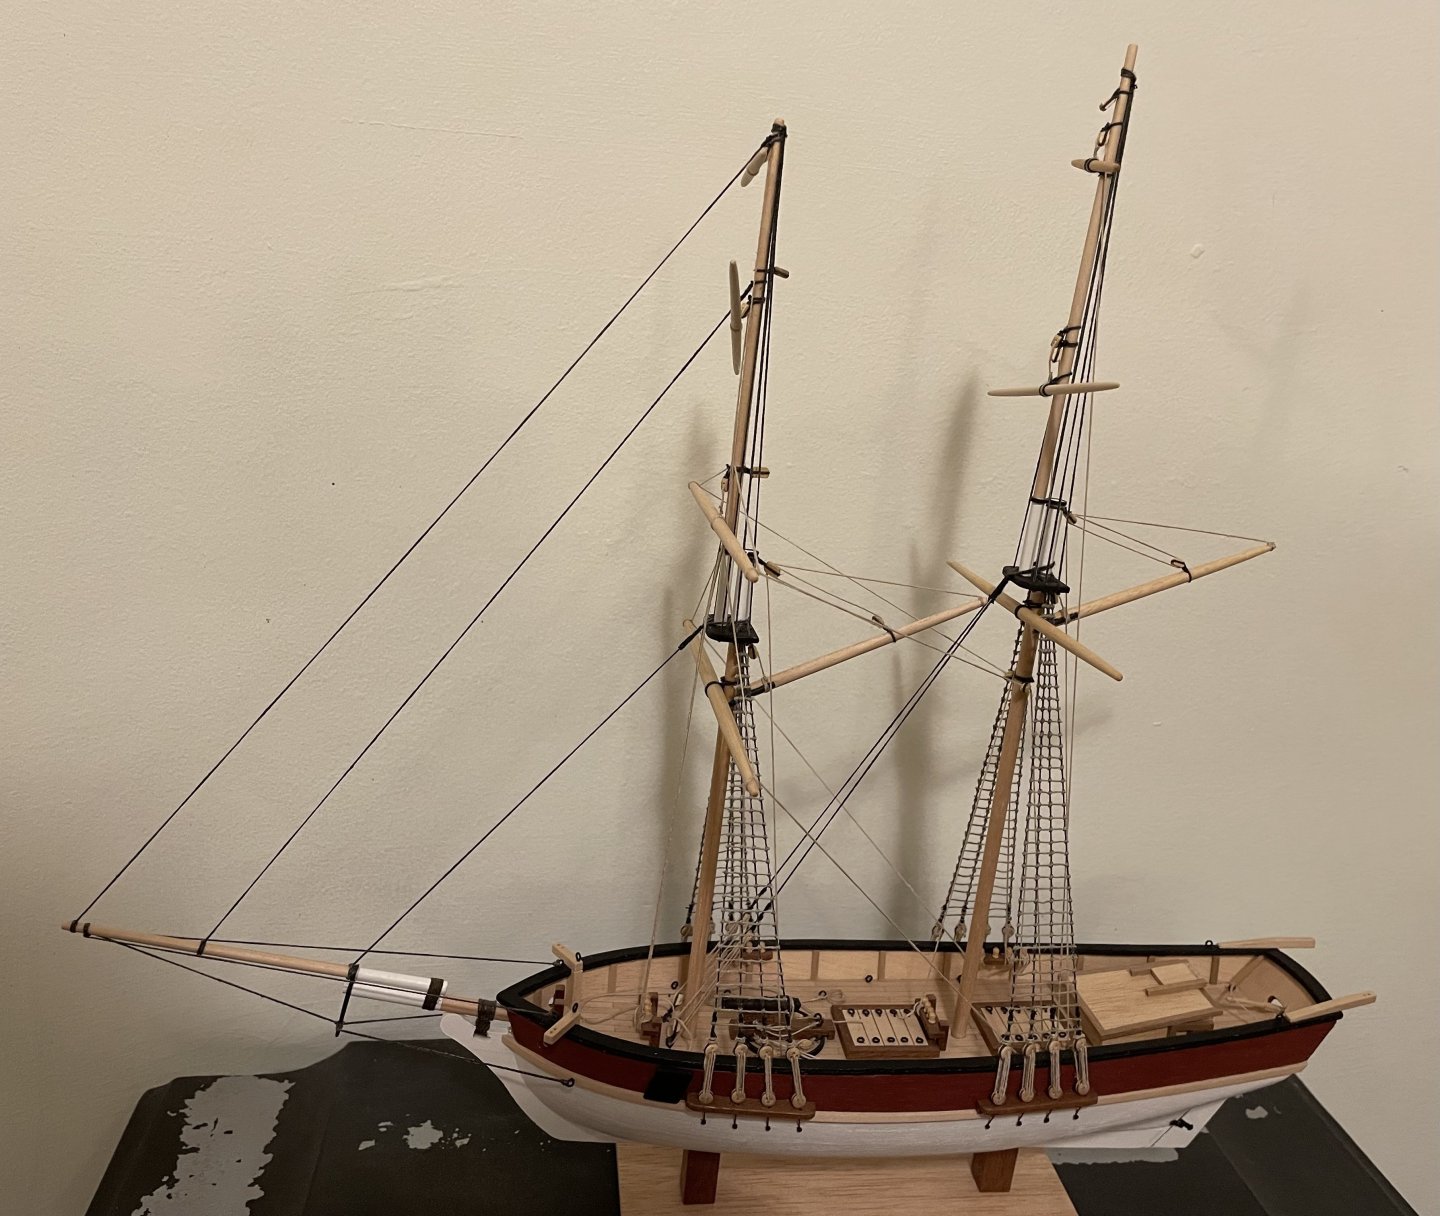
A little more progress, and some mistakes made… All of the yards are now attached (although many still hanging loose!), and I’ve started putting the various lifts on and the braces working from the bottom up on the foremast. Having despaired previously at the lack of guidance in the instructions, I am at least comfortable with the plans, and the order in which to do things now that I’ve spent a lot more time studying them. I realised that I made a mistake with a pair of blocks that are used to feed a brace from one of the foremast yards down to belaying pins at the foot of the mainmast. The plans appear to show them attached to the main mast, but actually they should be on the shrouds. However, I’m leaving them as they are as the misplacement does not cause any issues with the rest or the running rigging. I’ve also had to deviate from the plans slightly in terms of which belaying pins to use for which lines. There are only 4 belaying pins on either side each the mast, and 4 in front. I’ve adjusted things slightly to avoid braces rubbing against shrouds etc, and it feels more logical to me! I did double-check plans to make sure that my belaying pins were correctly placed (which they were). Incidentally, I find wrapping line around belaying pins at 1/100 really difficult!! Other than that, I’m pleased with progress so far. It’s fairly slow going, but I’m enjoying seeing it come together. Not too much left to do at this point, although I am nervous that I’ll run out of thread for the running rigging. This is a bit odd since the thread I’m running short on should have been used for the ratlines, and wasn’t - so I should have loads to spare! We’ll see! Here we are so far - main big omissions are anchors and spanker boom along with the remaining running rigging. I’ll probably complete the braces from the yards on the foremast and then attach the boom before tackling the remaining running rigging on the mainmast. The anchors will be last as they won’t be obstructed by any rigging as far as I can see.
- 35 replies
-
- 2
-
-
- flyer
- constructo
- (and 1 more)
-
SiriusVoyager reacted to a post in a topic:
Flyer by WRed27 - Constructo - Scale 1:100 - First wooden ship build
-
damaartenman reacted to a post in a topic:
Flyer by WRed27 - Constructo - Scale 1:100 - First wooden ship build
-
damaartenman reacted to a post in a topic:
Flyer by WRed27 - Constructo - Scale 1:100 - First wooden ship build
-
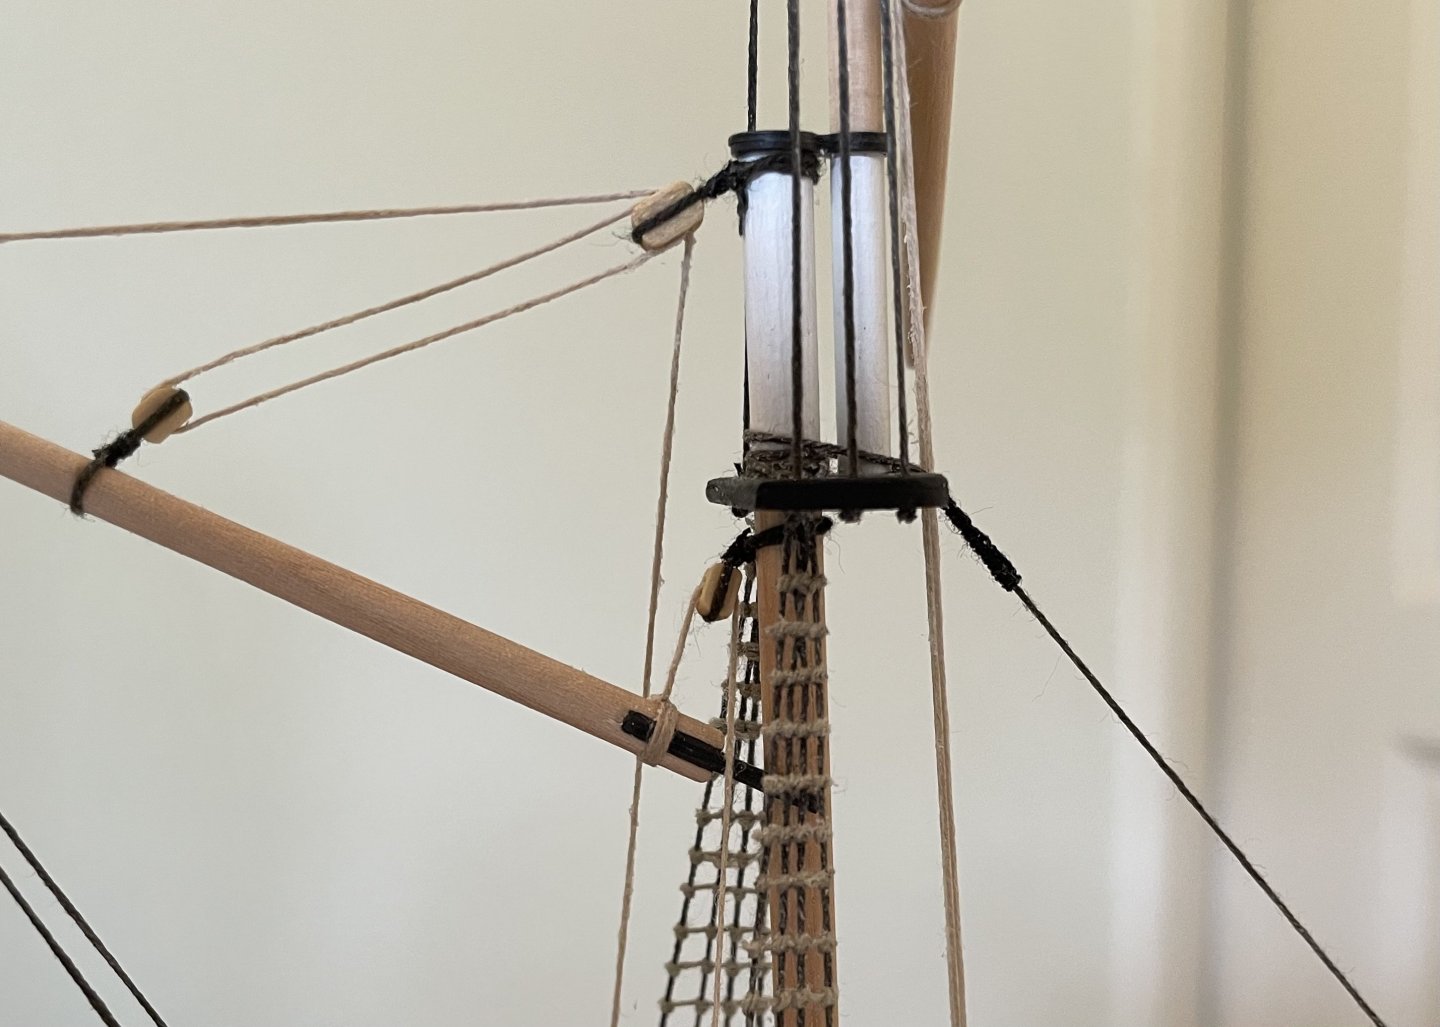
Well finally the ratlines are all done, which is a relief. I’ve also loosely fitted some of the yards on to the foremast but I think I’ll need to take them off again. I was deliberating how to attach the yards to the mast. The plans show them attached to a block above them, and the line then runs down to a belaying pin, which is what I’ve done so far. There does also appear to be a direct yard/mast attachment, but no guidance on how that’s done. I initially thought I could omit that, since the lines (braces?) running from the foremast yards through blocks attached to the main mast and down to belaying pins would hold them nicely in place. Only when I attached the first yard to the main mast did it occur to me that that wouldn’t work for the main mast yards, since the braces would pull the yards away from the mast, rather than pinning them to it! So I’ll likely seize a couple of loops on a line, wrap it around the back of the mast and slide the loops onto the yards, which I can then tighten & glue. Progress so far: I’ve attached the spanker gaffs on both fore & main masts. This was pretty straight forwards, other than the plans not showing how to attach the line on the gaff that is closest to the mast. I chose to attach a block (glad I bought additional ones) to the mast right under the foretop/maintop and then put multiple wraps around the gaff, feed it through the block & tie off to a belaying pin. Seems to do the trick! The plans do not have anything at all attaching the spanker boom. I think the assumption is that the boom will just hang off the bottom of the sail, which is OK if you’re attaching sails! So I’ll have to work out how I’ll tackle that. It’ll probably be something not too dissimilar to lazy jacks on a yacht. Other than that I still need to work out how to tie off the main stays, and what do to about the anchors, but I’m quite pleased with how it’s turning out.

- 35 replies
-
- 2
-
-
- flyer
- constructo
- (and 1 more)
-
Ratlines… Incredibly slow progress on these, mainly because I’m not finding it much fun. At all. This model doesn’t even have ratlines on the upper shrouds, and only 2 masts with 4 shrouds on each side. I’ll be terrified if I ever take on a larger model! Still, half way there, and I think the second set is probably better than the first so hopefully the next two will go OK. I used a template to space them, and they are ~3.5mm apart at 1/100. They looked too close together when I started at the bottom, but I think they are about right now that they are tied on all the way up. The yards etc are all ready to go so once I’m done with this, I can get back to something a bit more exciting! That ought to be some motivation to get them done! I’m inclined to go without sails as I don’t think the material looks great. But given how long the foremast ratlines are likely to take me, I’ve got plenty of time to reconsider!
-
ccoyle reacted to a post in a topic:
Flyer by WRed27 - Constructo - Scale 1:100 - First wooden ship build
-
Paul Le Wol reacted to a post in a topic:
Flyer by WRed27 - Constructo - Scale 1:100 - First wooden ship build
-
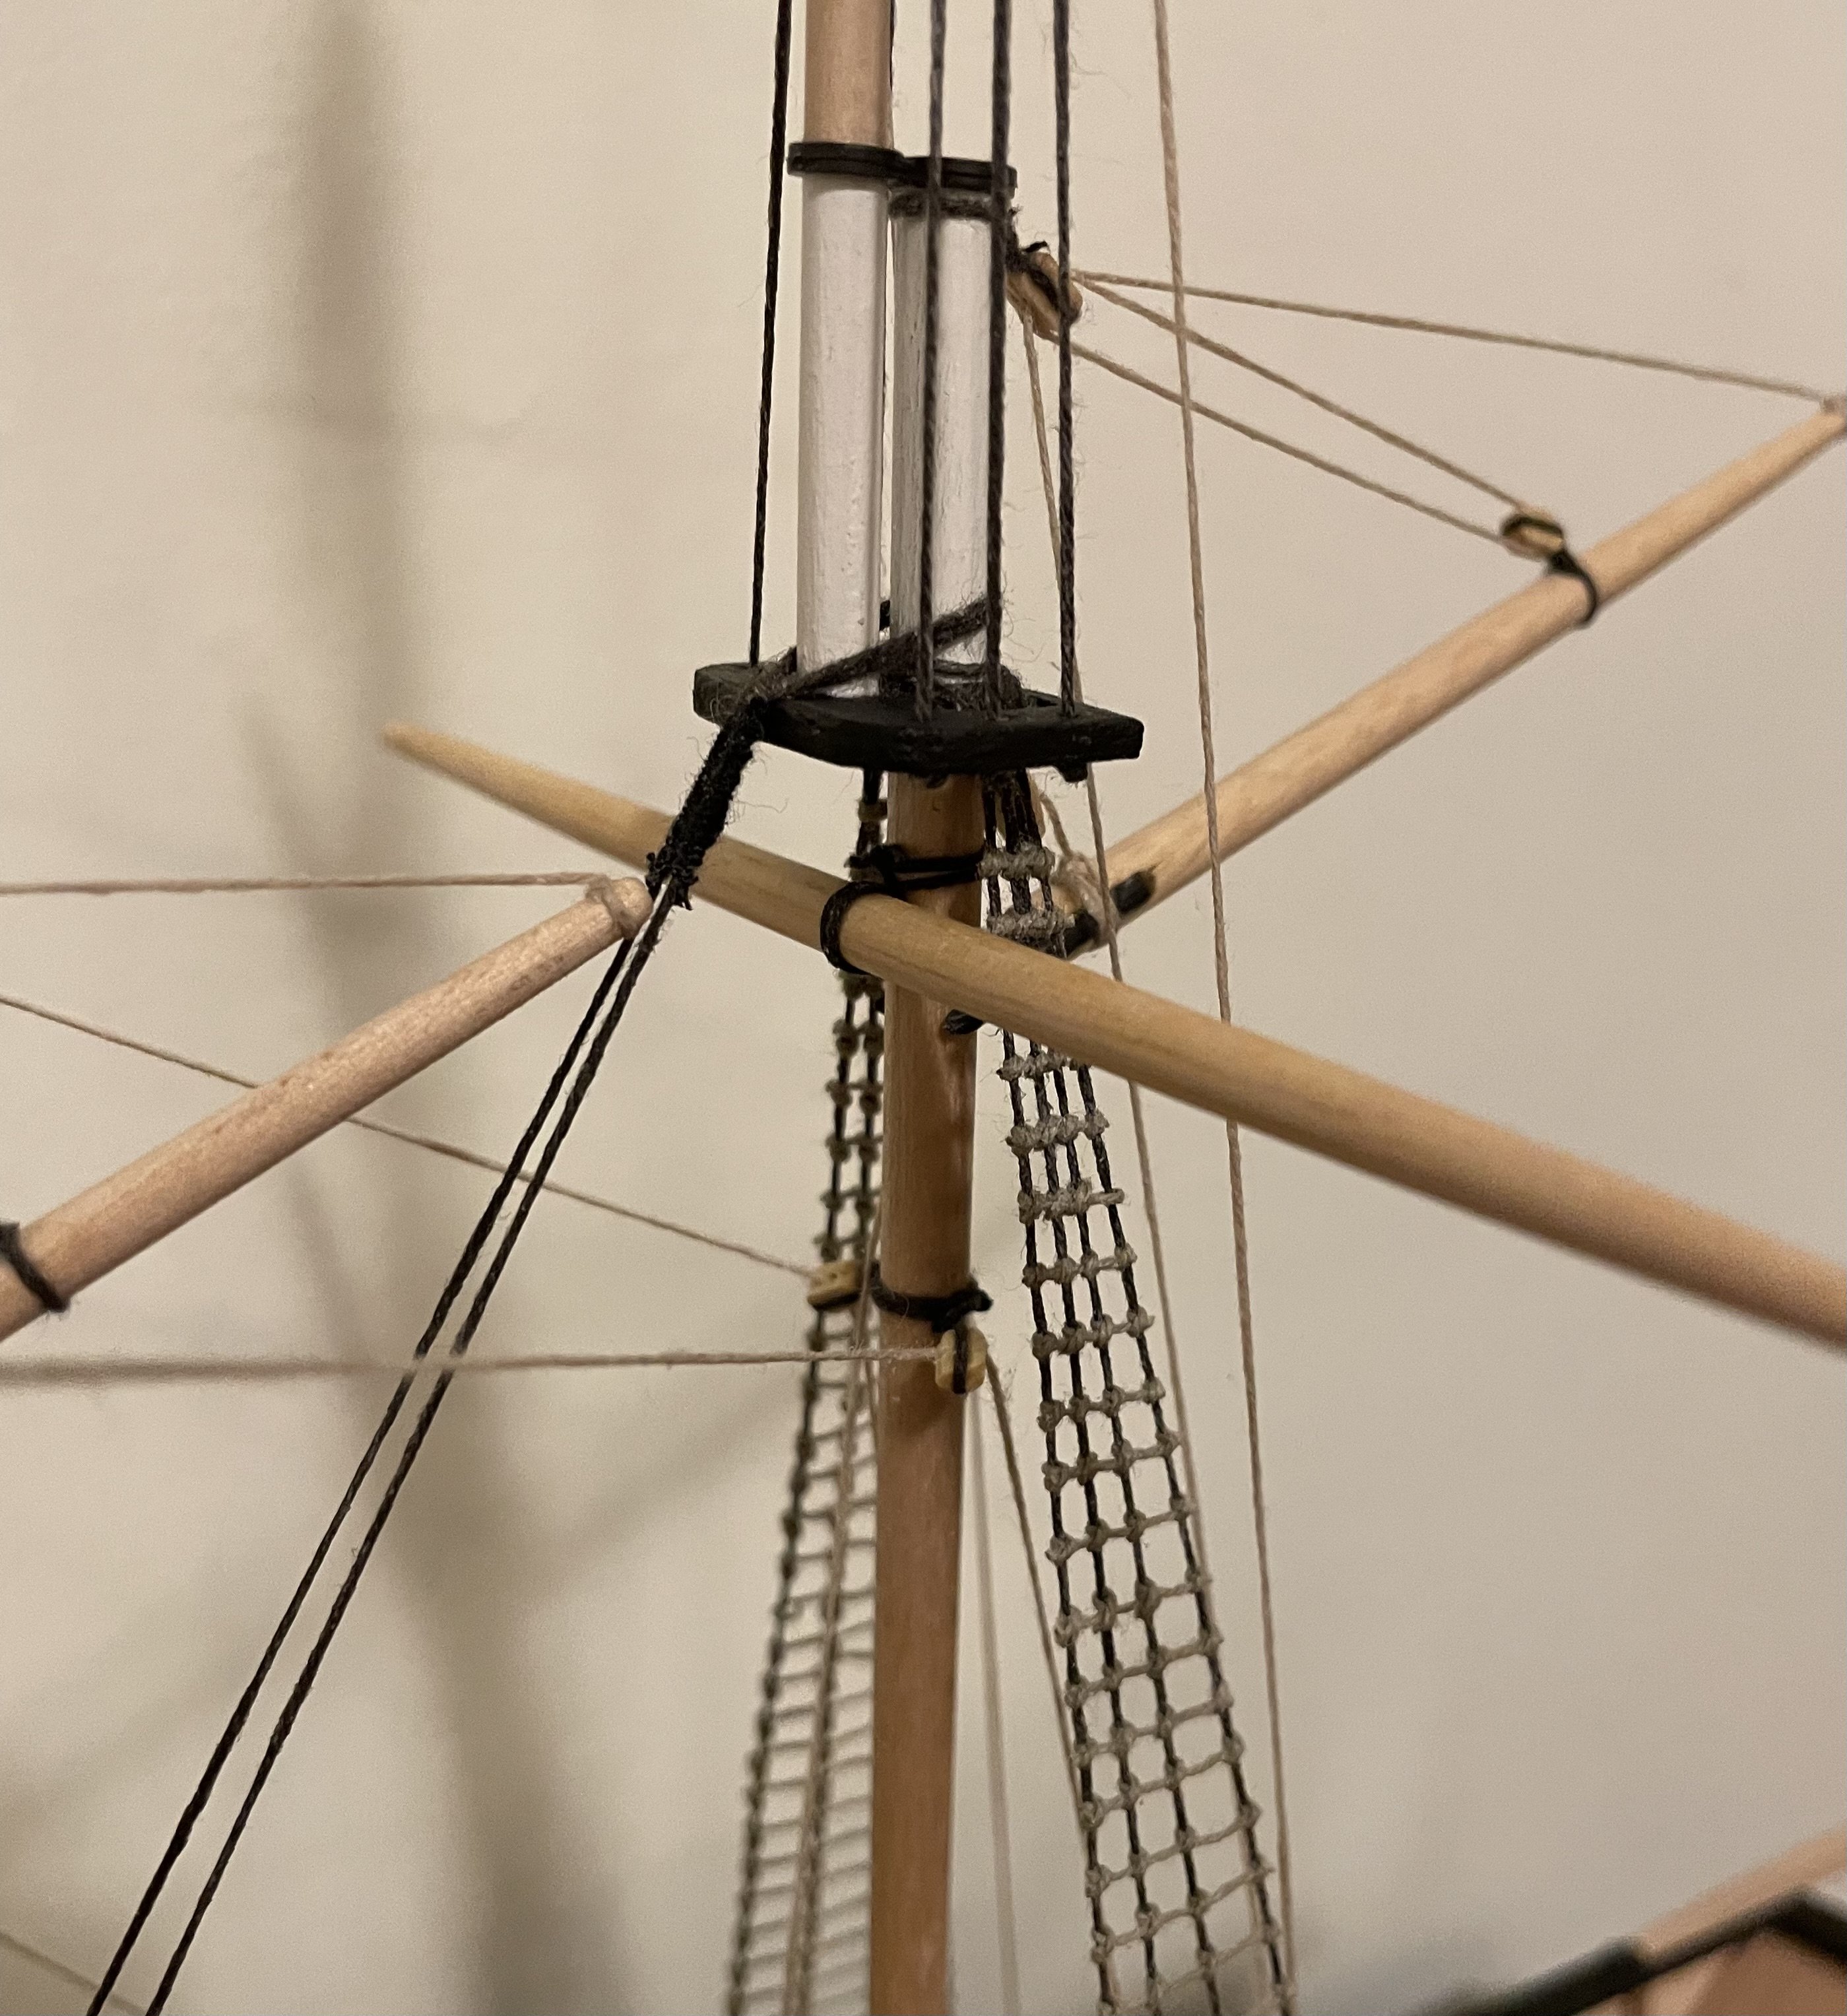
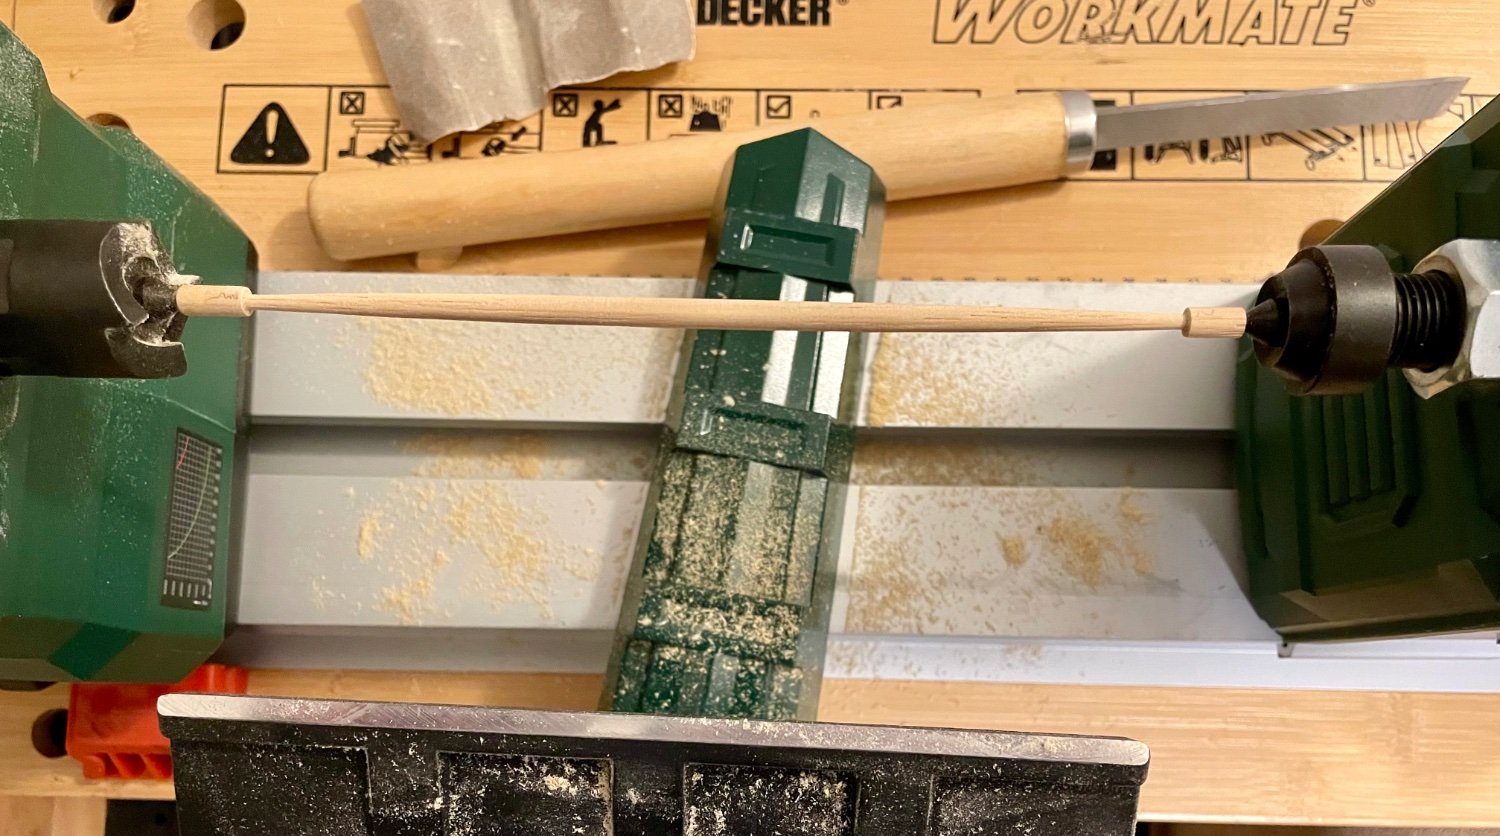
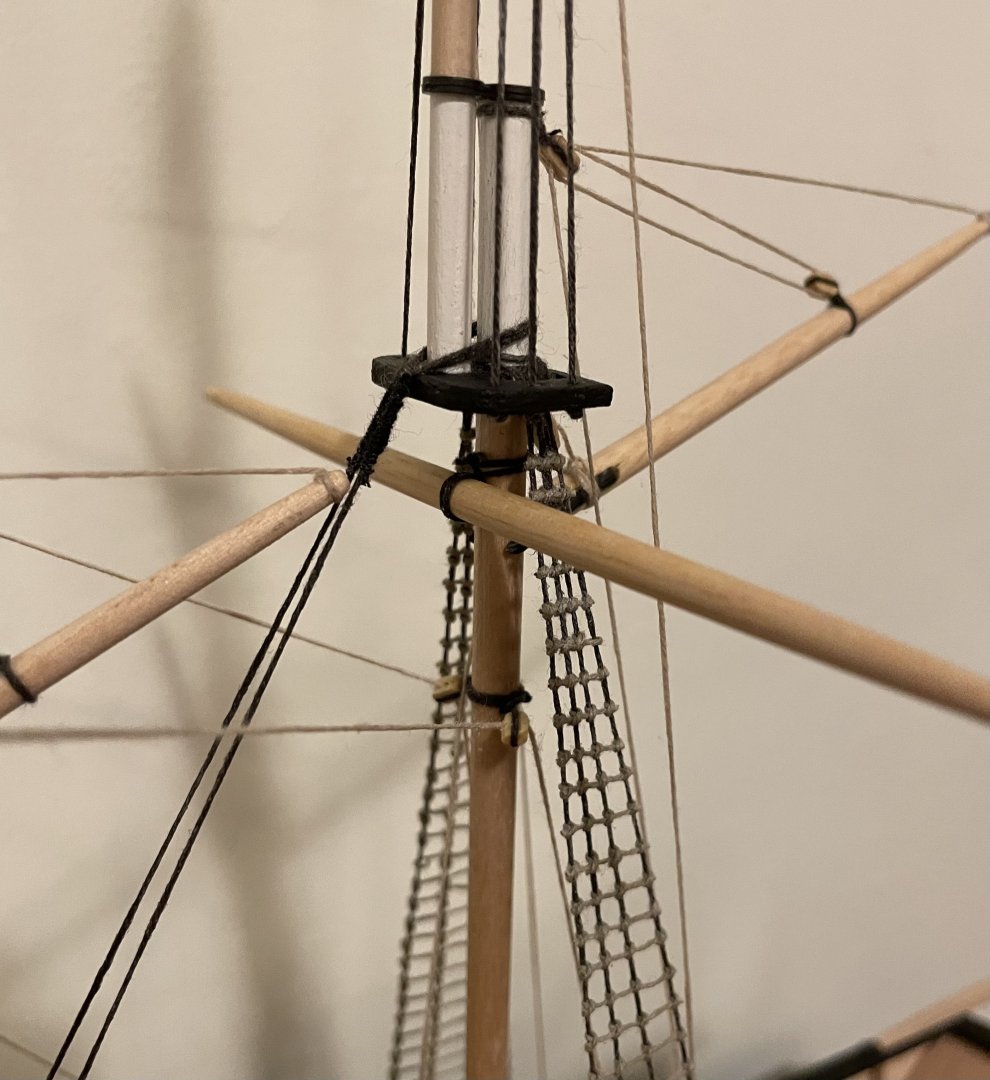
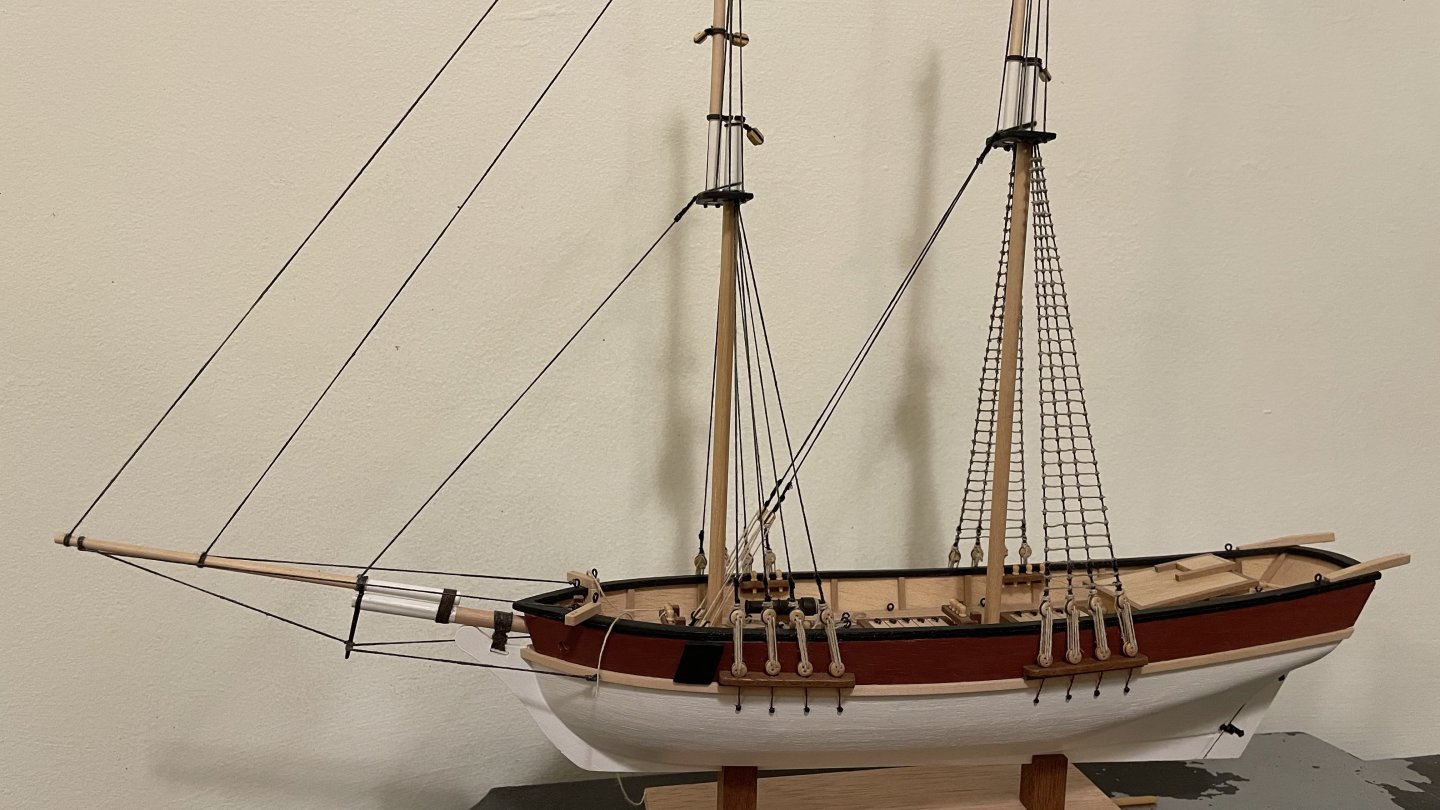
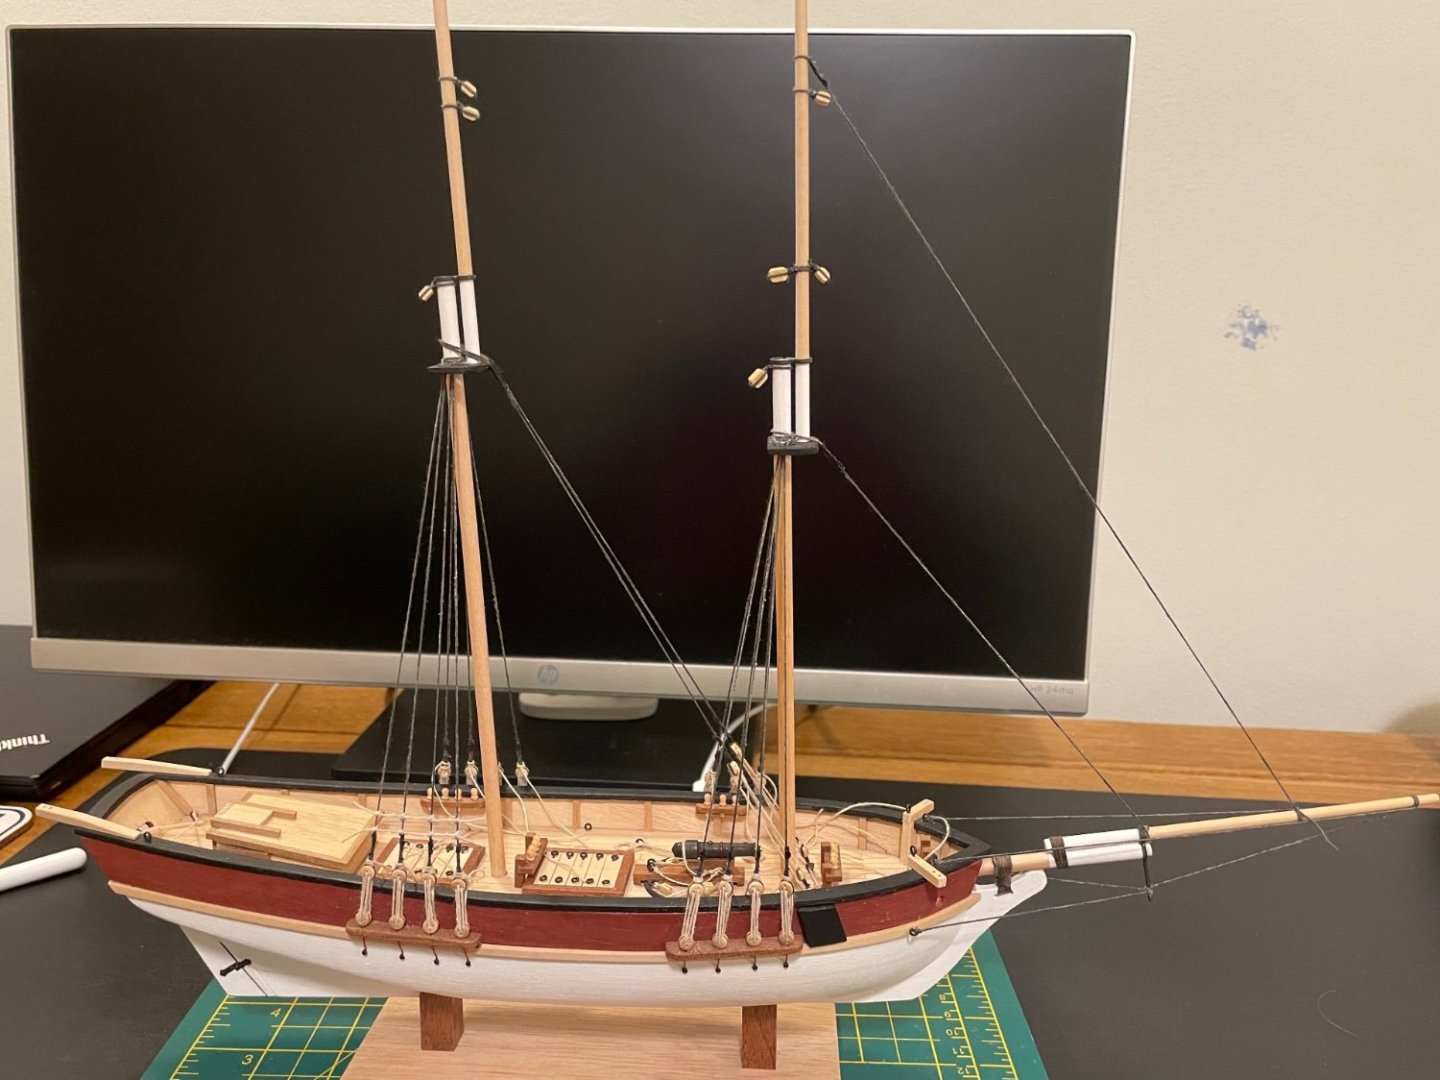
We continue… Standing rigging is all done now. I struggled with this a bit - firstly with the longest of the forestays. It was a bit of a delicate balance to get it sufficiently tight without pulling the mast forwards resulting in the other stays sagging. So they are not quite as tight as I would like, but at least they appear straight so I’m happy enough. Likewise with the upper shrouds. It’s hard to tell from the plans whether there should be an eyelet drilled into the top of the mast, but decided against this. Instead I tied a temporary thread around the mast, and seized the shrouds above this to stop them slipping down the mast when under tension. I wasn’t sure how to deal with an odd number of shrouds, so the aft shroud on each side is a single thread knotted around the mast. The final challenge with the shrouds was again getting them nice & tight. There are no deadeyes; this model simply threads the shrouds through small holes in the tops (which I had to re-drill to make evenly spaced), and then there is a some kind of stopper knot underneath. I could not get a knot tied close enough to the underside of the tops to keep any tension on the shrouds. So I ended up forcing the seizing & temporary thread a few mil down the mast, tying off the bottom of the shrouds, and then re-tensioning them by moving everything back up the mast and glueing it before removing the temporary thread. I think I just about got away with it. I’ve also tidied up the loose ends on the lower shrouds. Still need to decide what to do with the anchors, and also where/how to tie off the main stay pair as this is not clear in the plans. I’ve also been working on the various yards and booms etc. I bought a super-cheap lathe from Lidl last summer. I’m not normally a fan of tools from Lidl! But it does seem to be adequate for my needs - I’ve been able to shape the various dowels more easily than I could with the dremel bodge that I used for the top masts! I’ve got 3 or 4 more left to shape, and then I will attempt to decipher the plans as best I can. I have been spending a bit more time looking at some specifics and I think it makes sense for the most part, but there are still some noticeable gaps. There is still the small matter of ratlines too - I’ve decided to go with the 0.15mm grey thread so can work my through tying those in small chunks. Feels like it’s coming together at this point!

- 35 replies
-
- 3
-
-
- flyer
- constructo
- (and 1 more)
-
coxswain reacted to a post in a topic:
Flyer by WRed27 - Constructo - Scale 1:100 - First wooden ship build
-
coxswain reacted to a post in a topic:
Flyer by WRed27 - Constructo - Scale 1:100 - First wooden ship build
-
coxswain reacted to a post in a topic:
Flyer by WRed27 - Constructo - Scale 1:100 - First wooden ship build
-
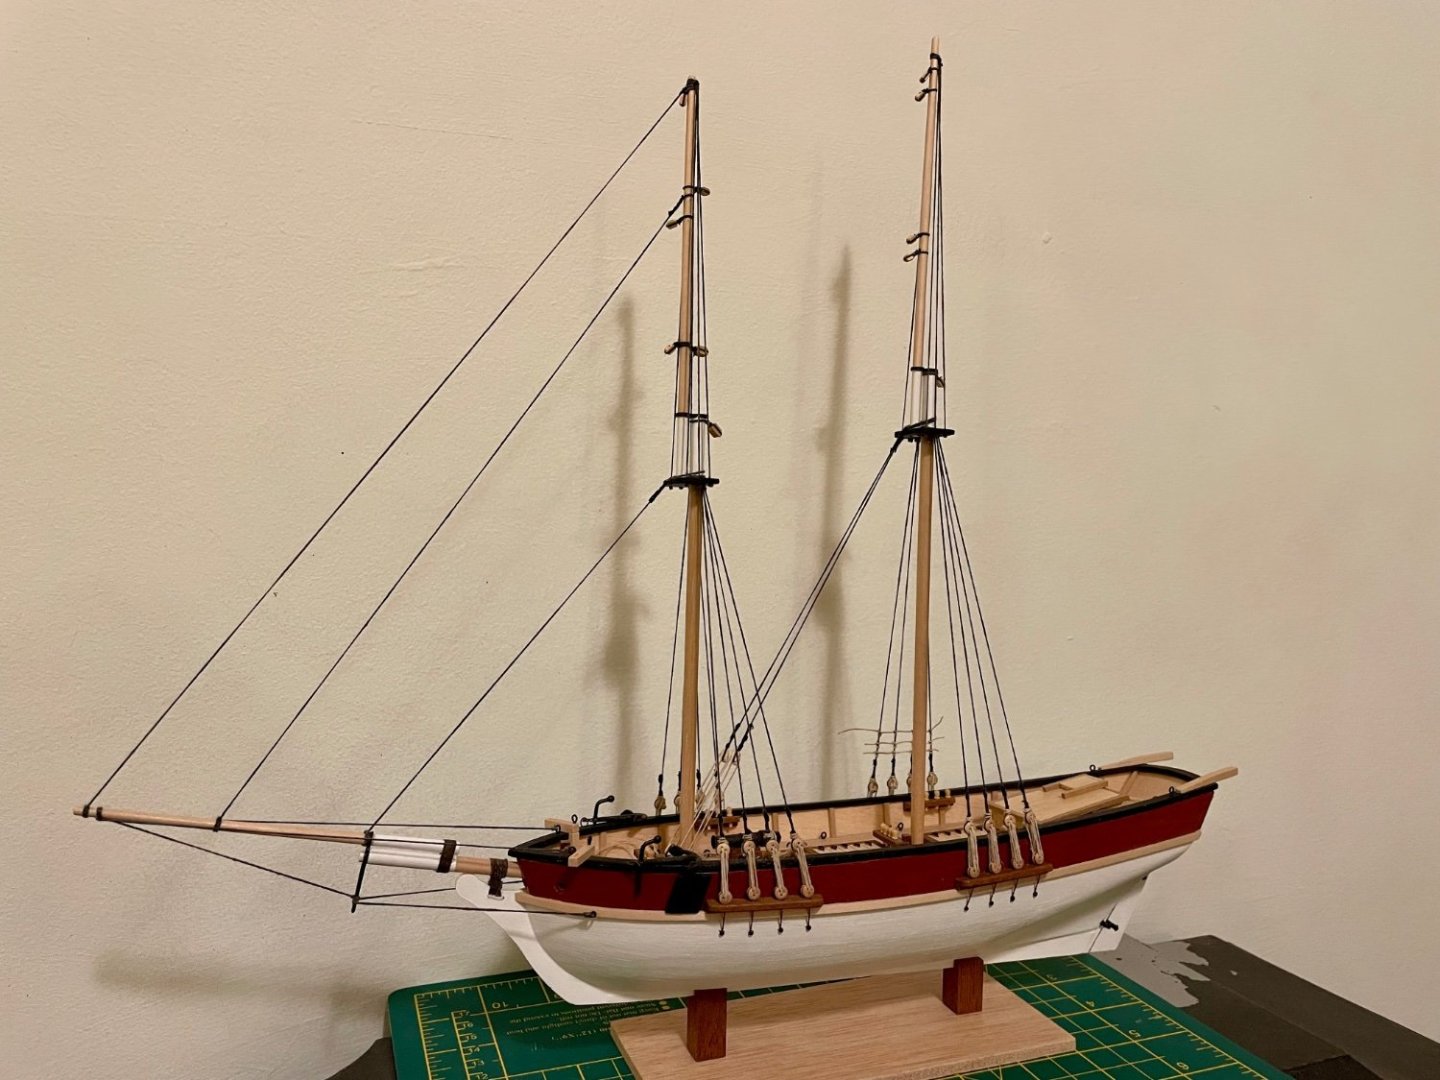
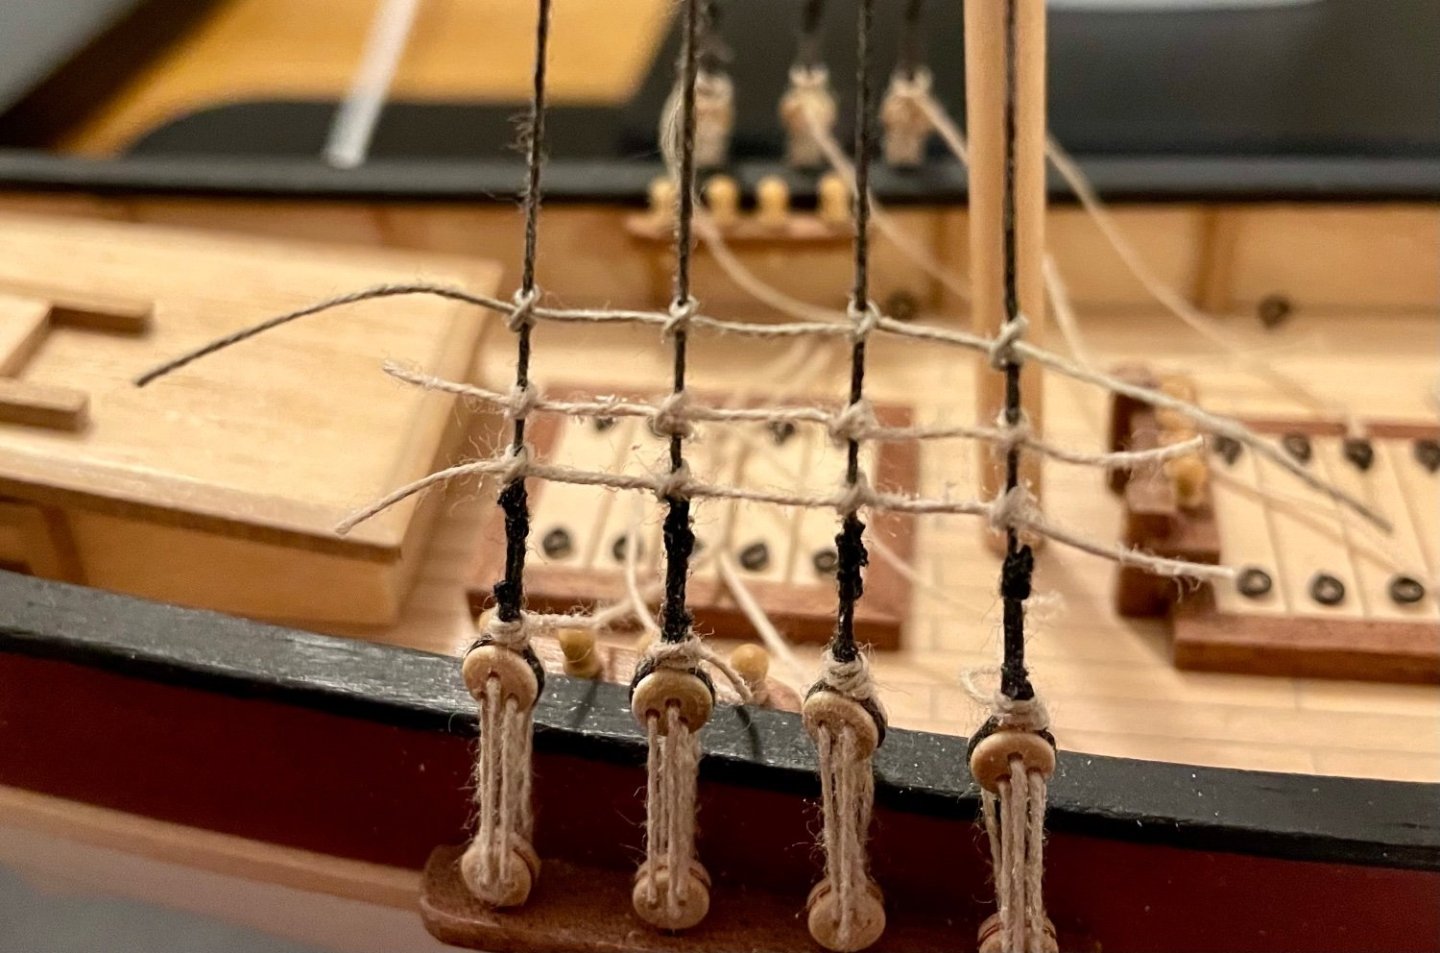
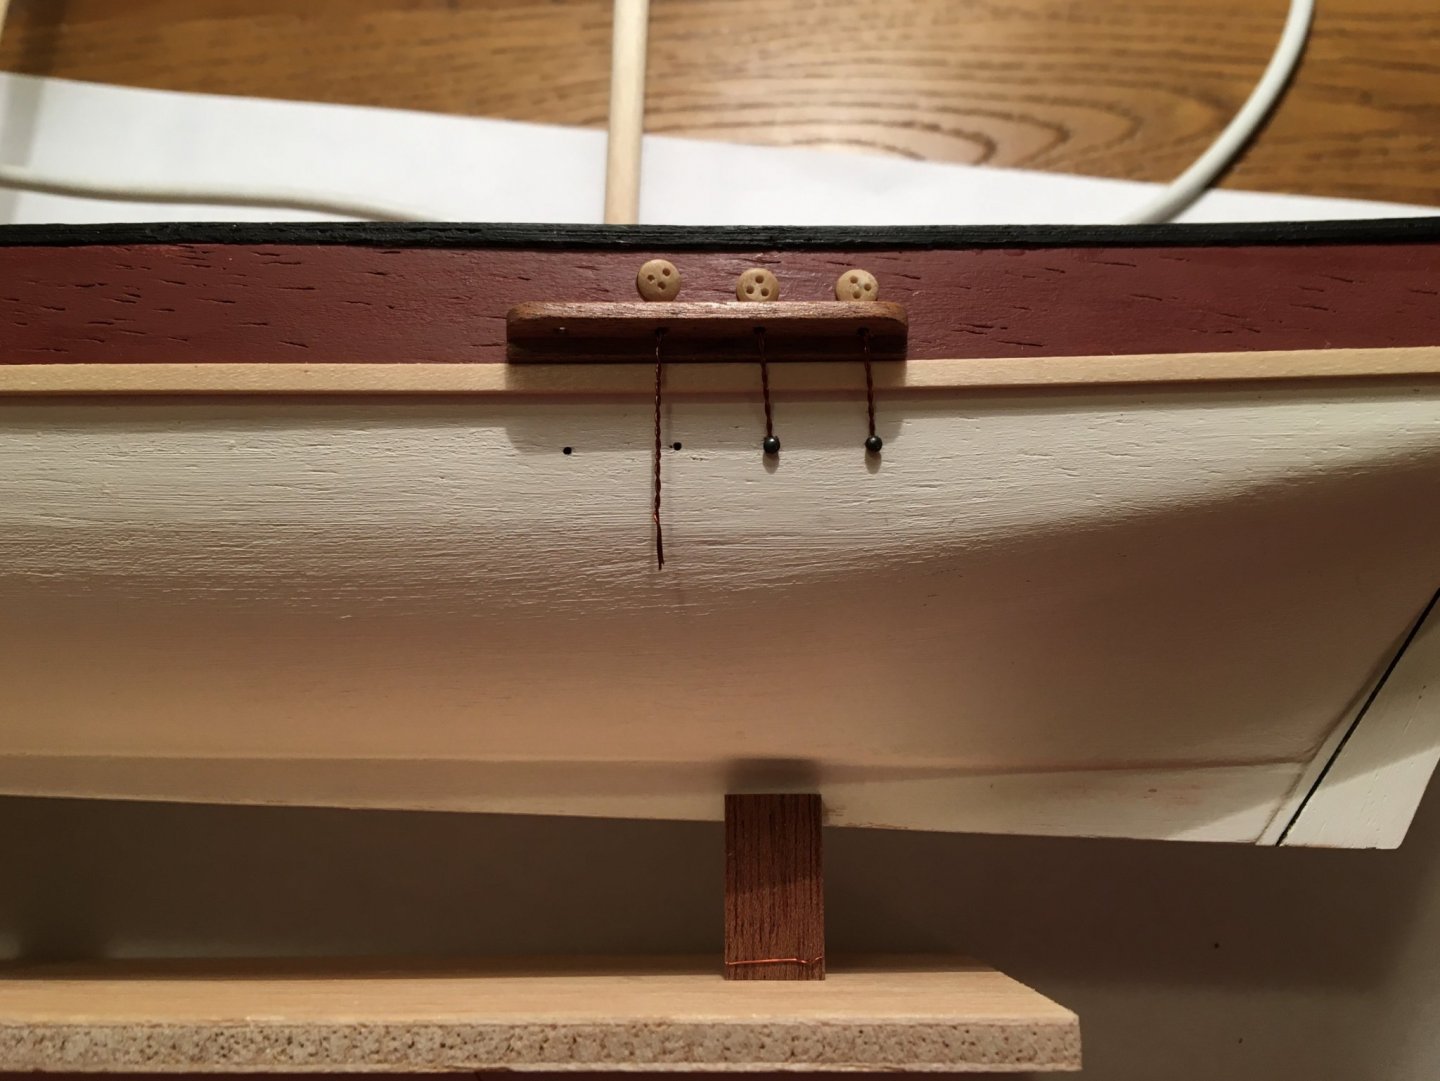
Some more slow and steady progress on my Flyer build. All the lower shrouds are on. I ended up coating them with glue/water mix to try to de-fuzz them a bit and i think they are looking OK. I’ve also managed to ensure no unwanted mast bend - everything seems to be lined up quite nicely. I’m not entirely happy with the thread between the deadeyes, but I think that’s more a reflection on the thread quality more than anything else. It feels as though the thread has a larger diameter than it ought to have, and consequently it doesn’t look as clean as it might. I wasn’t sure how to tie off those threads either, nor indeed what to do with the shroud ends, so I’ve gone with something that looks OK and is practical at 1/100. There are two seizings on the shrouds, and the line between the dead eyes is just wrapped around the shrouds a couple of times and tied off. I’ll glue them before cutting off the excess. I’m pleased that I was able to get a constant distance between the deadeyes. For the initial pair I measured everything as far as possible in advance and attached the deadeyes to the shrouds before anything was attached to the model. But latterly I would attach the first deadeye to the ship, and do the second one whilst it was attached. I found that it was quite easy to adjust the shroud length with just the throat seizing on the deadeye so could get a good compromise between the height of the deadeye and the tension in the shrouds. I’ve also attached two of the three forestays. There’s not a great deal of standing rigging left to do, and thankfully I don’t think I’ll run out! I’ve done a couple of test rat lines. I’m not sure whether it’s the colour combination, the thread diameter or the fuzziness, but I really don’t like them. I’d not really paid much attention until now, but the only two threads supplied with the kit are one dark brown and one natural. The thread diameter is not specified but I believe they are both 0.25mm, and the rat lines do not look right. I think the rat lines should be rather thinner threads, so have tried a 0.15mm thread from another kit as a test. The uppermost ratline is the 0.15mm thread, whereas the two below are the kit supplied thread. I’m not sure if it’s easy to make out in the image, but I think the thinner thread is a much better choice - it also appears to be better quality with far less fuzz! Still not sure on colour through - I can’t help feeling they ought to be darker! The decision might be made easier by the scarcity of thread in the UK at the moment - most seems to be out of stock! Still, plenty to be getting on with in the meantime!
- 35 replies
-
- 1
-
-
- flyer
- constructo
- (and 1 more)
-
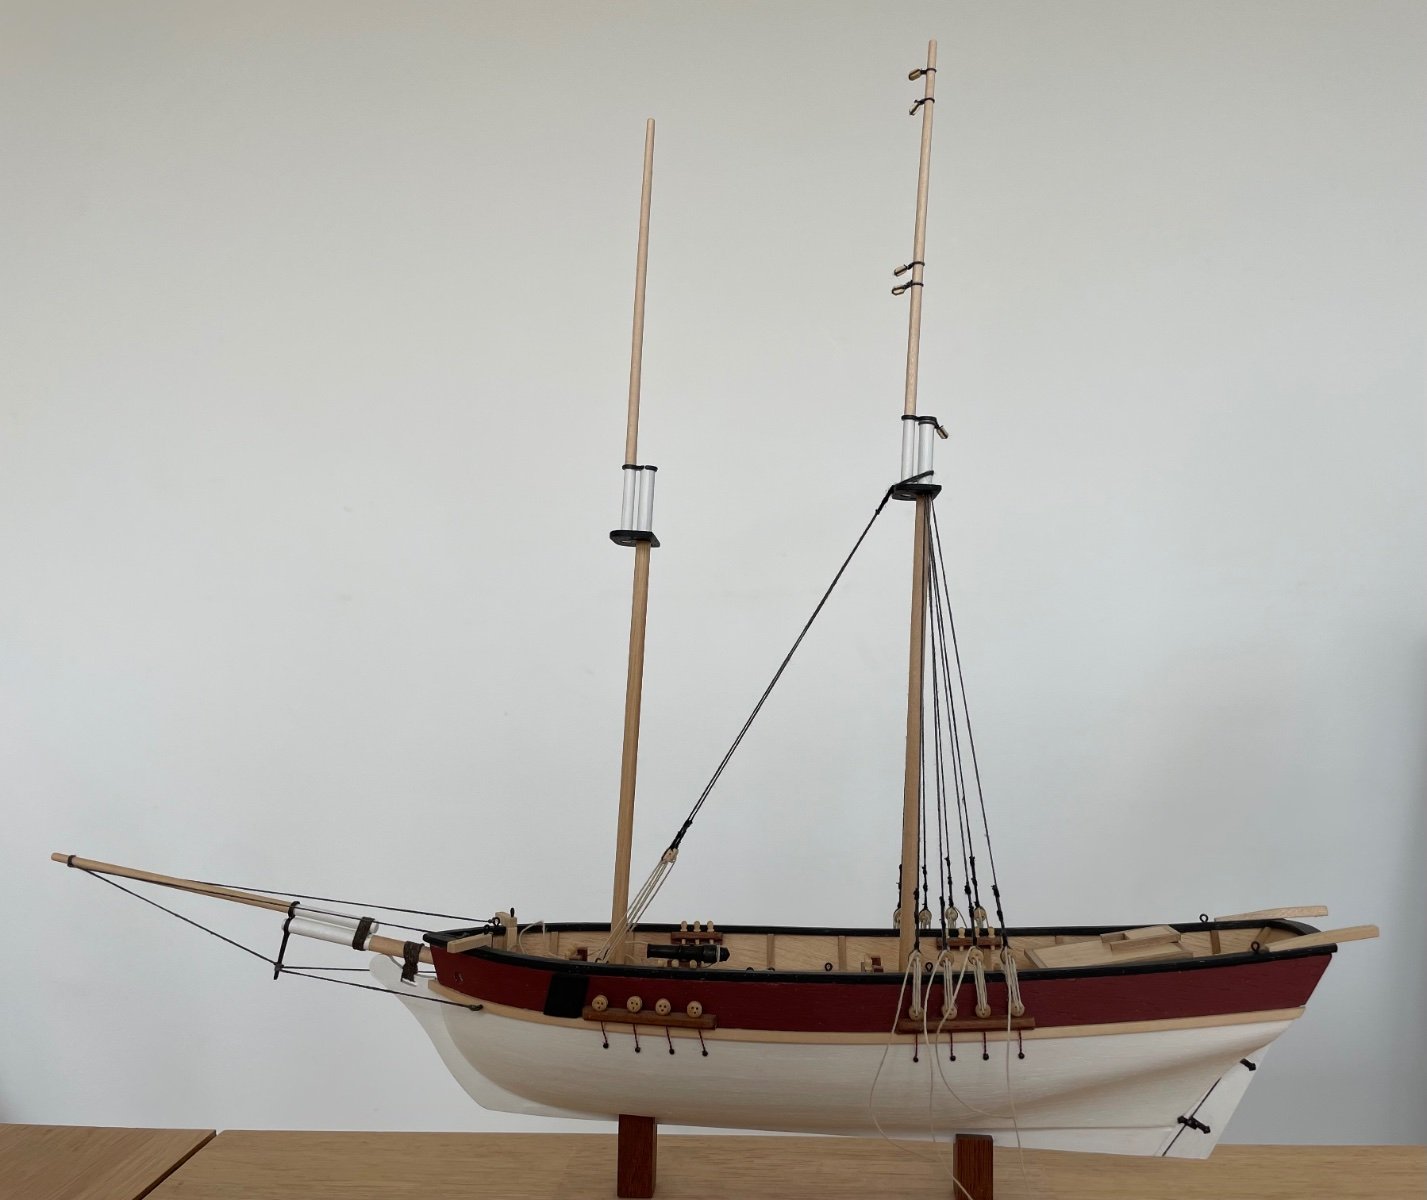
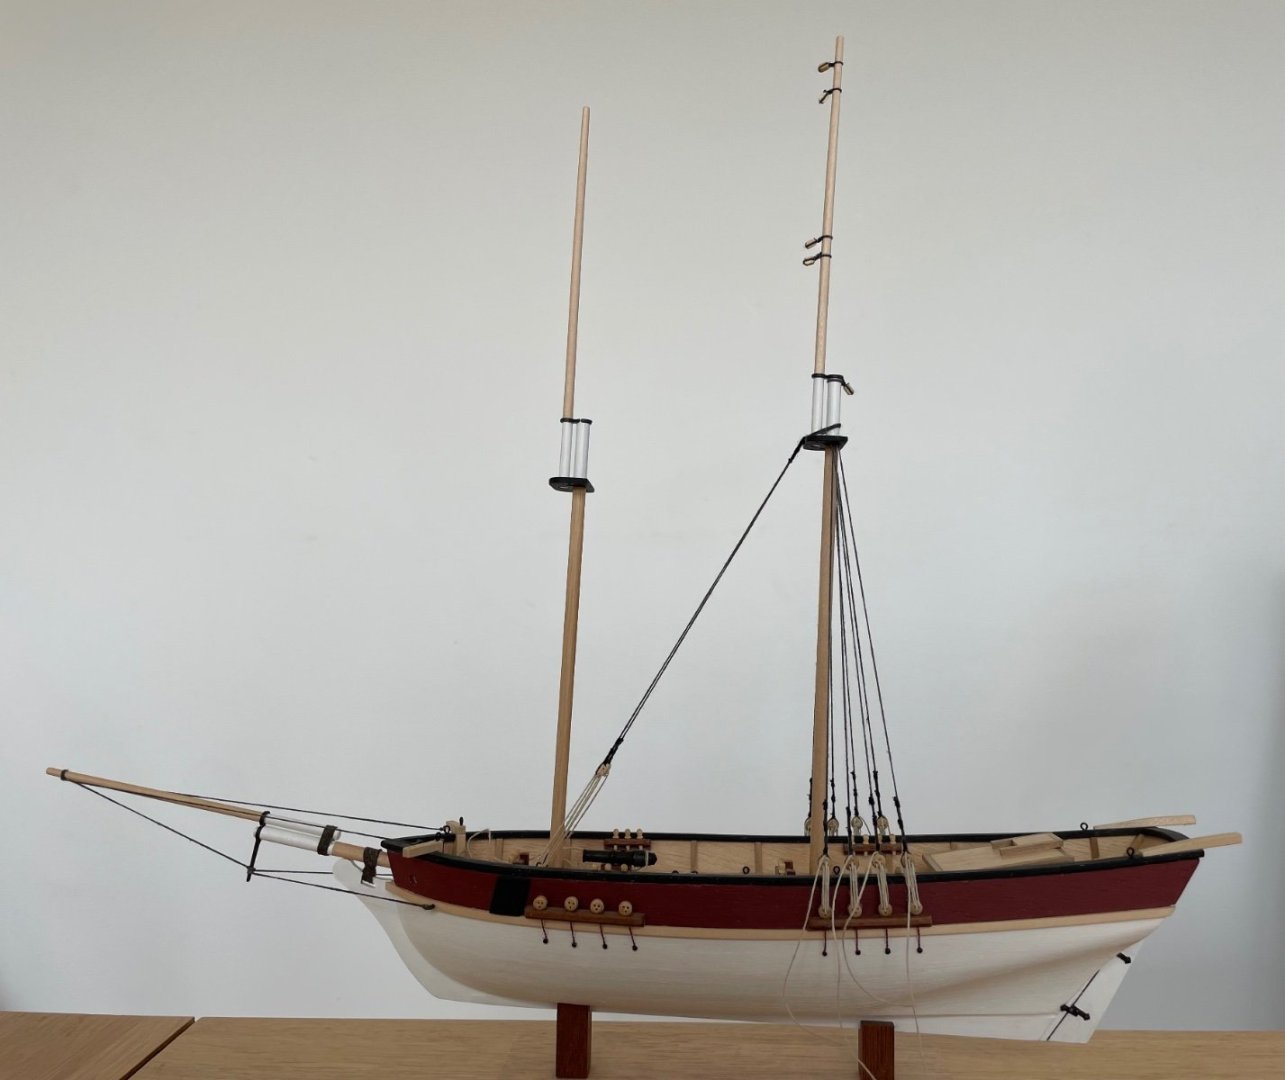
A bit more slow progress on the Flyer. I feel like I’m doing everything twice because there is so little guidance in the instructions. Even trivial things like the length of thread to cut for the line between deadeyes - I initially cut enough to get them attached but did not leave enough to tidy up the ends nicely! I’ve no clue how generous they are with the thread length supplied so trying to be fairly economical! Anyway, I’ve started with the main mast, and put the pair of main stays on first. I’ve not glued the mast in so am relying on tensioning stays/shrouds for placement. I’ve also put the shrouds on, and the aft pair on each side are really pretty tight to ensure the mast rake is aligned with that in the plans. So far so good I think, and starting to look a bit like a ship! Although I’m still not happy with the fuzziness of the lines in spite of running them through wax. I think I’ll need to coat them with a glue/water mix to improve the appearance. Hoping to get the foremast stays & shrouds in place this weekend.
- 35 replies
-
- 1
-
-
- flyer
- constructo
- (and 1 more)
-
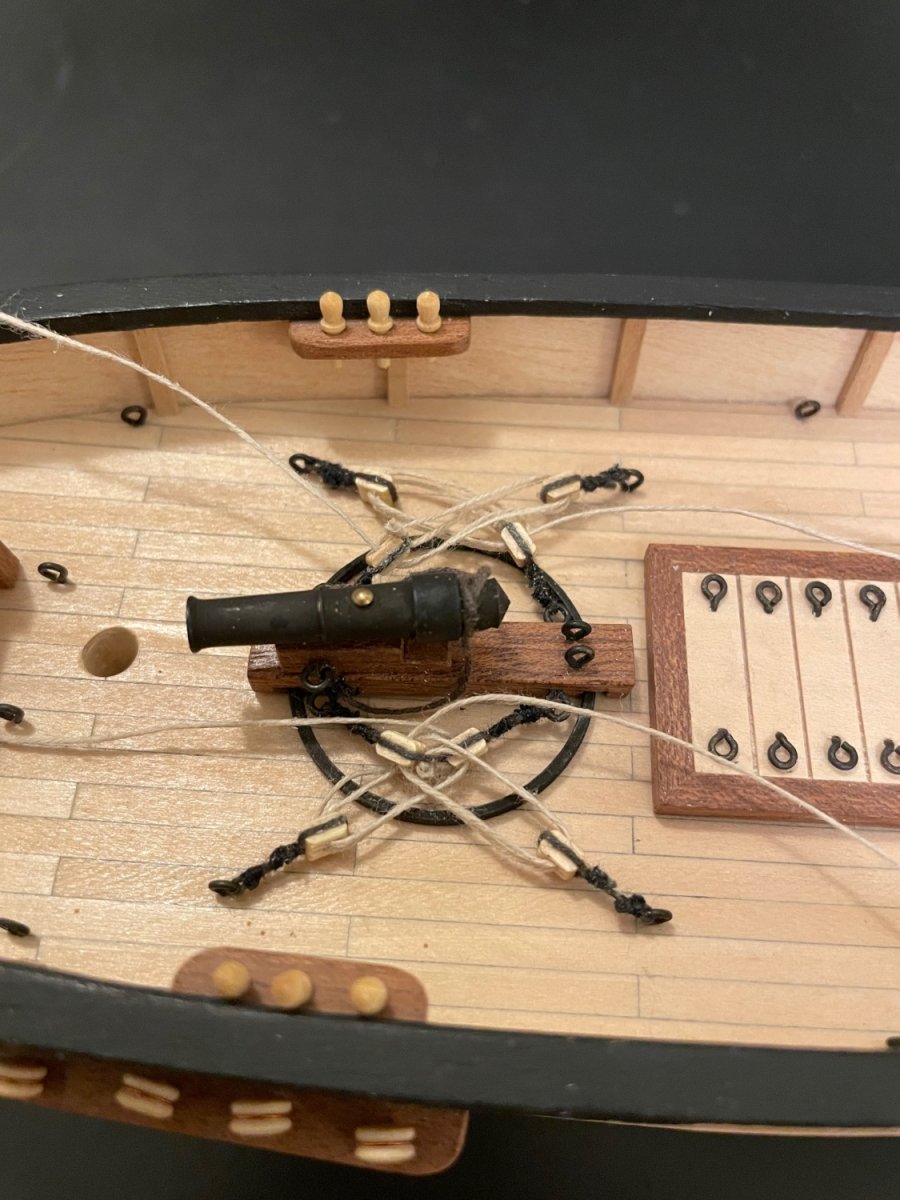
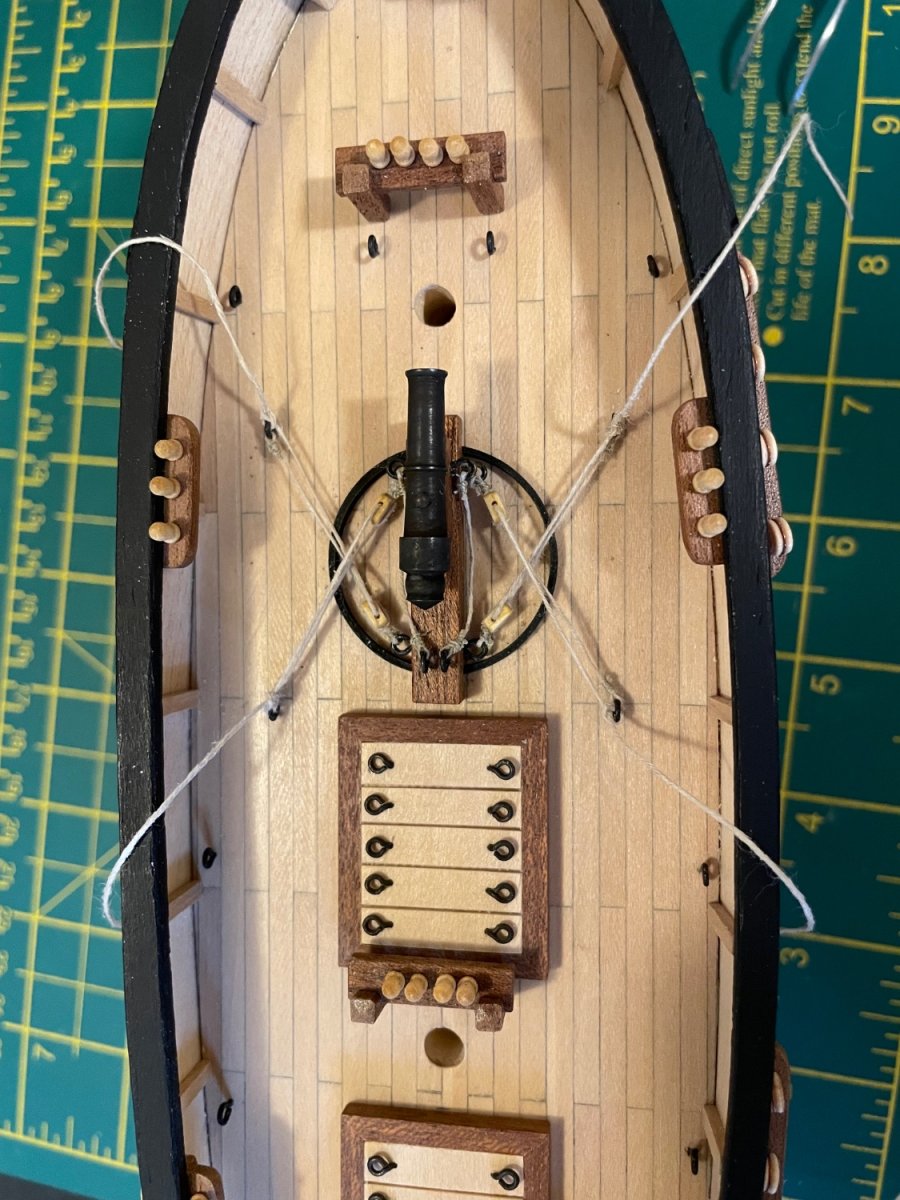
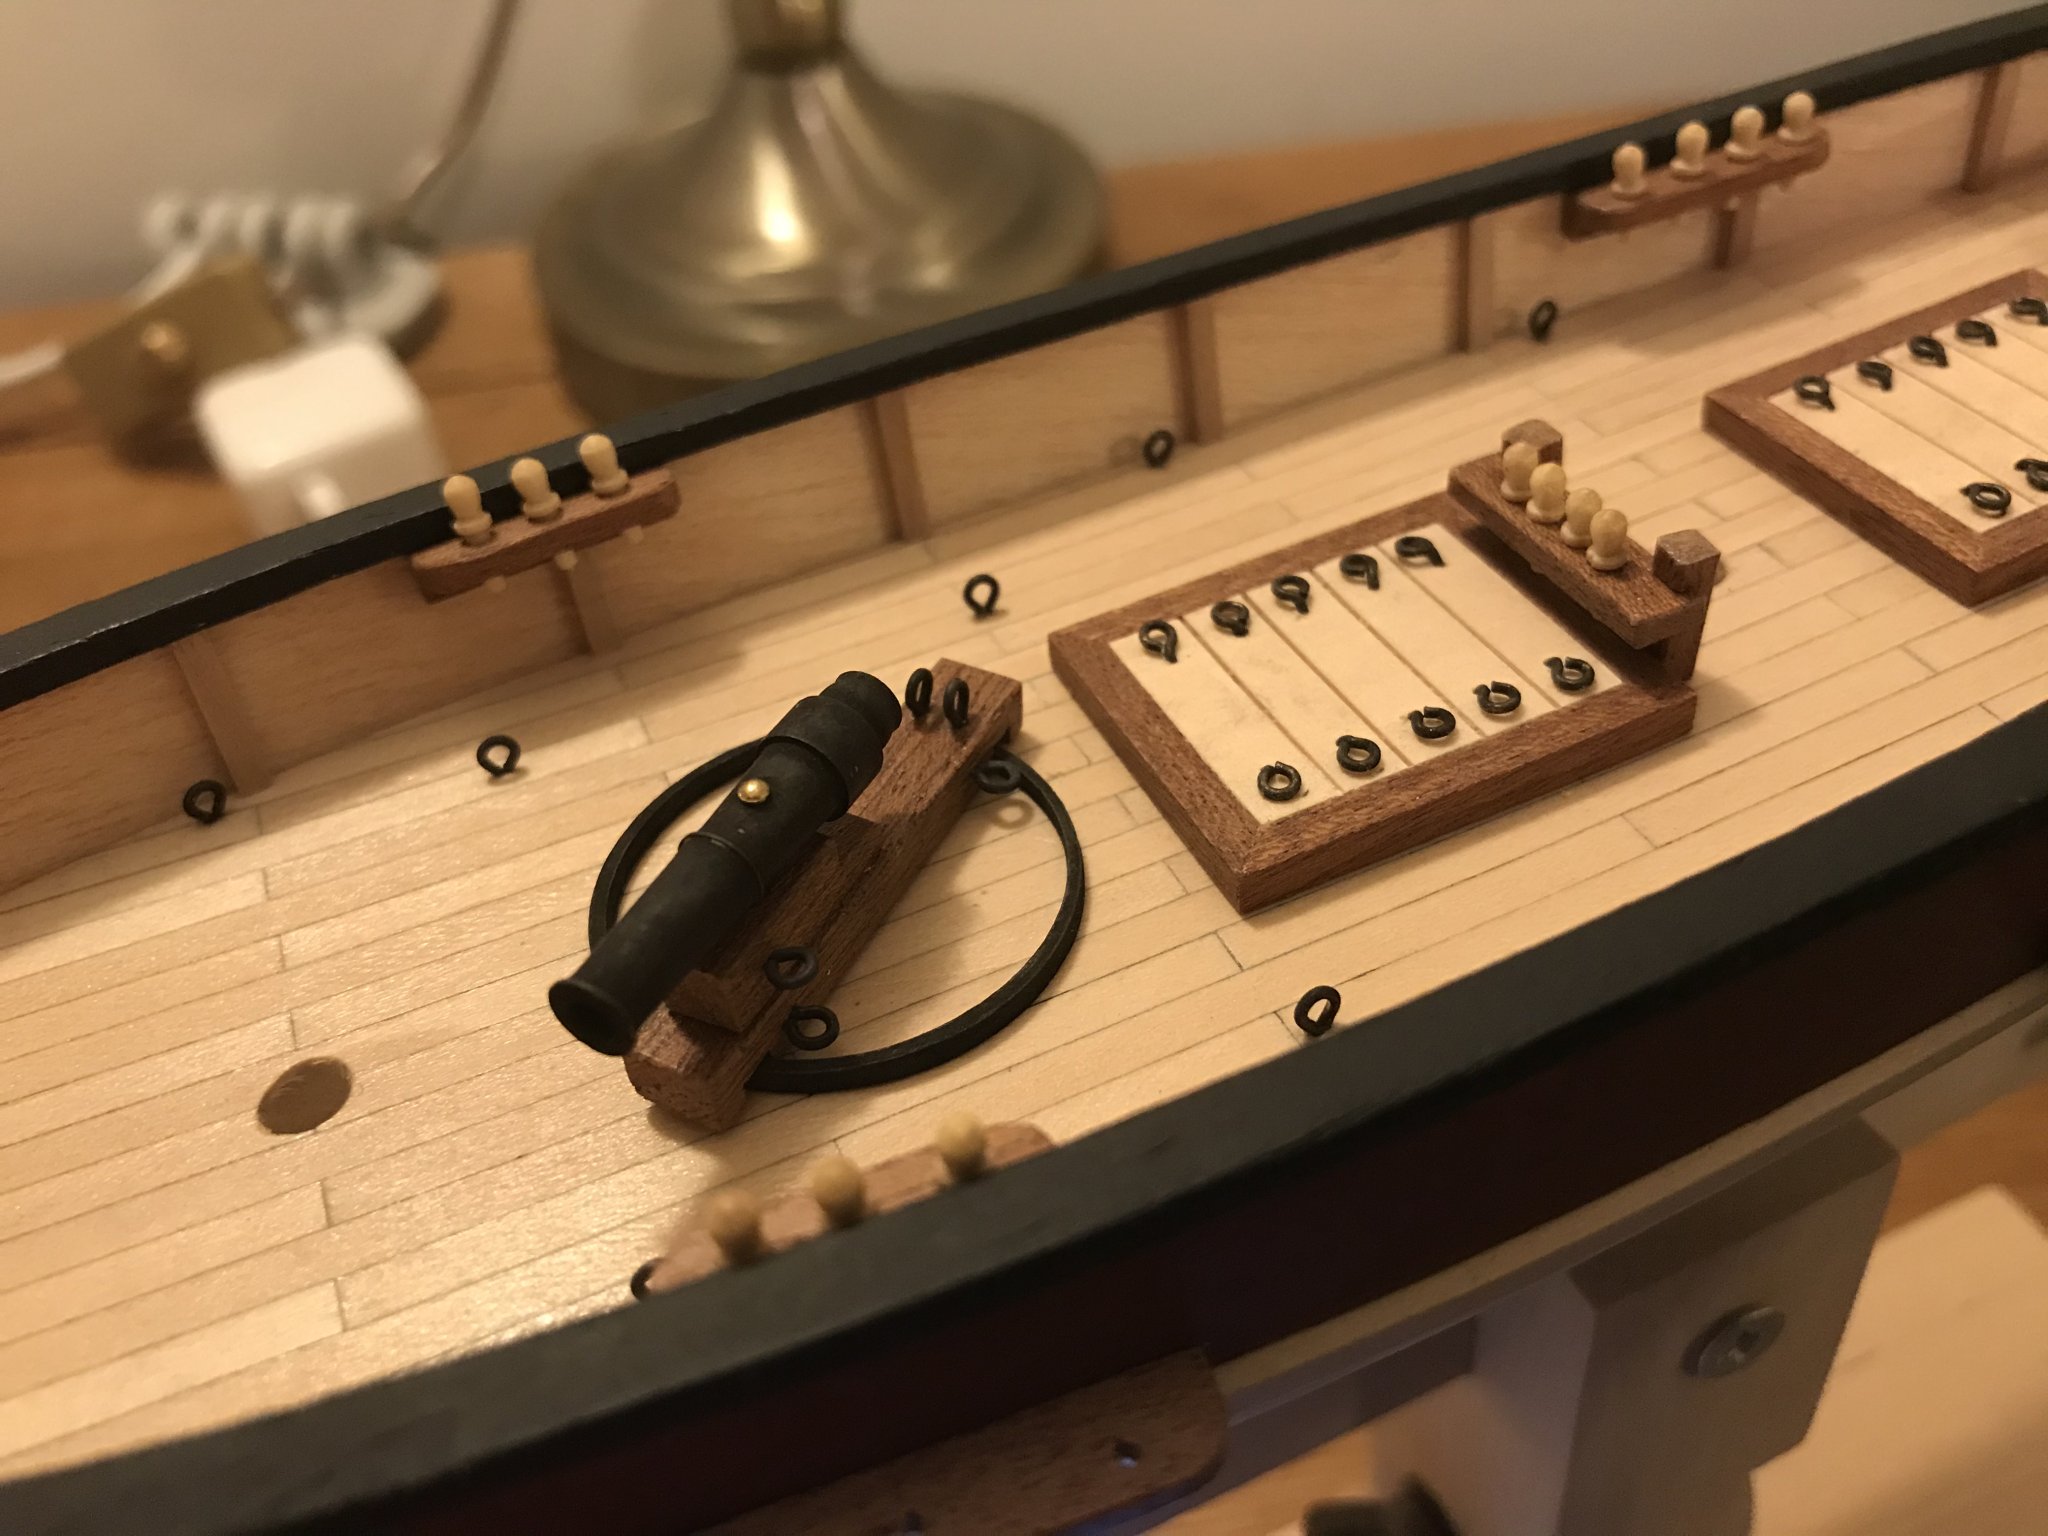
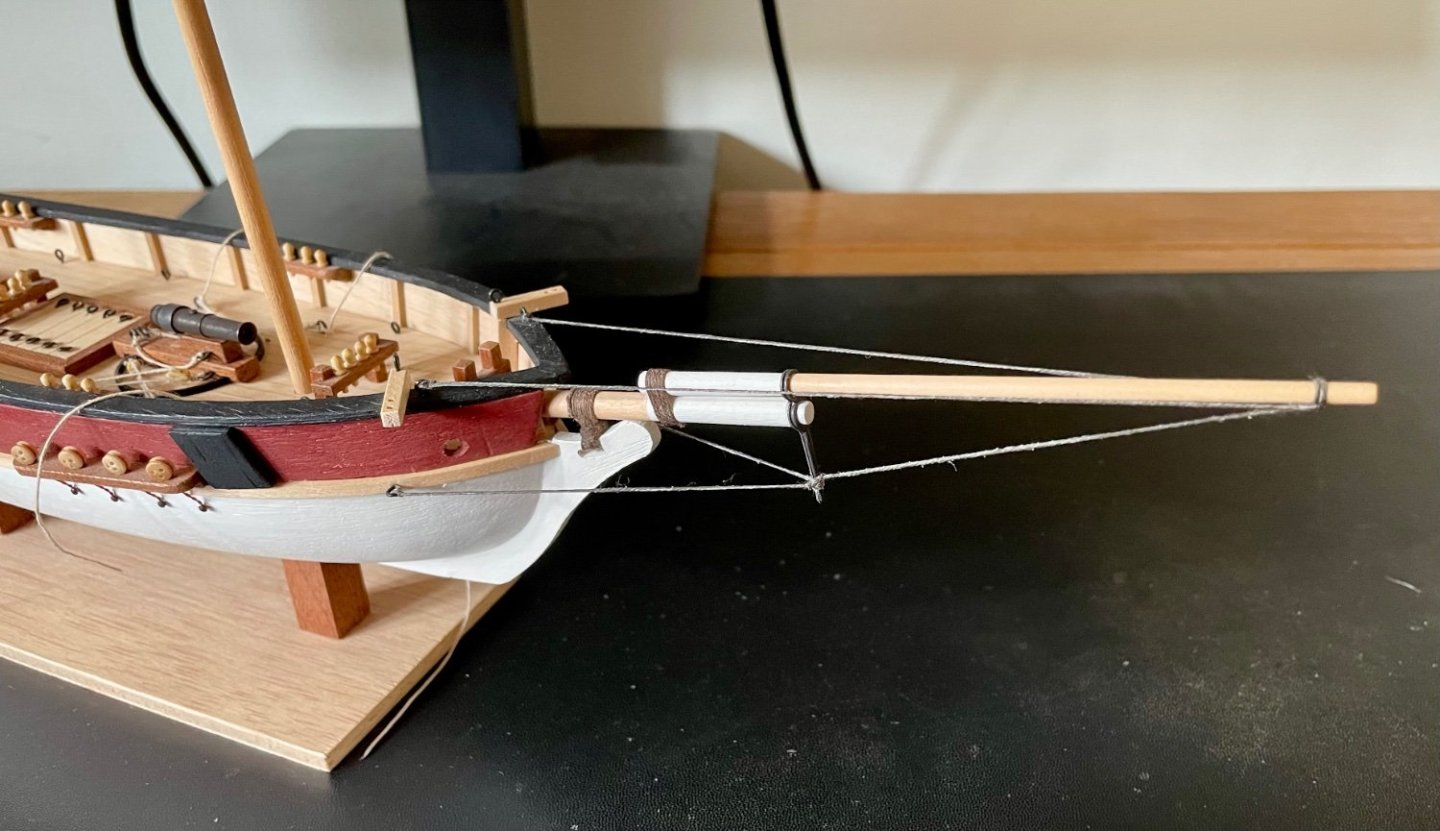
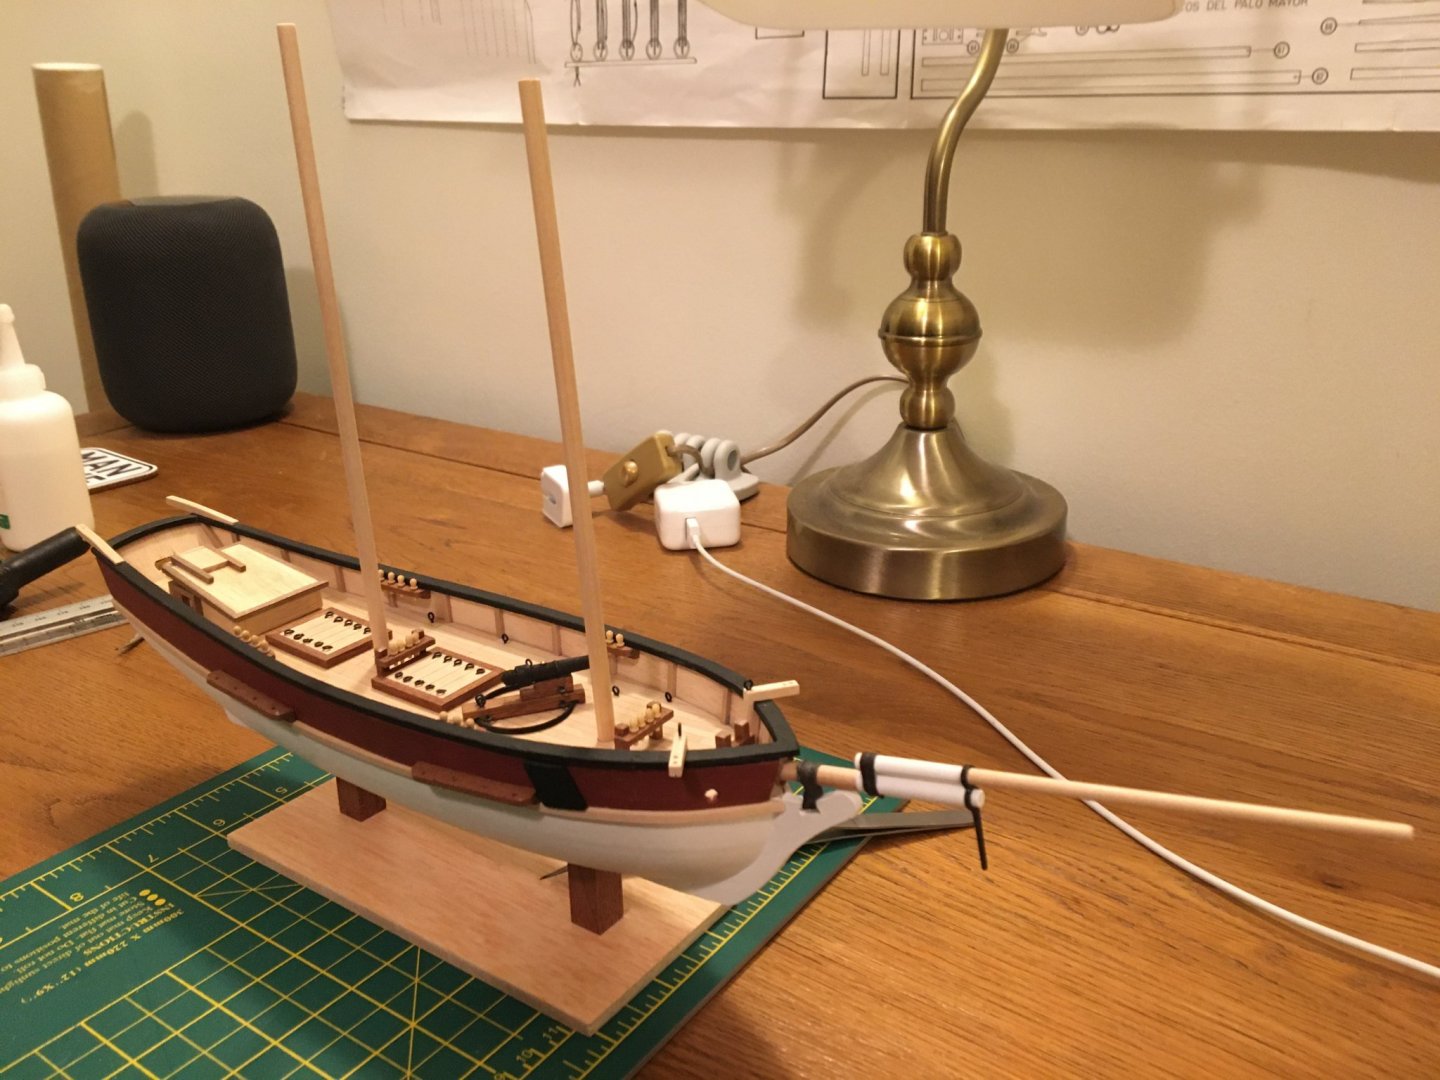
I’ve made just a little more progress with my Flyer build. I’m a bit frustrated by the lack of guidance in some areas. There is nothing for the anchor. The instructions & plans just have anchor warp running through the hole in the bulwarks and being tied off on the bowsprit bitt. There is no capstan or windlass arrangement on this model. I’ve see an excellent post on here describing how it would work on similar vessels, but I’m not sure I’ve got the space or layout to pull it off effectively, so I will likely opt for a couple of Sampson posts and will wrap whatever thread I have left around them. Likewise the tiller arrangement. I understand there would normally be a couple of single blocks on each side of the tiller, but there is not enough space for this to work; the gap between the two blocks is so narrow that it looks odd. Therefore I went with the plans provided and just looped thread around the tiller and tied it off on each side. I’ve added the bowsprit shrouds which I’m quite happy with. Having not done this before I was worried that I might not get them sufficiently tight but this has not been a problem so far. The only thing I don’t like is the white wax residue on the dark thread. It’s super fuzzy if not waxed, so would welcome any recommendations on how to avoid both wax and fuzz! I’ve also added a few more eyelets in preparation for rigging. Oh, and put a rope to restrain the recoil on the cannon because safety first! Next steps I think are masts which are only dry fitted so far, and then tackling the standing rigging. Do people normally glue masts in place in perfect alignment before any rigging, or can adjustments be made via tension on the standing rigging?
- 35 replies
-
- 1
-
-
- flyer
- constructo
- (and 1 more)
-
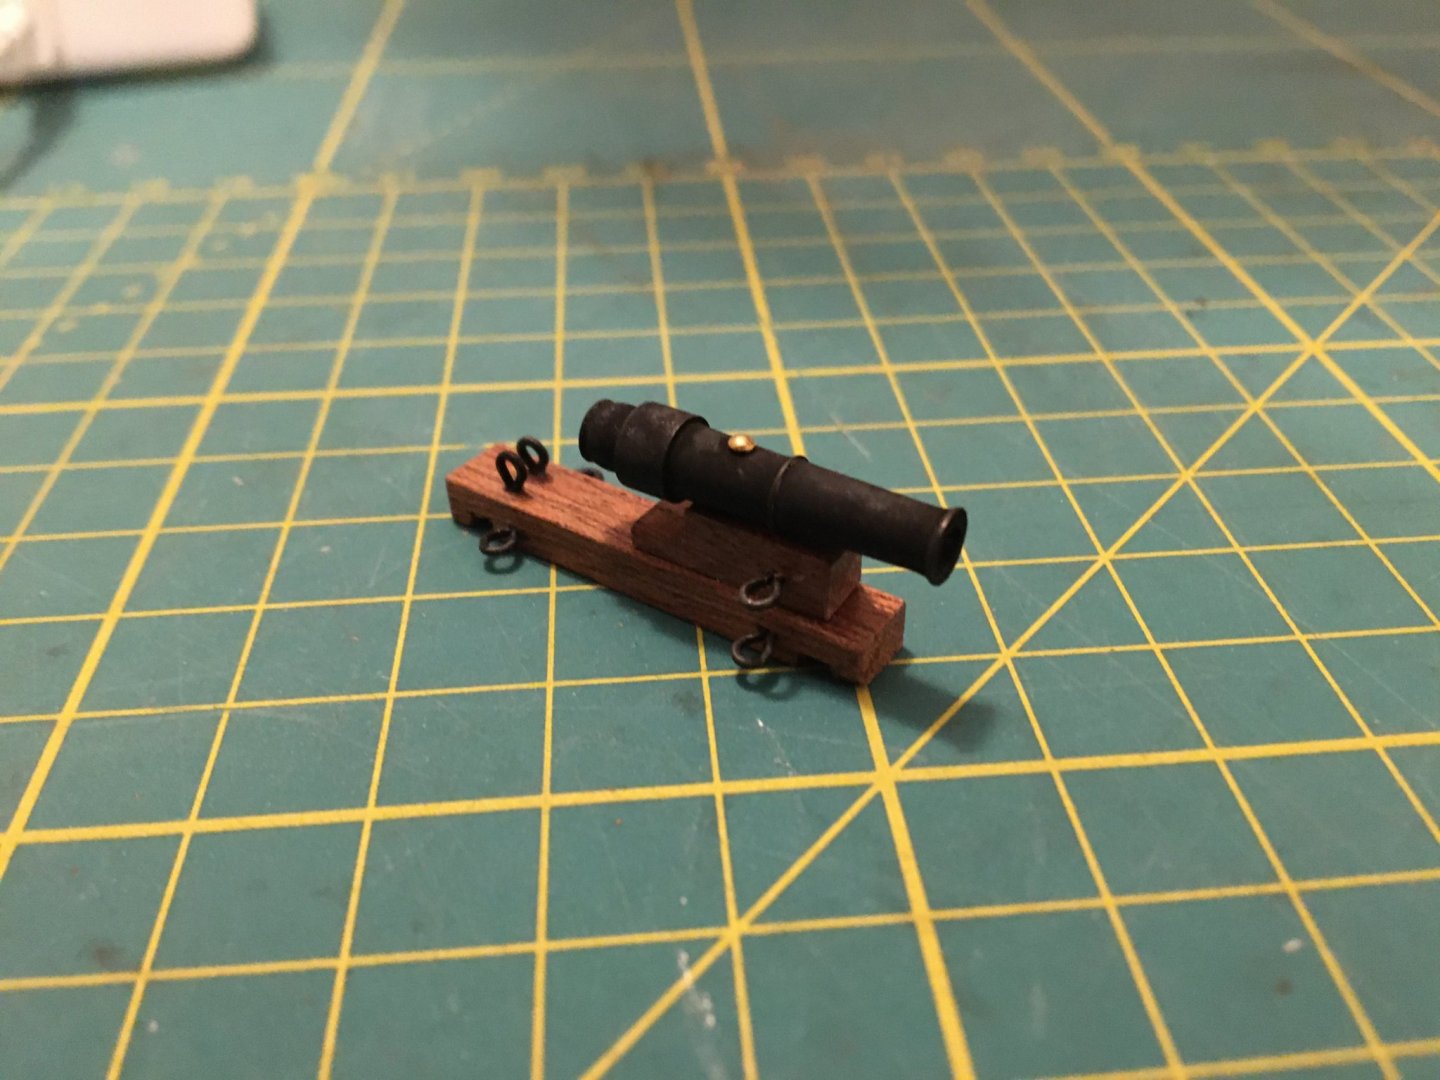
It’s just odd, isn’t it? There is no rope attached to the gun - which is as per the plan. So I suspect the gun crew wouldn’t last long at all - perhaps not even long enough to realise they shot through their own mast… The gun is definitely correctly mounted on the base, so I think I’ll re-add the rope that would restrain the cannon. There’s nothing on the gun to put it through though - previously I just wrapped it around the barrel for a slightly more authentic look…
-
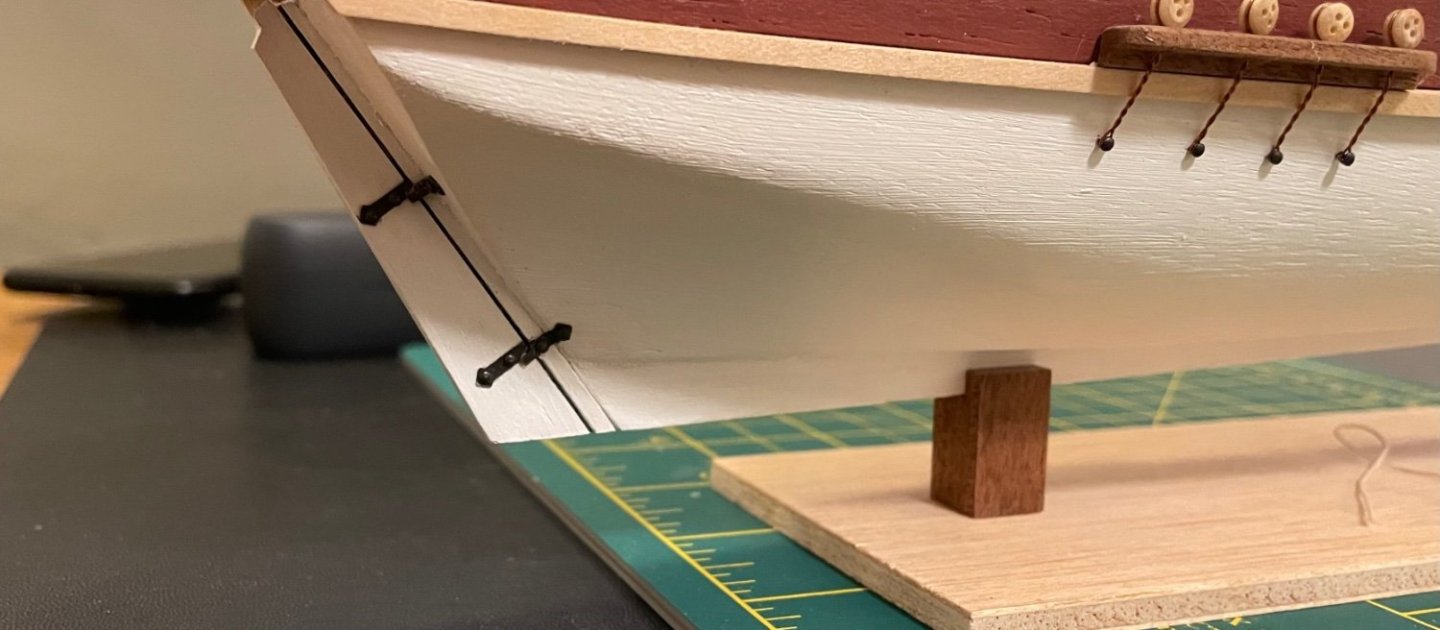
Thanks for looking in on the build log; I’m grateful for the comments and advice. I couldn’t agree more on the lack of rigging instructions! Having looked at modern kits with instructions available to download, I see pages and pages of glorious colour photos and step by step instructions! Super jealous of those! Anyway, I think I know where to begin with the standing rigging, and will work slowly through the running rigging when I get there. I’ve made a little more progress with the model although felt like I was going backwards briefly. The rudder hinges are a a bit odd on this model. Since the rudder is not actually separate from the sternpost (the gap is simulated by a groove cut into a single piece of wood) the rudder hinges are not actually hinges at all. They are single pieces of brass which you have to cut in half and then glue and pin to the rudder and stern. I found it quite difficult to get the pins in nicely - they are super fiddly since the rudder is only 3mm thick, and a pin has to go in on each side in the same place. I also managed to break the rudder off the hull when applying pressure to the pins, so had to fix that up. Thankfully that’s now done, so next it’s back to the anchors. The instructions are light on detail here as well - nothing describing or showing what to do with the lines, so a bit of research required here too. This is my Flyer so far:

- 35 replies
-
- 1
-
-
- flyer
- constructo
- (and 1 more)
-
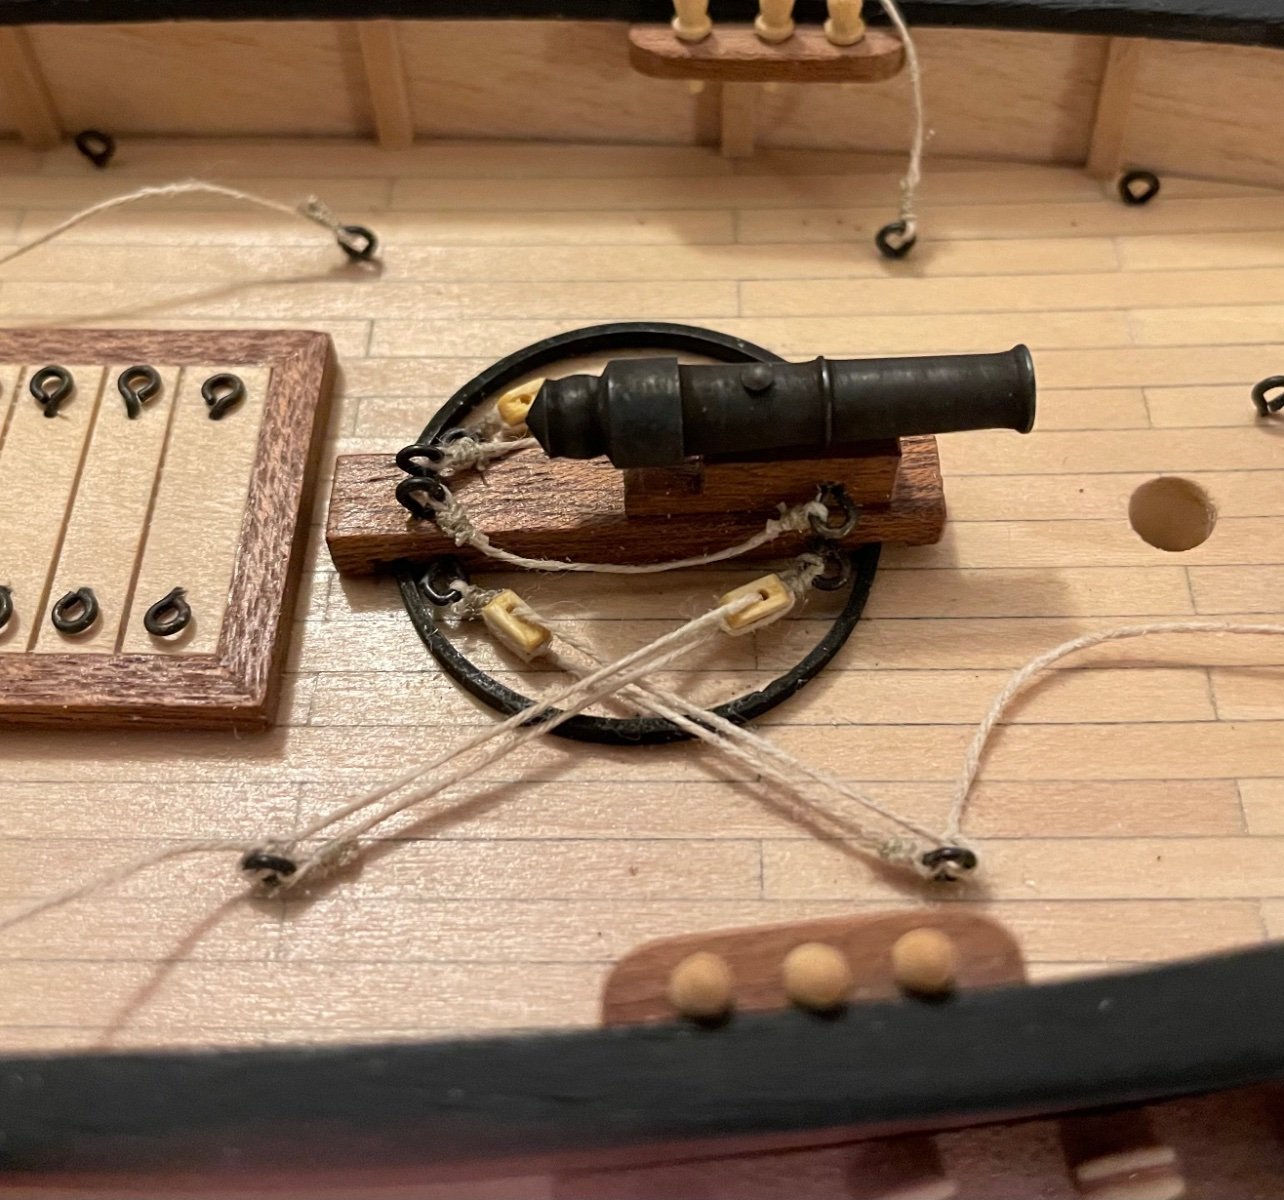
Apparently it’s been almost 4 years since I last worked on the Flyer. I guessed maybe 2, but 4 years is a bit of a shock. In any case I’m going to try to complete the build before summer (this year) here in the UK. When I left off, I had completed the dead eyes, and got as far as tapering the dowels for the masts and putting them together. I’ve noticed that the masts don’t quite sit at the same angle, but that’s a problem for another day. I started working on the carronade. This has been a bit of a learning experience. Trying to find a way of seizing relatively fine thread and getting a result I’m happy with has been a bit of a challenge. Additionally, there are no instructions for how to rig up the carronade, so I’ve done a bit of trial and error and ultimately found something that I think looks ok. Initially I tried rigging double blocks to both the carronade and the eyelets that are drilled into the deck, but the result just looked messy: Therefore, I undid all that, I went with a simpler solution - single blocks only on the carronade side, and just tying the threads off on the eyelets. I’m not entirely happy with how the thread looped on the carronade looks. It would be a heavy rope but with a thin thread I can’t get it to hang naturally. I also need to work out how to get rope coils to sit nicely, but I’m quite happy to at least have had some practice with seizing threads and working with tiny blocks! Rudder hinges and anchors next before working out how on earth I’m going to tackle the rigging. I’m quite looking forward to it though!


- 35 replies
-
- 3
-
-
- flyer
- constructo
- (and 1 more)
-
Incidentally, I’m not sure why some pics appear small and some large. They’re all taken with the same device, and all approximately the same size (in mb).
-
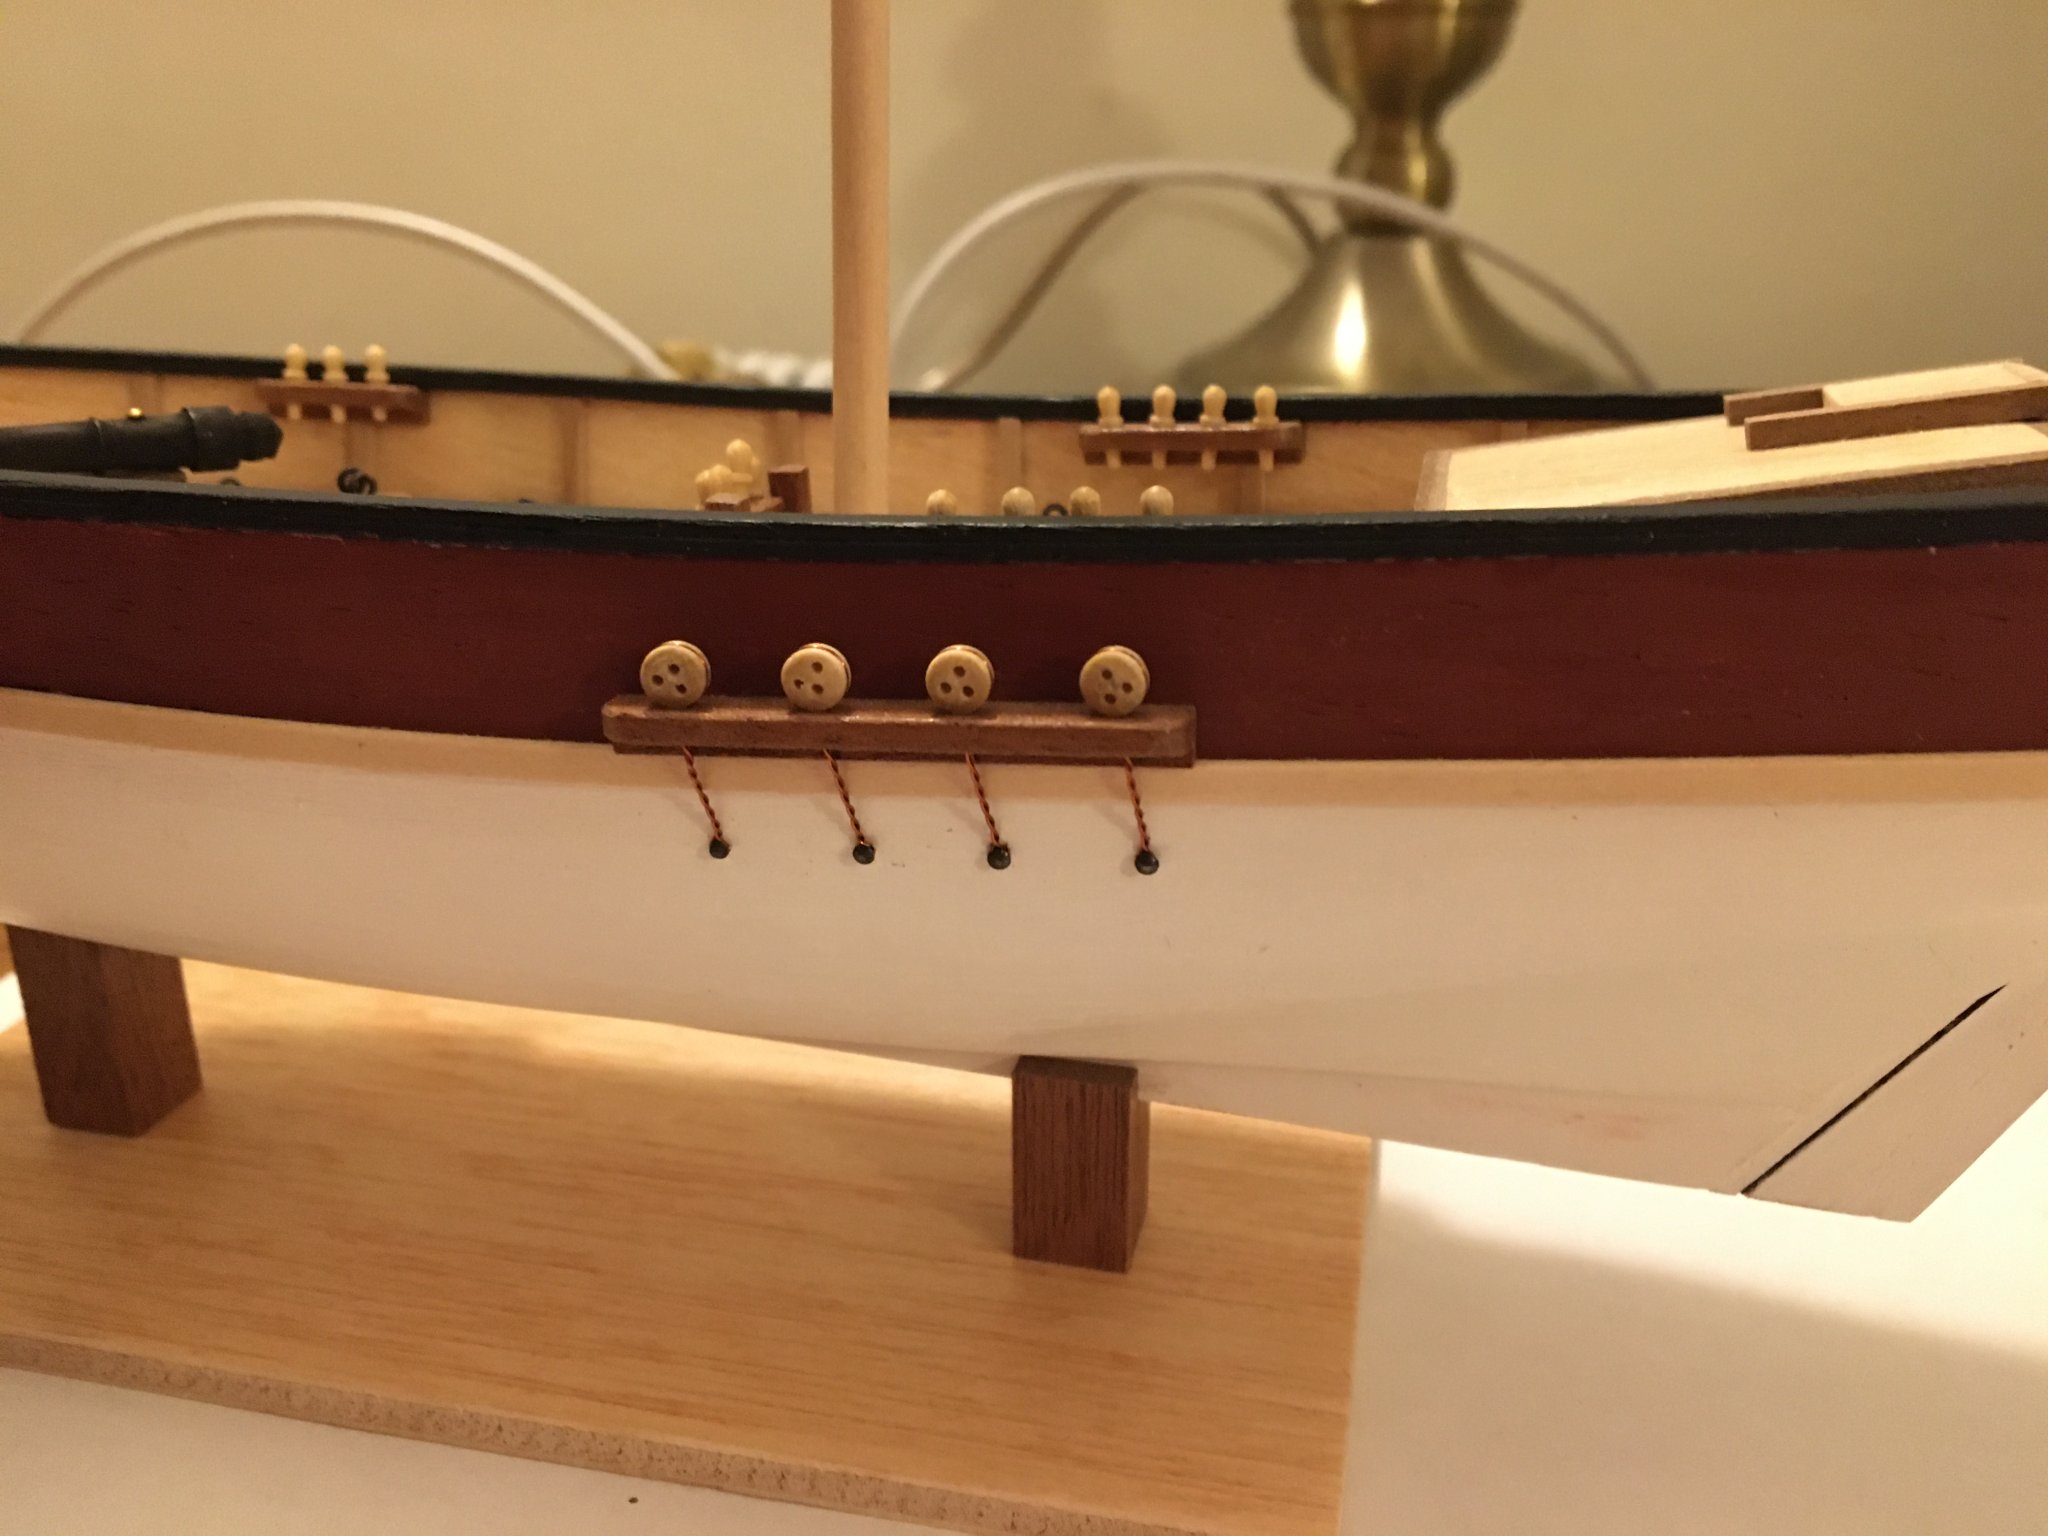
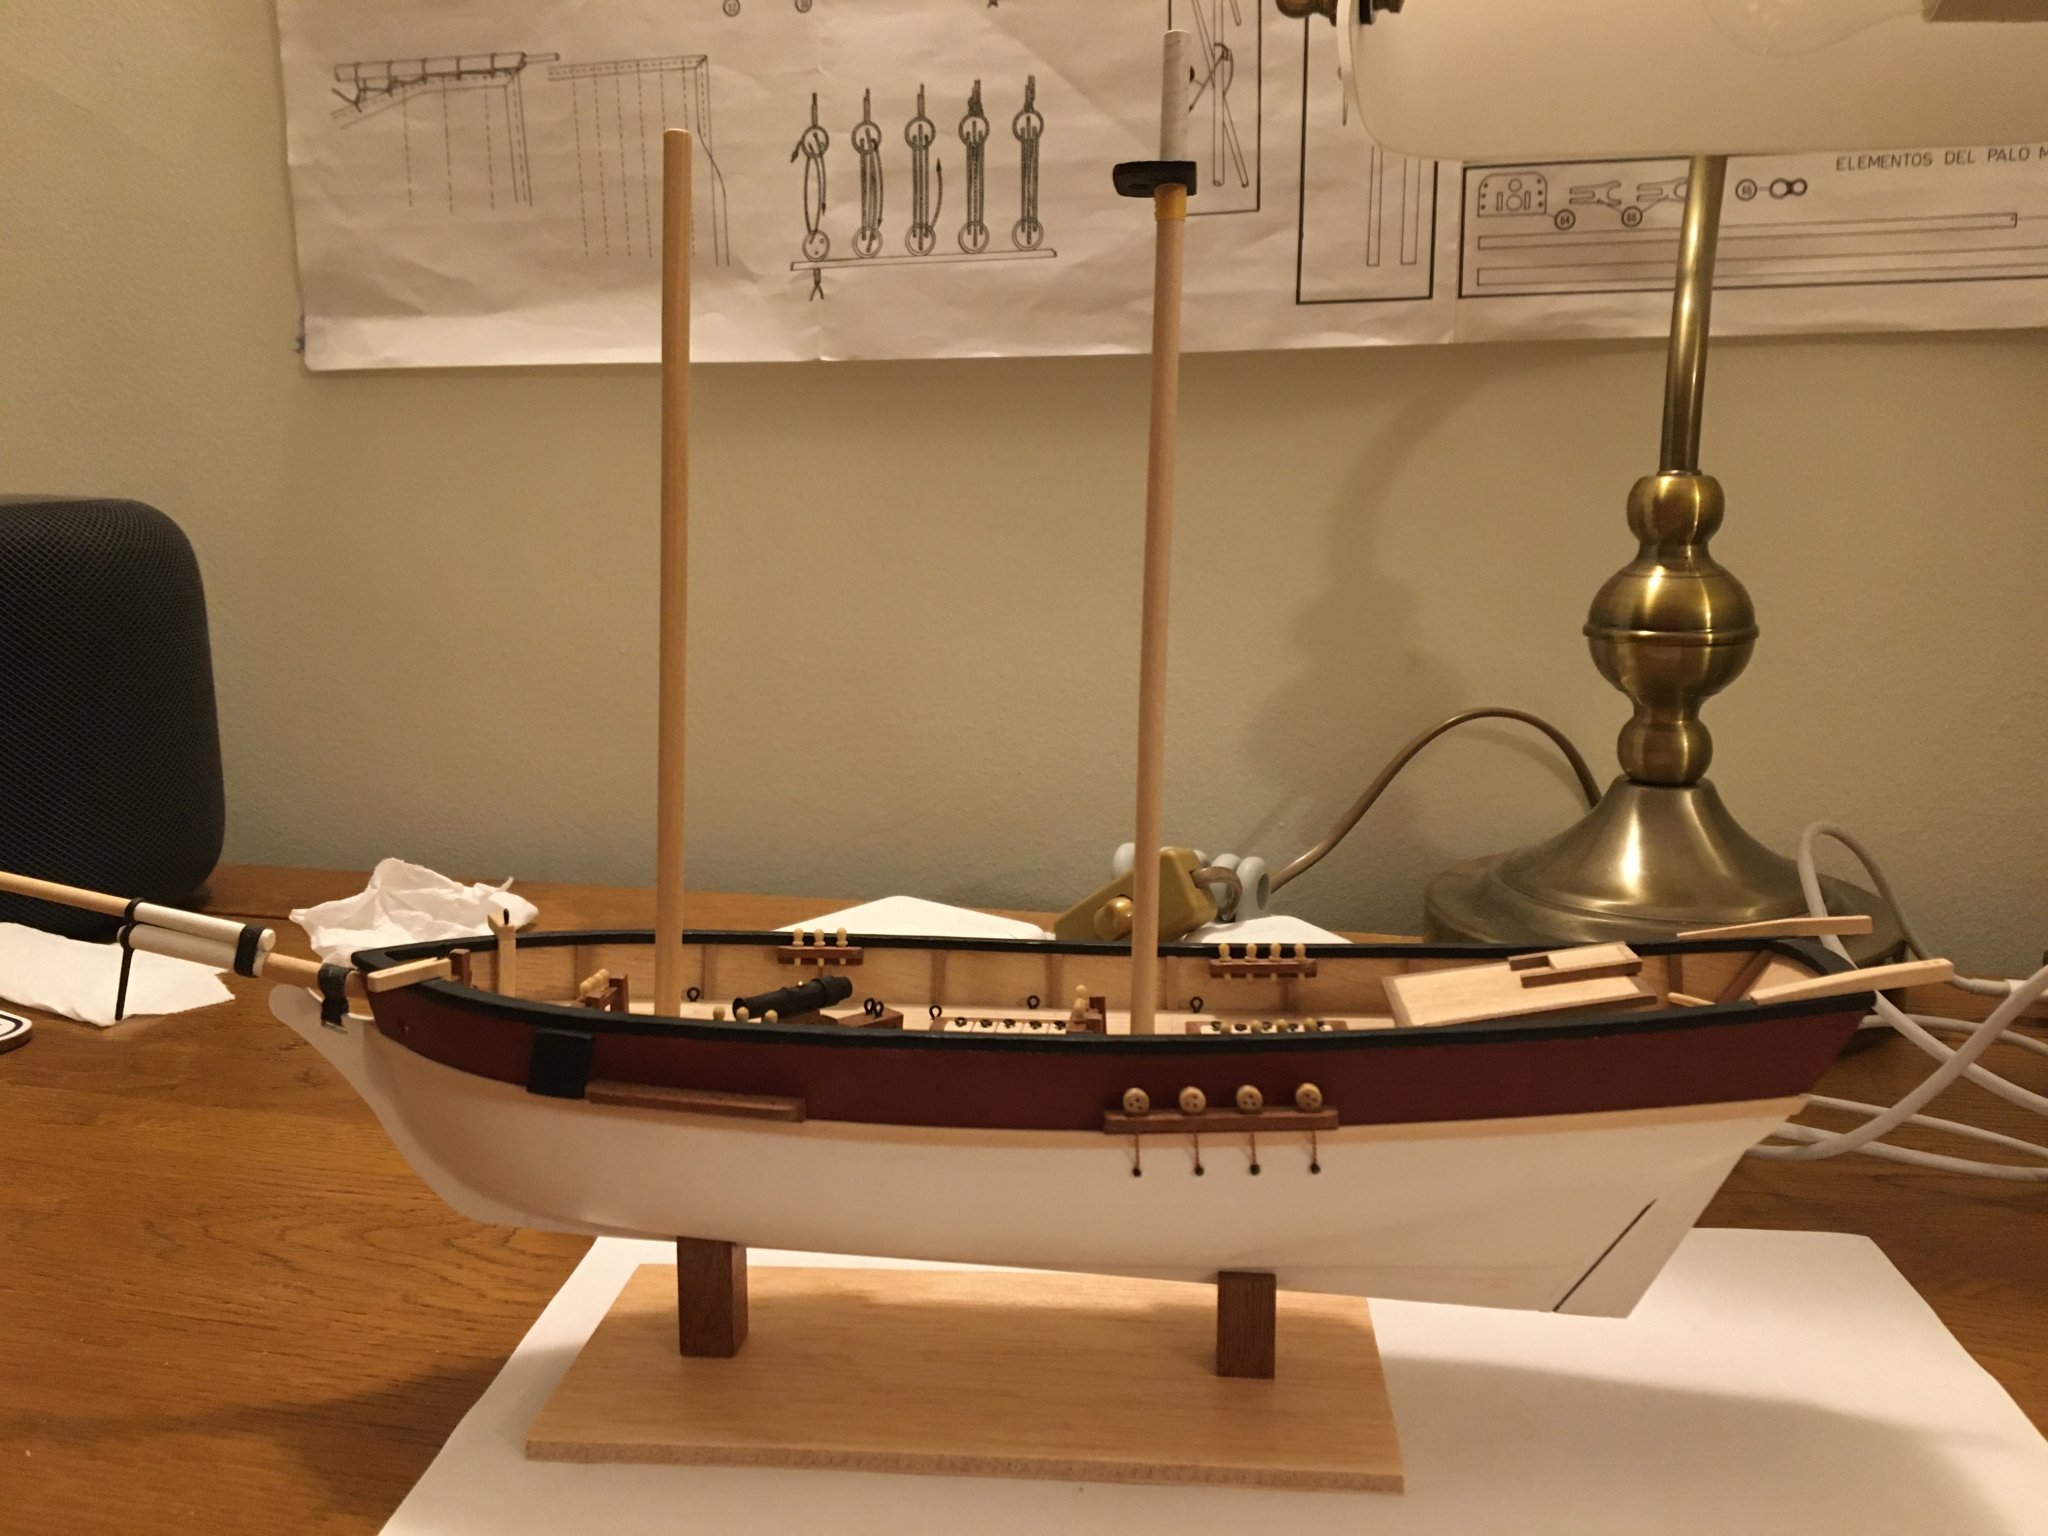
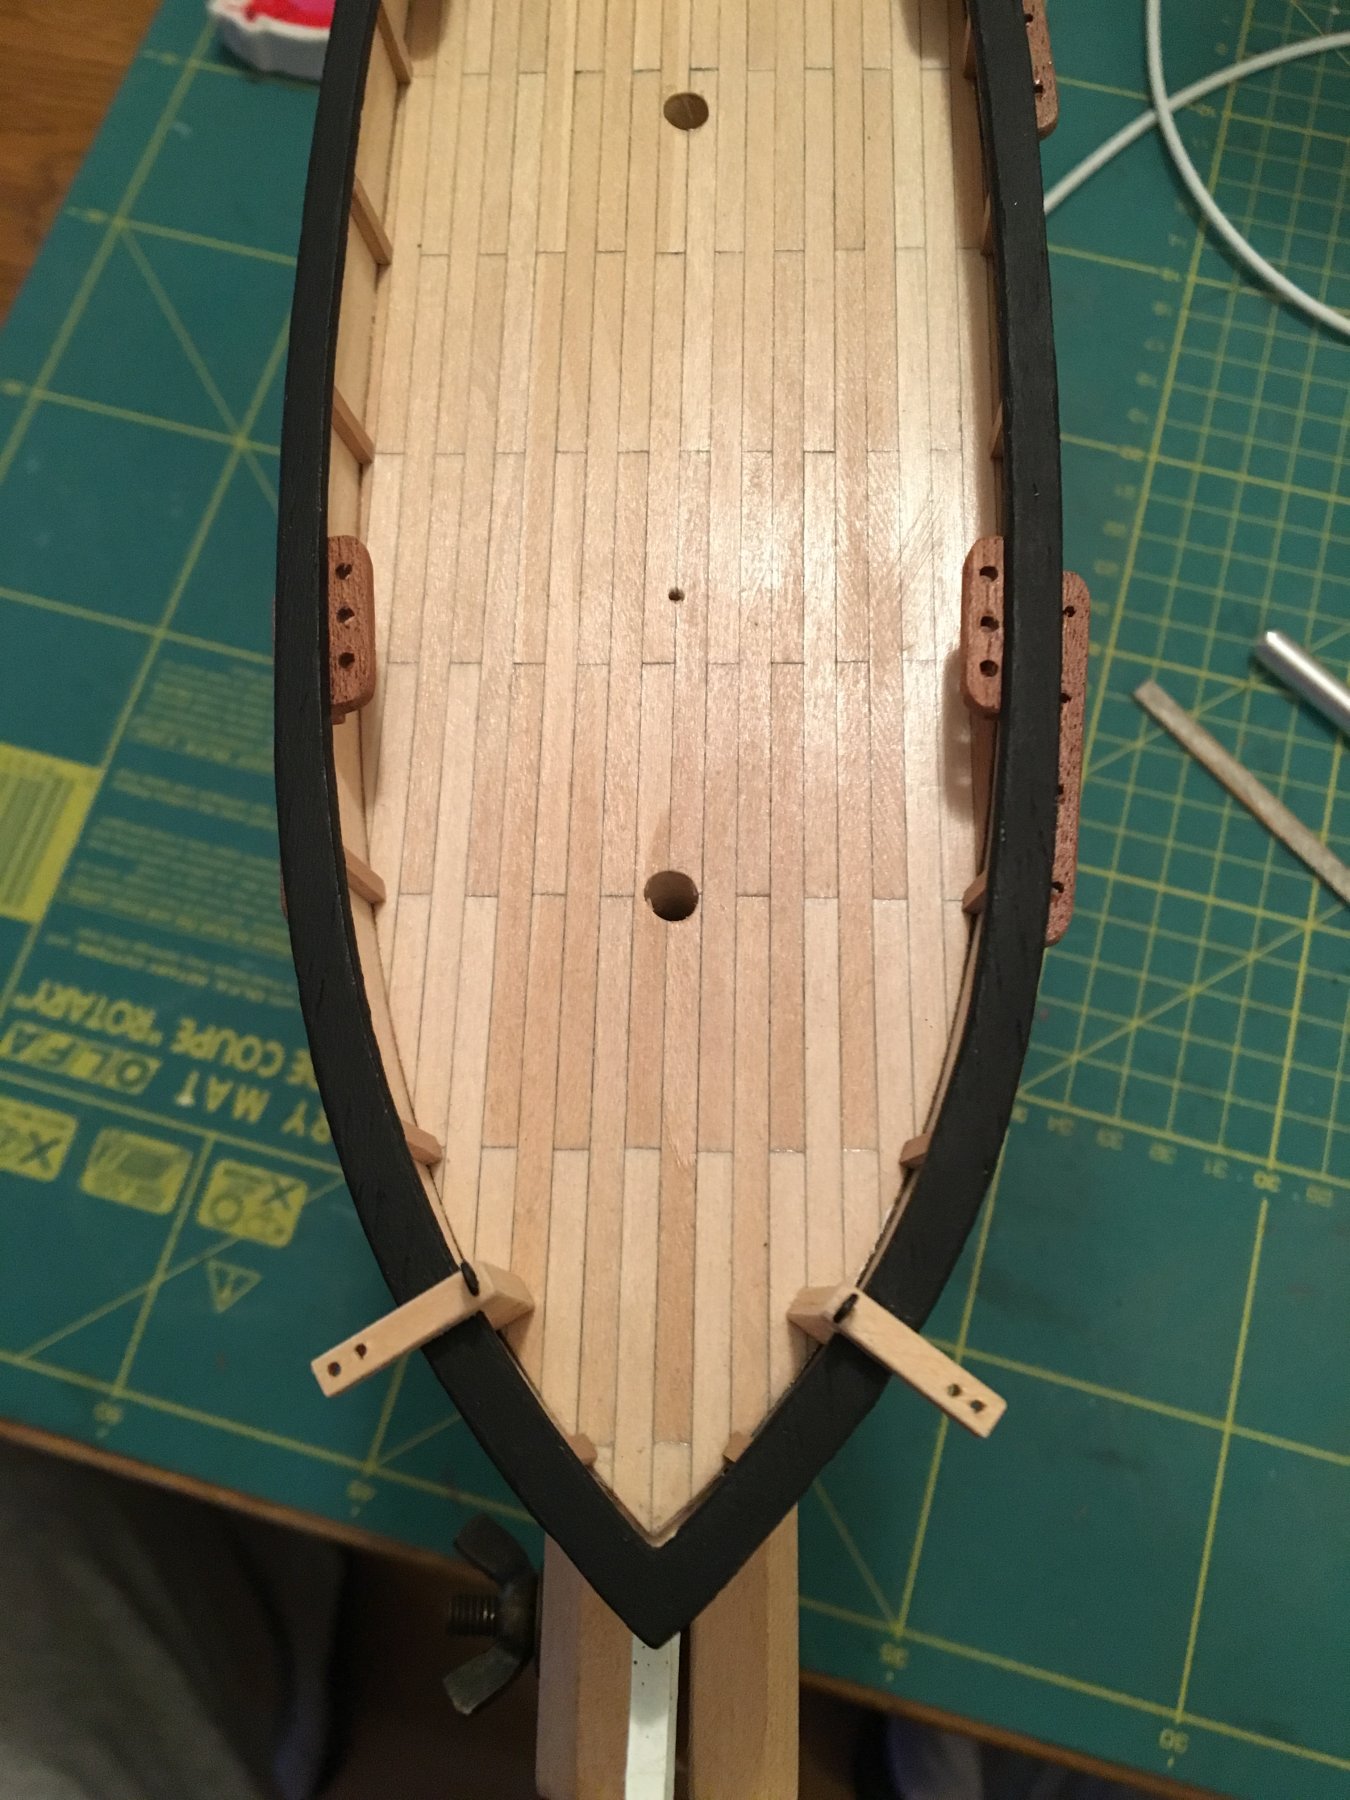
Well, the gammoning is done now. I think it looks OK. The only thing I’m not happy with is that after running the thread through beeswax, I’m left with some pale residue on the thread which looks a bit unsightly close up. Not sure if its because the wax is cold or if its due to some other reason. In any case, I’ve left it as it for now. There’s nothing stopping me redoing it if I have better results waxing the shrouds etc. I’ve pretty much reached the end of the written instructions now, other than to follow some vague guidelines about the anchors, but I thought they might get in the way, and will take care of them later. So from here on, its uncharted territory for me! I built the stand, only because I noticed whilst doing the gammoning that when I applied any kind of downward pressure to tighten the thread, the cradle I was using would tip. It’s supposed to be clamped to a desk, but my desk is not flat underneath. The stand gives me a bit more stability. There’s supposed to be a nice sapelly (sapele?) strip around the edge of the base. When I started cutting the edging to size, I ran out of wood after 3 sides, because of my repeated attempts to create pinrails that I was happy with from the same strip. 😞 The next step would be the chainplates/deadeyes. For this model, this is just wound copper wire (Constructo say its brass, but I’m sure its not) pinned into the hull. I attempted to blacken the wire, but Brass Black would not darken it at all. For now it will remain shiny copper. I’ve tried to line up the angles of the chainplates with how the shrouds will lie by measuring up the mast, and taping thread at the correct height. Then I ran the thread down past the drilled holes in the chainwales and marked where the pin would go into the hull. To my untrained eye, it looks about right, but time will tell when the shrouds go on! I’ve only done one set so far. I find I end up spending far more time thinking about how I will do something, than actually doing it. The other 3 sets should be pretty straight forwards, and then onto the more tricky bits. Here she is so far. Will.


- 35 replies
-
- 3
-
-
- flyer
- constructo
- (and 1 more)
-
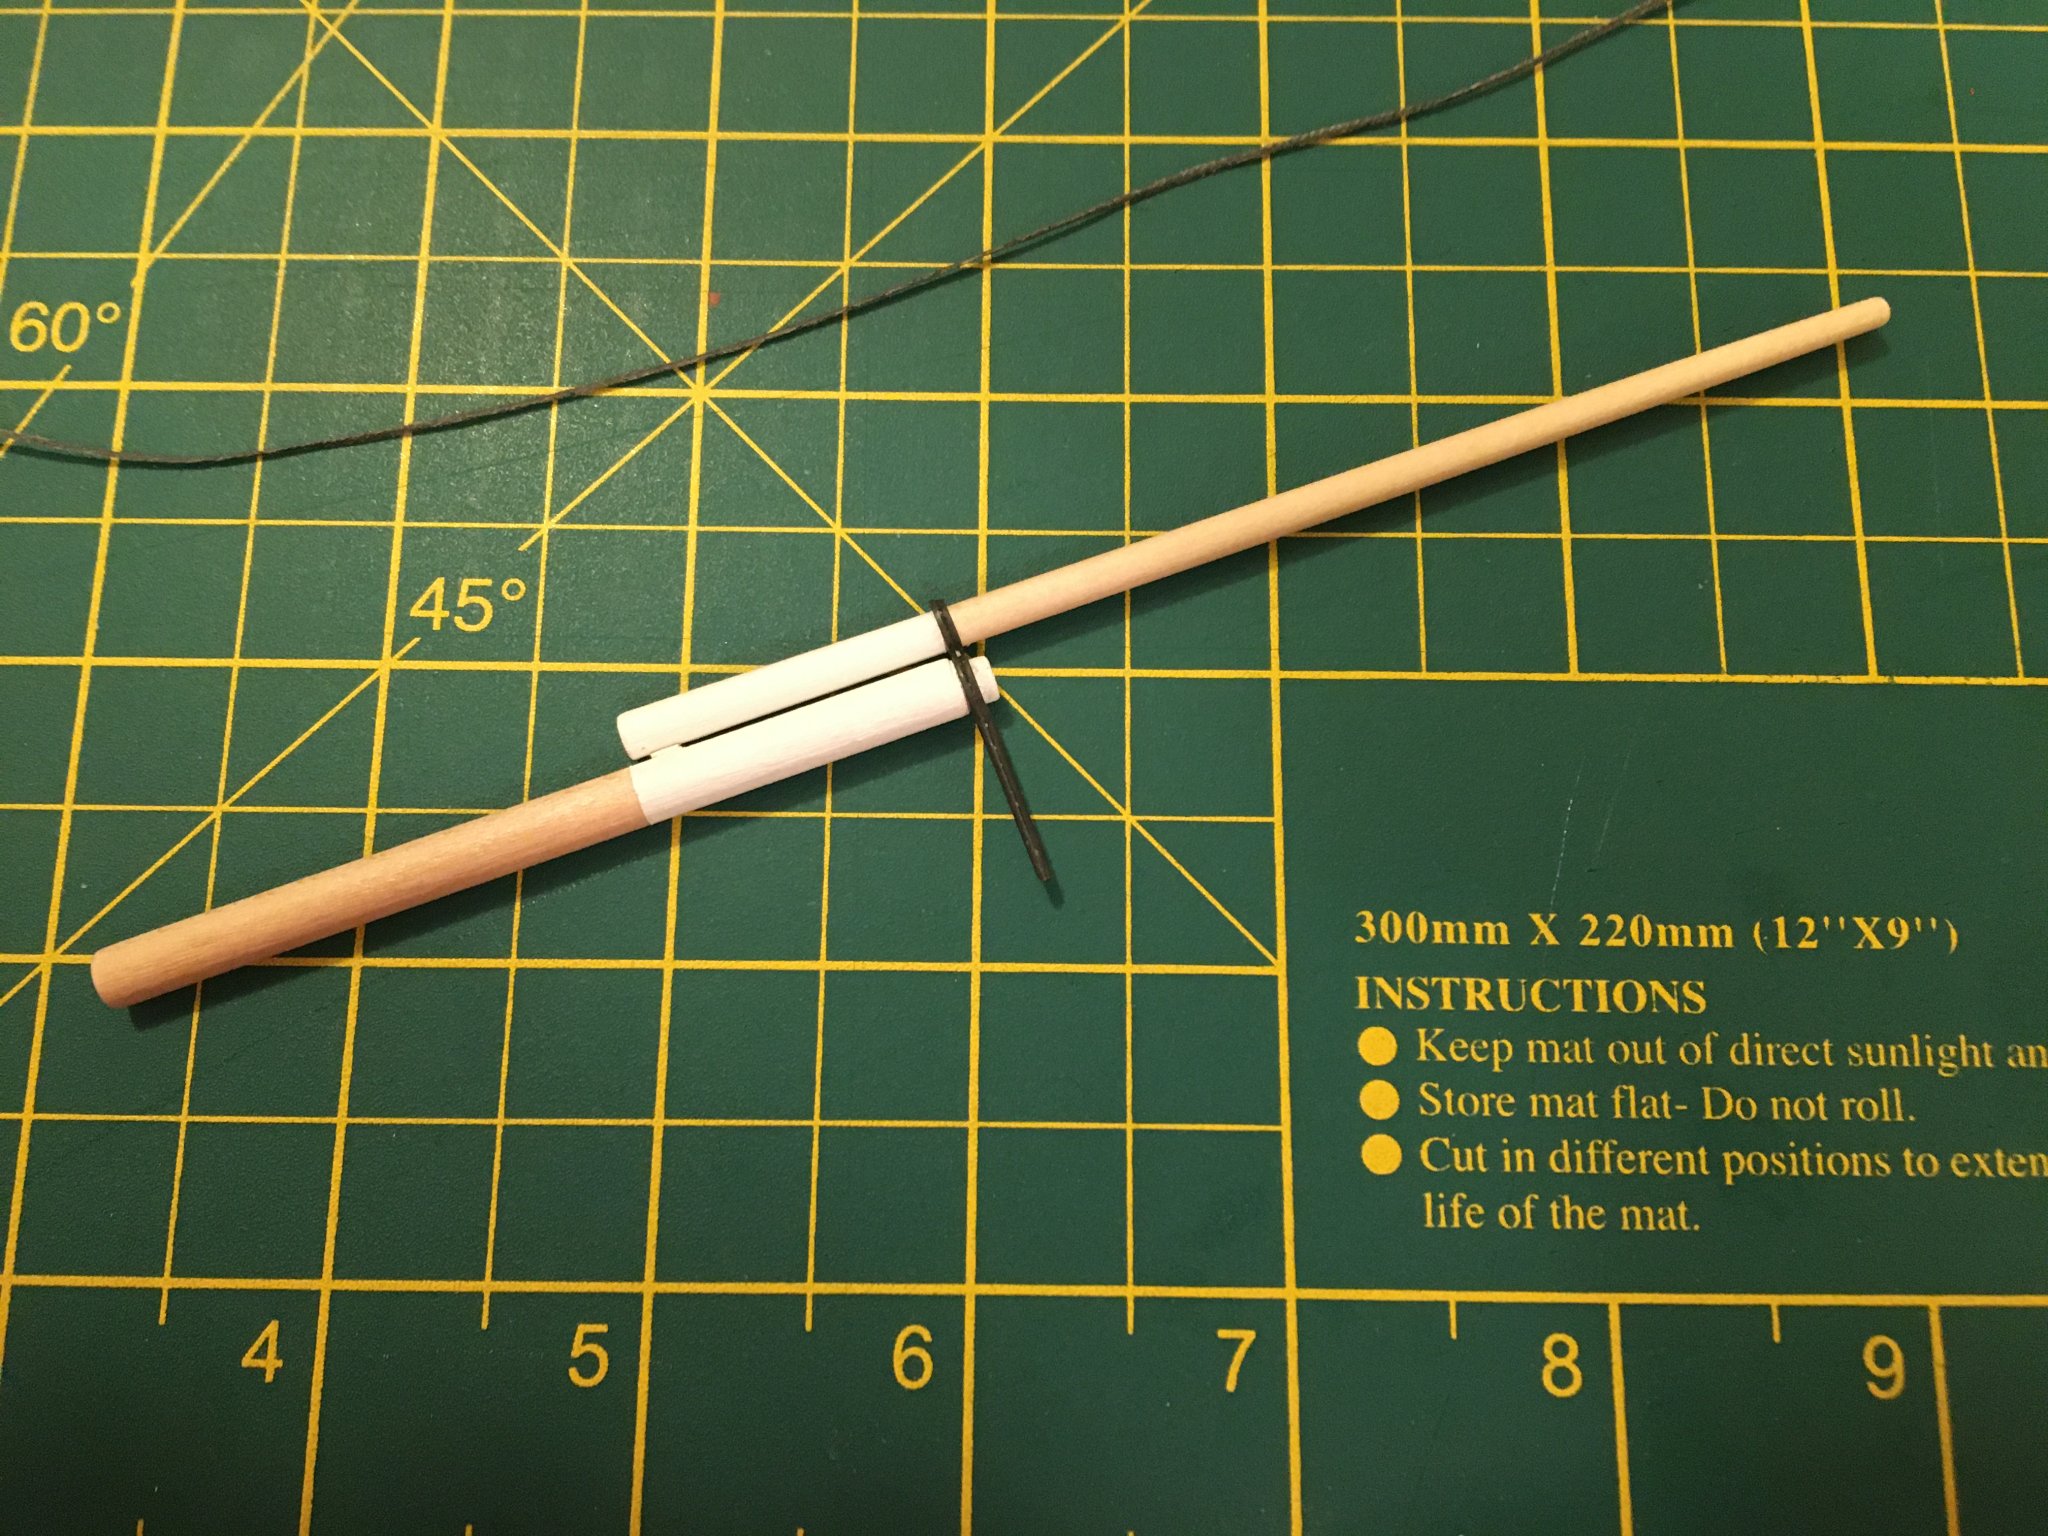
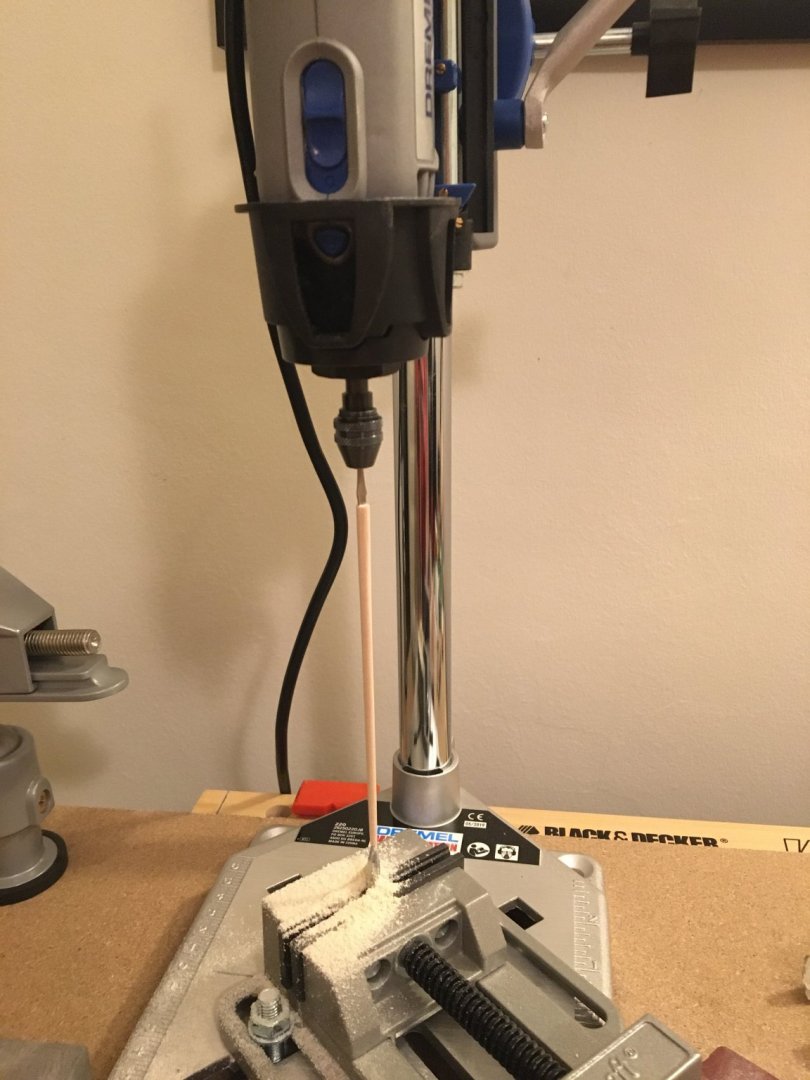
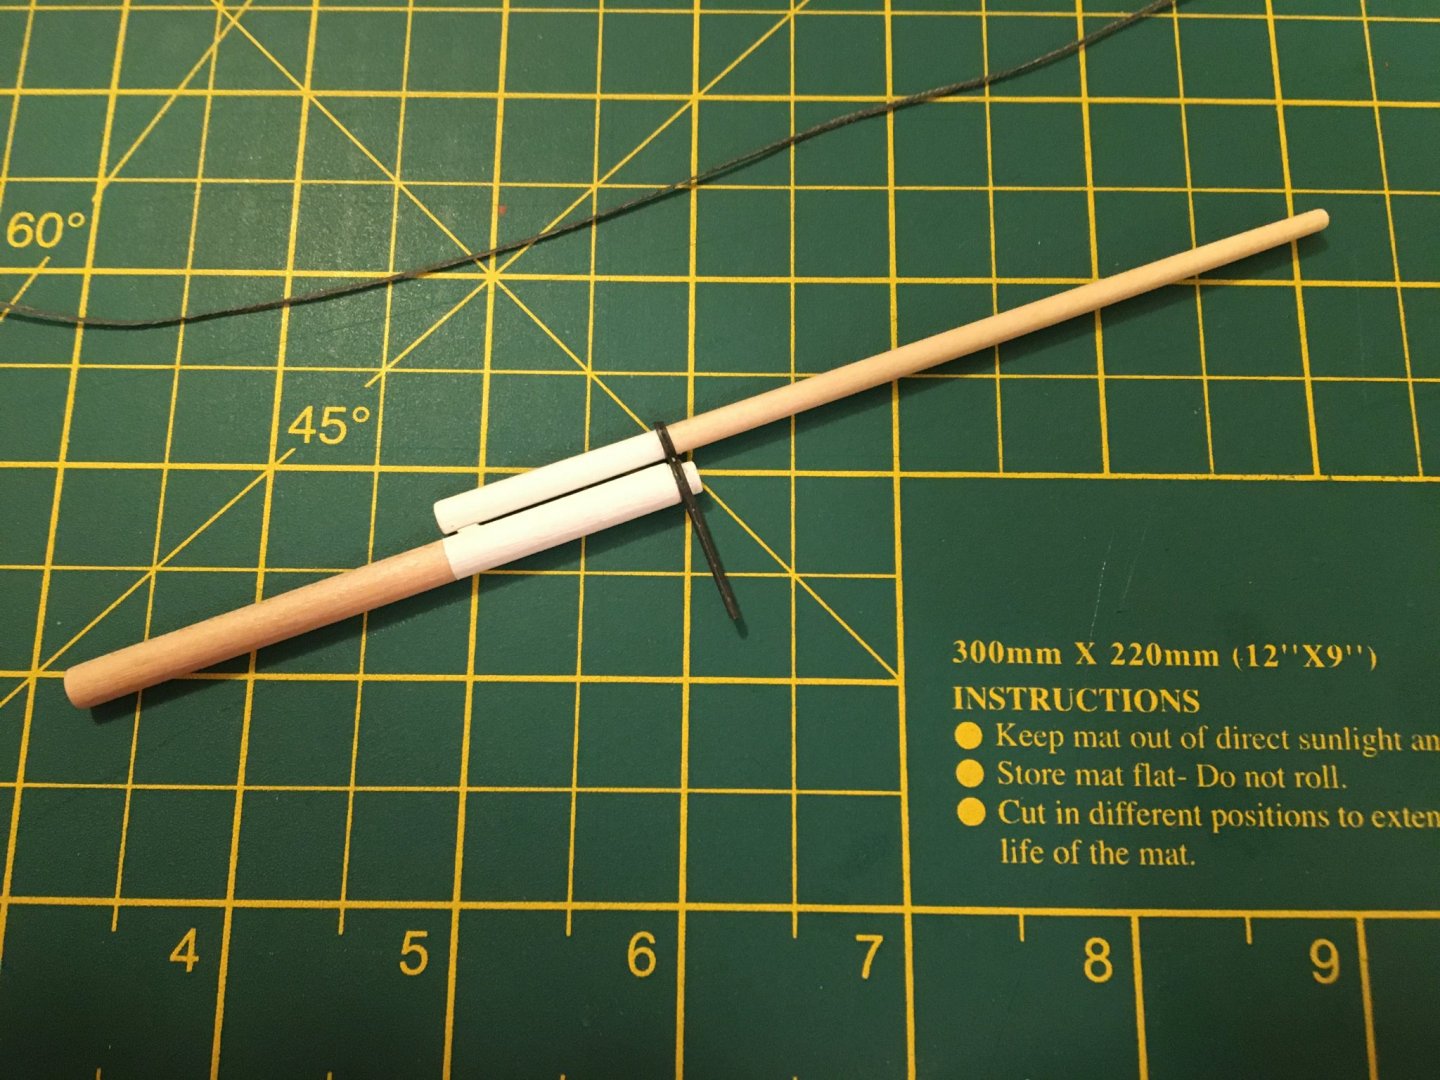
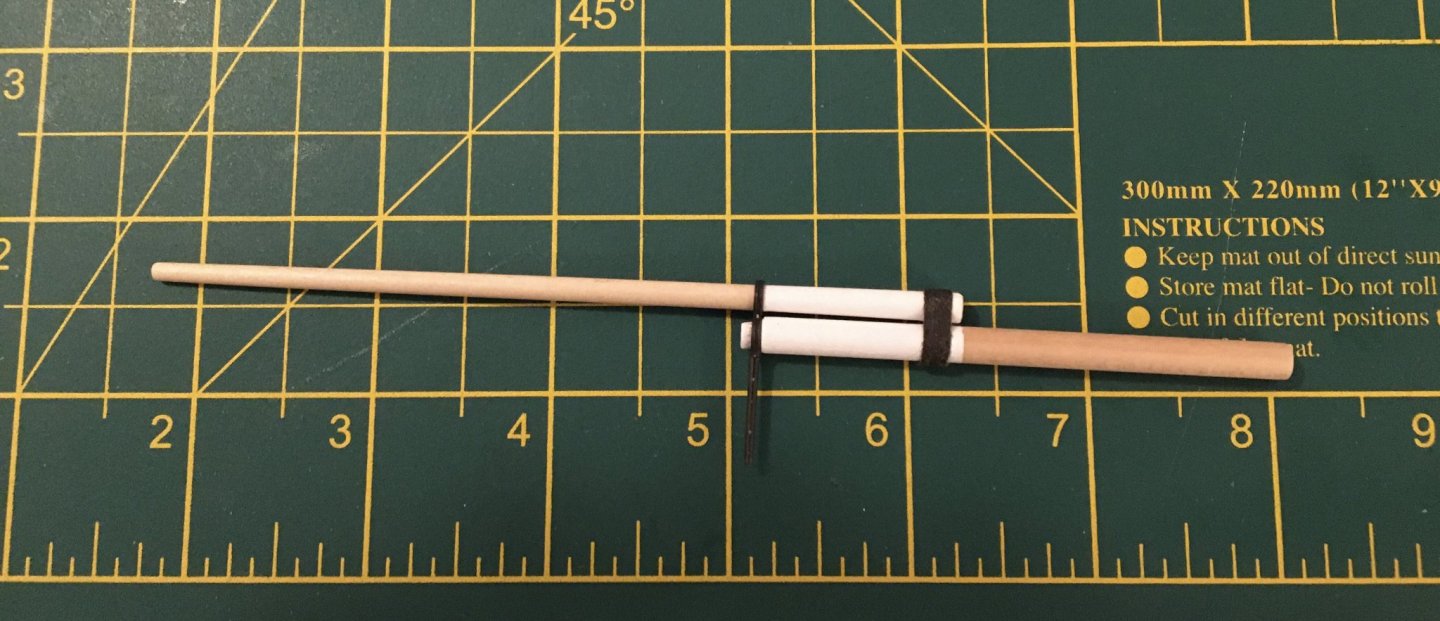
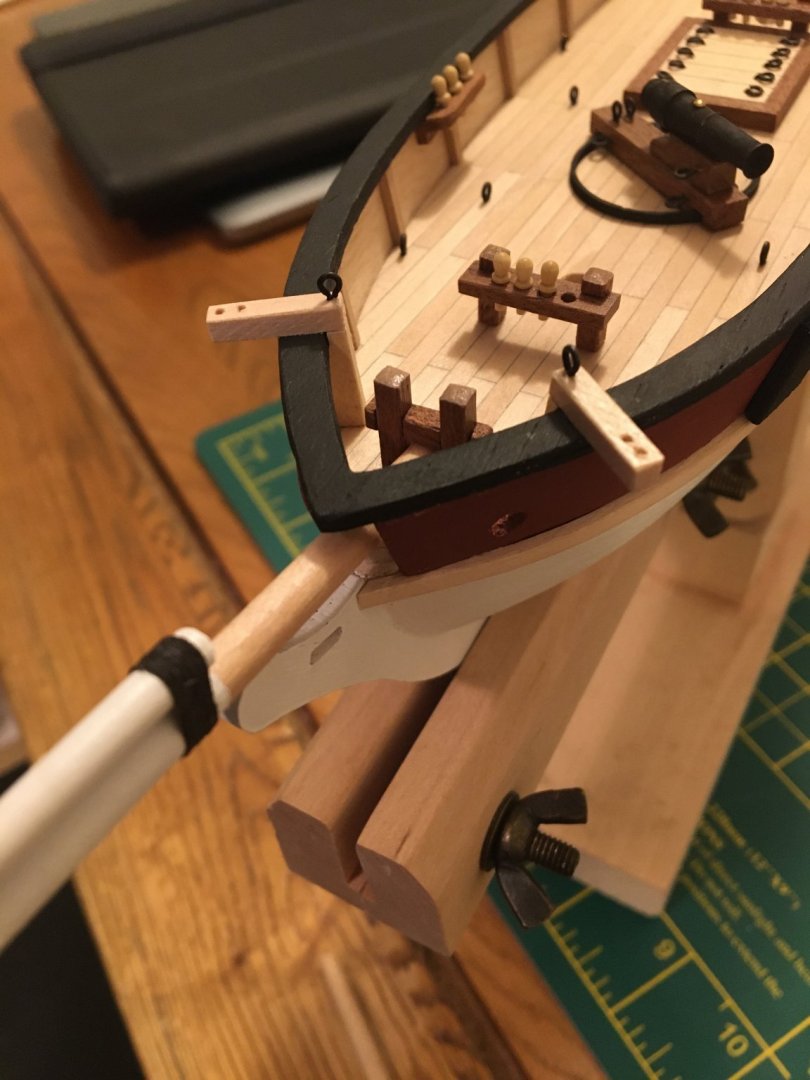
A brief update on my Flyer build. I’ve reworked the bowsprit bitt so that sits better with the bowsprit in place, and have been working on the ‘jib boom’ (which I previously thought was all part of the bowsprit). It needed tapering quite a lot, not least so that the bowsprit cap would slide on into the correct place. Most of the parts that need tapering are short enough that I can use my Dremel workstation as a vertical lathe to sand them to the correct diameter. I butchered a small screwdriver to create ‘teeth’ with which to turn the dowels. I added a small piece of scrap deck plank to sit between the bowsprit and boom, just to make sure that the angles were consistent. I painted it white to try to disguise it in case the woolding didn’t cover it completely. Thankfully the woolding did cover it so that it can’t be seen at all. I’m trying to stick with authenticity where realistically possible. I’ve not yet purchased any books on rigging etc, but probably will do in the near future. For the woolding, I followed some guidance from this site here, and managed to get a decent result after a couple of attempts. In theory, it should remain fast, but I coated it in PVA/water just in case! And dry fitted, snug under the new bowsprit bitt. Looking forward to doing the gammoning and making some more progress this weekend. I’ve been trying to see if I can splice a ‘rope’ but at this scale it’s beyond me as the thread is much too thin. So I’ve tested a cheat, where I’ve looped some thread around a cocktail stick, and then created some tight twists which I’ve clamped in place and applied PVA/water. It seems to hold OK, and given the thread diameter, it looks fine too. Thanks for looking, Will.

- 35 replies
-
- 2
-
-
- flyer
- constructo
- (and 1 more)
-
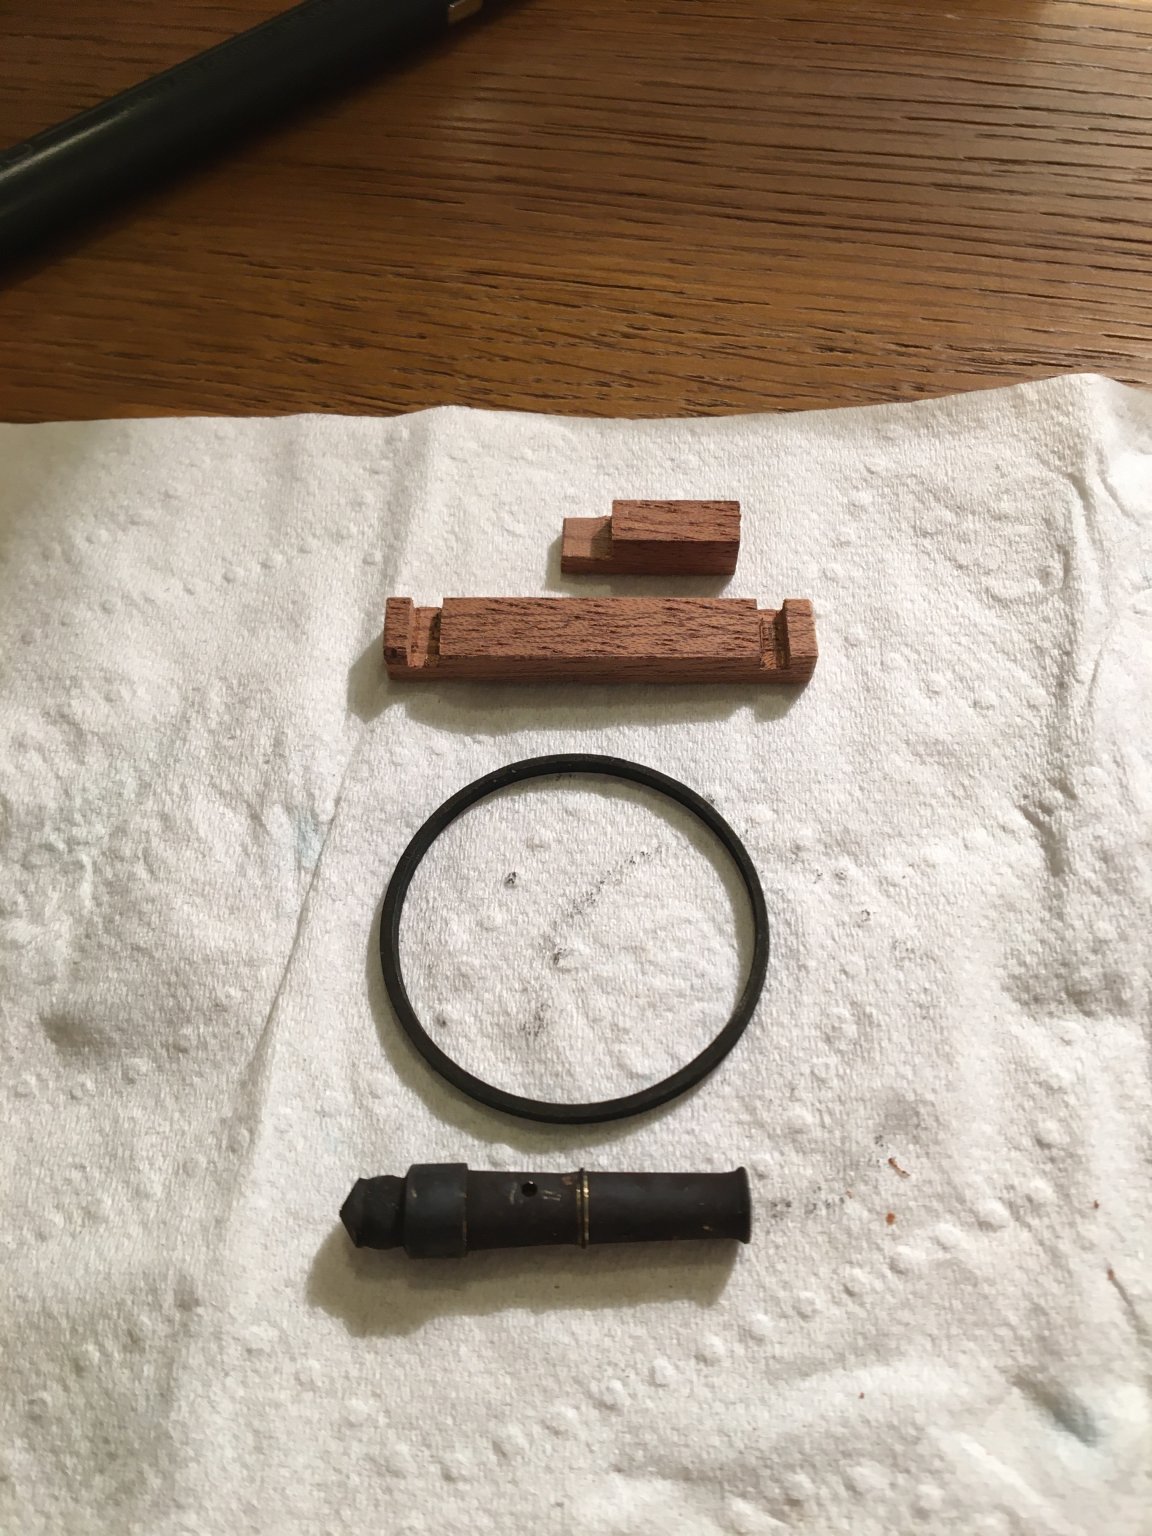
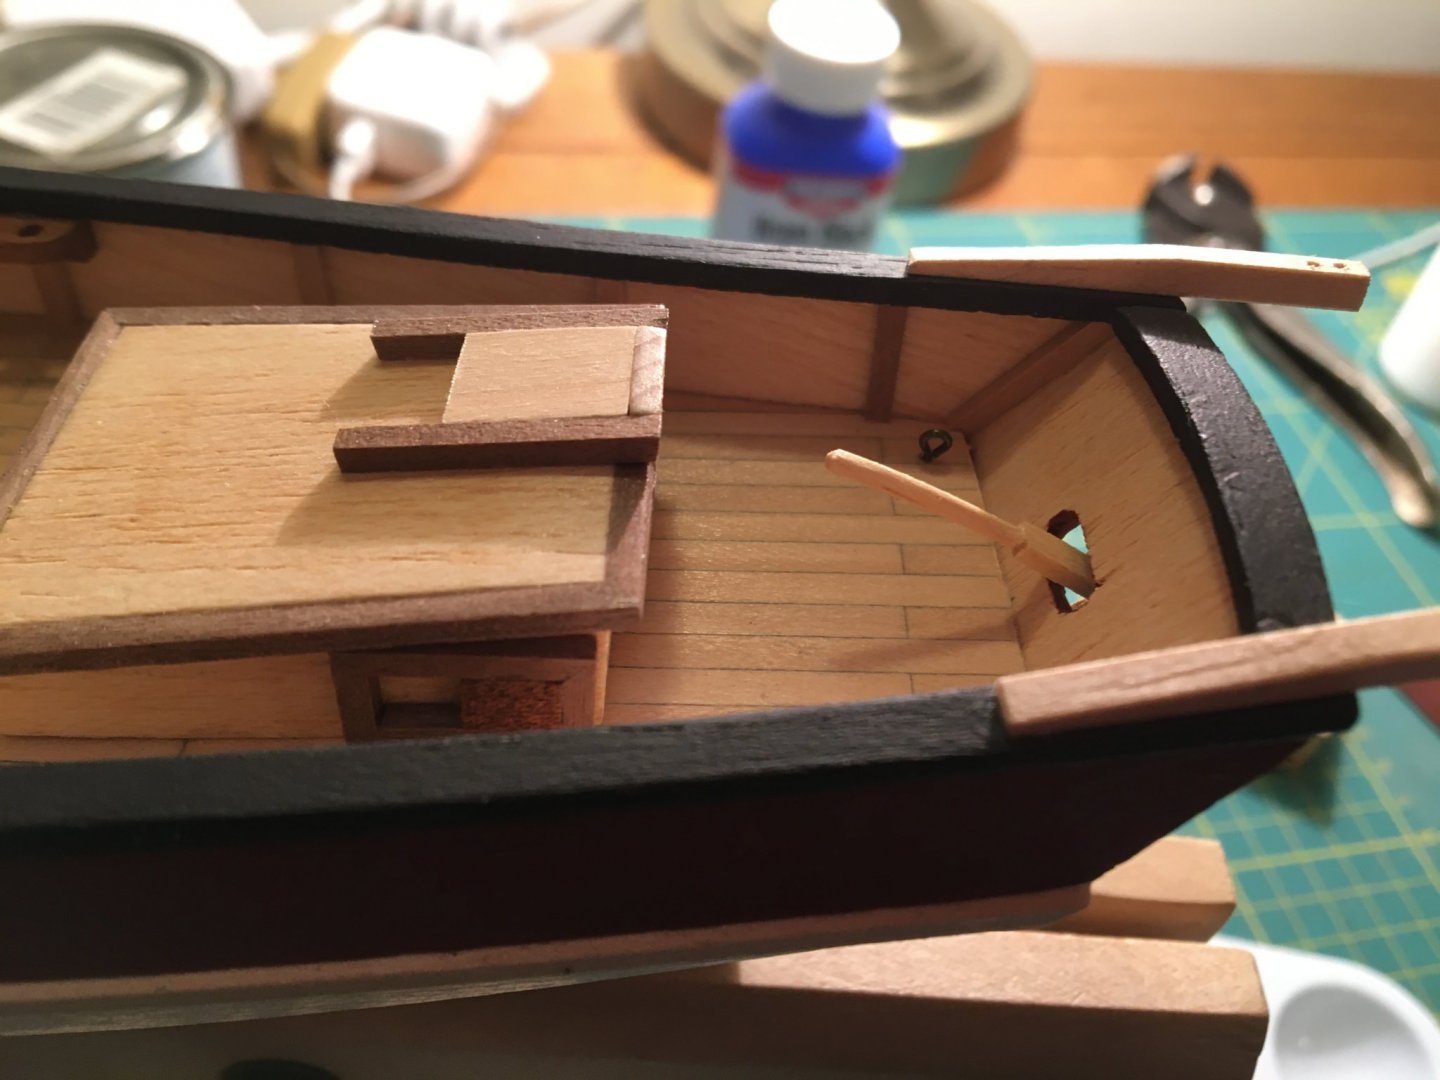
Wow - it’s been over 9 months since my last update on the good old Flyer. Progress over the summer was always going to be slow (even slower than usual) as I spend as much time as possible outside! I’ve since resumed work. The carronade is now built. The woodwork was pretty straight forward. I’ve used Brass Black again to blacken (all) metal parts. I’m not quite so happy with the finish on the carronade itself. It seems the larger the part, the more challenging it is to achieve a nice smooth and uniform finish. So this had a couple of treatments, and I think it looks ‘OK’. I’m not totally sure what should be blackened and what should remain brass, so at the moment I’m blackening all metallic parts. I’m generally happy with how it’s looking so far. The other thing I’ve put off so far is the ‘rope work’ associated with the carronade. Constructo seem to have simplified it somewhat. I’m undecided as to whether to attempt something more authentic. I can’t find much guidance out three for these deck-mounted swivel carronades. Father Christmas brought me a Dremel and Workstation this year, which has made some of the problems I was facing with manual drilling much easier, particularly with the very thin pinrail posts. So they are now firmly attached to the deck. I’m now ready to start with the bowsprit. But in doing so I realised that the bowsprit bitt that I made leaves a big gap, so I need to make a new one. I assume the idea is that the horizontal piece of the bitt rests against the top edge of the bowsprit? I’ve also created a tiller which took some considerable patience due to the scale - it required cutting a groove out of the tiller such that it would fit over the top of the rudder post. Even having narrowed the rudder post, there is very little room for manoeuvre. I think this is the fiddliest part I’ve had to deal with so far in the build. Thanks for looking, Will.


- 35 replies
-
- 3
-
-
- flyer
- constructo
- (and 1 more)
-
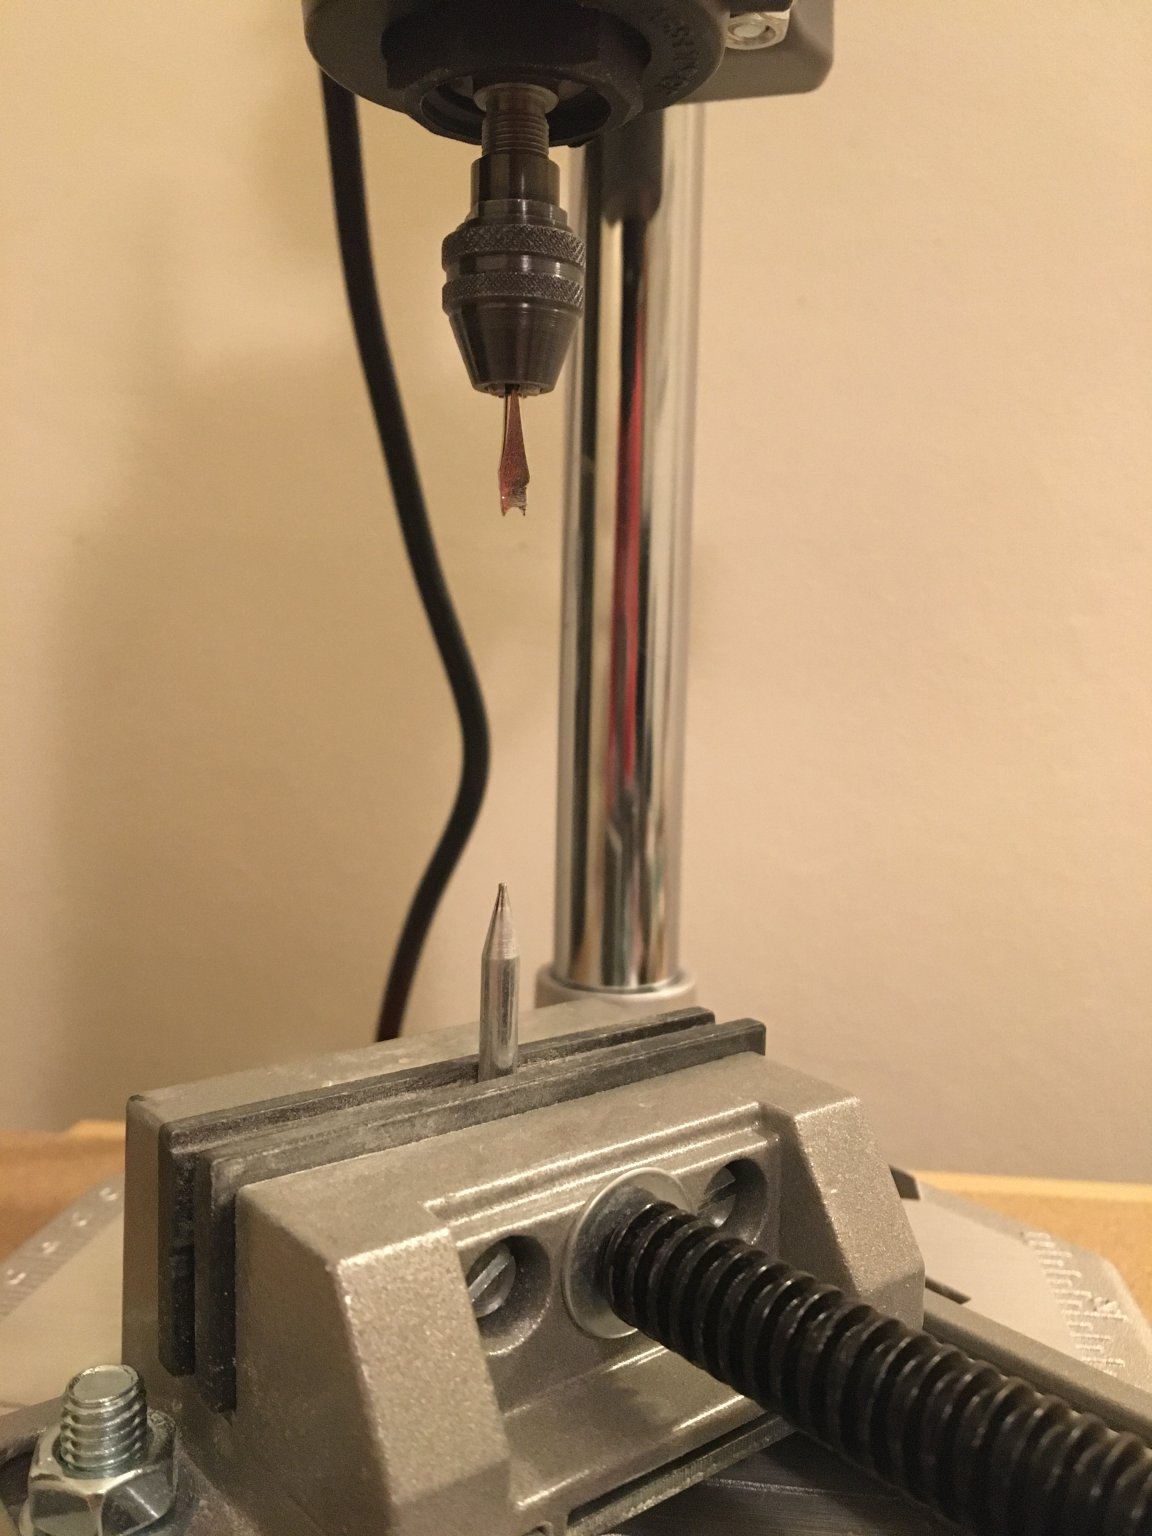
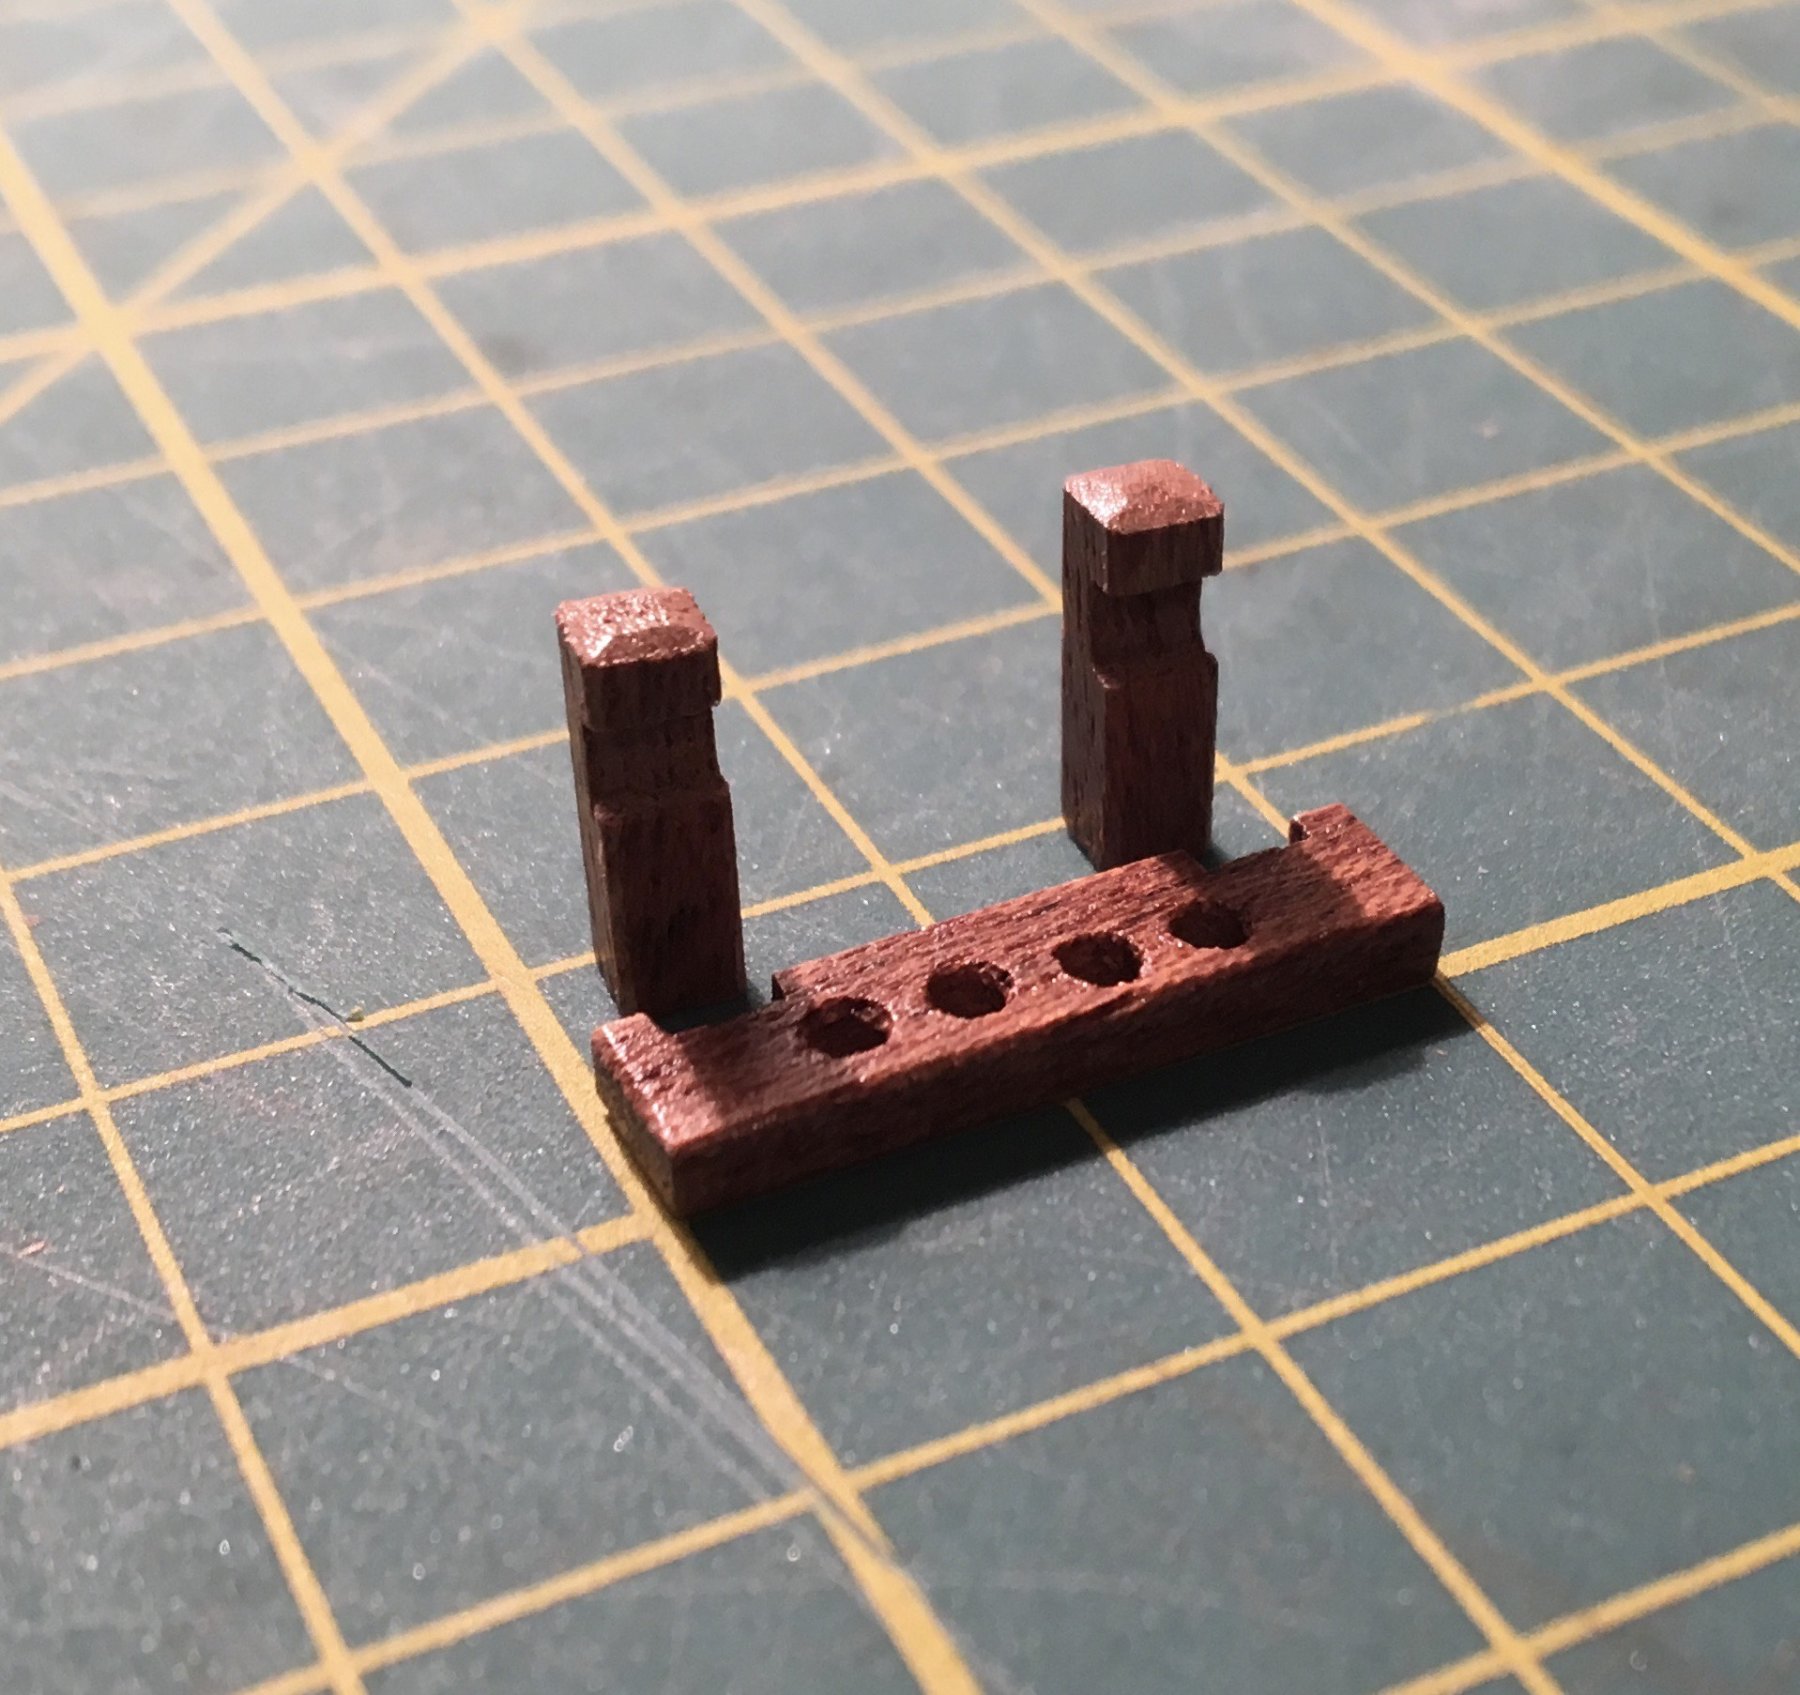
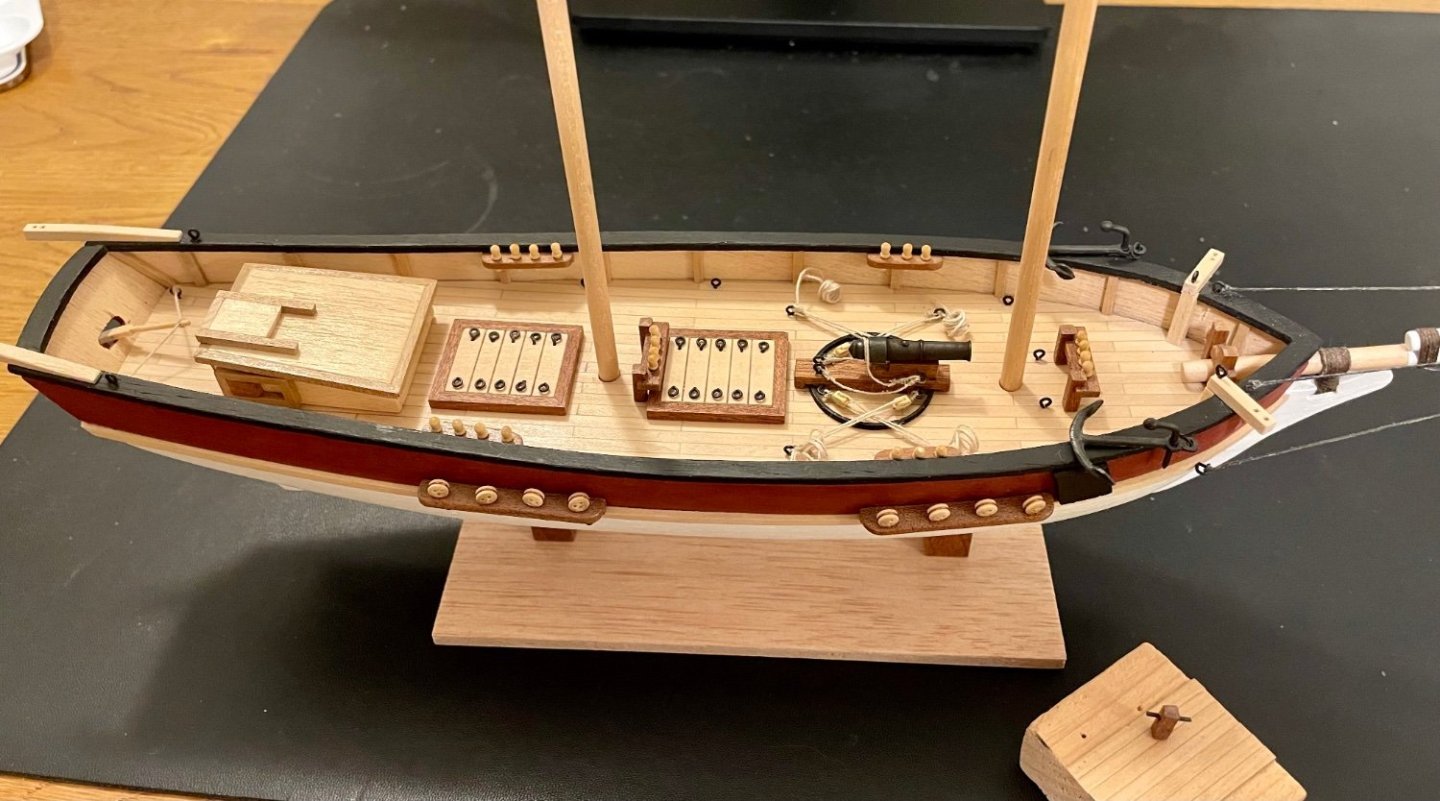
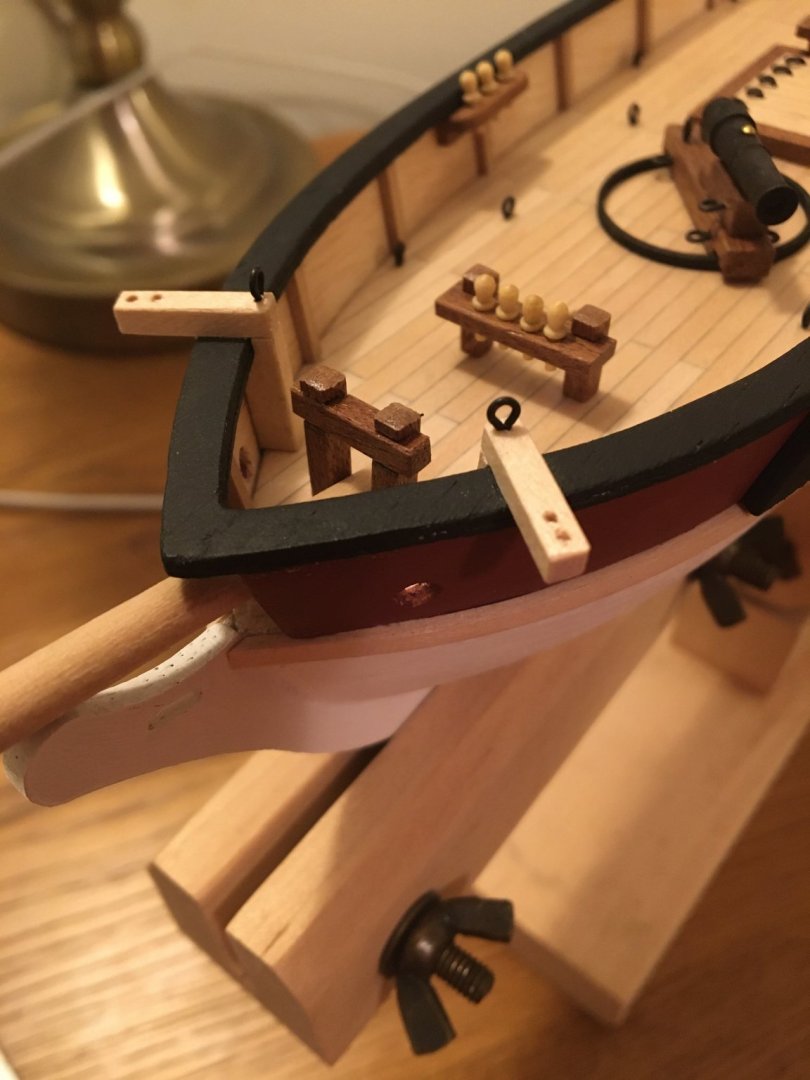
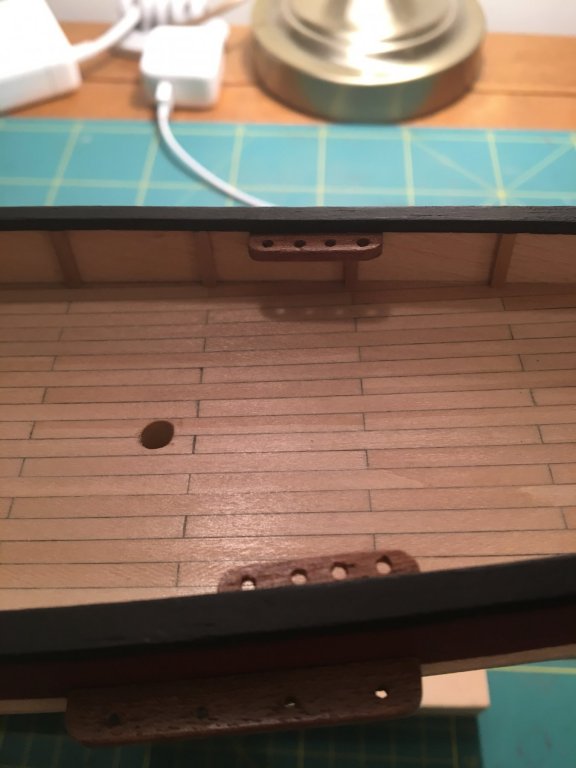
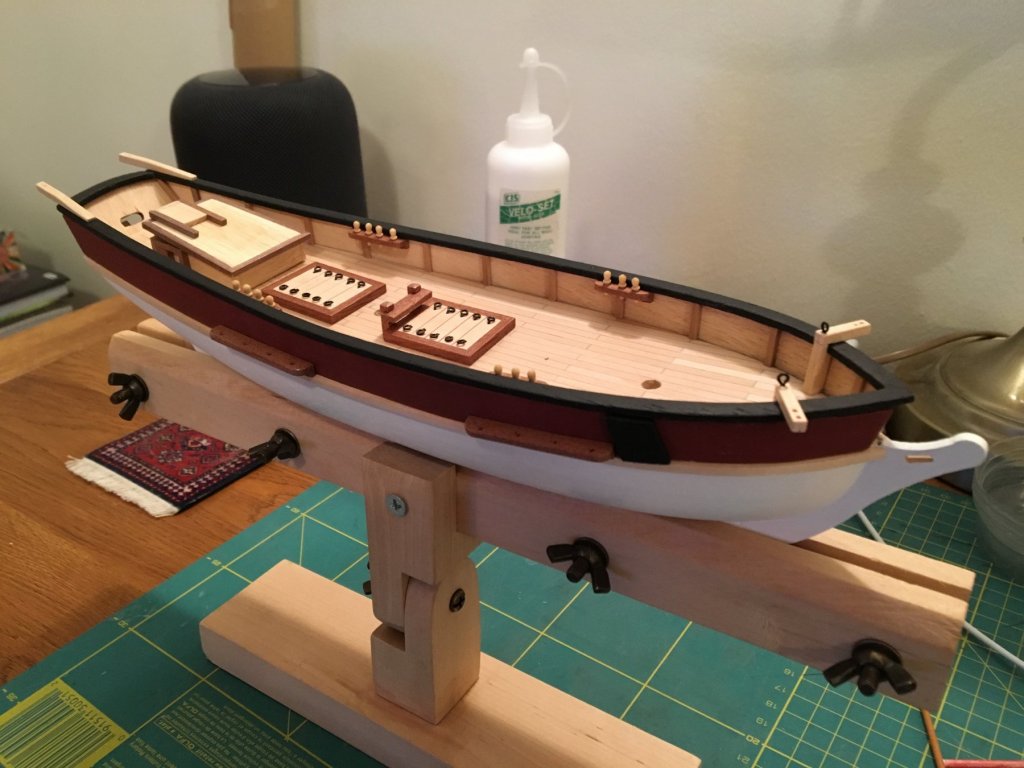
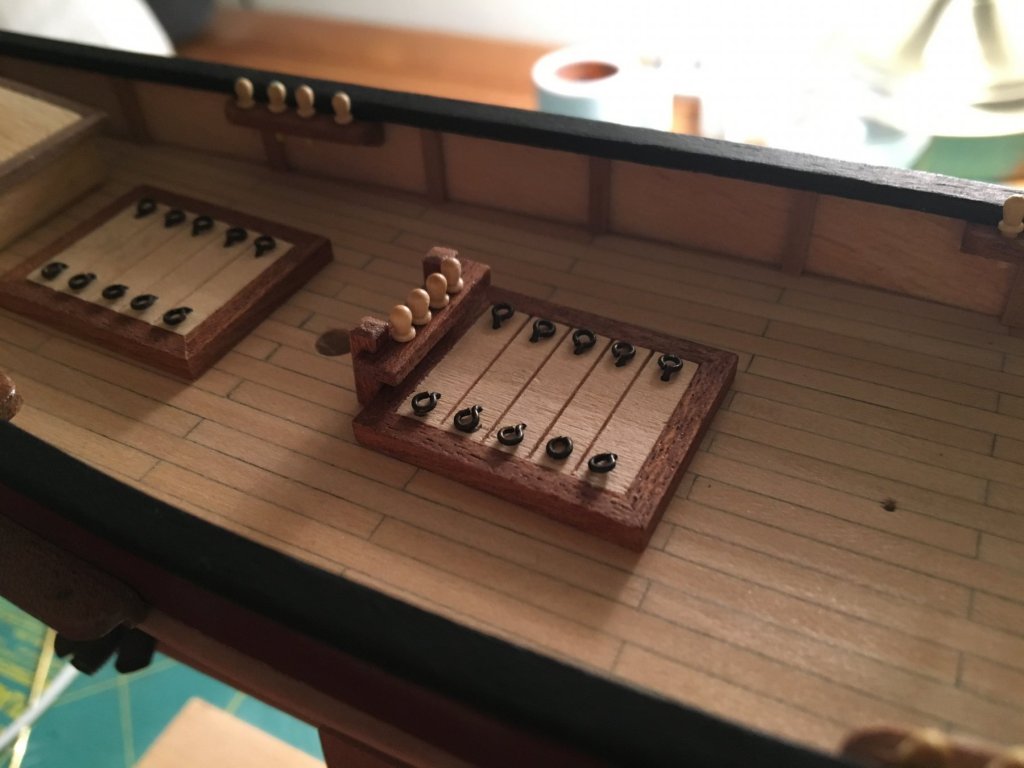
A brief update on my Flyer build. In the end, I decided to cut away a groove in the pinrails so that they would fit around the stanchions, and I could fit them in the correct place according to the plans. It may have been easier to cut away a portion of the stanchion, but they seem to be very well glued to the bulwarks, so I left them well alone! The grooves that I cut out are a pretty close match to the stanchions, and any inaccuracy is nicely hidden by the gallant rails. I’m happy with how they look... And a pic with belaying pins and the deck furniture (nothing glued yet though)! Incidentally, I also tidied up my little gallant rail filler at the bow. It’s quite hard to see now, so happy with the result. I started on the pinrails for the masts. These just comprise 2 posts and the horizontal rail, all with grooves cut in such that they ‘interlock’. Additionally, I had to drill a hole into the base of each post, and will put a piece of brass into it. Presumably this is just to anchor it to corresponding holes in the deck. Is it normal? I would have expected just glue would suffice? I’m struggling a bit to get nicely aligned holes drilled. In spite of measuring properly, it seems when I start drilling, there is just a little movement away from centre. It’s quite noticeable when holes are close together. Any recommendations on this at all? Pics below. Thanks for looking! Will.


- 35 replies
-
- 6
-
-
- flyer
- constructo
- (and 1 more)