HOLIDAY DONATION DRIVE - SUPPORT MSW - DO YOUR PART TO KEEP THIS GREAT FORUM GOING! (Only 36 donations so far out of 49,000 members - C'mon guys!)
×


lunarlander
-
Posts
22 -
Joined
-
Last visited
Recent Profile Visitors
510 profile views


-
 Gregory reacted to a post in a topic:
Hms Mamoli swift brig. rigging question
Gregory reacted to a post in a topic:
Hms Mamoli swift brig. rigging question
-
Hms Mamoli swift brig. rigging question
lunarlander replied to lunarlander's topic in Masting, rigging and sails
Thanks to get this far and to realize the kits might not be historically accurate is kind of a let down. I do have rigging period ship models and will follow that -
lunarlander reacted to a post in a topic:
Hms Mamoli swift brig. rigging question
-
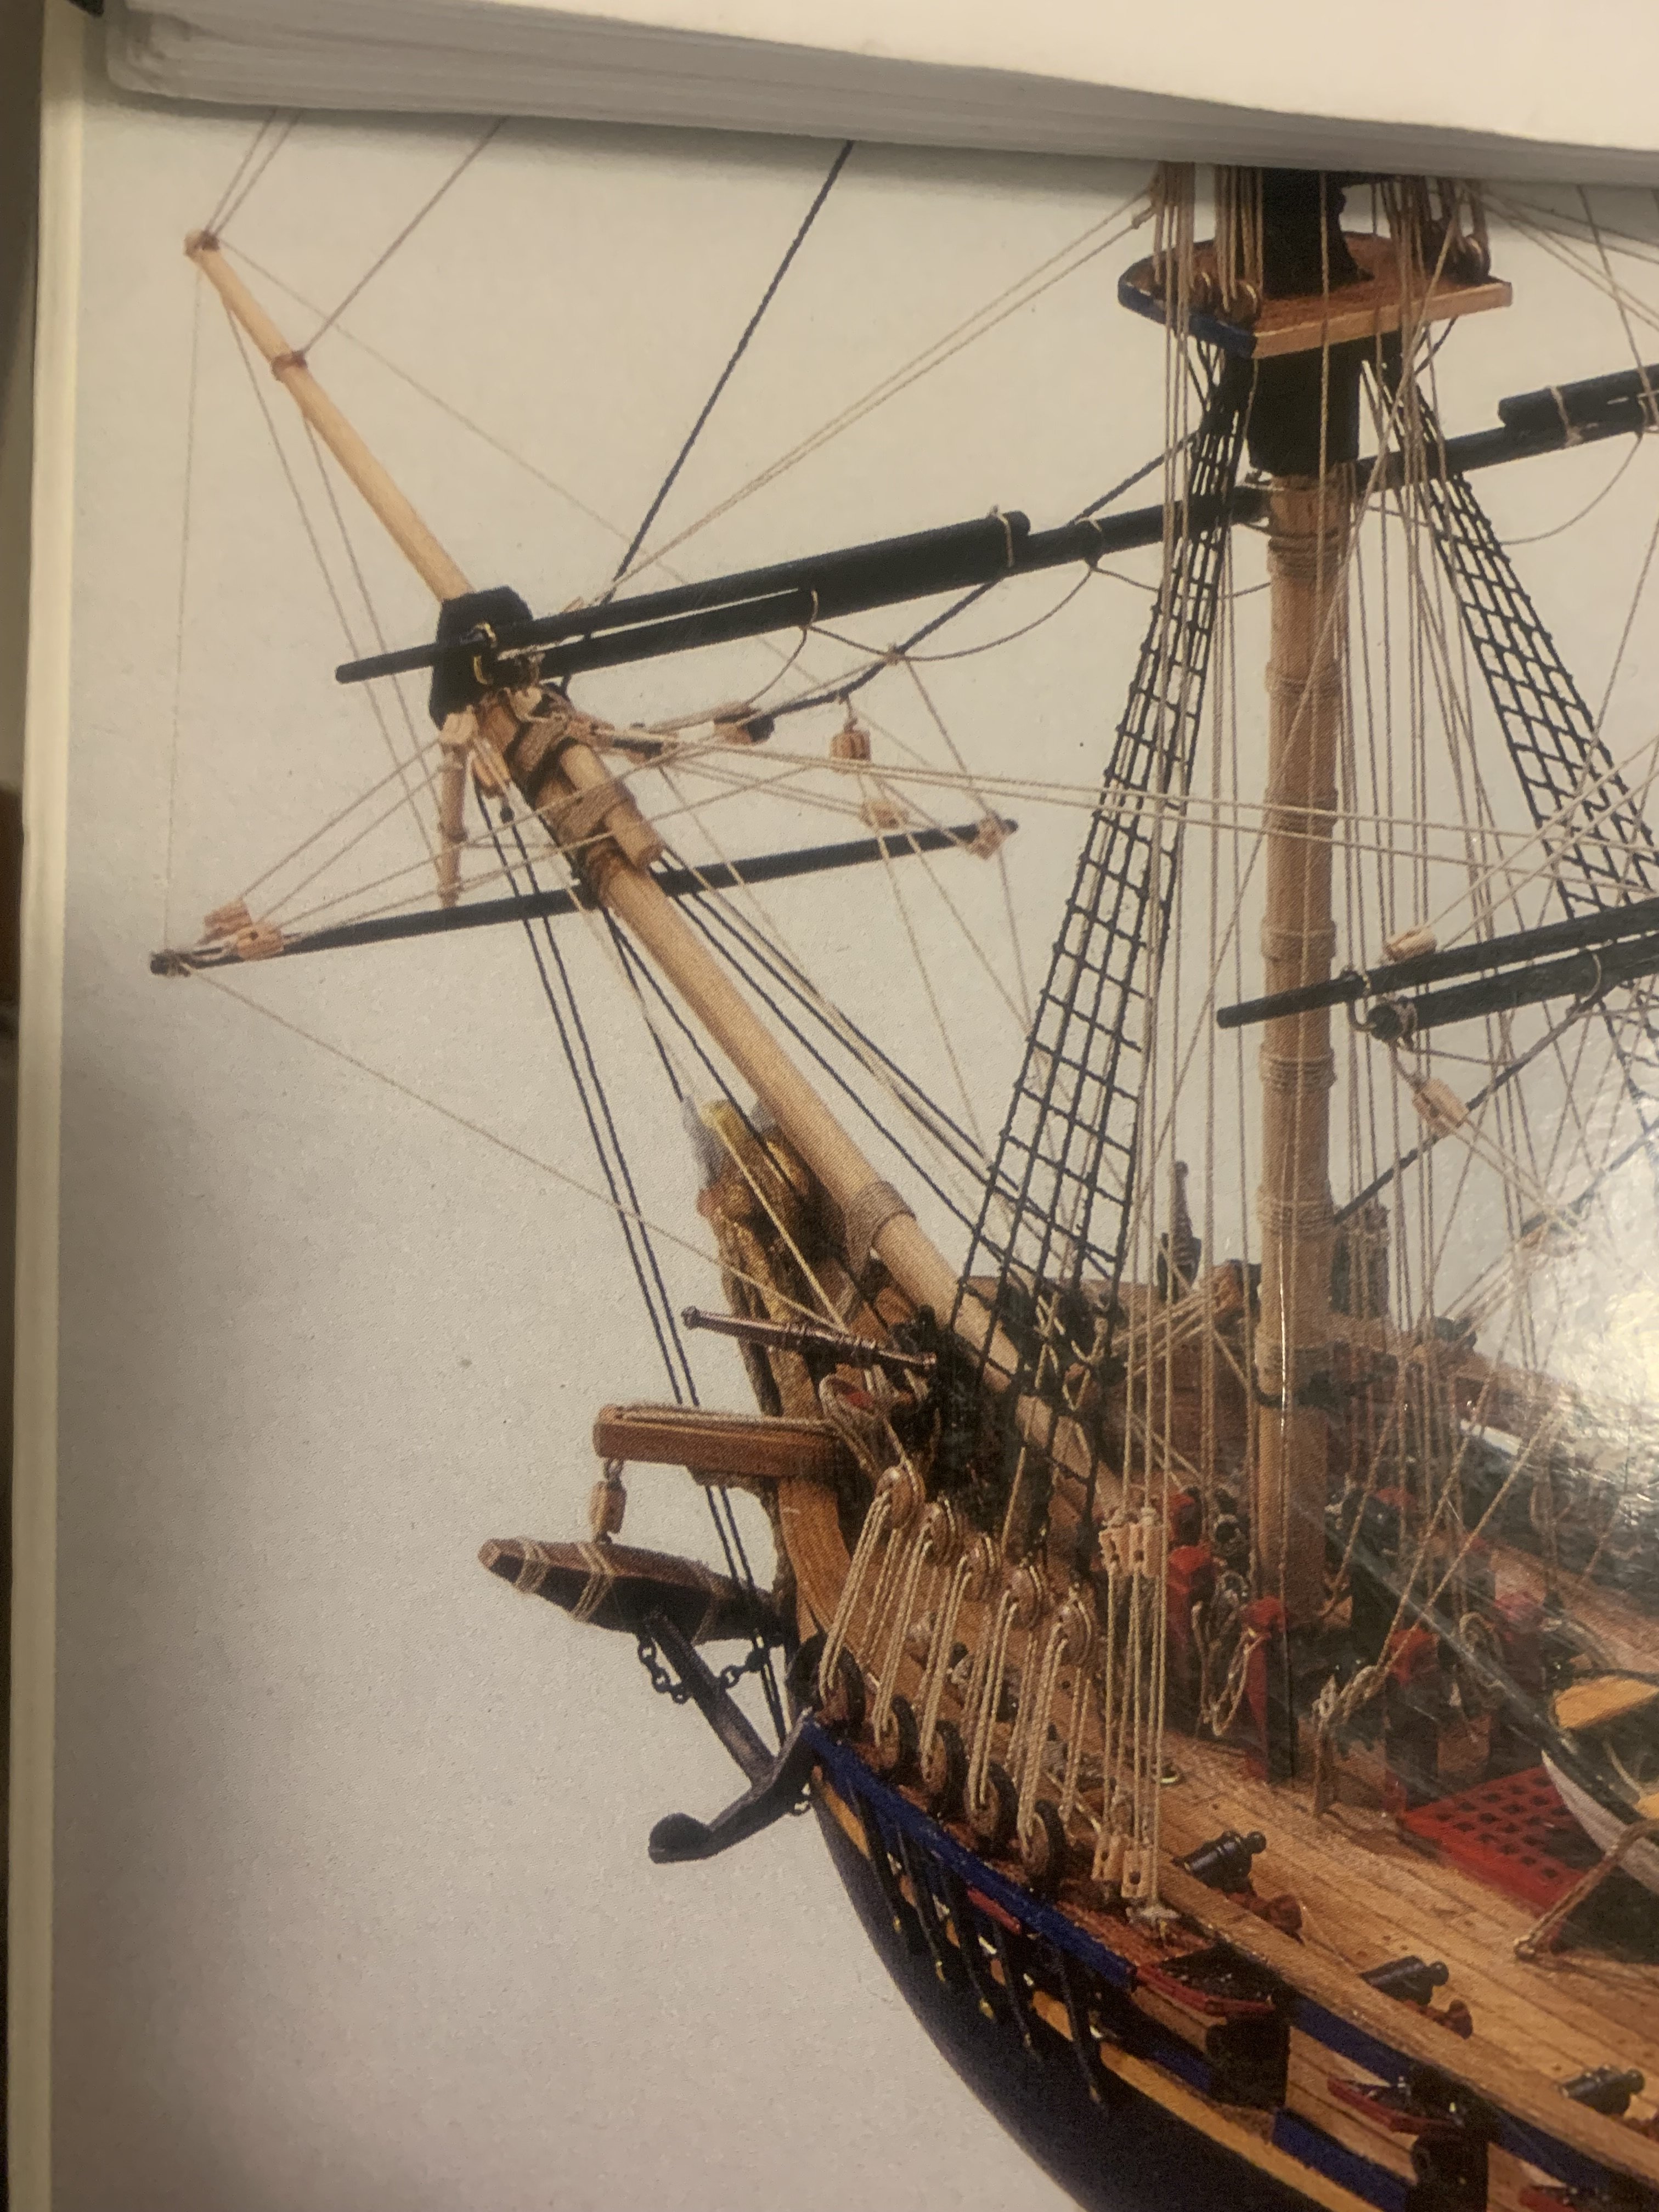
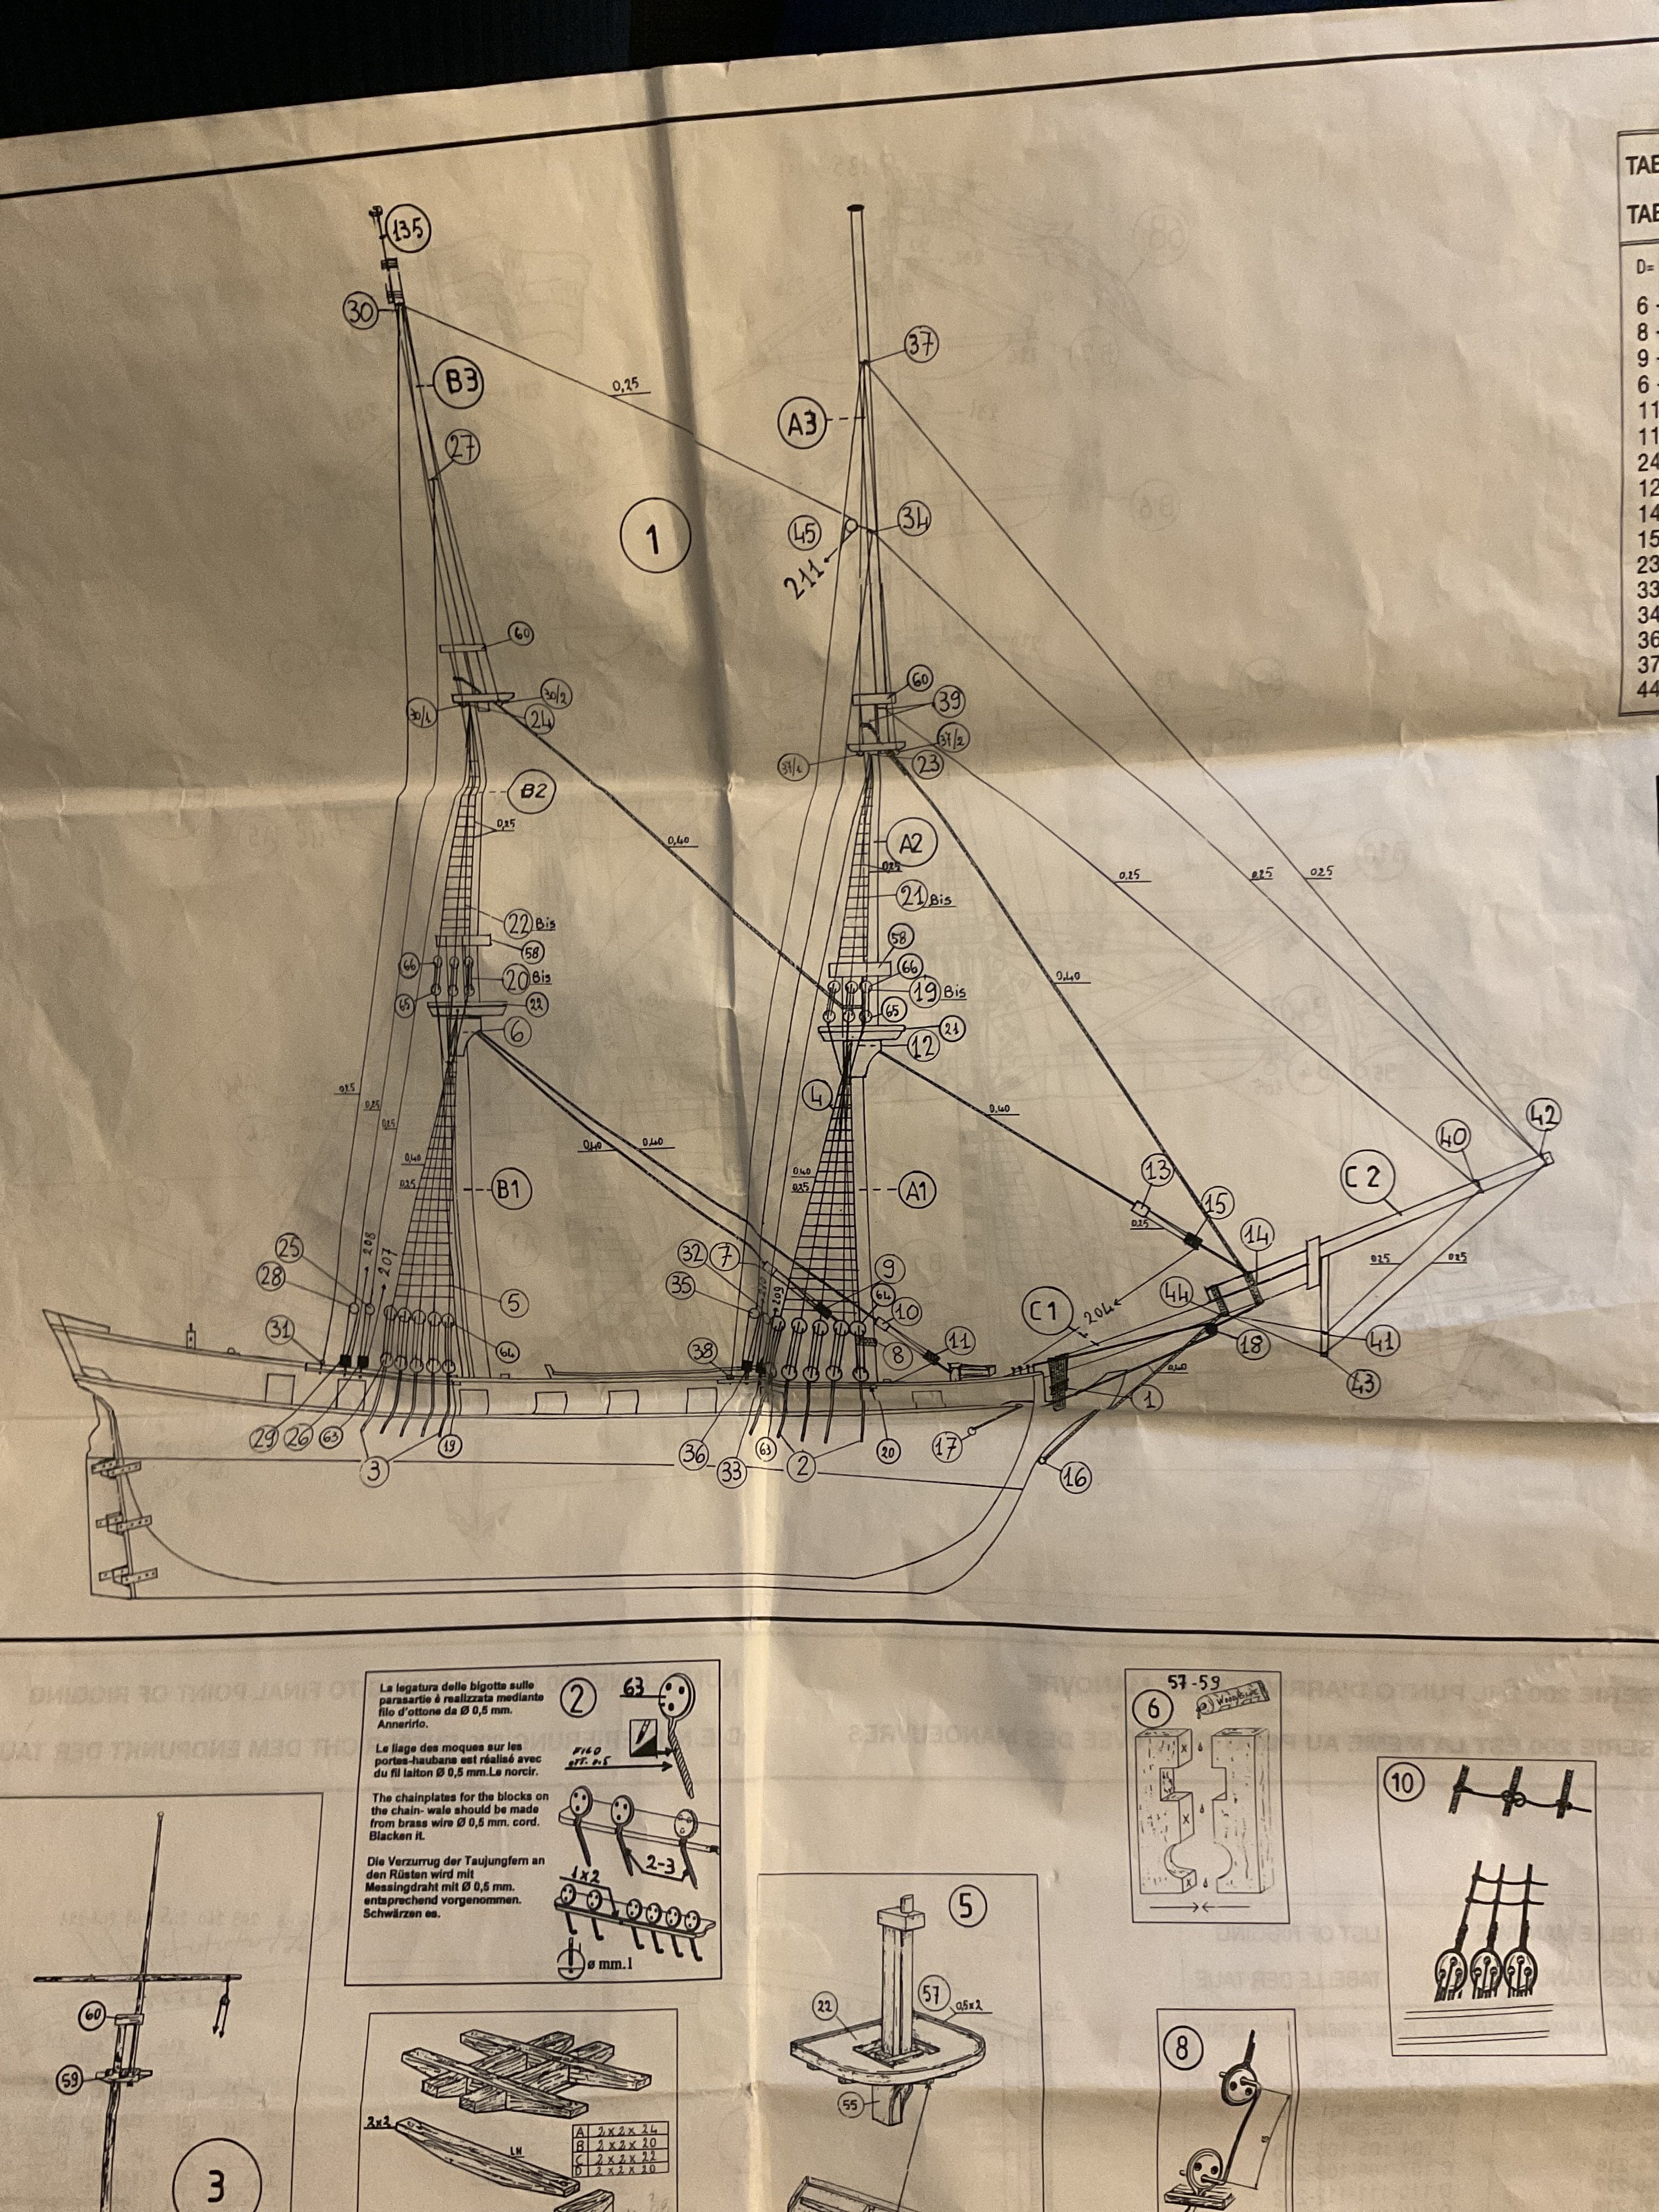
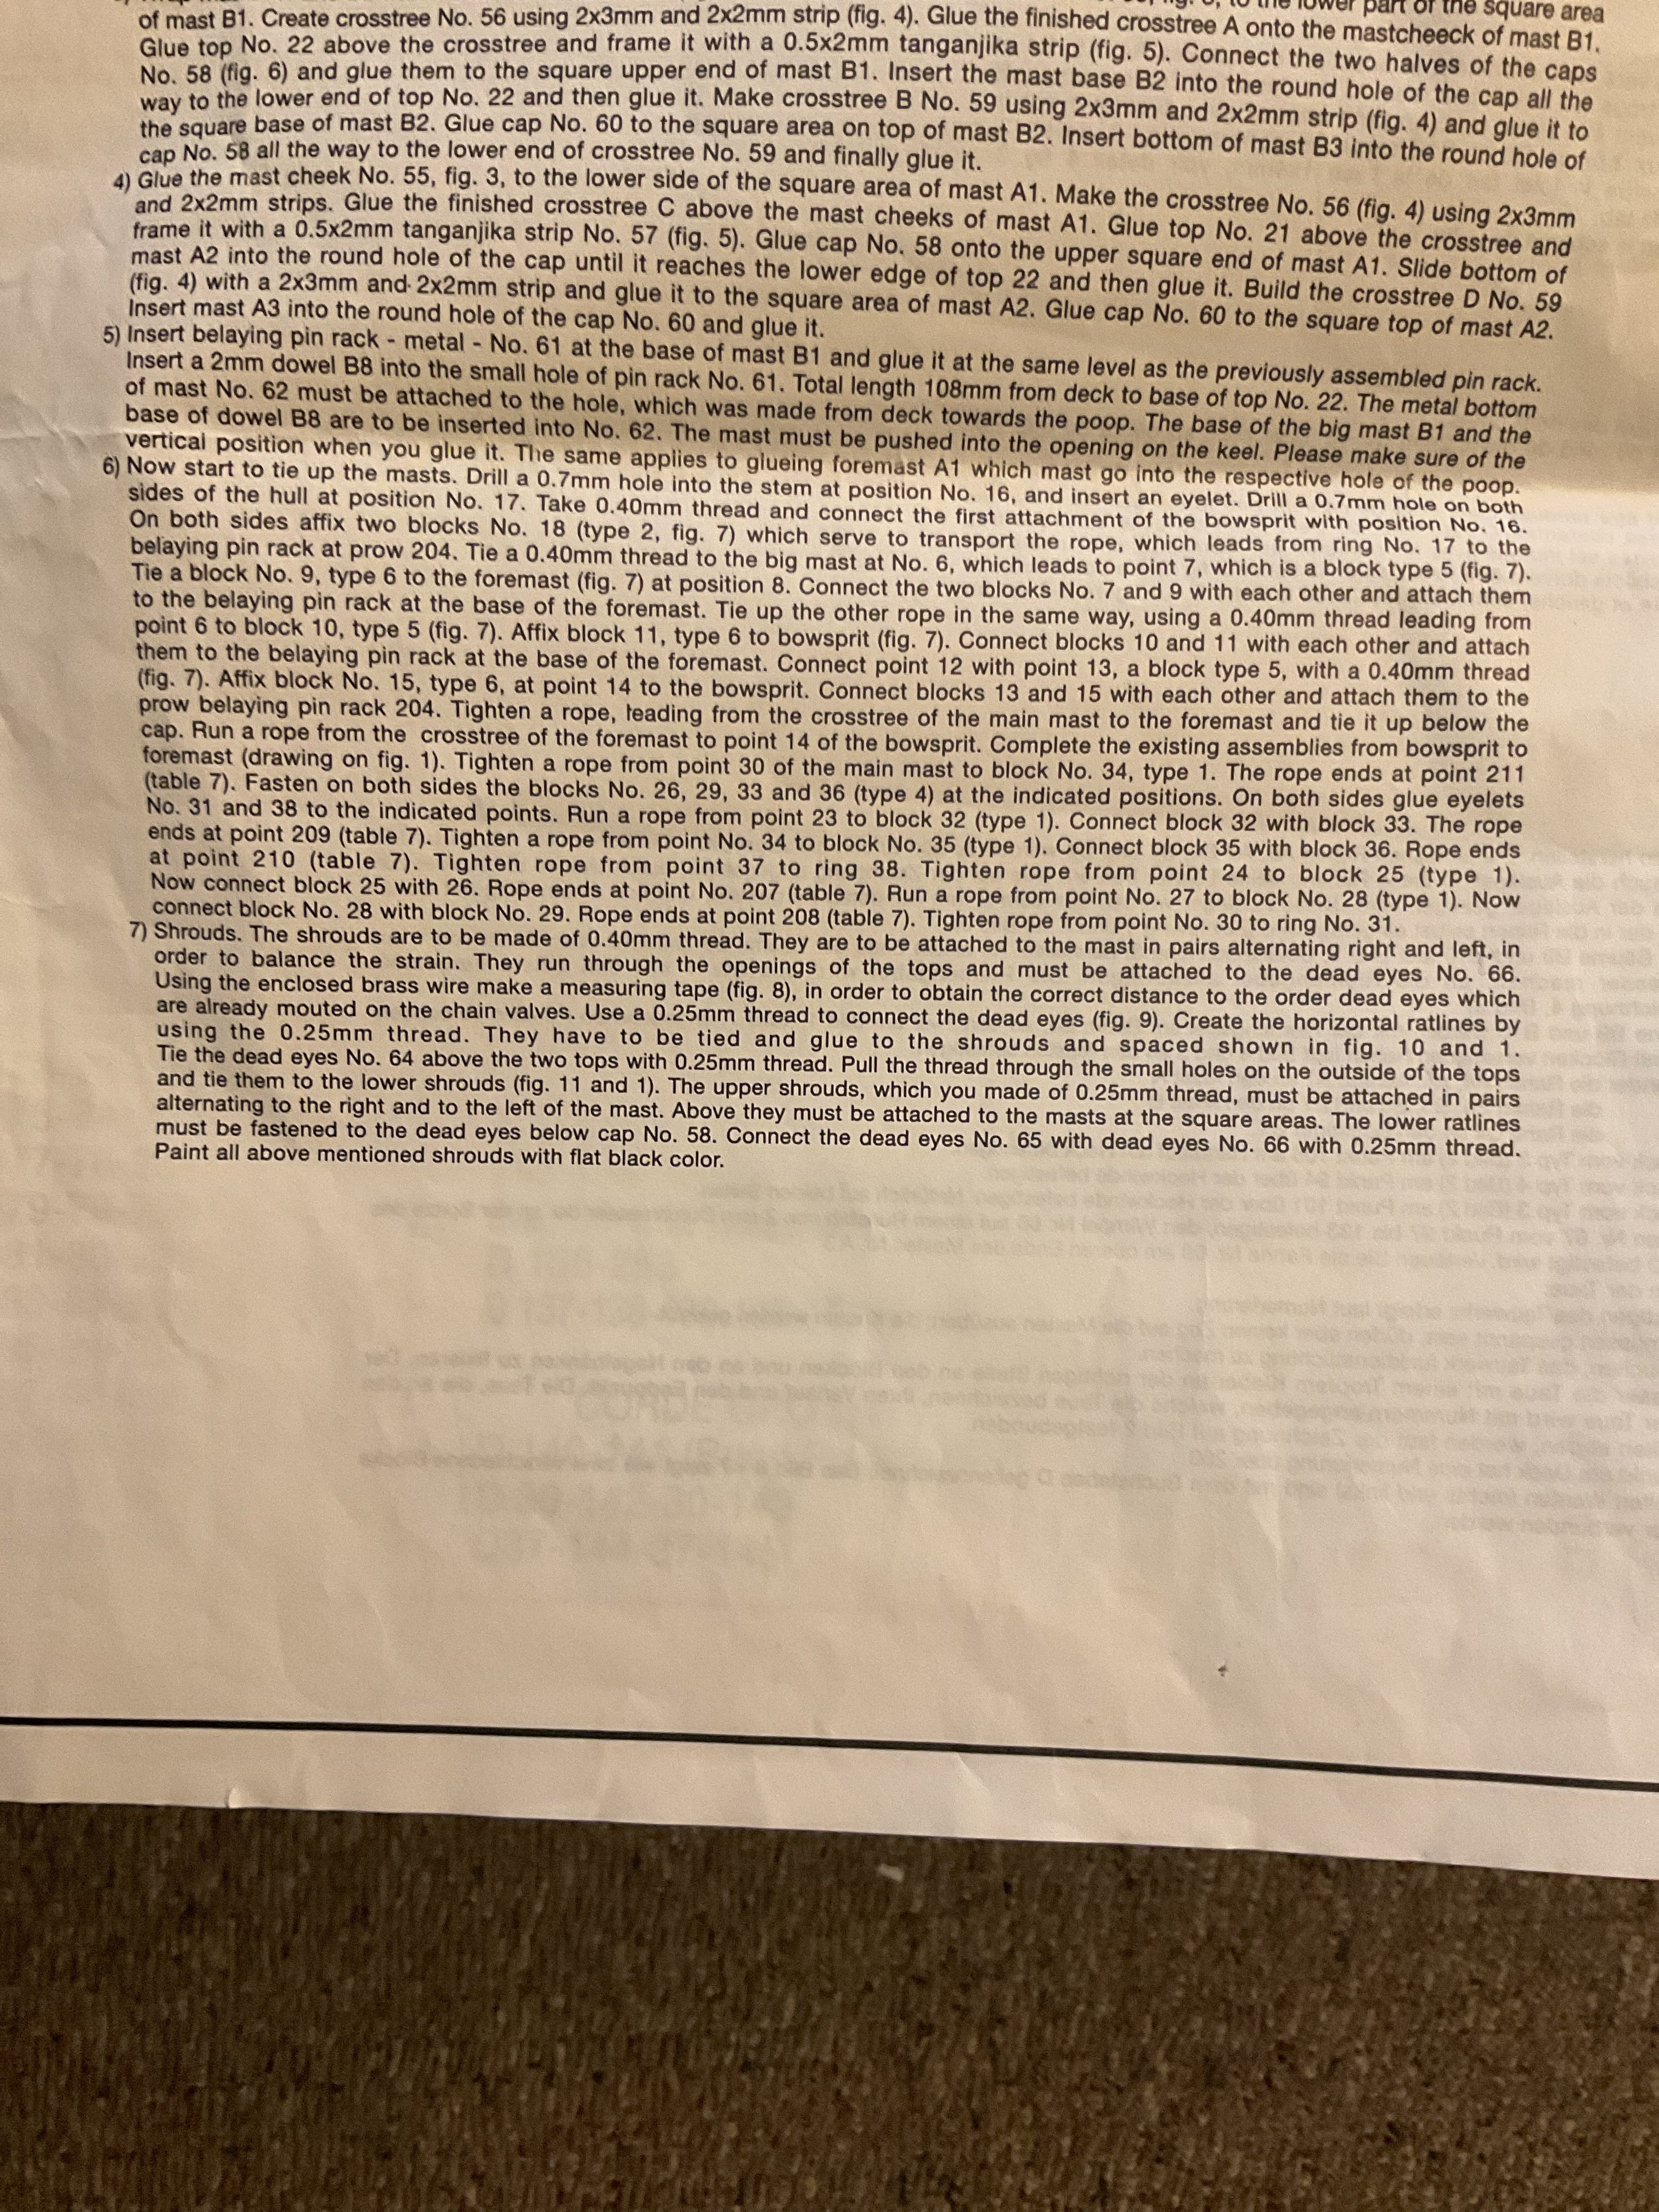
Is 17-18-204 not a bowspritshroud ? If so should it be belayed as per the plans? It’s my understanding they were not belayed and is there any other discrepancies that someone with experience can spot in the standing rigging ? I want to make it as accurate as possible and there is not much information on this particular ship I can find online.


-
lunarlander reacted to a post in a topic:
HMS Swift by lunarlander - Mamoli - Scale 1/70 - first build
-
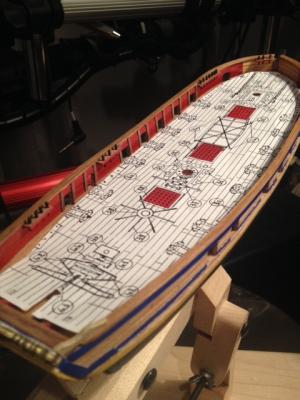
Everything is numbered etc im trying to look ahead and see if any blocks etc should be attached to places before starting on the standing rigging. On the bowsprit it says to lash the jibboom to the bowsprit then later in another step is to attach the spirit sail yard to the same spot that has been previously lashed. I have the rigging period ship book but it is all diagrams. It’s just trying to come up with a plan so I don’t have to backtrack later or try fitting a block or something into a place that would have been easier to do at the beginning of the rigging process.


-
ccoyle reacted to a post in a topic:
HMS Swift by lunarlander - Mamoli - Scale 1/70 - first build
-
vvvjames reacted to a post in a topic:
HMS Swift by lunarlander - Mamoli - Scale 1/70 - first build
-
Looking over the mamoli rigging plans for this is a little intimidating as an absolute beginner. I have new blocks and rope because the kit ones are garbage but trying to desipher the kit plans and figuring out the best approach for rigging is where the build is at now.

-
lunarlander reacted to a post in a topic:
HMS Swift by lunarlander - Mamoli - Scale 1/70 - first build
-
RolandR reacted to a post in a topic:
HMS Swift by lunarlander - Mamoli - Scale 1/70 - first build
-
RolandR reacted to a post in a topic:
HMS Swift by lunarlander - Mamoli - Scale 1/70 - first build
-
François de Saint Nazaire reacted to a post in a topic:
HMS Swift by lunarlander - Mamoli - Scale 1/70 - first build
-
vvvjames reacted to a post in a topic:
HMS Swift by lunarlander - Mamoli - Scale 1/70 - first build
-
SiriusVoyager reacted to a post in a topic:
HMS Swift by lunarlander - Mamoli - Scale 1/70 - first build
-
lunarlander reacted to a post in a topic:
HMS Swift by lunarlander - Mamoli - Scale 1/70 - first build
-
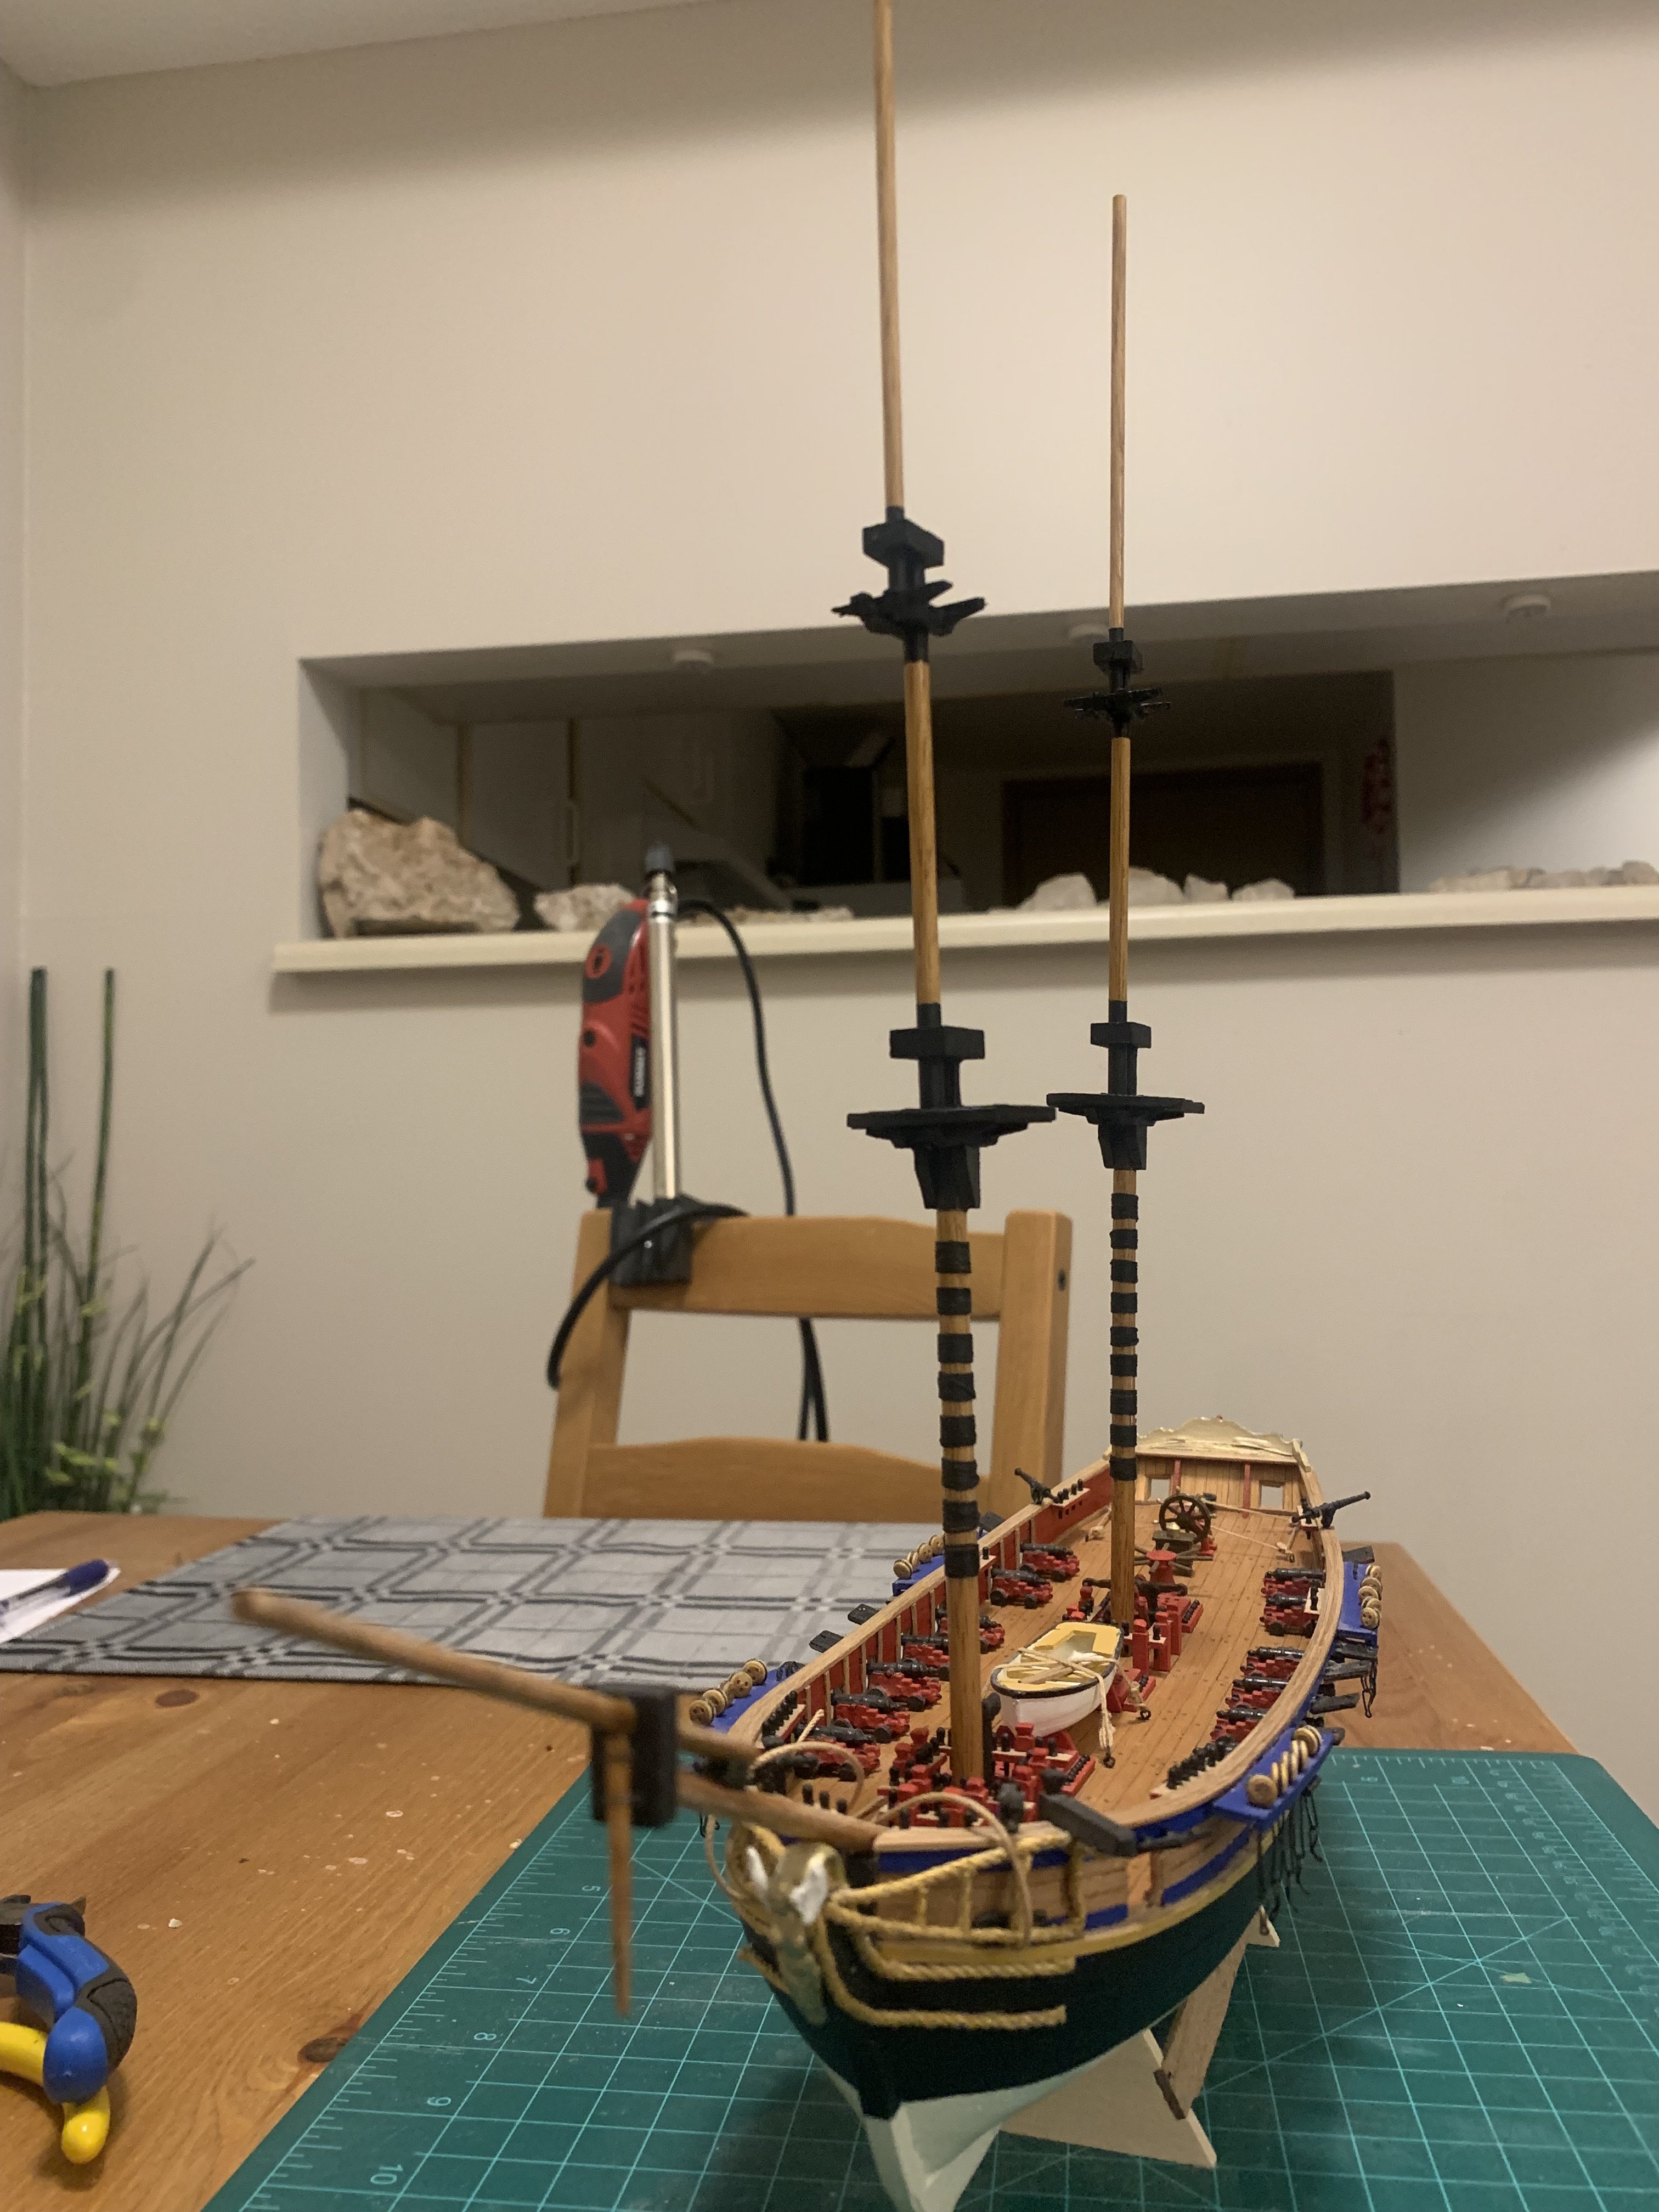
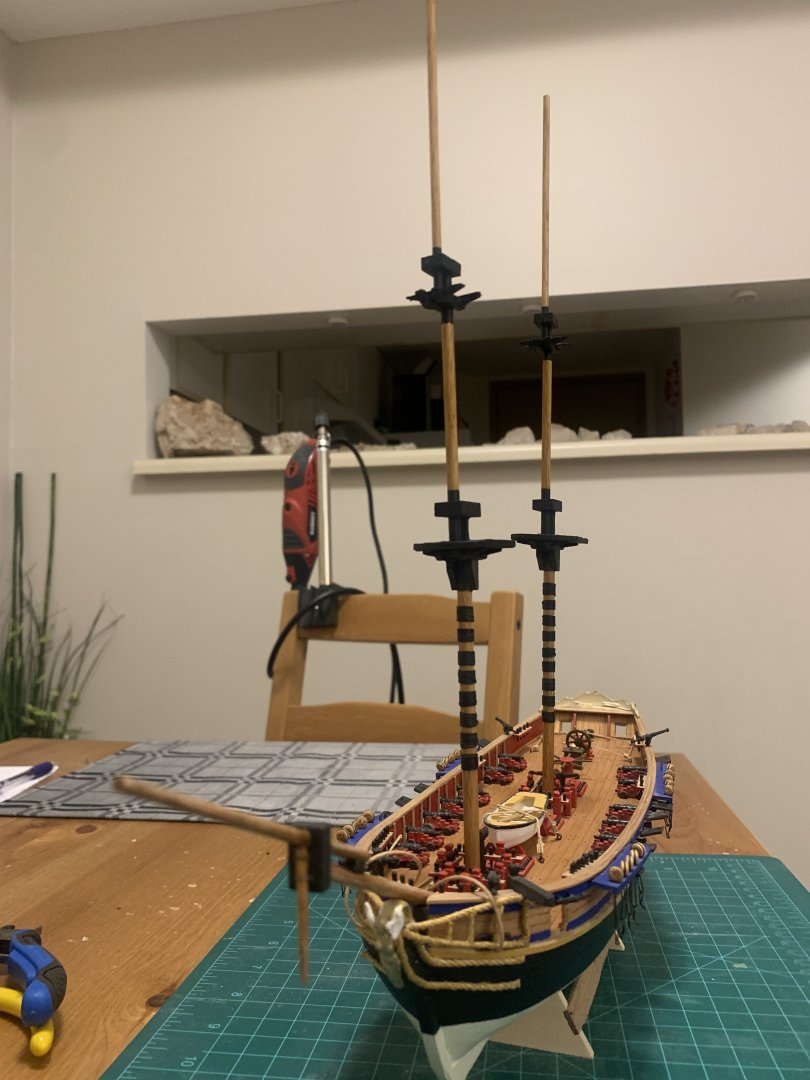
Does anyone know what color or how the masts and spars should be finished on this model to make it historically accurate ? I can’t find much information online and not sure about the accuracy of what is shown on the box cover. I was going to paint the spars and cross trees black but unsure about the masts and bowsprit.


-
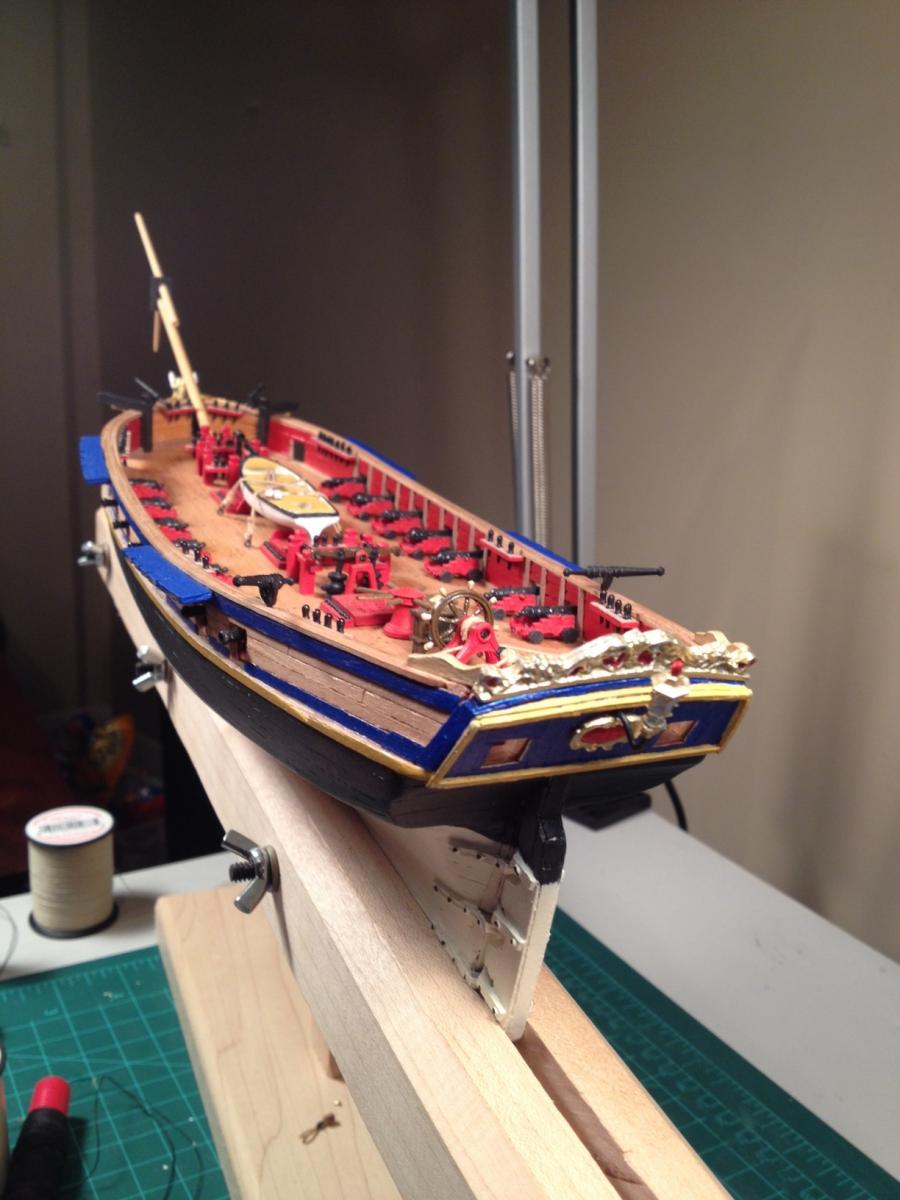
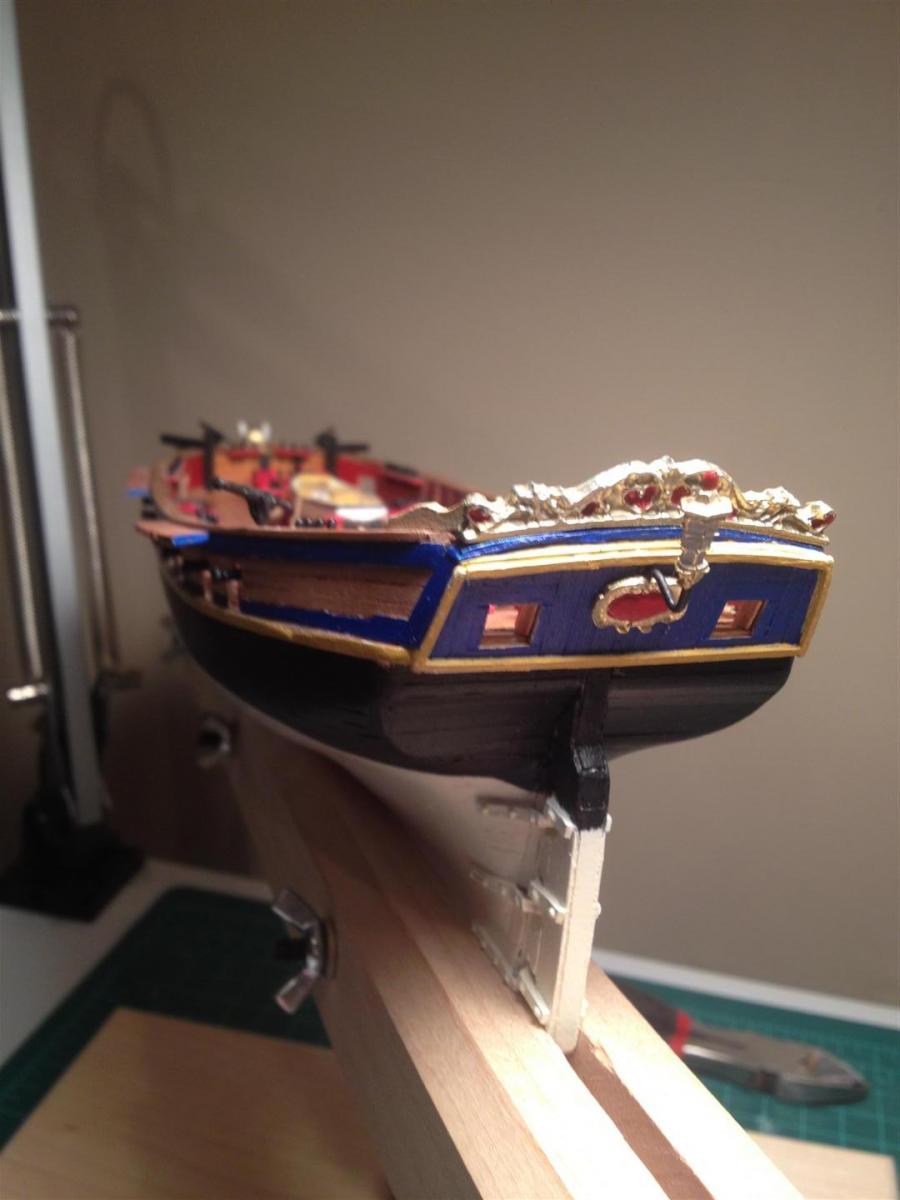
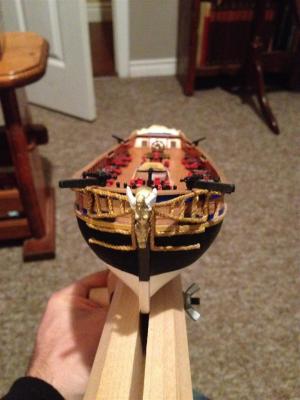
After a long hiatus kids life etc I’ve dusted off the ship and looking to get it finished. I’ve been looking at the chain straps and wondering what exactly is right for this period of ship? The picture on the box and instructions are two different things. I’m not sure if I have it right or start over and go with the instructions or something else. Any input would be appreciated or if there is some where else in the site I should post ?


-
GrandpaPhil reacted to a post in a topic:
HMS Swift by lunarlander - Mamoli - Scale 1/70 - first build
-
civilian reacted to a post in a topic:
HMS Swift by lunarlander - Mamoli - Scale 1/70 - first build
-
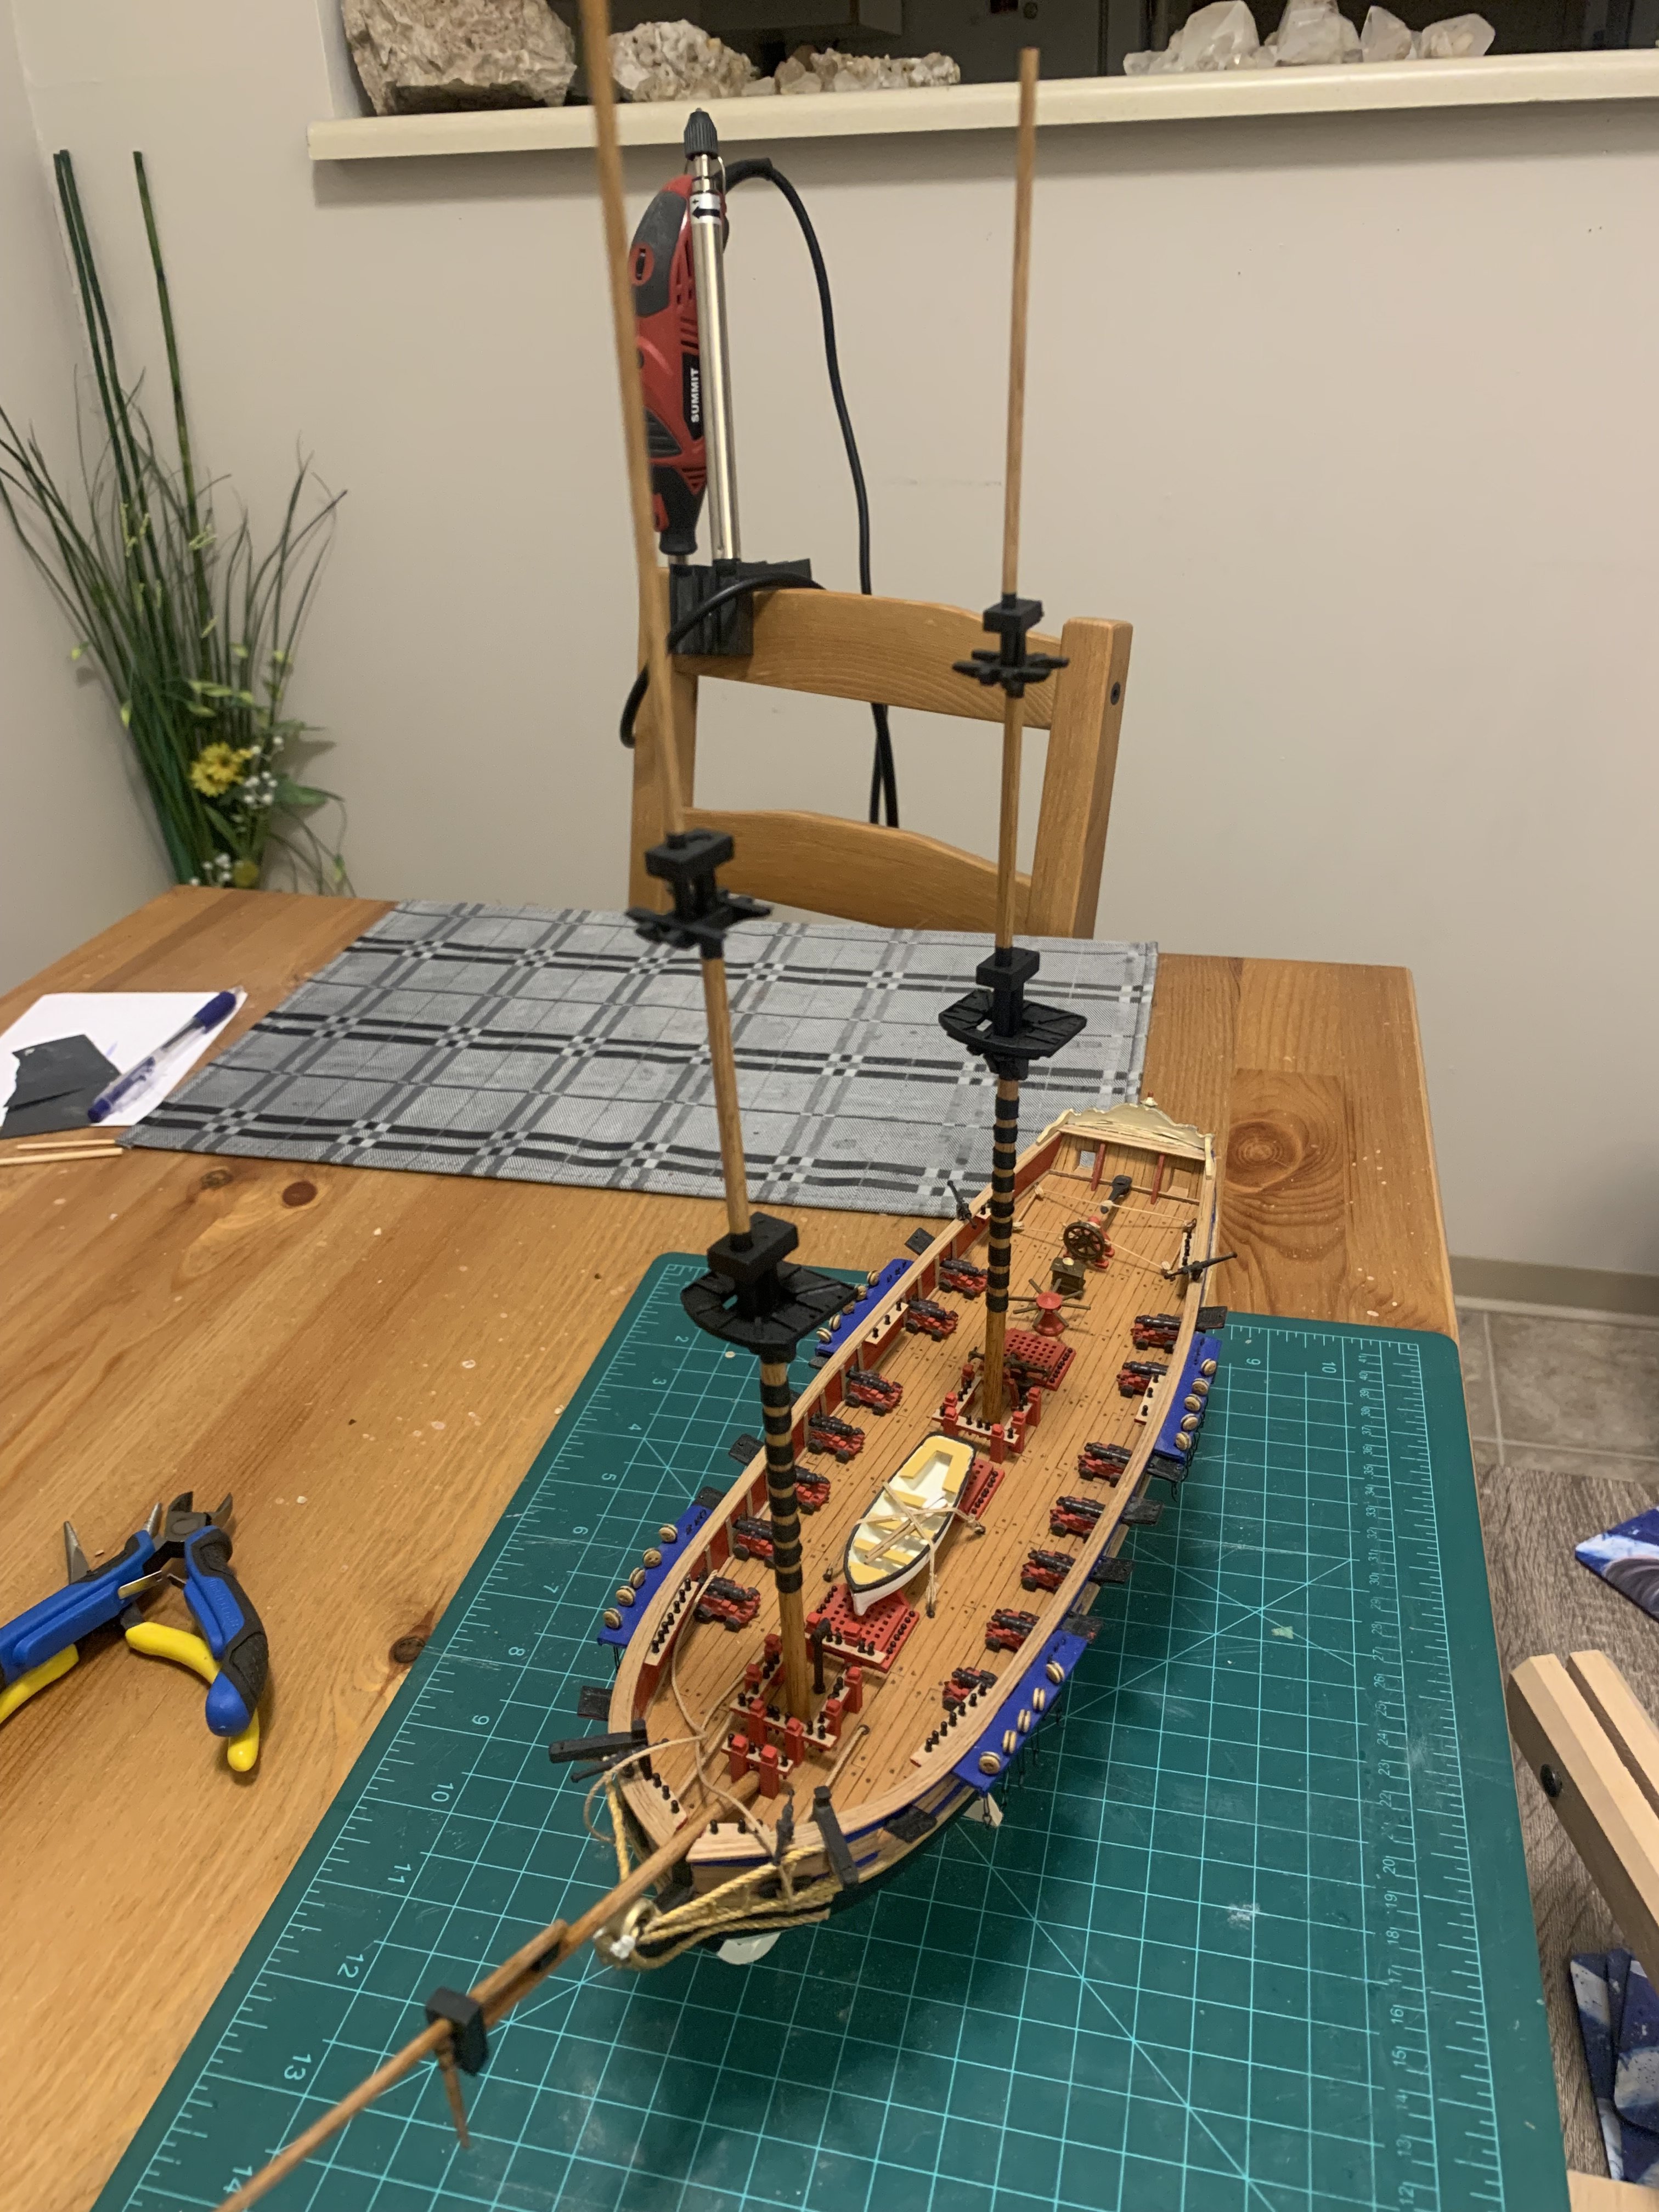
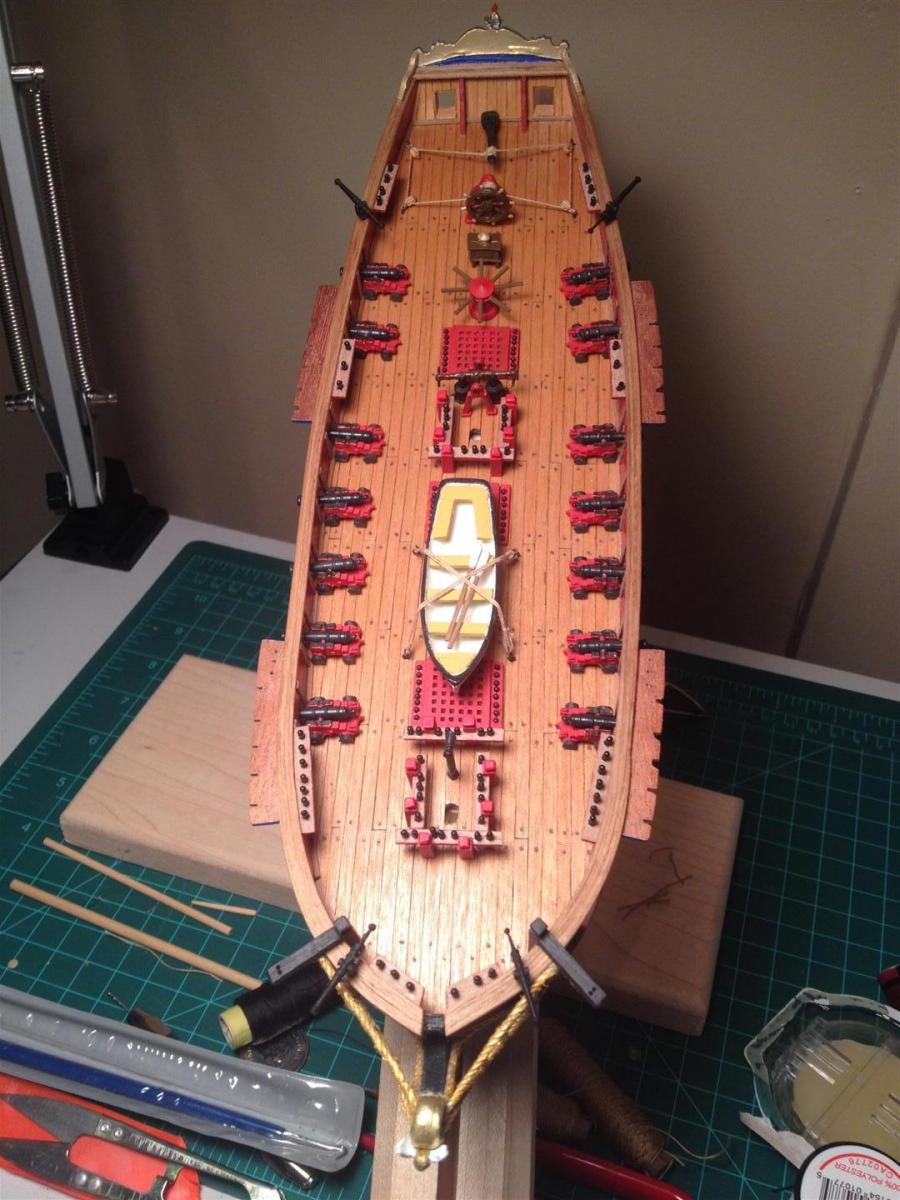
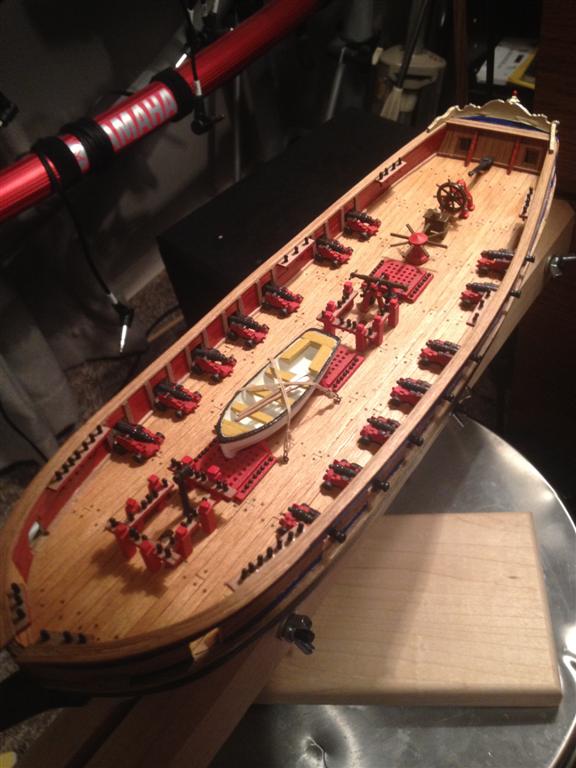
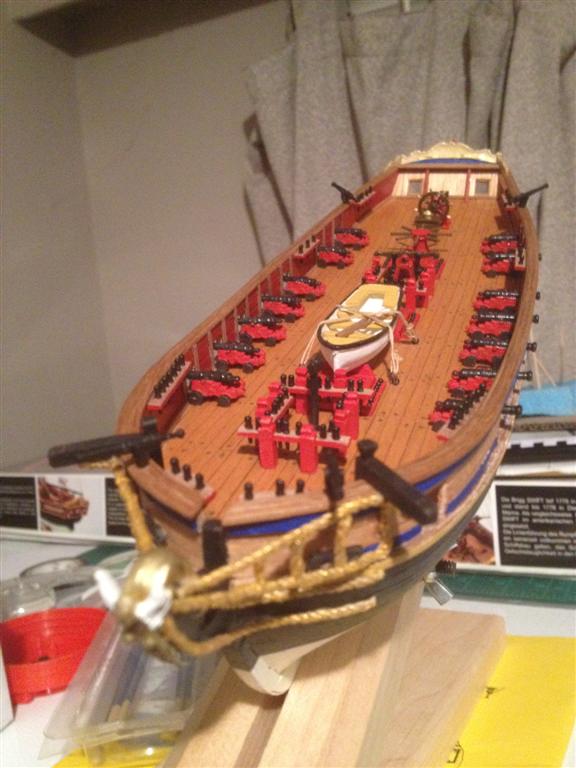
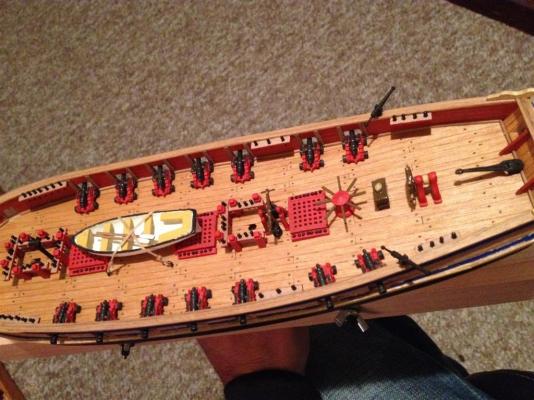
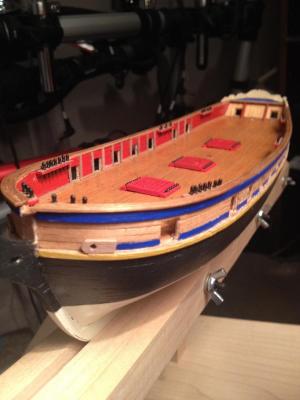
some more progress couldnt make up my mind between black or blue for the chainplate Blue seems to work well still havent figured out how to get high quality pics onto here

-
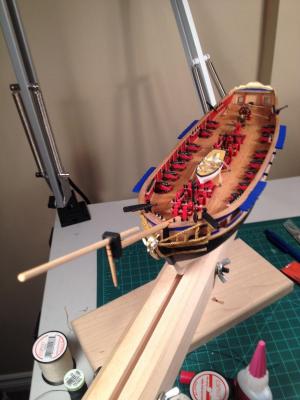
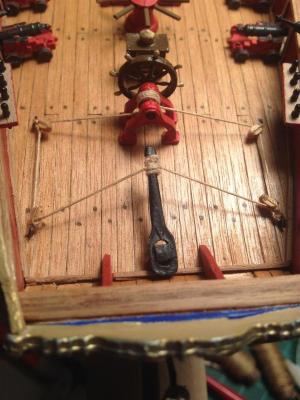
I didnt stick with the plans on the tiller/steering rigging I didnt see how the geometry would work in a real life application so this is what I came up with starting on the bowsprit now.I take the photos with my iphone and resize them on the computer they arent turning out very well if anyone has any sugestions for posting better quality pics.


-
its been a while since ive been here sorry for the late reply I find mamoli's instuctions and plans confusing and the use of words its hard to dechipher I have spent alot of time on here looking through posts to find answers and make sense out of the instructions.Their wood is nice tho
-
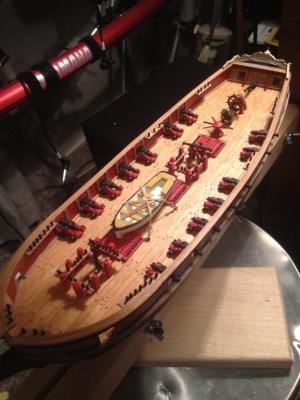
Been a while since last update kids and life have kept me too busy with little time for shipbuilding but its slowly coming along.

-
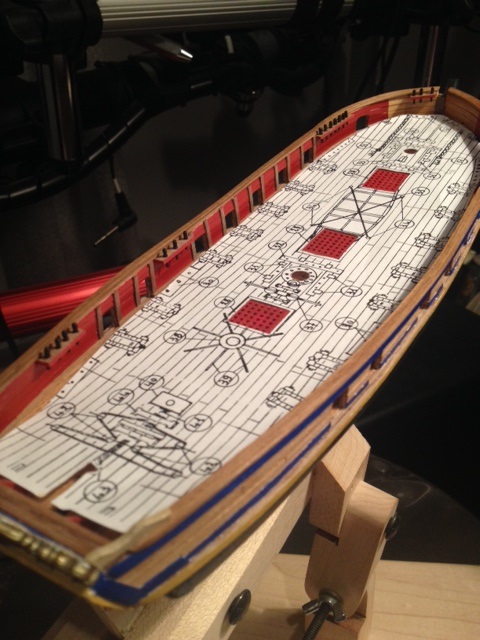
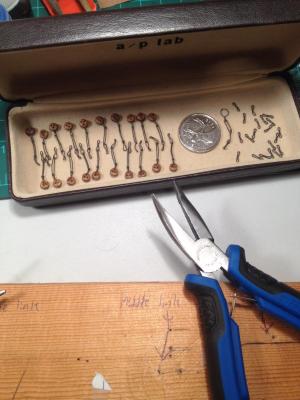
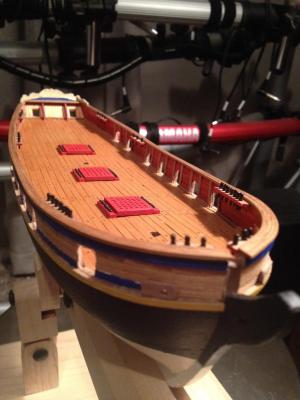
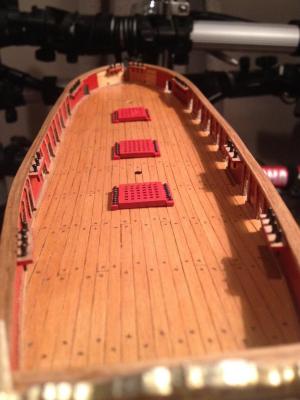
After painting the britannia cast belay pins with acrylic paint by hand and having it not work out I tryed wooden ones and they lookd horribly out of scale and too short then I tryd brass ones from my syren kit and they were too long I decided to clean off the paint which was a pain in the butt and spray the 7mm cast belay pins with a flat black primer and im very happy with the result.Should have just spray painted in the 1st place lesson learnt!!

-
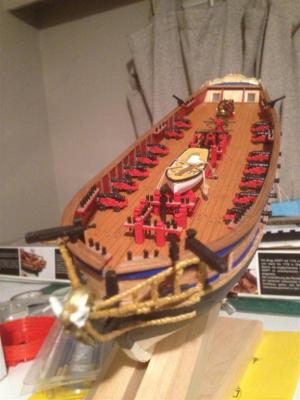
Thanx yes its my 1st build I do hve the syren from model expo already here waitng to be built that's where I got the cannon balls from.i was concidering ordering a wooden boat for the ship boat the one that comes with this kit is cast metal primed white but maybe it will turn out ok after painting and building seats oars etc
-
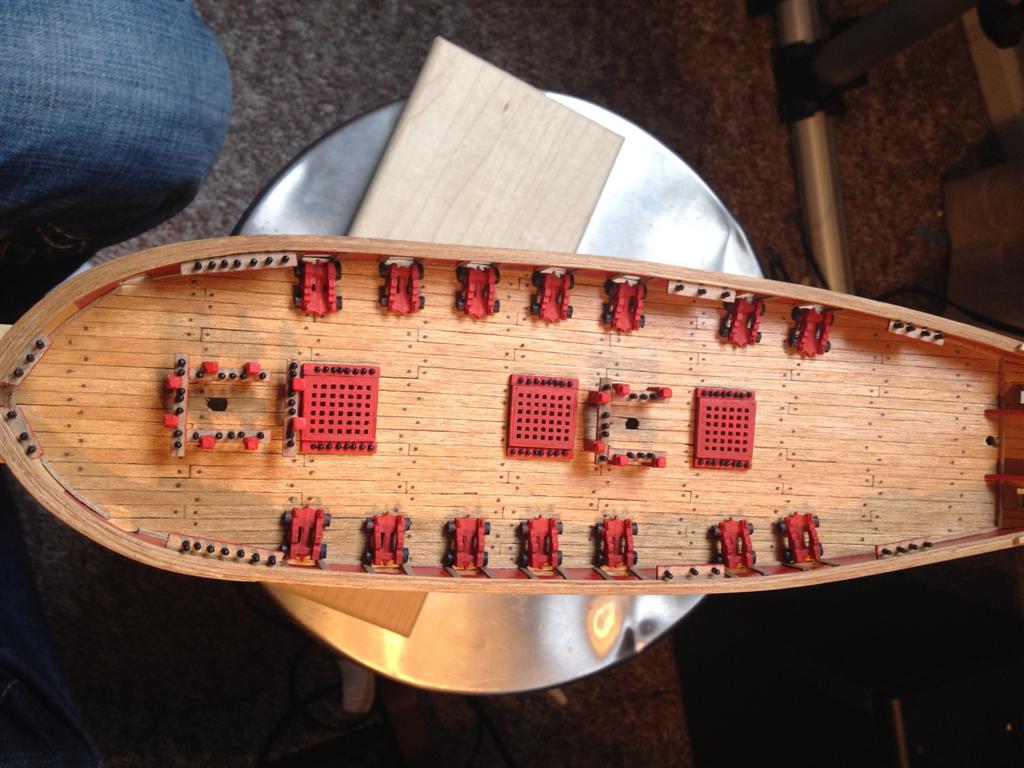
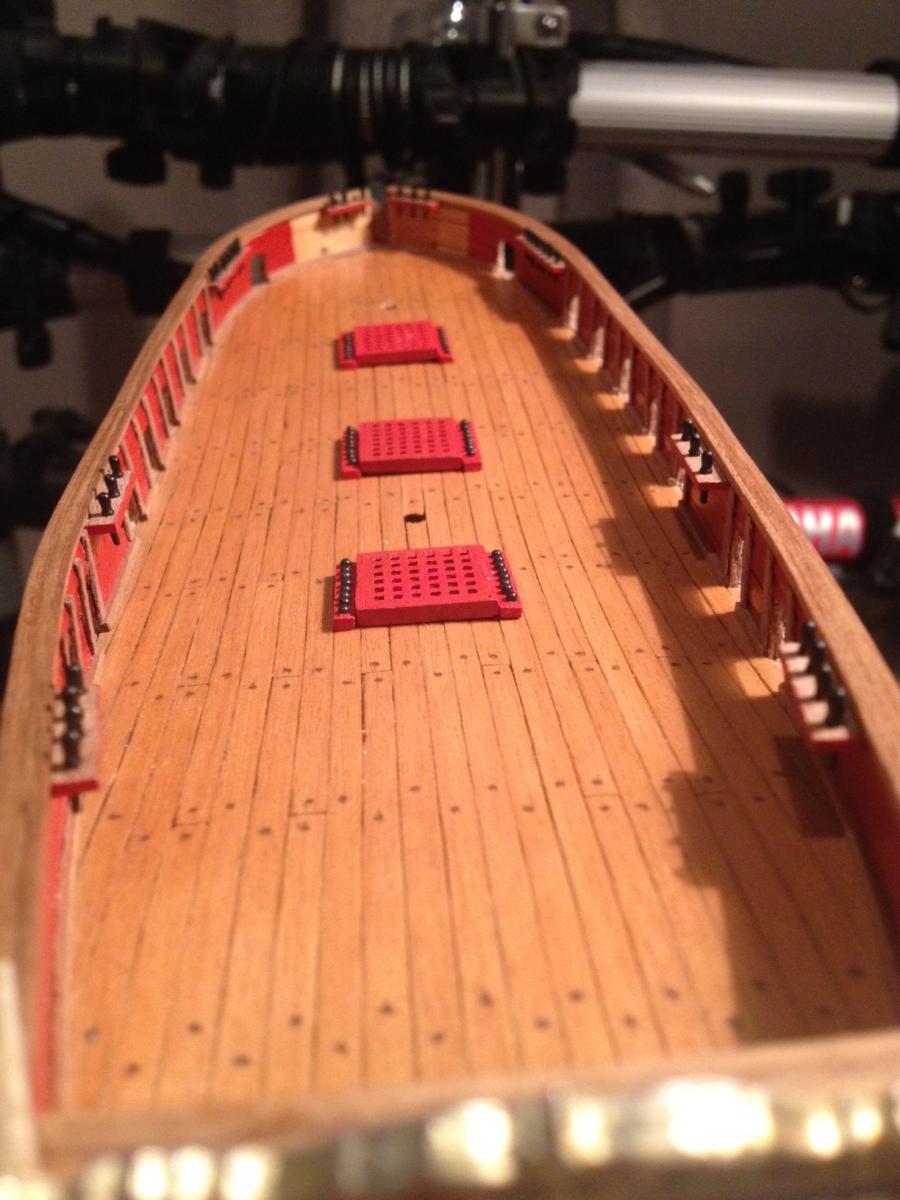
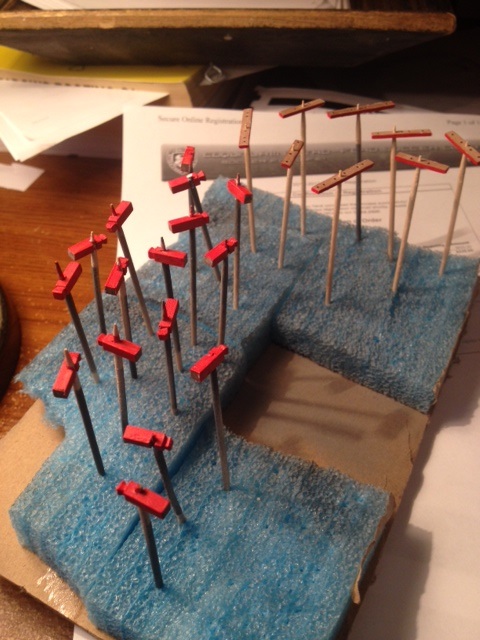
I couldn't help myself stole the 1.5mm cannon balls from the syren kit I just really want this model to be somewhat detaild as it will in the end be a gift for my father.I do have replacements coming but they are 2mm hopefully it doesn't hurt the scale for the next build. I have now started to get to work on the the belay racks and those little posts sure did a number on my eyes all 16 of them geesh time for some better lighting