-
Posts
1,268 -
Joined
-
Last visited
Content Type
Profiles
Forums
Gallery
Events
Everything posted by jack.aubrey
-
I resume this log idle for a while . . Friday, June 1st, 2012 - Gangways This afternoon I installed the two gangways that were ready for a while and I could not fit in place before the installation of the guns on the upper deck. P1080029R.jpg I obviously had to perform a minimal adaptation and then I proceeded to glue these two pieces exactly on top of the guns that I just finished to setup. To fix these two new objects I used vinyl glue, being careful to avoid any "accidentally touch" to the guns below. A few days ago I wrote that fixing the gun barrels to their truck "is a matter of seconds" by using the cyan-acrylate glue. Never such a sentence was more wrong !!. . while I didn't touch at all the guns with anything, to fix the gangways I had to plant three "practically invisible brass nails" per side and this revealed the main "weak point" of the cyan-acrylate glue: the 15/20 hammering (with a very light hammer) that I had to give it to plant the brass nail were enough to detach almost all of the barrels of the guns from their carriages . . Nothing irrecoverable, luckily. I can repeat this bonding in each case, may be with additional difficulties vs the past but I think this experience should be highlighted to make clear to those who 100% believe in this glue that it is not always the best solution, even if using the gel form. Now, thanks to this experience, when the right time comes I will use the two-component epoxy glue: it is much longer to dry than the cyan-acrylate but the seal and especially the resistance to impacts, at least to fix the gun barrels, should be totally different and much more better. My mind goes to the installation of all the metal sculptures on the stern. . Cyan-acrylate or two-component epoxy? And after years what happens? I have experience of models I made many years ago that every time I wipe them, I have to bond some pieces of metal that comes off: pieces bonded with the cyan-Acrylate . . Comments? All the best, by Jack.
- 299 replies
-
- soleil royal
- le soleil royal
-
(and 2 more)
Tagged with:
-
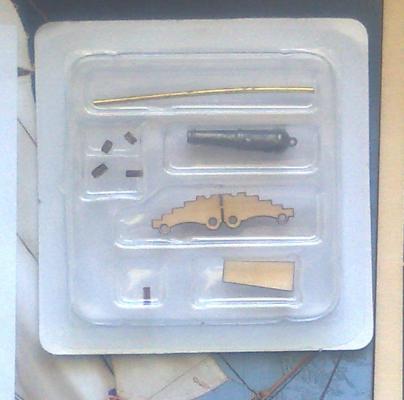
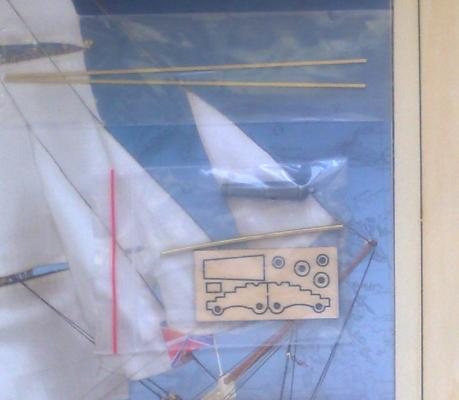
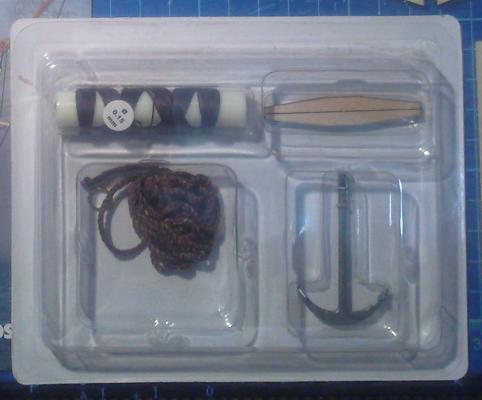
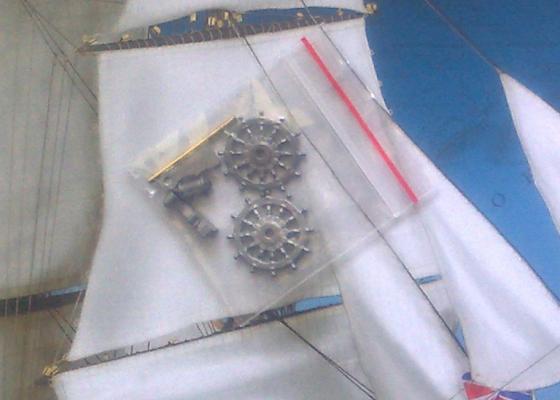
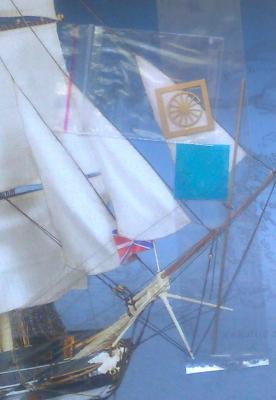
Thanks to all for your comments . . As promised I publish here some images, unfortunately of a quite bad quality due to some resizing, of some elements that have been distributed in practically every issue that I have only watched and archived . . for now. Carronades .. Anchor . . the steering wheel and something else unidentified . . Kind regards, Jack.Aubrey
-
Sunday, June 16, 2013 Five photos of the model with all the material delivered until issue 21 installed. Of course, I'm excluding some material such as cannons, anchors, etc., which, as I had occasion to write in the past, I will not work on until the right time, that I think will be quite forward. I'm thinking to make some photos of this kind of material, that is available, just to show the quality of the small but very important details. Be patient, please. Since monday I will dedicate to my other models, at least until the arrival of the next delivery. Until now I have not found problems worthy of the name. However, here below you can see the whole hull skeleton, now waiting for new pieces. May be I will have to wait from 15 to 20 days for next four issues. 01 02 03 04 05 Cheers, Jack. High Resolution Images: 01 http://i81.servimg.com/u/f81/12/86/14/83/p1090552.jpg 02 http://i81.servimg.com/u/f81/12/86/14/83/p1090553.jpg 03 http://i81.servimg.com/u/f81/12/86/14/83/p1090555.jpg 04 http://i81.servimg.com/u/f81/12/86/14/83/p1090556.jpg 05 http://i81.servimg.com/u/f81/12/86/14/83/p1090557.jpg
-
Saturday, June 15, 2013 The boxes, to simulate the viewing of the underlying deck, finished. In picture 01 they are shown capsized . . 01 while in this other photo (02) these boxes are shown from the visible side, anyway with the deck not yet applied. . the black color is normal acrylic paint, the bottom is planked with beech strips (distributed in issue 20). 02 In picture 03, instead, the deck is fixed on the hull. It is mostly perfect: there is a minimal misalignment of +/-0.5 mm, but after the installation of three floors (deck and false decks), I am really happy with this result. 03 In the next post i'll show more pictures of the work done to date. Sincerely, Jack.Aubrey High Resolution Images: 01 http://i81.servimg.com/u/f81/12/86/14/83/p1090550.jpg 02 http://i81.servimg.com/u/f81/12/86/14/83/p1090551.jpg 03 http://i81.servimg.com/u/f81/12/86/14/83/p1090554.jpg
-
Wednesday, June 12, 2013 - Beams and decks Today I continued to work on reinforcing beams I began Tuesday. So with the usual strip of poplar plywood used for the first four beams, I continued with the others installed in the center section of the hull. The stern is excluded for the moment because at present time I finished all the material, I have to wait for new shipments. 01 Next, since all the measurements made confirmed me the accuracy of the positioning of this first segment of the deck, on the contrary to my initial intentions not to fix anything until I had not even the last deck segment at poop, I decided to fix it permanently. The two images here below show the deck fixed also with the help of some "temporary" nails, that will be subsequently removed or leveled. In the two images can be seen as the first bulkhead is not exactly parallel to the others: it is visible a small wedge (in white because the glue is still not totally dry) with a maximum thickness of 1.5 mm on the left side of the hull. I can not understand how it happened, given the particular mounting method I adopted, but this worries me little or nothing. 02 03 Finally, the "problem" of the gap below the deck, between it and the underlying vertical wall. The photo here below shows this gap in a simple and clear way. The fact that the gap has everywhere the same width, it makes me think more of something desired rather than a design error, topic that has been discussed some messages above. 04 Cheers, Jack.Aubrey High Resolution Images: 01 http://i81.servimg.com/u/f81/12/86/14/83/p1090536.jpg 02 http://i81.servimg.com/u/f81/12/86/14/83/p1090537.jpg 03 http://i81.servimg.com/u/f81/12/86/14/83/p1090538.jpg 04 http://i81.servimg.com/u/f81/12/86/14/83/p1090540.jpg
-
Hi Yves. For a reason that probably I will never be aware, all the kits managed by De Agostini since this company started this kind of model shipbuilding, the "always present camber" was never implemented. My first model from De Agostini was the Santìsima Trinidad, then followed the USS Constitution, the french Soleil Royal, the british Victory and the Sovereign of the Seas and now the russian Twelve Apostles. All these kits had flat decks. I know many experience ship modeler criticised this approach but there were no changes. And, as you can probably understand, it should not be difficult to implement this aspect, especially with the Twelve Apostles. I manage the ship modeling forum of De Agostini in Italy as moderator and, having in addition the unofficial role of "pilot builder", I understand that If I implement the camber in my models I cannot make a comparative work vs the other forum members. So, in spite of myself, I do not change the basic project. But any time I start a new De Agostini model I discover that I must always answer to the following question: shall I implement the camber or not ? And until now the answer was not. Kind regards, Jack.
-
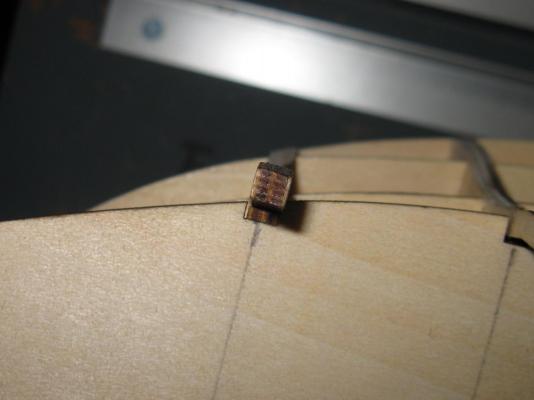
Tuesday, June 11, 2013 - Installation of beams This afternoon I had a couple of hours that I immediately dedicated to the Twelve Apostles. For consistency I painted hazelnut the internal sides of the new parts of the false decks, operation I said earlier totally useless . . but I like it. Then I installed the beams, provided in the issues 20 and 21. Nothing special to say for their assembly. I glued a strip 3 x 3 on the first bulkhead, in a such a way position to assure a strong support for the deck that must be installed over. This basis, in the original project does not exist, but the assembly will certainly be more accurate and also stronger. Then I started to think a possible way to implement the camber of the deck of this model, since as usually happen, this element is sistematically ignored since forever by De Agostini (or better, the kit manufacturers who design these model for her). I found it but, anyway, consistently with my role of "pioneer" (?) that was assigned to me in the DeAgostini forum I decided not to implement it but, just to make myself useful to those users, this method can be copied without difficulty by those who wish to implement this important particular. In the following photos, especially in the more detailed, you will notice that next to each beam in the bow area (but I think to continue with all the others, I glued to a side of the original beam, another piece of "home made" reinforcement, made with poplar plywood 5 mm thick. Well, this particular may seem like a simple reinforcement, and I have actually used in this way, but it would be enough that the top of this reinforcement was properly shaped that automatically you will have a new beam with the camber in place. At this point it remains only to paste the deck above this curve and the game is done. The bonding would be a bit more complex, because there is a minimal sheer, but definitely possible. . 01 02 03 The last image shows the placement of a half deck segment at the bow, reproducing a problem that another builder has, and probably more, in this area. More precisely it is located near the bulkhead number 3 . How I believe we can infer from this picture, the same problem, although to a lesser extent, is present also in my build, I will use for it a corrective method that I hope, if successful, to show you in the future. 04 Kind regards, Jack.Aubrey. High Definition Images: 01 http://i81.servimg.com/u/f81/12/86/14/83/p1090526.jpg 02 http://i81.servimg.com/u/f81/12/86/14/83/p1090527.jpg 03 http://i81.servimg.com/u/f81/12/86/14/83/p1090528.jpg 04 http://i81.servimg.com/u/f81/12/86/14/83/p1090529.jpg The following picture shows the problem as it appears to another user . .
-
Thanks Jasseji for you answer to Kayzee; you described exactly what is a De Agostini partwork. I hope your answer is enough for Kayzee, anyway I'm ready for additional informations. You can select two kinds of subscriptions (here in Italy, but I feel may be the same abroad): with a news-stand on a weekly basis (one issue every week); you have to go to the news-stand to get your personal copy; directly with De Agostini, in this case De agostini ships you by mail service a parcel containing four issues. This means you get a parcel every month at home. At the end you get the same final result, at the same price, but if you select the second choice you get, some additional gifts that often are useful during your build. Regards, Jack.Aubrey
-
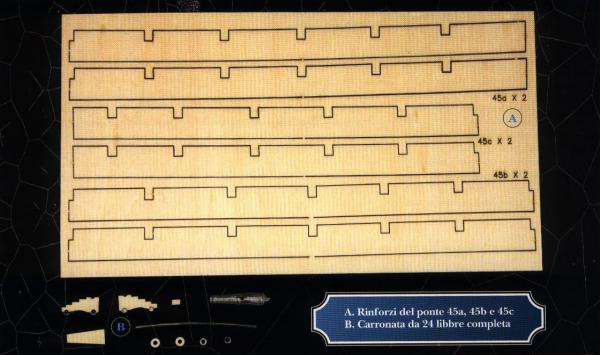
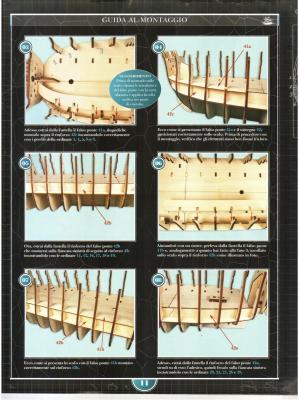
Saturday, June 8, 2013 - Another "floor" . . For the assembly of the vertical parts of the third and "last floor" (the horizontal elements are constituted by the deck itself, beams included) I used a different approach. First thing, I installed the central vertical piece (45b) that was the one best fitting with all the joints for the beams exactly in front of each bulkhead. I then let the glue to dry for a couple of hours to be sure this piece was properly fixed. In the meantime I went to the supermarket and when I was back I resumed the work. 01 Later I mounted the other pieces 45a, that is, those aft. Like 45b I had no problems with the joints. Then I dedicated to the pieces 45c (from centre to prow). Here the joints were definitely "so and so", then I took the correct measurements and I have adapted the joints to the current position of the bulkheads. On the right side these corrections were very limited, on the left side instead I had to correct more. This fact is indicative of something that does not fit 100% in my assembly, even if the problem, as it seems to me, does not bother me too much: I want to remember that the deck will be covered with planks (at the proper time) and all the gaps will be hidden. I have a theory of how this problem can be born but it is long to explain, especially in writing. . 02 03 04 05 Rather I would like to emphasize something never observed so far: installing the beams, it happens that the deck, applied over the latter, remains adrift about 1-1.5 mm from the vertical parts (45a-b-c) thus showing a gap just below. Personally I consider it, the first till now, a probable, recoverable, small error in the project. Cheers, Jack.Aubrey High Resolution Images: with an extra bonus image 06 . . 01 http://i81.servimg.com/u/f81/12/86/14/83/p1090516.jpg 02 http://i81.servimg.com/u/f81/12/86/14/83/p1090517.jpg 03 http://i81.servimg.com/u/f81/12/86/14/83/p1090518.jpg 04 http://i81.servimg.com/u/f81/12/86/14/83/p1090520.jpg 05 http://i81.servimg.com/u/f81/12/86/14/83/p1090521.jpg 06 http://i81.servimg.com/u/f81/12/86/14/83/p1090519.jpg Just to better understand I show here below what are pieces 45a/b/c.
-
Hi Jasseji, This is a new partwork started this year by De Agostini: It is the "Twelve Apostles", a Russian ship of the line. It is a weekly publication started in January 2013 and the whole collection will consist of 120 issues. This partwork was launched concurrently in Italy and in Russia. The Twelve Apostles model is unique and currently no other kit of this ship is on the market. For as I know there is no way to get this model from De Agostini outside these two countries but, as probably happened with HMS Victory launched some time ago in UK and then in Italy and now in Poland, or the Sovereign, started in Italy and now in UK, may be the !2 Apostles will come in Poland too . .
-
Friday, June 7, 2013 - images As promised, I publish here some images about the work done Friday. Let's start with the lower support for the mizzen mast, whose defective parts have been replaced in a issue contained in this monthly parcel. 01 A particular view of the second false decks at the prow zone. . you see a very small wood thickness filling a gap of the horizontal false deck, on the left side, near the first bulkhead, which leads me to expect a few problems in the near future. 02 Below three more general views, from various points of view, where you see the "hive" growing in size. . 03 04 05 cheers, Jack.Aubrey High Resolution Images: 01 http://i81.servimg.com/u/f81/12/86/14/83/p1090150.jpg 02 http://i81.servimg.com/u/f81/12/86/14/83/p1090151.jpg 03 http://i81.servimg.com/u/f81/12/86/14/83/p1090152.jpg 04 http://i81.servimg.com/u/f81/12/86/14/83/p1090153.jpg 05 http://i81.servimg.com/u/f81/12/86/14/83/p1090154.jpg
-
Sorry, I beg your pardon, but I do not undertstand exactly what shall I manage and order . . can you clarify ? Thanks, Jack. The Idea for a figurehead may be interesting, I will keep in mind for the future, Regards, Jack. Friday, June 7, 2012 - Resuming from issue 17. . Yesterday afternoon I spent four / five hours of nice work on the 12 Apostles. I applied the "second floor" of the false decks, both on the left side (issue 17) and right (issue 18). To avoid having to incredibly clamp everything, I glued the vertical reinforcements and I kept them fixed with "extra" fine brass nails, inserted with the "piantachiodi" (a kind of jig to force nails into the wood, not an hammer). In this way I gained time which allowed me to apply immediately after also the horizontal reinforcements. Now everything is in the drying phase of the glue. I also added the two pieces for the support of the mizzen mast, These new pieces, supplied in this last post parcel, replace the same defective pieces received time ago. Once again I followed the instructions on the contrary, I started with the piece 44a, then 44b, and finally, at the end, 44c. I prefer this kind of approach vs the one suggested by the instructions: I feel better and more productive. This time the set of three pieces 44a/b/c was as long as the hull, or rather just a little bit more, so I had not to use the same method that I applied for the first level of false deck. Instead, to keep the bulkheads at the right distance between them, during the gluing and fixing of the vertical reinforcements, I inserted into their seat (only inserted, without glue), the horizontal reinforcements. This fact is important to straighten any bulkhead that may be deformed in the upper zone. I'll take pictures as soon as possible. Sincerely, Jack.Aubrey
-
Thursday June 6, 2013 - Update Yesterday I received the post parcel number 6, which contains the issues n ° 18, 19, 20 and 21. I honestly thought of having to wait more, instead. . better that way. So, also because of a misfortune on the front of the Soleil Royal, I'll try to regain control of the Twelve Apostles in order to align the model to the last issue in my hands. I believe that in three / four days I can do all the work planned, then put me on hold again for the future next issues. So we'll hear soon, Cheers, Jack.Aubrey
-
Hi Yves, It seems you like in a particular way this model. I desume this from your very positive comments you posted.in this topic. I appreciate very much your comments Since they were available on my camera, I show you another batch of five images with the deck painted, from different viewpoints . . 01 02 03 04 05 Regards, Jack. High Resolution Images: 01 http://i81.servimg.com/u/f81/12/86/14/83/p1090139.jpg 02 http://i81.servimg.com/u/f81/12/86/14/83/p1090140.jpg 03 http://i81.servimg.com/u/f81/12/86/14/83/p1090141.jpg 04 http://i81.servimg.com/u/f81/12/86/14/83/p1090142.jpg 05 http://i81.servimg.com/u/f81/12/86/14/83/p1090143.jpg
-
Thursday, May 30, 2013 - Last news while waiting for new material . . Today was pretty much a day of rest. I finished the pieces to continue the installation and then I have to look forward to receive new material. Honestly is not 100% true: I would have to mount the main top, the guns and maybe a couple of anchors, but in my view I don't understand why I have to build elements of the model that I will need probably in a year, maybe more. In addition, why mounting a cannon now and another next week: I'll wait to have all of them and build all together. . So the images that follow in this message and the next, will be the last for at least sometime, as I expect to receive something not before twenty days. In the meantime, I will continue with another model, which I do not touch since six months. However, before temporarily put in "mothballs" the Twelve Apostles, today I enjoyed painting the inside of the lower deck. Operation honestly totally useless, you will never see anything of this deck, but I like the decks pretty clean, as my namesake in the books of Patrick O'Brian. Below is a detail of the bow. Note the reinforcement at the corner between the first bulkhead and the deck and a similar reinforcement above the line of junction between the segments (right / left) of the deck. 01 Here below is a detail of the poop . . 02 And an overall viewpoint . . 03 Cheers, Jack.Aubrey High Resolution Images: 01 http://i81.servimg.com/u/f81/12/86/14/83/p1090135.jpg 02 http://i81.servimg.com/u/f81/12/86/14/83/p1090136.jpg 03 http://i81.servimg.com/u/f81/12/86/14/83/p1090144.jpg
-
28 and 29 May - consolidation activities Having virtually exhausted the material to continue, waiting to resume the work, I started some activities focused to consolidate the work done. Among other things, are odd jobs that I have not yet finished. Essentially a couple of tasks aimed to reinforce certain points in my opinion potentially weak and waterproof the timber to avoid possible distortions of the skeleton. Regarding the first thing, which is the only one that is really visible: in the four images below I photographed some reinforcements, made with common poplar plywood (thickness mm 5), I've applied under the outer edge of the lower deck. It is not a difficult job even if it requires some patience. I think its purpose is clear: since when I applied the bridge I didn't put, in order to privilege the speed, the glue in the joint between the bridge and the bulkhead. Then I was not sure the bonding in that area was enough strong. In this way the deck and the bulkheads are inextricably attached and fixed together and this wide thickness will also be a good base for the application of the first strake, that I imagine will start from there. This job can't be considered finished: it will be necessary to bevel these small pieces that are straight while the bridge is curved, but it is a small additional job. To waterproofing the timber I applied a coat of glue diluted to 50%, rather abundant. In this way the wood is impregnated in depth and is less sensitive to changes in climate, at least within certain acceptable limits. In addition, the diluted glue penetrates into the wood, fixing further the existing bonds and strengthening the whole. Another advantage of this operation is that this diluted glue fixes the contours of the timber, in particular way for plywood, and this makes it harder and can more easily be sanded without the risk of chipping. These tasks are not strictly necessary but, rather than standing totally idle, are a good idea to perform. If all goes as I think and nothing unexpected happens, the next weekend I'll re-open the site of the Soleil Royal. Sincerely, Jack.Aubrey. 01 02 03 04 High Resolution Images: 01 http://i81.servimg.com/u/f81/12/86/14/83/p1090123.jpg 02 http://i81.servimg.com/u/f81/12/86/14/83/p1090124.jpg 03 http://i81.servimg.com/u/f81/12/86/14/83/p1090125.jpg 04 http://i81.servimg.com/u/f81/12/86/14/83/p1090126.jpg
-
Tuesday, May 28, 2013 Today I applied the first false deck on the left side and with this task I ran out of material for the hull up to issue number 16. I have left the material of issue 17 (second false deck) but I prefer to wait to have also the 18th to proceed in parallel on both sides of the hull. This is to prevent, even if the risk is now purely nominal, possible distortions of the hull. Due to overmentioned reasons, I now put this model on standby while waiting to receive the post parcel number 6 that will contain the issues 18, 19, 20 and 21. As far as I understand issue 21 will be released soon so I expect to receive the package about mid-June. In the meantime, I'll start some activities to consolidate the work done: to be generous i think three / four hours of work maximum, probably in two / three sessions, and inthe meantime I will re-open the shipyard of the Soleil Royal (described in another topic in this forum), now idle, until I'll receive the new material. I will show these activities soon, greetings, Jack.Aubrey.
-
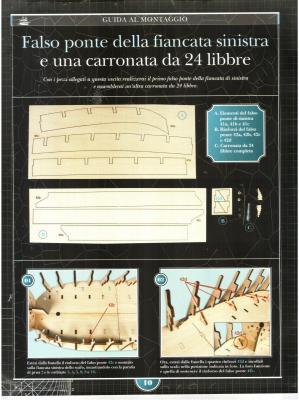
Monday, May 27, 2013 - Details about false deck reinforcements A couple of days ago, on another forum, I answered in this way to a user asking me how to interpret and manage the instructions found in issue 15, in particular the tab 01. . At that time I promised to show you what I would have done in that circumstance. The next images show clearly that in the end, after careful considerations, I opted for a fourth solution based on the third hypothesis . . But I must explain how I came to this solution. During the dry assembly of the three pieces that make up the deck reinforcement, I realized that, if I wanted to start with the piece 42c exactly in contact with the first prow bulkhead, and then mounting the other two pieces 42b and 42a, when arrived at the stern there was a gap of about one centimeter and a half. And as I already pointed out, the last bulkhead above the stern apperared to me a few weak . . So I decided a totally reversed approach: instead of starting to apply the item 42c at bow I installed the item 42a at the stern, making sure that the end of this last piece was in contact with the overmentioned bulkhead. I also blunt the thickness of the plywood to make it adhere with the maximum surface. Then I installed the item 42b in the center and finally I got the i nstallation of item 42c. And here I decided, since it was obviously too short, to cut it in the vicinity of the center of the second bulkhead, leaving for the moment an empty space between the first and the second bulkhead. Of course I kept everything clamped to wait for the glue was dried. Last, I built "from scratch" the final missing piece. I cut a rectangle of the correct size by using a piece of poplar plywood, with thickness of 5mm. then I shaped the extremities of this piece at the right bevel to adapt precisely to its place and, when everything was right, I glued. That's it, simple but effective. . Here are three images of the particular. . In the hope I was clear, I greet everyone with kindness. Jack.Aubrey 01 02 03 High Resolution Images: 01 http://i81.servimg.com/u/f81/12/86/14/83/p1090105.jpg 02 http://i81.servimg.com/u/f81/12/86/14/83/p1090104.jpg 03 http://i81.servimg.com/u/f81/12/86/14/83/p1090108.jpg
-
Monday, May 27, 2013 - False lower deck Today I dedicated my time to the installation, on both sides, of the reinforcements of the false deck, those that rest on the lower deck. The first two images show the two sides of the hull. The right side is in place, while the left is still being held with clamps while waiting for the glue to dry. I would note, in case anyone missed it, that the three pieces that make up one side of reinforcements, even if they seem right, in fact they are not: they are slightly curved to follow the line of the sheer below. WARNING: to be mounted properly. . 01 02 Then I prepared the pieces of the first false deck and I was able to assemble these pieces on the right side. Impressive the extreme precision of these parts, so much precise that, in order to put a bit of glue in some joints, I slightly widened these joints with a file. . 03 04 At the next message I will comment more in detail the process and I will clarify on behalf of the famous problem raised the instructions, step number 15-01: bending of reinforcement or corner? Sincerely, Jack.Aubrey. High Resolution Images: 01 http://i81.servimg.com/u/f81/12/86/14/83/p1090102.jpg 02 http://i81.servimg.com/u/f81/12/86/14/83/p1090103.jpg 03 http://i81.servimg.com/u/f81/12/86/14/83/p1090106.jpg 04 http://i81.servimg.com/u/f81/12/86/14/83/p1090107.jpg
-
Tuesday, May 29, 2012, afternoon. . finished. During the early afternoon, taken by a fit for modeling, I threw in the assembly of gun barrels. Operation seemingly simple and fast if it were not for the preparation of the recoil rope: the two ends of the rope are linked to an eyebolt, at an equal distance for all the guns since they are all positioned not ready for firing, the eyebolts are then inserted in a pre-drilled hole in the internal side of the handrail (?) and secured with a drop of cyano. The gun barrels are also glued to the gun trucks with a couple of drops of Attack Gel. I am considering whether to apply a strip of carborundum black sandpaper over the two pins on the side of the gun barrels, where they are cradled in the truck, but I don't know if it's worth or not. This because these details will most probably remain invisible when I'll mount above the gangways (?). But the fact of knowing that they are there. . . even if you do not see them, it must probably mean something to a modeller. 01 P1080247.jpg 02 P1080248.jpg 03 P1080249.jpg 04 P1080248R.jpg 05 P1080249R.jpg Finally, to be able to say 100% finished, I have to apply a coat of black paint in the thickness of the gunports of these twelve guns, an operation that normally would have to be done right before, but I forgot it !! At this point I'm very happy because this was a job that was blocking other works on the hull, and that took me a long period of time to complete.
- 299 replies
-
- soleil royal
- le soleil royal
-
(and 2 more)
Tagged with:
-
Tuesday, May 29, 2012 Yet another small step forward. . 01 P1080244.jpg 02 P1080245.jpg In my opinion the curls of rope made in this way, although technically sound, are still lower in fact of realism as to how I made on the Santisima Trinidad's cross section . . only problem that it took an incredible amount of time, while this method was faster . . 03 Santisima Trinidad/P1070589.jpg
- 299 replies
-
- soleil royal
- le soleil royal
-
(and 2 more)
Tagged with:
-
Hi Yves, I line of priciple, I run two shipyards concurrently. This is possible because I normally receive by post services a set of four issues of the partwork each month. The working tasks for the content of these four issues, in many circumstances can be done in a single week, and this fact makes possible to run cocurrently at least to models. Anyway, when I insert a message in this topic (but the same happens for the 12 Apostles and Santìsima Trinidad) I use to put as first line the date to which the message log belongs. In particular, regarding my Soleil Royal, I started its building some years ago (refer to first messages in this topic) and now I'm describing matters that happened more/less one year ago. So what you see now is not the current status of this build, but something in the past. I'm working to translate my Italian blog for Soleil Royal to reach today but I have a lot of things to translate and write. The same is happening for the topic regarding Santìsima Trinidad too. Hope now the situation appears more clear: at the moment I'm working for 12 Apostles and Soleil Royal, while Santisìma Trinidad is over. Regards, Jack.Aubrey.
- 299 replies
-
- soleil royal
- le soleil royal
-
(and 2 more)
Tagged with:
About us
Modelshipworld - Advancing Ship Modeling through Research
SSL Secured
Your security is important for us so this Website is SSL-Secured
NRG Mailing Address
Nautical Research Guild
237 South Lincoln Street
Westmont IL, 60559-1917
Model Ship World ® and the MSW logo are Registered Trademarks, and belong to the Nautical Research Guild (United States Patent and Trademark Office: No. 6,929,264 & No. 6,929,274, registered Dec. 20, 2022)
Helpful Links
About the NRG
If you enjoy building ship models that are historically accurate as well as beautiful, then The Nautical Research Guild (NRG) is just right for you.
The Guild is a non-profit educational organization whose mission is to “Advance Ship Modeling Through Research”. We provide support to our members in their efforts to raise the quality of their model ships.
The Nautical Research Guild has published our world-renowned quarterly magazine, The Nautical Research Journal, since 1955. The pages of the Journal are full of articles by accomplished ship modelers who show you how they create those exquisite details on their models, and by maritime historians who show you the correct details to build. The Journal is available in both print and digital editions. Go to the NRG web site (www.thenrg.org) to download a complimentary digital copy of the Journal. The NRG also publishes plan sets, books and compilations of back issues of the Journal and the former Ships in Scale and Model Ship Builder magazines.


