HOLIDAY DONATION DRIVE - SUPPORT MSW - DO YOUR PART TO KEEP THIS GREAT FORUM GOING! (Only 44 donations so far out of 49,000 members - C'mon guys!)
×


dewalt57
-
Posts
145 -
Joined
-
Last visited
Content Type
Profiles
Forums
Gallery
Events
Everything posted by dewalt57
-
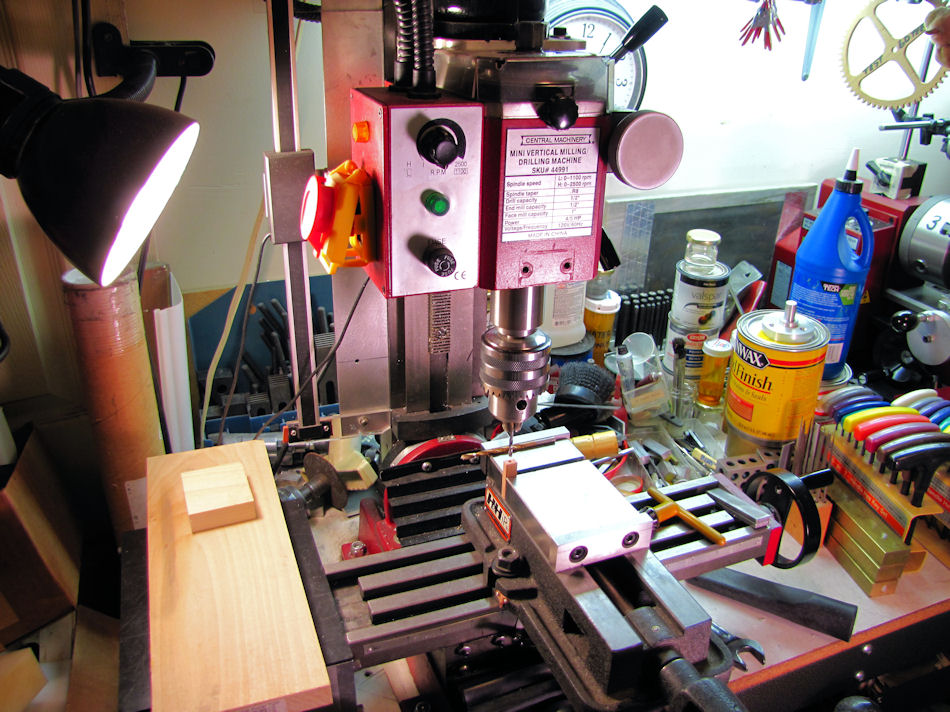
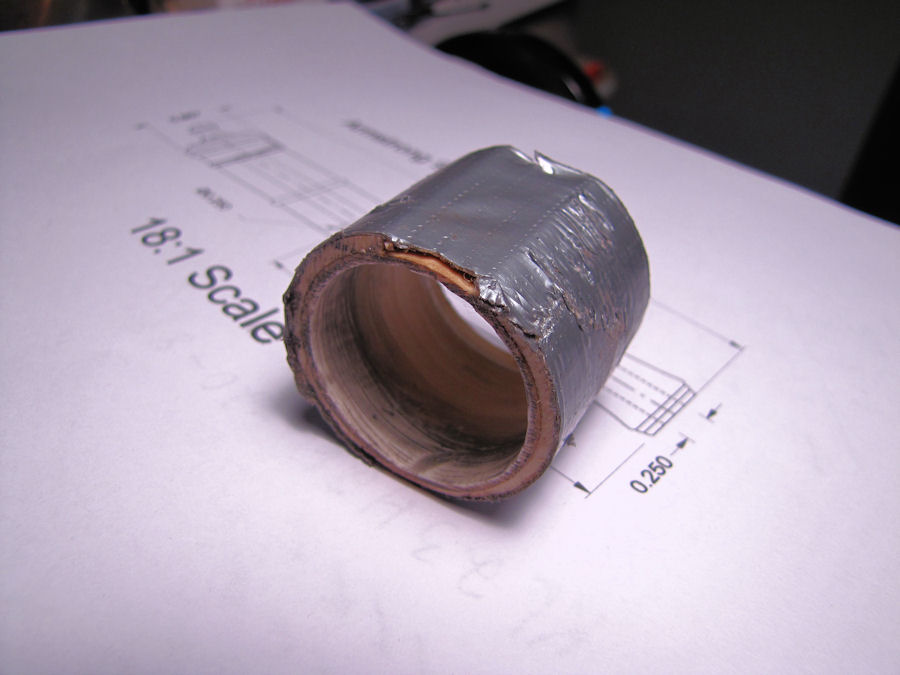
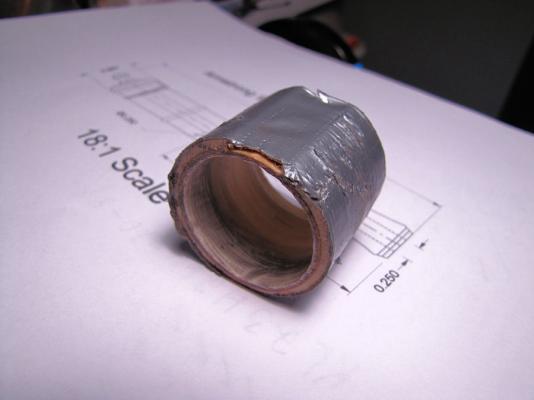
 Drilling the front Axletrees. First using a 1/8" for a pilot hole then the #14 drill bit. To a depth of .400" approx. I put white out on the bits to show me the depth drilled, since my electronic depth gauge has dead batteries again..... always when I need it, its batteries are dead!!! AL


-
Thanks guys!! AL
-
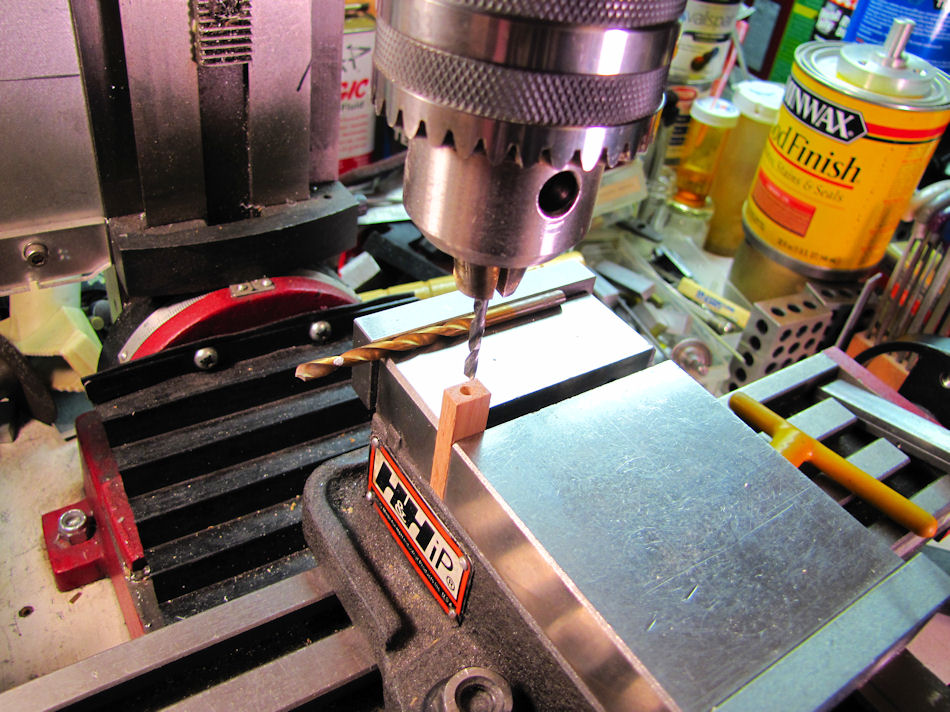
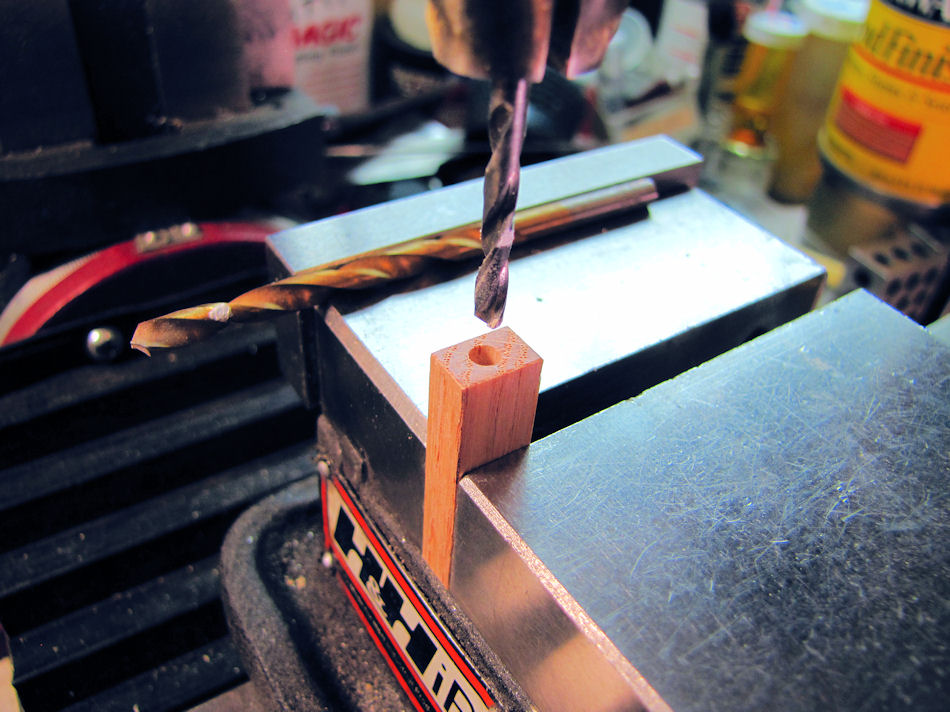
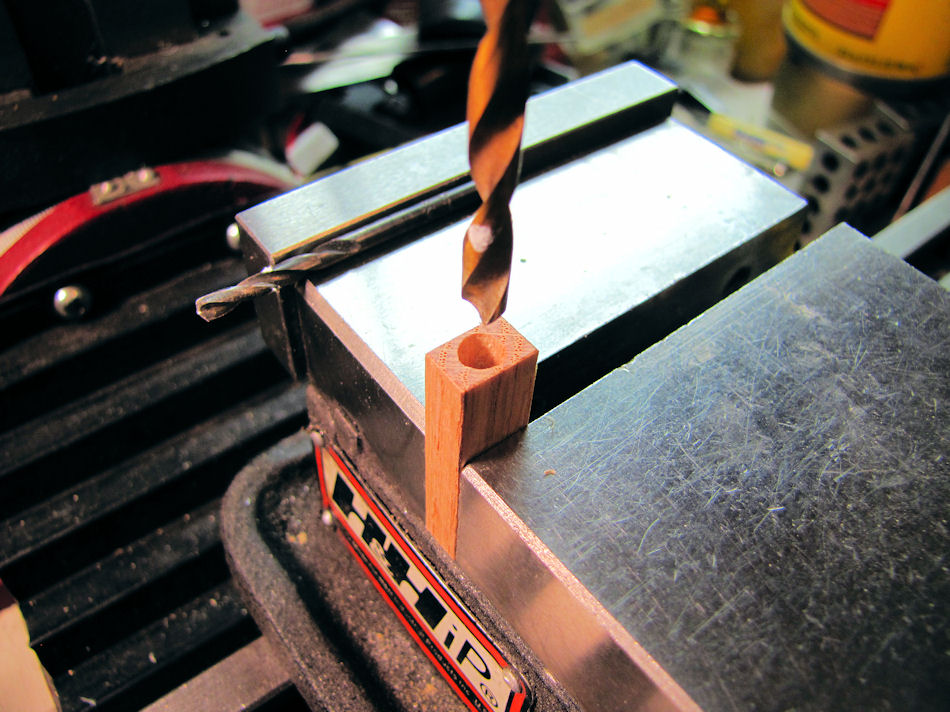
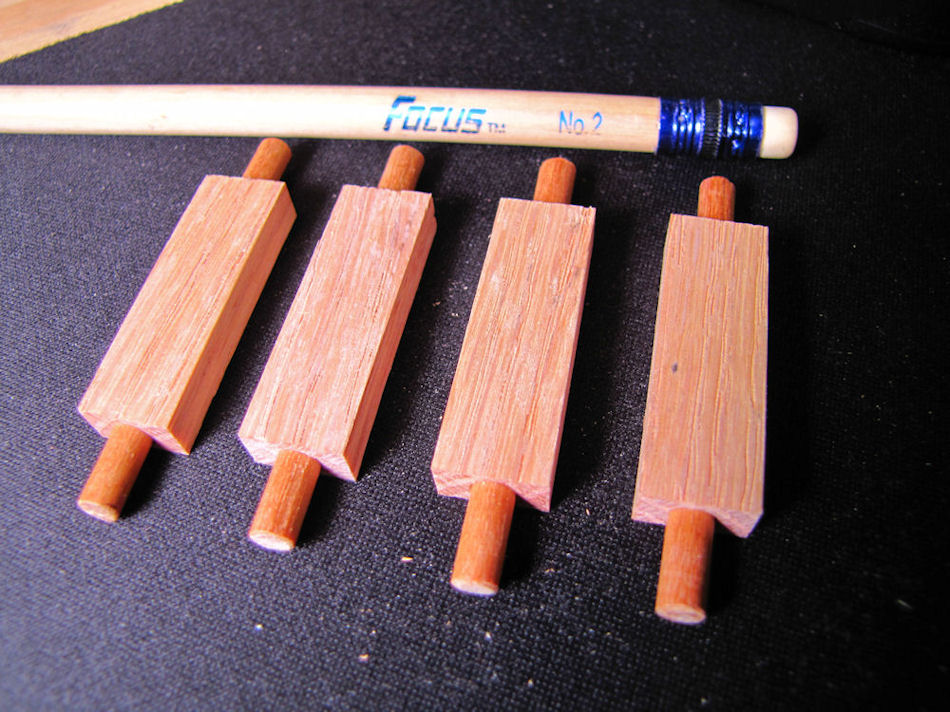
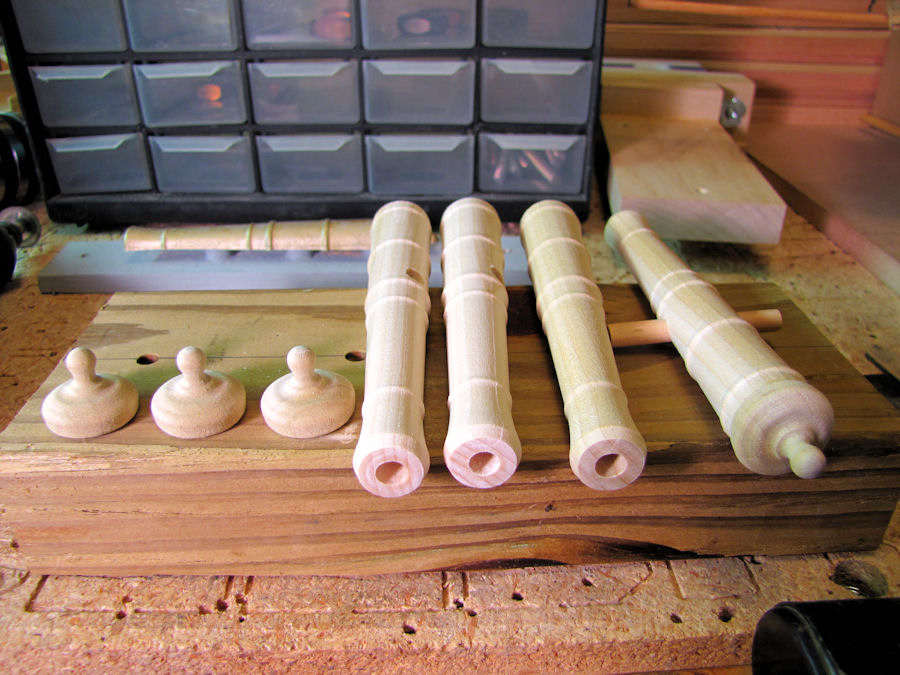
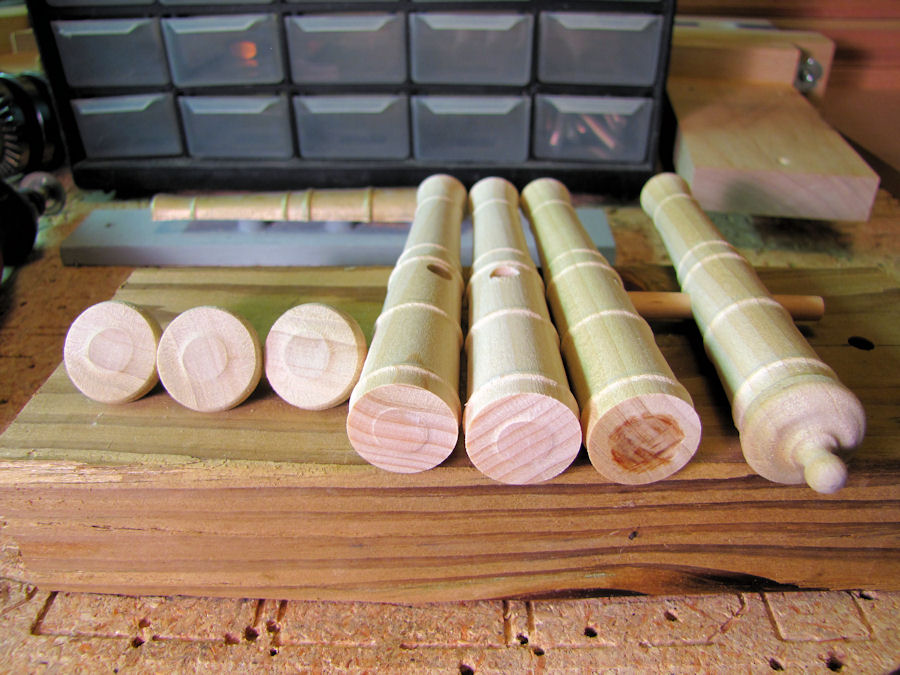
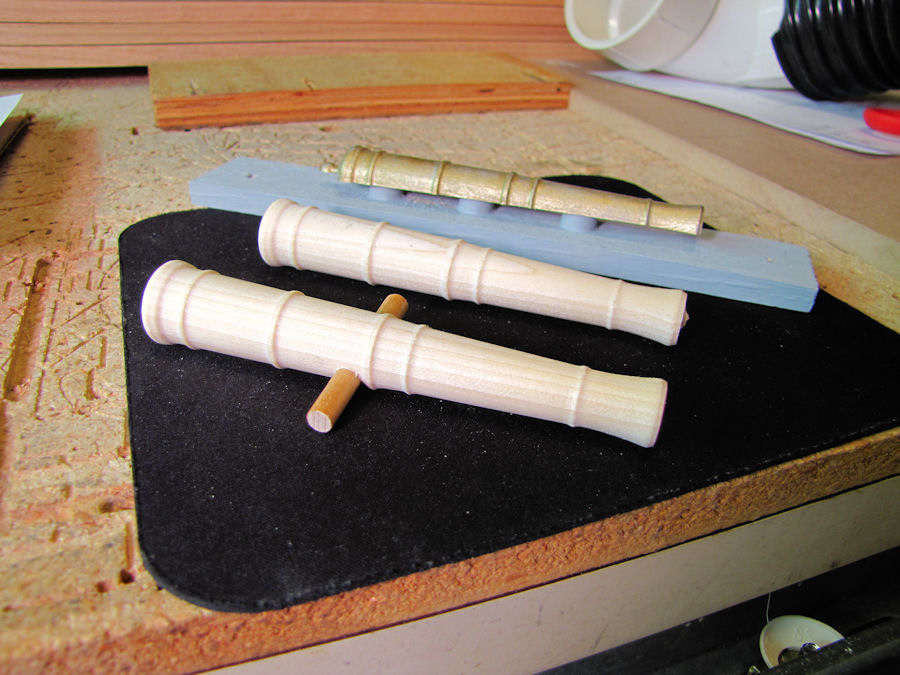
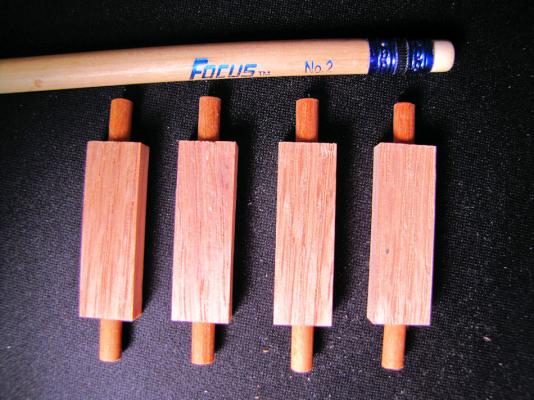
4 each rear carriage Axletree's completed. Red Oak & Poplar dowel. AL EDIT: How I made em..... After cutting the Red Oak to size on the Byrnes mini-table saw..... WOW!!! That saw can cut down to .001" if you can measure it to set it up!!! I then took the blocks to my HF mini-metal milling machine and stood them up in my precision vice so they were exactly 90 degrees from horizontal, scribed the center point in the end of wood block where the dowel goes using my dial indicator, then very carefully drilled a #14 (.182") hole at that center point about .300" to .400" deep. Not all the way thru!! Then did a flip over and drilled the other end using the edge of the vice as the reference point for the oak block. It didn't matter if each hole depth was different because I inserted the dowel afterwards and marked the finished length on the dowel, removed it from block and cut the dowel using my little hand saw to the length for that hole. Then I put a small dab of yellow glue on the end of the dowel and carefully inserted the dowel into the hole, taking care not to smear any glue on the wood block because I'll be staining the wood later and the glue blocks the stain.

-
Thanks Tim !!..... all ok here!! AL
-
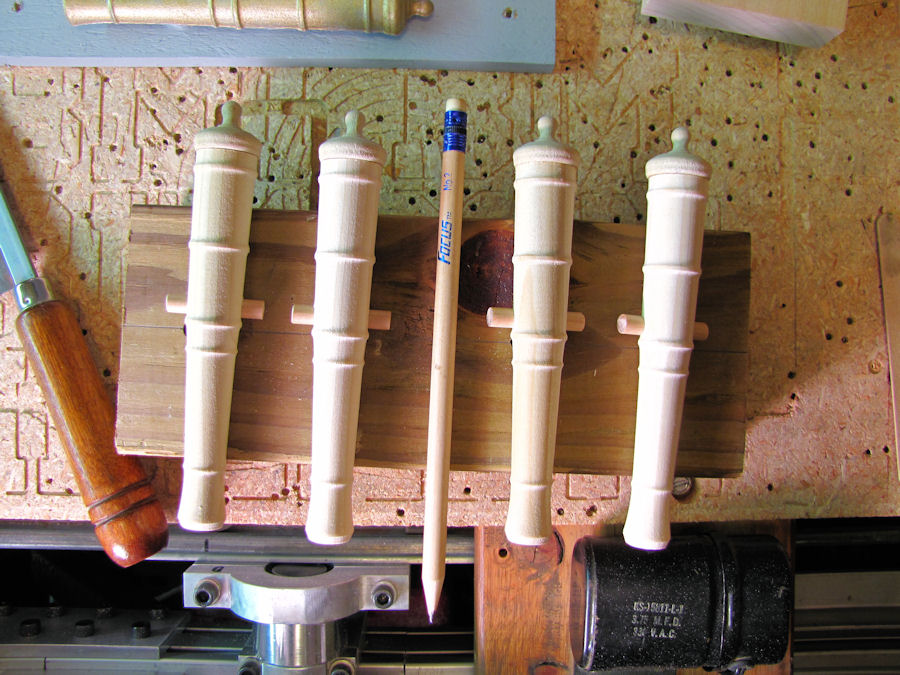
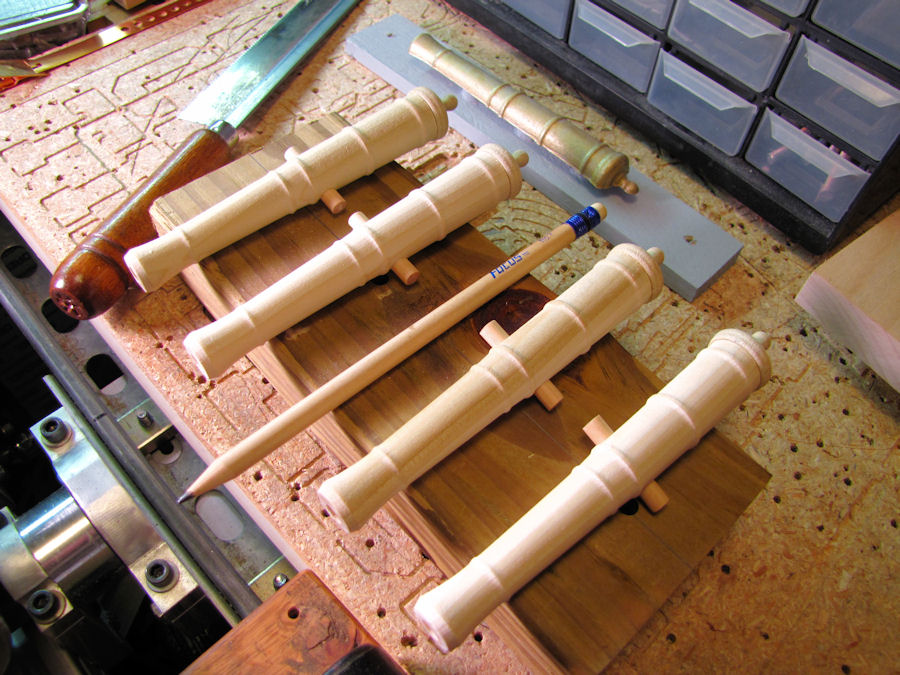
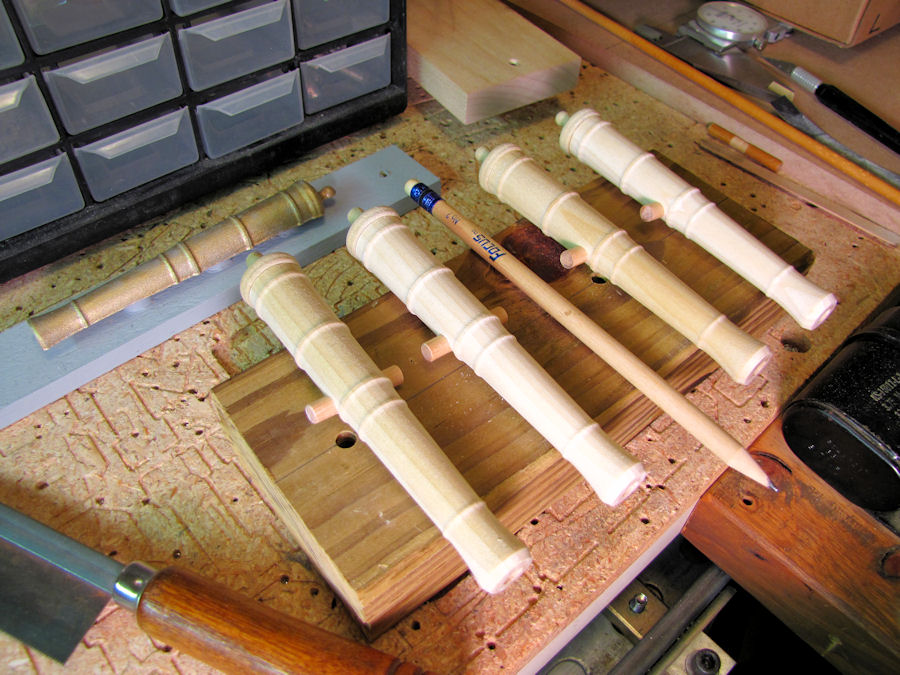
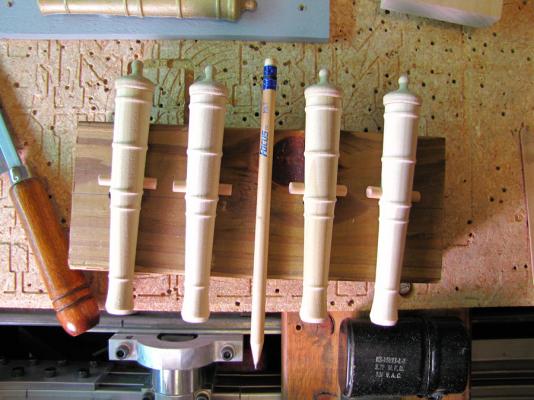
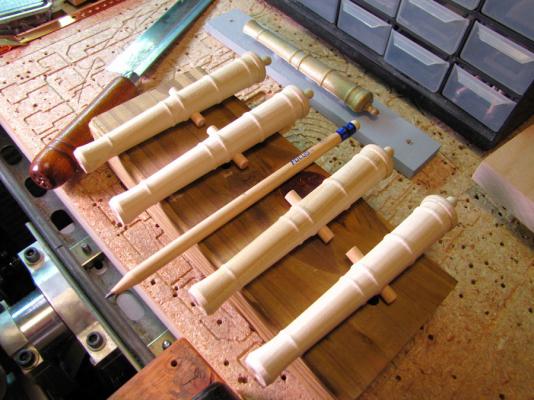
The cannon production line is coming along fine, ready to start the carriages next! AL

-
LOL.... Looks like a picture of my Admiral, even talks like her !!!...LOL Thanks for the pic Ray!! AL
-
Thanks Tim..... We got the ship's weather watch going 24 hours here and the hatch's are battened down, expecting more foul weather this evening to head our way! Meanwhile I've been doing some sanding on the cannon ends getting them ready to glue the two parts together. AL


-
Thanks Ray!! AL
-
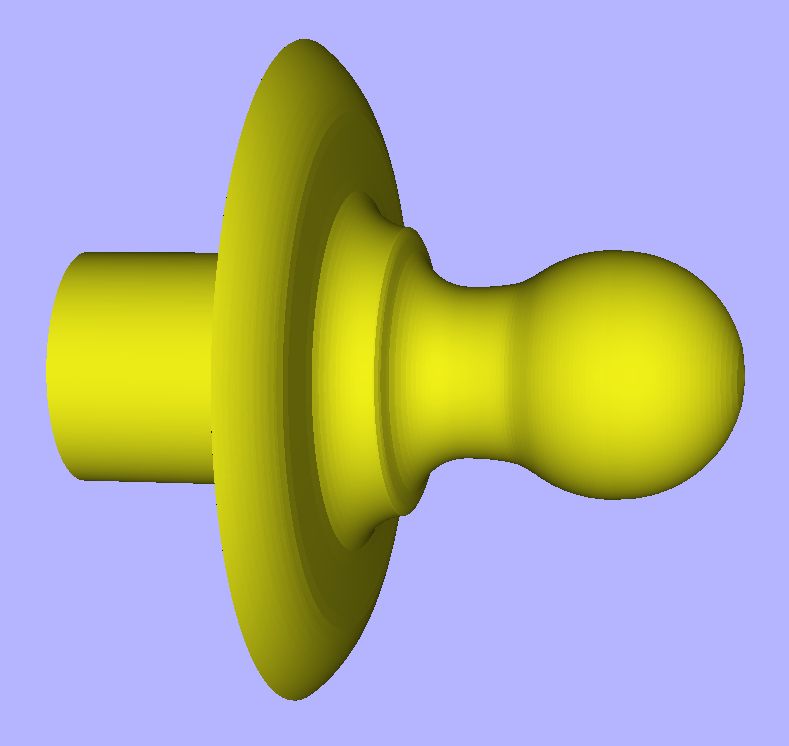
Thanks Ray!!! I have the book "Anatomy of The Ship The 24-Gun Frigate PANDORA" and was looking closely at its Cannons, remarkable how similar they are. My TRITON Cannons are a tad thinner in the body section and I almost want to redo them so they are a little more thicker in body shape, the thickness adds to the solid, heavy look of em, but thinking on how many hours it took to cut these, I'll leave em alone and carry on with the Carriage's.... LOL Slowly drawing up the carriage parts now, and getting ready to start cutting some wood. I'm thinking of using some Red Oak for the Carriage build and just staining them, The Cannons I'm thinking of painting with some Rust-Oleum Hammered #7218 Dark Bronze spray can paint. But for the rest of this evening it be foul weather here..... tornado threats, heavy rain, etc... so looks like we better keep an eye out and keep our foul weather gear close at hand till we sail into calmer waters!! AL
-
When did this happen?
dewalt57 replied to Q A's Revenge's topic in Painting, finishing and weathering products and techniques
I just found out that Floquil RR paint, who is now owned by Testors, is no longer going to make it !!! Another great product bites the dust!! AL -
Tim...... NO, the tail stock came with a 4" Rotary Indexer I have, but it works great for this project also!! Just like the 3" 3-Jaw Chuck came with my 7x10 Harbor Freight Mini-Lathe but I use it on this rotary setup for the CNC Wood MIll. I use a 5" 3-Jaw chuck on the HF Lathe which works better for me then the 3" did for holding larger size parts in its jaws. AL
-
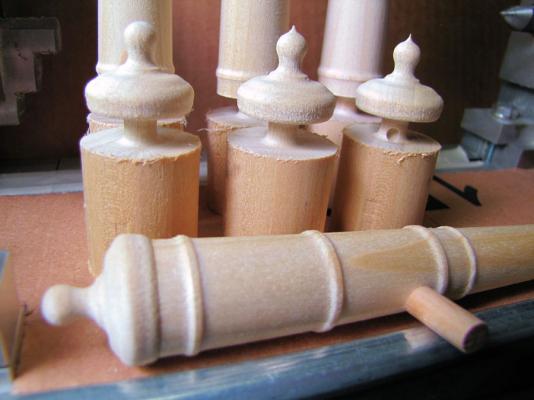
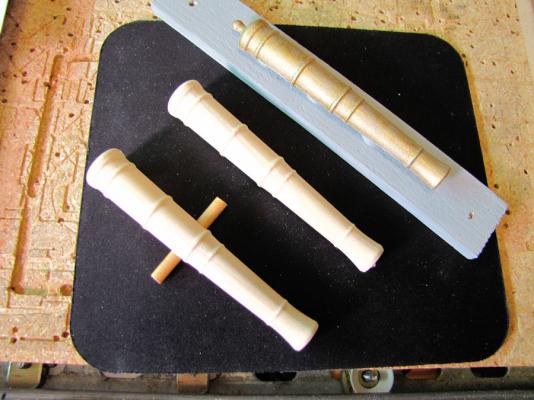
Finished cutting out all the Poplar wood Cannons! Now to start making the Carriages for them! AL
-
Tim..... it was static display only. All the info is on a private web site unavailable to the general public unless your a member. AL
-
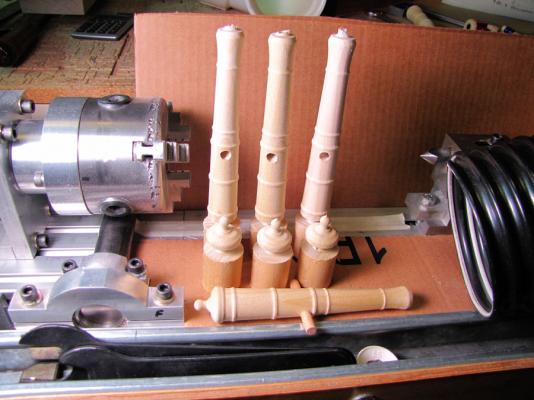
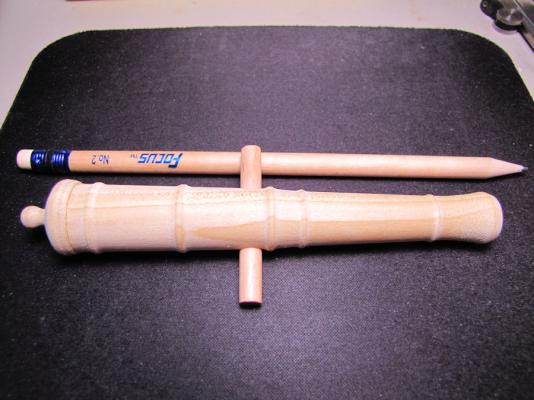
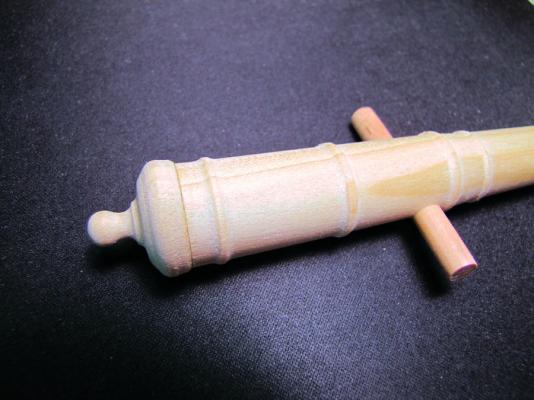
First completed Cannon done! Just need to make 3 more just like it and then the mounts for em. Its also VIDEO time again!! Who's got the popcorn??? AL
-
Tim..... the TANK wheels where for a 1/6 Scale German TIGER I model tank I was scratch building, but thats another story in itself... AL
-
Tim....... a few pages ago.... LOL OK Guys & Gals hope you all have your popcorn ready!!... here's the video of the tail end of the cannons being cut! Now I have to re-design the main body of the cannon and cut them out! Mark..... Not sure how the posting of that 18:1 things goes but looks good to me... AL
-
I agree with you on that Ray! Finished with the first one, came out great!! Uploading video now to U-tube, when done will post and some pictures. AL
-
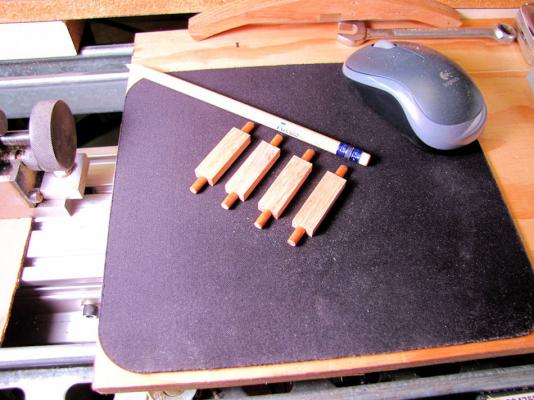
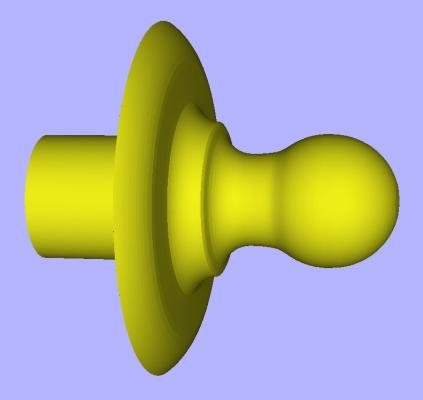
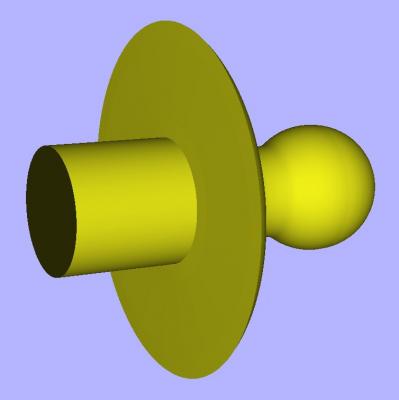
Ray..... Pretty cool looking, too bad I can't cut anything with that much detail at this scale. Had to re-design the baby pacifiers ( cascabels ) ... LOL The Poplar wood would not hold up without tear outs on the thin edge, so made the cut at a different place. Cutting the first test part as we speak. AL

-
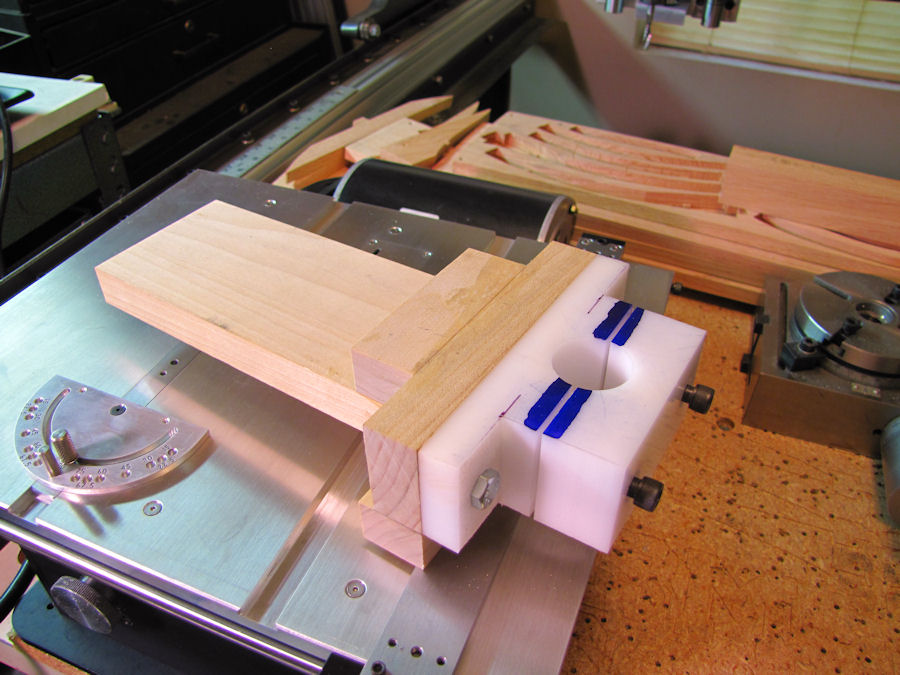
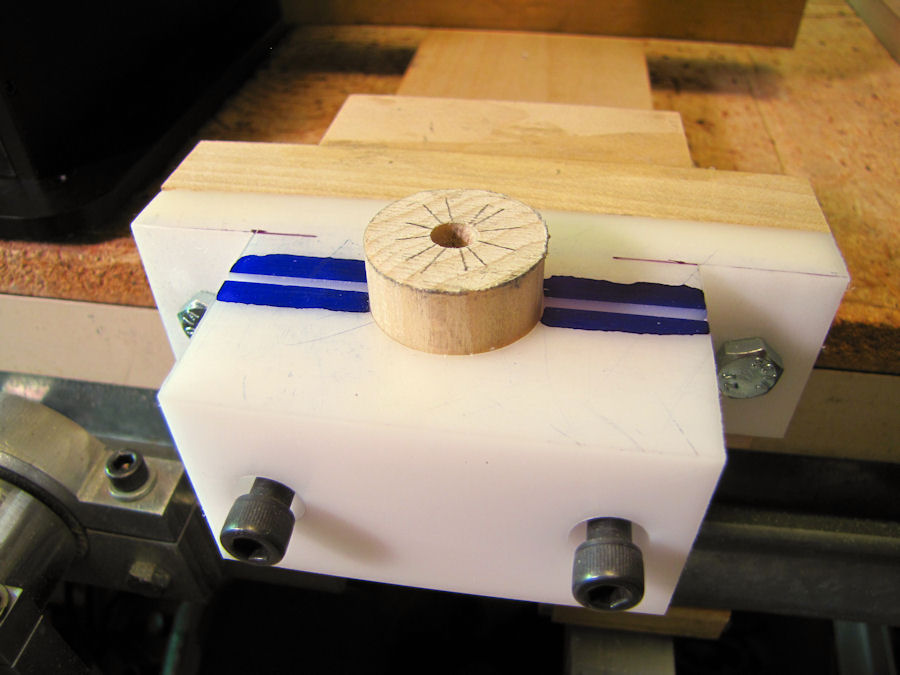
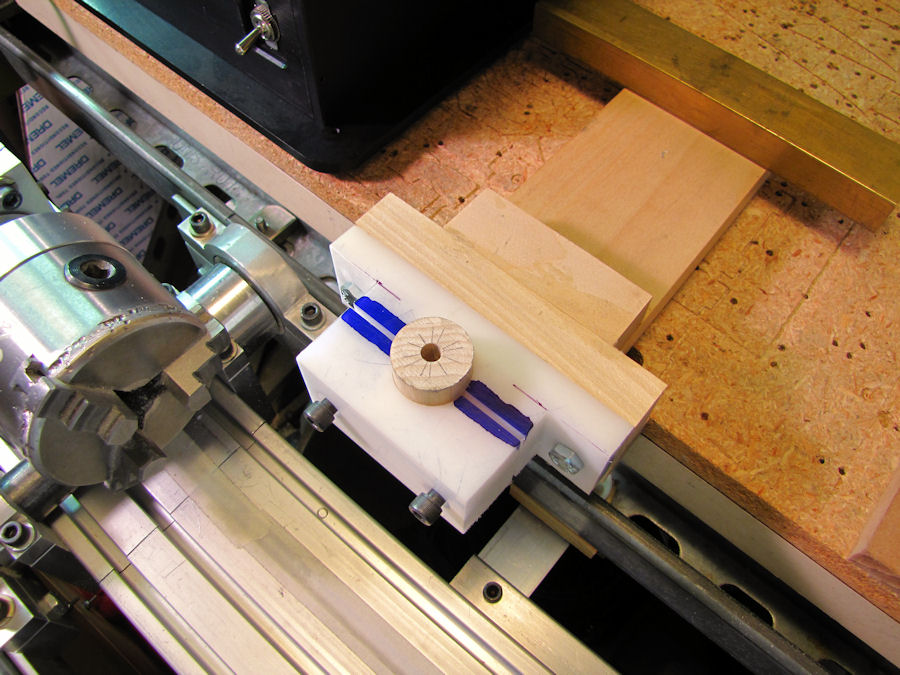
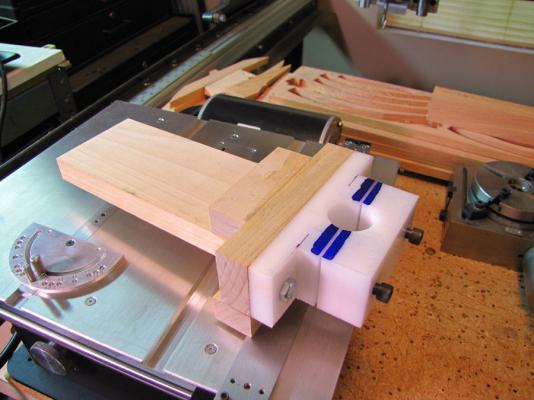
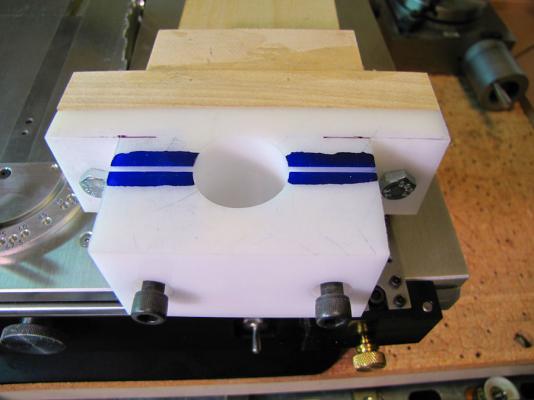
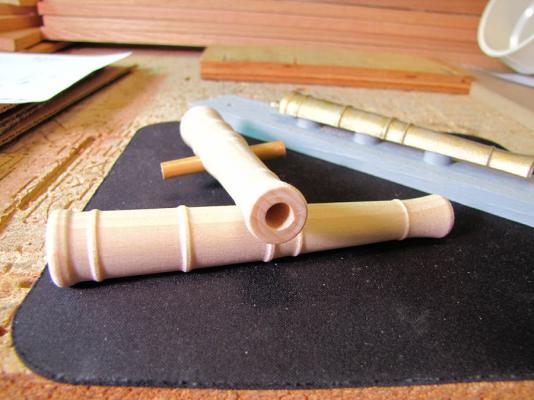
Got the Cannon dowel jig completed!! Now I can hold the cannon blank and cnc drill the barrel hole. Made from Poplar wood and a block of Nylon. Also got the rear end of the Cannon just about ready to start some test cuts on! AL


-
Model Machines 4" Table Saw
dewalt57 replied to dewalt57's topic in Modeling tools and Workshop Equipment
David.......Looking closer at my home made shop vac hose adapter it seems I made it from 2 parts of 1" PVC pipe, one part was sliced and slipped over the other, then Duck Taped on top of it all..... LOL Been using it for a couple years on my Skill bandsaw and its held up pretty good for what it is.... LOL Fits Jim's table saw just fine, slips in and out with no problems. AL
-
Yes Tim, I hand made the gcode for the Trunnion Hole as I described in the above post, using the 1/8" Ball nose bit ( so I wouldn't have to do a tool change) doing a pocket cut to make the 1/4" size hole. Attacked it from both sides so I would not get any wood tear outs, had the rotary rotate the part 180 degrees and step over a tad to align with the first hole, or tried to, I was pretty close but didn't win a cigar !!.... LOL AL
-
Model Machines 4" Table Saw
dewalt57 replied to dewalt57's topic in Modeling tools and Workshop Equipment
Thats great David!! Is it possible to post a picture of your Preac table saw? Would love to see what it looks like! I agree with you on changing blades, it is kind of a pain to do, and as I grow old my fingers have a difficult time grasping very small screws that hold down blade covers much less getting my finger inside the blade hole!! I do wish Jim's saw had a tad bigger screws, even a #6 would be acceptable to me, but #4's are just a tad on the too small size.... Don't get me wrong, I do love Jim's saw, just would like a few screws on it made bigger. Everytime I remove the blade cover I fear cross threading the threads on one of those tiny fine threaded screws putting them back in!! Yep.....brand new and I've had the blade cover off twice so far changing blades to see how they cut. It would be real easy to cross thread one of those tiny screws in the blade cover if your not careful!! AL -
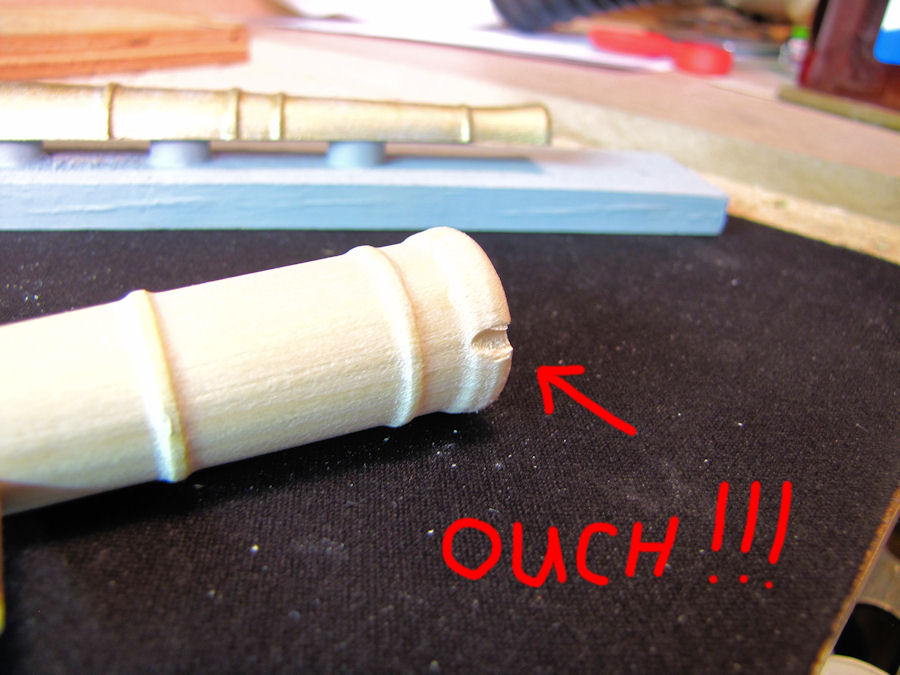
Got the 2nd Cannon Cut but had a collision between the bit and the part during a move doing an end trim!! Just nicked it a tad, a little bondo and she'll be ok.... LOL It was my Boo-Boo in some hand made gcode I did, I told the machine to move from one end to the other and drop in height at the same time, the machine is blind and so must I be at times because I didn't think about it hitting as it went to the other end... LOL Another problem I need to work on is drilling the barrel hole, I normally use my HF mini-lathe 7x10 to bore a hole in a shaft but these Cannons are too long for the tailstock & bit to accommodate them. So I'll need to make a jig that holds the blank vertical and drill on the Cnc wood mill. The cannons pivot shaft hole was bored from both sides, I feared a tear out of the wood as the bit came out the other side so I only bored half way, did I 180 degree rotation and bored again into the same hole location. I was a tiny bit off but close enough to make it work with no wood tear out in the poplar wood. The gcode to do that simple thing had to be coded by hand, the expensive gcode software can't do it!!! So now my gcode is getting more things to do, one step at a time, I can bore the pivot hole & trim the ends by Cnc. It's still taking roughly 2-1/2 hours to make one Cannon, not exactly production run speed by any means..... LOL AL


-
Model Machines 4" Table Saw
dewalt57 replied to dewalt57's topic in Modeling tools and Workshop Equipment
Thanks Joe!...... Ask away on Mach3 but remember I'm no expert on it, it just hums along and I don't pay any attention to it.....LOL I spend most of my time with Vectric's Aspire software making gcode and Mach3 just does what its told to do... AL -
Model Machines 4" Table Saw
dewalt57 replied to dewalt57's topic in Modeling tools and Workshop Equipment
Mark...... Thanks!! I'll check it out! Mike...... I had the same problem with my Skill bandsaw on the Vac port, I use a PVC coupler wrapped in Duck Tape..... LOL It works in Jim table saw also!!....LOL Plus it's no big thing to cut out a circle on my Cnc wood mill and make an adapter, or even use the proper size hole saw and make one out of wood. AL