HOLIDAY DONATION DRIVE - SUPPORT MSW - DO YOUR PART TO KEEP THIS GREAT FORUM GOING! (Only 68 donations so far out of 49,000 members - Can we at least get 100? C'mon guys!)
×


dewalt57
-
Posts
145 -
Joined
-
Last visited
Content Type
Profiles
Forums
Gallery
Events
Everything posted by dewalt57
-
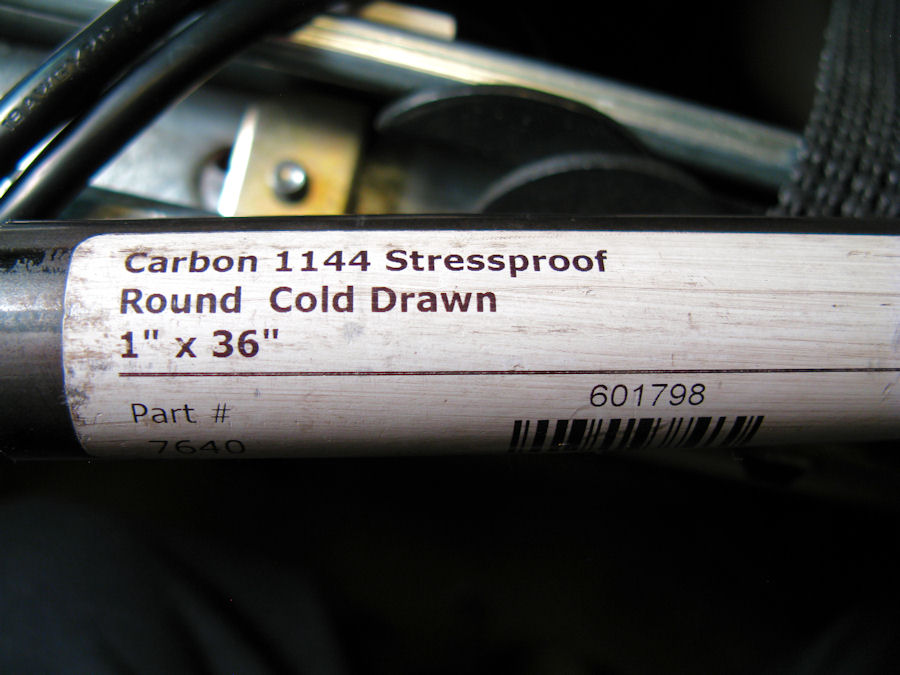
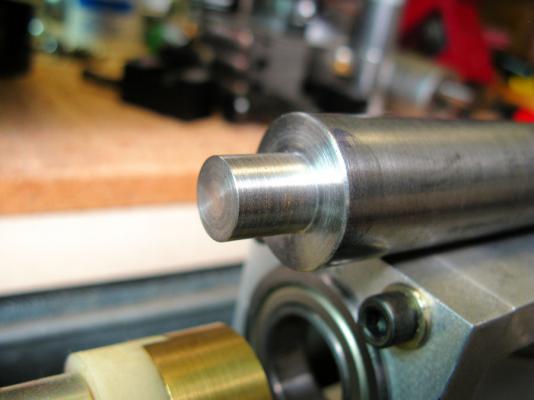
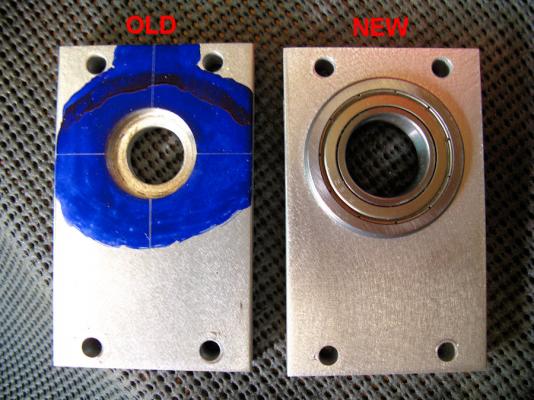
 Thanks Ron!!! Just finishing the Cnc rotary rebuild this morning, almost done, just need a few holes drilled/ Tapped to hold it all together! I'll be chewing on some wood soon making my Cannons or at least giving it a good try! New 1" Steel Drive Shaft for Cnc Rotator replacing a bent 1/2" shaft. Turned down end to 1/2" so it fits in brass stepper motor coupler. AL
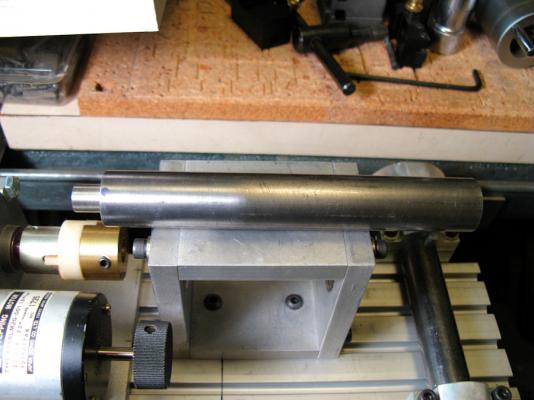
-
Yep.....I don't think the new 1" steel shaft will be as wimpy as the old 1/2" shaft was, and bend at the first wind! Thats what all this is about, experimentation to see what works and what don't .... LOL Then make it better!! AL
-
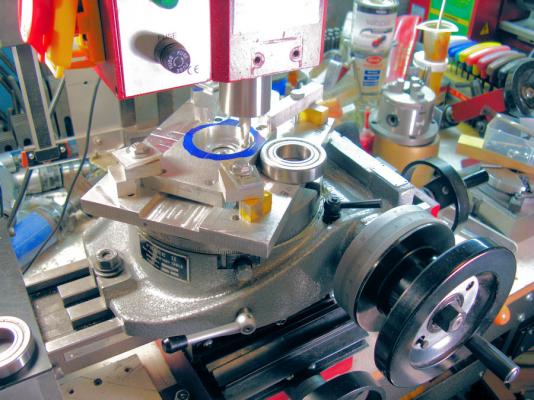
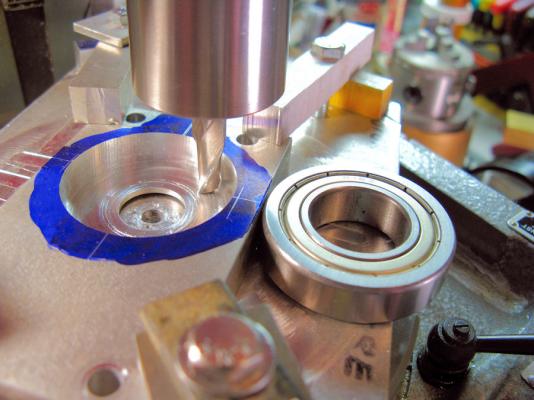
Thanks Tim!! Yes..... the Cnc does a good job of it.... now I'm side tracked rebuilding the Cannon rotator... LOL I'll get back to getting the rest of the hull formers cut soon, just finished getting my 1" shaft bearing mounts made for the Cannon rotator and working on what next to do to mount the 3-jaw chuck and motor coupler to the 1" shaft. Had to turn my hat around and be the ship's machinist making repairs...LOL AL


-
Not sure where everyone gets their Cannon Balls but here's one choice I'll more then likely use....... http://www.use-enco.com/CGI/INSRIT?PARTPG=INSRAR2&PMAKA=240-2436&PMPXNO=4837957 Think 250 ea. Cannon Balls is enough??.... AL
-
Tim.... Thats Great!!! Glad you enjoyed my video's, Yes, been a long haul getting all this built but its been worth it to me. Hard to believe I started out with pushing a Dremel tool with 125oz. motors on a John K. home made gas pipe & skate bearings "Pipe Dream" machine many years ago to what I have built up now!! If there is any way you can, I'd say build that Cnc machine and don't look back!! I run mine at the cheap level, no fancy stuff like limit switches just basic cut & go!! All home made even down to the plywood E-chain!! I'm retired now and lots of time to play with my toys and still learning new things, it never ends or at least I hope not!... LOL Keep the faith buddy!!! AL
-
I thought I remembered something about the bow of the ship..... now I know!! Life aboard ship in those days does not sound that great, those crewmen were a hardy breed for sure!! Thanks for the info!!! AL
-
Now I do have a serious question for those in the know!!! Where in the ship is the "Mens" & "Ladies" Restroom?? It never seems to be addressed in any movie I've seen except Master and Commander "The Far Side Of the World" movie where I believe it was the Captains toilet seat off to the port side of his room that took a cannon hit, they briefly showed a broken one hole seat, which I assume empties down toward the water?? But what about the crew, what did they do when nature called?? AL
-
No Mark...... this is not like a conventional wood lathe where the motor sits there and spins the wood continuously.... LOL On a Cnc rotary type lathe the motor that holds the wood is controlled by the computer gcode and only moves when its told to move and then very slow in small movements of degrees. Yep....the 4th axis computer thinks in degrees of movement not RPM, so the Cannon will be rotating in a number of degrees not RPM's. So if I want a complete circle I tell my "A" axis which is my rotary to move 360 degrees, if I want a continuous rotation, I just keep adding 360 + 360 + 360 for how ever many rotations it takes, but here's the catch, the computer adds up all these degrees and if it want to go back to Zero degrees, it has to unwind to get there. Its kind of a pain to wait for the unwinding but thats life in the fast lane.... LOL You mentioned sorting out the head movement to cut it on a wood type lathe, yes it can be done, but getting the gcode is not as simple as it seems. You have to have a program that can make the gcode for the Z axis control, normal 2D gcode software will not do it, it works with X & Y axis only for movements. You could put the router motor horizontal instead of vertical and do it that way, can be done and there are some horizontal router machines out there that use just that idea for doing Cnc wood lathe work. AL
-
Thanks Mark.... but the cnc mill chuck is a router spinning at between 8,000 to 14,000 RPM and I sure would not want to spin a chunk of wood 7" long at that speed, and only supported on one end, a tad bit dangerous for my taste.... LOL The rotary motor only moves a tiny amount as the cutter makes the cut end to end, how long it takes is not an issue here, quality of the cut is, I'd like to see 4 exactly the same Cannons, even if it takes a month to make them.... LOL I'm sure there are several ways of doing this faster and with less fan-fair but I'll be using Aspire software with its wrapper, doing the gcode to cut the cannon shape and it requires a setup like this rotary I'll be using as a 4th axis on the cnc wood mill. This will be very similar to Jame's video of how he did his project.... . AL
-
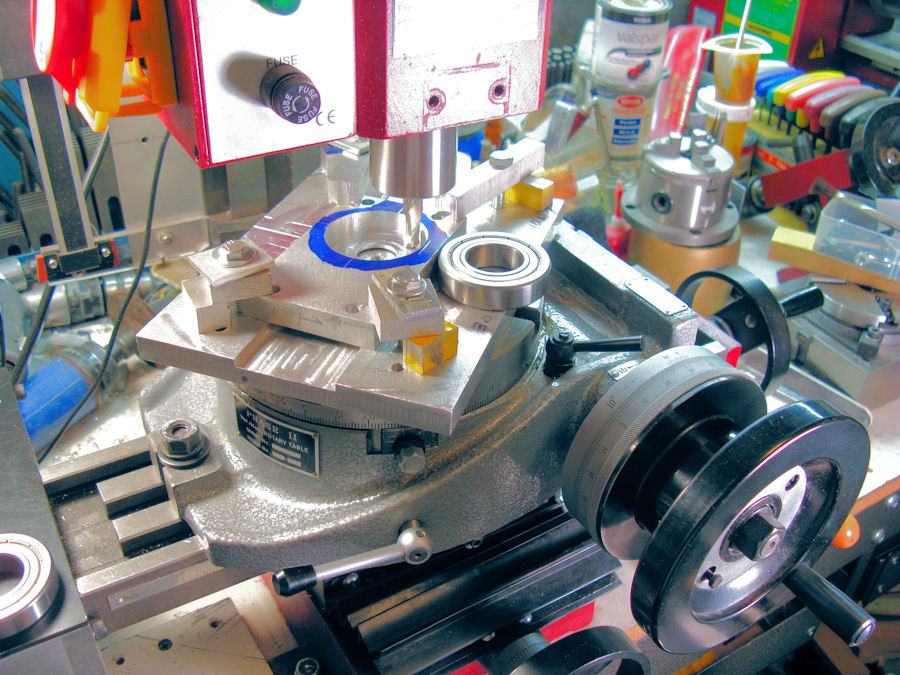
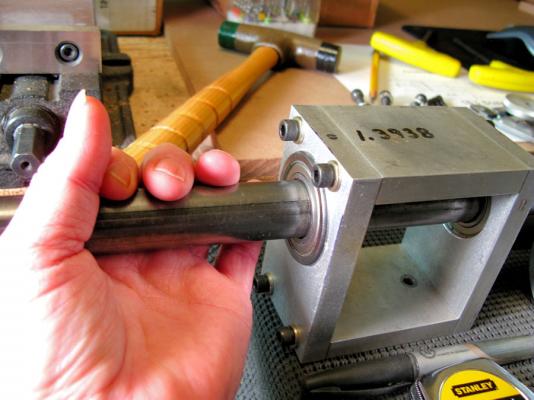
Thanks Mark, Tim ! What I want to do next is use my home made DIY Cnc rotary 4th axis setup to make the cannons. Doing a half cut and glueing them together is just not that easy, everything would have to be cut perfect to get a good alignment between parts without a glue line showing and things do go wrong during a cut. So a complete round rotary cut would be better.... or would it?? But before I can setup the rotary for testing, I have to finish the modification to it to fix it. I crashed the chuck and bent the 1/2" drive shaft and now I'm replacing it with a 1" drive shaft which means bigger bearings etc....this is all hand made equipment that I designed and fabricated in my little machine room, the 18:1 gear box with stepper motor came from MPJA surplus and is no longer available. Here's a video of it all running that I made before the crash happened. http://www.youtube.com/watch?v=LG5yGKrfERI AL
-
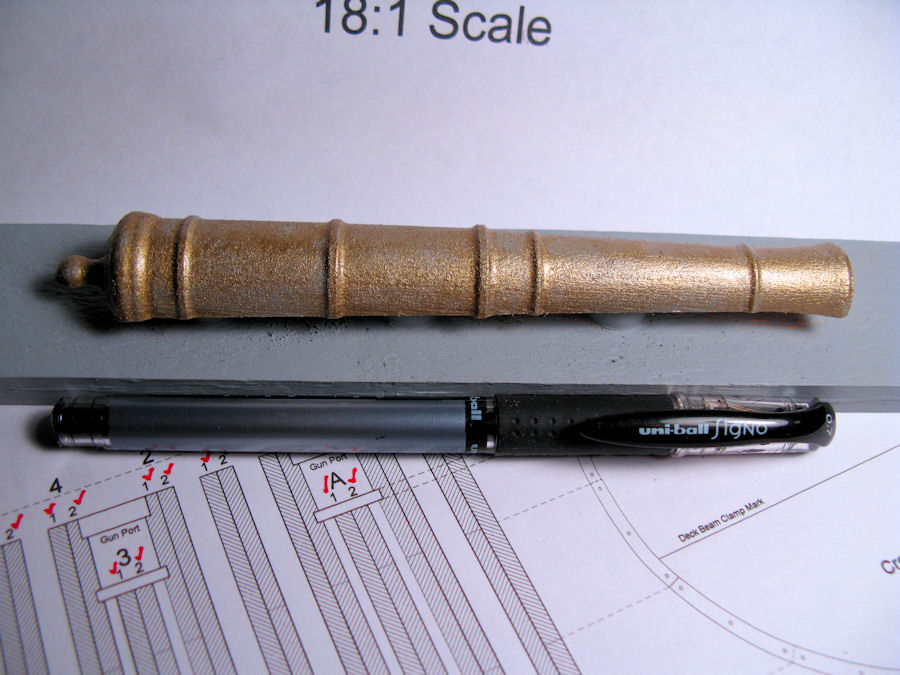
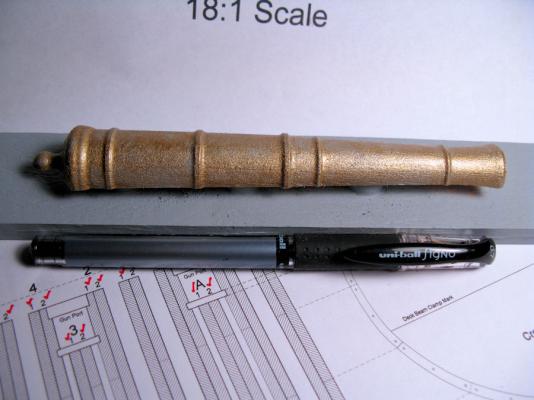
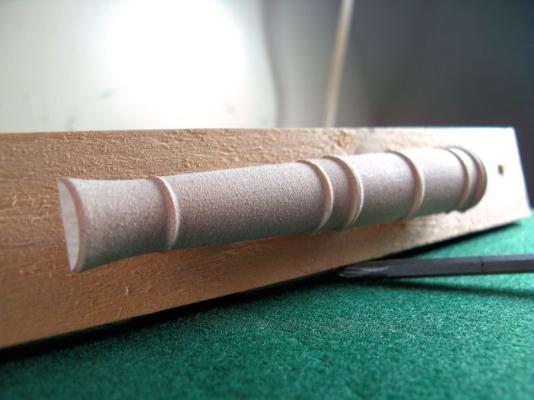
Thanks Ray! This is using 25% step over with the 1/4" ball nose bit for roughing to within .001" of finial shape and a 5% step over for the 1/8" ball nose bit to do the finish cut. What that means is that when it makes one cut end to end, it steps over 5% of the cutter diameter and does the next cut. Takes 1 hour to complete the job. As you can see it's capable of very fine cutting down to the width of a human hair if need be!! The real limitation is the size of the cutter used, a 1/8" ball nose leaves a rounded edge where I'd like a sharp edge, I need a smaller ball nose bit to get more detail But the smaller the bit the more chance of bit breakage!!! The smoothness of the cut speaks well of the machine's stability and stiffness. AL Here it is next to a pen to see the size of it, brush painted with some gray primer and some gold leaf paint I'm been wanting to try out, very rough surface and gold leaf paint is way too thin for my liking. Rough surface is typical of MDF when not sanded smooth.
-
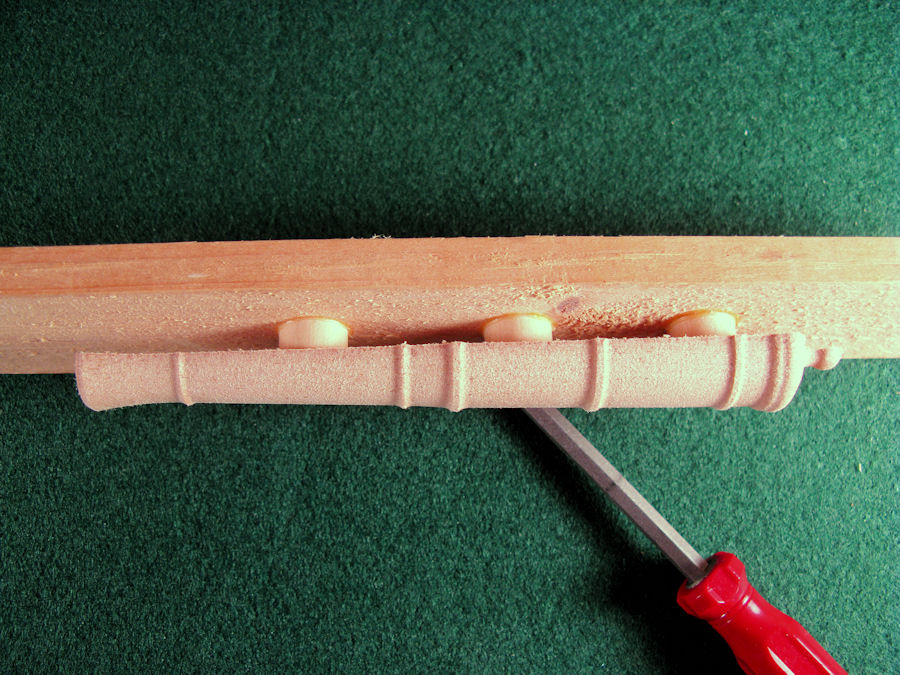
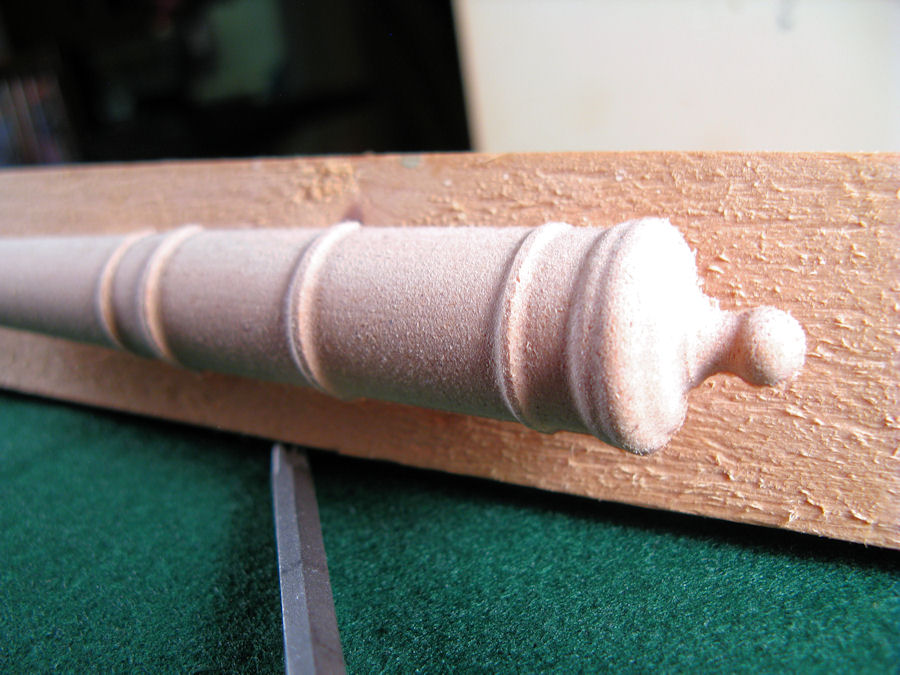
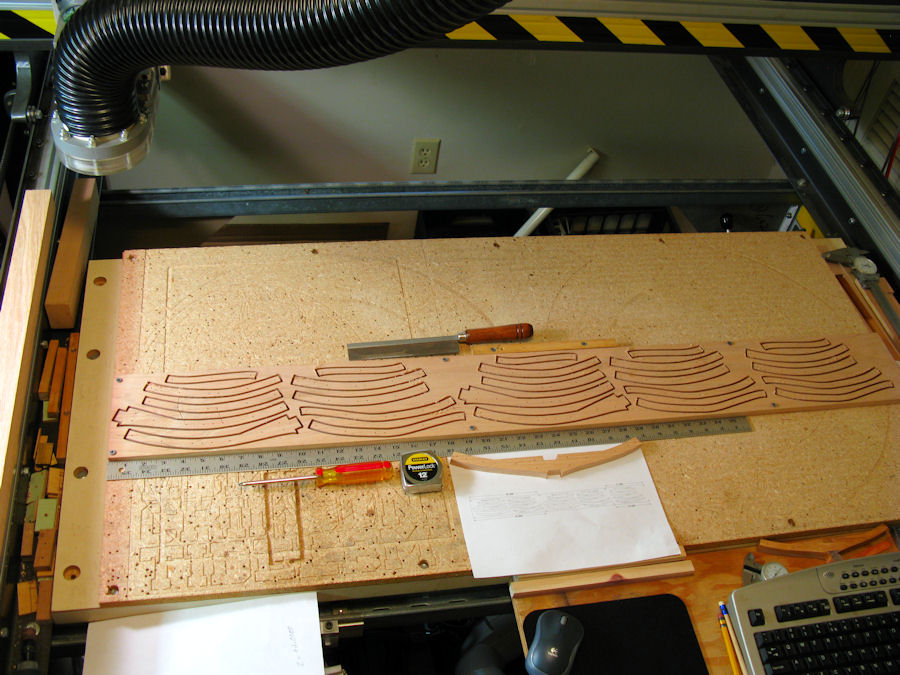
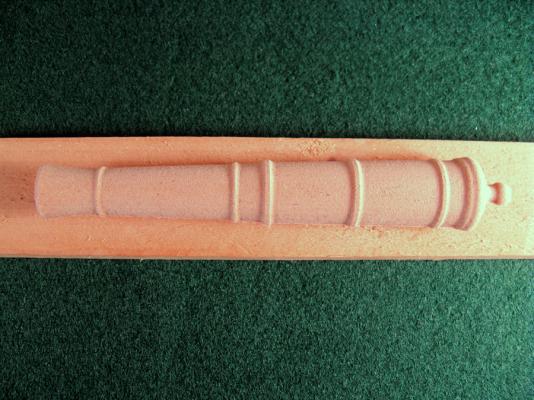
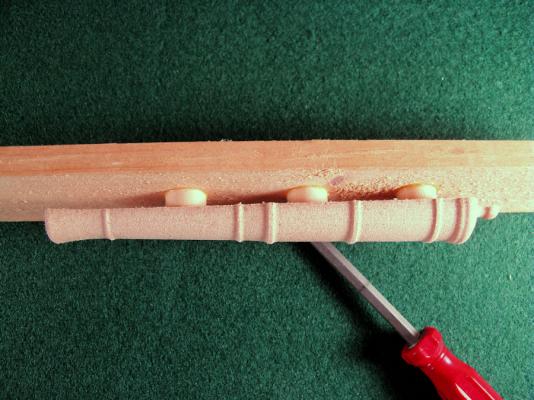
Got the hull former plank layouts completed but haven't started cutting yet. For a little change of pace, trying my hand at Cannon making using my home made Cnc Router wood mill. There are several ways of making a Cannon as most of us know, the hard part is figuring out how to hold the blank while it gets cut on. Here is just one example that I just tested, cutting a half model of a Cannon. This was 5.619" long with a diameter of .867" at its widest point and fits a 1/4" diameter cannon ball, approx. 18:1 Scale. This was just a test to see how much detail can be done and how smooth the cut would come out on my Cnc Router wood mill using a 1/4" Ball Nose for Rough cut, 1/8" Ball Nose bit for Finish cut, not bad at all, just needs a few improvements done. I would still prefer a rotating blank to cut on but don't have my 4th axis rotator modifications built yet. Material for Cannon blank is MDF 1/2" thick x 1" wide glued to standoffs on a throw away pine board. The beauty of this process is that when the blank is done, it is band sawed off the glued dowels and then glued to another half prepared the same way. Barrel hole would be drilled in both half's held together before being cut to shape. Again, this is just one way of doing it. No sanding was done to smooth surface, its as it was just after cutter finished with it. AL

-
Thanks guys!! The way I see it is...... if all else fails, I can always build a canoe out of it.... LOL AL
-
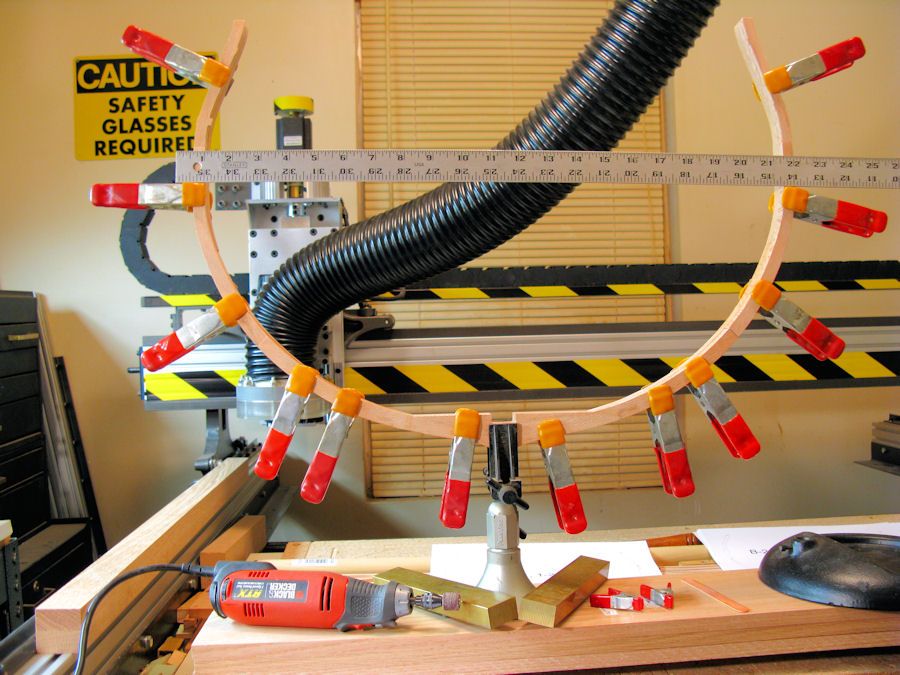
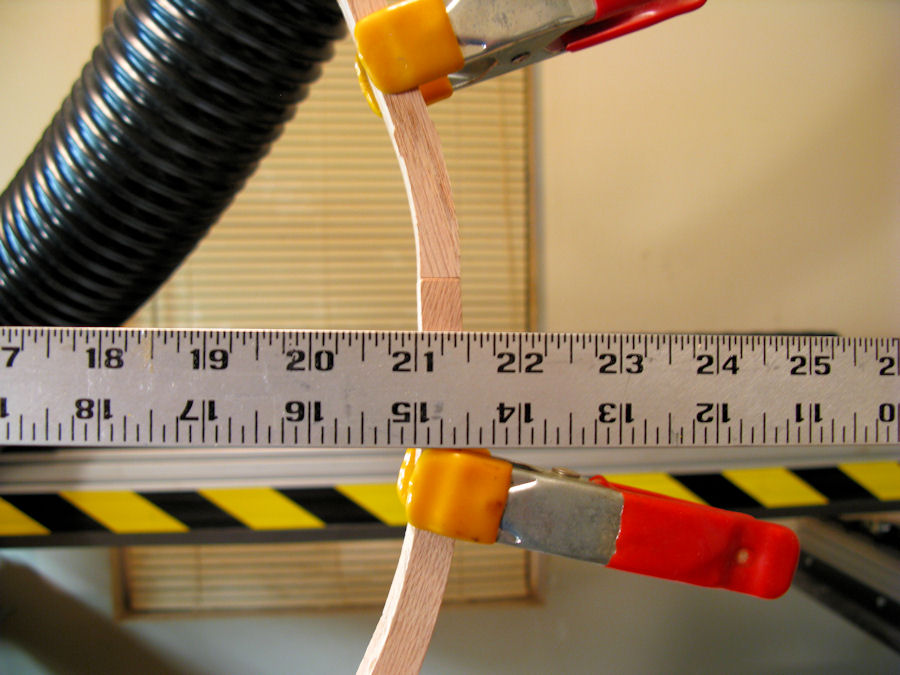
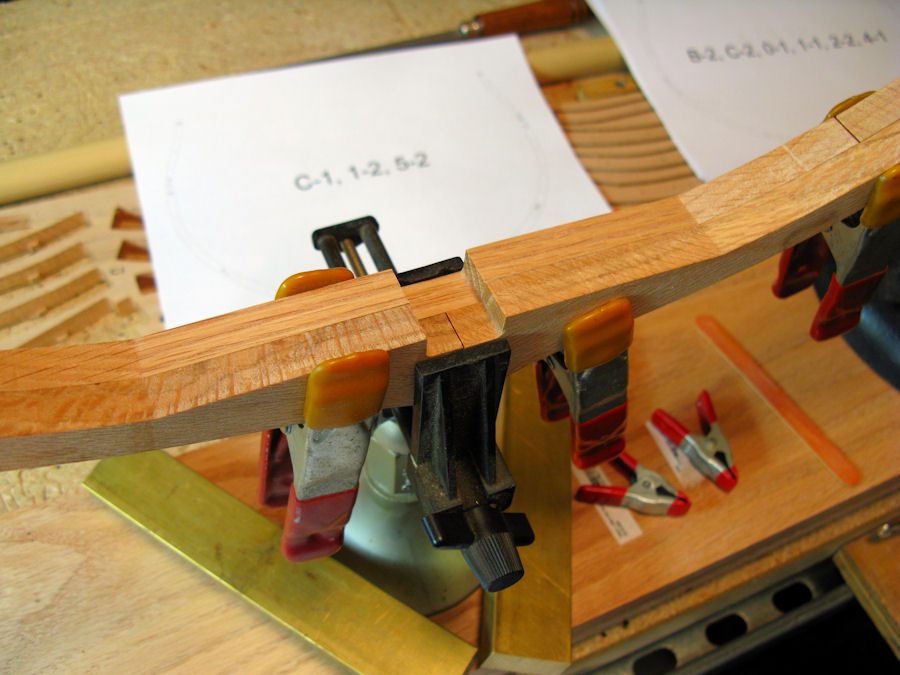
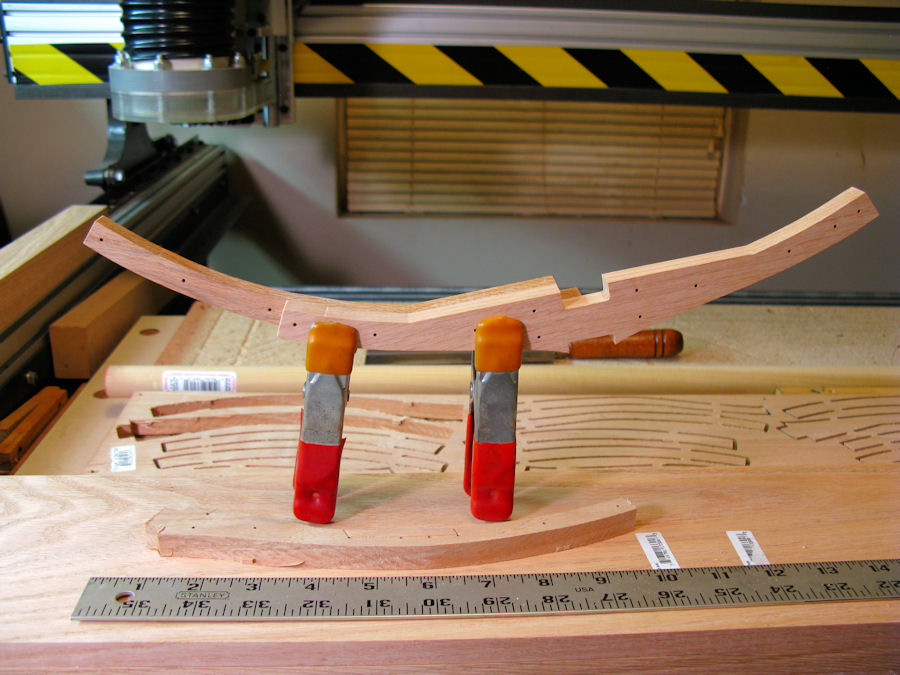
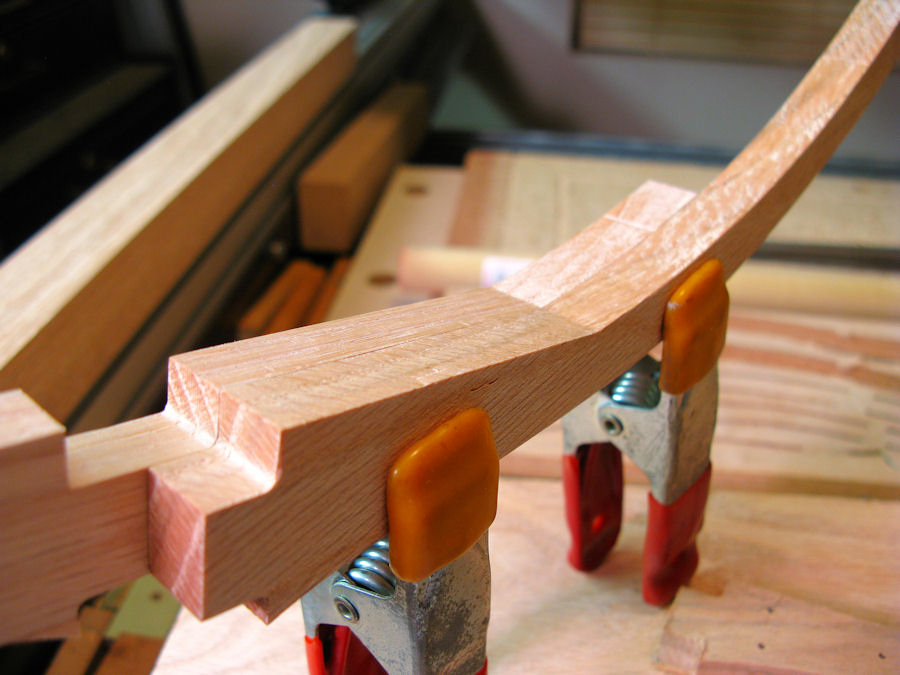
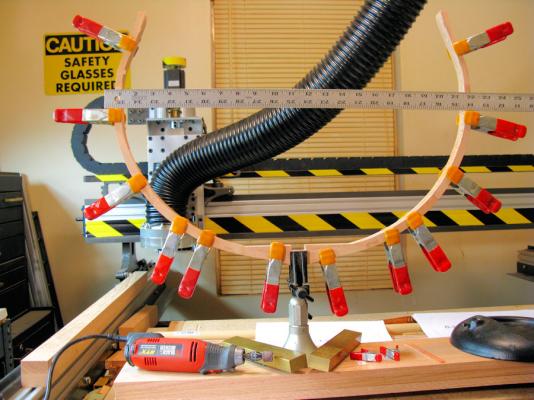
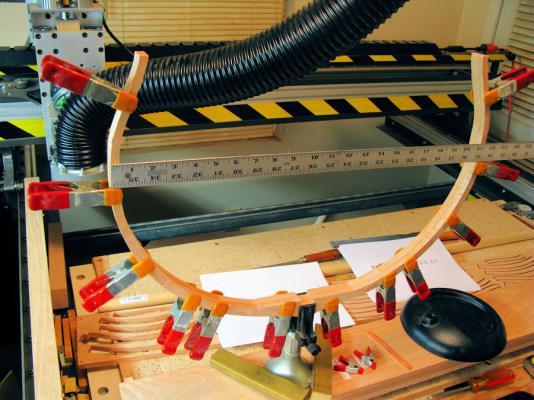
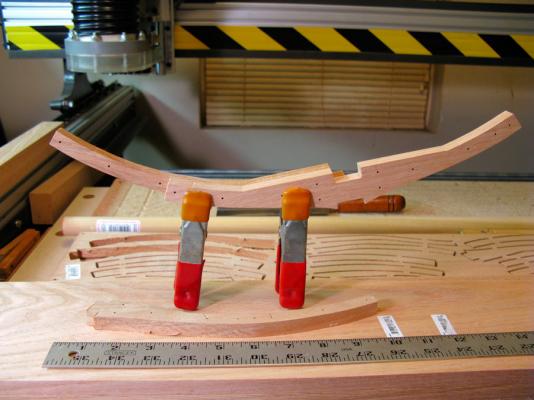
Couldn't wait any longer, just had to see how she looked with one complete hull former clamped together.... LOL She's a big lady for sure!! Still working on parts placement on boards for cut path's. Laying out 101 hull former parts can be a mind bender for sure, must be done by hand to get the best fit and use the least amount of wood, then double checked against my cut list to make sure I'm not cutting out duplicate parts or missing any!! AL


-
Looking good Ray!! AL
-
Thanks Tim !! No cutting started yet on the new timbers, looks like I will need some more wood ...!!! Configuring cut paths now and so far looking like a total of 8 sheets of wood will be needed, I'm 4 sheets short of the mark... AL
-
Thanks Ray! Thank God for BONDO !!!LOL.....I love the stuff.... AL
-
Thanks Mat, I am such a perfectionist at times and expect my machine to be the same way..... LOL I really shouldn't expect perfect results from a low cost Hobby Cnc wood machine compared to a High cost Cnc machine used in metal machine shops around the world but I do.... LOL Like I said, there are many factors at play here causing these imperfections, higher cost lead screws on the cnc wood mill would help, stiffer structure to the cnc machine, etc,etc, etc.... there were many trade offs that I made during my building of this machine and I wanted to keep the cost as low as possible but have a fairly good machine. I think I have met that goal mostly. I think it will build parts to this ship model just fine, a good companion to the new toy that's coming in a couple weeks.....YEP!!! I ordered one of Jim Byrnes small table saws!! Can't wait to get it and take it for a spin!!.....LOL It will replace my old useless Dremel small table saw, the first one they made, what a joke that thing was, no wonder they took it off the market years ago!! It was a fire hazard to start with and under powered by a small motor which had a fan blade inside the motor case to cool the motor winding's. Only problem was the motor was placed under the saw table where all the saw dust is, the motor had a PCB with motor brushes on it which collected the fine saw dust as it got drawn thru the motor and the brush sparking would set the dust on fire!!! More great Dremel engineering!!!....LOL AL
-
Got some more ship timber in and a 1" Poplar dowel to make cannons with! So we are back at it again making chips!! Cut out a couple parts to check size and fit, for those who think CNC is flawless, think again.... LOL There is a slight mismatch in parts, several reasons for this, main one is..... its HARD wood with a GRAIN!!! The small 1/8" End Mill cutting bit will try to follow the path of least resistance in the grain of the wood, even a Carbide bit will flex a little while cutting, I even try to chuck the bit up close so it doesn't hang out too far from the router chuck, too long a bit will chatter, ( bending while cutting ), and make a wider cut path ( also known as Kerf ). Its just like a table saw, you only use as much blade as you need to cut the wood thickness!! So a CNC wood router is not perfect but its close enough for me to deal with. Another item of interest is that this router is a ( bought from Lowes ) Hitachi M12VC variable speed 8,000 RPM to 24,000 RPM, I never use this router on HIGH speed. The speed dial has a scale of 1 to 6, I never go above 3 which is maybe 12,000 RPM. Most of the guys that run full out and under a heavy load, end up replacing their router bearings after a year of hard pressed wood cutting, I've had mine running for over 5 years with no trouble. So bottom line is..... go easy on your tools and they will last a long time! Your mileage may very!! AL Notice the mismatch in cut between the next two pictures. Top side perfect match. Bottom side mismatch.


-
bp1535..... How about over in "Shore Leave" , Ask your question and I'll try to answer over there but remember I'm no expert by a long shot on any of this. AL edit: Added...... Or you could just PM me and I can answer thru normal email. AL
-
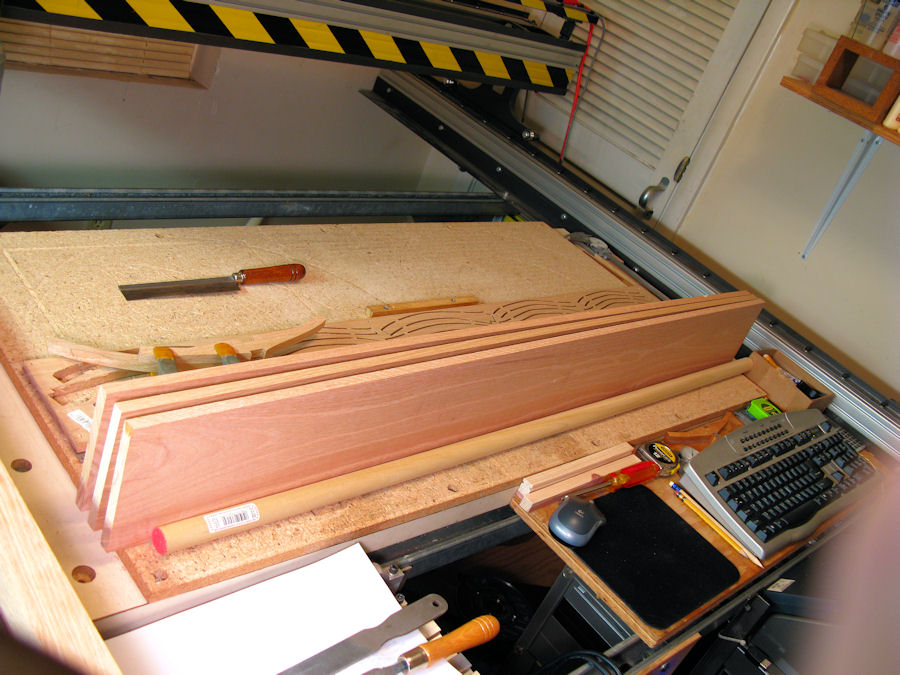
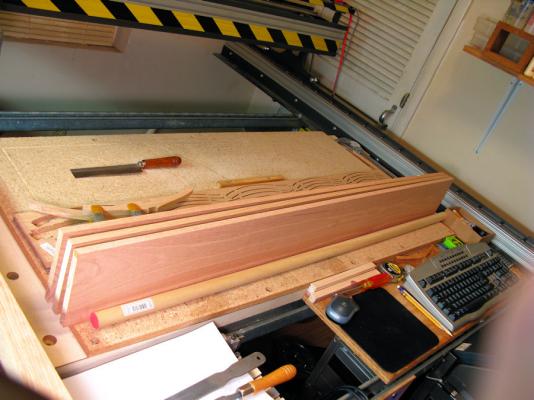
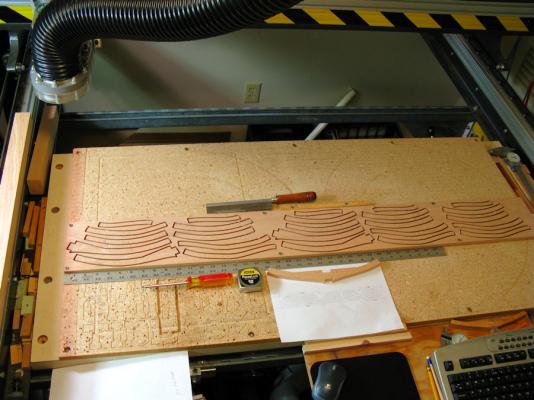
1st 2" x 6" x 48" Red Oak plank cut finished, enough parts for 2-1/2 ea. hull former's, if my math is correct.... LOL That's approx. 8 hours of Cnc wood cutting! Need a run to Lowes lumber department to get some more ship timbers now, the ship yard is depleted of Red Oak!.... LOL AL

-
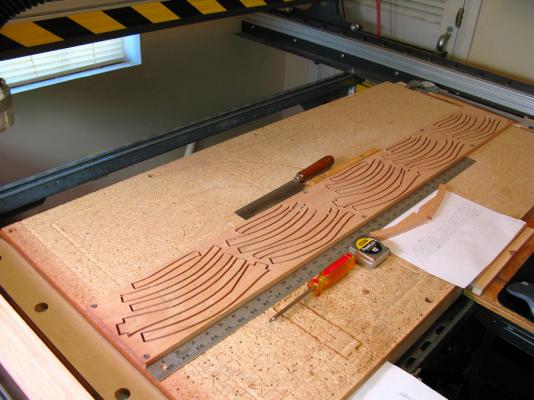
So am I Ray! I keep having this strange dream on the scale of the ship....LOL Almost done cutting on the first 1/2" Red Oak plank, only 3 more to go! Lets see at 8 hours per plank, its only 3 more days to have all the hull former's! Provided I can stand the dust collector noise that long! Got a 1 HP dust collector running sucking up the wood dust while it cuts and it does make a racket in the house! The Admiral has tolerated my hobby cnc wood mill but if it suddenly broke, she won't shed a tear over it I'm sure... LOL AL Hmmmm.....would it fit in the back yard???
-
Thanks Jim.... slowly getting things cut, looks like over 6 hours of cutting on each Red Oak board at the speed I'm running, and I'll need 3 more 1/2" x 6" x 48" boards to complete the hull former's, so this will take a few days. AL
-
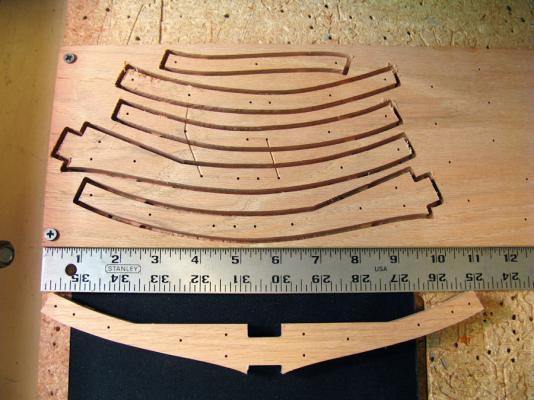
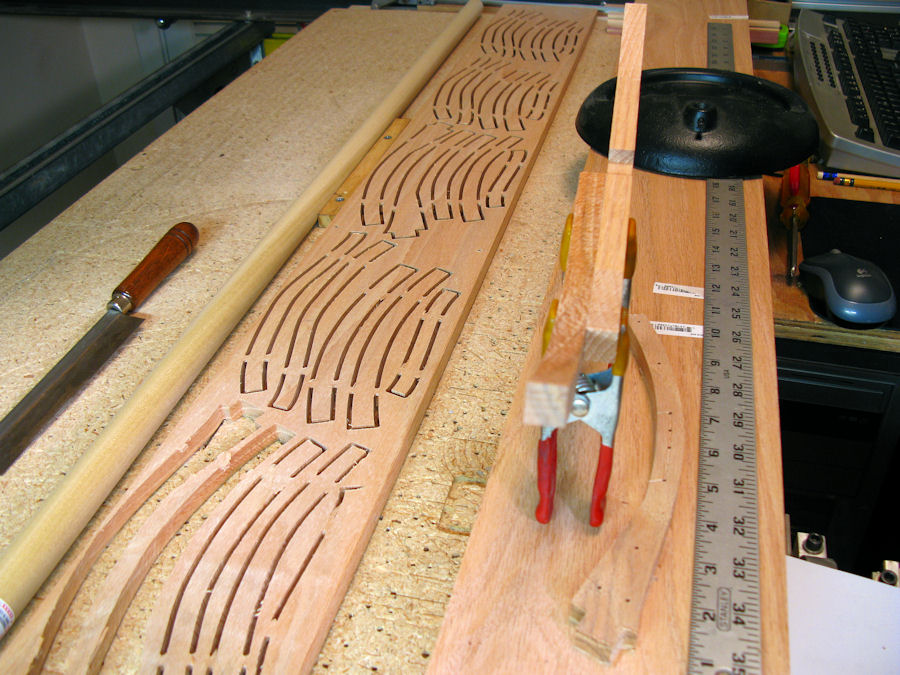
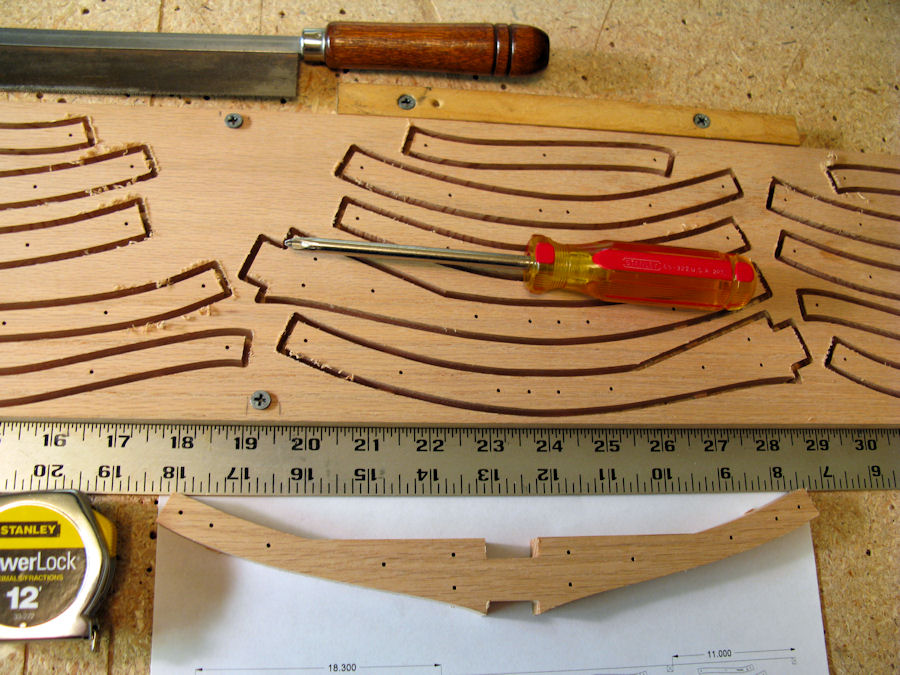
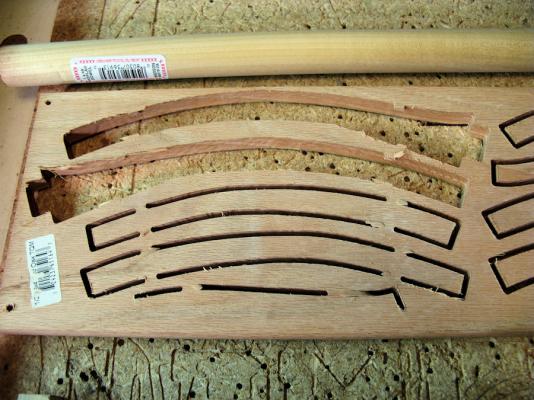
Thanks Ray!! Now if I could just find some more of that size skewers, I've had these for over 30 years as you can tell by the price tag on em.... LOL The one's I found recently are much bigger in diameter. Well.....What can I say.... I've changed the Scale to 18:1 !!!!! Can we say BIG!!! A single hull former is now a full 1/2" thick, normal stock size Red Oak at Lowes, right off the shelf!! Still cutting the Red Oak 1/2" x 6" x 48" with a 1/8" end mill bit in the router at 30 IPM taking .020" bites out at a time. Slow going but the results look great to me!! Here's a picture of Hull former parts after a few hours of cutting, even has scale hull worm marks cut into em.... LOL! That Red Oak has been sitting around here awhile and got cupped a tad on that one end, my drill bit dragged across the wood while drilling Treenail holes....I only had .100" clearance set on the drill bit safe Z height, my bad !!! My ta-rain following radar wasn't working at the time.... LOL AL