HOLIDAY DONATION DRIVE - SUPPORT MSW - DO YOUR PART TO KEEP THIS GREAT FORUM GOING! (Only 44 donations so far out of 49,000 members - C'mon guys!)
×


dewalt57
-
Posts
145 -
Joined
-
Last visited
Content Type
Profiles
Forums
Gallery
Events
Everything posted by dewalt57
-
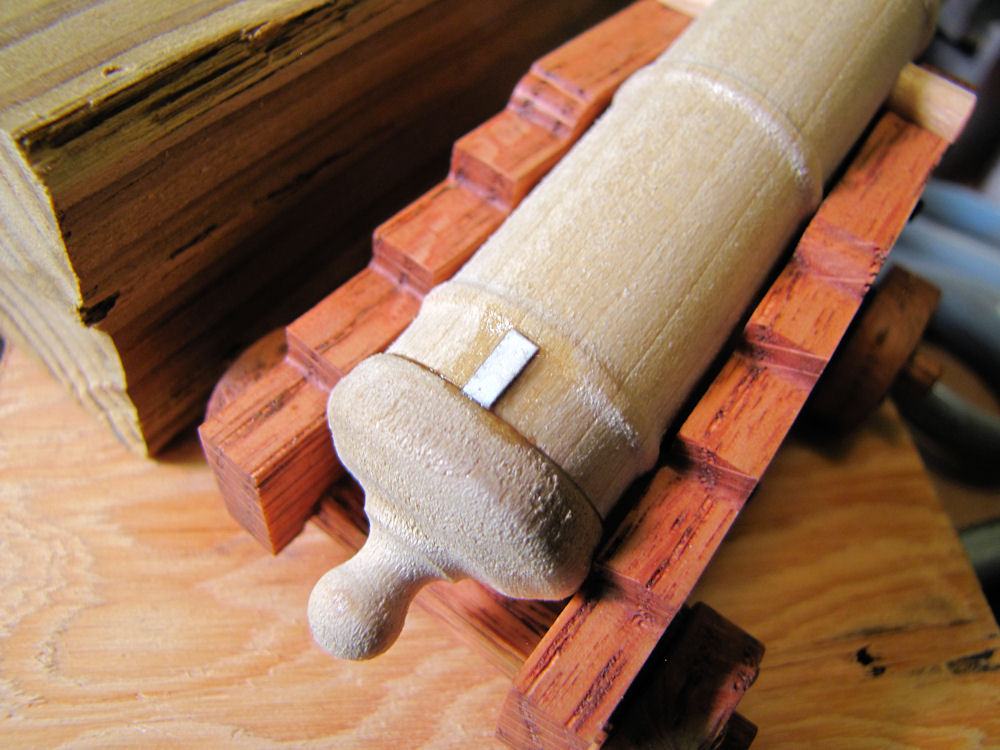
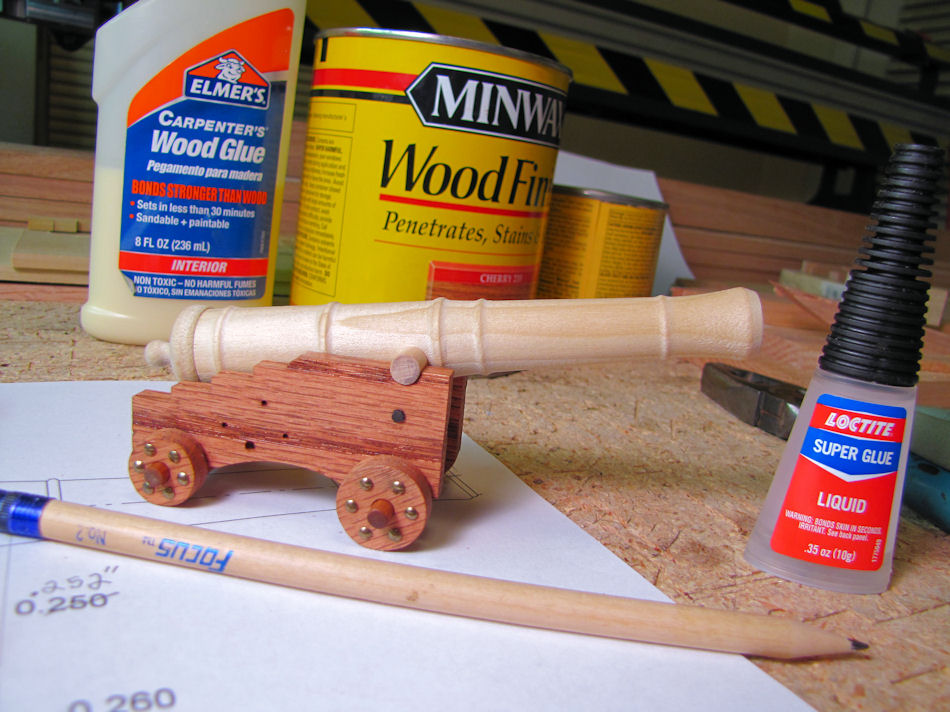
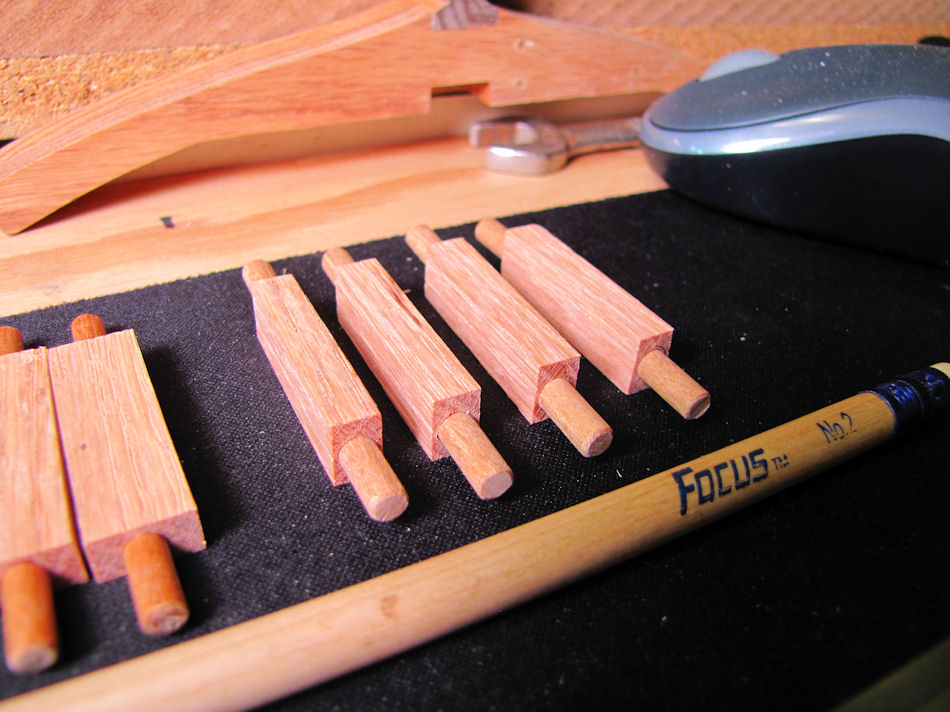
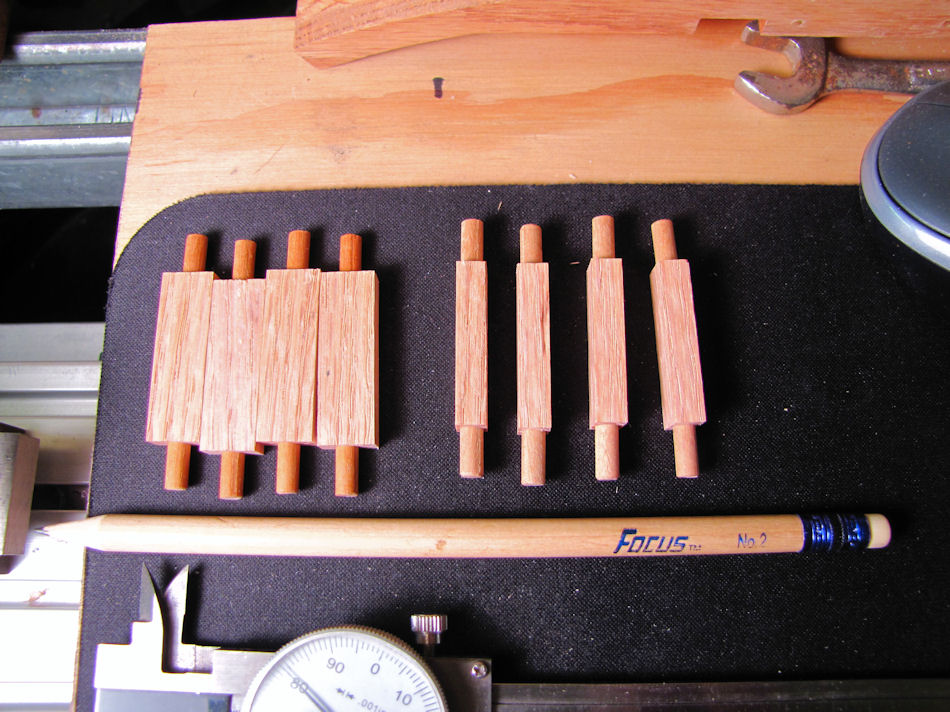
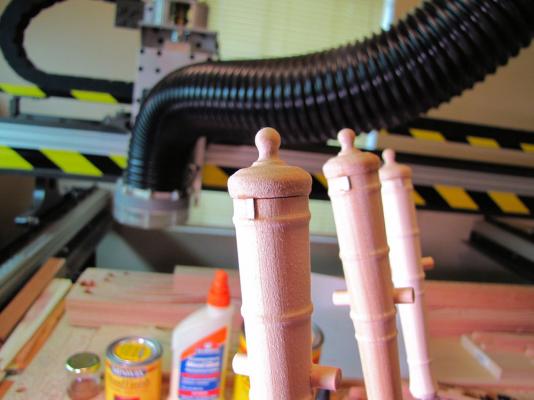
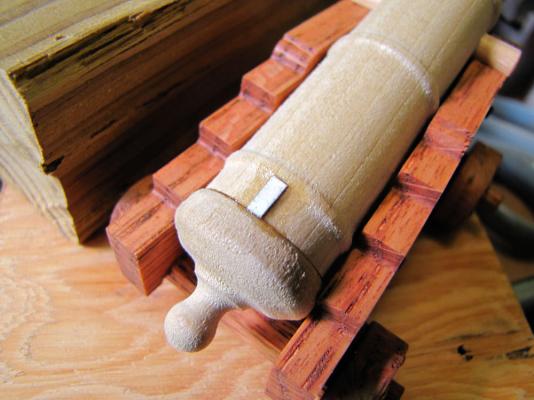
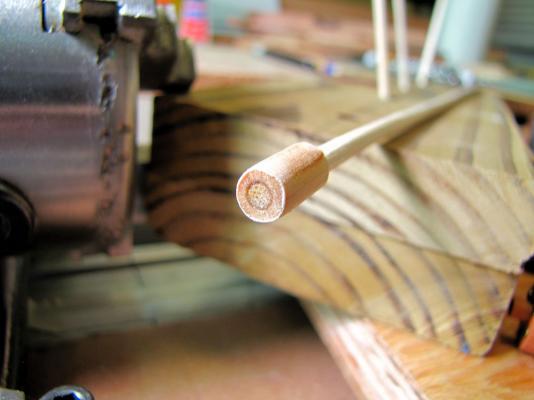
 Thanks Ray!!! Still got a few more things to do to the cannons, just finished getting the touch hole plate added and skewers made to hold the cannons while painting them. Getting ready to do some thick primer paint brush work around the touch hole plate and rear of each cannon before I use spray can primer to the whole body. I used 1/8" bamboo skewers glued inside 1/4" poplar dowel so I would have clearance around the cannon's end so the paint doesn't glue the skewer to the barrel. AL
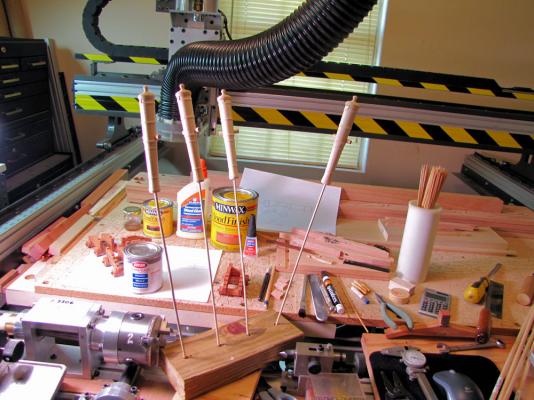

-
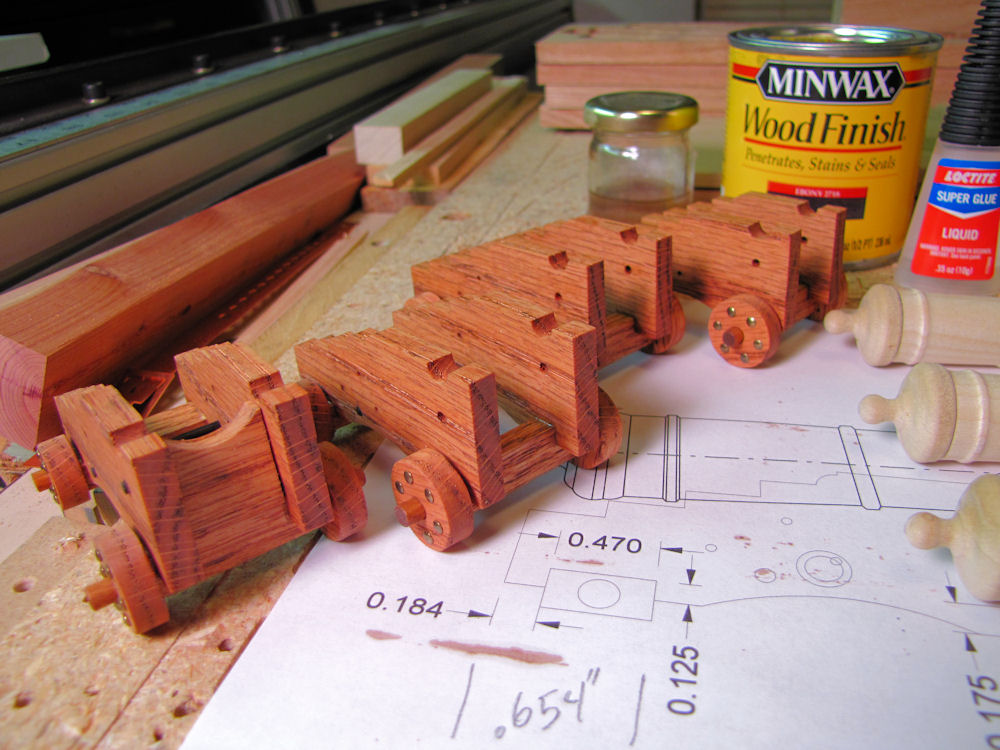
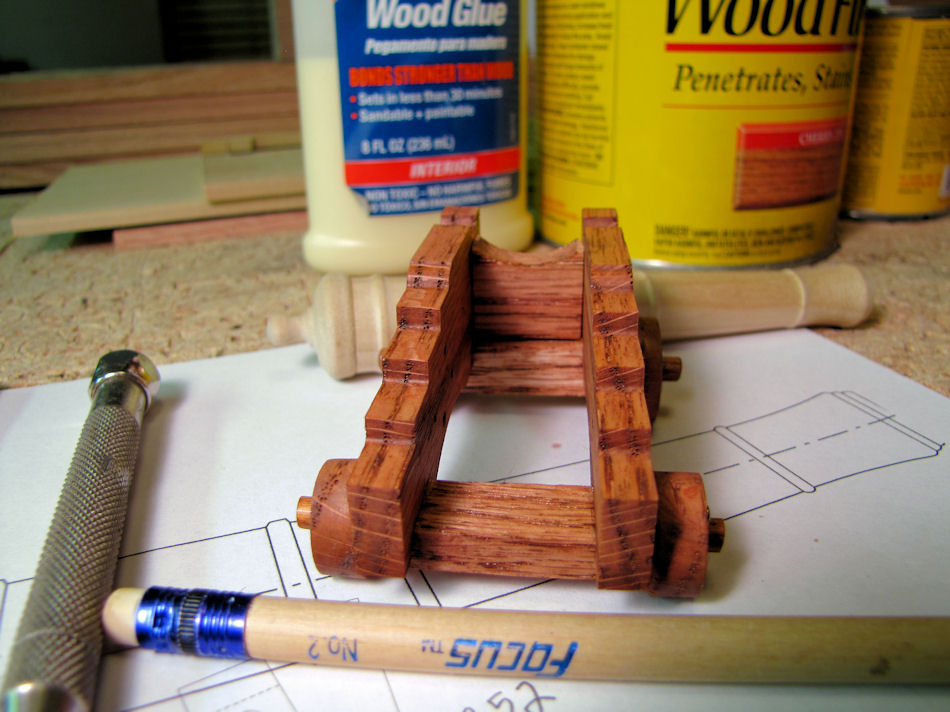
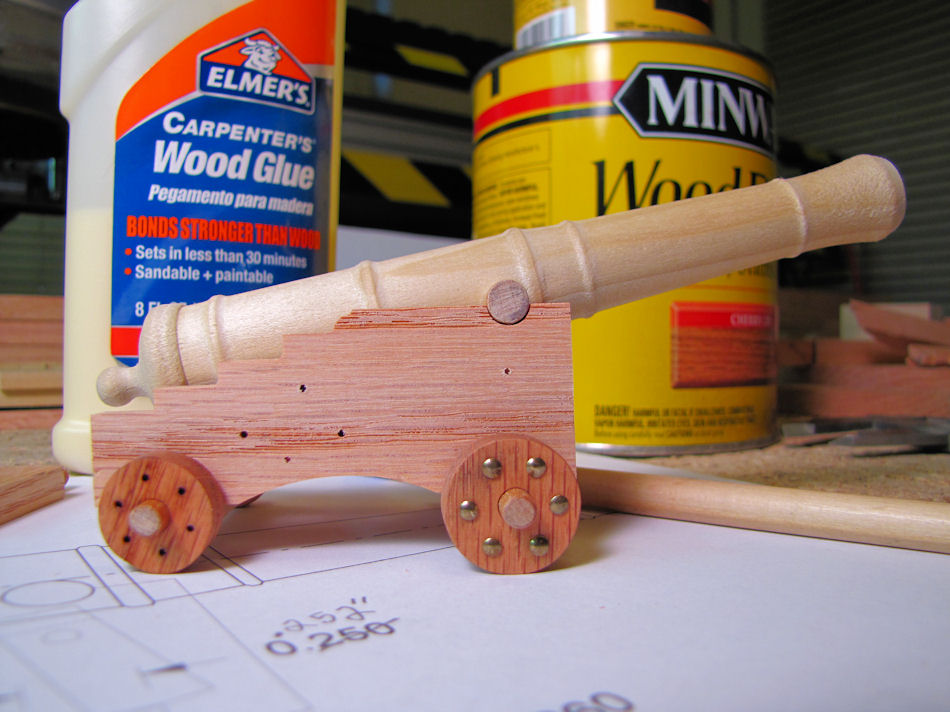
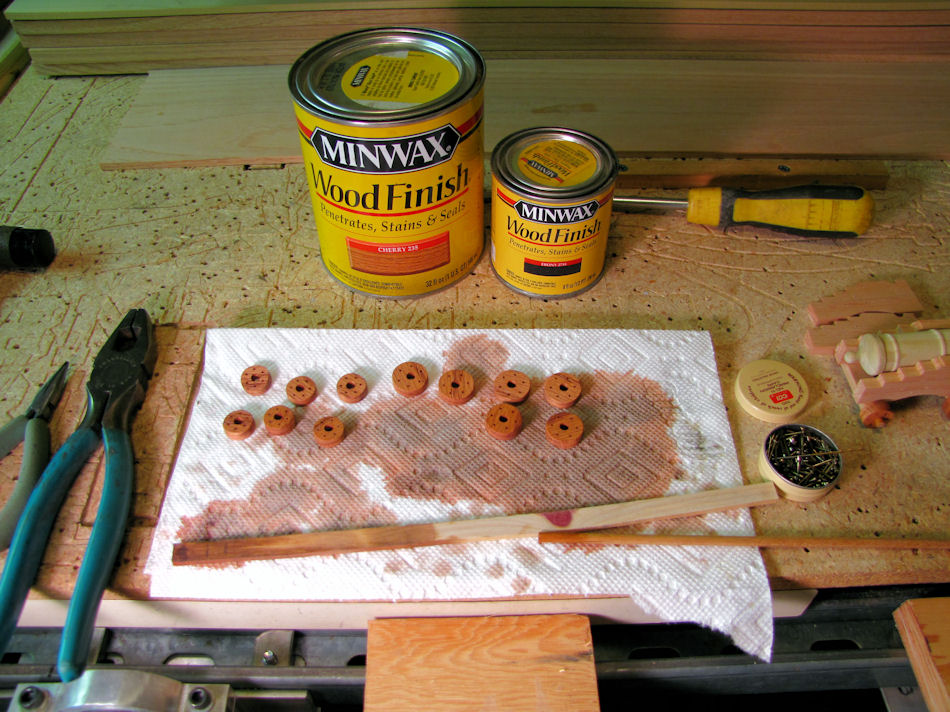
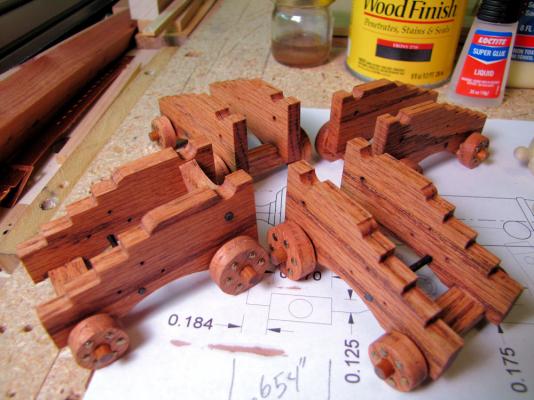
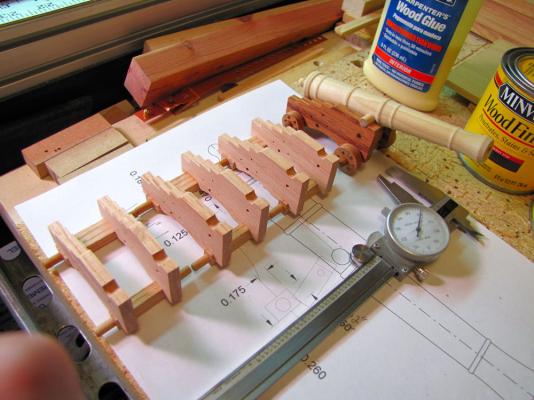
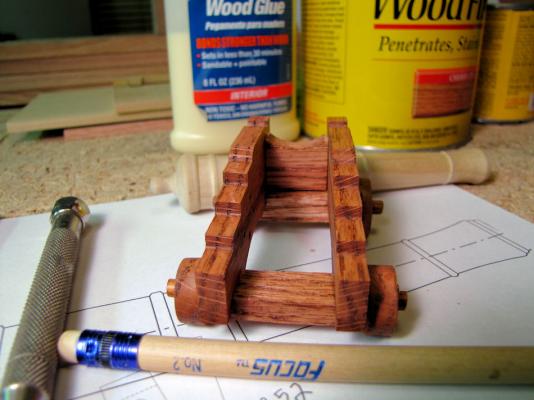
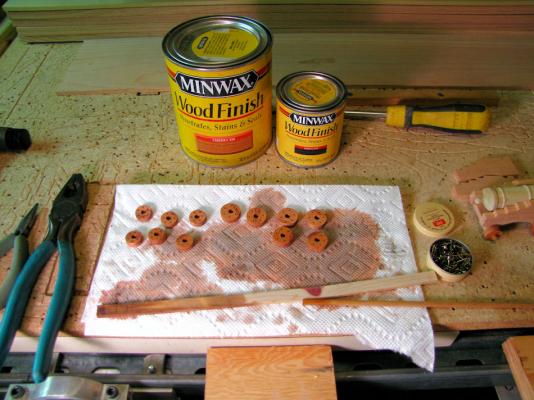
Got the carriages stained and a little bit more done. AL

-
Yes Matrim.... its like having your own Sherwood Forest with all the wood ticks, mosquitoes, chiggers, snakes, etc....that go with it... LOL I really hate bugs and snakes!!! And did I mention lots of Poison Oak all over the place! AL
-
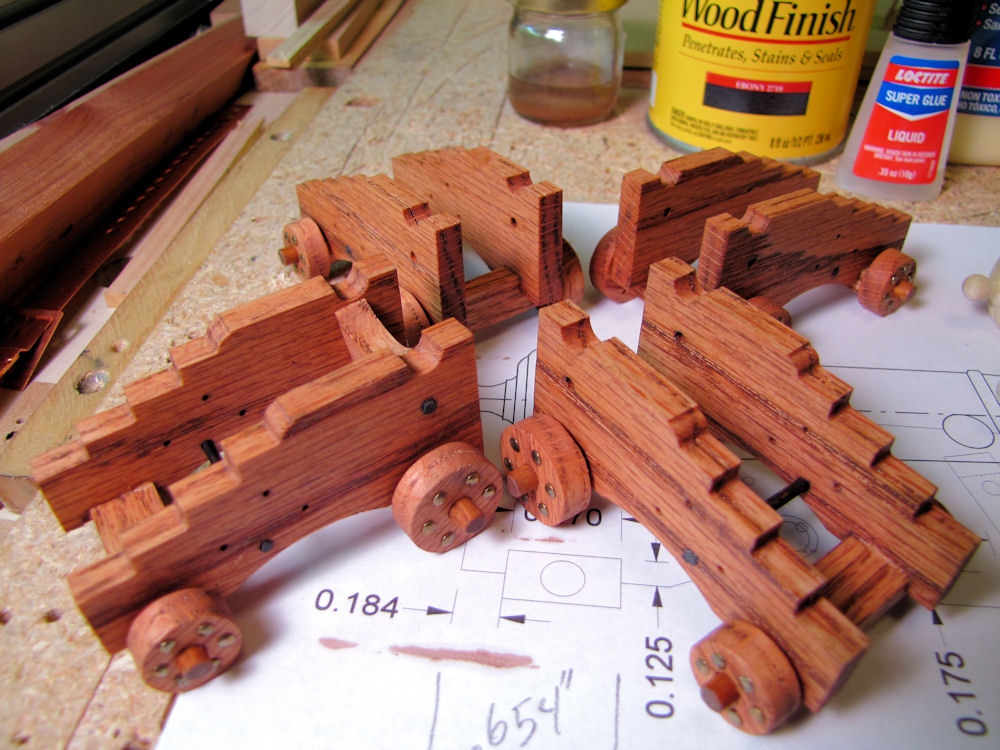
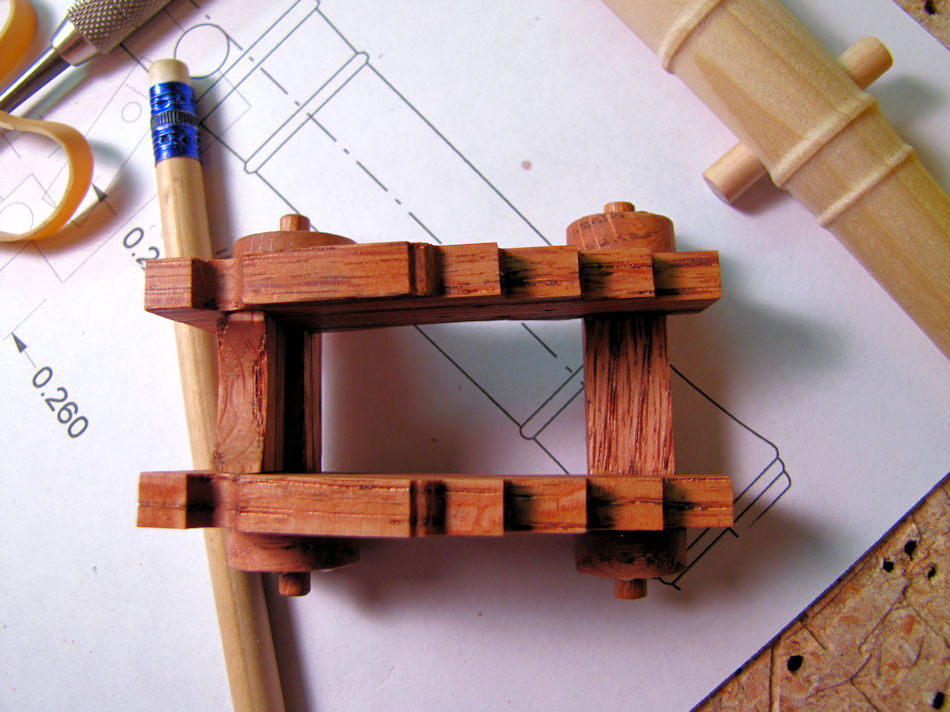
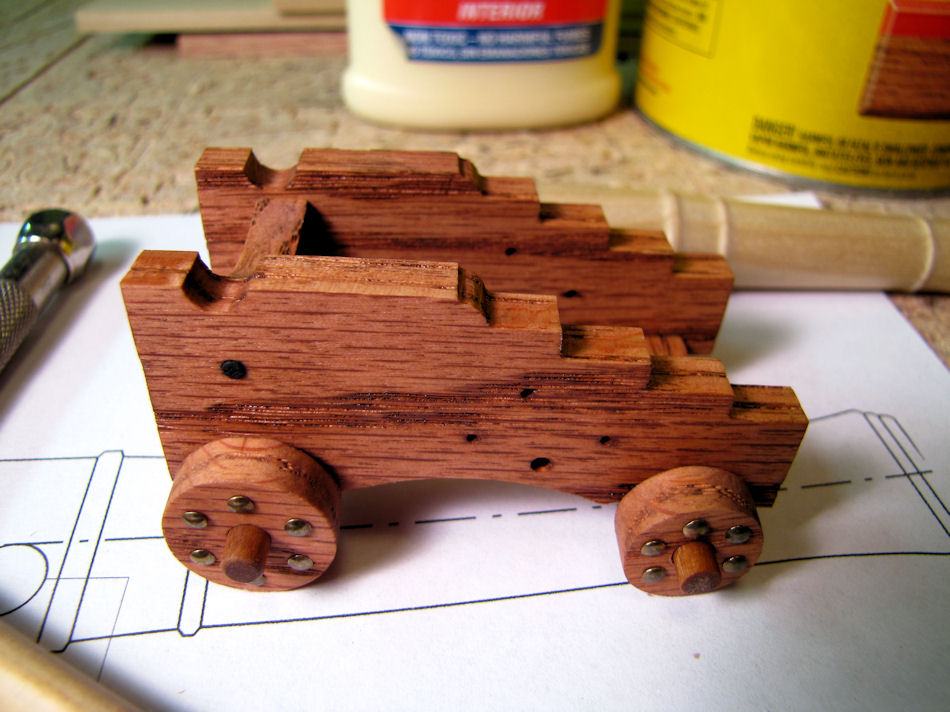
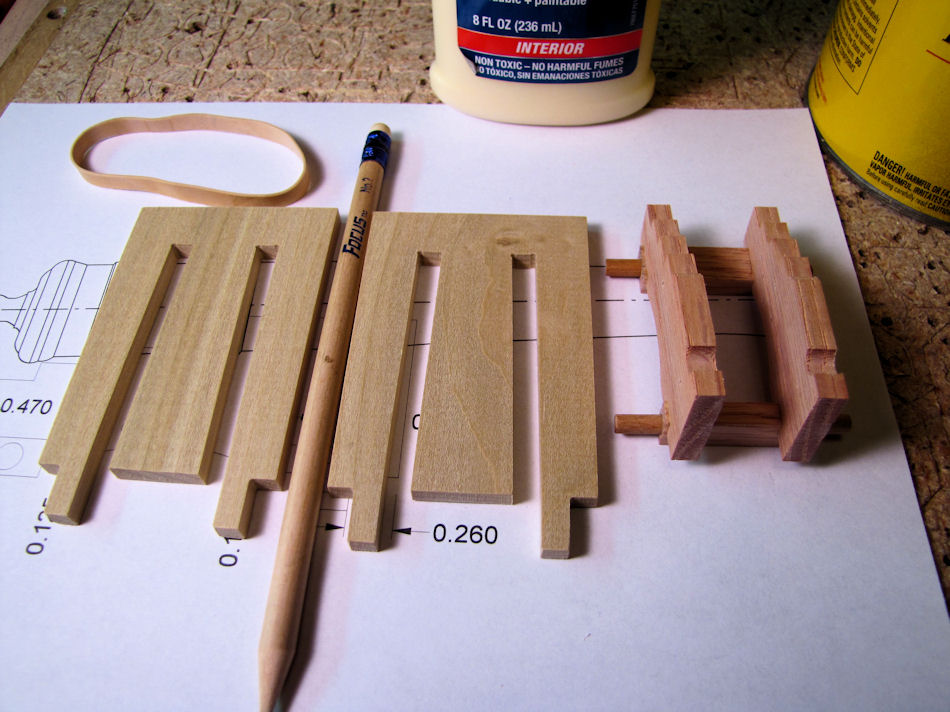
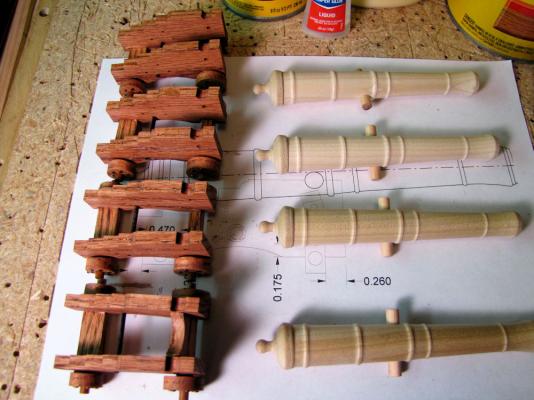
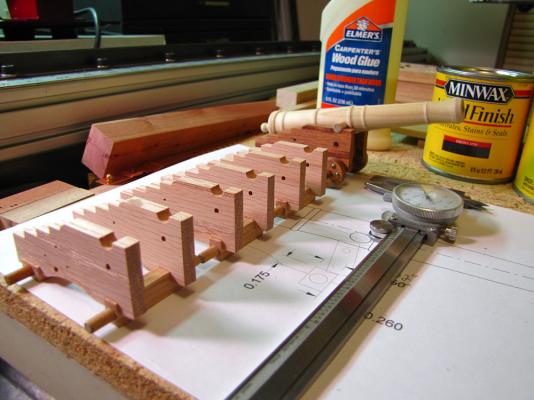
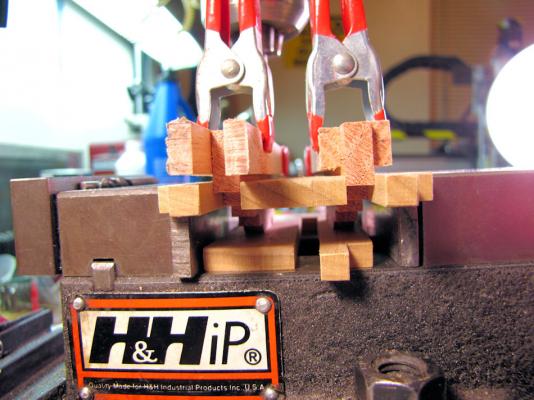
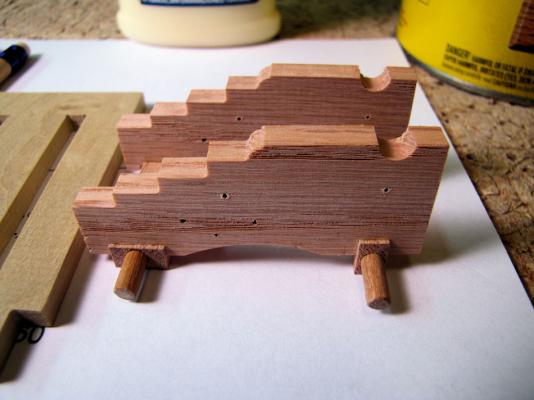
Got the last of the 4 carriage frames slotted for the axiltrees, now to get em stained. AL

-
Thanks Tim! This 1:18 scale sure eats up the wood, had to go out in the yard and cut some more wood for the ship!! LOL AL Just some yard work cutting down some dying trees, keeping me busy when not working on my ship.

-
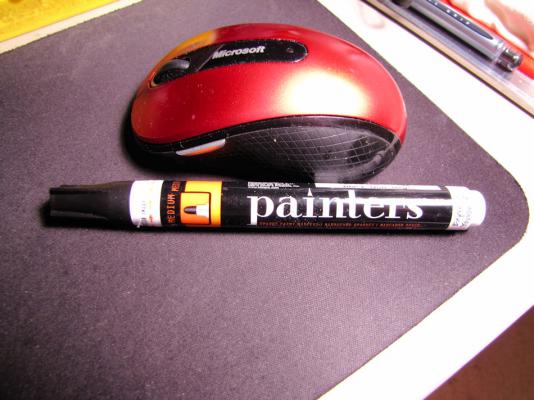
LOL.... some times I think I'm dragging 50 lb. cannon balls behind me .... LOL Anyway....I was in Walmart the other day and cruising thru the craft dept. area and ran across these paint pen markers for $1.97, thinking they might be useful to us in our hobby, worth a try I guess. They come in many colors, I got a black one to try out on some scrap, which I did on some red oak, no bleeding and seemed to cover pretty good. I'll try more test on some planking later on. Thought I'd share this with you. Just in case the ink in the Sharpie pen bleeds in the wood on you, there is something else to try. AL
-
Slow down Ray!!! Your getting too far ahead of me.... LOL Looking good buddy!!! I like the mast!! I've got to stop dragging my anchor and get busy here.... LOL AL
-
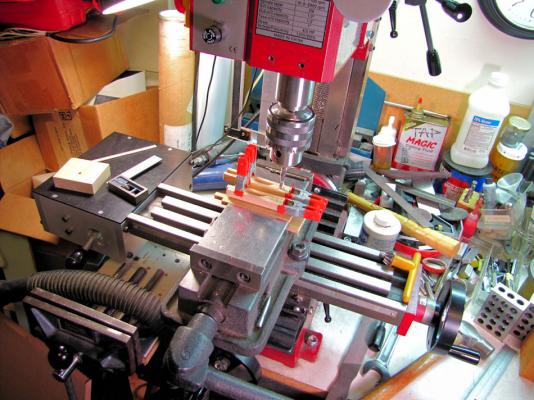
Thanks Tim!...... Yes, small mill for sure, vice is only a 4", biggest that will work on a HF Mini-Mill. The X-axis has about a 10" working area, The Y-axis has just a tad less then 4", the Z-axis is not much better and the bigger the chuck the less head space you have..... I use short (screw machine ) drill bits when I can. AL
-
Thanks guys!! Just wish the "mill room" as I call it.... was bigger...... LOL That HF Mini-Mill has been a real little work horse in there over the years, along with the HF Mini-Lathe, been able to pull off some really neat projects with em but had to push em to the limit and then a tad more to get there due to their small working limits!! AL
-
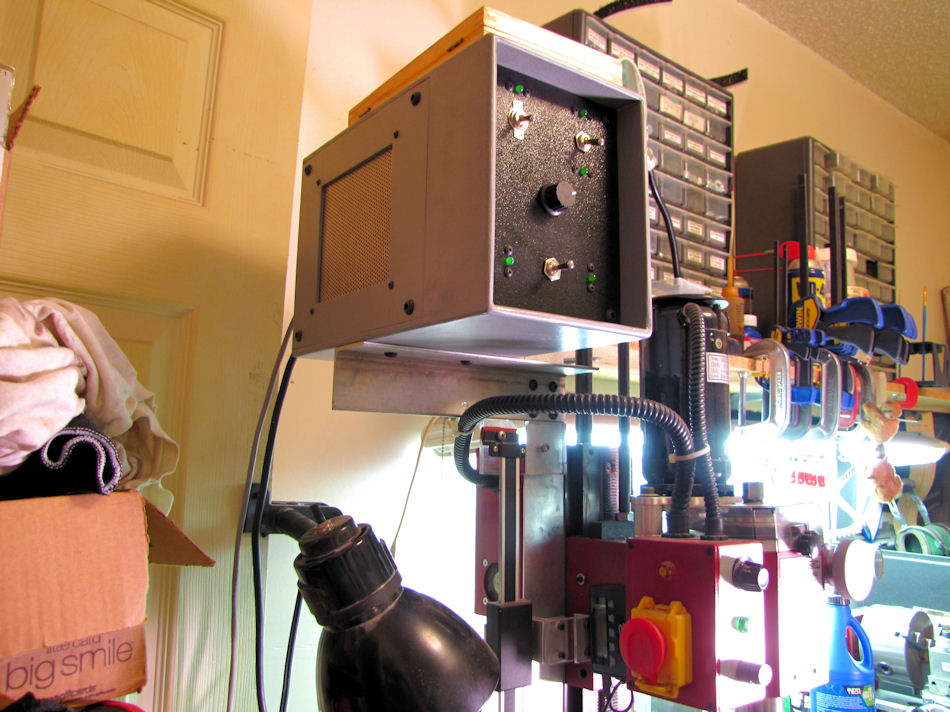
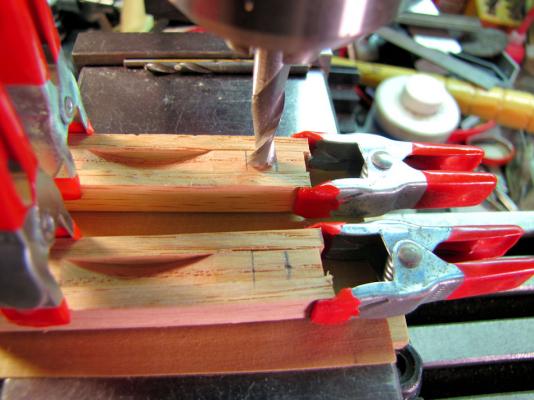
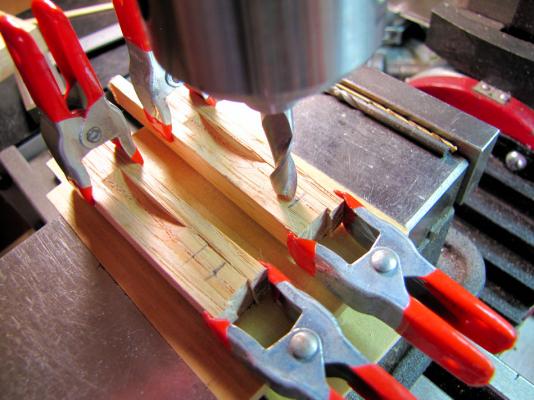
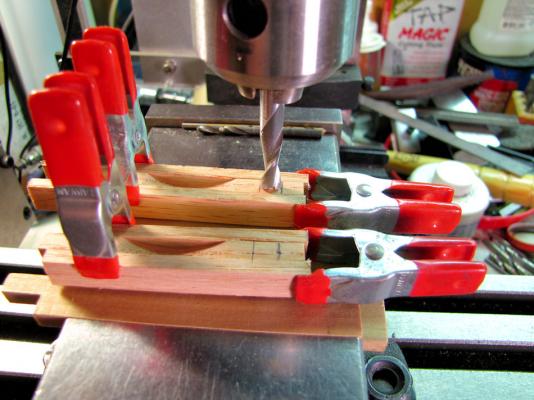
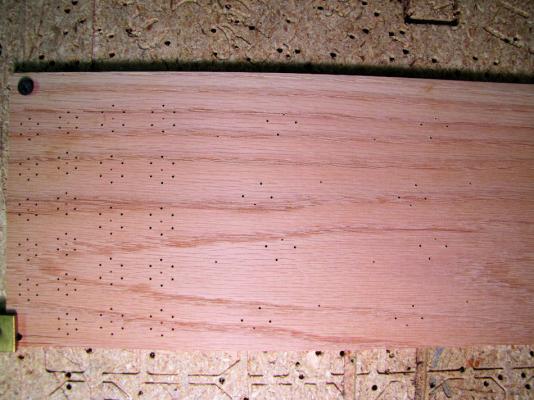
This is how I set up the carriage jig to cut the axiltree slots in the carriage side parts. Done using the manual controlled HF Mini-mill. The clamps hold scrap red oak so I don't have "tear outs" in my good parts as the 1/4" cutting bit chews thru the wood to make the slot.... And YES!!..... thats a home made 24VDC motor drive unit with speed & direction control on the left side of the X axis on the HF Mini-mill! Home made engage/dis-engage shifter lever on the front side, power control box mounted over head on top of Z axis. With that I can power the X-axis left or right from 0 to 20 IPM and NOT have to do any hand cranking of the X-axis!!! Really sweet setup when you need to get raw stock down to size and not wear out your arm cranking the table back and forth... LOL AL

-
Very nice Ray! AL
-
Outstanding detail work!!! AL
-
Piet........ Thank you!! I thoroughly enjoyed your post of the 019 submarine build, I need to finish reading it all. We share the same addictions it seems, machinery, planes, ships, subs!! I'm a self taught manual machinist, learned it over the years out of necessity to make a living with it plus I like doing it!!. Wasn't till about 8 years ago that I started learning the CNC side of things, still teaching myself and learning how to do it..... LOL I guess I like the challenges of it all and the feeling of creating with it as a hobby. But really, its just another tool to use in the shop, just got a few more buttons to push!! Stop by the shipyard any time for a visit I'll be here making wood chips and saw dust... LOL AL
-
Interesting video on U-tube of early Naval guns!! AL http://www.youtube.com/watch?v=S8dJJ1aPQiQ#t=2700
-
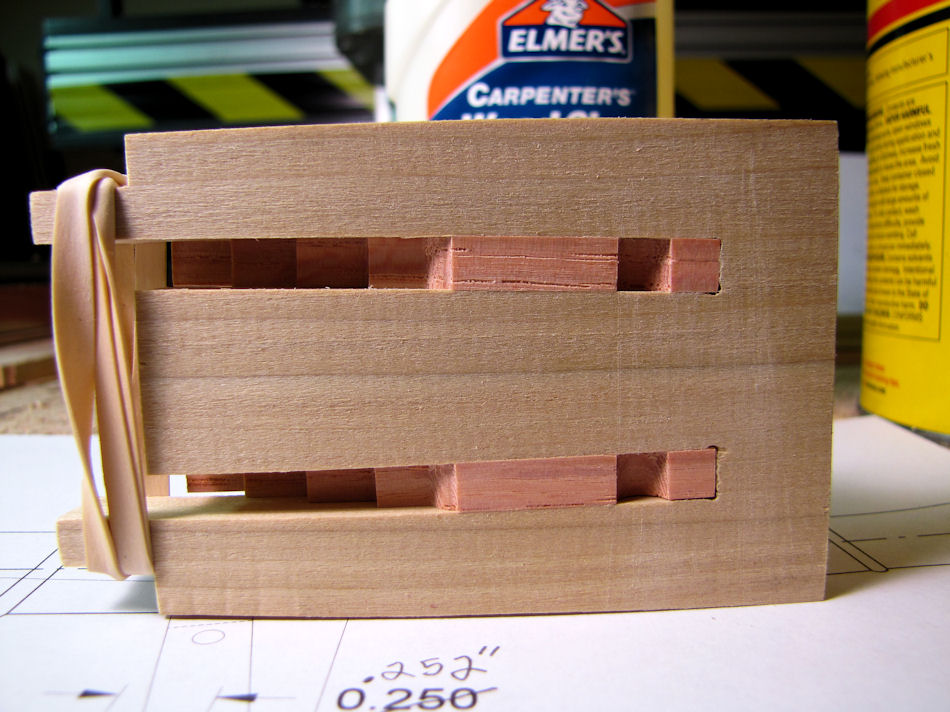
Thanks Tim!! Yes, it was just 1 rubber band that held the wood clamp tight. AL
-
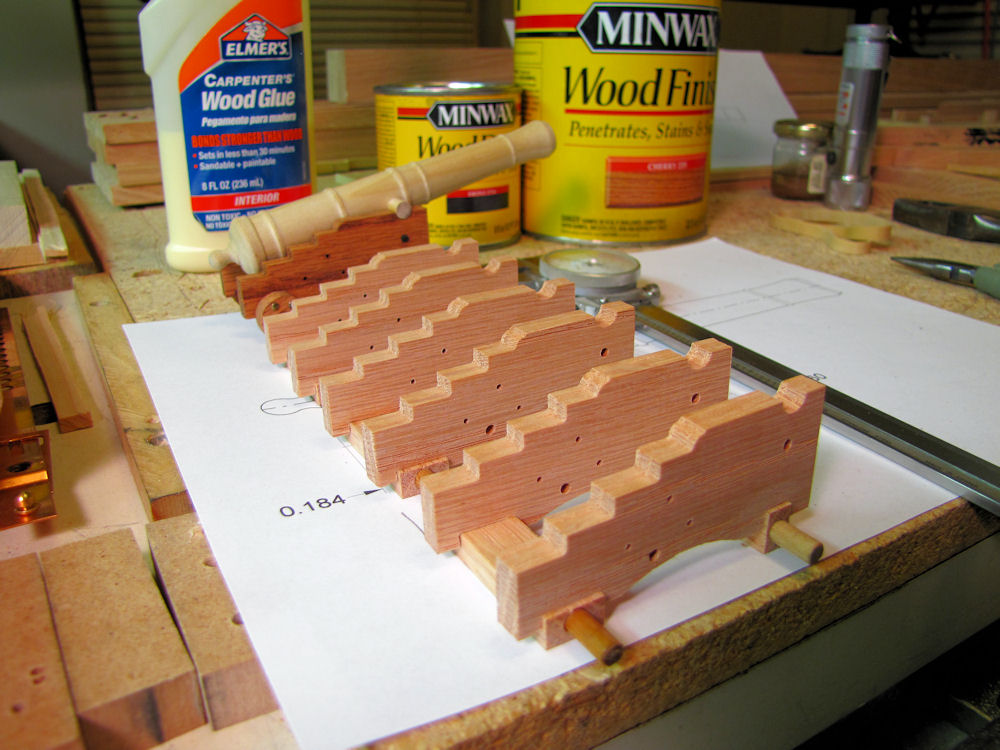
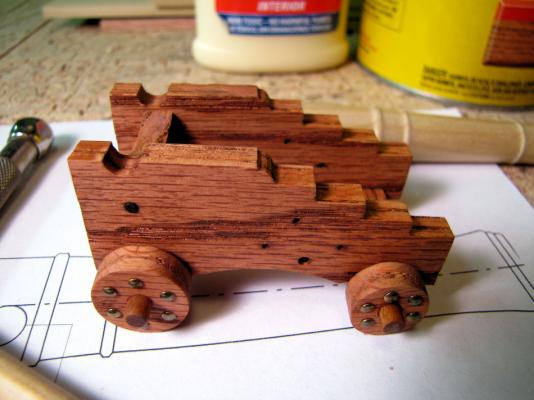
Got the first carriage stained and some more parts added!! Slowly getting there!! AL


-
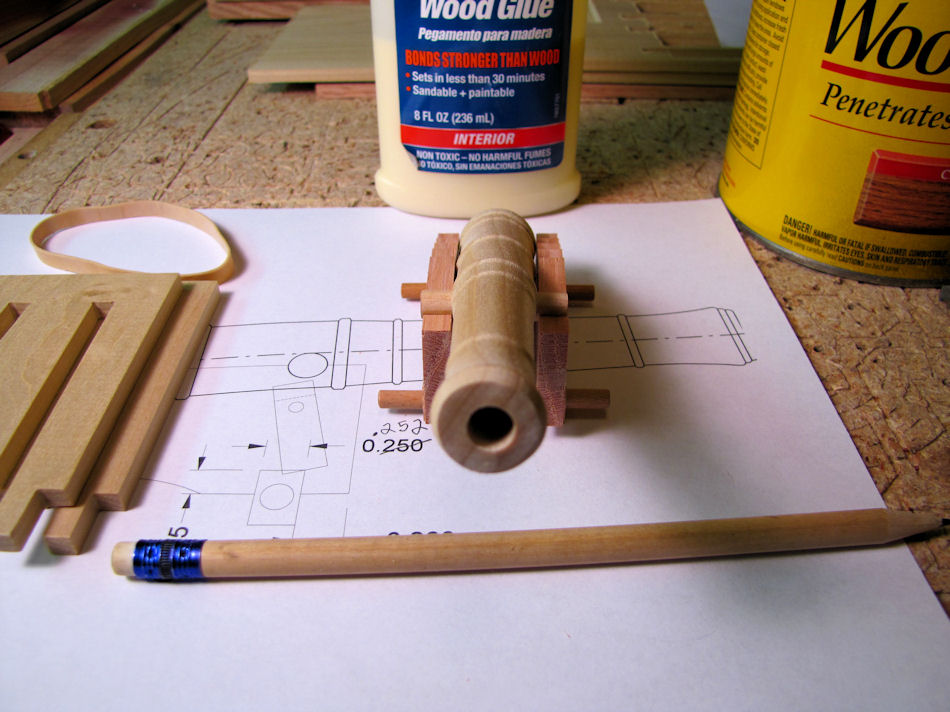
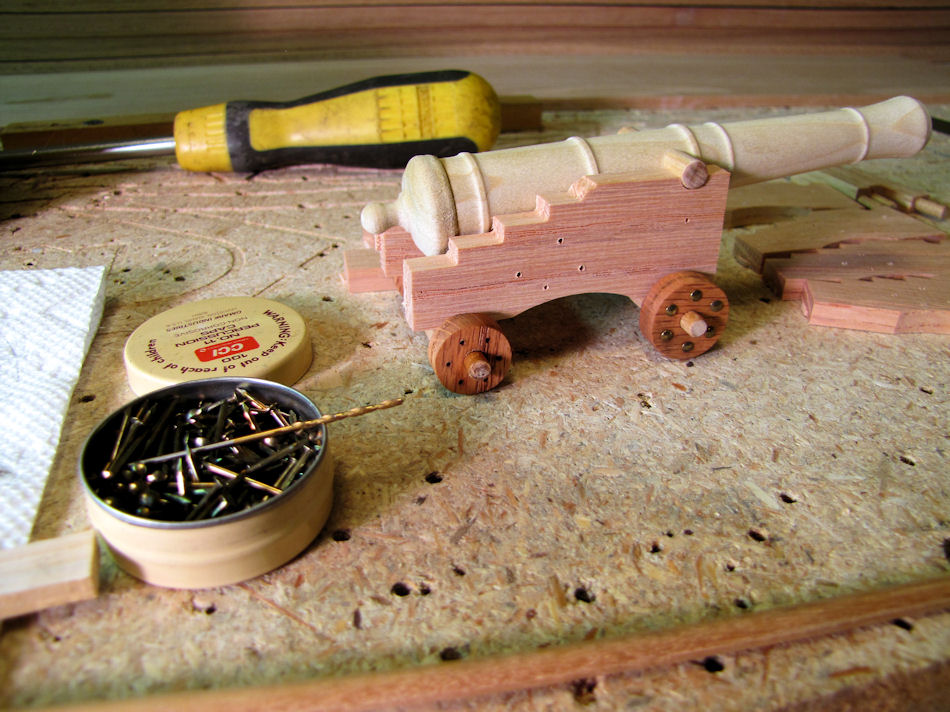
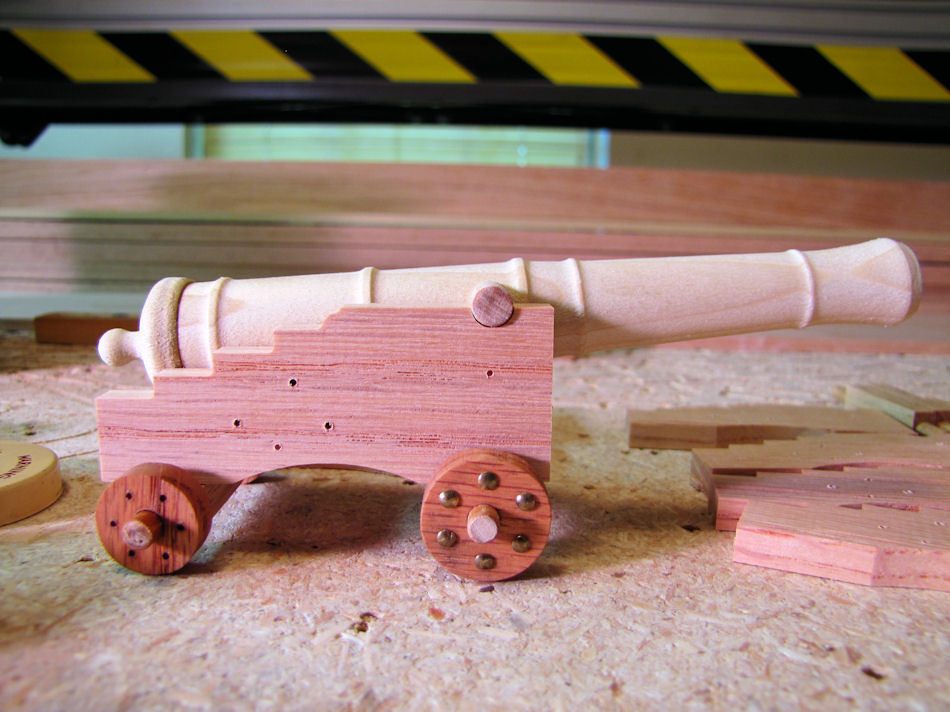
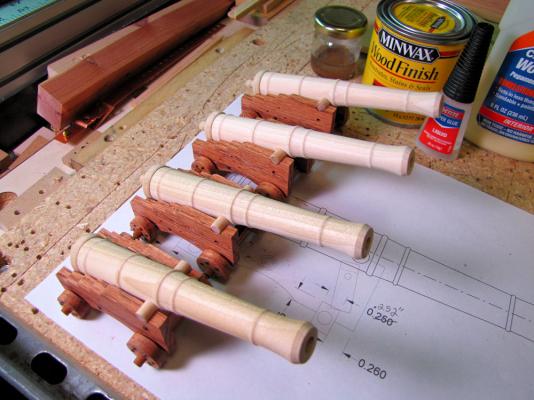
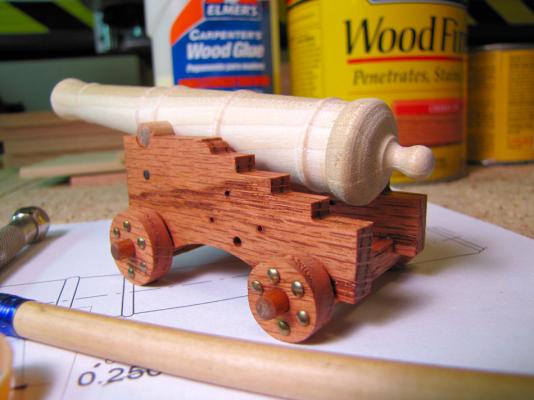
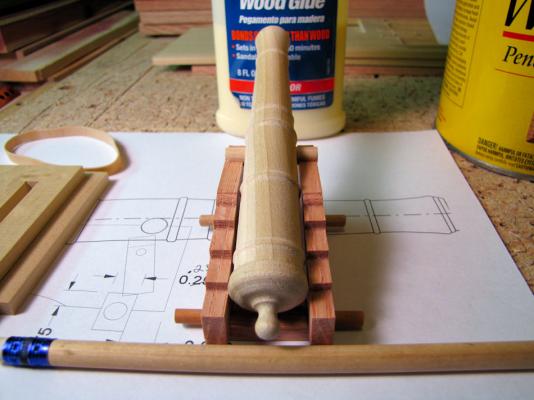
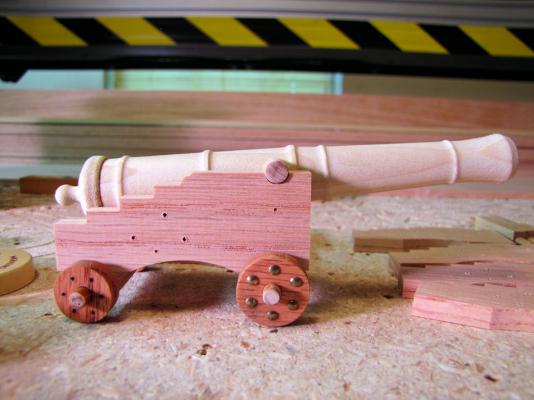
This is how the first cannon is looking so far!! The cannon barrel is not glued in, just laid in place to check fit. Still need to stain the carriage wood like I did the wheels. AL


-
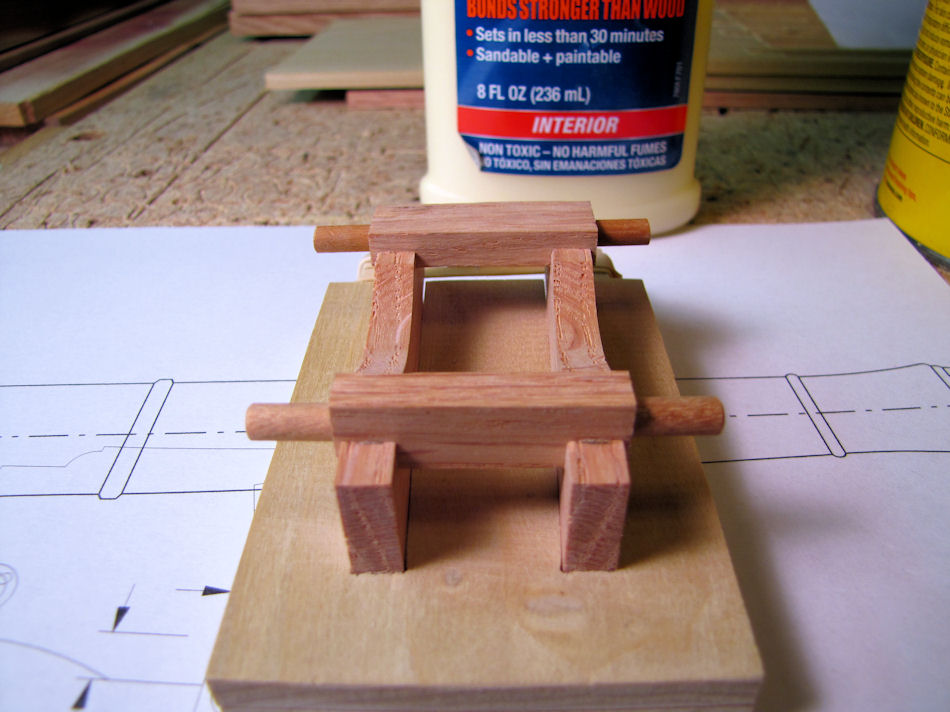
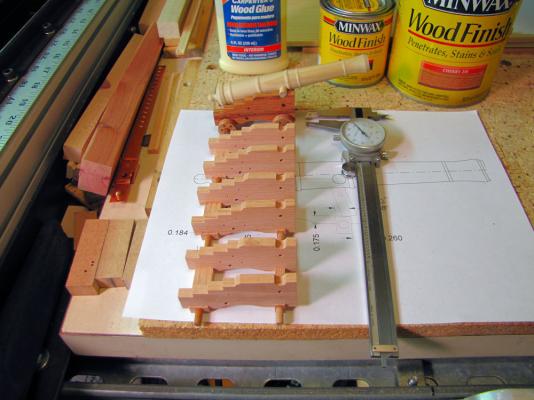
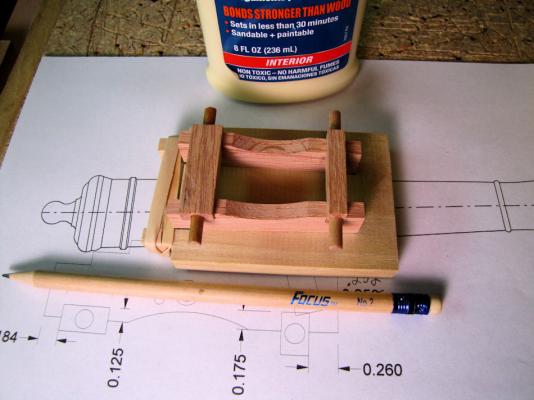
Kept thinking I needed to make a carriage jig to hold the carriage side at the proper angle for drilling holes and mounting the axiltrees..... so I made a simple and workable jig! Got the first carriage slots made for the axiltrees with it. AL


-
LOL..... Yeah buddy!!! I'm a "TOYS-R-US" kind of guy, always making toys it seems, your never to old to play!!!....LOL Our imagination is our only limitation!!! AL
-
Thanks Tim!, slowly getting there! Doing the stain on the wheels and some mock-up assembly just to see the over all look. Still need to slot the bottoms of the sides for the axiltrees to sit correctly. Pinning the wheels just to add some looks to em! AL

-
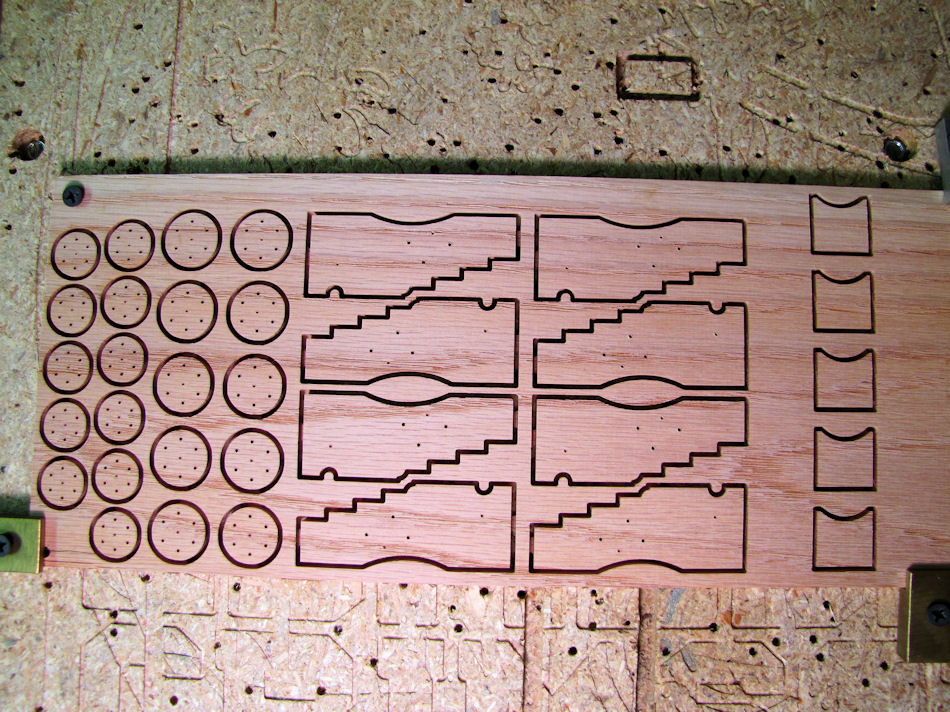
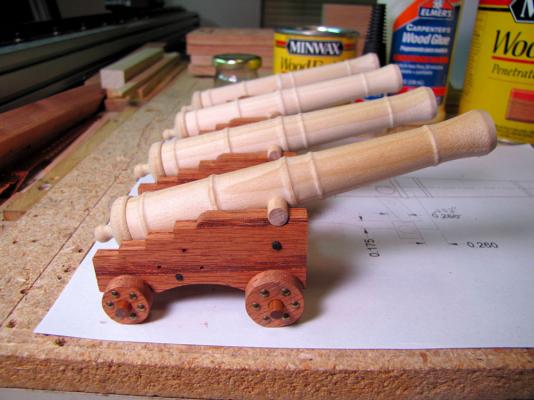
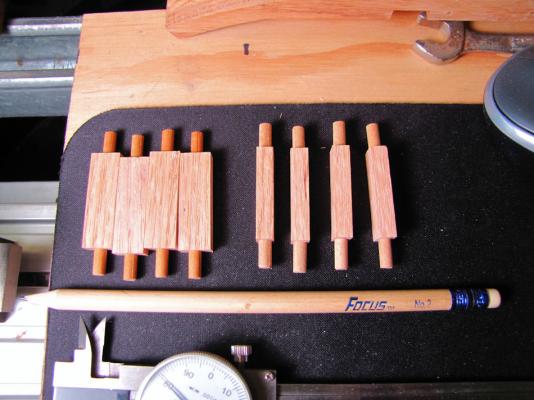
Some parts for the cannon carriages are cut. Made from 1/4" Red Oak. AL

-
Looking great Ray!......Someday..... I hope mine looks half as good as yours!! AL
-
Thanks Ray!!..... I got some things in mind already for the carriages...... AL
-
Thanks Tim! I hear you on the cash flow, same boat here! Thanks Wouter!! I'm giving it my best shot for my first ship build!! Still learning as I build each item. The front cannon Axletrees are done, next I'll do the wheels and sides on my CNC wood mill! AL

-
Thanks Tim!! And good luck with your CNC Mill, looking forward to you getting it up and running!! AL