.jpg.baa4e4cb90ff55d84dab632308826688.jpg)
Davemc
-
Posts
51 -
Joined
-
Last visited
Content Type
Profiles
Forums
Gallery
Events
Everything posted by Davemc
-
.thumb.jpg.31273b535b82e53d104538017f8a7b21.jpg) Hi am I correct in thinking that the Formast is supposed to be vertical and the Mizzen and Main at a slight angle?
Hi am I correct in thinking that the Formast is supposed to be vertical and the Mizzen and Main at a slight angle? -
Not perfect will need to tidy up a few things but making some progress
- 25 replies
-
- 6
-

-
- snake
- caldercraft
- (and 1 more)
-
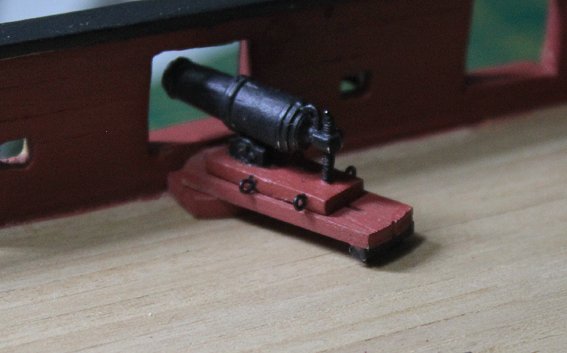
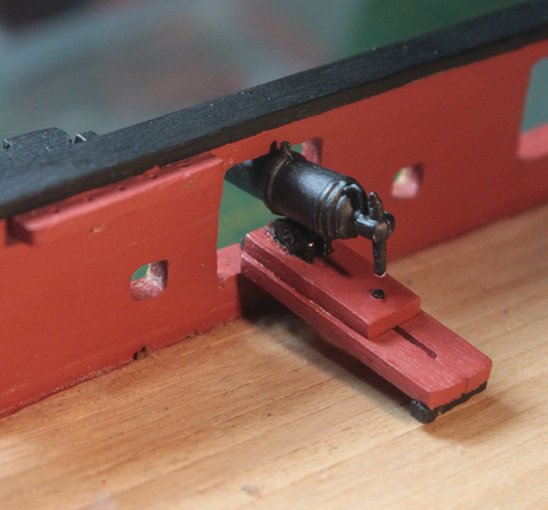
Problems solved, used a 0.9mm brass eyelet to attach the barrels to the carriage, and made a deck swivel from lime wood strip. Hopefully will look ok when rigged.
- 25 replies
-
- 2
-
-
- snake
- caldercraft
- (and 1 more)
-
Thanks again. I think I will do as you suggest and mount the guns to the deck, I have just experimented and can make an extension to the front of the carriage that looks similar to yours. Some home made eyelets also seem to be a good idea. Thanks for the help Dave
-
Thanks Glenn, I think I may need to remove the sills unless someone has a better suggestion. I bought the barrels, not a kit, to be honest the kit is out of my financial reach, I expected the eyelet to come with them, and then use the carriage that came with the Snake kit.
-
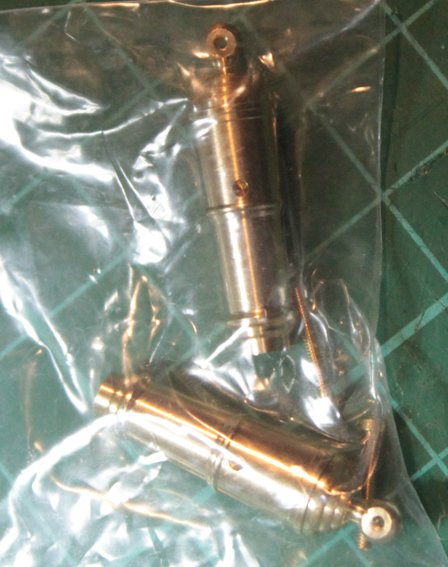
Two problems the carronades when assembled foul the top of the gun port. I bought brass carronade barralls from Caldercraft but they don't come with any method to attach to the bed only have a small hole in the base. Photos attached. Suggestions please
-
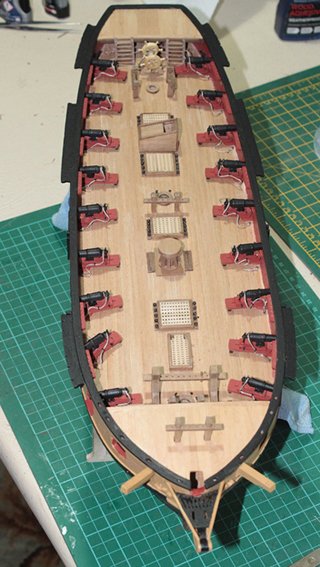
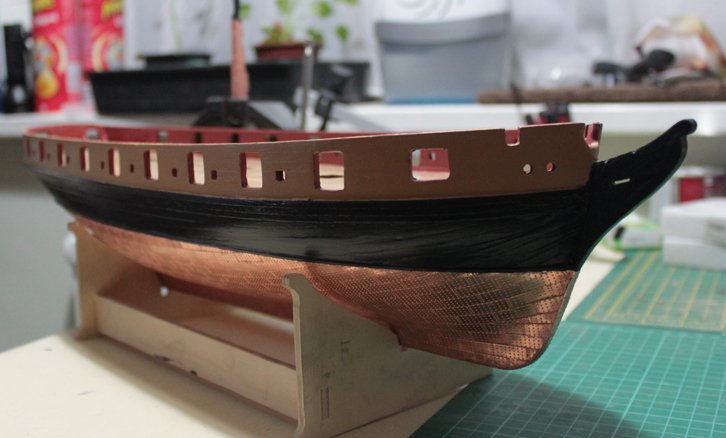
Back after a long break! Partly enforced due to eye ops, but also made a mess of the deck planking so decided to start again from scratch. Deck planking and copper on the hull completed.
- 25 replies
-
- 7
-
-
- snake
- caldercraft
- (and 1 more)
-
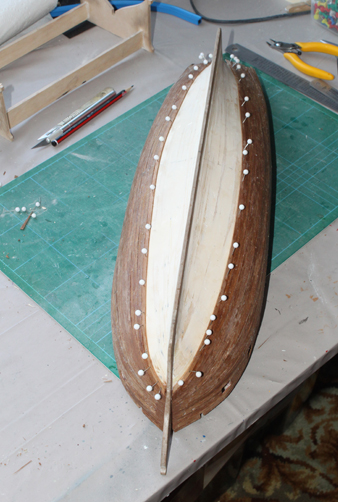
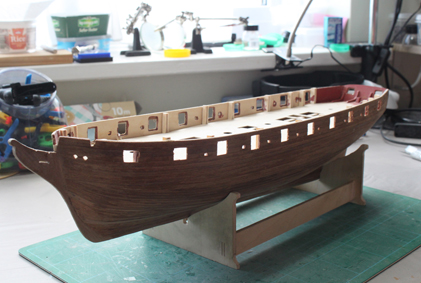
Completed the second planking. I now need to trim the gun-ports etc before sanding down and trimming the bow and stern planks
- 25 replies
-
- 6
-
-
- snake
- caldercraft
- (and 1 more)
-
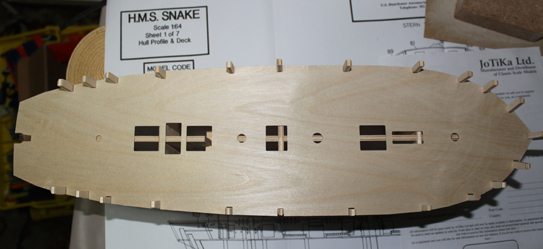
I have started to build HMS Snake the initial stages have been completed, first planking etc, the only point of interest maybe that i used "wood filler" to fill between the bow bulkheads then sanded to shape to help the first planking of the hull.
- 25 replies
-
- 1
-
-
- snake
- caldercraft
- (and 1 more)
-
made a hook on the ends to go around the futtock staves
- 1,144 replies
-
- 1
-
-
- snake
- caldercraft
- (and 1 more)
-
had a similar problem, i ended up using stretched 0.8mm brass wire for catharpins, fitted after placing the topgallant masts Dave
- 1,144 replies
-
- 1
-
-
- snake
- caldercraft
- (and 1 more)
-
Thanks Stergios Merry Christmas
-
Sorry I was not clear, on the cruiser just the left and right stern most shroud on each mast, I do not know the technical terms! Petersson page 42 shows a slightly different arrangement
- 1,144 replies
-
- 1
-
-
- snake
- caldercraft
- (and 1 more)
-
The cleats were not required on all shrouds on the Cruiser they were only needed on the rear most shrouds as in your picture. Dave
-
No .7mm wire in the kit but I bought some 0.8mm via the internet then "drew" it through a vice to straighten and stiffen it (it came in a coil) Dave
- 1,144 replies
-
- 1
-
-
- snake
- caldercraft
- (and 1 more)
-
hi, I have been working on the Cruiser model on and off for nearly three years! Yes it is now complete and installed on its base. I tried to post an image but not successful, I will try to put one in the Gallery area. best wishes Dave
- 1,144 replies
-
- 1
-
-
- snake
- caldercraft
- (and 1 more)
-
To answer my own question, and thanks Mort for your input. I started with the lower fore yards working up and worked towards the stern, I had already positioned the Stays, if I was doing it again I would leave the stays until the yards were positioned. Once that Gaff and driver booms were completed and rigged I went back to the bow and completed the bowsprit and spiritsail yard. Apart from a few adjustments and positioning of anchors I believe I will have completed the model. Next job will be to add a captain and perhaps a few crew and a ships boat. Thanks to all who have helped with their pictures etc
-
I thought I would be able to add an image to show my progress so far but not successful, I have also completed the Ratlines, and yards, but not added the yards yet Dave
-
Hi I am building HMS Cruiser and your help and that of Beef Wellington has been invaluable, thank you. I have built the masts and am ready to start the rigging but I have found the instructions not at all helpful, where should I start, I guess from the stern? Should I fit the stunsail boom first? Thanks
- 1,144 replies
-
- 1
-
-
- snake
- caldercraft
- (and 1 more)