.jpg.baa4e4cb90ff55d84dab632308826688.jpg)
Davemc
-
Posts
51 -
Joined
-
Last visited
Recent Profile Visitors


-
 Eindride reacted to a post in a topic:
Oseberg by Davemc - Billing Boats
Eindride reacted to a post in a topic:
Oseberg by Davemc - Billing Boats
-
mtbediz reacted to a post in a topic:
HMS Snake by Davemc - FINISHED - Caldercraft - 1/64
-
mtbediz reacted to a post in a topic:
HMS Snake by Davemc - FINISHED - Caldercraft - 1/64
-
GrandpaPhil reacted to a post in a topic:
HMS Snake by Davemc - FINISHED - Caldercraft - 1/64
-
GrandpaPhil reacted to a post in a topic:
HMS Snake by Davemc - FINISHED - Caldercraft - 1/64
-
GrandpaPhil reacted to a post in a topic:
HMS Snake by Davemc - FINISHED - Caldercraft - 1/64
-
GrandpaPhil reacted to a post in a topic:
HMS Snake by Davemc - FINISHED - Caldercraft - 1/64
-
.thumb.jpg.31273b535b82e53d104538017f8a7b21.jpg)
Oseberg by Davemc - Billing Boats
Davemc replied to Davemc's topic in - Kit subjects built Up to and including 1500 AD
thanks -
J11 reacted to a post in a topic:
Oseberg by Davemc - Billing Boats
-
J11 reacted to a post in a topic:
Oseberg by Davemc - Billing Boats
-
Oseberg by Davemc - Billing Boats
Davemc replied to Davemc's topic in - Kit subjects built Up to and including 1500 AD
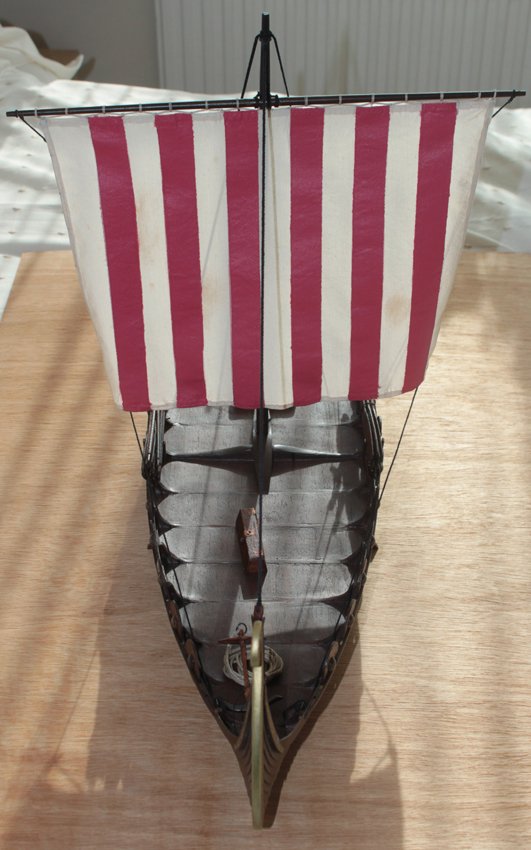
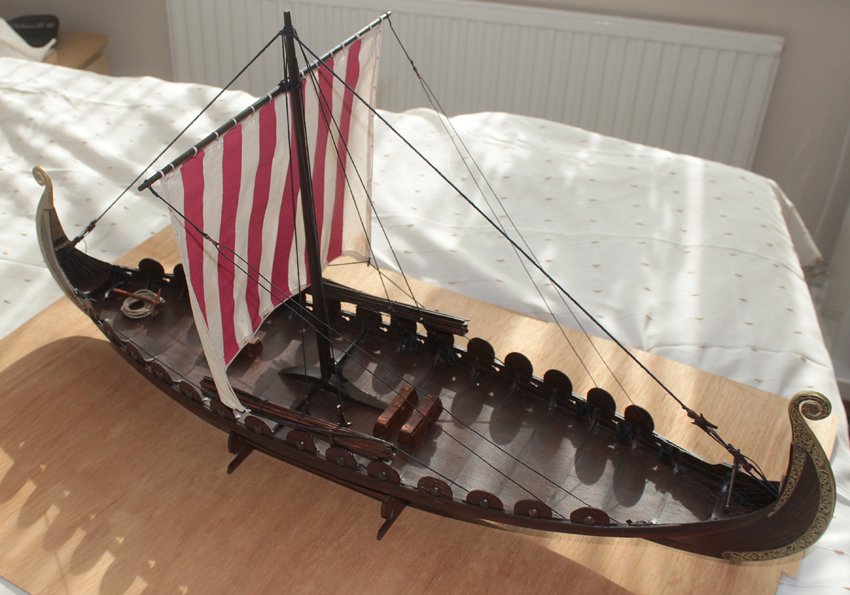
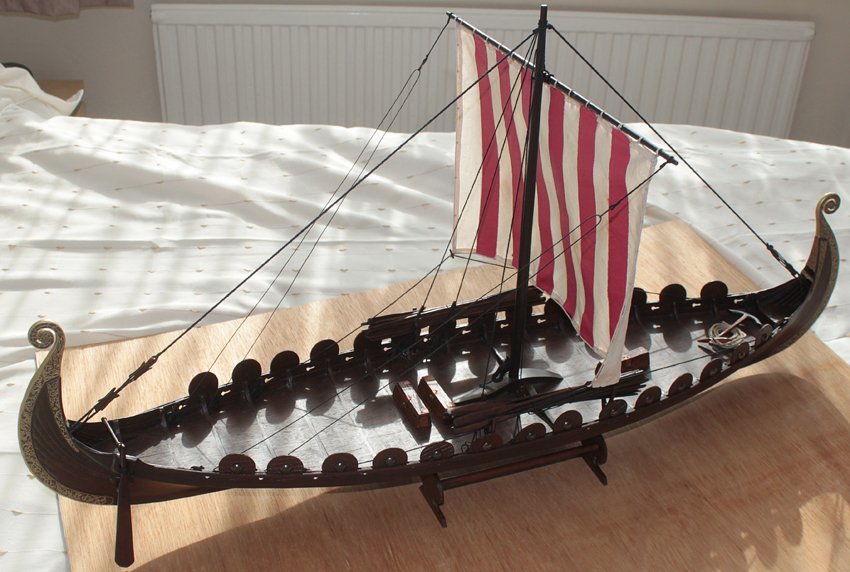
Completed this ship pictures attached, although they are not particularly good.
-
Oseberg by Davemc - Billing Boats
Davemc replied to Davemc's topic in - Kit subjects built Up to and including 1500 AD
Sides just about completed, now the decision as to how to work the bow & stern. I think it will be trial and hopefully not too much error, I intend taking down the layers of ply on the boat itself rather than the scroll work, but the final decision will have to wait until I have completed the removal of the first layer. -
Oseberg by Davemc - Billing Boats
Davemc replied to Davemc's topic in - Kit subjects built Up to and including 1500 AD
Completed the lower hull, now to start fitting the side pieces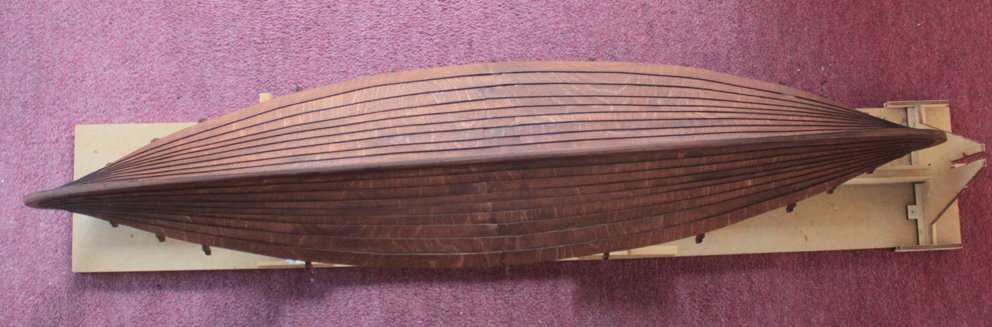
-
Oseberg by Davemc - Billing Boats
Davemc replied to Davemc's topic in - Kit subjects built Up to and including 1500 AD
I gather that I will have to drill the oar holes in the top plank using the plans as a template, any hints on doing this without causing damage would be appreciated! -
Oseberg by Davemc - Billing Boats
Davemc replied to Davemc's topic in - Kit subjects built Up to and including 1500 AD
Keel & Frames in position 5 & 6 glued
-
Oseberg by Davemc - Billing Boats
Davemc replied to Davemc's topic in - Kit subjects built Up to and including 1500 AD
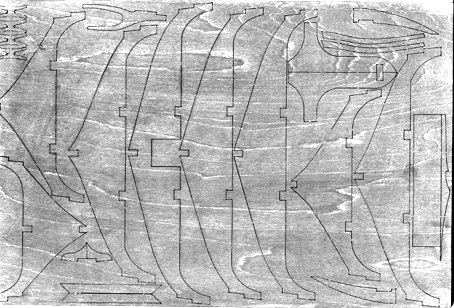
Attached is the diagram in the Oseberg manual, which I found different from the materials supplied, two separate pieces arranged in a different way, fortunately I soon realised the symmetry of the construction and was easily able to work out the position of each frame.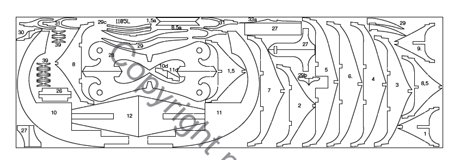
-
Oseberg by Davemc - Billing Boats
Davemc replied to Davemc's topic in - Kit subjects built Up to and including 1500 AD
Thanks Michael Dave -
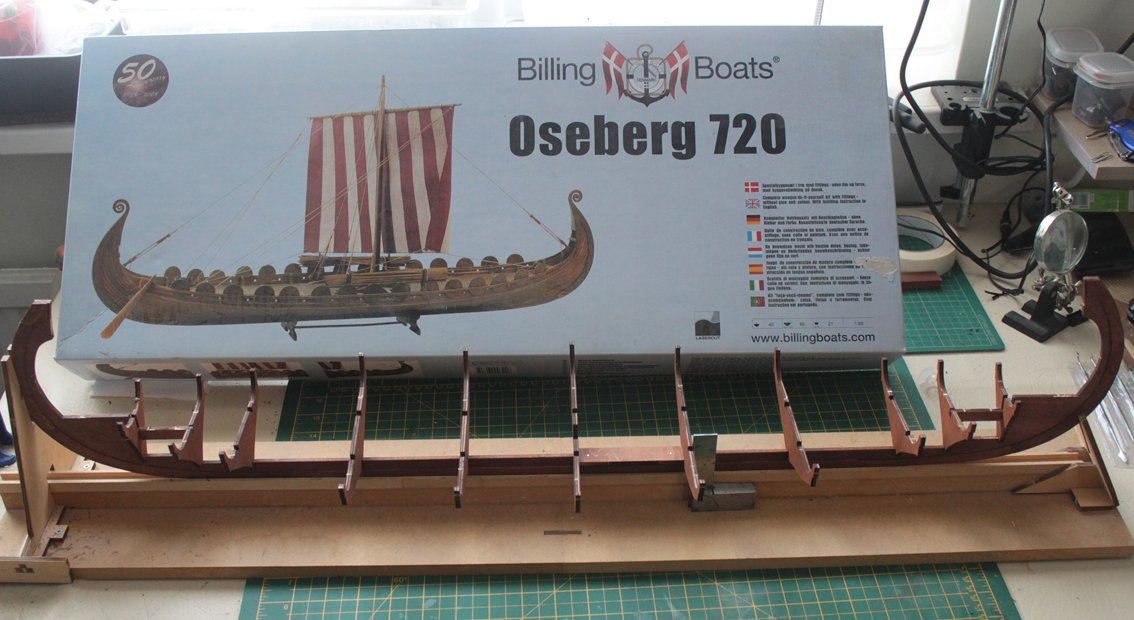
Having completed HMS Cruiser and HMS Snake I decided I needed a break from Rigging😕 and having seen Jack P's build log I have decided to try the Oseberg. After an initial confusion at finding that the laser cut frames were arranged in a different pattern to the diagram in the plans I have set to it and started the keel. I have decided to stain the wood dark mahogany and have stained the frame and planks with two initial coats. I have mahogany veneer to cover exposed plywood edges, but otherwise will be using the wood supplied Photos to follow
-
Sorted keel started
-
Thanks but it does not match the laser cut parts in the two pieces I have
-
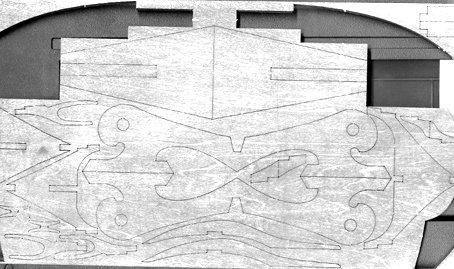
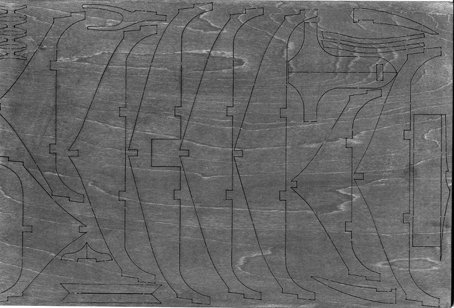
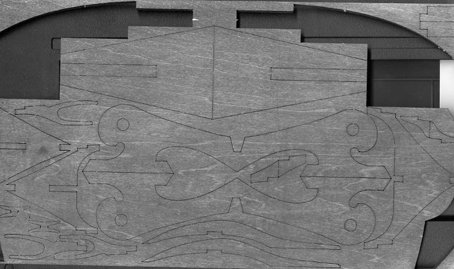
Hi saw your log and the great results and decided to try my hand at building the Oseberg, unfortunately the plans do not correspond with the laser cut frames! I have attached images of the laser cut wood. If anyone can help with the numbering I would be grateful. Dave
-
HMS Snake by drtrap - Caldercraft
Davemc replied to drtrap's topic in - Kit build logs for subjects built from 1751 - 1800
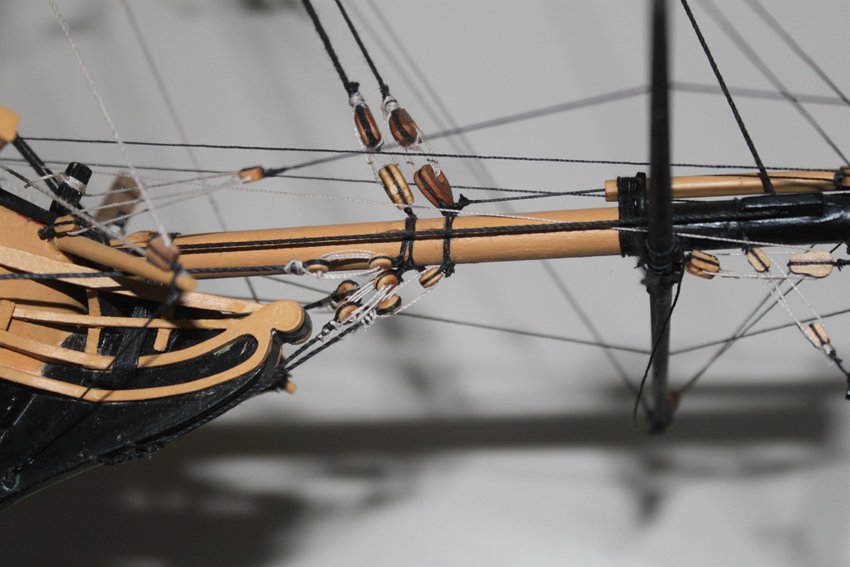
I cannot remember if the numbers on the plan were correct or not but I soon learned not to seal and trim the lines as after all were fitted I had to go around and re-tension a number of them. Dave -
HMS Snake by drtrap - Caldercraft
Davemc replied to drtrap's topic in - Kit build logs for subjects built from 1751 - 1800
Sorry beyond my knowledge and skill level Dave -
HMS Snake by drtrap - Caldercraft
Davemc replied to drtrap's topic in - Kit build logs for subjects built from 1751 - 1800
the attached should answer your question