HOLIDAY DONATION DRIVE - SUPPORT MSW - DO YOUR PART TO KEEP THIS GREAT FORUM GOING! (Only 72 donations so far out of 49,000 members - Can we at least get 100? C'mon guys!)
×


preservedkillick
-
Posts
45 -
Joined
-
Last visited
Content Type
Profiles
Forums
Gallery
Events
Everything posted by preservedkillick
-
 Hi (again) Bob Looking more carefully at your (really nice!) photos and reading your log more carefully, I can see that you shaped both the mainmast and the bib/side fishes so that the overall assembly ends up pretty much round, allowing the kit wingsail gaff jaws to fit. Of course none of this shaping is called for in the jotika instructions, or really indicated in AOTS, so I made no attempt to do it - just glued the kit bibs either side of the circular lower mainmast, ending up with something quite square. I can't do anything about the mast at this point, so I guess I'll try to open out the kit jaws, or if necessary scratch some more "open" ones that will fit my mast. Sometimes experience is far superior to just following the instructions ! Onwards and (at worst) sideways !
 -
Hi Bob Sorry, I meant the side fishes, which extend over halfway down each side of the mainmast. I can't make the gaff jaws anywhere near fit around these Alan
-
Hi Bob Thanks so much for the prompt reply - I think I'll end up adding vangs for sure. One more related question if I may... You say in the log that you used the kit "jaws" for the wing sail gaff, but they don't seem to fit at all well, because the mainmast is pretty much square-section at that point (because of the cheeks fitted either side). Am I missing something ? Alan
-
Hi Bob What a beautiful Granado you've created ! I've a small problem with mine - hope you don't mind me asking so long after the event..... (and apologies if the answer is in your log somewhere - I've not read it all) The problem is the vangs on the wingsail gaff - none of the Jotika docs refer to these, nor does my copy of "Anatomy of the Ship", but I notice you've fitted them. Fitting vangs seems essential, otherwise there's no tension on the lifts. What did you base fitting these on ? And where did you belay the falls to ? Thanks Alan
-
Hi Jack The pit surrounds are of course really, REALLY securely glued in place (things always attach particularly well when you subsequently decide you need to remove them!) - not sure how much damage I might do getting them out - probably damage/destroy the base and /or other side components as well, also three weeks is about par for Jot once you get their attention IME. The add-ons sure are fiddly, but perfectly doable, given they're out of sight
-
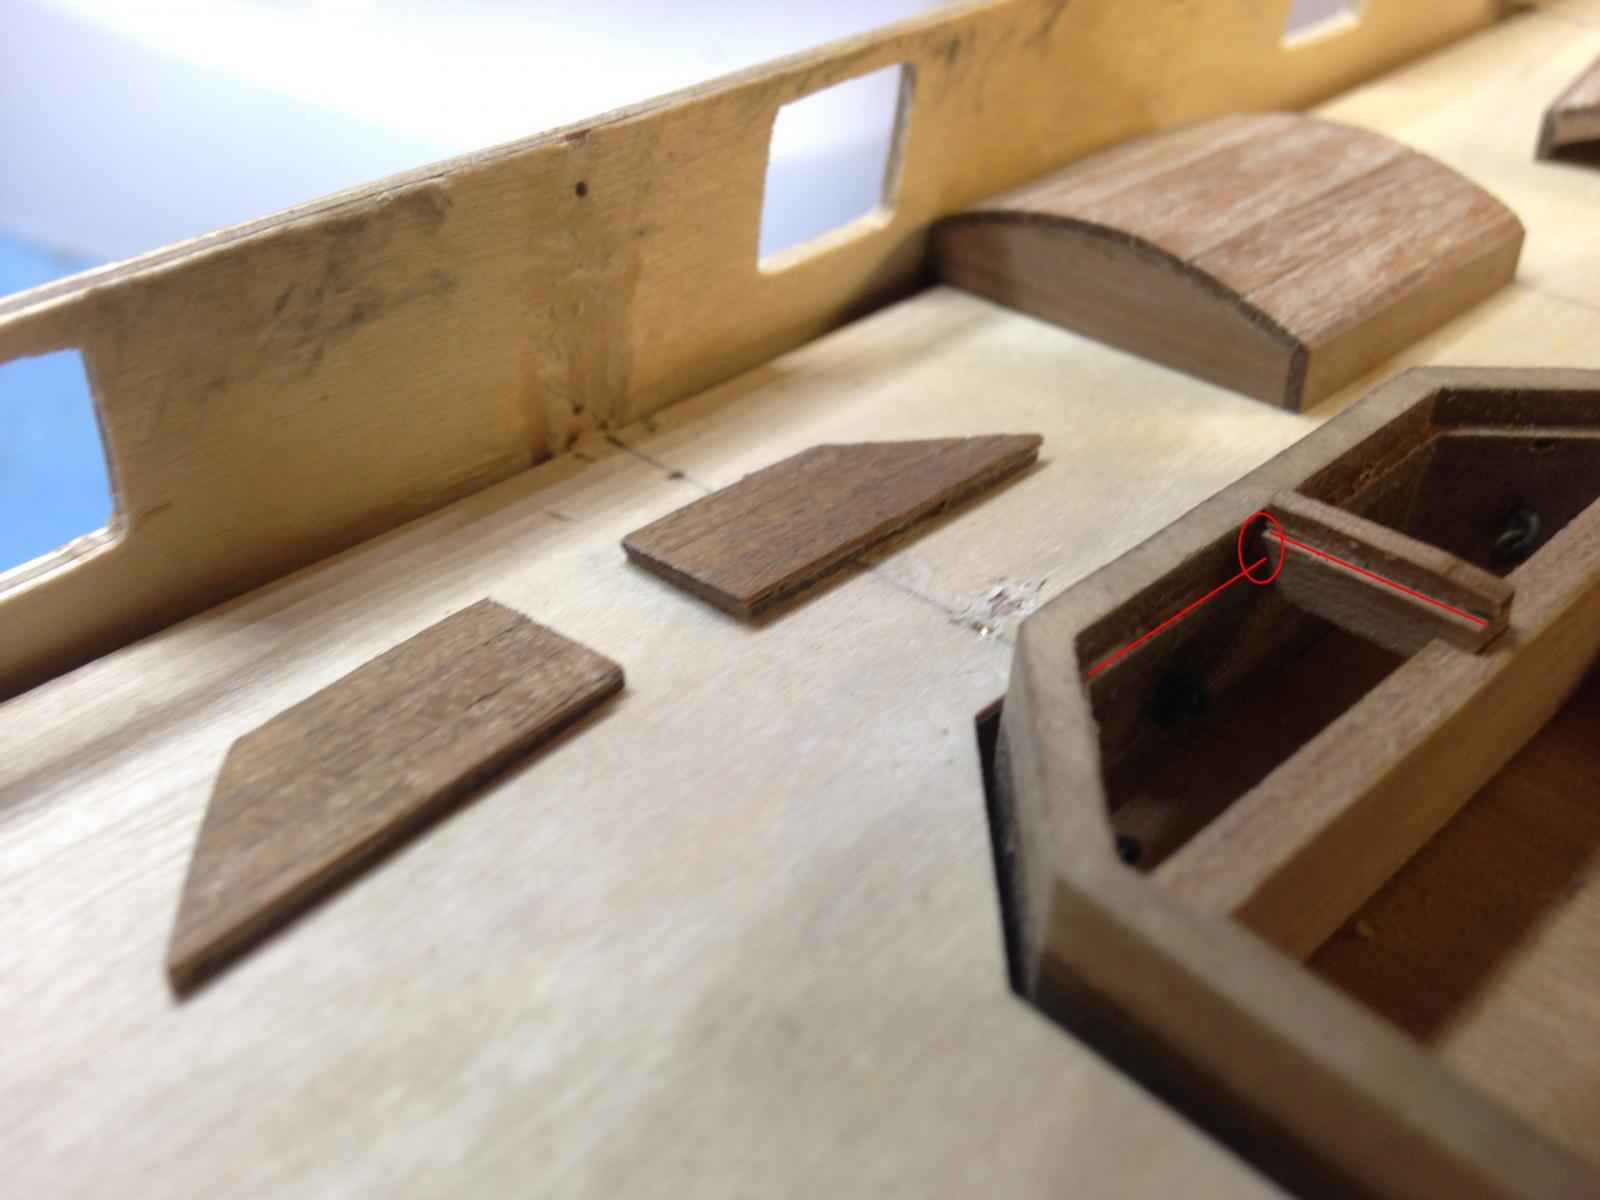
Best solution appears to be small pieces of 1 x 1 on the back of the side covers where they sit on the offending rebates - allows the cover to sit perfectly flush and doesn't mar the pit surround, at least one of which I'll leave visible (not sure yet how to display the mortars yet). If I need demounted side covers on show, I can easily build more without the add-ons. Hope the CNC depth didn't go awry on anything else !
-
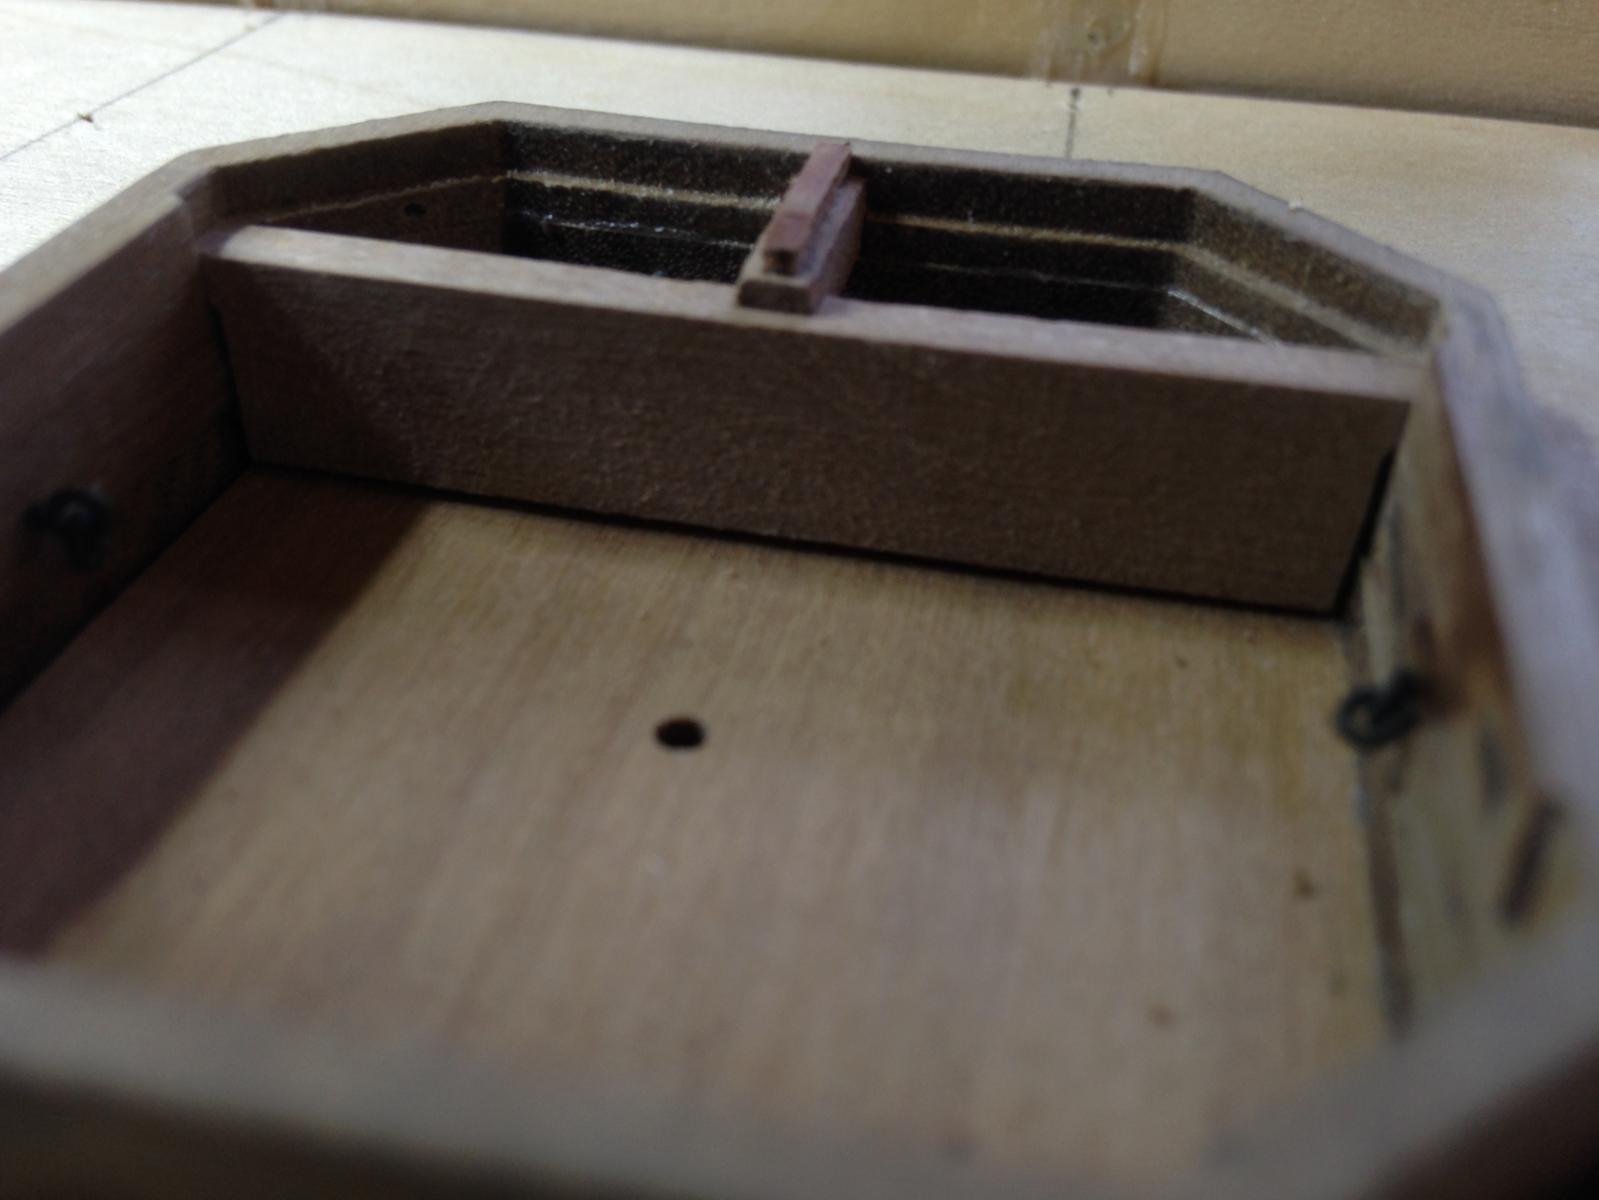
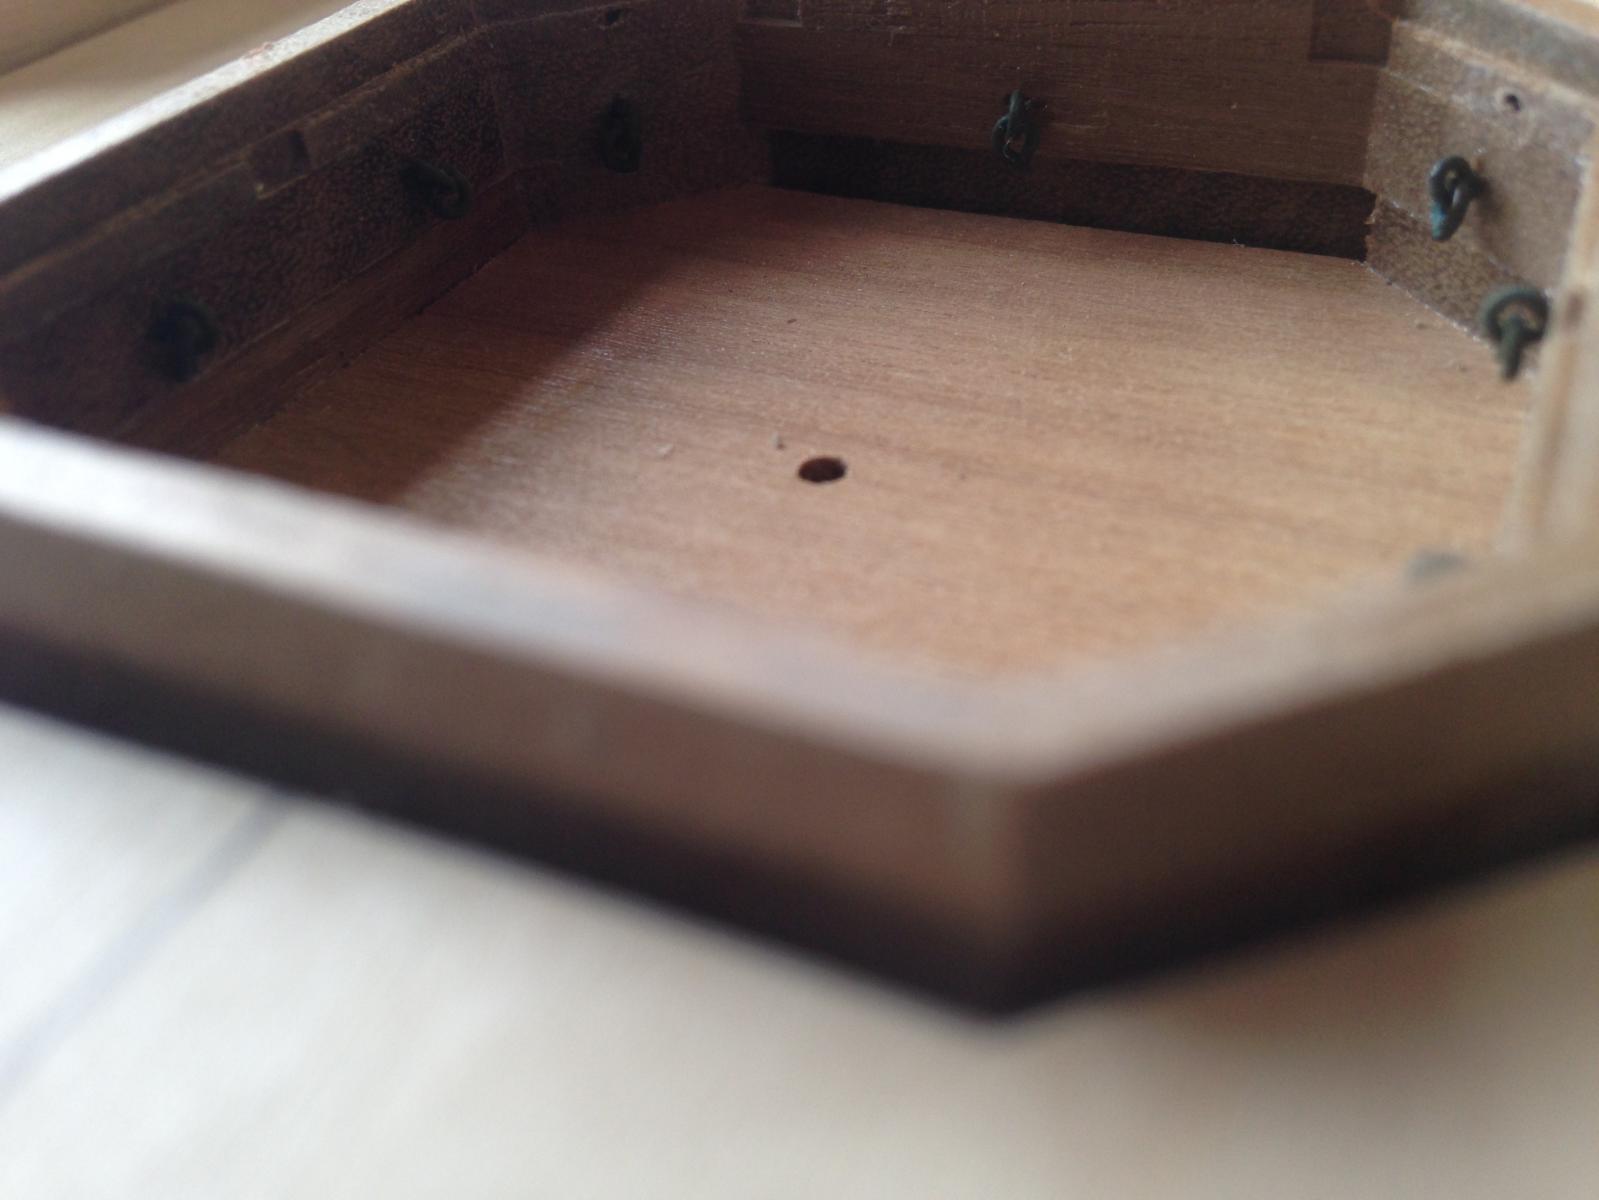
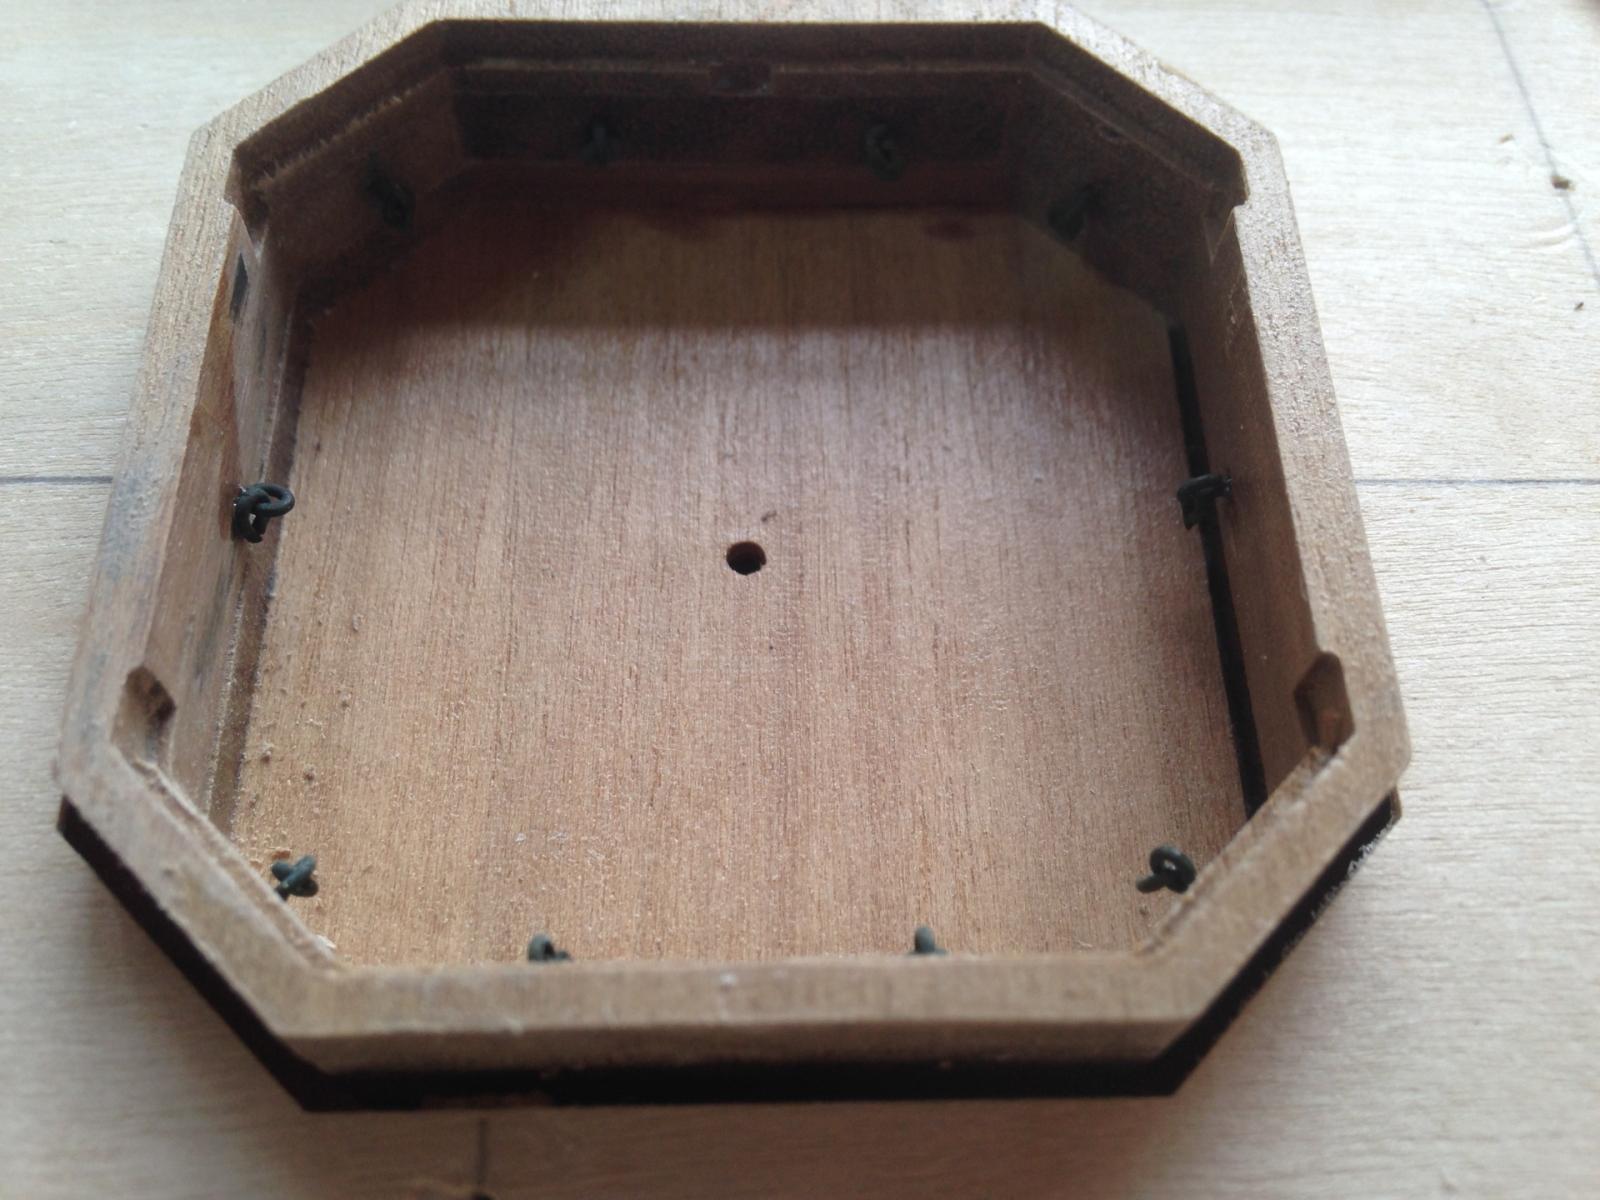
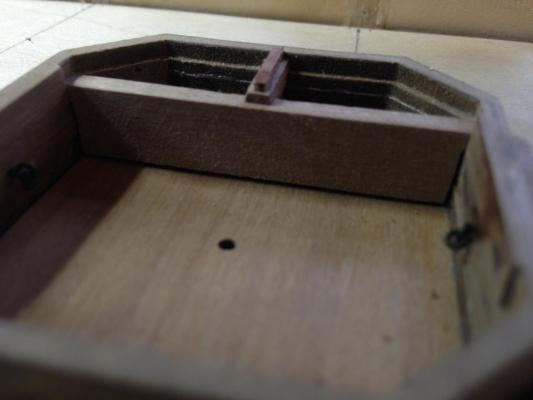
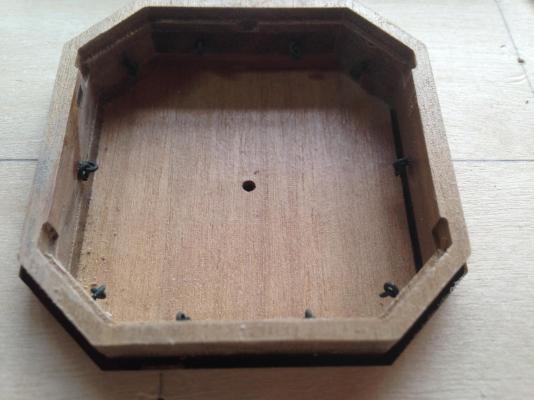
Looks to me like the rebate on (all) the mortar housings is about 1mm too low - should be 1mm from the top edge - mine are clearly at least 2mm. Found a build photo on the Jot site that clearly shows the rebate higher on their parts You can see (I hope) that the rebate is below halfway on mine (top photo) and above it on Jot's (bottom) Have to scratch my head over the best way to fix this - don't fancy trying to build up those tiny rebates by 1mm..

-
Hmm, here's a thing.... The top of the lower 3* 3 part of the removable strongback isn't flush with the rebate on the inside of the mortar housing, so the side covers can't sit horizontal and aren't properly supported. AOTS clearly shows this rebate at exactly the same level all around the side cover, as one would expect. What have I done wrong.......

-
Completed the first sliding canopy-half (bar the ring-bolts). Seems to be slight disagreement over whether the side planks go under the roof planks or butt alongside them - plan shows the former, and the manual the latter. Not helped by fact that the "1 * 5" strip supplied turned out to be 1 * 4, causing further confusion. Eventually sided with manual and went for "alongside" (and raided stash for some actual 1 * 5). Result looks pretty good (IMHO) - hope I can replicate it three more times. Need to be careful to check that the two halves will actually meet in the middle (sounds obvious, but....)
-
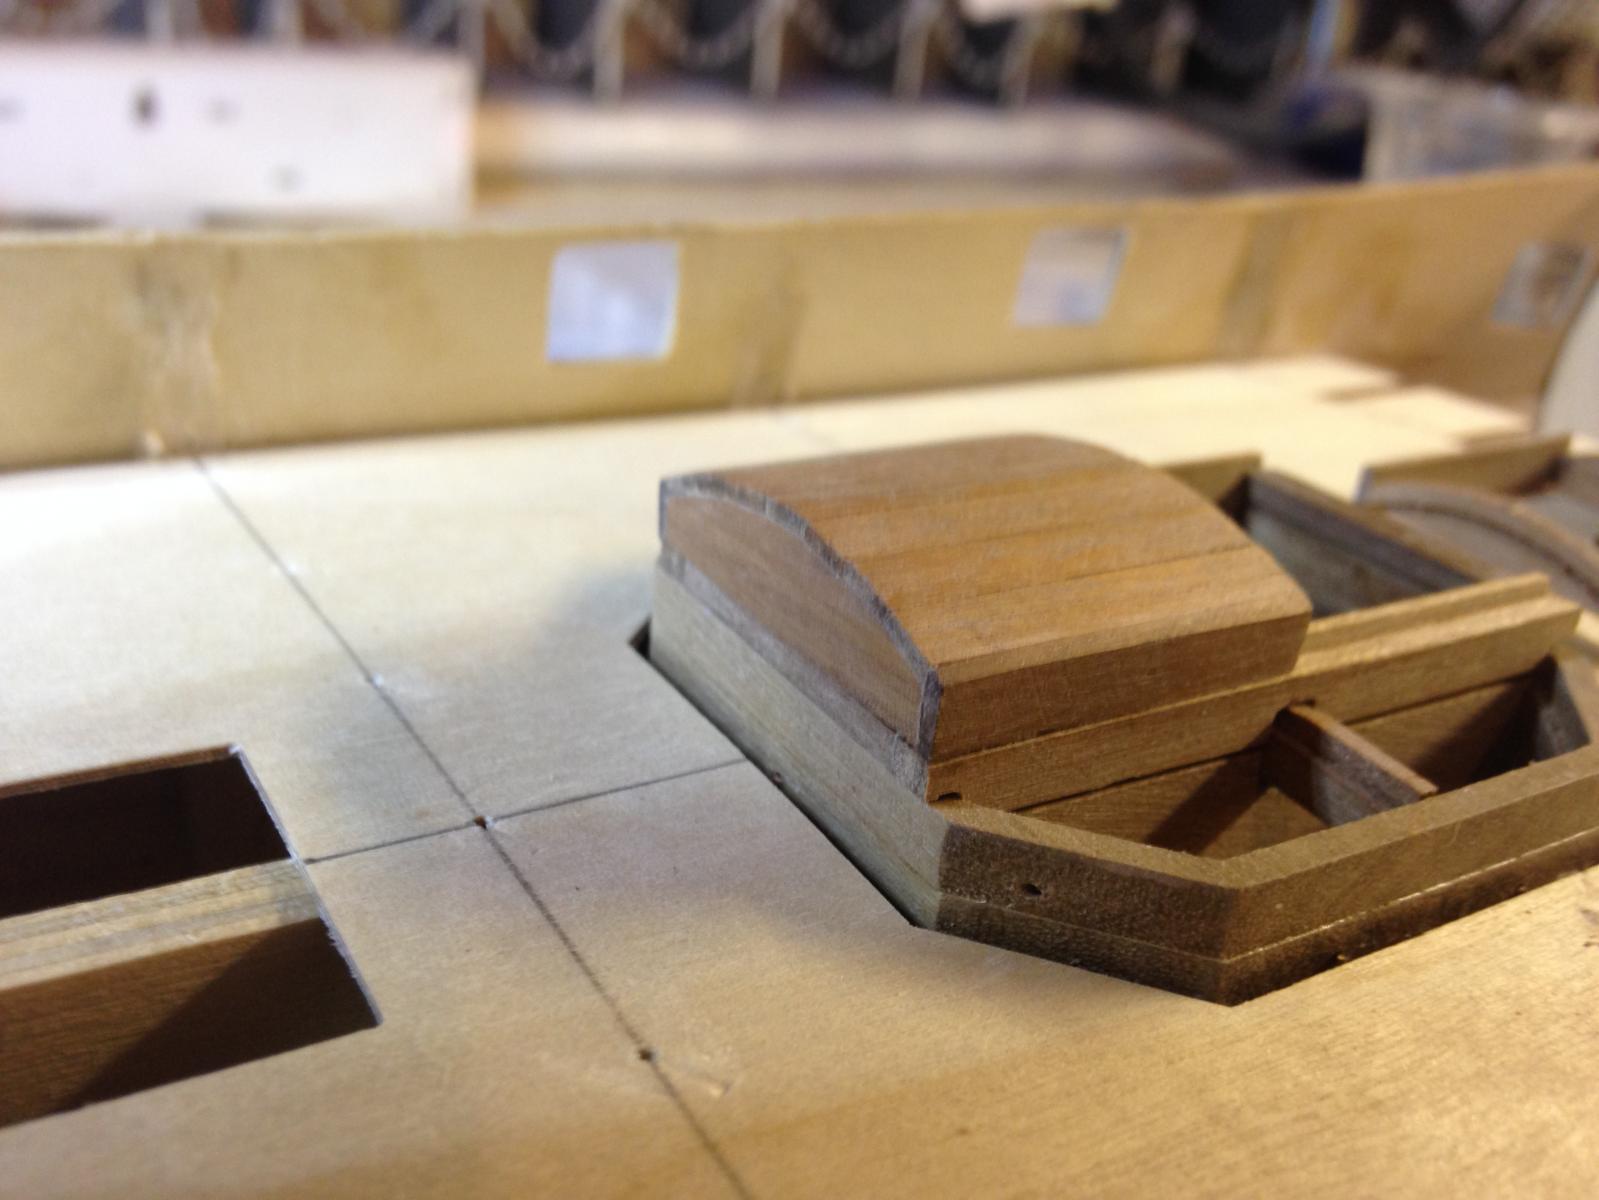
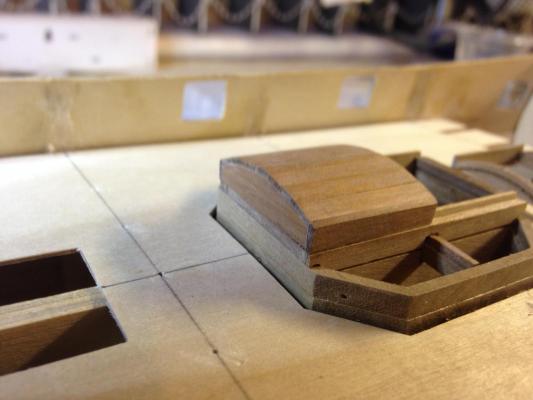
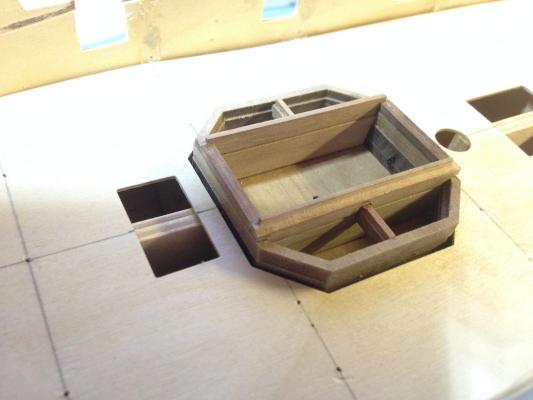
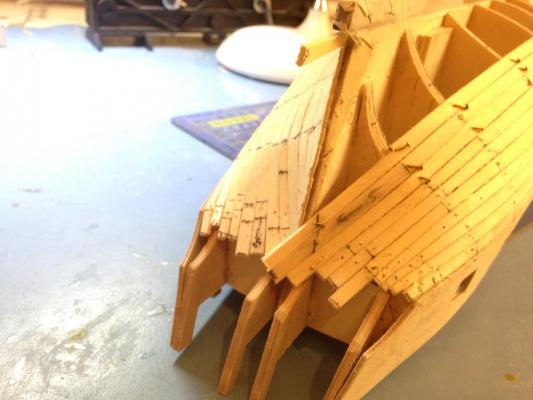
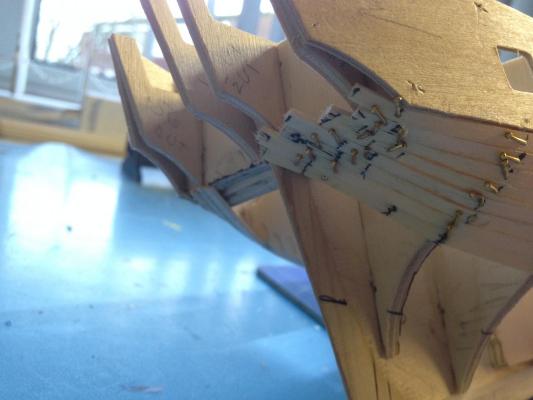
Mortar housings progressing. Several attempts at assembling the upper longitudinals/traverse bulkheads (61/62) - and a certain amount of blue air - because the former needed reduction to fit in the housings and I kept breaking the assembly apart again when filing (because it's just butt joints at the corners). Eventually resorted to reducing the longitudinals to fit first, and then assembling them to the bulkheads - then immediately fitting the whole lot to the housing to keep it square. Fiddly-diddly IYKWIM. On to the even-more-fiddly-looking canopies.....
-
Thanks guys. Jack - those "long gaps" just happen don't they - life just keeps getting in the way of ship-building! Chemical blackening of the ring bolts looks pretty convincing to me - perhaps a little too matt, though that's easily fixed. Prefer it to paint I think, though of course it's *much* more costly. Different stuff to what I used on Bounty, and seems to work better, though I'll hang fire on final verdict until I've tried it on brass - seem to recall it took forever to get anywhere near convincing cannon barrels, and there are a lot more on this one.

-
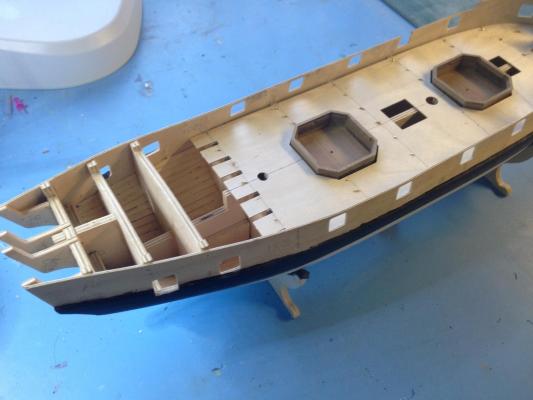
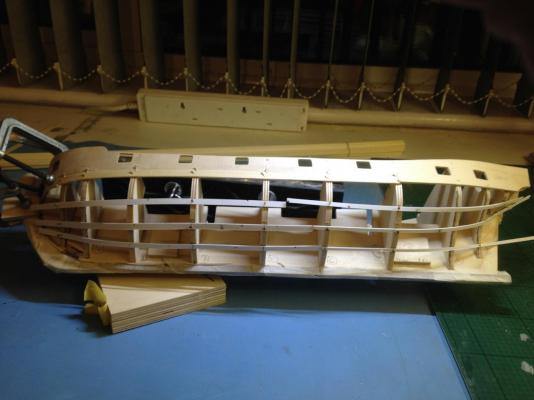
Finished (or at least stopped) touching up and varnishing the hull. False Upper Gun Deck glued and pinned in place. Mortar beds constructed, drilled and varnished (went for satin in the end, which I think I'll stick with, apart from decking). The mortar housings overall look like they'll be a project in themselves - nice lot of detail ! Need to try out chemical blackening the ring bolts versus painting, whilst the deck is going off.
-
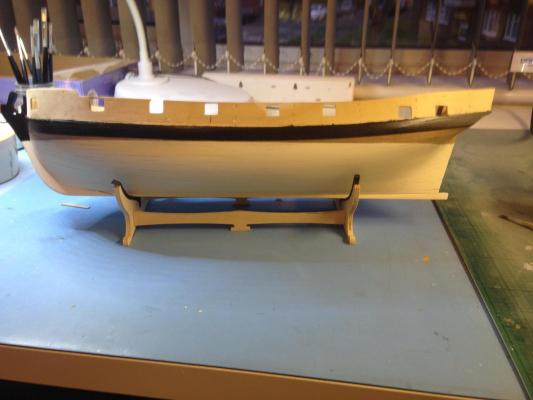
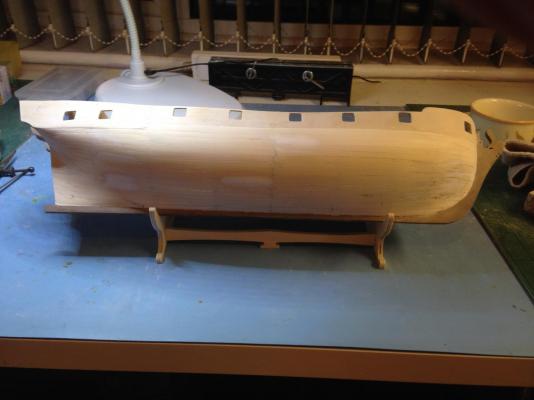
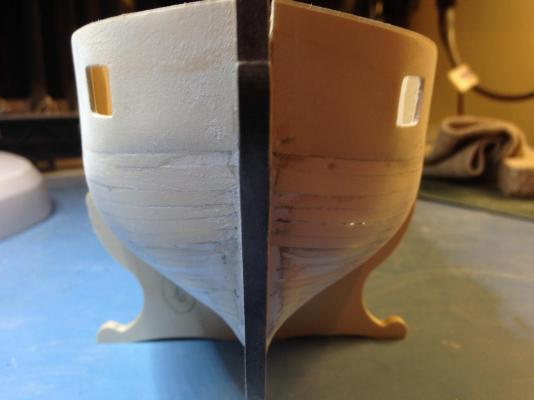
Hull painting completed. Went for a sort of cream off-white, which I think gives a nice contrast with the bare wood and the black on the wales, without being too pristine. Very slight gaps in the planking are visible, but I don't find that objectionable - at least it's clear the thing is made from planks ! Need to decide what varnish to use on the unpainted areas - I quite like satin rather than utterly matt
-
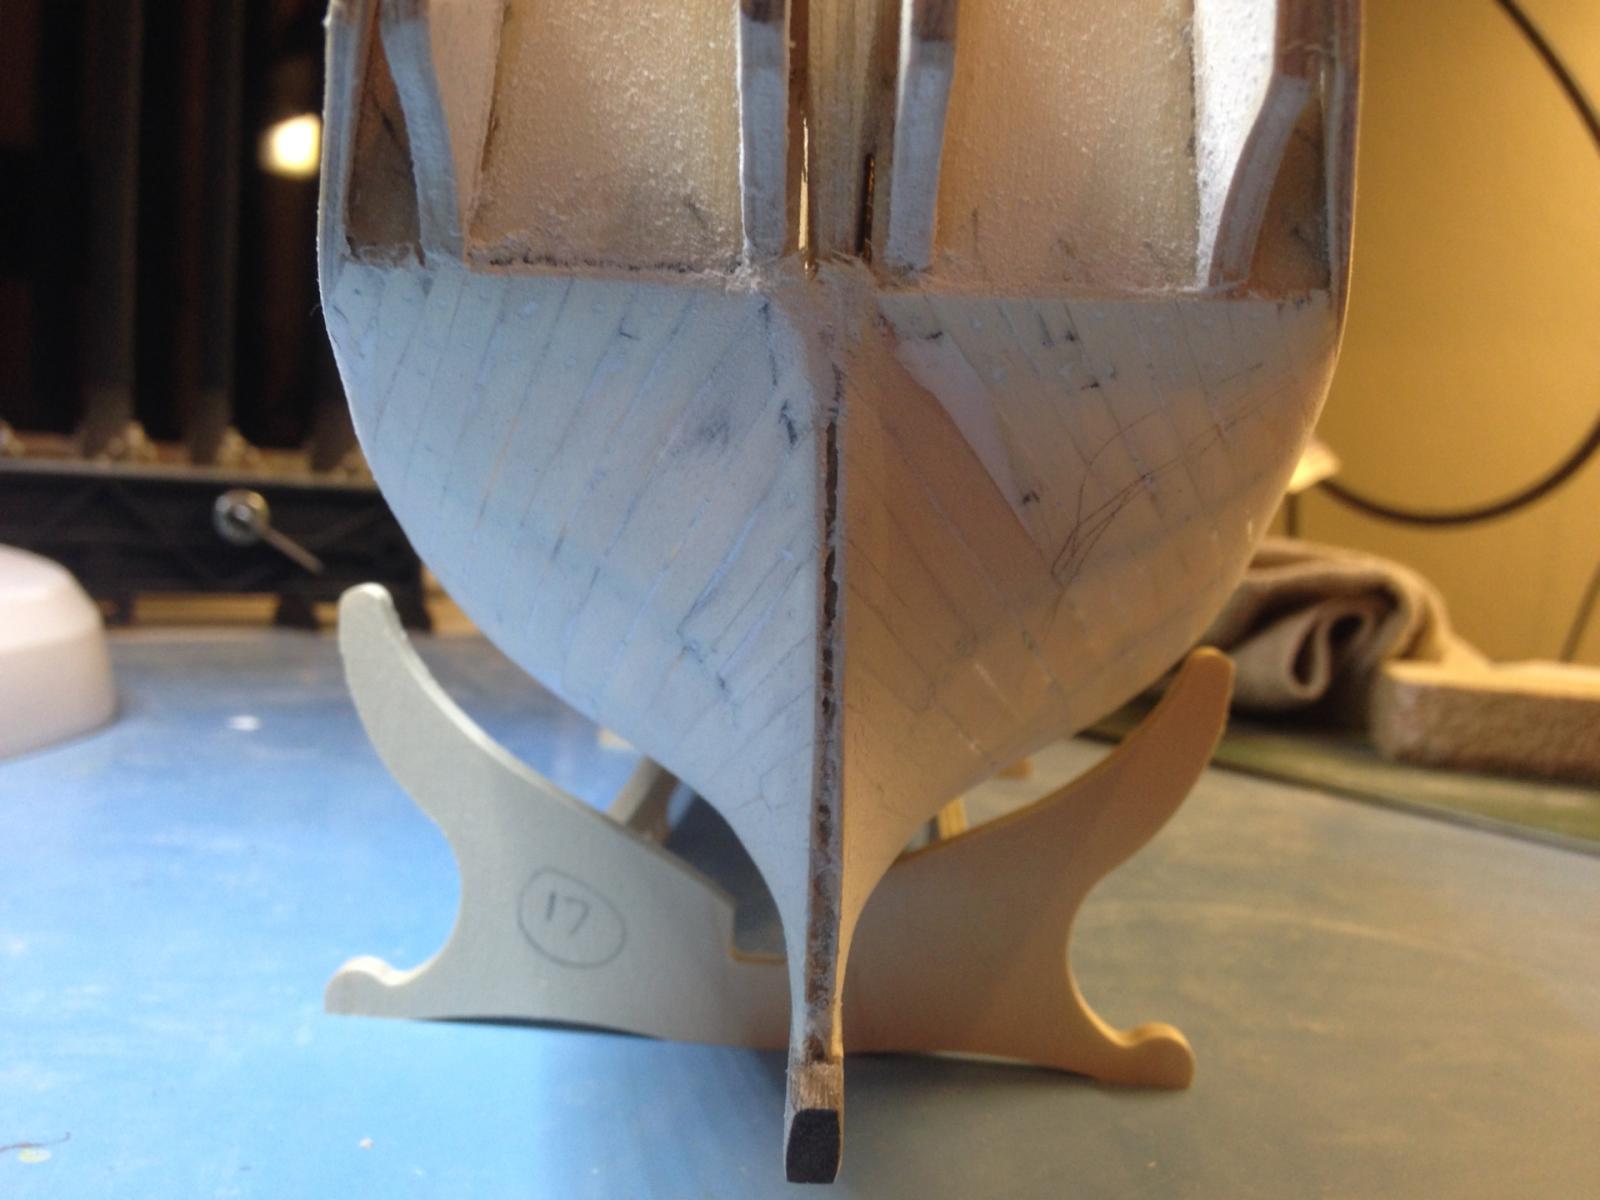
Sanding of second planking below the wales almost complete (ideally needs good daylight, and it's getting dark here !, so I'll finish it tomorrow). Few very minor gaps, but I'd argue they make it look more authentic. Used 400 => 800=>1200 grit wet/dry. Fears of sanding "through" the rather thin walnut strip not realised thank goodness :-o Not sure why the manual leaves fitting the stern post so late (it's at the end of completing the second planking) - I'd have thought fitting it now would give better continuity in the paint. Can't see that it's going to interfere with fitting the stern counter etc. if fitted now. Hmmm....
-
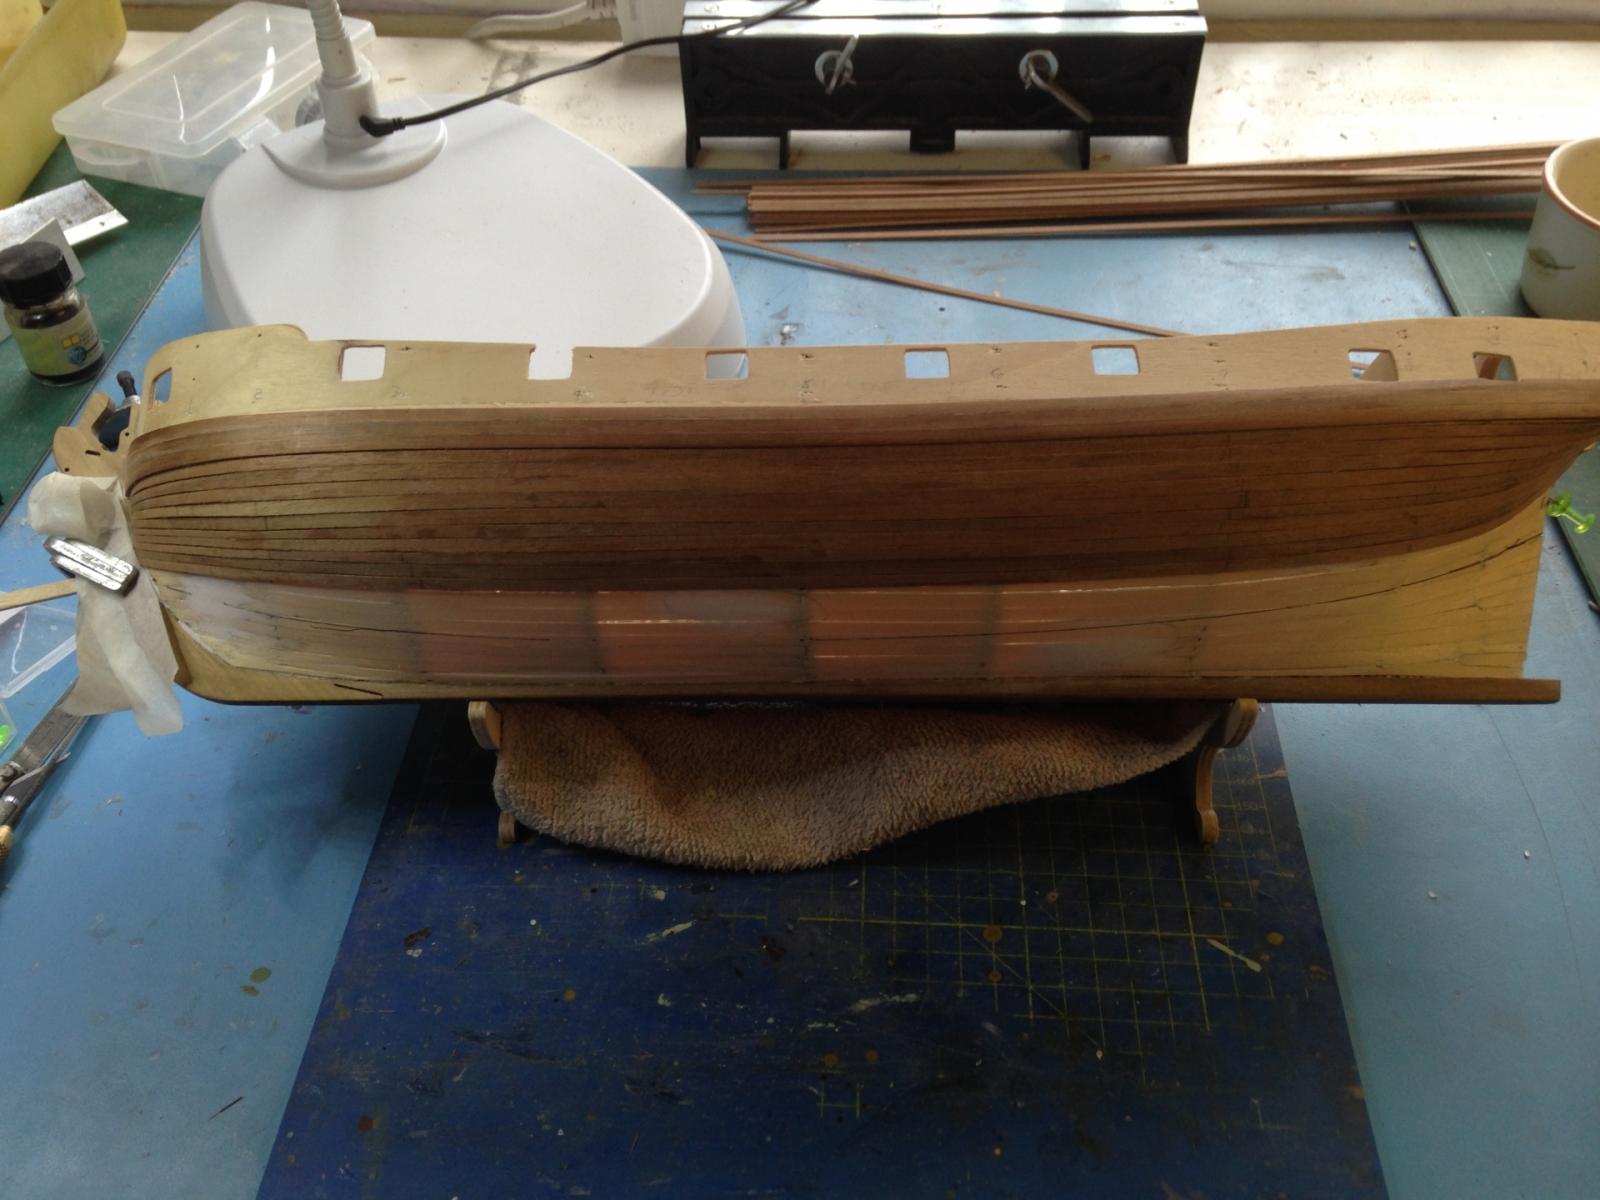
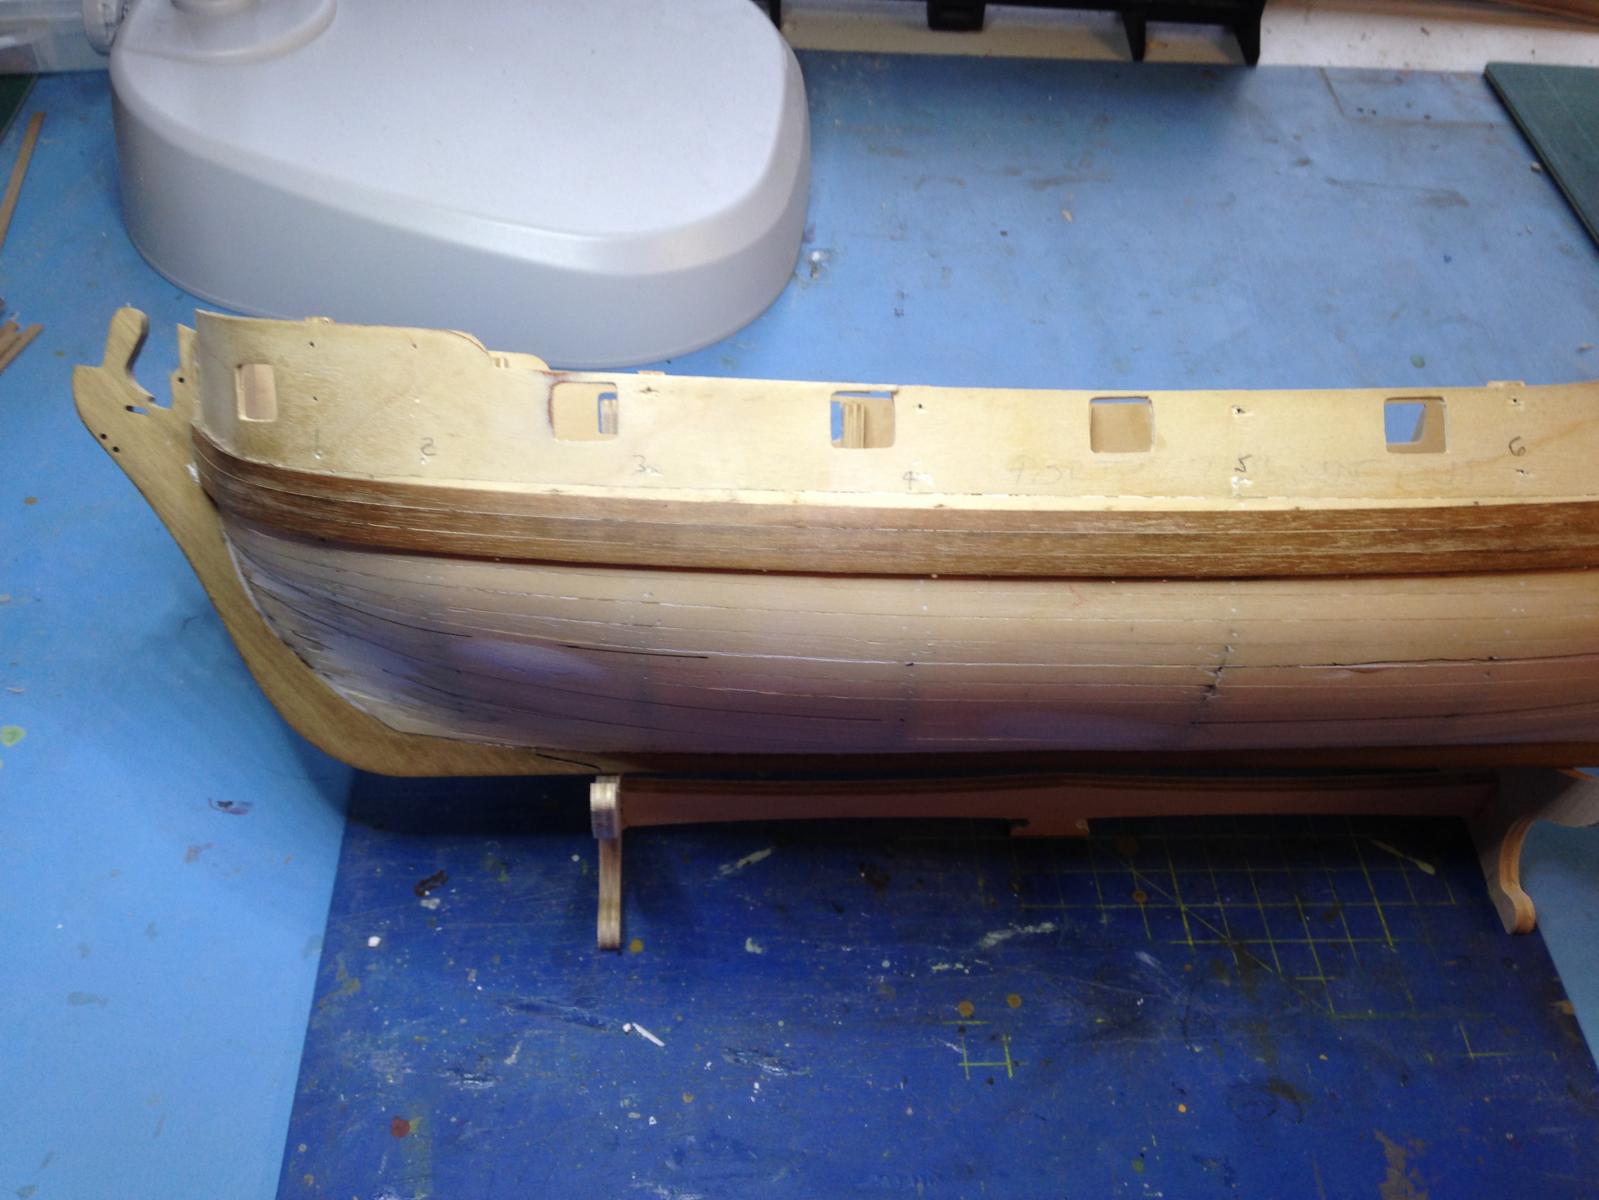
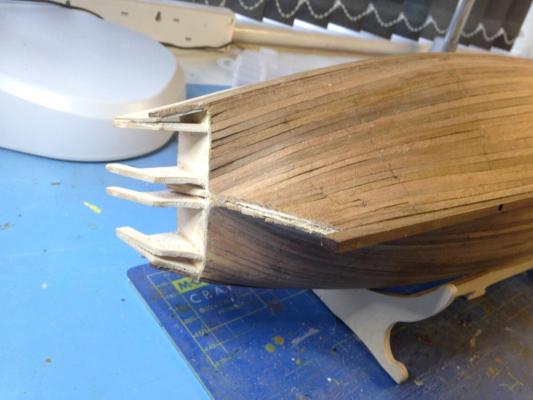
OK, planking below wale finished on both sides. Stern trimmed along rudder post and counter. Obviously wasn't quite as careful at the stern on the port as some of the ends haven't gone down as flush as they might - all within the bounds of sanding though Looking ahead a little.. What's the thinking on hull paint colour - I haven't painted a hull before (only coppered) - have a feeling just pure white may look a bit too pristine ? Also looked at the mortar housings a little - how about chemical blacking of metal parts (e.g. ring bolts) rather than painting - I tried this on my first build (years ago) and found I had to leave the parts in the stuff for hours to get a significant effect - has it got any better ?
-
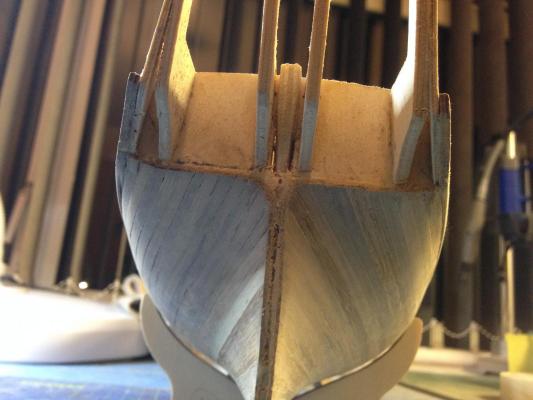
Starboard 2nd planking below wale complete. No particular problems. Took 3 stealers of increasing length to deal with the usual fanning out towards the rudder post (manual seems to show two, but this isn't an exact science by any means). I notice they bring their stealers to a sharp point - I never do that - always put a blunter angle right at the end - as shown in AOTS (which refers to them as "deadwood knees", the planks between keelson and keel being " deadwoods" - new one on me!) Started reading the manual for the next stage (mortar housings), which must mean I've nearly had enough of planking. Small matter of sanding to go of course....
-
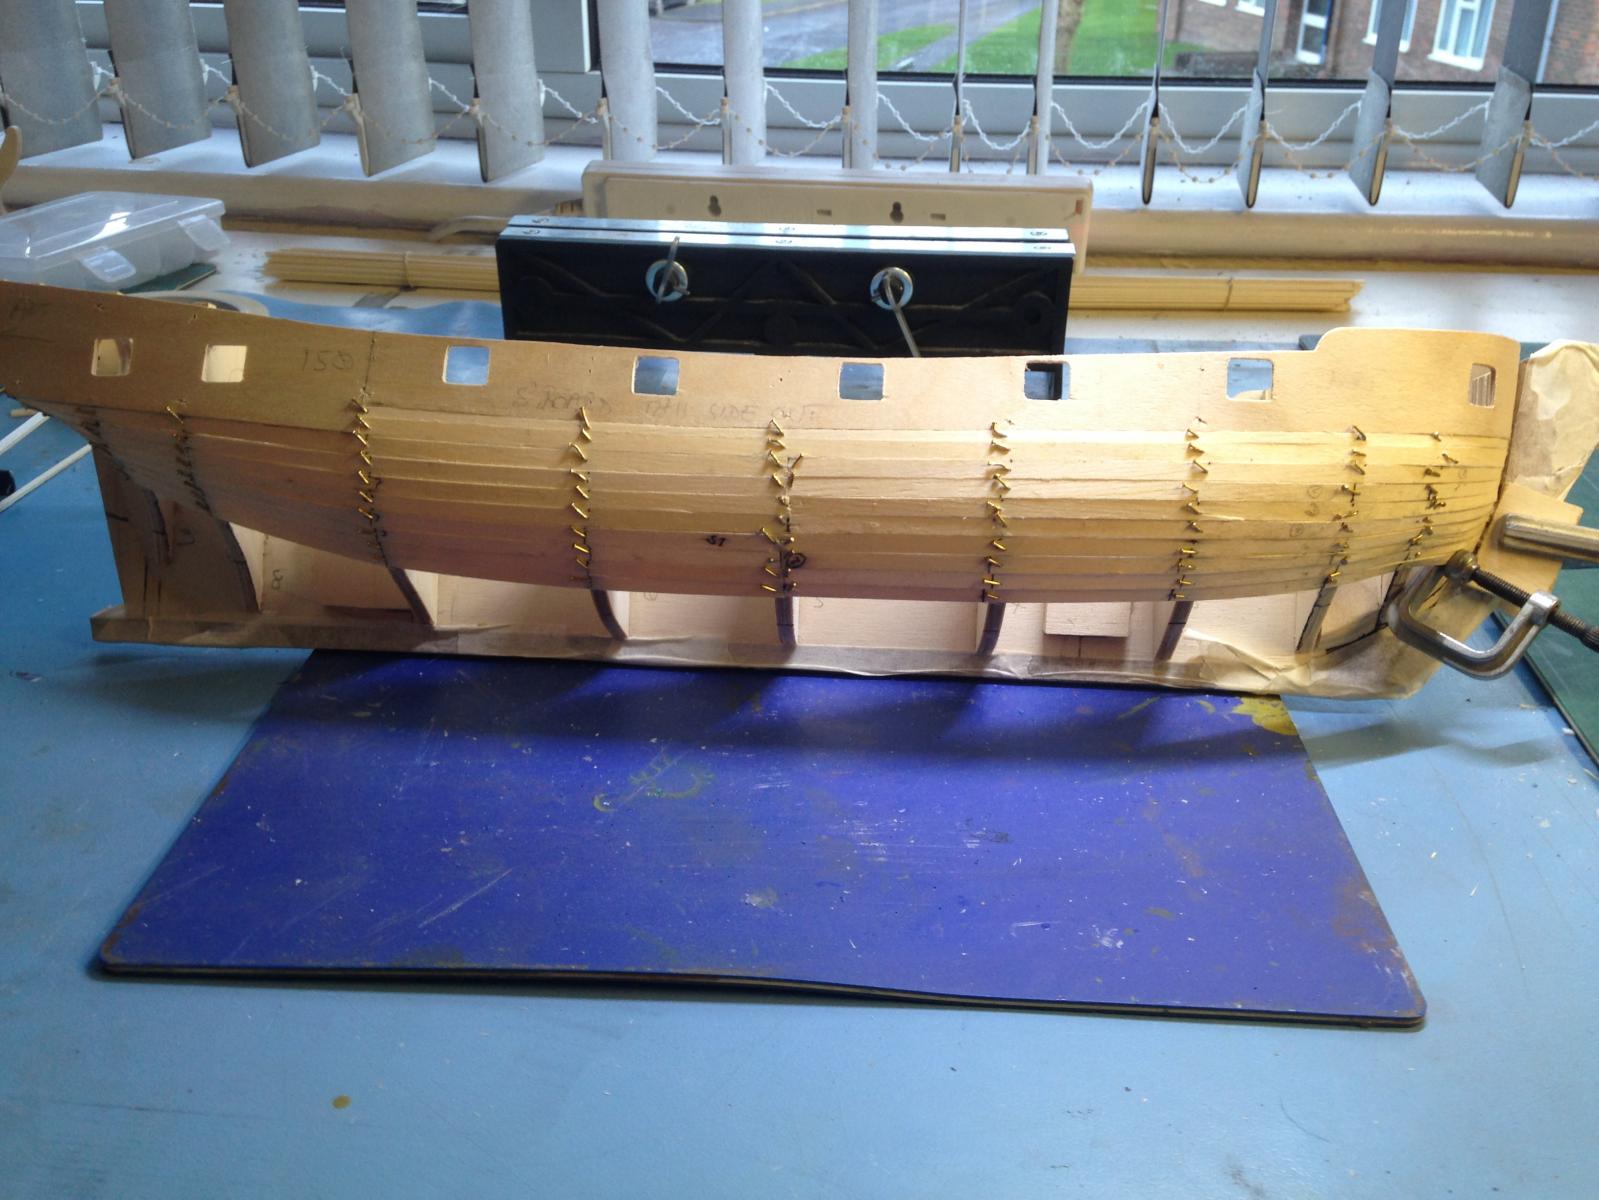
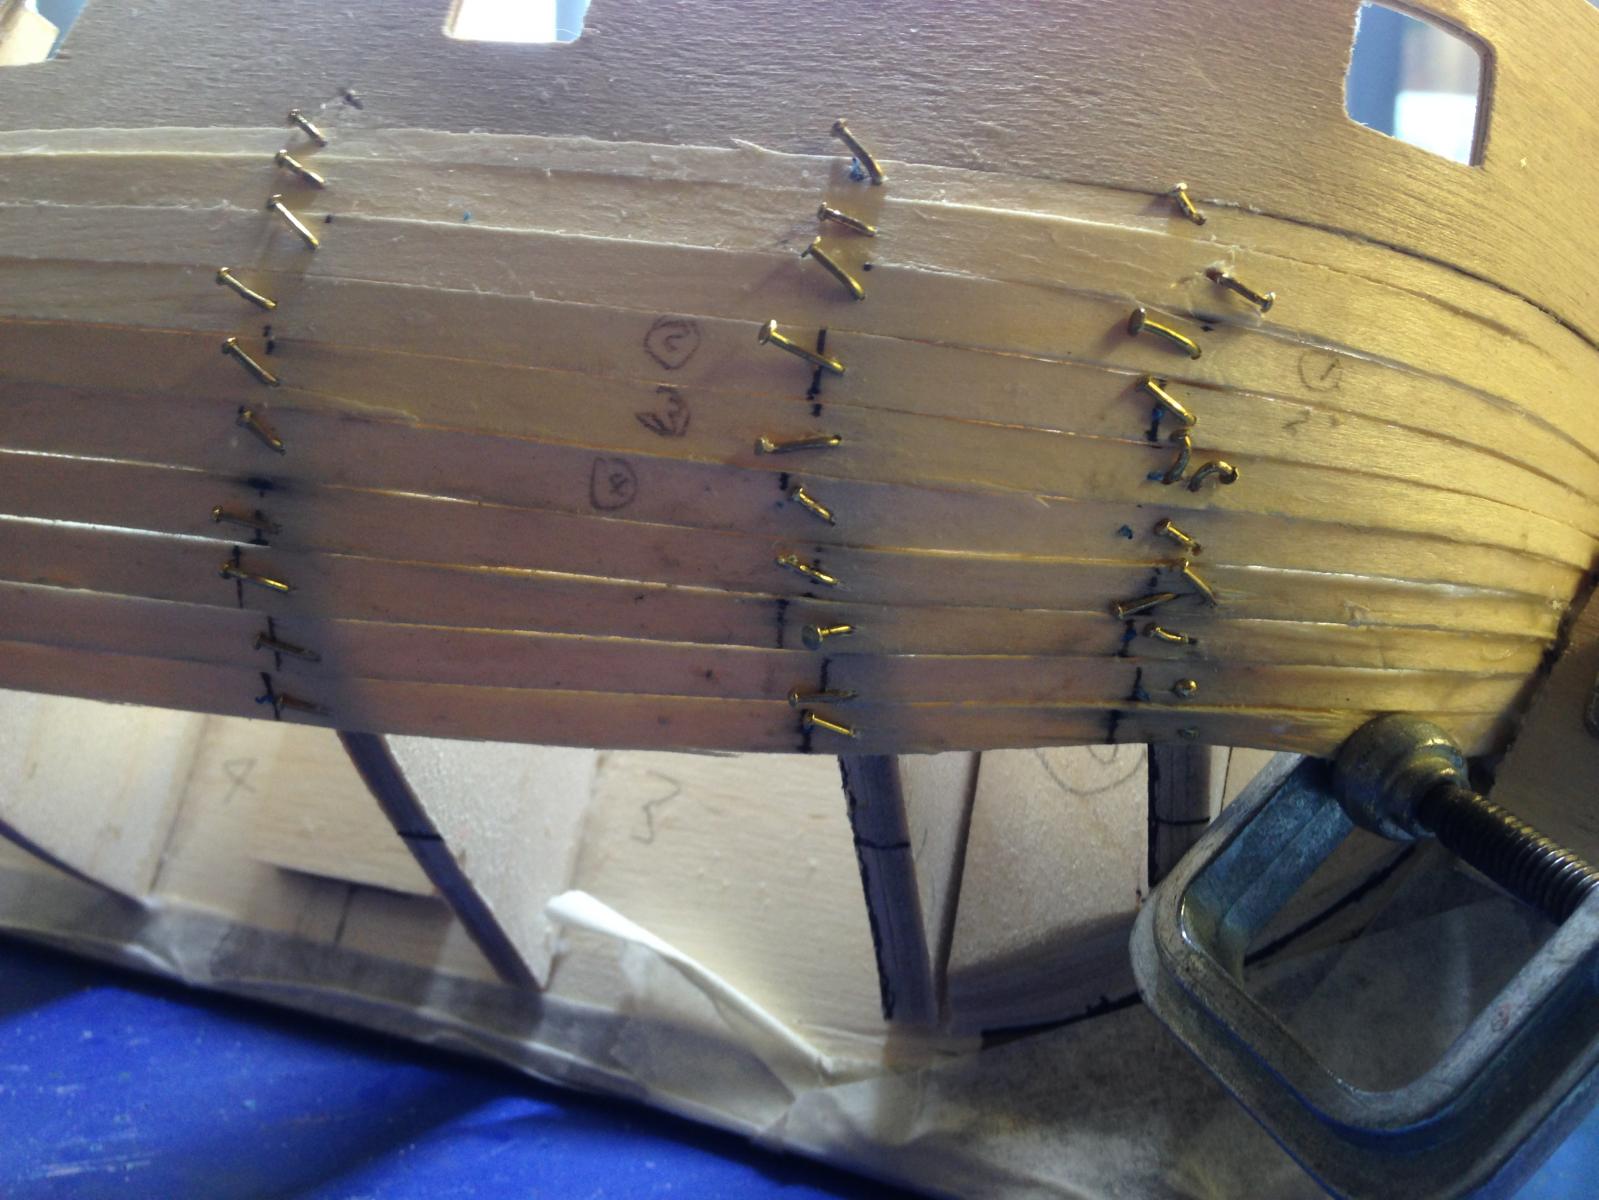
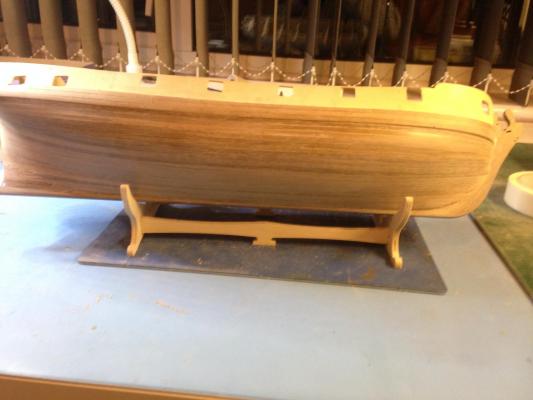
Second planking progressing without too much drama. I think painting wales either now or later would work - decided to go with "later" - I'm used to uber-complicated masking on plastic kits, so masking basically straight lines holds few terrors. I'm not sure why the wales are separated out - on Bounty the entire hull was planked first, then a second set of planks added to represent the wales - seems to me this avoids any issues with discontinuities between wales and rest of planking. Few minor issues with planks going a little "clinker" around the curve of the bow, but nothing sanding won't take out, and anyway in painted areas below the waterline, so filler would even be possible (purists, look away !). This seems quite a "benign" hull shape compared with both my previous builds. Haven't soaked at all (don't like the shrinkage after fixing) - just used nippers around the curves. The "my way or the high way" manual has a real downer on nippers - I'd agree if one were using them to try and bend a plank away from its natural run, but if you've got the plank in the right place on the hull (you can just about see the lines where I marked out the planking bands before starting), then using nippers just to get the curve around the hull works fine. Used purely PVA and push-pins to hold, which does mean only one plank at at time per side, but that suits how I like to work. Looking forward to the bands next to the keel - I find planning and fitting stealers strangely satisfying. Don't see too many issues with the quality of the walnut - maybe a lucky batch.

-
Looong gap since previous post due to various domestic issues, but back in harness now (ship-wise, not domestic !) Completed both wales. Not sure whether to paint these now, or after the rest of the planking is laid and sanded. Obviously painting wales now means no masking, but I can't see how I'd avoid damaging the paint whilst sanding the rest of the second planking - seems like masking off the wales after all is sanded will be easy enough - the only risk is paint bleeding into the unpainted planks either side I suppose. Hmmm.

-
Joe/Gunther Thanks for the thoughts. I must say I find the Caldercraft manual a bit "you must do it like this and only like this" in places, whereas there are invariably several ways to "skin a cat" (sorry cat-lovers!). Actually - I bet that phrase originates with the nine-tailed variety, so belongs here ! Alan
-
Moving swiftly on to the wales.... What does anyone use for gluing second planking ? The manual says use medium CA, but I've previously just used PVA, using push pins to hold down the edges of the planks so there are no holes. The only drawback is that it takes longer as you can only fit one plank at a time (one per side I usually do). Have to say I really don't like CA, and prefer to avoid it if I can - at least for for large areas and where there's a choice
-
First planking done and dusted (emphasis on dust!) No great drama. Did get a sort of "dimple" under the curve of the bow on both sides - not sure why - maybe inadequate bevelling ? Anyway, the filler neatly did away with it in both cases. I guess the filler is a bit of a telltale for places where the underlying planking wasn't as true as it might have been (note to self - this is *first* planking - duh!) Jot came up with the couple of missing parts from the kit - took about 3 weeks overall, allowing for New Year and hassling via CMB, so not too bad - I guess their CS has picked up again

-
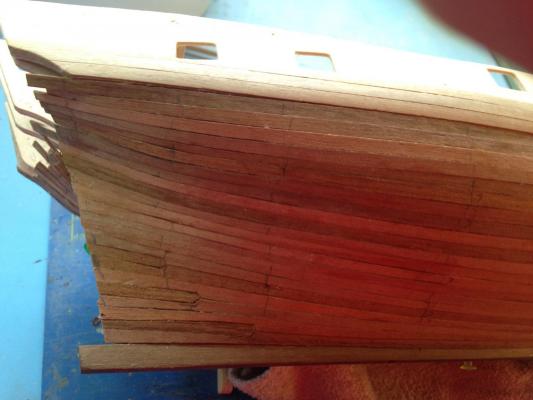
Hmm heat gun - that's something I hadn't considered - something else to try - do you use just a normal DIY-type gun, or something smaller ? I think the problem at the bow is not the bending - simply that the gap between the stem and the first bulkhead is quite wide and there are many different curves that would go in there - without some sort of guide, it's hard to know which is correct. The supplied gunport pattern works higher up, but the curve needs to change as you work down. I don't think this one is any worse than Bounty, which I did without balsa (since I knew no better!), but on the other hand that one is coppered, so any slight irregularity lower down is covered, whereas this one, being painted, will probably tend to emphasise them
-
First planking underway. Stern is straightforward, but I'm definitely struggling to follow the curve at the bow - balsa filler would definitely have been a good move. Nothing disastrous, just means more work sanding and filling. Tried both nippers and soaking (on different planks!) - still not sure which I prefer - contrary to the dire warnings in the manual, I don't believe nippers allow the plank to follow an "un-natural" course, provided the "nips" are kept perpendicular


-
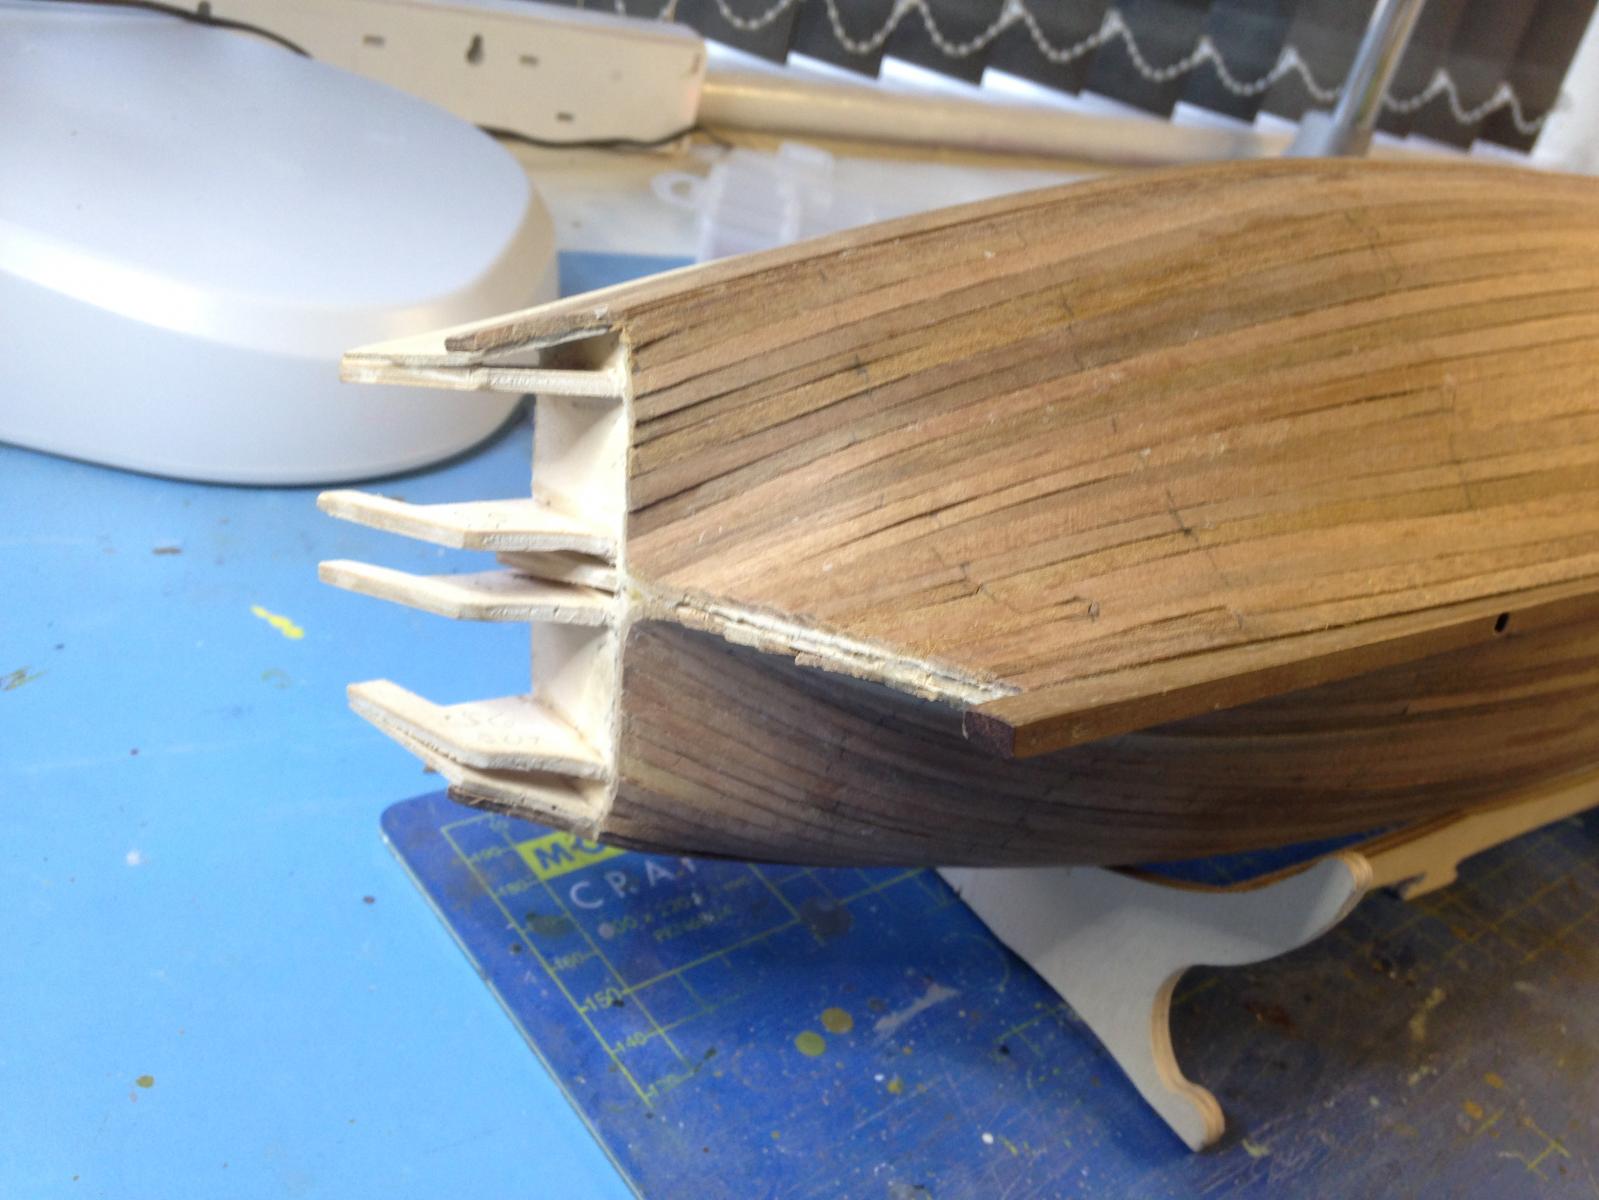
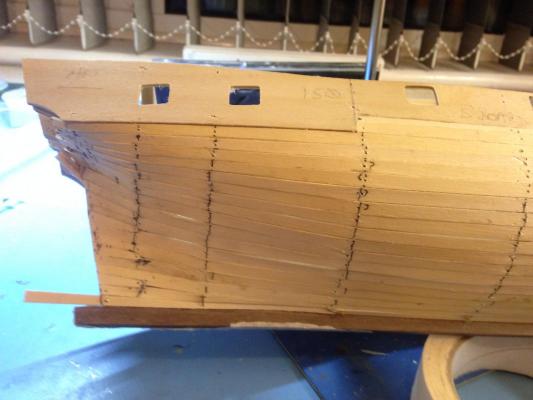
Gunport patterns firmly in place - couple of minor distortions around ports, but nothing planking/sanding won't fix First two planks fixed below pattern on port side - I used the provided pattern again to get the curve right - might have been a case for a balsa filler in front of bulkhead 1 to keep that curve correct - done that before with success, but it does take a while. Planking bands laid out. I use flexible styrene strip for this - it behaves reasonably like the timber i.e. doesn't bend too easily laterally, .A thin piece of same also does for measuring distances around bulkhead edges. I tend to do first planking much more precisely than necessary - the engineer in me I guess ! I'm curious why this one is a chunk more expensive than HMAV Bounty (for example), which has a substantially larger hull, three masts, coppering, and POF boats. Not complaining - these kits are still great value (Jotika - don't read !) in terms of the hours they provide - just curious what drives the price. Maybe a bomb vessel with 10 guns is just more in demand than a mere armed transport with 4 ! The instructions are a *lot* better so perhaps more time was spent in design
-
Thanks Joe Looked at that way, the curves on the extensions make sense I think the shape (angle) of the patterns is off a little at the stem - but easy fixed All glued and drying now