


Watto
-
Posts
8 -
Joined
-
Last visited
Content Type
Profiles
Forums
Gallery
Events
Posts posted by Watto
-
-
On 2014-10-25 at 5:03 AM, giantdog said:
Thank you all for your input, I'm slightly less terrified of the planking stage (slightly).
In preparation I've put the false deck on to help stiffen the bulkheads, give me a better idea of the ships lines and something else that I can't quite remember at this moment (it'll come to me).
I steamed the deck for 20 minutes and dry fitted, leaving this to cool over night and it did seem to hold it's shape pretty well.
I've now glued it in place.


Thanks for the method of fitting the deck. Here was my own attempt

-
Hi all,
sorry for the lack of updates, been slow at the shipyard with raising a very active baby.
Firstly, @Vacotton = I Ebay-ed HO scale furniture, closest thing to 1:96 scale.
Now onto the update, its amazing what you can get done with a week off sick.
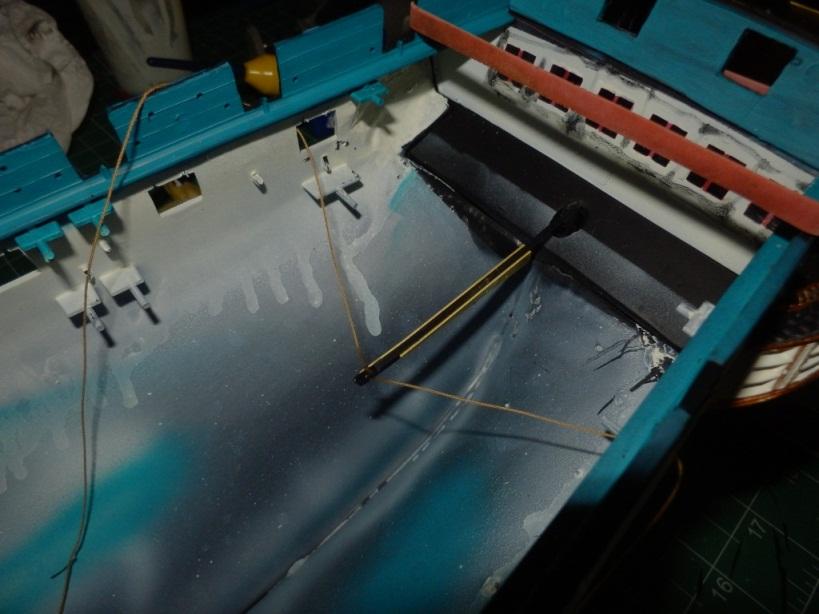
Firstly, mainsail sheets were fitted

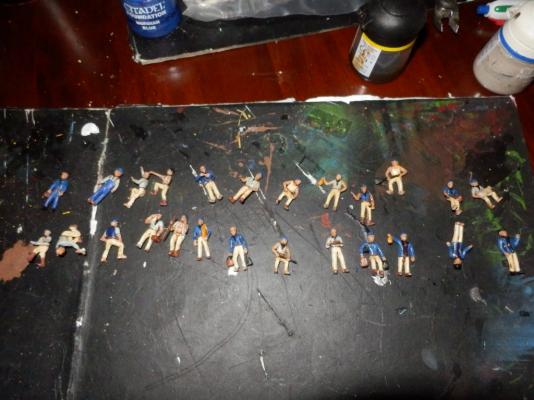
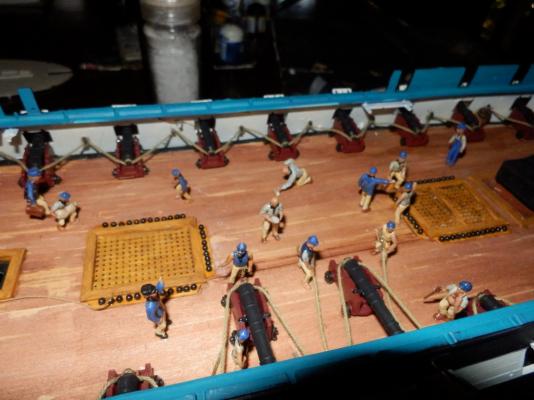
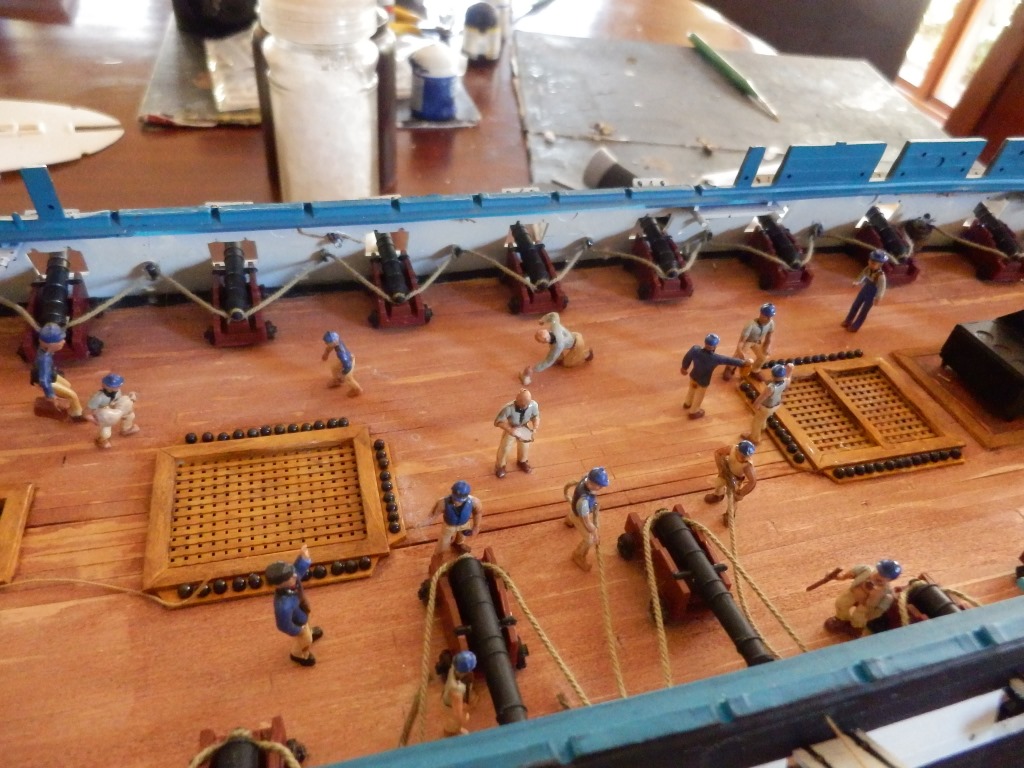
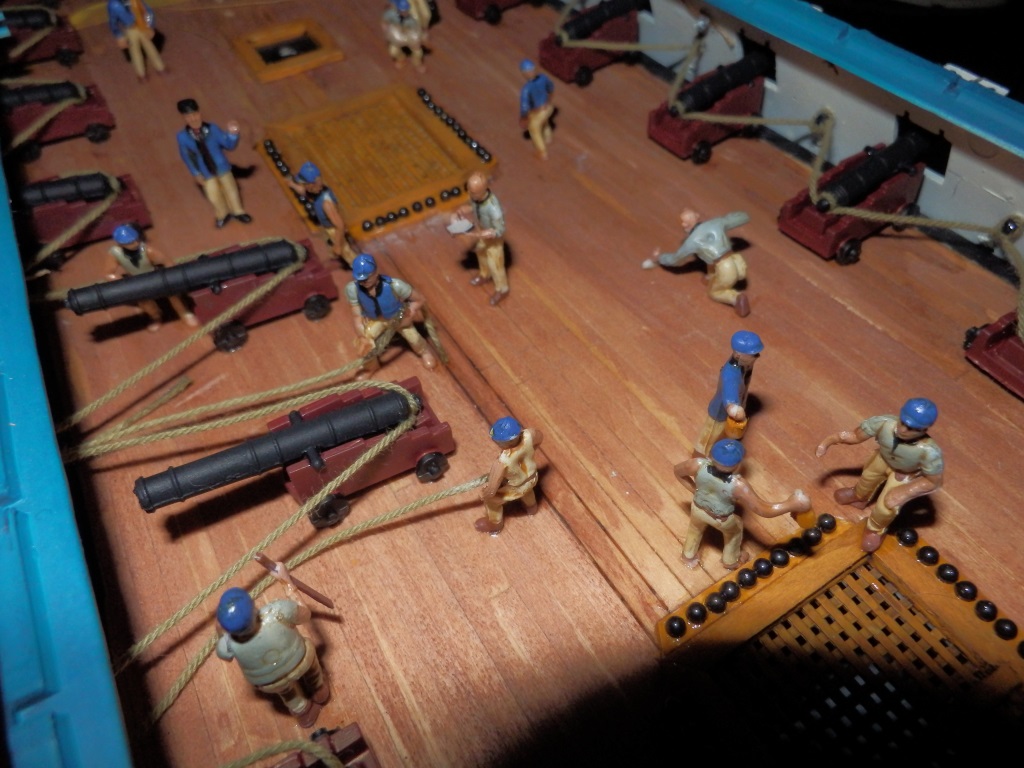
Time was to add some life to this model, in the form of some crew!


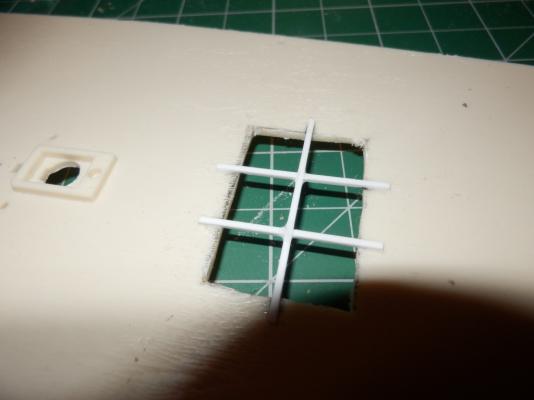
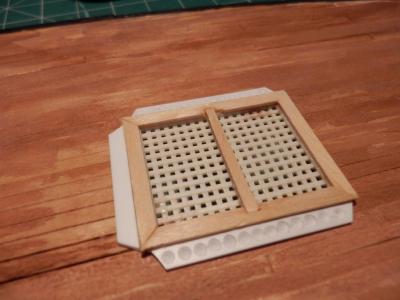
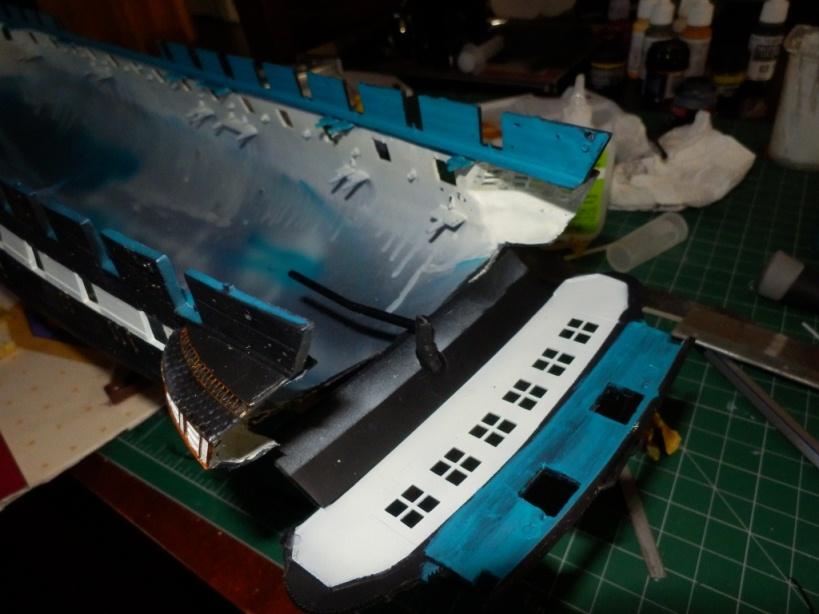
Next was to add some light to the wardroom in the form of a skylight

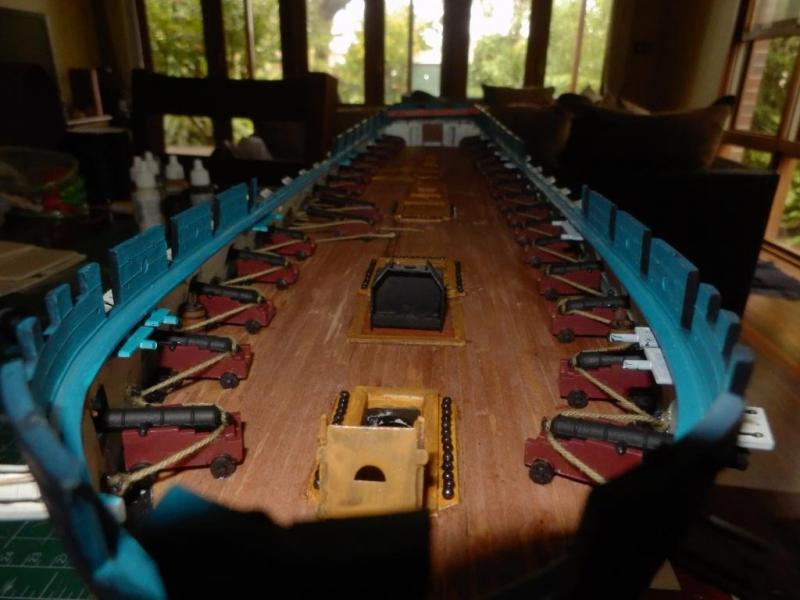
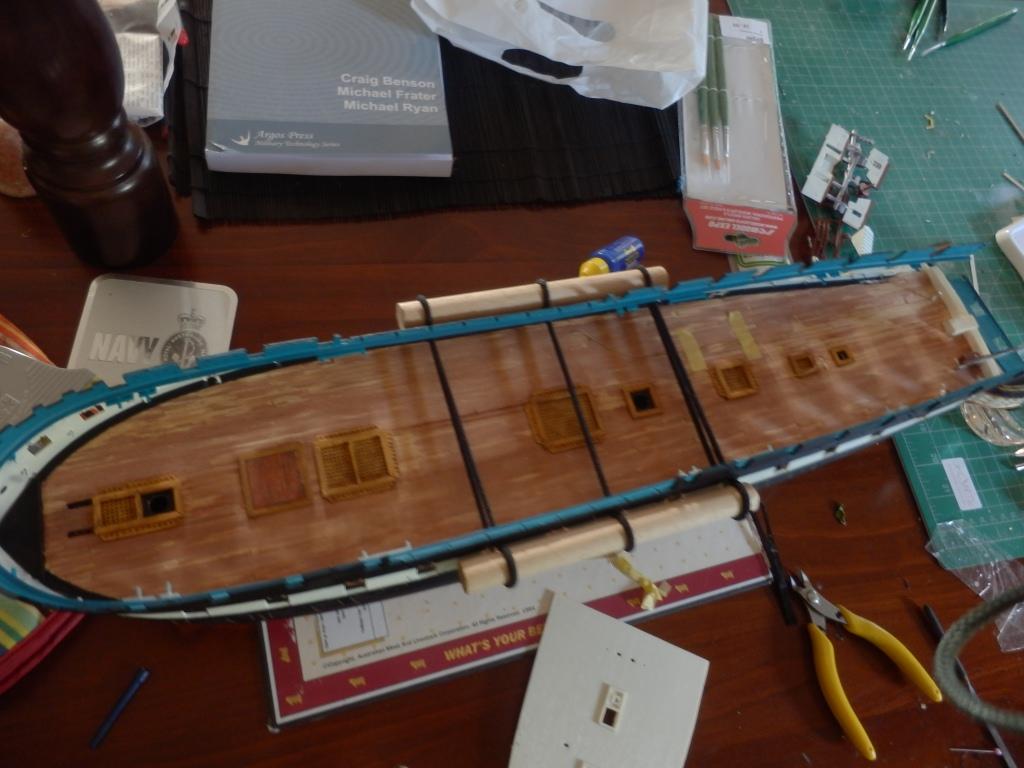
The Spar deck was then clamped together and laid with basswood

Then stained, this time with Devlan mud, as it isn't called the weatherdeck for nothing. Note shot racks were added.

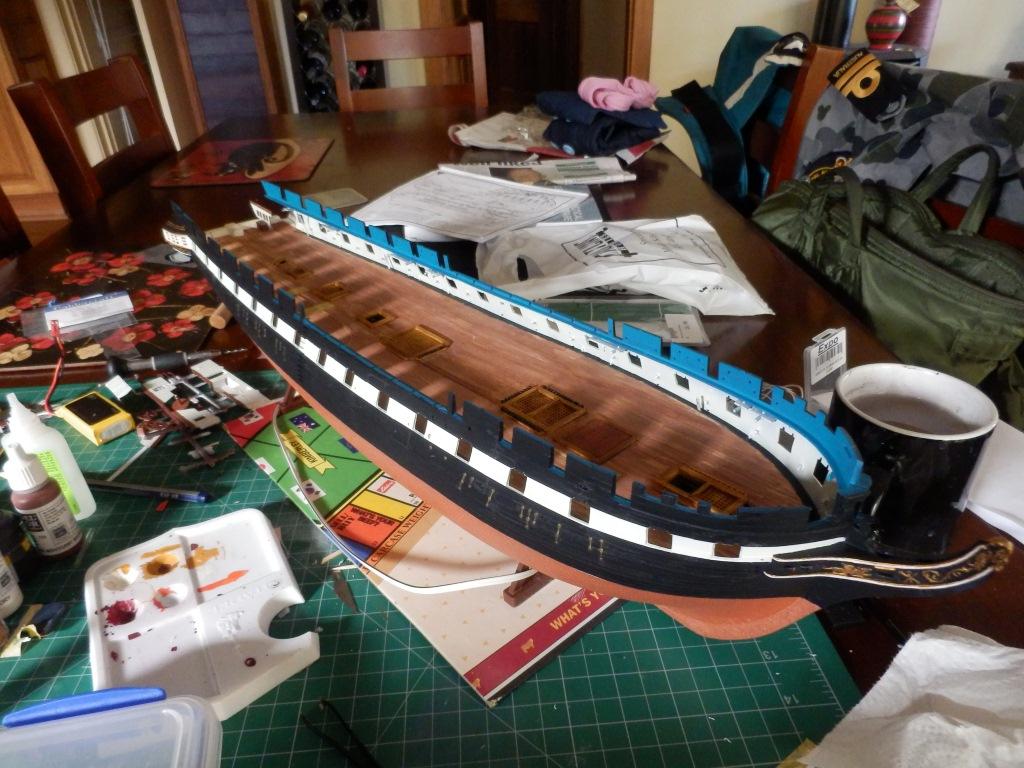
Then the deck was finally fitted to the hull
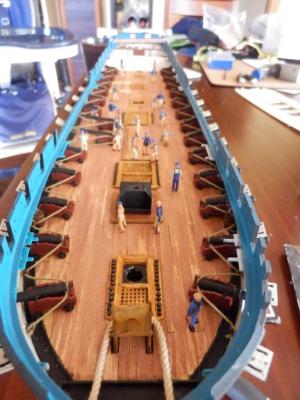
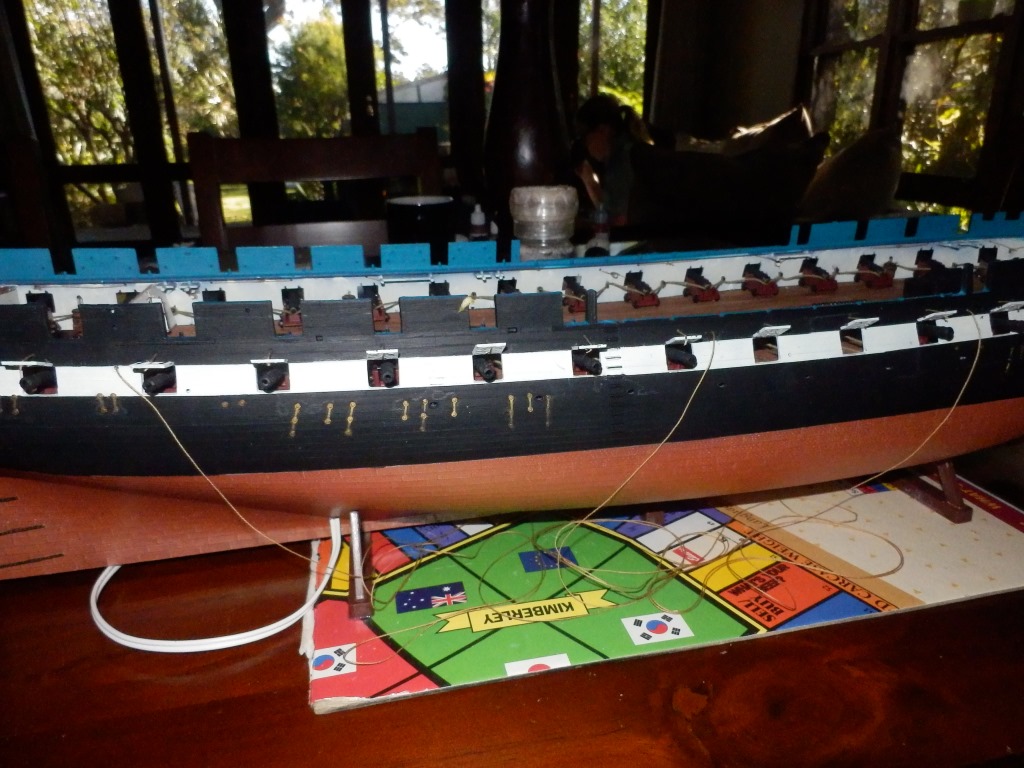
Finally, some MOAR guns!, plus other fittings such as the WORKING wheel and fiferails

Stay tuned for more (but don't hold your breath)
- bhermann and GrandpaPhil
-
 2
2
-
Time for another update.
Lets turn this ship into a warship!
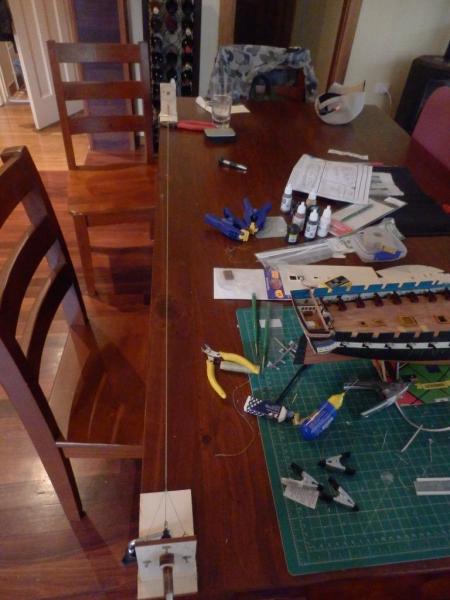
firstly, needed some 60" lengths of rope, time to find out the limts of the rope walk
After that it was a simple but tedious process to mount and string up the guns
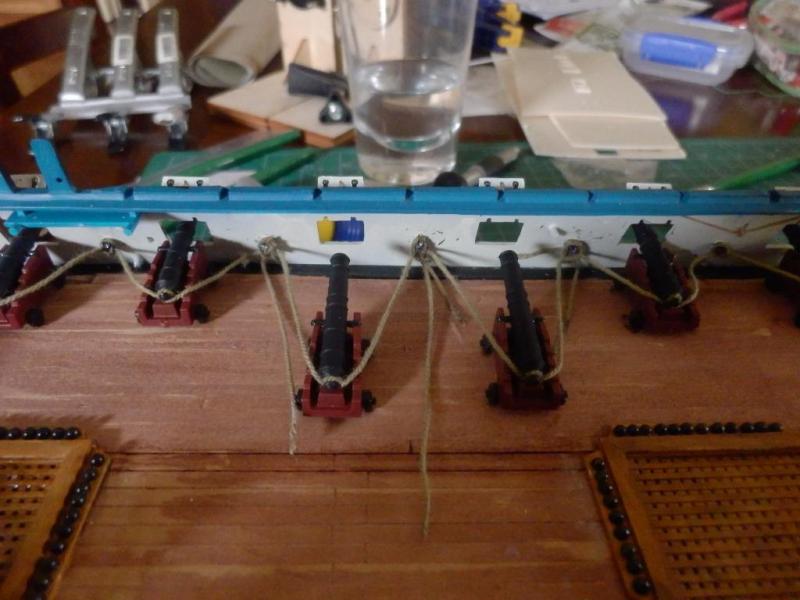
I used some barrels to camoflauge the lights as lanterns

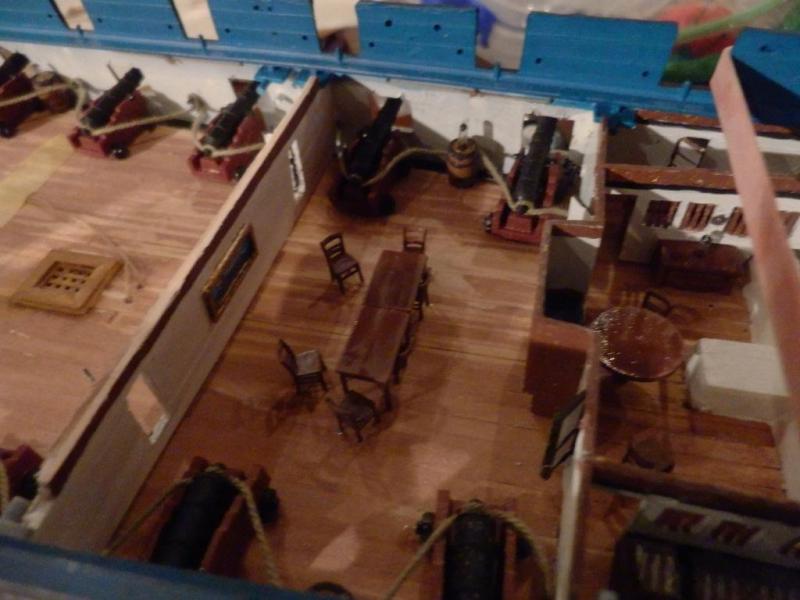
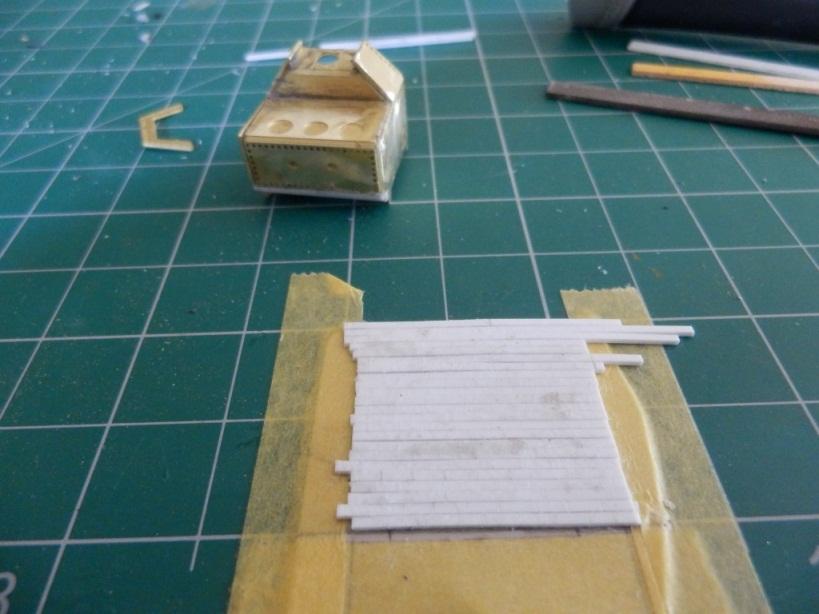
I wanted to extend the great cabin to closer to the prototype, so a chinese container was canabilised and liad with basswood strips
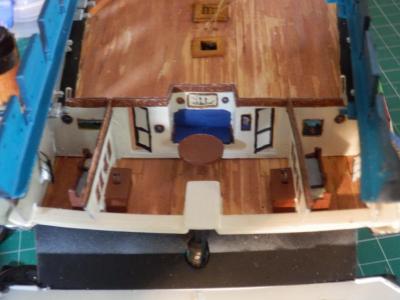
And once you have a new cabin you need to furnish it, in this instance with some HO scale tables and chairs
-
Soak in luke warm water, washed with soapy cloth and rinse and dry.
Other tips. Plan your modifications and kitbashing early and order your parts in Well before they are needed.
Good tools make a difference too. Heaps of clamps, files, drill bits, sandpaper, emeryboard. A rotary tool is a good investment.
Revell needle point glue is a must.
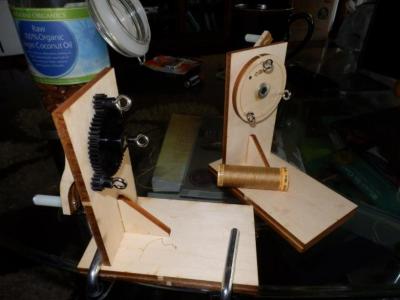
I havent started on rigging, but the supplied thread and shrouds are crap. Im making my own with an amati (model shipways) rope walk
-
Just a quick update
Port covers have gone in, giving us a first look at my hand made rope. Guns should be in by the end of the week
-
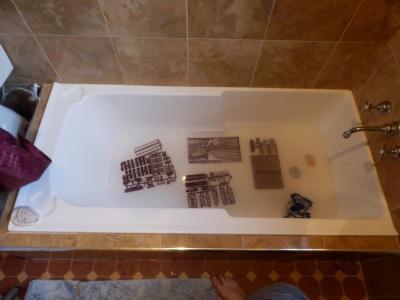
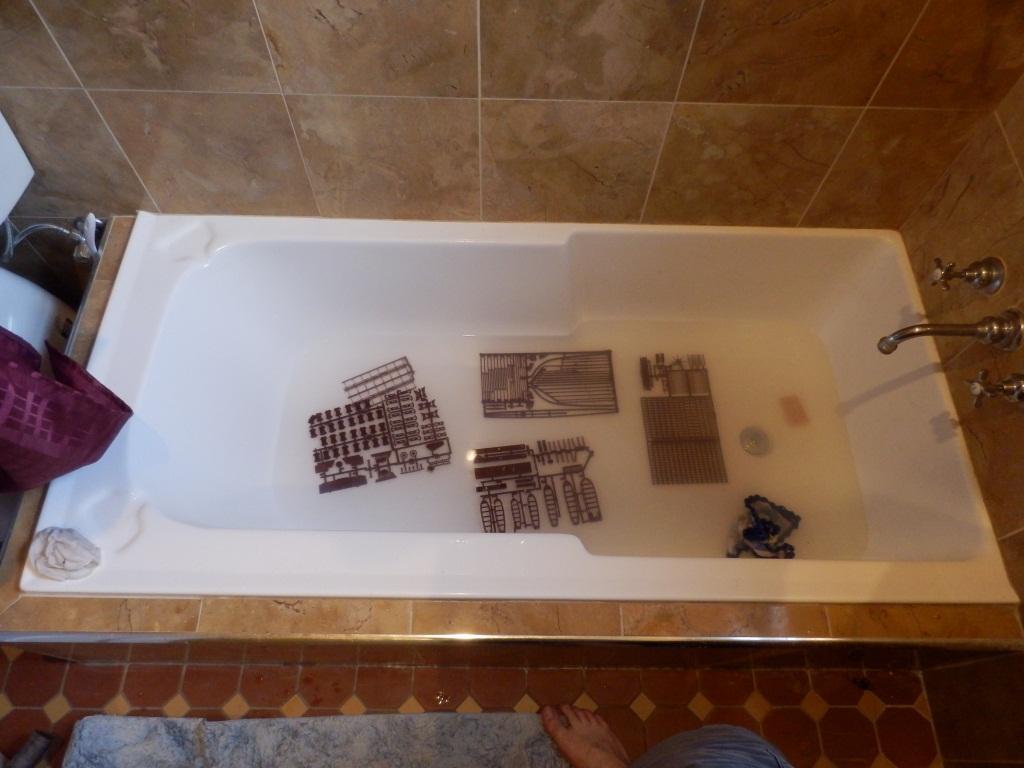
You need to wash off the releasing agent of the sprues that's used to remove them from the molds. Noting the size of the kit, the bath was easier than the sink
-
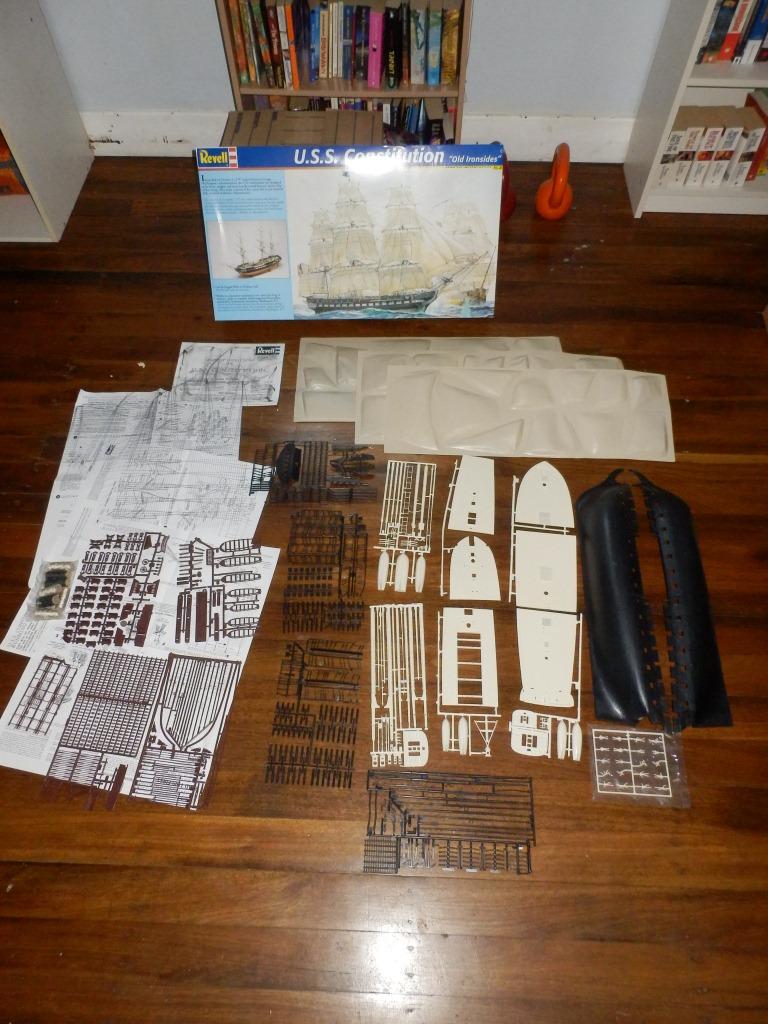
hello all
lets rebuild this log.
The kit in all its glory, awaiting a fool to play with her

SPrues were washed to clean off the releasing agent. Noting the size the bath was the easiest option
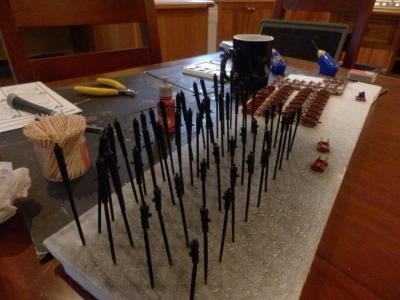
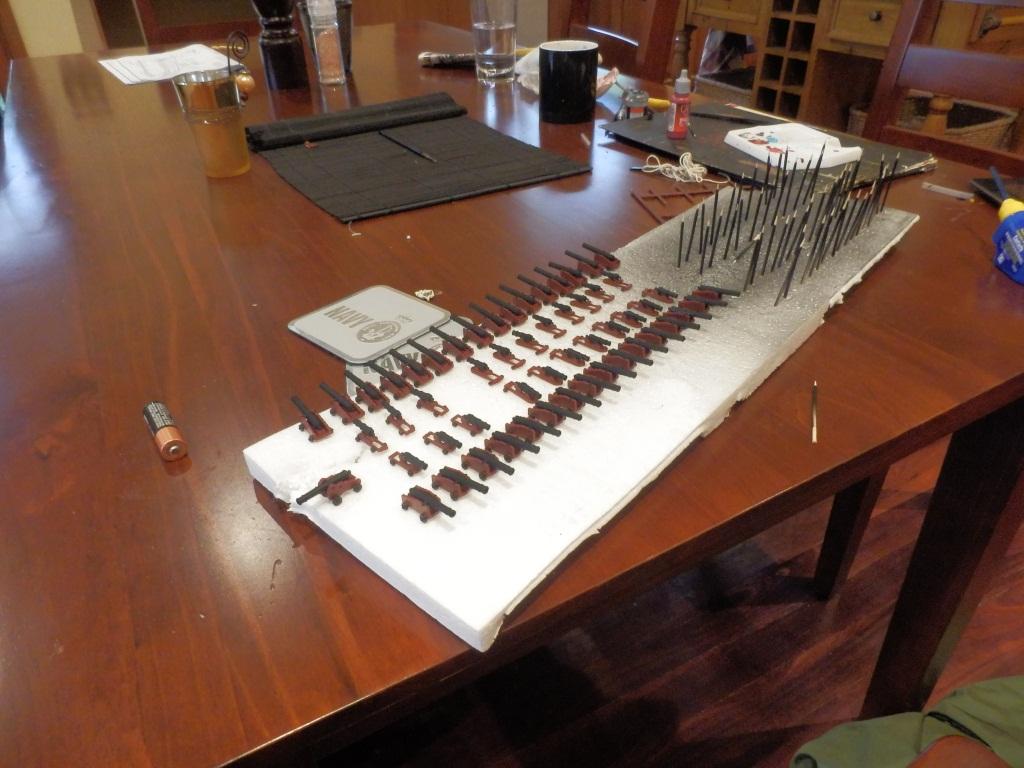
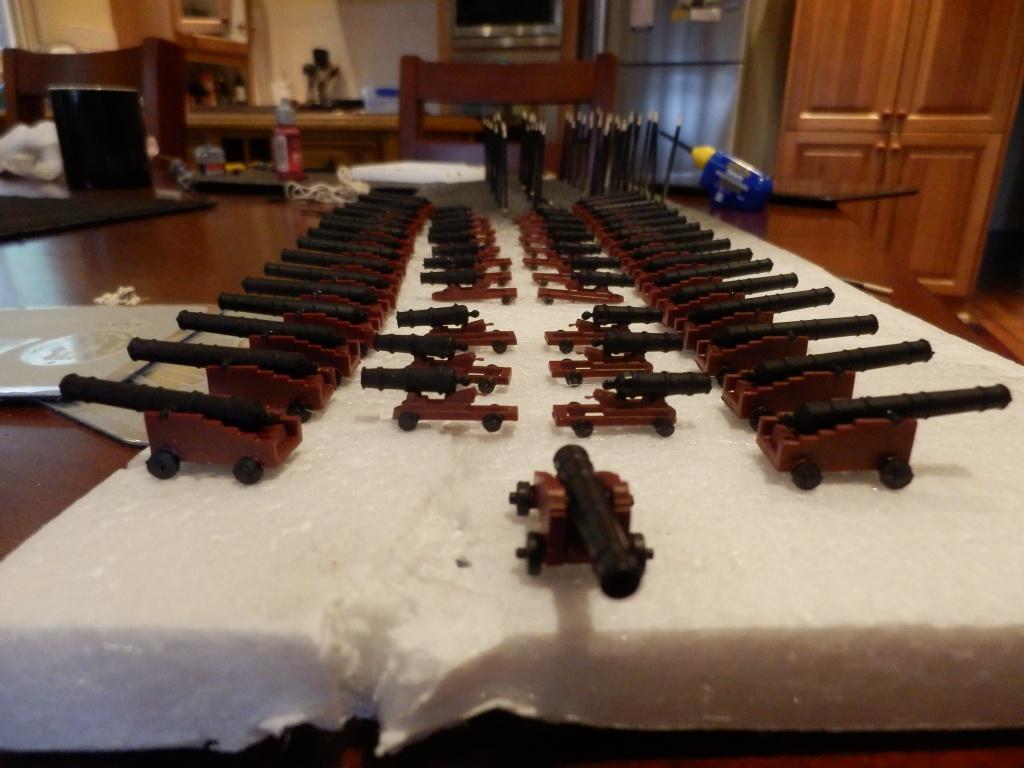
I started with the tedium of building all 55 guns
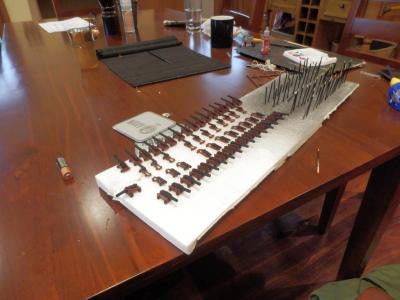

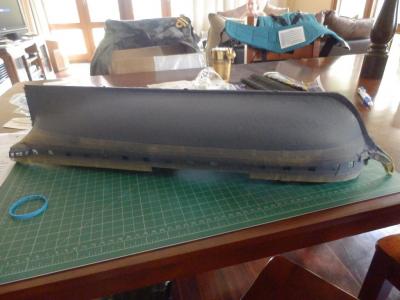
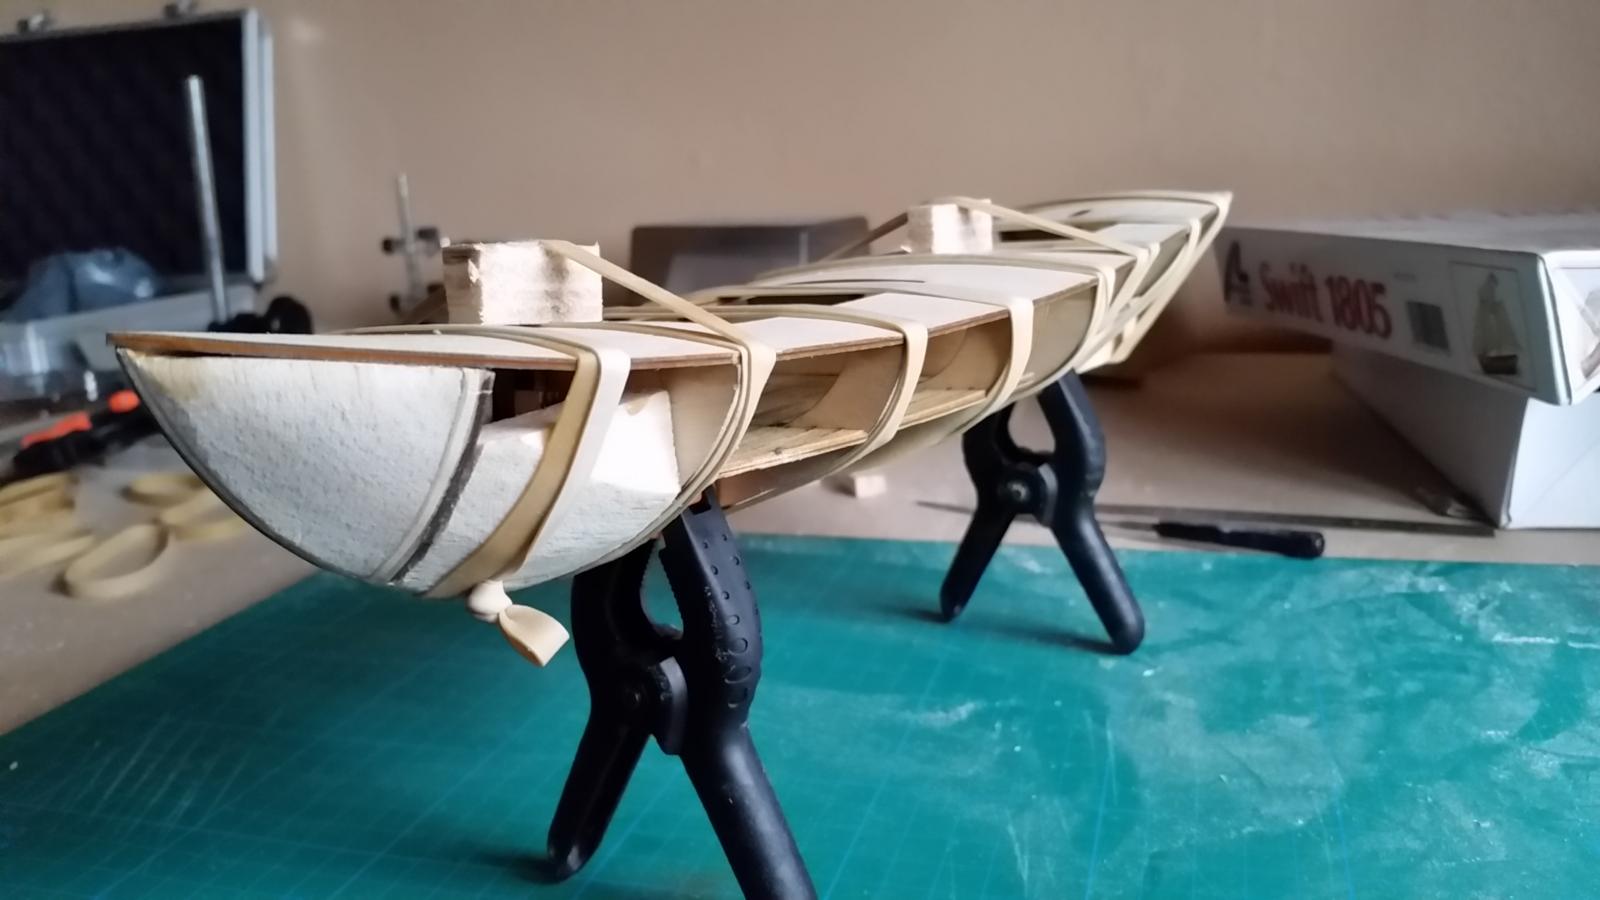
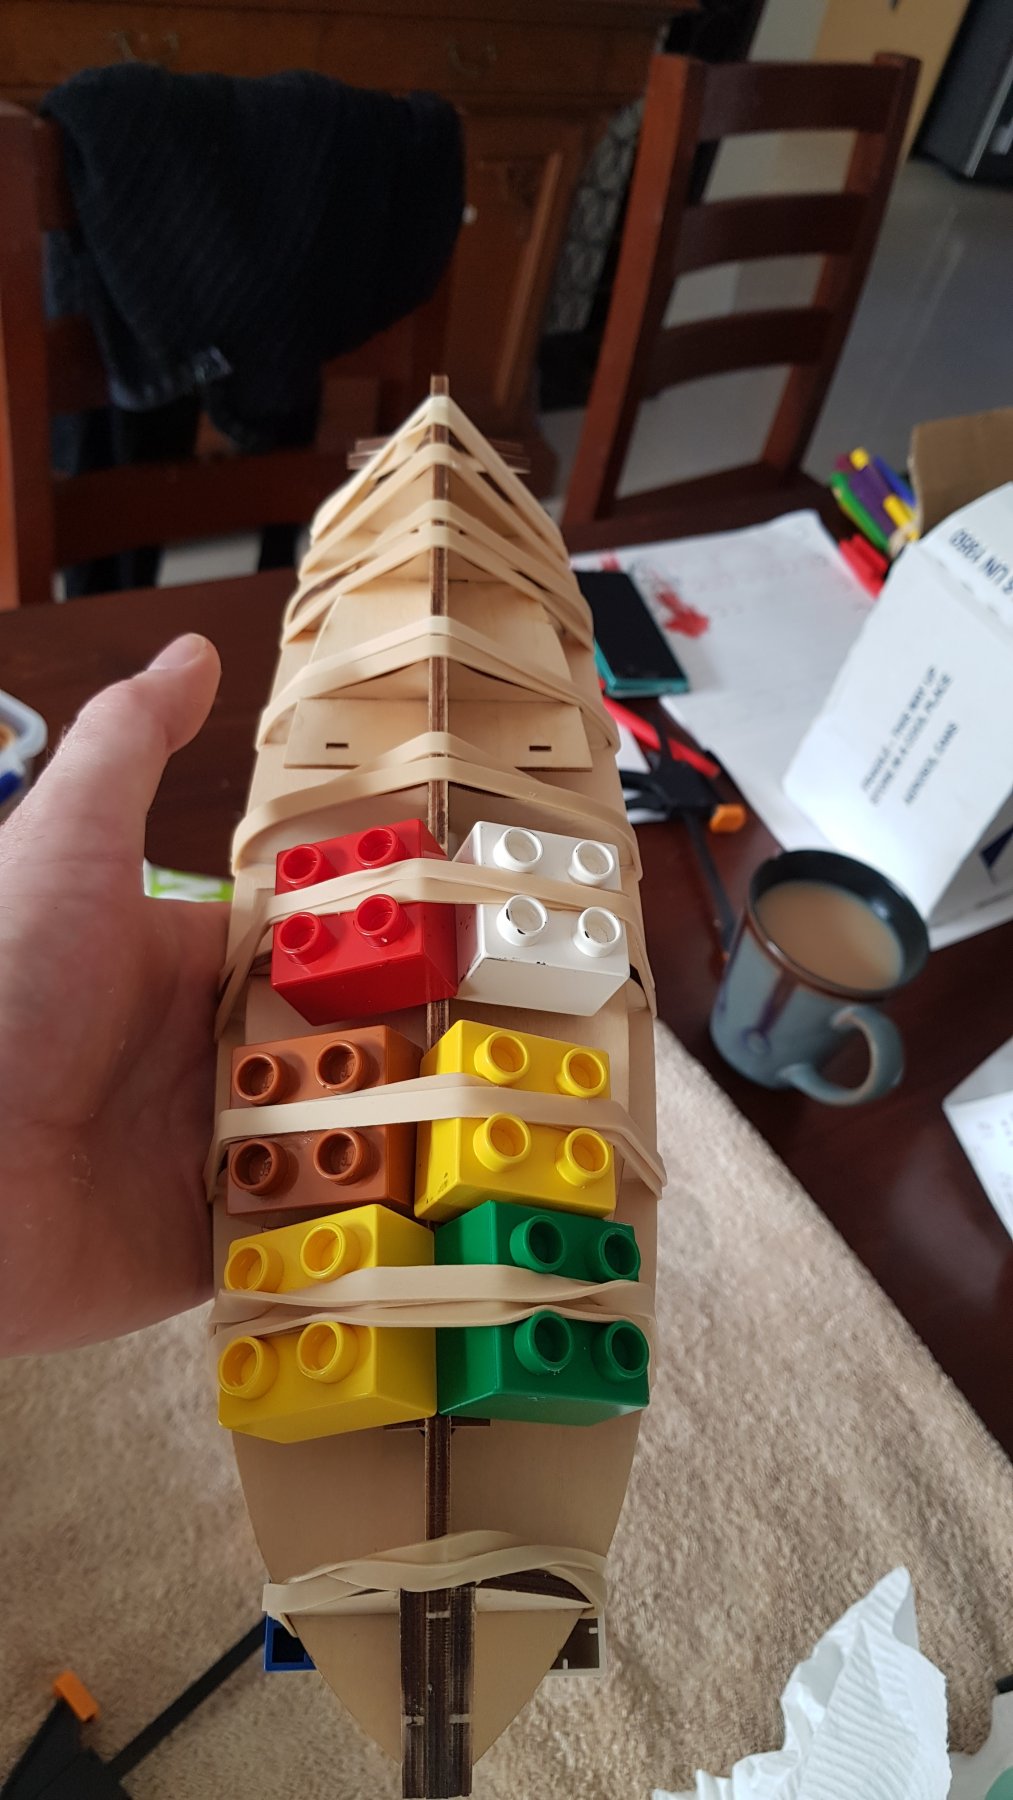
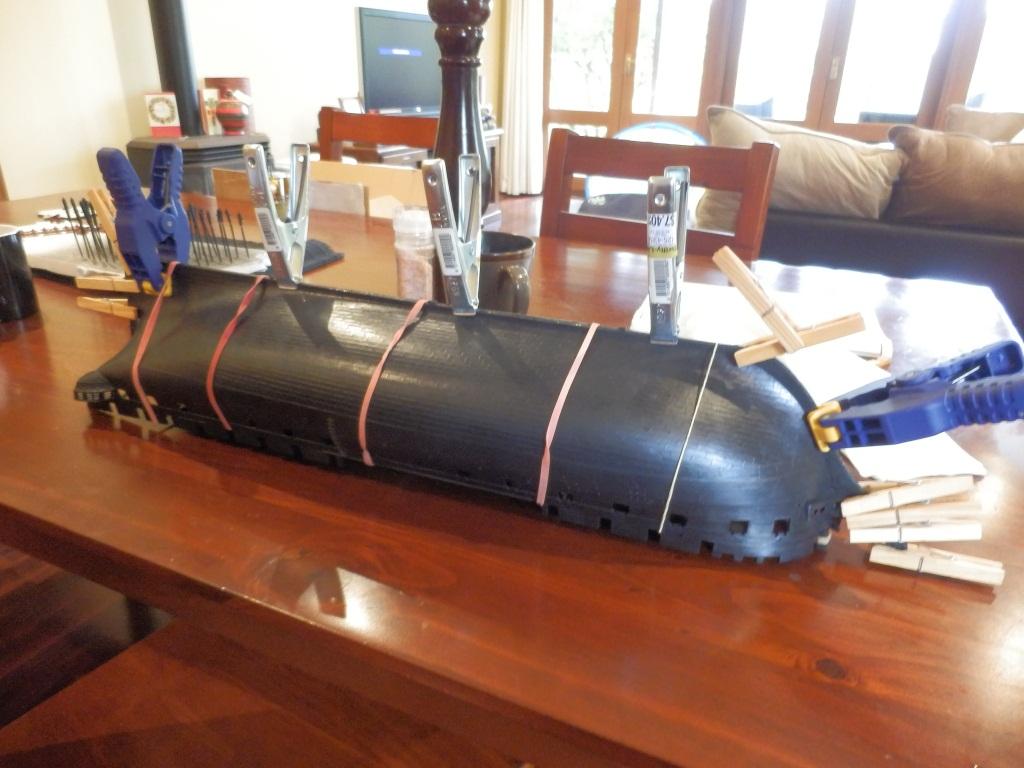
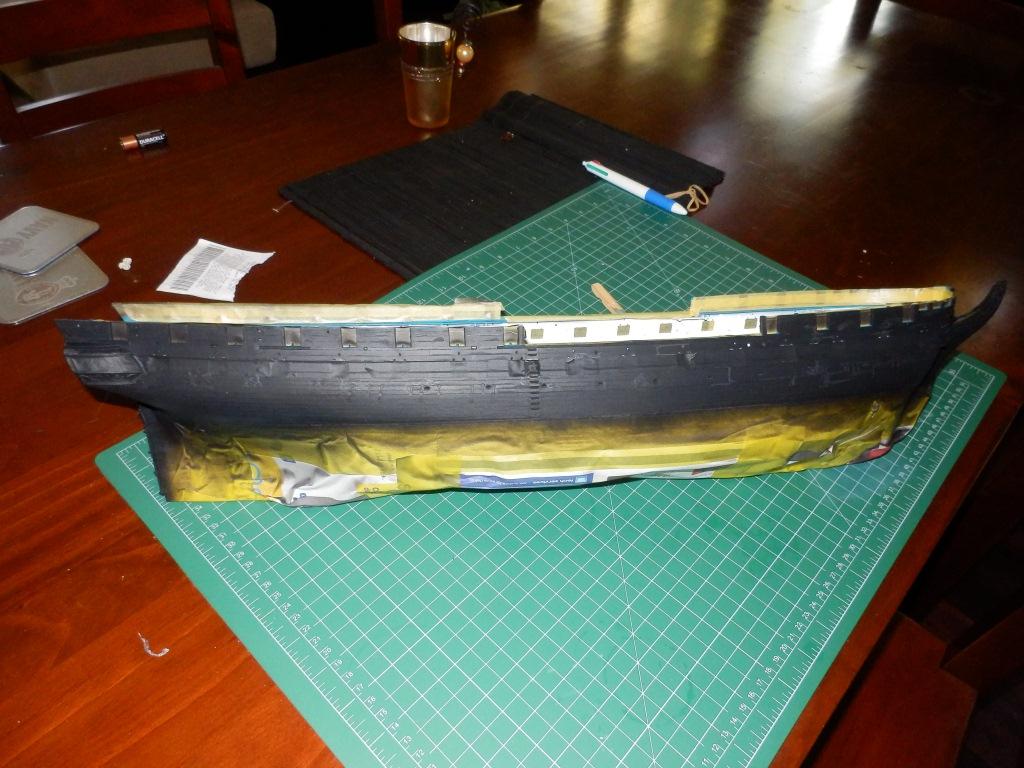
Hull was cleaned up and clamped together. Little warping was evident and it came together nicely

Onto priming and practice with the airbrush. I am using citadel and Vallejo paints, as I like working with acrylic.

TA DA!

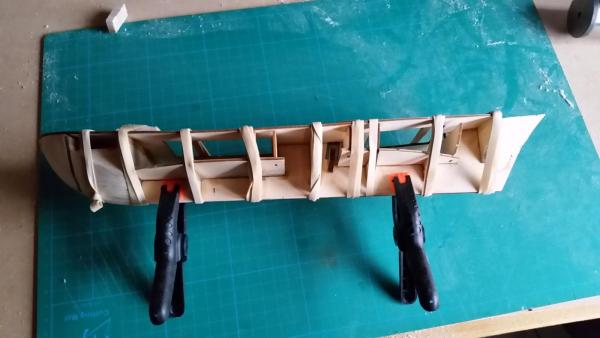
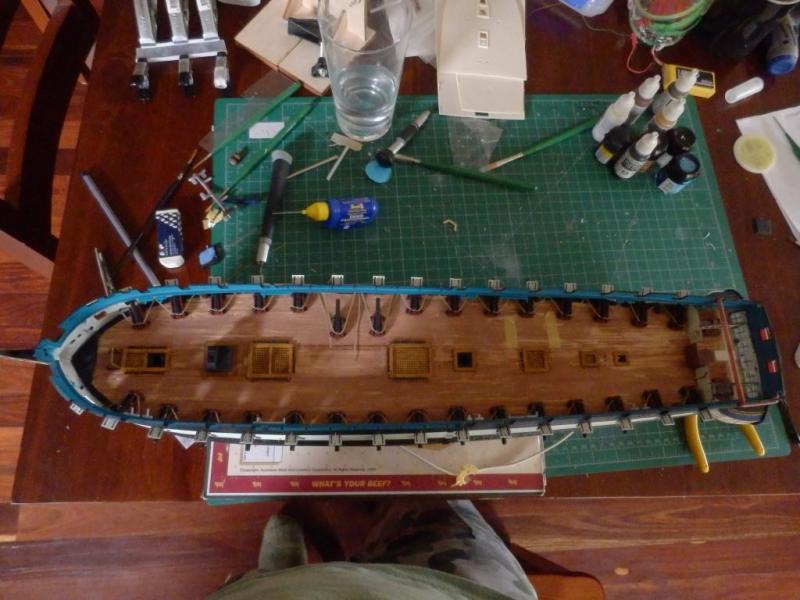
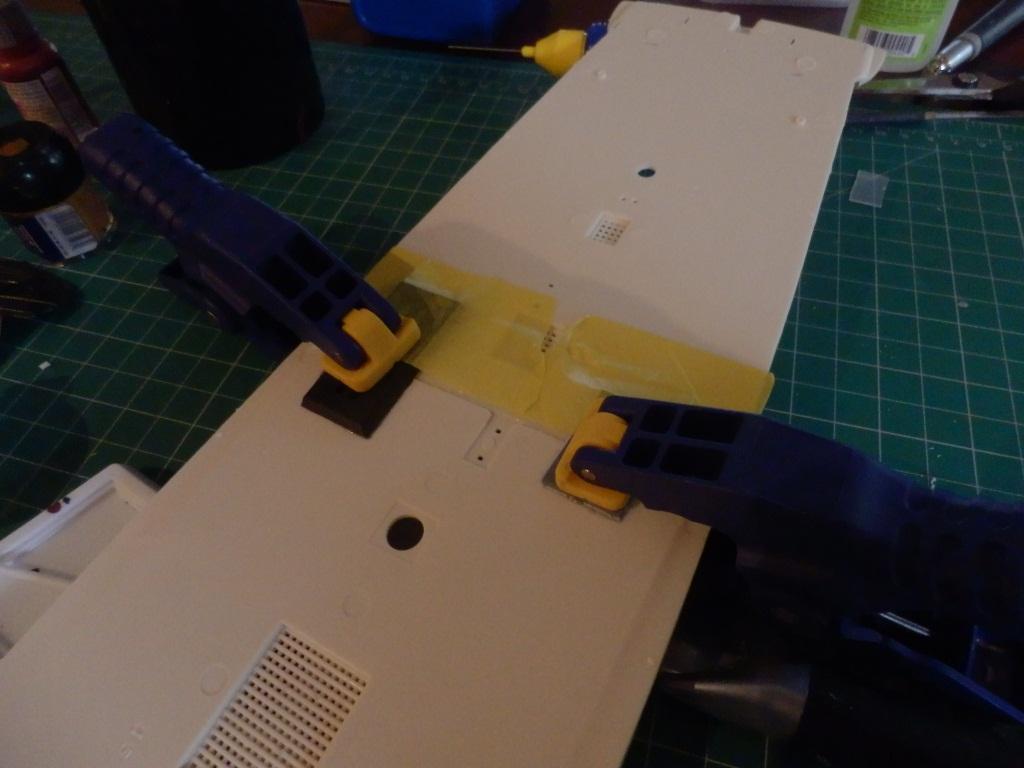
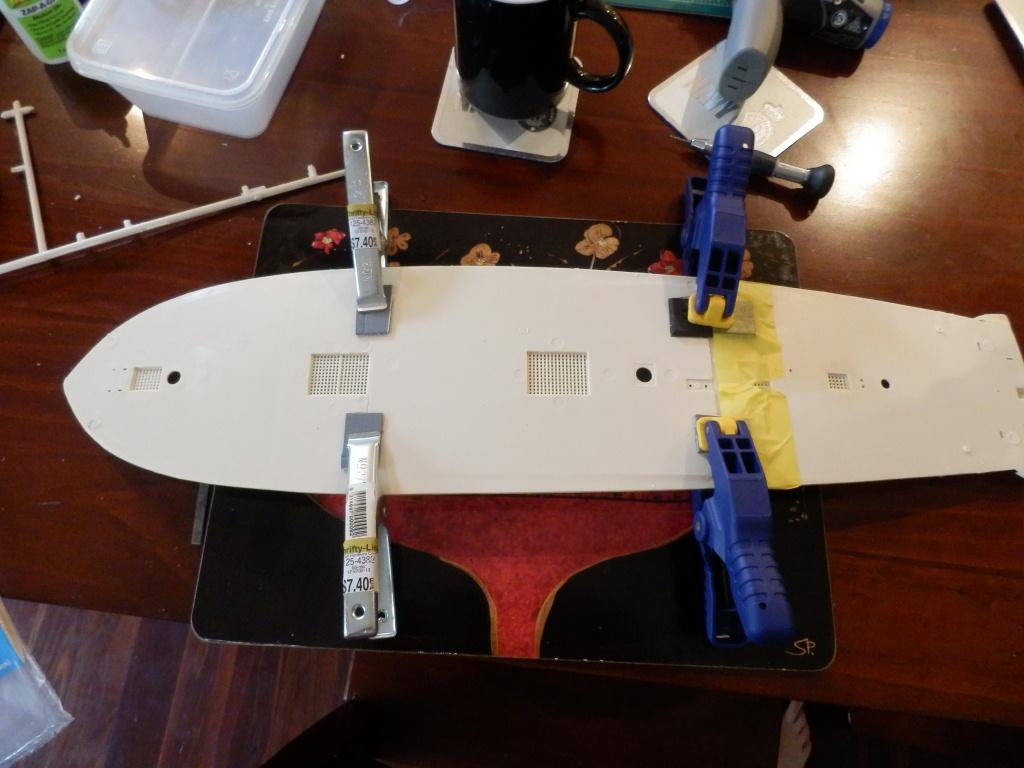
Following most peoples lead, I clamped the deck pieces together to remove the seams


Some detail work whilst the deck dries. I am really trying to force myself to allow the glue to dry completely for critical areas. Good thing theres heaps to do
Rudder was then installed
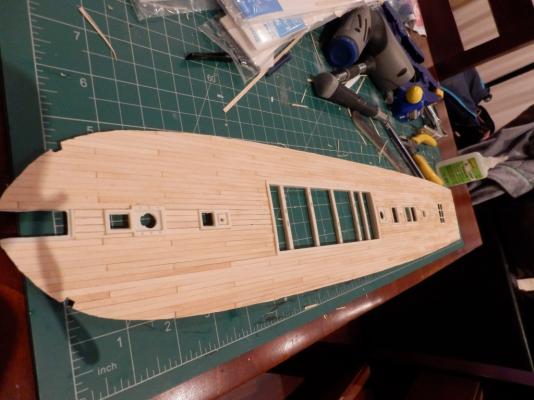
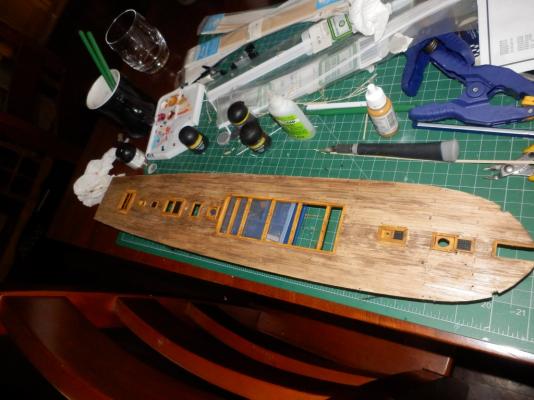
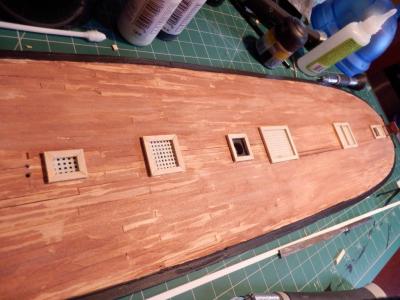
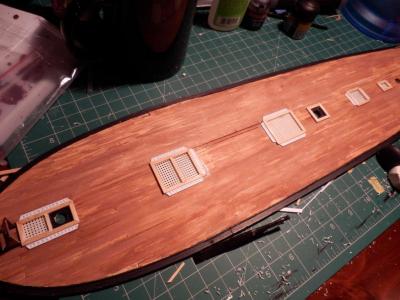
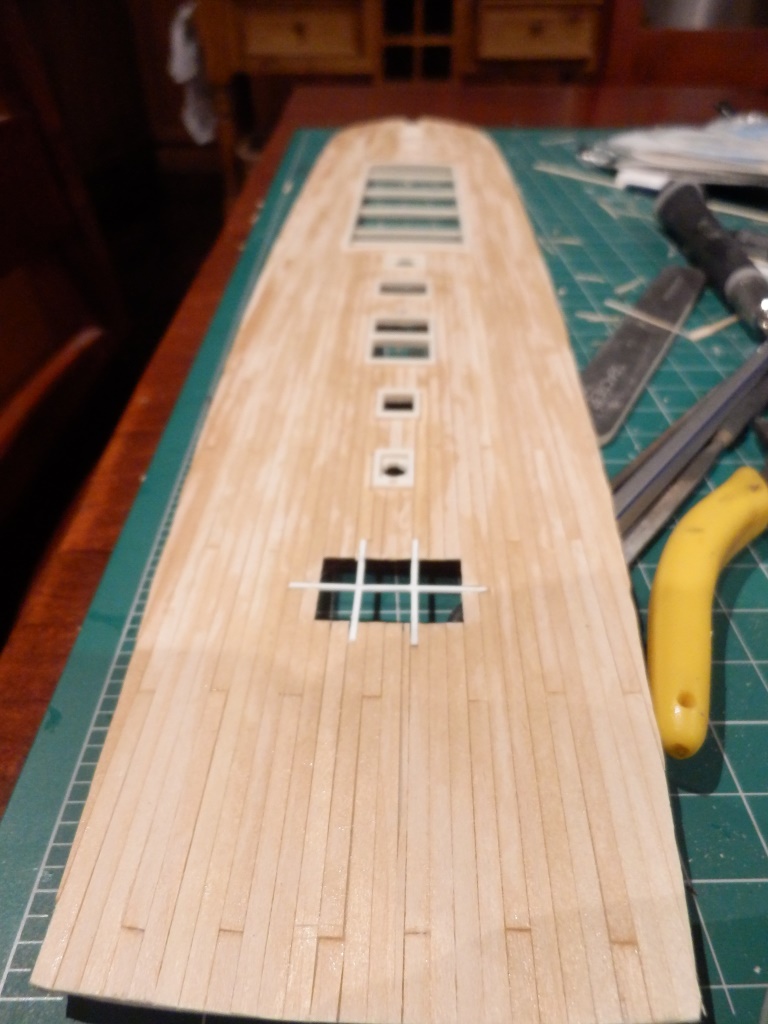
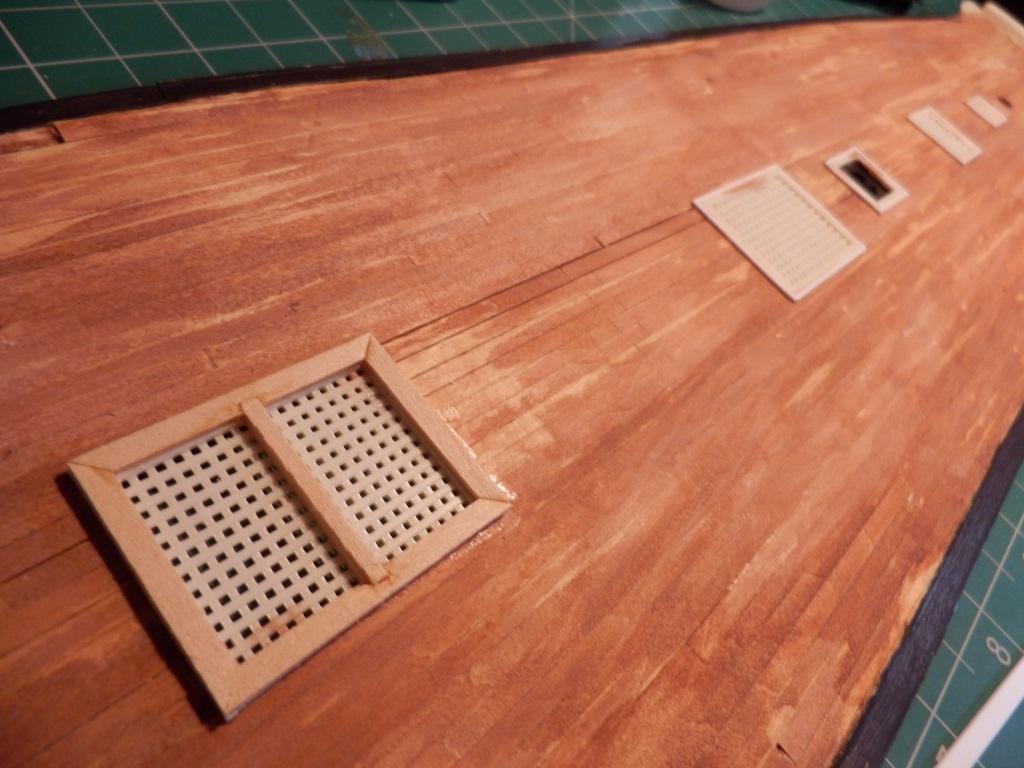
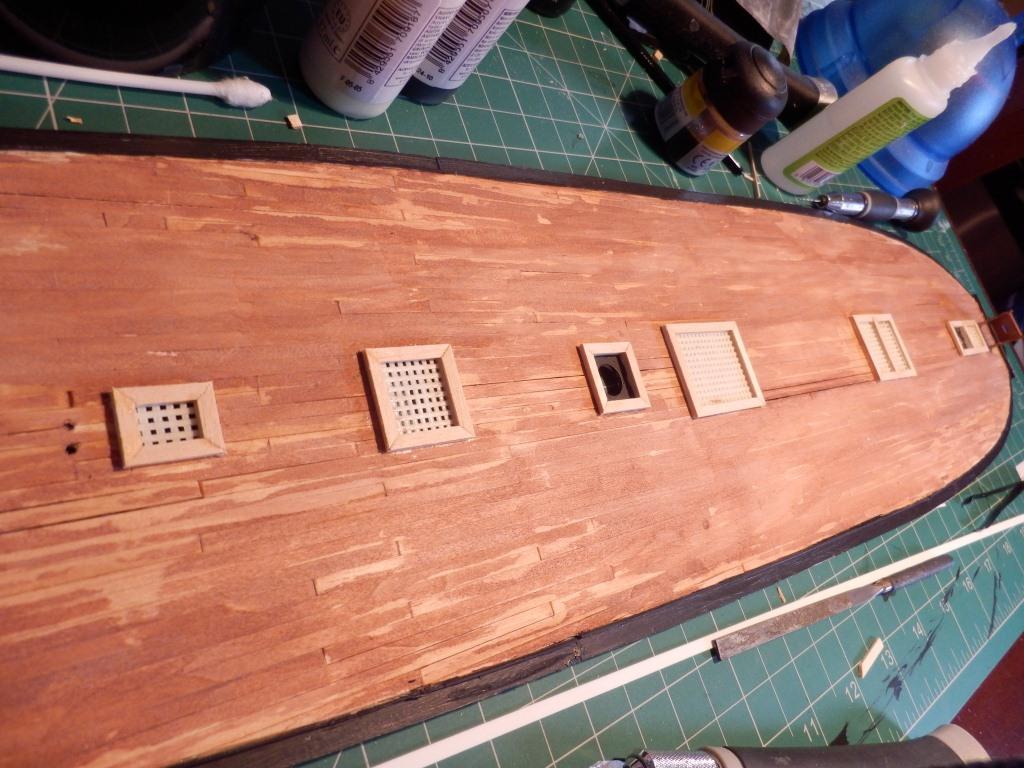
I have decided to clad both decks with basswood strips, it looks alot better than the etched in wood grain
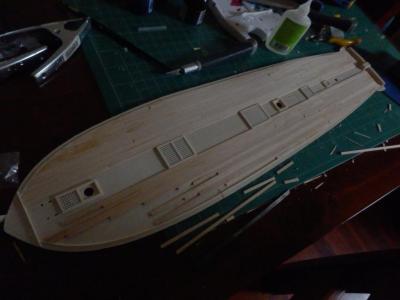
I used Ogryn flesh was for the stain, came up nicely
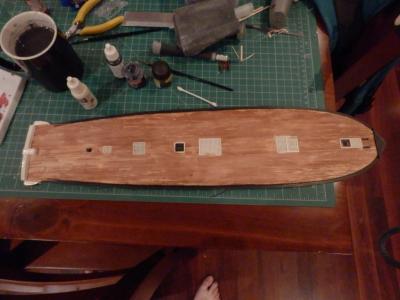
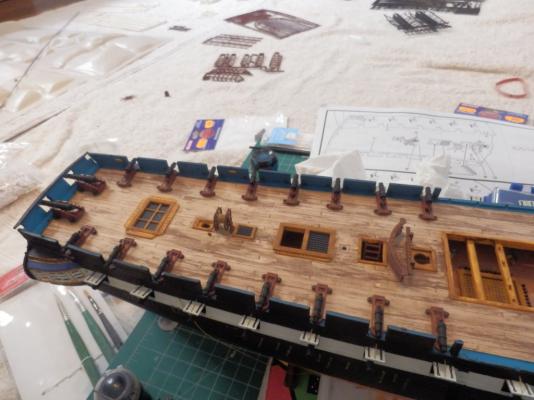
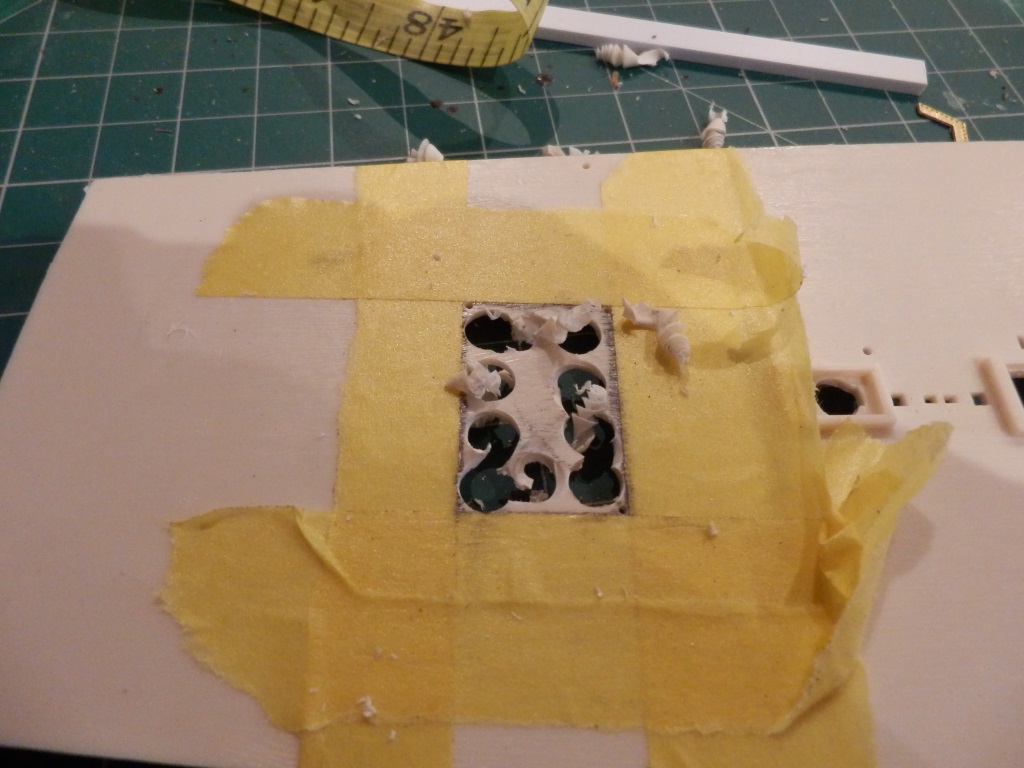
Bulking out the hatch comings
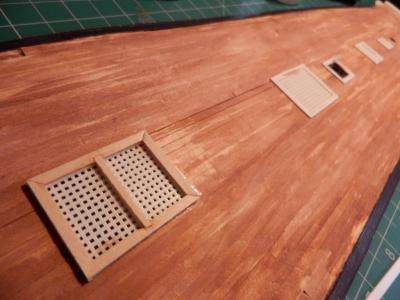
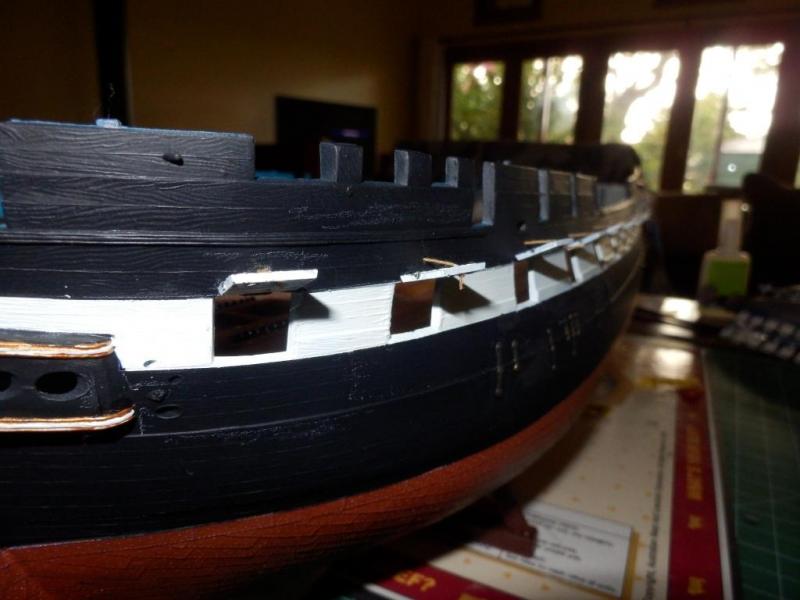
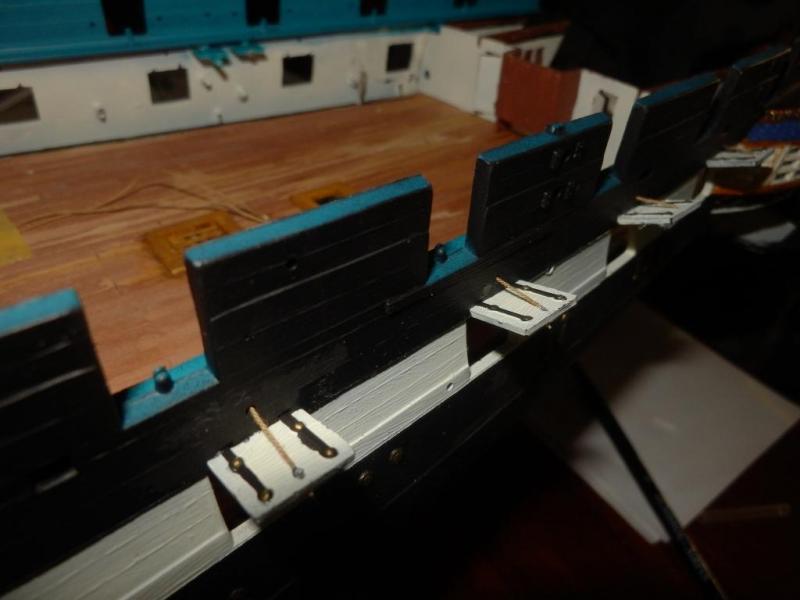
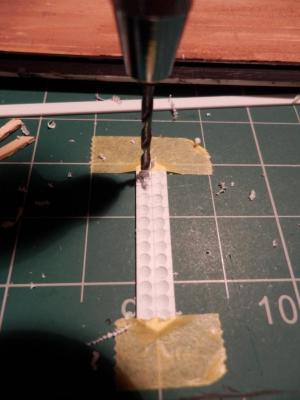
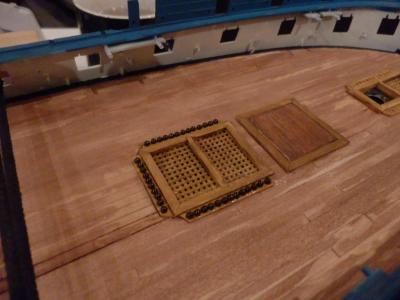
Adding shot racks to the gun deck
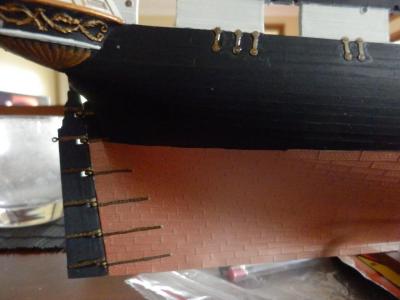
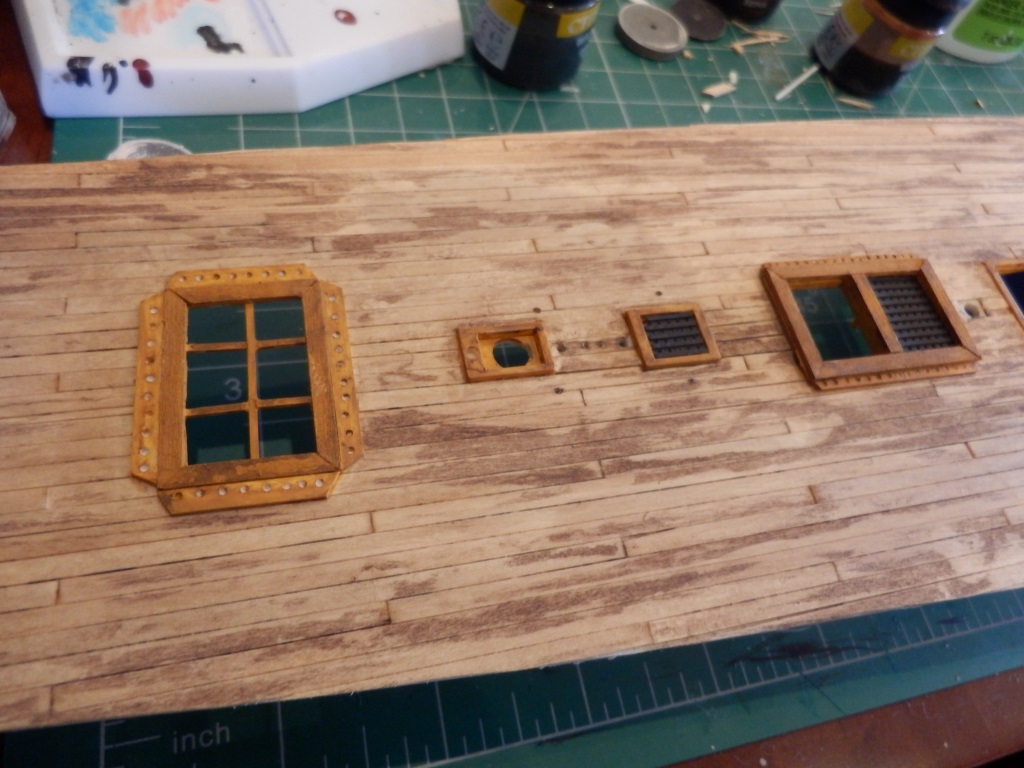
Some deatil work on the rudder and chainplates
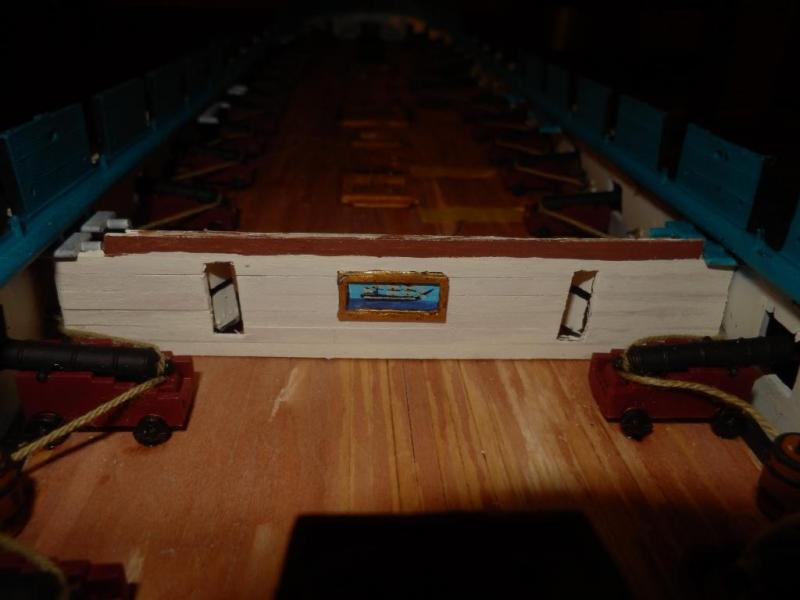
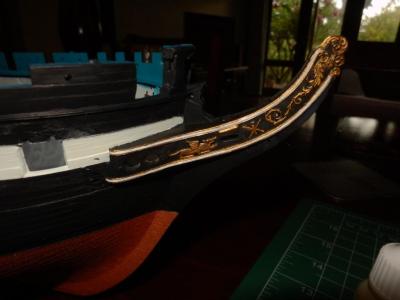
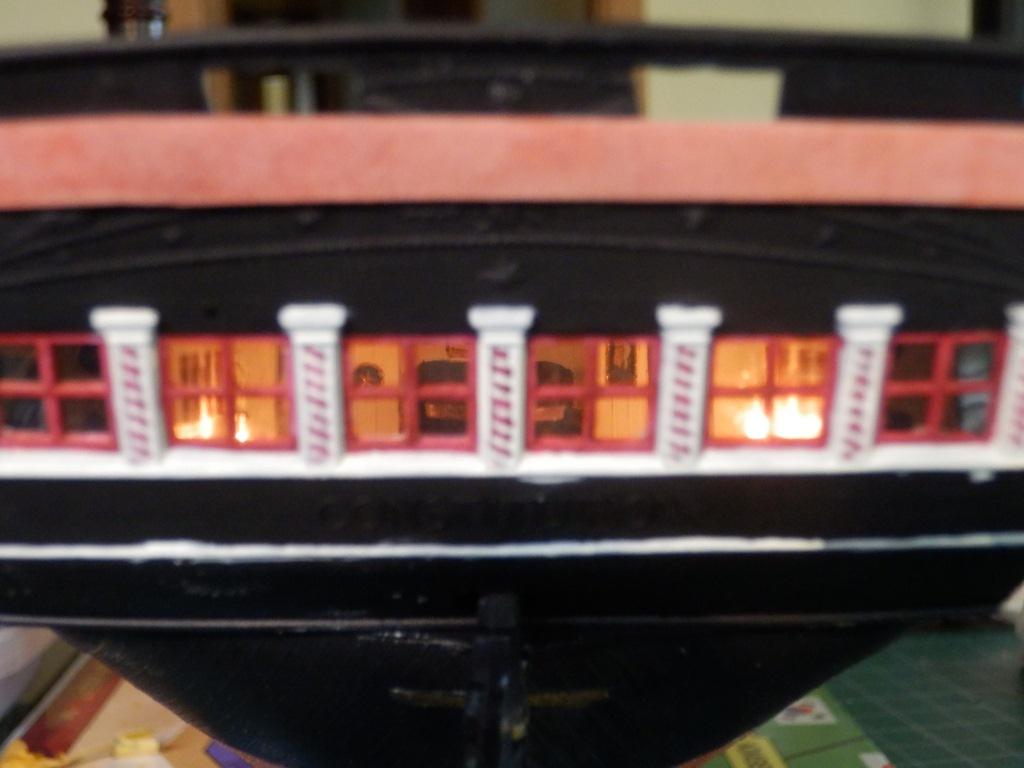
Following Force9's lead, I ordered some PE plates from Bluejacket.inc. Its a pity the stern plate doesnt actually fit to scale.
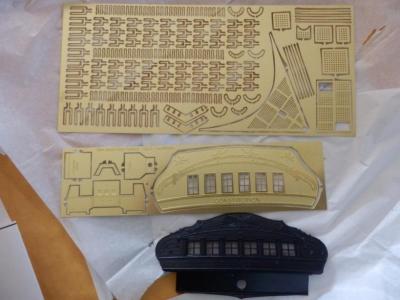
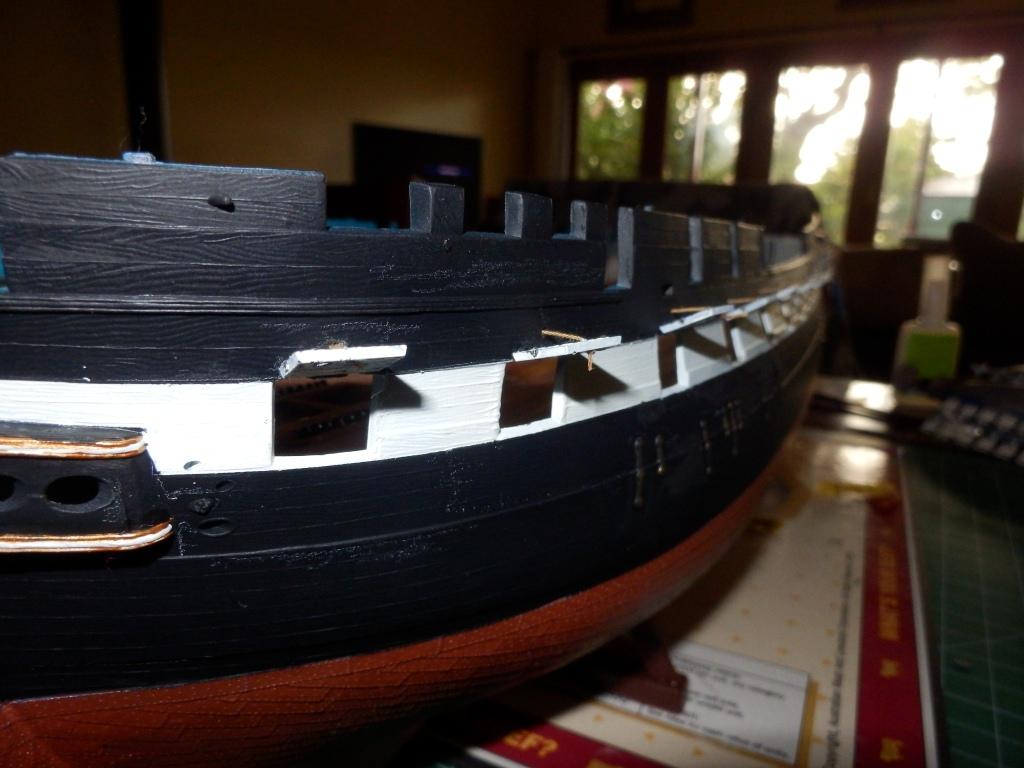
You can't have a Conni without her famous stern chasers
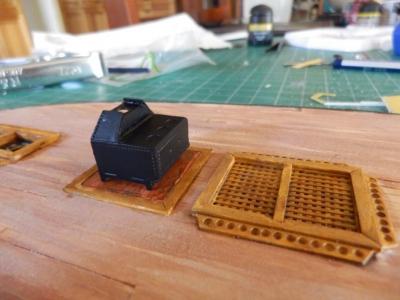
Laying bricks for the Camboose platform

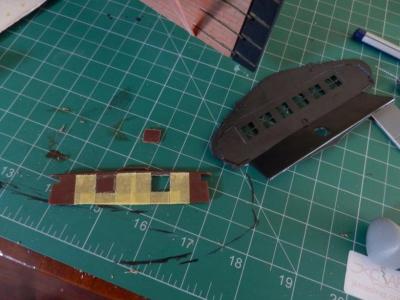
Sternplate was installed and detail started

Ordered an Amati ropewalk to use for all the lines needed, including making my own shrouds and ratlines
I reinforced the rudder tiller with some scrap brass to ensure smooth turning

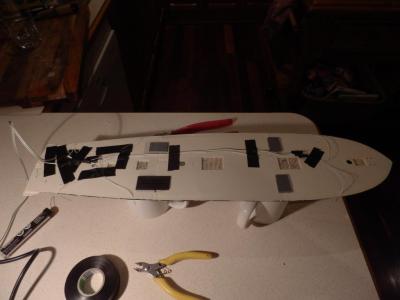
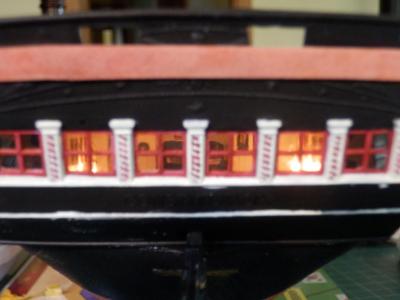
Grain of rice bulbs were installed to light up the gun deck
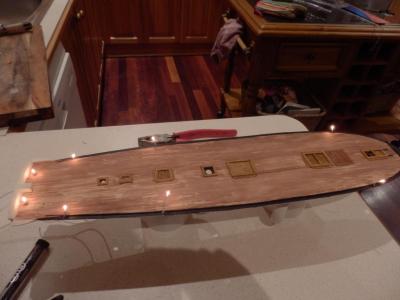
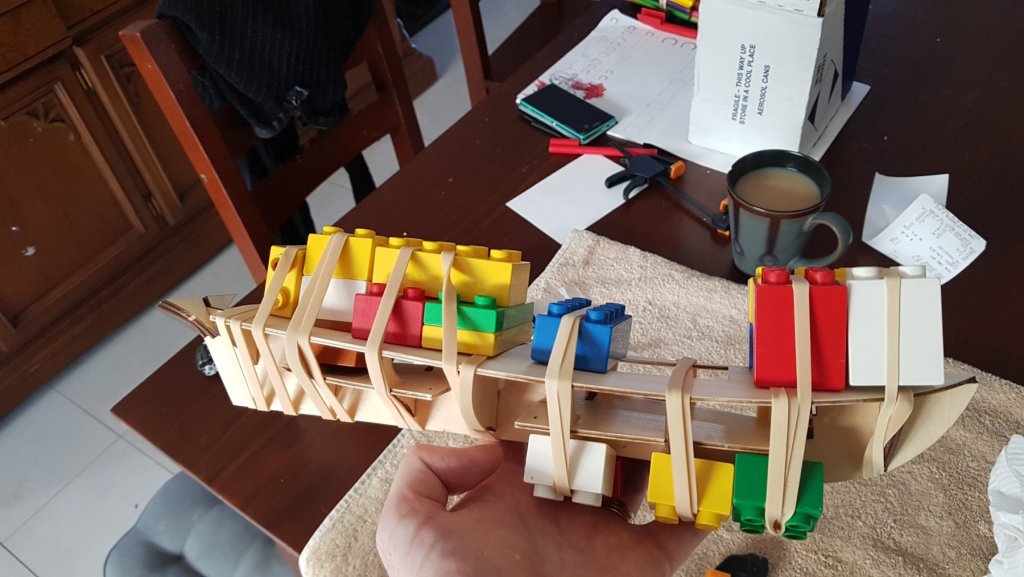
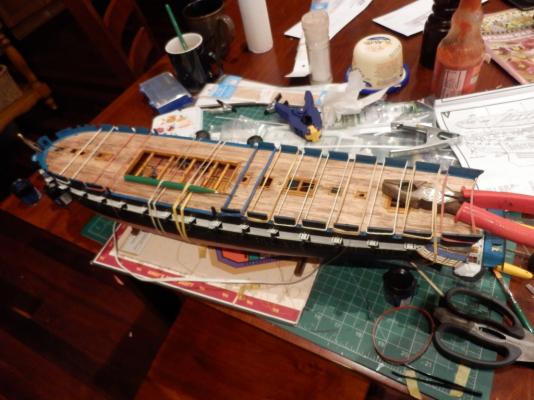
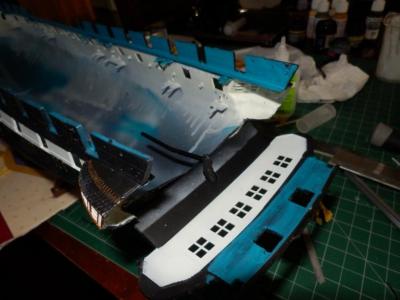
The gun deck goes in, and it fit! used some of the Admirals hairbands to squeeze the hull together


shot racks were filled
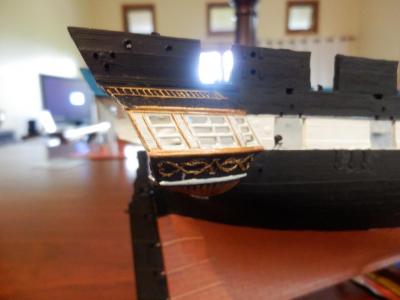
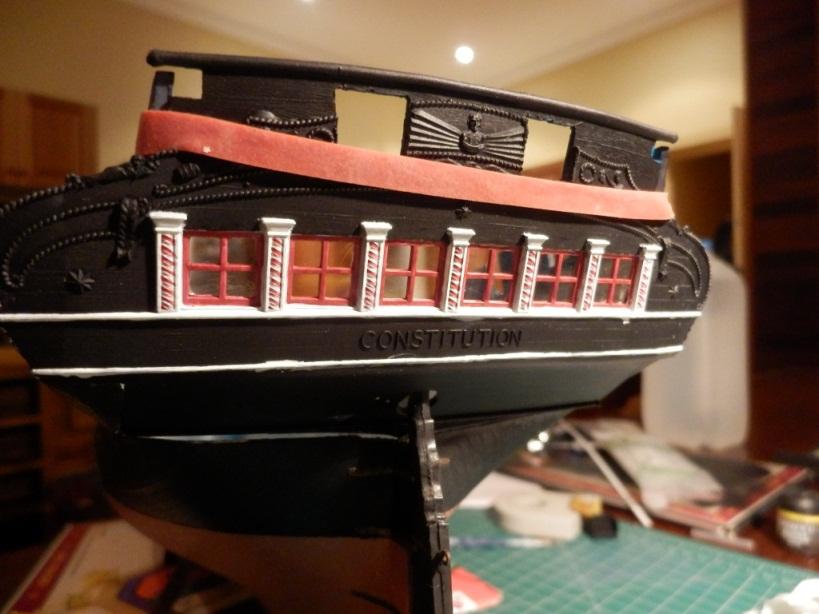
Captains cabin was painted, trimmed and installed

- ronald305 and GrandpaPhil
-
2


Le Superbe by Blue Ensign - FINISHED - Heller - PLASTIC - Built as "Le Praetorian", after Boudriot
in - Kit build logs for subjects built from 1751 - 1800
Posted
Thanks so much Blue Ensign for your technique for sailmaking. I have used it on my Revell Constitution and am very happy with the results.
I modified slightly by using a brown pencil that matches the colour of my rigging lines, and have cut the sails with stepped angles to force shape into them once in position.
Also think I added a little too much yellow but hey, what can you do