MORE HANDBOOKS ARE ON THEIR WAY! We will let you know when they get here.
×


Capt.Bob
-
Posts
69 -
Joined
-
Last visited
Content Type
Profiles
Forums
Gallery
Events
Everything posted by Capt.Bob
-
Hi Ed, I have a question concerning the term "sided" that appears on the YA drawings. I thought I understood the term to mean material thickness required to produce the component. On the stem patterns there are several pieces that reference 35" upper & 16" lower. Could you please explain. Have I completely misunderstood the term? Bob
- 3,618 replies
-
- 3
-

-
- young america
- clipper
- (and 1 more)
-
Mark, Ian, OA, Frank, Jerry, & Avia... Gentlemen, thank you. All great ideas. I shared Mark's anxiety about spending money on things that seem important, but never get used. I am going to use the mill primarily for ship modeling, which means mostly hardwood &, brass. Aviaamator, nice job with your homemade mill. I'm sure I'll have more questions once I spend some time playing with it. Take care, Bob
-
Hi Mark, Well, lets see: 1. (84634) 6 piece HSS end mill set 3/8 Inch Shank, Center cut, 4 flute 2. (82678) 3 piece Fly Cutter Set 3. (84700) ER 25 Collet Set 4. (83952) Power Feed Control Box 5. (82578) 42 Piece Clamping Set 6. (83383) Two-Way Milling Machine Vise Total =$599.20 Bob
-
To all: Just destroyed my budget and bought myself a MicroMark milling machine. The mass destruction came from accessories. A rotary table had me really confused about applications. I held off to wait for fiscal recovery and to investigate worthwhile applications. The bank will undoubtedly be sending me a Christmas card with the appreciation of their stockholders. Also, any other accessories that people have found useful. Bob
-
To all: Being new to the forum, I have spent considerable time wading through 74 pages and I, like you, have been mesmerized by Ed's artistry and workmanship. Viewing YA as an opportunity to move to a higher level, I bought the book, built the shipway, built the fixtures, bought wood and suddenly ran headlong into reality. I am an engineer by profession and as everyone knows engineers can build anything or at least we think so. The first part is to fabricate is the lower keel members using scarf joints. If think Ed is really talented, try this: Get some scrap wood (1.4" by 1/8") and make the scarf joint on page 23 Fig. 3-7. Does yours look like Ed's? Tight joints, no gaps. I'm on my eighth try and getting closer. Now, in reviewing the 861 photos currently in this forum, I have yet to find a single open joint of any kind. NOT ONE! The man is amazing! I hate the word "awesome", but this maybe one occasion where it must surely apply. Needless to say I have had to seriously reevaluate my alleged capabilities. "We should endeavor to persevere" - Chief Dan George Can't wait to see what comes next. BTW just read Clayton Feldman's review of YA in N/D Ship's 'n Scale. I don't really think he paid it justice. I found his criticism rather trite. The book is filled with photo descriptions and who needs Volume II when Volume I is two years worth of work.
- 3,618 replies
-
- 13
-
-
- young america
- clipper
- (and 1 more)
-
Hi Pete, Alcohol! I've used a variety of solutions over the years, but never just IPA. Any particular reason for that preference over others? Is it particularly suited to basswood? Usually a water/ammonia solution works well but tends to bleach out the color of some species. Bob
- 258 replies
-
- 5
-
-
- buzzards bay
- herreshoff
- (and 1 more)
-
To all: I have watched with interest at everyone's safety concerns. We truly have become a thoroughly risk avoidant society. Just remember the safest knife is the sharpest and the safest tool is the one that scares the hell out of you. No offence guys, but Ed is a big boy. (I can hear the thundering rebuttals already) "Remember, be careful out there" (Hill Street Blues)
- 3,618 replies
-
- 14
-
-
- young america
- clipper
- (and 1 more)
-
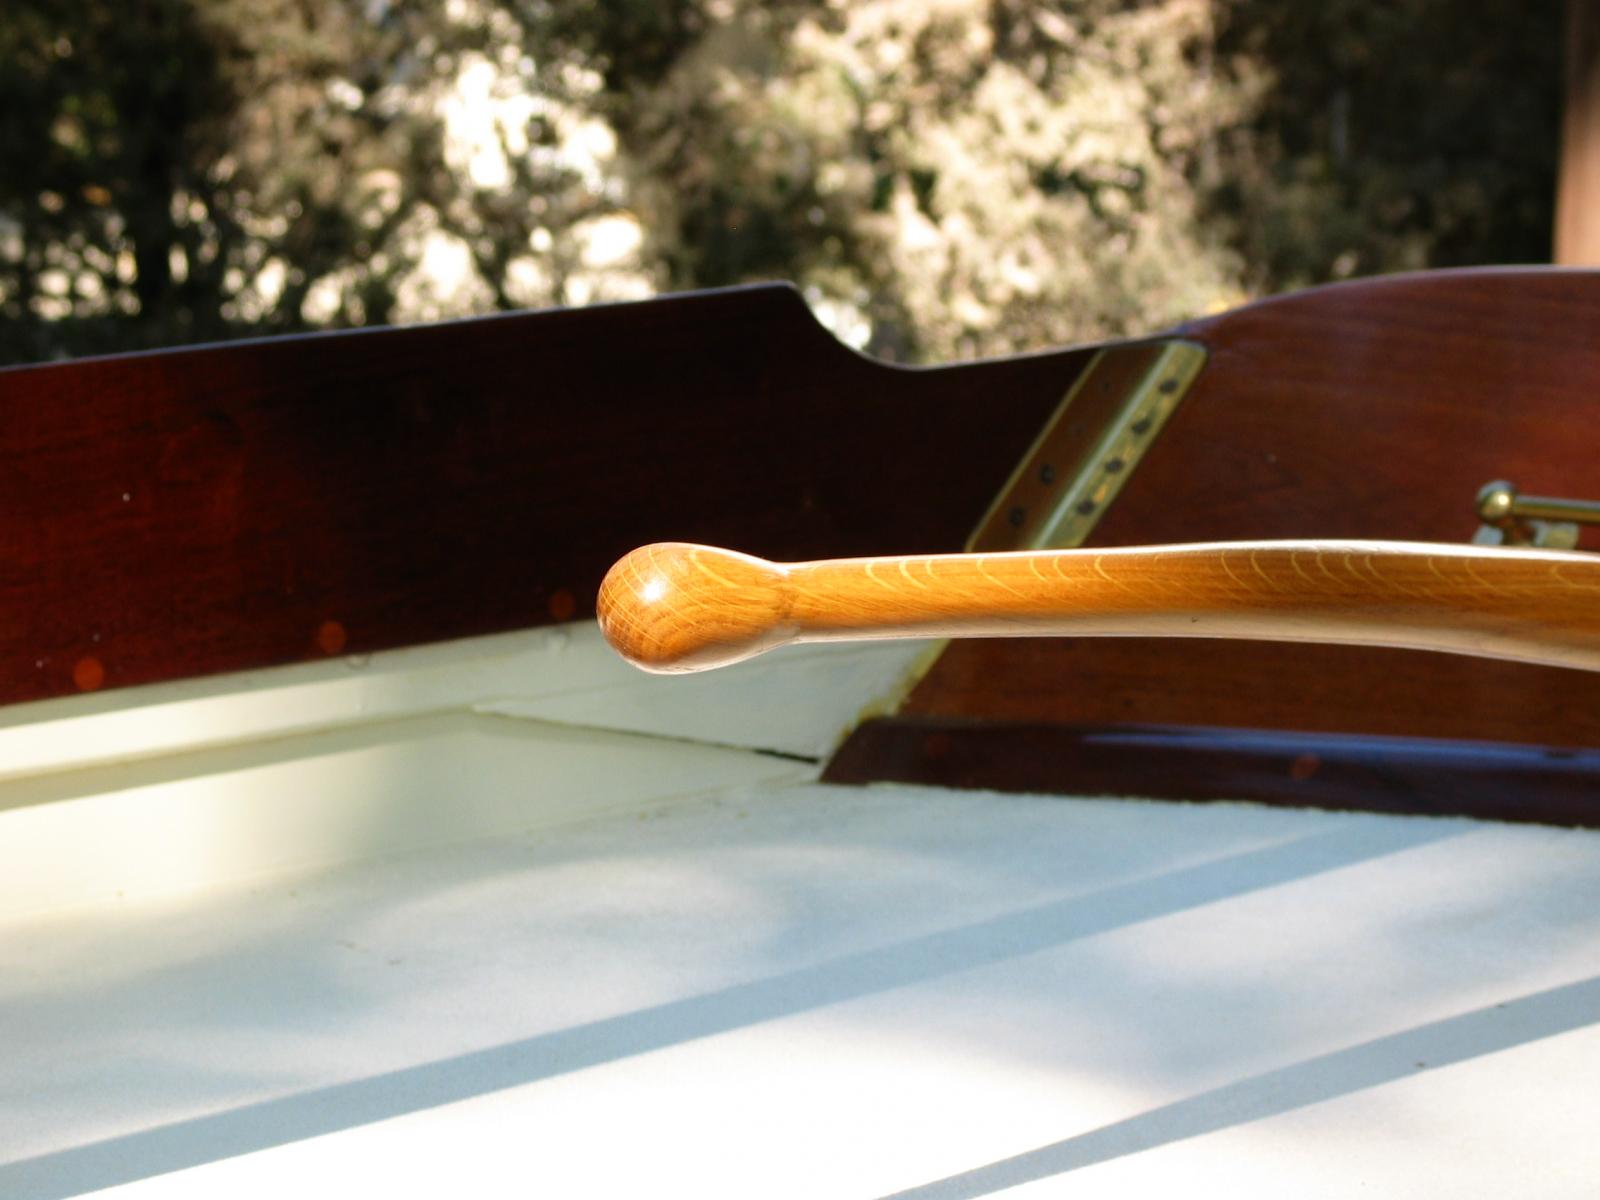
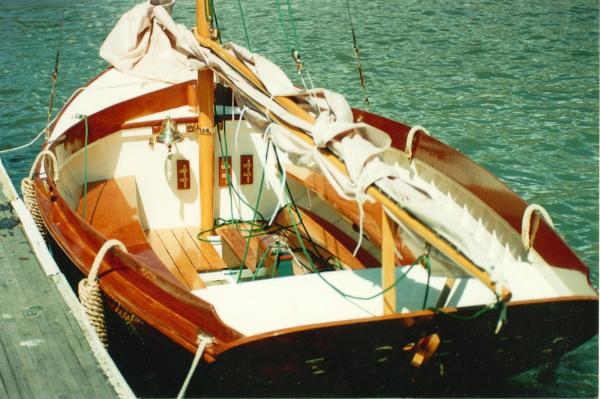
Hi Pete, Thanks for the photos. I am impressed with the fact that you pay close attention to unique Herreshoff details. In particular, I noticed the "Herreshoff egg" on the tiller. Also, an excellent job on the coaming. That is a lot more difficult then most would realize. It was the toughest piece on the full size. Concerning the Bluejacket kit, it has very little to offer someone at your level. There are several scale discrepancies and all the fittings are potmetal. On the other hand, for the beginner there's value for the price. The Joel White Haven is a substantial project. It took me about fifteen months, but I was still working at the time. In retrospect, I would do it again in a heart beat if I lived on the coast or on a waterway, It was on my bucket list, having grown up on the coast of Maine. However, the high desert is no place for wooden boats. Keep up the great work, Bob

- 258 replies
-
- 5
-
-
- buzzards bay
- herreshoff
- (and 1 more)
-
Hi Pete, Your avatar of a Herreshoff 12 1/2 caught my eye. I'm a big fan of Herreshoff boats. In the nineties I built a full size Joel White Haven 12 1/2, which is a centerboard version of the original (Buzzards Bay Boys Boat). I'm just finishing a Bluejacket kit of the same boat. I certainly agree with your choice for a model. I have a New York 25 on my bucket list. Looking forward to your progress. Good luck, Bob
- 258 replies
-
- 10
-
-
- buzzards bay
- herreshoff
- (and 1 more)
-
Steve, I noticed your problem with the local copy people. Ed has given the purchaser full permission for reproduction of the material on page 18. The last paragraph under "Information Included" stipulates that: "This information is intended for use only by the purchaser of the book. You may make copies of the material for your own use, including printing at different scales" Try taking the book to the copy center and showing them the reference. Having a single continuous print is much better than messing with individual sheets. I also recently purchased the book and am trying to muster the courage to step off the cliff. Best regard, Bob
- 3,618 replies
-
- 5
-
-
- young america
- clipper
- (and 1 more)
-
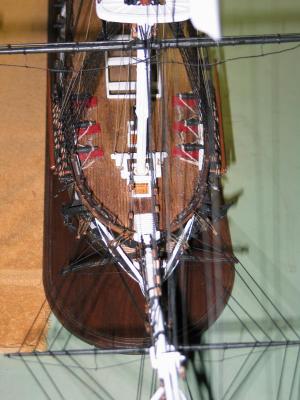
Its hard to argue with a photo. I'm sure that Model Shipways took the latest configuration. If you want to get really precise when doing scale, you usually have to pick a specific date and even then its really difficult to capture all the details correctly. The Connnie has been rebuilt so many times during its life that almost none of the original wood remains in Boston harbor. One piece of advice which may be helpful. I'm working on the running rigging on my Mantua Connie, which is suppose to be the 1797 configuration. As you can see it looks quite different than the MS 2040 configuration. I would highly recommend that before you complete the mast construction you study the rigging very thoroughly. There are a great number of blocks and harness elements that will be needed. Carefully consider installing most or all of these features before stepping the masts and laying in the standing rigging. It has been very cumbersome installing these items amongst a sea of thread. Best of luck, Bob P.S. Apparently there is a difference between plain photos and scanned .jpg files.
-
JS, I have a complete set of the 1932 engineering drawings of the last major Connie rebuild. It shows two sets of three "seats of ease". I tried to attached a .jpg scan, but kept getting Error 500, whatever that means. I also have a scan of the Crew's Head from Karl Marquardt's "Anatomy of the Ship, which shows two sets of four seats. I am trying to finish the last of the rigging on a Mantua 1:96 scale Connie and it shows only two seats total. So, I guess you can pick whichever one suits your fancy. Bob
-
Inspiring accomplishment. I am stuck and can't seem to get back to work. I have been building masts & spars. Finished everything but the upper main spars and got stuck. By the way, I'm reminded of the people who thought that the moon landings were staged when I look at your shop. Nobody has a shop that clean and organized. It would take me a couple of days to clear my bench to that level. Must be the sign of an organized mind. Perhaps it's the secret to such outstanding work. Looking forward to the next phase,
-
Hi Jeff, Late at night and just finished watching an interesting segment on YouTube. There is significant reference to the Connie. Just thought folks might enjoy it. http://www.youtube.com/watch?v=flxJPl-qwIc
-
Jeff, Go over to Adrenaline Hobbies in Roy or Frequency RC in Layton (North side of the mall)and get some Stay-Brite silver solder. It comes in a small tube with a bottle of flux and a roll of solder. It's about 5% silver content, so it flows at a rather low temperature. The higher the silver content, the higher the flow temperature and higher the strength. The Stay-Brite is plenty strong enough for your application. Harvey is right about cleanliness. Very important. I generally use MEK to clean the metal parts. This removes all the grease & oil. The trick on the dead eye hoops is to apply a drop of flux on the part, place a small bead of solder on the iron, and carefully touch the part with the bead of solder and remove the iron. This will minimize the heat transfer. A little practice is all it takes. Good luck,
-
You guys are not helping at all. I have been debating whether to add copper to my Mantua 1:8, but have had trouble finding the proper scale. For the MS2040 the $200 price tag is a little intimidating, so I'm reluctant to use anything that's going to look out of scale. I once talked to one of the model builders on the Queen Mary who said the secret to museum quality is "proportion, proportion, proportion! However, keep the postings coming, I need all the encouragement I can get. Currently, I'm buried in masts & spars.
-
Bob, Thanks for the photos. I have been saving everything (237 ea.), which will be a geat addition to the parcticum. By the way, are folks aware that a complete set of the restoration engineering drawing are available from the Boston Navel District. The drawings include everything from the keel to the Captain's cutlery and furntiure. The CD only cost about $30. Keep up the great work, Bob
-
Jeff, Glad to see you postings continued. I'm still struggling with my Mantua kit, but hope to get started on the larger Model Shipways kit. I'm going to try your method of copper plating the hull. I hope you don't mind some questions. I'm sure I'll have a few. Take care, Bob