


CptNautilus
-
Posts
26 -
Joined
-
Last visited
Content Type
Profiles
Forums
Gallery
Events
Posts posted by CptNautilus
-
-
Here is a recapitulation of all the chapters completed up to now:
Chapter 2: Planking the hull, first layer
Chapter 4: Planking the hull, second layer
Chapter 5: Covering the door frames
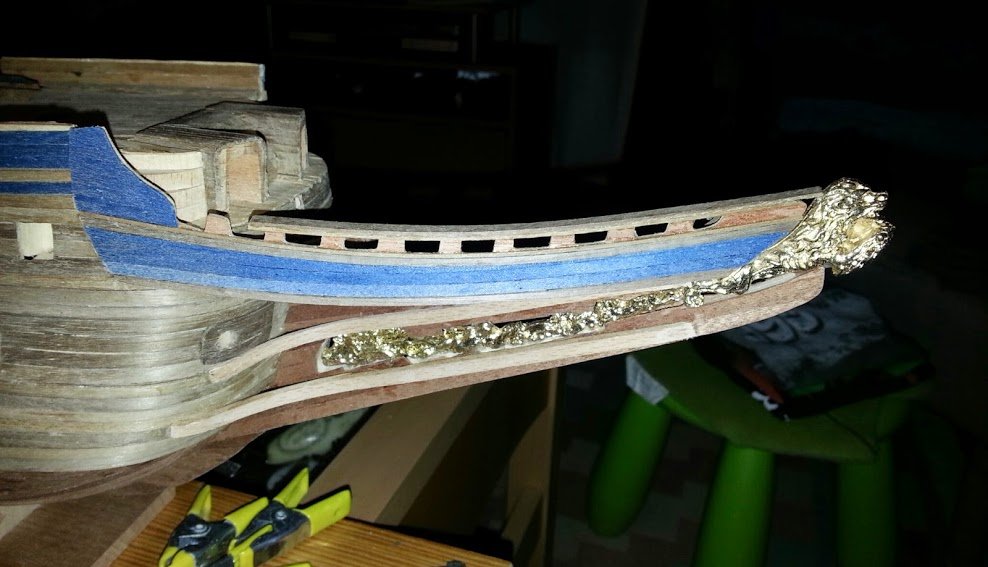
Chapter 9: The beakhead and the keel
Chapter 11: The heads and the beakhead
Chapter 14: Deck fittings (belaying pins, bits, doors and chains)
-
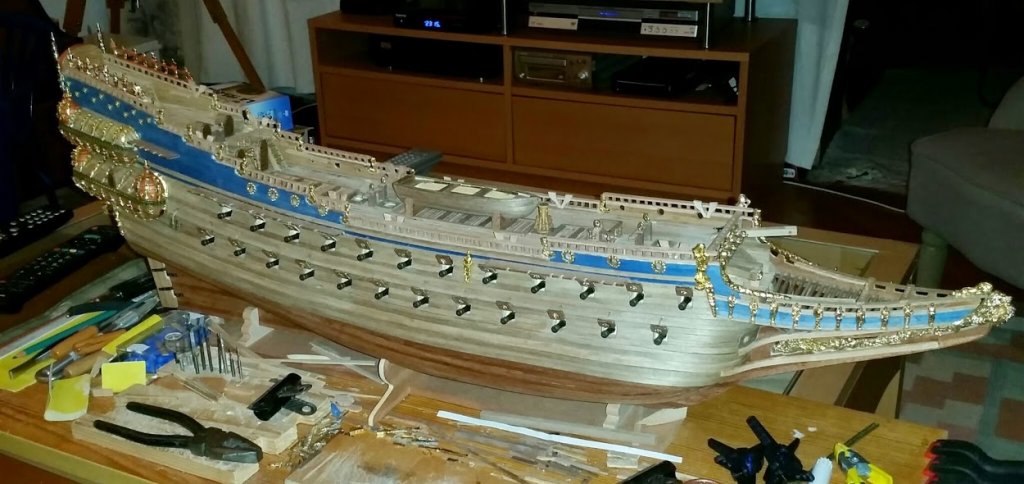
Yeah! A rainy Sunday gave me a boost and allowed me to complete the hull before Christmas. Finally it will have taken me less than one year to complete the hull.
I felt that sometimes a bit of copper paint would improve the fittings:
I am now moving to the masts, which I feel will asks for several new techniques.
-
I am doing good progress with the decorations. Still, I'm not sure I'll finish before Christmas holidays stop me. So I thought I would give a head-up here.
Chapter 19 is not yet finished but you can already check it.
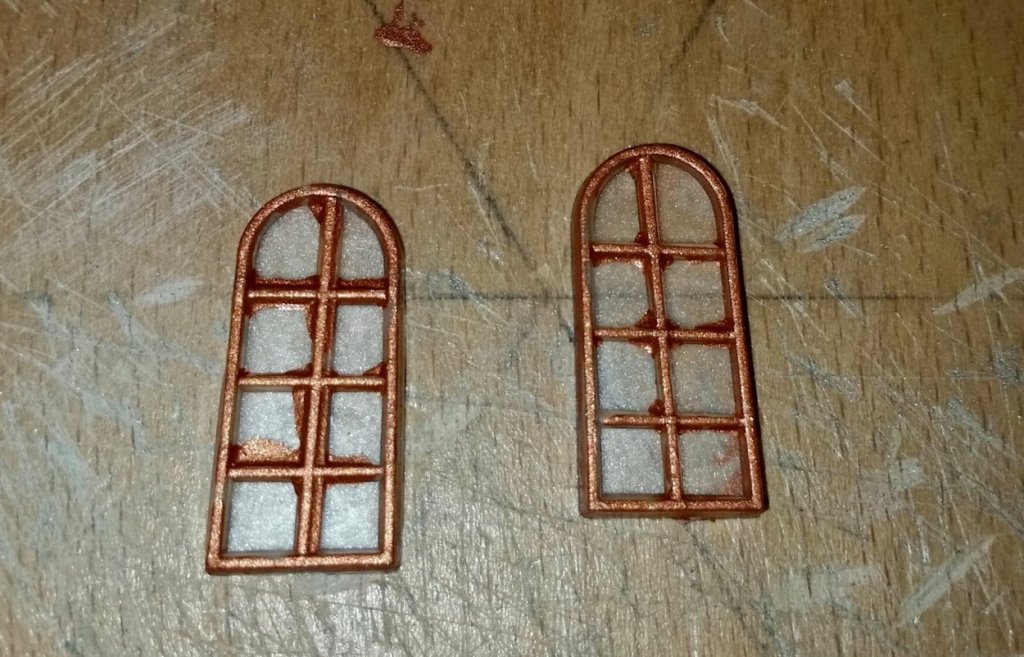
The plan fails to explain how the upper part of the poop is supposed to be done. This is how I did it:
I used some "brou de noix" (natural tincture made out of crushed nuts) to paint the outside.
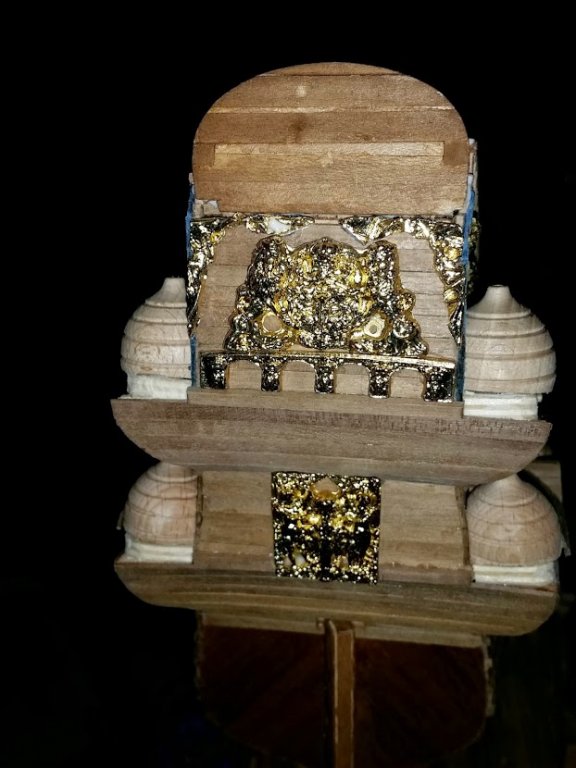
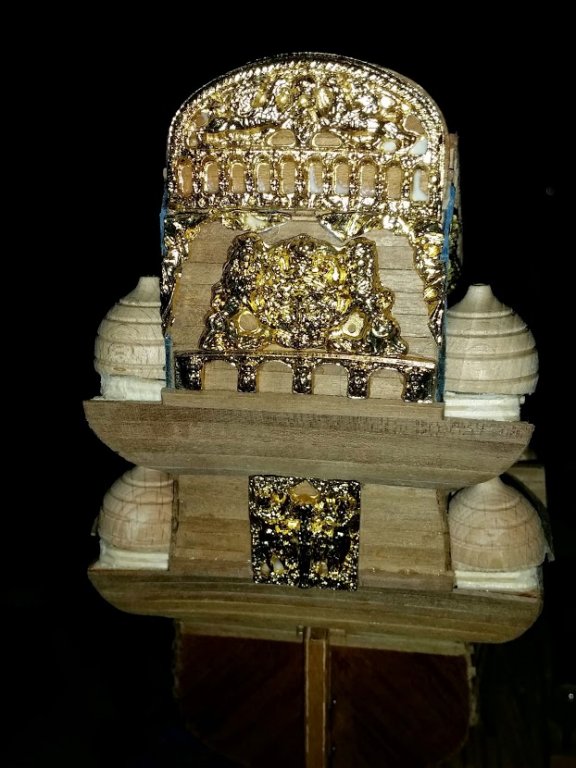
I planked the inside with the same wood used for all the other gunwales. Finally I painted the top edge with a copper paint I have used for the cupolas.

-
-
Hello Capt, Welcome to this great informative site,thank you for your most detailed log in pictures,it will surely be most appreciated, Edwin
Thank you for your kind comments.
Indeed, I'm posting much more pictures than words. That's in part because what I have found mostly useful in other's logs are the pictures, looking for details that are not so well presented in the plans or in the building book.
-
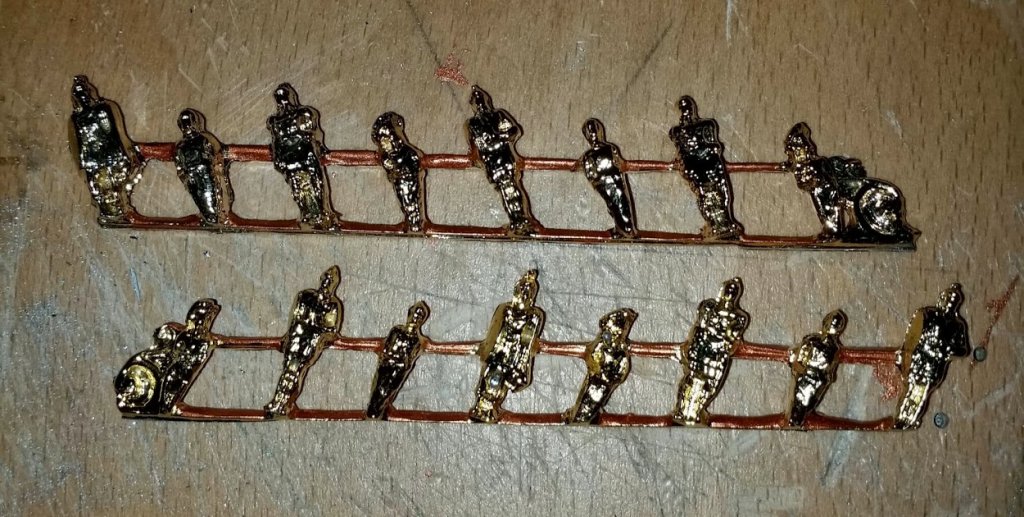
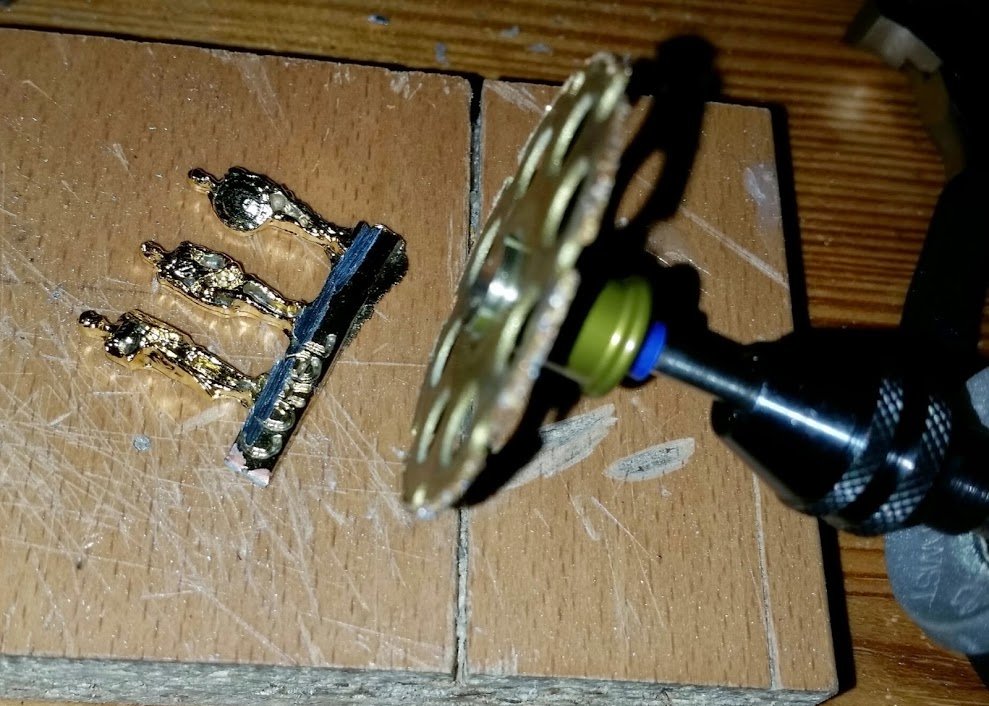
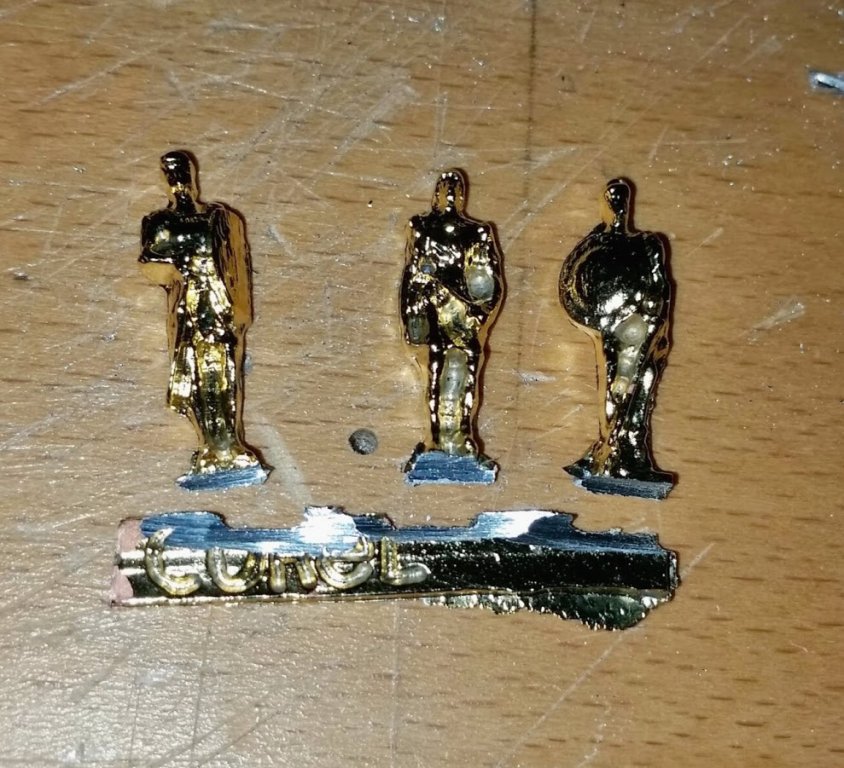
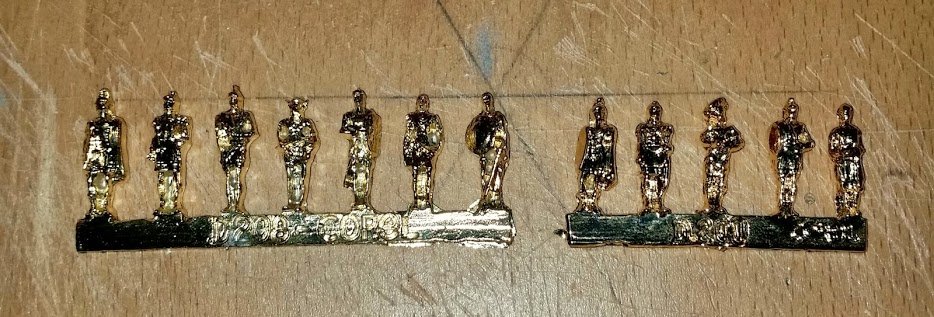
A cut-off wheel in a Dremel might work well.
I have tried with good success so far. I did not cut all the way through the base but about half of it. Then, using flat pliers I have twisted it. The base was now weakened in the right spot and broke just under the feet of the figures. I then removed the last bit with cutting pliers.
-
Best idea I have found after breaking several
Please excuse the photo of my example on your build log, but it was only intended as a quick way of explaning
Regards,
Michael
You mean that you are sawing them off the base, correct?
-
-
Thanks!
I'm sitting here with my Corel mast plans, copies of the Billings mast plans, and the actual Vasa plans from the 1980's! Trying to figure things out between the 3 plans!

Frank
That makes for a awsomely great model!
Now that you are reaching the masts, I guess the archeologist's plans are going to be less accurate as the masts were not so well conserved in Stokholm's harbour muds?
-
Very interesting. I'm following you closely because I have just finished the portholes and after gluing the ornaments on, I'll be right there, building the masts. It helps to have someone scouting the approaches!
Very good and inspiring work.
-
-
-
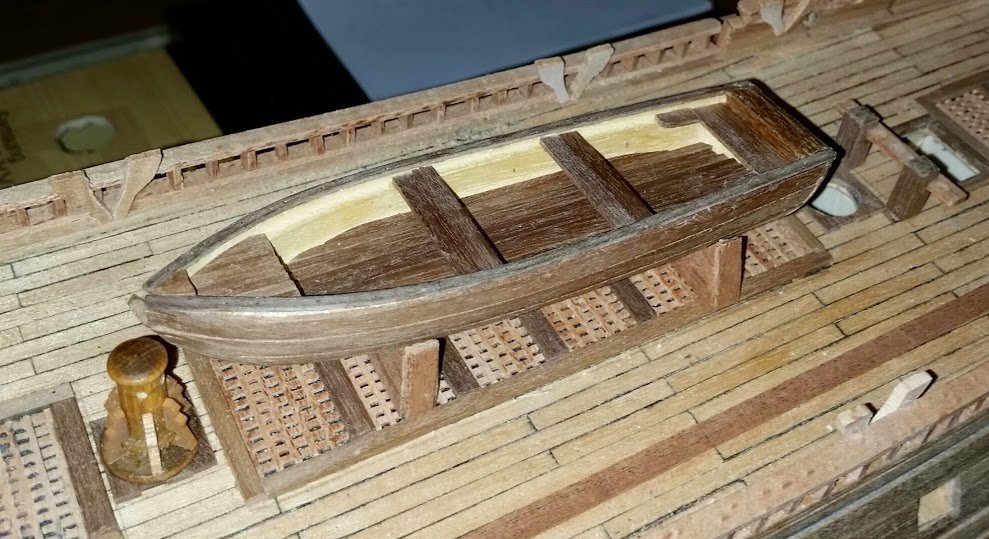
The boat looks great. Is it planmed to give him rams or a rudder?
I don't think so. The boat is meant to be stored on the main deck and I don't think they let the oars and rudder on when not it use. Also, I might already have some difficulty to fit it between the main mast and the capstan and a rudder would only make it harder.
-
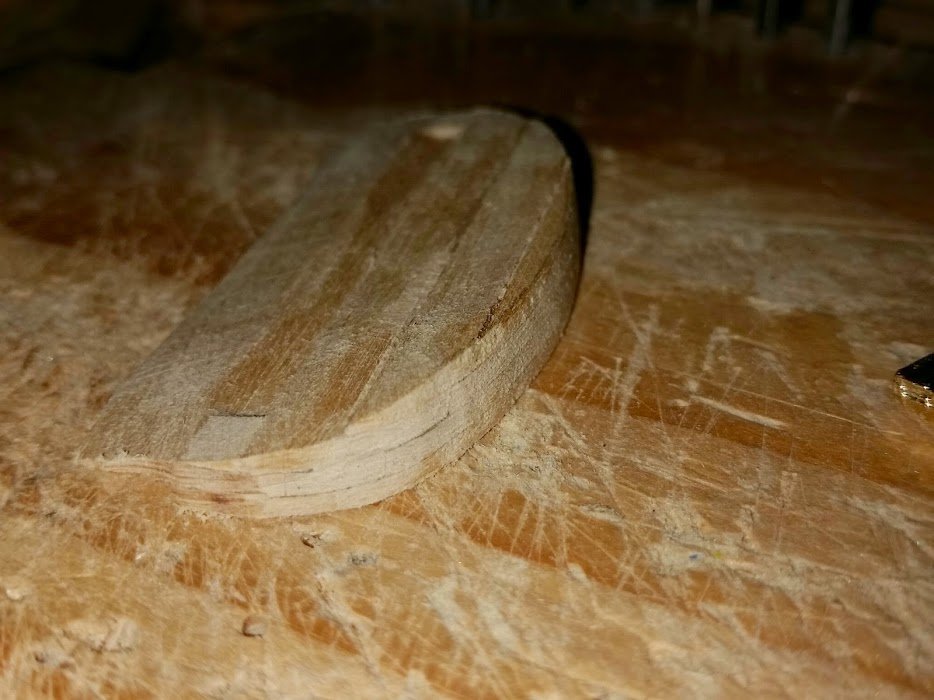
I like the colour of the boat, what wood is it made of?
The planking is made of walnut. The inside, I'm not sure but probably limetree.
-
I have now finished the tender. It was probably the last time I had to curve planks with steam.
I have started working on the portholes. 48 of those tiny pieces to make and my first contact with rope.
At some point in the process, when I can work with open windows, I'm going to varnish the hull.
-
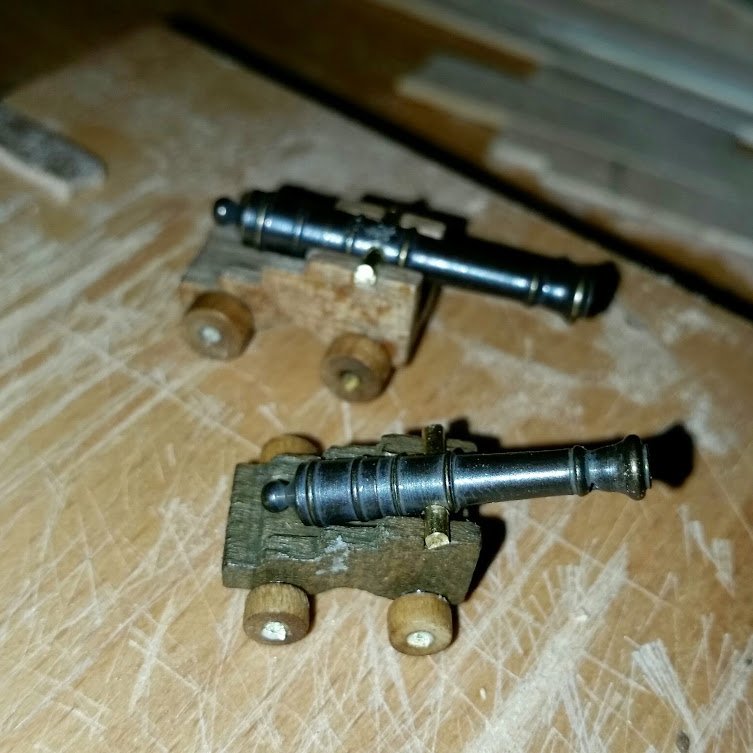
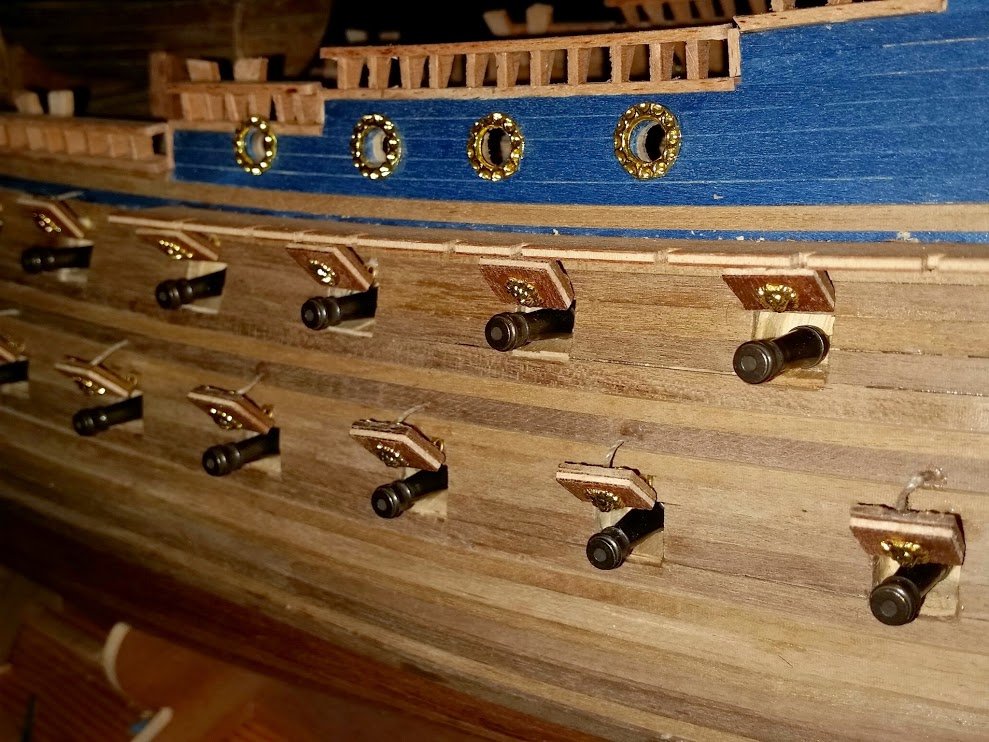
I have completed the deck gun carriages and portholes. Working on the tender now.
-
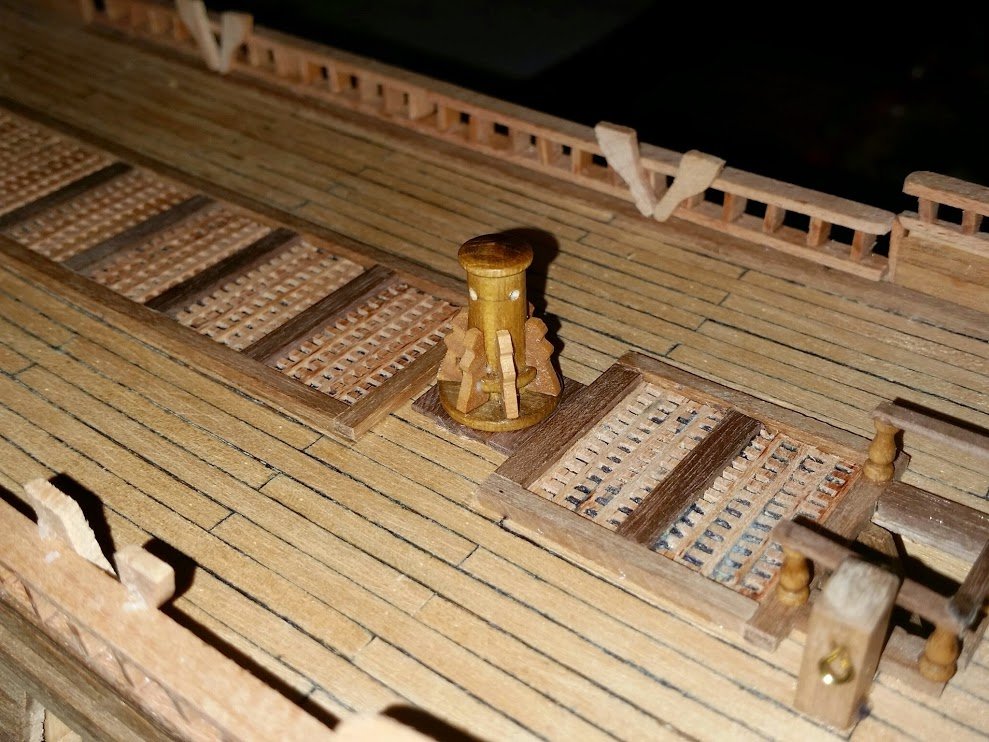
I am done with the fittings of the main deck and I am know working on its guns.
Chapter 14: Deck fittings (belaying pins, bits, doors and chains)
-
How are you tying those tiny knots?
-
Chapter 11: The heads and the beakhead
I am currently working on the fittings of the main deck. More pictures soon.
-
-
Hello,
I noticed your log today for the first time
good to see that another Corel Vasa builder started.
first impression of the pictures is very good.
Thanks!
I'm following on your steps, learning from your great pictures how to do things and anticipate future problems. As this is my first attempt at modelling, I'm learning on the way.
-
To make it more practical, I have partitioned the pictures into several "chapters", each describing one phase of the construction:
Chapter 2: Planking the hull, first layer
Chapter 4: Planking the hull, second layer
Chapter 5: Covering the door frames
I'll post more chapters later. I'm currently working on the deck bits.
-
Yesterday evening was a big psychological step as I put the sides of the beak on. It drastically changed the whole ship silhouette, something that does not happen so often. I expect that the next time such a change will happen is when I'll put the masts in, something that should not happen before a few months have passed...
Look at the pictures.
-
I do have one question tho, do you know why some Vasa ships models are blue and others red? I didn`t find out an answer on google.
Thanks for the welcome and the kind words.
As for your question, here is what I have found: The Vasa kit from Corel was made shortly after the Vasa was extirpated from the muddy bottom of Stockholm harbour. By then, little was known about its colours. They therefore based themselves on artist renditions of the ship, who painted her in various patterns of blue.
Later, archaeologists were able to find pigments in the wood of the Vasa and from them were able to deduce her true colours. It appeared that she was actually mainly red, along with a luxuriance of very vivid colours. The best vision of what the Vasa looked like is shown in the Vasa museum (which I was lucky to visit a few years ago) on a large scale model they built.
So, when I received this model, I immediately saw that the colours were not right.Still, I chose to keep the original blue colours, for two reasons:
1. I don't see myself painting all these tiny figures
2. I find the real colours too vivid to my taste. The model itself is not totally accurate either. So, what the hell... this ship is going to decorate our dining room for years and I prefer to have a nice-looking (for my 21th century tastes) model than an accurate but offensive-coloured one.
Here is a picture of this model
- MarisStella.hr, edmay and WackoWolf
-
 3
3
.JPG)
Wasa by fmodajr - FINISHED - Corel - 1:75
in - Kit build logs for subjects built from 1501 - 1750
Posted
Great work! Thanks for sharing. It is very helpful. I'm also working on the main-mast currently and it is good to see how you are doing it, even though I don't have the skill and the tools to follow all your tracks.
Happy Holidays everybody!