MarkBseau
-
Posts
50 -
Joined
-
Last visited
Content Type
Profiles
Forums
Gallery
Events
Everything posted by MarkBseau
-
Hobbico's HobbyLite wood filler works well. Easy to use, easy sanding, adheres well and is strong.
-
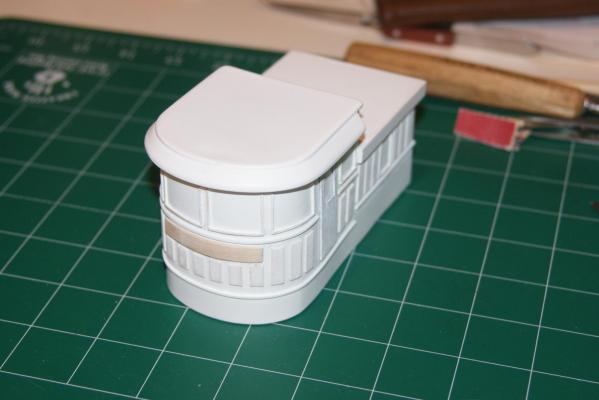
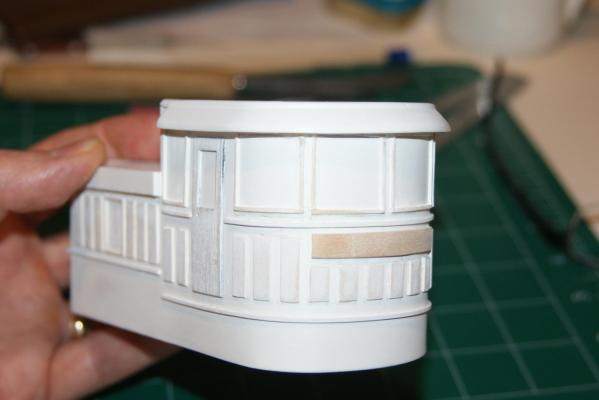
I hope I don't end up sorry I tried this, but... I didn't want to go with just the decals for the panels, windows, etc. So I got some 3/16" wide strips of bass, and I'm cutting panels. And for the windows, I have some 1/32 sq stock that I'm gluing on; I think I'm just going to try painting those a dark gray. I've done the same for the little skylight, and the large cabin. It's a lot of panels! Need to work some more on the cabin, but here's a couple quick shots of the pilot house.
- 30 replies
-
- 2
-

-
- george w washburn
- dumas
- (and 1 more)
-
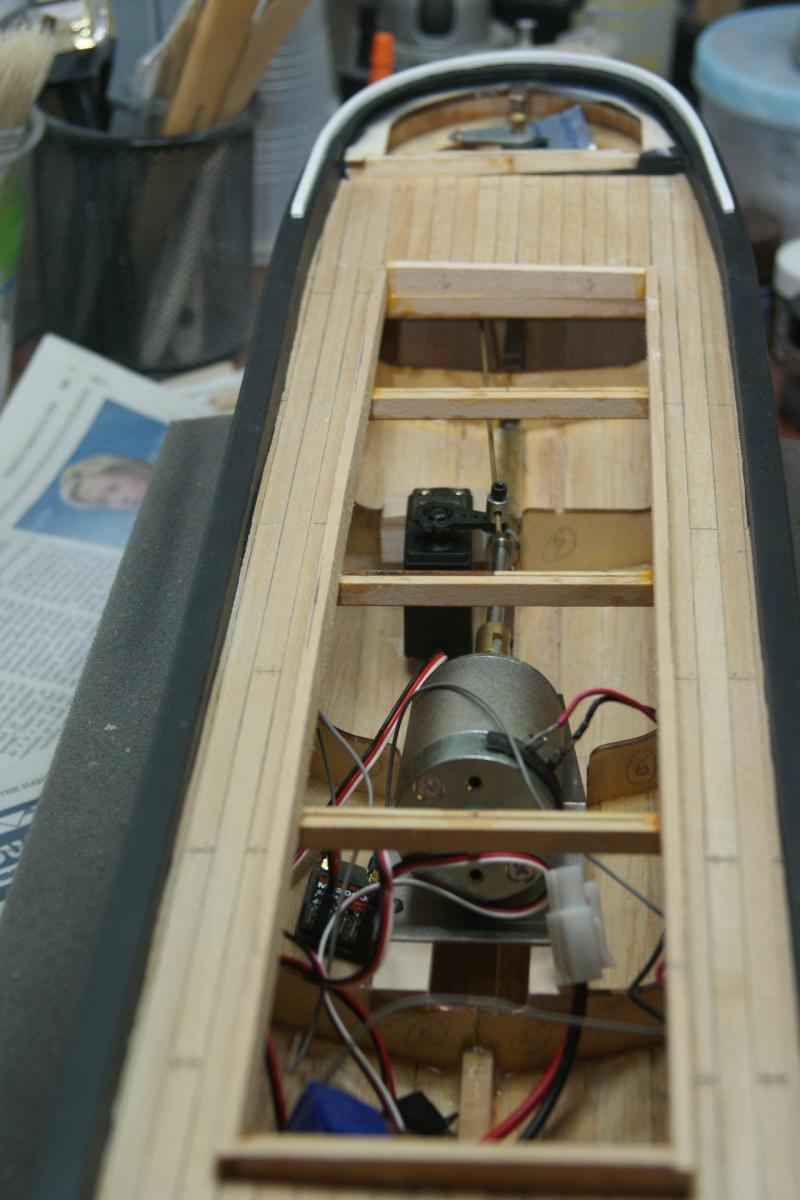
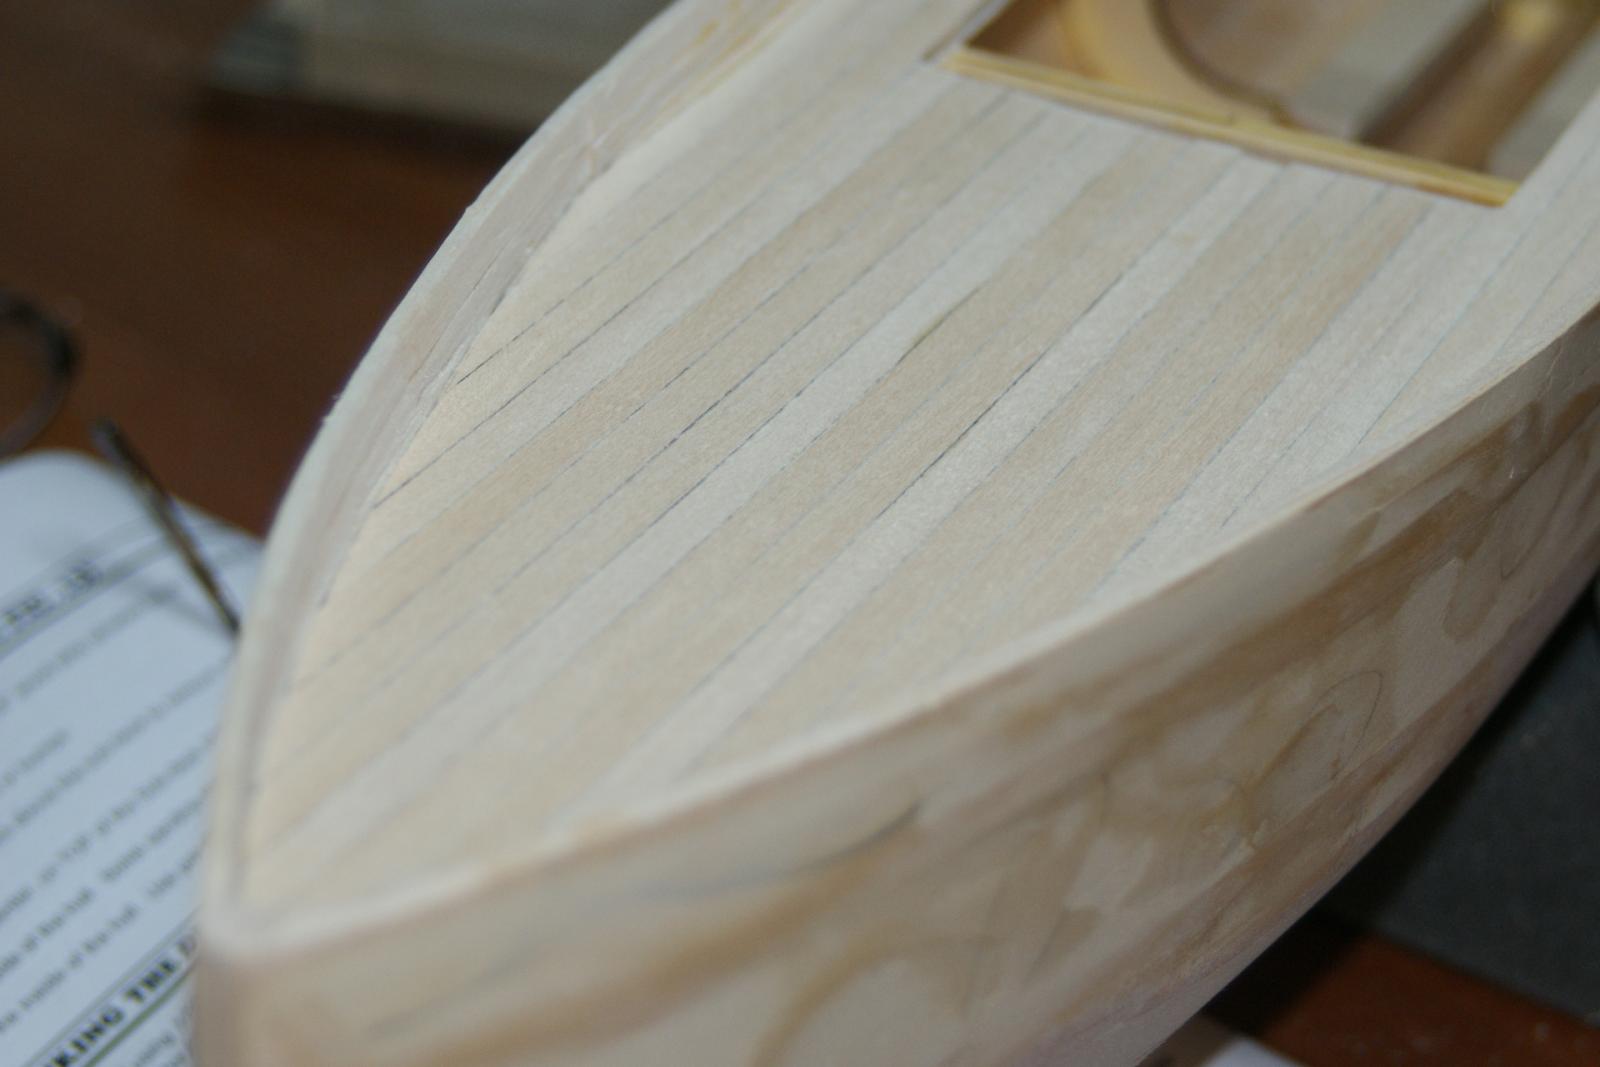
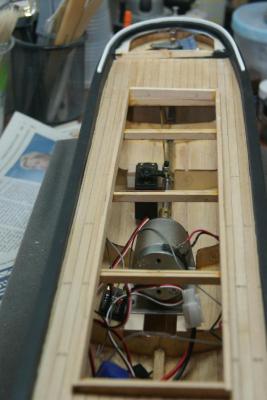
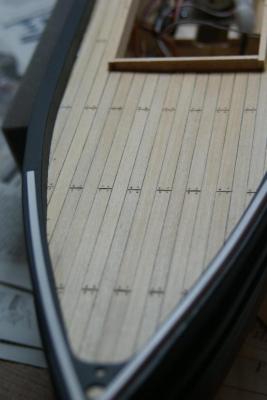
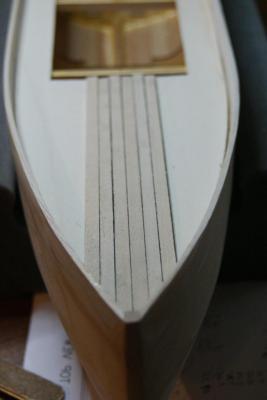
I'll skip back a bit - have my hardware below... Oh, and I dressed up the deck a little bit since December's photos, adding some detail to the planking.
-
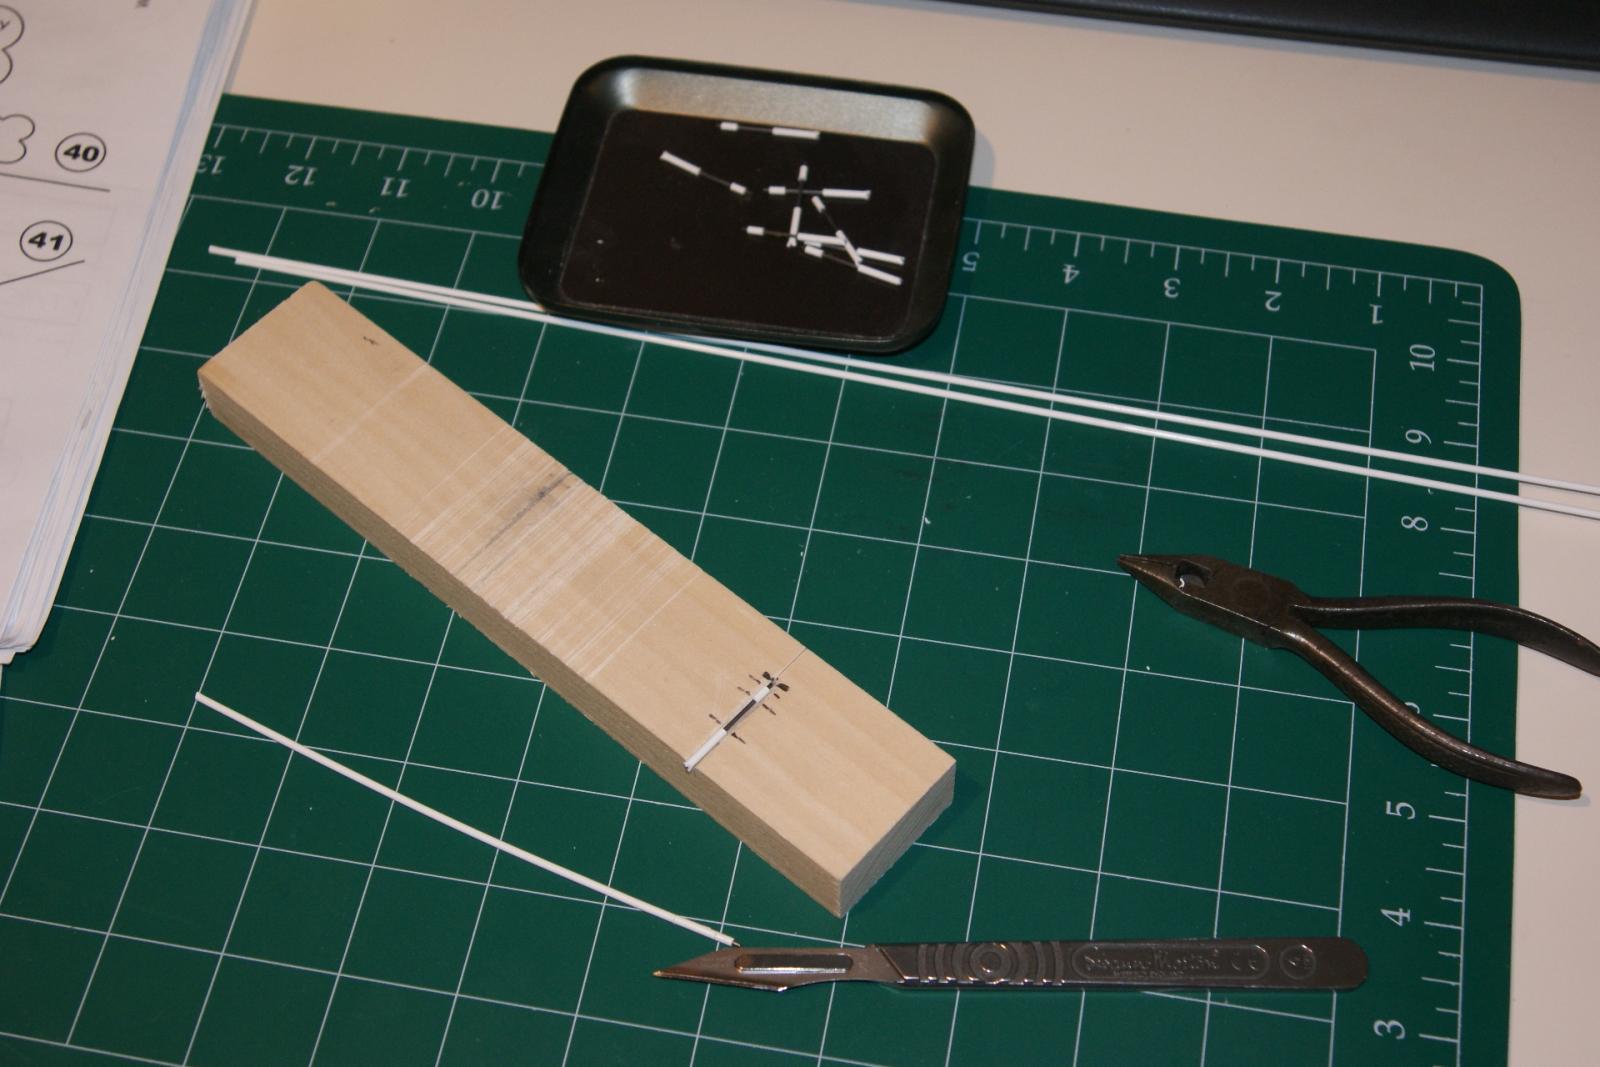
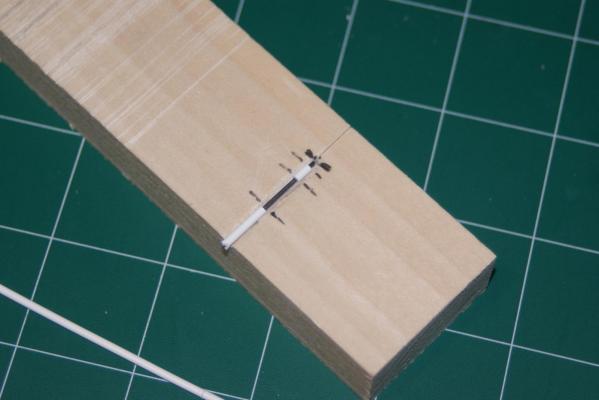
Hey, thanks Larry! Bet you thought I'd quit... No, I'm just a procrastinator about loading up the photos... And I'm slow. Cutting the stanchions that will be used (one of these days) on top of the cabin. Here's the little jig I built to 'assembly-line' the process...

- 30 replies
-
- 1
-
-
- george w washburn
- dumas
- (and 1 more)
-
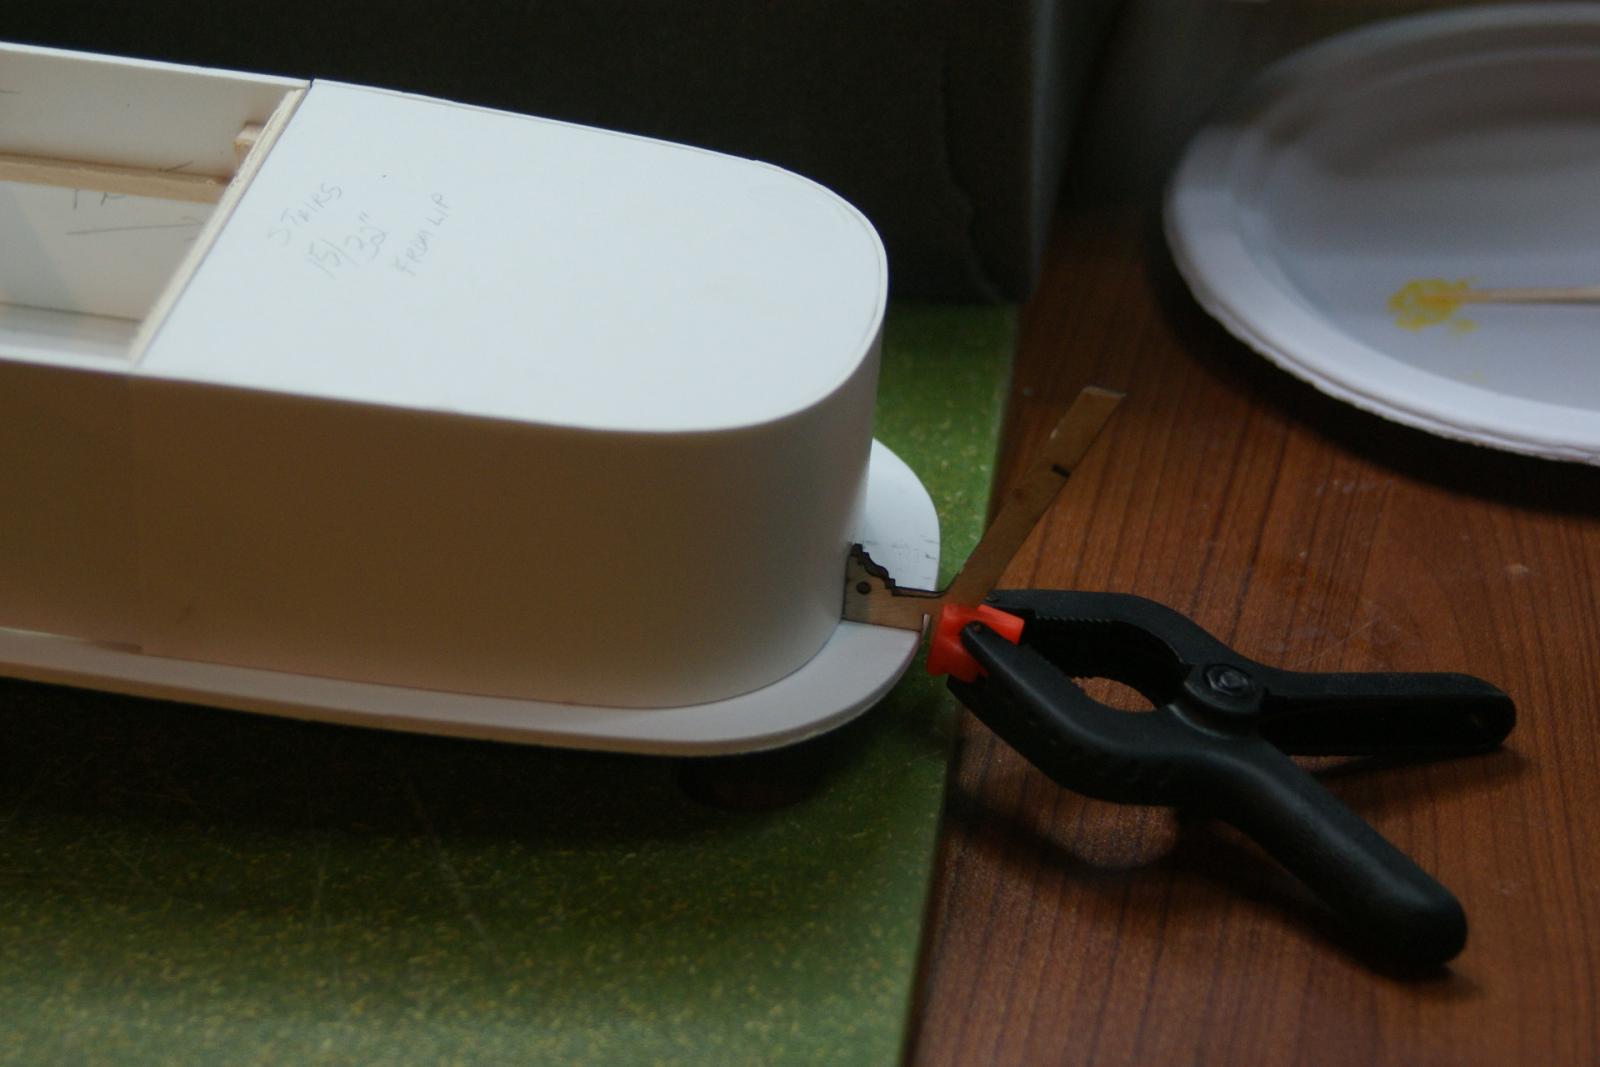
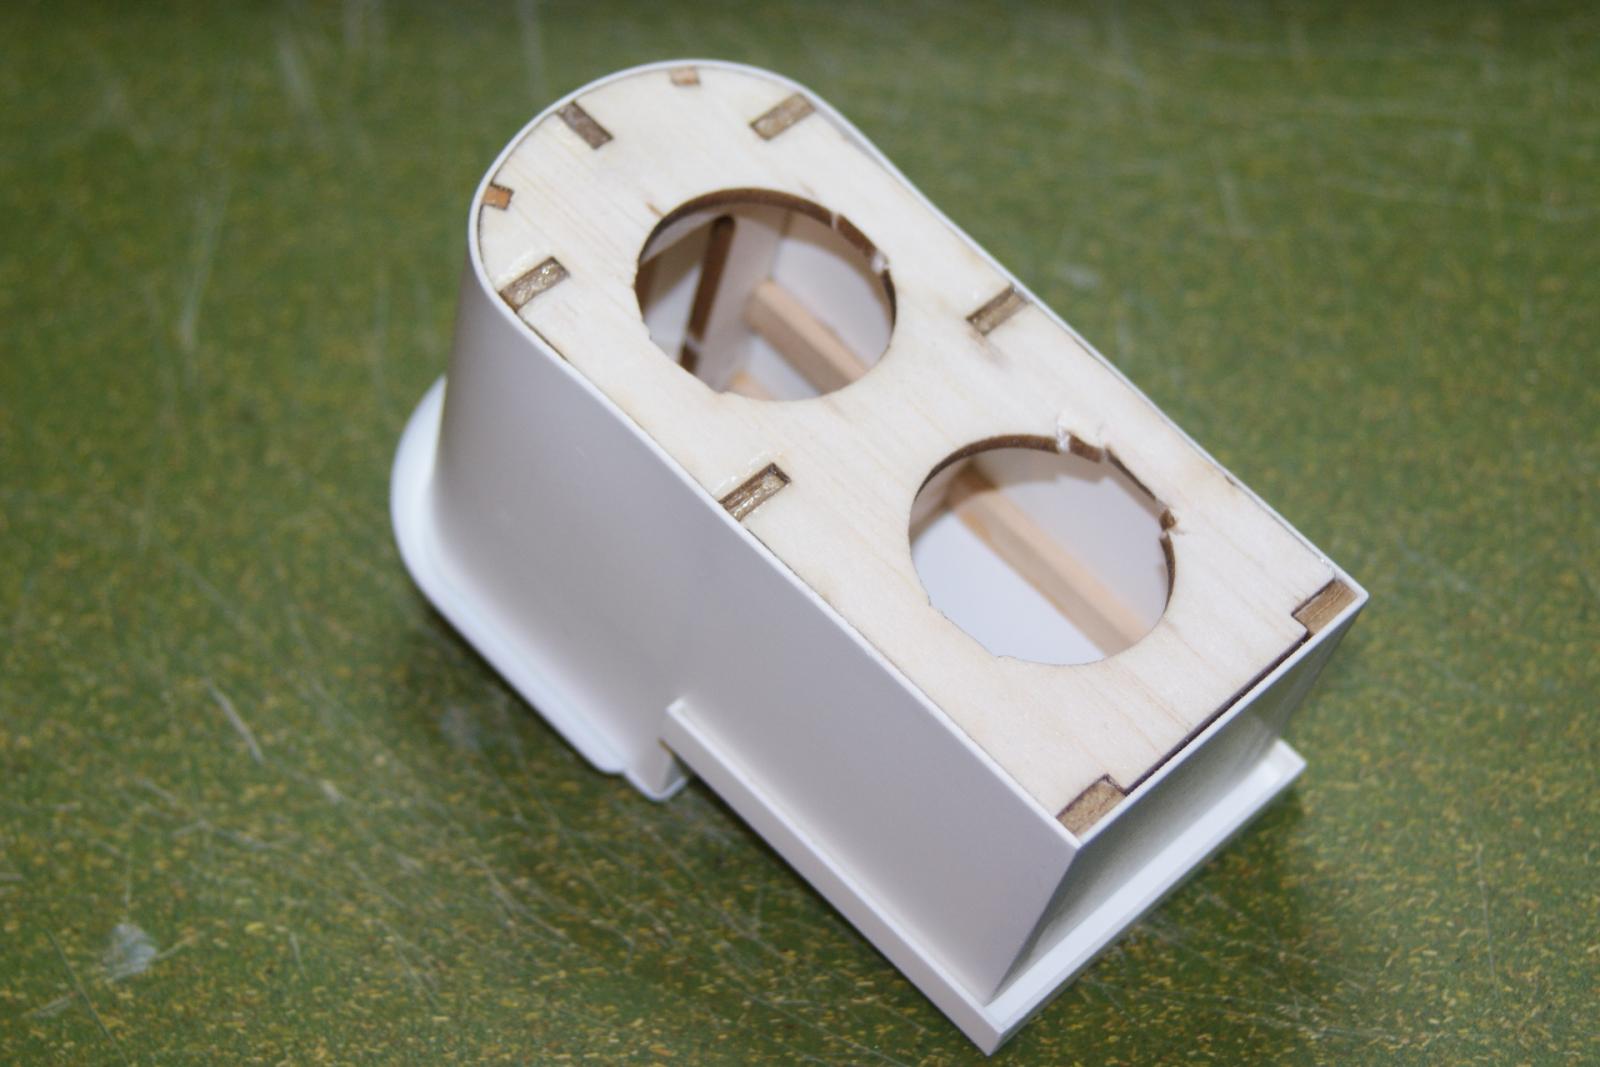
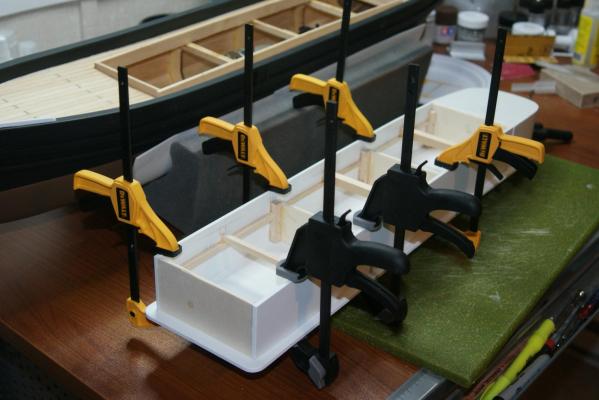
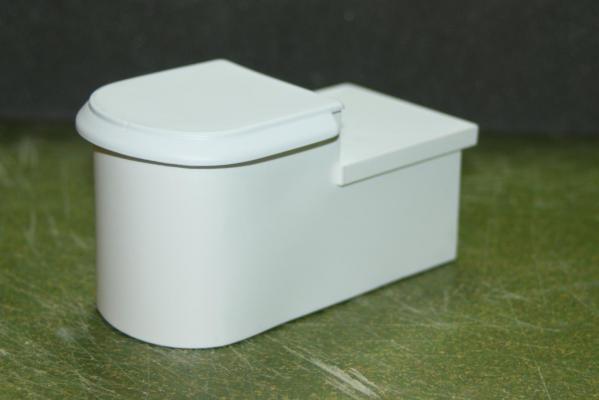
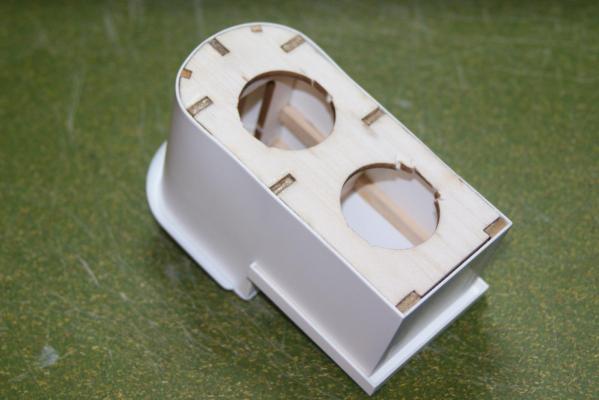
Constructing the cabin... I added some extra support inside to keep those walls straight. On the little pilot house, YOU MUST preshape the curved piece of PVC. You might be able to see on the underside of mine that I didn't do that enough, and it cost me. It's a little bowed out at the top of that picture... In the 2nd photo here, I'm just measuring the distance with the staircase that's going to go there, glad I thought of that beforehand.
- 30 replies
-
- 1
-
-
- george w washburn
- dumas
- (and 1 more)
-
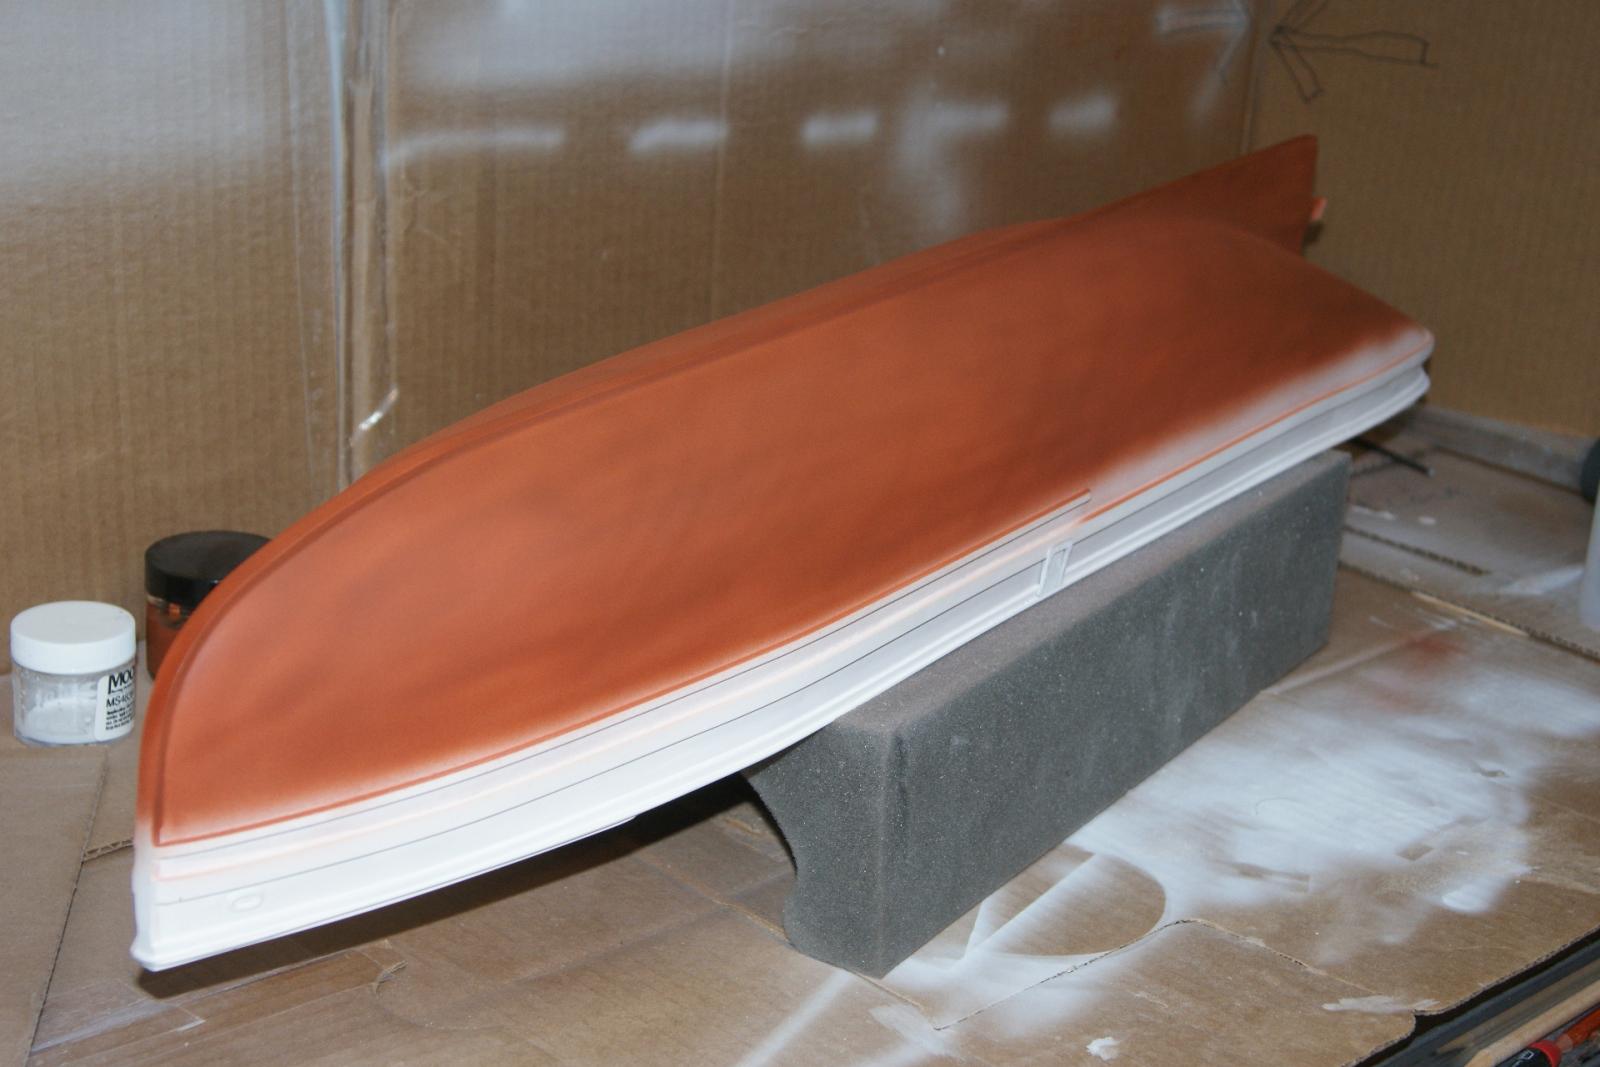
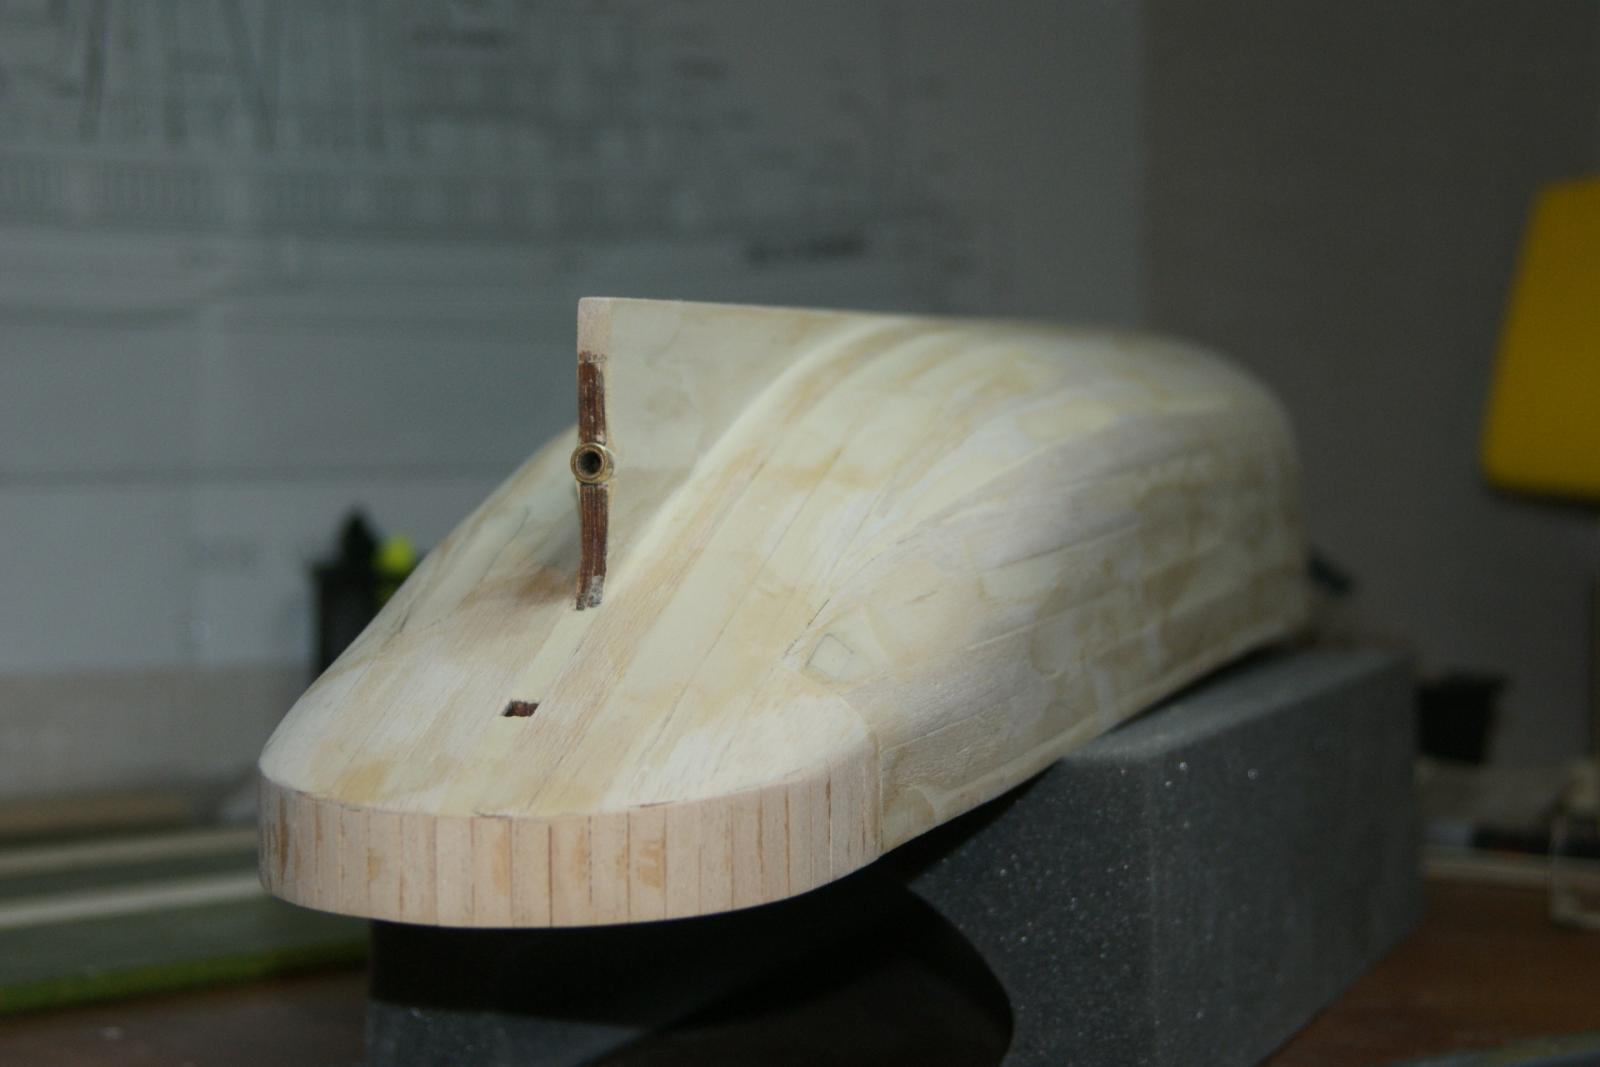
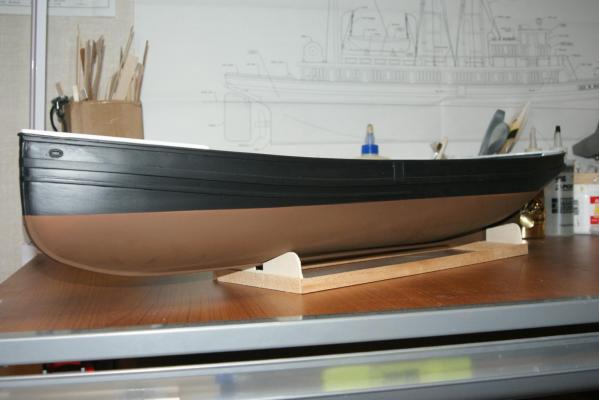
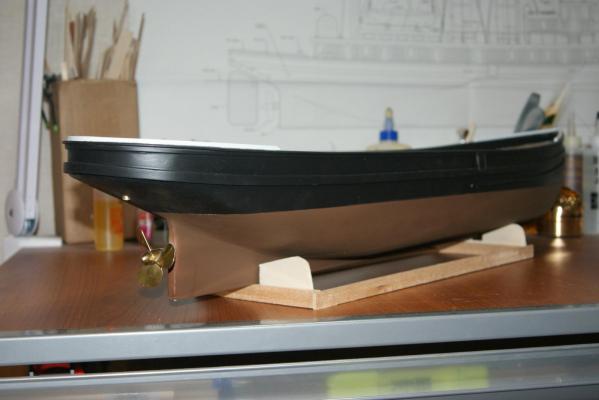
Finally got to the point where I could put some primer on the hull and start painting. By this time, I'd installed running hardware, the rudder, etc.

- 30 replies
-
- 1
-
-
- george w washburn
- dumas
- (and 1 more)
-
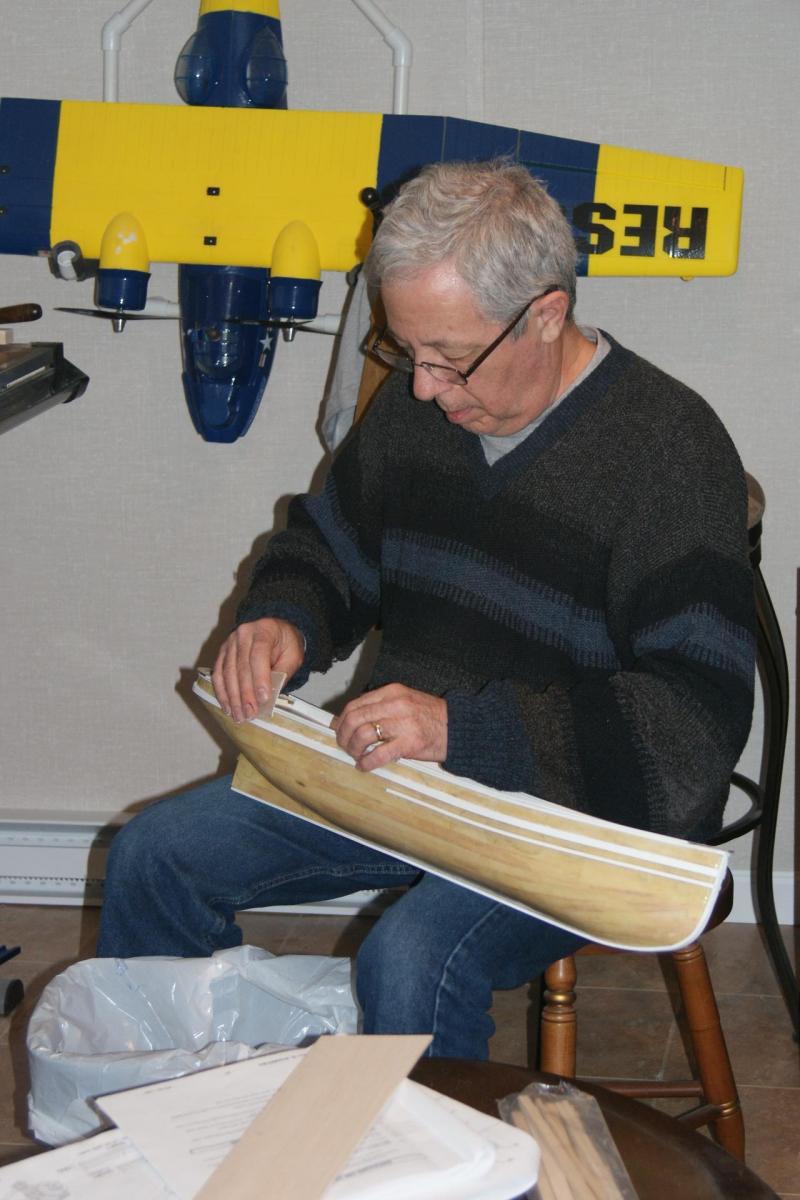
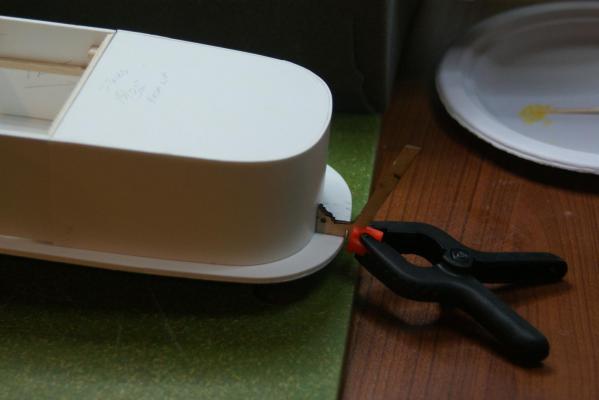
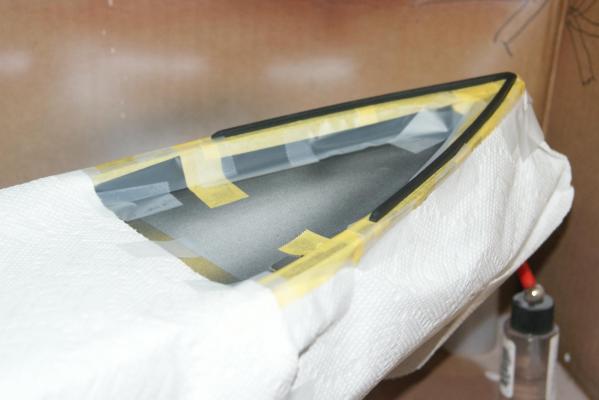
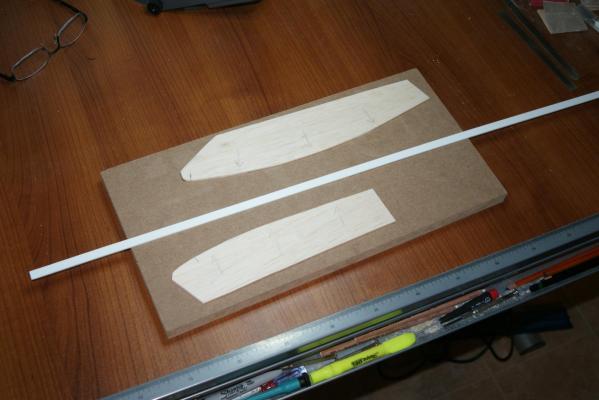
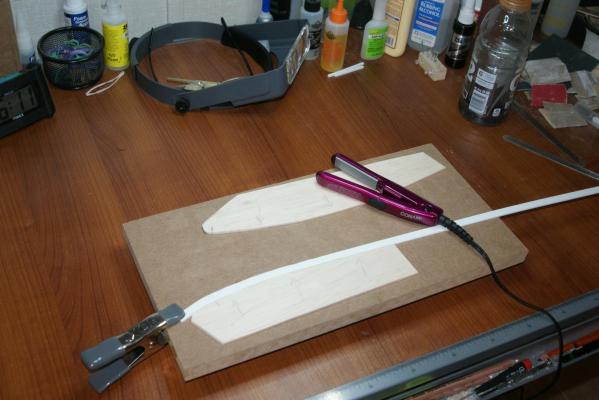
Installing the cap rail all around. I was concerned about how this would work out because it's made of a 2mm x 3/8" PVC strip, into which you have to introduce quite a curve laterally. I knew you could apply heat to PVC and bend it like spaghetti, so I tried that - made a template with the right curve in it, put it on a board, and used a hair curler on it like so, see attached. Big mistake - almost another disaster, because there is just enough of this stock to make the rail, you can't waste a long length of it. The problem controlling the heat - this stock is thin enough that just a small amount of heat almost turned it into a pool of liquid, I was shocked. Luckily, my one and only try at this worked out - it seemed warped for a while, but eventually straightened out (in an hour or so, I think). TO BUILDERS: Don't overthink this like I did. You can use CA glue (works well pvc-to-wood) just a short length at a time, holding it in place, and you CAN bend that wide piece of pvc around those curves. With no waving, no banks at all. Like the old guy in photo #3.

- 30 replies
-
- 1
-
-
- george w washburn
- dumas
- (and 1 more)
-
It's been a long time, but I have actually been working on this tug. For a couple of weeks around Christmas I let it sit, because I'd caused an absolute train-wreck in trying to fiberglass the hull. I have no photos of that; it was just too gruesome to publish. I had to step away for a while, knowing I had to file/sand/grind most of down and try again... Cutting to the chase, I did that. NOTE to BUILDERS, if you want to try fiberglassing: - Thin your resin till it's like water (as is recommended in all the YouTube how-to's) - You don't have to do it all in one piece of cloth. Go ahead and section it off and make it easy on yourself. - You'll be able to easily feather a new section into the last section, it'll be fine. Since the disaster, I've (slowly) been working on it, just haven't been transferring photos to the computer. But photos coming now...
- 30 replies
-
- 1
-
-
- george w washburn
- dumas
- (and 1 more)
-
OK, thanks. I might have to forget about my wanting the water-base (for primer anyway), and give it a try. Tamiya gets rave reviews for their products anyway, and also I know I can buy some locally. Thanks, SpMan.
-
Thanks for that - now do you use it "as is", straight from the can, into your airbrush, or do you thin it at all?
-
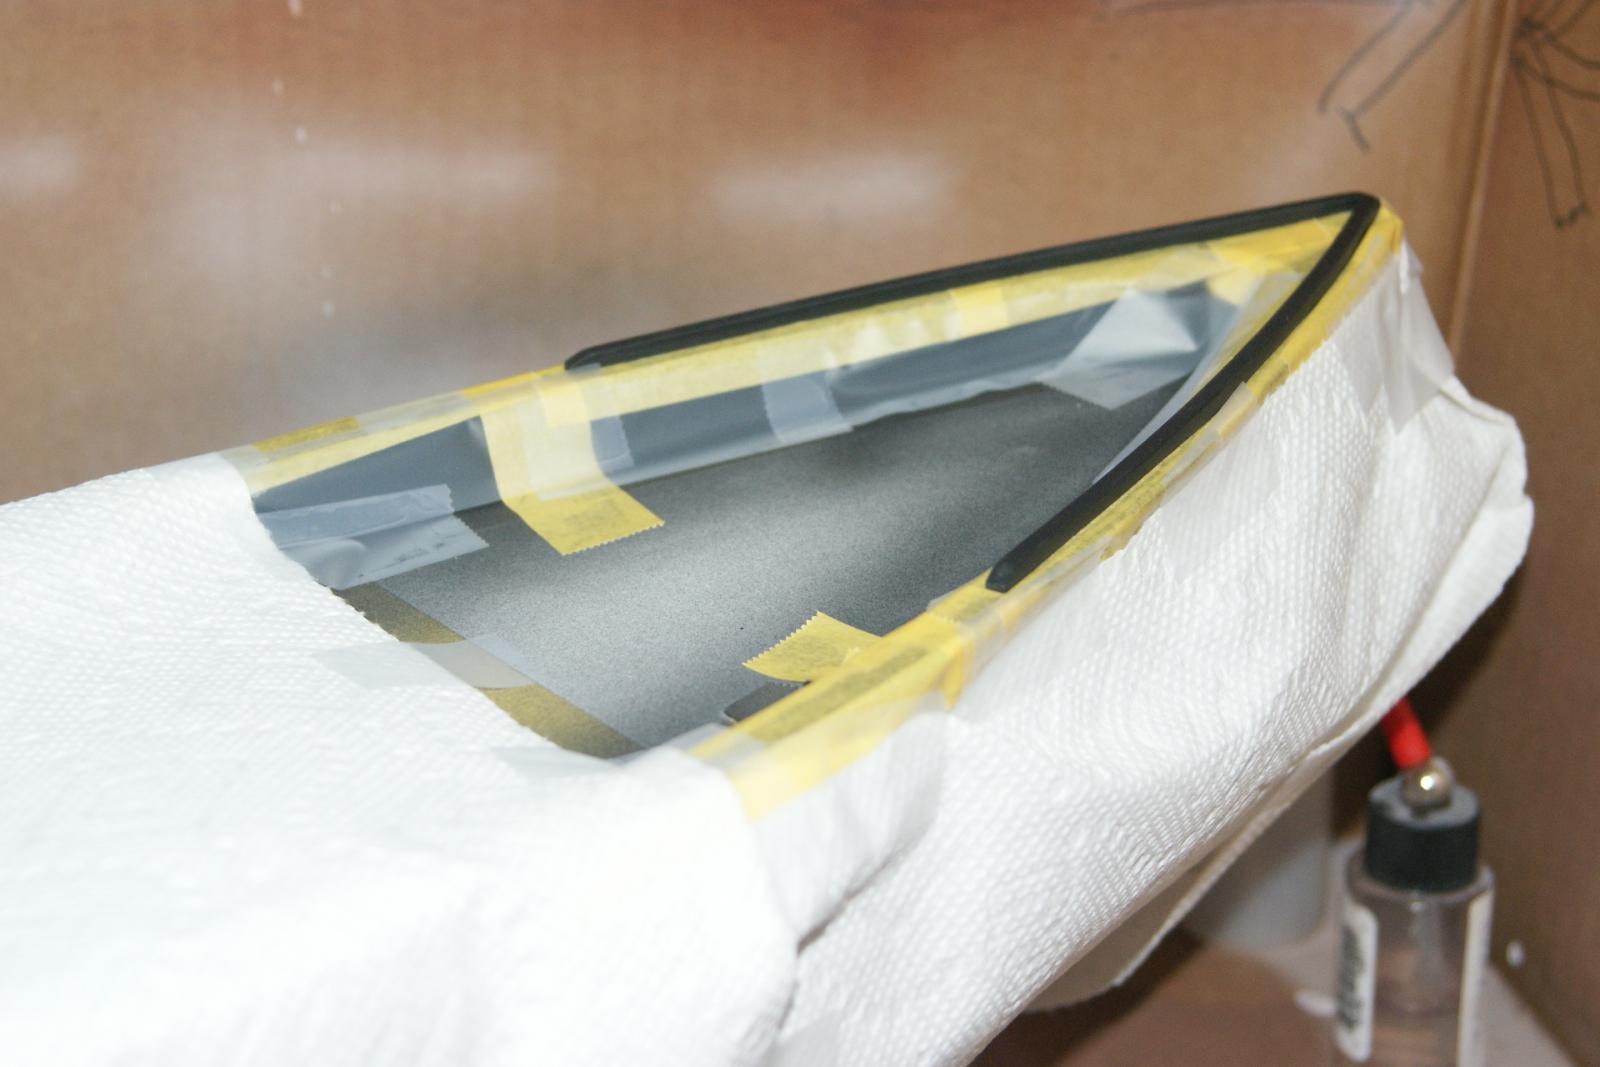
This is a request for help on my airbrush priming, which could be going a lot better... I'm new to airbrushing, but determined to use it. Bought an Iwata HP-BCS siphon-feed, I think it's a .05 tip. I'm trying to prime the hull of my Washburn tug, which has been coated with Z-poxy resin. Using ModelExpo paints, and I got some of their primer (or at least they call it that), so that's what I'm using. I know it should be very thinned (it's very thick in the bottle). I went overboard on the thinning, though, so it seems as if I'm spraying mostly water on it. Barely covers. I wouldn't mind a thin coat (I've read JPett's other thread on Tips&Tricks), but this is extreme; it's pretty runny. The good news, on the other hand, is that I've used some 1000 paper on it and (where it ran), and it can end up as smooth as silk. But even as thin as the coat is, I'm spraying away my little bottles of primer really fast - maybe I've just diluted it into nothingness. I'd like to stick with something water-based, as I don't have a great place to do my painting, no ventilation. So are there any suggestions (other than sub-contracting it out)? Should I mix up the rest of my primer, a little thicker this time, and continue, or use something else altogether? I'm spraying with low psi (about 10), the tip being maybe 6 or 8 inches away from the work, trying to get some coverage without just blasting liquid and making it run... To JPett: Great timing on your thread - I almost put this post in it, but I didn't want to mess up 'Tips & Tricks' with a specific problem. Thanks, Mark
-
What keel clamp is recommended?
MarkBseau replied to MarkBseau's topic in Modeling tools and Workshop Equipment
JPett, thanks - there's a post in this forum titled "Amati tools", and actually I misrepresented it in my post. A couple of people had slightly negative comments about their holder, but mostly that it was a bit on the small side, I was probably unfair there. I've seen your post about building one, remembered it. But I think what I'd like is one of those that (1) gets the work up off the table a little (closer to my eyes), and (2) one which you're able to hold a POB model inverted to use while planking the hull. Otherwise, I agree with you - a couple of straight-edges that you can adjust for a keel width on the table ought to be good. HSM, I know - I admit to already having a couple of such tools that were buying mistakes... So I'm still going to look - would probably like one of those that's a "Goldilocks" size, has a couple of sliding, adjustable clamps, that can fit between bulkheads. I see plenty of photos of them in build logs, but would like to hear from folks (like HSM!) who are glad or sorry that they've bought a certain one. Wondering what people have, how much approx., and where'd they buy? -
Can I get some recommendations for a keel clamp (or vise, whatever we call it). I thought sure I'd see a topic on this, but I'm not finding much. The only definite thing I've seen is advice to not bother with Amati's. What do you have and like, which are the most versatile, yet not the most expensive. Thanks! Mark
-
Both of you have plenty of experience with airbrushing - what paints do you recommend? I'd prefer water-based. In the acrylics, what names do you like, and also where do you buy them? I ask the 'where' because I wonder if you have brands suitable for these models and materials that you buy in local art stores, etc. Thanks
-
Thanks guys - Walter - Thanks for the tip about sanding off the 'char' from the laser cuts. In my case, I don't think that was the issue though. It wasn't so much that the planking separated from the frames, it's that the planks (which in this case were just a really soft balsa) had actually warped, they sort of "waved" away, it's almost as if they expanded. That's why I tend to think that water was involved. One thing that I'd been doing was soaking the planks in water and putting them on pretty much as soon as they came out of the water. Now I don't know how much of a mistake that is. (Although - I didn't find them warped like the morning after, either - this mis-shaping happened many days later!) The second thing is, I used plenty of wood filler to get this hull in shape. I did not thin the filler at all with water (or anything), used it right out of the container. Again, I don't know if, or how much, the filler material has anything to do with the problem. I wish now that I'd taken some photos of the disaster and posted them, was too embarrassed at the time. GuntherMT, and Larry - Yes, thanks for that - exactly the kinds of thing I'm looking for. I'll probably go with acrylic paints too. And GMT, I was wondering about just a little stain on the deck, and probably would have tried a MinWax product, just because it's familiar stuff. Good to hear that you glued stuff over it without problems. But anyway - yes, I gather testing everything is the only safe way to go.
- 30 replies
-
- 1
-
-
- george w washburn
- dumas
- (and 1 more)
-
Thanks Larry, the deck is already planked. My concern is just that I don't have a handle yet on what finishes (including paint, varnish, oils, urethane, etc.) are glue-friendly and which are not. (So I don't cause myself a problem installing deck buildings and fittings.) I'm trying to find a good post about that, but haven't run across one yet, except for a recent find warning about a tong oil finish.
-
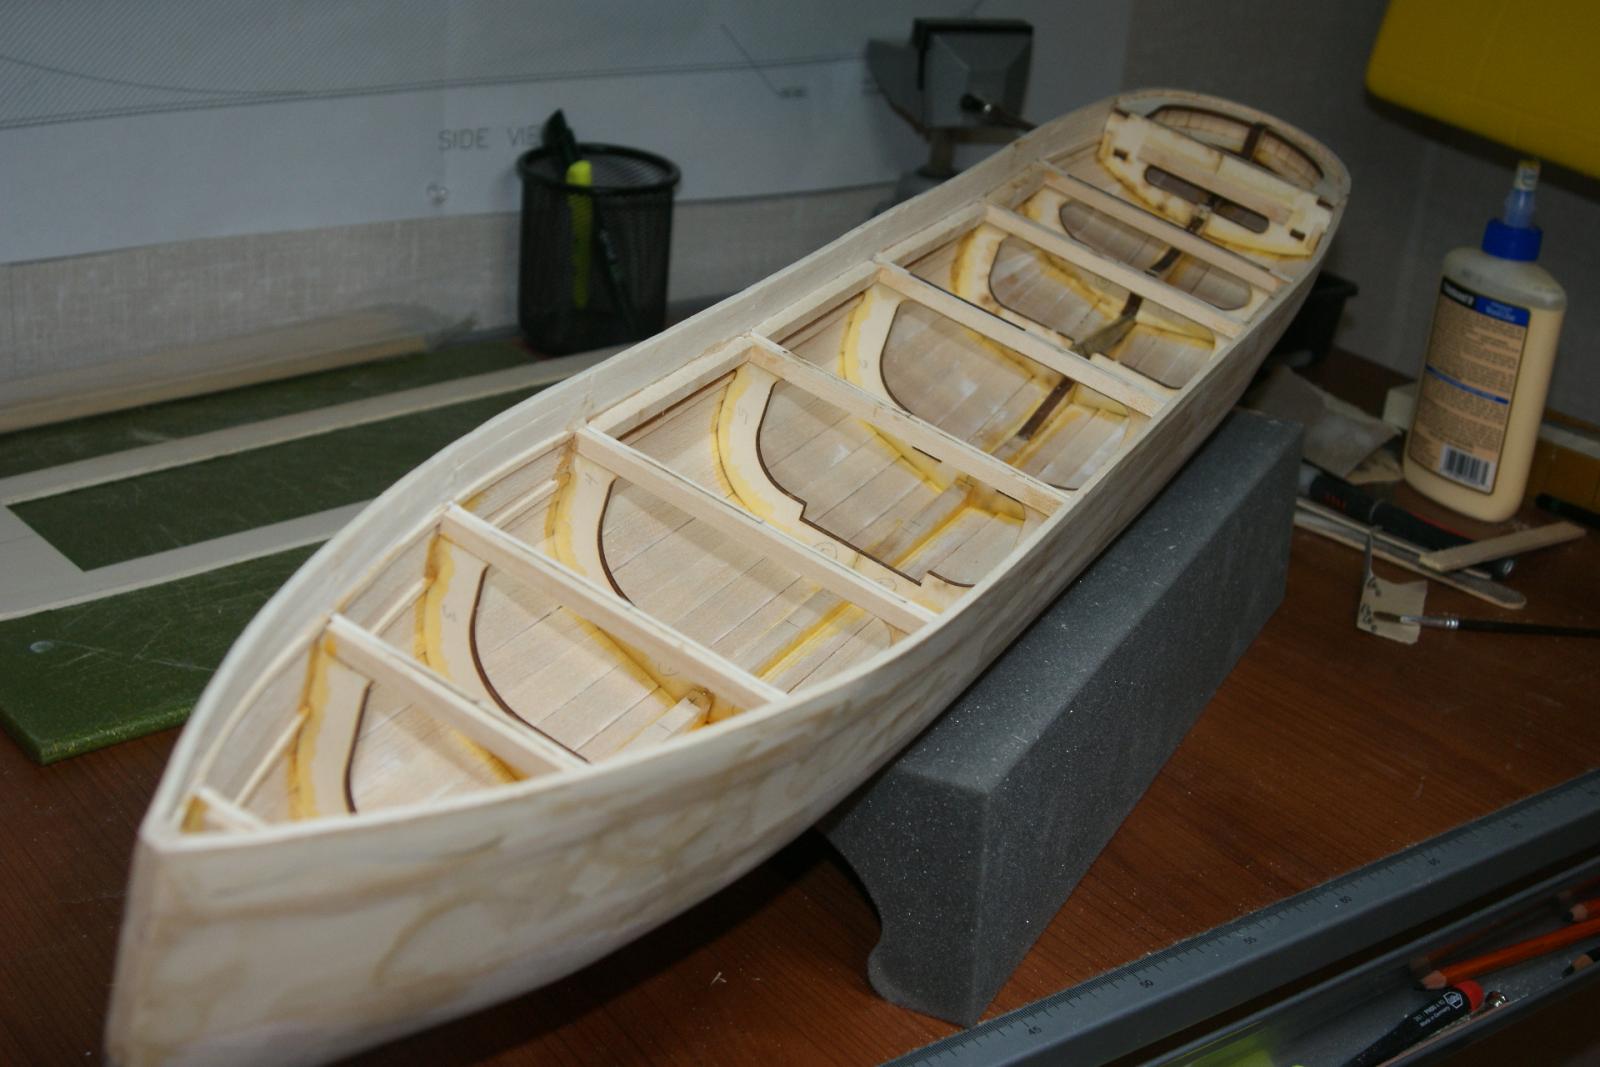
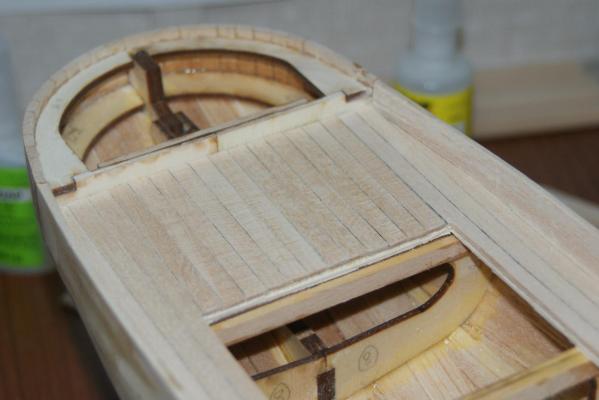
After brushing some Z-Poxy on the hull's interior, I've now finished planking the deck. That's a very satisfying piece of the process, I am really enjoying this. Don't like the mistakes I'm making, but I'm learning a lot. The next part is fiberglassing the hull - that's a bit intimidating, but we'll get through it. Anyway, here's my first deck, and some decking music... Anyone have recommendations for sealing the deck? This kit suggests simply a couple coats of Sig's Nitrate dope. I guess that's a clear, simple finish. Is that basically just a sanding sealer? Will gluing deck pieces over it be a problem?


- 30 replies
-
- 3
-
-
- george w washburn
- dumas
- (and 1 more)
-
Thanks very much for that tip, Larry. I've read about doing that, but I would definitely not have remembered it, and there's no mention of that in the instructions. I've written it into the plans and instructs now, so hopefully...
-
By the way, both of your projects are wonderful. I'm blown away by the complexity of Larry's Niagra, and John's MaryRose.
- 30 replies
-
- 1
-
-
- george w washburn
- dumas
- (and 1 more)
-
Thanks John & Larry. Yes, going to epoxy the interior first. I can't wait to really get going on this - after that task I can get the deck on it and really get working! As I browse ahead in the instructions and plans, I'm getting more and more gung-ho. That plane is a PBY Catalina, a land/sea plane - no landing gear on it. At one point my thought about RC'ing this Washburn was that, because I'd like to try flying the PBY from water, I could possibly have this boat along with me in case I made a less-than-happy landing out in the middle of a pond somewhere, so I could nose it back to shore. (OK, it's 'when', not 'if'.) I guess part of my brain is still that of a 12-year old...
- 30 replies
-
- 2
-
-
- george w washburn
- dumas
- (and 1 more)
-
Thanks, gentlemen, for all the suggestions, and for the great links. Haven't made up my mind yet, but I have a good deal more information to work with. This helps a lot.
-
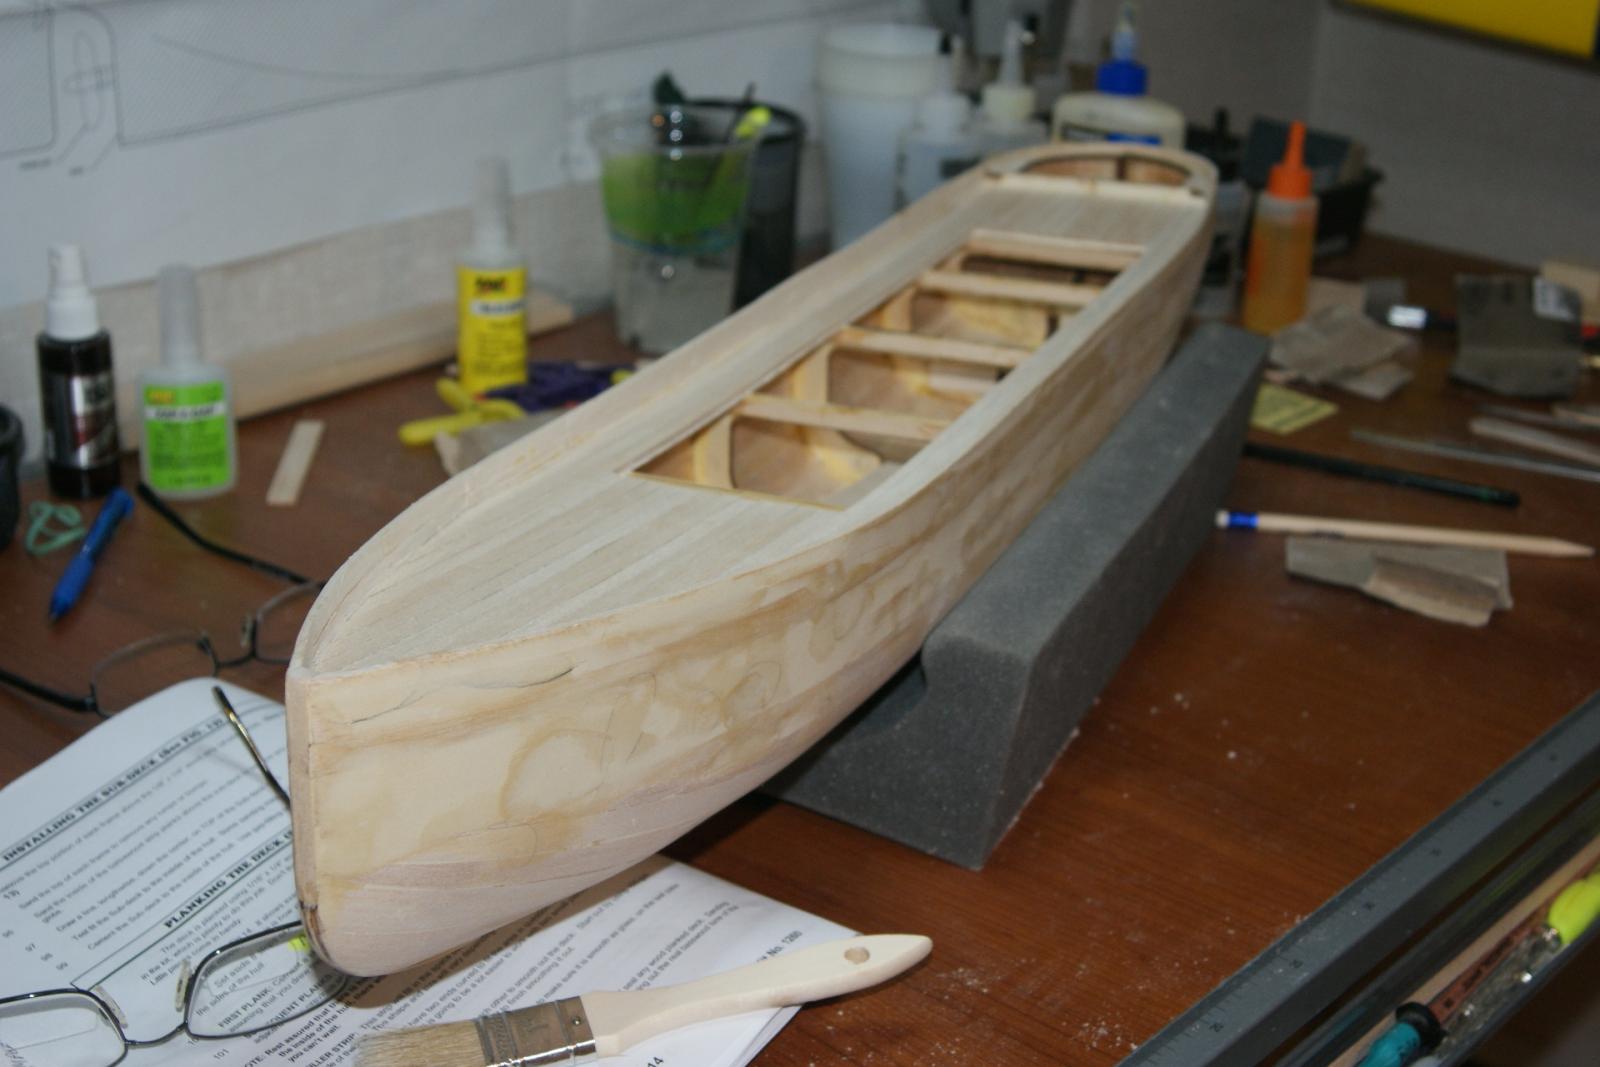
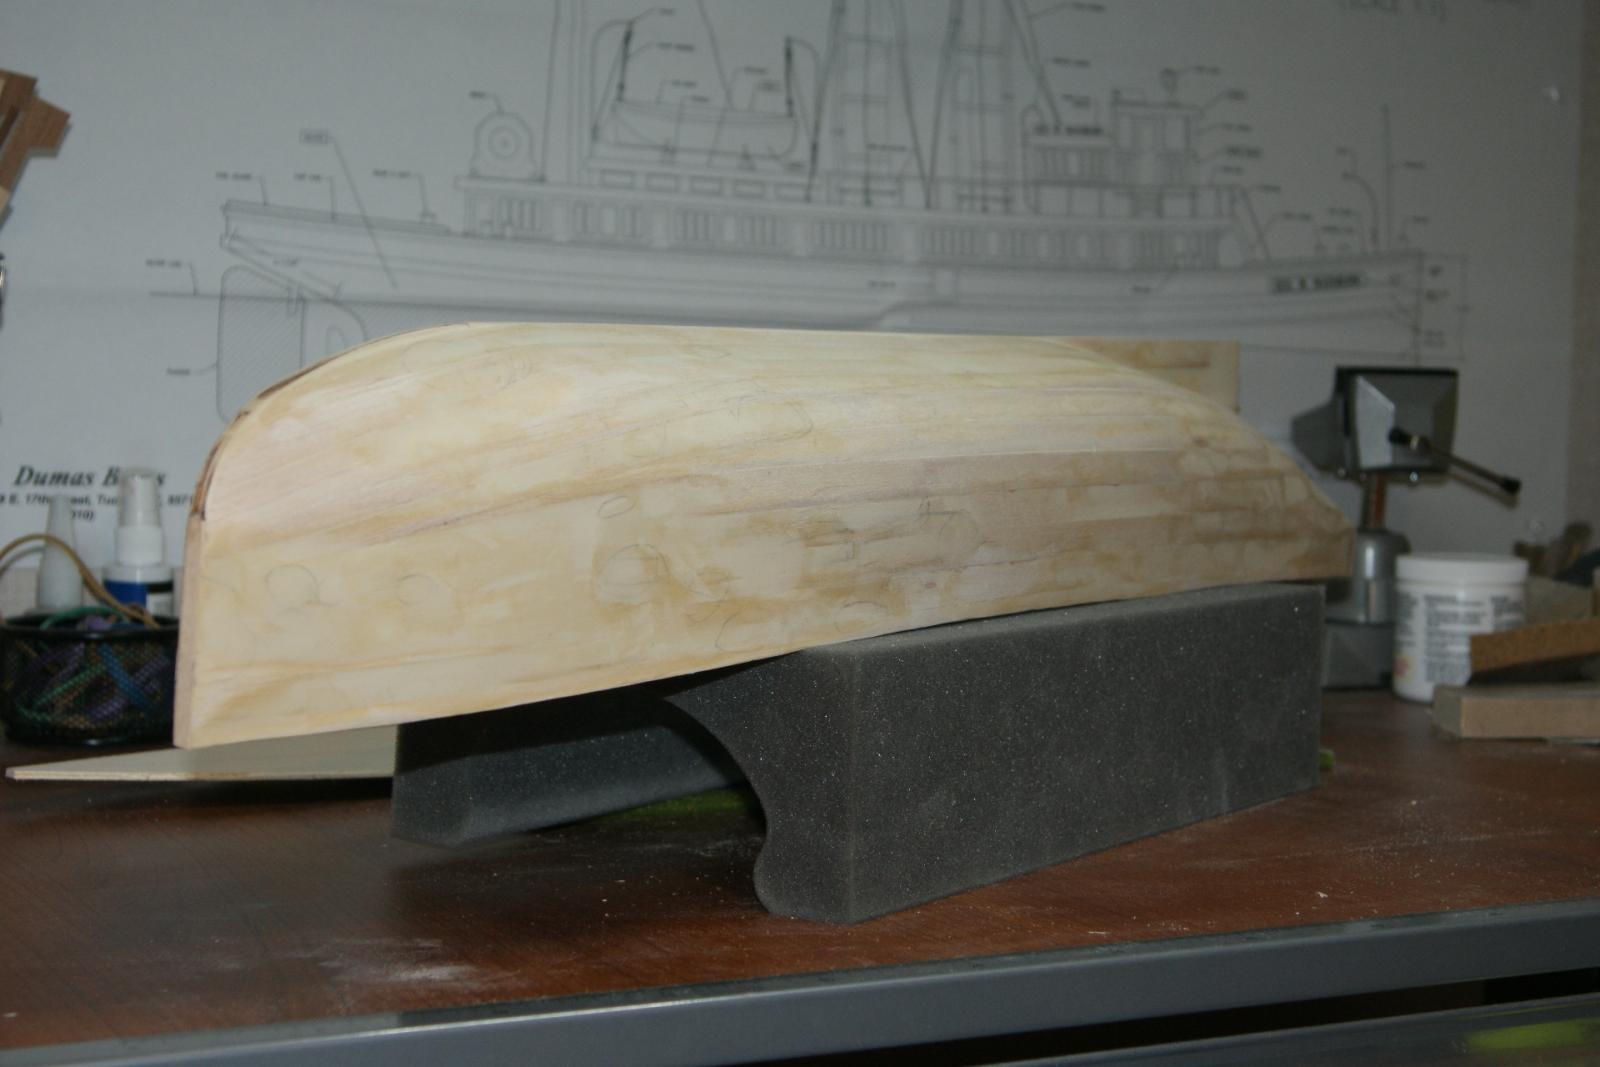
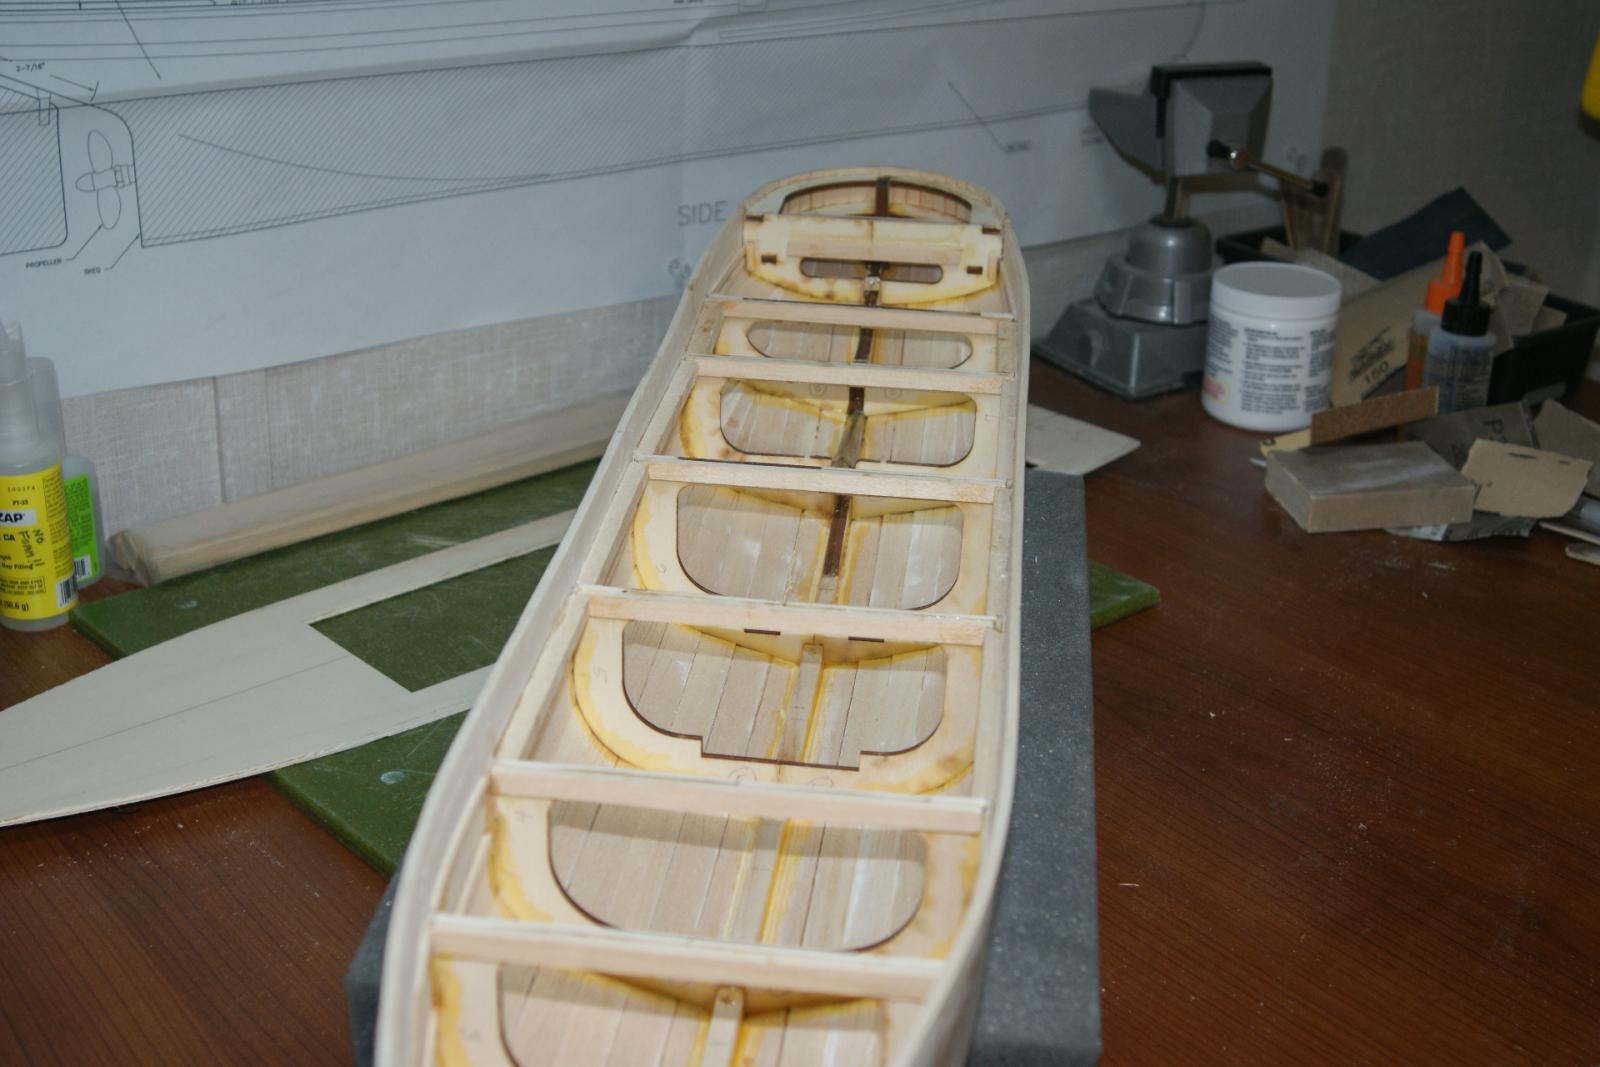
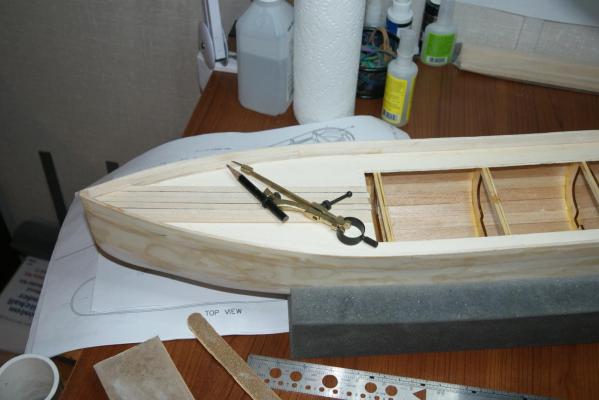
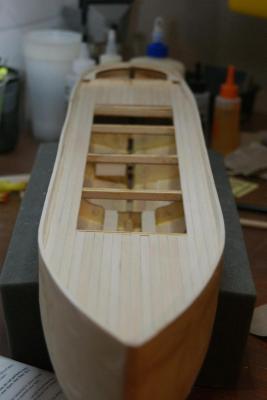
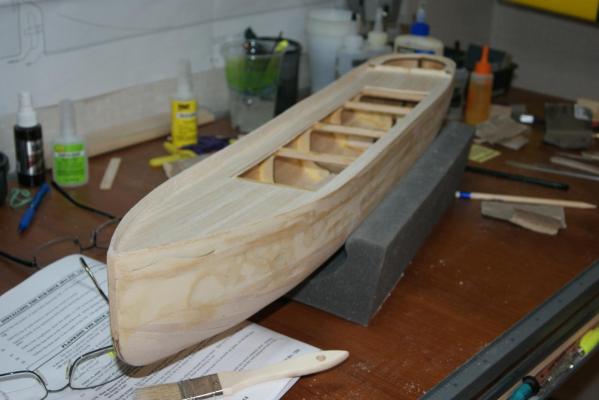
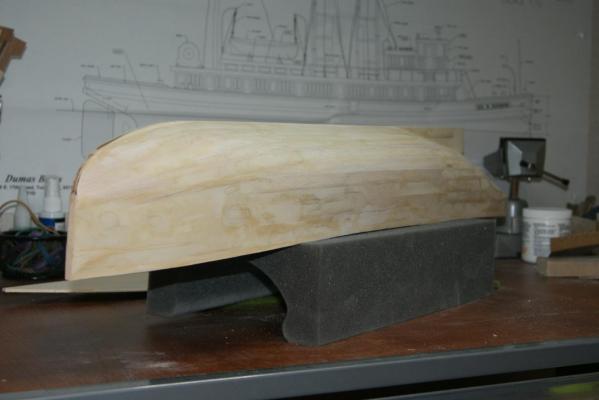
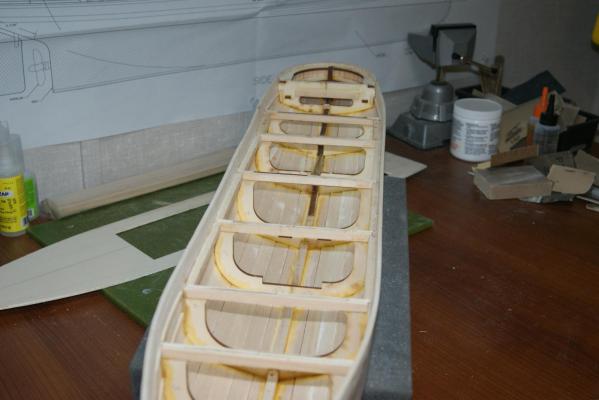
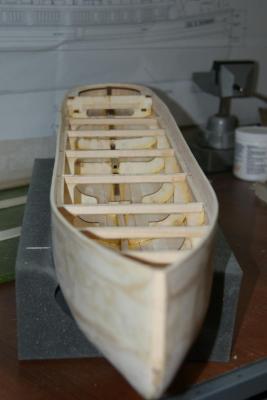
A few more photos. Here's where I am now - hull planking done, waiting for my Z-poxy and glass. In the 3rd photo here, I think you can see the braces I glued between some of the middle frames (at their top), to bring the planking back to where it's supposed to be. (Used epoxy, plenty of it.) At some point, days well after the planking was finished, I suddenly discovered the planking had separated from the frames (along the deck level). It seemed to be expanded, was warped and wavy. I didn't photograph it, didn't want that in any archives... In the 2nd photo, you can see that the port side is pretty straight - the other side is less so, but not too bad now. But before my fix it was pretty awful. This happened at some point after applying wood filler - not the first time, probably after several iterations of filling & sanding down, over several days. Could this be because of the wood filler? I didn't water it down at all, used it straight from the container. Is this unusual, I hope?


- 30 replies
-
- 3
-
-
- george w washburn
- dumas
- (and 1 more)
-
As another new guy to airbrushes, I'd like to "re-open" this discussion. Does anyone have any particular ideas on a good manufacturer (or a company to stay away from)? It seems like I'll end up spending about $300 (US) for a brush and compressor that will be decent, but not top-of-the-line "Pro" equipment, which I certainly don't need. Is there much more to it than that? (I've made note of the 'booth', that's for sure - but I'm not including that in this budget.) I've never used one at all. I want something that will give me a decent result, but on the other hand, I won't be using it outside of this modeling, so it won't get all that much use. Single-action vs double? (Don't even know what that means.) Why would you want an open gravity-fed cup (seems like a disaster in the making) instead of a bottle? Paasche, Iwata, Badger, Testors? Go for one of these, stay away from one? Thanks for any help!
-
Good idea. Yes, I've been saving those corks for a long time myself. I always thought I'd like to have enough to build a boat. I think I can build about a 23 footer at this point.
-
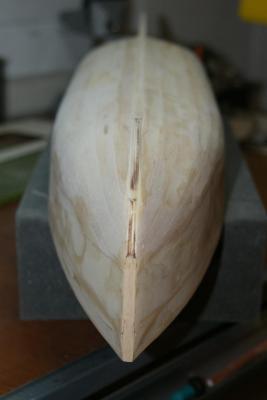
Hi Larry, Thanks, I think it'll be OK (for a first one anyway). But not stern , it's the stem (bow) that got off-kilter, you can see that a little bit in the photo that's looking at you dead-on. It's not too bad, but just isn't what the better builders would accept. It's the kind of thing that I need to learn to anticipate and prevent. Yes, the next thing that happened to me (still haven't posted a photo of it yet) is where the upper hull planks started pulling away (expanding?) a little from the frames! Yikes, it was horrible. I didn't replace them - I've braced (and glued & clamped the heck out of em) them and it looks pretty decent now. I'll get a photo out tonight. Thanks for looking, I am going to start asking questions! Mark