knotty74
-
Posts
91 -
Joined
-
Last visited
Content Type
Profiles
Forums
Gallery
Events
Everything posted by knotty74
-
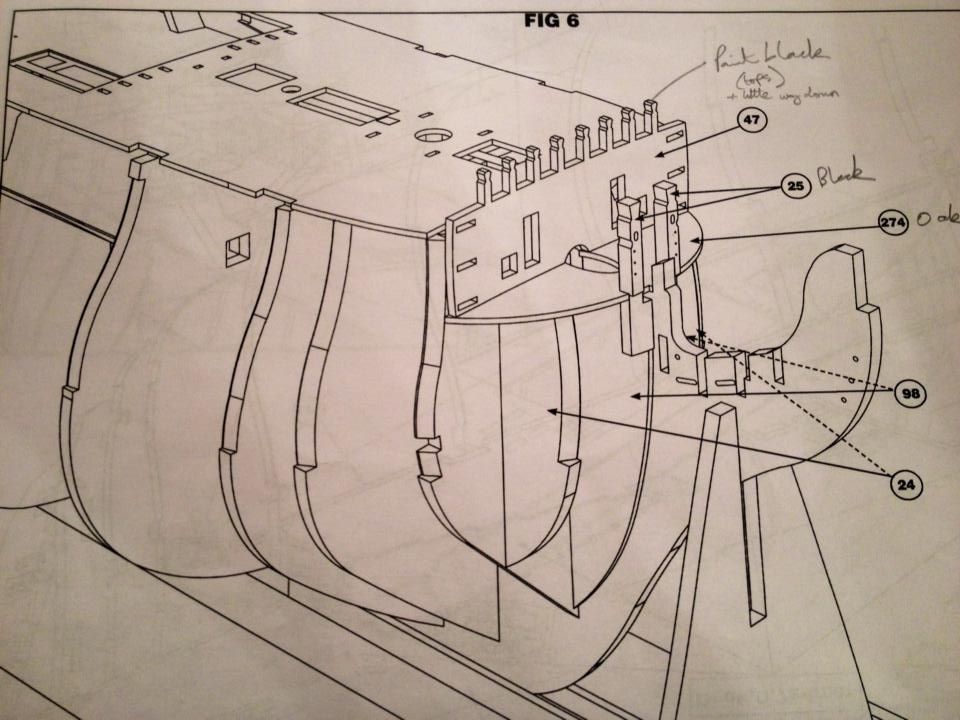
 Fig 6: Beakhead basework Beakhead backboard put in place and painted a little way down so it was easier to do, rather than wait until the blue fascia was added later.
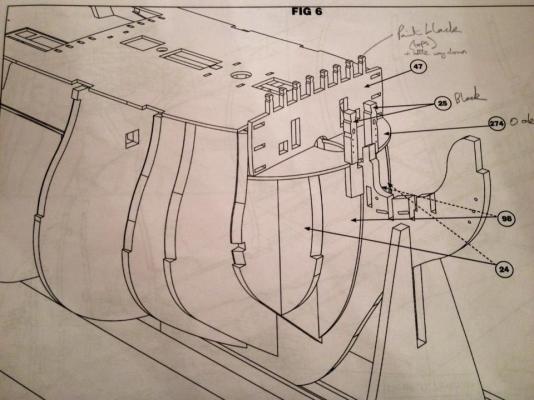

-
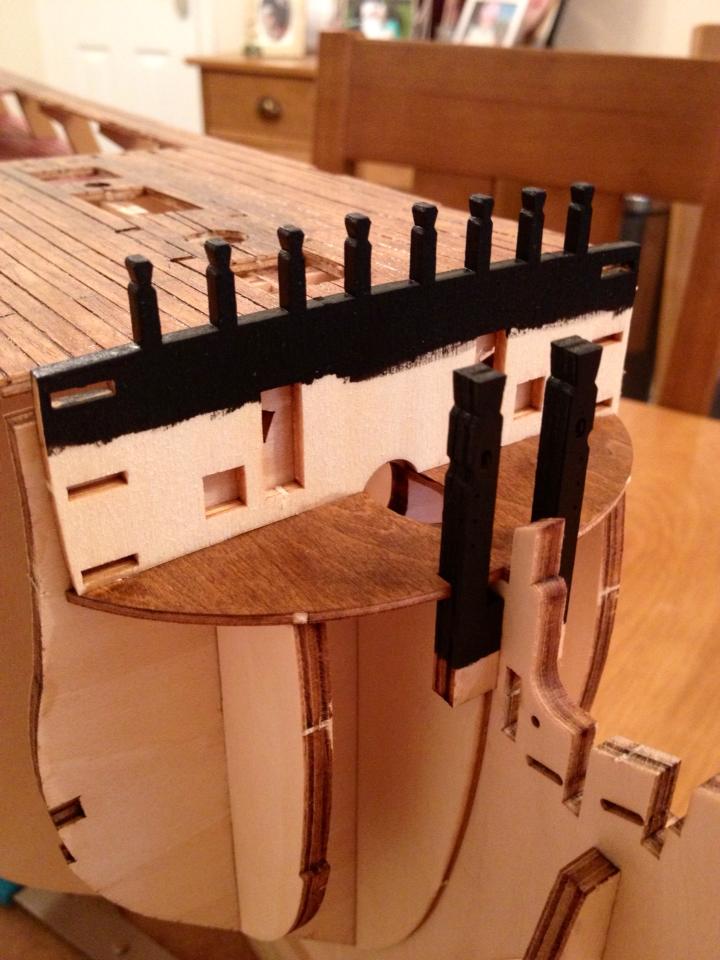
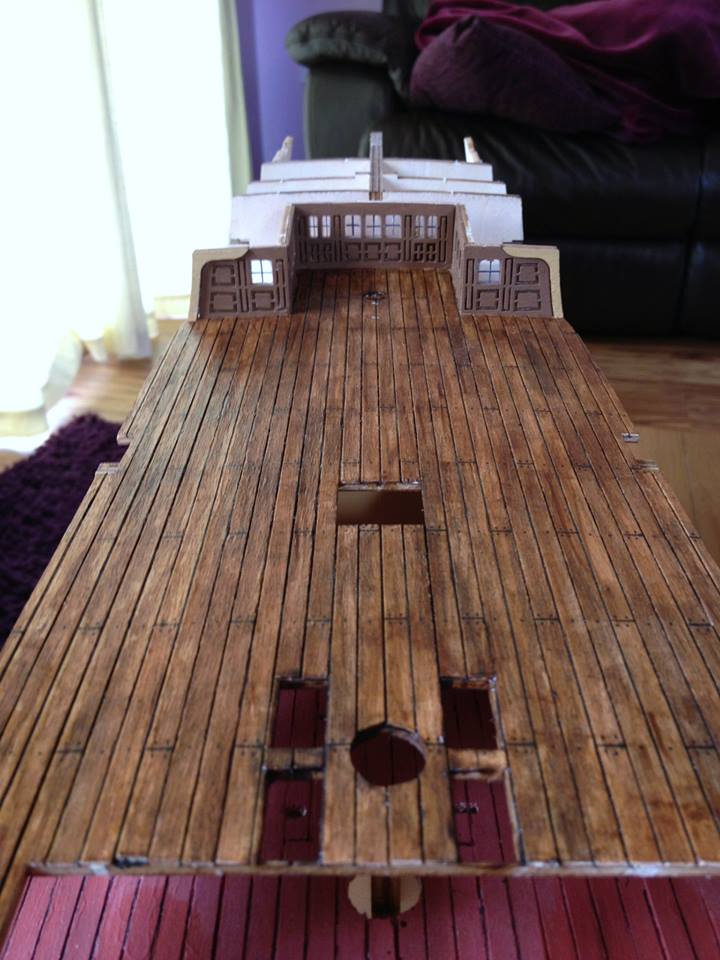
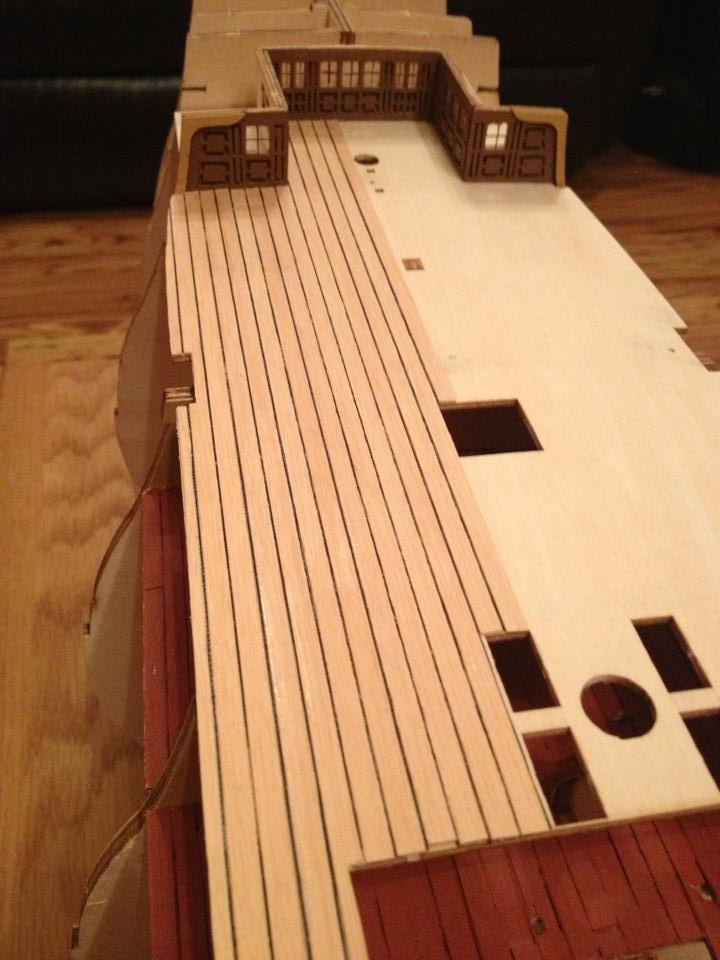
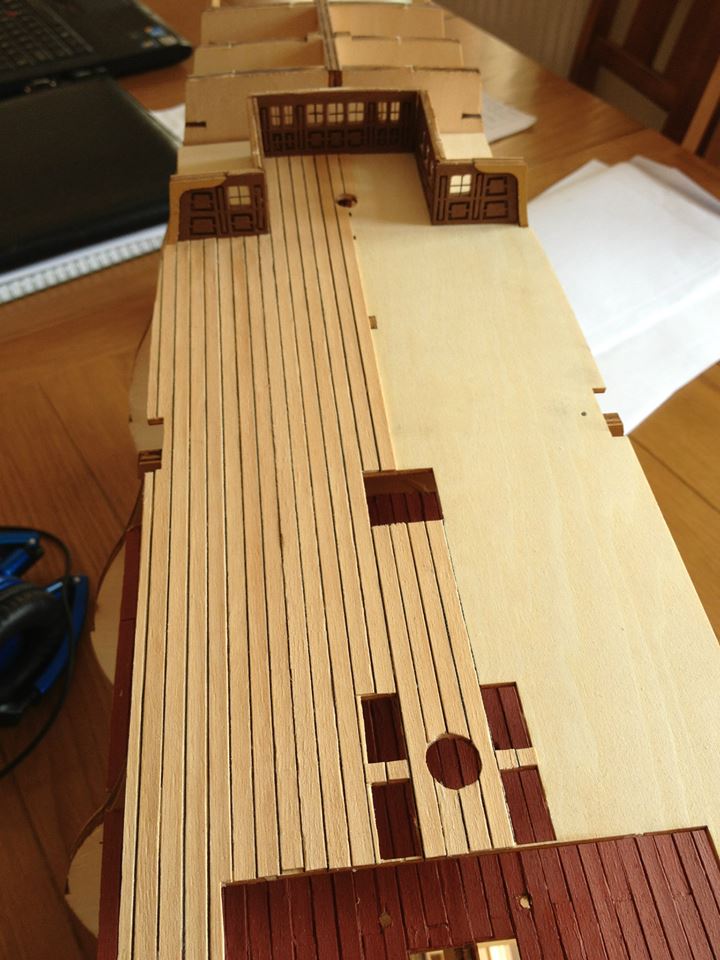
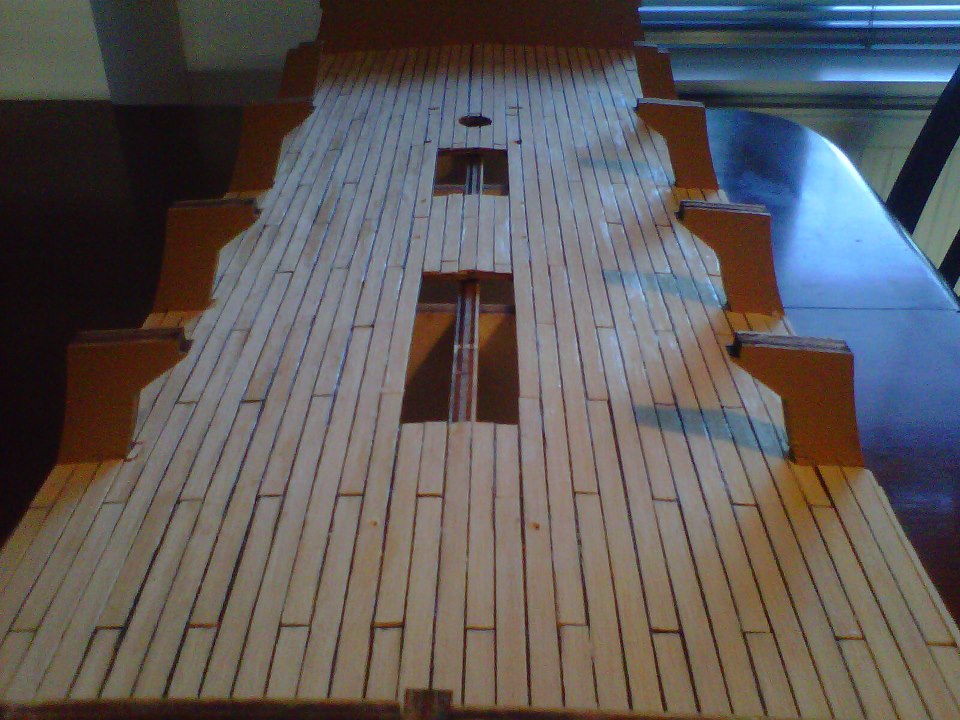
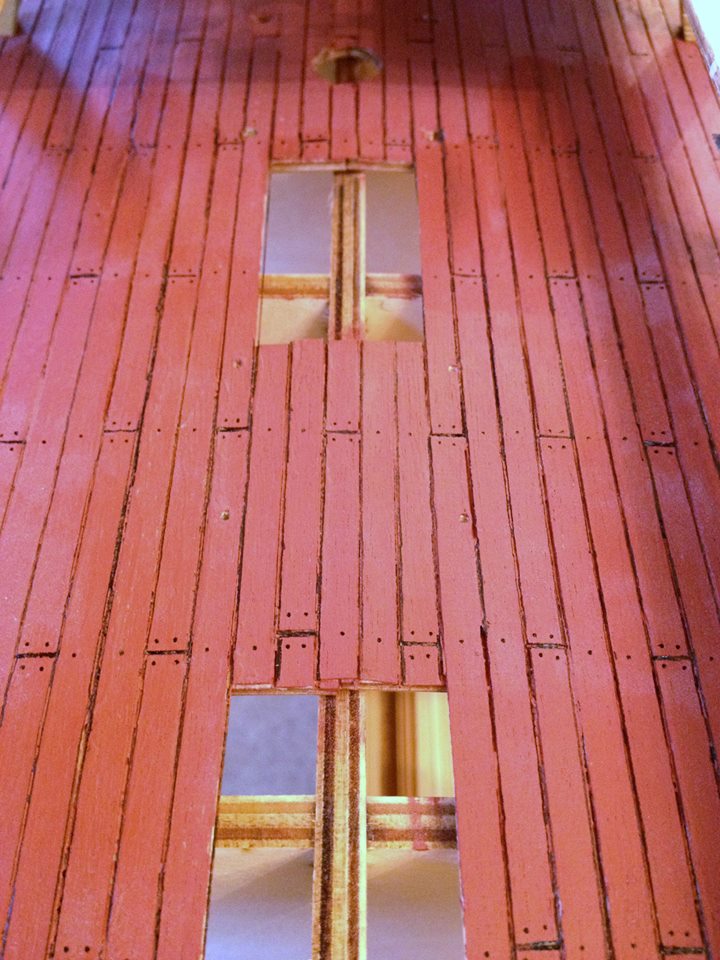
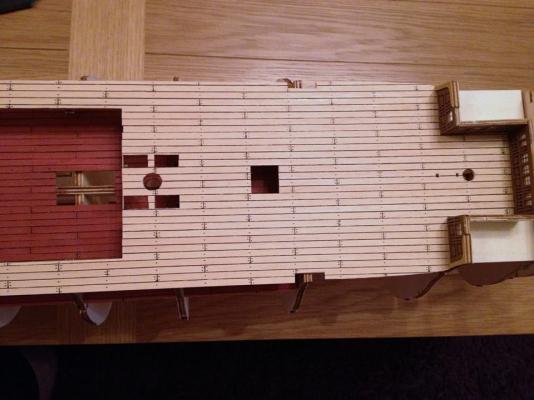
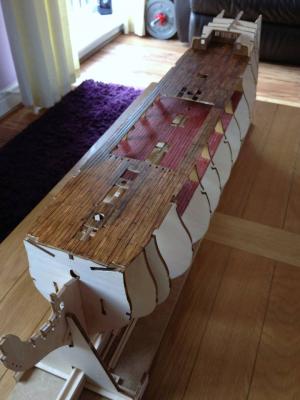
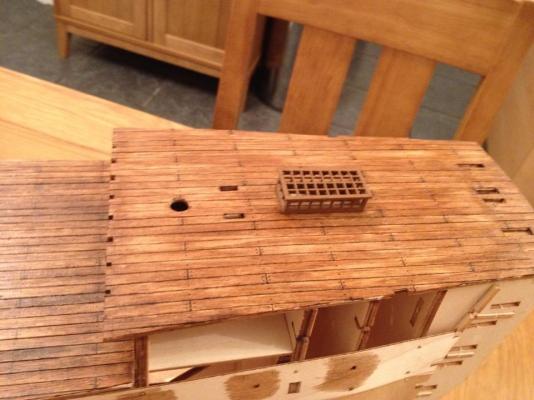
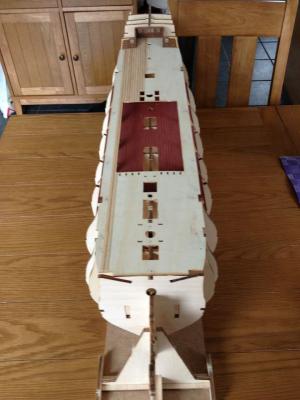
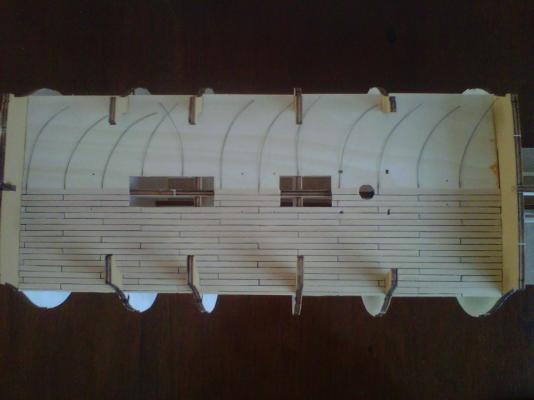
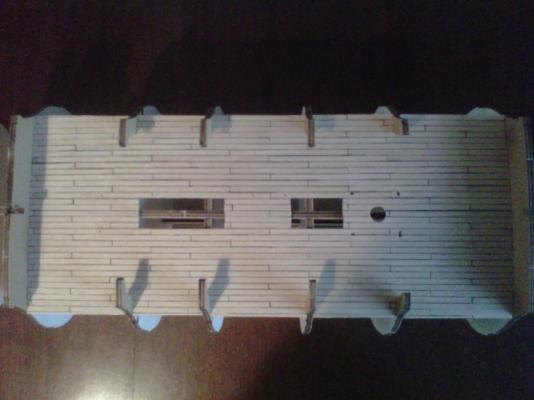
I came up with the oak-wash idea myself, essentially watering down a normal oak varnish with some water. Was really pleased with the overall look of the decking, as it will be the main bit that people will see on the completed model. I added the skylight to the middle of the poop.


- 117 replies
-
- 8
-

-
- victory
- billing boats
- (and 1 more)
-
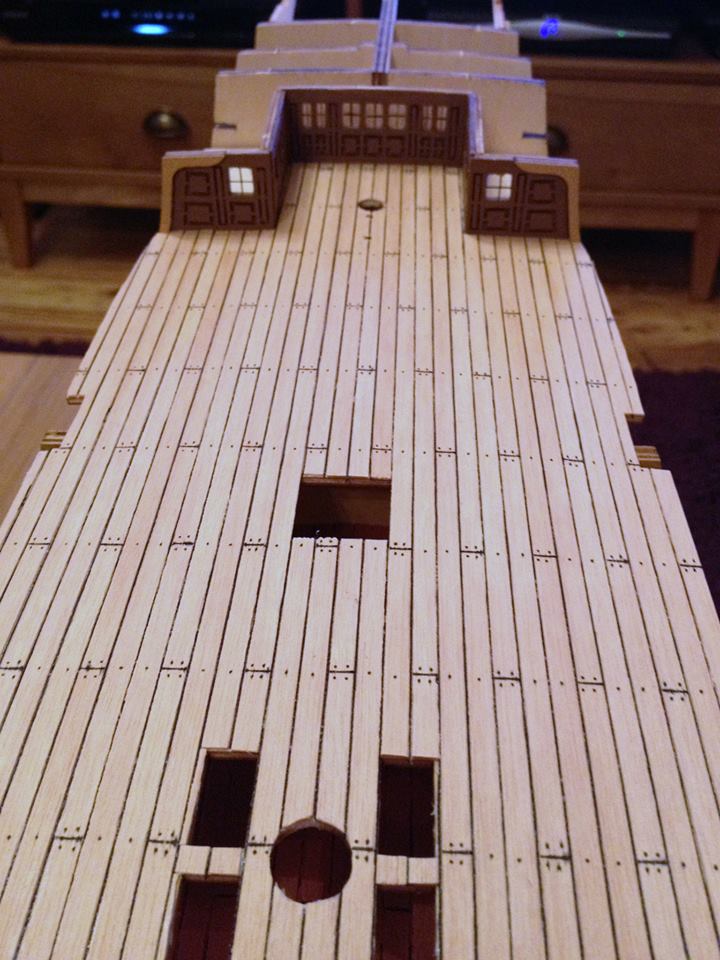
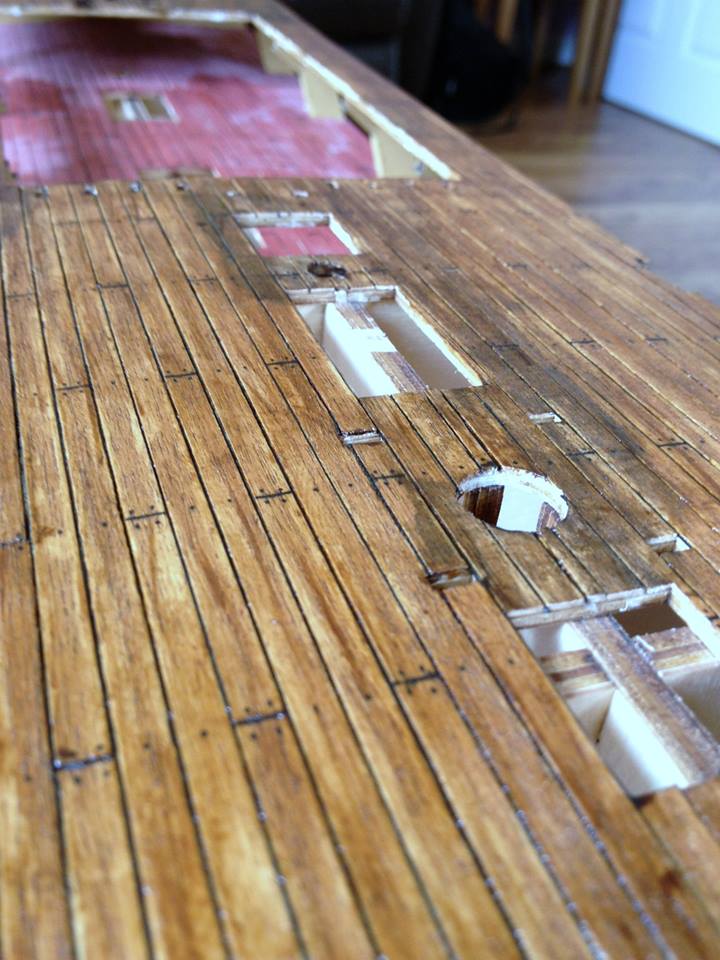
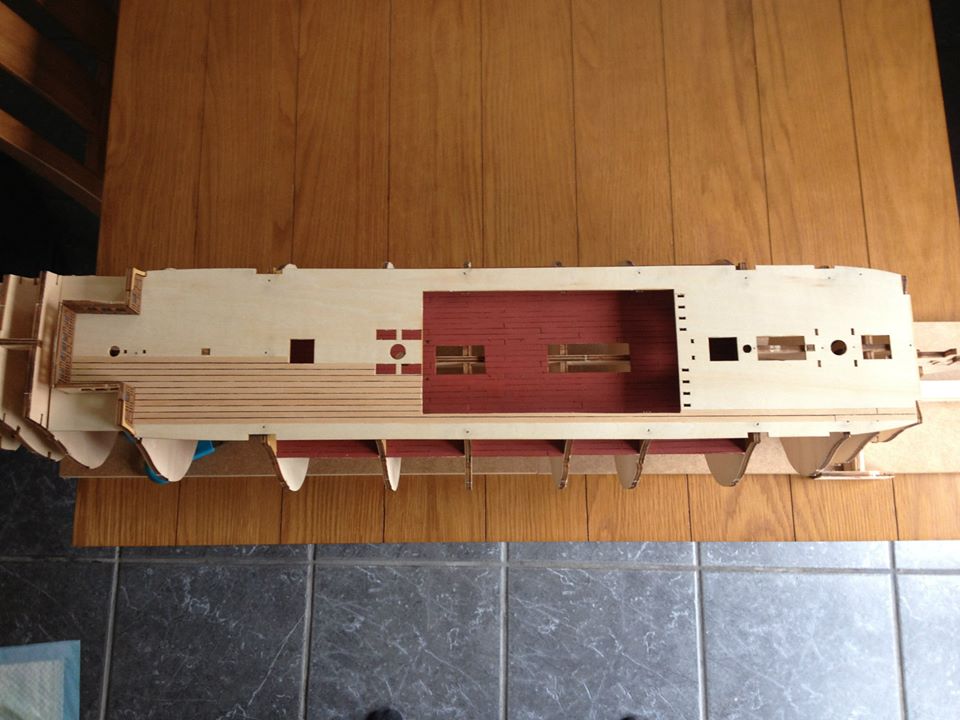
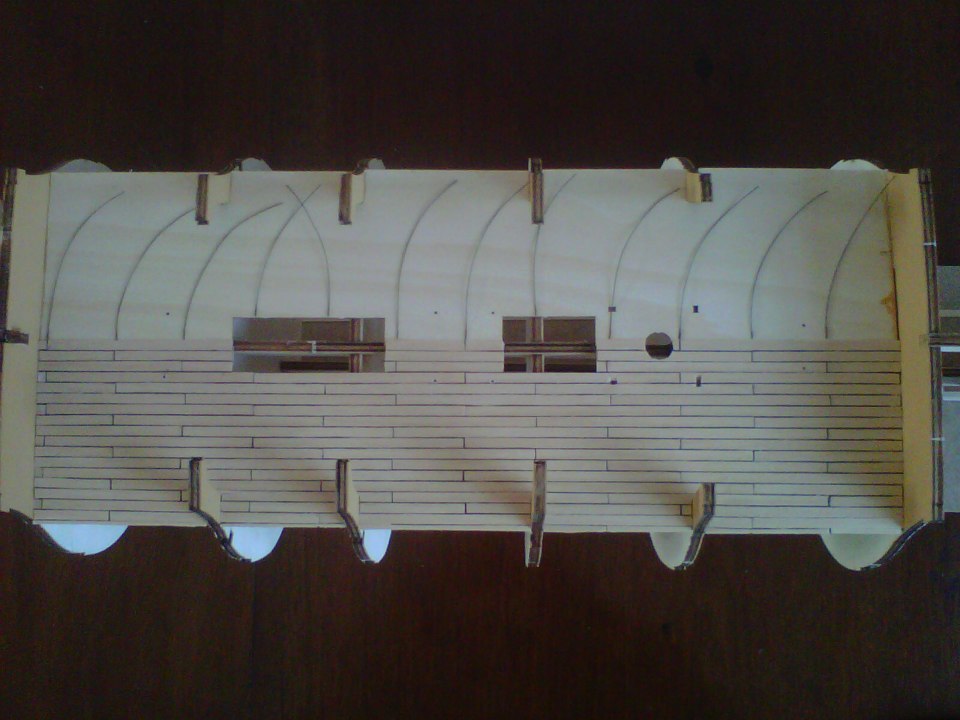
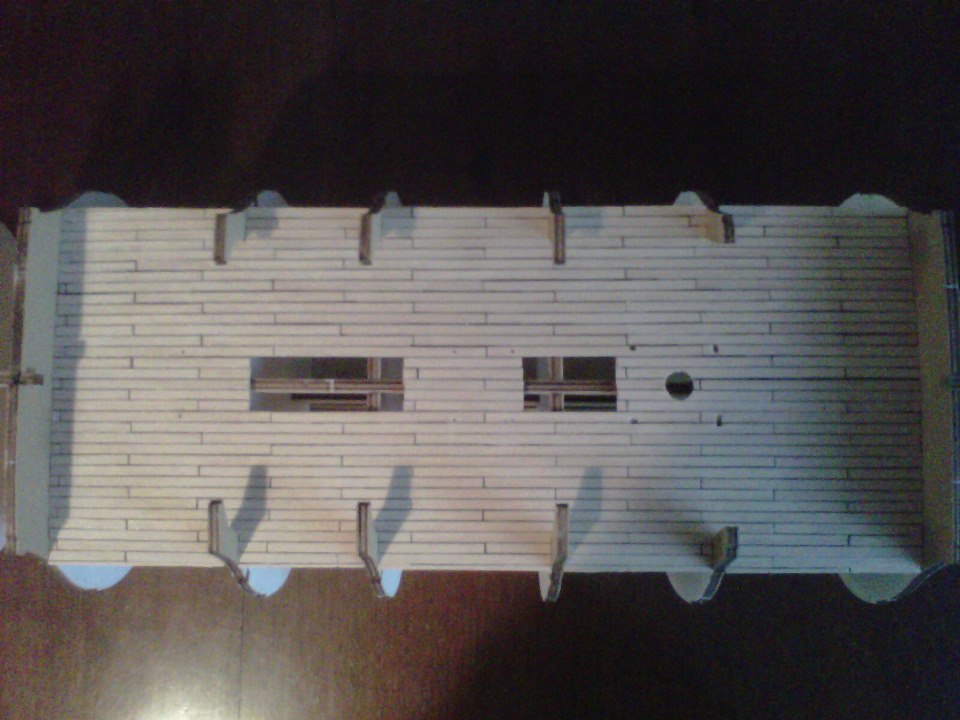
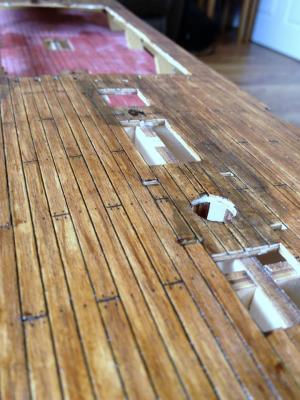
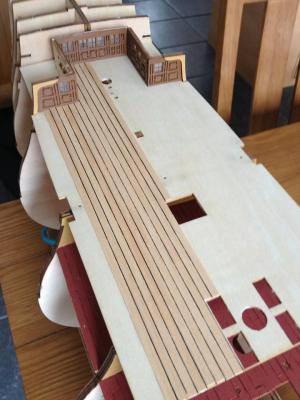
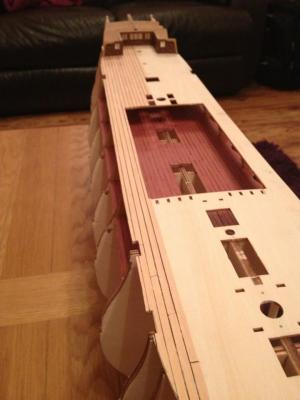
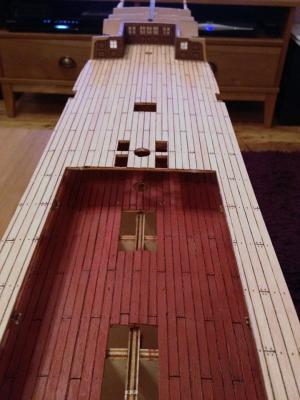
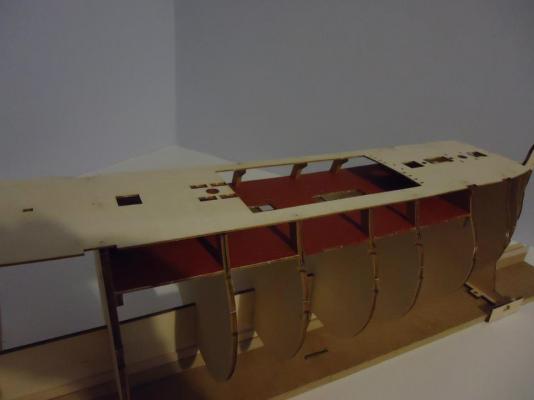
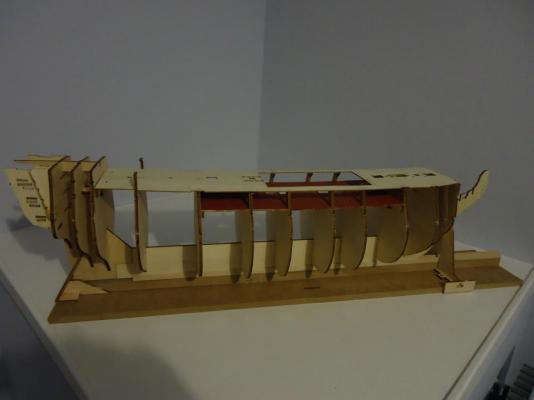
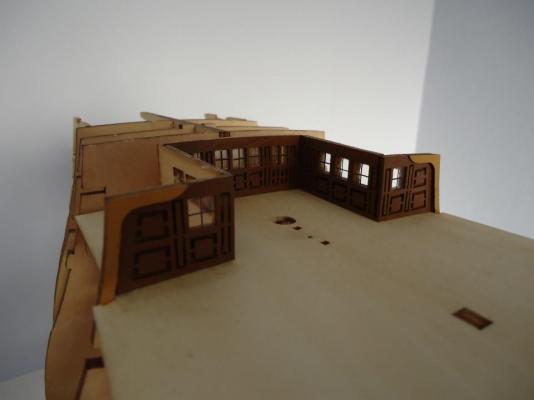
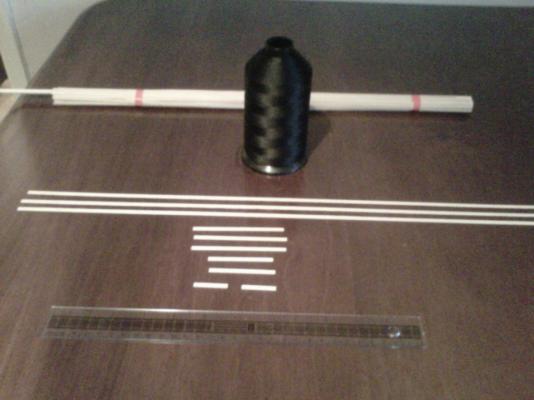
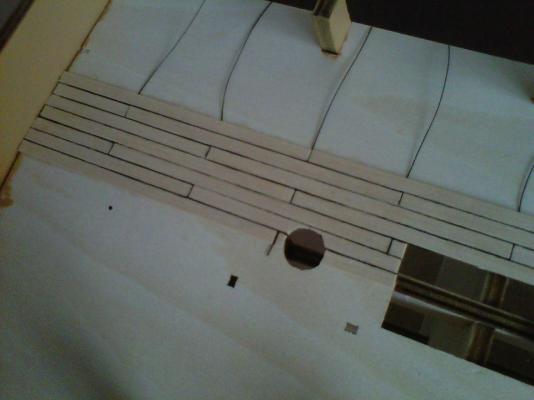
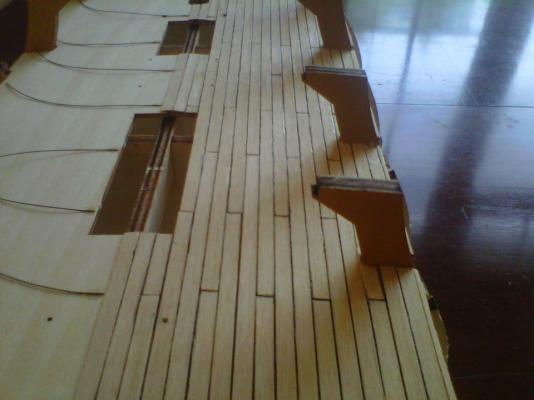
Fig 5: False poop deck and planking both the quarterdeck and the poop deck This was a huge area of planking and given it was going to be oak-wash stained when I finished (and hence be covered up), I decided to cheat a little and plank in long lengths, using the same pilot pen used for the deck nail effect, on the upper gundeck below, to then ink in the butt shift effect and the deck nails on the quarterdeck planking. I still used the bonded nylon along the edges between the planks to simulate the caulking.


- 117 replies
-
- 6
-
-
- victory
- billing boats
- (and 1 more)
-
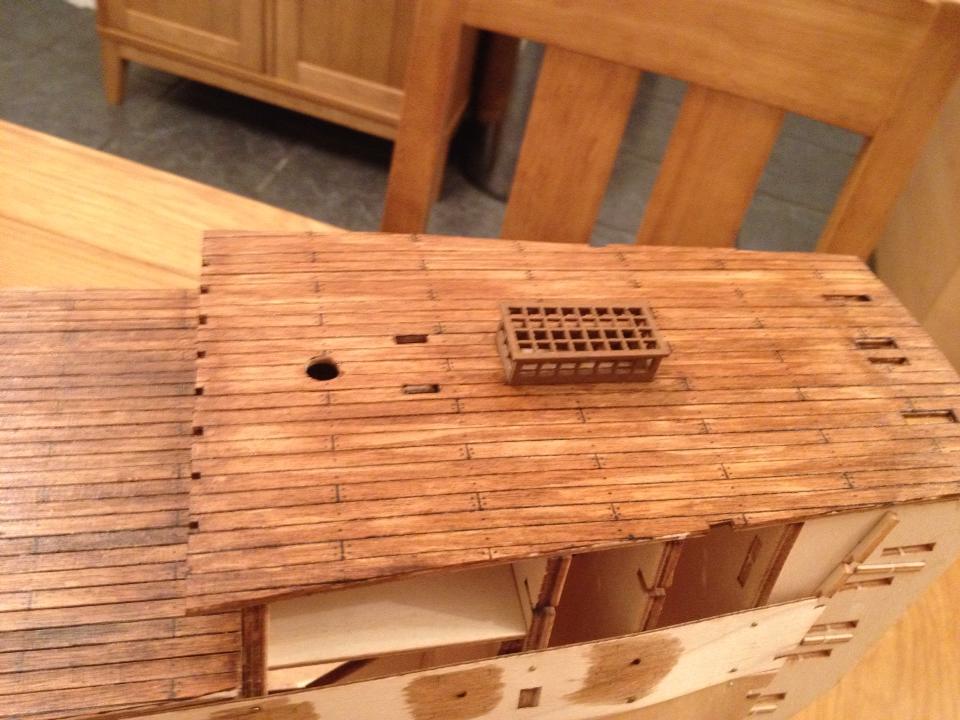
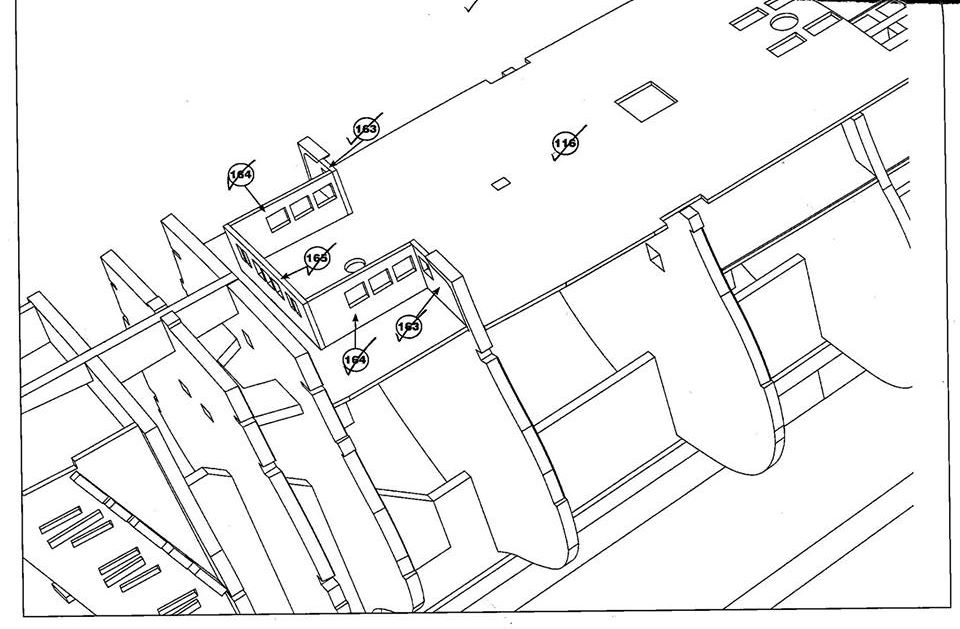
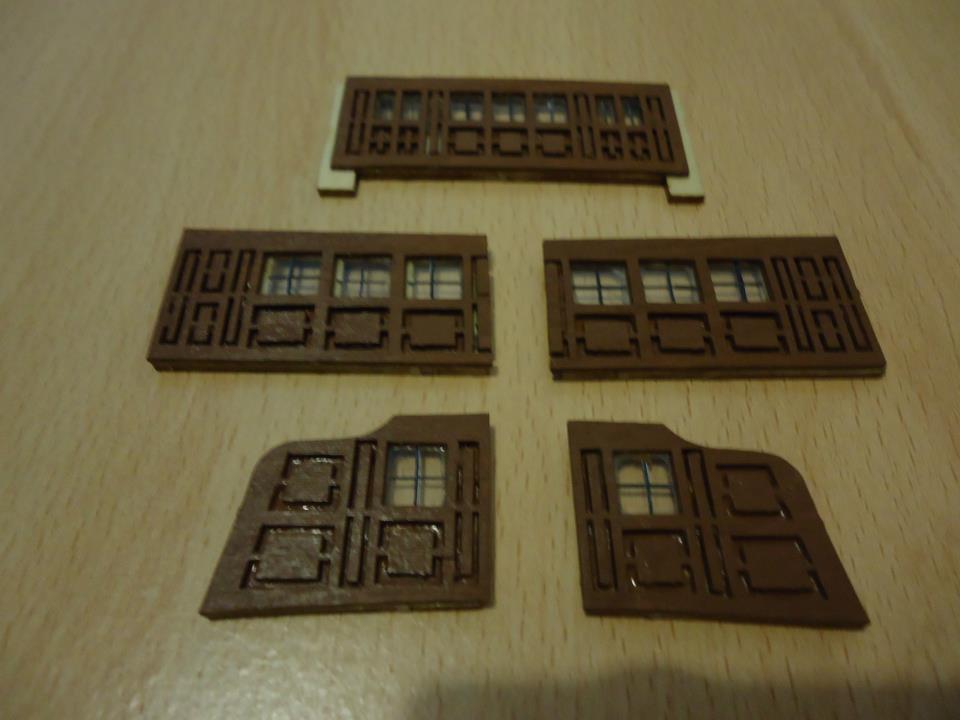
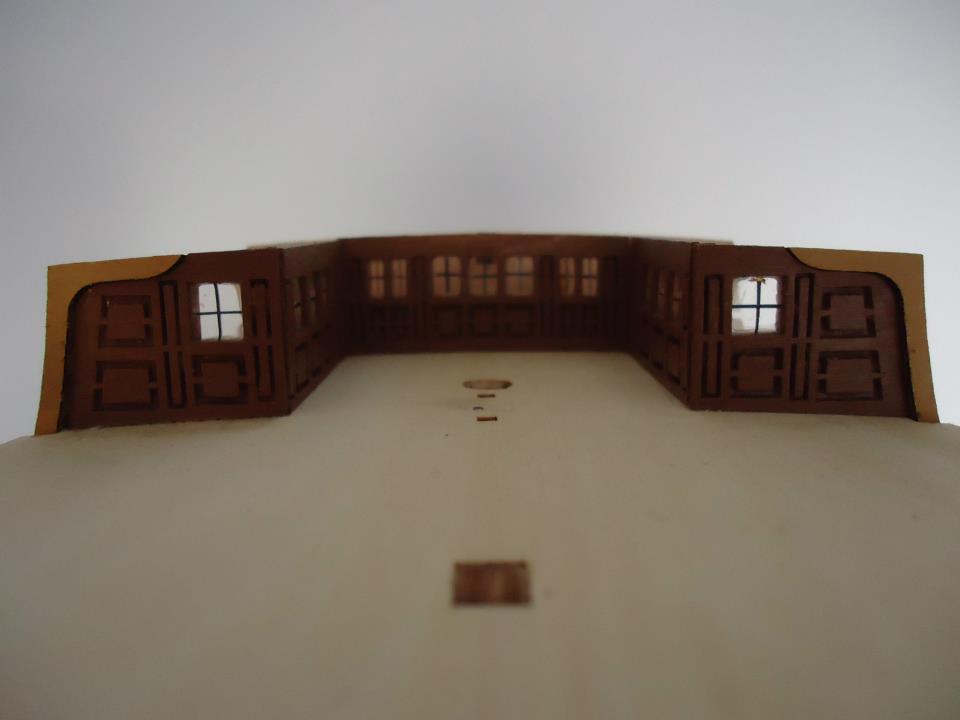
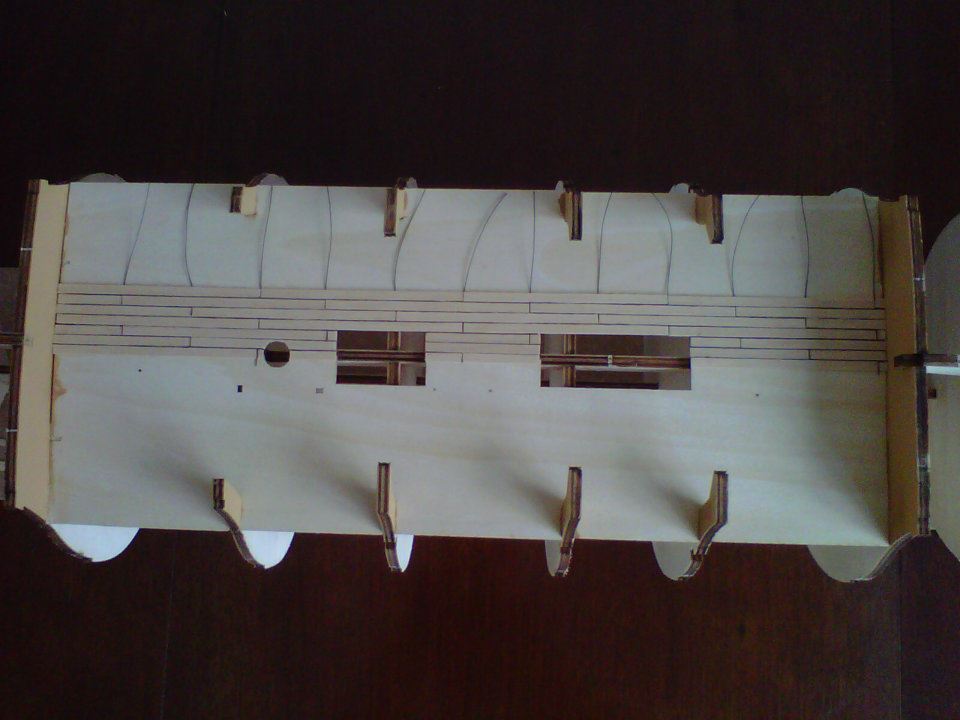
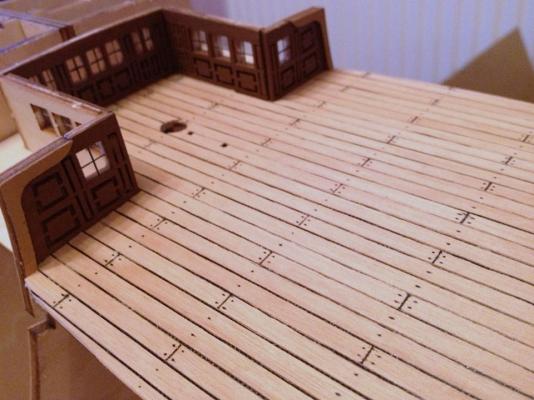
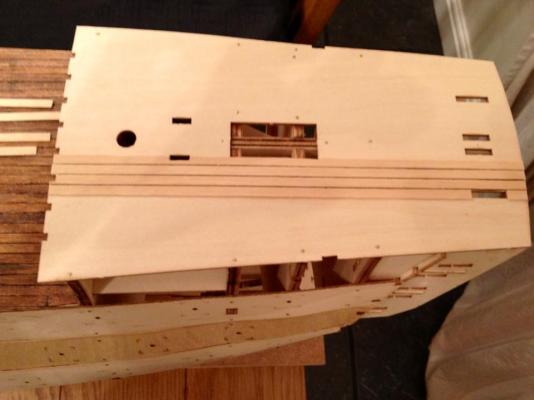
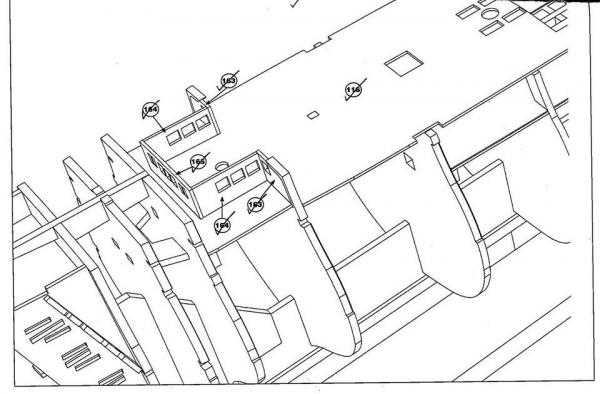
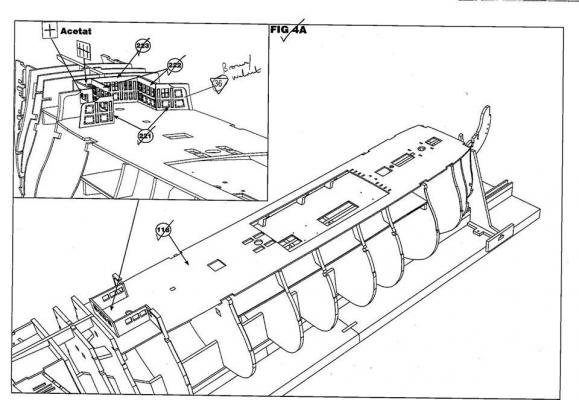
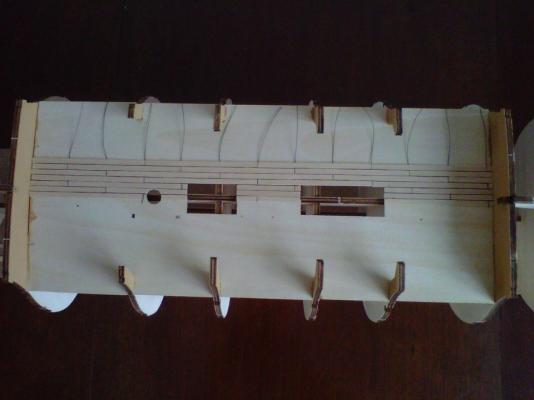
Figs 4 & 4A: False quarterdeck and cabins Again, the false deck fitted between the various bulkheads with virtually no adjusting. Excellent laser-cutting! The cabin woodwork was quite fiddly to do. I fashioned the leading to the window frames out of a bar code printed onto some sticky labels at work and then cut out and stuck onto the acetate provided with the kit.


- 117 replies
-
- 5
-
-
- victory
- billing boats
- (and 1 more)
-
Hi Boyd. Yes, I actually started my build back in July 2012 and made good progress up to about March 14 and have subsequently ground to a halt due to the time constraints mentioned in my first post. So, with Grandad now here, and having found this site, I'm now keen to get restarted. So I will upload my build log, as far as I got in those first 18 months or so and start again from that point.
- 117 replies
-
- 1
-
-
- victory
- billing boats
- (and 1 more)
-
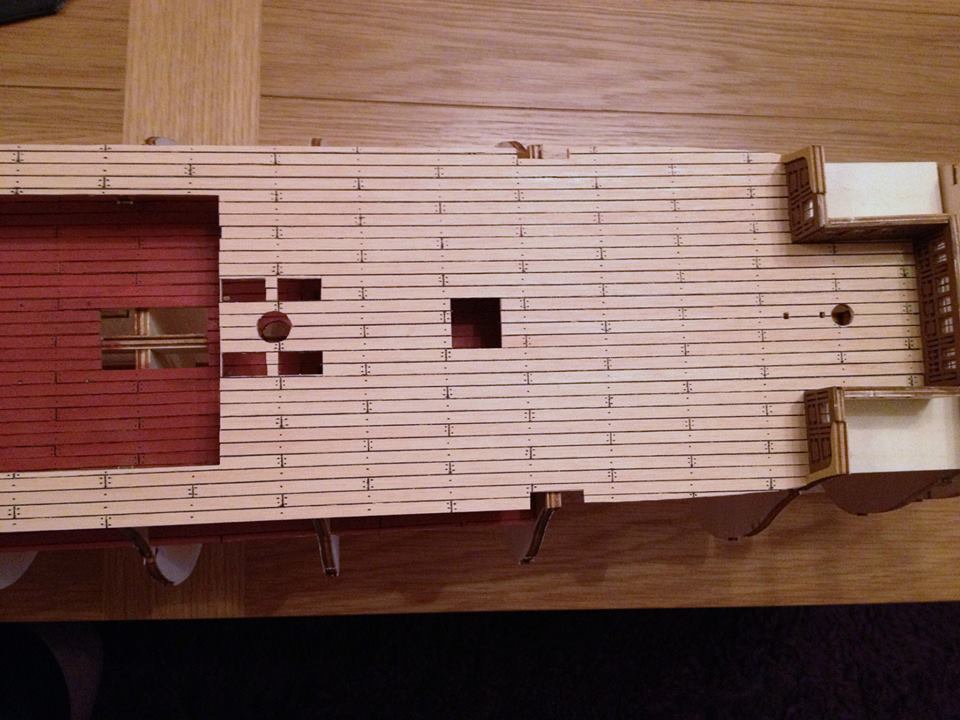
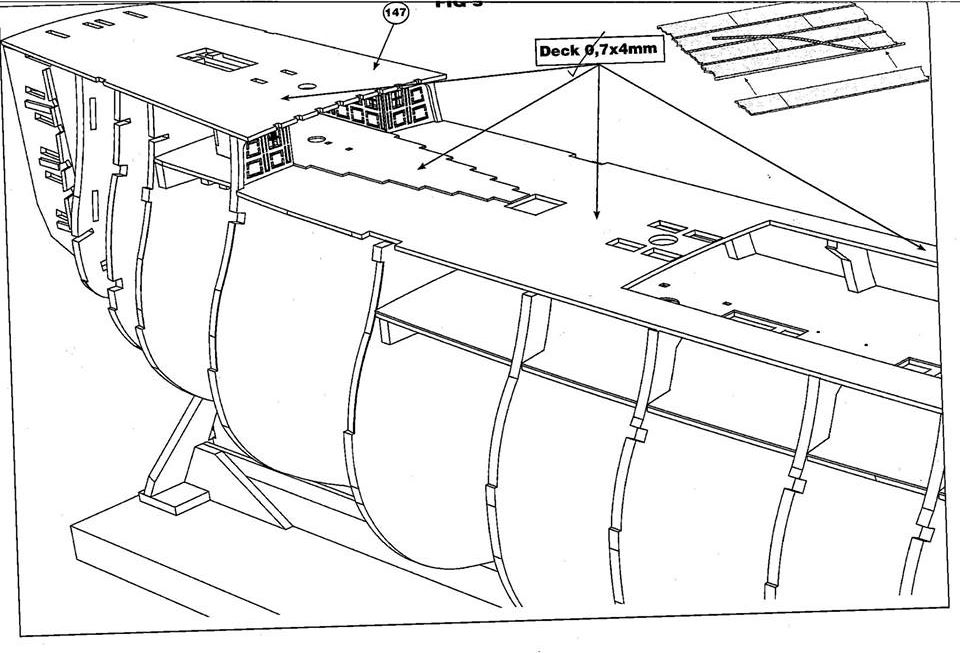
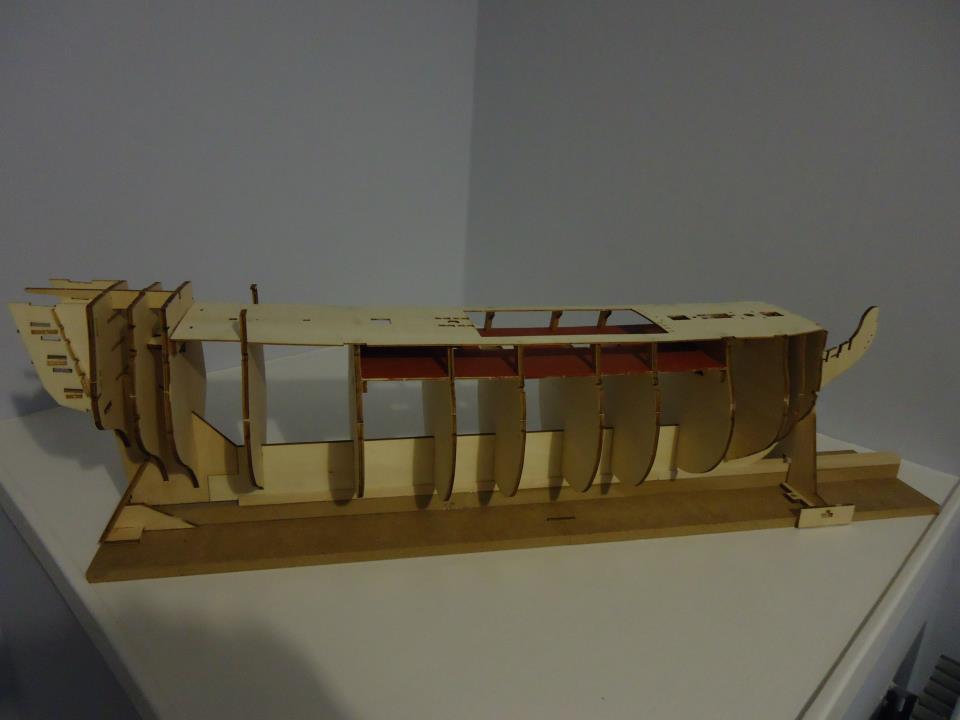
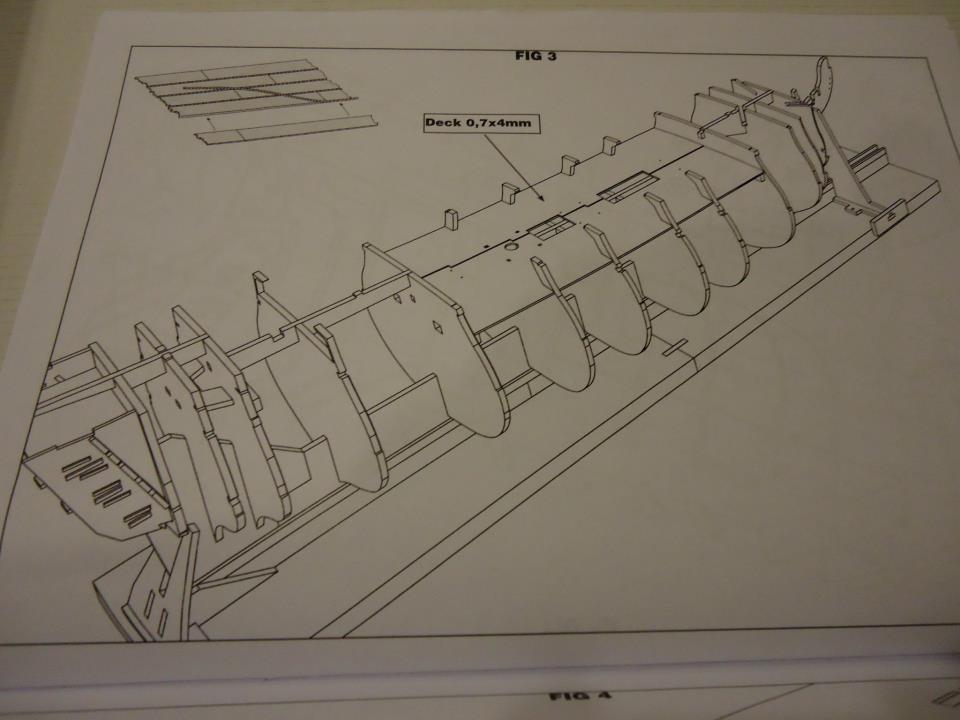
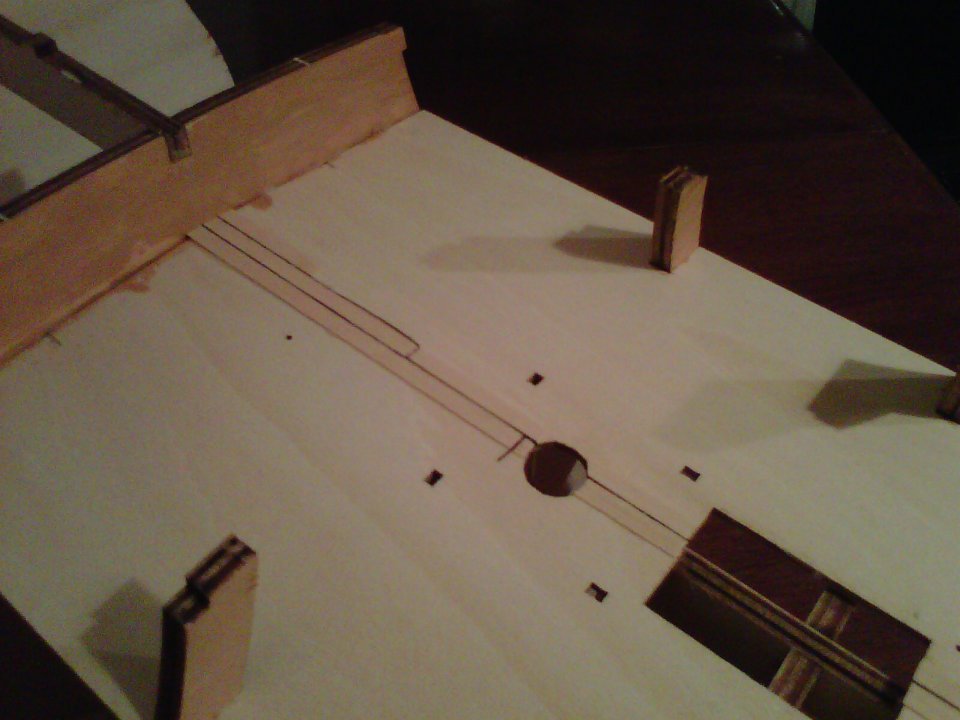
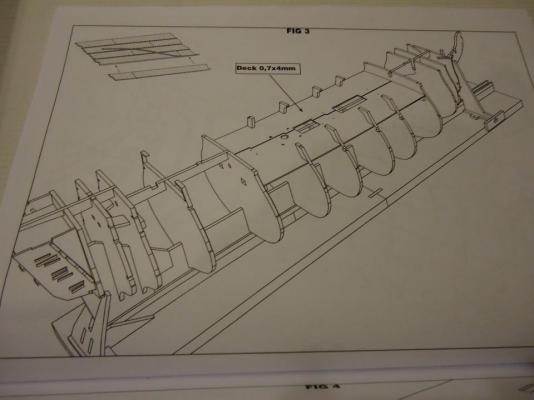
Fig 3: Planking the false upper gun deck So the fun and games then began and my first decision to deviate from the plans. Fig 3 just showed the gundeck being vaguely planked in some way and some sort of material being used as caulking. I did some research online (though somehow still didn't manage to find this site) and decided I would purchase some bonded black nylon thread for my caulking and that I would cut the deck planking strips provided into 9cm lengths (seemed to replicate a reasonable plank length), such that they could be staggered at 3cm intervals and look like some sort of butt shift system. I started down the centre-line and worked out to one side, finally cutting and shaping round the bulkheads. Then switched around and did the same the other side. The final touches were to paint the whole thing in red ochre (as I'd read about the decks being painted red to prevent the spilled blood distressing the crew) and to add some deck "nails", 2 at each end and 1 at each 3cm point along the lengths. This was done using a 0.5mm black pilot pen. In hindsight (and having done lots more research and reading now) I realise I should have done a proper 3 or 4 butt system, as on the ship herself, but what's done is done. It took a long time to do but I was very pleased with the effect created, even though a lot of this deck won't be seen once the quarterdeck is added later.


- 117 replies
-
- 12
-
-
- victory
- billing boats
- (and 1 more)
-
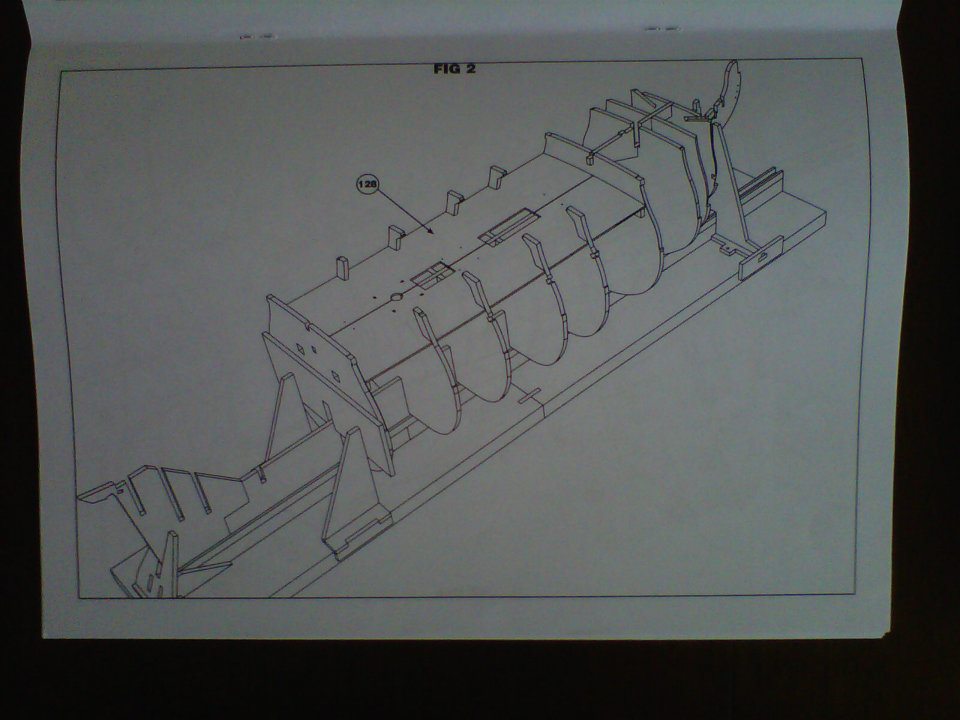
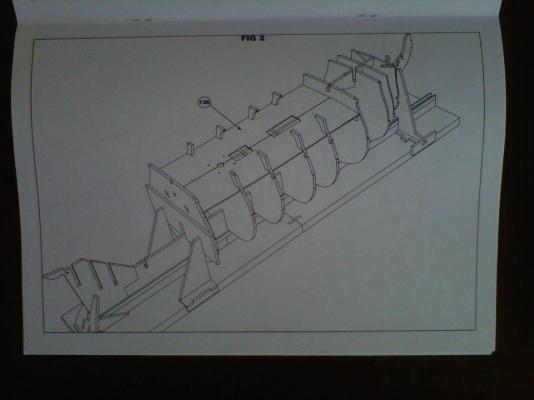
Fig 2: False upper gundeck So far, despite the lack of instruction in the manual, the laser-cut pieces have fitted together superbly well. The false deck slotted in with the minimum of fuss and adjustment....which at least proved I'd got the bulkhead alignment reasonable straight if nothing else.
- 117 replies
-
- 4
-
-
- victory
- billing boats
- (and 1 more)
-
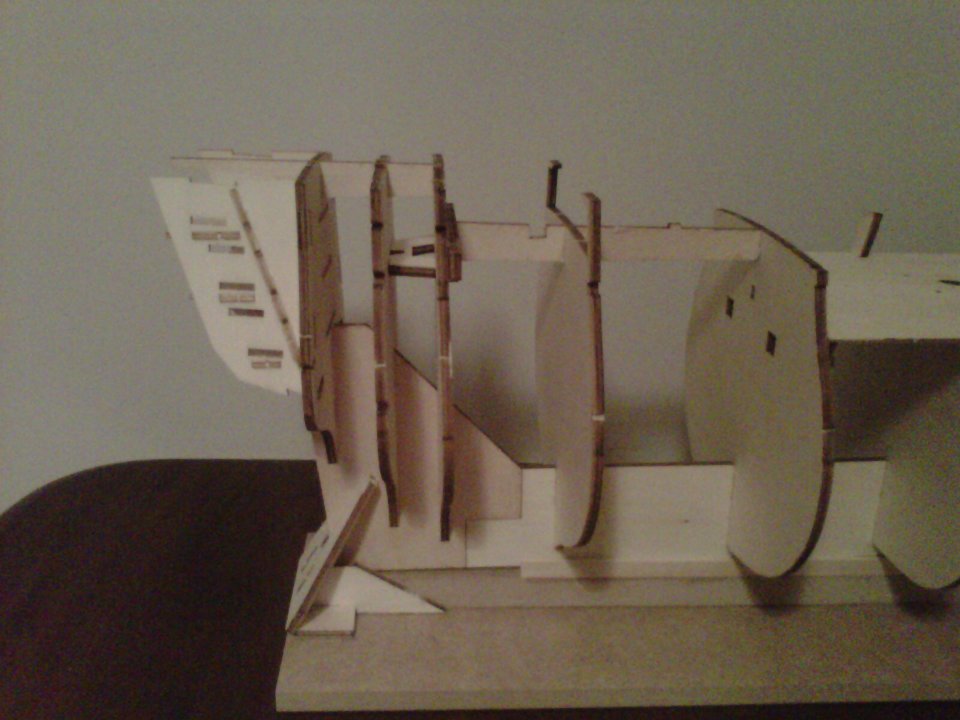
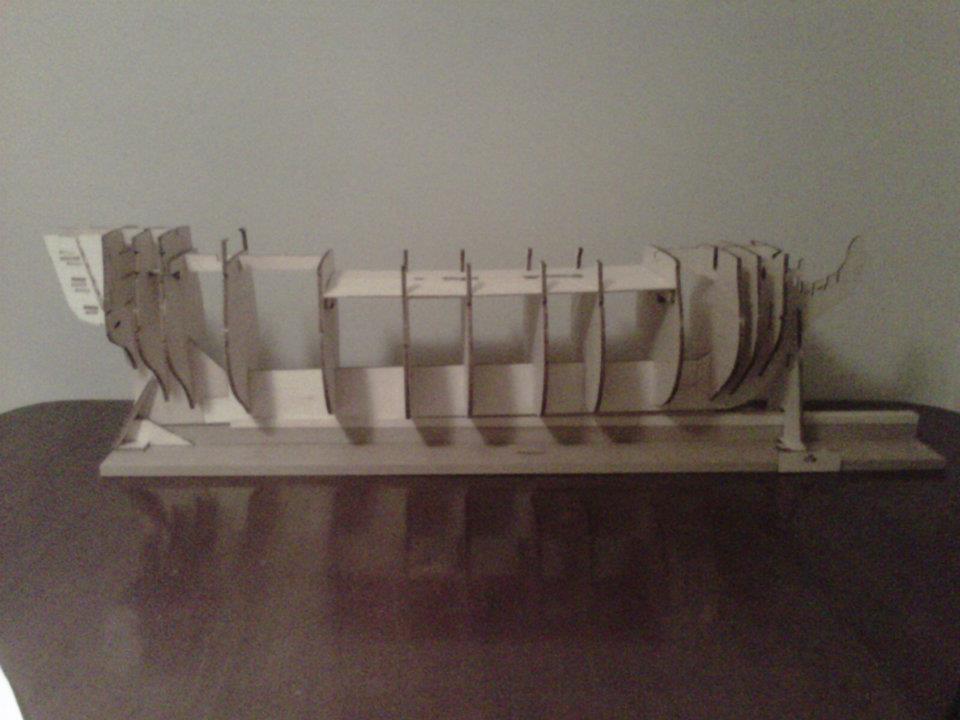
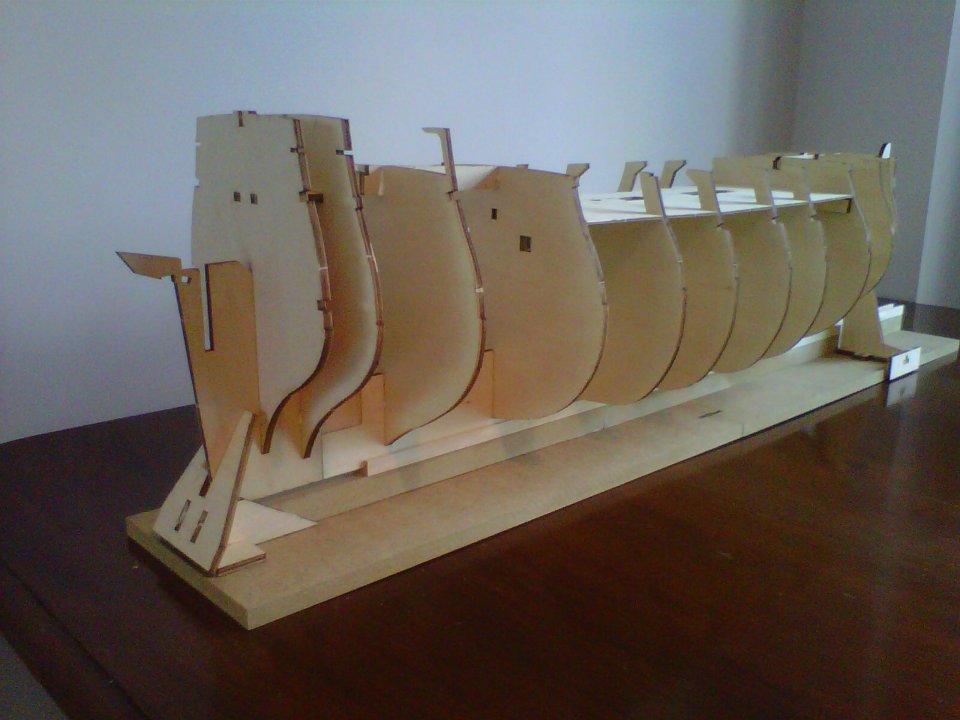
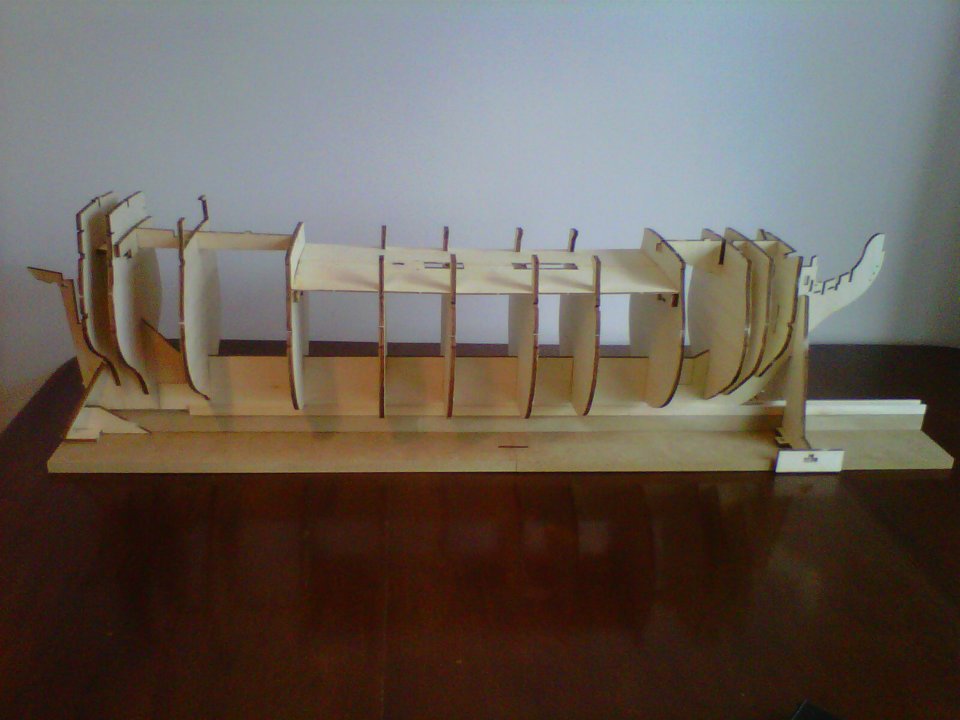
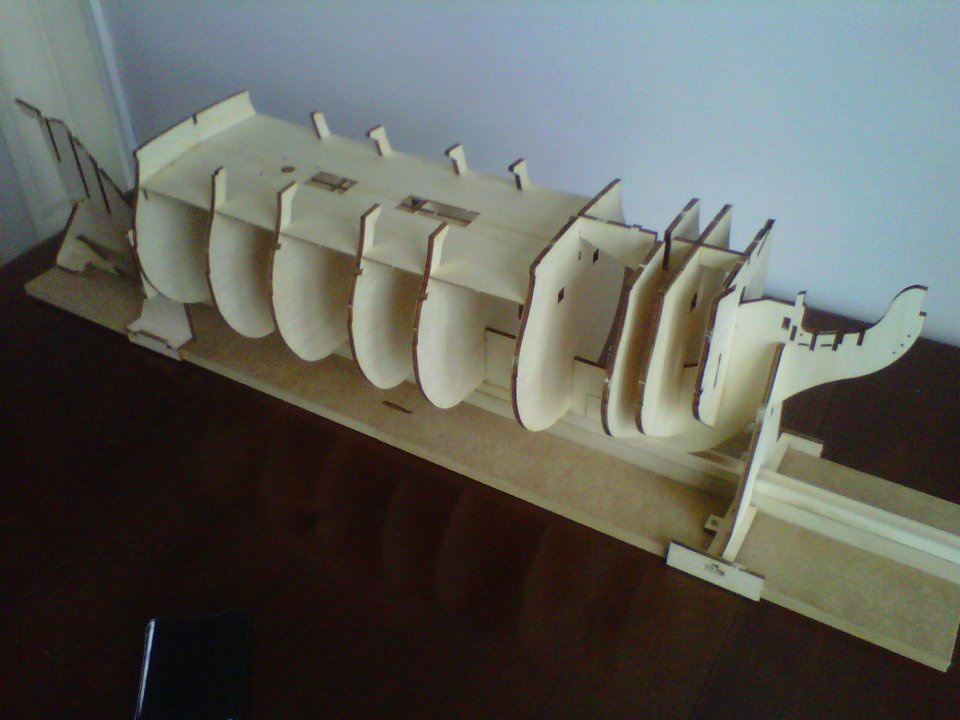
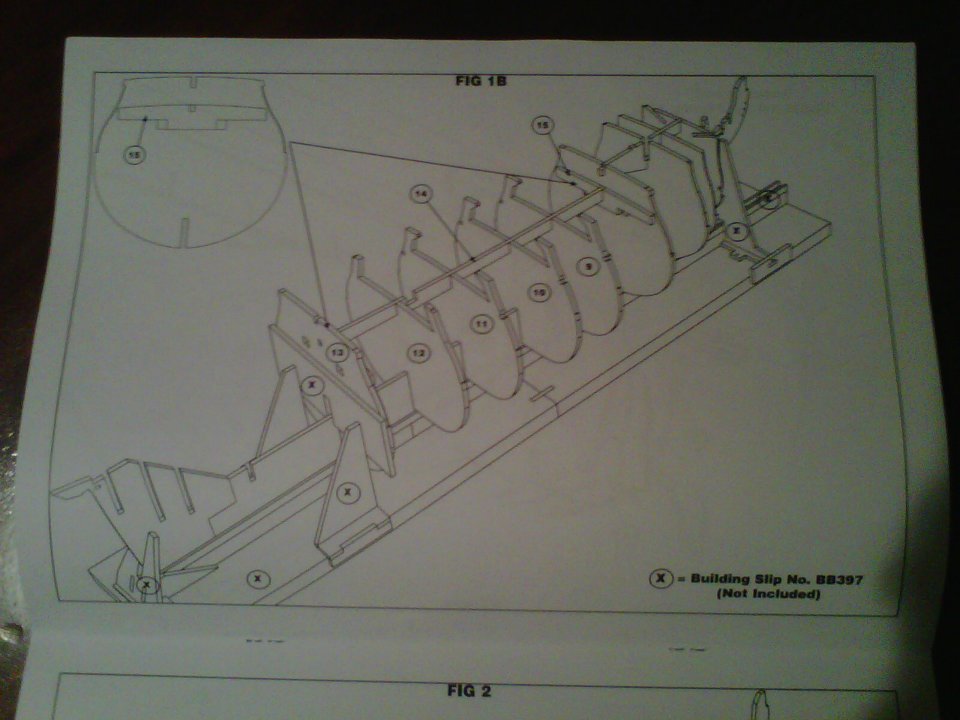
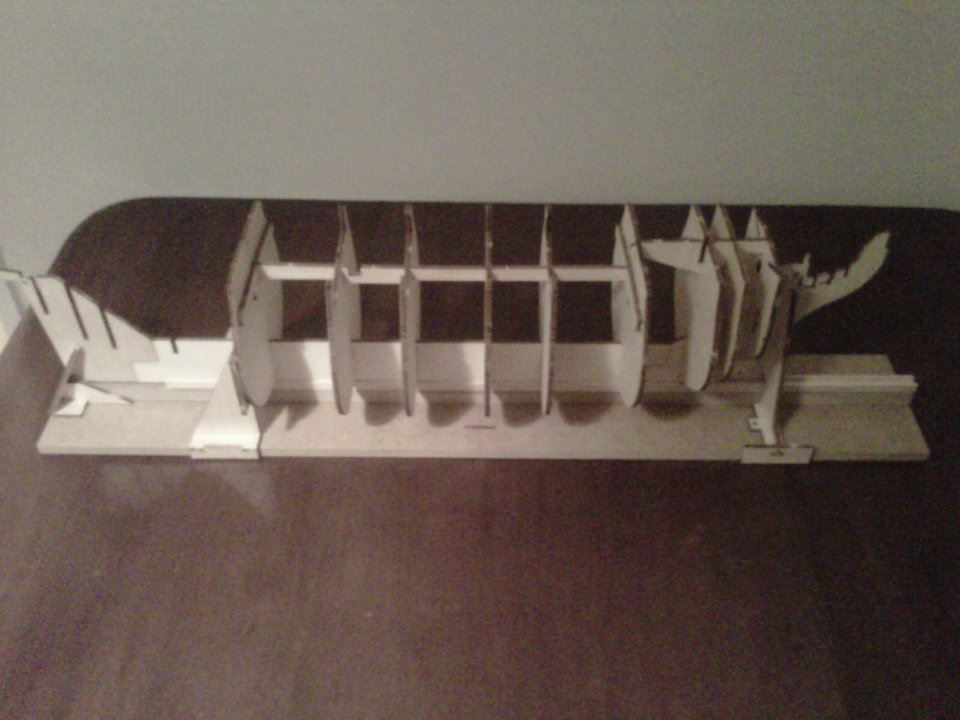
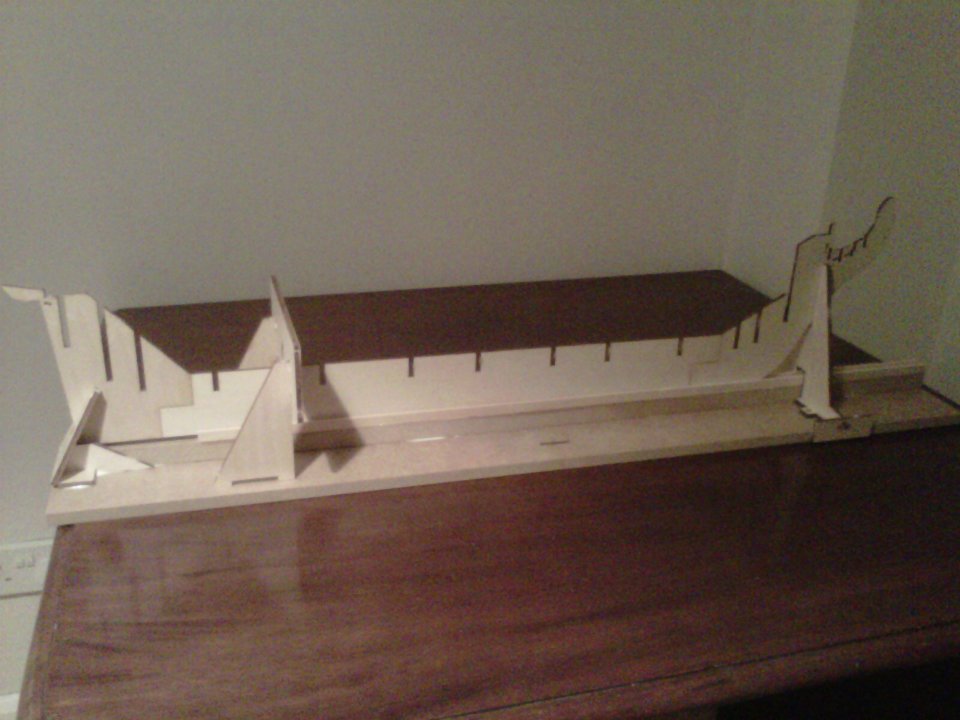
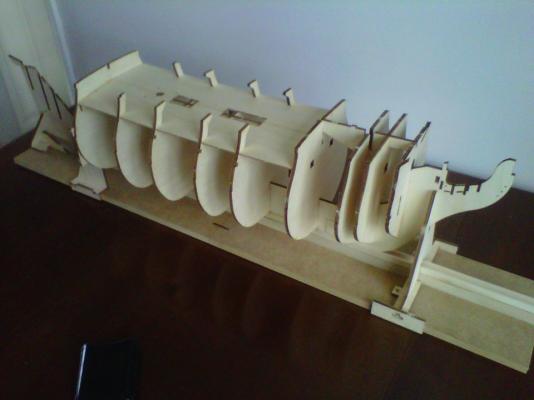
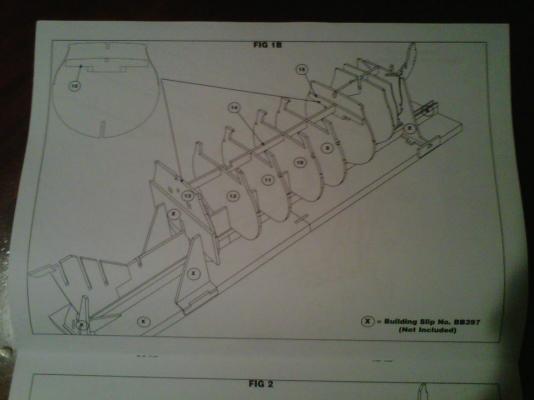
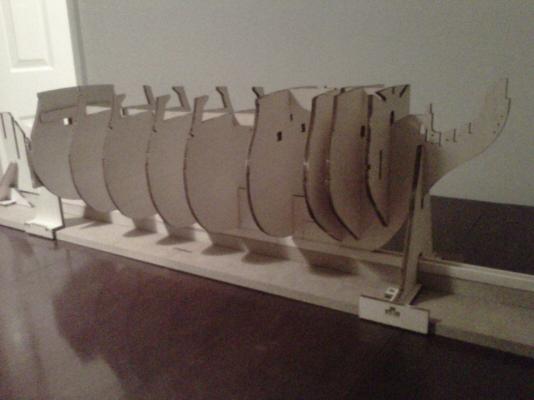
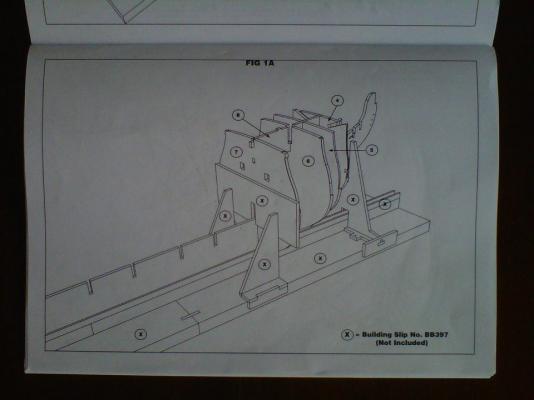
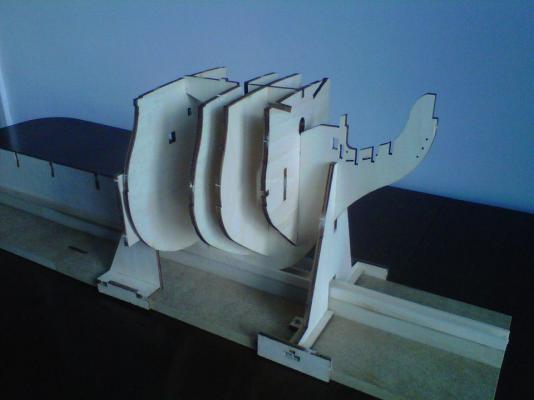
Fig 1B: Mid-section bulkheads All fairly straightforward so far. Bulkheads dry-fitted first to ensure they slotted in snugly and square. Starting to resemble a rather bony fish at the moment!
- 117 replies
-
- 3
-
-
- victory
- billing boats
- (and 1 more)
-
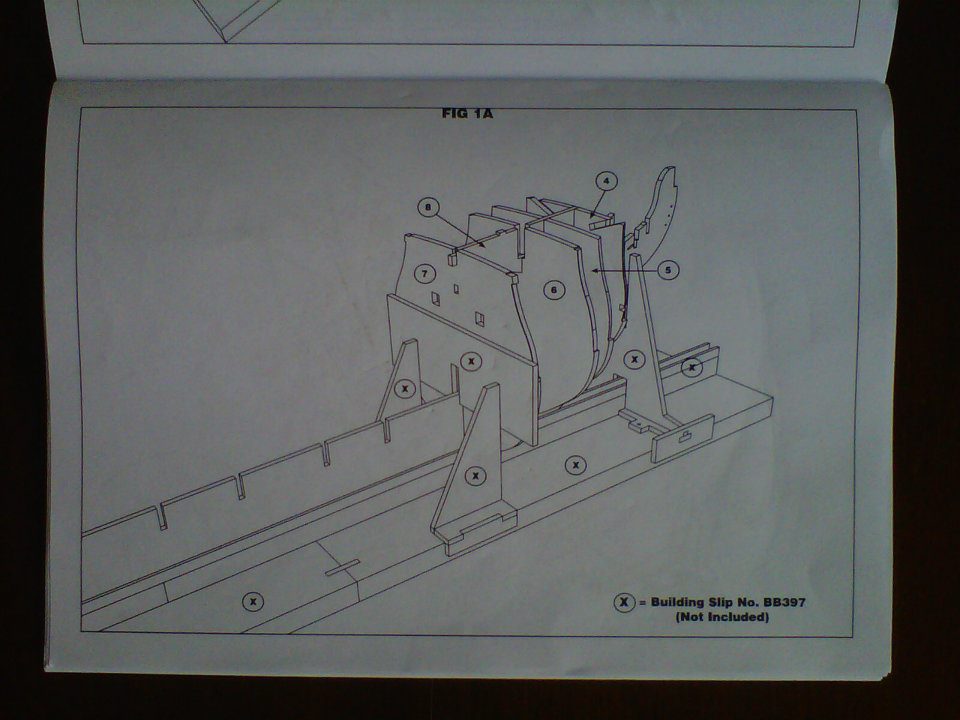
Fig 1A: For'd bulkheads 1A?! Bloody cheats. Call it Fig 2 so it feels like I'm making more progress! Apologies for the rubbish photos (these early shots weren't great)
- 117 replies
-
- 3
-
-
- victory
- billing boats
- (and 1 more)
-
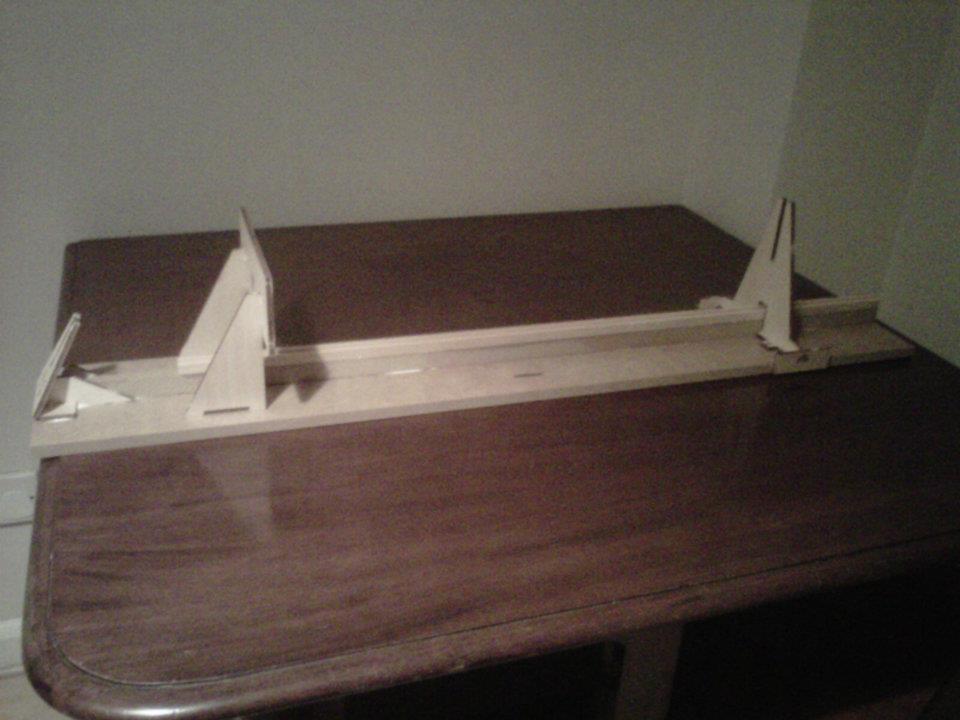
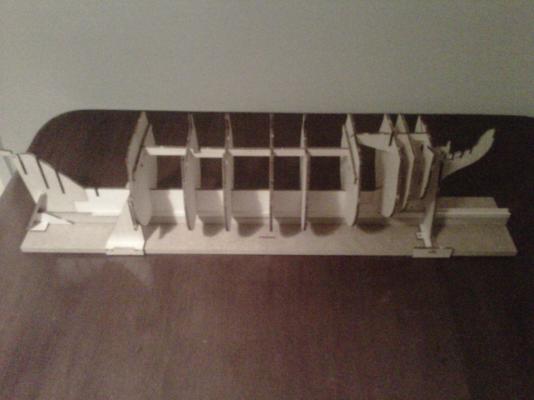
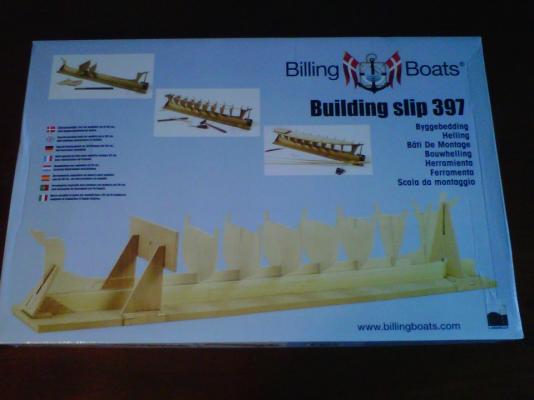
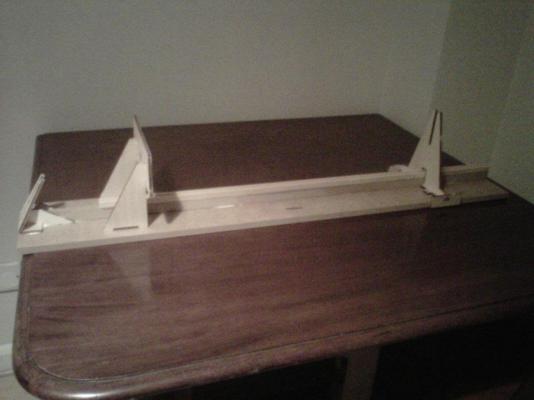
The Building Slip Quickly realised I'd need somewhere proper to actually build her on and thought I'd need some sort of "shipyard" arrangement. Searched "building slip" online only to find Billings actually do one themselves. Result. Bit expensive but has proved totally invaluable for me to date.

- 117 replies
-
- 4
-
-
- victory
- billing boats
- (and 1 more)
-
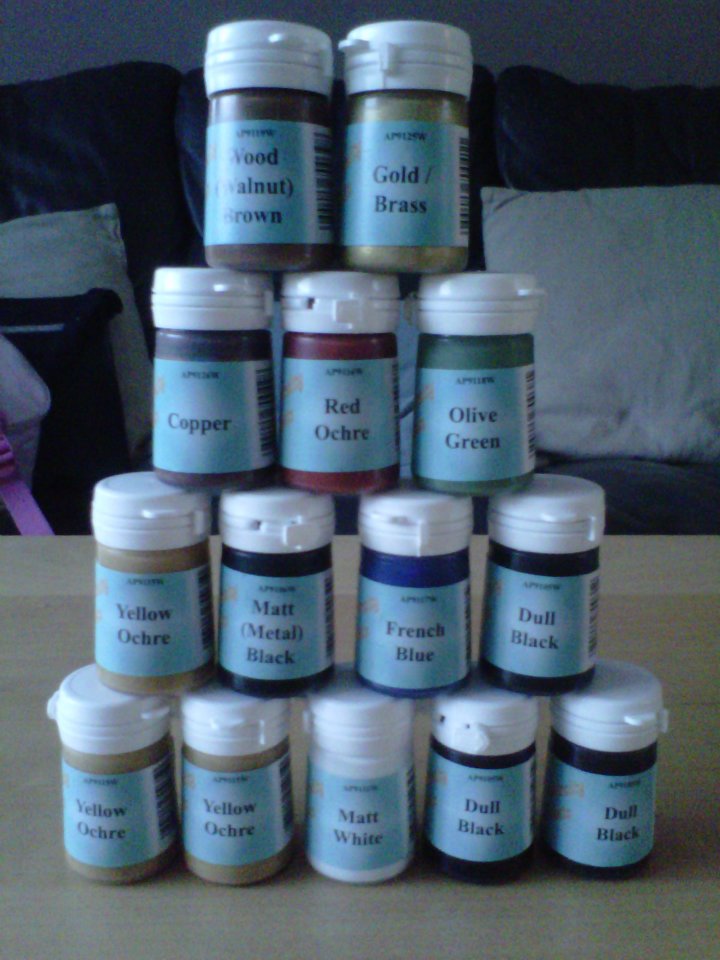
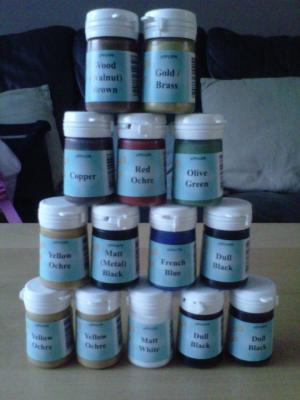
Sent off for the "Victory paints set". Now that's some proper ship colours.
- 117 replies
-
- 2
-
-
- victory
- billing boats
- (and 1 more)
-
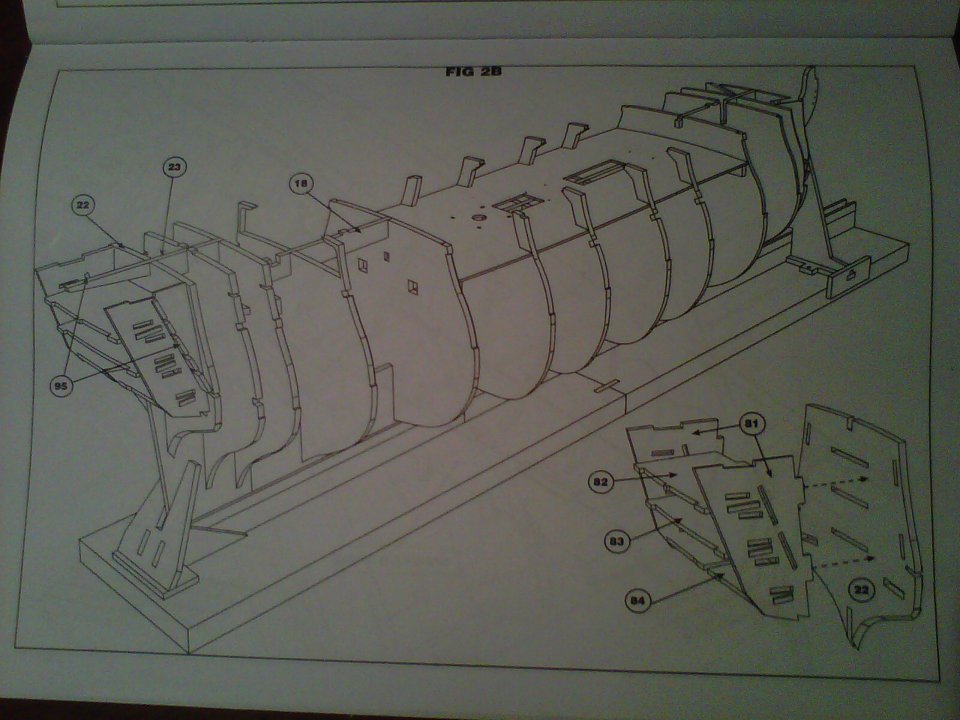
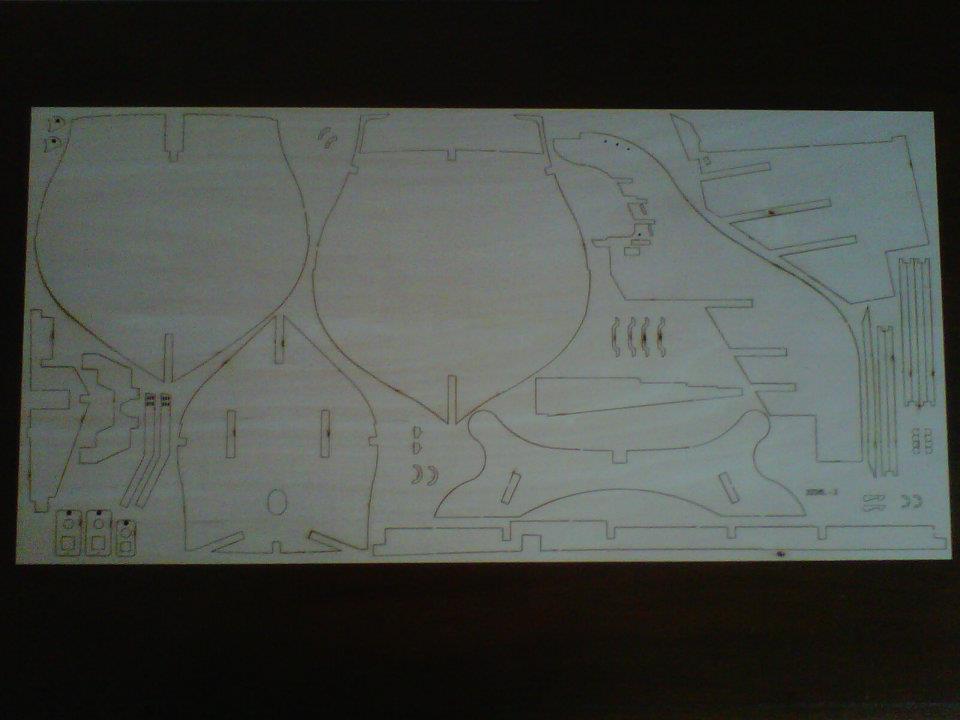
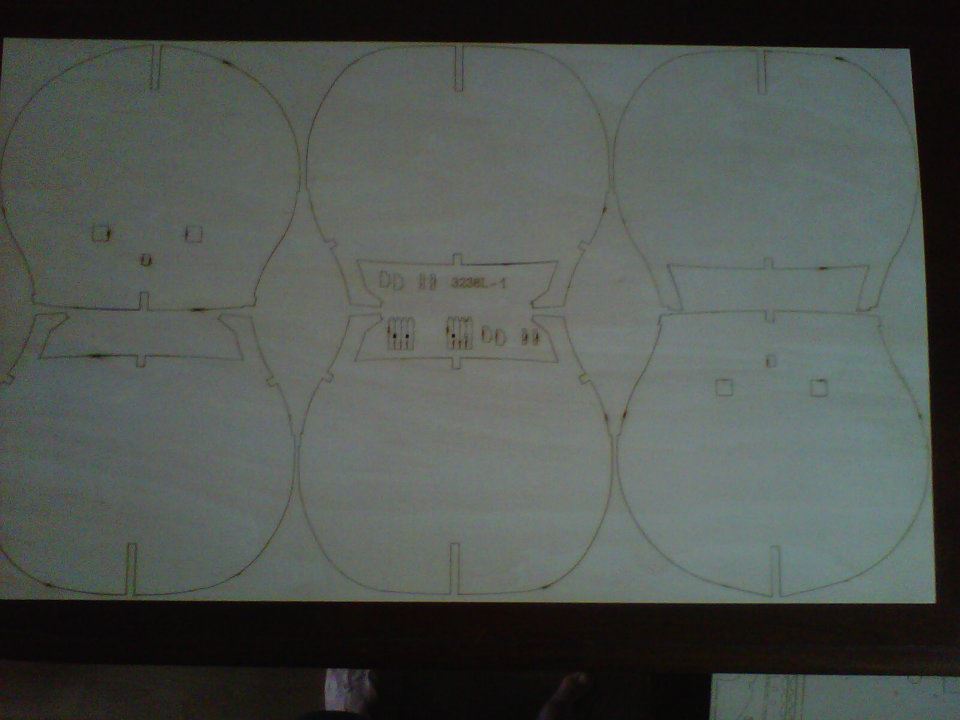
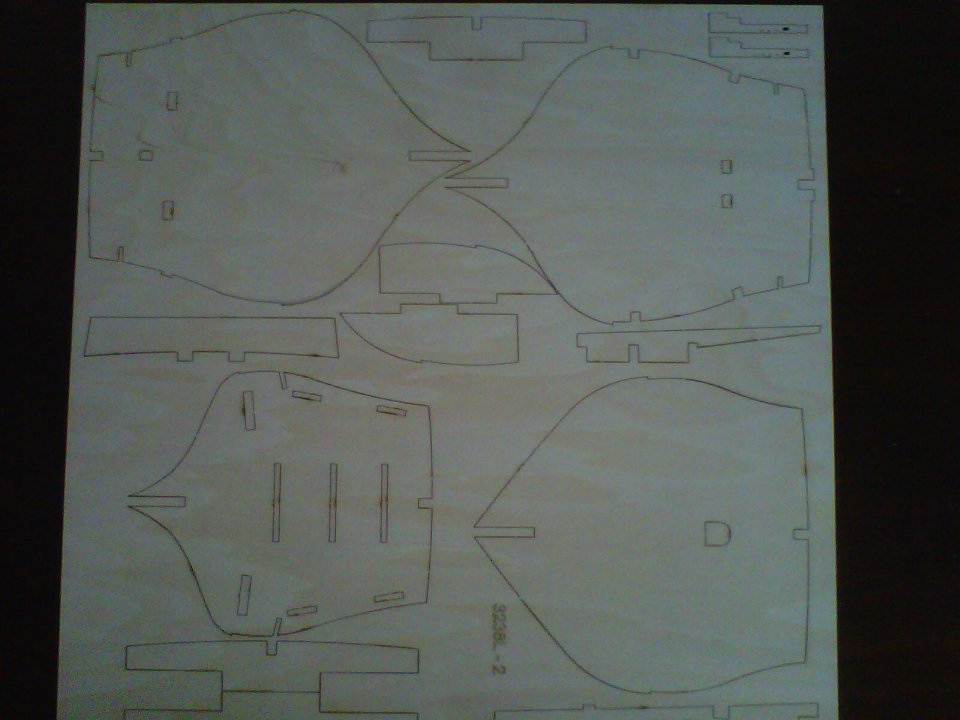
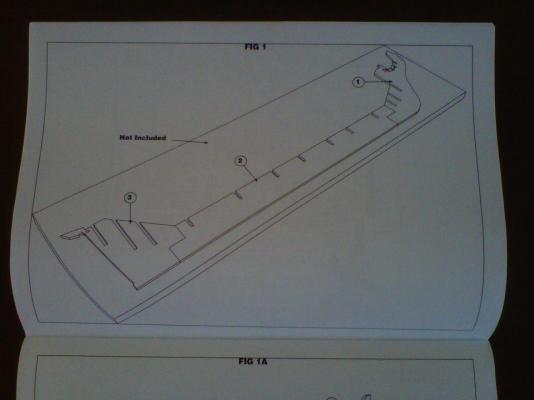
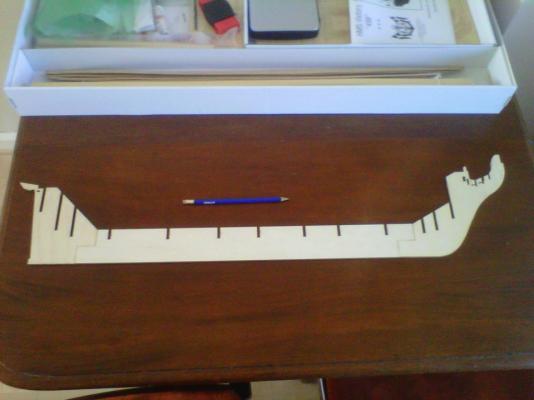
Fig 1: The Keel So it began. The first thing I did was pencil number every piece on the various laser-cut sheets with the corresponding part number so that there would be no getting mixed up. There is also a numbered parts list at the front of the instruction manual, so the idea was to cross off each part, both from the list and on the drawing in the manual, as it was used/added to the construction such that nothing was forgotten. This was followed by a comprehensive read through the "instruction" manual.....this model is marketed as being "expert" level and maybe what they really mean is if you're tackling a Victory (which I've read should be your 5-6th ship attempt, not your first! Eek!), then you should know what you're doing by now, so we're not going to tell you very much about how to put it together. To say the instruction manual is unhelpful is a massive understatement! There is a picture of which parts go together where but there is no idea given of which order to do this in, or indeed any advice on how to do it. This wasn't a problem with the keel but got more troublesome as it progressed.
- 117 replies
-
- 5
-
-
- victory
- billing boats
- (and 1 more)
-
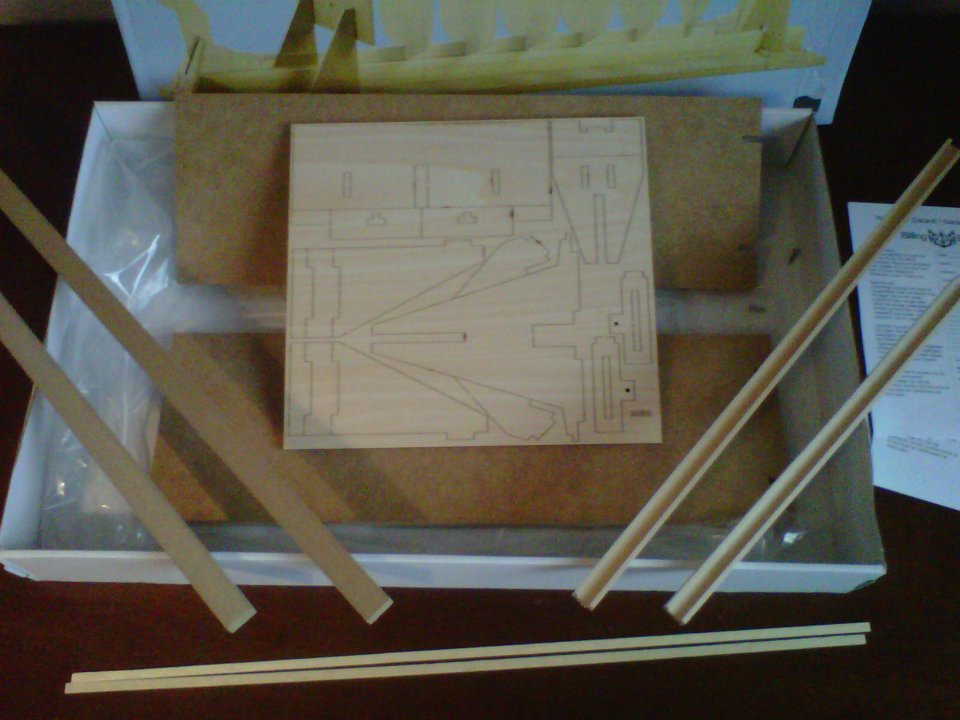
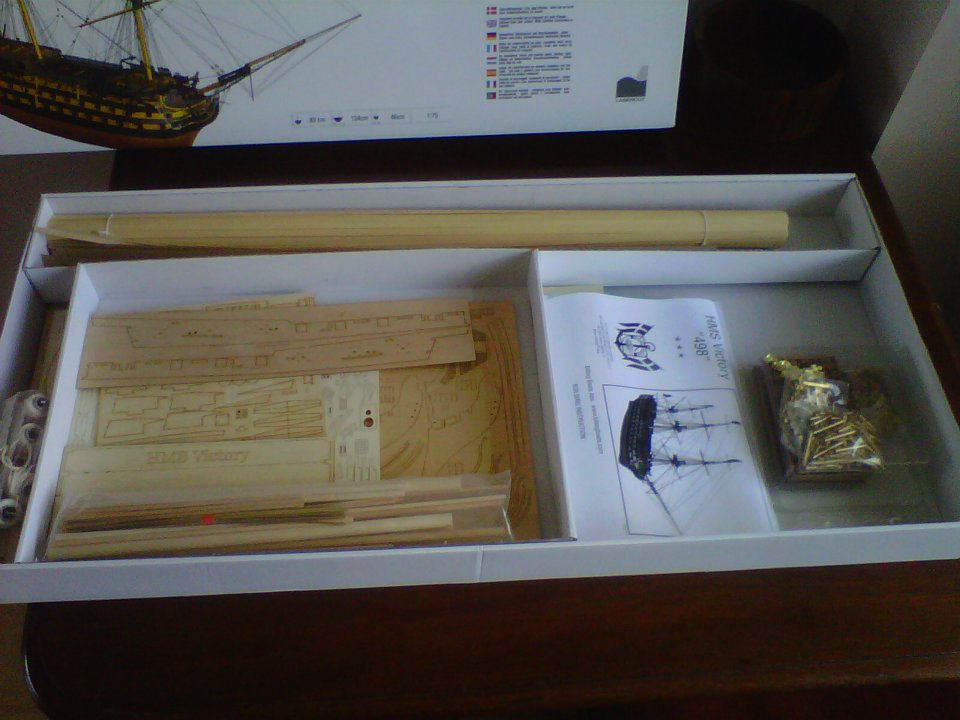
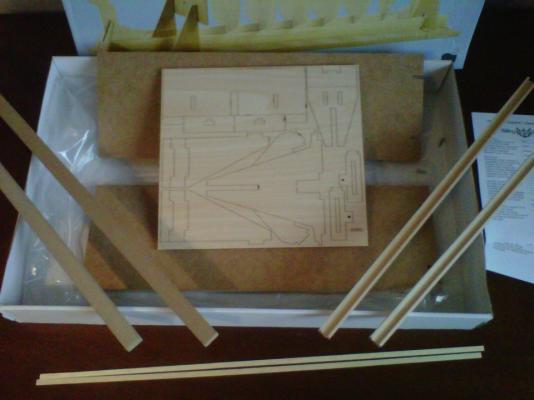
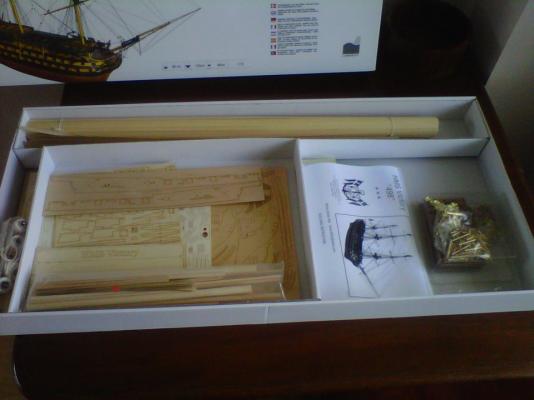
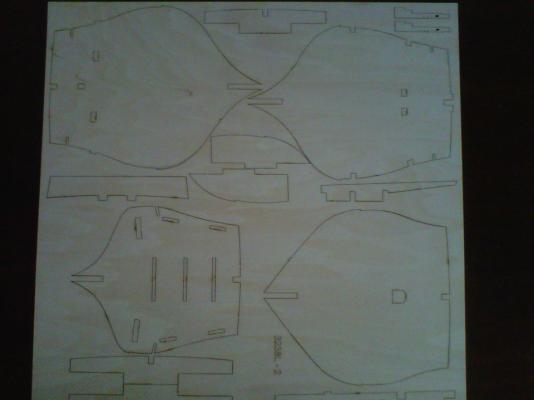
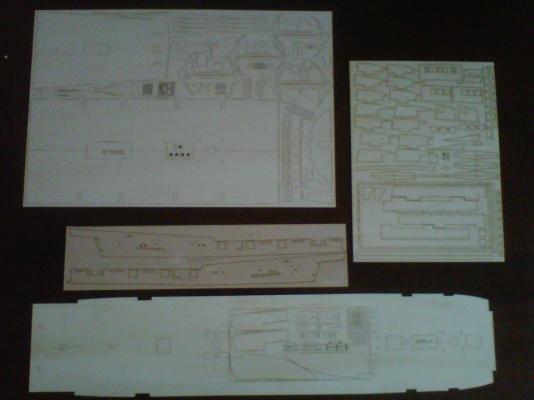
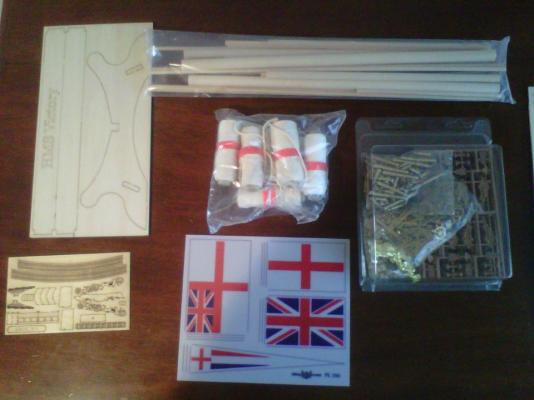
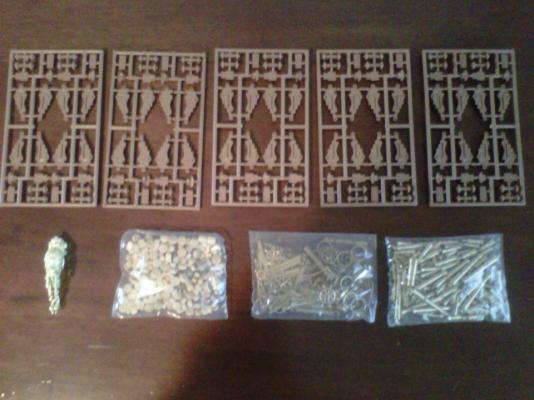
This was the day I received the box in the post. Initial impression (following the initial gasps of delight) were how good the laser-cut pieces looked swiftly followed by how many of them there were! This was July 2012!


- 117 replies
-
- 6
-
-
- victory
- billing boats
- (and 1 more)
-
Born in Plymouth and brought up in Pompey. 6 generations of Royal Navy on both sides of my family (all mainly Chief POs, ranging from stores to engineers) but I let the side down when I broke the traditions and didn't become a matelot (mainly because I wanted to fly harriers but got diagnosed as colour blind at 11, so that was out, and lost the heart to do anything else RN related!). So.....I became an accountant, via a trip to Uni to get a Marine Engineering degree....what else! Live in "Admiralty House" (now I'm 40 and have my own nice enough to merit the name), prints of HMS Victory and HMS Royal Sovereign adorn the entrance hallway, stairs and my office, so doing all the "right" things. However, I've always wanted to build a big, wooden, model of "Vicky" as a nod to my Naval heritage and all those family members who have served before. Call it my "apology", if you like. So, my Grandad (stoker/engineer, turned Seawolf programme leader post-Navy), then 81, bought me the Billings Boats kit in a "get on with it then cos I want to see it finished" prompt. This was 2 years ago and I'd made some good progress but it stalled what with the general time-constraints of life (work, kids, divorce, re-marriage etc etc) but I want to kick-start it again and get going. Partly prompted by the fact that same Grandad, now 83, went through a tough time recently and I've now taken him in to live with me and my family (as a thank you for looking after me all those years my Dad was away when I was younger). Wish I'd found this site sooner as have been reading with interest some of the other build logs and some of the hints, tips and problems I've faced so far may have been a bit easier to overcome! Anyway, I will start to post photos of the work to date and some of the above issues and then carry on from where I left off. First ever build, so it's not perfect (so please be gentle all you pros) but I've tried to show (mainly Grandad) that despite being a number-cruncher by profession now, there's a real marine engineer (not just the right letters after my name) in there somewhere! Anyway, I hope you enjoy. Cheers, Chris
- 117 replies
-
- 7
-
-
- victory
- billing boats
- (and 1 more)