-
Posts
91 -
Joined
-
Last visited
Content Type
Profiles
Forums
Gallery
Events
Everything posted by knotty74
-
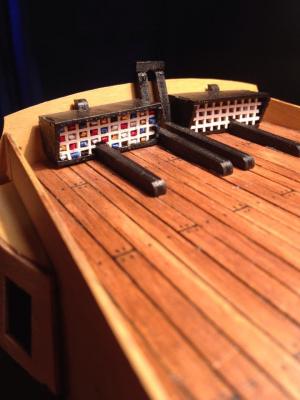
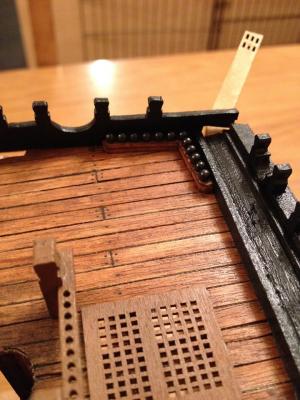
Saw an idea for adding signal flags to the storage on the poop. I'd read about wrapping kitchen roll round brass wire and daubing it in glue and then paint. Like the idea of having flags in principle but came up with the idea of using coloured ribbon instead, as this would be more like the correct texture. I've cut along the seam of the ribbon to stop it fraying too much and then folded it over and using tweezers, dipped each tiny piece in PVA then slotted them into the apertures. One side done, the other to do. Shows the difference.
- 117 replies
-
- victory
- billing boats
-
(and 1 more)
Tagged with:
-
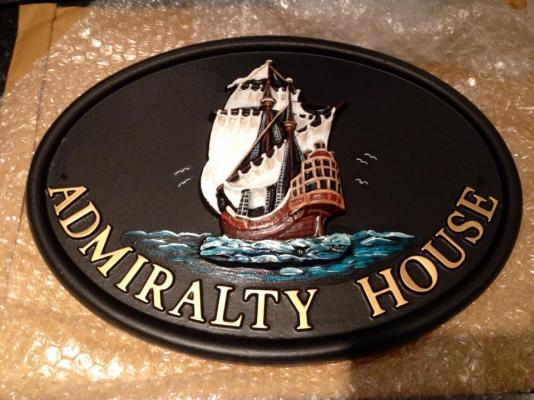
Slightly indulgent digression from my build log but thought you lads might like to see my new house name plate (moved in end of Oct 14):
- 117 replies
-
- victory
- billing boats
-
(and 1 more)
Tagged with:
-
Boyd - if my Billings Victory ends up looking half as good as this, I'll be very pleased indeed! Re the stern galleries, how did you end up doing the window frames? There is no "noughts and crosses" board with the kit (like there is with the Jotika one) to go in each aperture, so what did you use to make it so neat?
- 413 replies
-
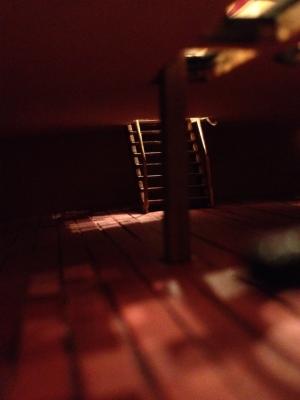
Final couple of atmospheric shots of the lower deck with some of the extra details (shot round the hatches etc) on the gun deck. This is now up to date with where I am now!
- 117 replies
-
- victory
- billing boats
-
(and 1 more)
Tagged with:
-
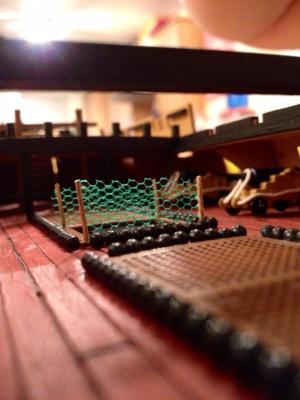
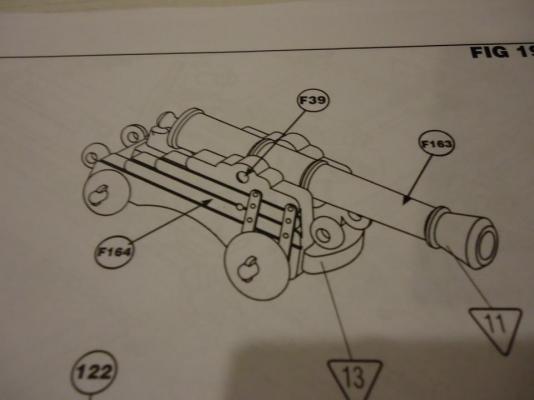
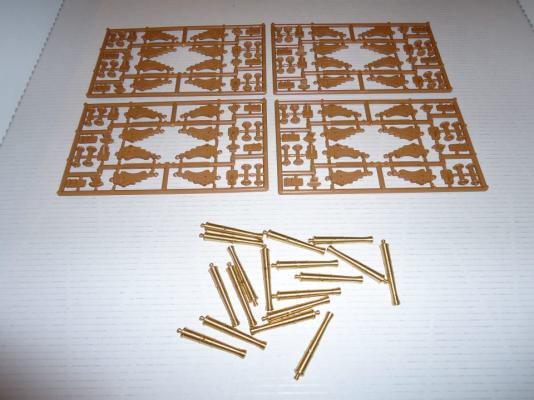
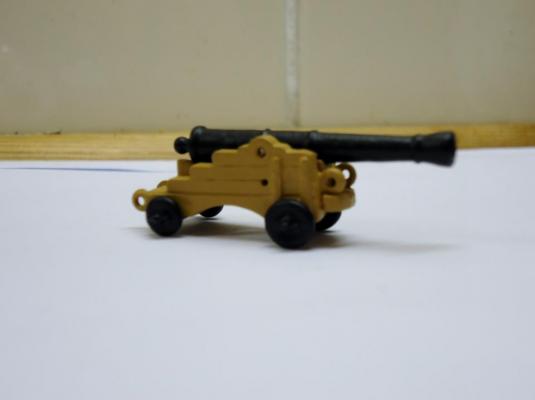
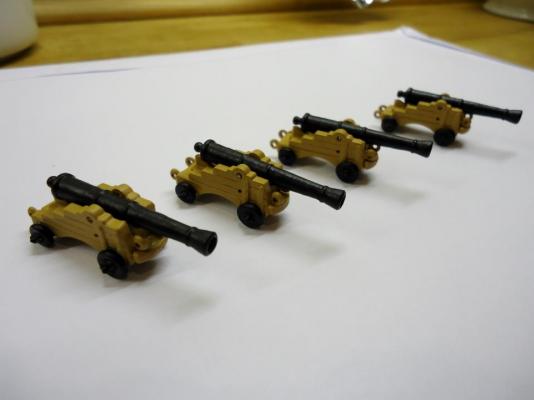
Guns Had a go at putting together the basic guns and adding some breeching rope for the lower deck (where you can't see it join the hull wall, so don't need to overcomplicate it at the front of the gun). Need to still add some eyebolts on the side (bought some black wire to do so with) and some more rigging at the back etc but thought I'd upload them anyway for no given this is where I have got to.
- 117 replies
-
- victory
- billing boats
-
(and 1 more)
Tagged with:
-
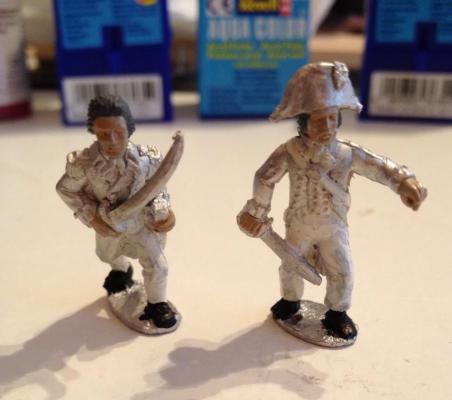
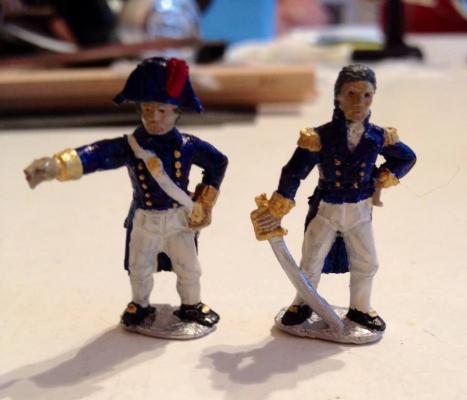
Some other miniature painting work: The crew Decided ultimately I want to show her with some crew members onboard. Got quite a few gun crew, midshipman, powder monkeys to ultimately paint but for now, just had a go at some of the officers I have.
- 117 replies
-
- victory
- billing boats
-
(and 1 more)
Tagged with:
-
Thanks, Boyd. I hadn't got to that bit so thanks for the heads-up on the numbering error. Re the hull bottom, I think I'm just going to paint it. I've not got the skill for copper plates and I don't really like the shiny orange finish that it produces either (personal taste). Will also help to cover up some of my planking deficiencies (without creating something else to not be correctly aligned!)
- 117 replies
-
- victory
- billing boats
-
(and 1 more)
Tagged with:
-
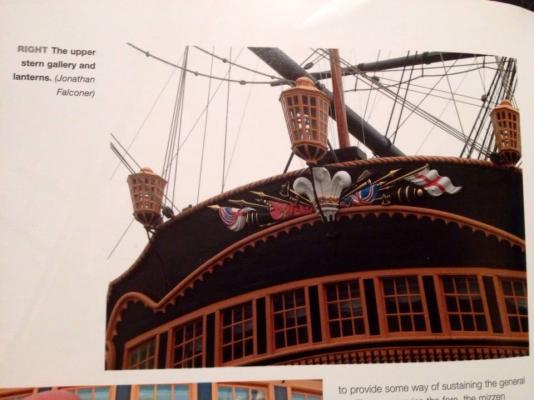
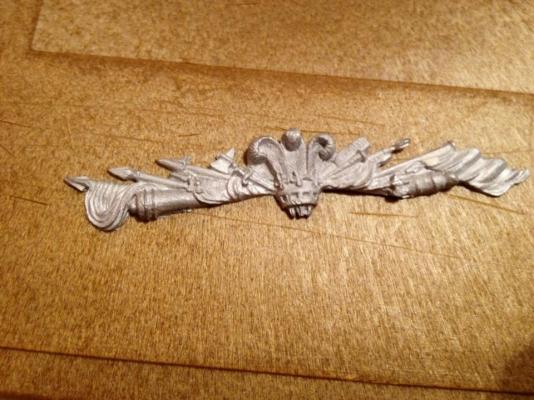
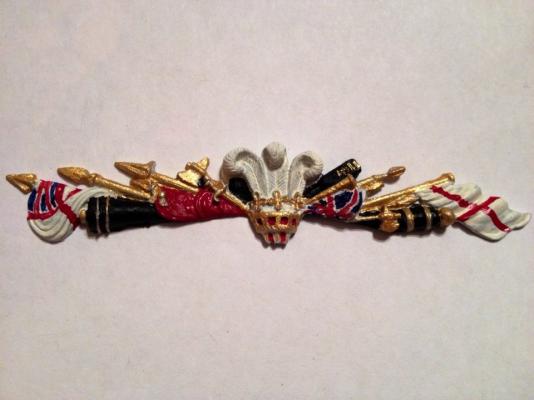
Stern taffrail I decided to have a break from the planking and so had a go at seeing if my small-scale painting was going to be any good. The taffrail that comes with the kit is a piece of naff ply and so I bought the cast one from CMB. Very pleased with how it came out.
- 117 replies
-
- victory
- billing boats
-
(and 1 more)
Tagged with:
-
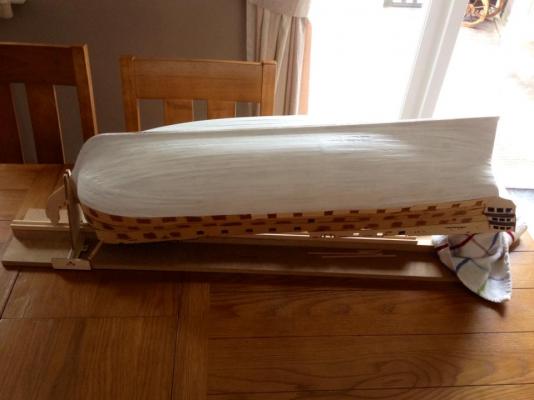
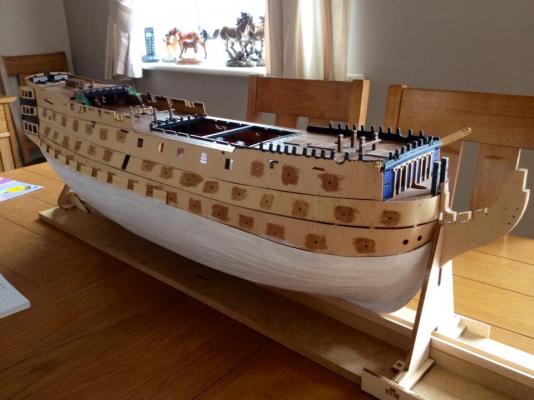
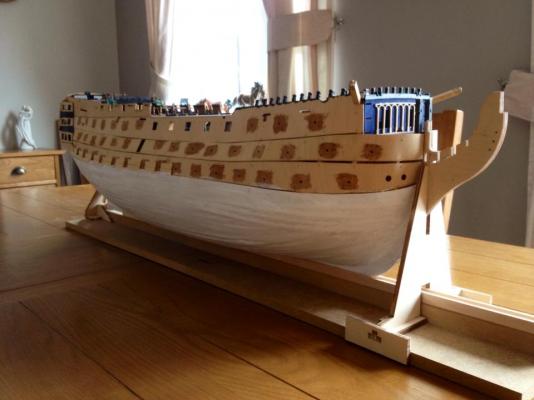
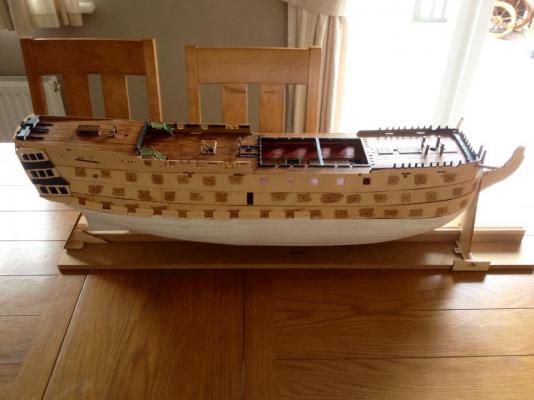
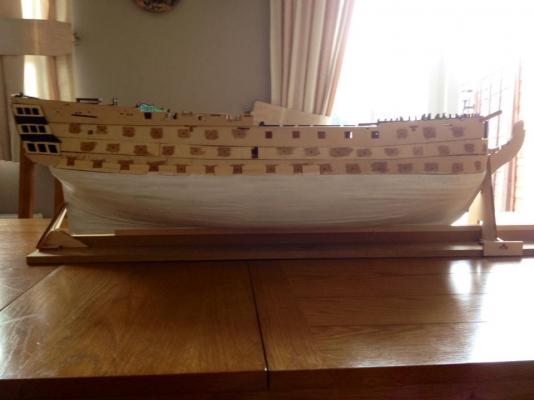
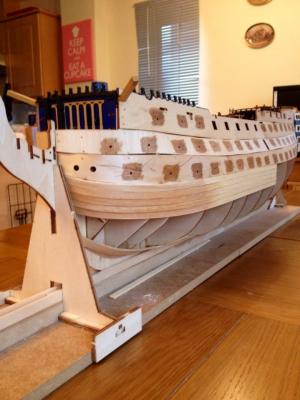
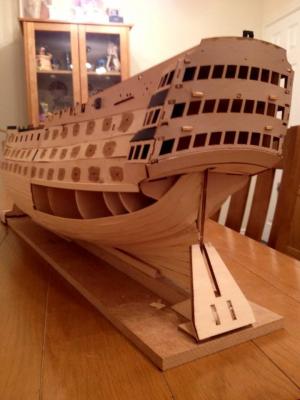
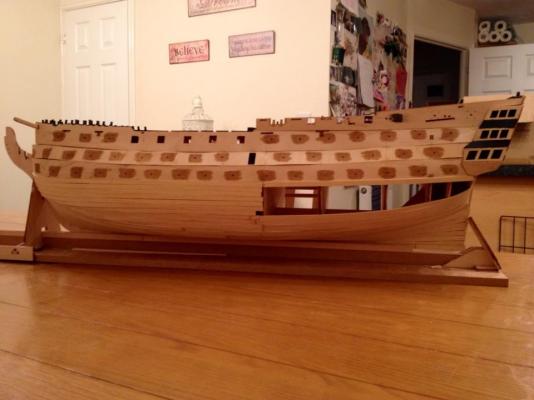
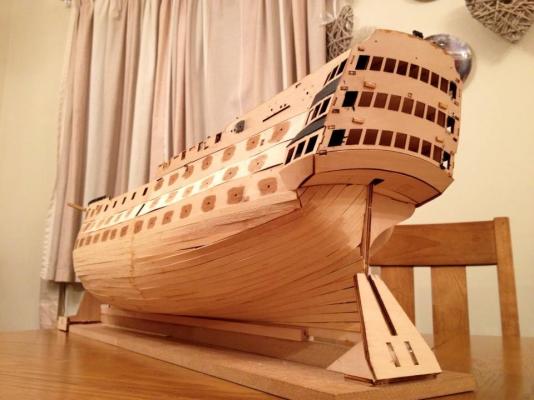
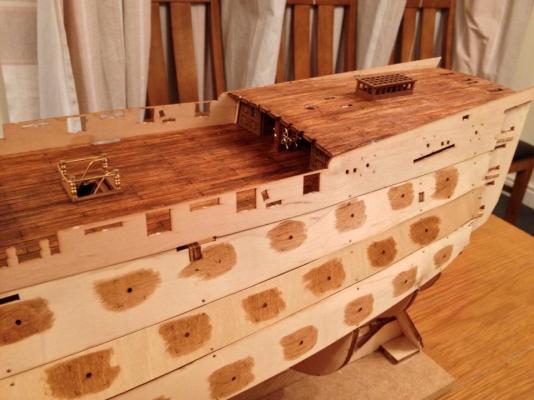
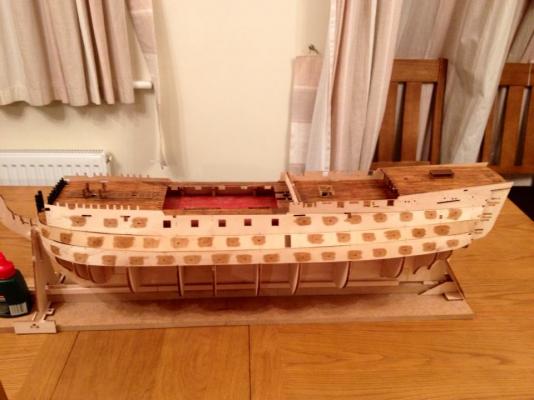
Hull planking continues So overall, I know it probably looks very unconventional and not at all how it should have been done but she has now had one set of filling, sanding and priming and is, at least, no longer a skeletal-looking shell. I think I'll need at least 2 more runs of filling, sanding and priming to get to a finish that I'll be happy to paint. In terms of progress on the actual ship, this is where I got up to and the point I will carry on from. Took from July 2012 to March 2014 to get to this point.
- 117 replies
-
- victory
- billing boats
-
(and 1 more)
Tagged with:
-
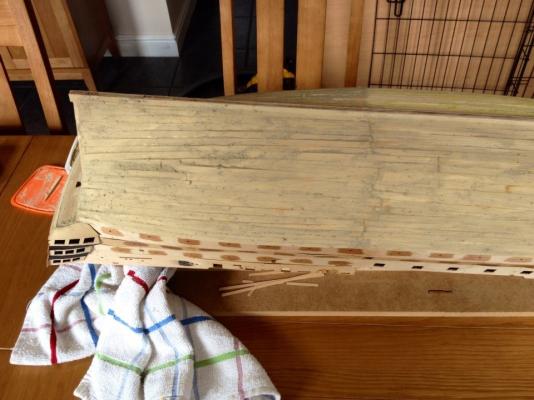
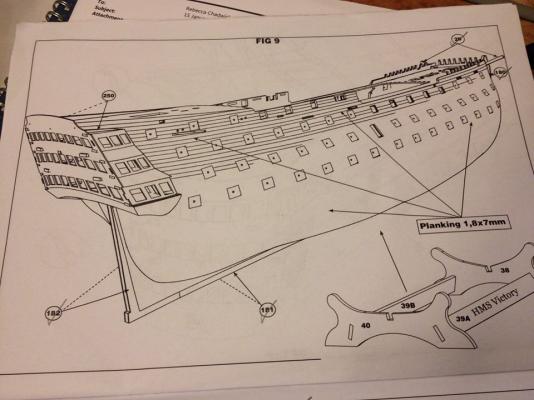
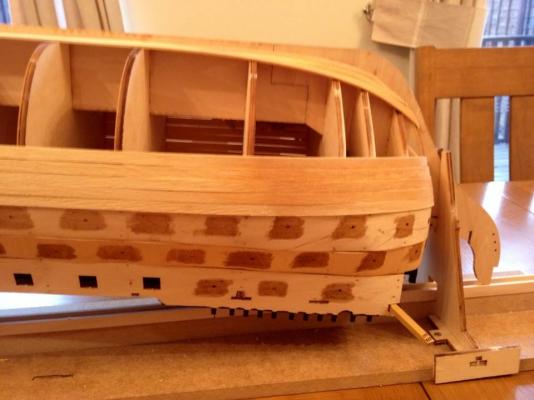
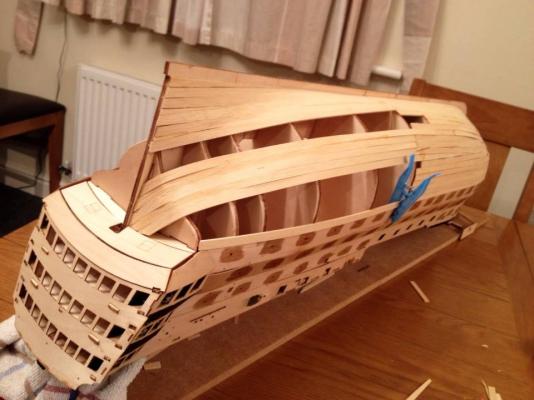
Fig 9: Hull planking Ok, so finally got to the point where I could no longer put it off. Never built a wooden ship model before so this was going to be my first attempt at hull planking. Faced with just long, and fairly thick, strips of planking materials, even just holding one of them up against the hull and seeing the level of both curve and twist required, I wondered how on earth I was going to get this to look at all acceptable! This, so far, is the biggest bit that the instructions were unhelpful for. Clearly, having now had one attempt at doing this, hull planking is an art form that is difficult to do and there is certainly a knack to it. I have included the Fig 9 page that you get by way of "instruction"! I'd read that you can take some of the pain out of the job by essentially cutting the strips in half and just planking from amidships to the bow, then amidships to the stern. This generally then means that you only have to deal with one curve at a time. This will be a painted model and so as my filling, sanding and painting is good enough, then this join shouldn't be too obvious come the finish. I stood the half-cut (had they been on the rum?!) planks into a tall vase of boiling water and let them soak for half an hour, I then simply used my thumb and forefinger to start to bend them into shape and then back into some fresh hot water to bend the bow sections and stern sections round to the required level of curve. This seemed to work fine and I didn't need to invest in plank nippers etc. I'd sanded down the bulkheads where needed by dry fitting each hull plank and seeing where they barely touched due to the curvature, so once each plank was curved as required, I started laying them. I started at the waterline, effectively where the earlier, wider, hull planking strips finished and worked my way downwards and forwards. During dry-fitting, I realised that that approach wouldn't really work for the stern, due to the curving upwards, so started at the keel and went the opposite way, using stealers to fill in any remaining gaps.
- 117 replies
-
- victory
- billing boats
-
(and 1 more)
Tagged with:
-
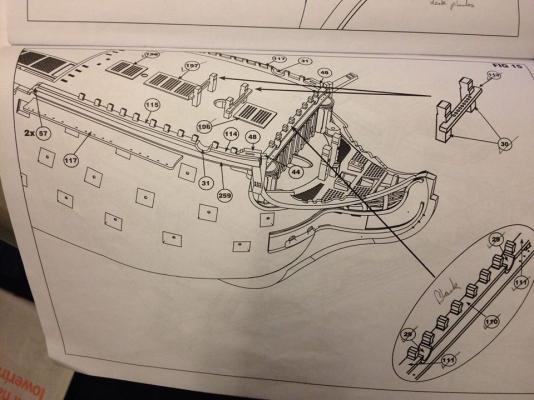
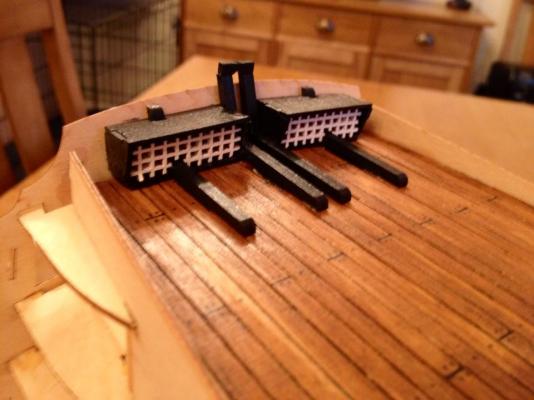
Fig 15: Forecastle The plans showed 3 gratings, 2 belaying pin benches and some more work on the beakhead railing. This was all painted, assembled and placed in situ. The plans also showed (and provided) 2 'L'-shaped cannonball holders. So next purchase was some 3mm black steel balls to make them look more authentic.
- 117 replies
-
- victory
- billing boats
-
(and 1 more)
Tagged with:
-
Boyd - having seen your build now, I'm torn as to what to do about the planked-over hatchways. Clearly, they're not "right" but they're more difficult to access (could still be done) but they really won't be seen much as I've bought some additional boats to go over the skid-beams. So I'm thinking it might be easier to leave the ones that will be almost totally hidden and just paint the planking that is in the hatches black so it just looks like the hole disappears below decks.
- 117 replies
-
- victory
- billing boats
-
(and 1 more)
Tagged with:
-
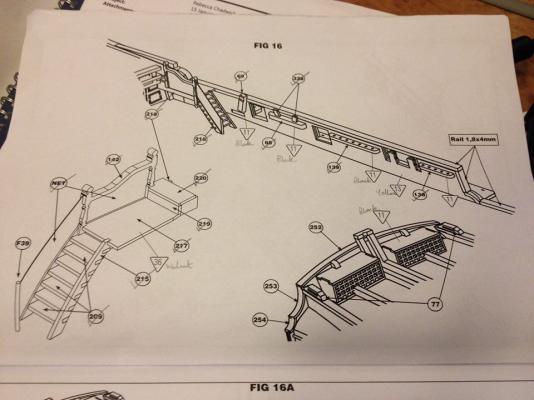
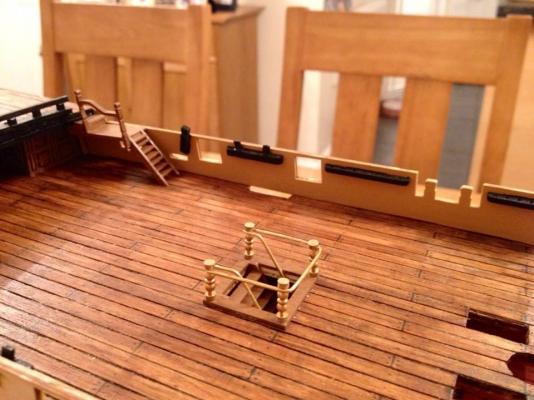
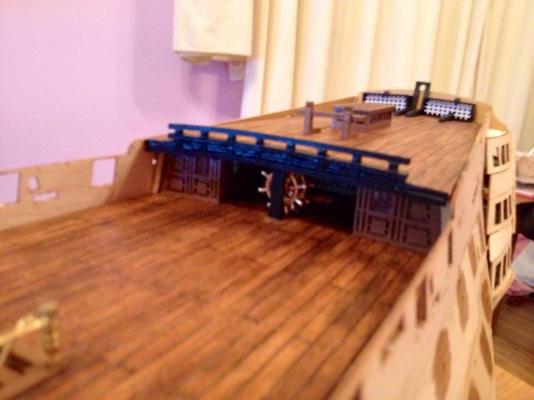
Fig 16: Quarterdeck to poop stairs Fig 14 is a lot of the building up of the beakhead framing and Fig 15 is more work on/around the foc'sle, so I skipped to Fig 16, seeing as I was working on/around the quarterdeck anyway at this point and put together the stairways up to the poop. A little harder to get these right due to the angling and fitting into situ required. Also added the black racks etc shown.
- 117 replies
-
- victory
- billing boats
-
(and 1 more)
Tagged with:
-
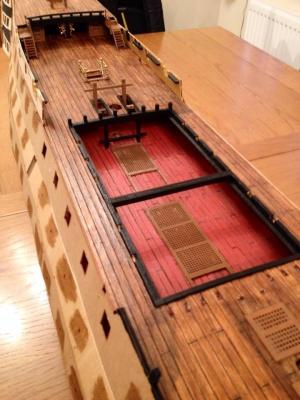
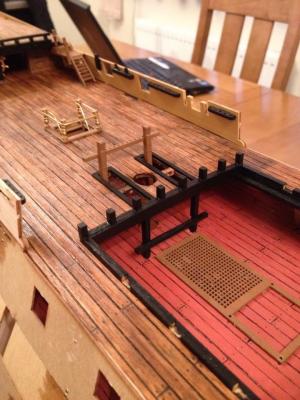
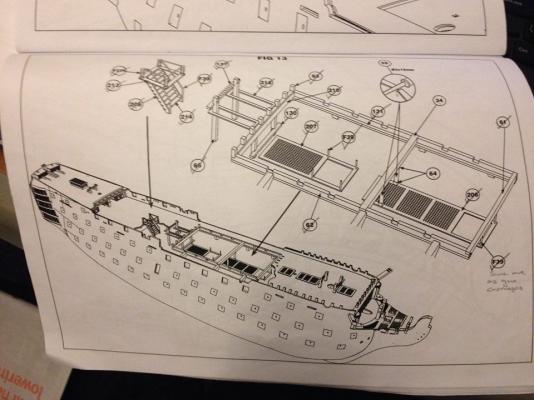
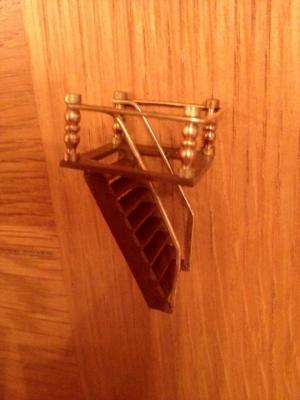
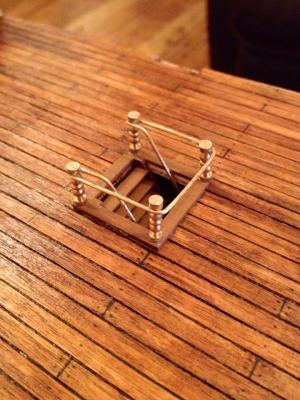
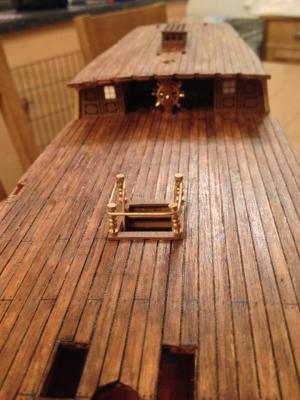
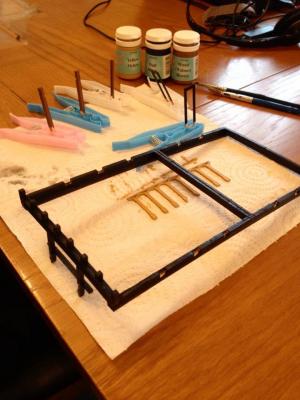
Figure 13: Quarterdeck ladder and the main quarterdeck frame Continued to put off the hull planking (probably wrongly but it was over-facing me as a prospect) and so set about some of the work to be done on and around the quarterdeck. Stairway assembled and placed and the aperture frame assembled and painted before slotting into the gap in the framed deck. Just put one cross-member in for now for added strength, as need to leave room for access to put the guns in once the hull planking has been done and I've stopped turning her upside down.
- 117 replies
-
- victory
- billing boats
-
(and 1 more)
Tagged with:
-
A quick nod to some of the main reference books I have used: Owners' Workshop Manual - HMS Victory (Haynes) Building Plank-On-Frame Ship Models (Ron McCarthy) The New Period Ship Handbook (Keith Julier) The Wooden Fighting Ship in the Royal Navy AD860-1860 (EHH Archibald) Aware I need to get the "anatomy" book at some point.
- 117 replies
-
- victory
- billing boats
-
(and 1 more)
Tagged with:
-
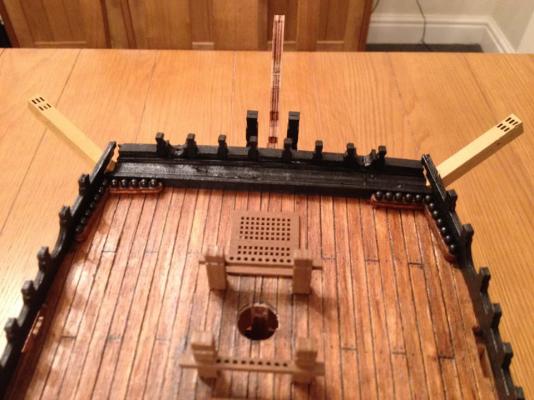
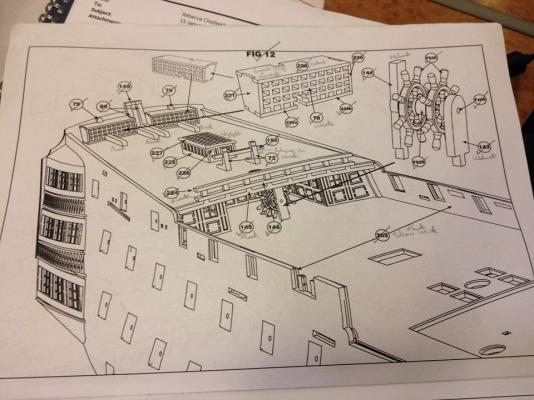
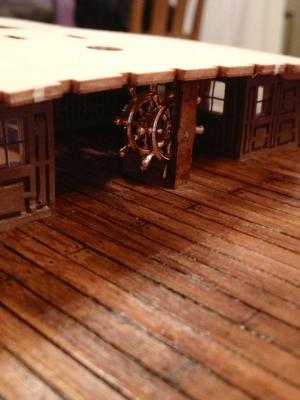
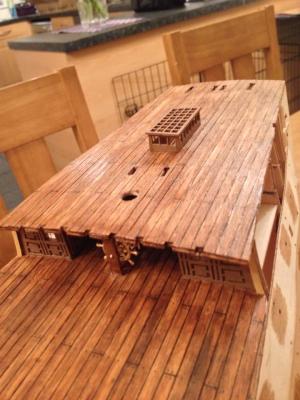
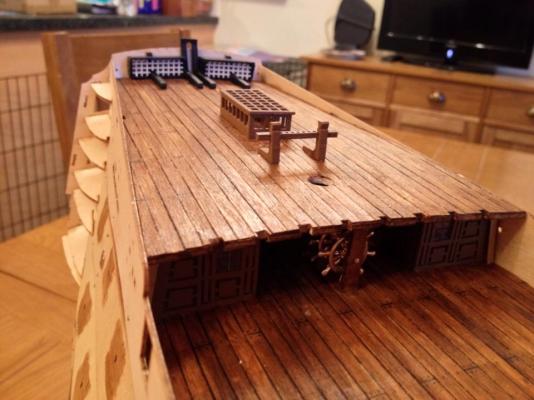
Fig 12: Kitting out the poop deck Lots of work to do here. Firstly, the ship's wheels needed putting together and placing in situ. As this was always going to be a more "representative" model, ie the best I could do it, with some extra bits bought over and above the basic kit without going too silly, rather than a 100% attention to every last detail kind of attempt, I decided to leave the wheels brass as I thought they looked too pretty to paint. The skylight, signal flag storage, belaying pin bench and railings were all fairly straightforward constructions. One thing I will be adding having viewed some of the other build logs on here now is some miniature flags in the storage gaps and leaving it open.
- 117 replies
-
- victory
- billing boats
-
(and 1 more)
Tagged with:
-
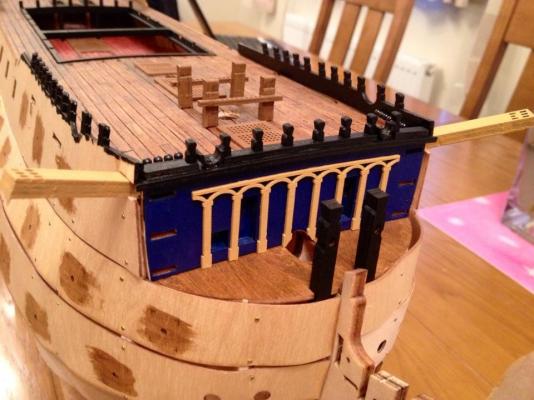
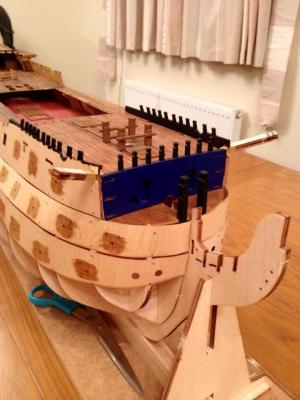
Fig 11: Decoration on beakhead fascia Fig 10 was some of the detailed top-work on the stern gallery but that couldn't be done until the hull planking (Fig 9) had been done and so I skipped to Fig 11 for now and simply painted and added the yellow overlay onto the blue background. Lots of other work to come back to on Fig 11 but too delicate to do for now without the hull planking being done.
- 117 replies
-
- victory
- billing boats
-
(and 1 more)
Tagged with:
-
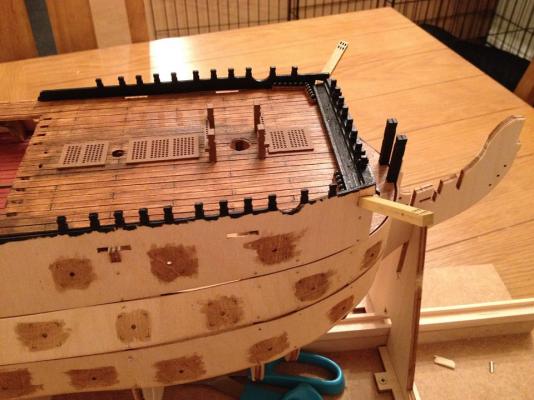
The eagle-eyed amongst you will have noticed I have skipped from Fig 8C to Fig 9A, ie missed out Fig 9. Essentially, Fig 9 is just the hull planking and so needed a lot of research before I began to do this for the first time ever. Also, to be perfectly honest, I was bored of planking having done both the gundecks and wanted to do something different for now and so built some other things. Probably a bit of an error in hindsight as having so much of the deck furniture completed, didn't help the subsequent planking and sanding etc. Pics to follow.
- 117 replies
-
- victory
- billing boats
-
(and 1 more)
Tagged with:
-
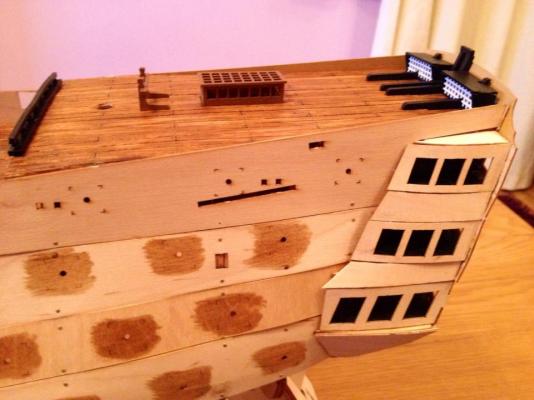
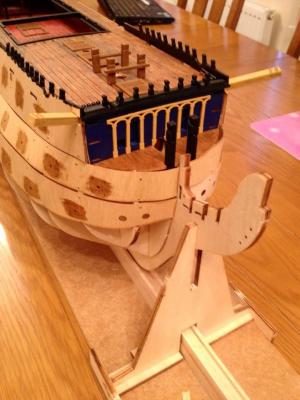
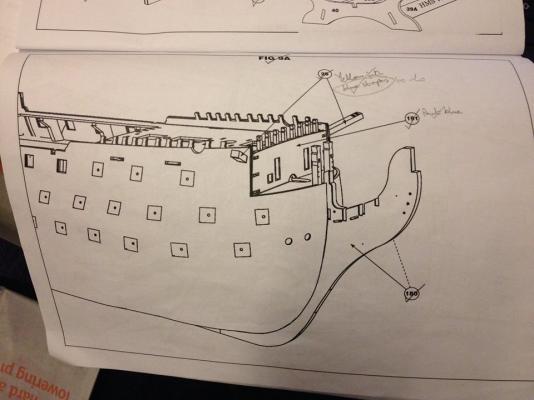
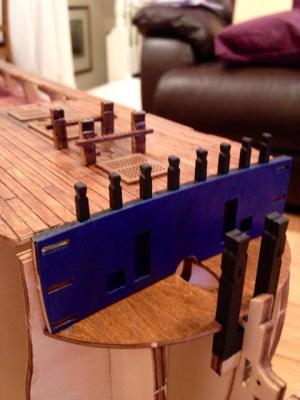
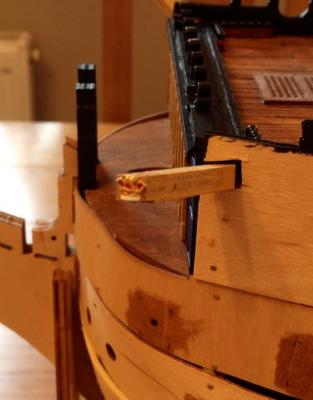
Fig 9A: The catheads and the beakhead fascia Catheads slotted in (again minimal trimming) and the blue fascia added to the previously painted black baseboard. Another additional purchase to the basic kit added at this point; some very nice little cathead crowns that I painted, having made reference to various pics/photos in the books I was now using for research purposes.
- 117 replies
-
- victory
- billing boats
-
(and 1 more)
Tagged with:
-
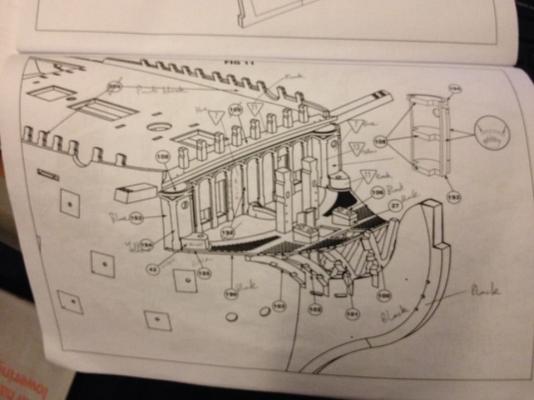
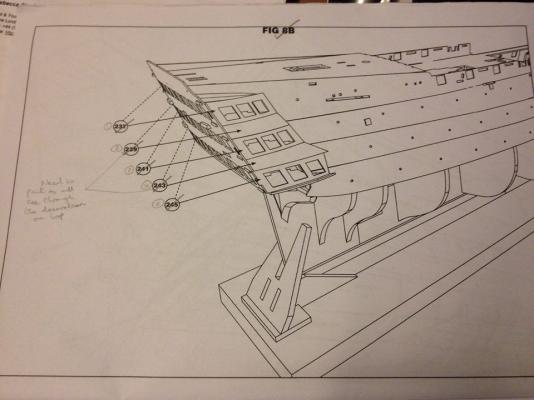
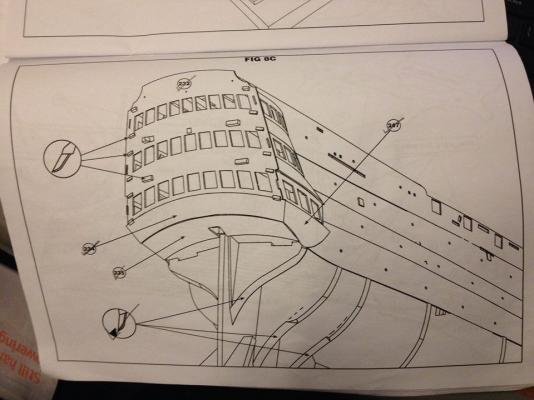
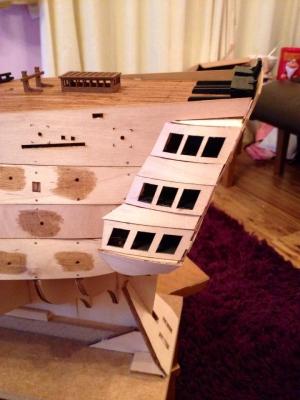
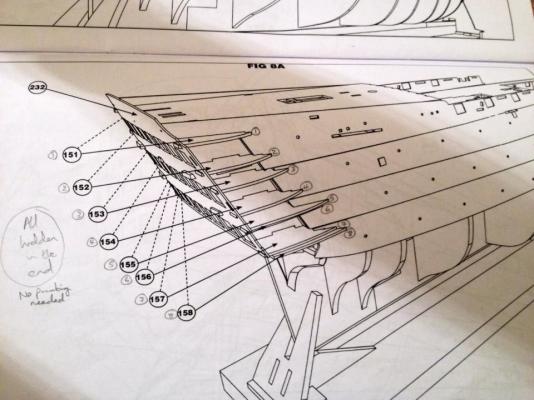
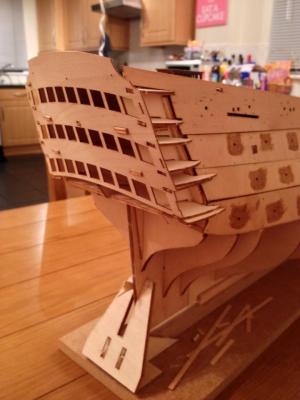
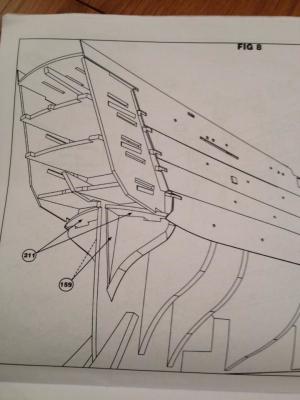
Figs 8B & 8C: More stern gallery fascias Starting to build up the gallery now, building on the basework previously done. I painted the inner surfaces black before adding the new pieces, whilst I still had access, such that the bare wood wouldn't be seen through the windows.
- 117 replies
-
- victory
- billing boats
-
(and 1 more)
Tagged with:
-
- 117 replies
-
- victory
- billing boats
-
(and 1 more)
Tagged with:
-
- 117 replies
-
- victory
- billing boats
-
(and 1 more)
Tagged with:
-
Thanks, Gundorph. It's actually taken over 2 years so far but I've only just found this site and so am uploading my build log to where I have got to so far. So this is a very fast-forwarded version of how long all this actually took! Ha ha. Few more posts to go yet, when I get time.
- 117 replies
-
- victory
- billing boats
-
(and 1 more)
Tagged with:
-
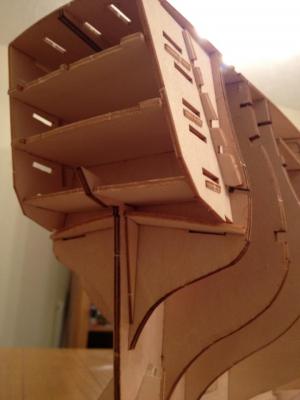
Thanks, Keith. Agree the knightheads are fairly prominent and one of the "mistakes" I have made thus far is to get bored with the planking and to start making and fitting deck furniture, which in turn has meant I've had to be more careful when planking and sanding/filling. To date, no breakages/damage as yet as I have been making sure the upturned bow has slotted into the holding groove in the front of the building slip. More to follow on this when I get the rest of the build log uploaded. Cheers, Chris.
- 117 replies
-
- victory
- billing boats
-
(and 1 more)
Tagged with:
-
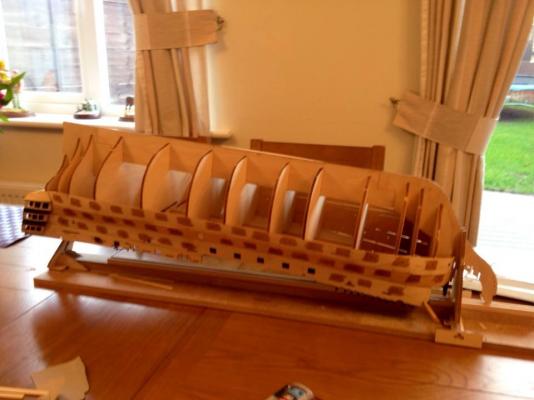
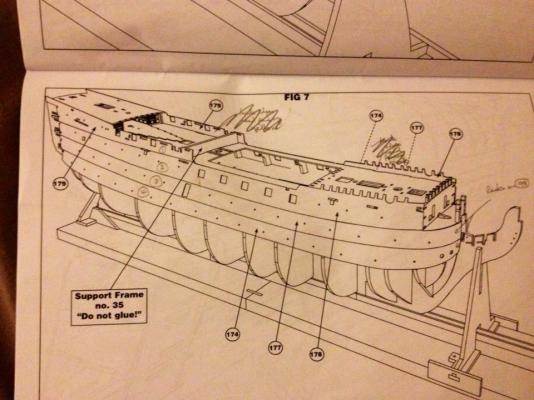
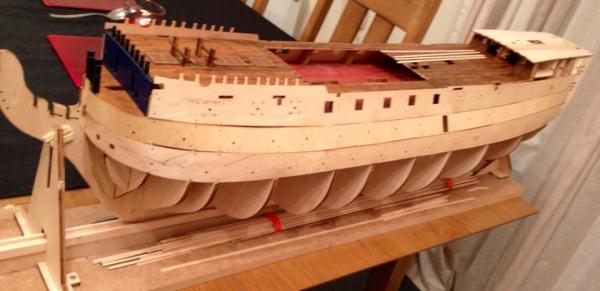
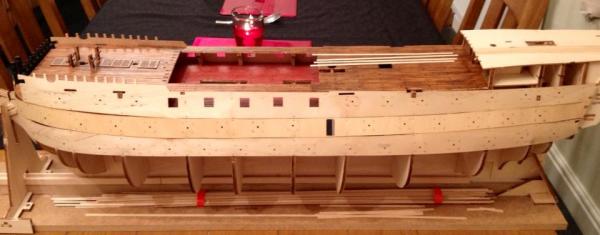
Fig 7: Hull planking strips These were very thin and pliable and so bent easily round the bow section.
- 117 replies
-
- victory
- billing boats
-
(and 1 more)
Tagged with:
About us
Modelshipworld - Advancing Ship Modeling through Research
SSL Secured
Your security is important for us so this Website is SSL-Secured
NRG Mailing Address
Nautical Research Guild
237 South Lincoln Street
Westmont IL, 60559-1917
Model Ship World ® and the MSW logo are Registered Trademarks, and belong to the Nautical Research Guild (United States Patent and Trademark Office: No. 6,929,264 & No. 6,929,274, registered Dec. 20, 2022)
Helpful Links
About the NRG
If you enjoy building ship models that are historically accurate as well as beautiful, then The Nautical Research Guild (NRG) is just right for you.
The Guild is a non-profit educational organization whose mission is to “Advance Ship Modeling Through Research”. We provide support to our members in their efforts to raise the quality of their model ships.
The Nautical Research Guild has published our world-renowned quarterly magazine, The Nautical Research Journal, since 1955. The pages of the Journal are full of articles by accomplished ship modelers who show you how they create those exquisite details on their models, and by maritime historians who show you the correct details to build. The Journal is available in both print and digital editions. Go to the NRG web site (www.thenrg.org) to download a complimentary digital copy of the Journal. The NRG also publishes plan sets, books and compilations of back issues of the Journal and the former Ships in Scale and Model Ship Builder magazines.


