knotty74
-
Posts
91 -
Joined
-
Last visited
Content Type
Profiles
Forums
Gallery
Events
Everything posted by knotty74
-
 Hi Keith, been away from the site for a while! Your coppering looks stunning and great job on the figurehead ( I know how small it is and the level of precision required on the paint job! I'm back following your progress with interest. Chris
 -
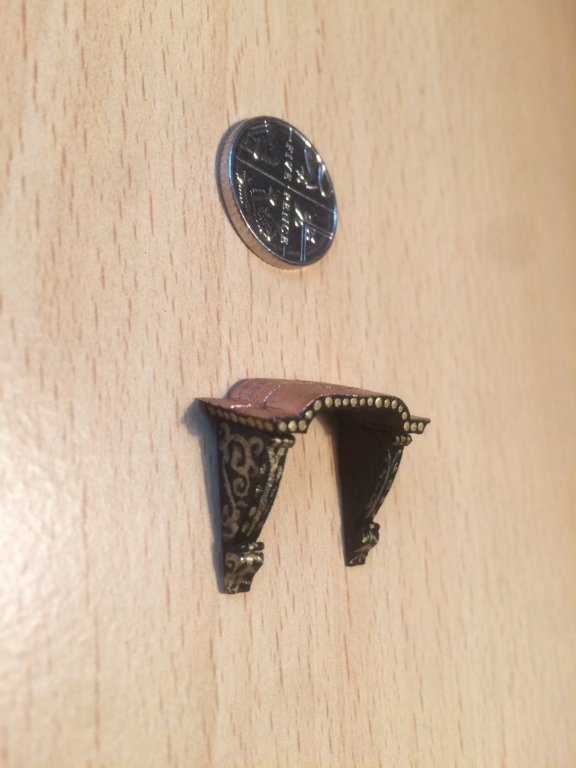
Completed both the entranceways. Used pics from the books and actual to see the roof was copper (now oxidized green, so will need to weather mine when I do my hull, bought some Humbrol chrome oxide weathering powder). Hard to get the decorations in such small scale. So freehanded some swirls and put the dots round the top with the end of a toothpick! To gove a sense of scale I placed a 5p piece next to it (about the same size as a dime, if anyone's from the other side of the pond).

- 117 replies
-
- 2
-

-
- victory
- billing boats
- (and 1 more)
-
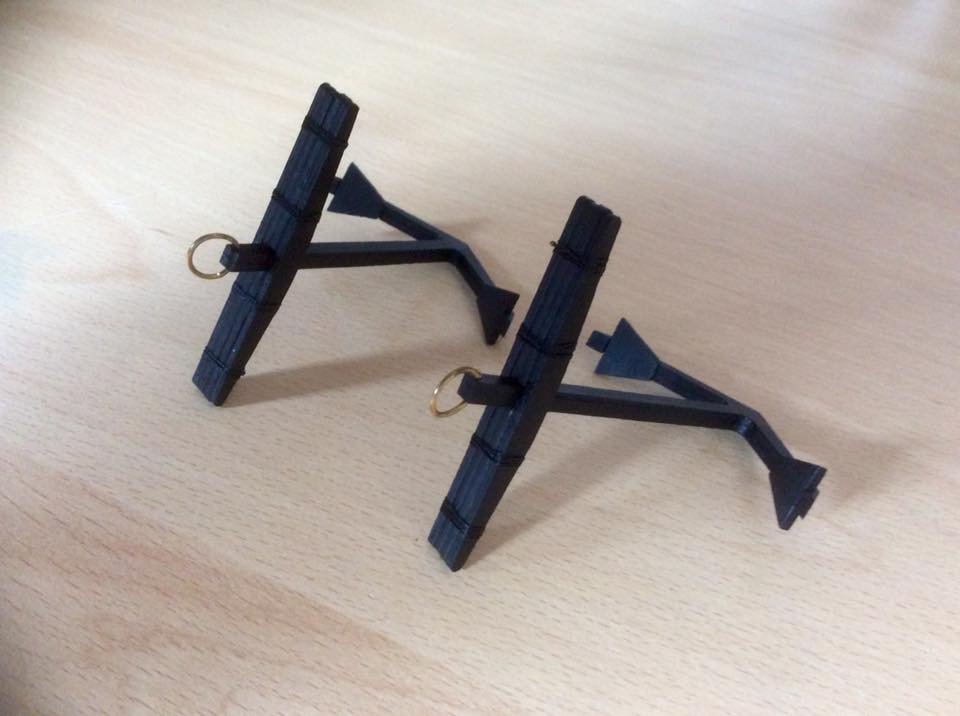
The 4 anchors completed (only 2 shown in pic). Lots of individual parts to each one (20!). Used the nylon thread that I used for the deck caulking to add some roped effect around the top.
- 117 replies
-
- 2
-
-
- victory
- billing boats
- (and 1 more)
-
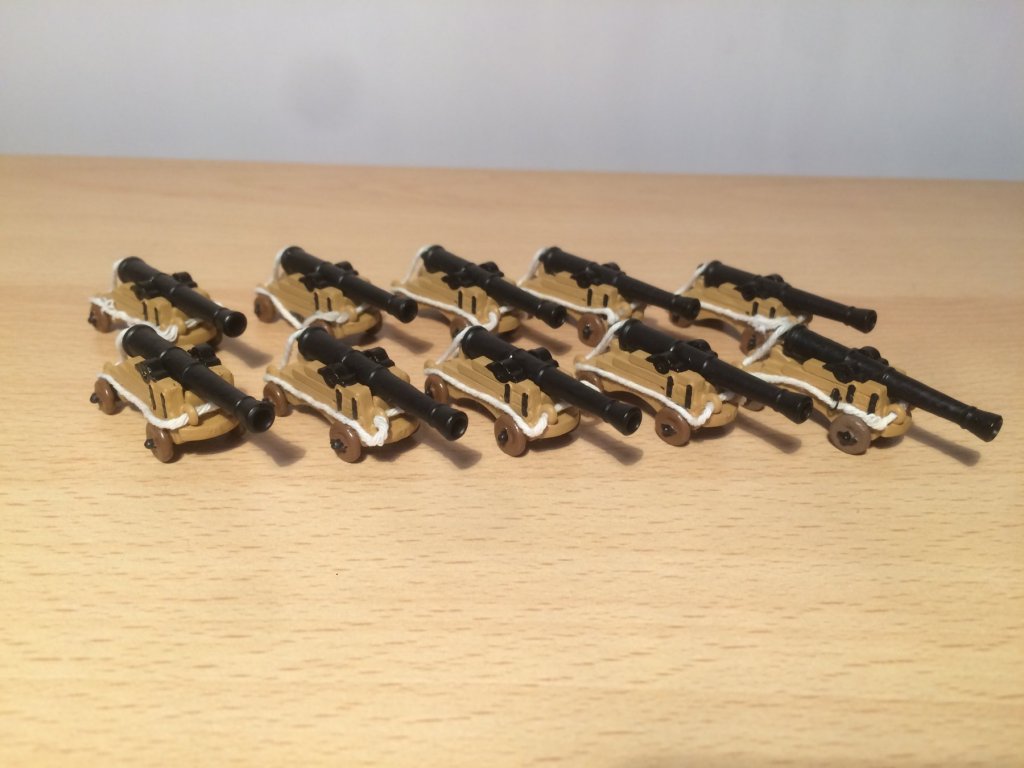
All 10 guns for the upper gundeck have now been finished off and rigged (of a fashion, as mostly won't be seen, especially now I have the boats for the skidbeams). Have also completed the 8 for the upper deck and added some more rigging for those given they'll be seen more. Have got rear rigging trains too for the 2 that will sit on the foredeck. Also finished the 2 fore deck carronades and added some rigging.


- 117 replies
-
- 3
-
-
- victory
- billing boats
- (and 1 more)
-
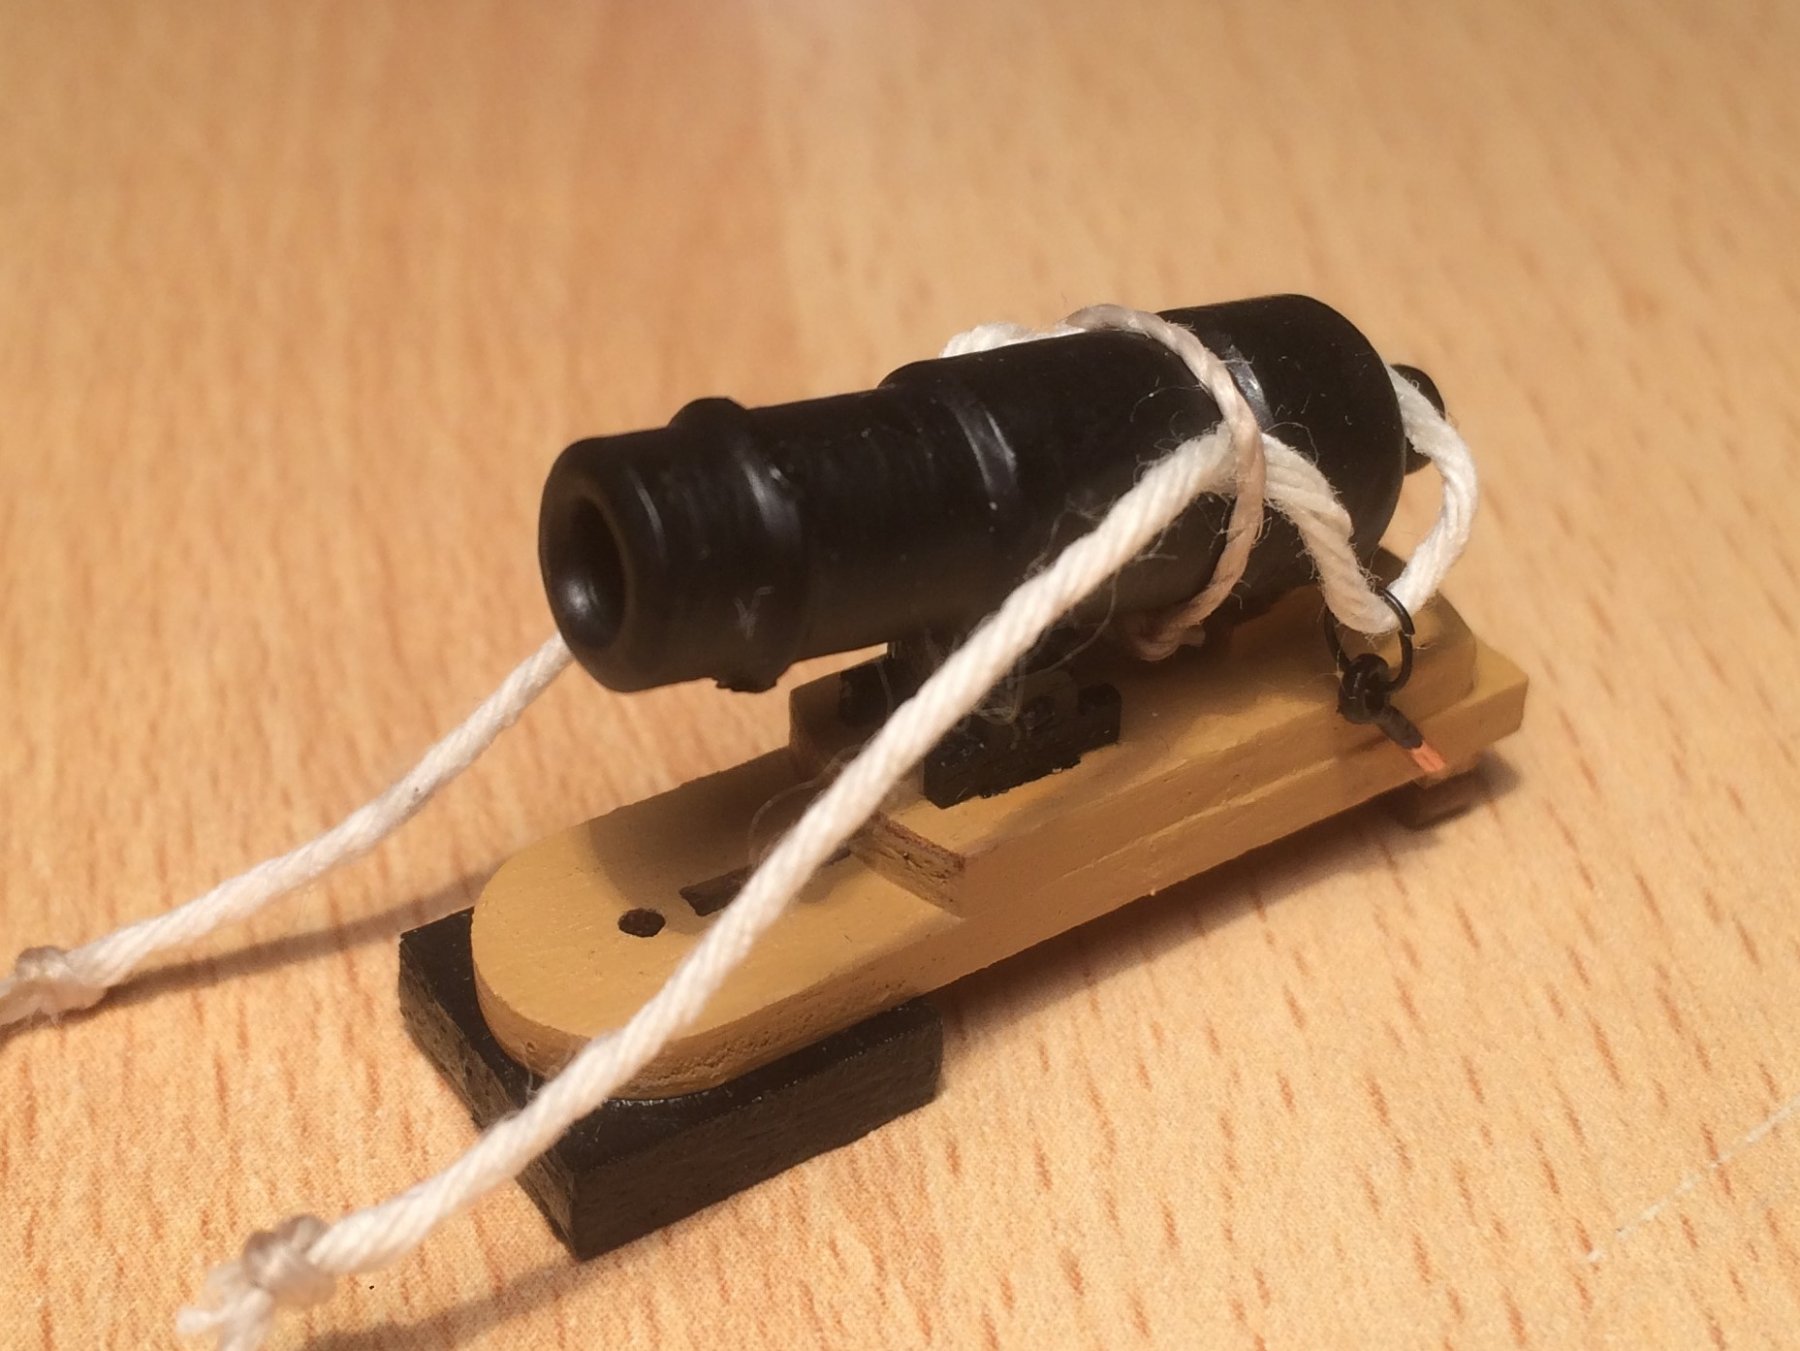
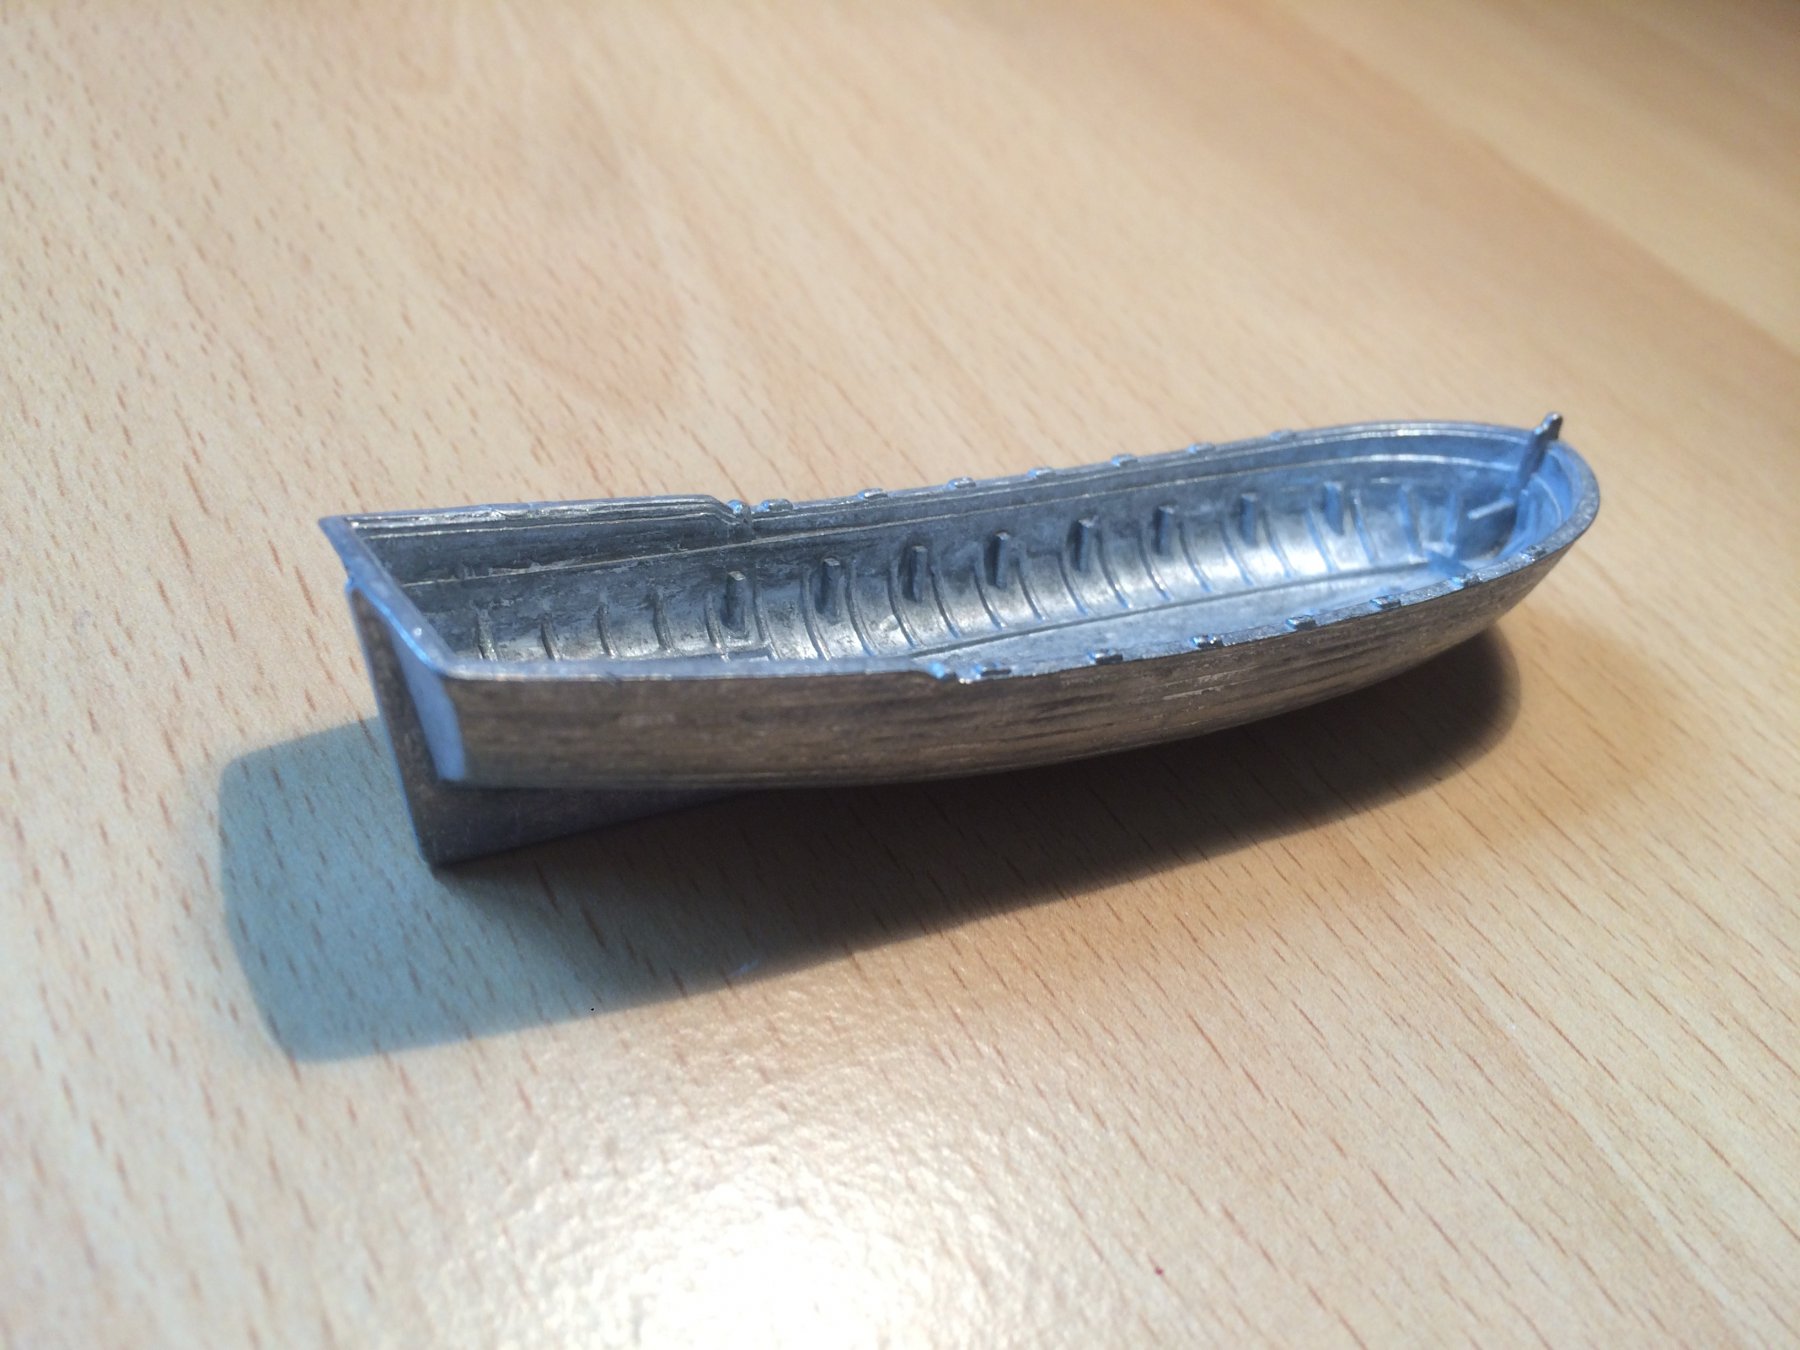
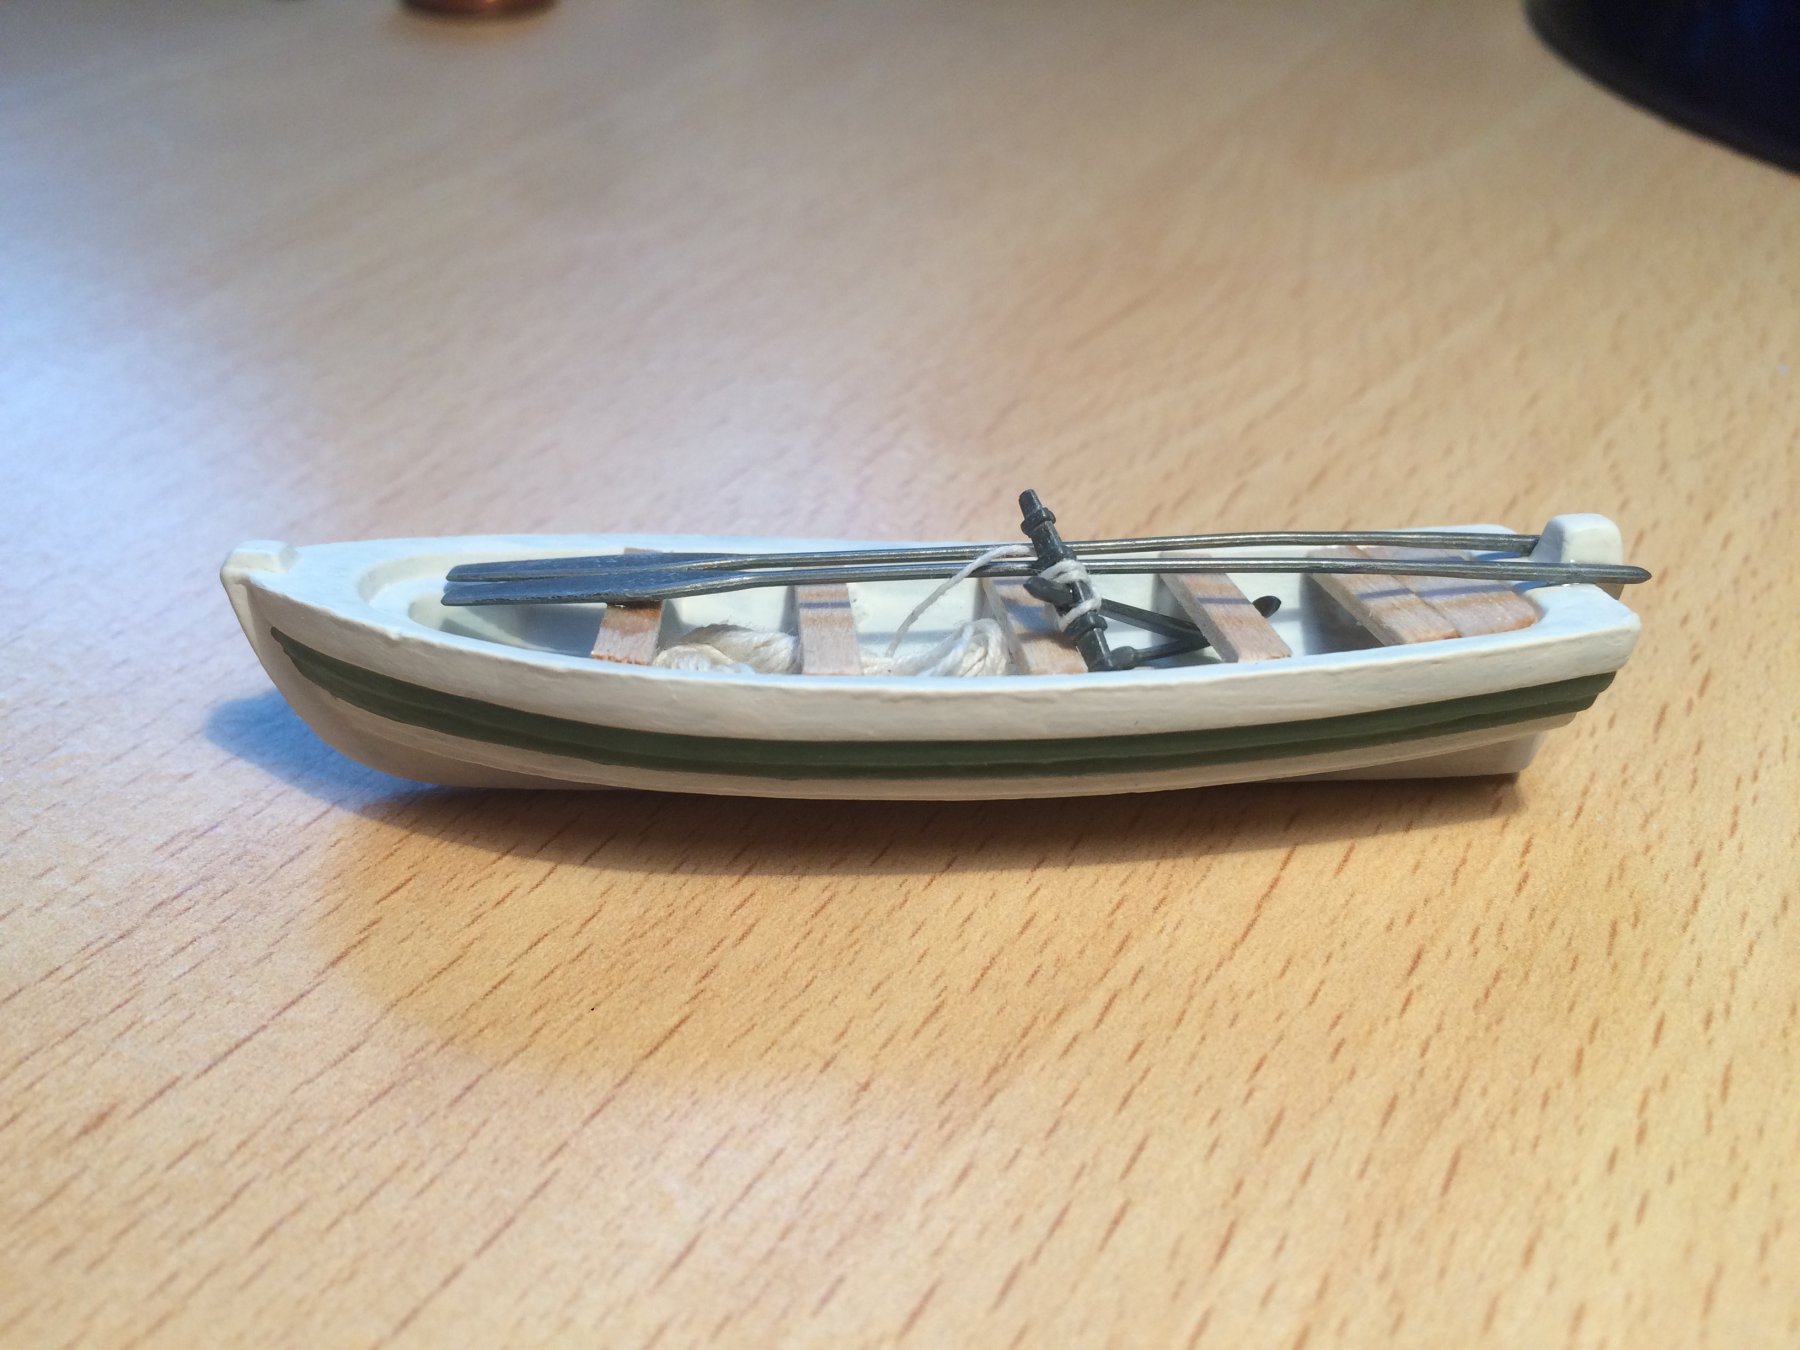
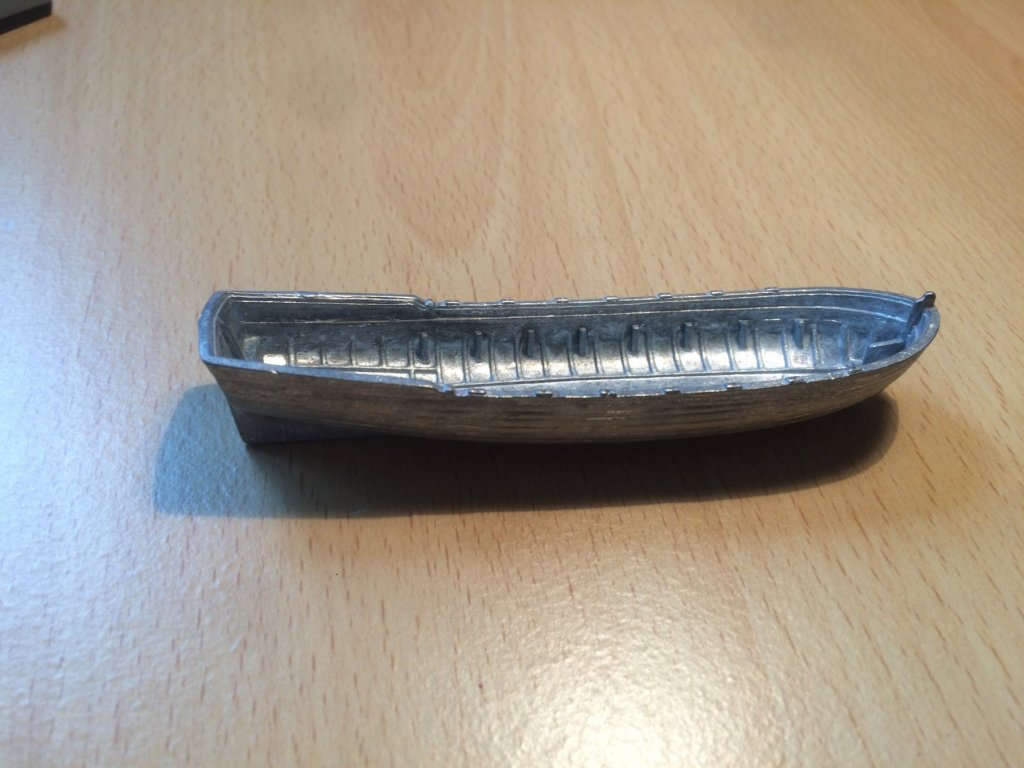
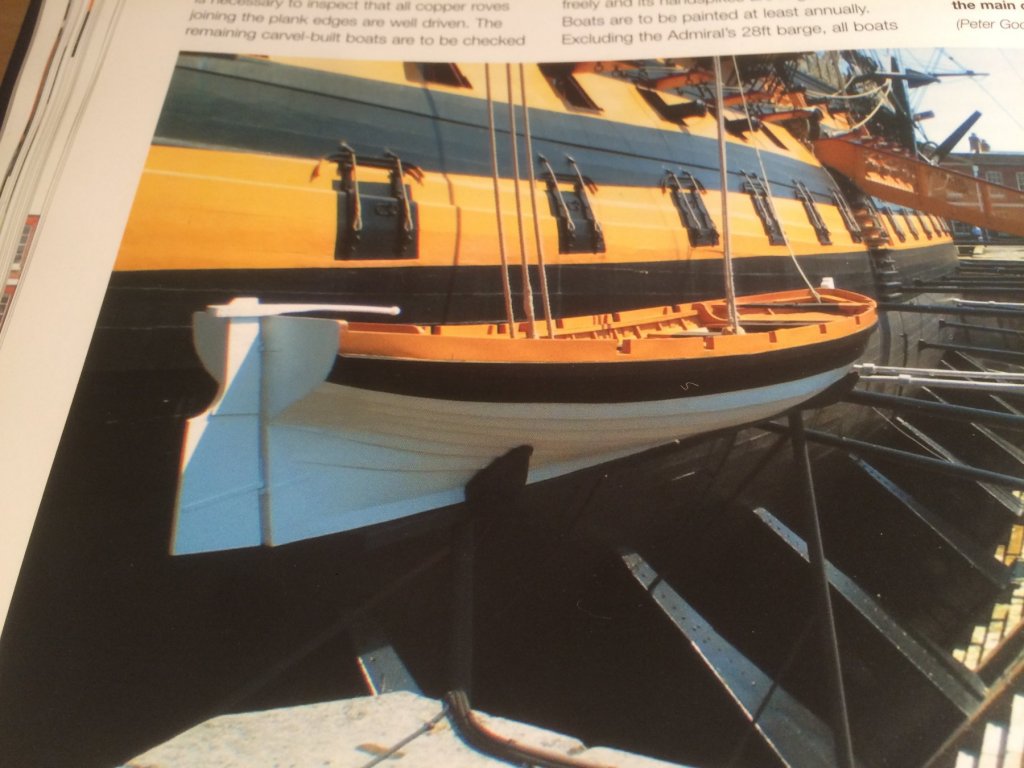
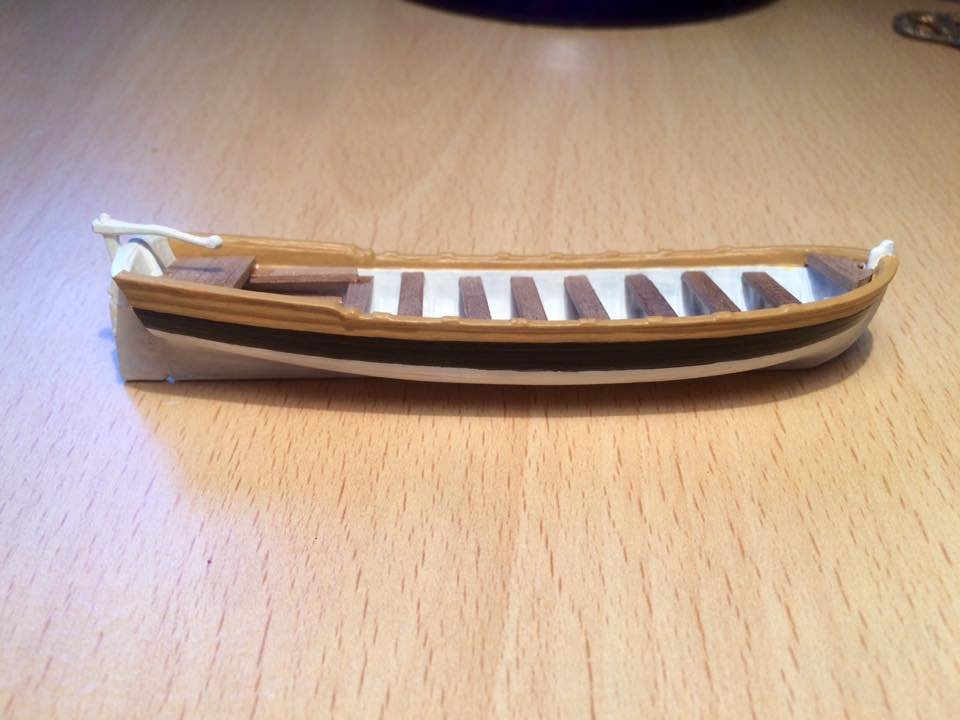
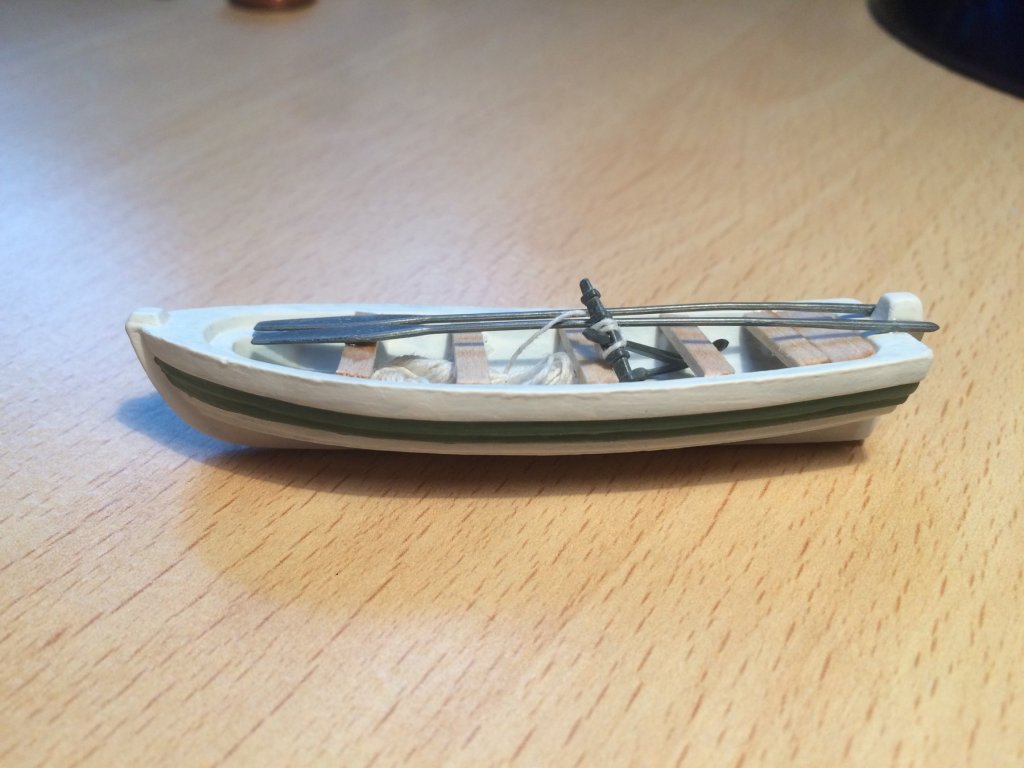
The Billings kit doesn't come with any ship's boats. So I researched and tried to find a small boat kit that could be customized to give a decent representation and bought 2 of the "longboat" kits from Amati. I also pilfered a 3rd one from the leftover, unused kit from my Bro-in-Law's abandoned Victory monthly-magazine build. The Haynes manual has some good pics and I had loads I'd taken myself on my actual visit to try and replicate the colour schemes. Happy enough with how they've come out. I've also scratch built some cradles to sit them on the skidbeams, from the leftover sprue that the original bulkheads came out of.


- 117 replies
-
- 3
-
-
- victory
- billing boats
- (and 1 more)
-
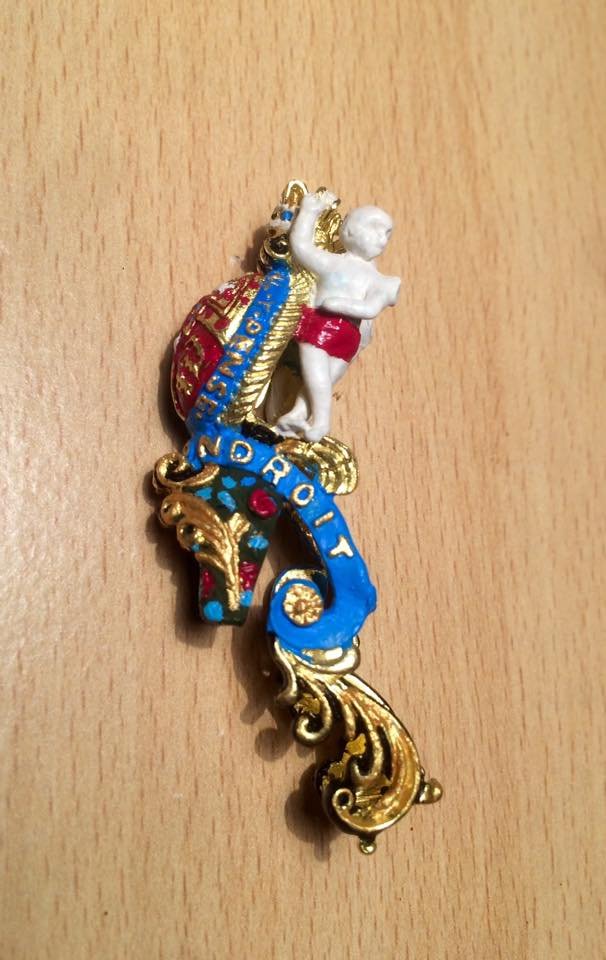
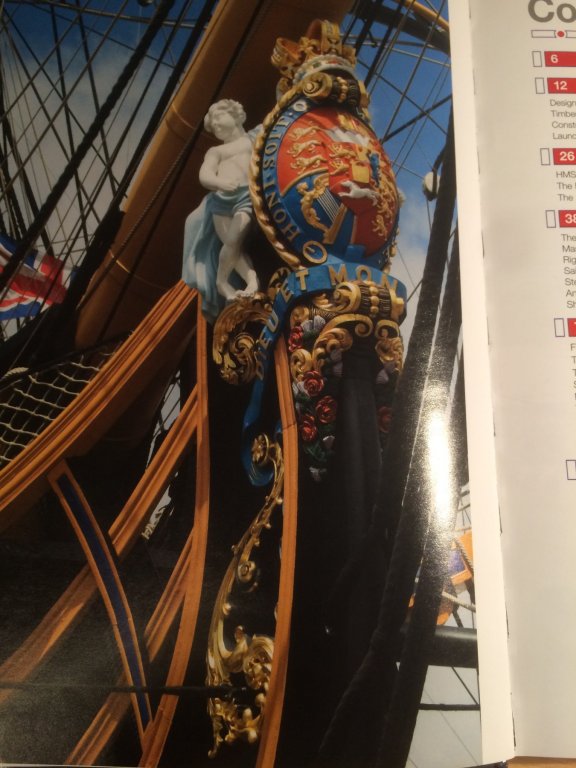
Beautiful brass figurehead comes with the Billings kit and there's a lot of detail on it. Took some small brushes and about 2 weeks to complete!

- 117 replies
-
- 3
-
-
- victory
- billing boats
- (and 1 more)
-
Work and family (life in general) meant I took an 18 month sabbatical! Realised only the other day that I hadn't posted on here for over 2 years (people will have thought I'd passed away!!). Anyway, have been doing some more bits recently, having come back to her and wanting to get cracking again. Still not finished the hull planking but have done some other peripheral bits, so will upload some pics shortly.
- 117 replies
-
- 1
-
-
- victory
- billing boats
- (and 1 more)
-
That'll be it then, Boyd. Your missing 6 are on your lower deck! Where did you get the Amati ones from for that price, please? I've looked but they're a lot more than that where I've seen them.
-
Hi Boyd, She's looking absolutely marvellous! Well done, mate. I had kits for 20 cannon carriages with mine. 18 cannon barrels though. 10 for the lower deck, 2 for the forecastle (along with the 2 carronades) and 6 for the quarterdeck, around the location of the stairs and ships wheel. Have you used more than you were supposed to on the lower deck where you recessed your gun ports? Chris
-
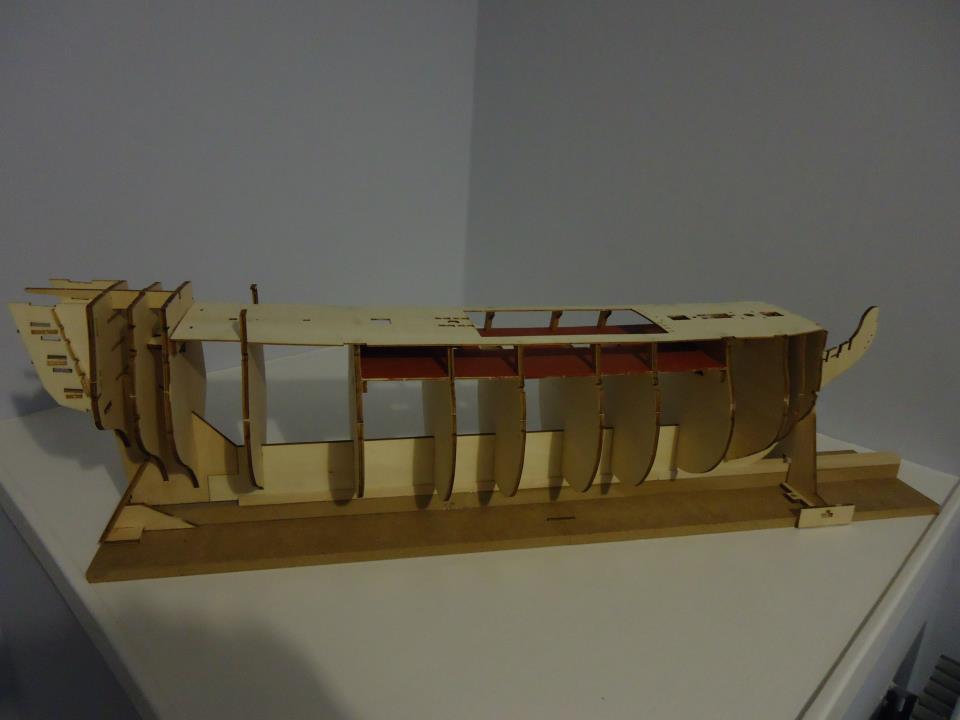
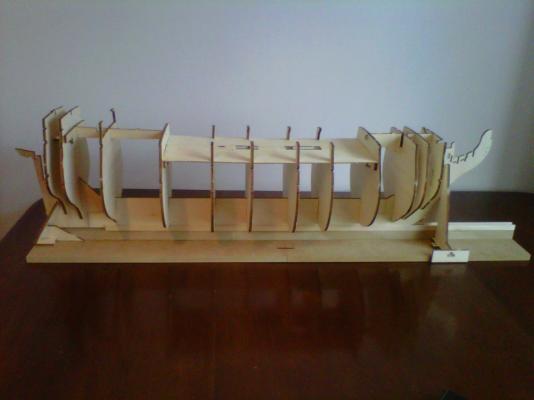
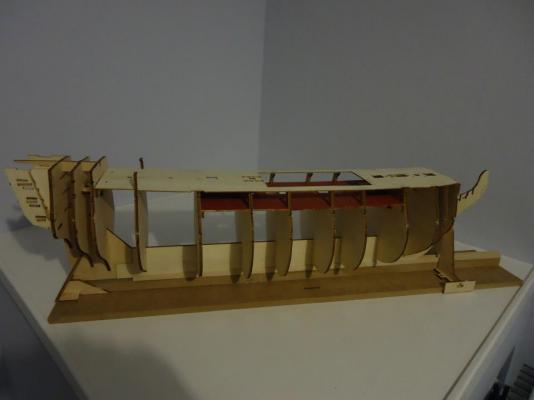
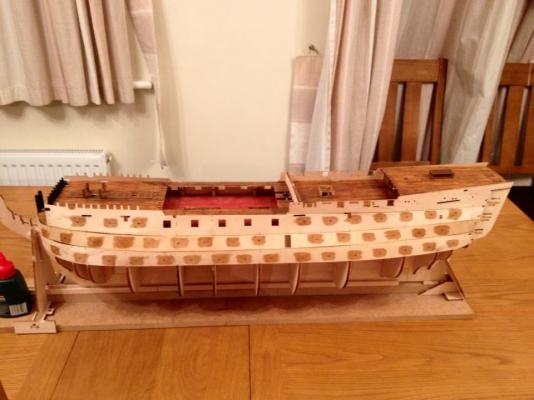
I think mine had a slight curve upwards too towards the end where the cabins go, though maybe not quite so pronounced. I've included below some photos of mine at about the same stage you are and then a bit further on.
-
http://www.cornwallmodelboats.co.uk/acatalog/amati_boats_oars.html I bought some of the Amati longboats on the attached link. They do 70mm, 90mm and 105mm and will be painting them in the white and green to give a nice representation of the real thing.
-
Agree. I simply painted the area black where the stairway should be on that lower deck. As you say, won't be able to see anything by the time the skids are in place and especially if you are buying boats (none supplied with the kit) which I have done.
-
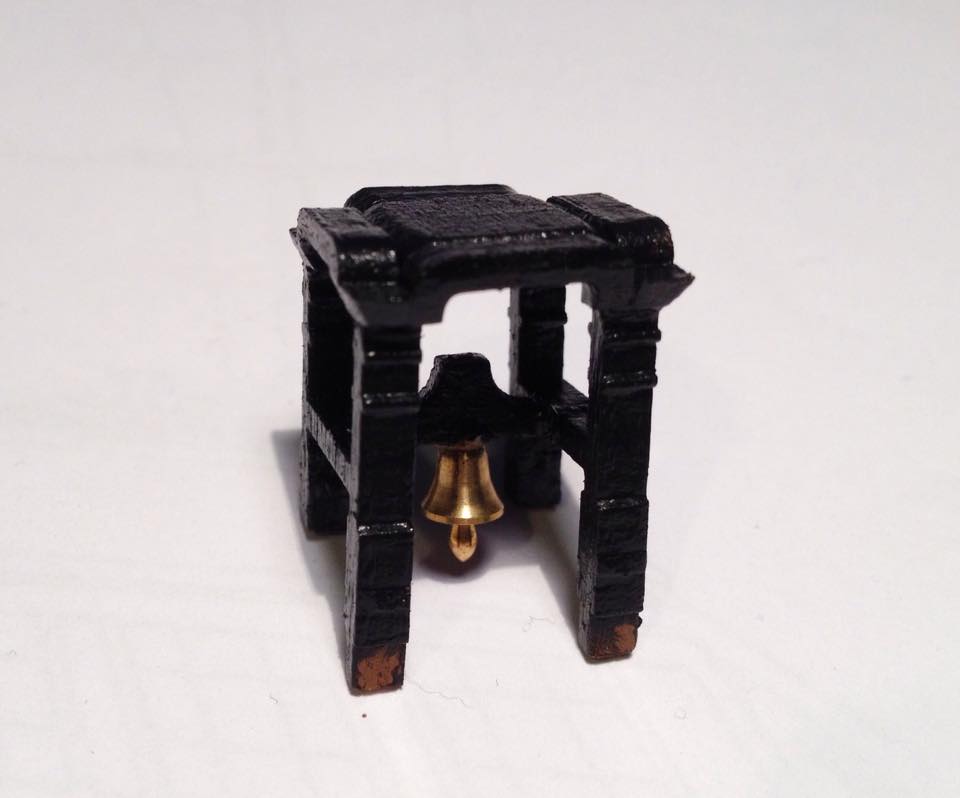
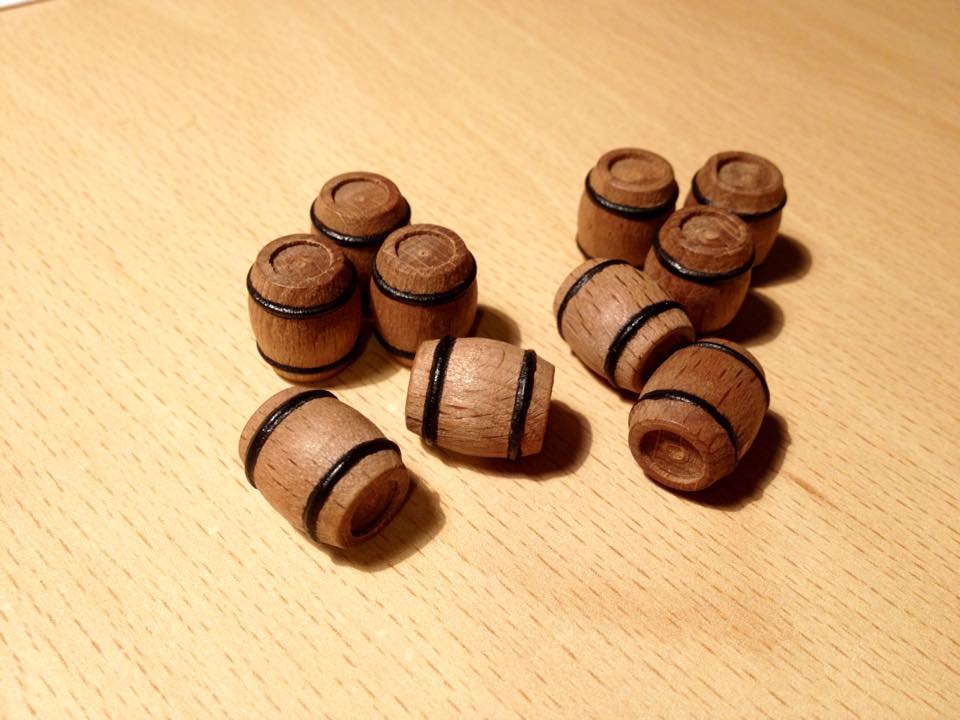
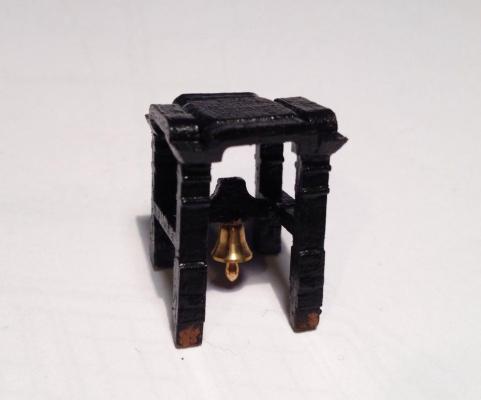
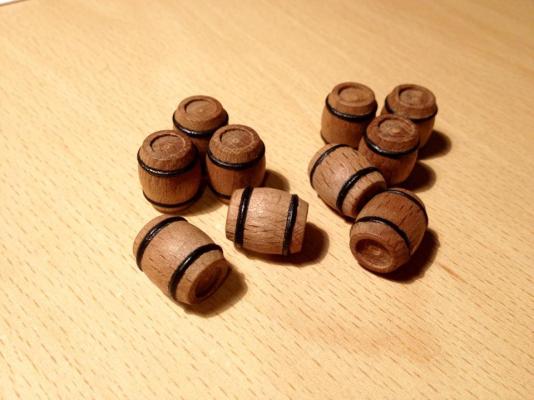
Couple of other little bits done today, constructed the bell tower and painted it walnut wood colour and then realised it should be black when I checked my Haynes manual for pics. Learning point - check the books first before picking up paint brush! Also, had bought some rum barrels from CWB and so painted the metal rings onto them. Each ring needed painting 3 times, as just painted the raised ridge gave a wiggly line down both sides, so each side needed tidying up. Think they'll add some authenticity though and look alright.
- 117 replies
-
- 5
-
-
- victory
- billing boats
- (and 1 more)
-
Got my roundhouses done last night. Tight curving but with some soaking in boiling hot water and heating again over a candle flame, managed to get it curved enough. Then sanded off and painted both the blue and yellow detailing.

- 117 replies
-
- 5
-
-
- victory
- billing boats
- (and 1 more)
-
Welcome Philip, another joiner to the Billings Victory team! Like Keith, I'll be painting mine too. As with Boyd, Keith et al, happy to share any insights thus far and will keep an eye in here with interest. Good luck and welcome! Chris
-
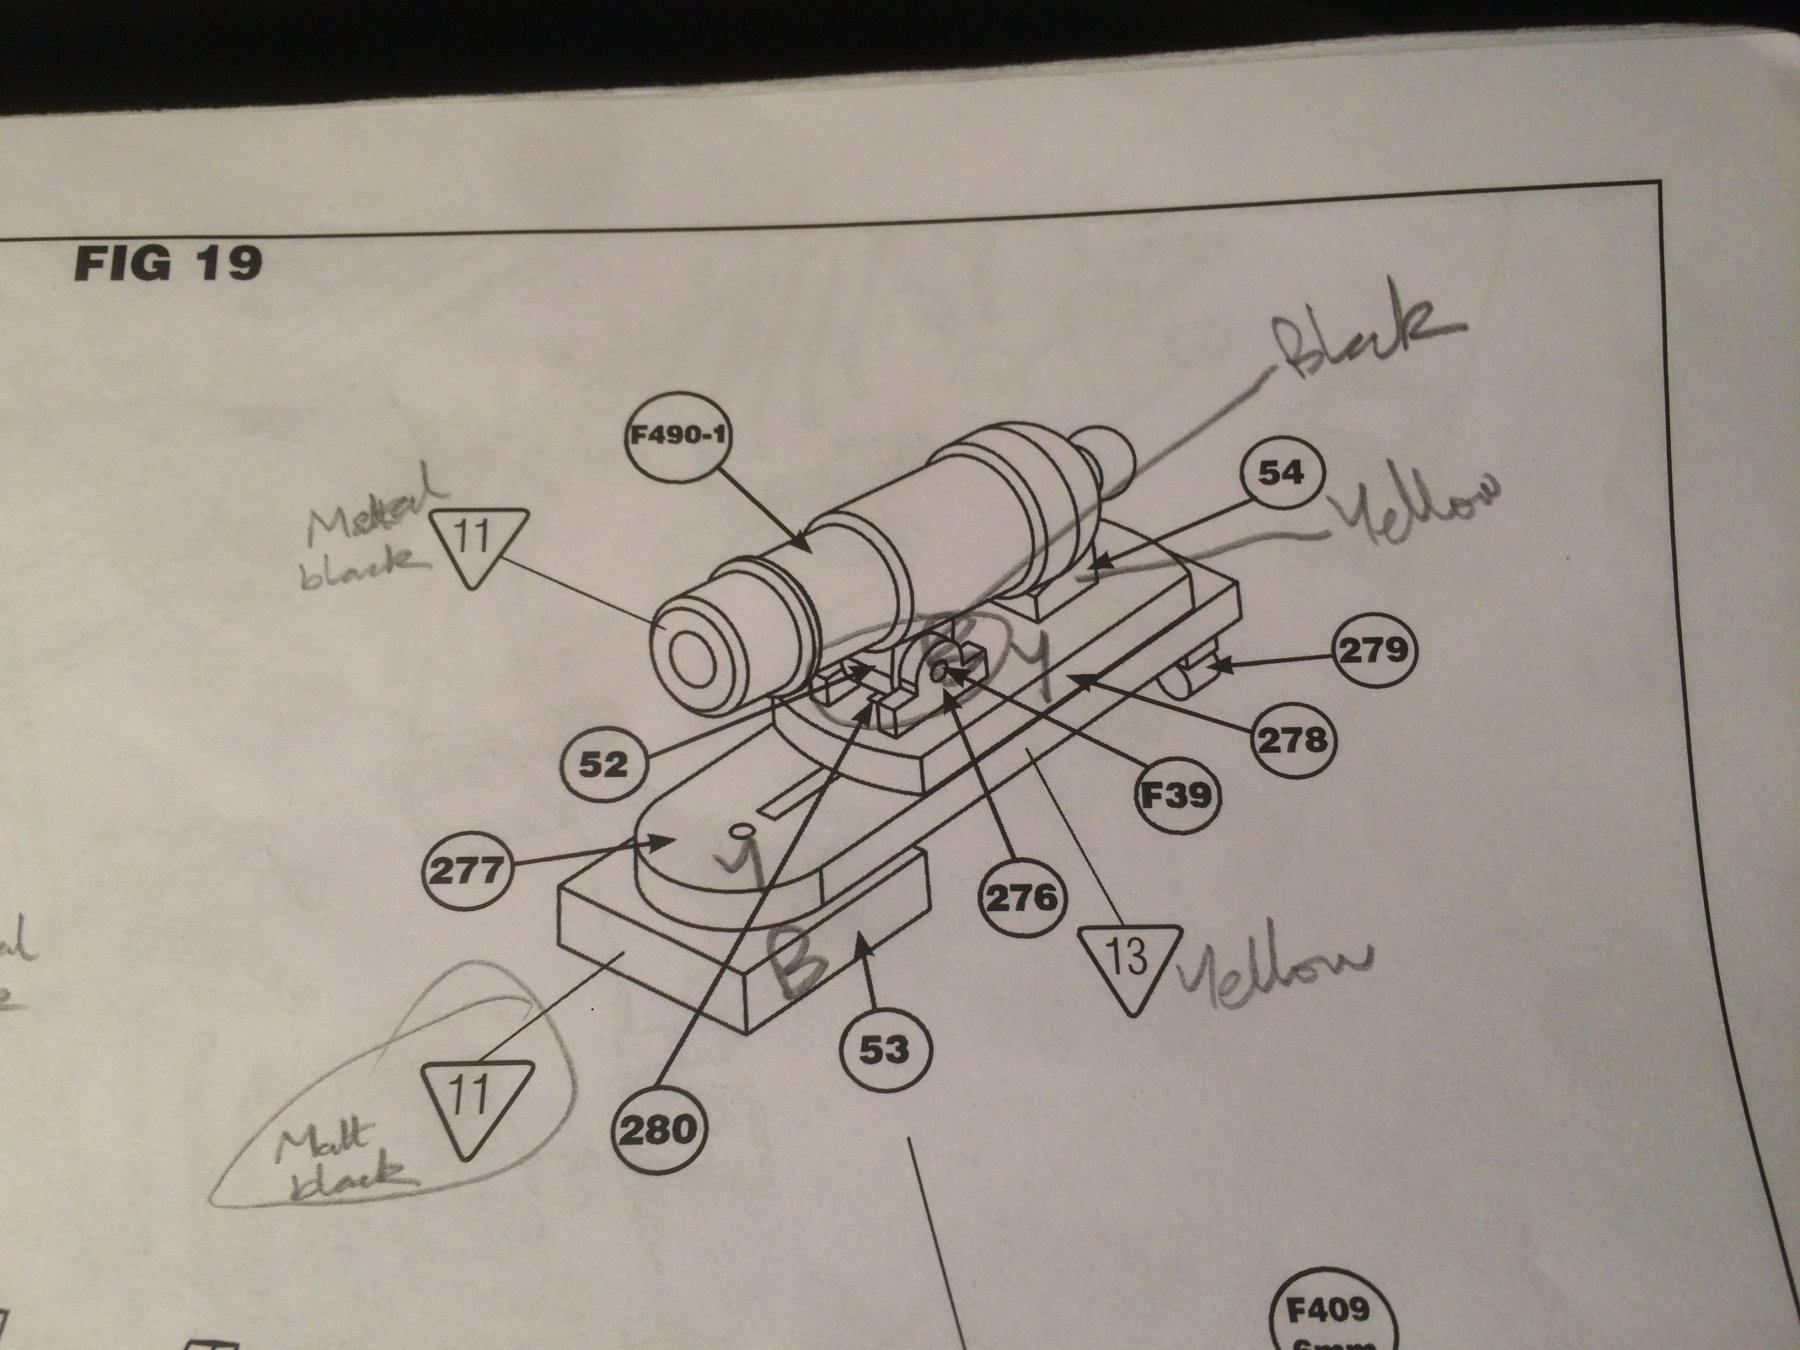
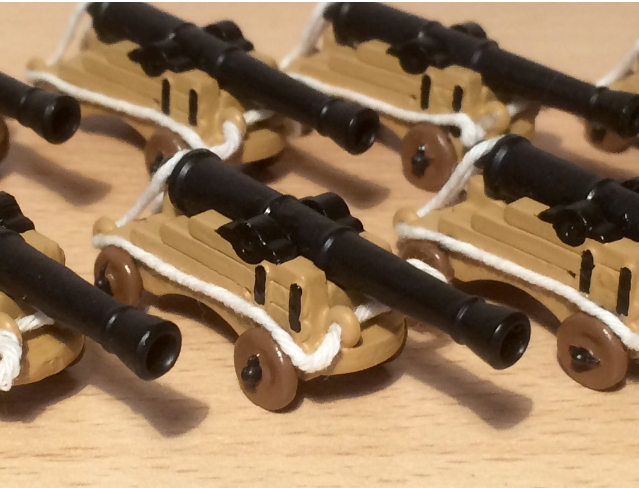
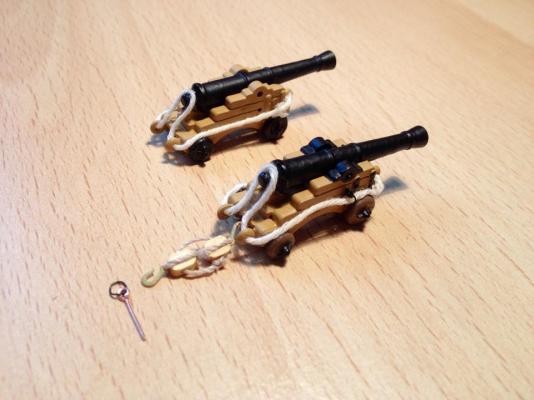
Having had a look round some of the other builds now I'm on here, I realised how inadequate the guns were that I'd built previously and so did a lot more work on one of them over the last couple of nights to see if I could make it look better. Repainted the wheels to a wood colour (rather than black), painted in the trunions and fastenings, made breeching eyebolts from brass eyelets, added a train tackle loop and used black wire and used some additionally purchased single blocks, rigging rope and brass hooks to build a representation of the train rigging. These ones are to go on the mainly hidden gundeck and so the front of the cannon will be pushed up again the inner hull wall and so I won't need to attach the front end of the breeching rope to eyebolts. I think they look so much better now. Attached a before and after example.
- 117 replies
-
- 5
-
-
- victory
- billing boats
- (and 1 more)
-
Boyd, could you please give me some advice for curving the wood on the roundhouses. I've tried soaking and steaming but it just doesn't seem to want to bend that far without snapping! How did you do yours, please?
-
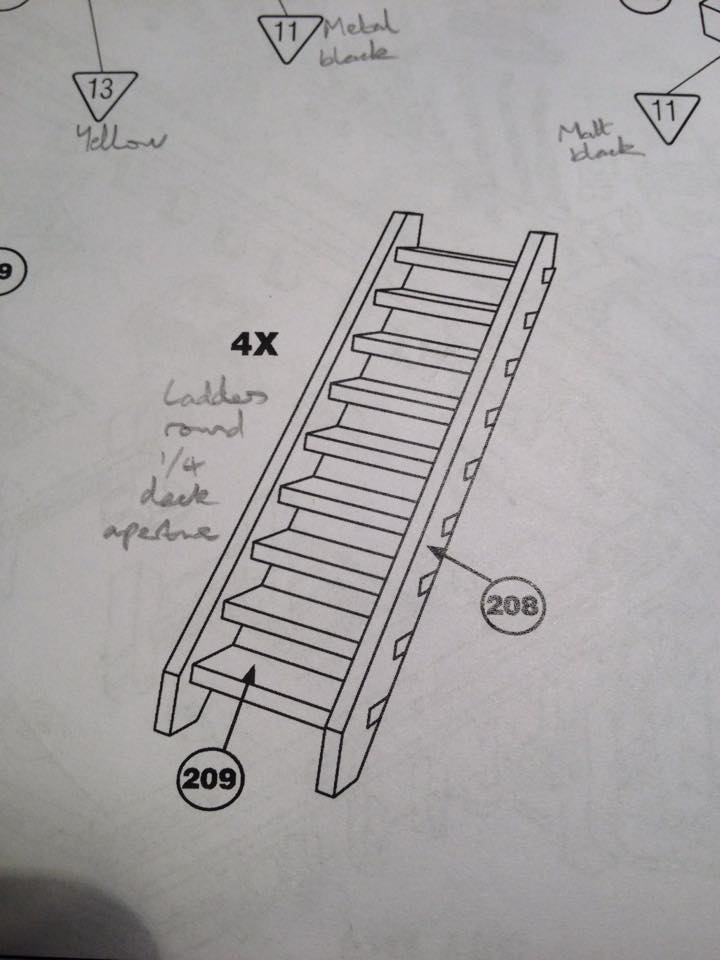
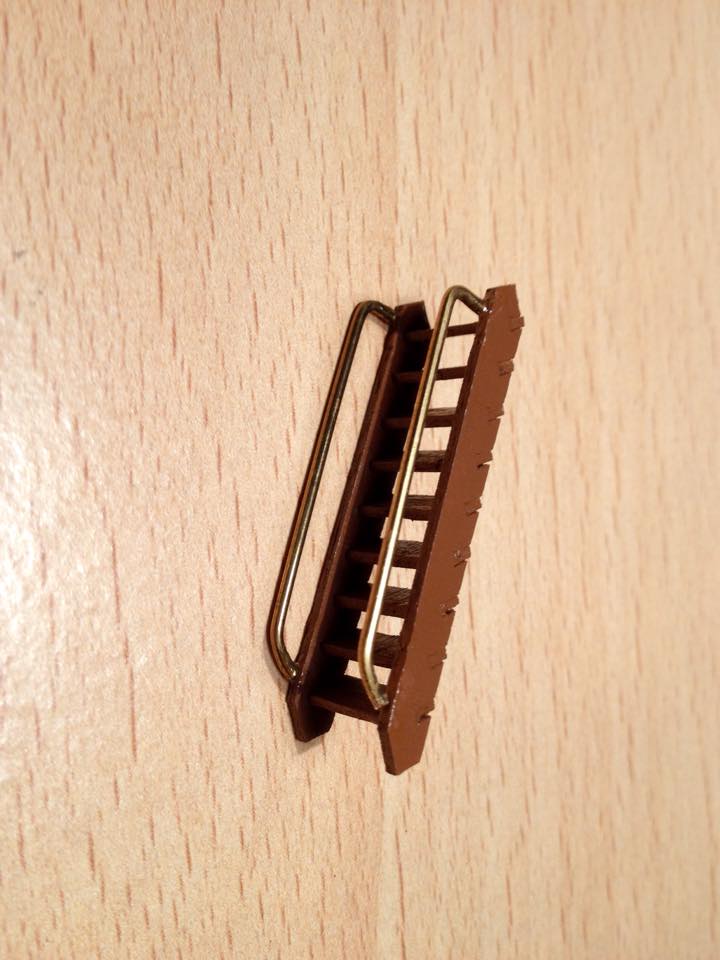
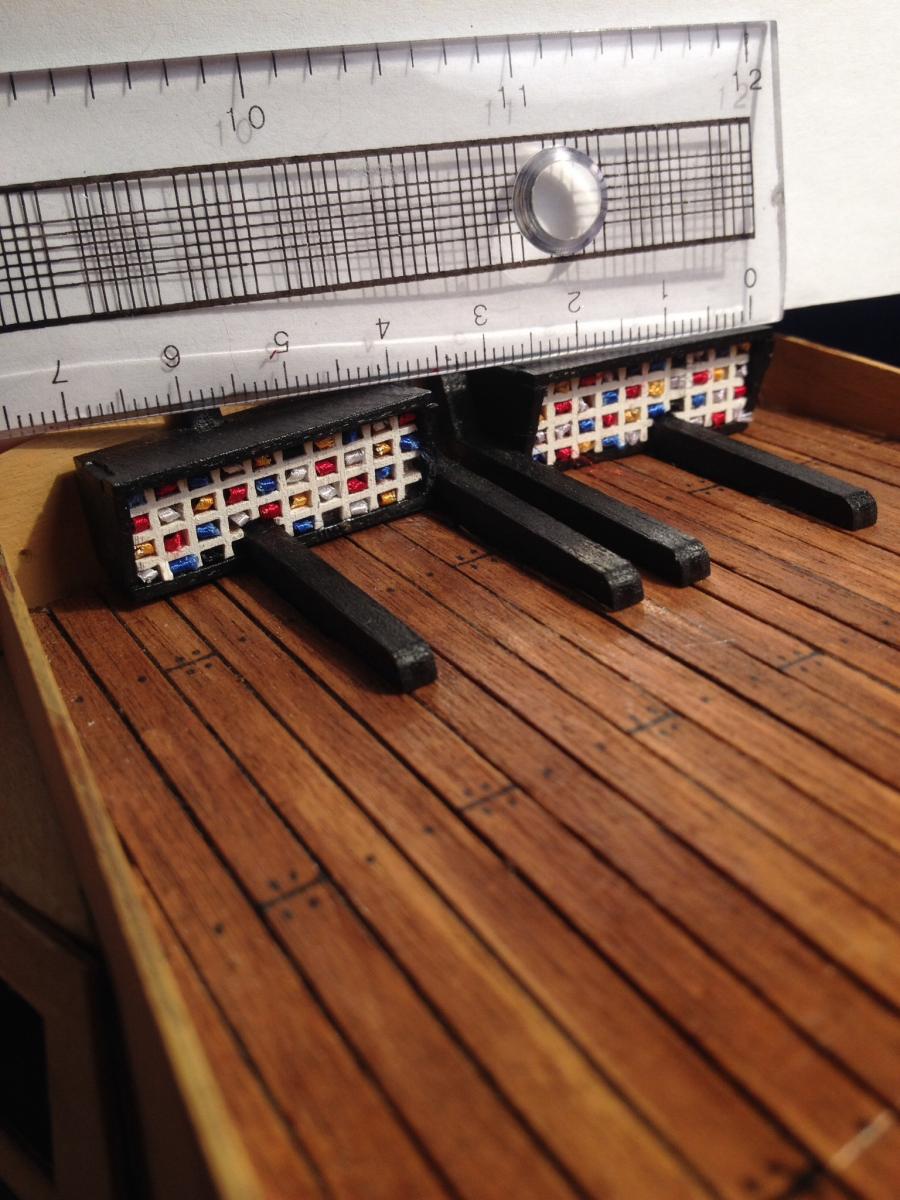
Ladders 4 x ladders from the quarterdeck down to the upper gundeck. Again manual just shows the wood in the kit, so I've added some brass handrails myself.


- 117 replies
-
- 6
-
-
- victory
- billing boats
- (and 1 more)
-
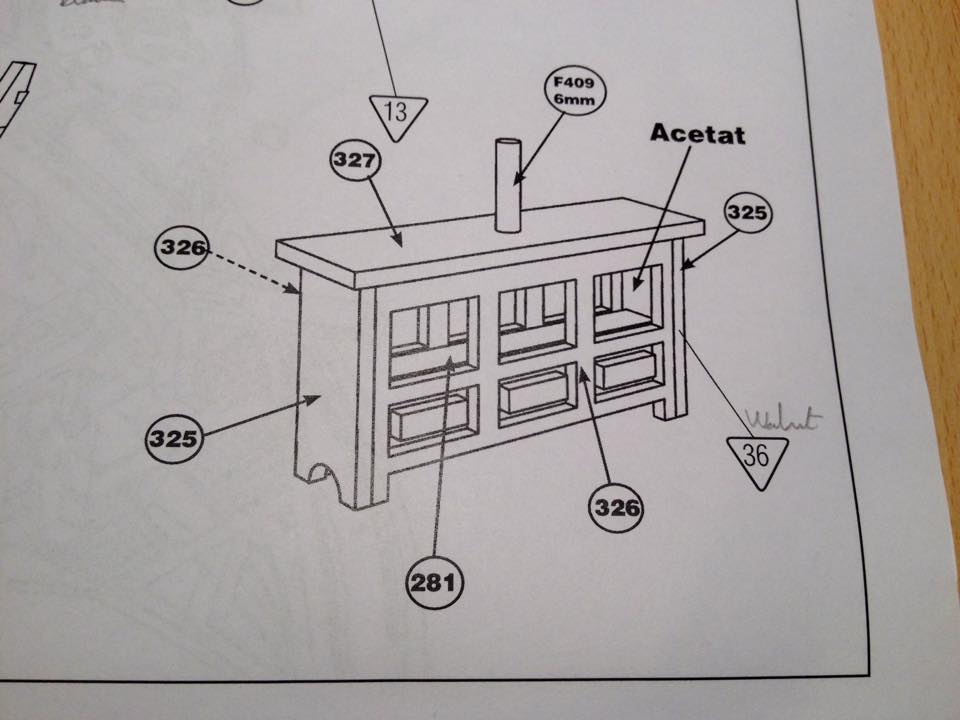
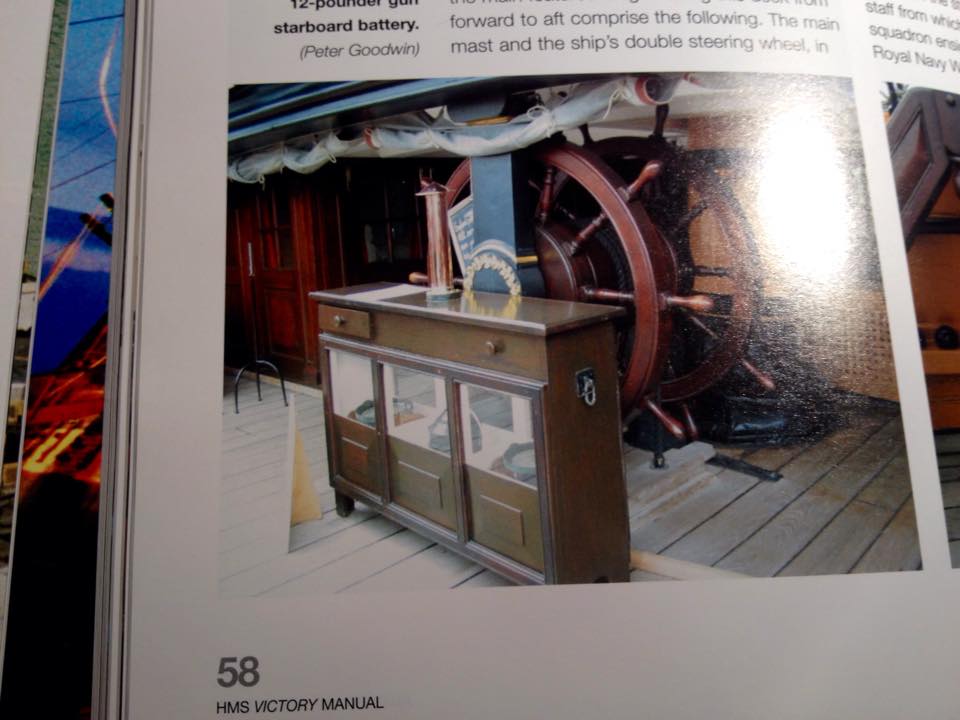
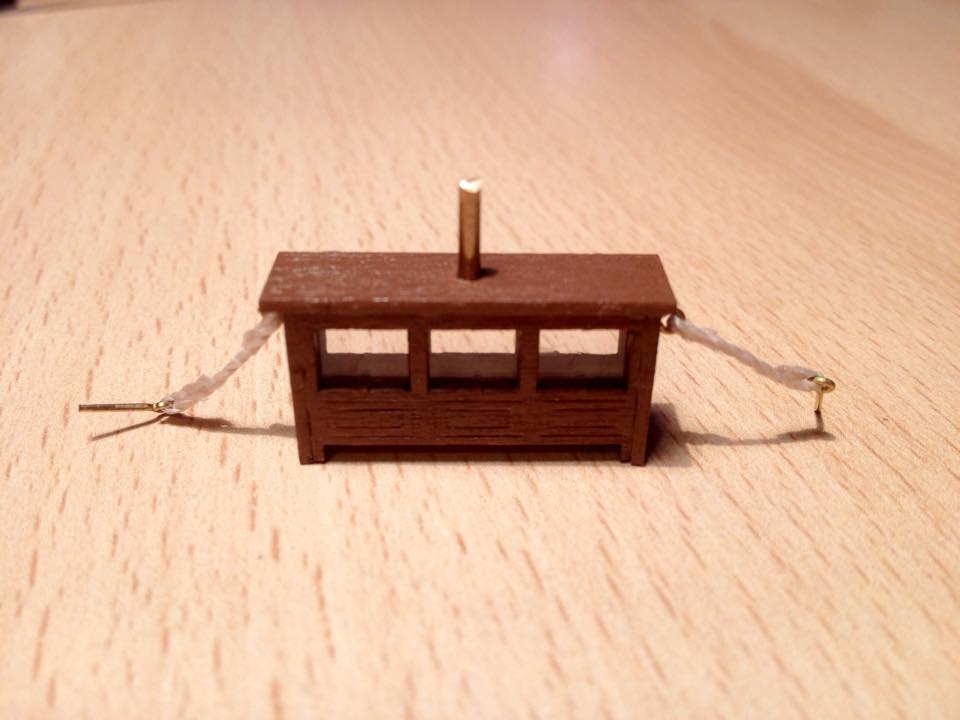
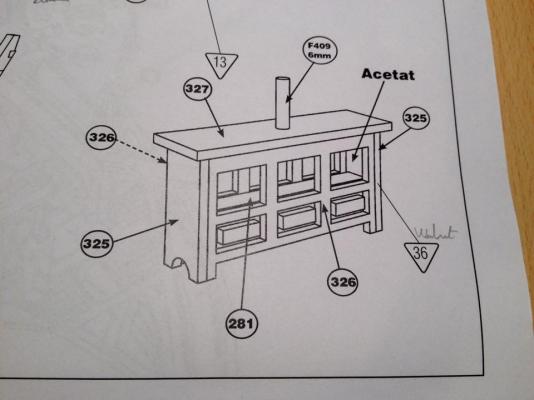
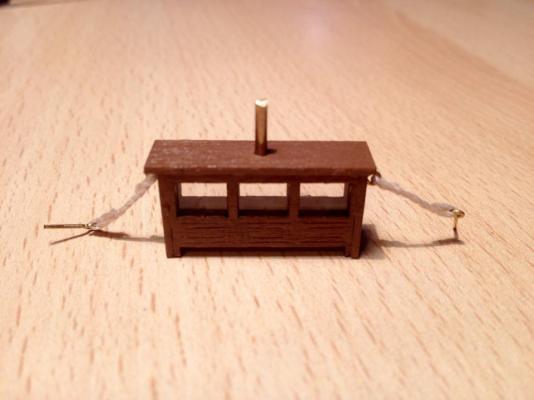
Binnacle Few hours spare this week so did a couple of smaller jobs. First one was building the binnacle. The manual just showed the wood provided, so I've added brass eyelets and some rope 'stays' for added authenticity. Eyelets already added to secure it to the deck once the hull planking has been done.

- 117 replies
-
- 3
-
-
- victory
- billing boats
- (and 1 more)
-
Hi Nick, good to see Tubbsy off the mark on Saturday. Indeed, as Pompey lads, "Vicky" was a must at some point! Thank you for your kind words about my progress so far. This is definitely my first one!
- 117 replies
-
- 1
-
-
- victory
- billing boats
- (and 1 more)
-
Thanks, David. Yes, given it's a first build (even for a marine engineering grad - albeit that was 20 years ago now) I've definitely been taking my time. 2.5 years of it so far! Back on it now, having had a house-move induced sabbatical.
- 117 replies
-
- 1
-
-
- victory
- billing boats
- (and 1 more)
-
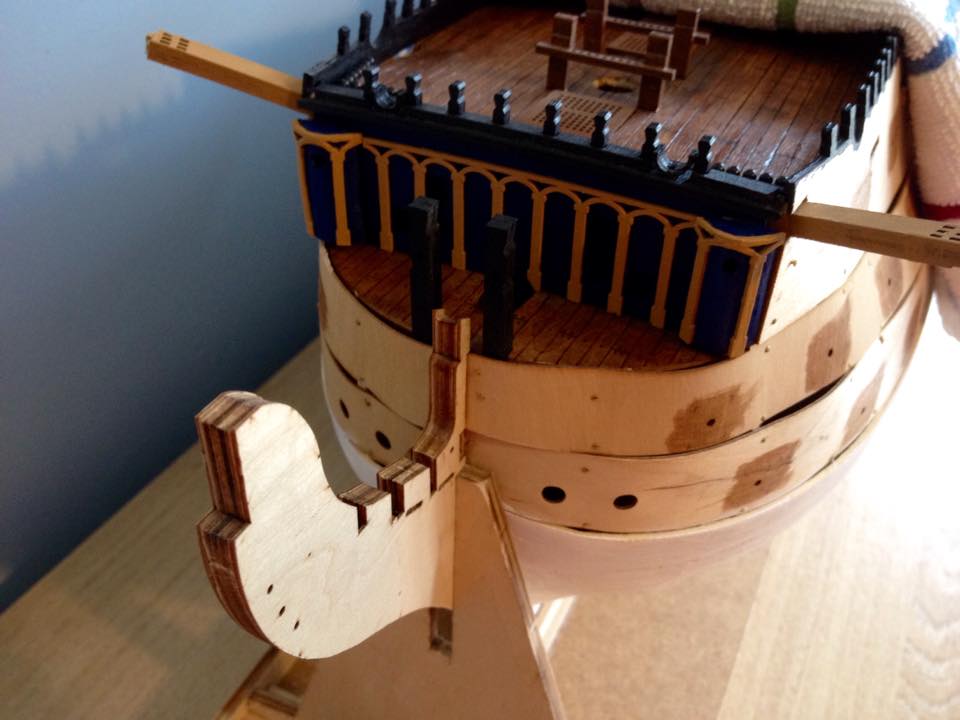
Thanks, Boyd. At least you know exactly the size of the "holes" I'm dealing with! I'm building roughly in line with the instructions. I deviated a bit once I got to the planking and got a bit bored. However I've got to the point where I need to do a lot more of the deck furniture, cement in the lower deck guns and build up the beakhead etc and so I don't want to do/can't do that until I've finished the rest of the hull, or I'll end up causing damage. So next steps are the re-sanding and filling (x2) of the entire hull but I also need to finish planking over and round the gunports. I can then paint in the stripes and the copper bottom.
- 117 replies
-
- 1
-
-
- victory
- billing boats
- (and 1 more)
-
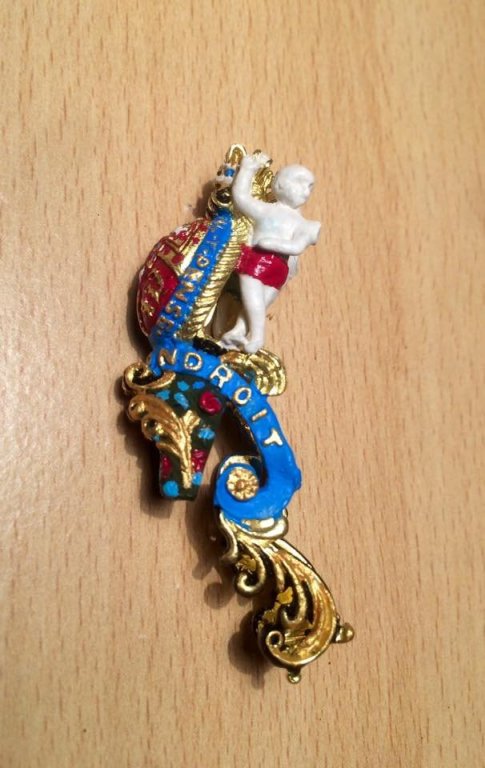
Both sides done now and ruler shows how small it is.

- 117 replies
-
- 4
-
-
- victory
- billing boats
- (and 1 more)