andy
-
Posts
96 -
Joined
-
Last visited
Content Type
Profiles
Forums
Gallery
Events
Everything posted by andy
-

Wappen von Hamburg by andy - Corel
andy replied to andy's topic in - Kit build logs for subjects built from 1501 - 1750
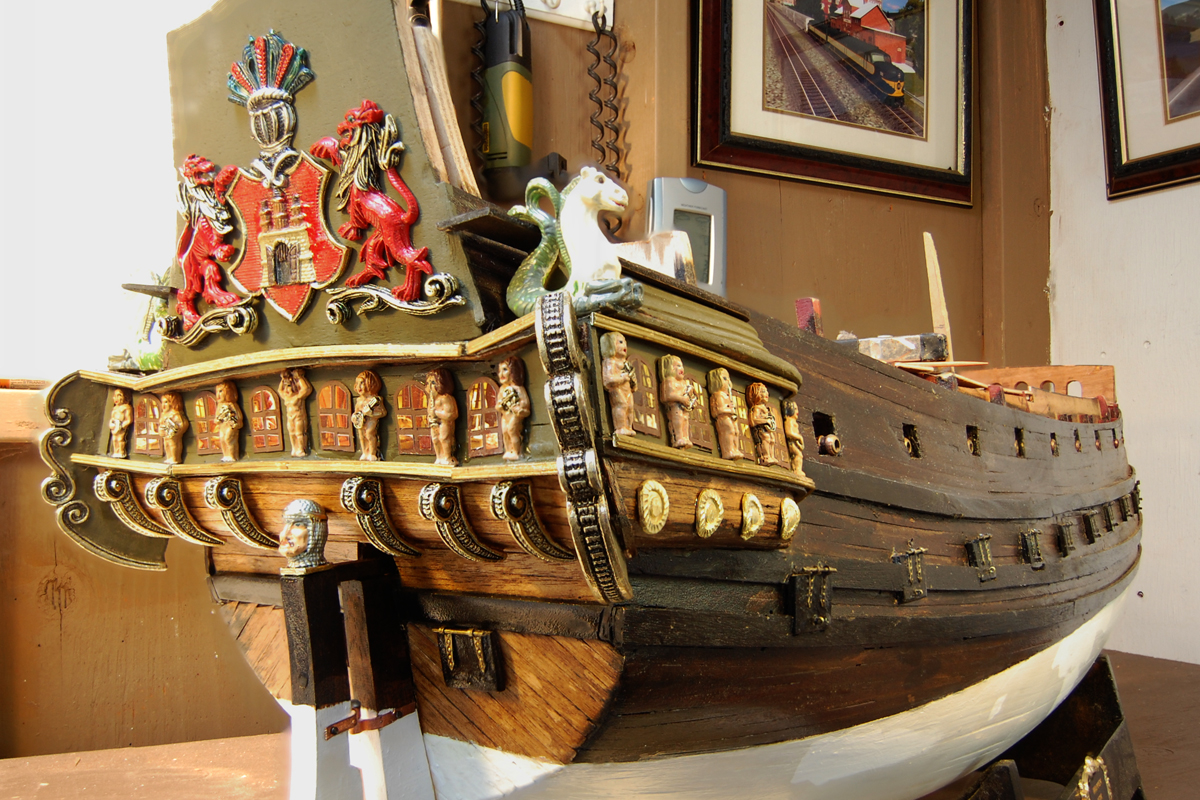
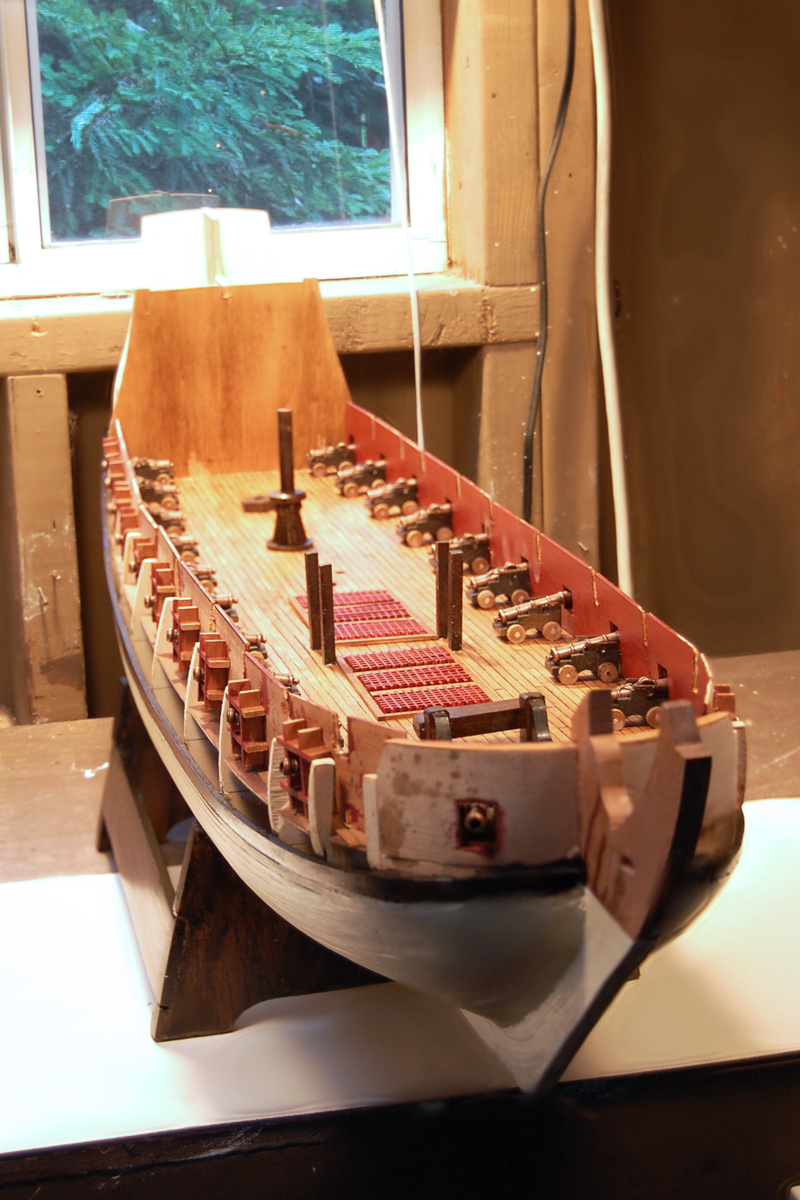
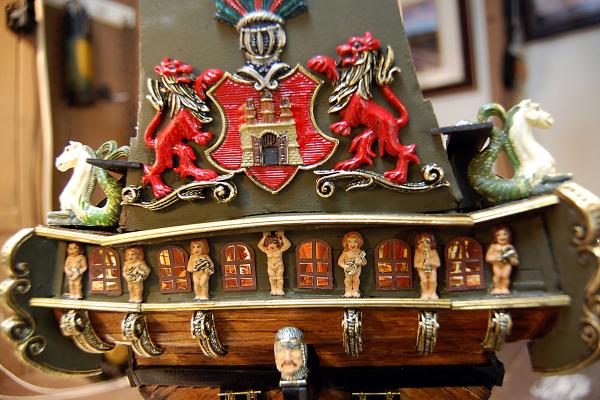
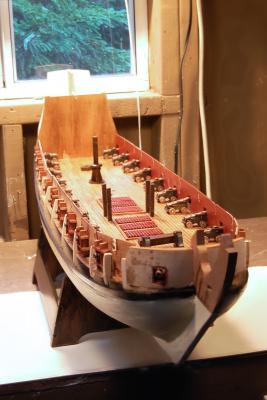
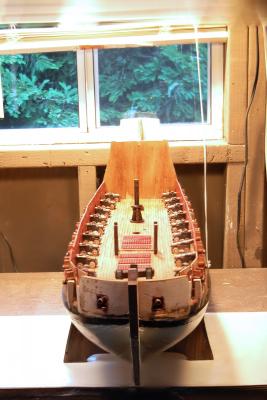
Hi Everyone, It has been awhile since my last post, but I have made a fair amount of progress. the planking has been raised above the 2nd gun deck and all elements of the 2nd deck have been completed. Given my problems with the gun carriages on the lowest deck, I have used dowels to secure the carriages on this deck. I can't imagine them coming loose this time. One of the features of this kit are the elaborate rear galleries, and one of the mysteries of the kit is how in the world do you build them with the materials and instructions supplied. There is only one schematic of how the various parts are supposed to fit, and no other written instructions that I could find. I spent a lot of time trying to figure out how putting the pieces together per the schematic, or any other way, was going to end up looking like the finished model pictures I had seen. I finally gave up! Although it was probably too early in the build to start the galleries, I decided there was not much point in continuing on with the build unless I could complete them. I decided to ignore the schematics and do a freelance build that would end up looking like the terrific pictures I had found on the internet. In the end I think things turned out pretty well as shown in the pictures below.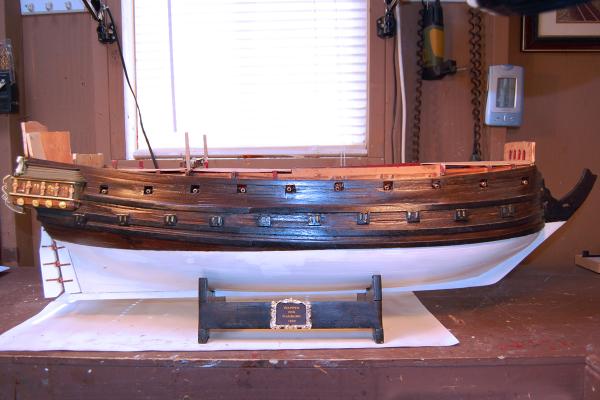

-
Wappen von Hamburg by andy - Corel
andy replied to andy's topic in - Kit build logs for subjects built from 1501 - 1750
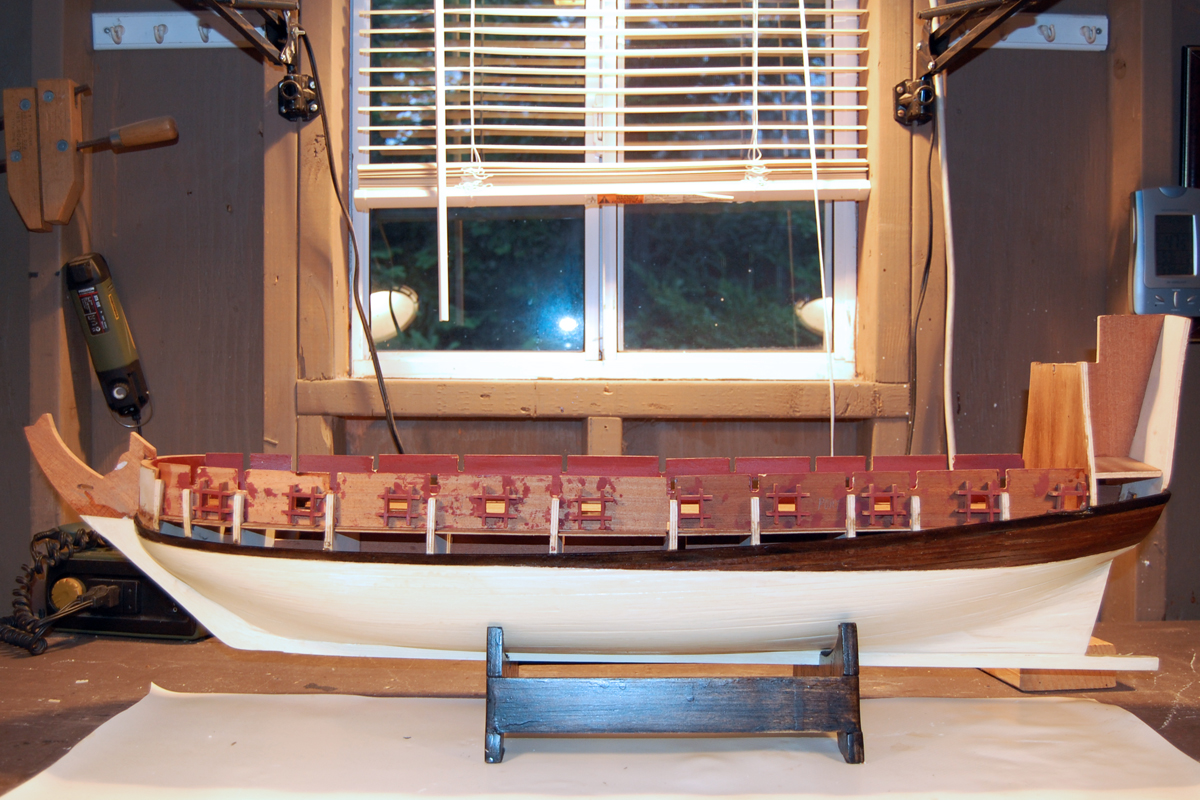
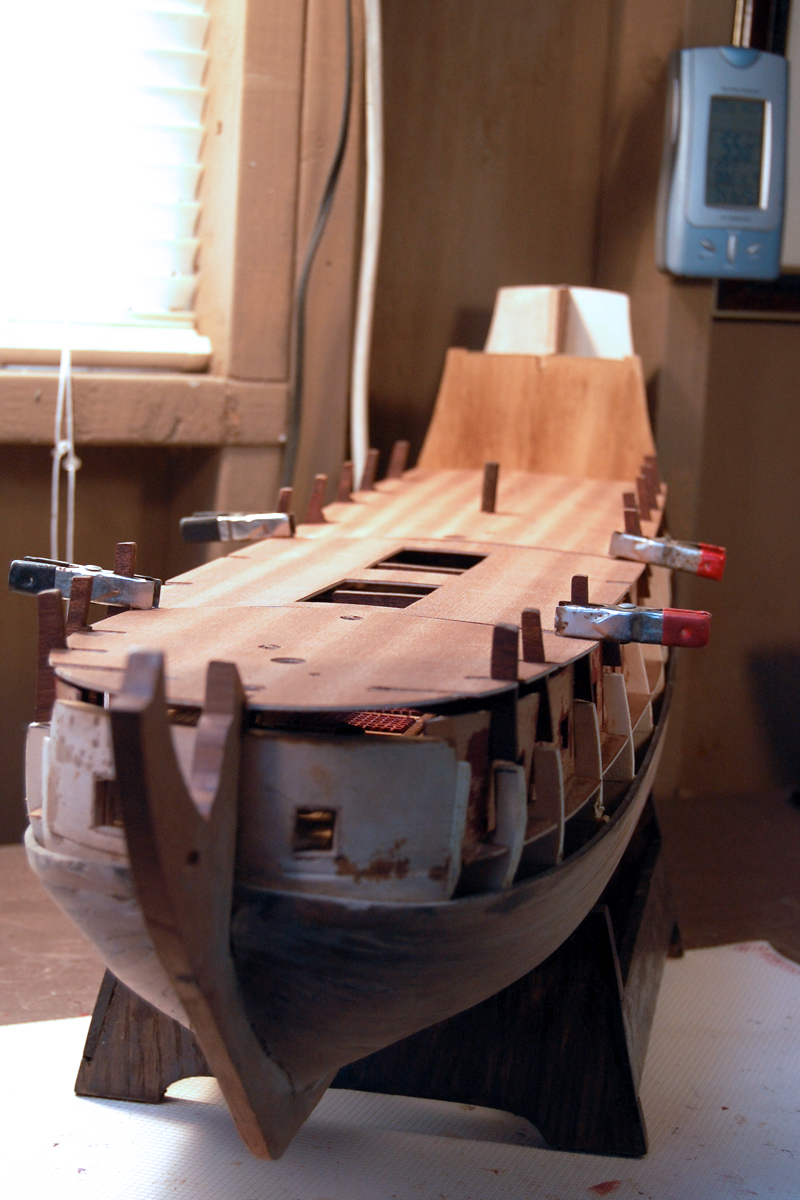
Hi Everyone, The new wale strips arrived and after staining them ebony I have begun installation. I have also completed the lower deck gunport covers and have added them. I had every intention of blackening all the hardware, but in the end decided I liked the look of the shiny bits even though it is probably incorrect. I continue to add additional planking and though it looks a little rough right now it is nothing that sanding, walnut wood filler and walnut stain won't fix. I have also completed the main gun deck, and though it will mostly be covered I have planked the whole thing. The kit and build continues to be very challenging, but progress is being made. Pictures below.
-
Wappen von Hamburg by andy - Corel
andy replied to andy's topic in - Kit build logs for subjects built from 1501 - 1750
Hi Everyone, Thanks for all of you comments and suggestions. Mike, I certainly agree that 8000 hours is anal to the extreme. I considered removing the second deck to redo the cannons, but I would also have to remove some of the planking I have completed, and frankly, I think I might completely ruin the ship. The idea of simply removing the barrels, and attaching them to the carriages at a later date is possible, but if you read above, you will see that the kit was missing the metal strips used to attach the barrels to carriages. My improvisation would make it difficult to easily remove the barrels without destroying the carriages. Since my last post I have scoured the internet for paintings of 17th century sailing ships with the lower level gun ports closed. I have found several and have reconciled myself to building the ship in this manner. I have completed the repainting of the hull below the waterline. I'm glad I have redone it because it looks much better. I'm awaiting the new wale strips and will take pictures as soon as they are installed. -
Wappen von Hamburg by andy - Corel
andy replied to andy's topic in - Kit build logs for subjects built from 1501 - 1750
Hi JP, You are 100% correct. I should have pinned the gun carriages to the deck. I will certainly look for pictures of your completed WvH and thanks for the offer of help if needed. Andy -
Wappen von Hamburg by andy - Corel
andy replied to andy's topic in - Kit build logs for subjects built from 1501 - 1750
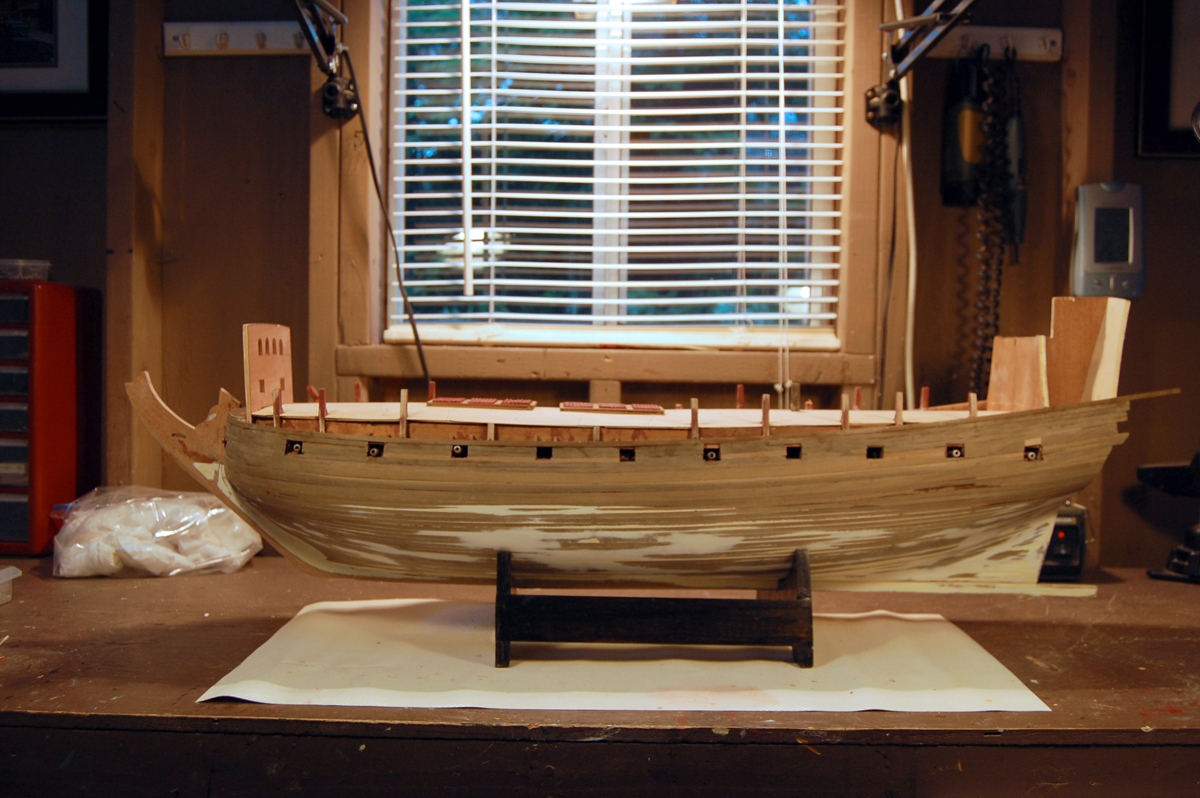
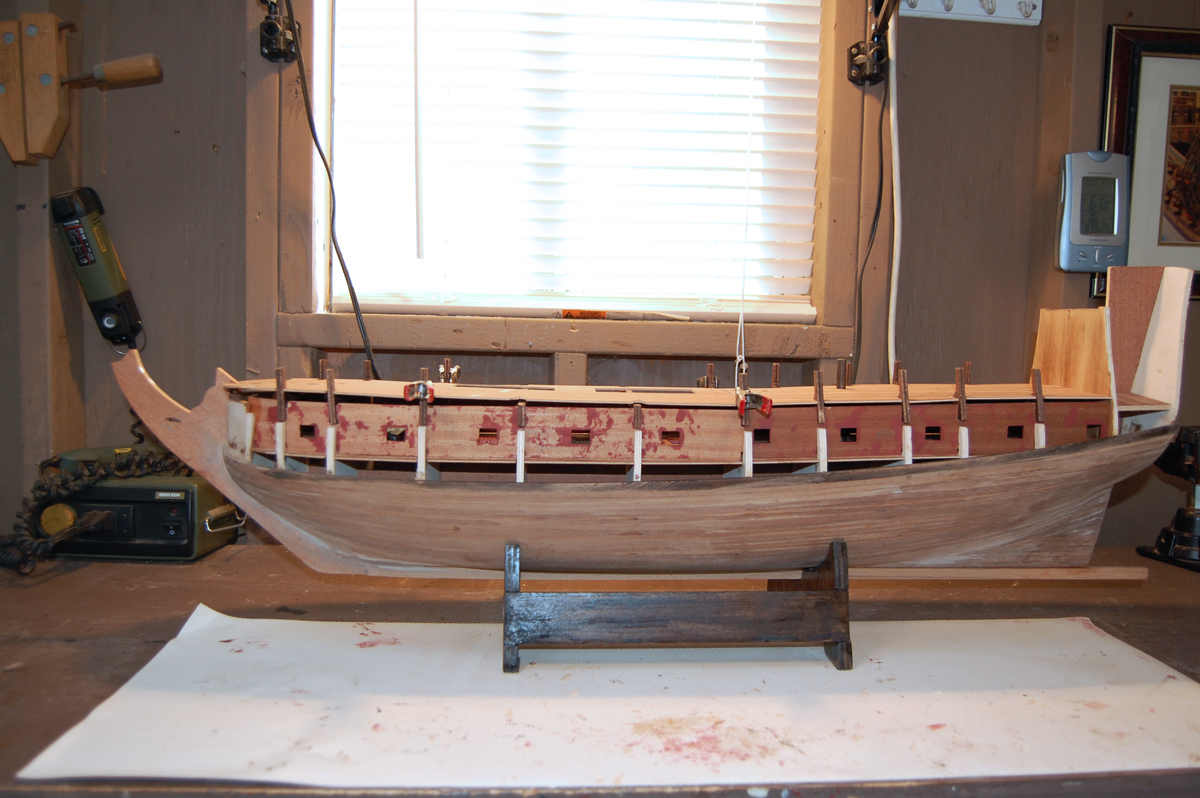
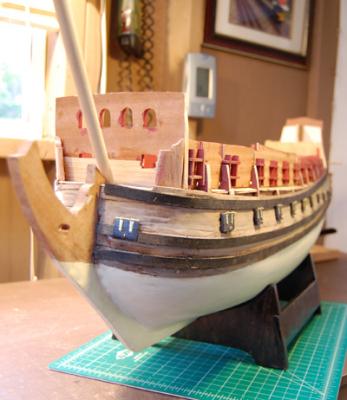
Hi Everyone, After due consideration, I have decided to take a large step backward on my WvH build. While adding additional planking a big worry I had about the way the build instructions said to build the ship came true. As can be seen above, the lowest deck has 22 fully configured cannons which are glued to the deck and then completely covered up by the next deck up. I knew this was going to be a problem and flattened the wheels to increase the glueable area. I also built 2 mm high frames around the carriages to further increase the glueable area and provide additional stability. In spite of these precautions, and extreme care taken when adding additional planking, many of the cannons came loose. Having already added the next deck, there is really no way to re-secure the cannons. Even if I could figure out how to do it, the 22 cannons are going to be a problem throughout the build. Accordingly, I have decided to remove the cannons, which I can do since I haven't glued down the grates, and go with closed gunports on the lowest deck. By the way, does anyone know when closed if the gunport is planked, and is the planking horizontal of vertical? Next, I searched through the kit"s materials looking for the gunport hinges and other hardware I would need for the gunports. There weren't any so I had to order some. While doing this search I also realized the material for the wales was short. The kit's wales are 8mm x 3 mm and are meant to be fastened directly to the bulkheads. That is the way I installed the 2 lower ones, but didn't like the results. In addition, I wasn't really satisfied with the finish on the lower part of the hull, even though it looks good in the picture above. I finally decided on the following actions: 1. Remove all lower level cannons and create closed gunport covers. 2. Re-sand the entire hull, removing the finish and sanding the wales down to the planking level. 3. Order thinner wale material and install on top of the planking level. This kit continues to be a problem for me, but I am determined to end up with a beautiful ship. It is no surprise to me that I cannot find any completed build log of the WvH. It is a struggle. Below is a sad picture of how the ship looks today. I promise it will look better in the future.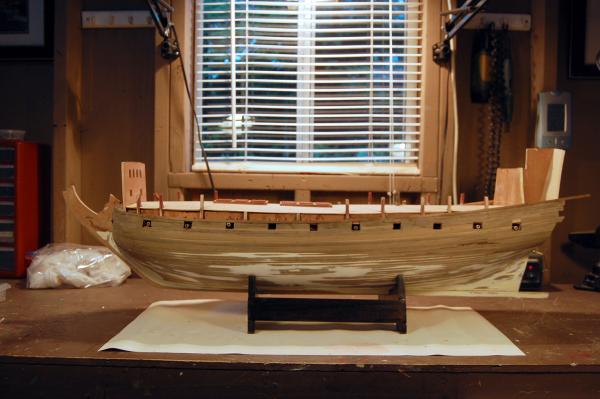
-
Wappen von Hamburg by andy - Corel
andy replied to andy's topic in - Kit build logs for subjects built from 1501 - 1750
Hi Piet and Josh, Thanks for responding after my long absence from the forum. One of the habits I need to develop again is checking this build log often so I respond more promptly. I have had to spend some time reorganizing my ship building area and getting my tools sorted out. That, plus the Holidays, slowed down the actual start of the renewed building effort. I have completed the planking of the second deck, and and I have just re-started hull planking to bring is up to the level of the second deck. Pictures will follow soon. Piet, I would be happy to help in any way I can with your build. -
Wappen von Hamburg by andy - Corel
andy replied to andy's topic in - Kit build logs for subjects built from 1501 - 1750
Hi Everyone, It's been almost a year since my last post, but believe it or not, I'm still here. Shortly after my final post last January, I ran into another frustration with the build and realized I wasn't having fun anymore. I had been toying with the idea of building an N-scale model railroad and decided the time had come to store away the Wappen von Hamburg and start on a railroad project. That project is now complete, picture below, and it is now time to resume work on the ship. I had packed everything away very carefully, and the ship is just as I left it. I reconfigured my shed from a railroad workshop to a shipbuilding boatyard and am ready to restart the build. I am taking some time to reacquaint myself with the instructions and the immediate next steps and will be posting some pictures soon. As part of the reacquainting process, I have carefully reread this build log, and am amazed, once again, by all the helpful comments and information I received from around the world. To all of you, I apologize for the interruption.
-
Wappen von Hamburg by andy - Corel
andy replied to andy's topic in - Kit build logs for subjects built from 1501 - 1750
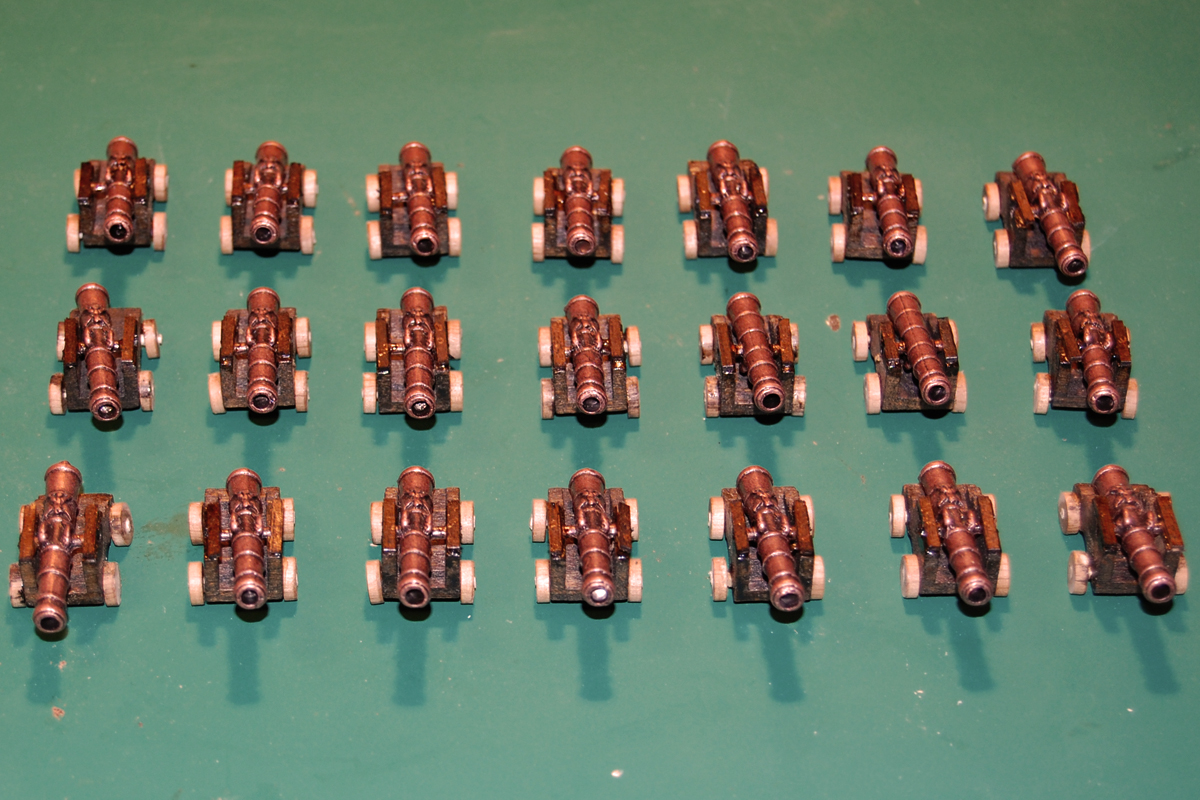
Hi everyone, I considered using blackening solution on the canons but decided I liked the way they looked straight from the kit. They are somewhat darkened and not the bright brass normally found in kits. I substituted little strips of wood for the bridge hardware missing from the kits and sanded down toothpicks for the wheel axles.. Since the cannons for the lower deck are completely covered, it will not be noticed, but I ordered the missing hardware for the upper deck cannons. All of the deck furniture and cannons on the lowest deck will be glued down and completely covered, so if anything comes loose it probably is gone forever. Once that is done you don't really want the ship turned up-side-down so I decided to paint and finish the hull below the waterline now. This is not part of the instructions, nor have I seen anybody else do this, but it seemed best to me. I hope I don't regret the decision. After painting I glued everything down to the lowest deck. The next steps will be to add up to six planks to each side of the hull and cover the lowest deck with the next one.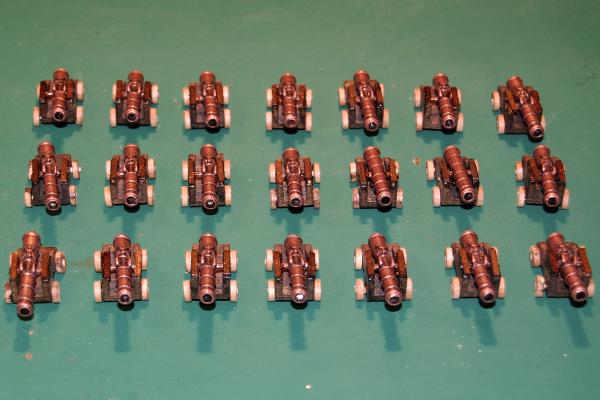

-
Wappen von Hamburg by andy - Corel
andy replied to andy's topic in - Kit build logs for subjects built from 1501 - 1750
Hi Josh, On a single planked hull, you don't really want to use nails and leave a hole in the plank, and trying to clamp each plank would be nearly impossible. The push pins you're talking about are a really great solution, and I have used them on my Wappen von Hamburg. I highly suggest you get yourself a couple of packages of them and use them on your build. Andy -
Wappen von Hamburg by andy - Corel
andy replied to andy's topic in - Kit build logs for subjects built from 1501 - 1750
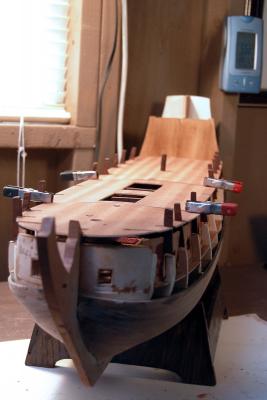
Hi everyone, As promised, now that the Holidays are over I am making more progress on the ship. The lowest deck o the Wappen will eventually be completely covered and viewable only by peeking through the gun ports, but I have decided to treat if as though it were completely viewable. I have taken time on the deck fittings such as the grates and capstan, and have planked the deck. I have not yet glued anything down which is why the gratings seem to be out of line. I have tried several approached to simulate the deck caulking with less than perfect success. This time I used a Bic Mark-it with a beveled edge, and it worked the best so far. I had very little leakage into the plank itself, and if I tightly clamped up to 10 planks together, I was able to do them all at once. I then attached the inner walls to the lower deck. Before I went any further, I decided I had better trill fit the next deck. I fitted all the deck supports and then checked to see that the actual deck plates fit. After taking the pictures below, I took the whole structure apart so I can continue working on the lowest deck. Je suis Charlie Andy

-
Wappen von Hamburg by andy - Corel
andy replied to andy's topic in - Kit build logs for subjects built from 1501 - 1750
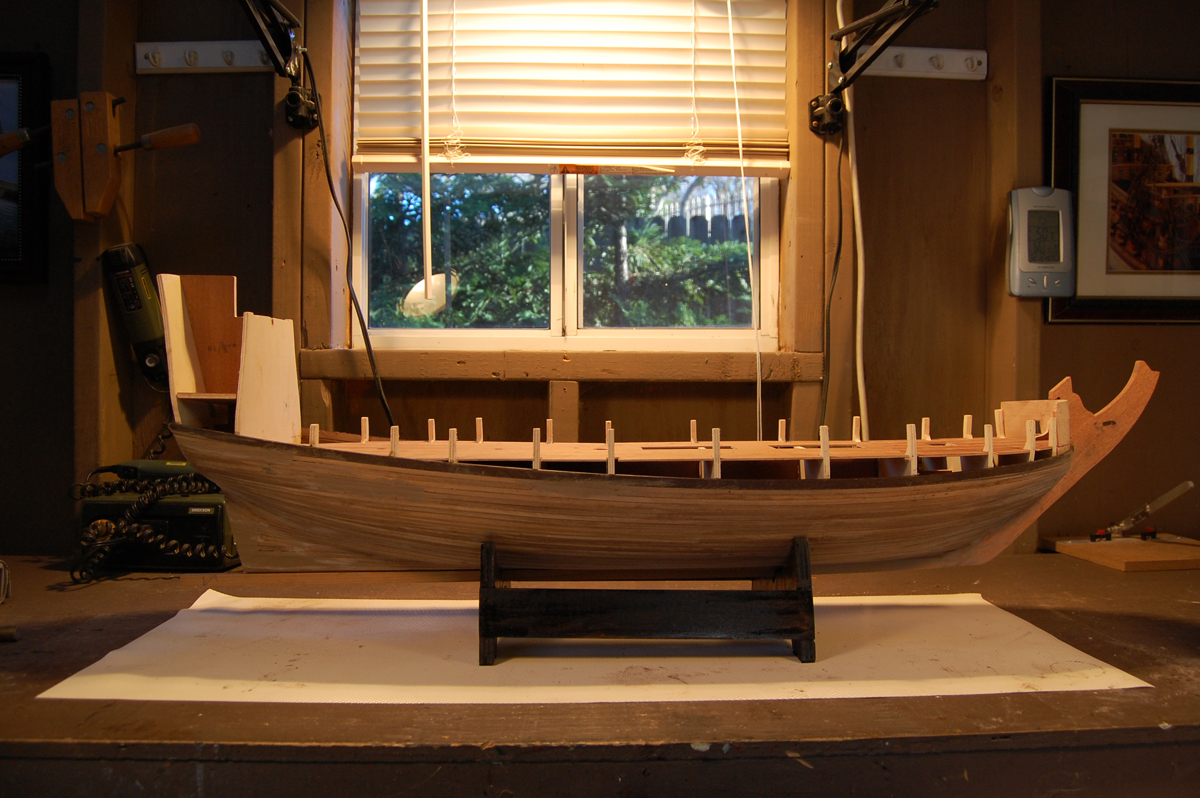
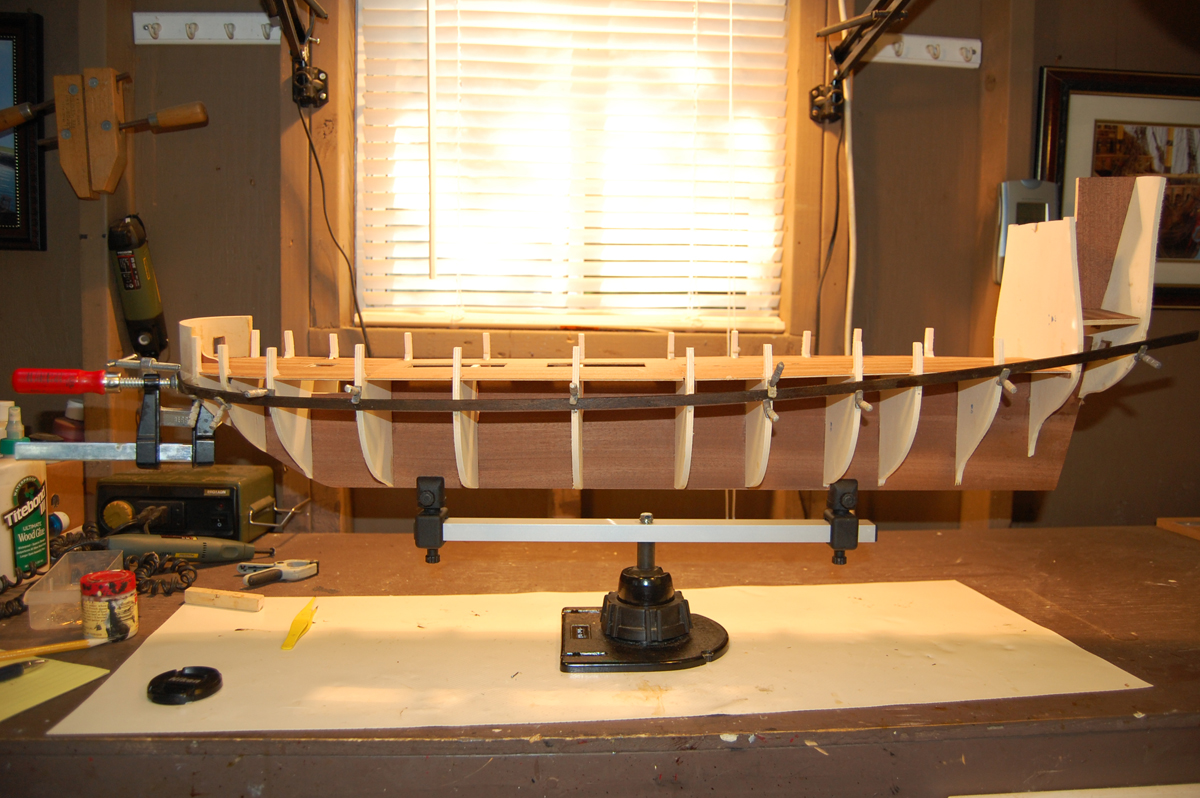
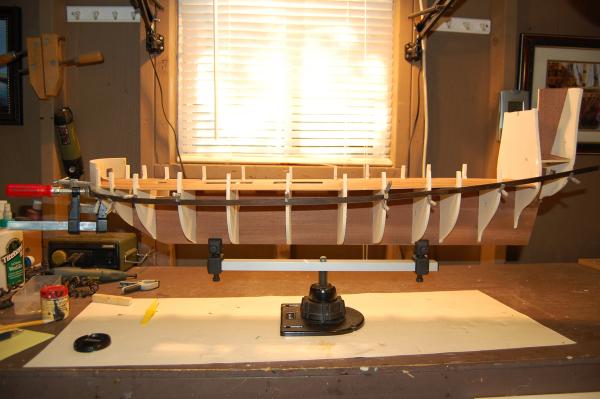
Happy New Year Everyone, Its New Year's day and I'm starting 2015 in the right way by finally making a new post. Not much ship building has taken place since Thanksgiving due to travel, holiday family obligations and general merrymaking. Starting now, though, things will be back to normal and more rapid progress will take place on the Wappen von Hamburg. As of today the planking below the waterline has been completed and I have constructed a stand, from scratch, so the ship can sit upright. I'm giving myself a 7.5 out of 10 on the single layer planking process. I had hoped I could do a more perfect job. but I found the process quite challenging. I'd say I could do better next time, but if I have my way, there won't be a next time. The ship is eventually painted white below the waterline. so thanks to lots of sanding, walnut wood filler, and a good undercoat, I think it will look fine in the end.
-
Wappen von Hamburg by andy - Corel
andy replied to andy's topic in - Kit build logs for subjects built from 1501 - 1750
Hi Guys, Once again, thanks for all the comments. Andy -
Wappen von Hamburg by andy - Corel
andy replied to andy's topic in - Kit build logs for subjects built from 1501 - 1750
Hi Max, Thanks for the comments. This morning I worked on the starboard and port side windows. I played around with the original image and tried to make it look like you were viewing the same cabin from the side. It turned out pretty good, and I am also eager to see how the windows will look on the ship. Andy -
Wappen von Hamburg by andy - Corel
andy replied to andy's topic in - Kit build logs for subjects built from 1501 - 1750
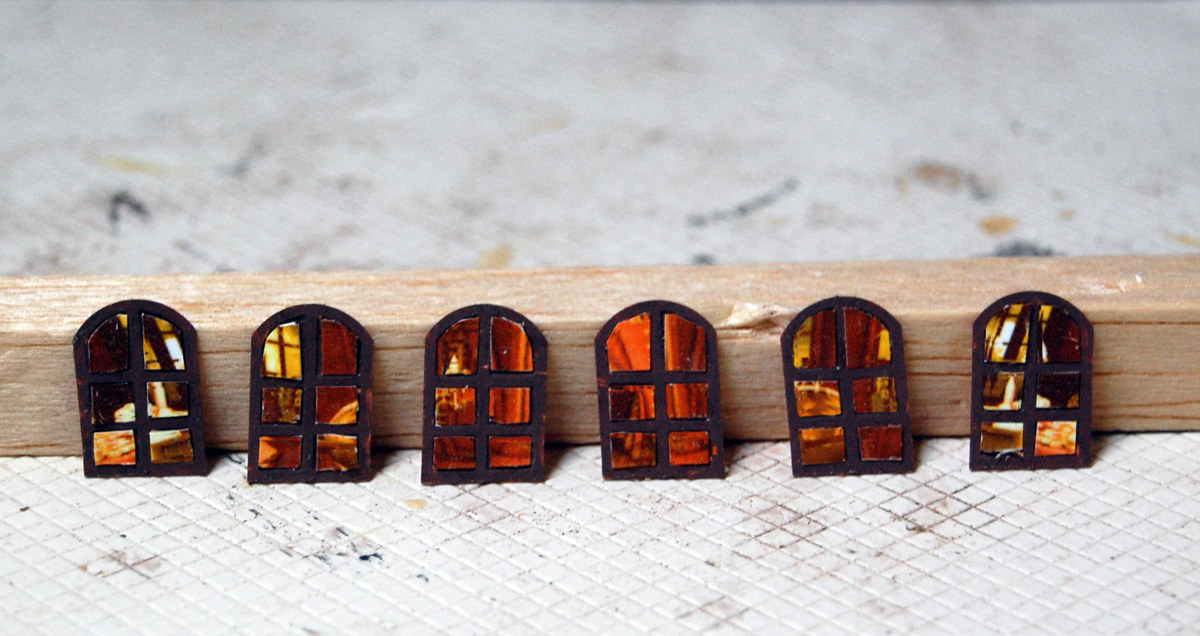
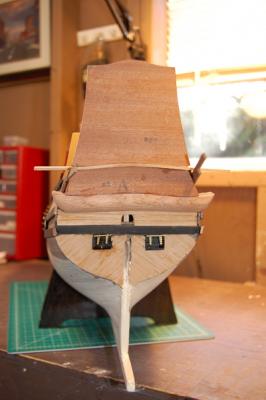
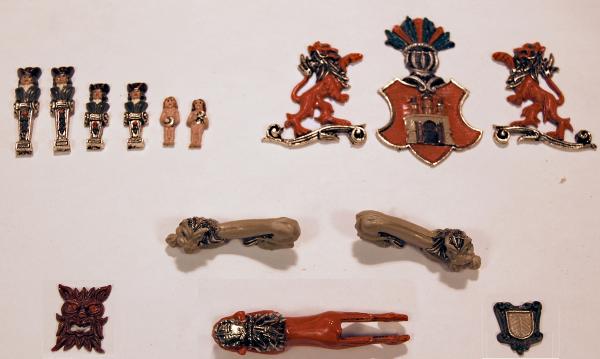
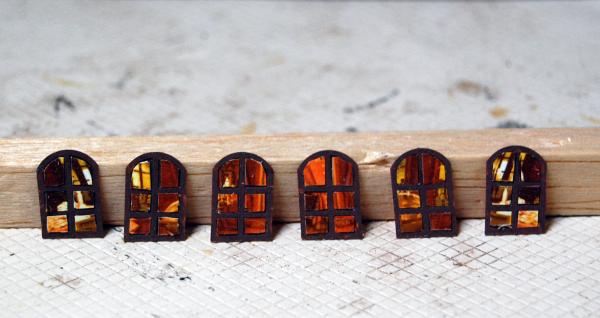
Hi Everyone, Planking on the Wappen von Hamburg continues on its slow but steady pace. Because of the way I am securing the planks to the bulkhead, and the fact that I want to give the glue an overnight to dry, I can only do 2 planks a day. I have 14 planks left on each side so I will be done below the waterline in 2 weeks. The slow progress on the planking has given me a chance to accomplish other tasks. There are many castings, both large and small to be painted. Although I have used spray primer on 2 of the larger figures above, I wanted to leave some of the brass showing on many others. I thoroughly degreased those, and using 2 coats of Hunbrol paints, they turned out fine. I also applied a coat of satin varnish as protection. Some examples are shown below. In most photos I've seen the stern winnows of the ship have simply been painted a dark color, or in Xander's case covered with small cutout pieces of an old CD. I wanted to try something different. I found an old photo of an actual sailing ship's stern cabin. Using Photoshop I overlayed the stern window casings and cut out everything but what you would see through the windows. I then printed that out, and using a razor blade cut out the individual pane-views and glued them to the casings. The results are below.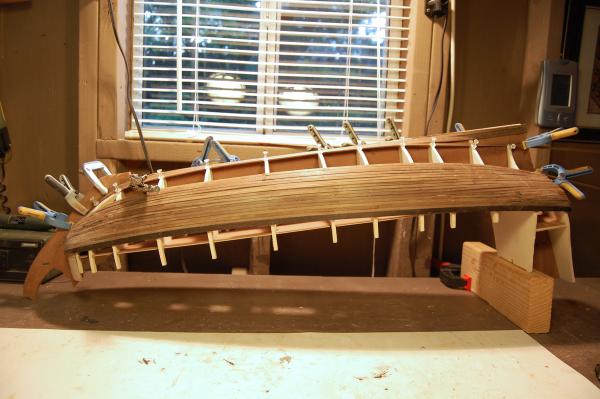
-
Wappen von Hamburg by andy - Corel
andy replied to andy's topic in - Kit build logs for subjects built from 1501 - 1750
Hi Rob, Thanks so much for the timely tip. I was just to that point with the planking, and was going to figure out my own way to anchor the planks at the bow. I'm not quite sure how I missed the parts you mentioned in the drawings, but they went right over my head. I have installed the bow blocks, and they are a much better approach than I would have come up with. Once again, thanks a lot. Andy -
Wappen von Hamburg by andy - Corel
andy replied to andy's topic in - Kit build logs for subjects built from 1501 - 1750
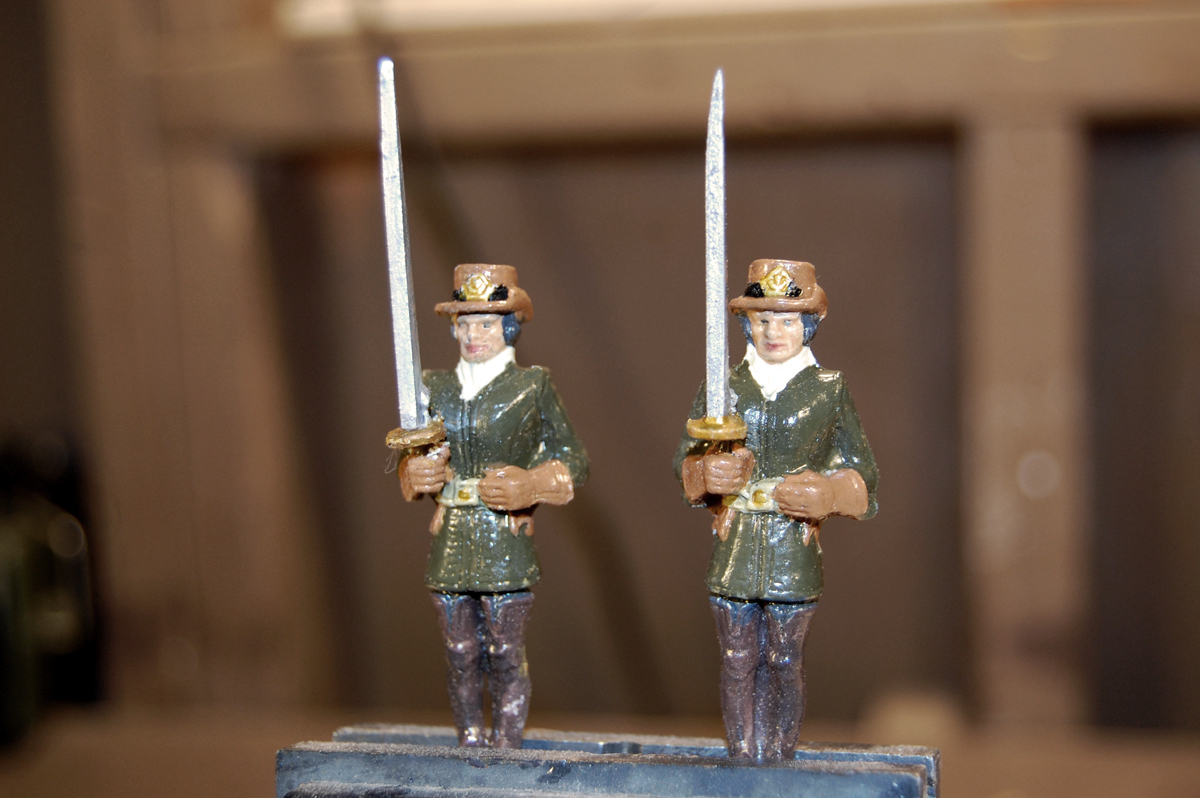
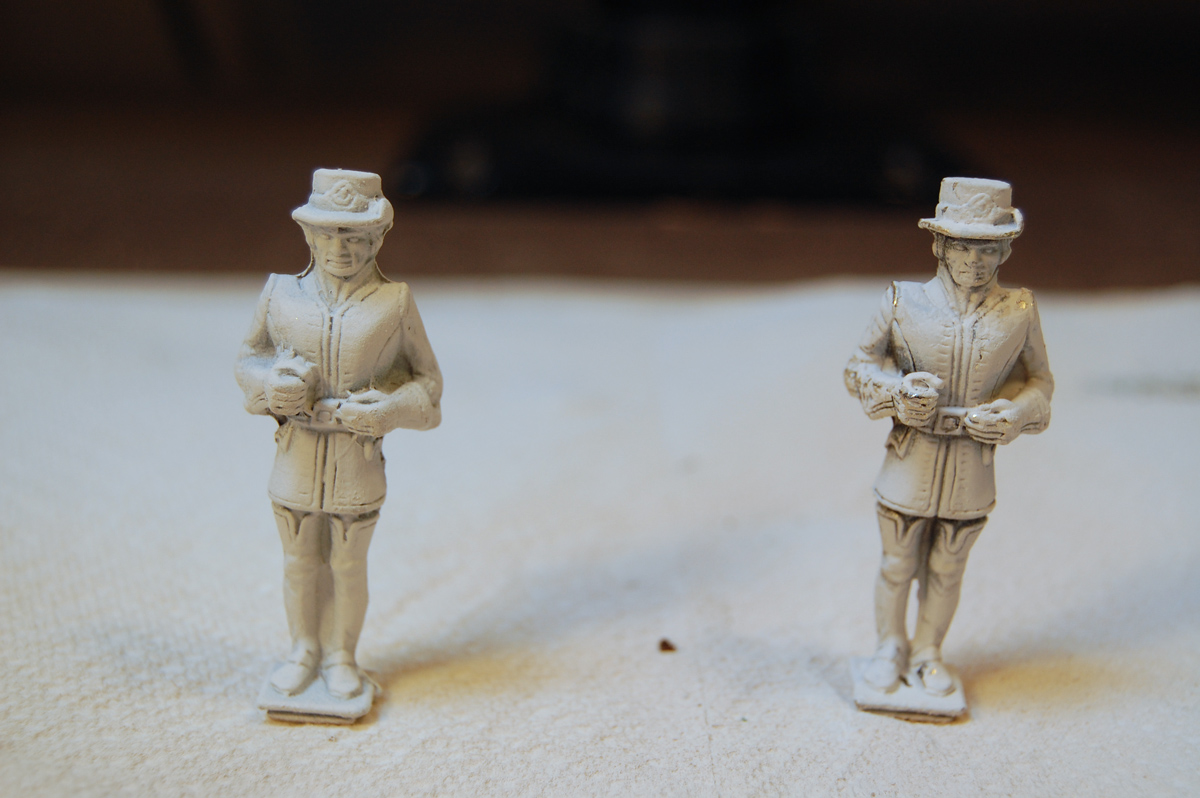
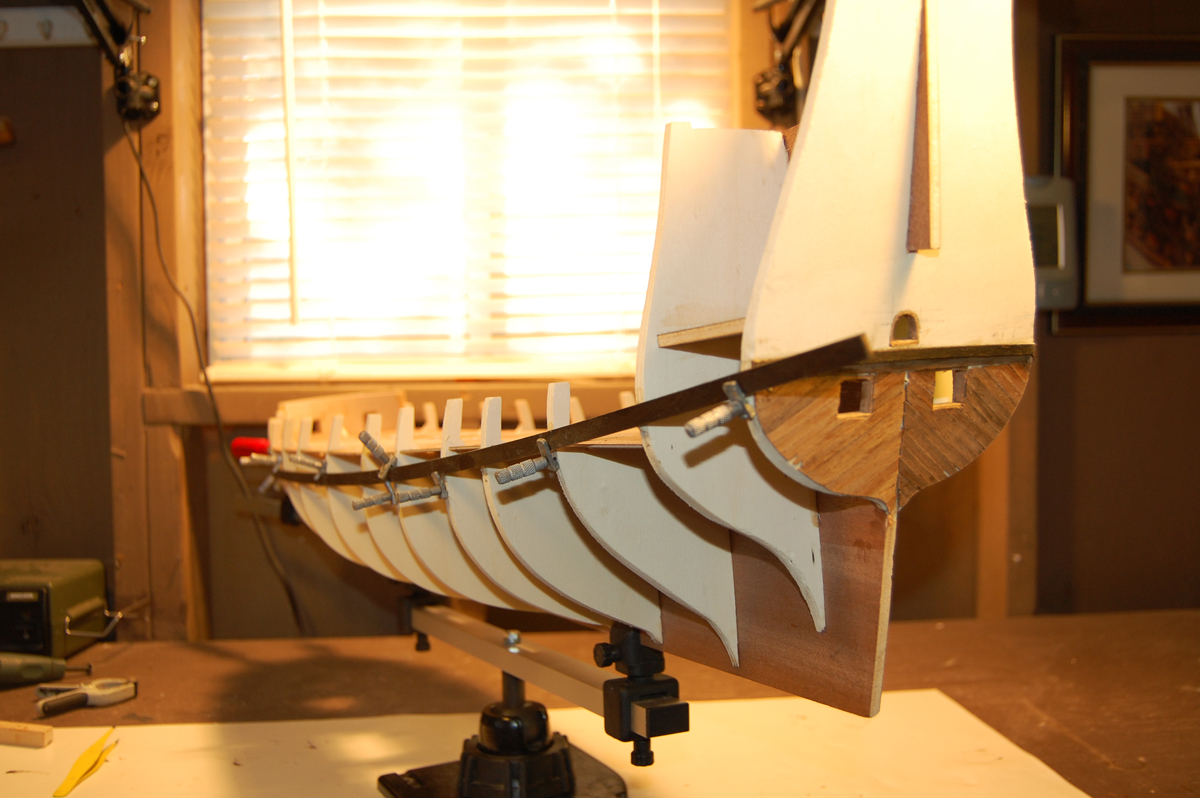
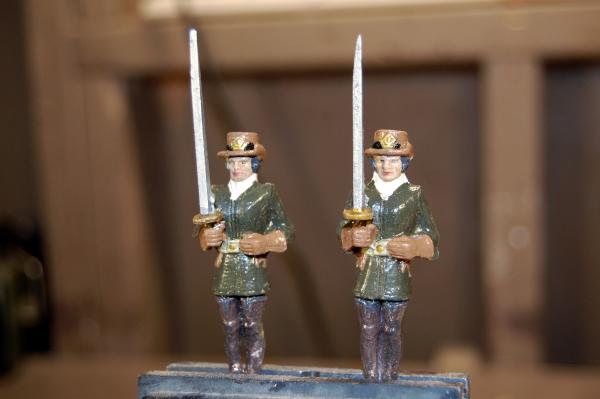
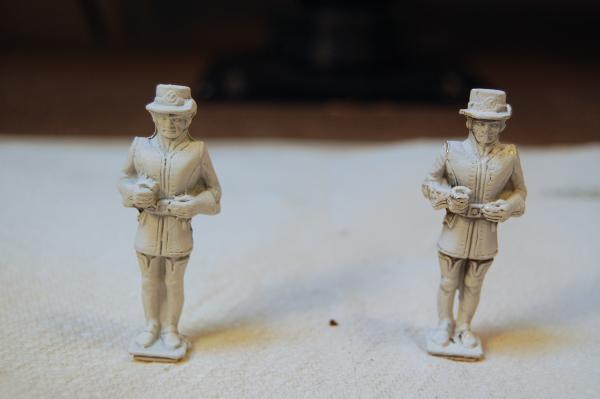
Hi All, I'm having second thoughts about this single layer hull planking. I'm taking as much care as I know how to take, and using all the tricks I have learned over the course of building several ships, but I'm not sure if it will be good enough. Time and sanding will tell. I'm taking a certain amount of comfort in knowing that I can order walnut timber for a second layer of planking for under $30. I'm not sure of the correct name, but I added the additional bow piece way before indicated in the directions and before shown in Xander's website. As shown buy the clamping above, it will help securing the planks at the bow and assure a proper fit. Of course, it didn't fit correctly on the keel piece and getting the complex curve to fit was quite the job. While waiting for planks to dry I have completed several small jobs shown below. The men above will stand at the stern of the ship. They are about 3 inches tall and did not come with the swords. I made the from wood.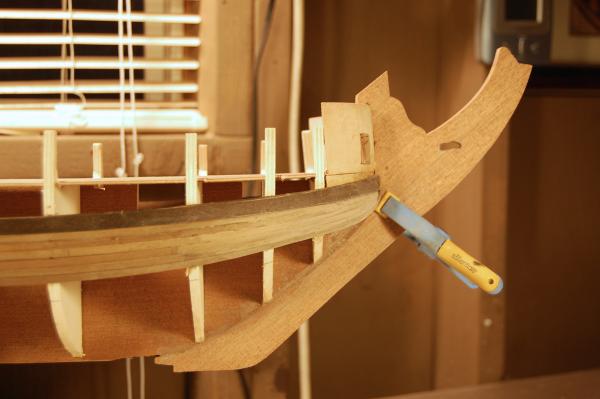
-
Wappen von Hamburg by andy - Corel
andy replied to andy's topic in - Kit build logs for subjects built from 1501 - 1750
Hi Everyone, I did some figure painting today and it went well with the primer. Pictures soon. I don't always use the little vice grips, but sometimes on really difficult bends they are the only things that are strong enough to hold the plank where I want it. I try to judge the pressure that's required, and if it's a lot, I put a thin piece of veneer strip between the plank and the jaws. -
Wappen von Hamburg by andy - Corel
andy replied to andy's topic in - Kit build logs for subjects built from 1501 - 1750
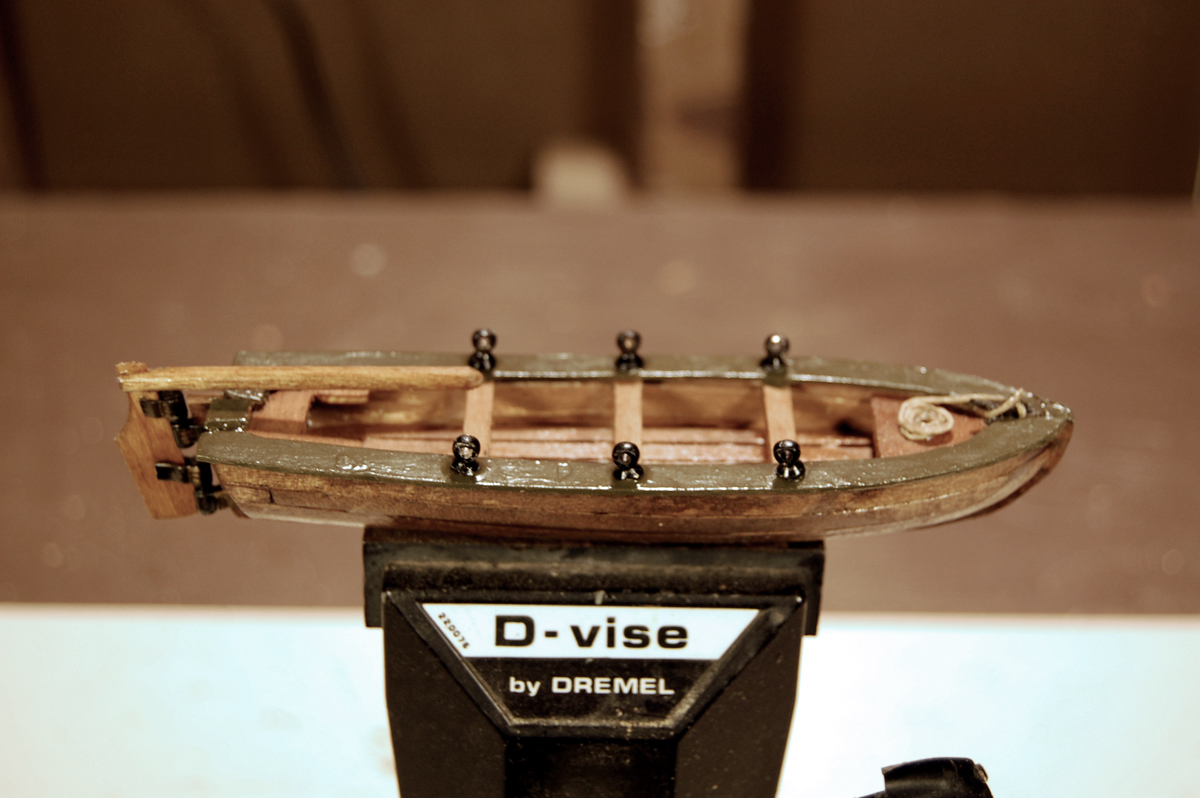
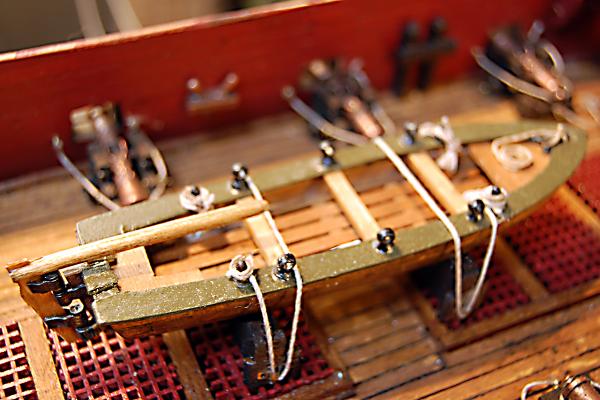
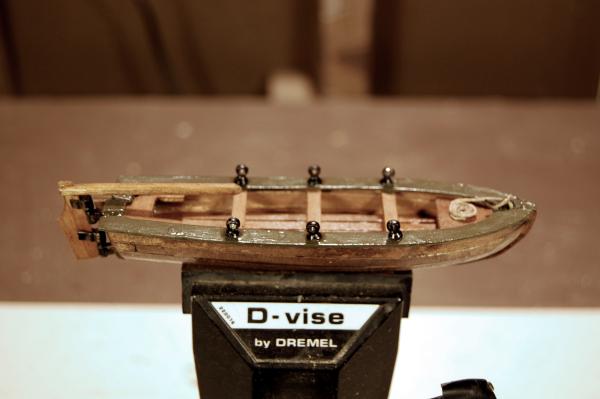
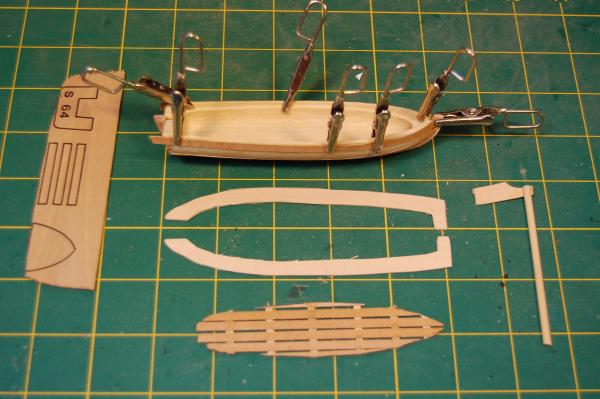
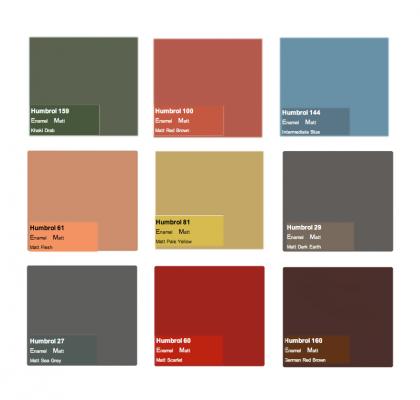
Hi All, The planking continues on its slow progress. i have not experienced any real problems except I can only do 1 or 2 planks per day. I am working on customizing the lifeboat. which basically only came with the shell and some rudimentary seats and stuff you had to cut out. So far it is going well also. I started working on painting 2 of the larger figures today, But first, I examined the 15 wonderful photographs of the WvH linked above. Using Photoshop, I sampled all of the colors required and then went to the Humbrol website and found a color chart of all of their matte colors. I picked the closest ones to the chart I had made and added them to my Photoshop file. The result is below. Of course, I ordered the required colors. After reading Xander's build log I thought after a thorough degreasing I could paint directly on the figures. I didn't like the result, so I washed them clean and used some primer. We'll see how that goes.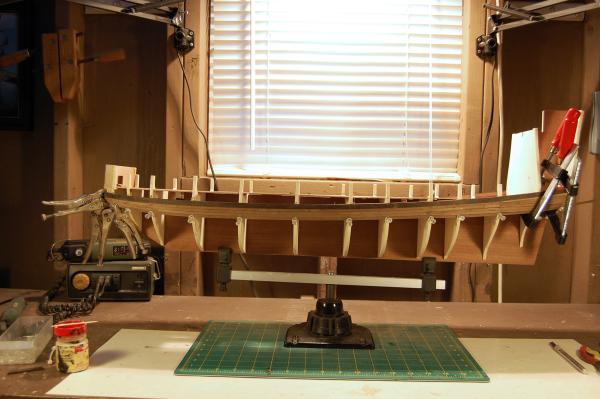
-
Wappen von Hamburg by andy - Corel
andy replied to andy's topic in - Kit build logs for subjects built from 1501 - 1750
Hi JP, You may very well be right, but I have carefully checked the drawings and Xander's website. I seem to be in line with what she has done, and she never mentioned a problem. In any case, it's a little too late since I have already started planking. I'll just have to live with the consequences. Planking is coming alone OK, but is really slow. Because of the way I am pinning the planks, no holes through the wood, at most I can do 2 a day. I expect planking below the waterline will take me up to 2 months. In order to fill out the time, I have started work on customizing the lifeboat, and will soon start painting many figures. I'll be posting some pictures soon. Andy -
Wappen von Hamburg by andy - Corel
andy replied to andy's topic in - Kit build logs for subjects built from 1501 - 1750
Hi Everyone, I finally took the time to visit the home page of the website and realized the model was not in your living room, but in the living room of Dr. Michael Czytko, the author of the website. Sorry for the confusion. Andy -
Wappen von Hamburg by andy - Corel
andy replied to andy's topic in - Kit build logs for subjects built from 1501 - 1750
Hi Ferit, When you first sent me the link I thought the model was scratch built and in a museum, or there was a kit builder in the world that I didn't know about. I never suspected it was in your living room! Thank you for all of the information. It is a humbling experience for we mere mortal model builders to see workmanship like that. Andy -
Wappen von Hamburg by andy - Corel
andy replied to andy's topic in - Kit build logs for subjects built from 1501 - 1750
Hi guys, Thanks for all the great information, but the real question I should have asked is, "Is the ship shown in the website scratch built or a kit, and if a kit, whose?" If the kit is scratch built, the carvings on the stern are terrific. Andy -
Wappen von Hamburg by andy - Corel
andy replied to andy's topic in - Kit build logs for subjects built from 1501 - 1750
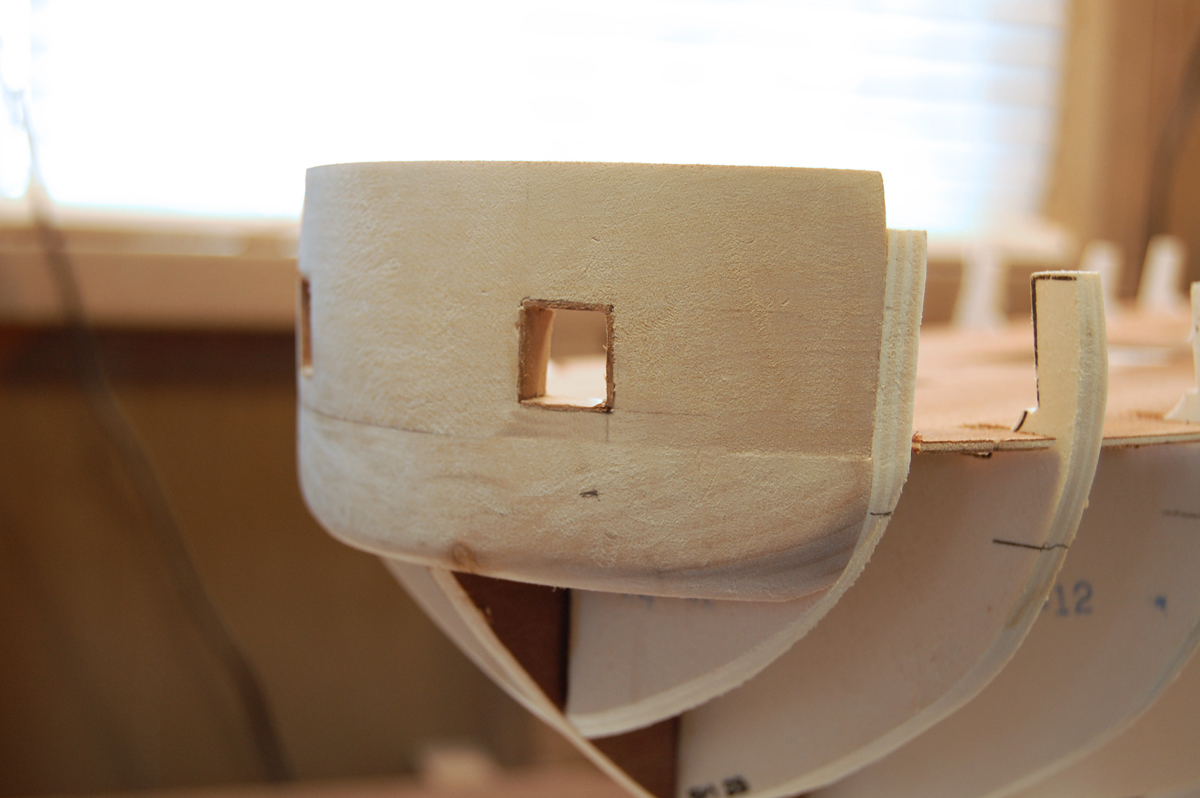
Hi Everyone, There is a link on the above post which shows a Wappen von Hamburg very different from the one I am building. Does anyone have any information about what this is? I spent the morning attaching the lower wale to the bulkheads. I knew this was going to be a critical job, and I had spent quite awhile trying to figure out how to do it, but my approach didn't work. I then tried 2 other ways, but they didn't work either. The problem was that the wale strip was so thick and springy that even though I had bent it, it was still pulling out any fastening method I used. I kept thinking, "Oh no, if I don't get this done the whole build is going to be ruined!", but I finally stumbled across an approach which worked. I figured I'd better stop for the day and let the glue dry. Andy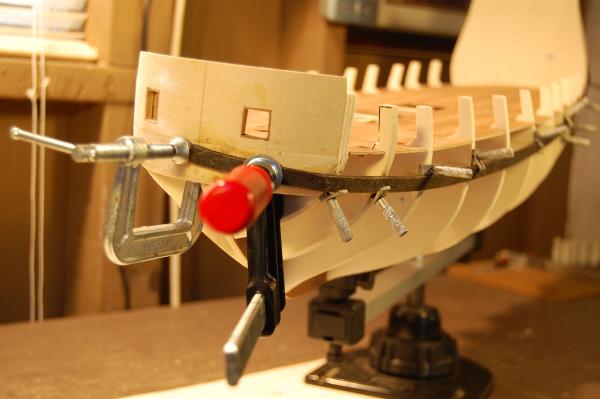

-
Wappen von Hamburg by andy - Corel
andy replied to andy's topic in - Kit build logs for subjects built from 1501 - 1750
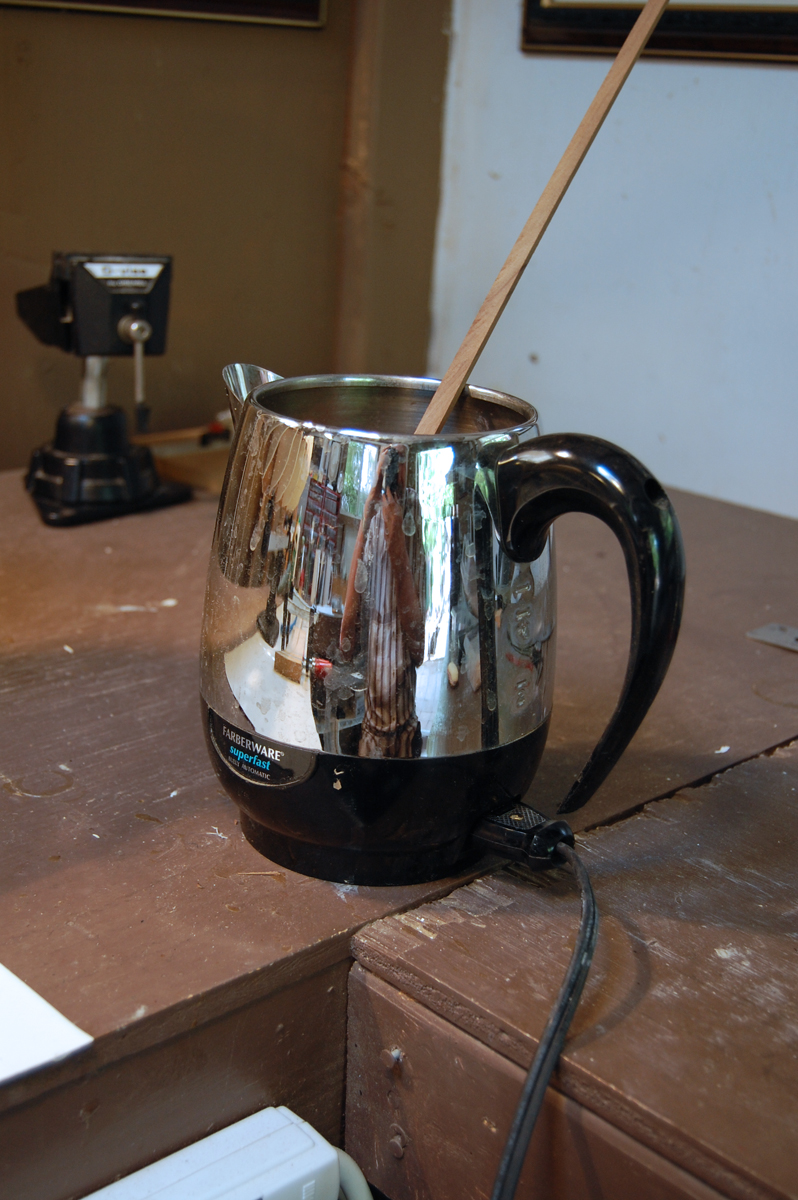
Percolator users of the world, unite!!! -
Wappen von Hamburg by andy - Corel
andy replied to andy's topic in - Kit build logs for subjects built from 1501 - 1750
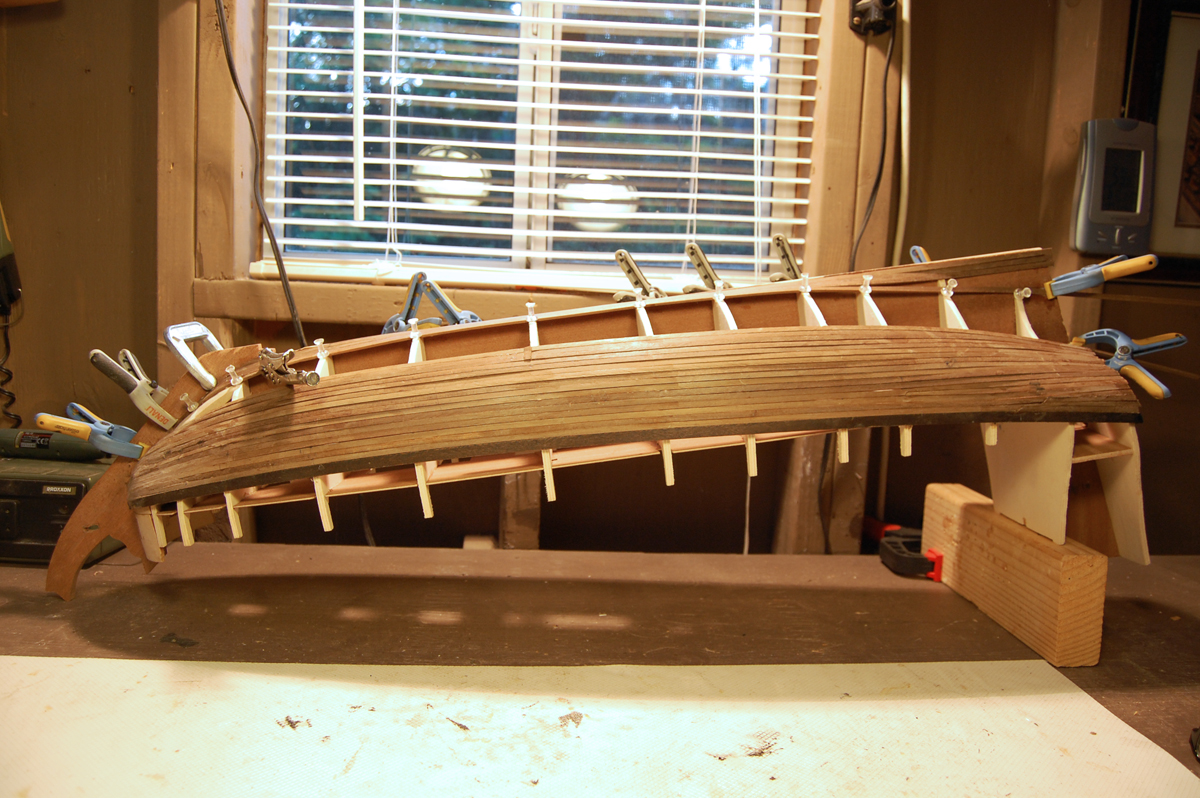
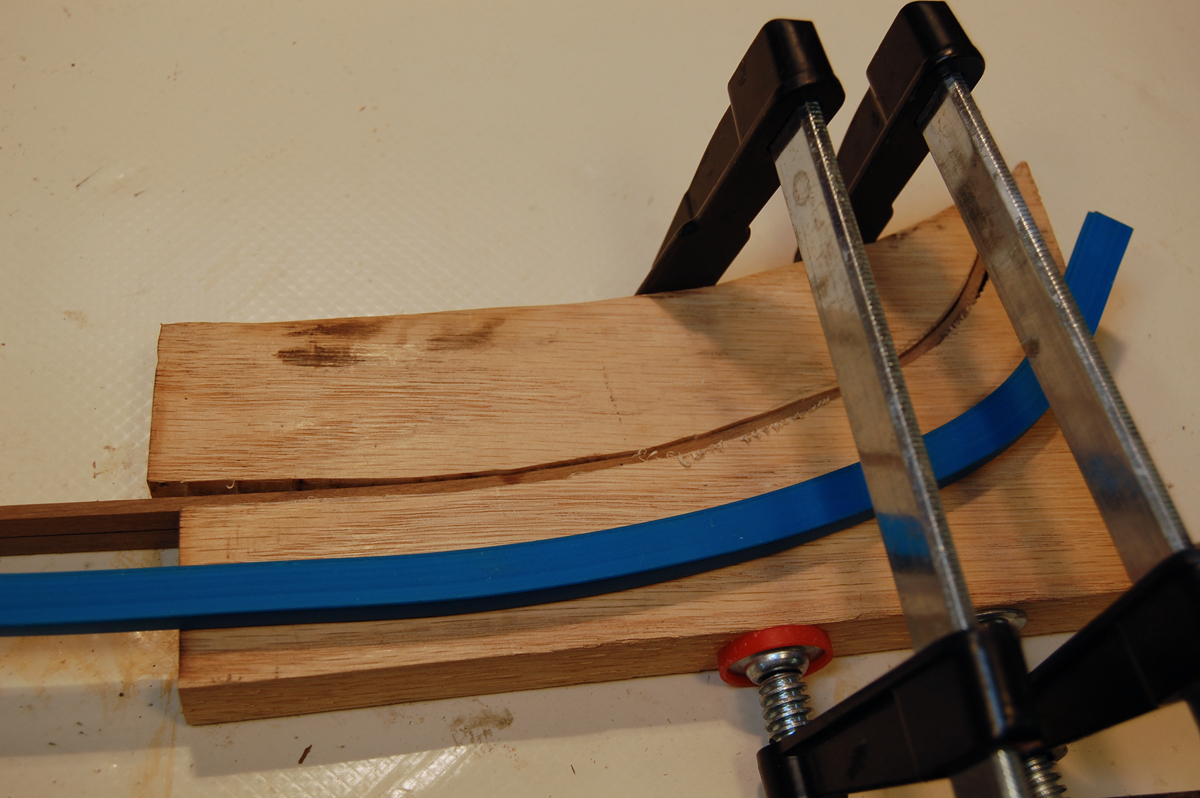
Hi, Studying the instructions I realized the lowest wale is a walnut strip 8mm wide by 3mm thick, and it must curve around the entire bow. I was trying to decide how and where to start the single planking, but given the size of the wale, I thought I'd better start there. I never have tried to bend such a big strip around a sharp curve like that, and if I couldn't get that done, ship building was going to take a down turn. Compared to the wale the regular planks would be a piece of cake. I may have an unusual way of bending planks, and I didn't know if it would work on the wale. I have an old small coffee percolator and I start by getting water boiling in it and sticking in the planks for 30 minutes. I bought a very handy little tool on Amazon. It is the blue strip in the photo below, and will bend around anything and then hold its shape. I use it to determine the shape required on the bow, and then transfer that shape to a piece of scrap wood. I then cut along the shape line with a hand held jig saw making a 2 piece bending jig. I then take the wood that has been soaking, and gently start bending it to conform to the shape, finally clamping and letting it dry overnight. I really didn't think the 2 wale strips would bend without breaking, so I went very slowly, holding my breath all the way. All went well, and we will see how it turned out tomorrow morning. Prior to any soaking and bending, I sanded all bulkheads to provide a smooth curve for the planks.