DONATION DRIVE - SUPPORT MSW - DO YOUR PART TO KEEP THIS GREAT FORUM GOING!
×


andy
-
Posts
96 -
Joined
-
Last visited
Content Type
Profiles
Forums
Gallery
Events
Everything posted by andy
-
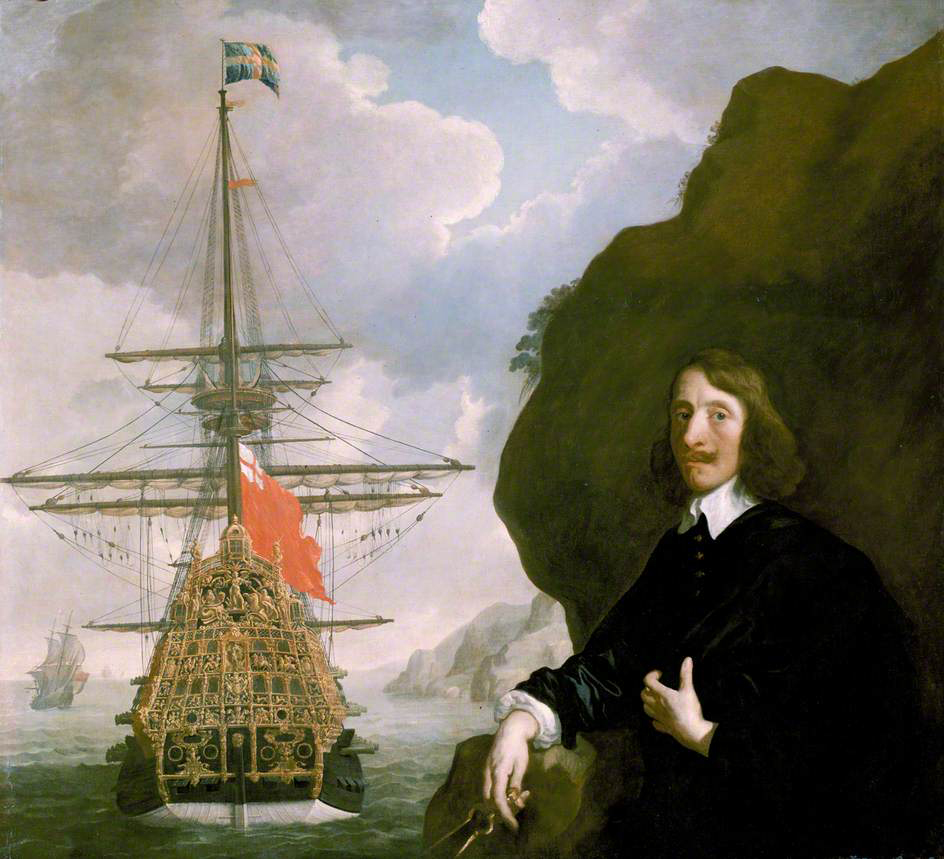
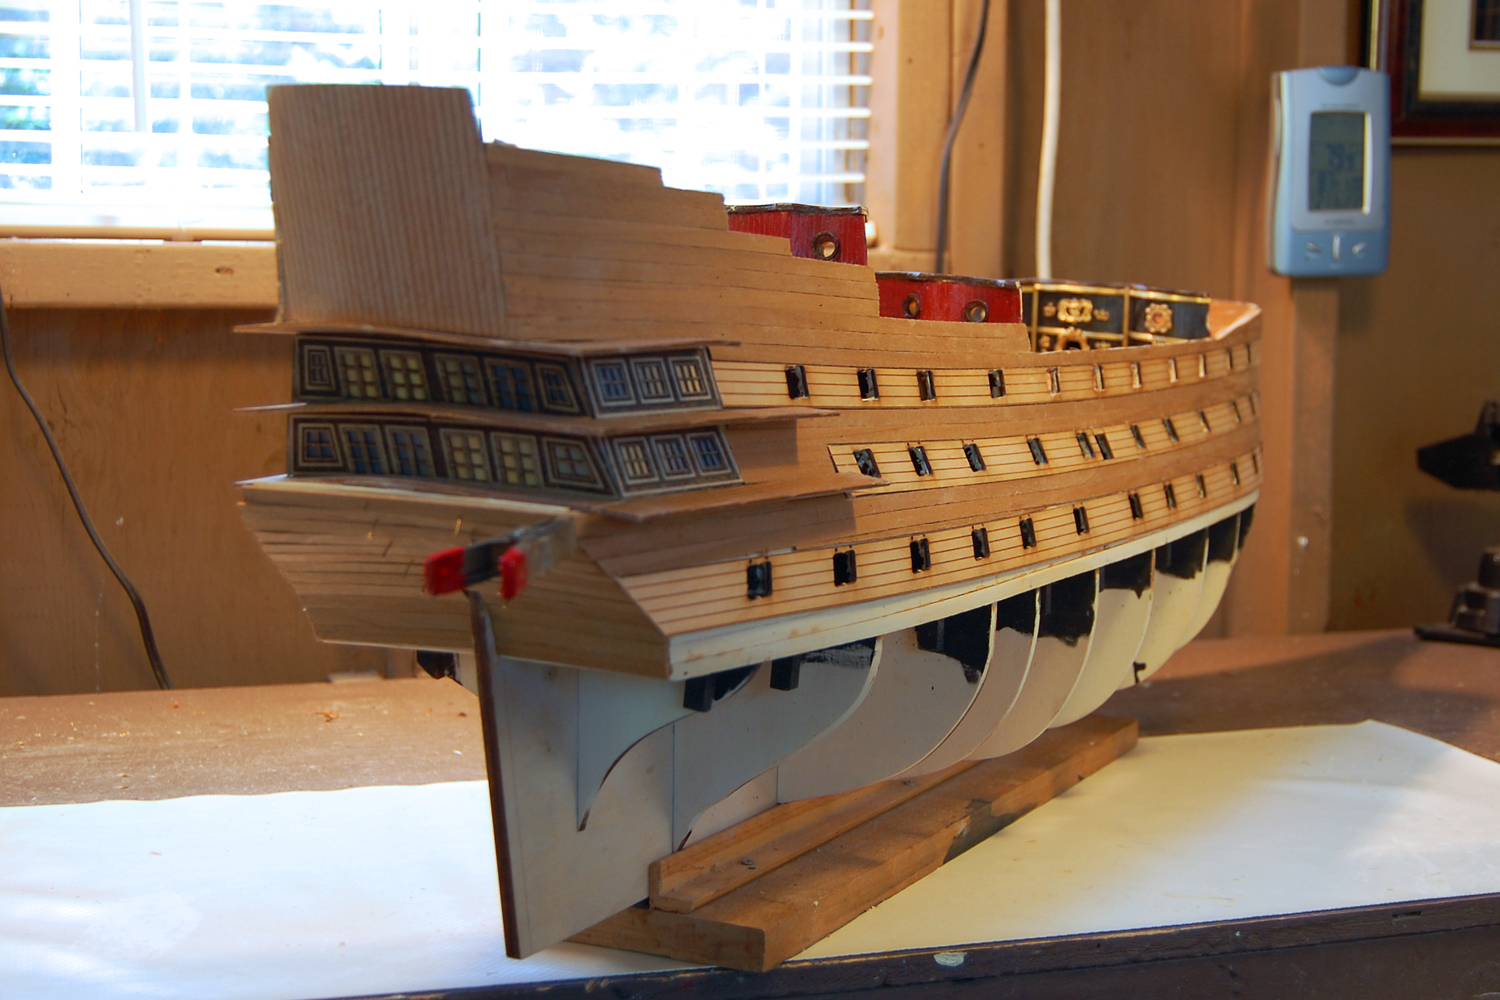
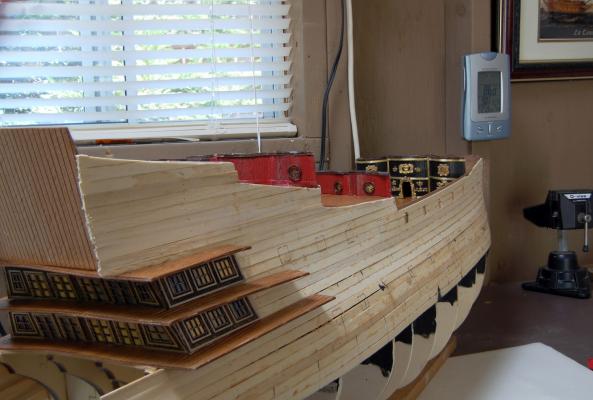
 After much gnashing of teeth, I have finally finished the planking and placement of the wales. It is safe to say that planking is not my favorite ship building activity. In spite of all my worry, I think it has turned out OK. Not perfect like I had hoped, but OK. I decided to complete the planking and wales before I did any finishing because I trust the steadiness of my hand with a paintbrush more than my hull building skills. Now it is finally time for staining and painting. As can be seen already, I have decided to paint the upper hull black as described by Thomas Heywood in his 1637 article, A True Description of His Majesties Royall Ship, where he reports that King Charles I said, "all which workes are gilded over, and no other but gold and blacke to bee seene about her." I am also going to depart from the other excellent builds on this site and paint the lower hull white, as shown in the 1645 painting of the ship and Peter Pett by Peter Lely. I am undecided about the middle section of the hull. Almost all of the models I have seen either simply varnish the walnut planking or stain the section with a lighter stain such as Golden Oak. I am thinking about going with a darker stain, again as shown in the Lely painting. Anybody have any thoughts? Lely Painting
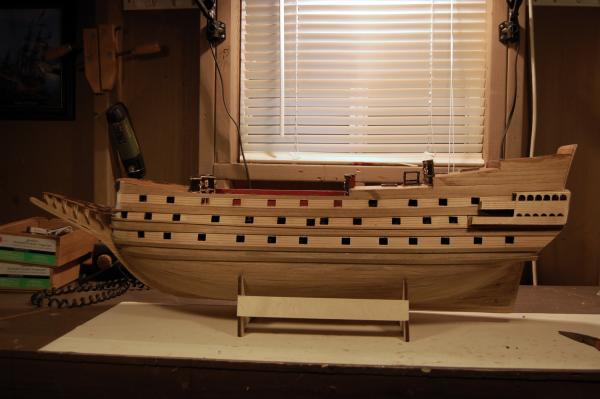

-
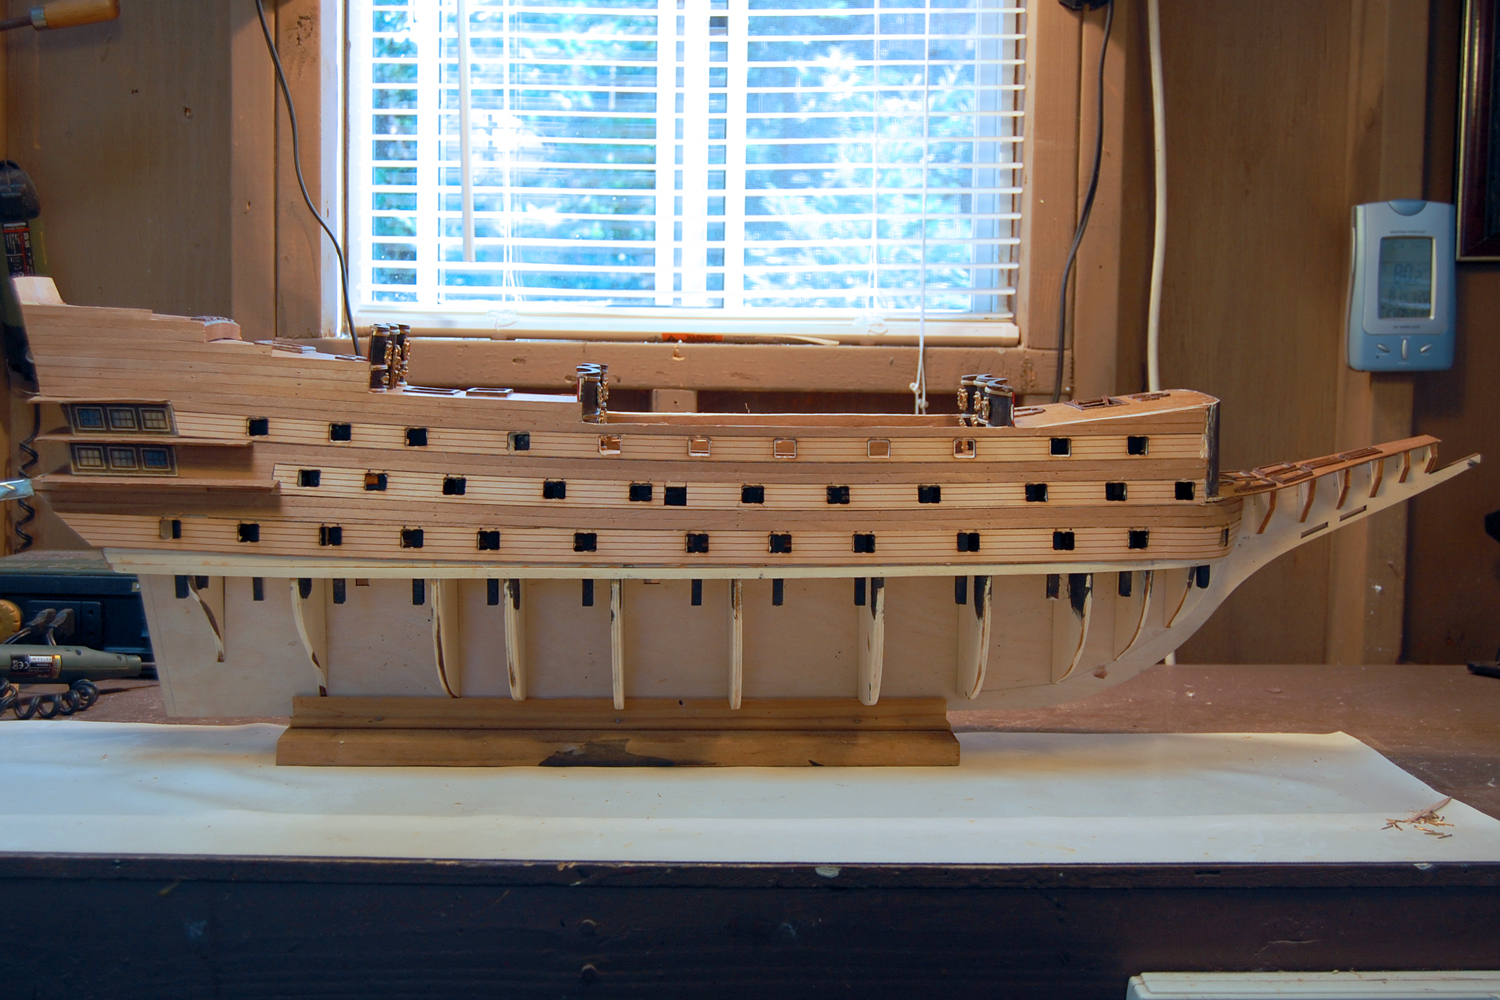
Thanks Gary, and yes Denis. I have already started the second planking on the lower hull. So far it is going pretty well. Denis, I know what you mean about the handrail pieces. In fact, a couple were split when I opened the box. I have removed them all, repaired the broken pieces and stained them. I have set them aside waiting for installation.
-
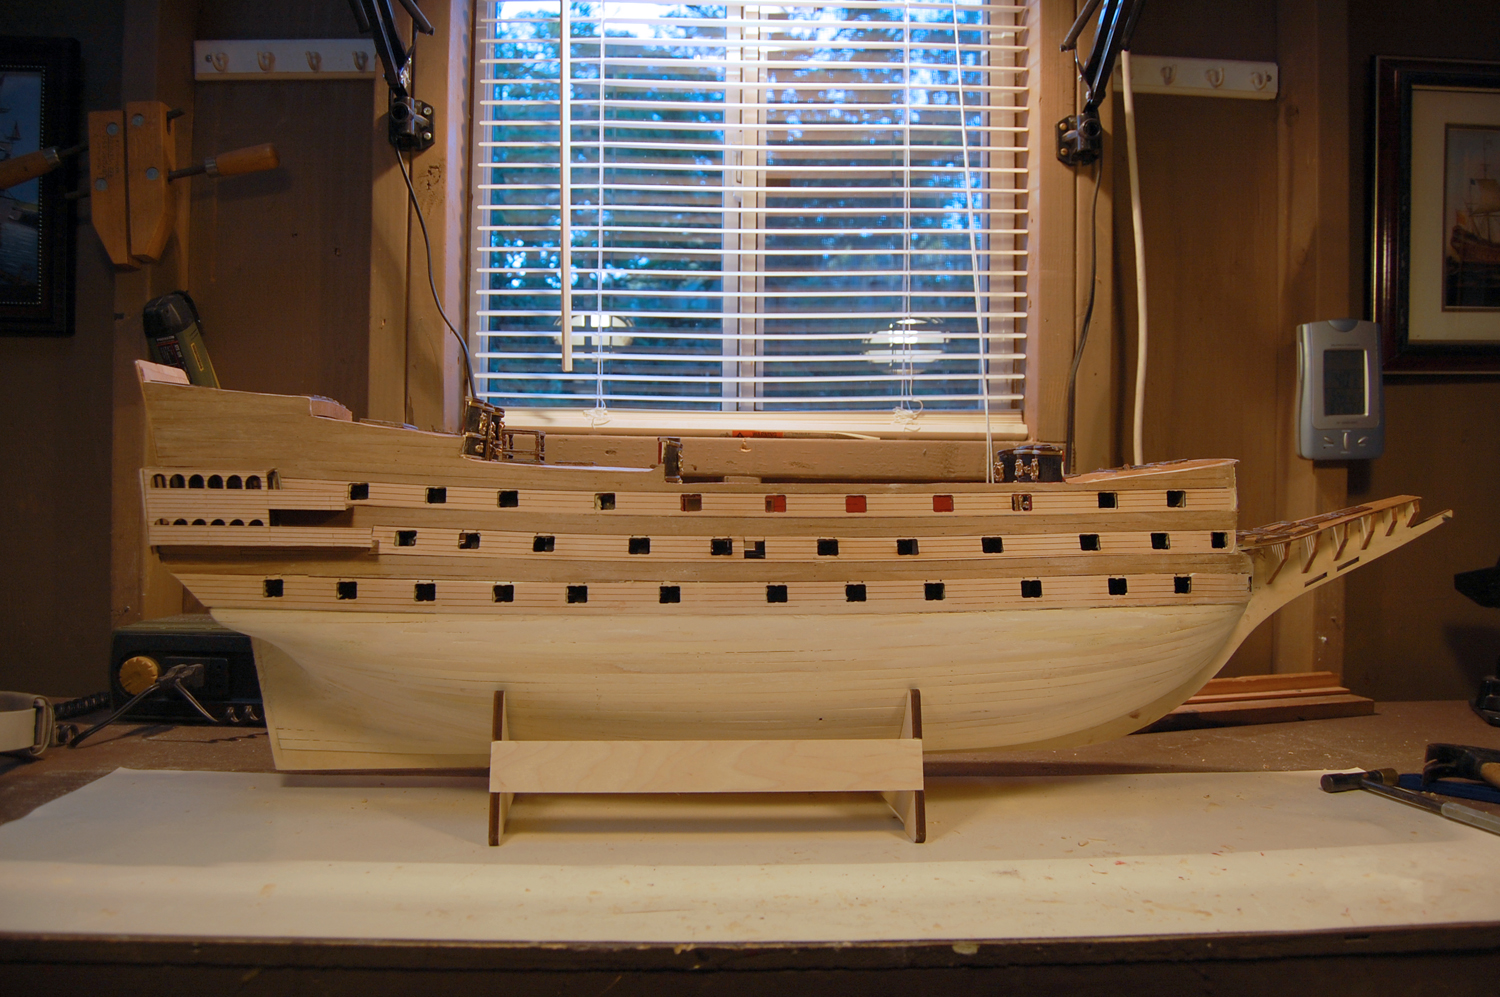
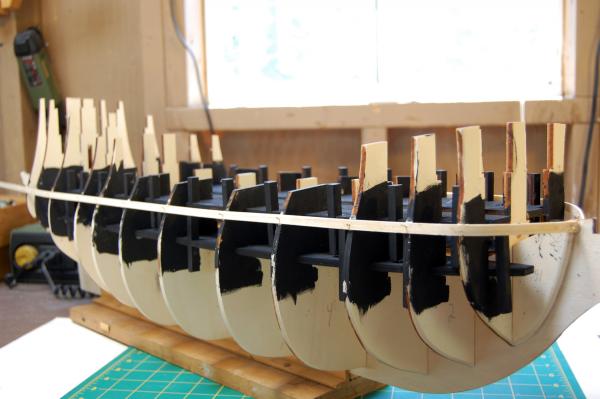
Books say that the first planking should be done carefully enough to be displayed as the final planking, and as I look at the logs of other builders it seems to be possible. I simply am not there yet. I have finally completed the first planking of the Sovereign, and all I can say is, "Three cheers for wood filler!" With this ship my biggest problem was clamping the ends of the planks, particularly at the stern. I have many different types of clamps, but nothing seemed to work well. Regardless, I have built a firm and smooth base and hope the second planking will be easier. I managed not to do any damage to the work already completed.
-
Hi Everyone - I haven't planked the lower half of the hull because the instruction manual indicates not to do it yet. I'm not really sure why, but maybe it will become clear eventually. I thought about doing it anyway, in spite of the instructions to the contrary, but decided to play it safe. By the way Garym, I do have the newer instructions dated 2008. If you take a look at the other SOS build logs by Denis Pink and Vince P you will see they encountered the same issue. None of it is a problem except that turning the ship upside down with all of the deck features and galleries in place is a bit problematic. Gentleness will be the word of the day.
-
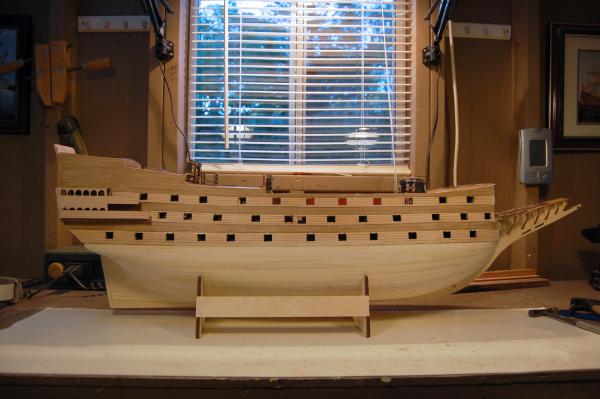
I was away for a week in Phoenix visiting family. When I got back the ship was still here, and I began cutting out gun ports and working on the upper level second planking. I was about to make a major mistake on the locations of the gun ports, but thanks to Denis Pink, who spotted the error from one of the above pictures, I was saved from a potential disaster. Like Vince P. mentioned in his build log, I think it is weird to be working on the upper level second planking before completing the first planking, but that is what the instruction manual says to do to. As I write this New Zealand is one win away from taking the America's Cup back to New Zealand, and really has the superior boat. I am fortunate enough to live near San Francisco and actually viewed one of the races live. Any relationship between the America's Cup yachts and the ships we build is purely coincidental. They are more like fighter jets. Perhaps premature, but congratulations to New Zealand.


-
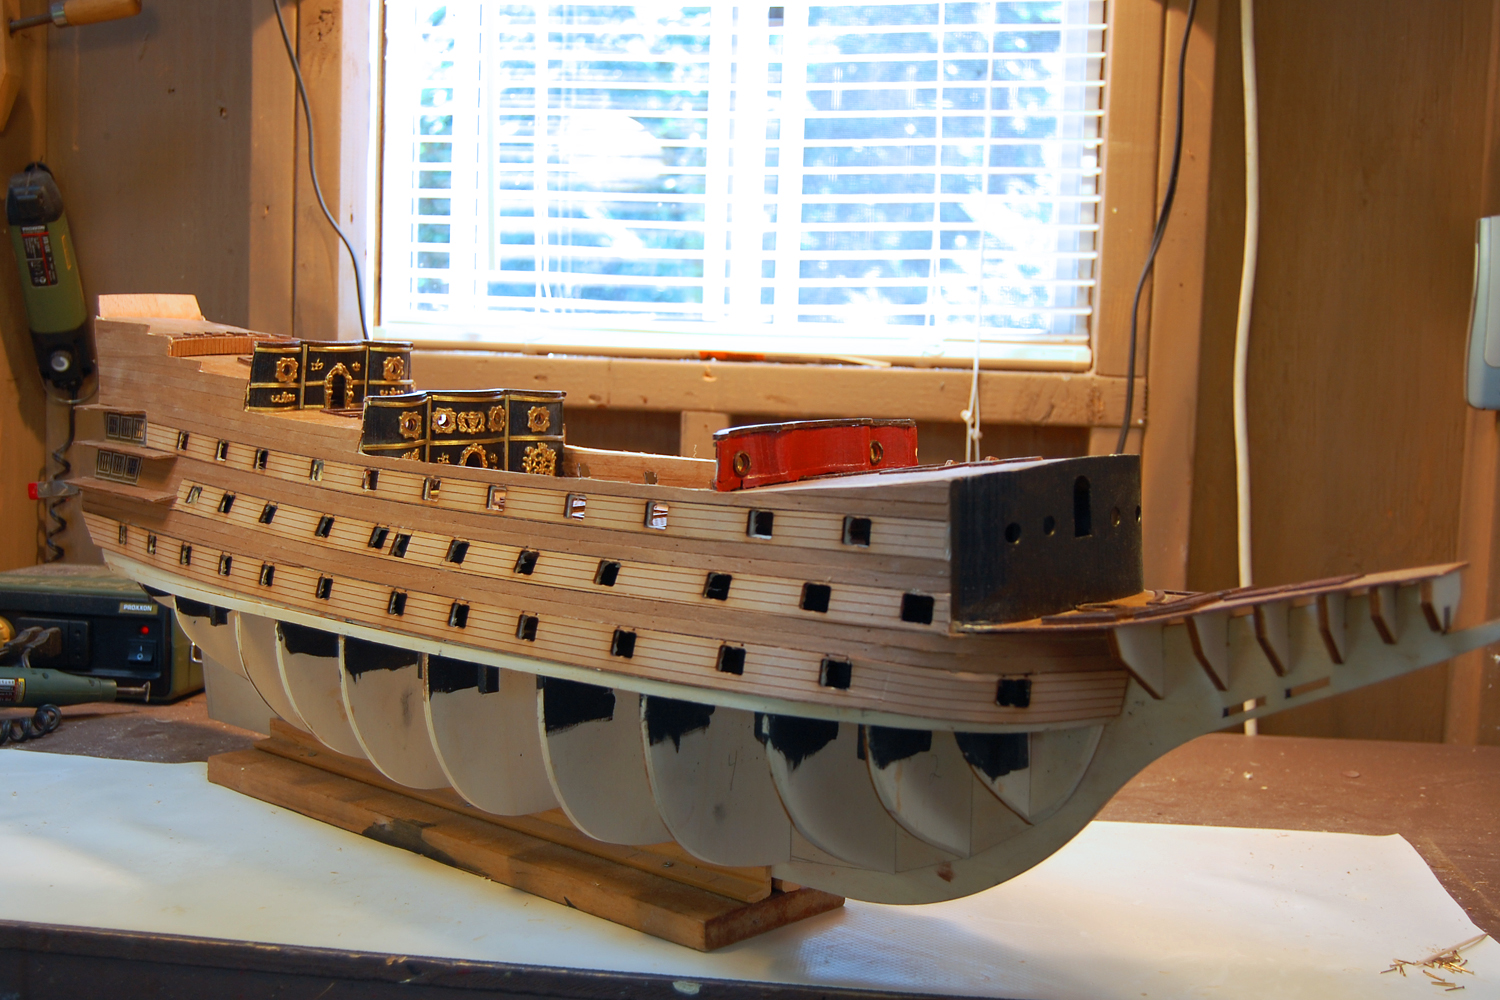
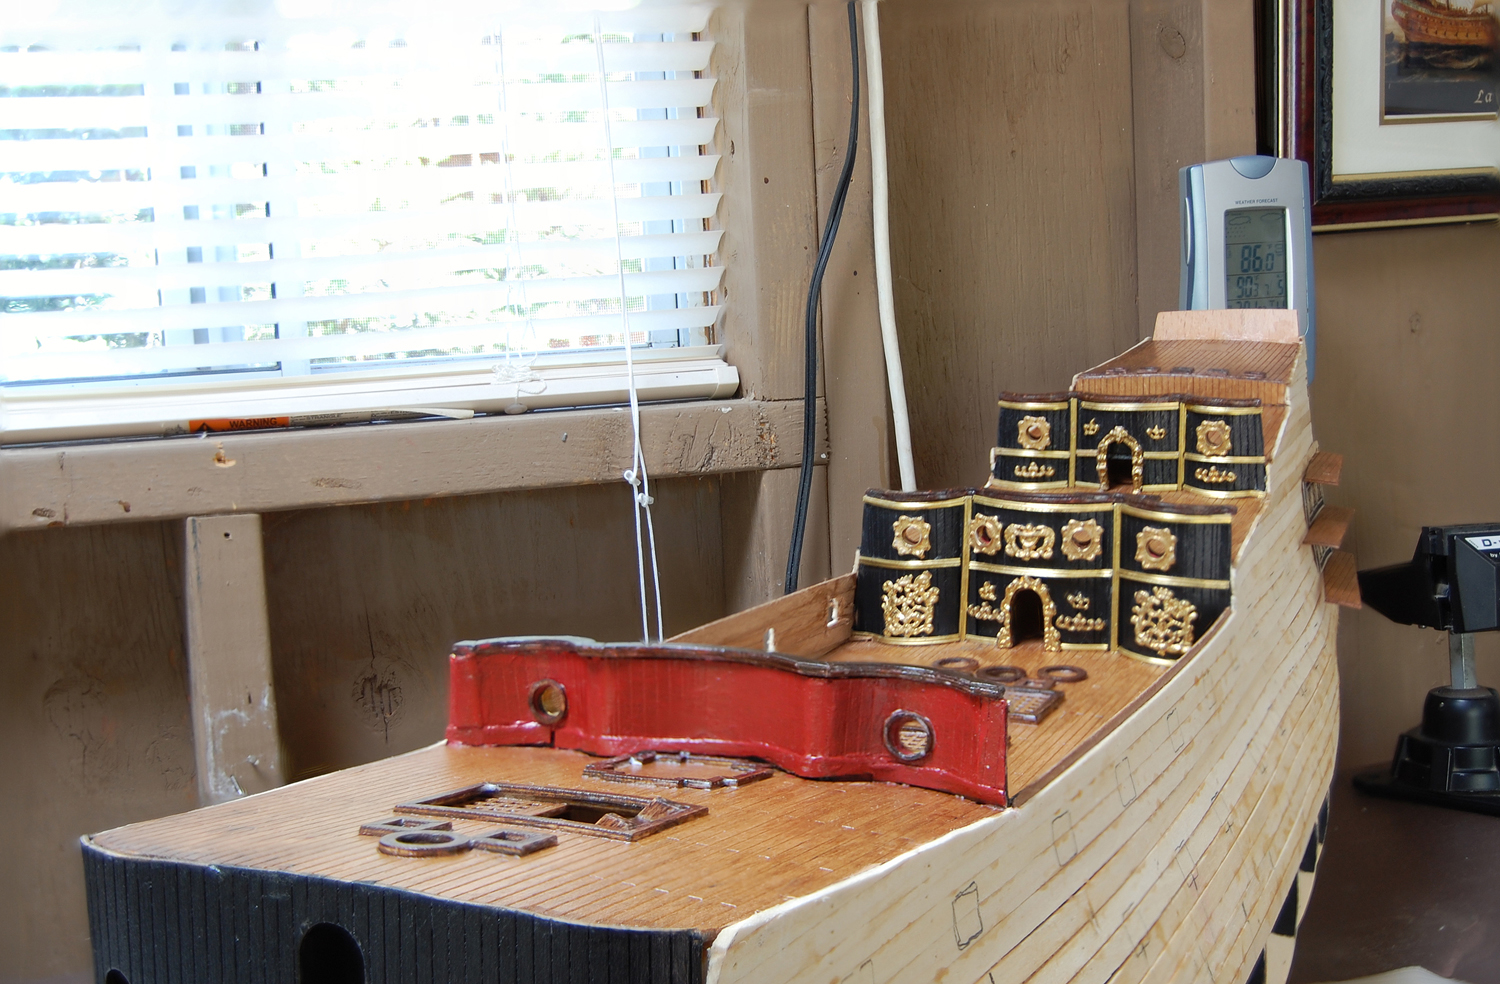
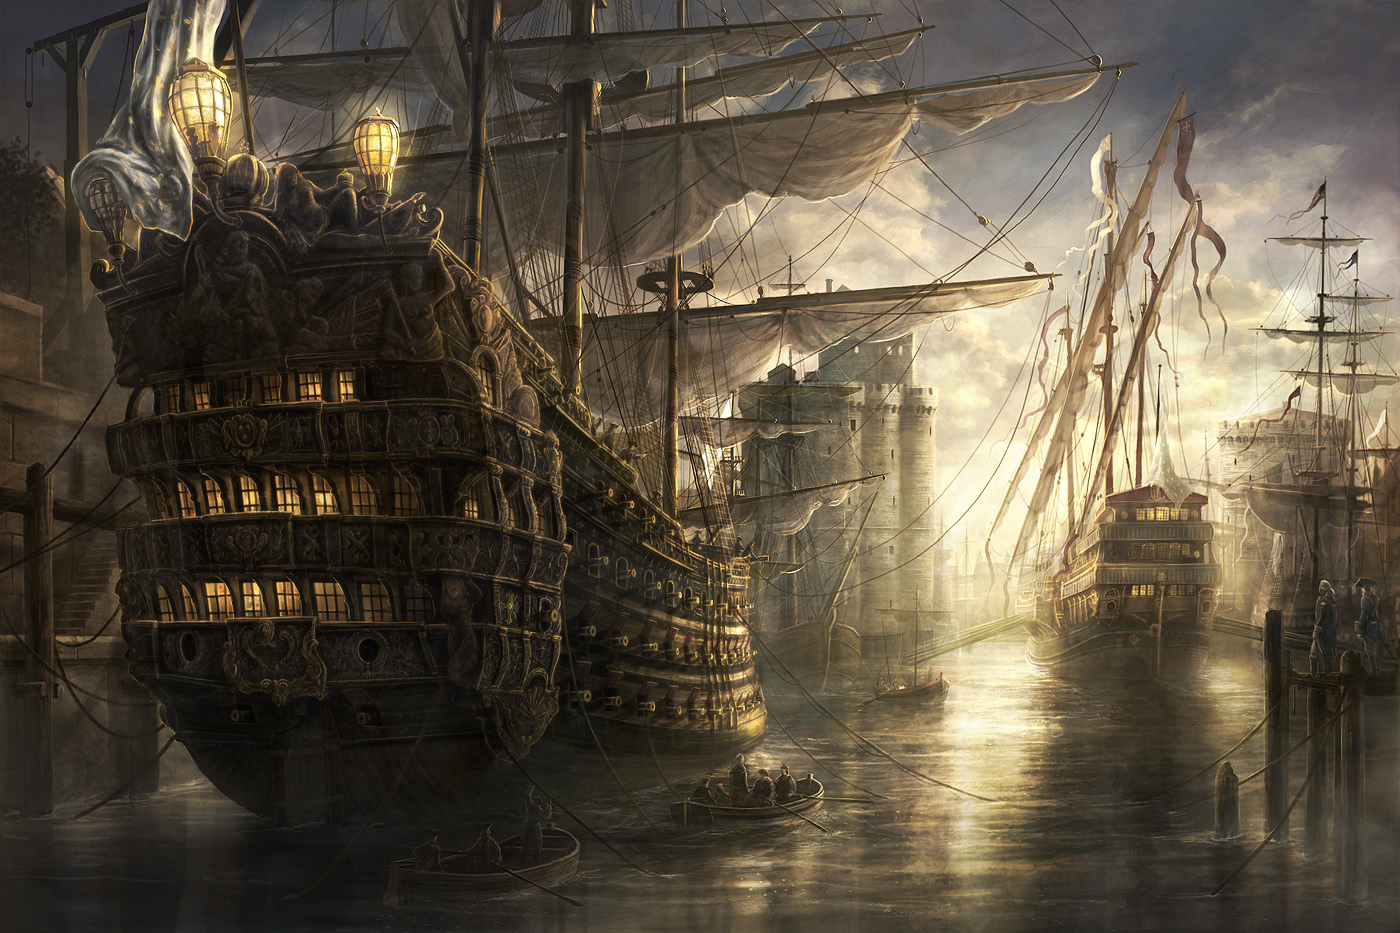
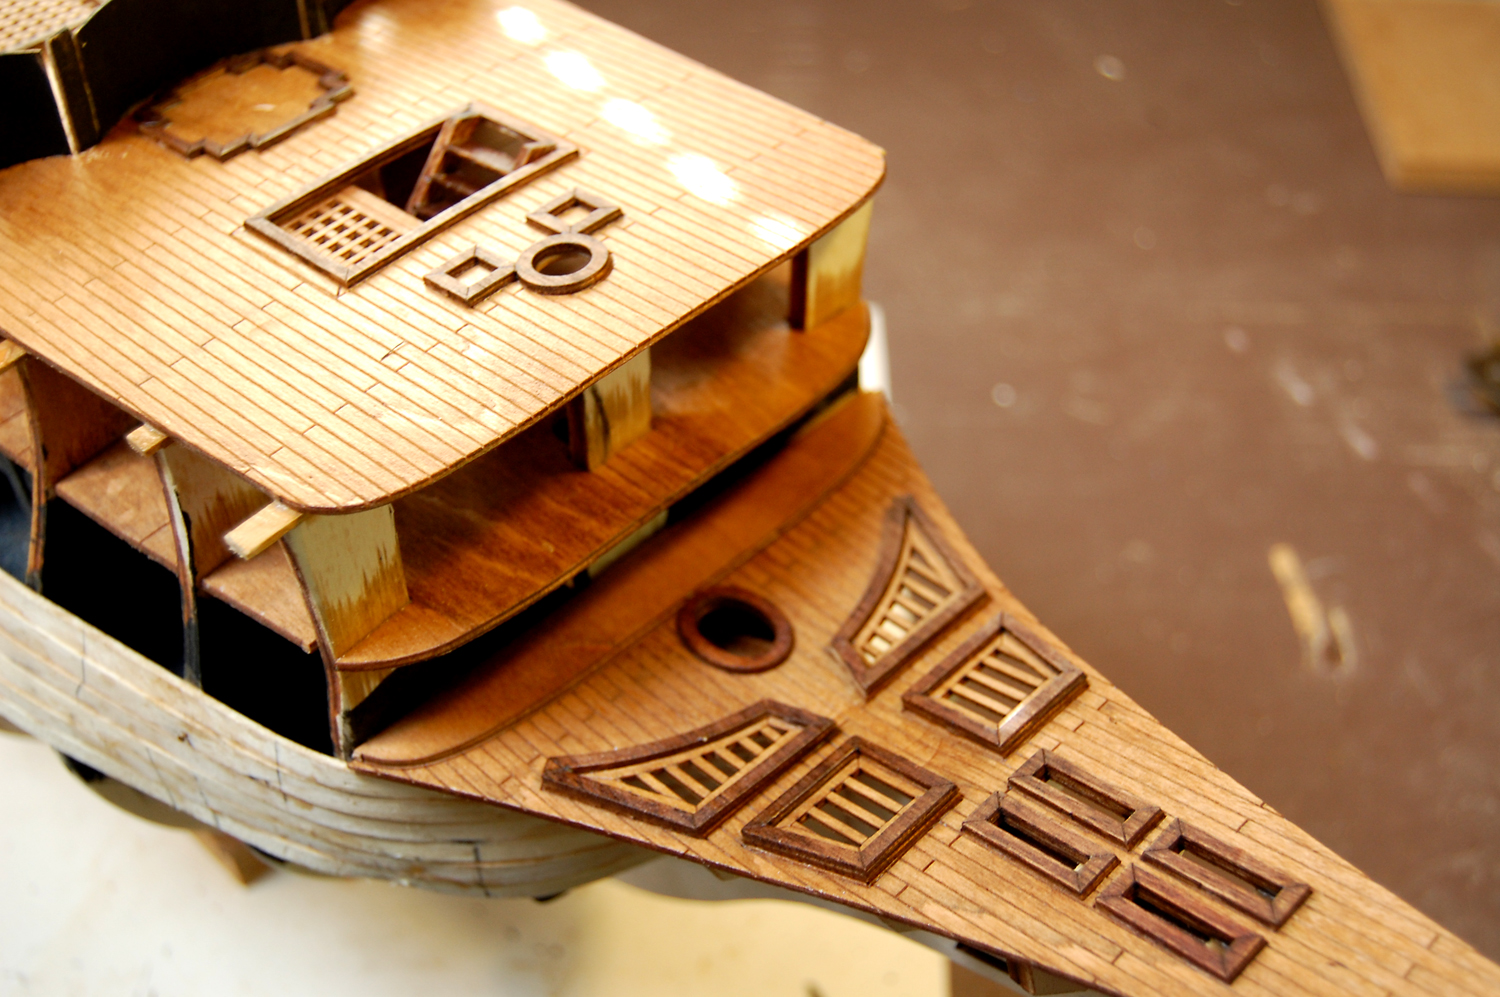
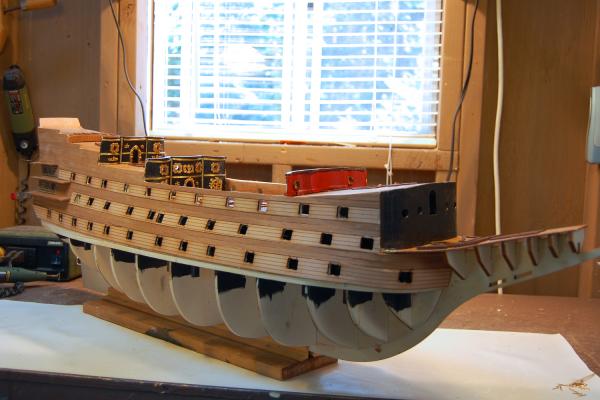
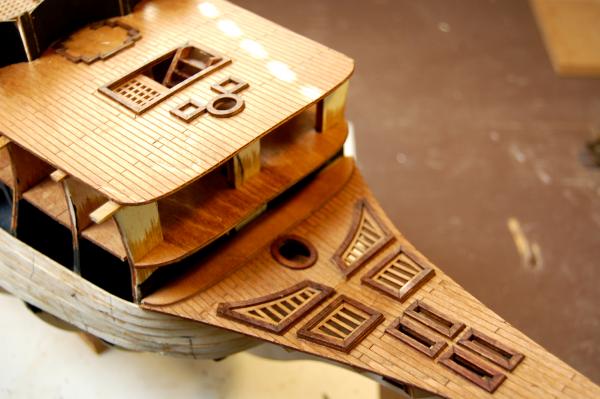
I have completed the curved deck partitions and the upper level first planking. Have marked the gun port locations and started to cut out the gun ports for the main deck. I have decided to paint the bulwarks red, so figured I should also paint the inner portions of the deck partitions red. They will have cannons, and we wouldn't want the color of blood to spoil the ship's look. I had difficulty figuring out the directions for the stern galleries. They didn't make any sense, and still don't. I finally abandoned the directions and drawings and relied on instinct. It worked out OK, which is a good thing since the galleries are so important to the the final look of the ship. While I was deciding what to do I came across a piece of computer art by an artist named Rado Javor. I tried to simulate the look of lanterns in his stern galleries. I have a brand new printer which didn't print the colors the way I wanted them, but it still is pretty good.


-
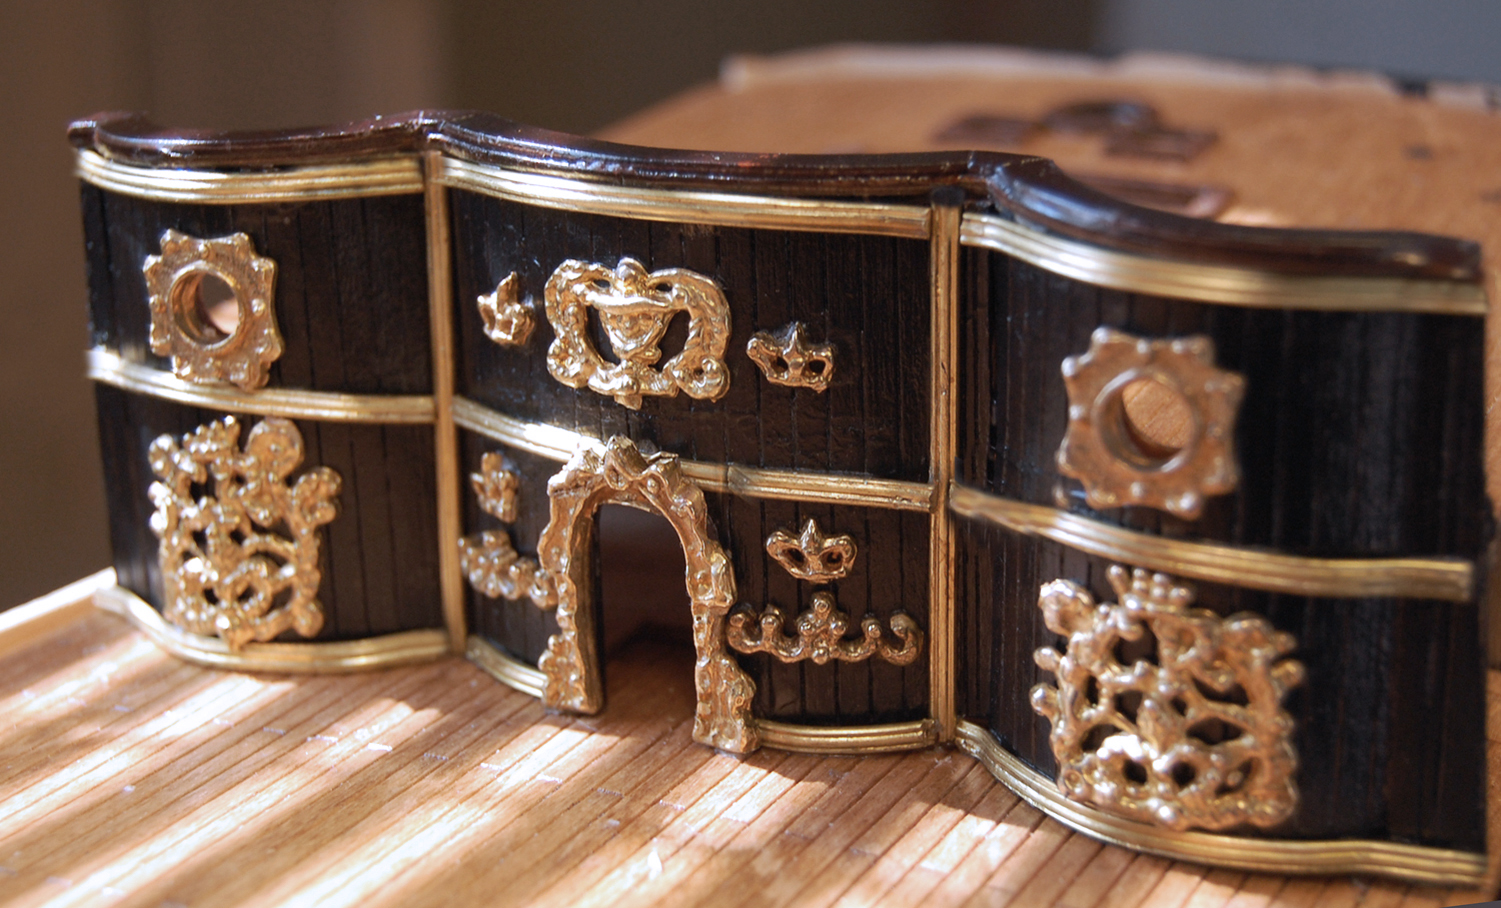
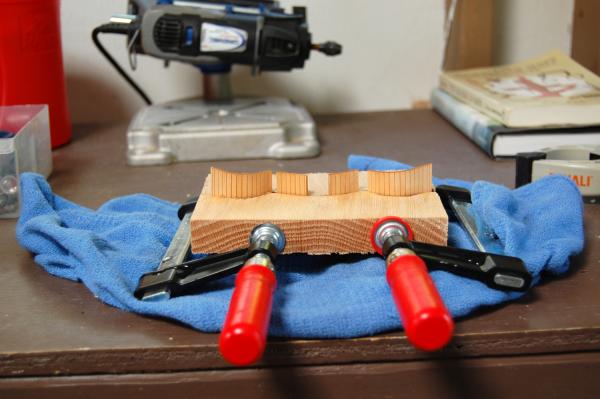
I have spent the past several days working on the curved deck partitions. I was able to use the jig shown above to bend the metal pieces. That helped a lot. The biggest problem I had was getting the metal decorations glued to the wood and clamped while keeping them in the correct position and not getting glue all over the wood. Still have 2 more partitions to go, and like most things, they will be simpler to do and done better. Practice makes somewhat perfect.

-
I have been working on deck gratings and the curved elements of the upper decks. the work raised two questions which I answered, perhaps wrongly, myself. The first involves the hatch grating where the ladder goes down. The instructions show the grating partially opened, but on top of the moulding around the hatch. All of the other gratings are under the moulding. I went the under moulding route ( see the photo below.) The instructions also implied that the pieces that are the curved elements should be cut into 7 sections. This seemed strange, but I wasn't sure the whole thing could be bent properly in one piece. The photo below shows the 3 curved pieces. There are also 4 narrow non-curved sections. I have completed the forward curved section, and the approach worked fine.
-
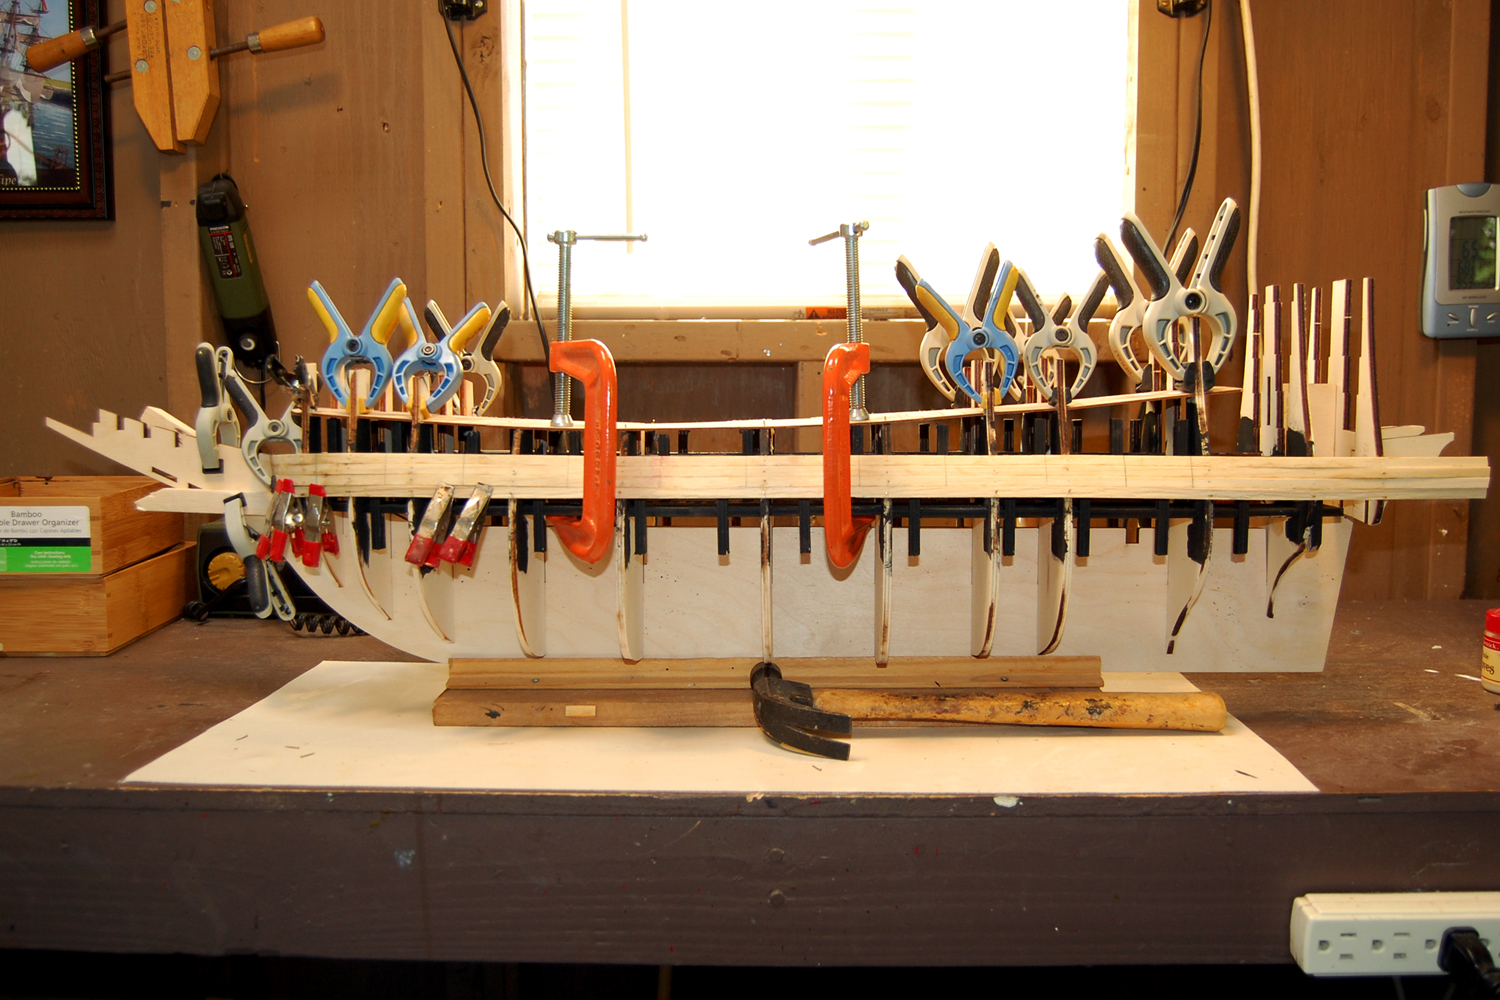
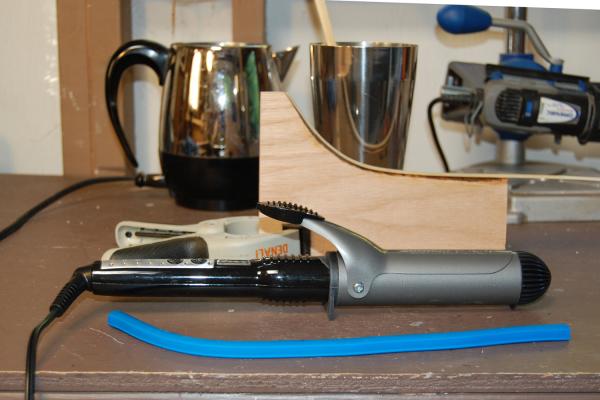
I decided to try a new approach to plank bending for this ship consisting of a combination of several articles I read. To start, I purchased a 12” Flexible Curve from Amazon.com. (The blue thing in the front of the photo below.) I bent it along the forward bulkheads of the ship to determine the precise curve needed for the planks. It holds its shape, and I transferred the curve to a half inch thick block of wood, cutting it out with a portable jig saw. This is my bending jig. I use an old coffee pot to heat up water, stick a couple of planks in a container, pour the hot water in and wait a half hour. Then I press a wet plank into the jig and use a woman’s hair curler, set at the highest temperature, to dry out the plank, pressing it into the jig as I go along. So far it’s working very well. In spite of the perfect bend you still need to use a lot of clamps to hold things together while the glue dries.

-
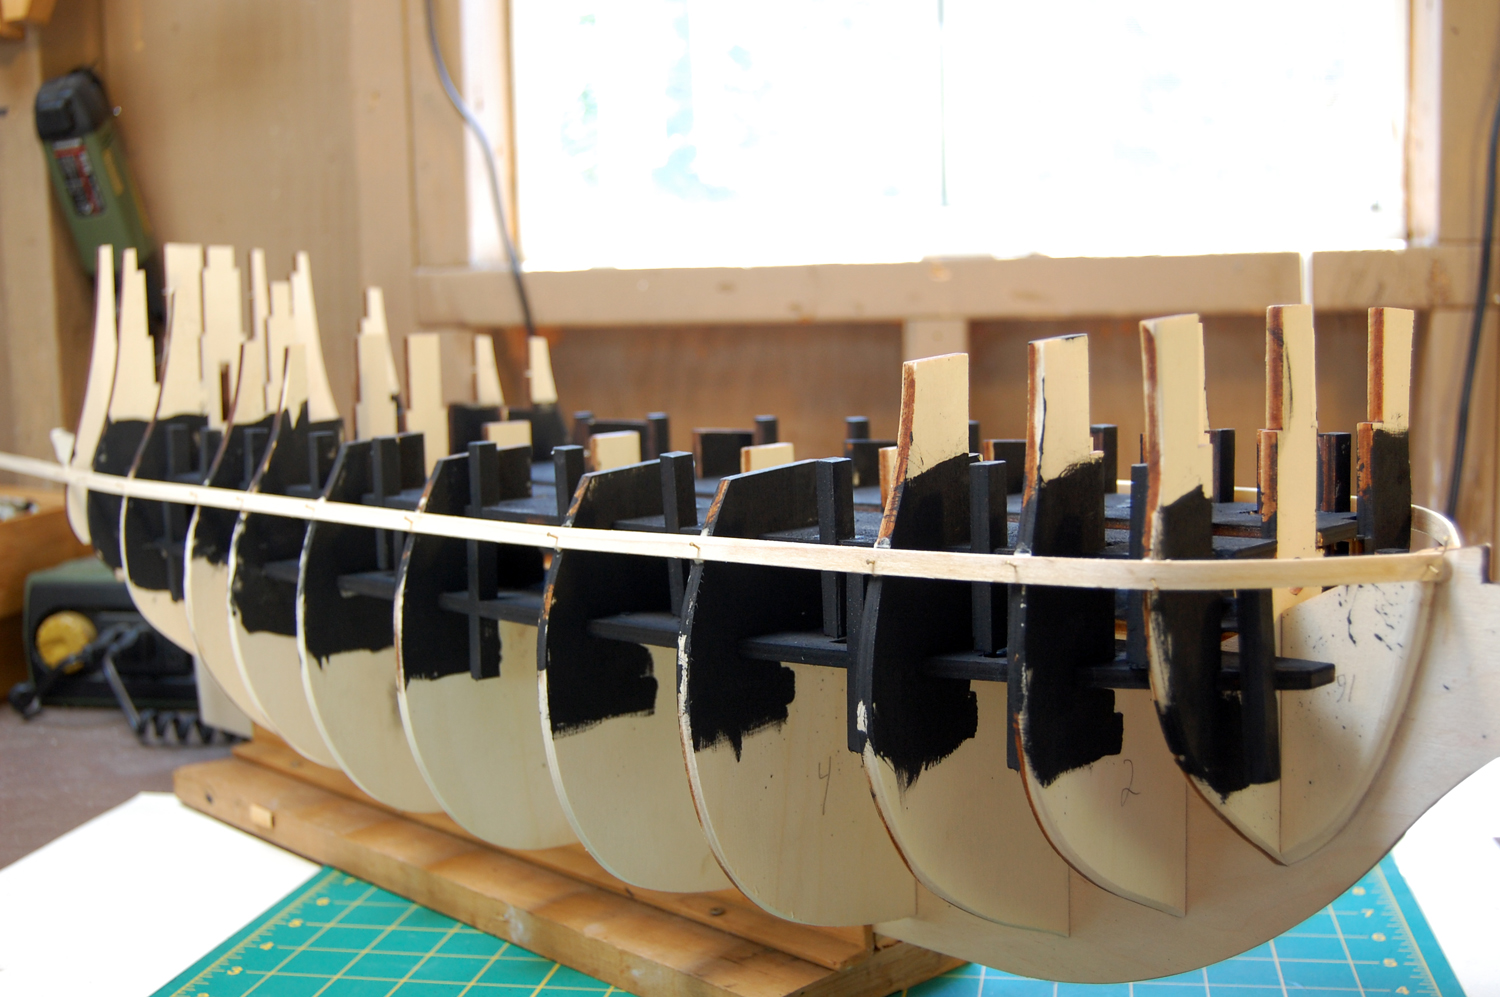
Not really knowing what would show on the lower decks I painted everything black and added the first two balsa planks as shown on the instructions.
-
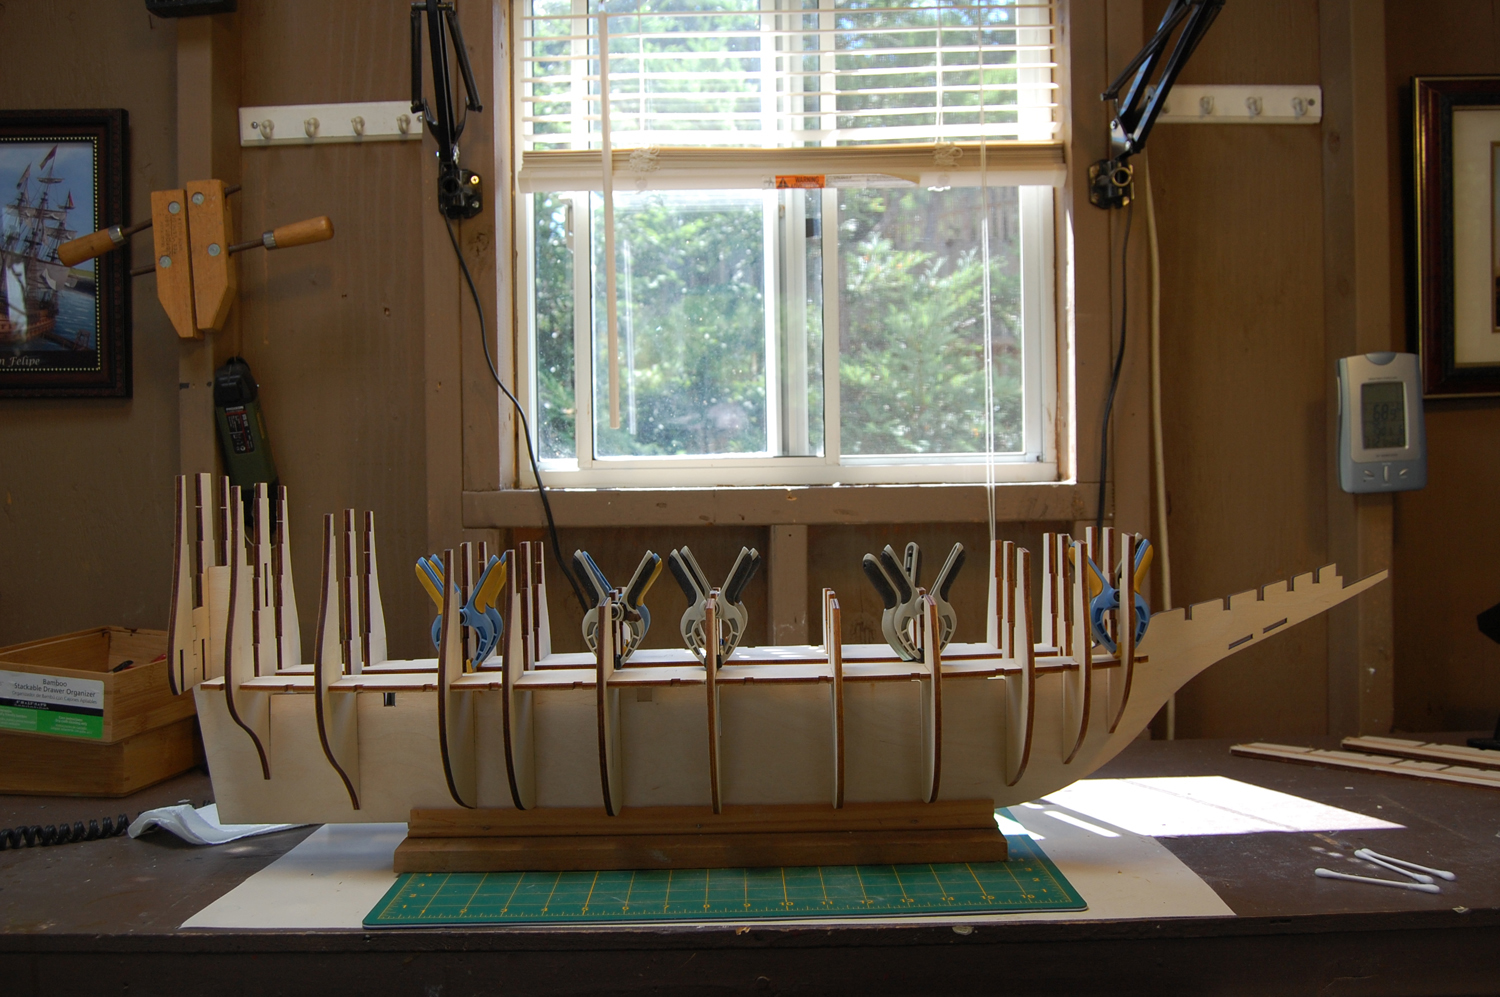
08/01/13 I enjoy the history, art, and warships of the 17th Century which you can explore on my website www.17thcenturywarships.com. I am, though, a relative newcomer to the art of shipbulding. To date I have built two ships: the French Ship La Couronne and the Spanish Ship San Felipe. My goal is to build a major warship of each of the 17th century naval powers. Perhaps I should have waited longer to gain more experience before attempting this, my next project, but I am expecting delivery Monday, 8/5/13, of Mantua’s Sovereign of the Seas. It should be a real challenge and learning experience. My ship building efforts take place in an 8’ x 10’ shed. The keel of the Sovereign will be laid here. In the weeks leading up to the arrival of my Mantua kit I have been doing as much research about the Sovereign of the Seas as I can. I have carefully read the wonderful build logs of Vince P and Denis Pink. I have marvelled at the build and carving ability of Bill Short. I have purchased and read Sovereign of the Seas by James Sephton and The Rigging of Ships in the Days of Spritsail Topmast by R. C. Anderson. I have obtained a copy of A True Description of His Majesties Royall Ship by Thomas Heywood and was able to read a rare copy of Popular Mechanic’s Sovereign of the Seas by Harold T. Bodkin, published in 1933. The entire study has been very interesting and quite daunting to a relatively inexperienced ship model builder such as myself. How someone like Bill Short can undertake, on his second build, to kit-bash the Mantua model and proceed to carve the decorations himself is totally beyond me. My aspirations are much lower. I will be very happy if I can simply get through this build, as documented by Mantua, in a reasonably competent manner. I still have much to learn about the basics such as planking, wood finishing and rigging, and will share my experiences, both good and bad, here. According to UPS my kit will be delivered this afternoon, and I’m quite excited. 08/07/13 As advertised my ship sailed into port on Monday. I decided that I needed to take the obligatory photo of the unopened box. Next I took a partial inventory of the contents and measured and labelled all of the wood strips and dowels. The packaging was well done, but a glance at the instructions told me they were not. I thought the San Felipe’s instructions were bad, but these are worse. I then proceeded to do some initial hull construction.


-
The Sovereign of the Seas Build Log