


Winlich
-
Posts
66 -
Joined
-
Last visited
Content Type
Profiles
Forums
Gallery
Events
Posts posted by Winlich
-
-
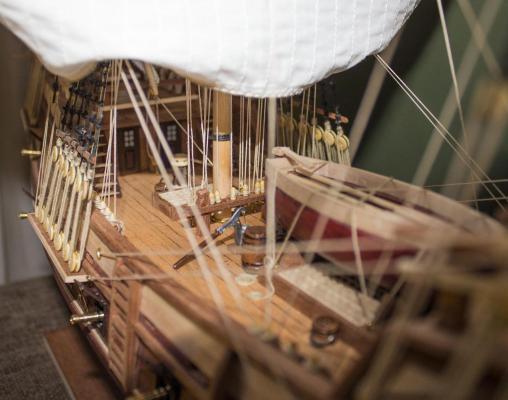
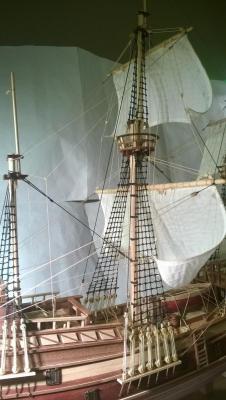
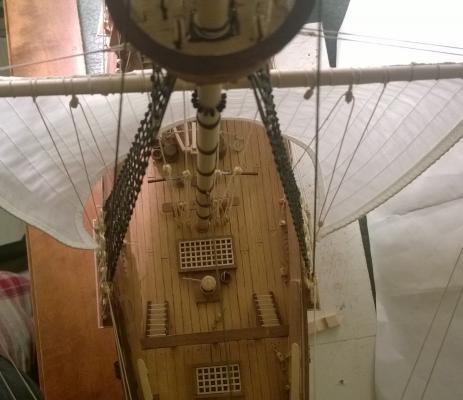
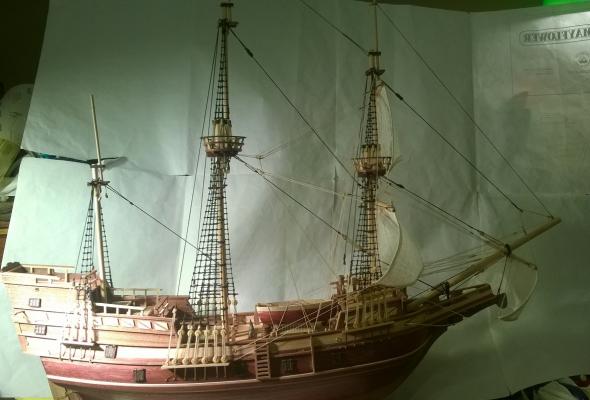
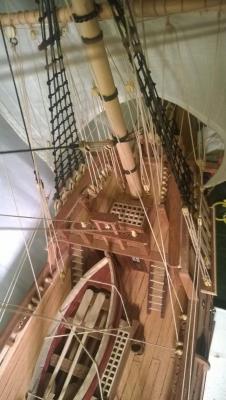
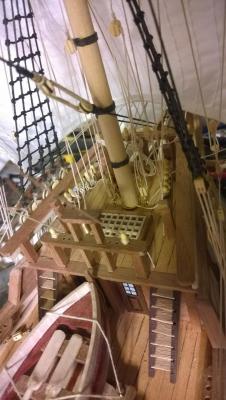
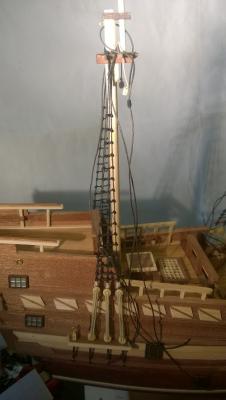
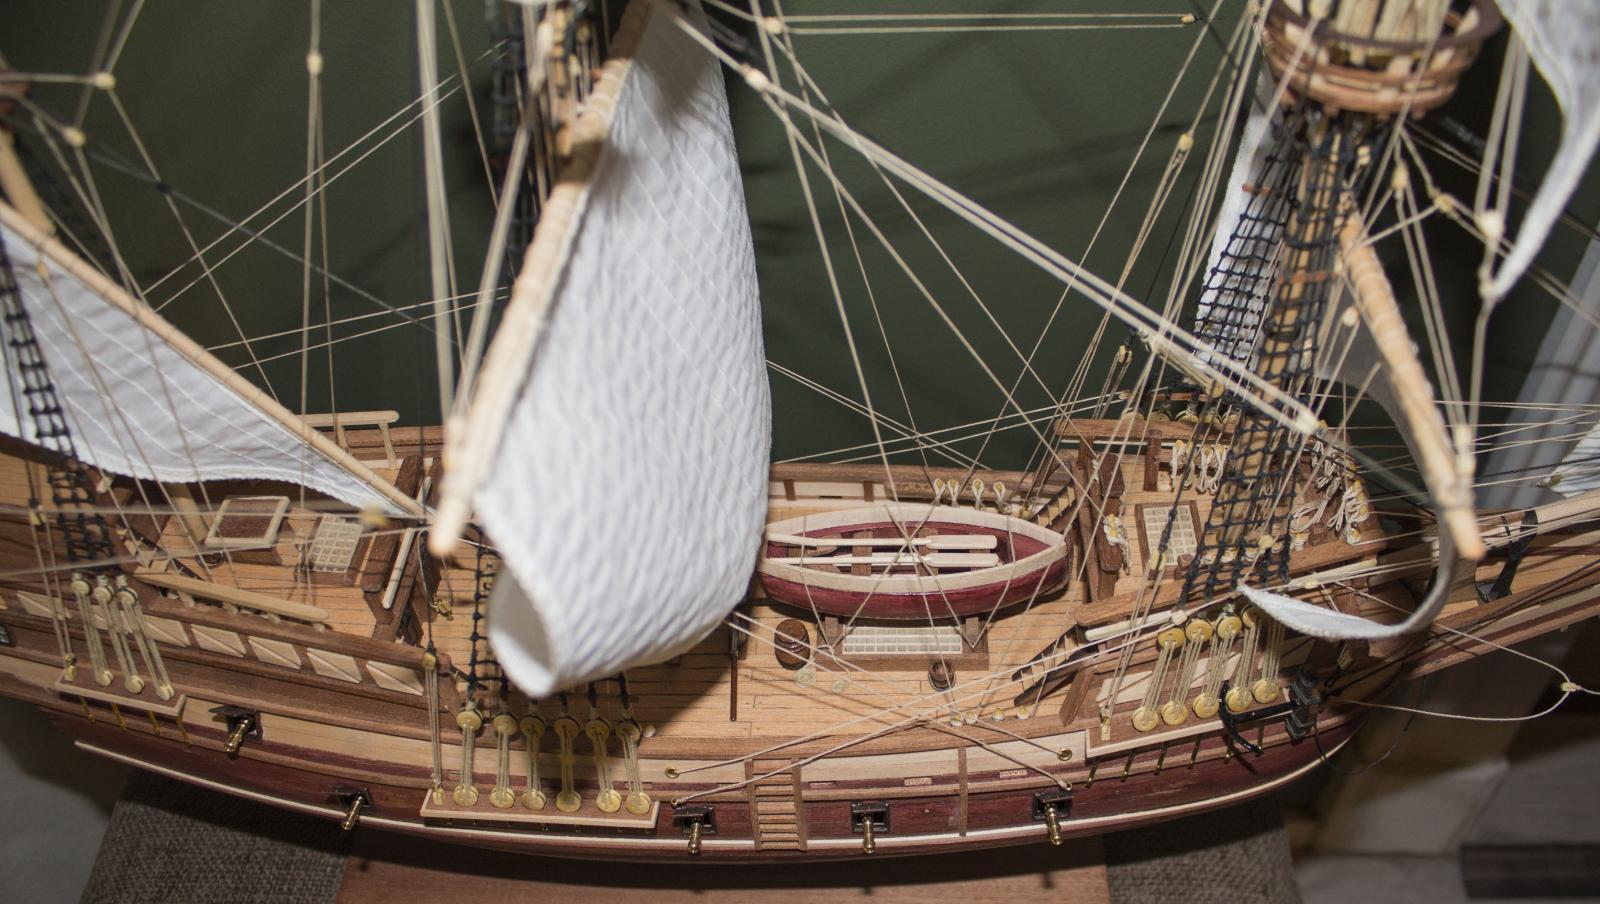
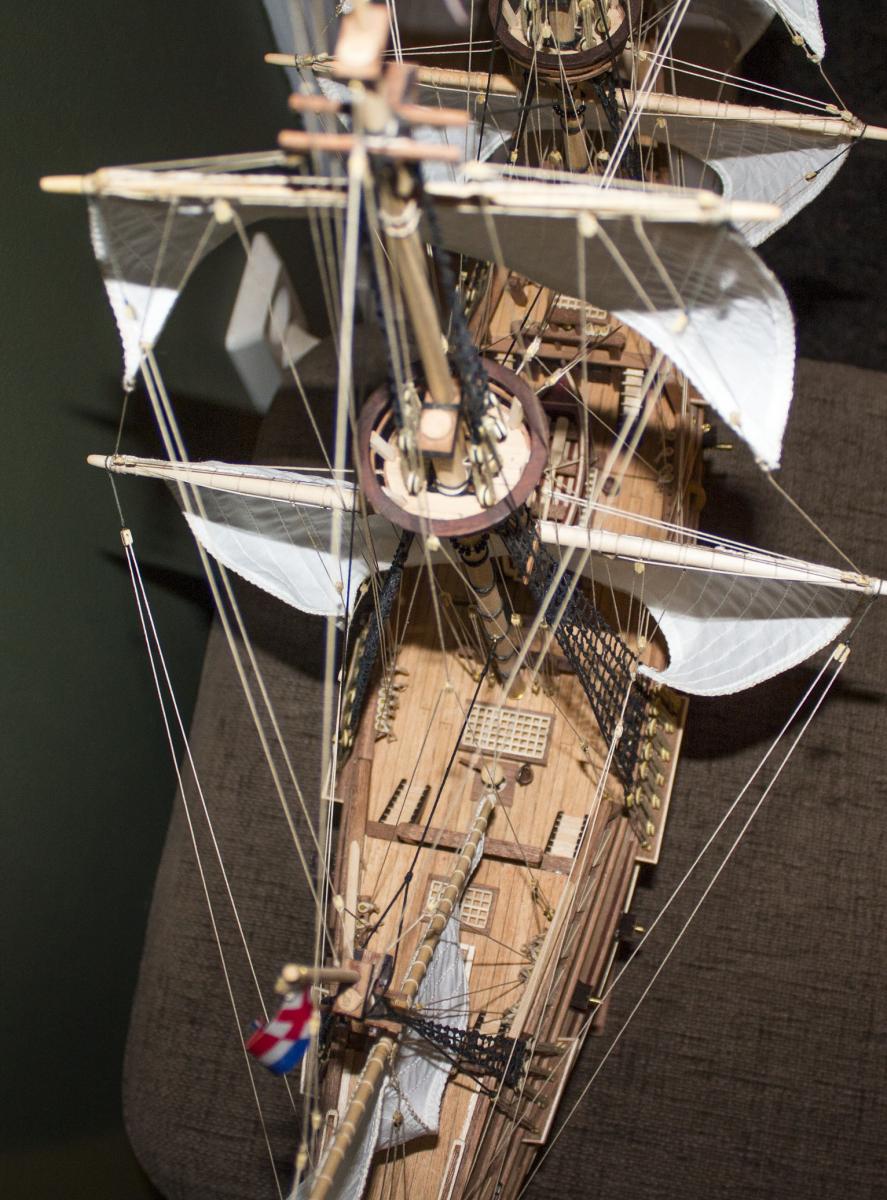
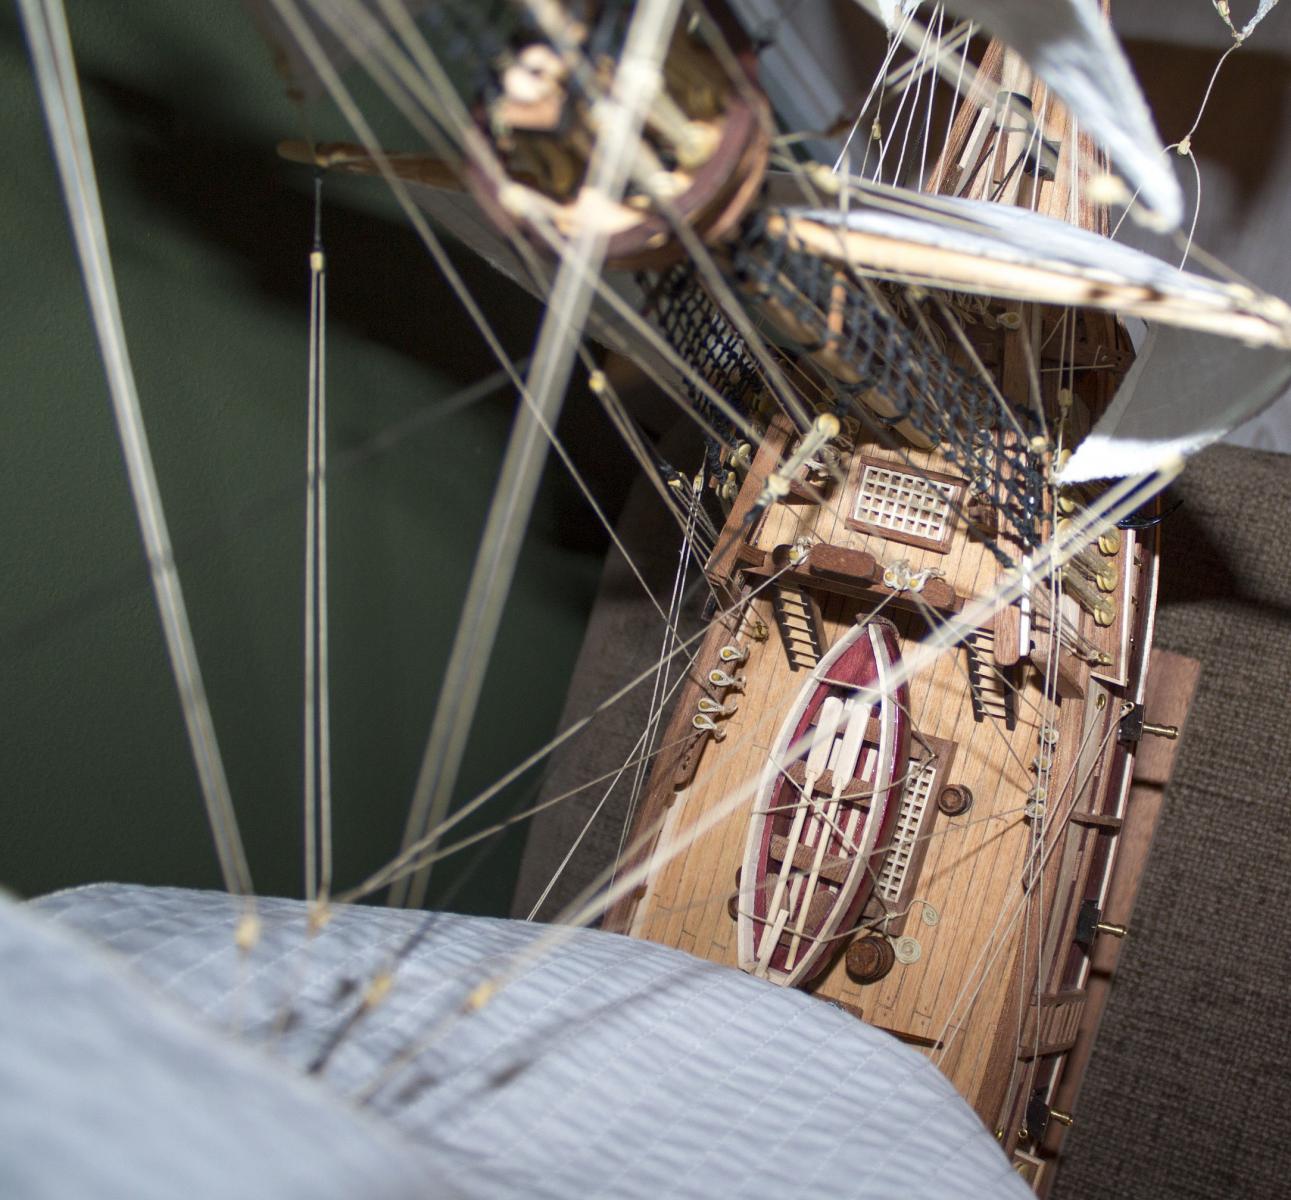
6.7.2015 Finished.
Attached the rear lamp and guns. Few minor adjustments here and there but otherwise my first wooden build finished!

Few last words:
Very interesting project, learned a lot in both model building and also how things worked back when the ship was build. The more I started reading, the more I wanted to add details but as I said before, I decided to settle this one to the kit build and concentrate on realism and details in the next build. Constructo Mayflower definitely isn't beginner build as the sales person said, but it can be done if you search Internet for explanations and details and read Model Ship World
 . Seriously, without this forum I wouldn't have probably finished this one.
I read in some one's signature that "there are only two ways: the fast one and the correct one". I definitely boosted this, in 3 months there were 2-3 days that I didn't touch the build. The longest days were maybe 10-11h building. I didn't quite understand the remediation needed later if some base element isn't quite there -> In next build: plan ahead few moves, do it once, do it properly, do it in time, if it's not 100% ok, remove it and do it again, only then move forward. Next model will take much longer and I need to find better place to build, where I can leave the project hanging even for longer period of time.
I'm more than happy to take more detailed pictures if someone is building this model and wants to see how I did some part.
Next model... I don't know yet. I'm somehow drawn to the HMS Victory because of the level of details (and many build logs available), but lets see. Open for suggestions!

-W


- yvesvidal, captgino, Shipyard sid and 1 other
-
 4
4
-
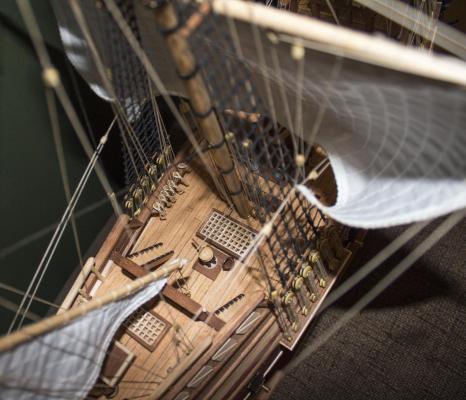
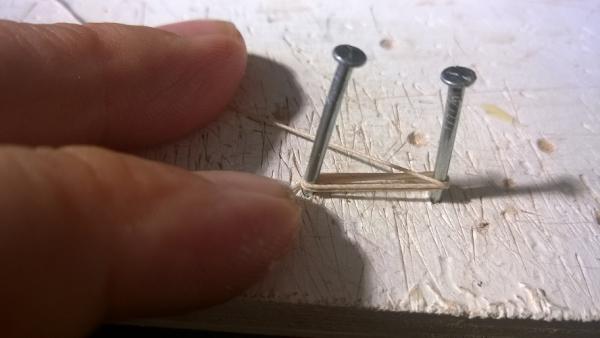
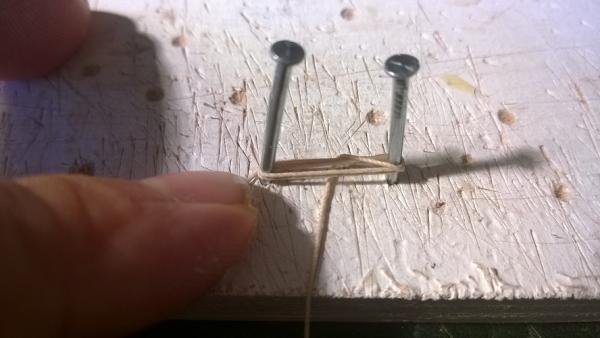
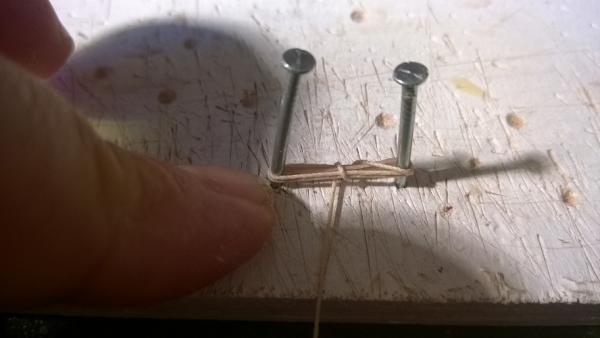
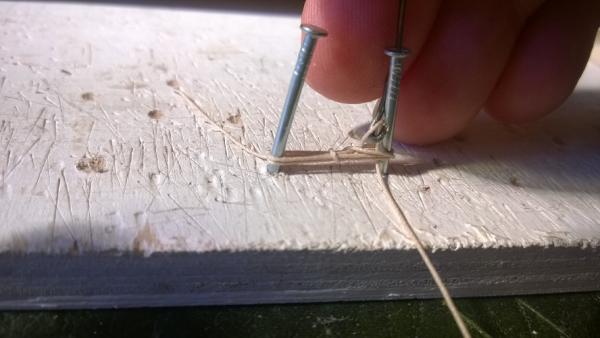
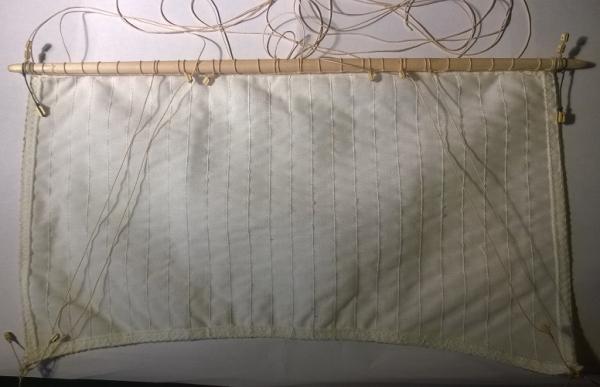
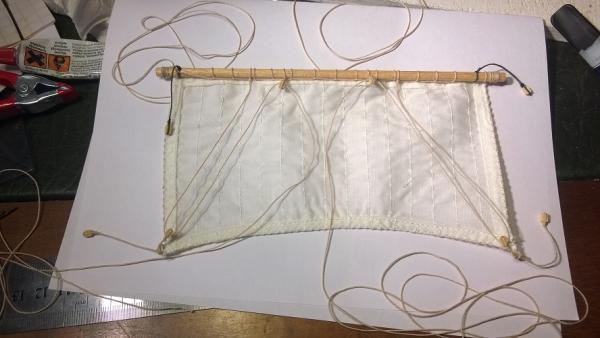
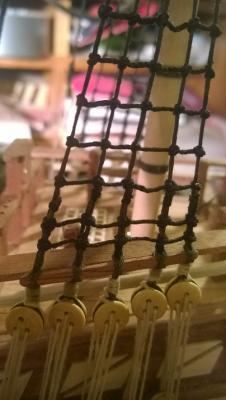
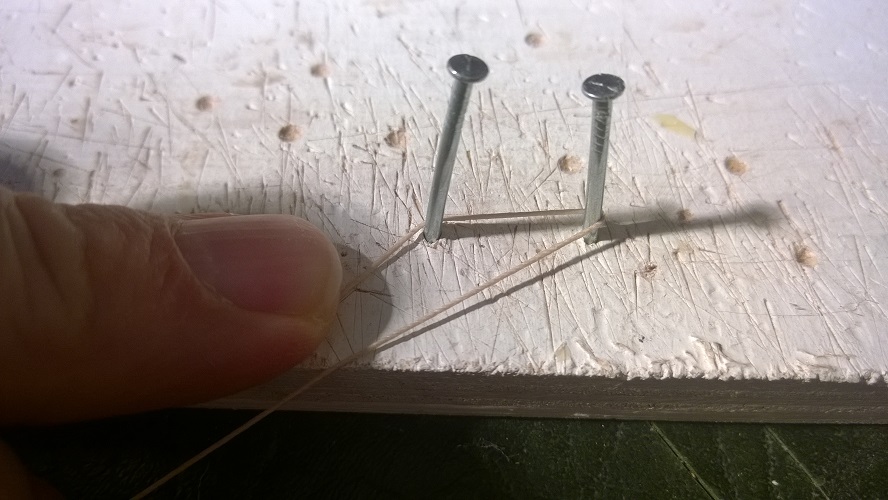
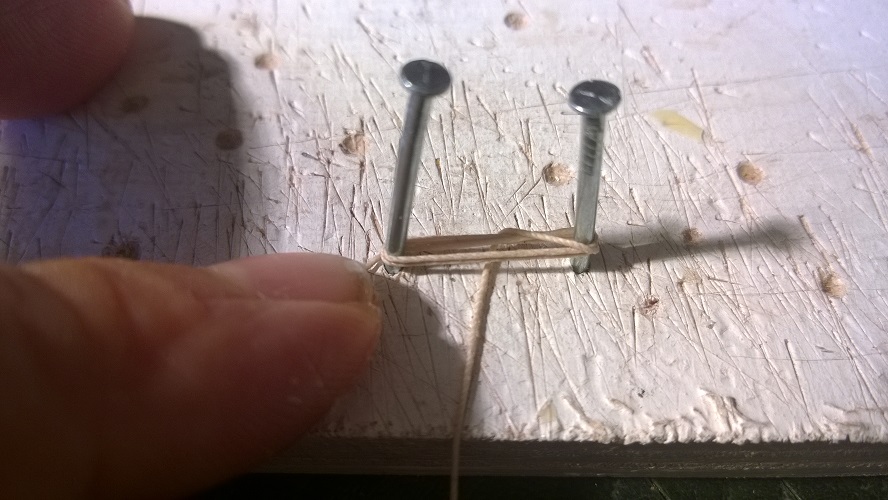
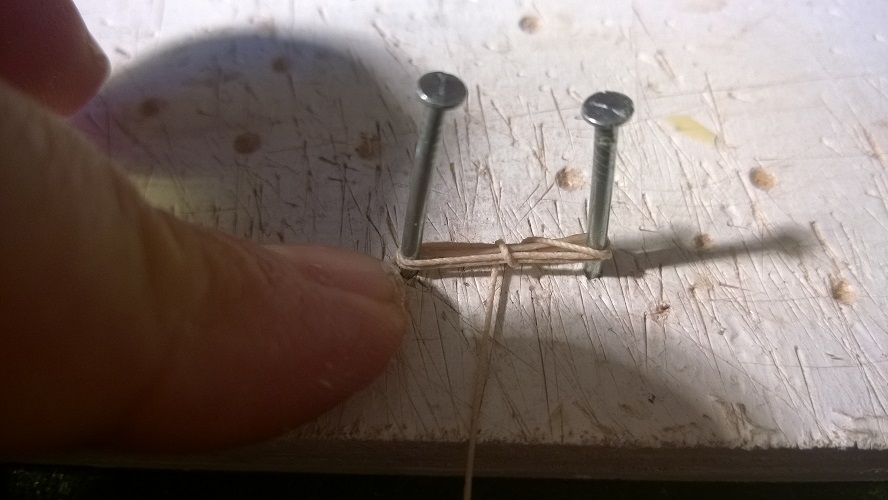
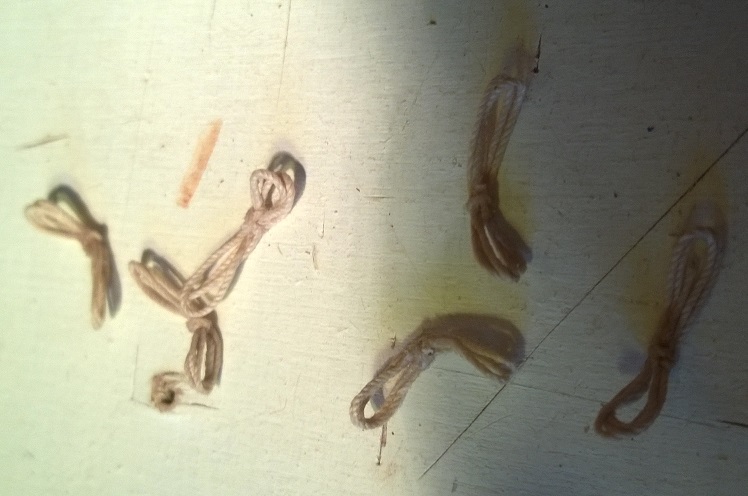
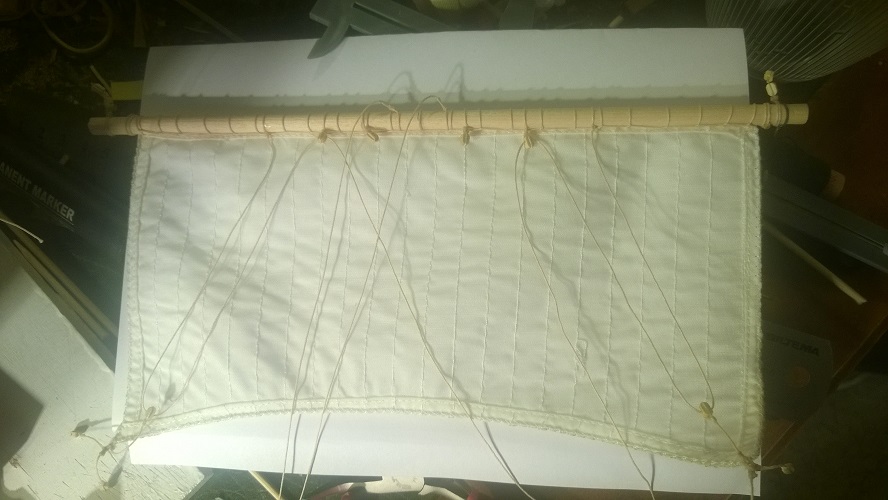
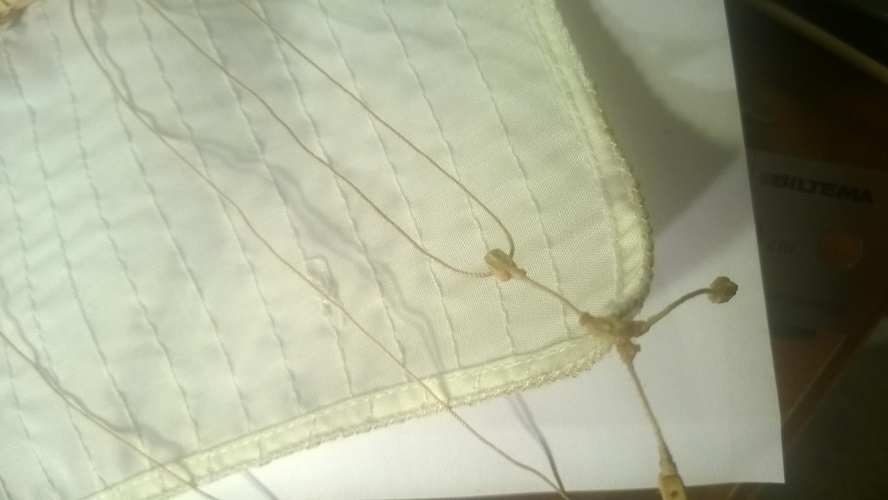
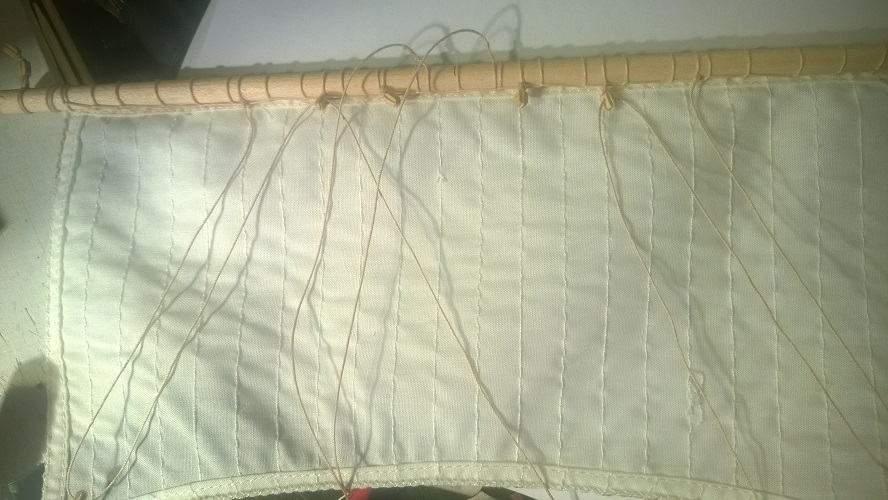
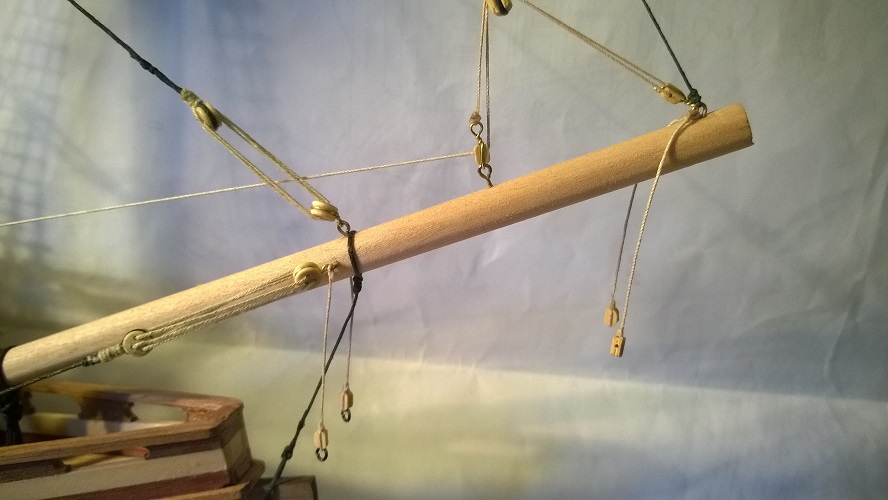
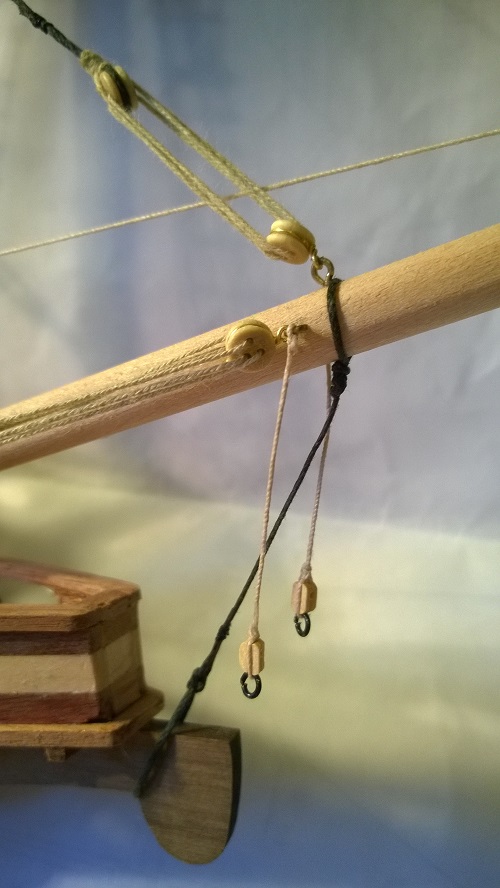
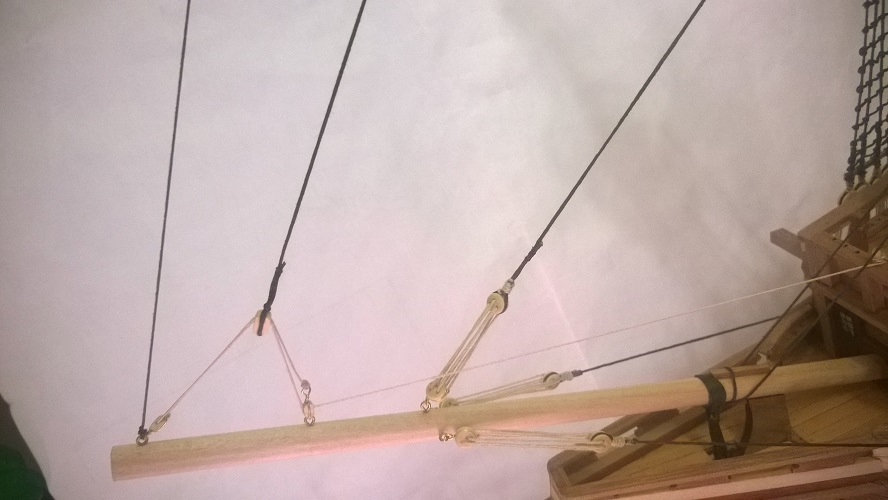
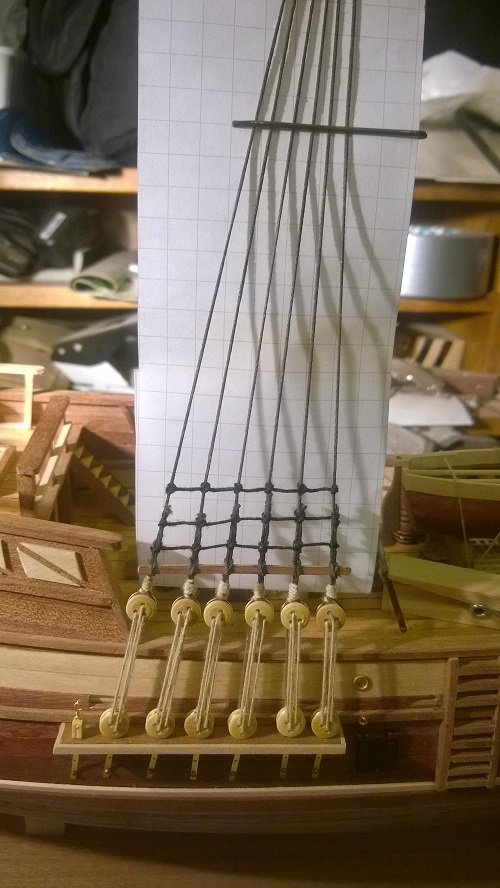
4.7.2015 Preparing coils
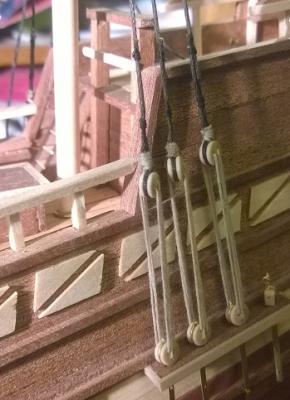
Today it was making coils on top of the belaying pins. If I calculated correctly, there are 64 lines connected to the belaying pins.
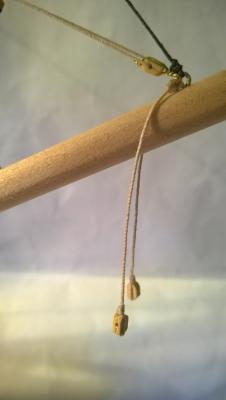
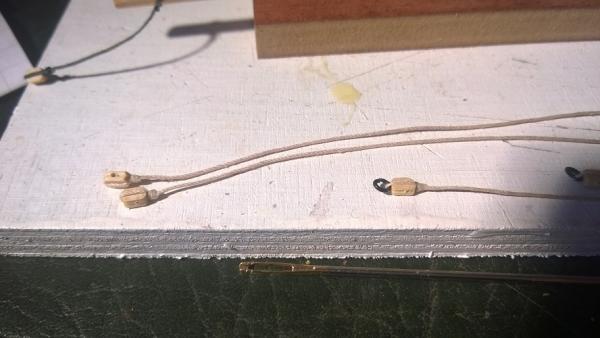
Learning: Before I started to connect the lines to the belaying pins I read info on how they are actually done. I understood that 4 loops (up and down counting as 1 loop) is the "real" way of doing it. I noticed that after 3 loops it becomes more difficult since the area in the lower belaying pin is coming very small so I went for 3 loops. Now when I try to attach the coils on top: As the result the coil seems to be "swollen" somewhat because there is so much rope already around the belaying pin, so maybe I should have done only 1 loop, put CA and then attach the coil afterwards.


-
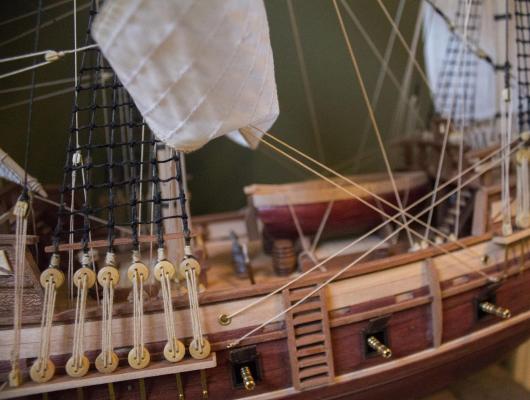
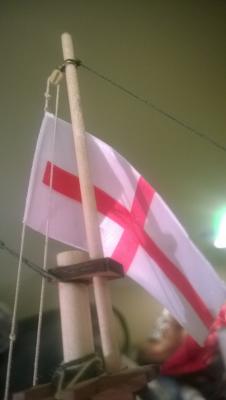
3.7.2015 Anchors and flags
Anchors were fairly easy to attach. Even thought the guide suggested putting anchors way before, it was a good idea to leave them in the end so that they won't disturb the other rigging work.
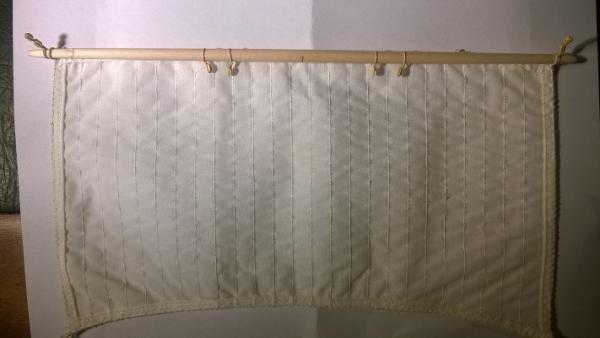
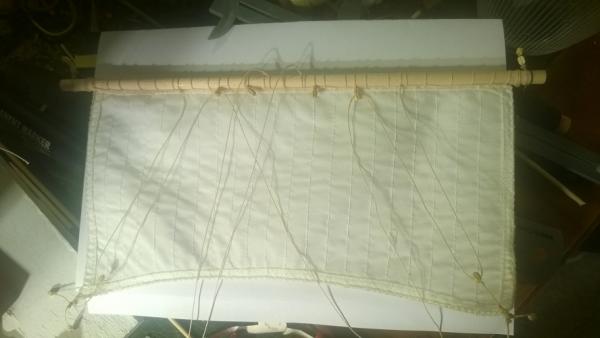
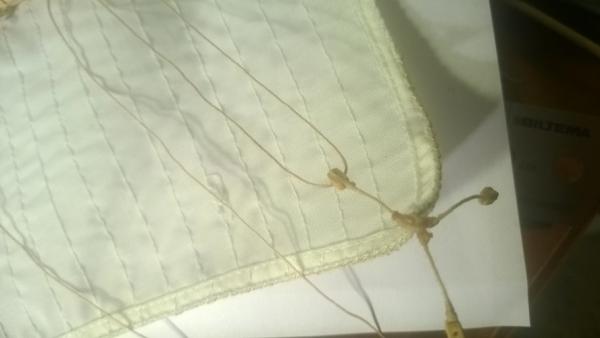
Flags are poor quality "stickers" that stick out straight. I read how the flags were actually tied, but I decided I will stick with the kit and not build the "eye" and "bar" to attach the flags. I'll probably try to moisture the flags and put some weights for one night so that they would seem more natural.
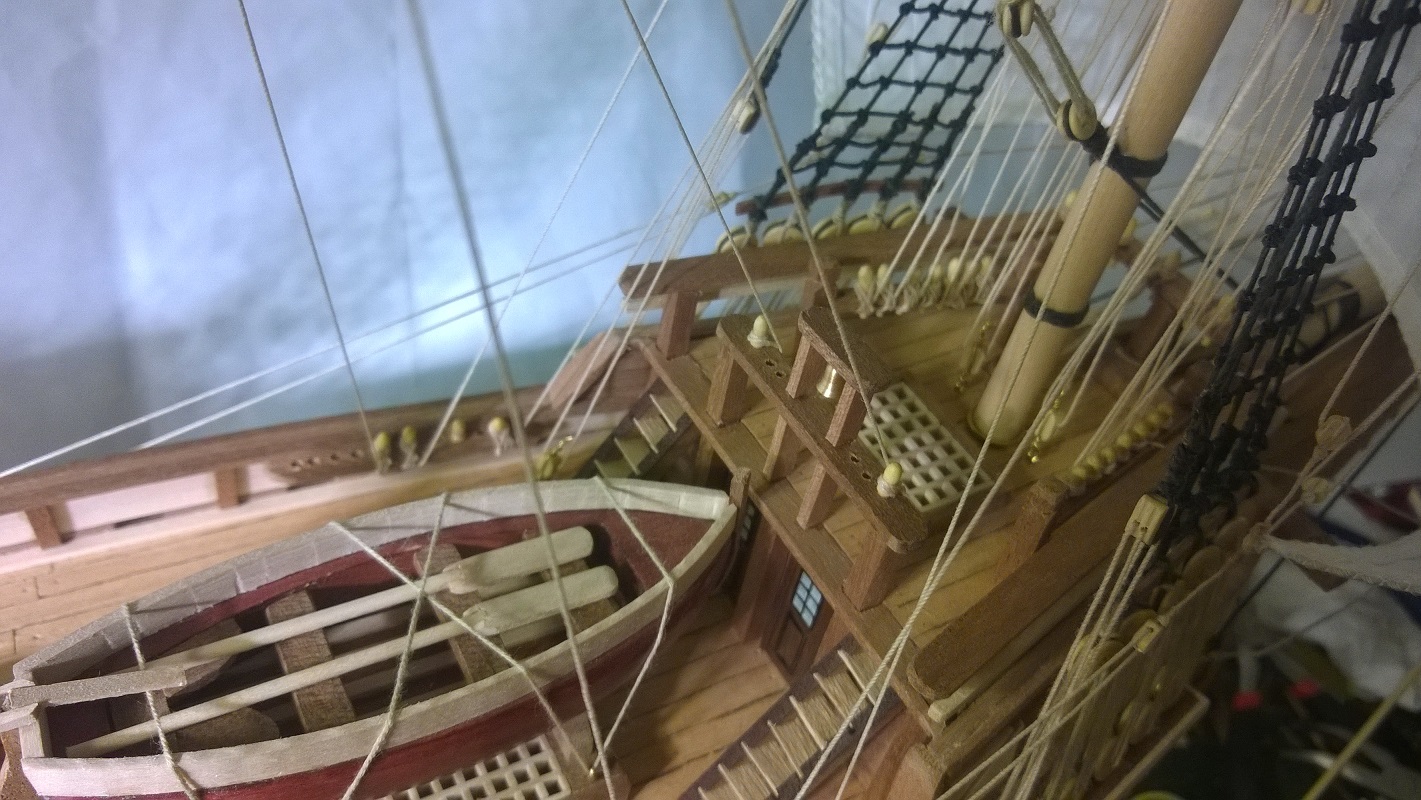
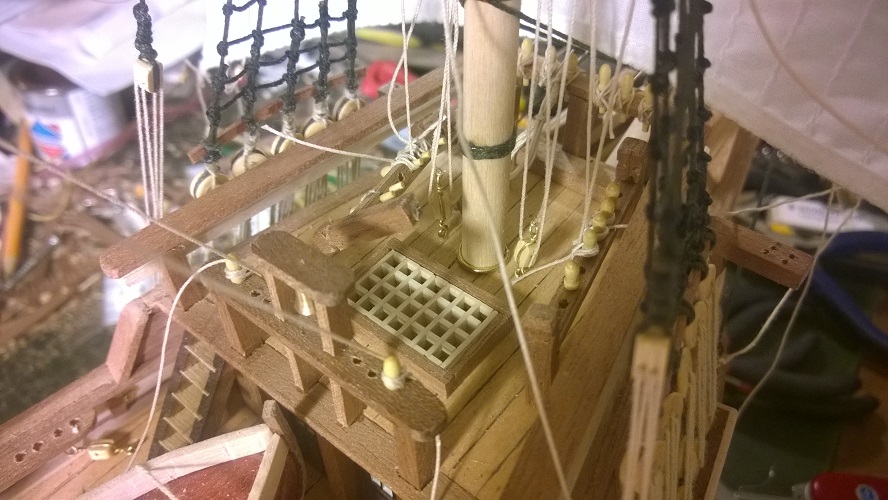
I'm still missing the coils around the belaying pins, gluing guns and the lantern.

-
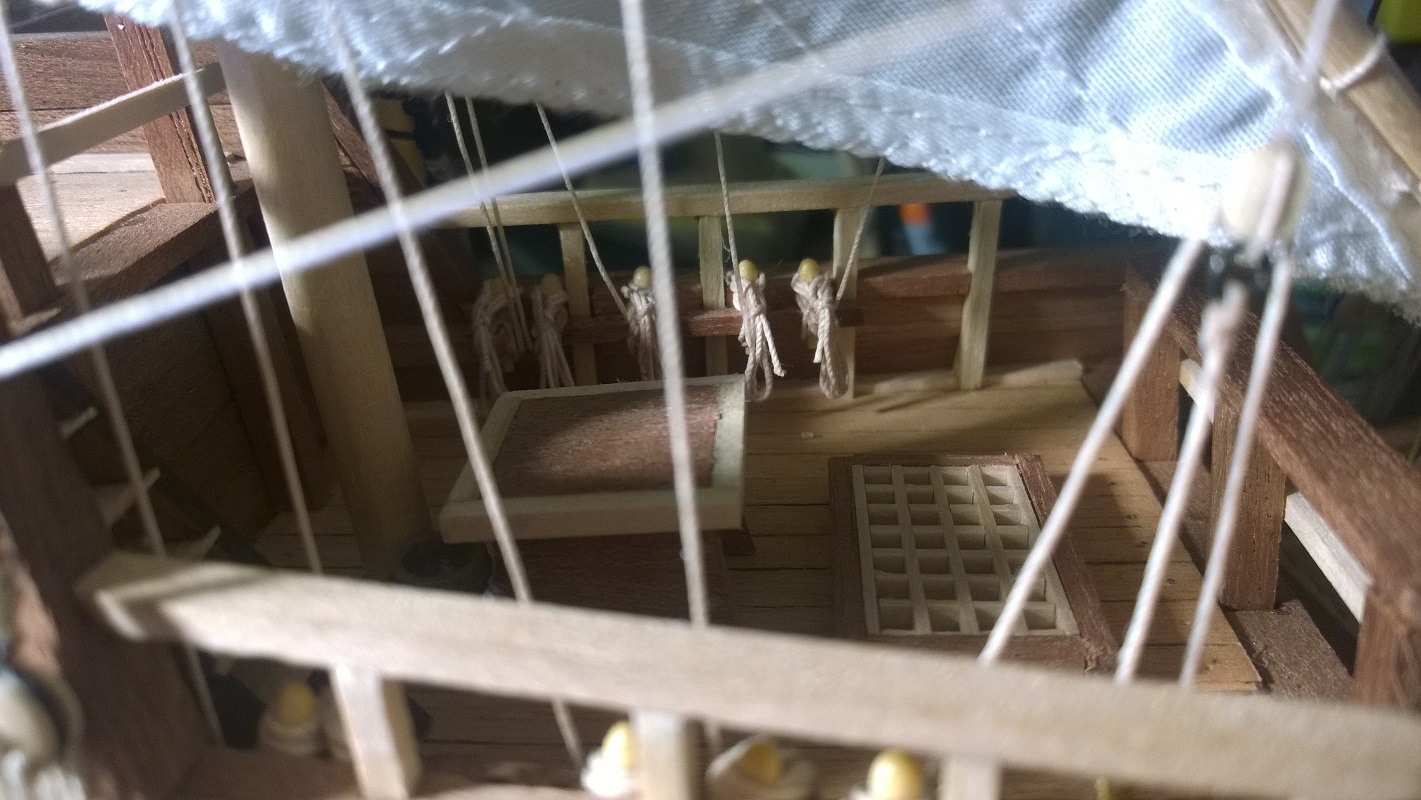
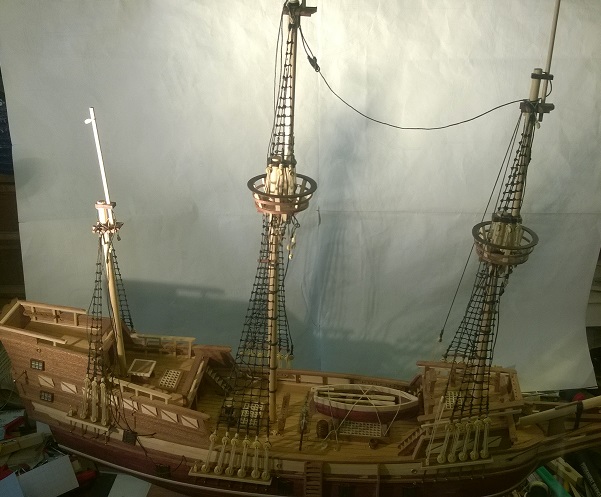
Deck weathered and holy stoned .
Looking very nice!! I only hope there would be more detailed pictures, descriptions and accessories you used to have that result
 .
.-W
-
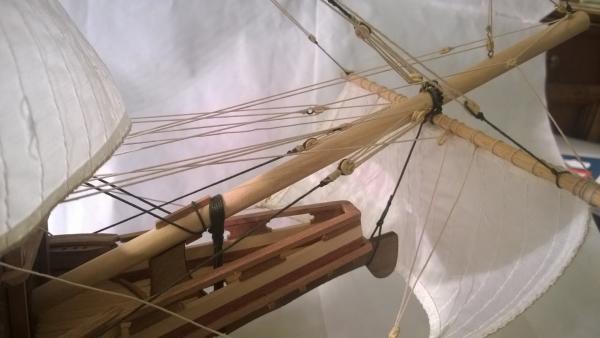
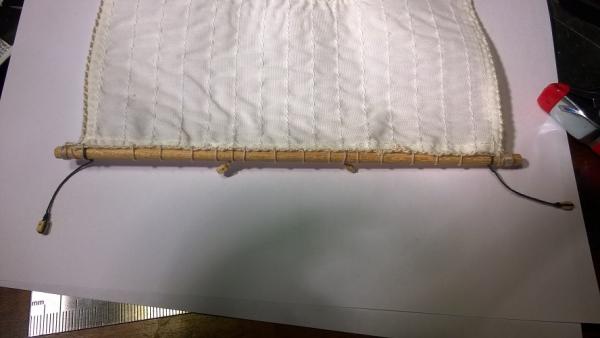
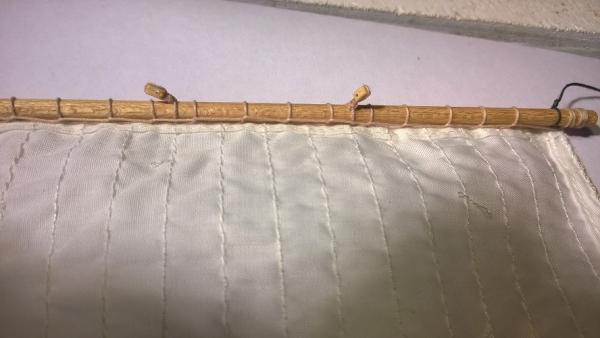
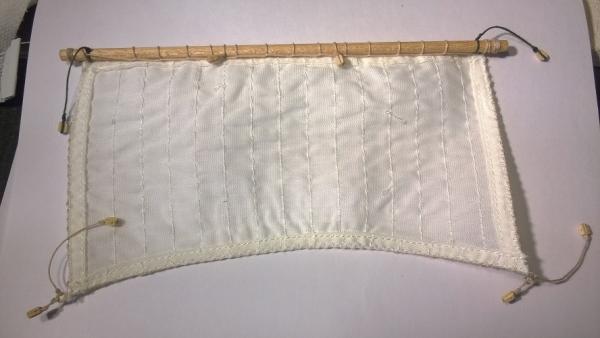
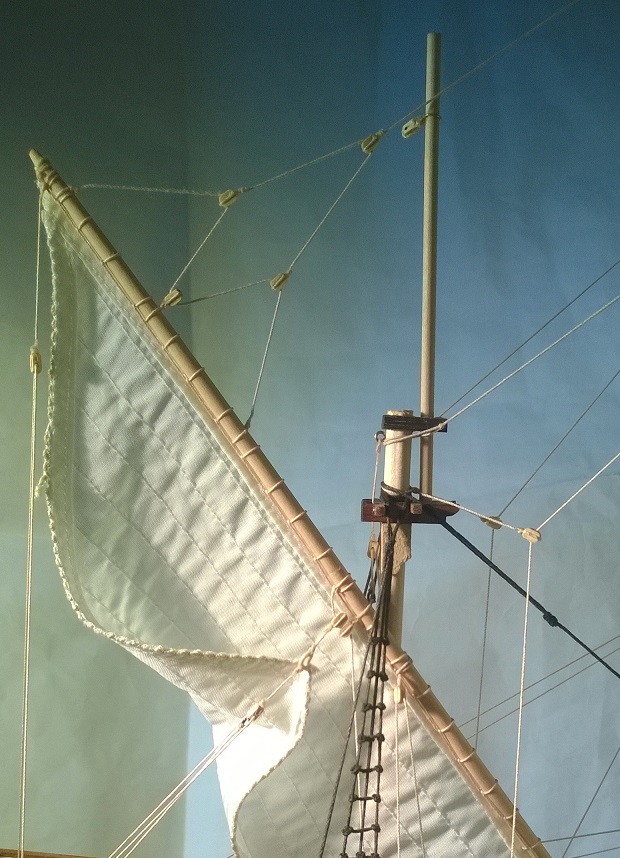
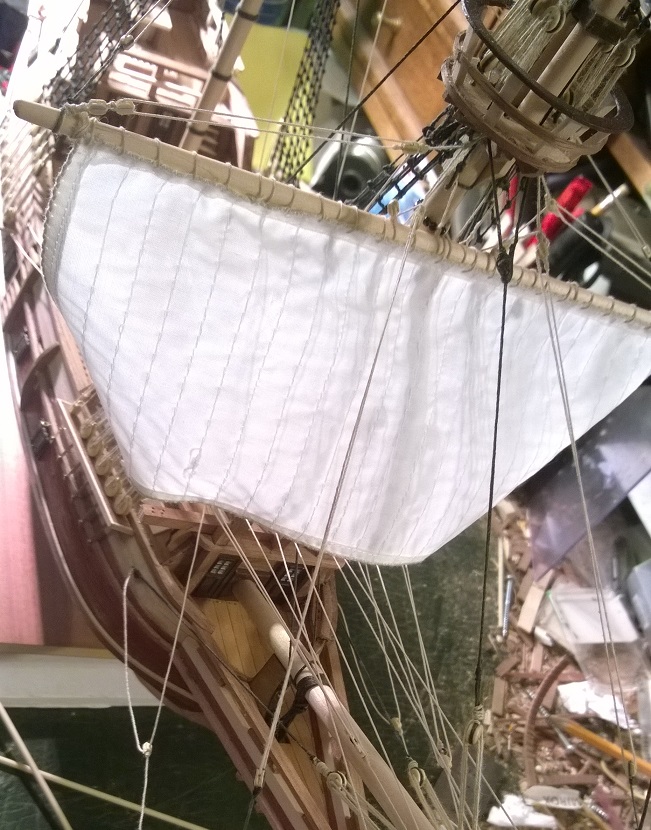
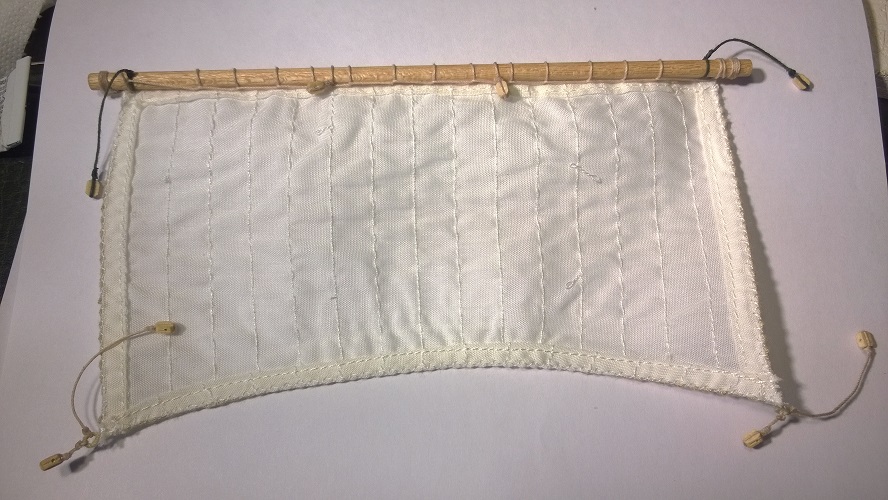
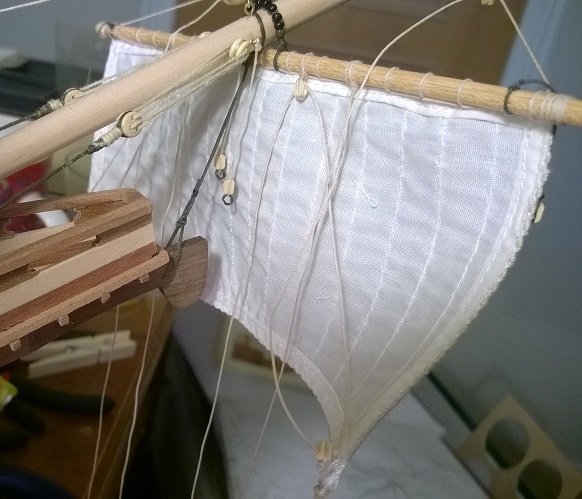
2.7.2015 Finishing Mizzen yard and sail
Few differences again in the guide and with the plan. Even in the plan there are two different connection points for the lining to the belaying pins.


-
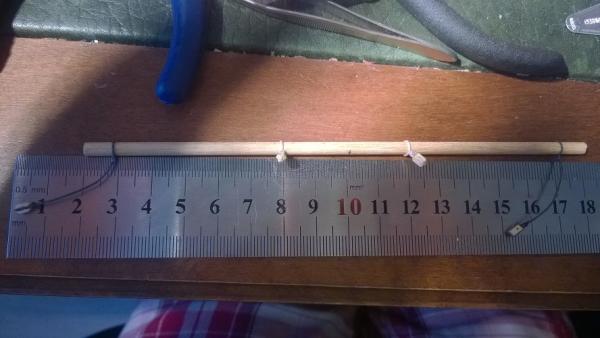
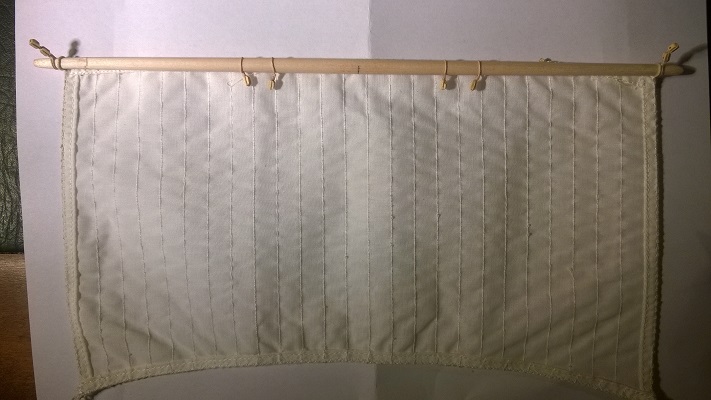
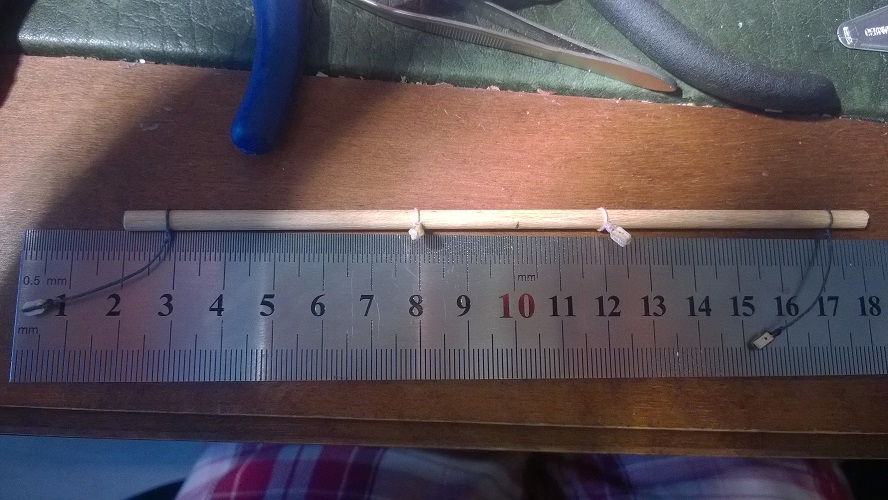
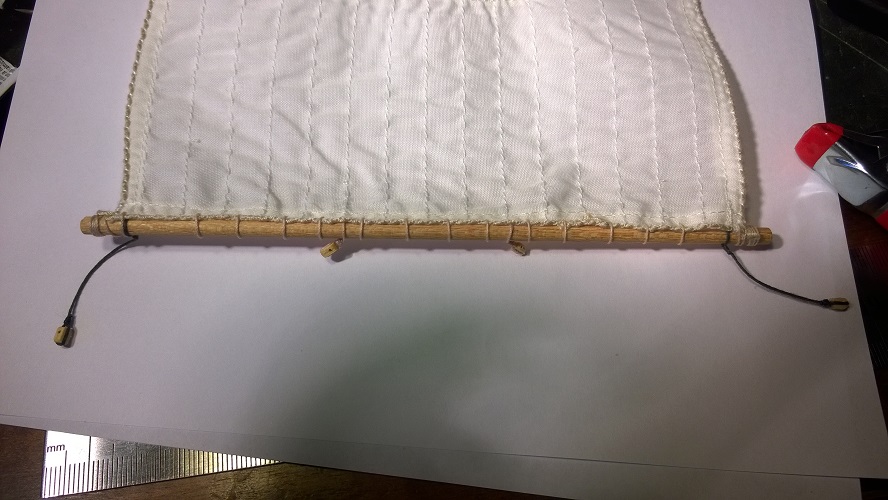
1.7.2015 Preparing Mizzen yard and sail.
Everything went pretty smoothly today. I spent quite a time thinking the position of the sail in the mizzen mast. The sails are ready made in Constructo kit, but looking at the guide and looking model I found in Internet, the sail is positioned differently. Also, in the Constructo part guide says that the mizzen yard is 215mm, and in the plan it's clearly 265mm. Also the sail's longest side is 260mm. Next I examined the sewings, which are different in few models. I decided to use the long mizzen yard (265mm) and attach the longest side of the sail to the yard.

- Jolley Roger and yvesvidal
-
2
-
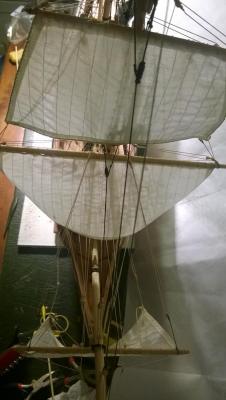
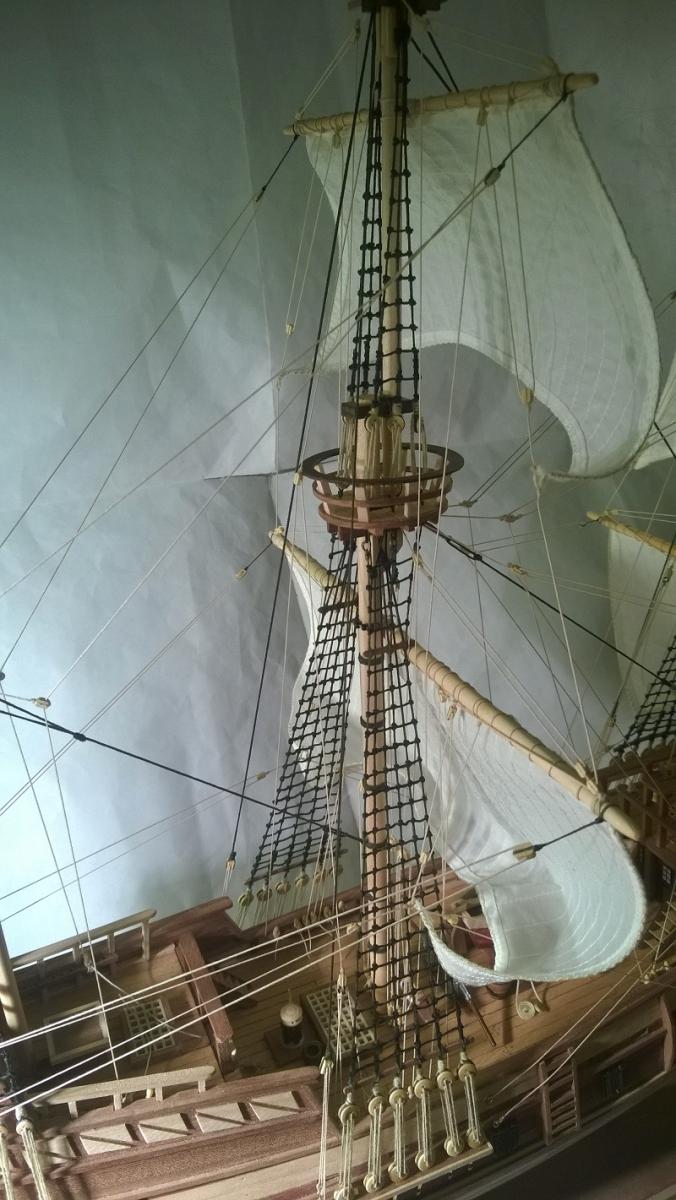
30.6.2015 Finishing main top yard and sail.
I adjusted a little bit the position of the sail on the main mast I did yesterday. I loosened the main sail tacks and let the clue-line block raise. Two reasons for this a) It gives a bit more lively look (not all sails are flat) and
 gives better visibility to the deck lines and accessories . Only one mistake today: I put the sail wrong side front in the main mast top yard, so had to rework a bit, luckily I noticed that before moving forward putting the yard in place.
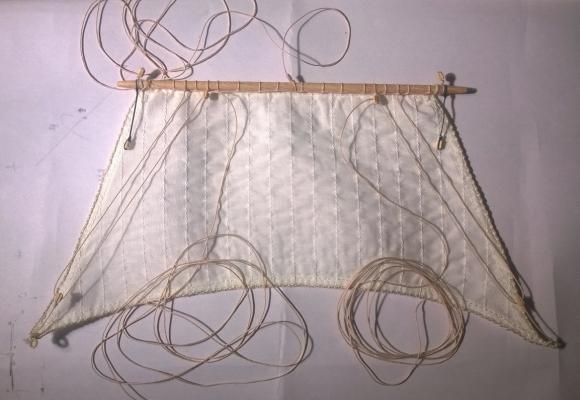


-
29.6.2015 Main yard and sail
Finished prepping the main yard and sail, putting all the lines that are going to get attached already in place both in yard and also those who are attached to the main mast. Basically only lines I didn't already prepare were the main topsail sheets and the 2 main tacks. After the preparations I started connecting the lines and putting the 4 needed double blocks in place.
Again, didn't yet put any glue into the belaying pins after connecting the lines, because if I need to adjust them later when the main topsail is in place.


-
28.5.2015 Preparing main yard.
Learnings: If I don't learn from 2 already same mistakes, maybe after the third... Power drill + Yard tapering + too much power on sandpaper = broken yard.
-
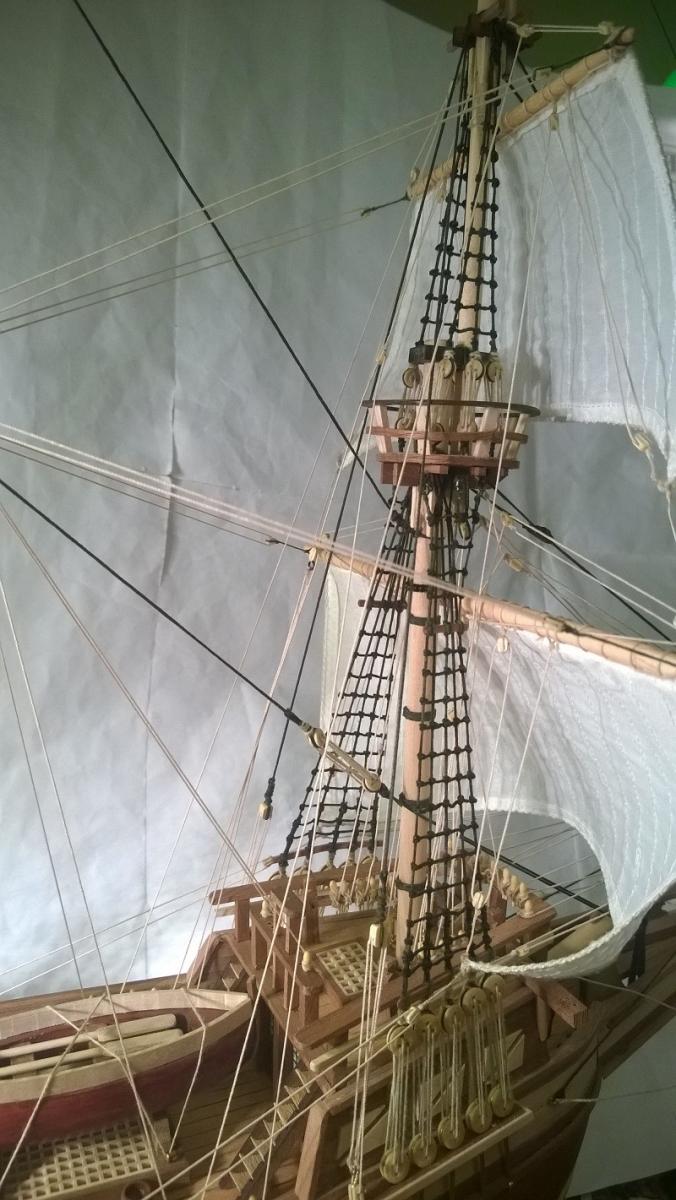
27.6.2015 Finishing fore mast rigging
Today finished fore mast rigging. I still didn't put the coils on top the belaying pins because I'm not sure if still some of the pins will be used later (hard to insert the line if there are coils on the right and on the left belaying pins).


-
25.6.2015 Completed the fore main yard rigging.
Comeback from yesterday's struggle, managed even pour the paint to the floor yesterday when I was finishing up...
Anyways, today finished fore main yard riggings. I was pondering quite a while the position of main tackle clue garnet, should the line go in front of the sail or in the back (as in the guide). If the idea of this line is to reef the sail or even pull it up to the yard. Well, I ended up putting that line in the back of the sail as in the guides and in this ready model: http://www.shipsofscale.com/gallery/vosullivan/mayflower/index.html

-
24.6.2015 Operating with the Fore yard. Managed to blow the yard to pieces and breaking my belaying pin rack...
I started tapering the fore yard by attaching other end to the drill and using sandpaper on the other end. Everything started smoothly until I pressed medal to the pedal and gave too much pressure with the sandpaper -> the yard cracked into 3 pieces. Not only did I that once, by twice. Learning: Patience pays off, use the sand paper pressure gently and eventually I ended up using just sand paper and forgetting the drill.
After the tapering, I put some color into the yard (same as I used in the deck planking) to give it a bit better color and attached the sail and the blocks to the yard. Eventually I was in the same point as yesterday and started sorting out the lines to the belaying pins. When I was about to attach the last lines from the spritsail yard, the left side belaying pin rack came off. Learning: Put the belaying pin racks in place _firmly_ already in the beginning. Let's hope now it stays in place, as the result the base of the rack is not so smooth anymore, there are bit of glue marks now visible after the repair in a small space.Not my day today...


-
Now, I'm wondering about your masts...
Oh my... Just realized why the connector piece's (lower mast and upper mast) holes were that small! I made the holes larger and larger and eventually when the 6mm and 8mm masts went through, there wasn't room left (~0,2mm). Well, now I know what tapering means and also learned that the reason was to lower the weight of the yards... AND masts..
-
OK, I have a question. Is your bowsprit and the yard for the sail not tapered?
Umm... had to search what it means
 . If I'm correct it means that the yard is thinner on the edges than in the middle? Nope.... I've actually seen that in the pictures of other building logs, thought of it a month ago but I somehow figured its something special for those vessels and I'll come back to that but now that you mentioned it... I also noticed that I haven't finished the edges at all...
Can't blame Constructo since I wouldn't even call this guide an instructions so have to look into the mirror
 . Well, only solution is to break the fore yard ropes and do it again. Too bad I already managed to prep the fore yard ropes into the foremast ready for the actual yard including the rope that is being used to pull down the yard. Probably going to leave the bowsprit and the spritsail yard as it is, lets see tomorrow when I'm calmer .
Thanks Rschissler for bringing this up!!
-
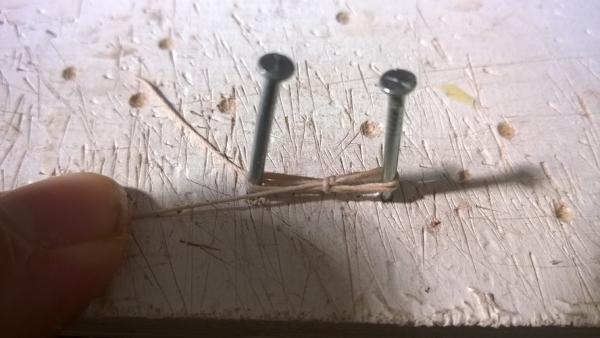
23.6.2015 Fore yard and the sail
I ended up cutting off the yard that connects spritsail yard edges and the foremast midpoint because the fore yard couldn't fit. Going to attach that right after I have rigged the fore yard and the sail. I think the same problem goes with the fore yard connection to mainmast midpoint, so this time I'm not going to attach it yet to the belaying pins.
Managed to prep today the fore yard and sail blocks.


-
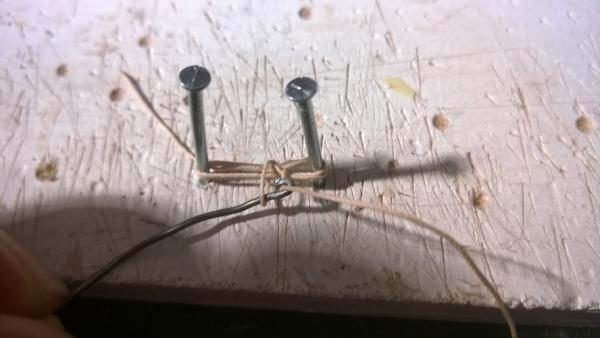
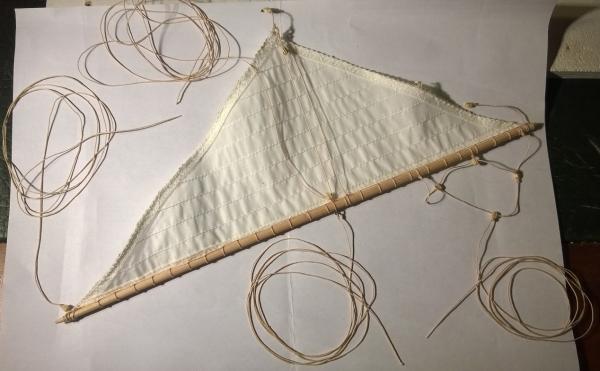
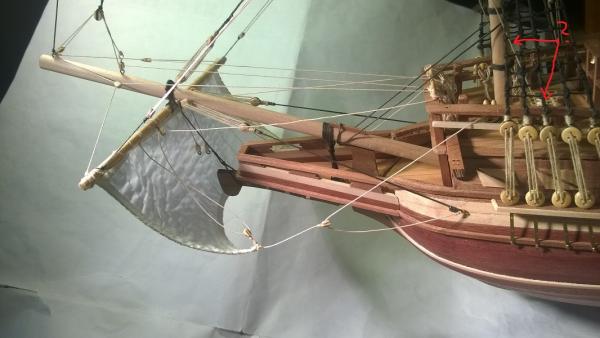
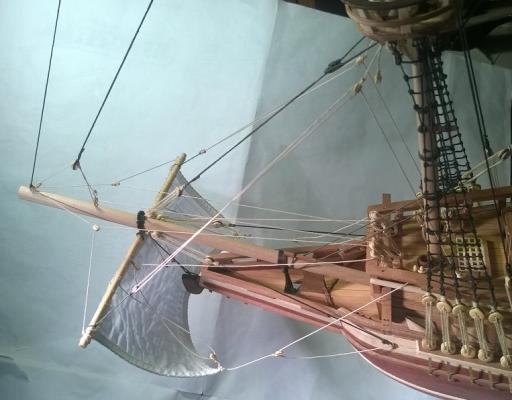
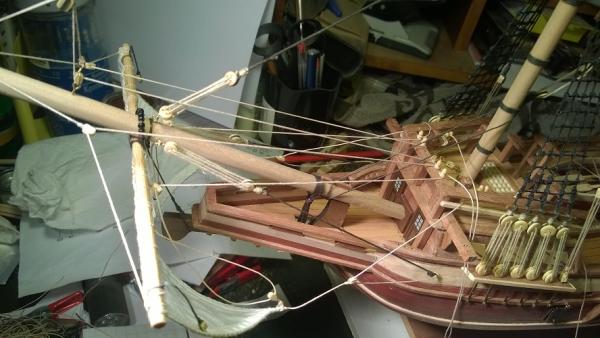
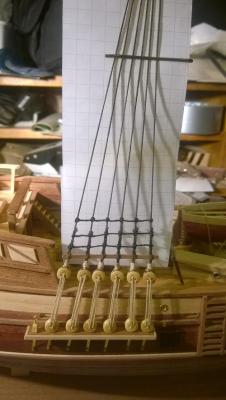
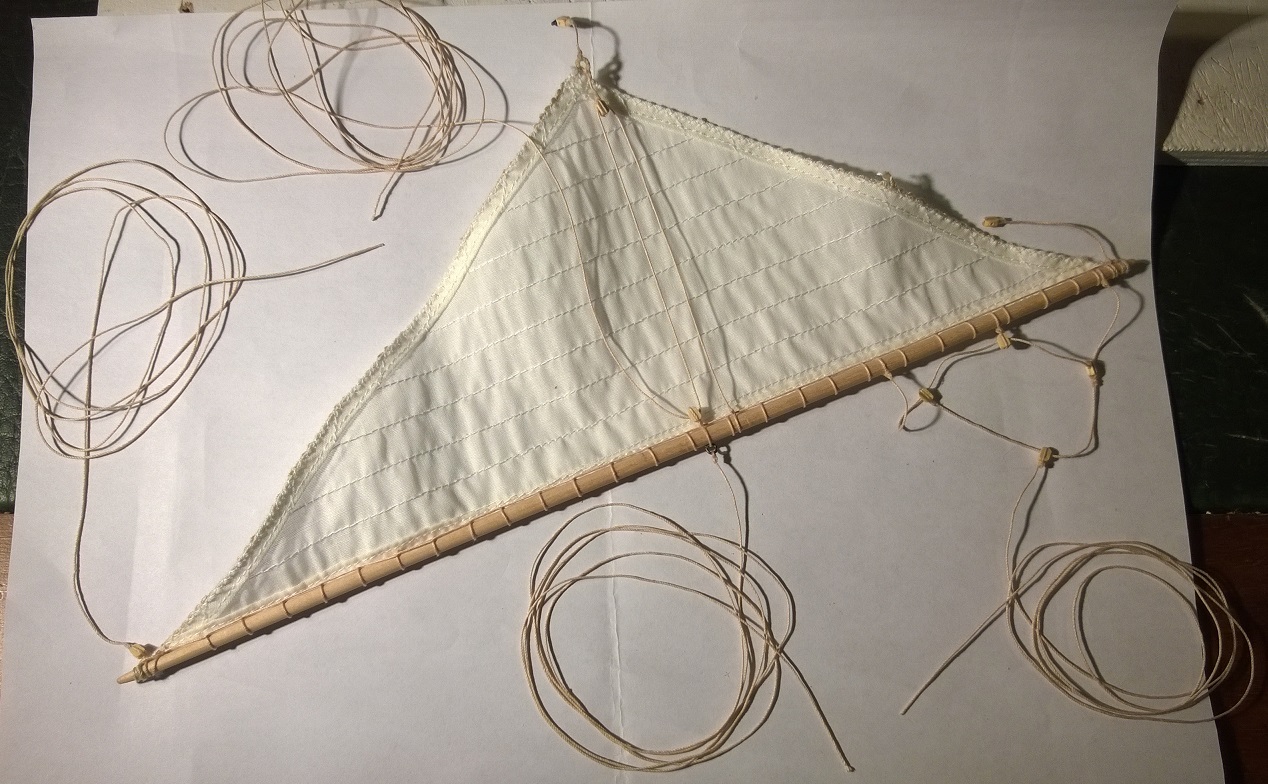
22.6.2015 Finishing spritsail.
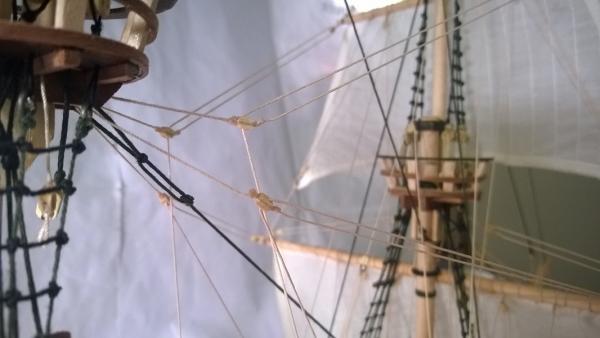
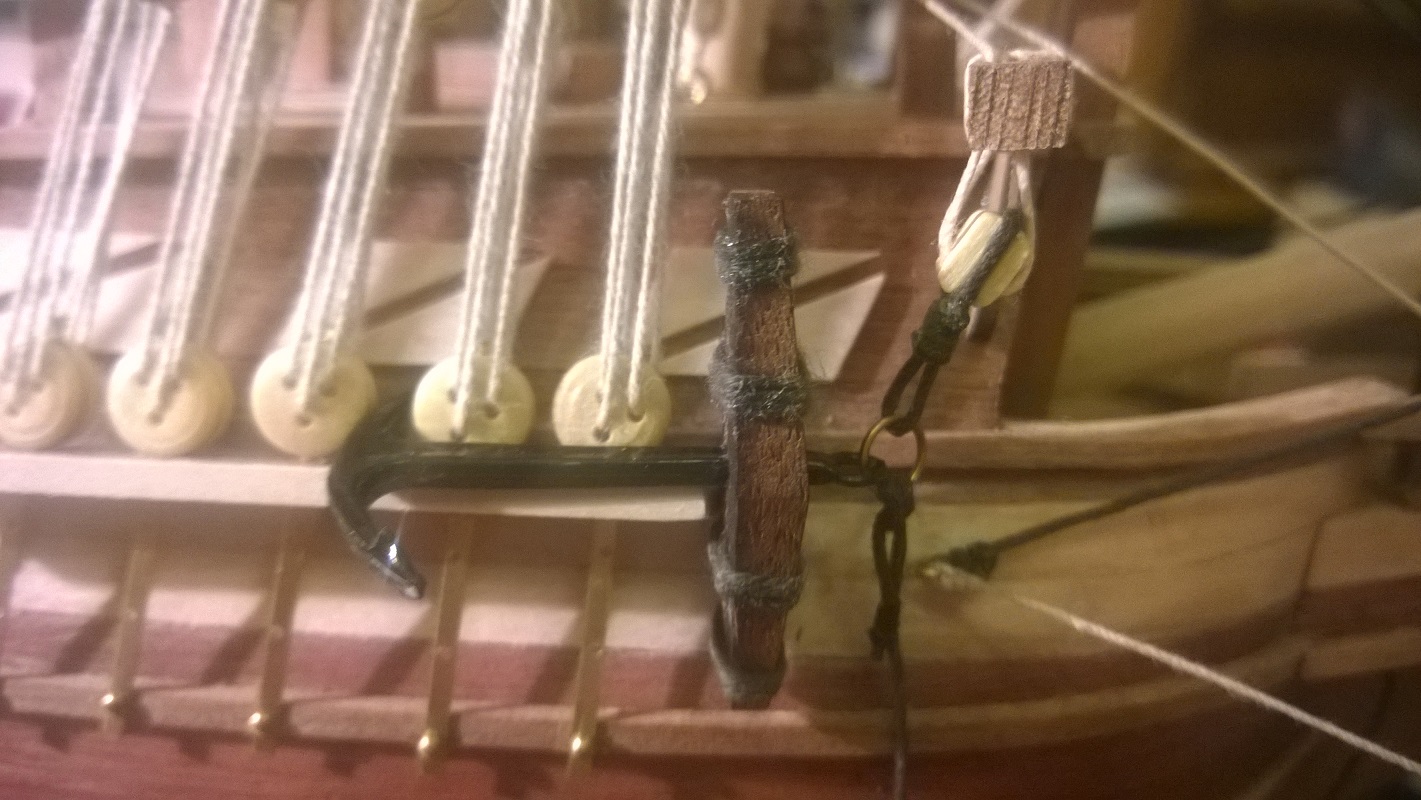
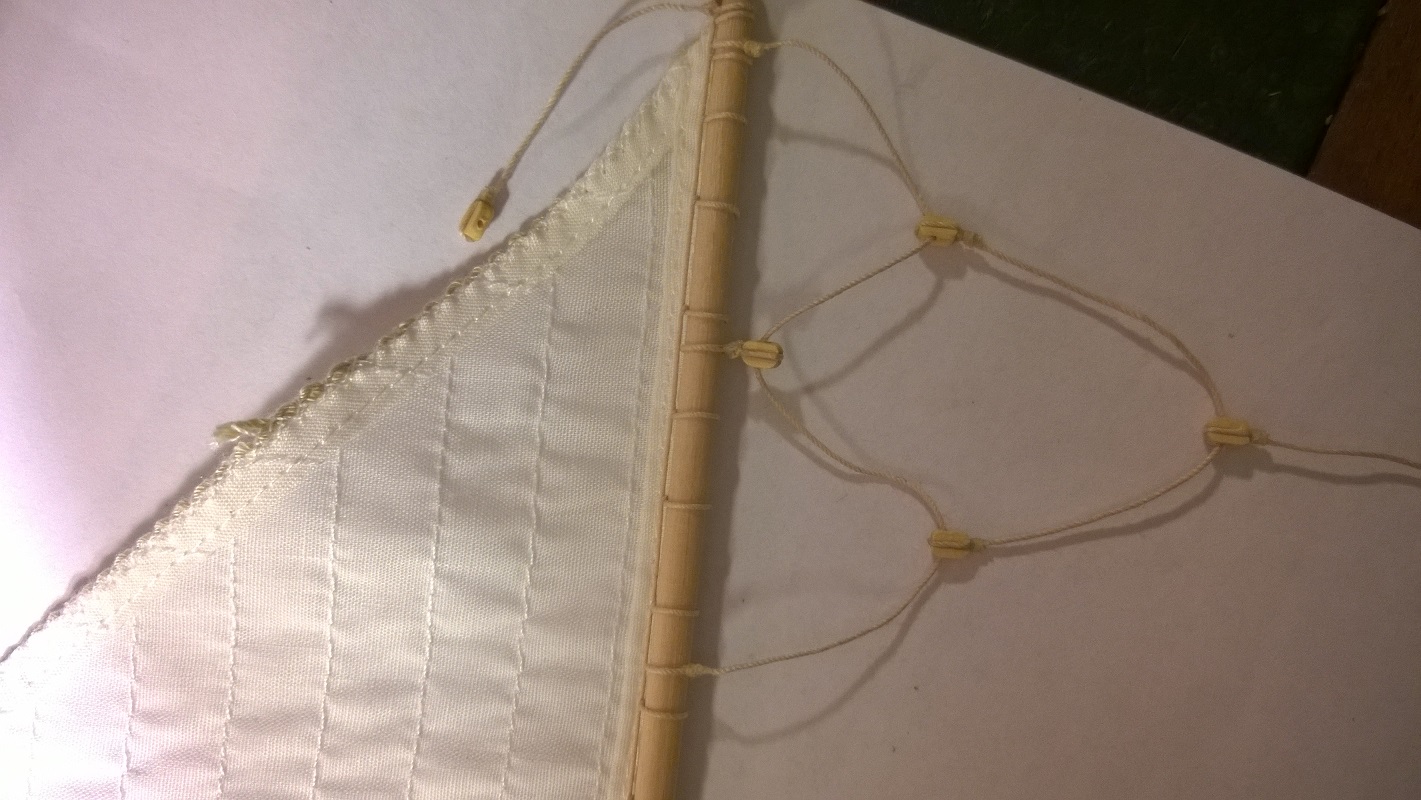
Learning: Constructo manual says the position of the yard that is attached to the edges of the spritsail and runs through the foremast midpoint blocks. The belaying pin position seems to be wrong and I need probably to reposition the belaying pin for that rope. It seems that I cannot fit the Main foremast sail if the ropes are attached to rear belaying pins. I put the picture with red arrows pointing the problem position. Too bad I didn't leave too much extra rope to the belaying pins and already applied CA, well, lets see how it looks when I have prepped the lower foremast sail.
Also tried coiling few example ropes, didn't attach them yet since the space between the belaying pins is small and I will still need the room.

-
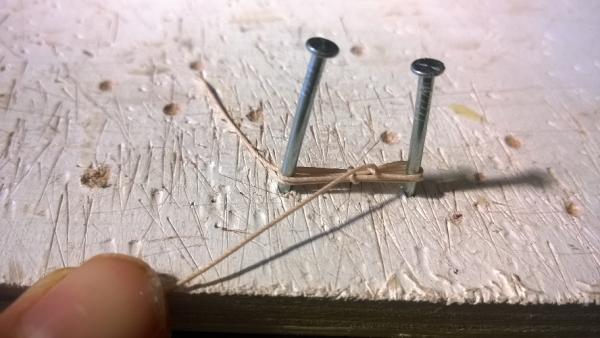
21.6.2015 Spritsail rigging
Today I started rigging spritsail and attaching garnets. Before attaching the bowsprit sail, I attached all the needed skoots/ropes (not sure if that's the correct name).
Few learnings: Attach the base for belaying pins properly, when you start attaching ropes to the pins, how frustrating is that the base comes off. Second: Attach first the yards, and only then the ropes that connects the sail tips (skoots?). Third, since there are quite a many belaying pins, make sure you read the number correct where you want to attach the rope.


-
-
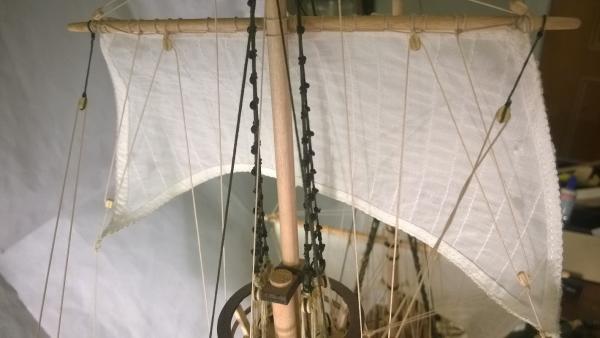
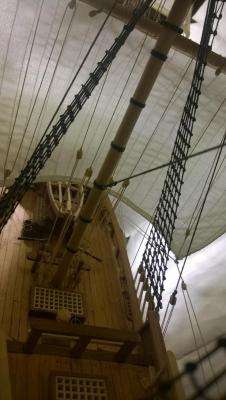
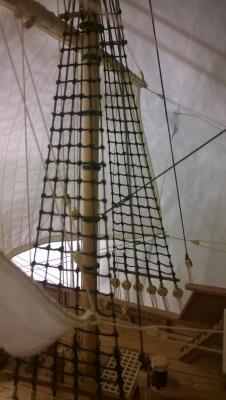
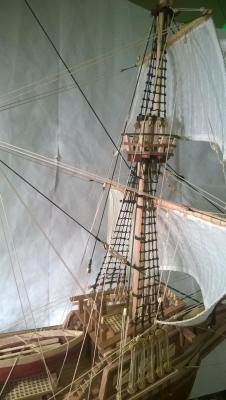
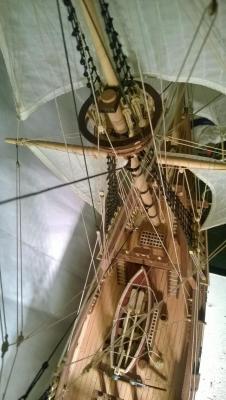
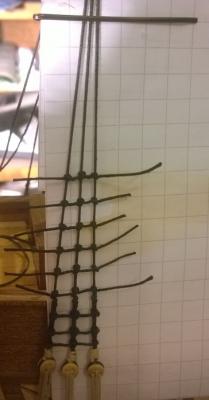
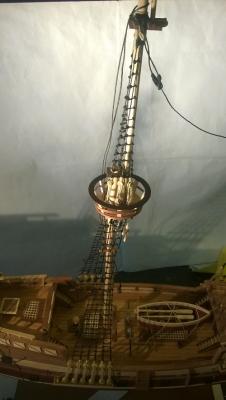
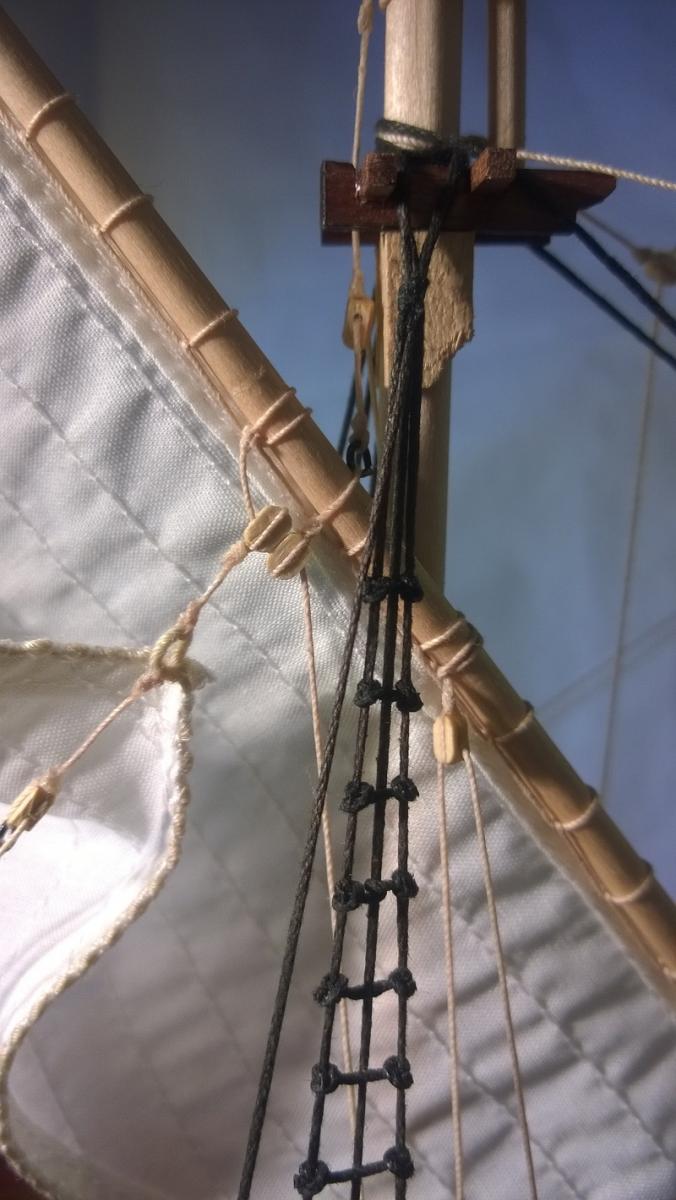
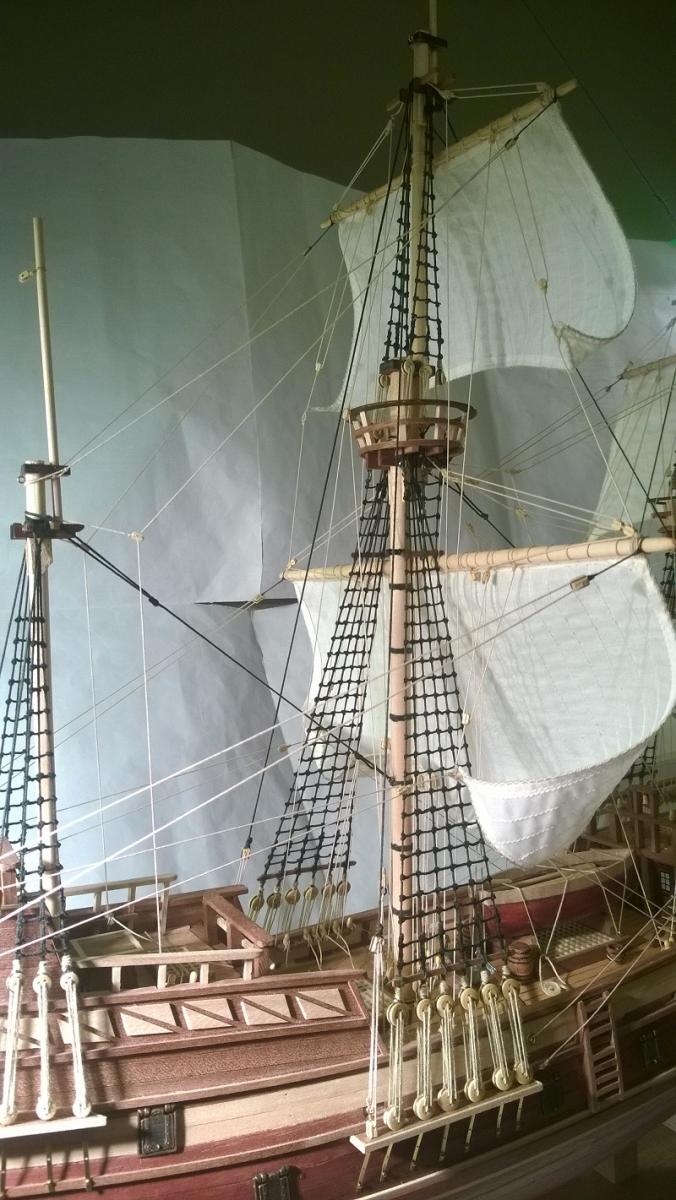
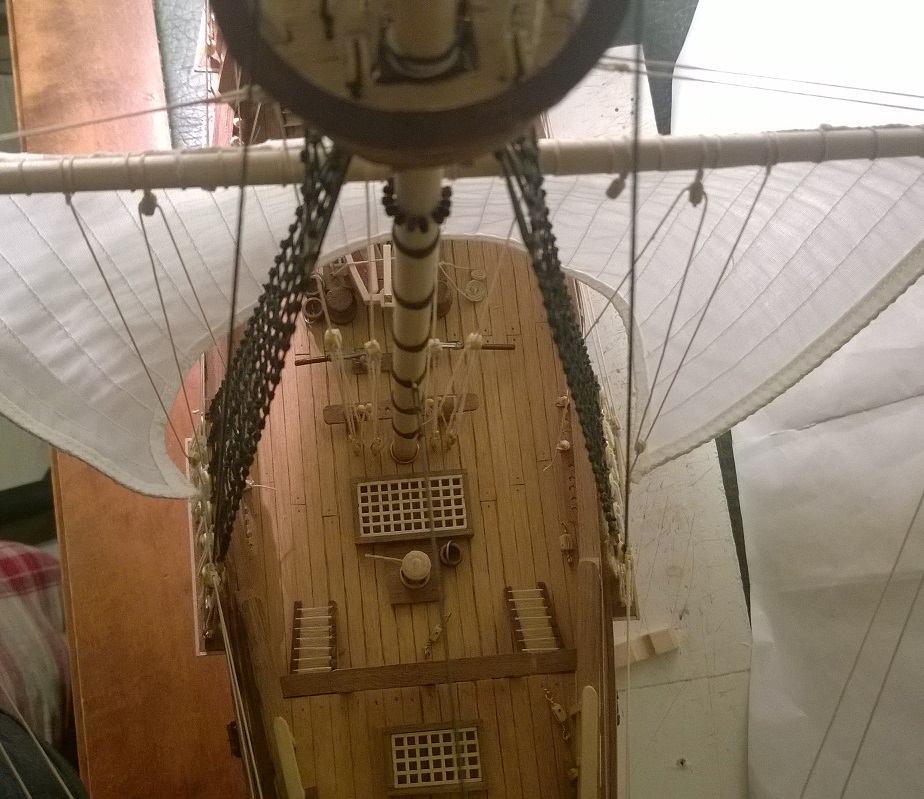
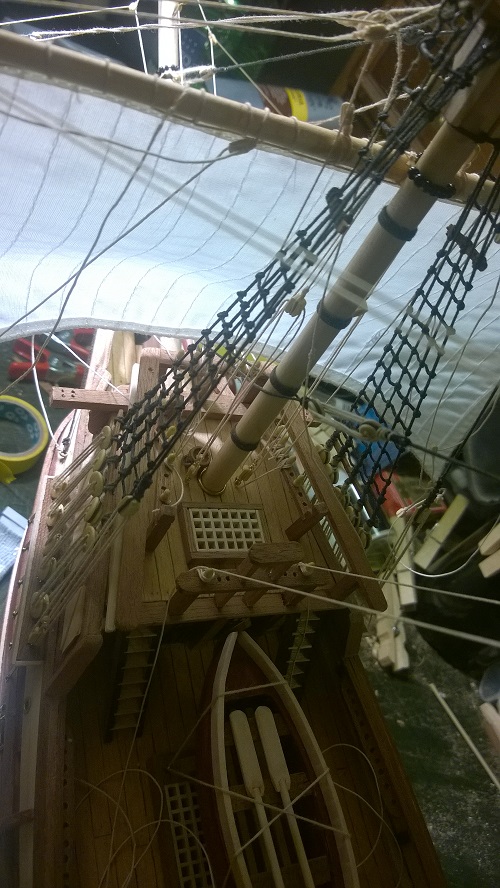
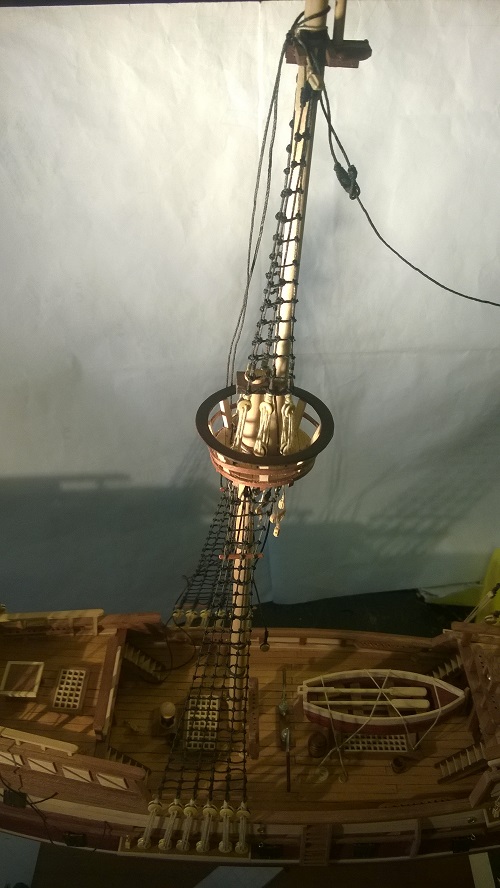
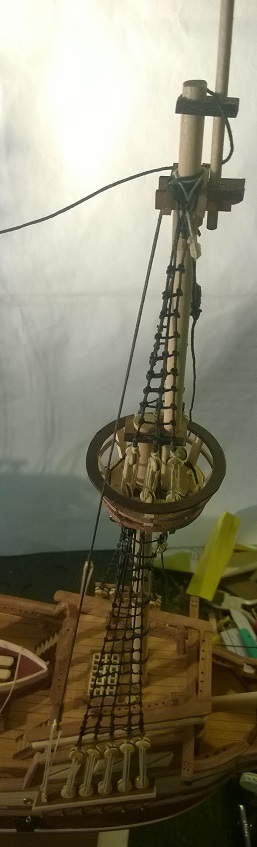
19.6.2015 Ratlines finished
Finished top masts and mizzen ratlines and have to say I enjoyed the ratlines stage. Few things I noticed: The top mast shrouds were too loose, should've tightened them in previous stages. Second, attach yards only after the ratlines are finished. Third: Prepare (don't attach) the yards before moving to shrouds (easier to move to yards when you don't have to work right behind the newly build ratlines).


-
18.6.2015 Base foremast ratlines finished. Moving to Mizzen and then top mast ratlines.
Today finished the fore base mast ratlines. As I figured earlier, it was not a good idea to attach the fore mast yards before doing the ratlines. They weren't disturbing that much, but maybe I would have tightened them a bit..
-
-
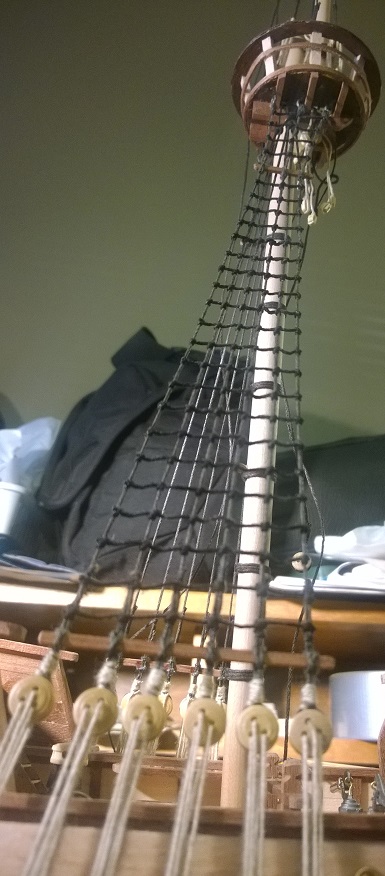
14.6.2015 Sheer poles and starting ratlines.
Today I started with the much waited ratlines. I think the ratlines should be straight horizontal (?) and if the sheer pole is adjusted to the hull's angle, the ratlines should move horizontal straight pretty fast when starting from downwards up. Anyway the basic knots felt easy to do, but getting the ratlines straight (right tension not to pull shrouds together and not to be too loose) was a bit more difficult. Going to search more best practices and continue tomorrow.
I'm trying to put ratlines every 0,8mm, so in 1:65 scale it would be 52cm in real size.
-
two days break and today 13.6.2015 Mizzen shrouds ready.
Tomorrow main mast sheer poles and I guess after that ratlines before the yards! I've looked a lot of information how to tie the ratlines and I think I'm going to follow this method: https://www.youtube.com/watch?v=yMmGFWJhi8E
-
Very nice first build, your skill is very evident! Keep it up!
Thanks Asat! I try to keep calm and not to hurry ahead too fast and make mistakes (done enough already)

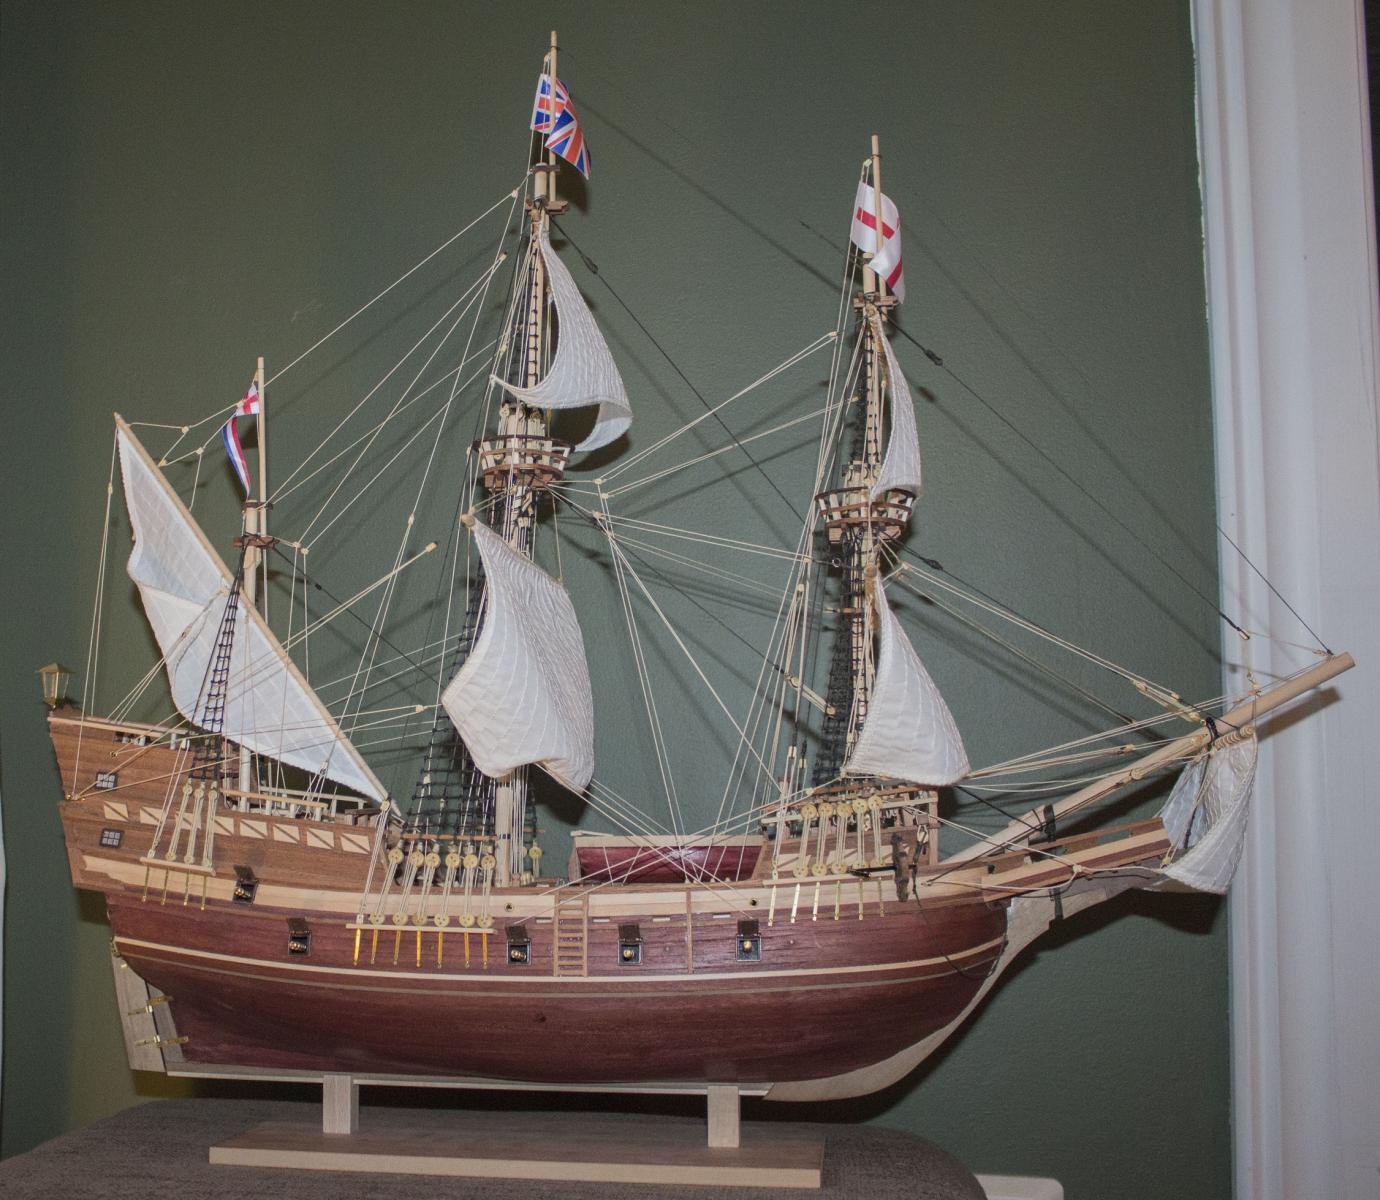
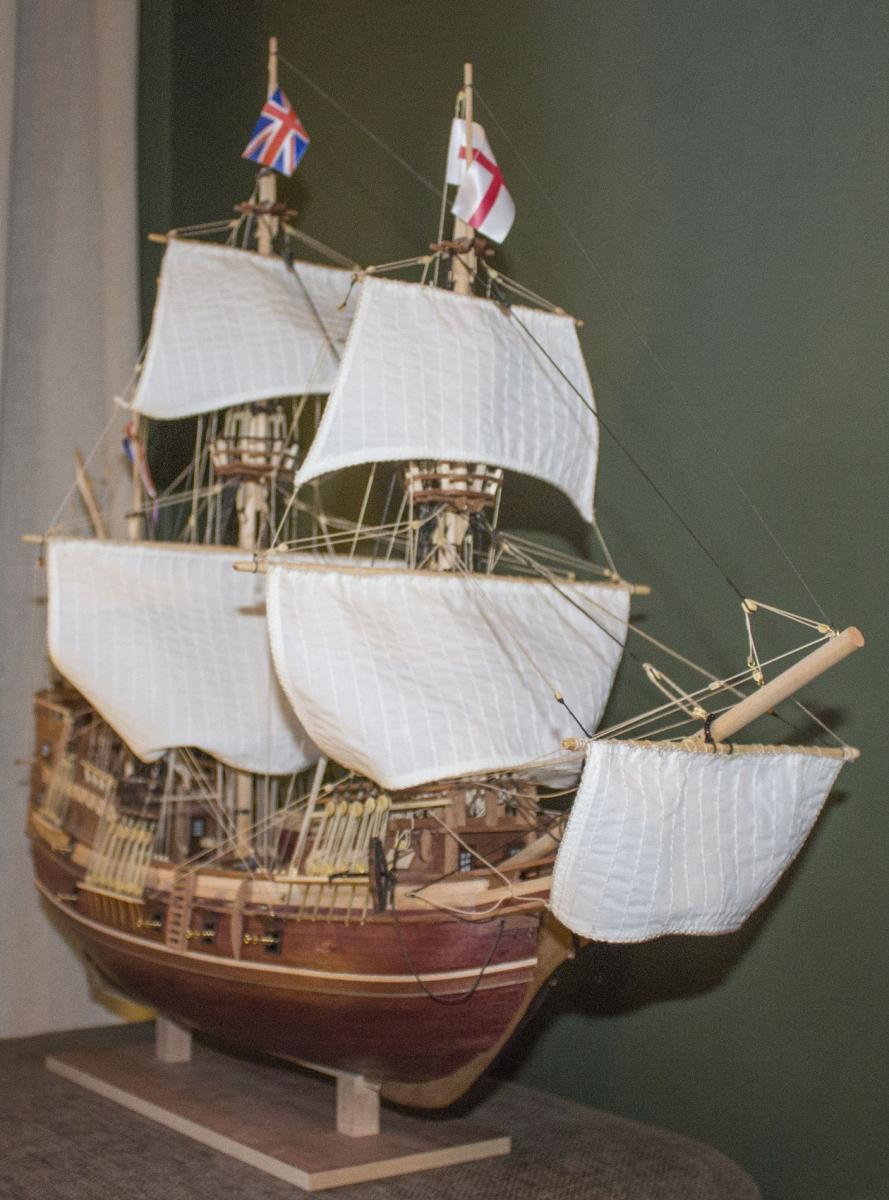
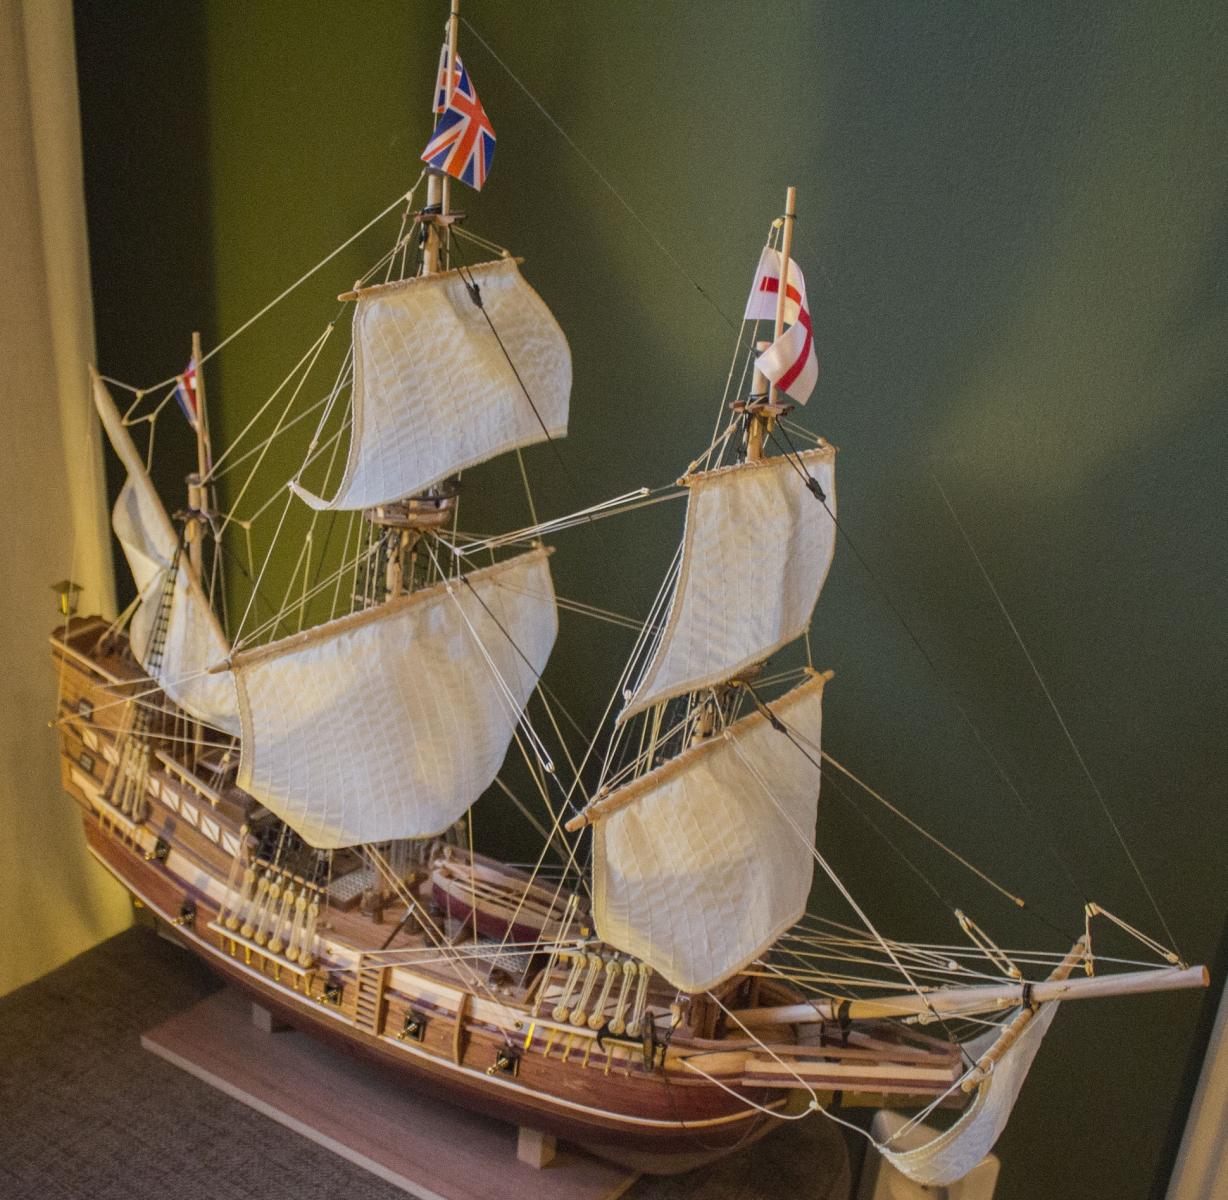


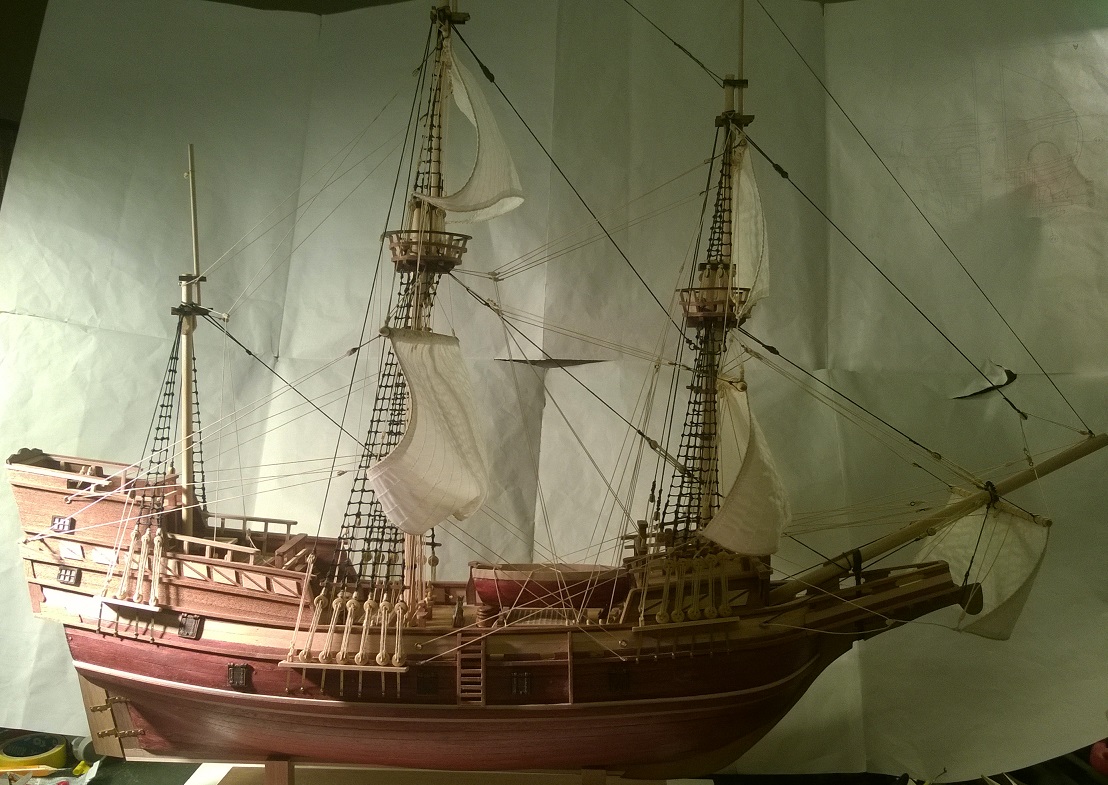


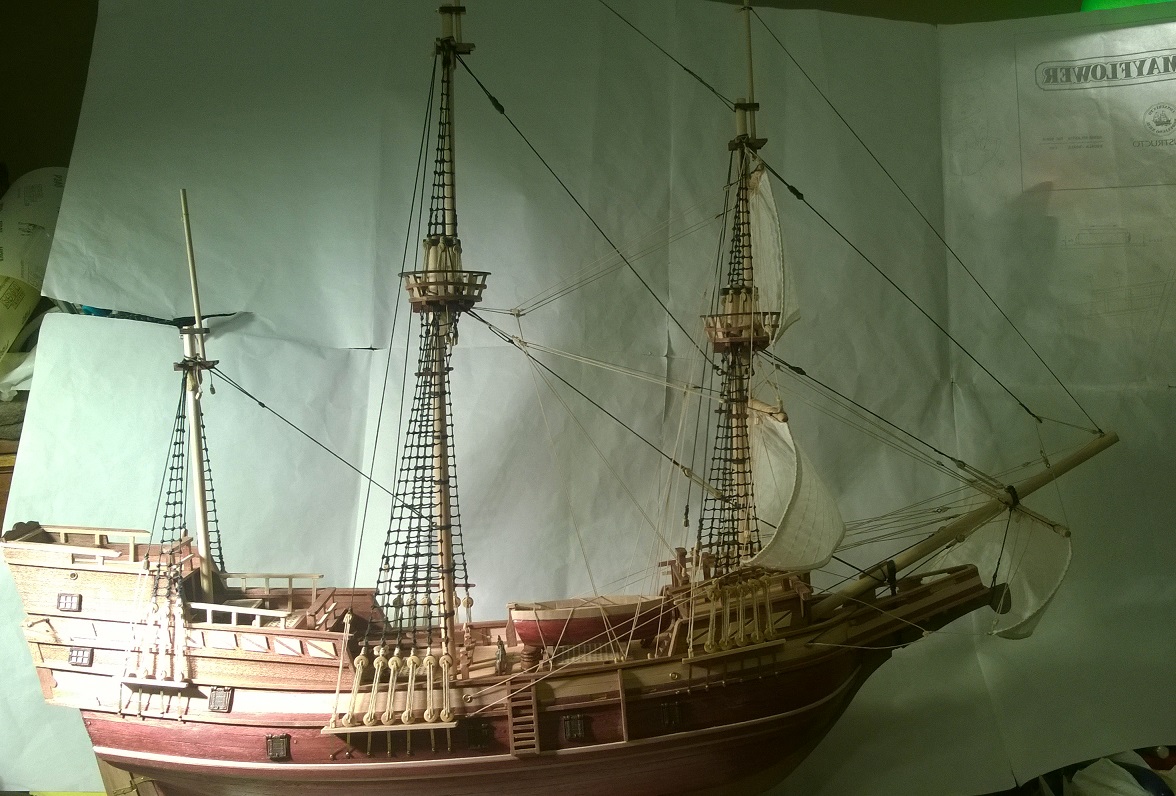


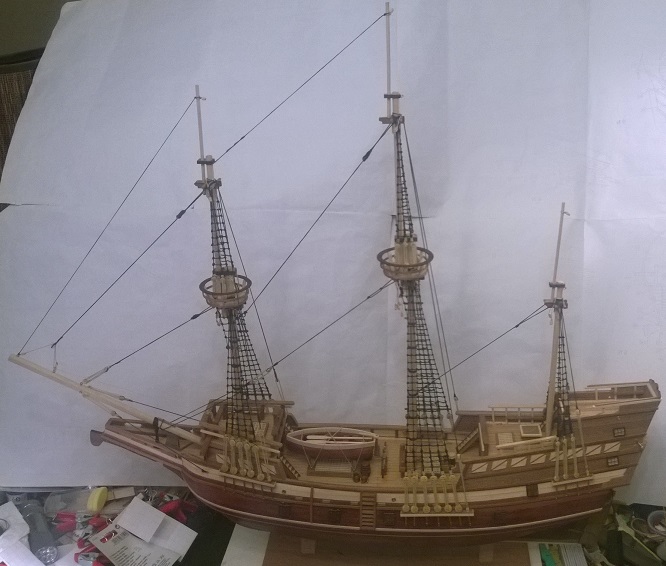


Mayflower by Winlich - FINISHED - Constructo - Scale 1:65 (First build)
in - Kit build logs for subjects built from 1501 - 1750
Posted · Edited by Winlich
Hi Klinko,
How did you glue the bow reinforcement wrong?
For some reason I missed 1 reinforcement in the middle and thought that it didn't matter. However since the false deck is bend towards the edges, I had difficulties later (planking) since the false deck wasn't "fixed" on the other side. I needed to put plenty glue underneath the false deck (and bend it correctly) to make sure its tight before I could continue. If the false deck wouldn't have been leveled correctly, It would have been impossible to fix later.
The bow especially is a place where you can see if the false deck is too high or low in other end, and how it's sides are sanded. It will have effect also on the hull plaking when you close the deck level (bending, since the hull planks continue upwards from the deck level, there cannot be a gap between the bow deck and the hull planks) and how the hull planks meet the bow sprit planks.
So looking back, making the base correct, helps you lots of trouble and remediation in the next phases. I would try to remove carefully the bow reinforcement and if the reinforcement brakes, you can make new one using the part # 26 (2x6x600), since at least with the Constucto kit there were still about 15 pieces extra remaining in the end. I'm sorry I can't help much with the glue removing (I know that there are guys here in the forum who knows everything about glues ), I didn't use any glue/water/else mixing and if I had to remove a piece, I just used carefully brute force and tried to mitigate if something broke (like in later stages using sand dust and glue in visible gaps).
Also any marks in the keelson and the false decks will not be visible after planking, just get the angles, height, place right and symmetric. If I missed the actual point, please put a photo .
.
EDIT: Looking back my pictures, it seems that I missed 2 reinforcements, the one in middle and also the bow. putting them also as attachments.