CDW
-
Posts
7,757 -
Joined
-
Last visited
Content Type
Profiles
Forums
Gallery
Events
Everything posted by CDW
-

1960 Corvette by gsdpic - MFH - 1/12 - Multimedia
CDW replied to gsdpic's topic in Non-ship/categorised builds
Gary This fellow has some excellent videos on building MFH kits, including soldering. His videos are well worth watching. www.youtube.com/@motorsportinscale2291 -
1960 Corvette by gsdpic - MFH - 1/12 - Multimedia
CDW replied to gsdpic's topic in Non-ship/categorised builds
I'm in the same boat with you on soldering white metal, Gary. No experience with it and what little I have was bad experience. The problem is the low melting temperature of the white metal. The solder used must be one that melts at a lower temperature than white metal. Did you order some from England? That's the only source I found, a shop in England, although some modelers say a well-stocked model railroad shop carries it. There is no well-stocked model railroad shop near me and I found none online in the USA. A very experienced friend in Canada who builds many MFH kits says he uses 5-minute epoxy and CA glue to build his kits. Even he has not enough experience with solder to feel comfortable using it. Now the nice thing about using CA glue is that an acetone bath will dissolve the CA glue if you make a mistake. CA glue is a perfect match for temporary glue to check fit in temporary assemblies of white metal parts. My friend assembles his entire model temporarily before committing to a permanent glue. He gives it an acetone bath to take it back apart once he is certain everything fits properly. This of course DOES NOT include resin parts, which should not get an acetone bath. He tapes and uses blue tack, or white glue to assemble resin parts. -
1960 Corvette by gsdpic - MFH - 1/12 - Multimedia
CDW replied to gsdpic's topic in Non-ship/categorised builds
I like your improvised paint booth, Rob.! -
1960 Corvette by gsdpic - MFH - 1/12 - Multimedia
CDW replied to gsdpic's topic in Non-ship/categorised builds
Agreed, just mostly cosmetic differences between the 1960 f.i. system and the 63. The 63 looks a lot sexier than the 60 unit. I will print it out and do a fit check when I build my Corvette. -
1960 Corvette by gsdpic - MFH - 1/12 - Multimedia
CDW replied to gsdpic's topic in Non-ship/categorised builds
This is close, but not an exact match for the fuel injection system for the 1960 Corvette. This particular system was used on later, 327 powered Corvettes. This fuel injection system is available as a downloadable, 3D printable file. Too bad MFH doesn't offer the correct system as an add-on item for the 1960 Corvette. I tried to find a match for the 1960 version but this was as close as I could find.
- 34 replies
-
- 10
-

-
1960 Corvette by gsdpic - MFH - 1/12 - Multimedia
CDW replied to gsdpic's topic in Non-ship/categorised builds
I looked it up and here is what I found concerning engine options for the 1960 Corvettes: For the 1960 model year Corvette (C1), Chevrolet offered only one engine family, but with multiple power levels depending on induction and tuning. 1960 Chevrolet Corvette – Engine Options All 1960 Corvettes used the Chevrolet small-block 283 cubic-inch (4.6L) V8. There were four factory horsepower options: Engine Code Induction Horsepower Notes 283 cu in V8 Single 4-barrel carburetor 230 hp Base engine 283 cu in V8 Single 4-barrel carburetor 245 hp Higher compression 283 cu in V8 Dual 4-barrel carburetors 270 hp Performance option 283 cu in V8 Fuel Injection (Rochester Ramjet) 290 hp Top performance option Key Details All engines were naturally aspirated (no superchargers or turbos). The 290 hp fuel-injected 283 was famous for achieving 1 horsepower per cubic inch, a major milestone at the time. Fuel injection was expensive and rare but offered exceptional throttle response and racing credibility. Transmissions included a 3-speed manual, 4-speed manual, or 2-speed Powerglide automatic (automatic not available with fuel injection). -
1960 Corvette by gsdpic - MFH - 1/12 - Multimedia
CDW replied to gsdpic's topic in Non-ship/categorised builds
Gary Nice start on the engine. Do you recall what the four engine options were in 1960? I am guessing they were all variations of a 283 ci V8 engine. The 327 didn't come out until later. -
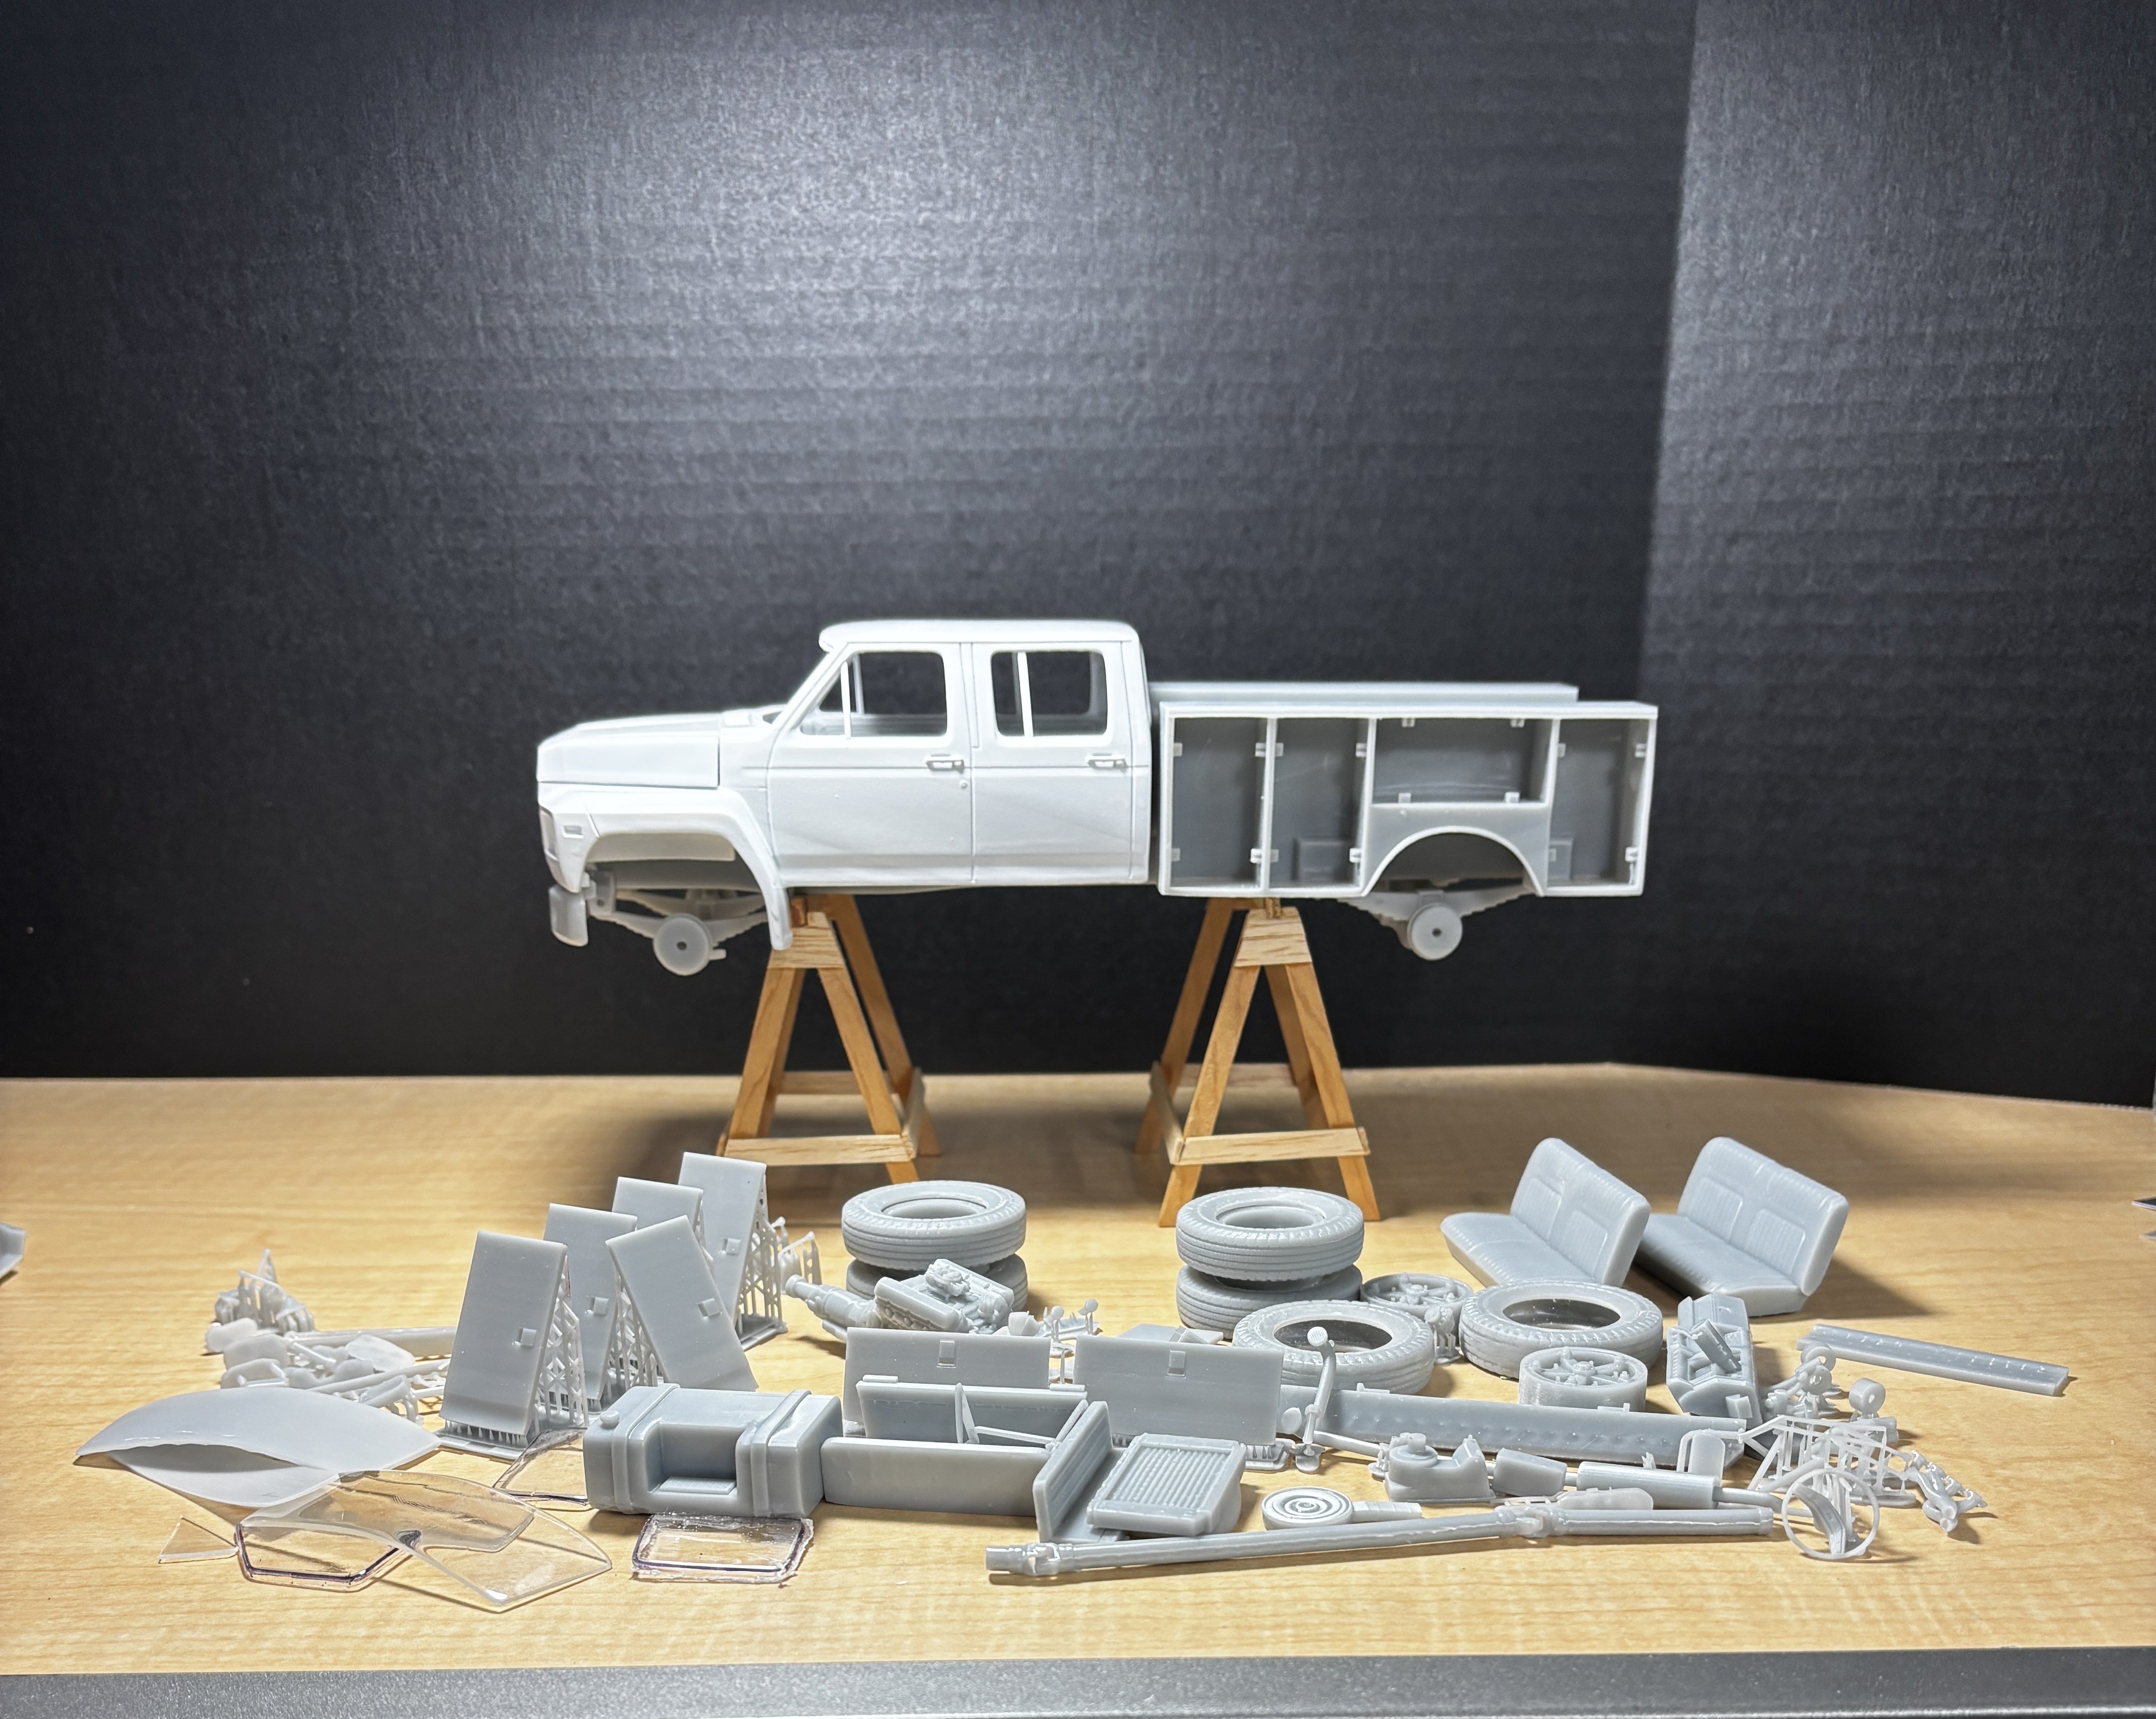
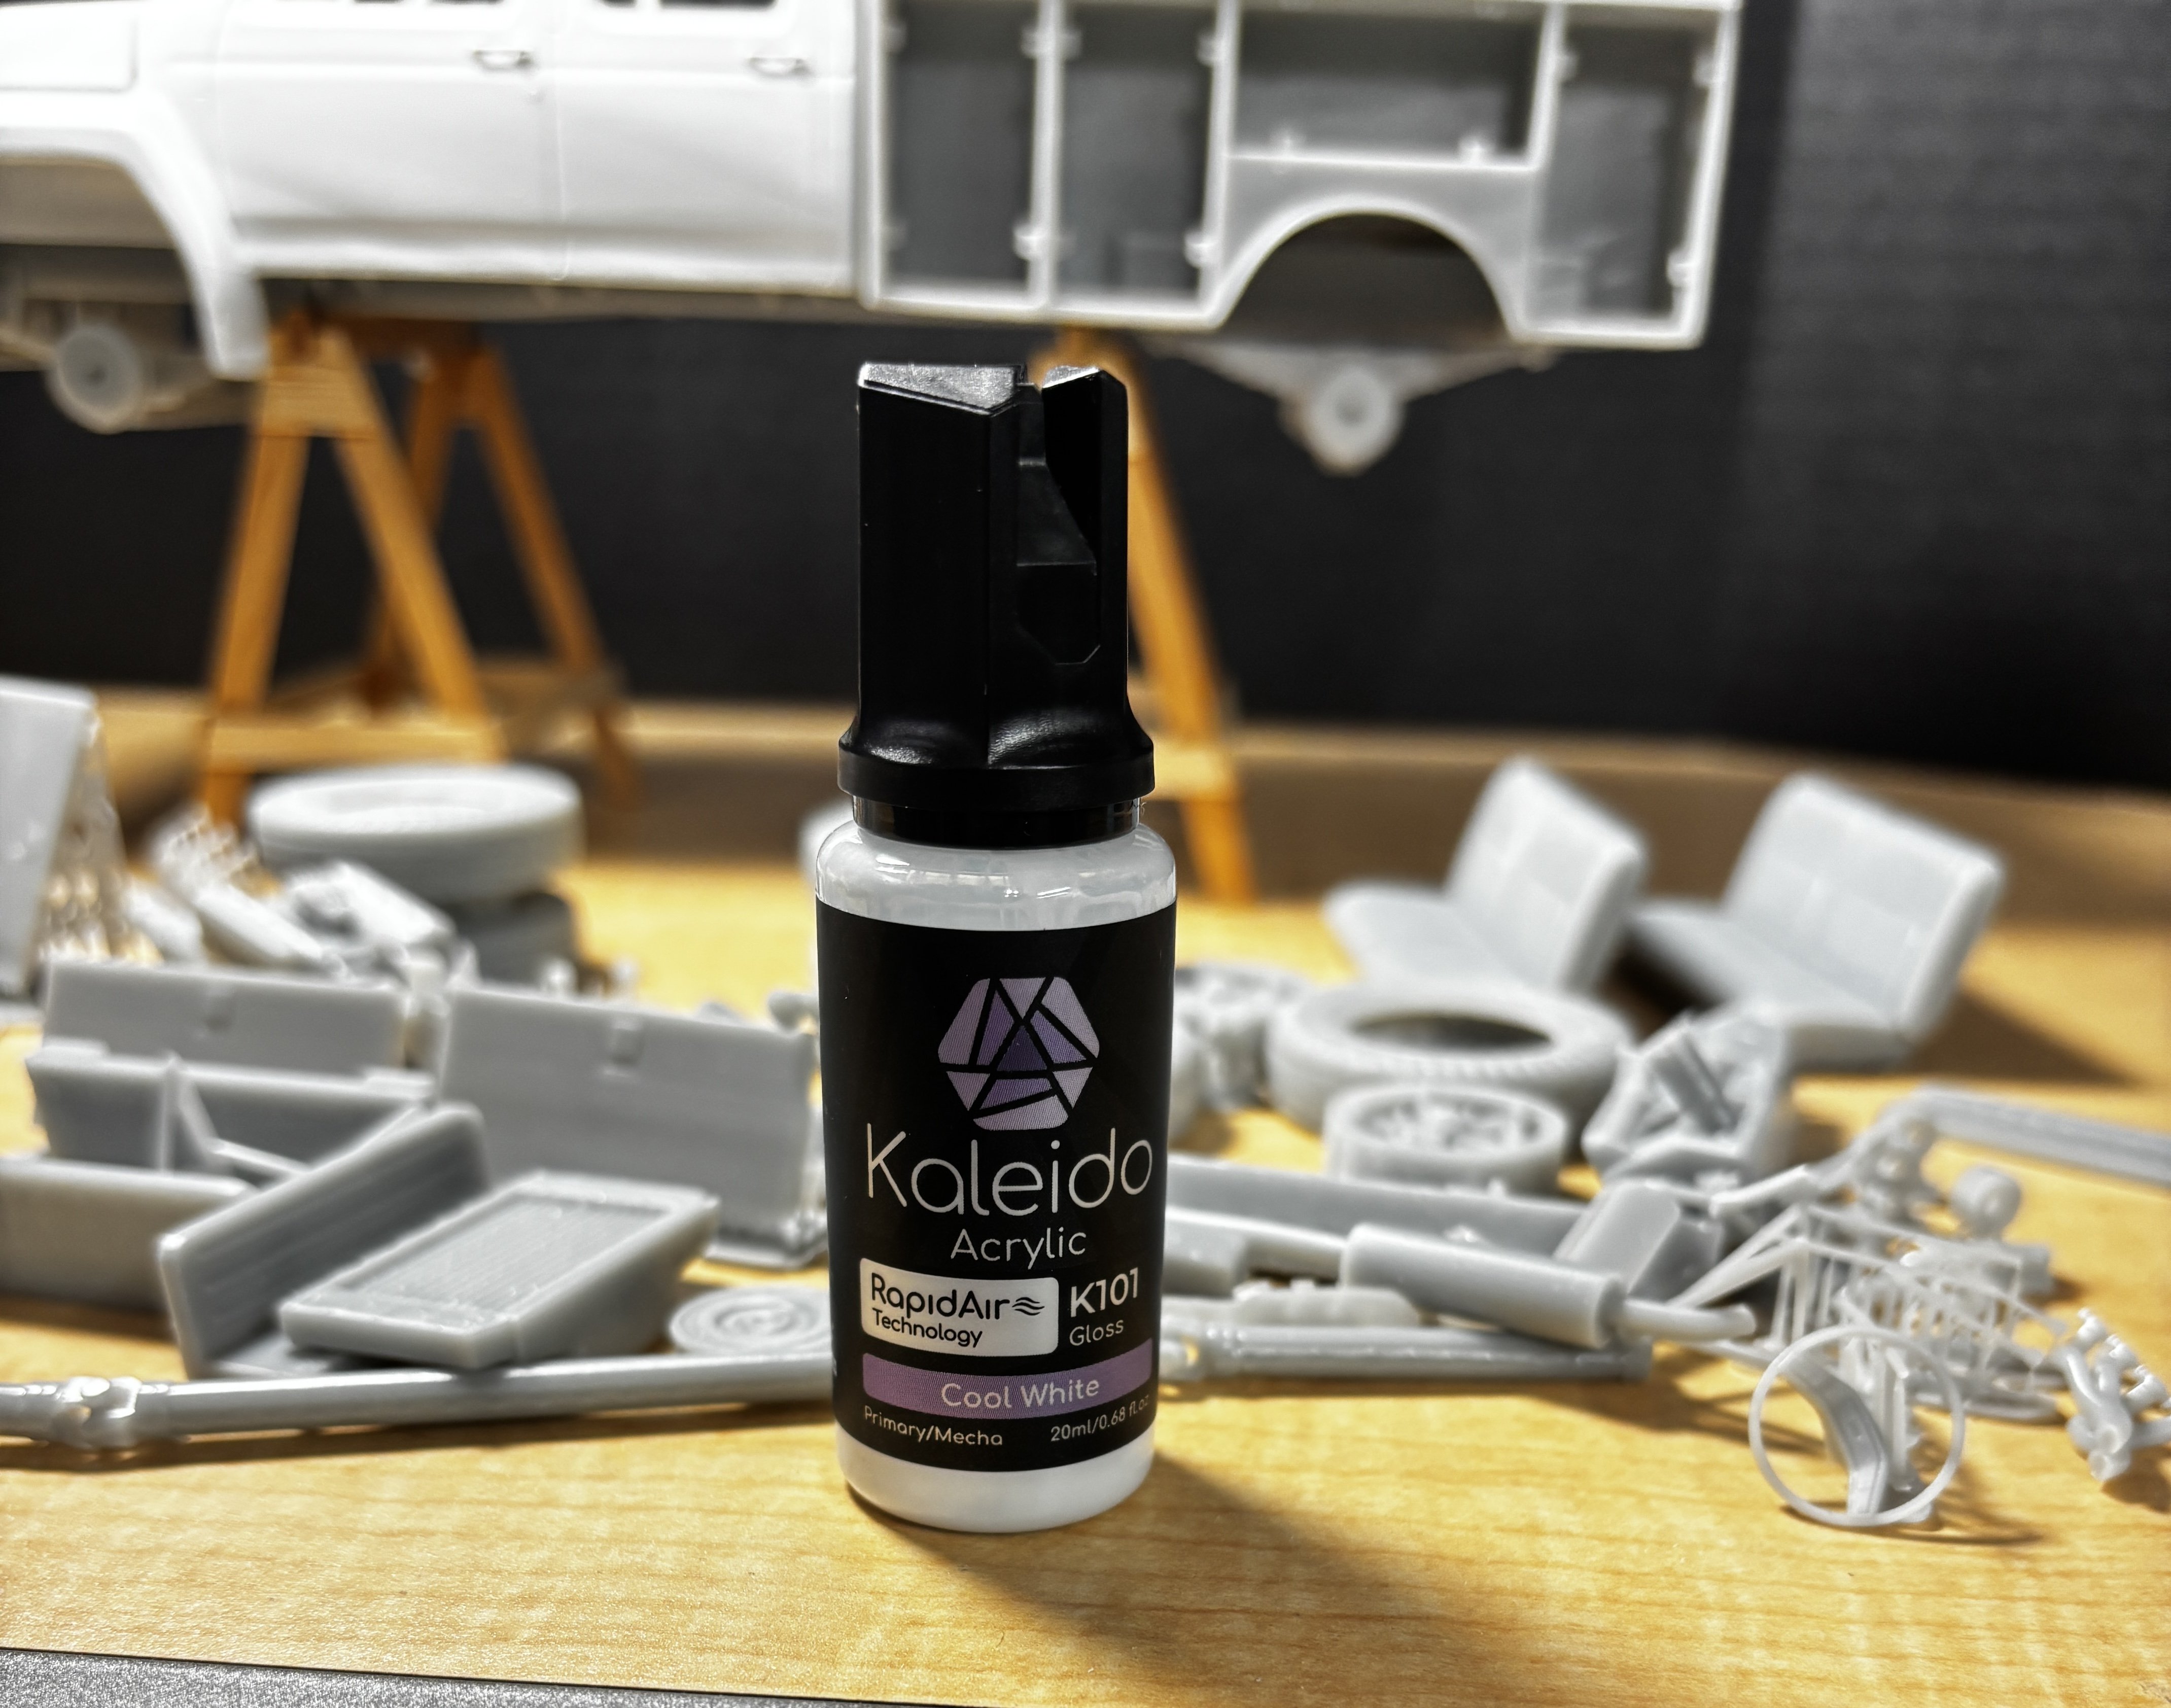
Using a file designed by Andrez Bezdrodny, I printed the parts using my Elegoo Saturn 3 printer. All parts are 3D printed with the exception of the windows. The windows are formed by using 3D printed window bucks provided in the Bezrodny files as molds, then vacuformed with 1mm thermoplastic. With this build, I am testing a brand new, innovative acrylic paint line called Kaleido. The paint is specifically designed to mimic the qualities of lacquer while eliminating all undesirable hazards of solvent based paint. Hard, durable, glossy finish. As you can see, I chose plain old white as my initial paint color. I can say so far the coverage is excellent. Quality of pigments excellent. Dries fast but not quite as fast as lacquer. There is a full range of colors available as sets of 24 colors each, all gloss. There are gloss and flat clear varnishes, gray, black, and white flat sandable primers as well as a gloss black primer. They have taken acrylic model paints to a new level. I won’t post a lot of progress photos but will post final photos of this paint/3D resin test project when completed.


-
1960 Corvette by gsdpic - MFH - 1/12 - Multimedia
CDW replied to gsdpic's topic in Non-ship/categorised builds
Looking forward to your build, Gary. Test build everything to make sure all fits well. Only commit to permanent adhesive after you are certain all subassemblies go together without a hitch. Same goes for paint. No paint until all test fitting is complete. -
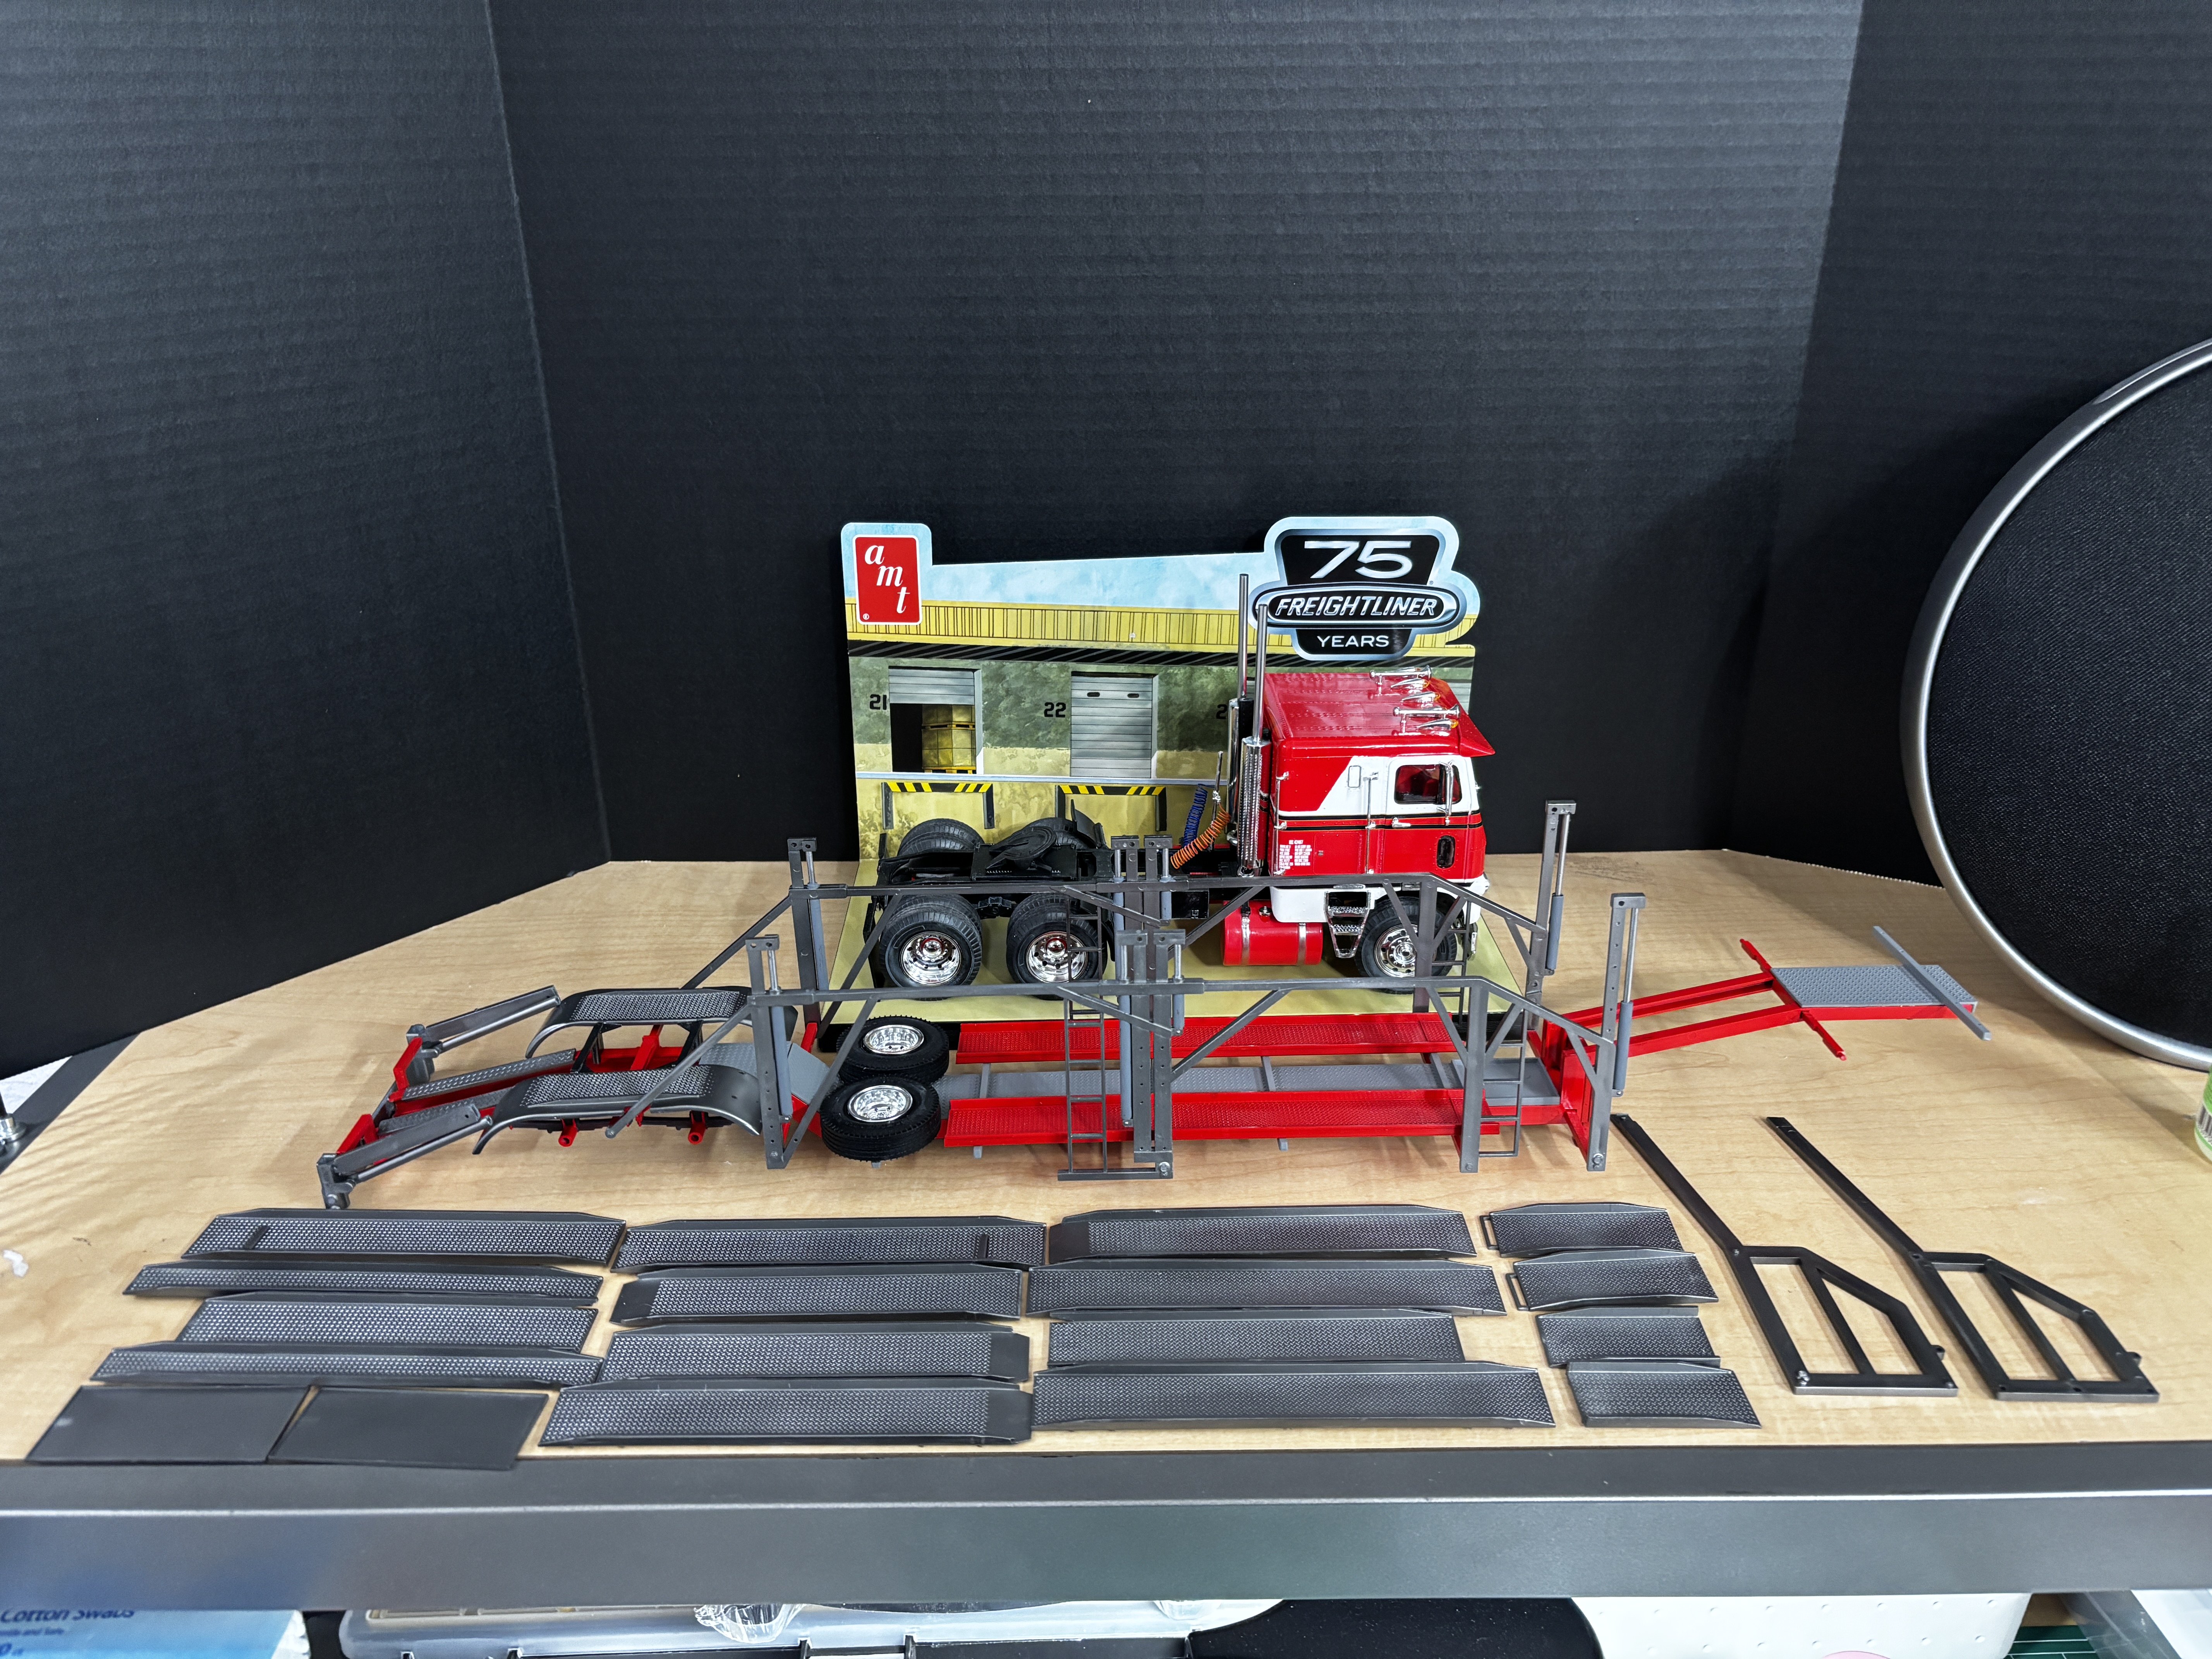
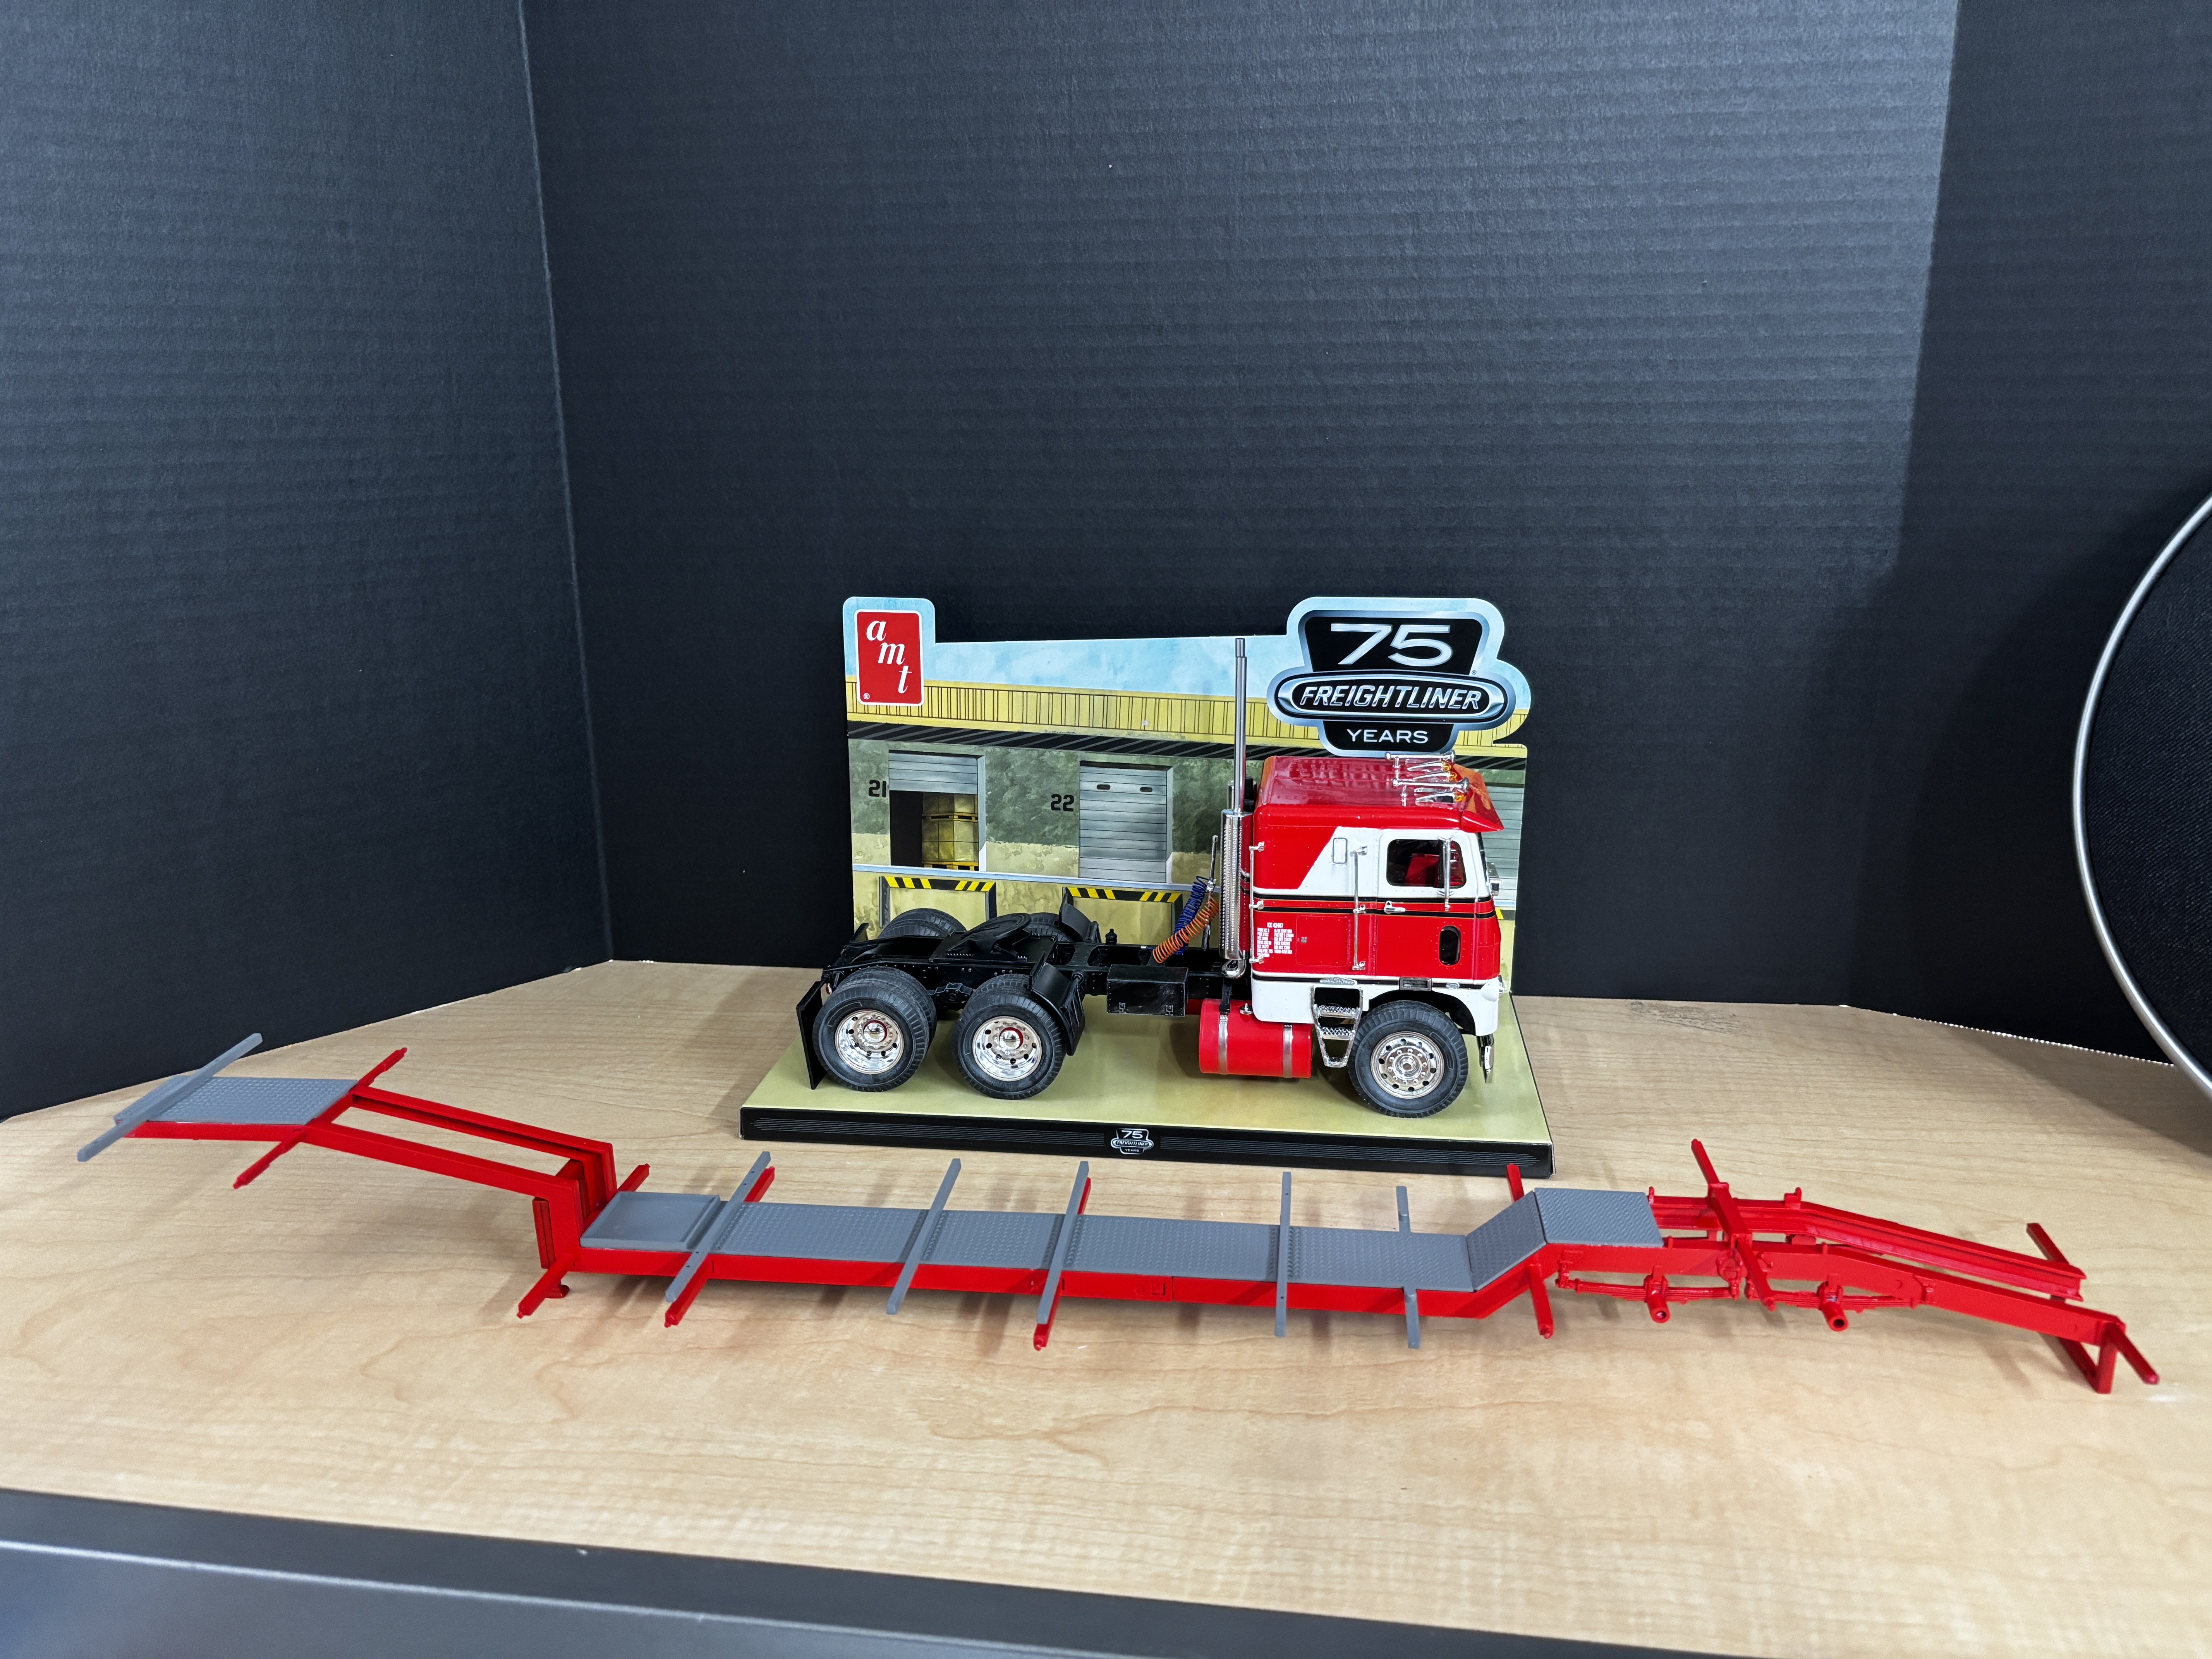
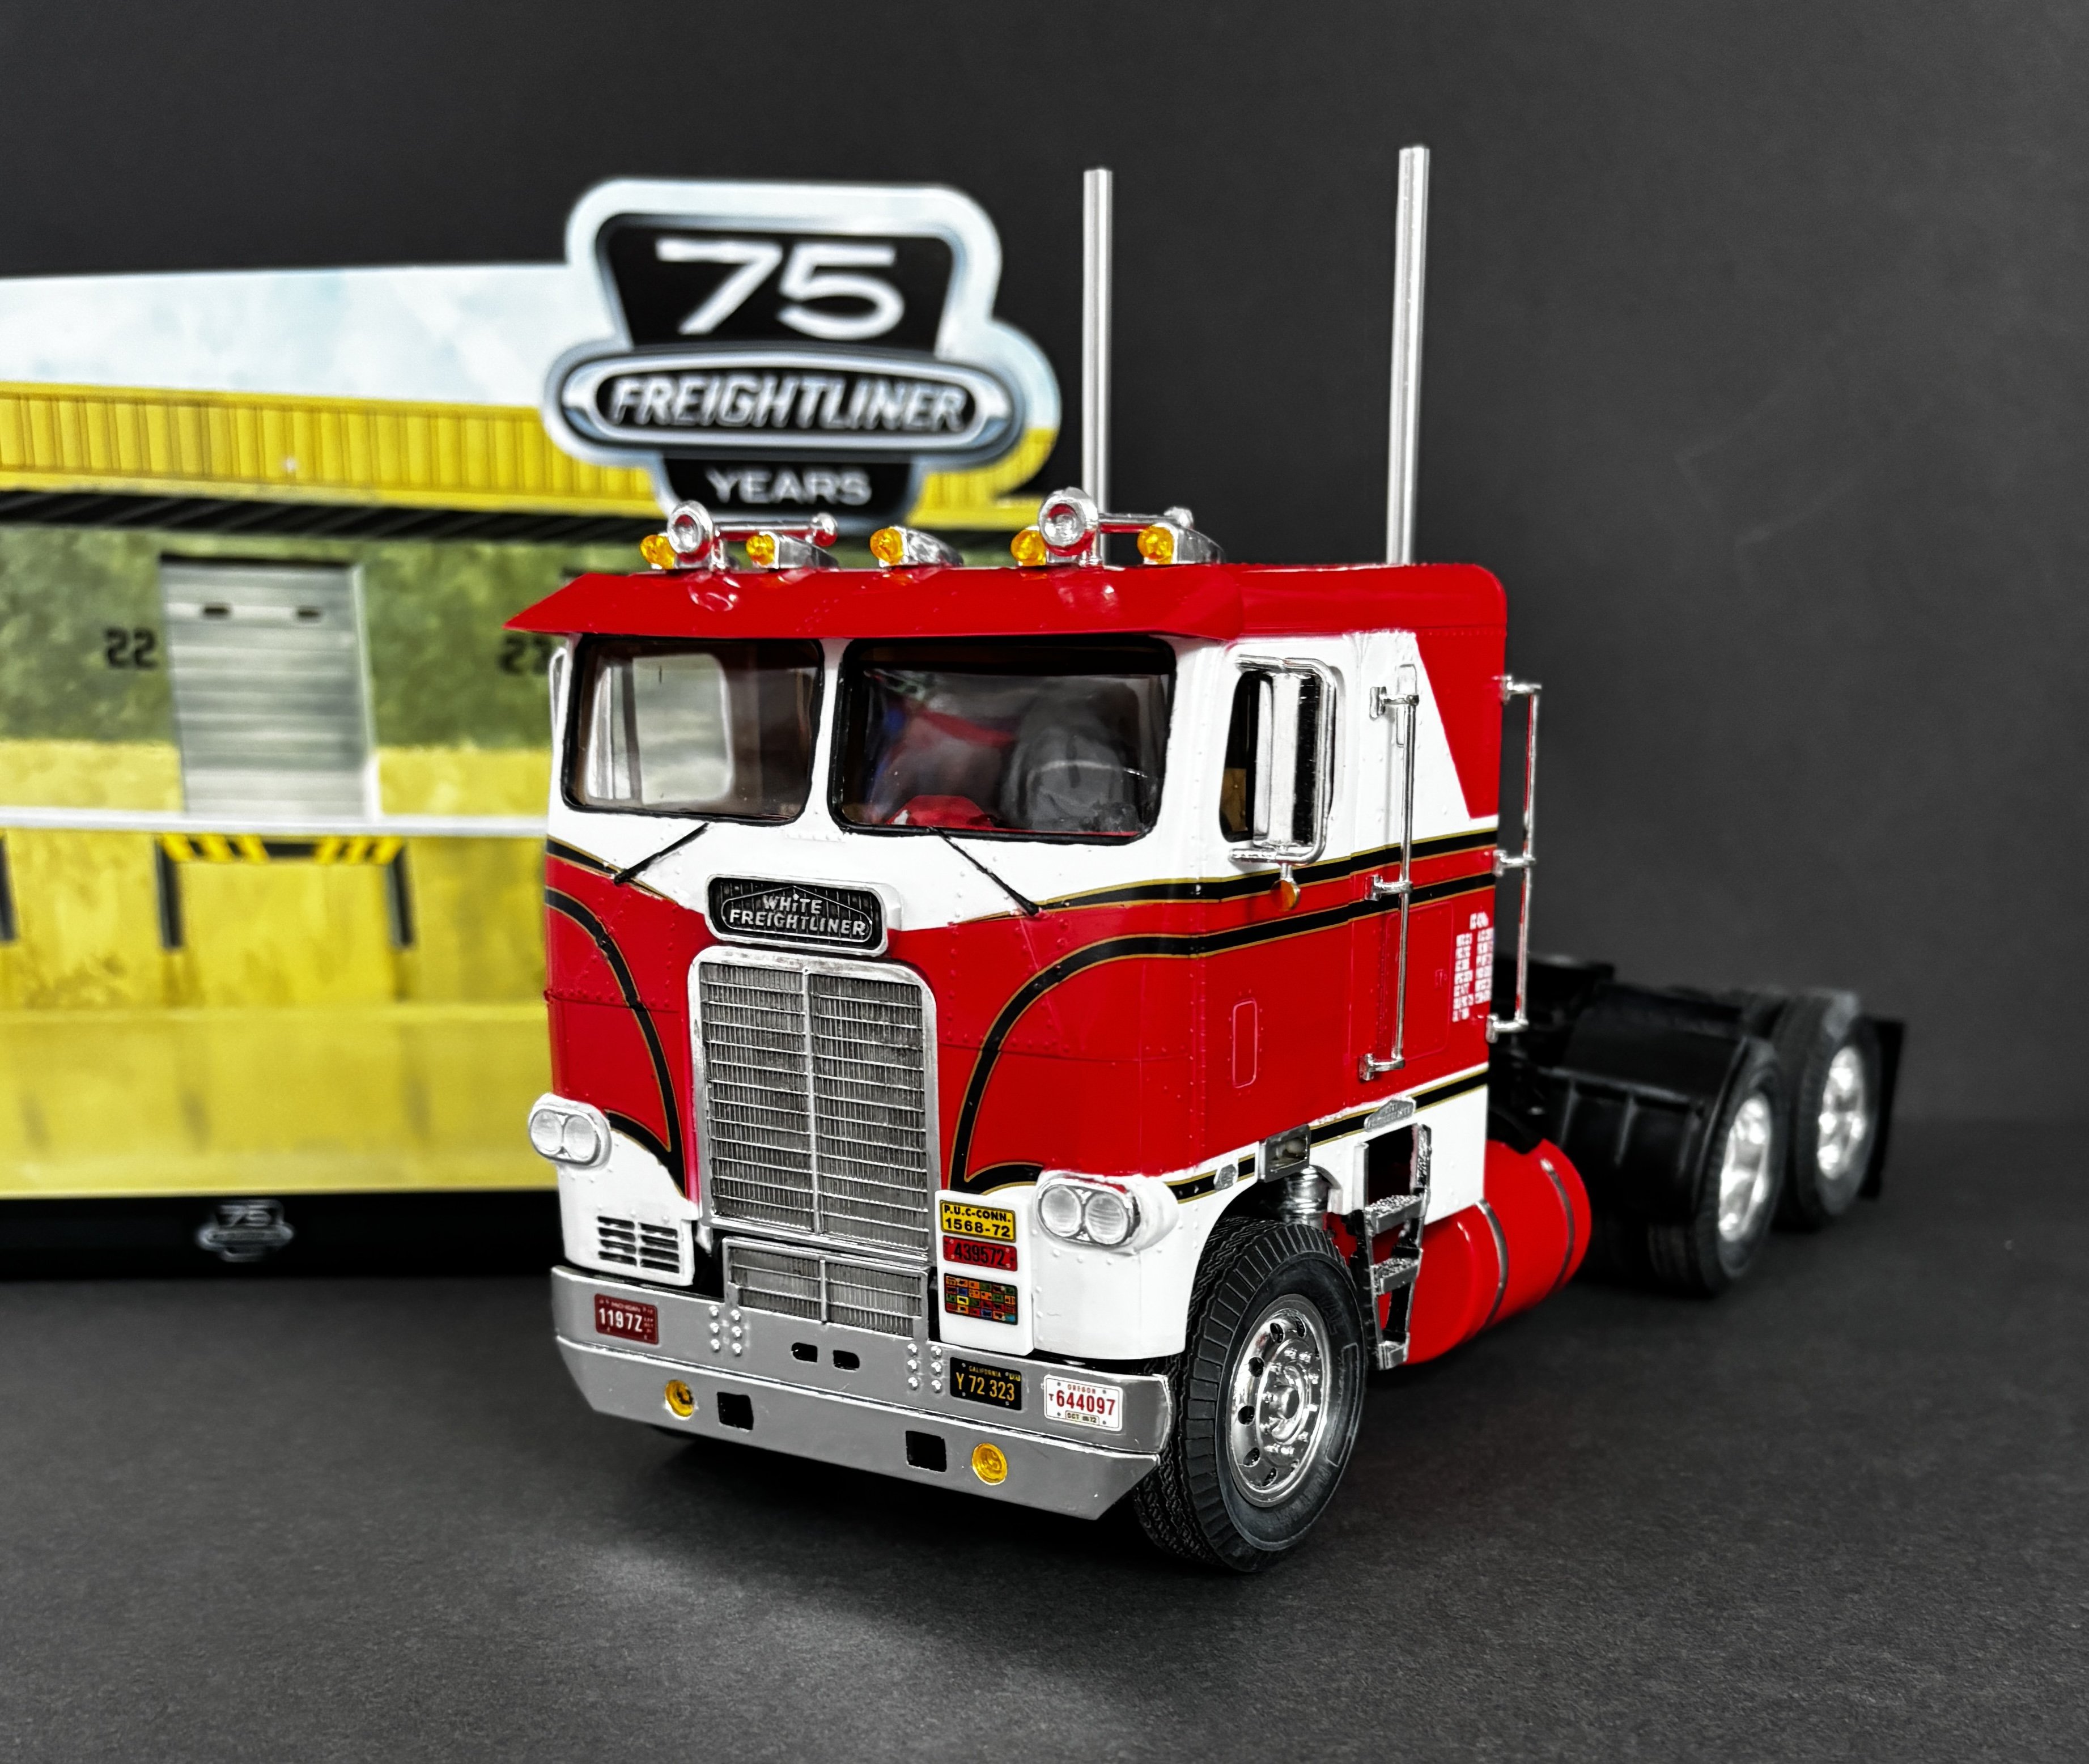
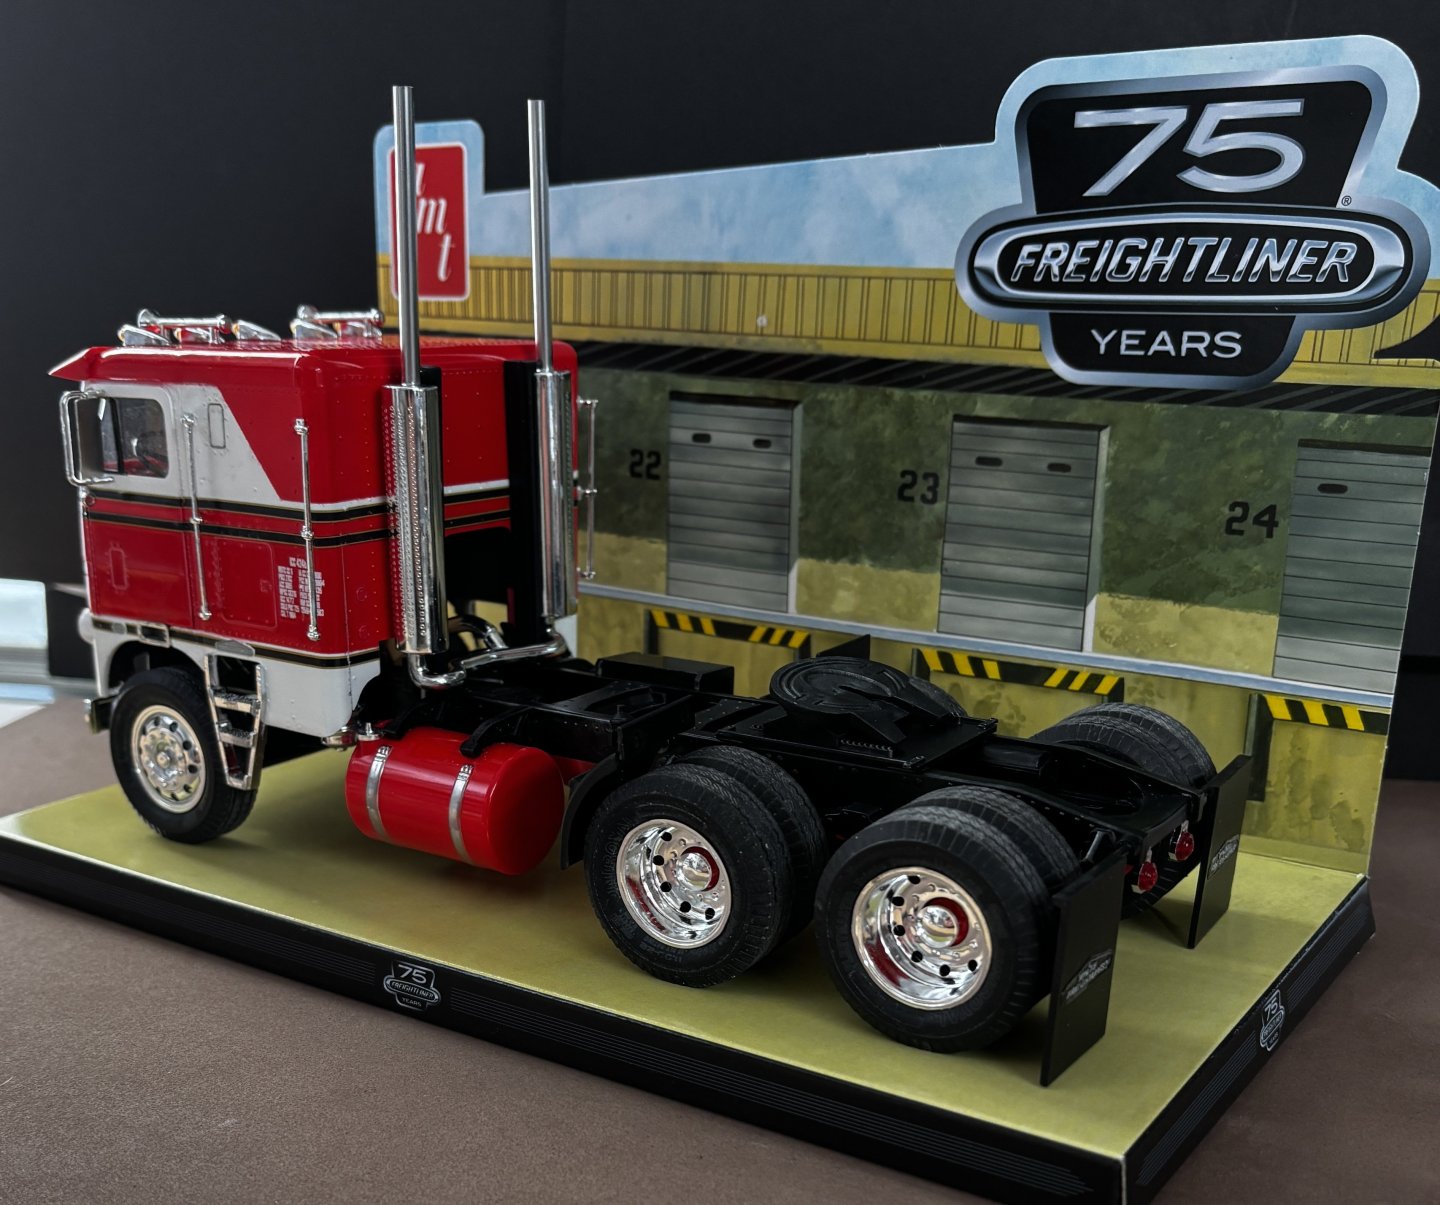
My last model finished (almost) for 2025. White Freightliner was lonely all by itself.

-
- 6
-
-
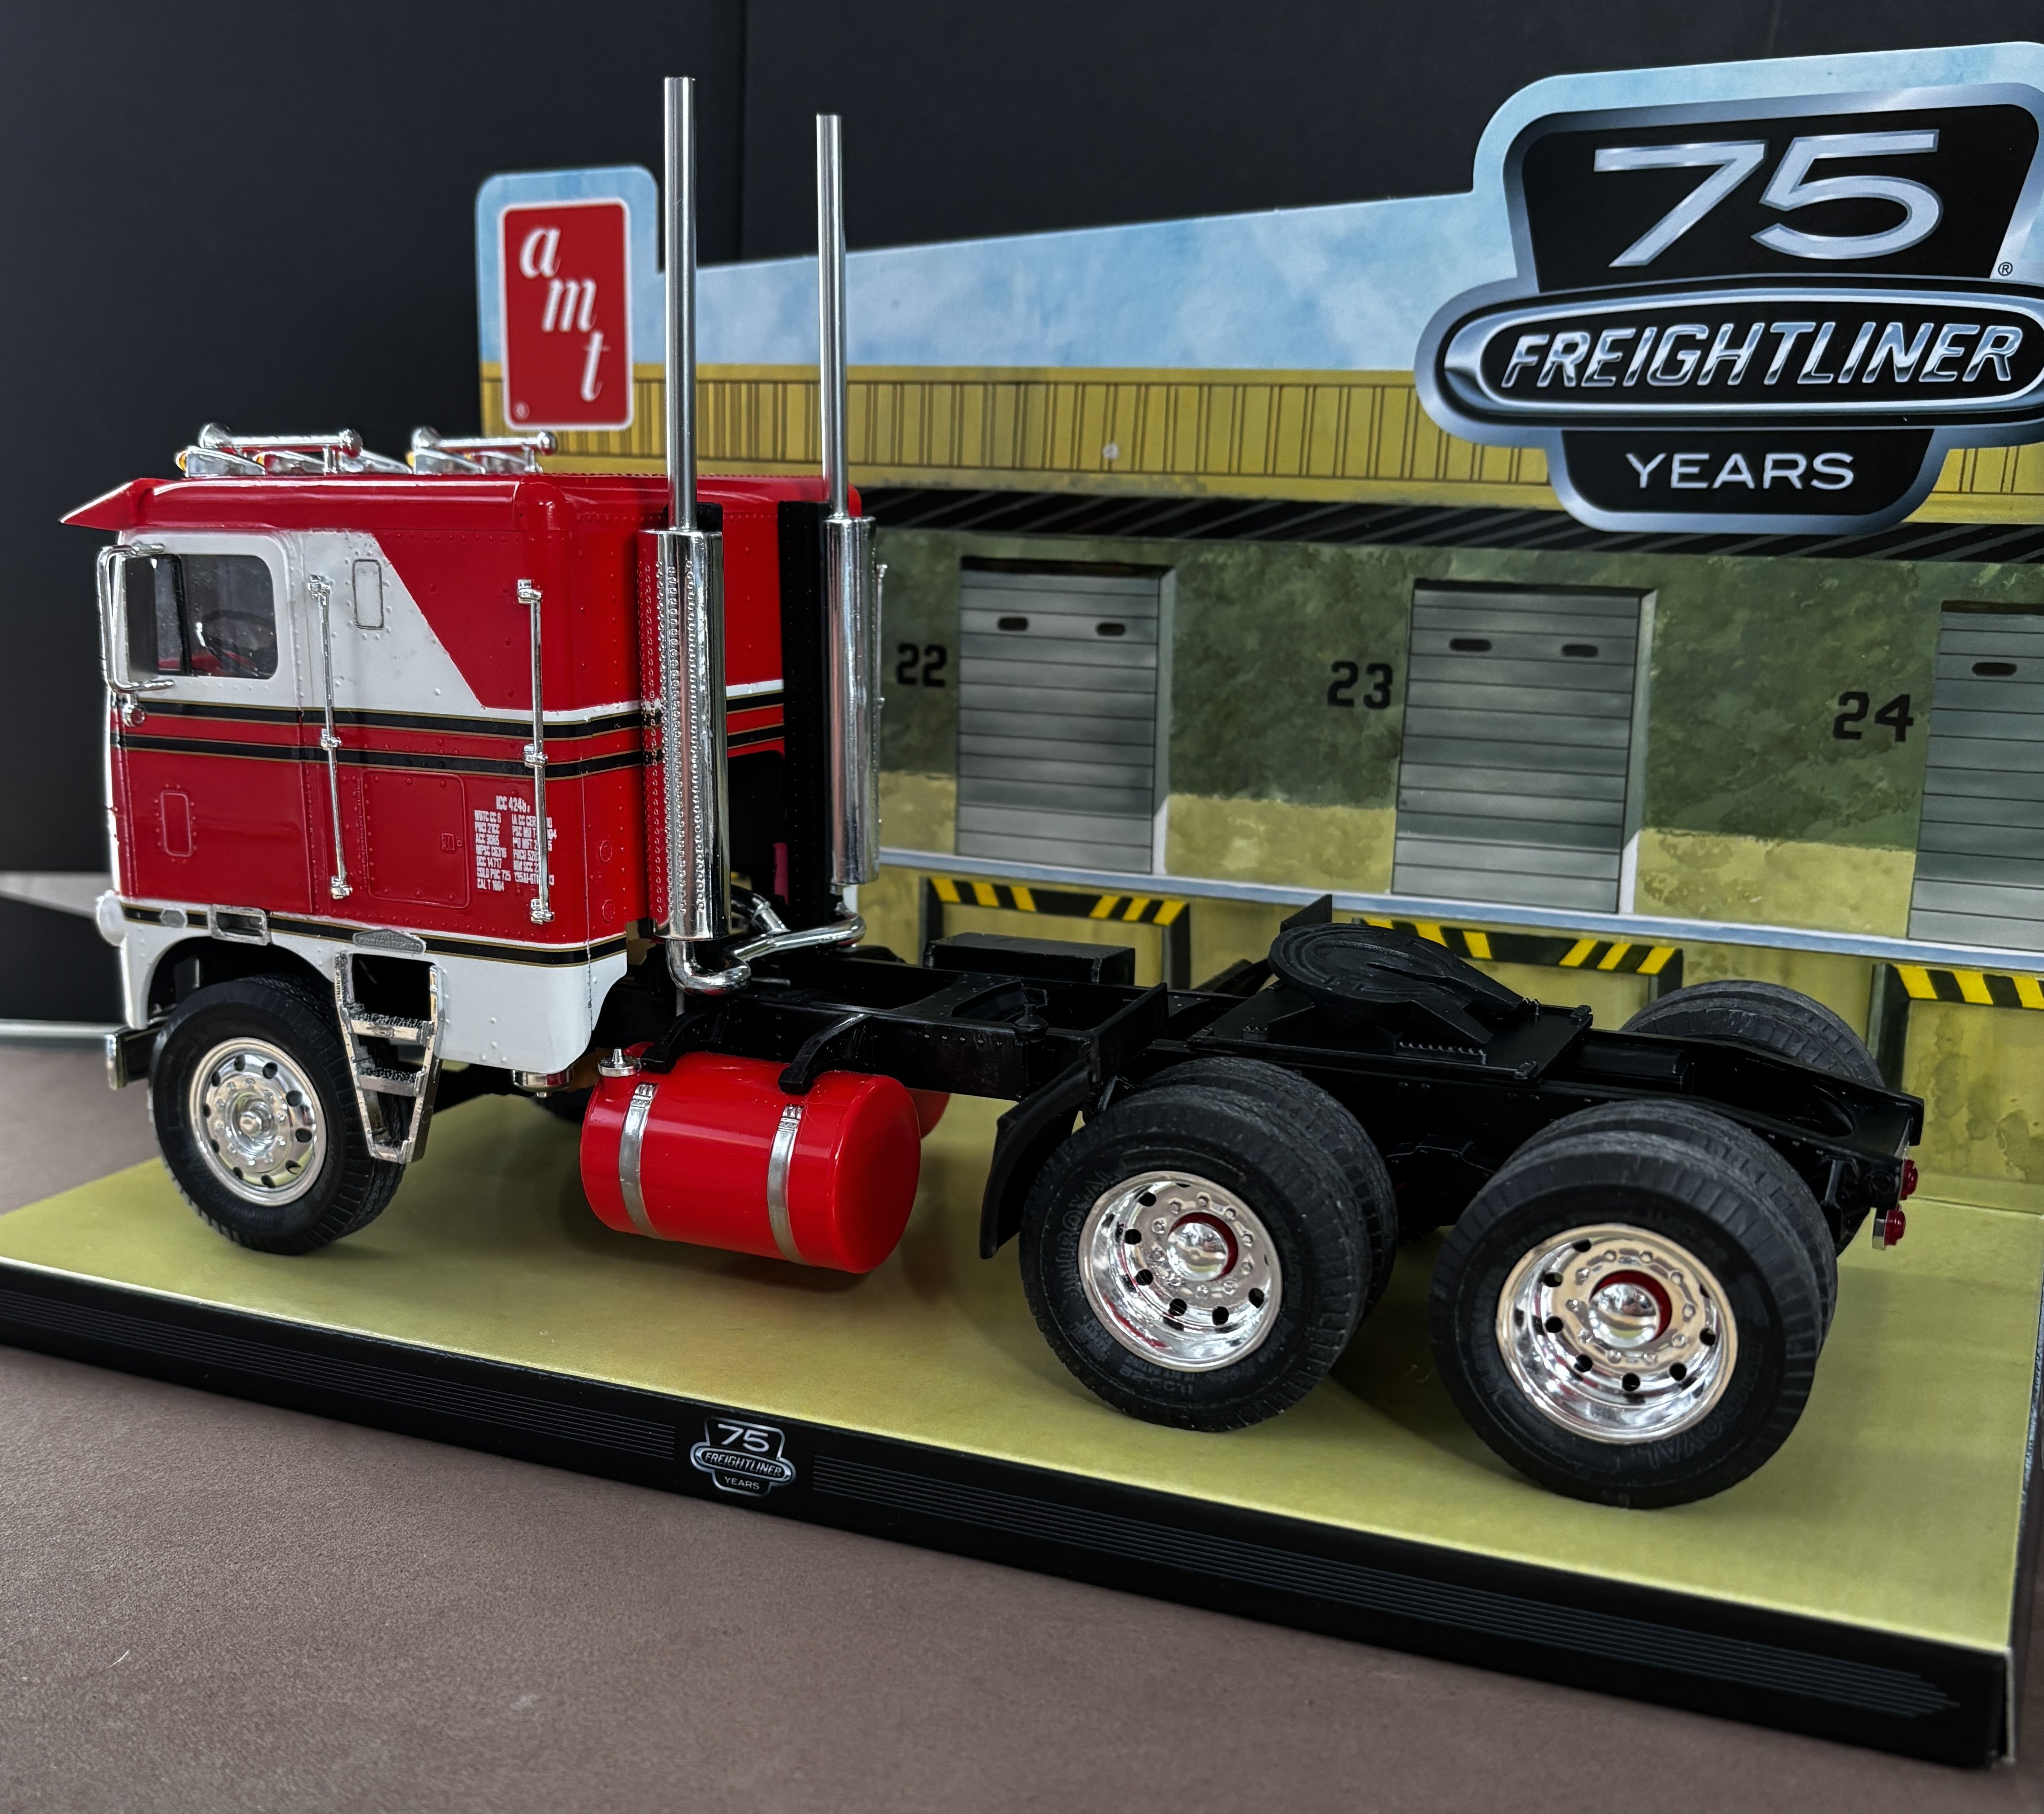
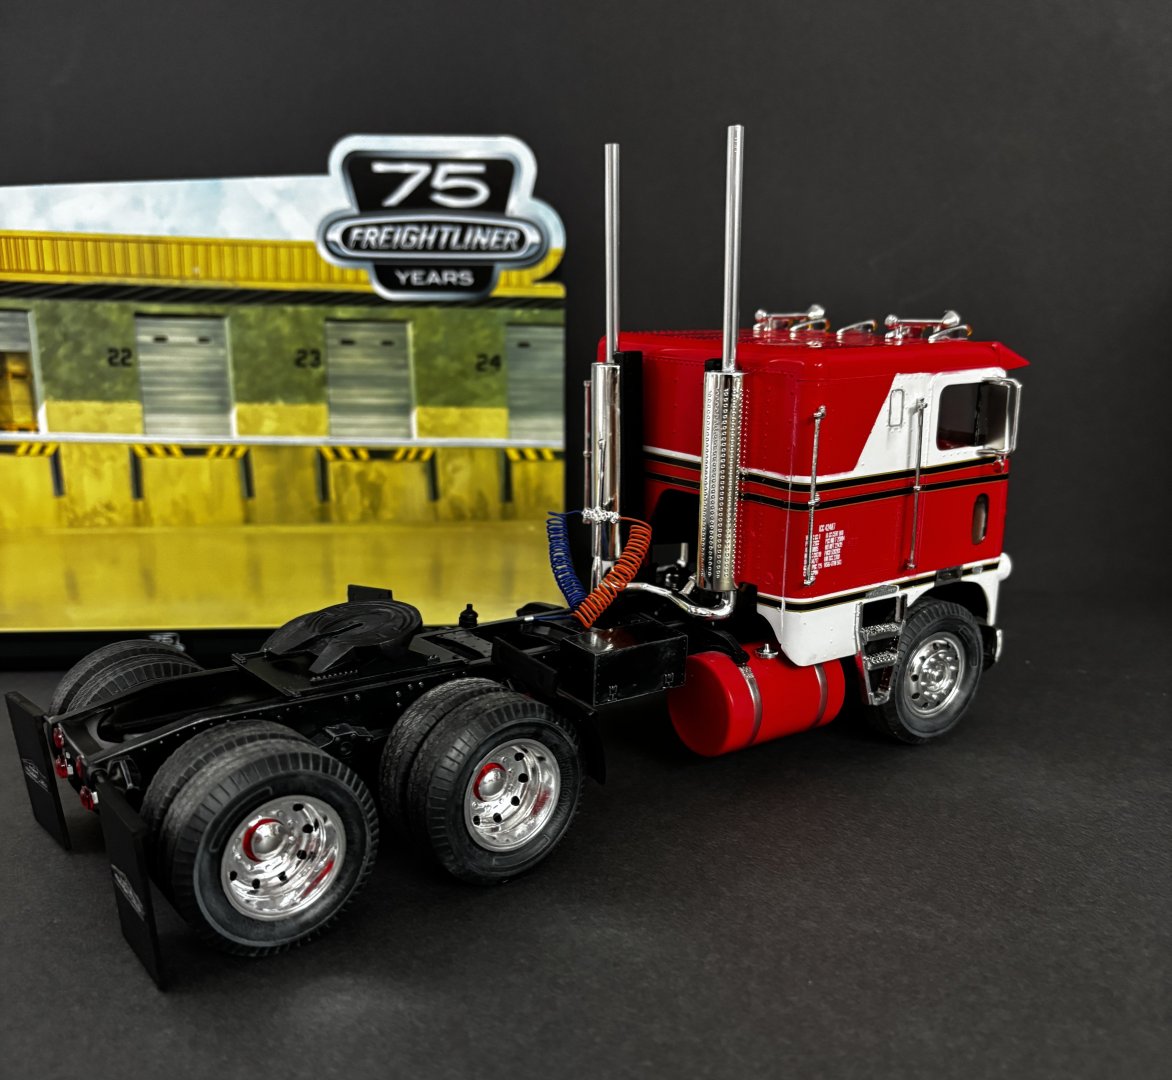
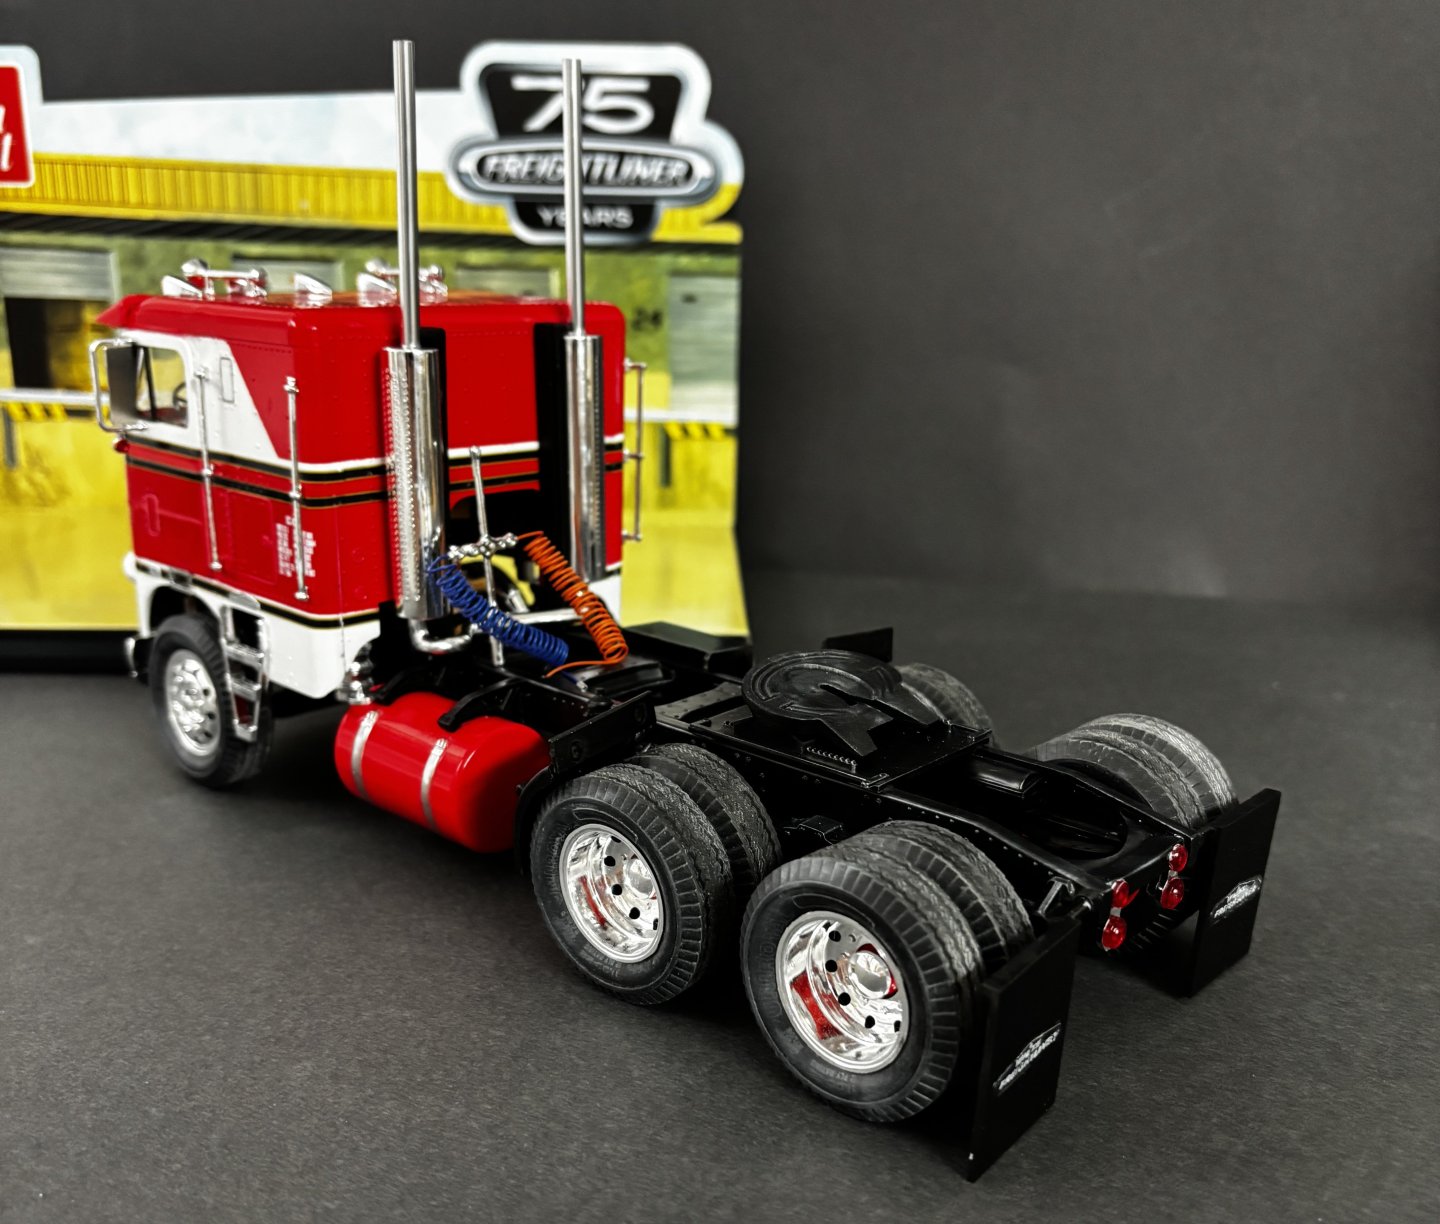
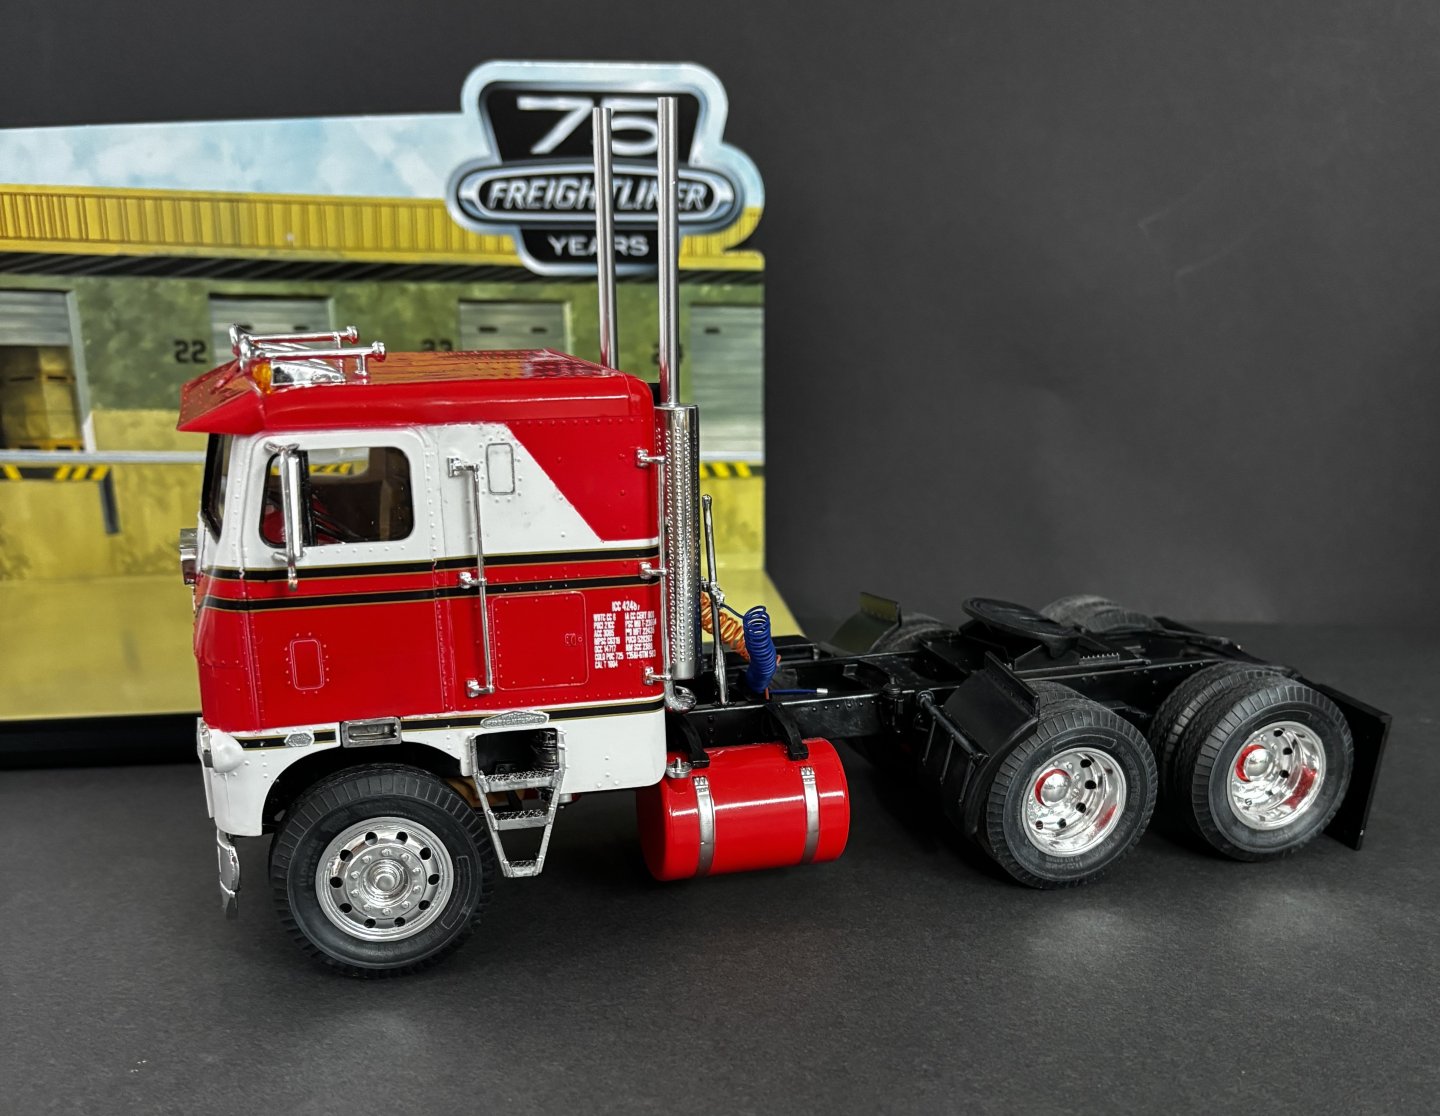
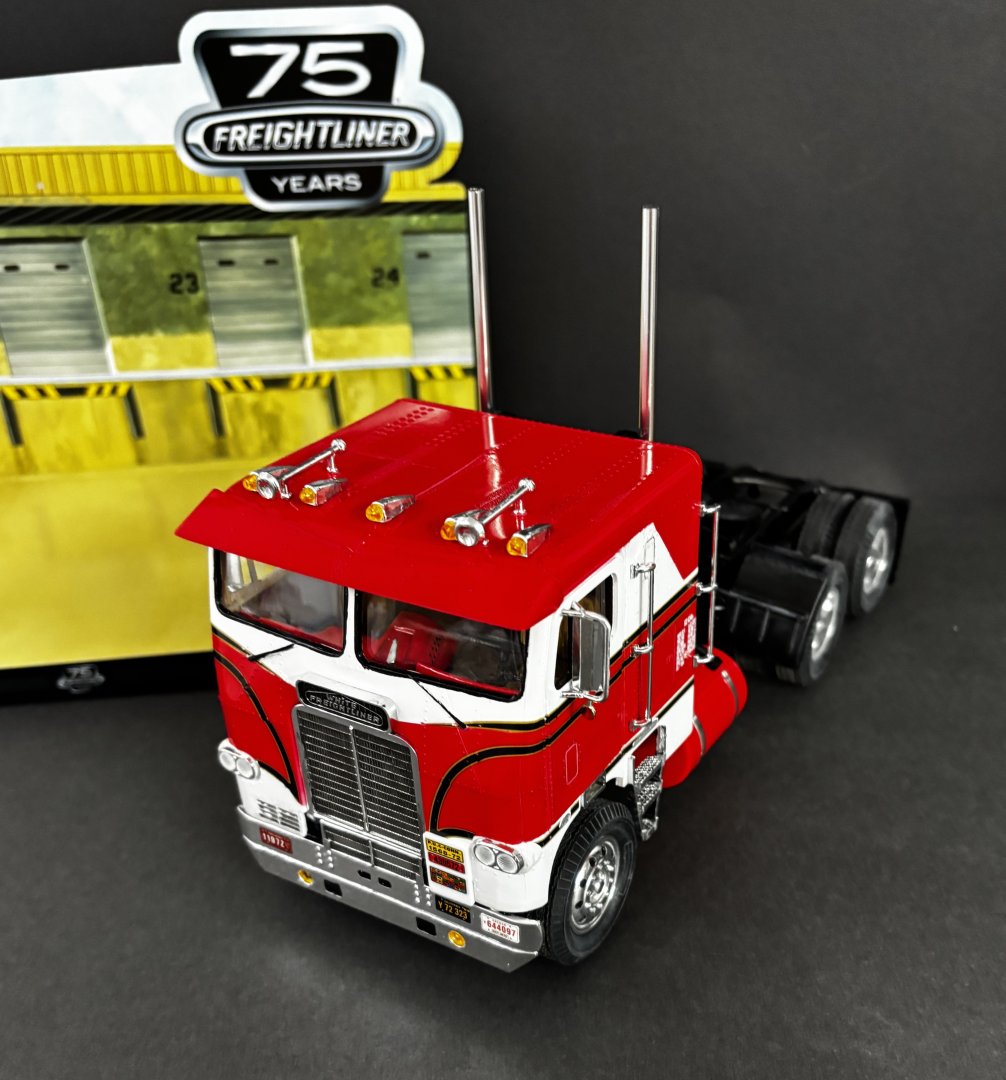
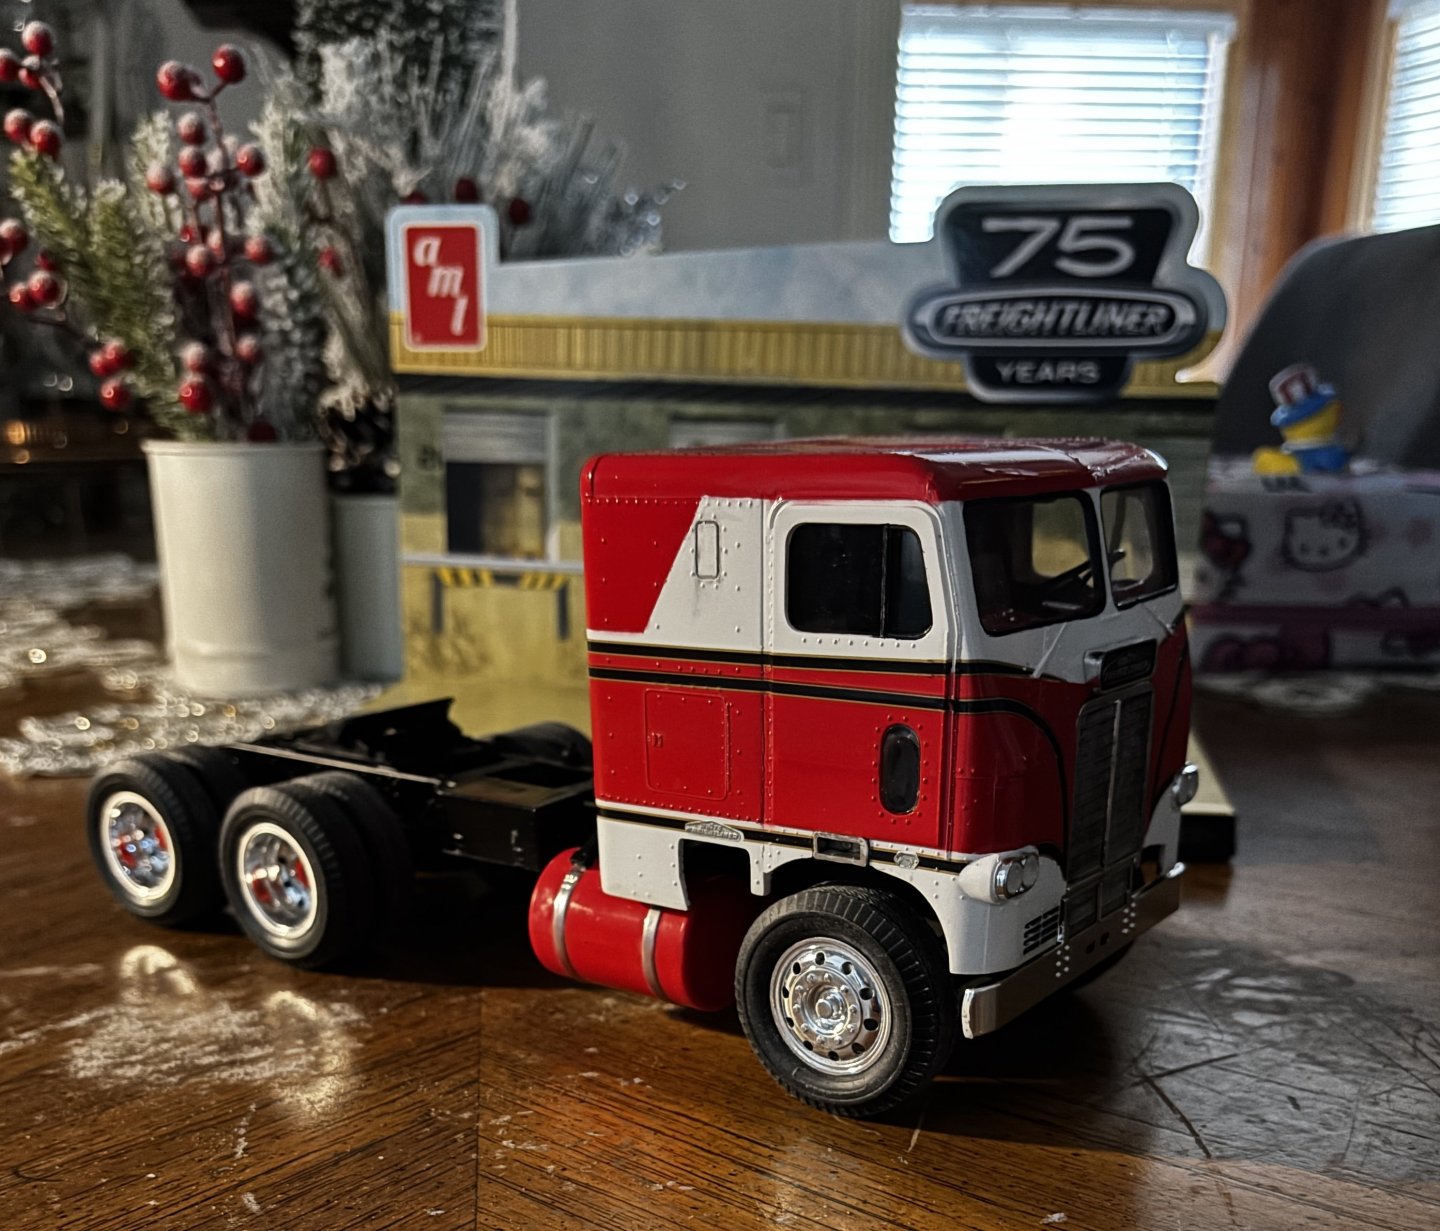
White Freightliner DD by CDW - AMT - 1:25 Scale - PLASTIC
CDW replied to CDW's topic in Non-ship/categorised builds
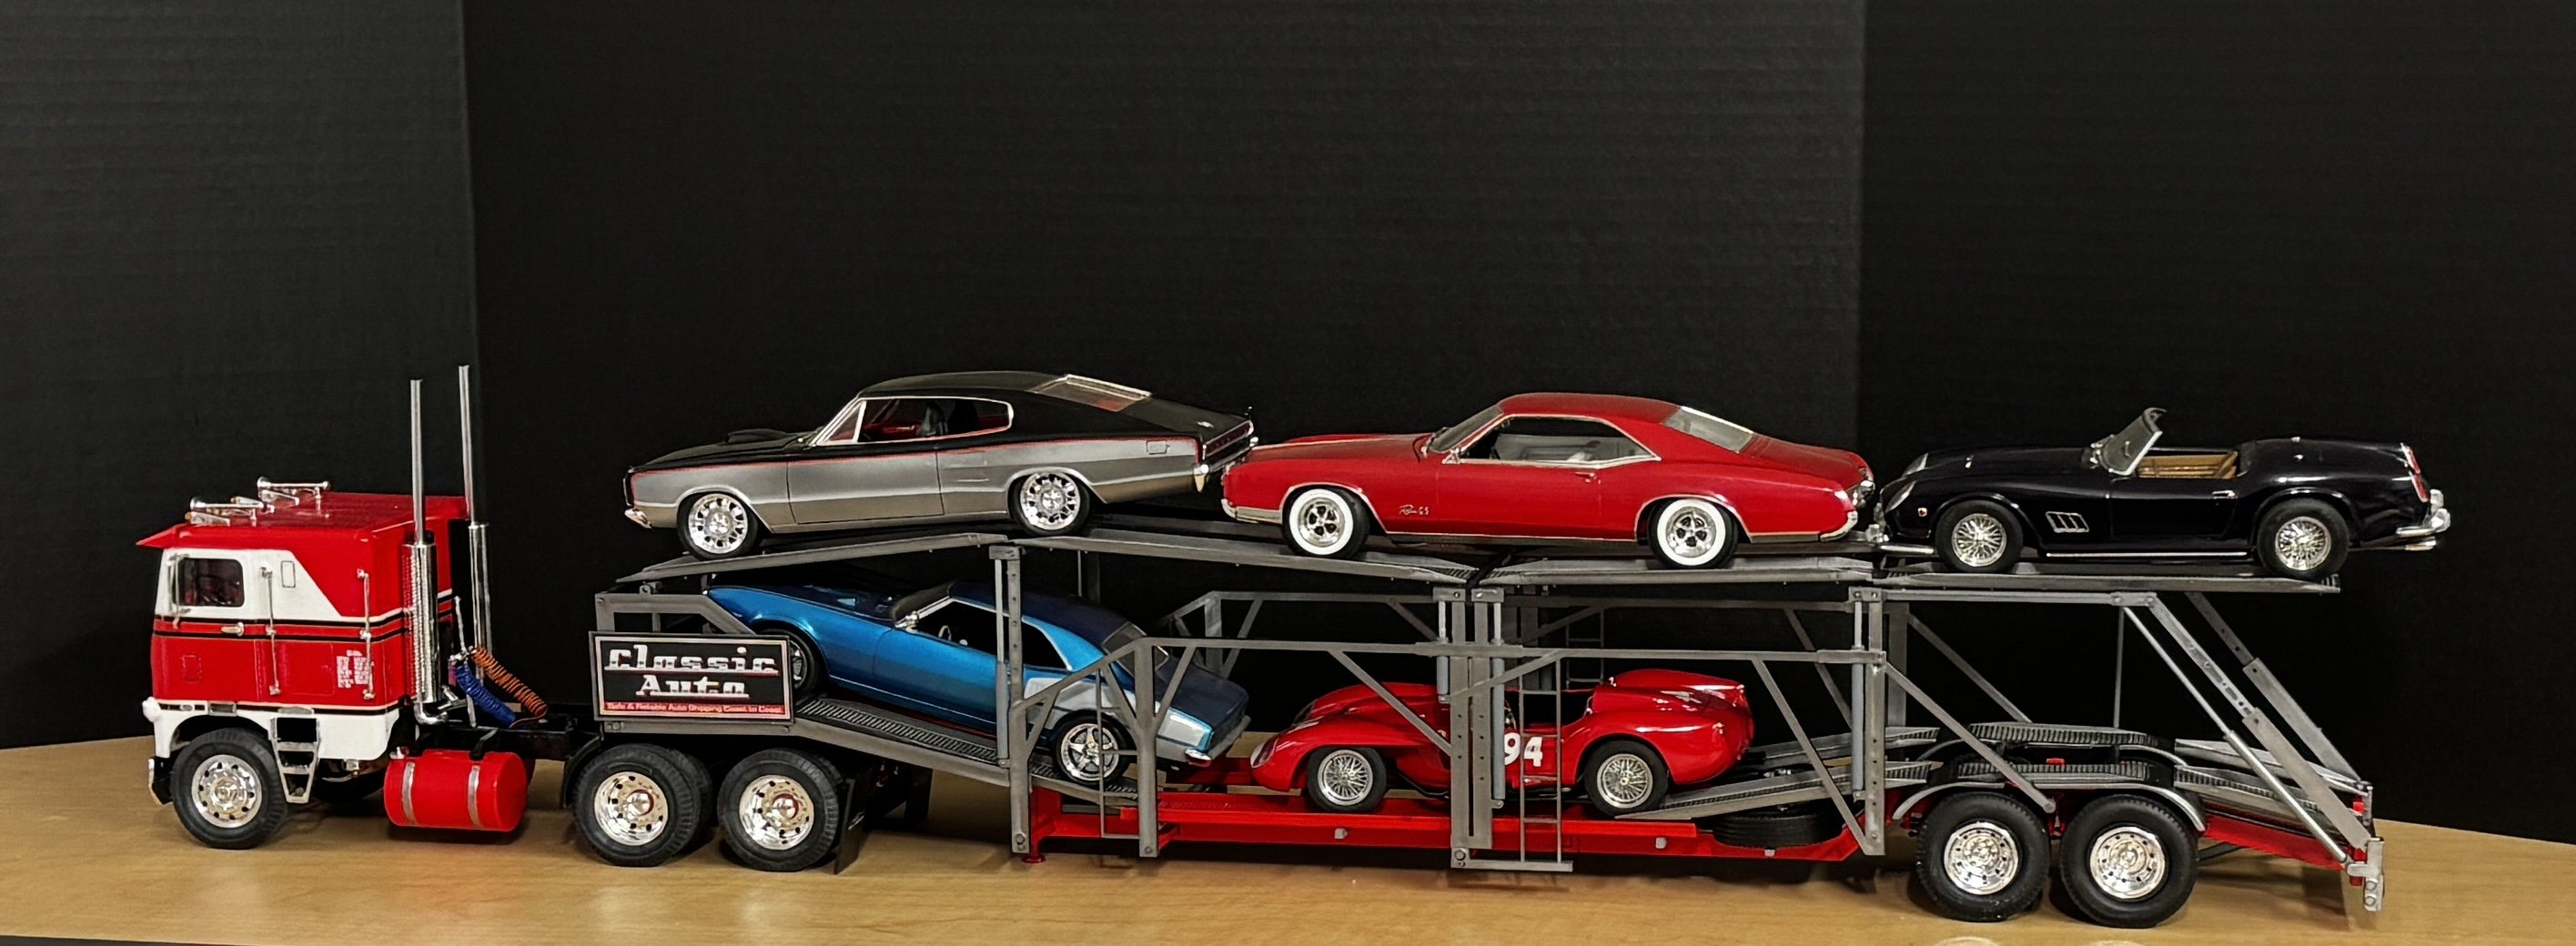
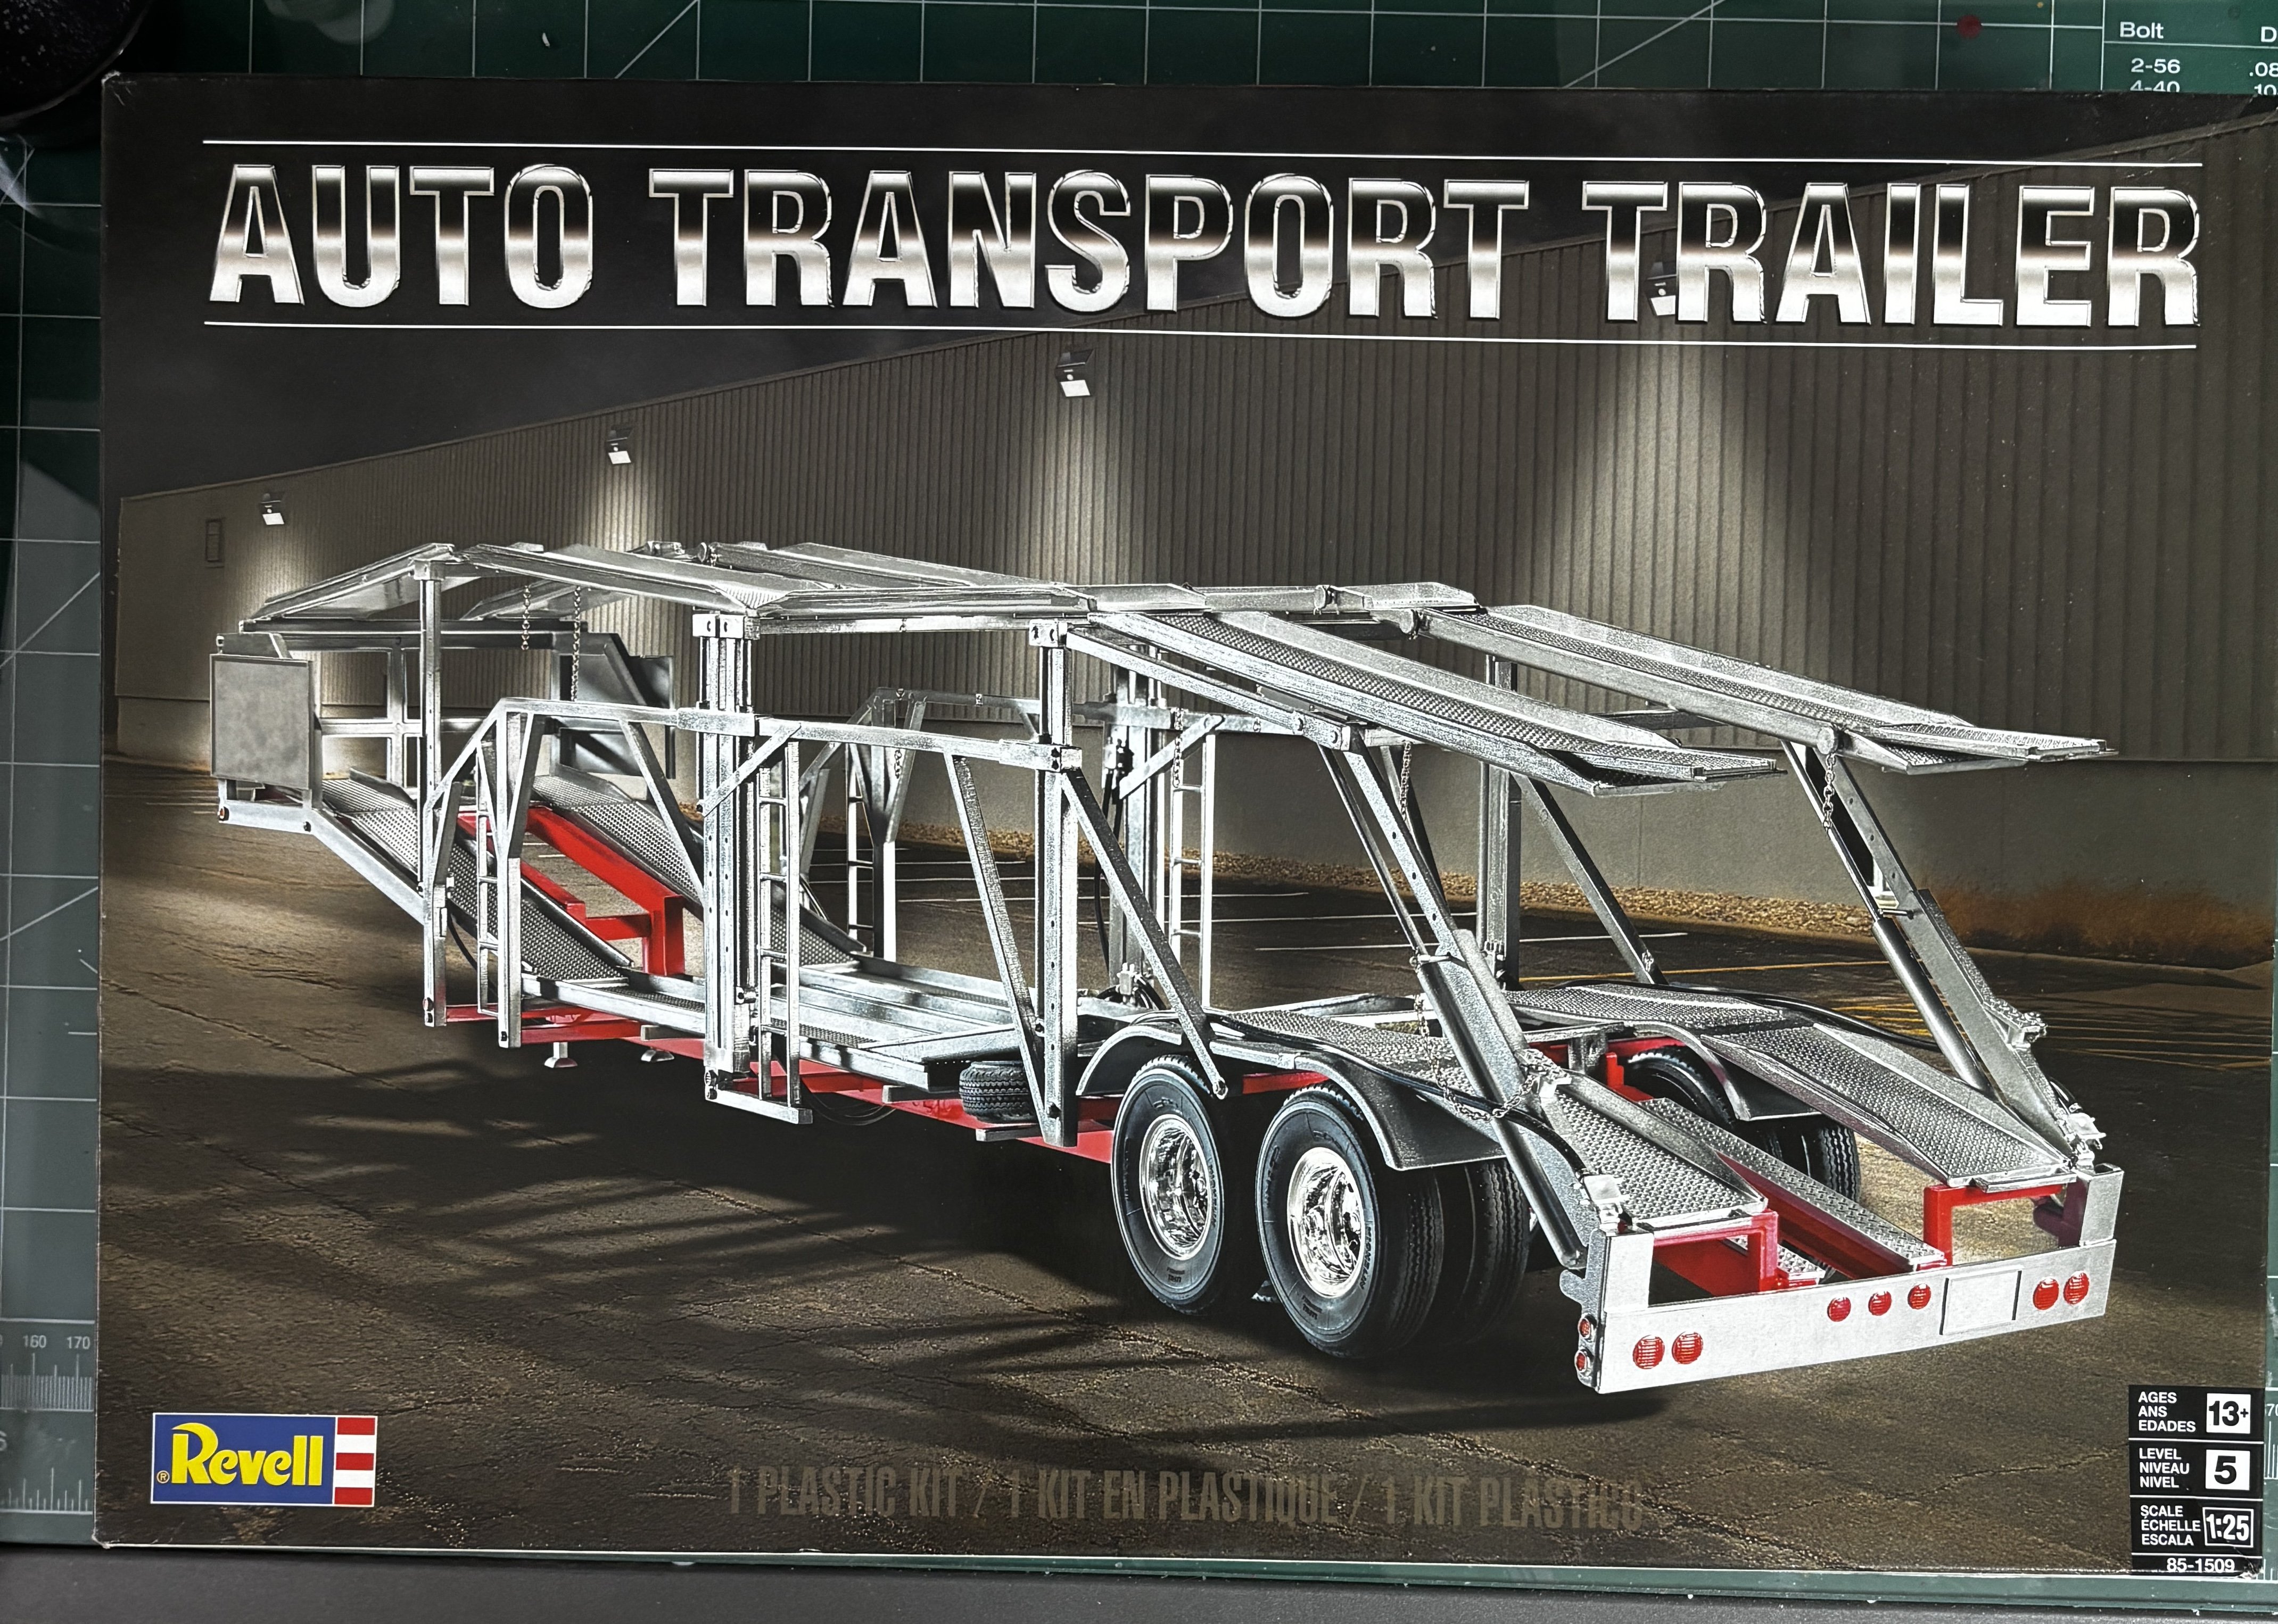
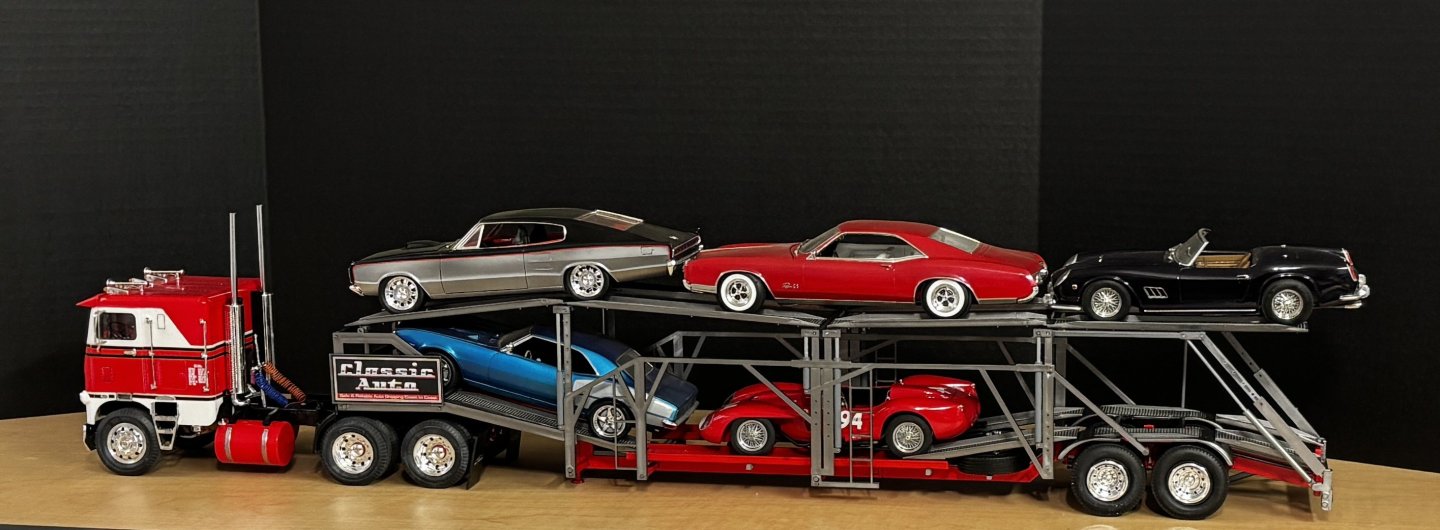
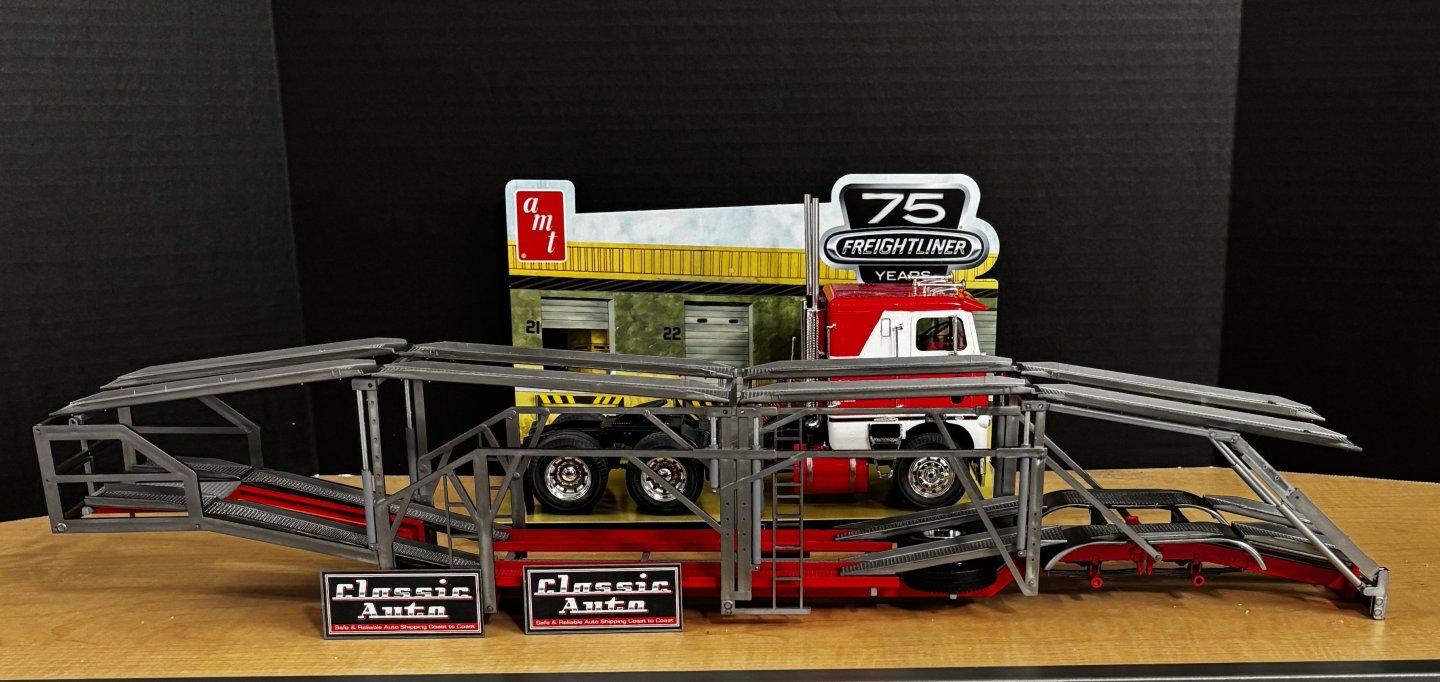
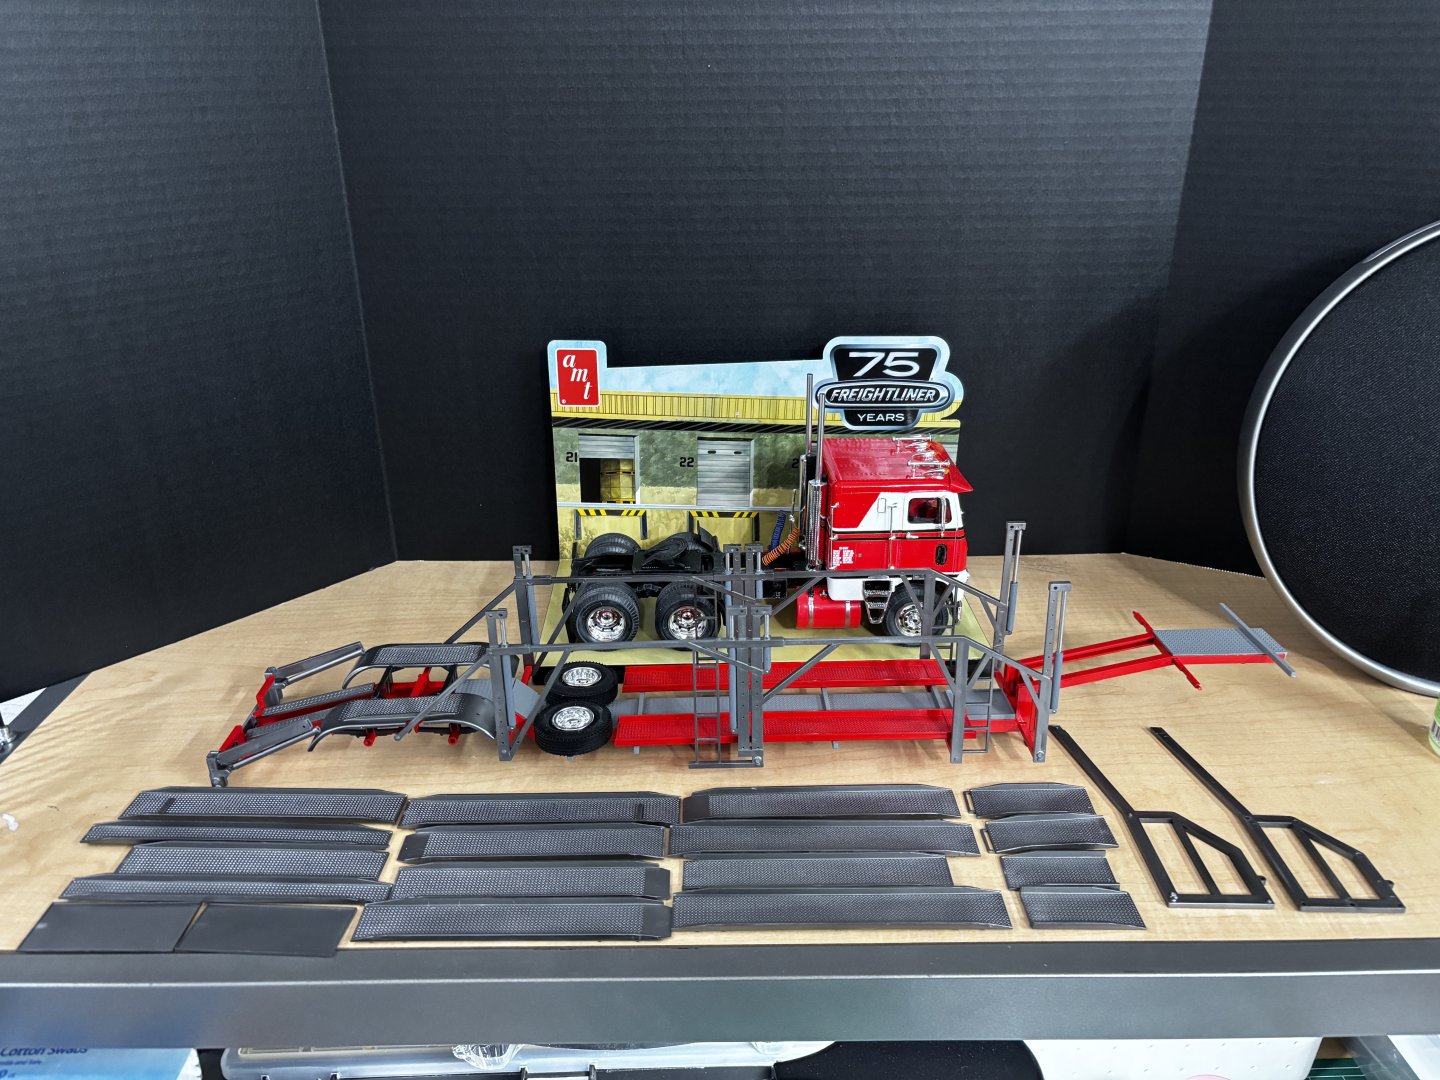
This might be the right load for the Freightliner. Besides, up to eight car models can fit on the trailer, freeing up the shelf space the truck-trailer combo would require.
-
White Freightliner DD by CDW - AMT - 1:25 Scale - PLASTIC
CDW replied to CDW's topic in Non-ship/categorised builds
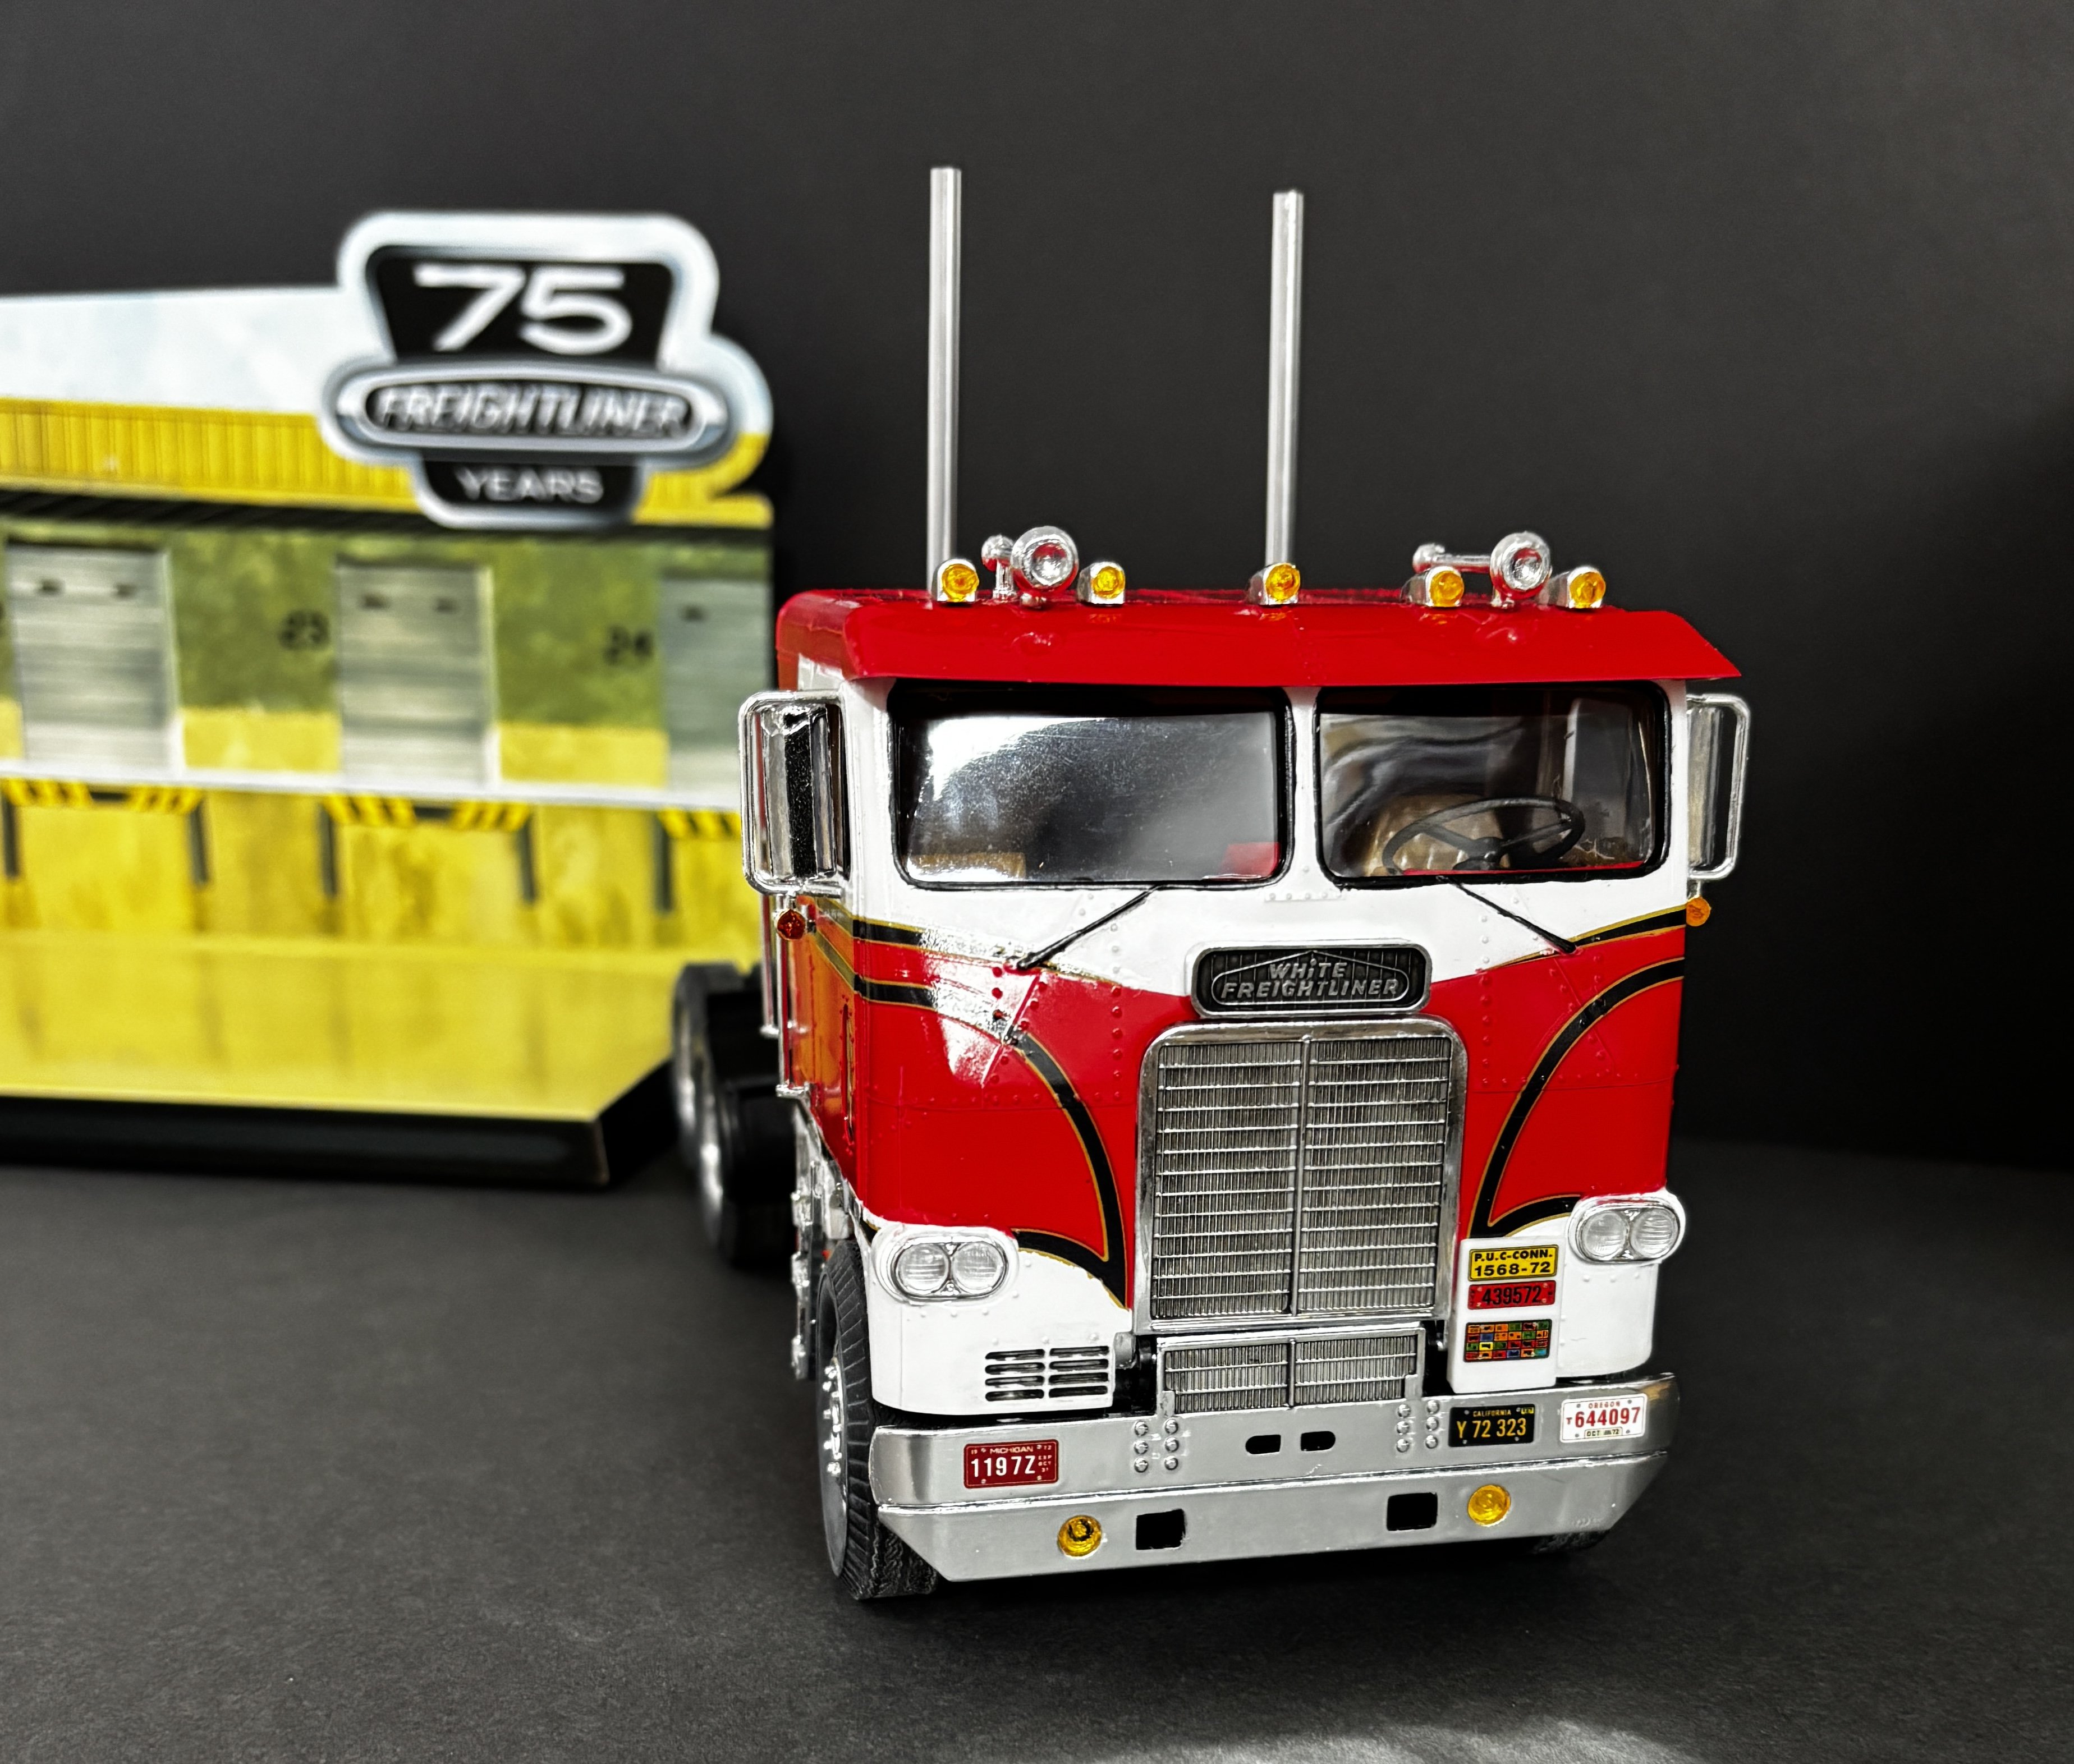
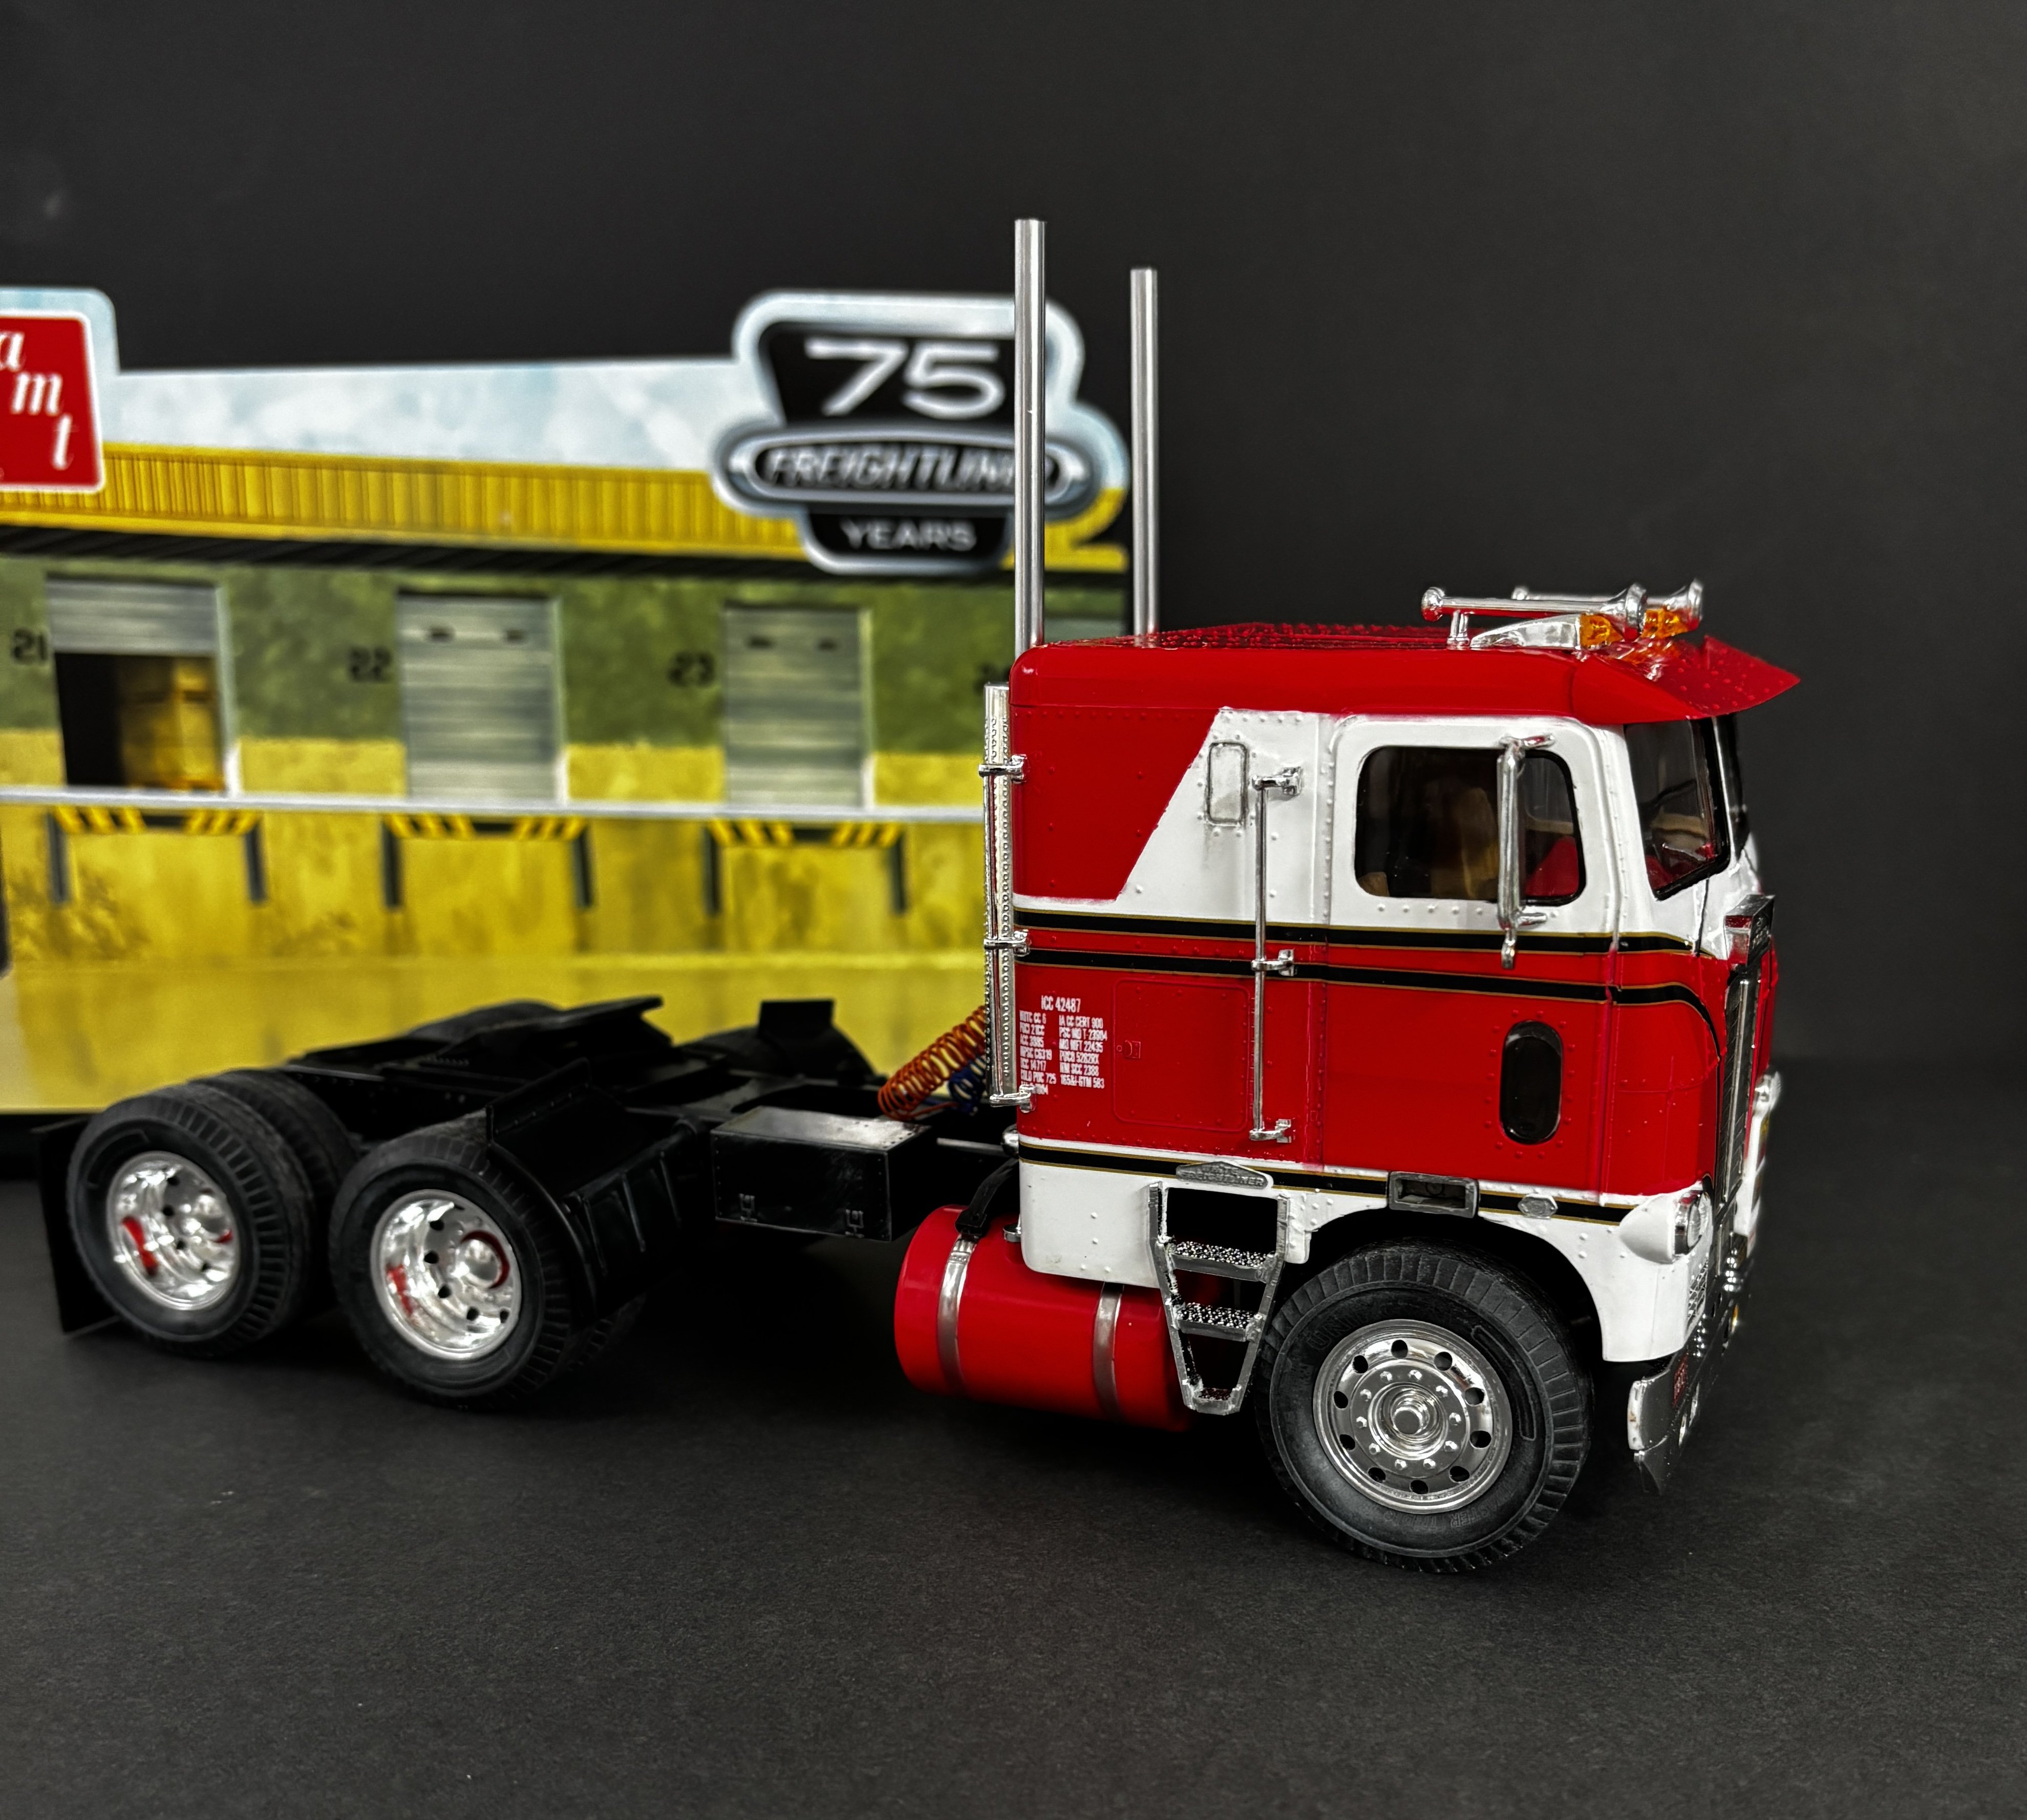
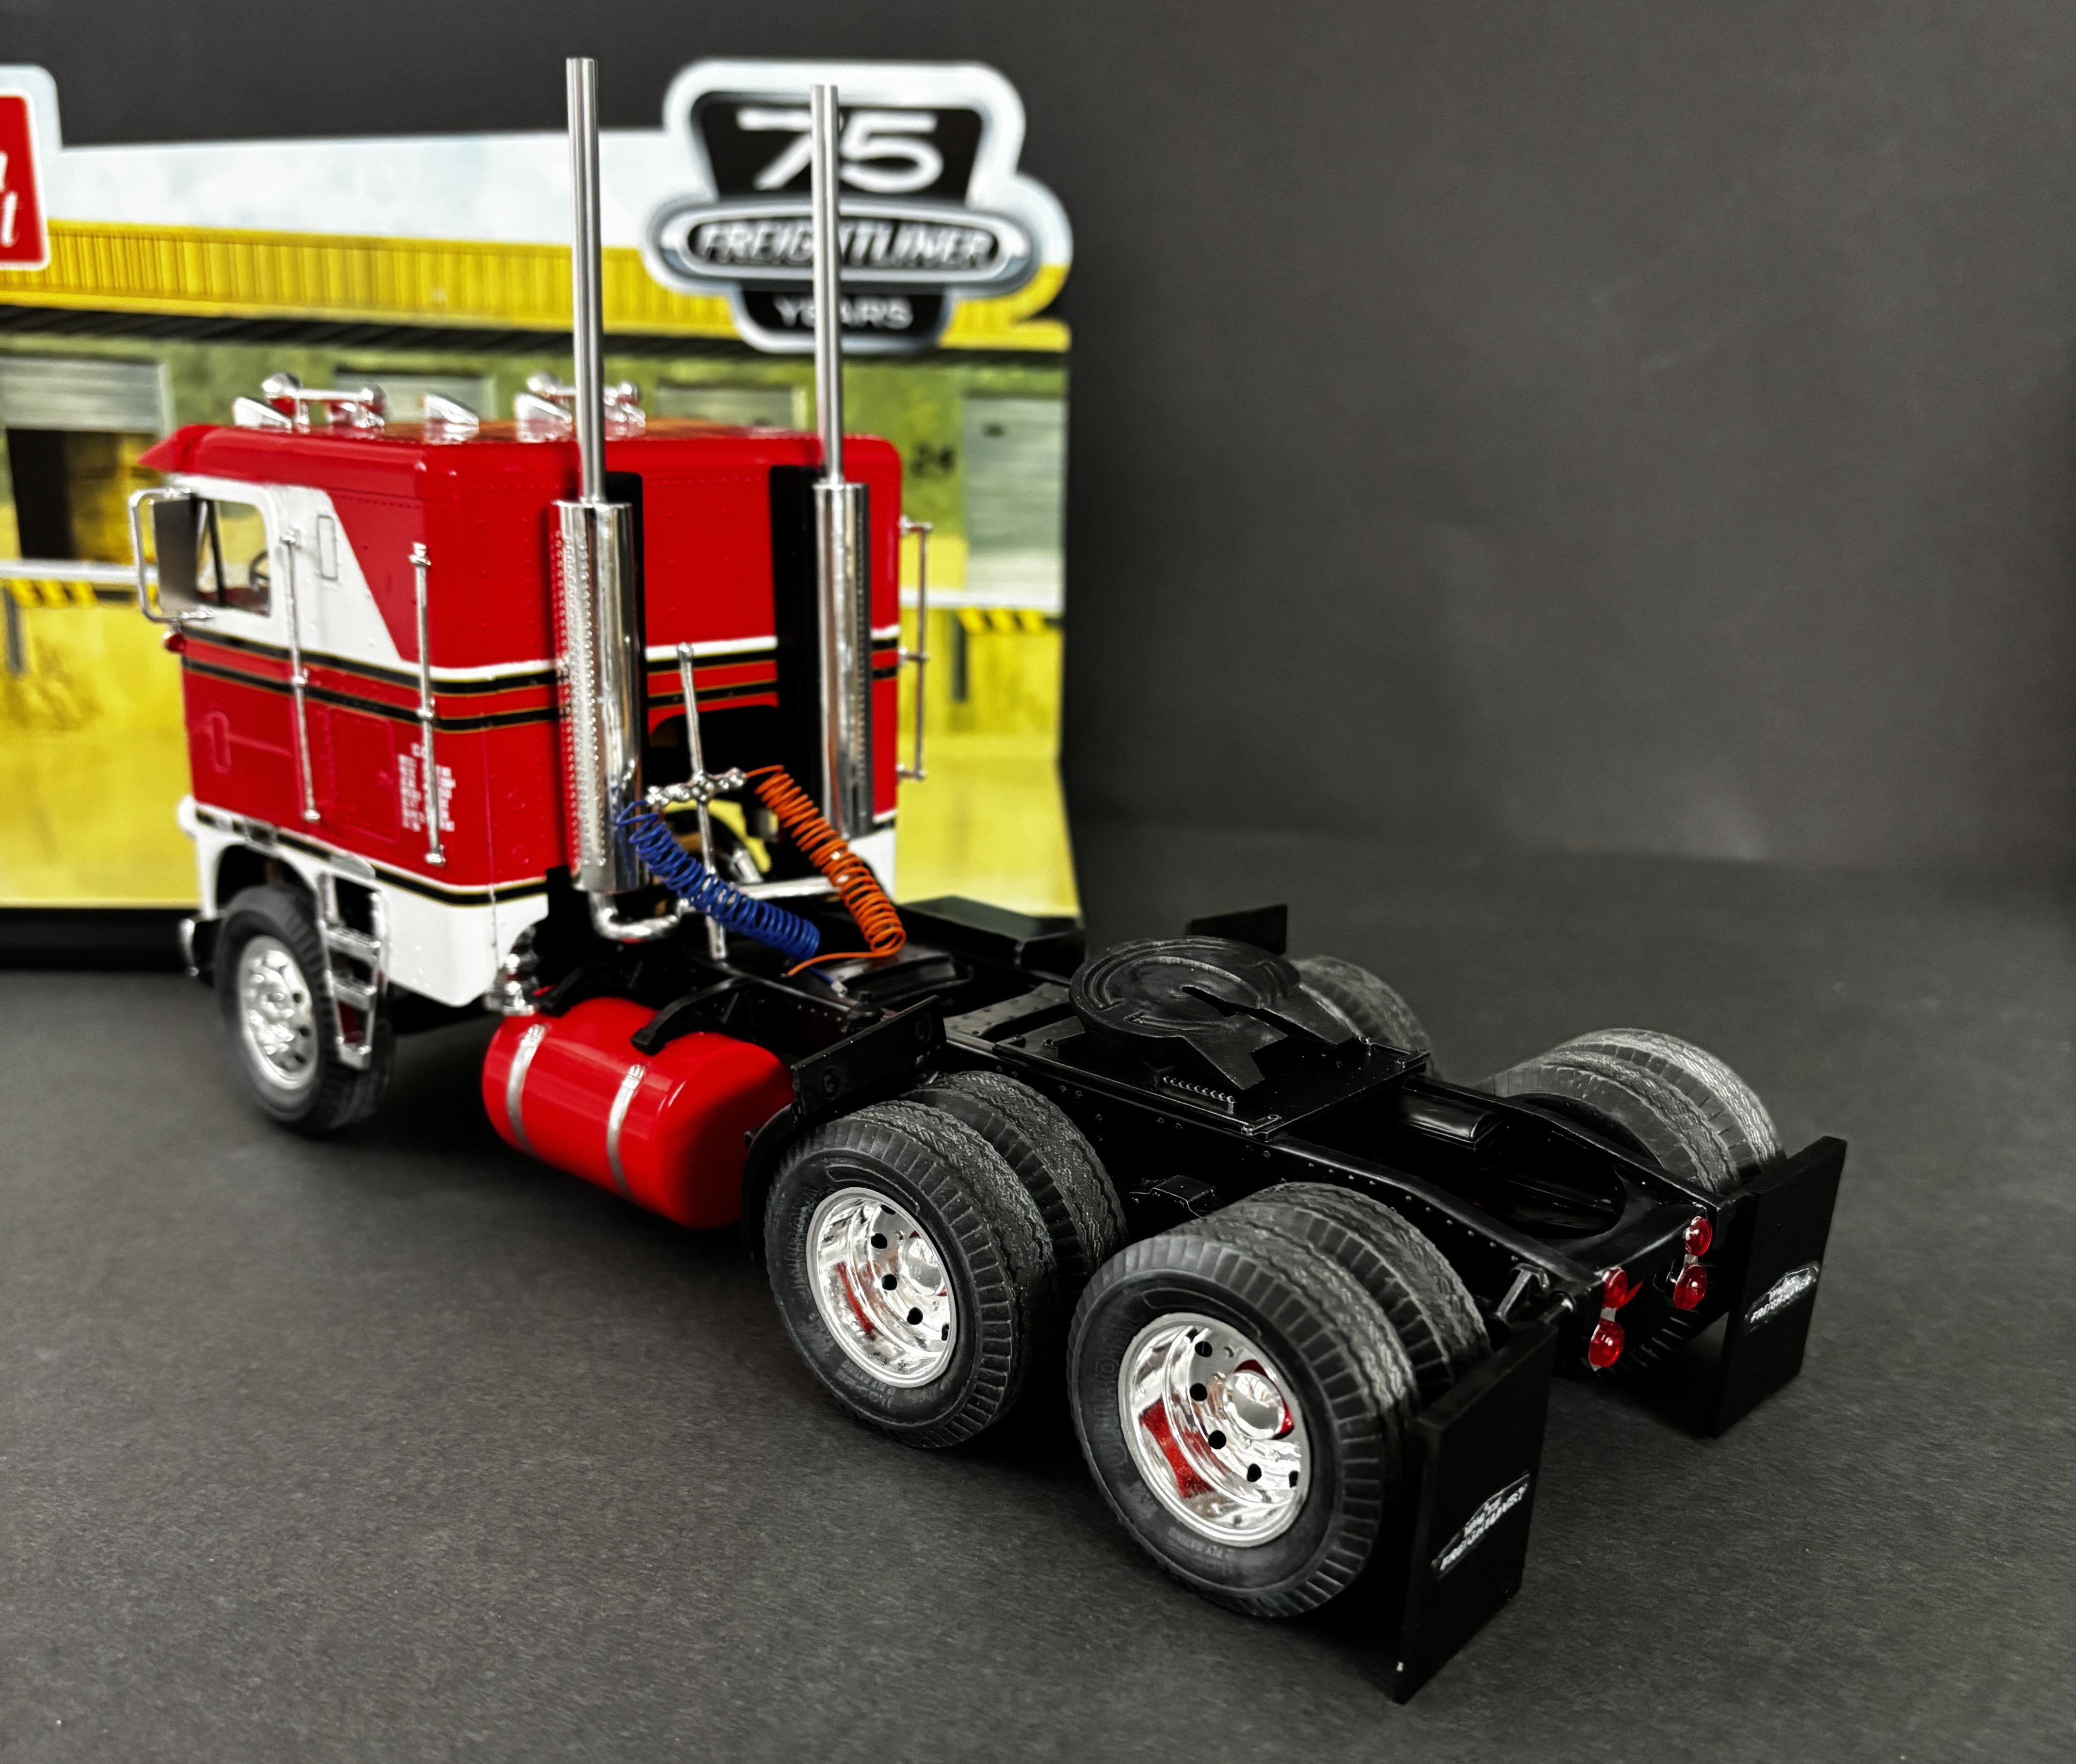
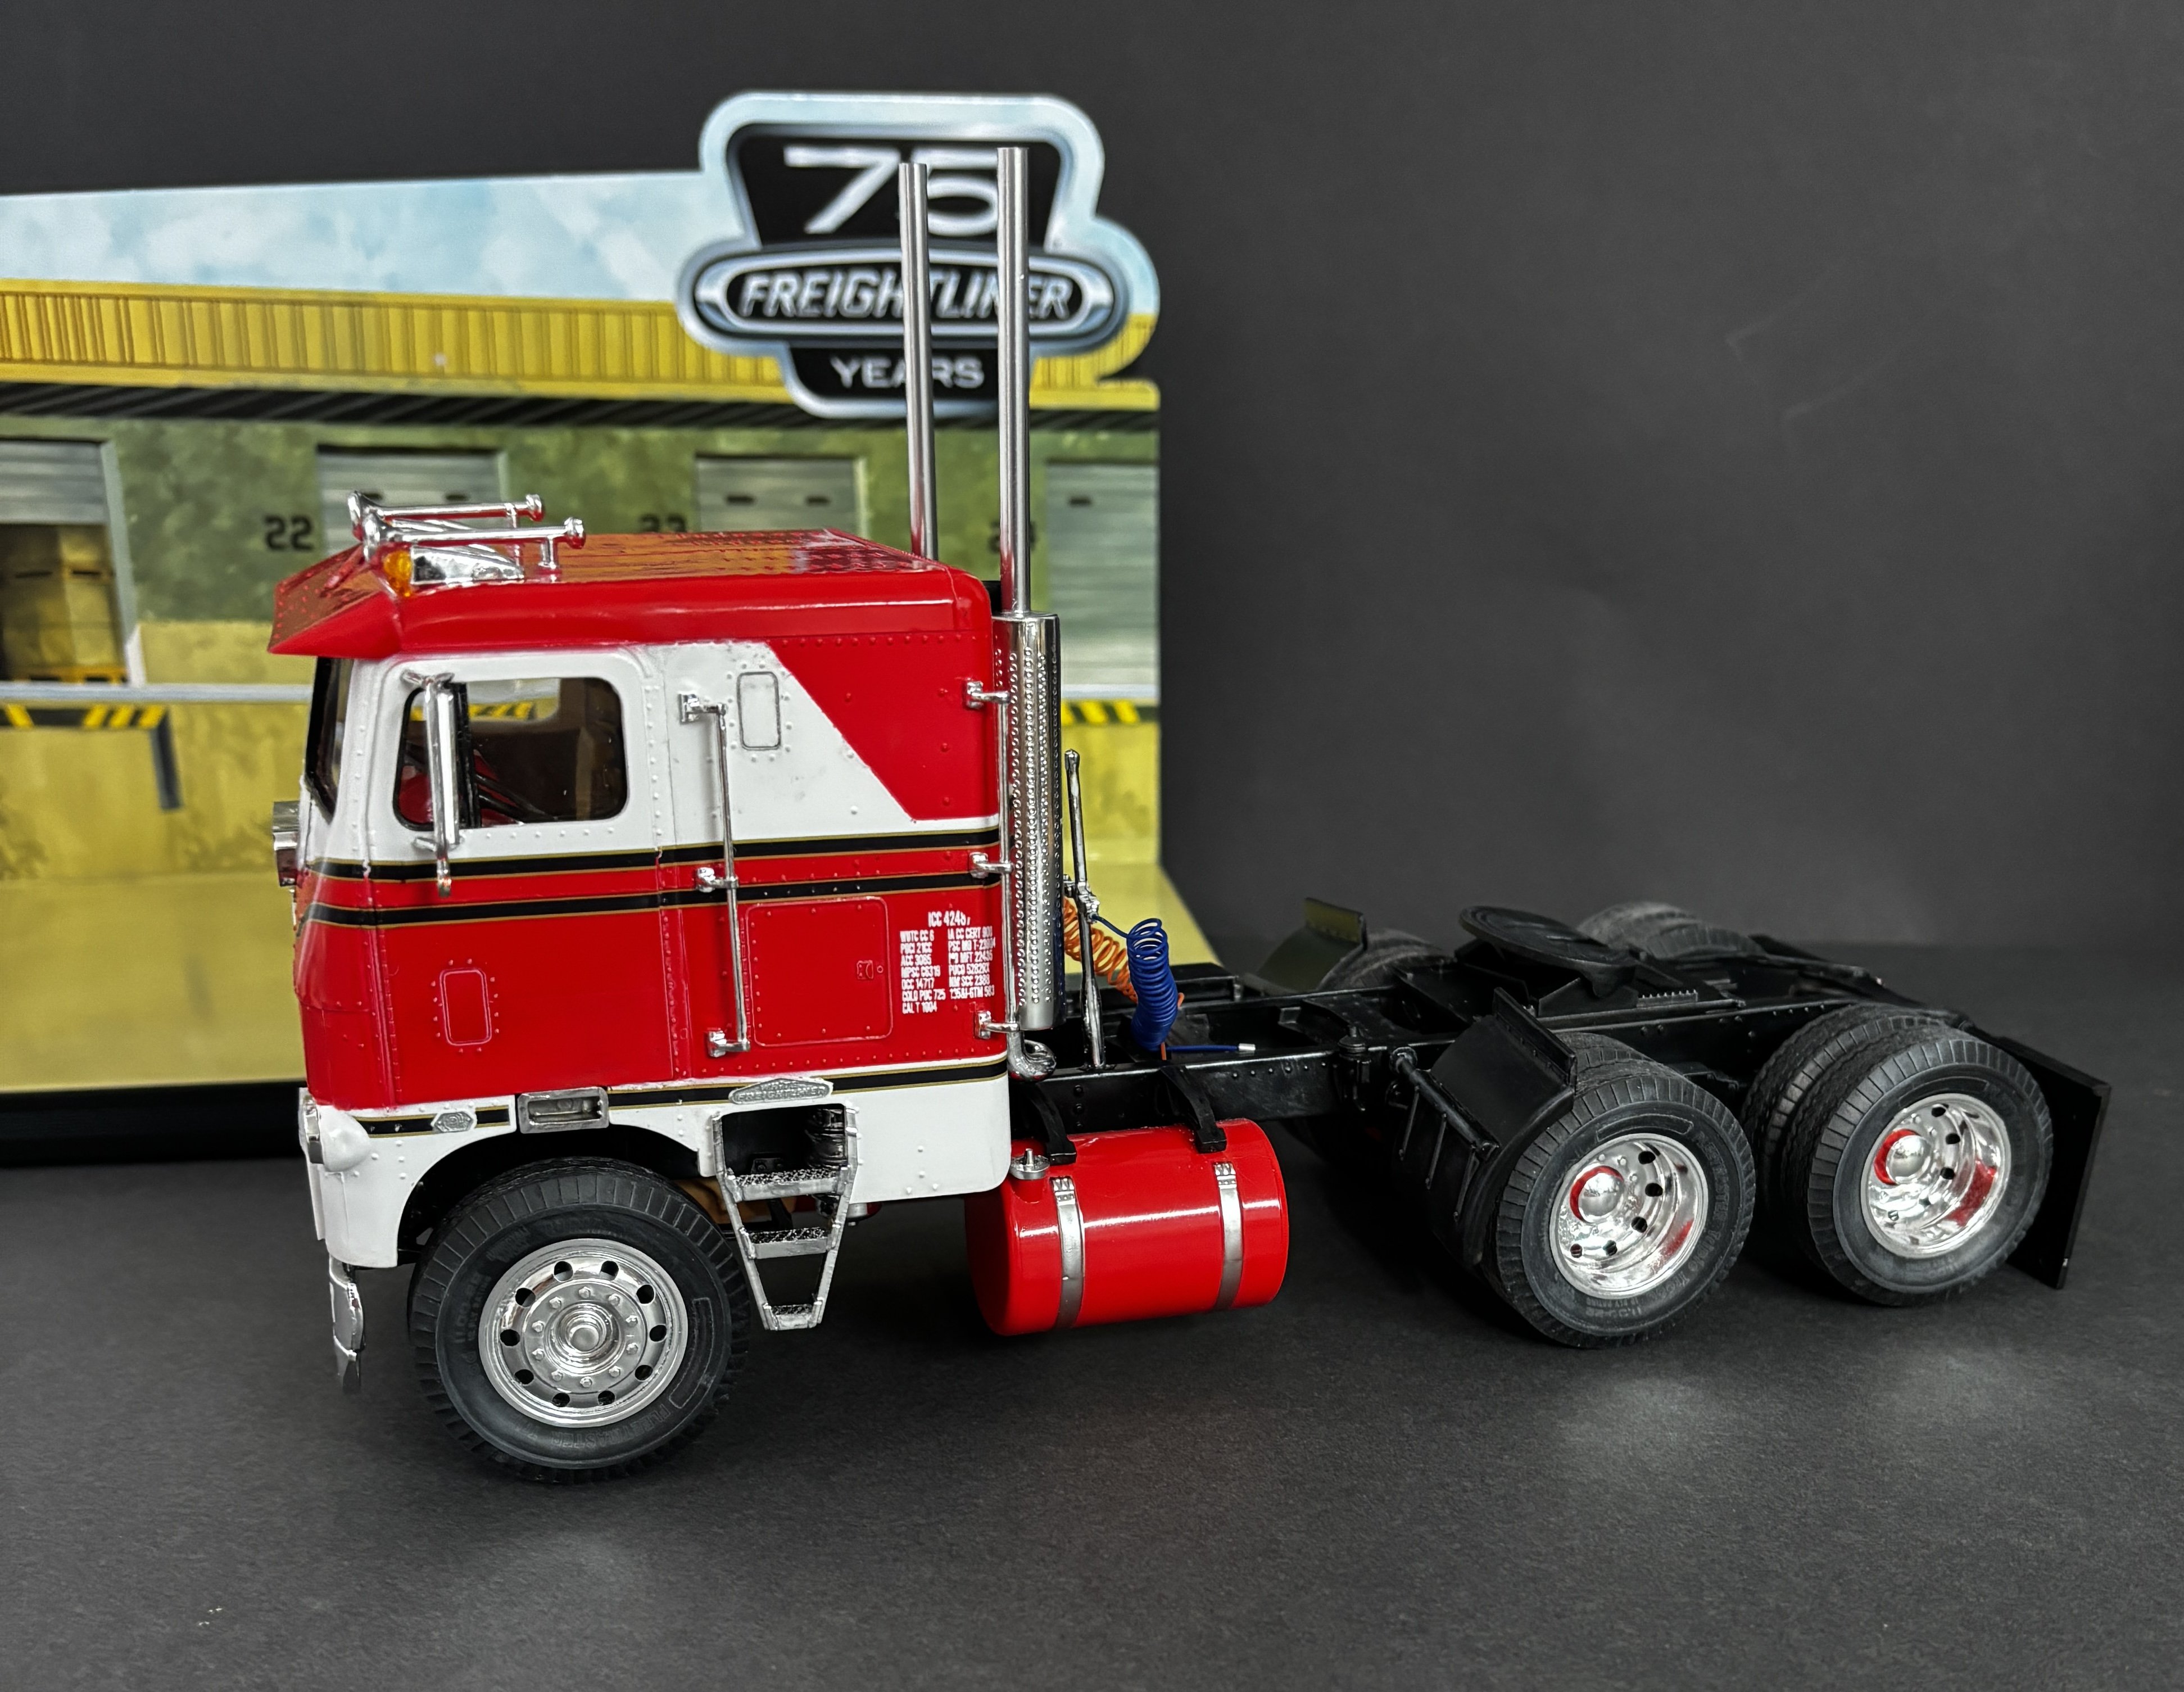
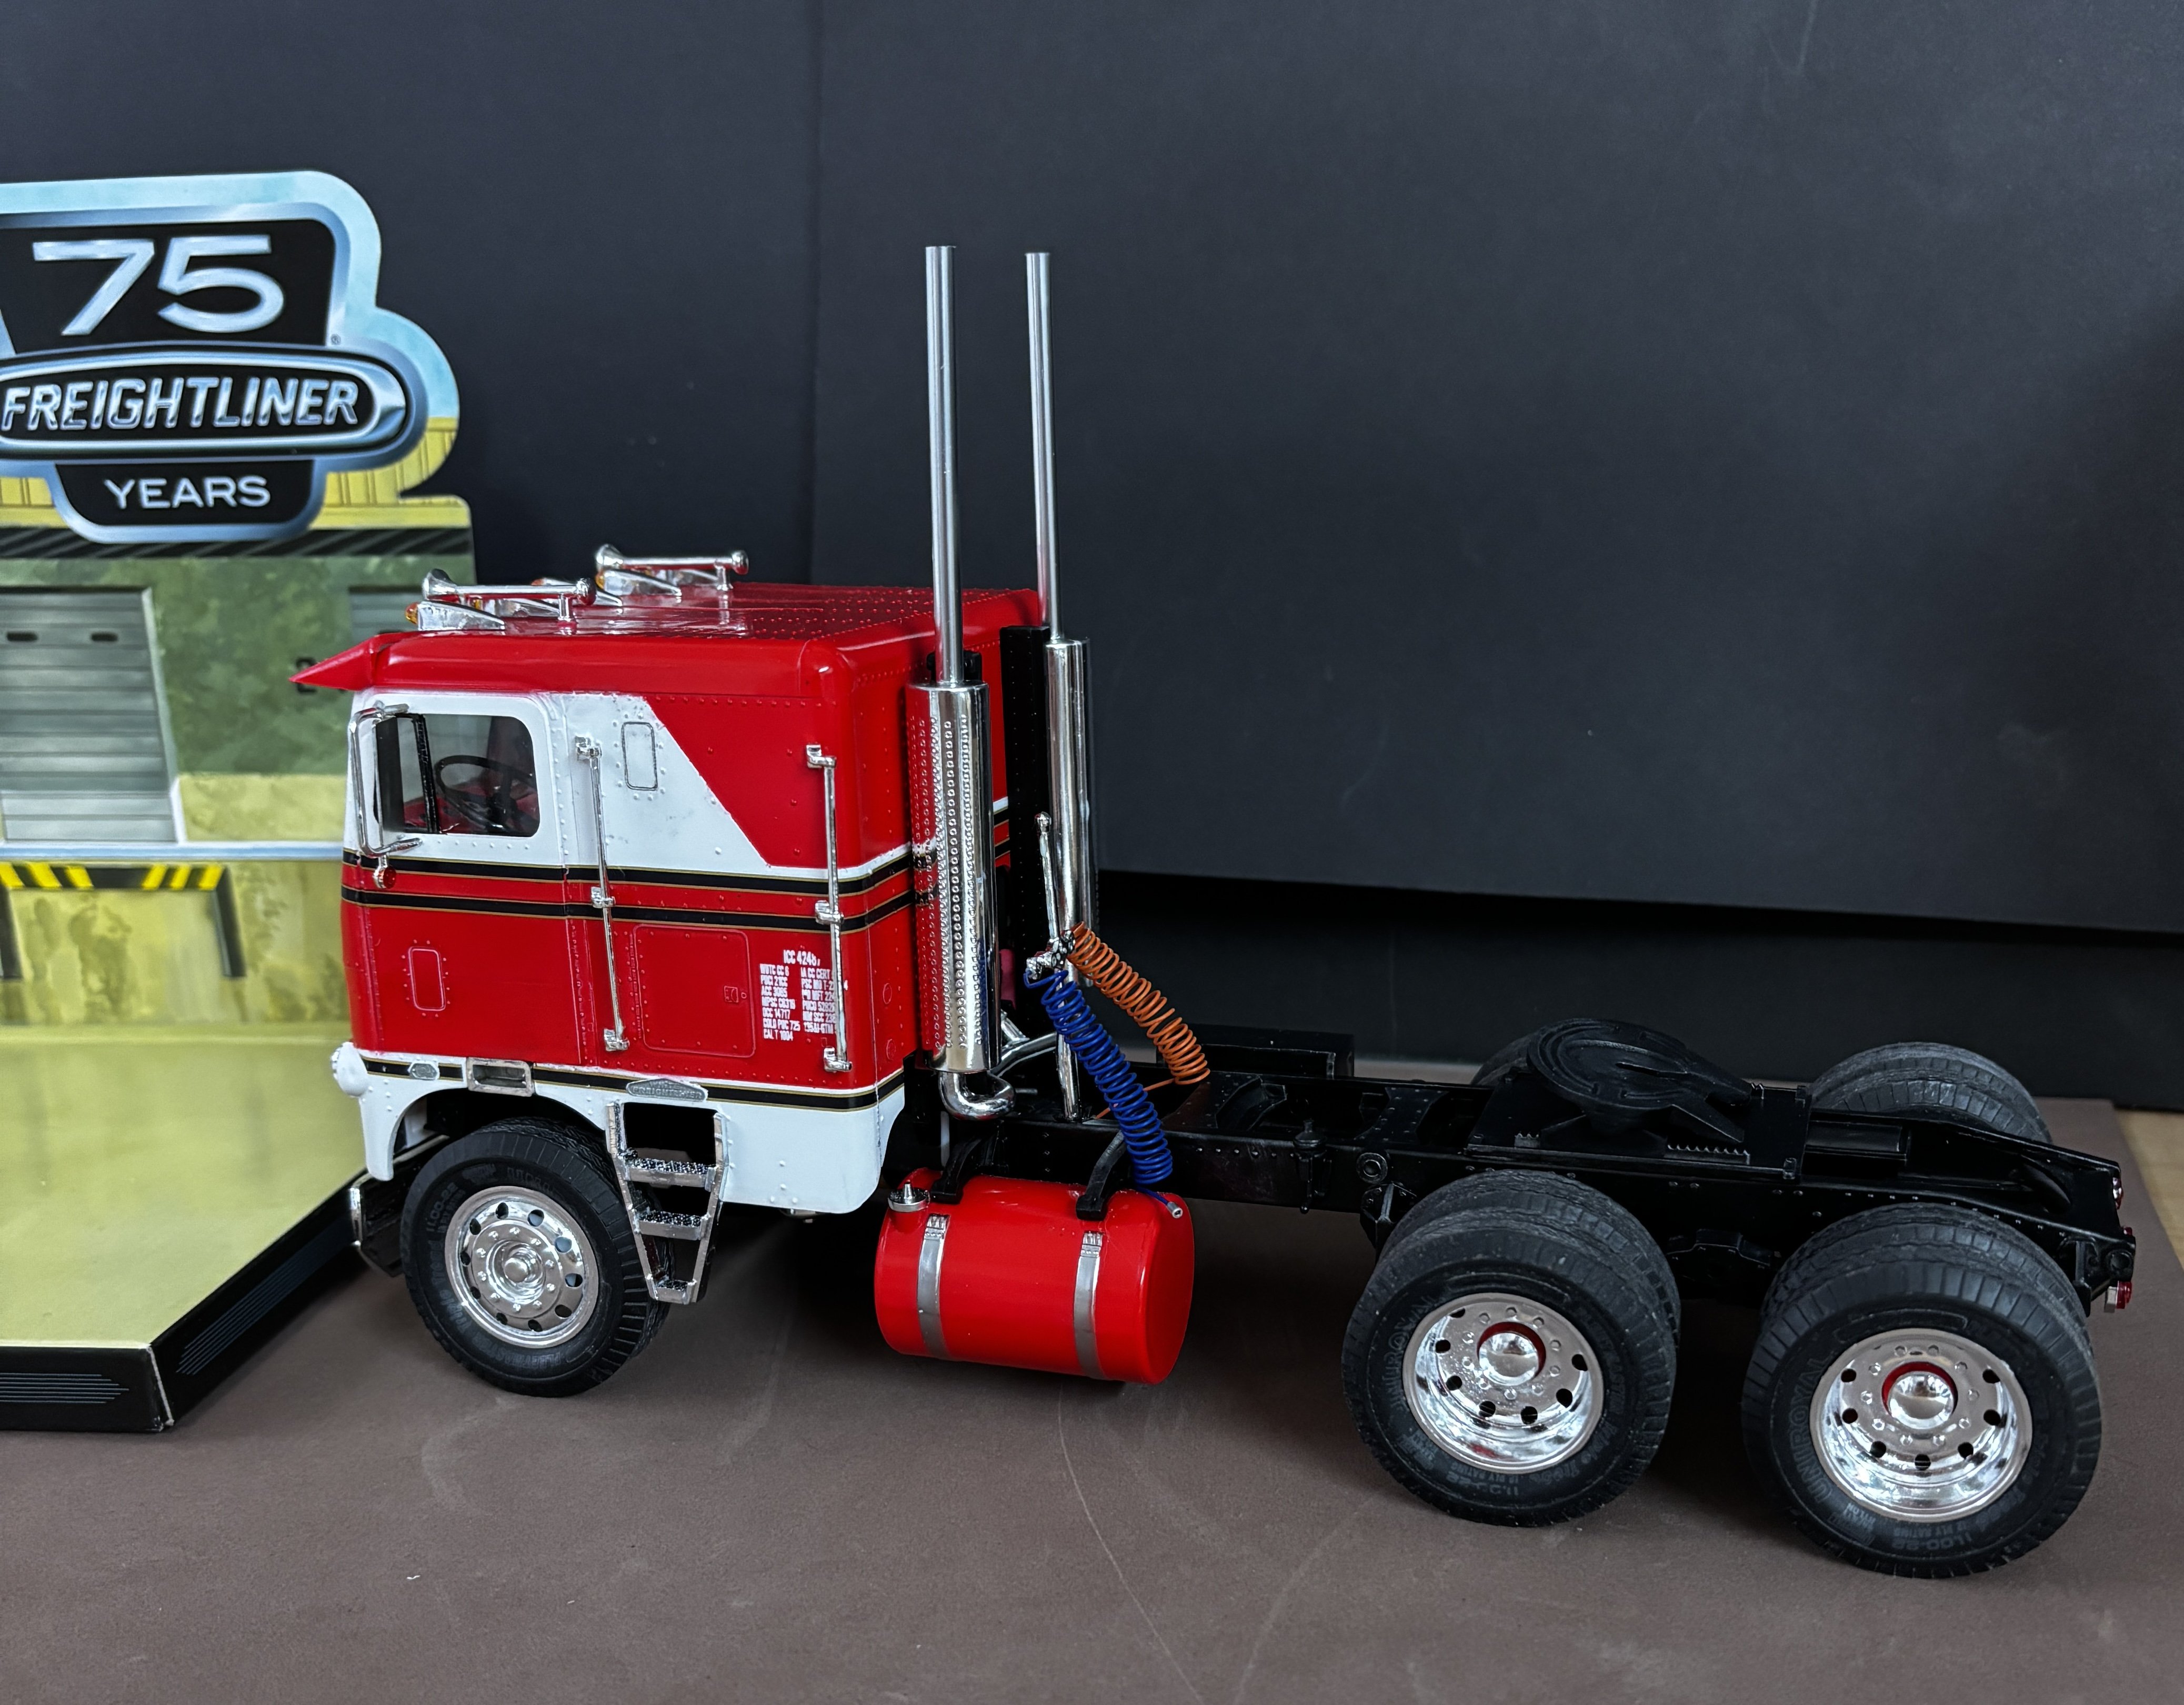
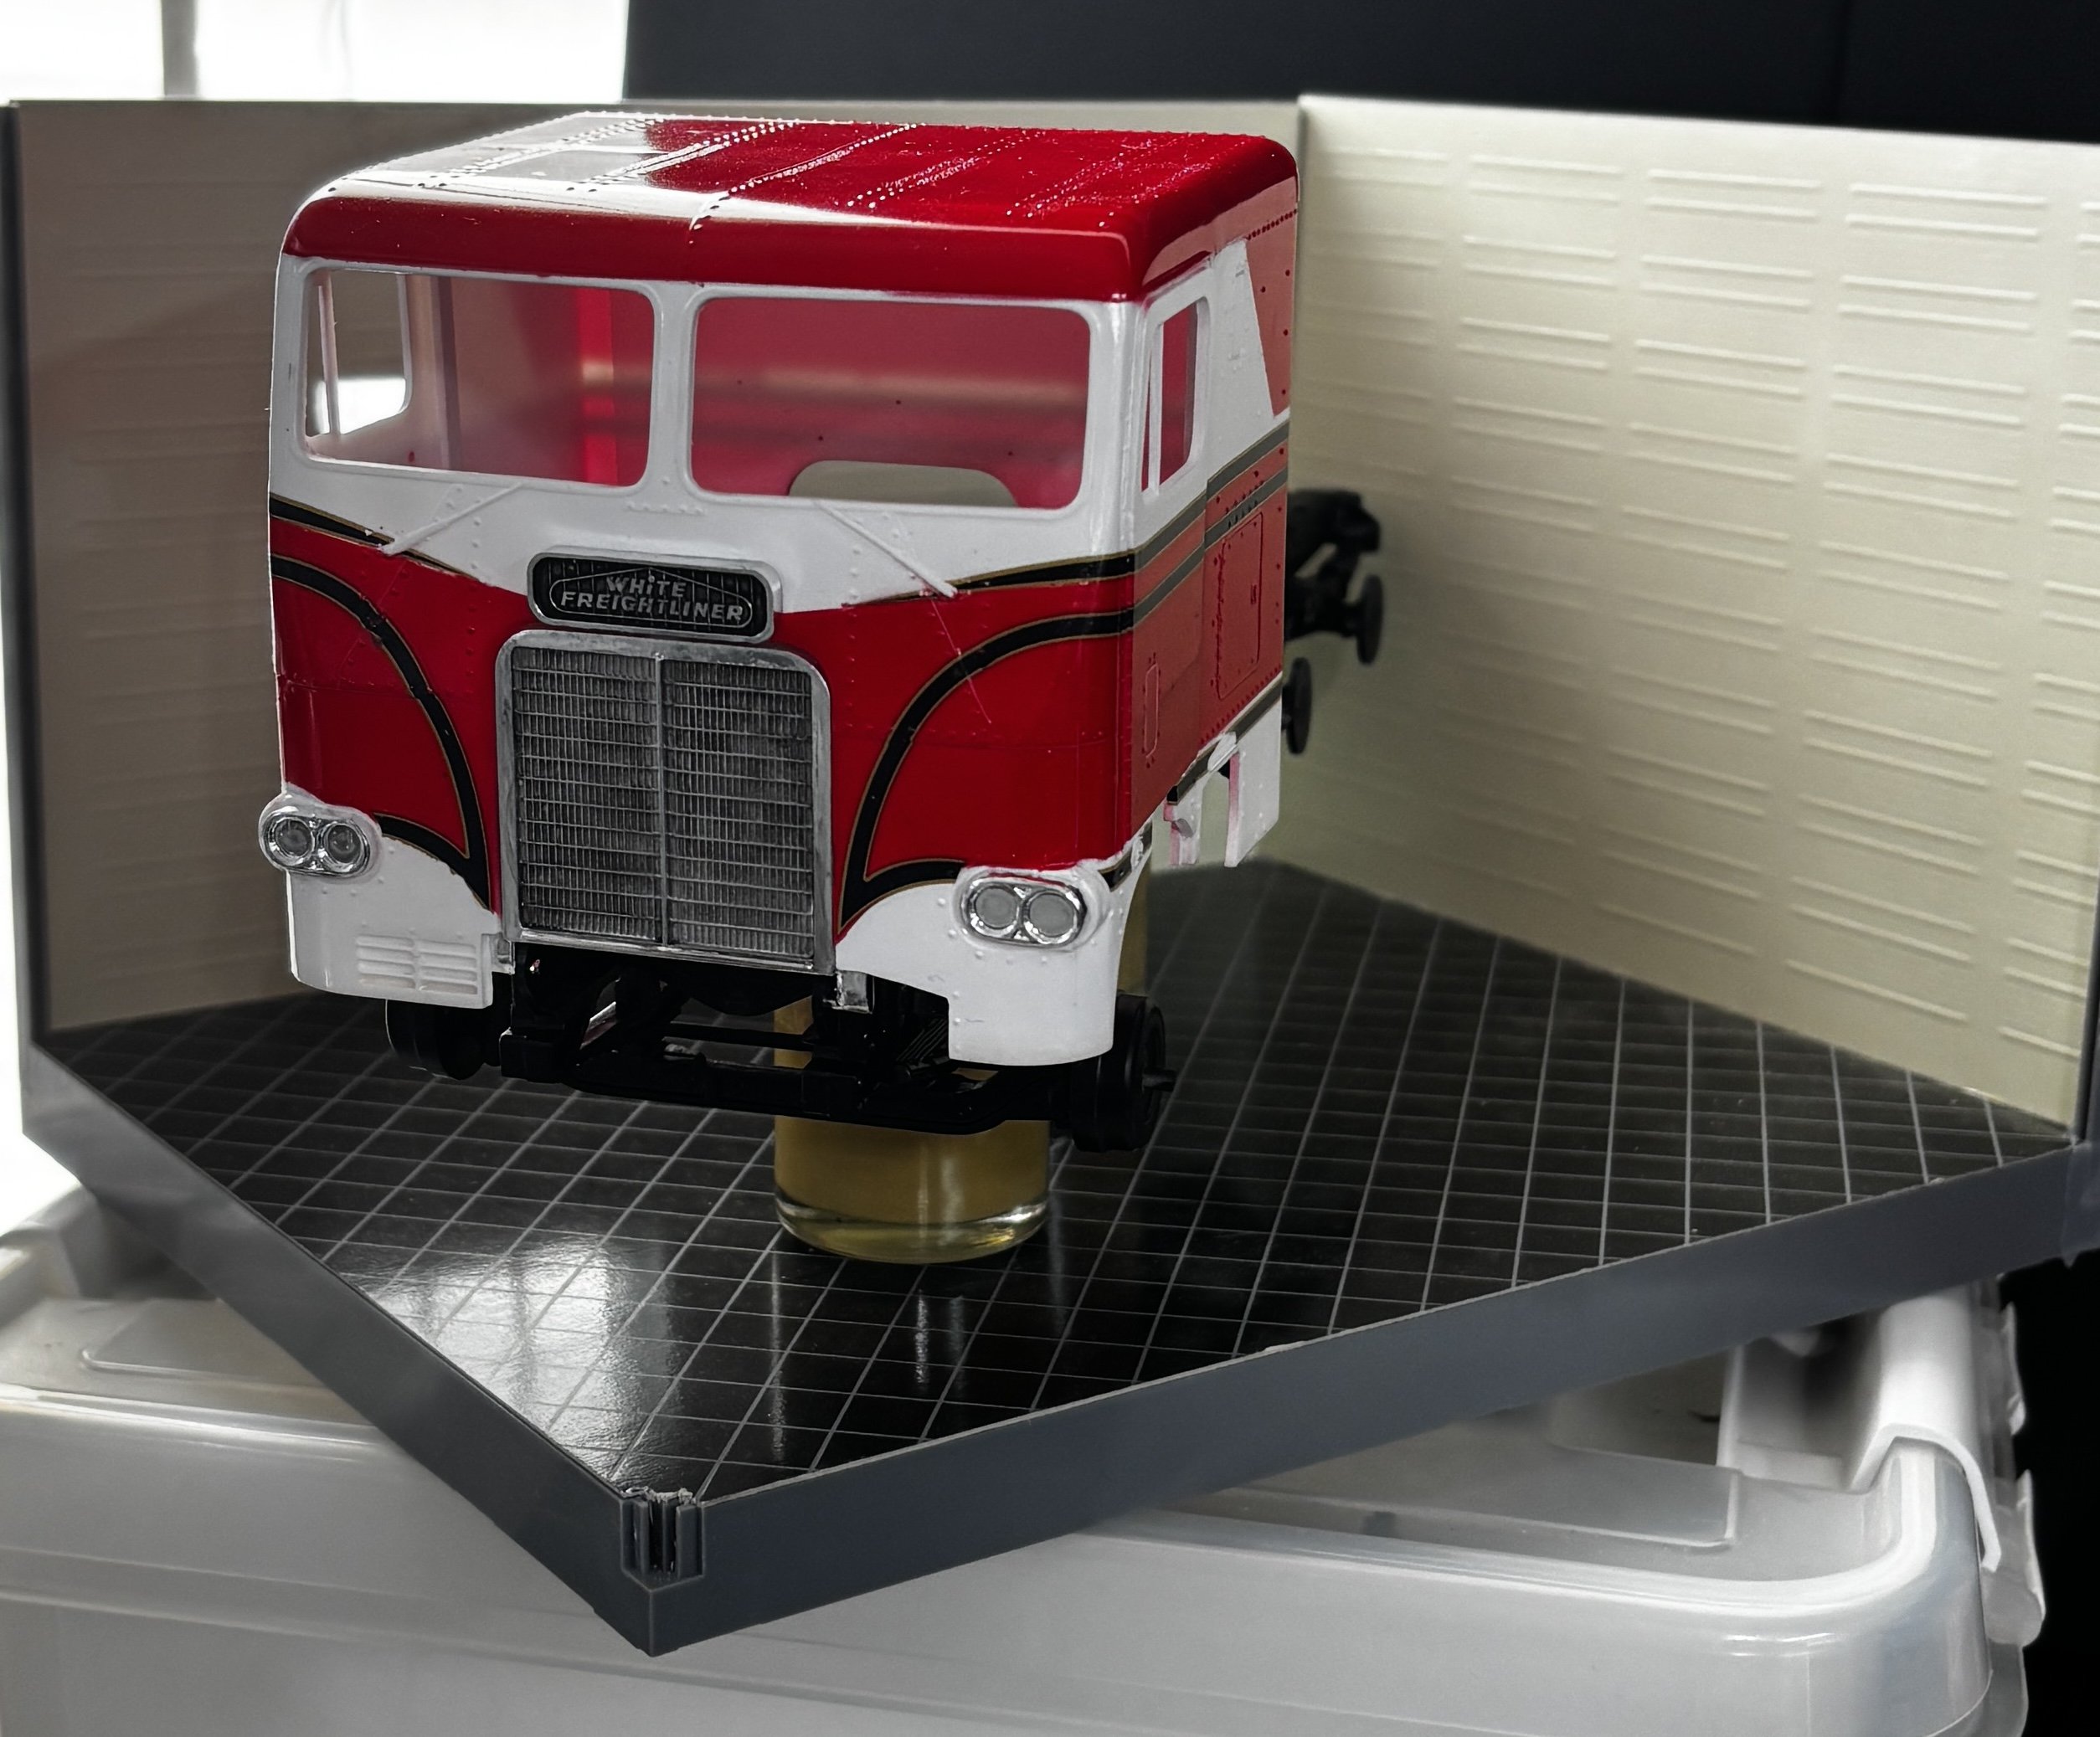
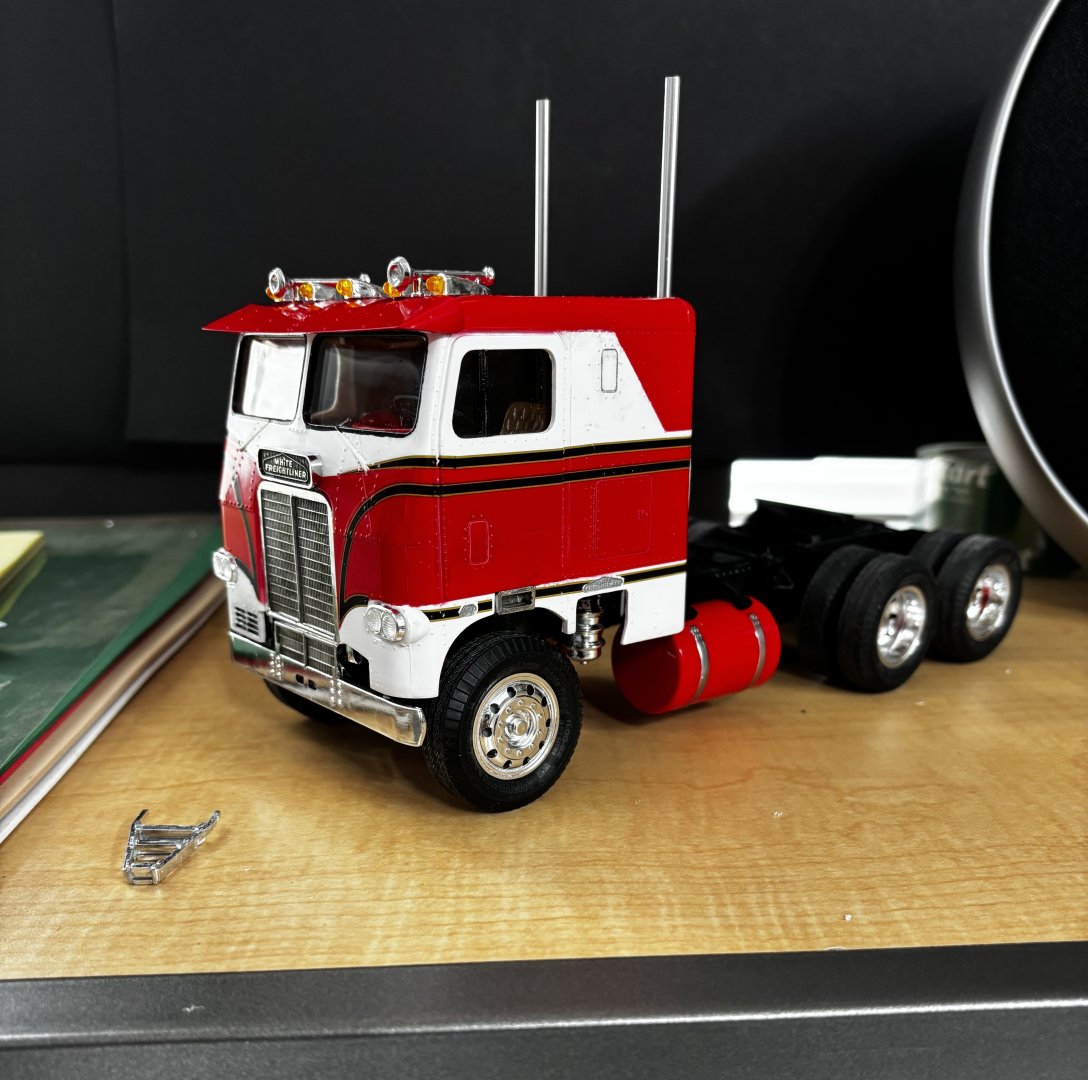
Gonna call this finished. Could have spent more time and effort but wanted to get my feet wet with a first ever big rig build for me. Learned a lot with is kit and look forward to more similar kits in the future. Thanks for following along and for all your likes and comments.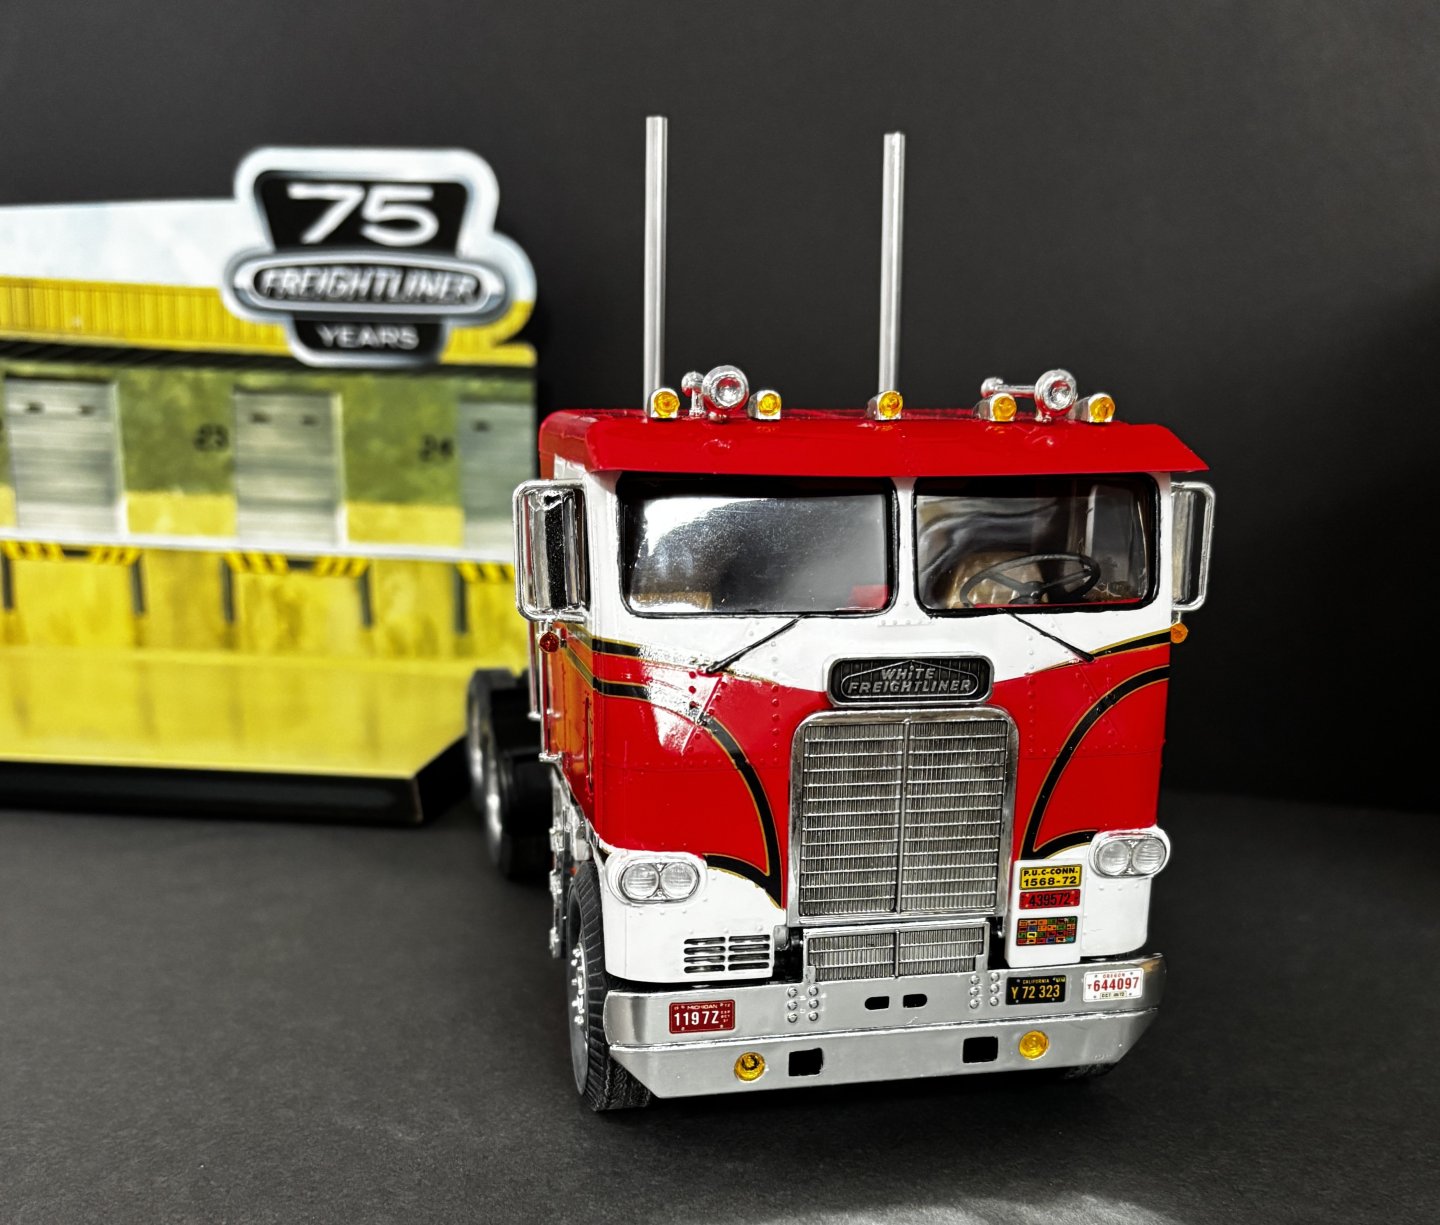


- 30 replies
-
- 11
-
-

-
White Freightliner DD by CDW - AMT - 1:25 Scale - PLASTIC
CDW replied to CDW's topic in Non-ship/categorised builds

-
White Freightliner DD by CDW - AMT - 1:25 Scale - PLASTIC
CDW replied to CDW's topic in Non-ship/categorised builds
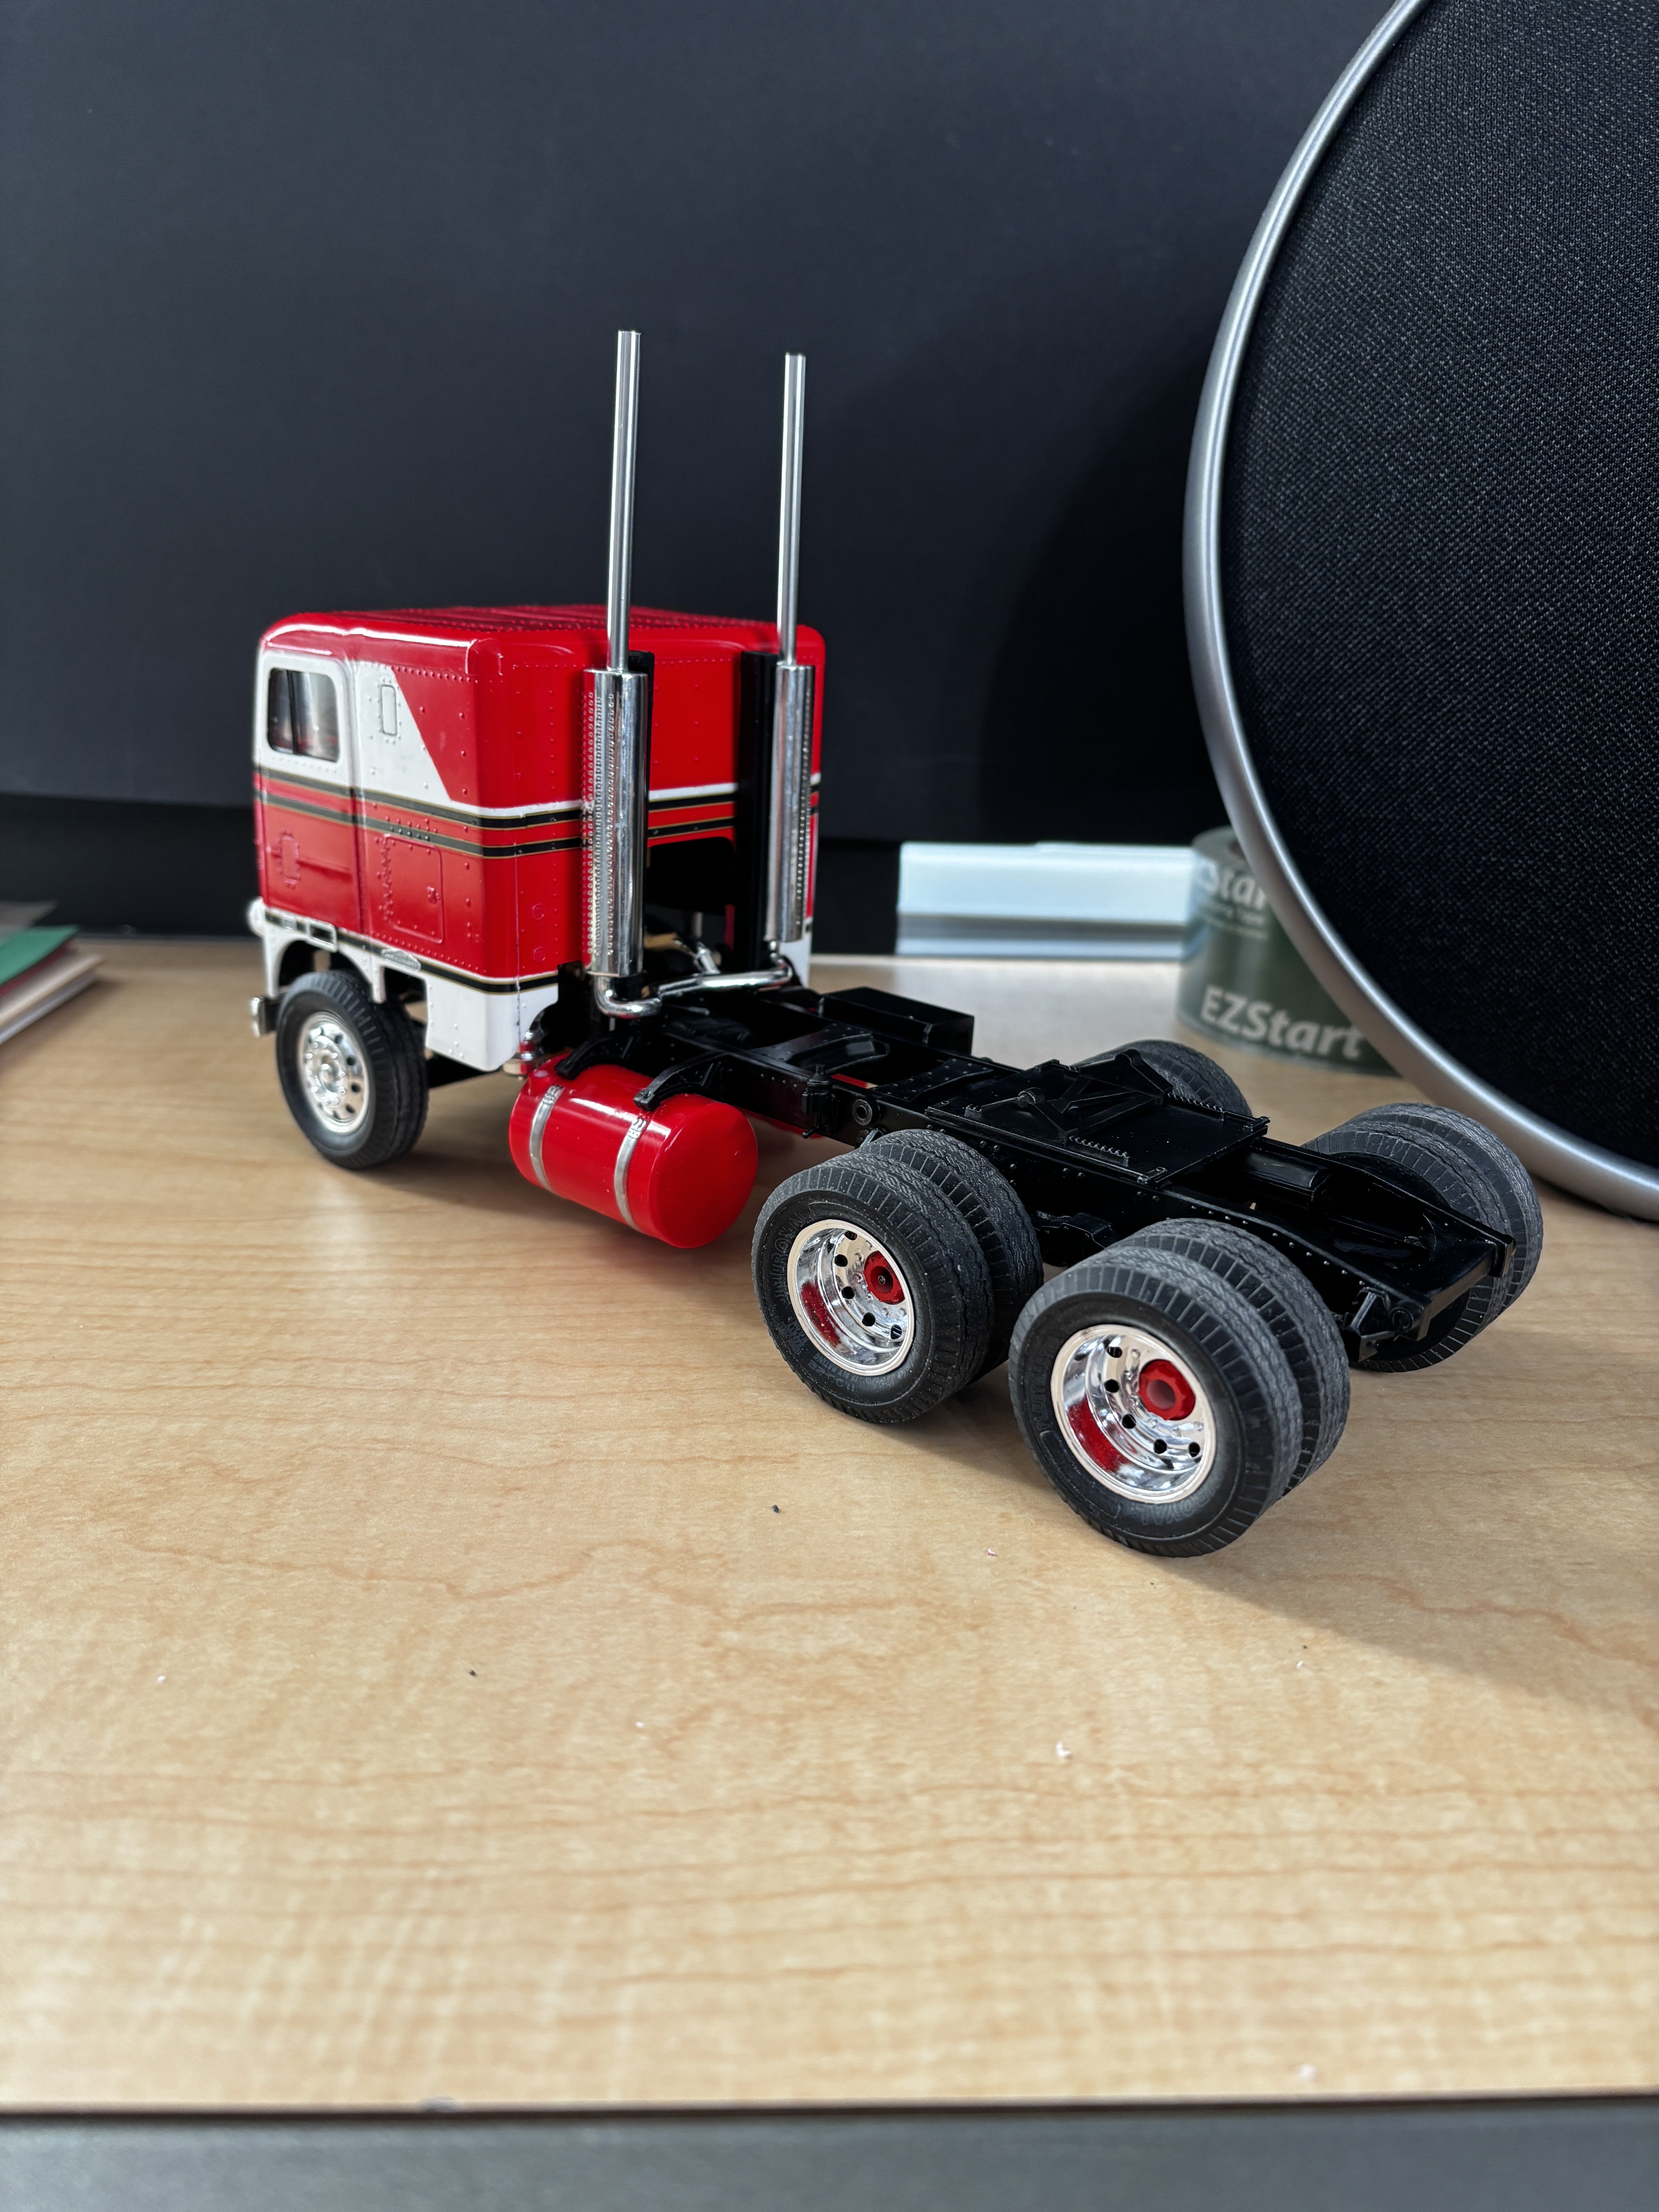
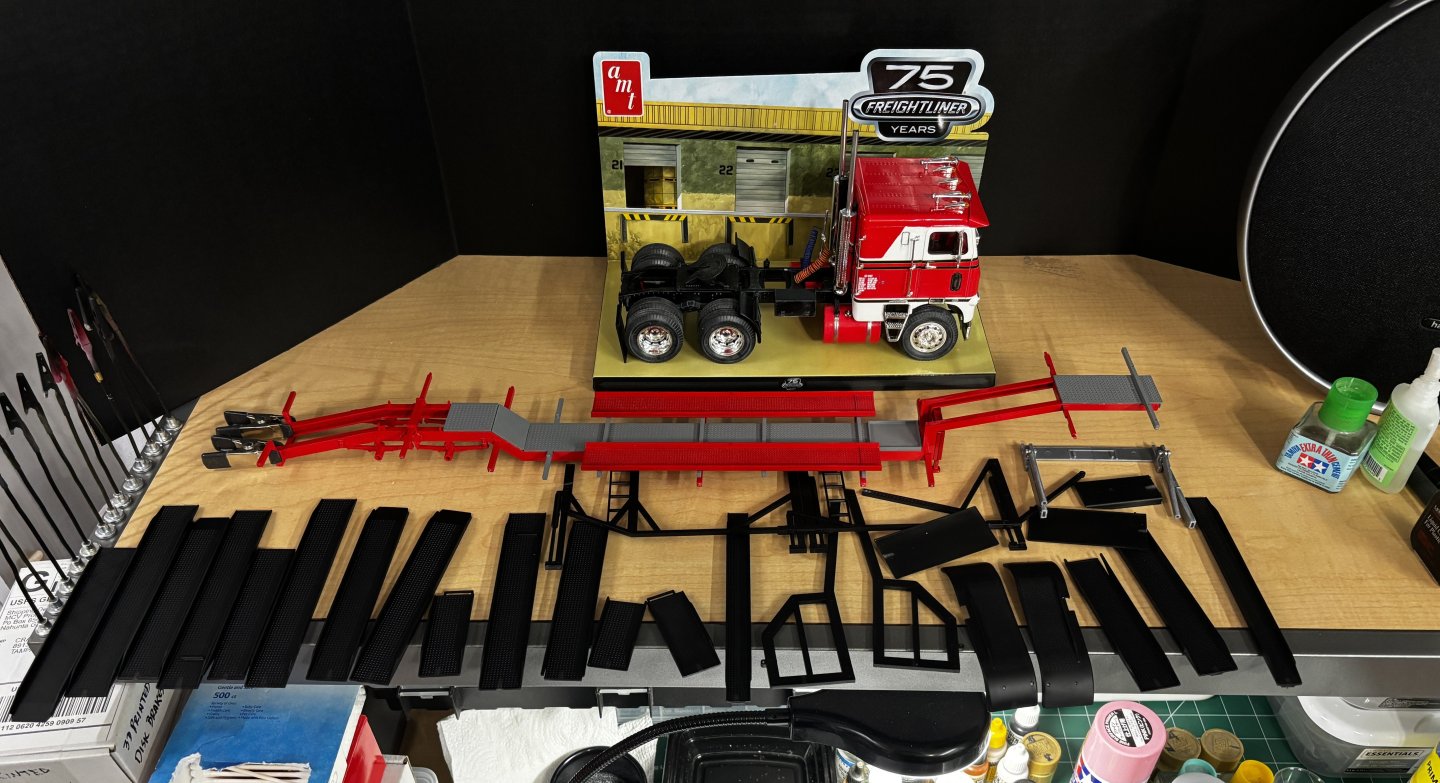
More remains to be done but it’s getting closer to conclusion.


- 30 replies
-
- 10
-
-
-
White Freightliner DD by CDW - AMT - 1:25 Scale - PLASTIC
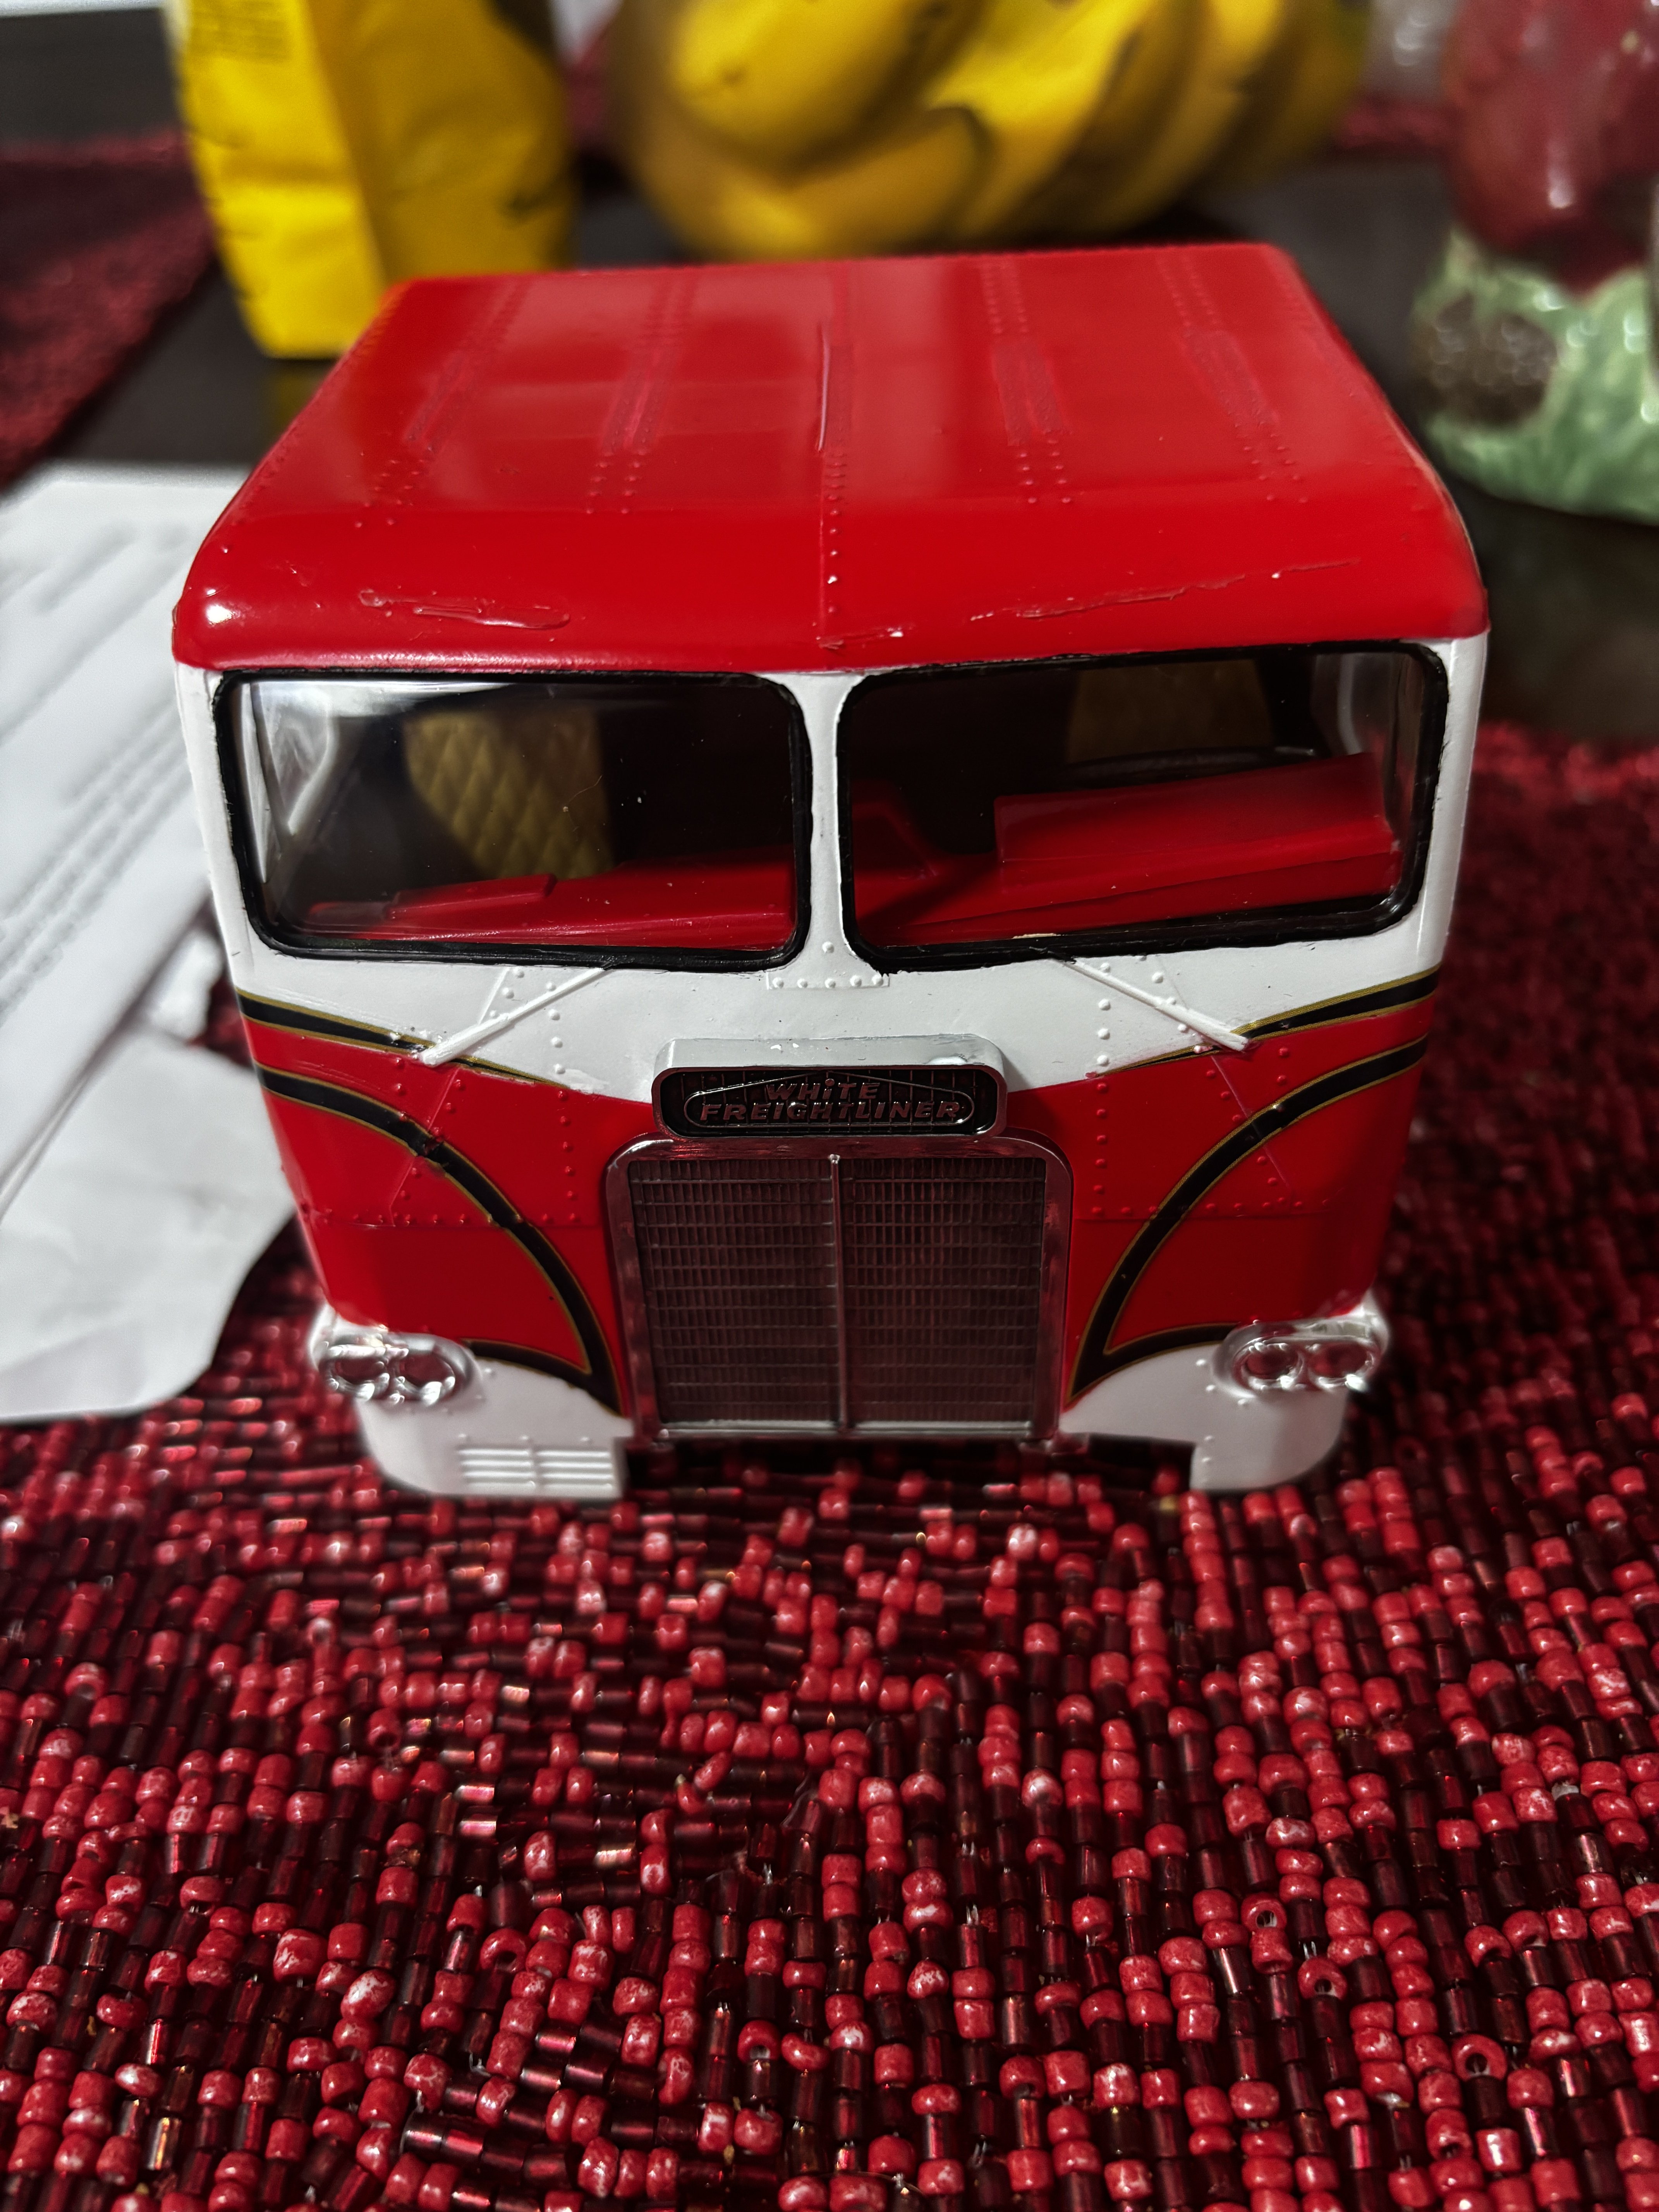
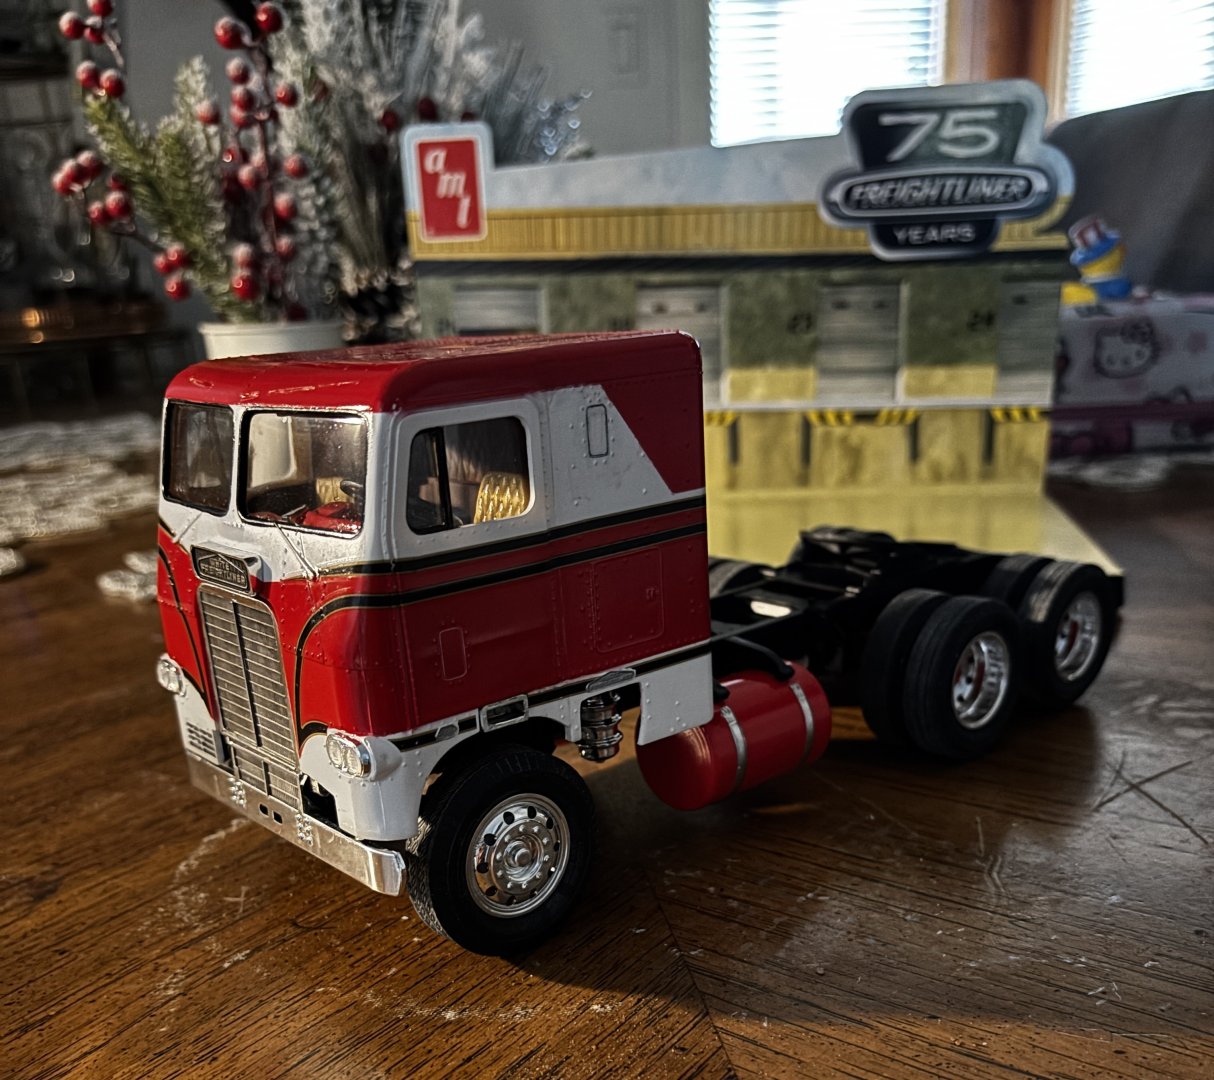
CDW replied to CDW's topic in Non-ship/categorised builds
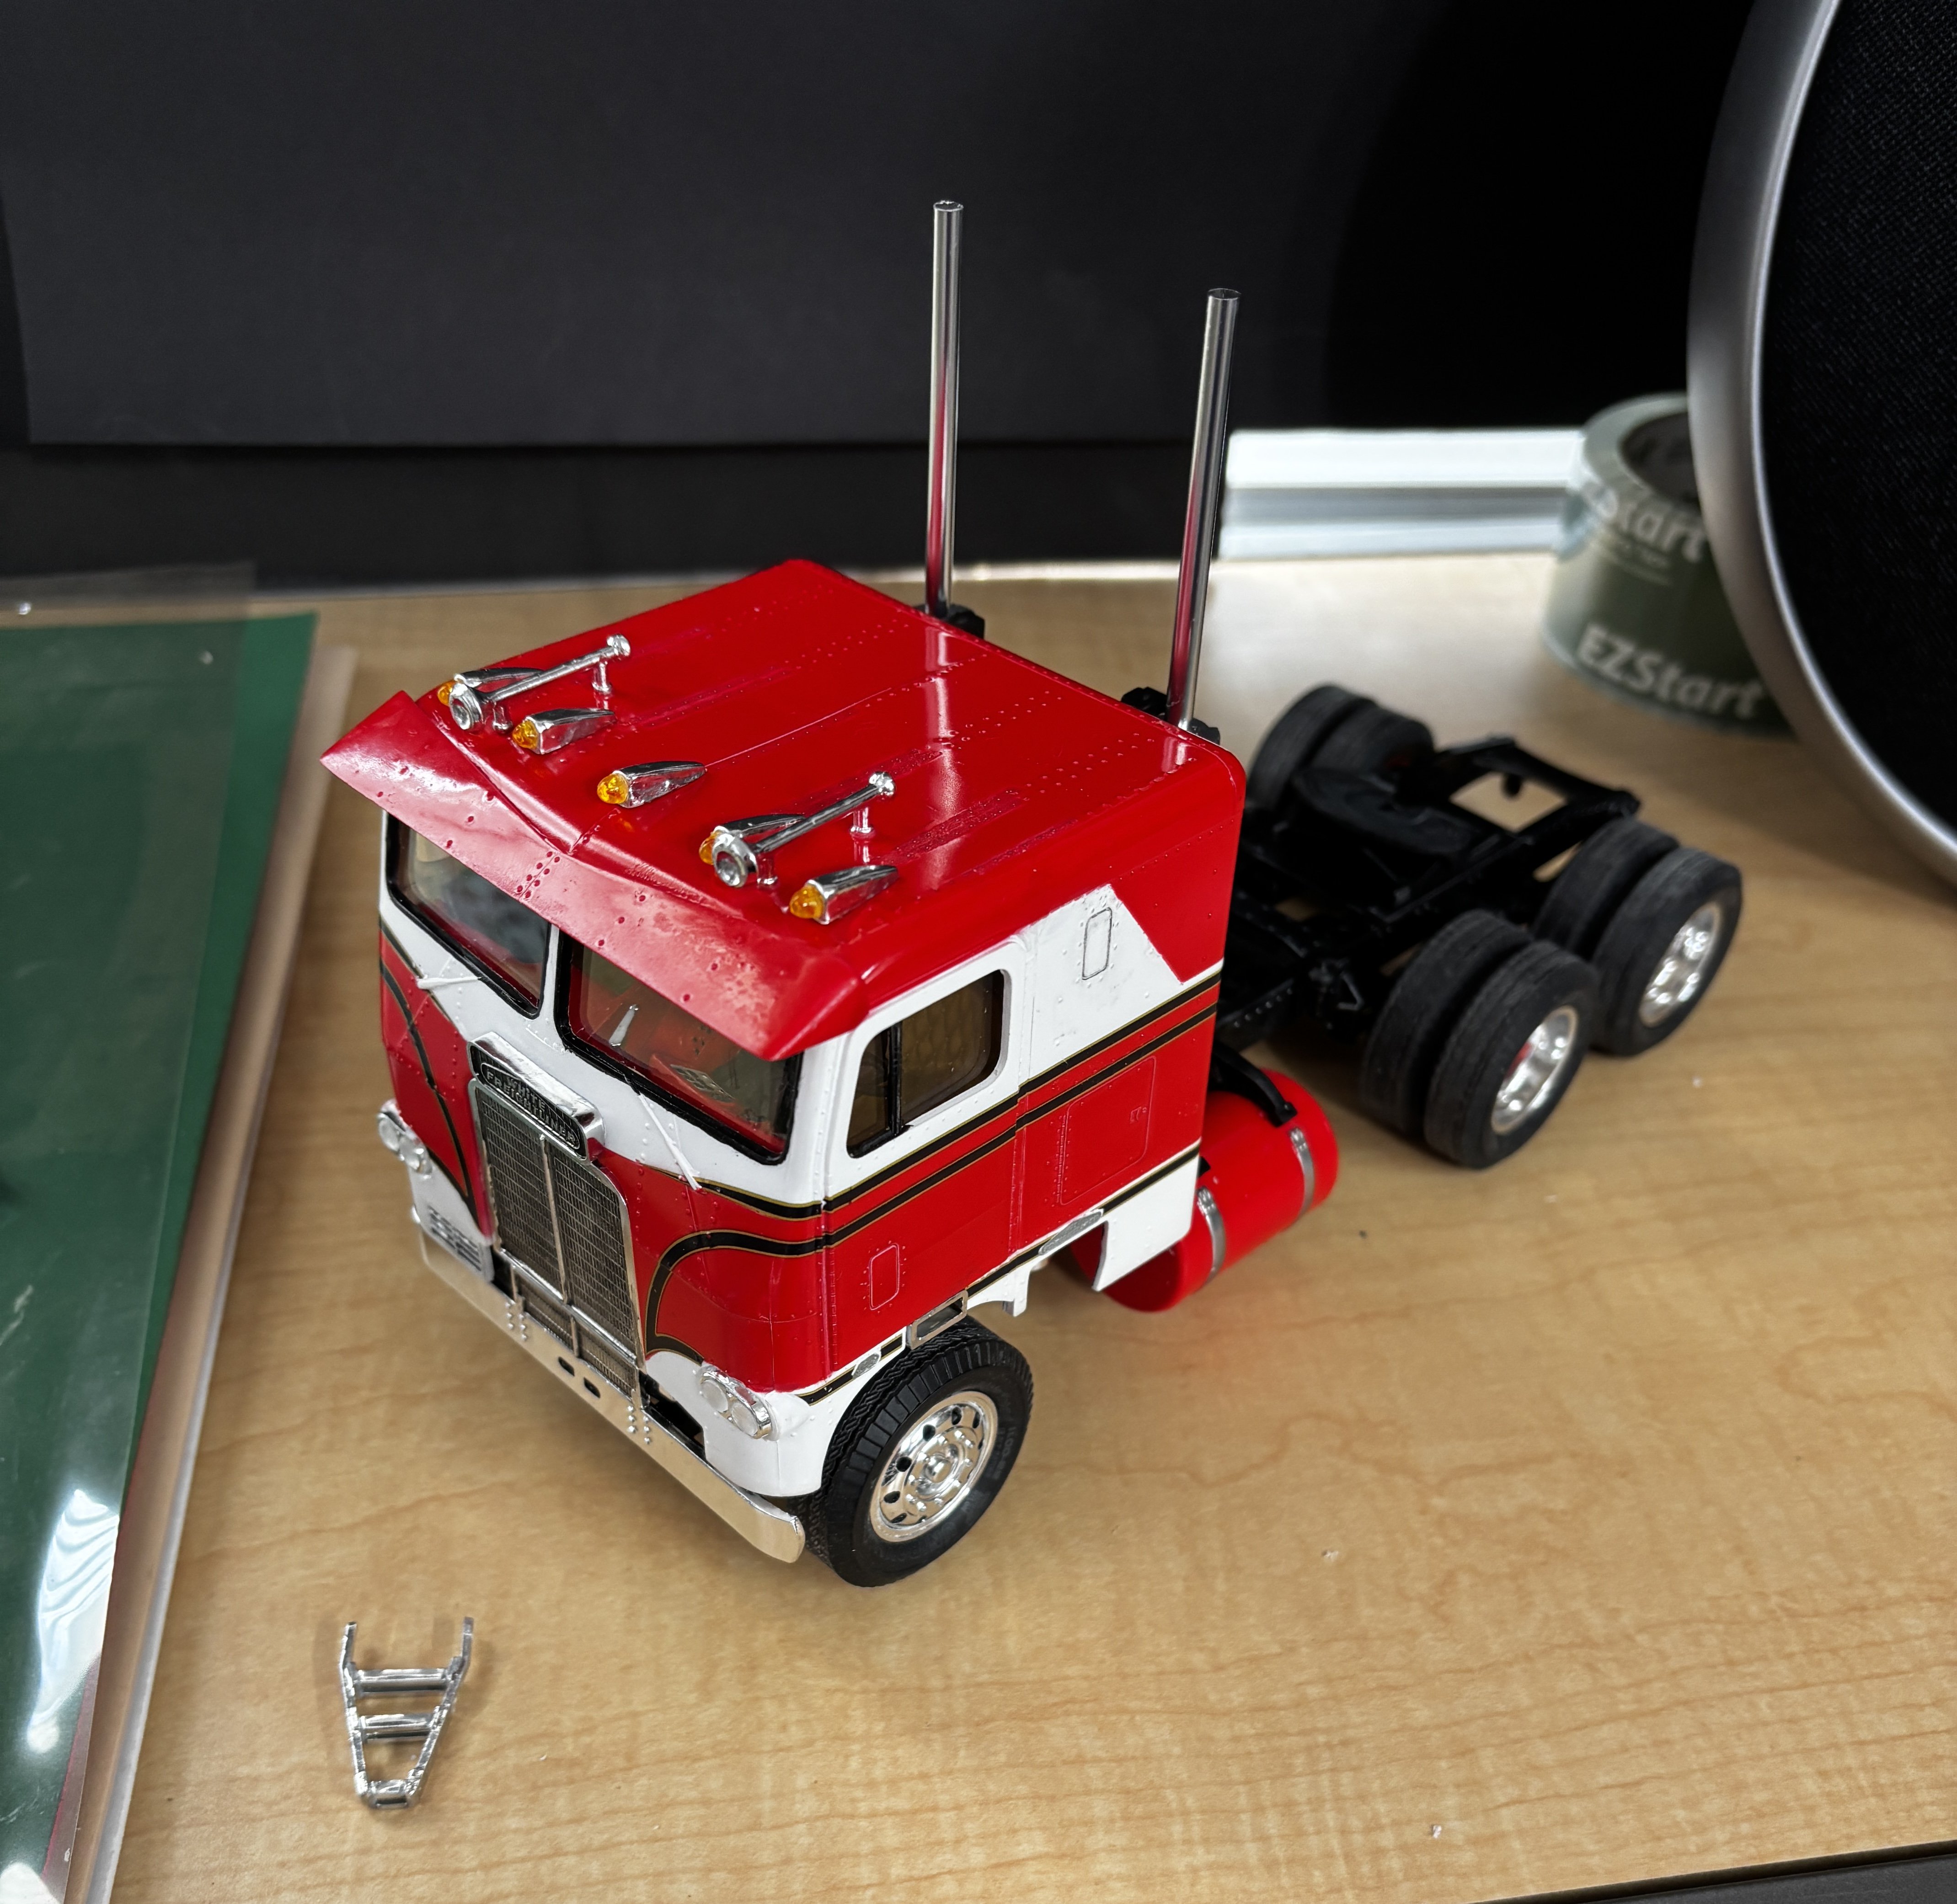
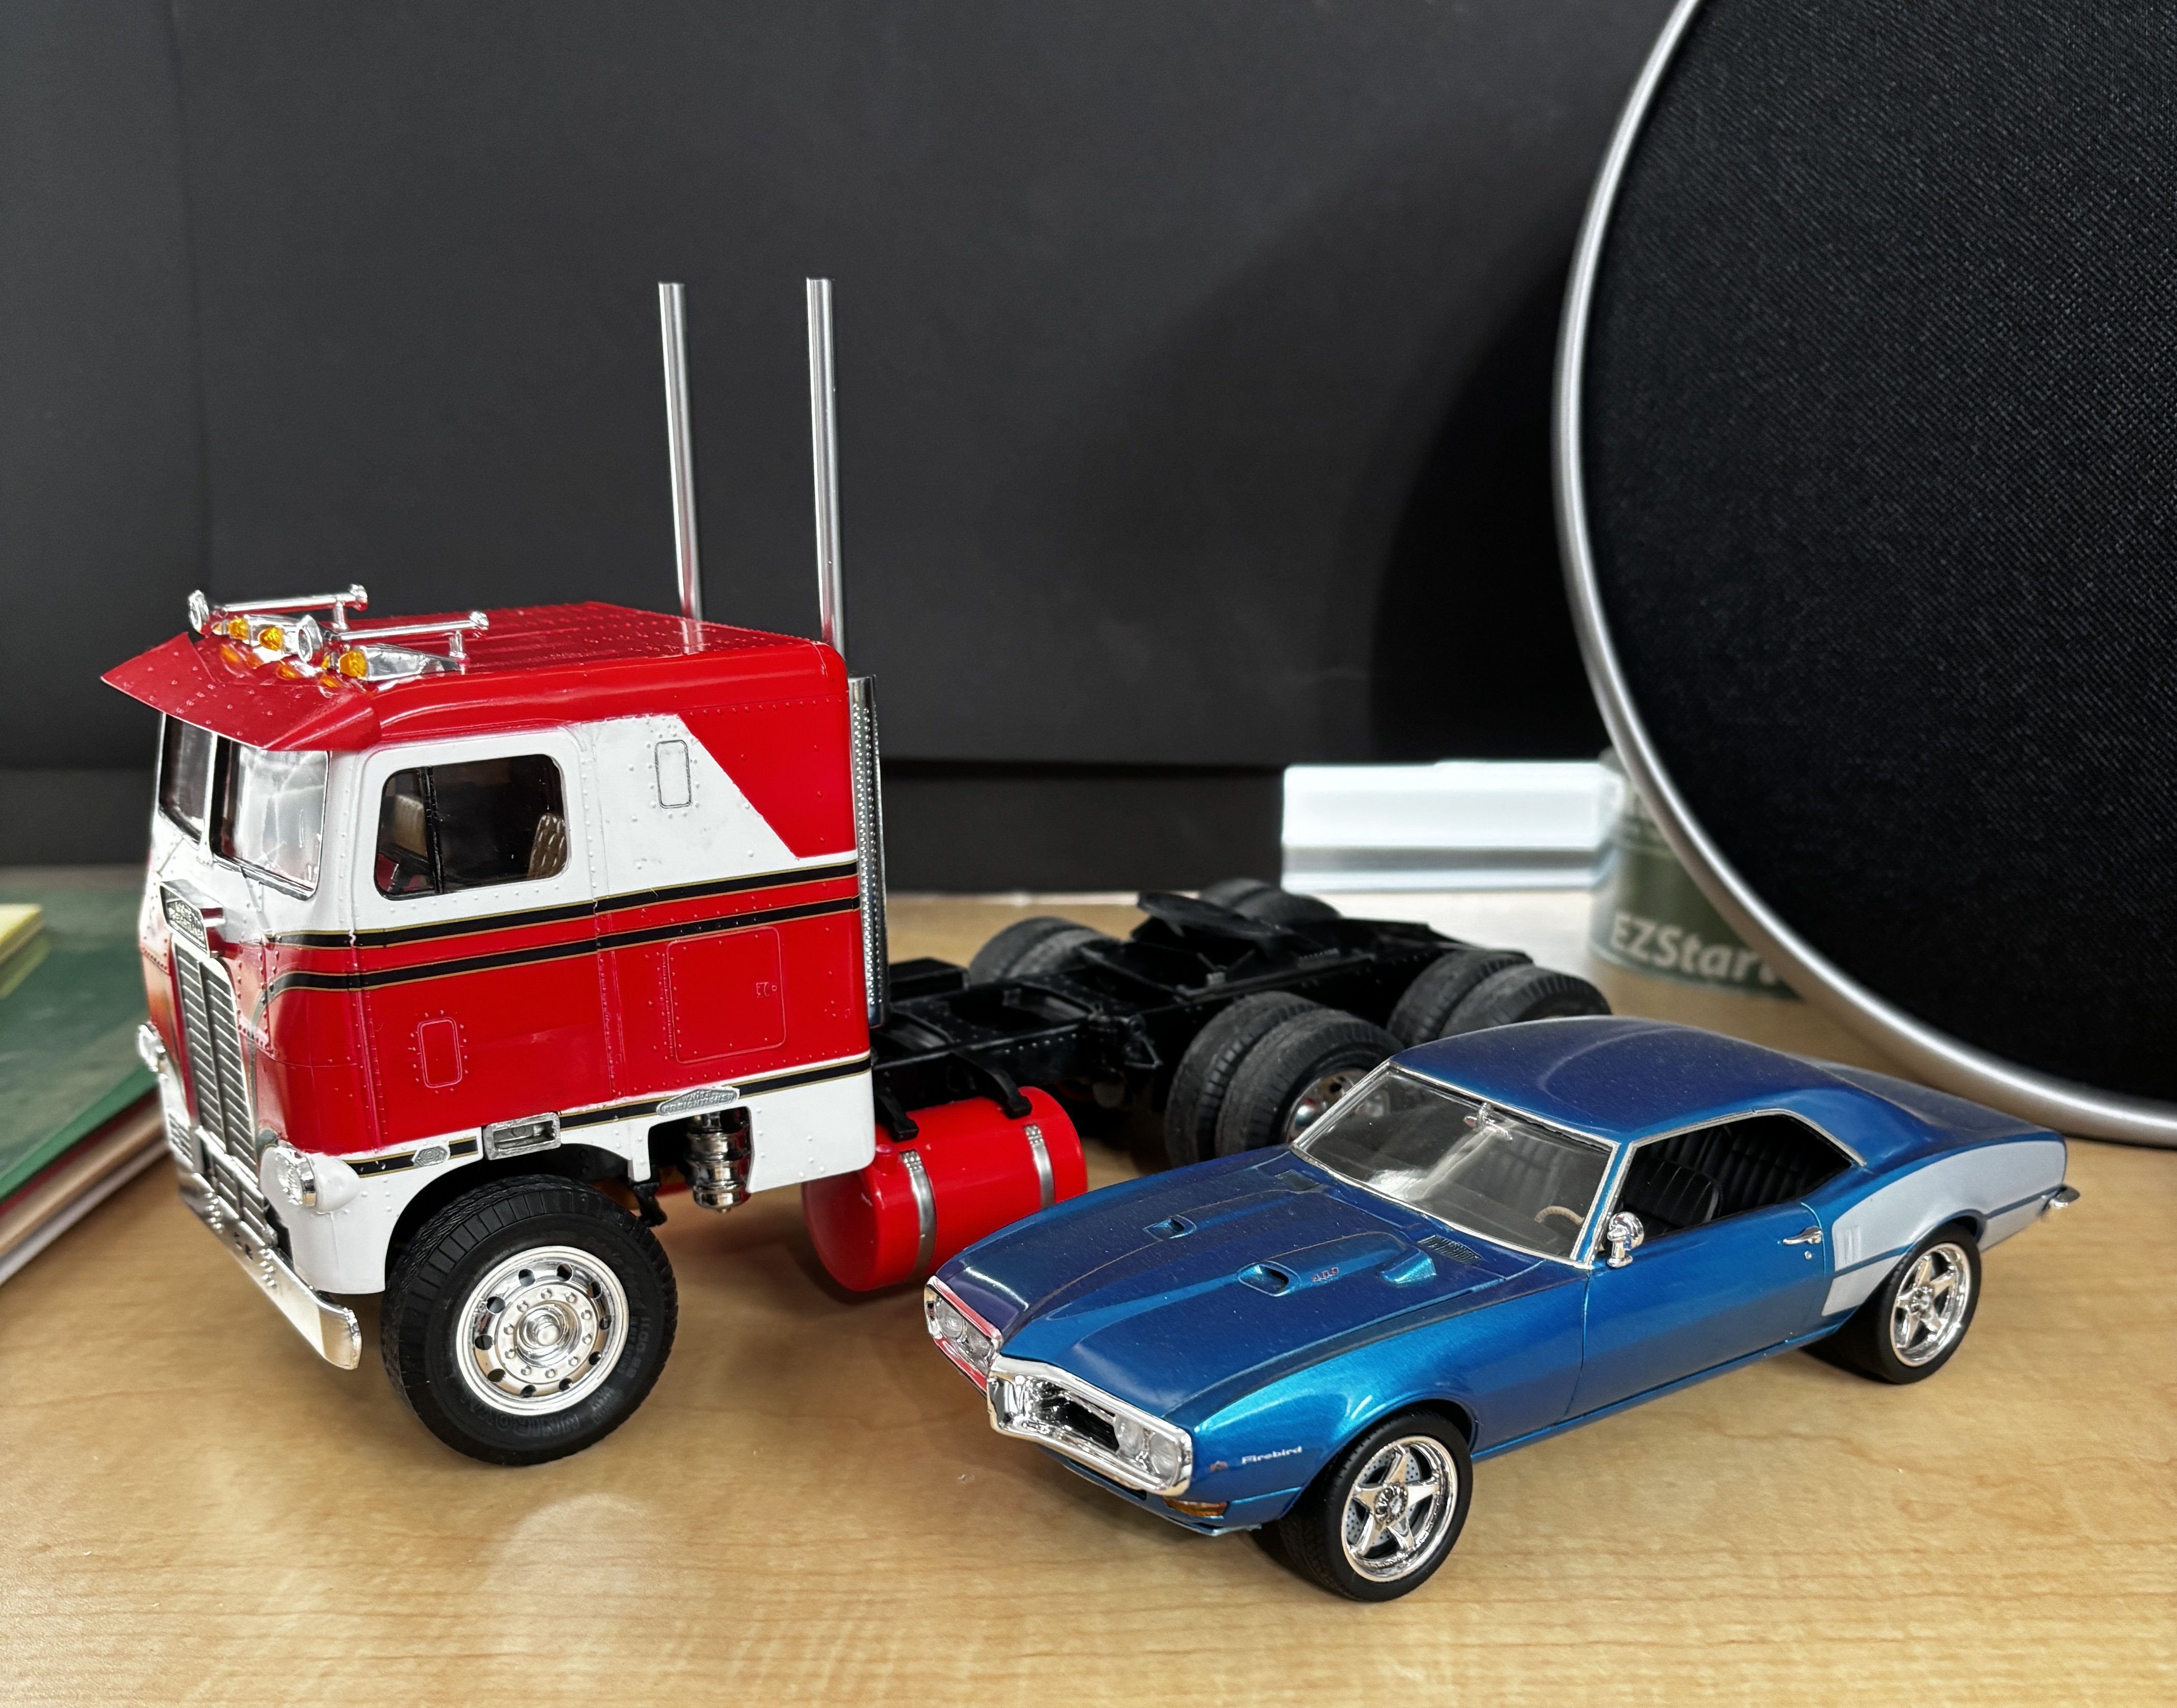
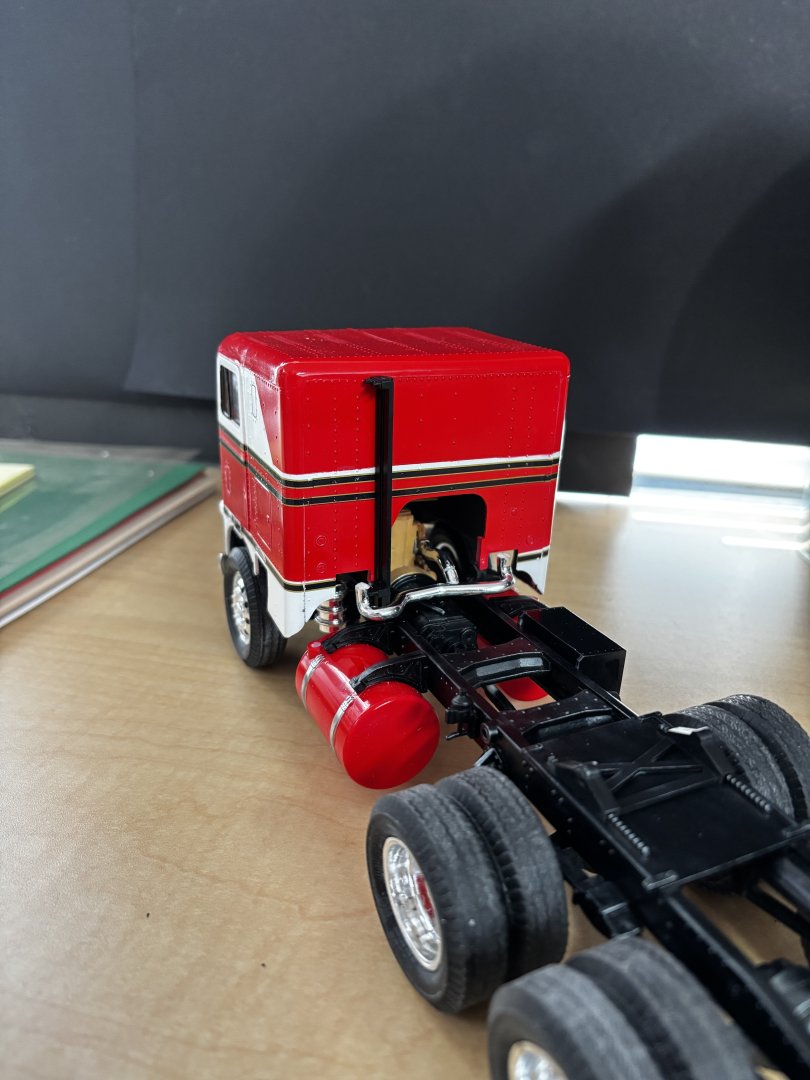
Horns, cab running lights, visor added. Baby moon hub covers on rear hubs. 68 Firebird sits along side for size comparison.

-
White Freightliner DD by CDW - AMT - 1:25 Scale - PLASTIC
CDW replied to CDW's topic in Non-ship/categorised builds
She’s got stacks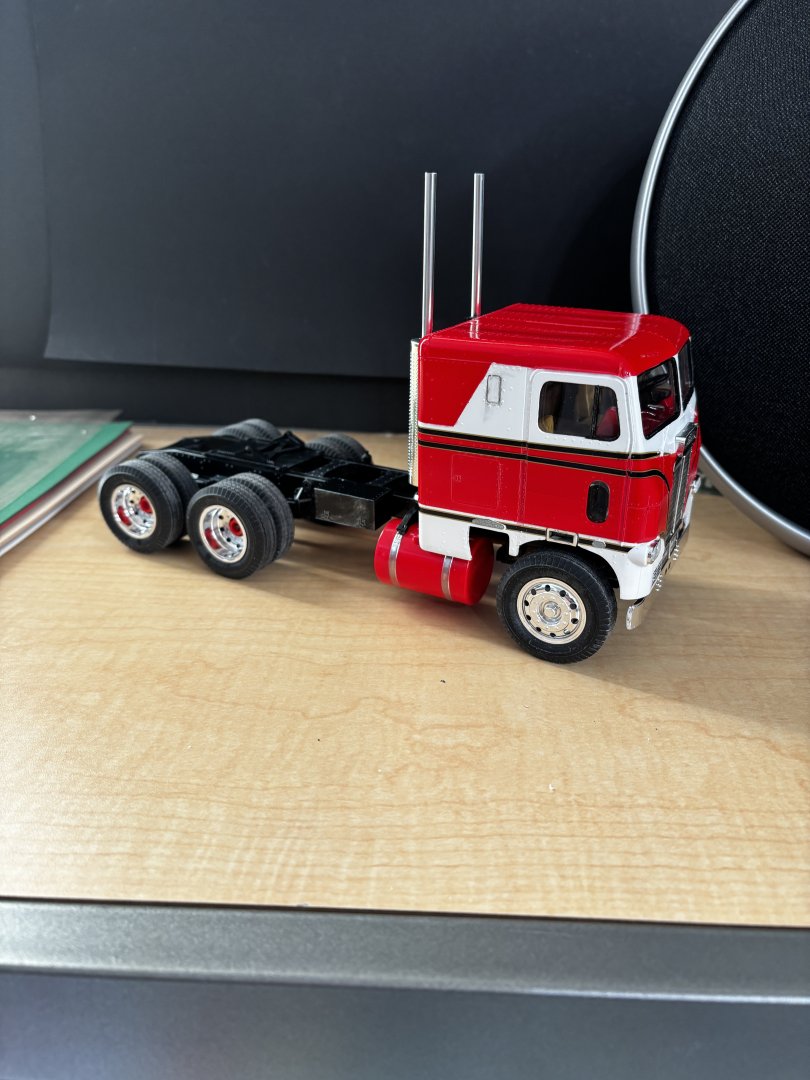

- 30 replies
-
- 10
-
-
-
White Freightliner DD by CDW - AMT - 1:25 Scale - PLASTIC
CDW replied to CDW's topic in Non-ship/categorised builds
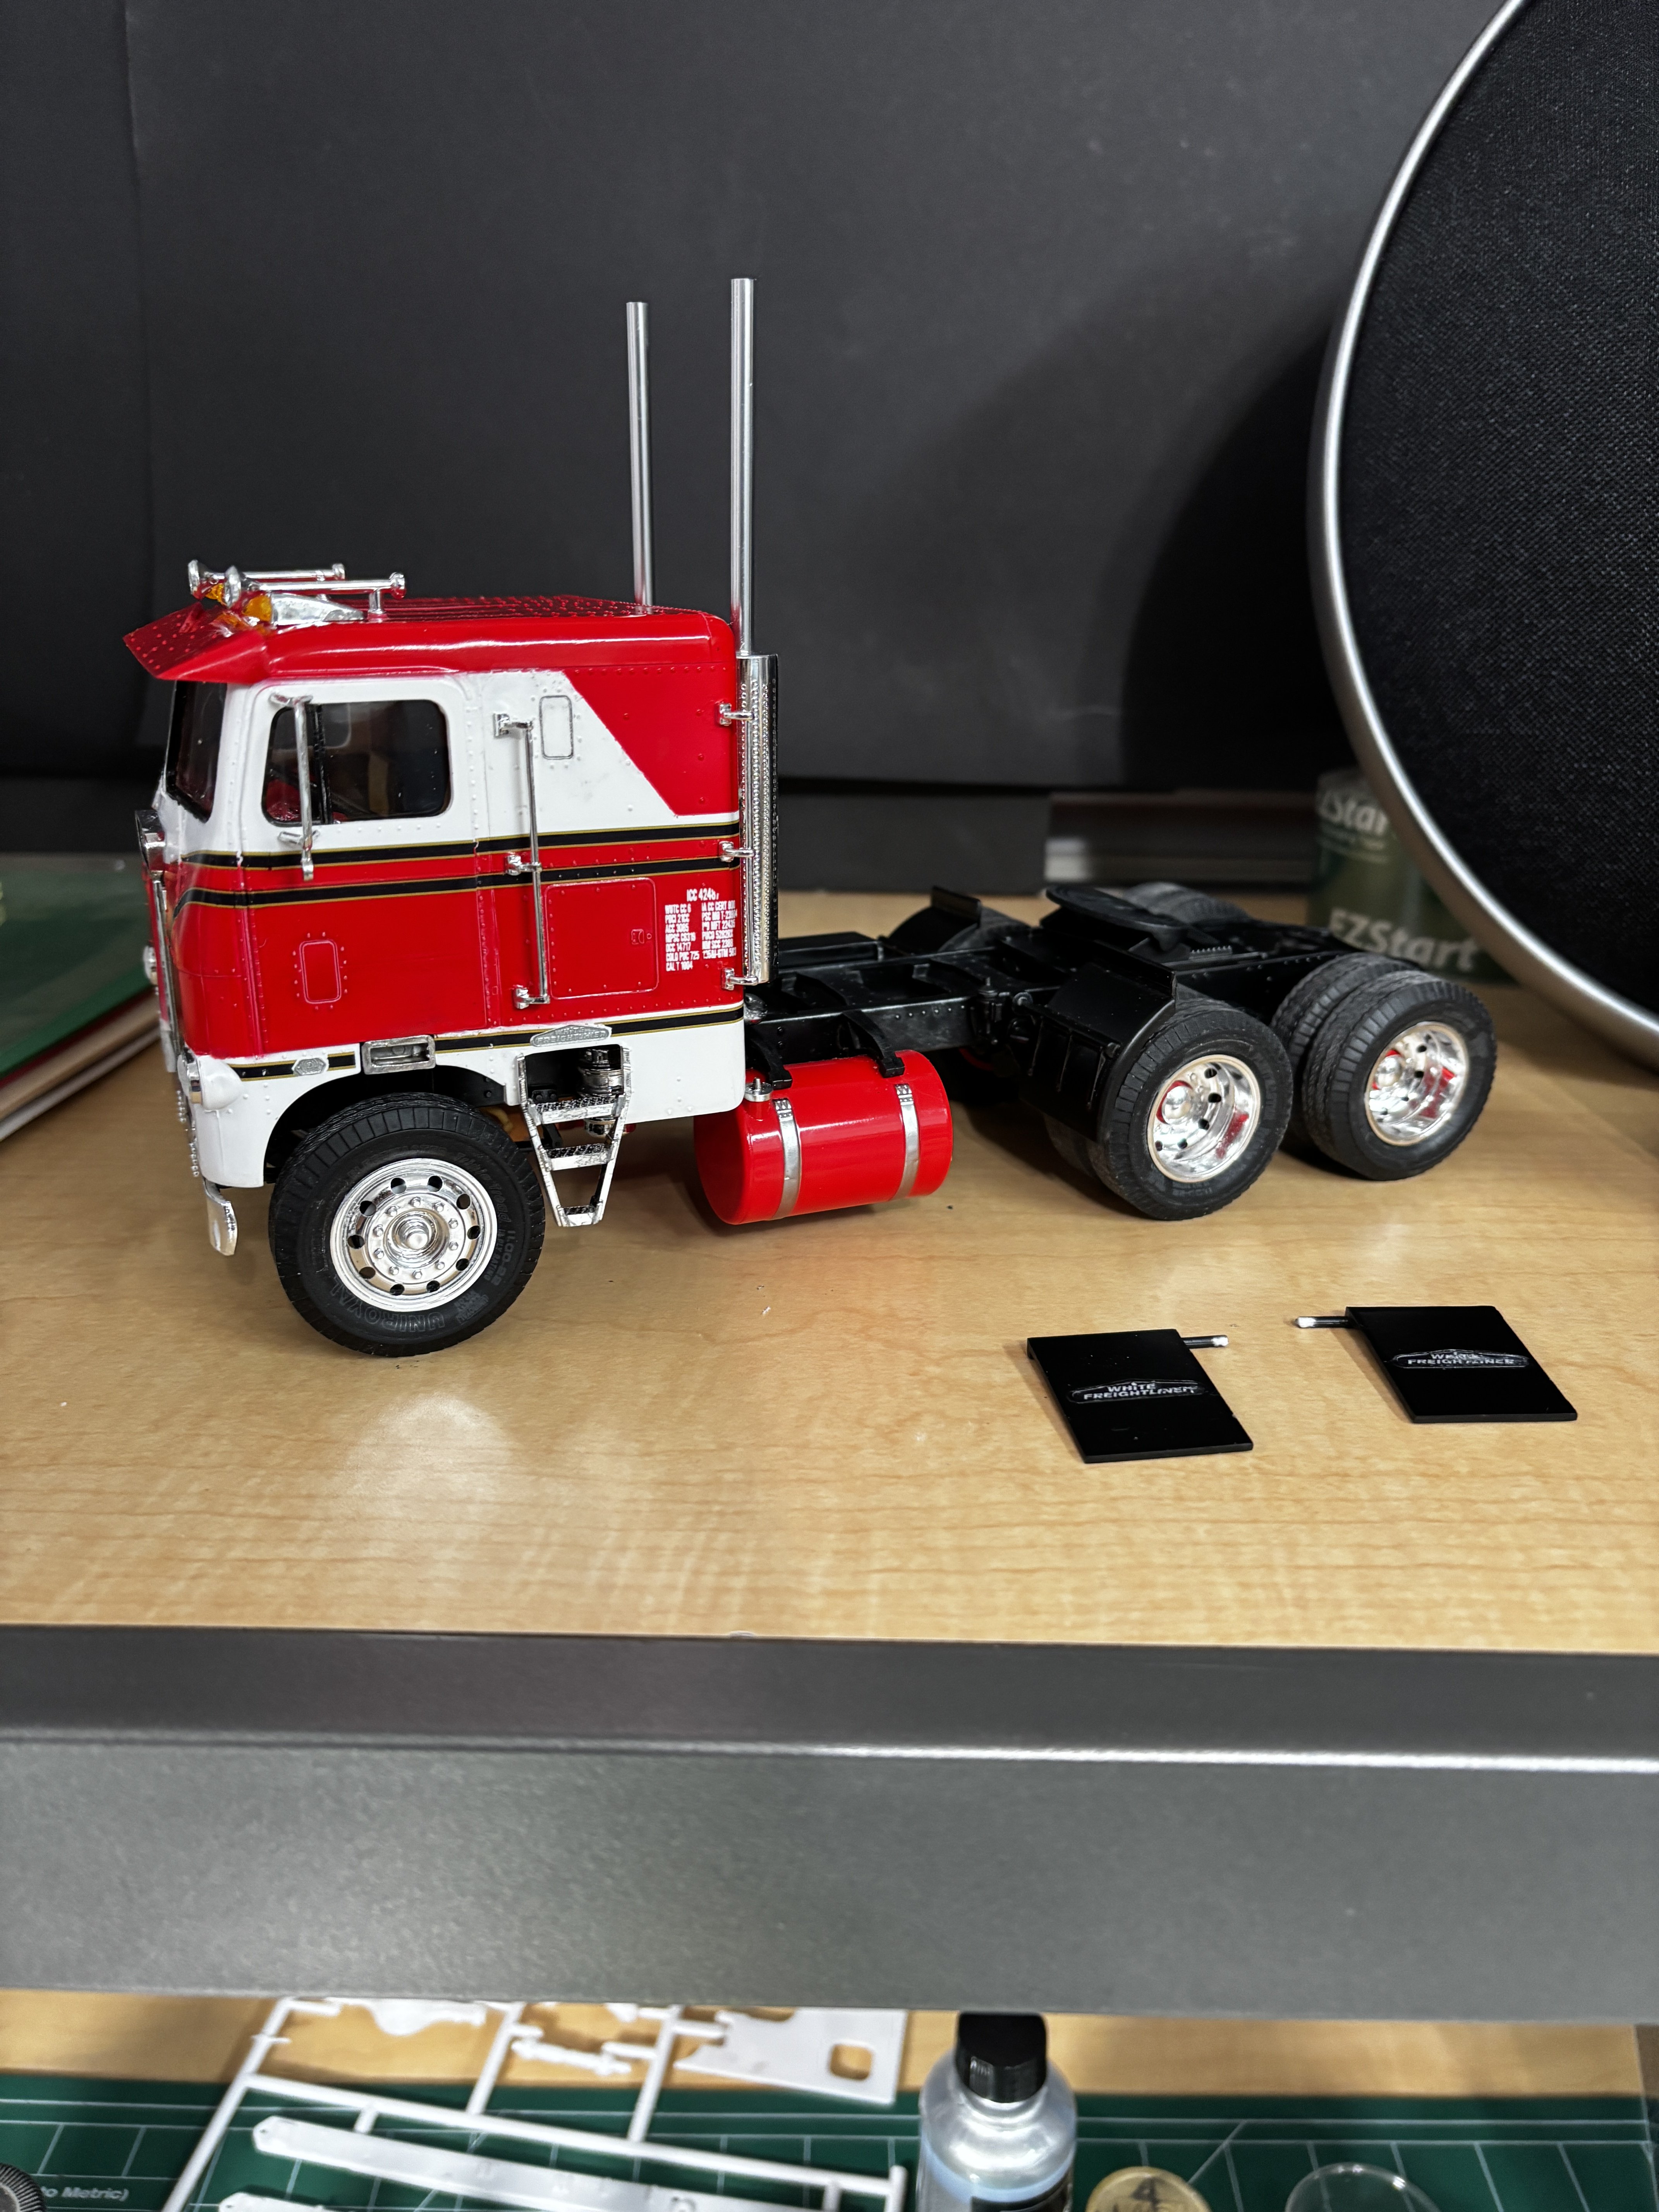
I’ll do something with tire weathering at the end when I’m sure handling of the model is almost finished. i still need to drill location holes in the cab to install all the bits. That will take some time. More wreathing in general as well. -
White Freightliner DD by CDW - AMT - 1:25 Scale - PLASTIC
CDW replied to CDW's topic in Non-ship/categorised builds
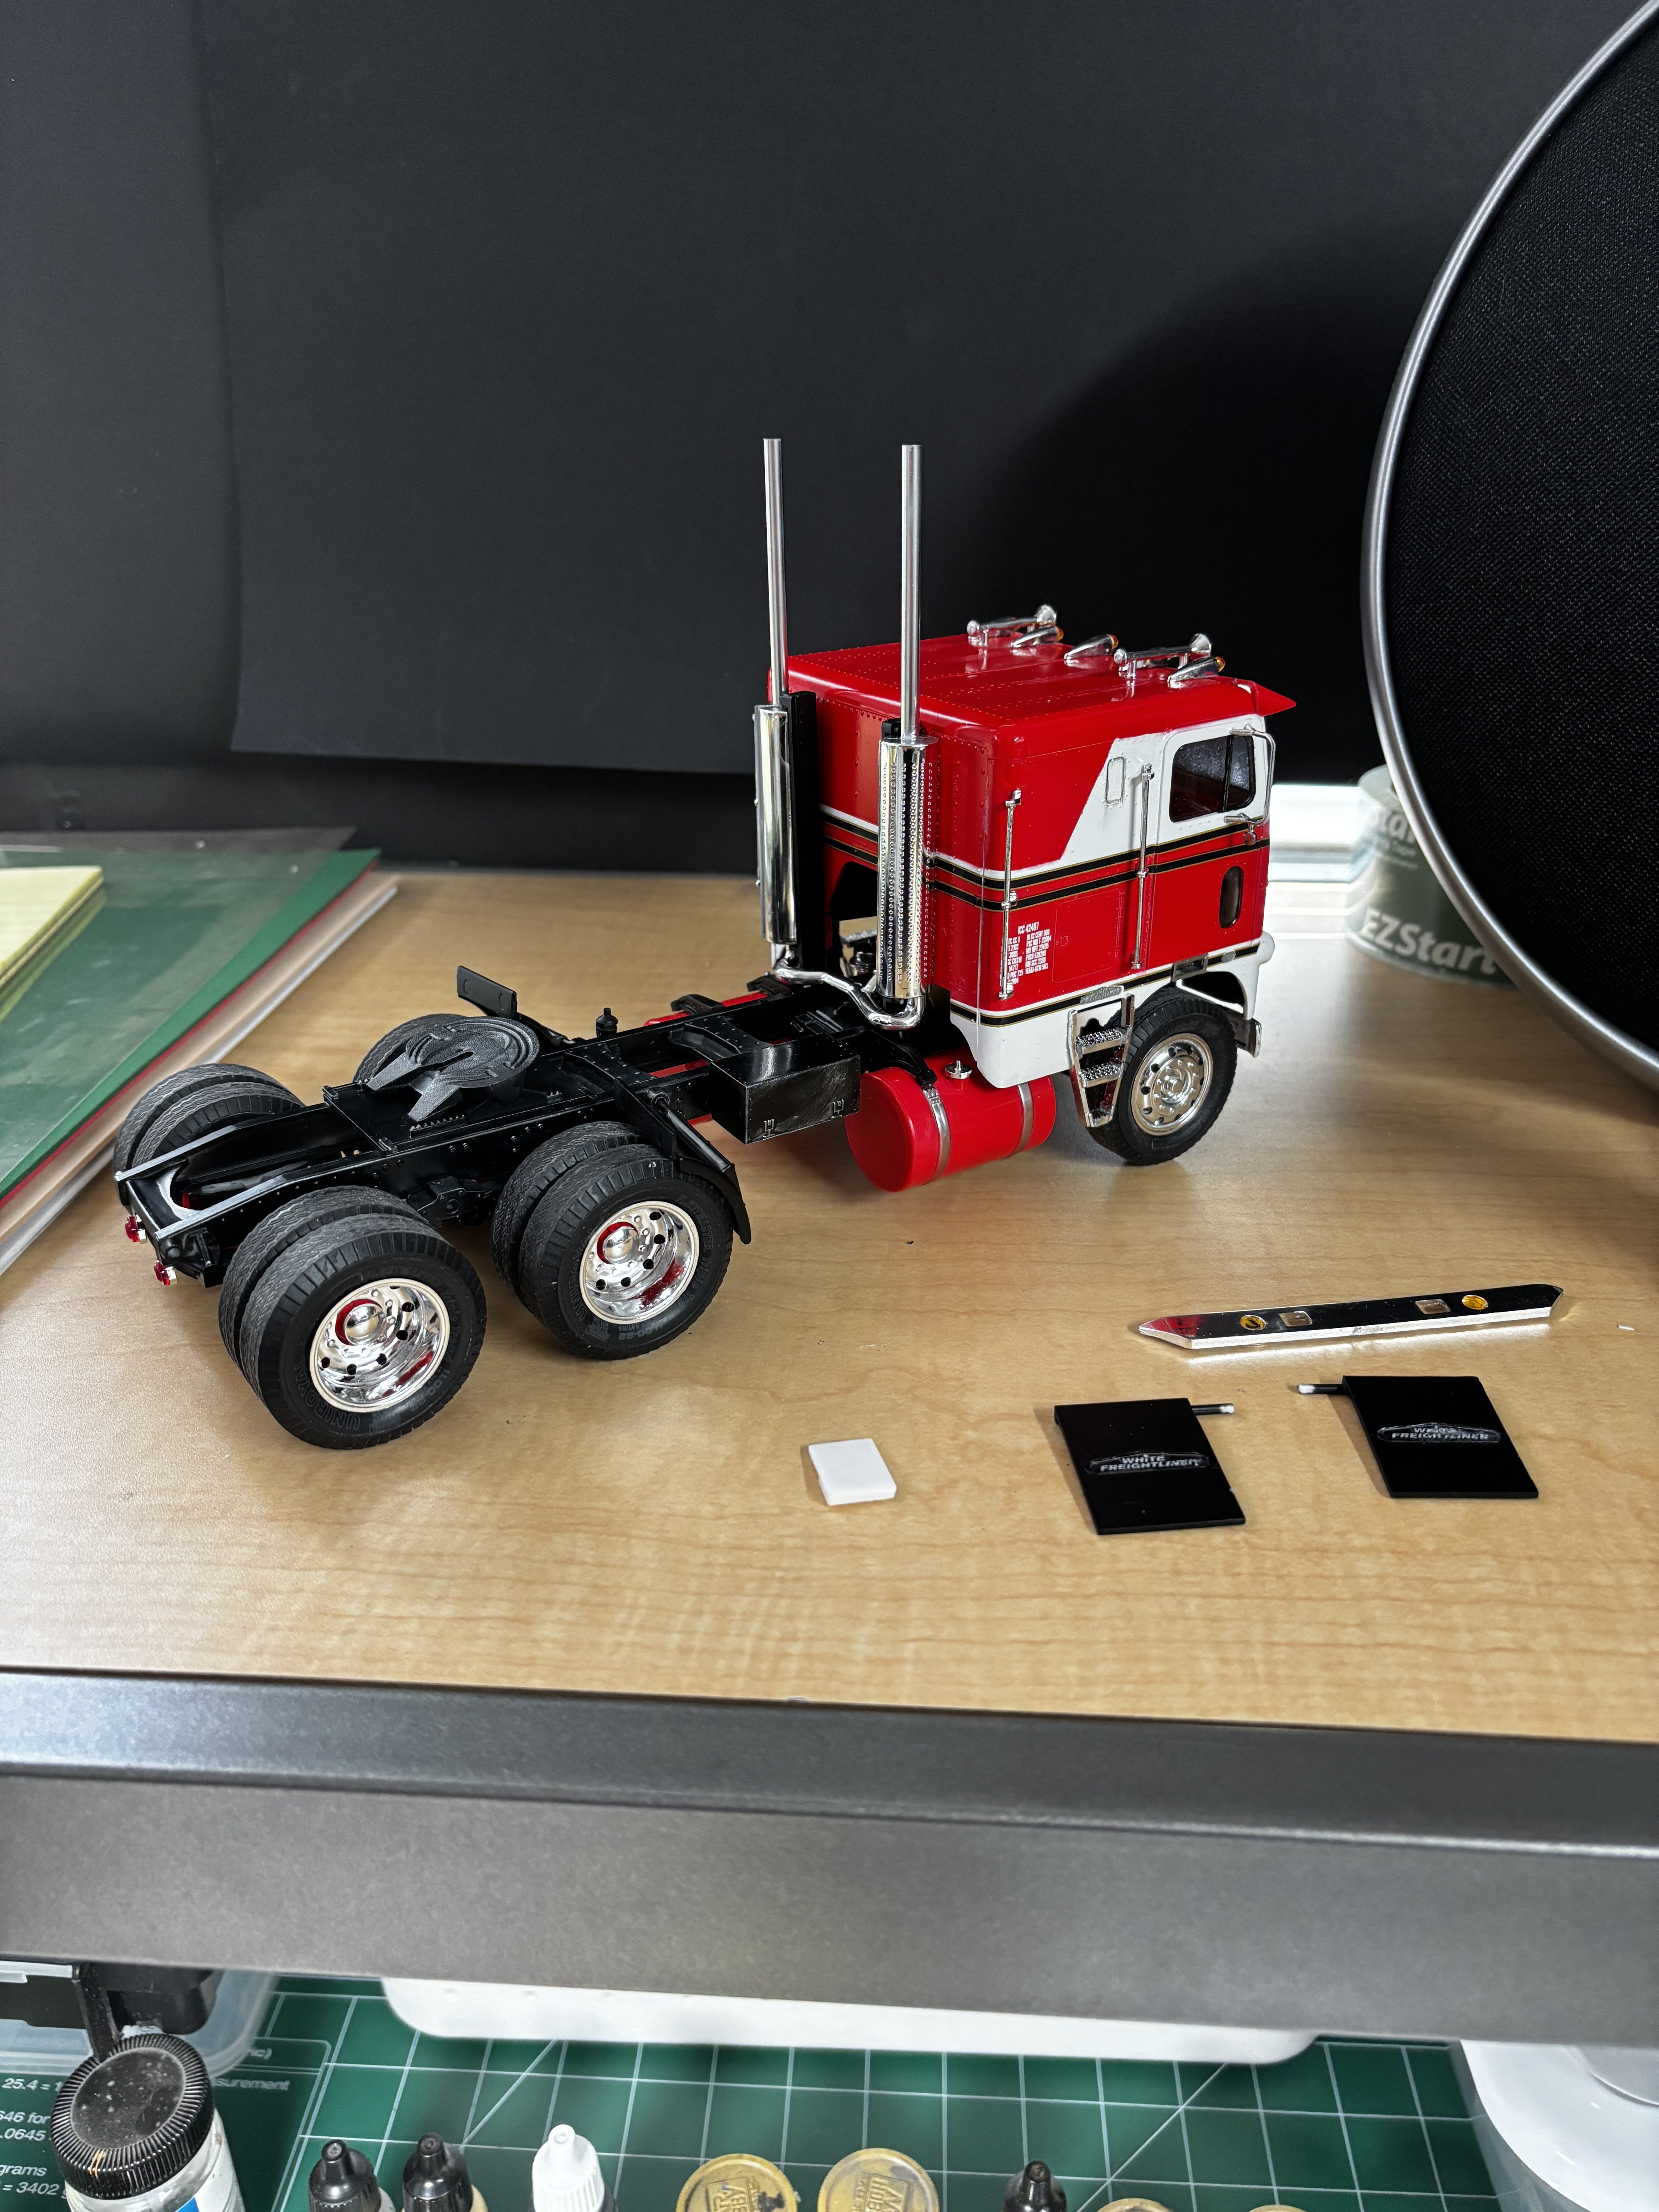
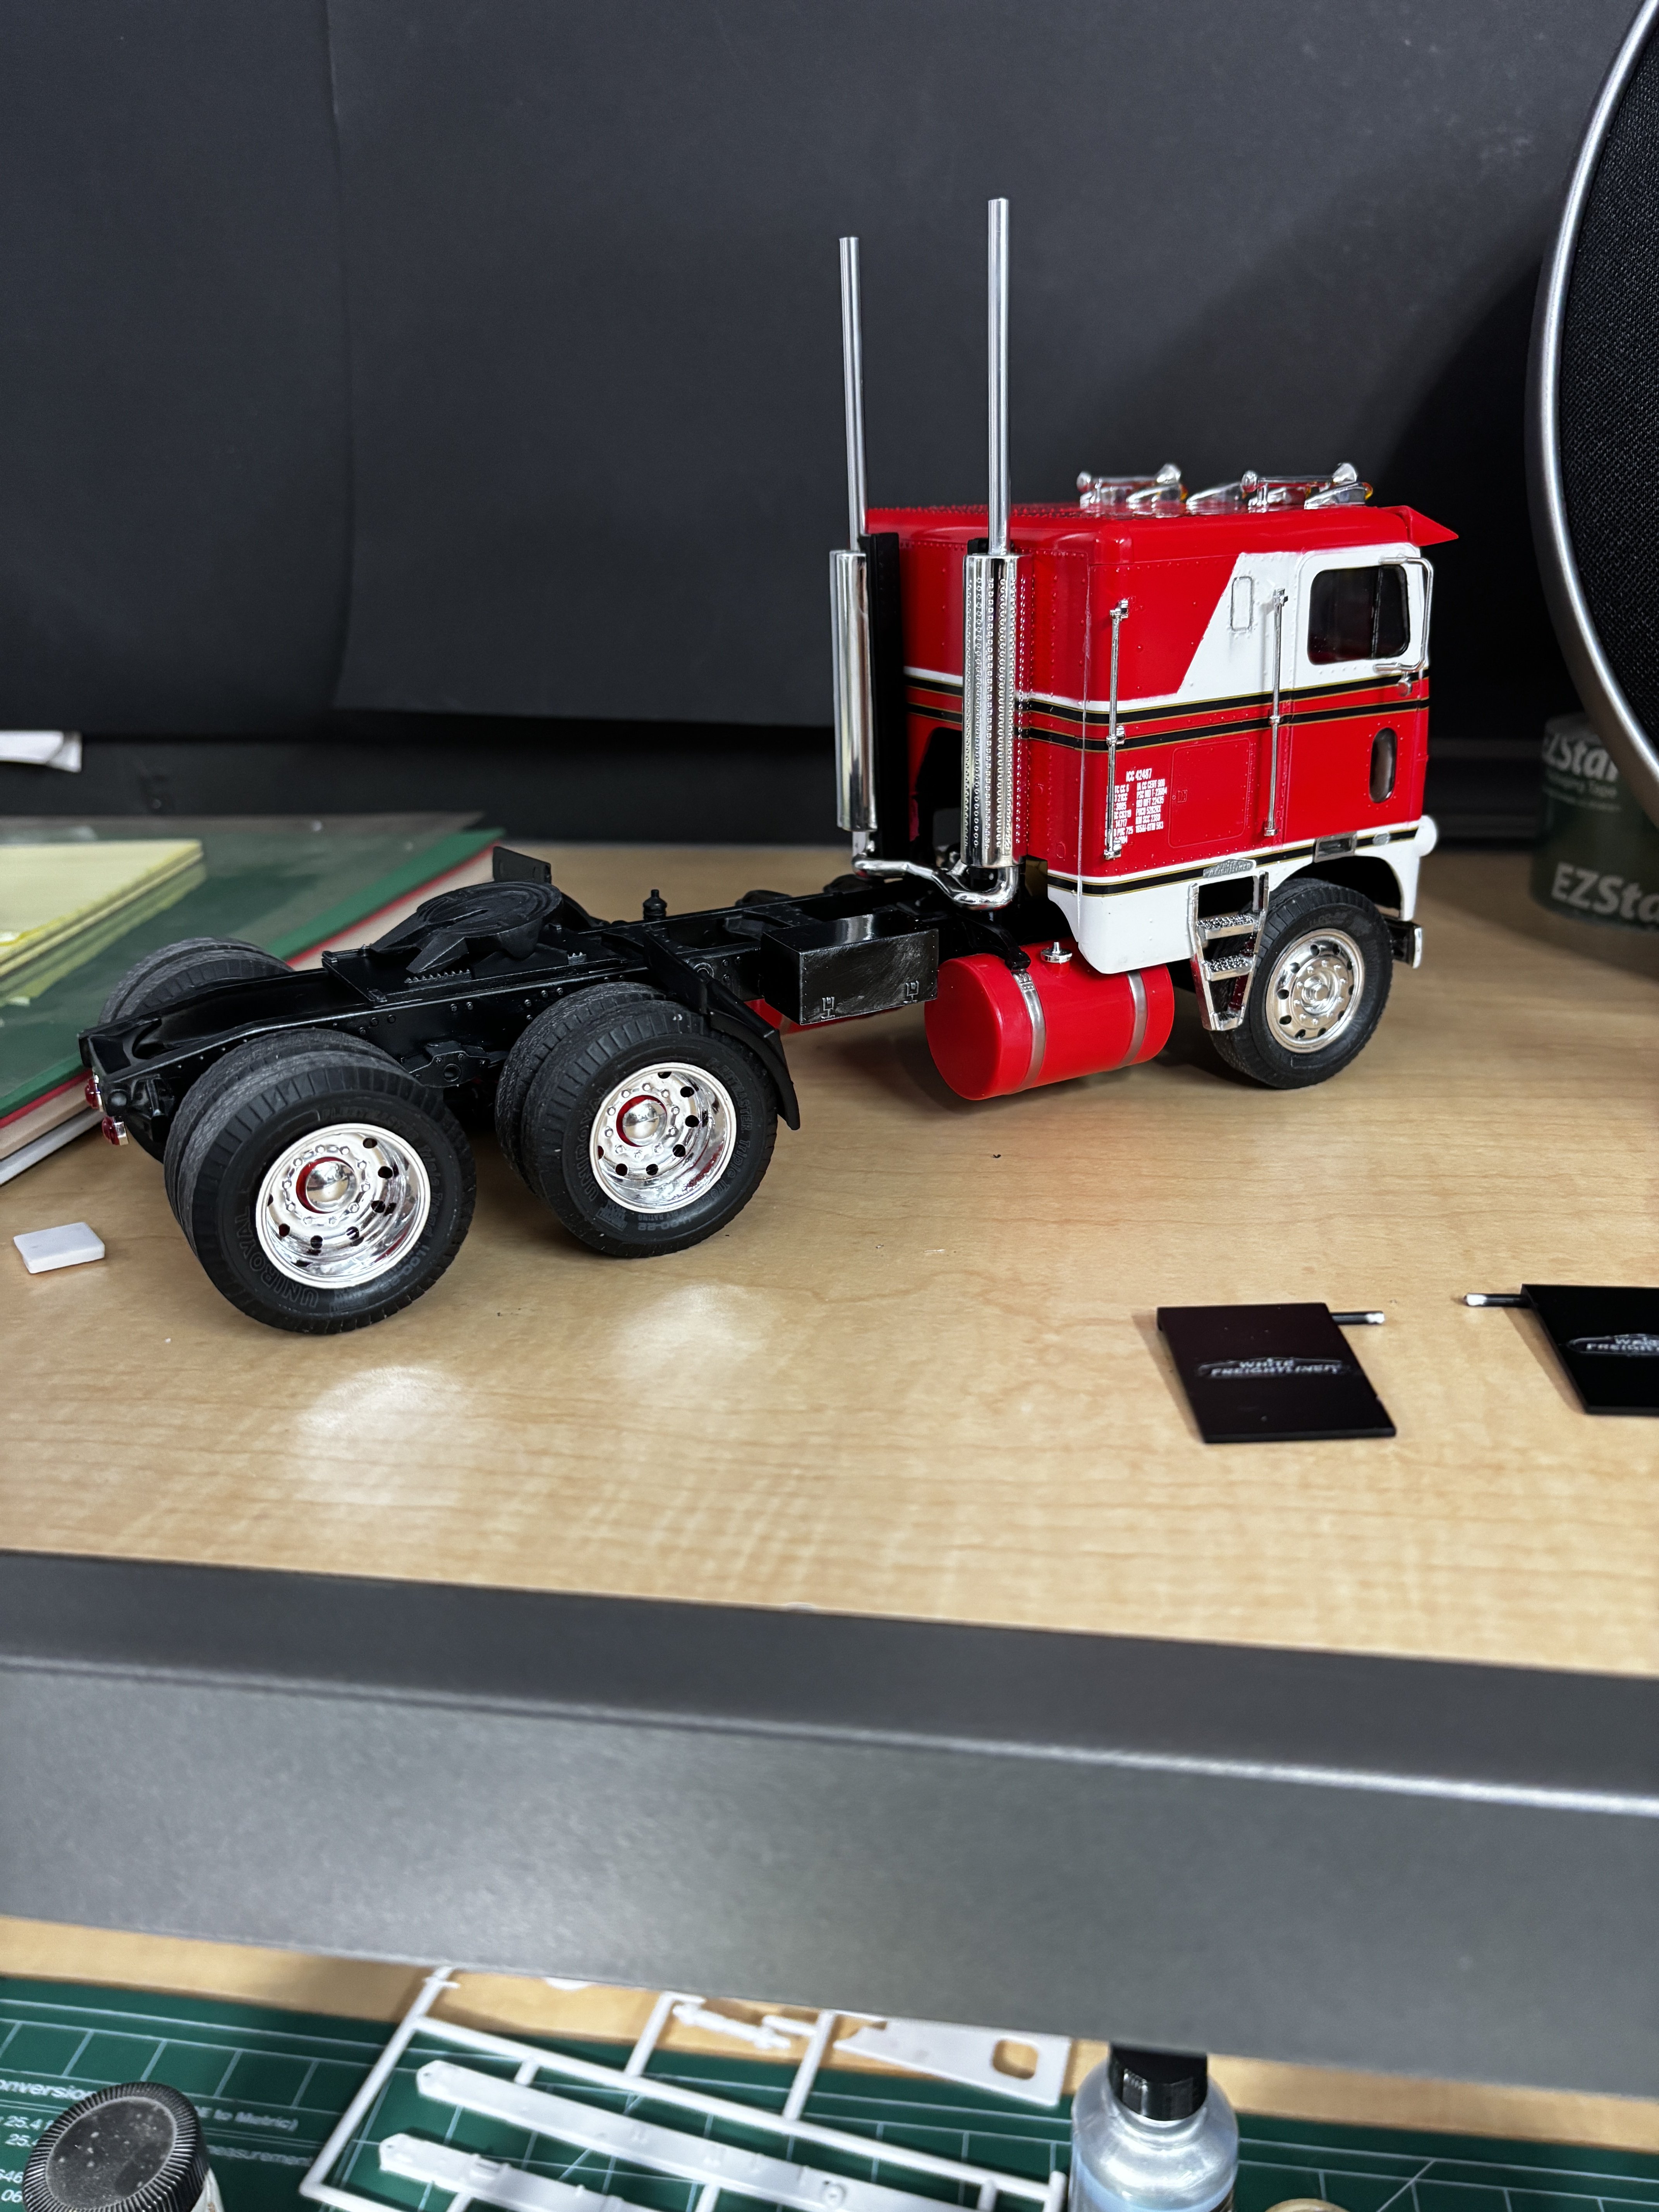
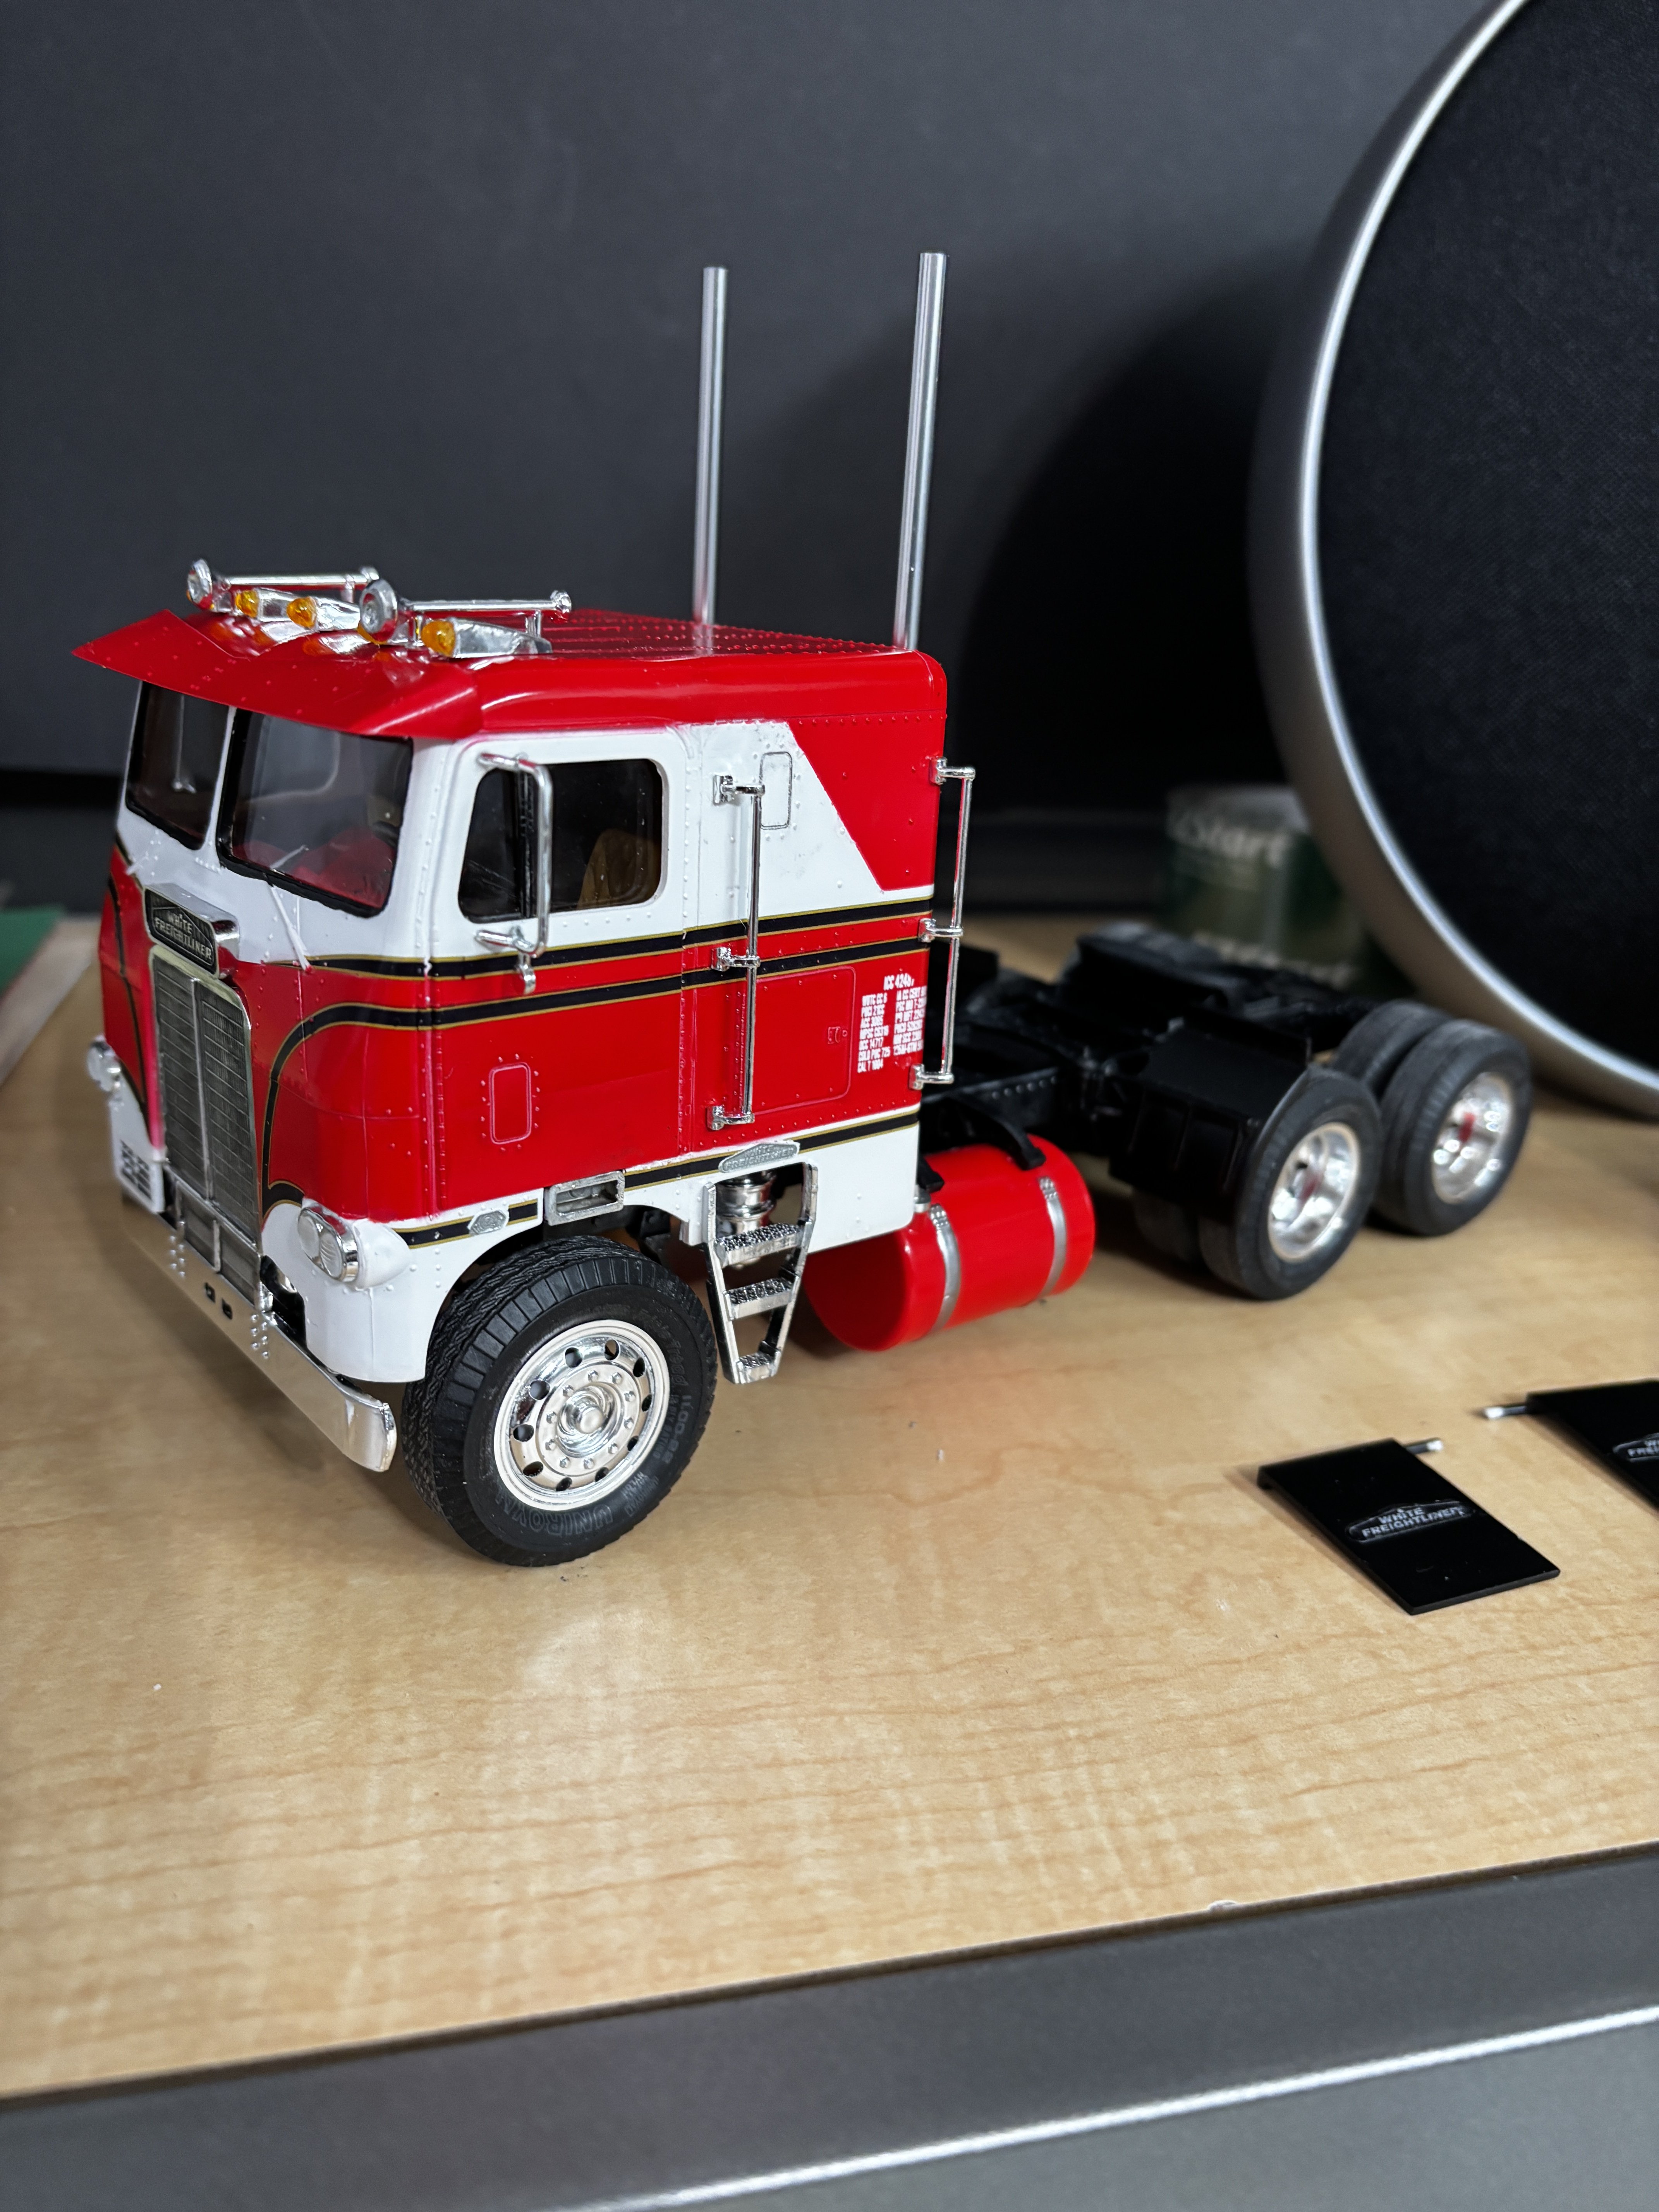
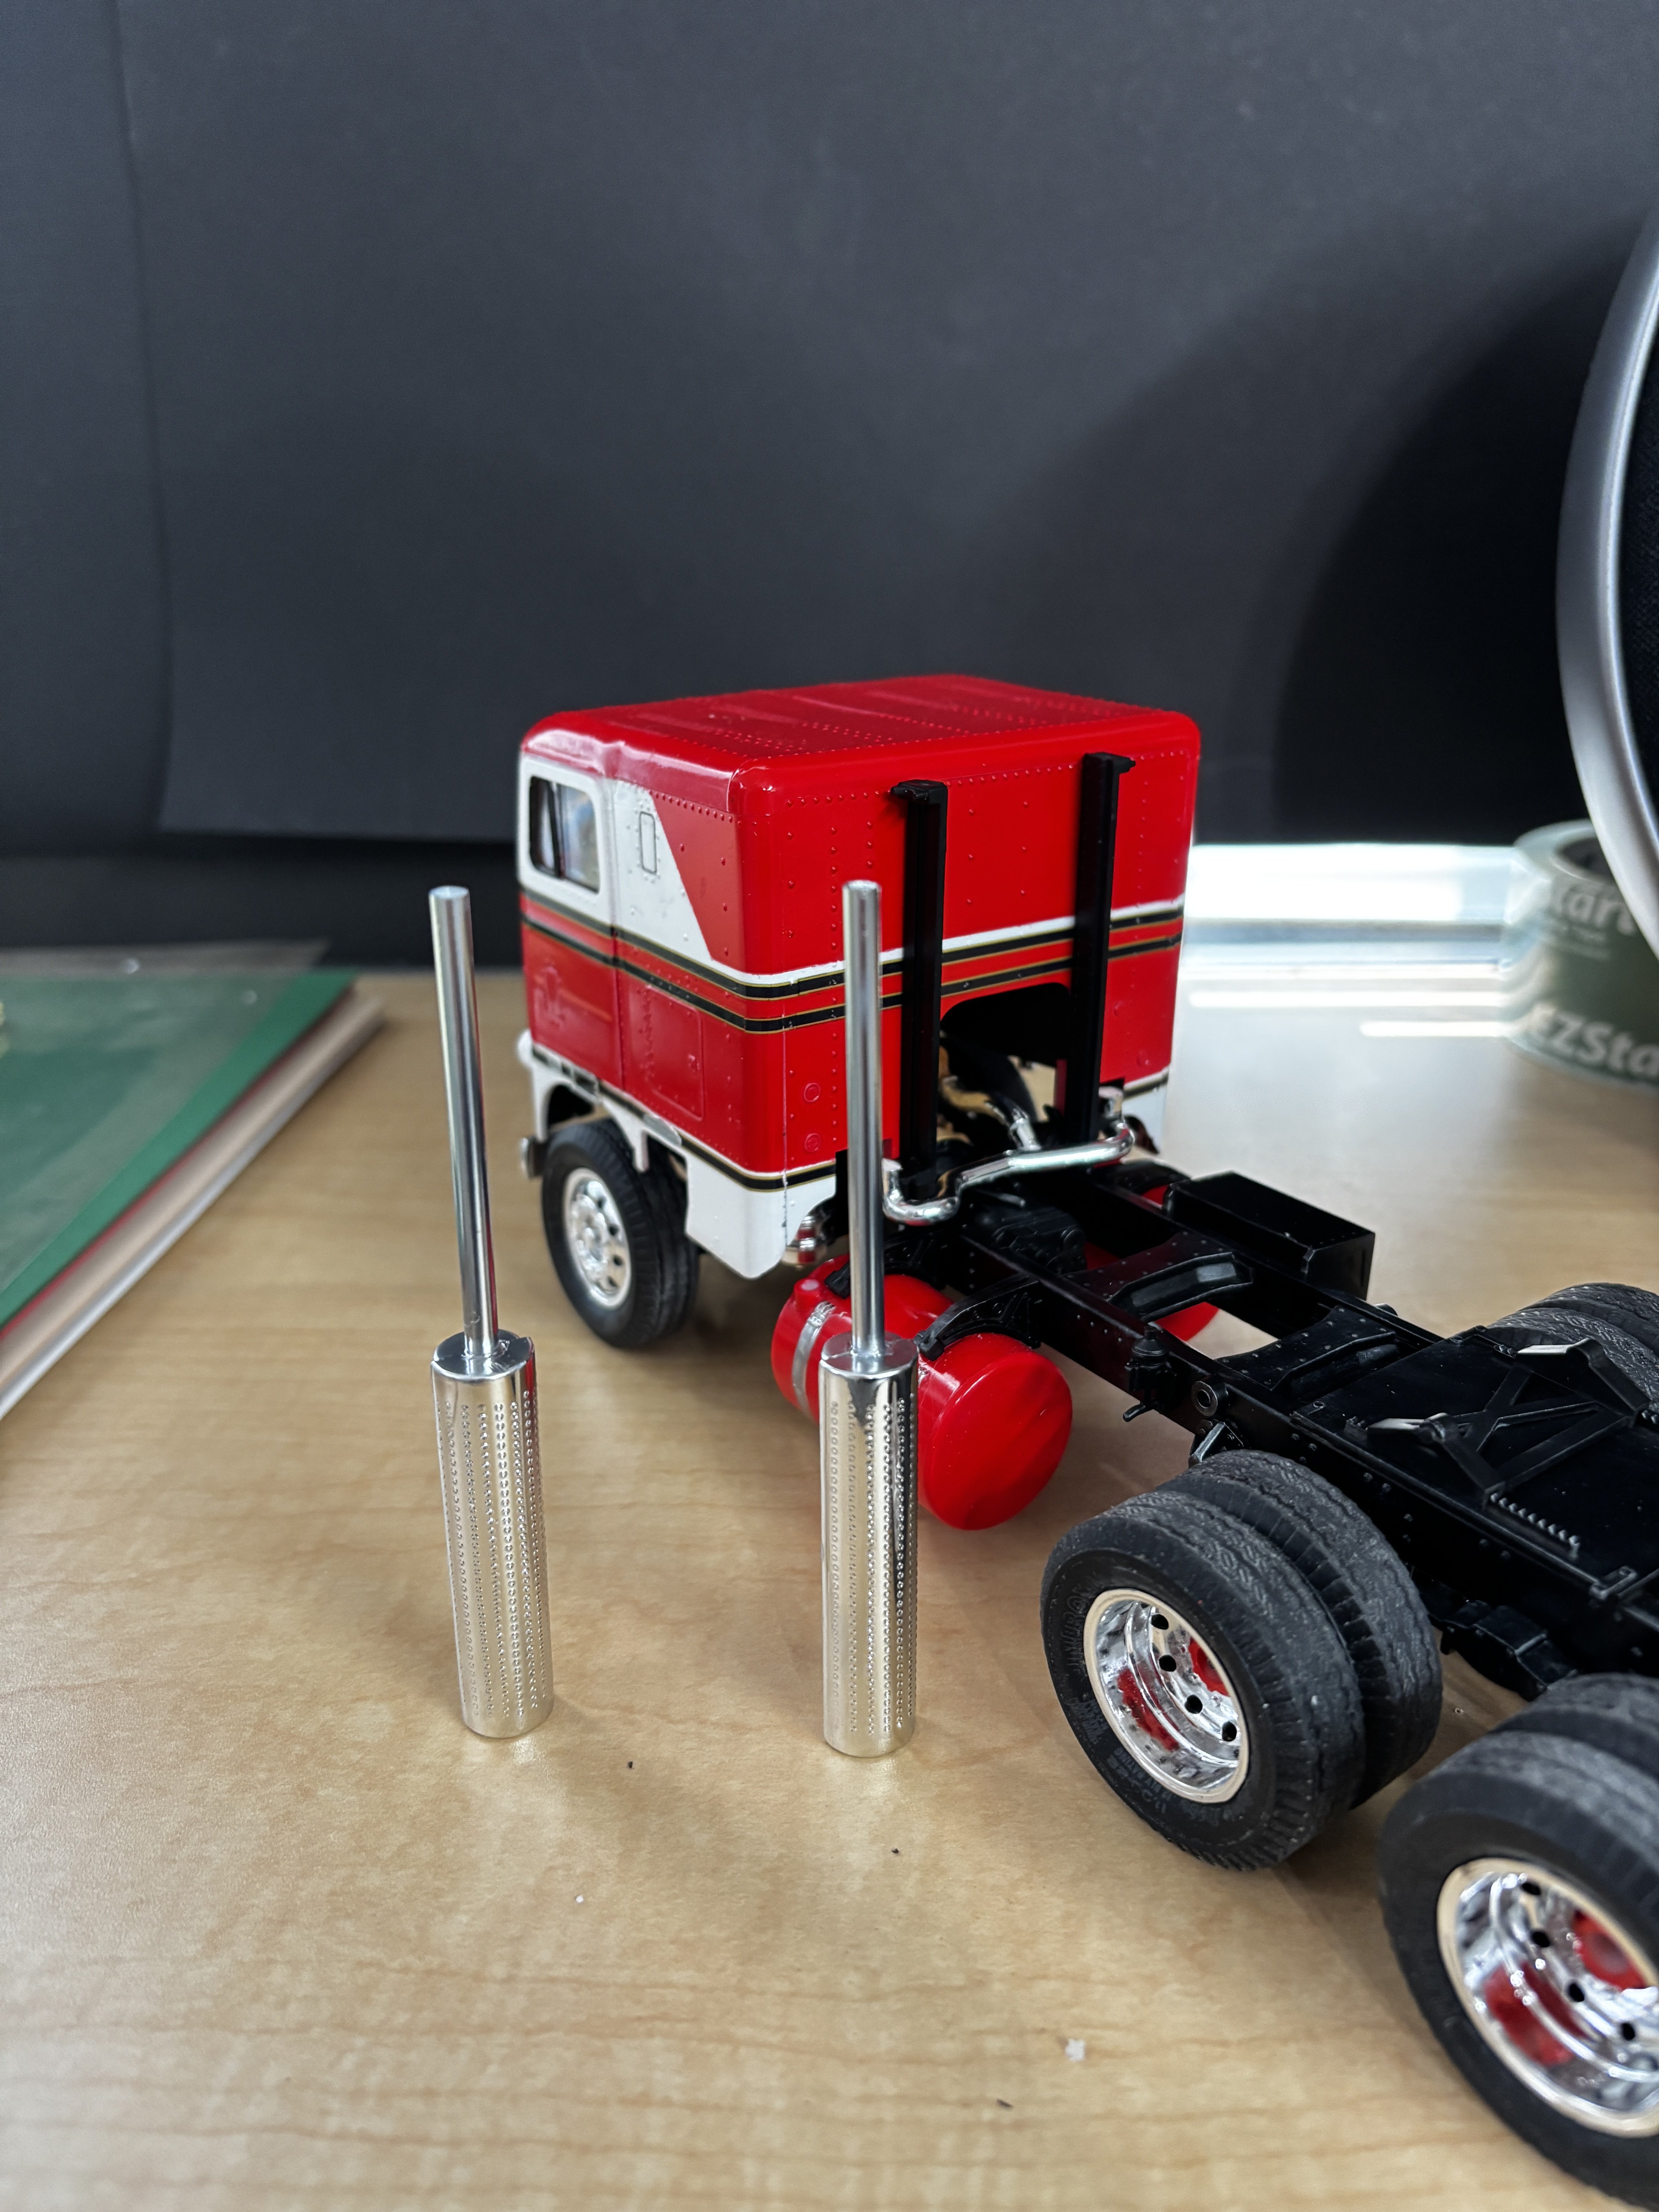
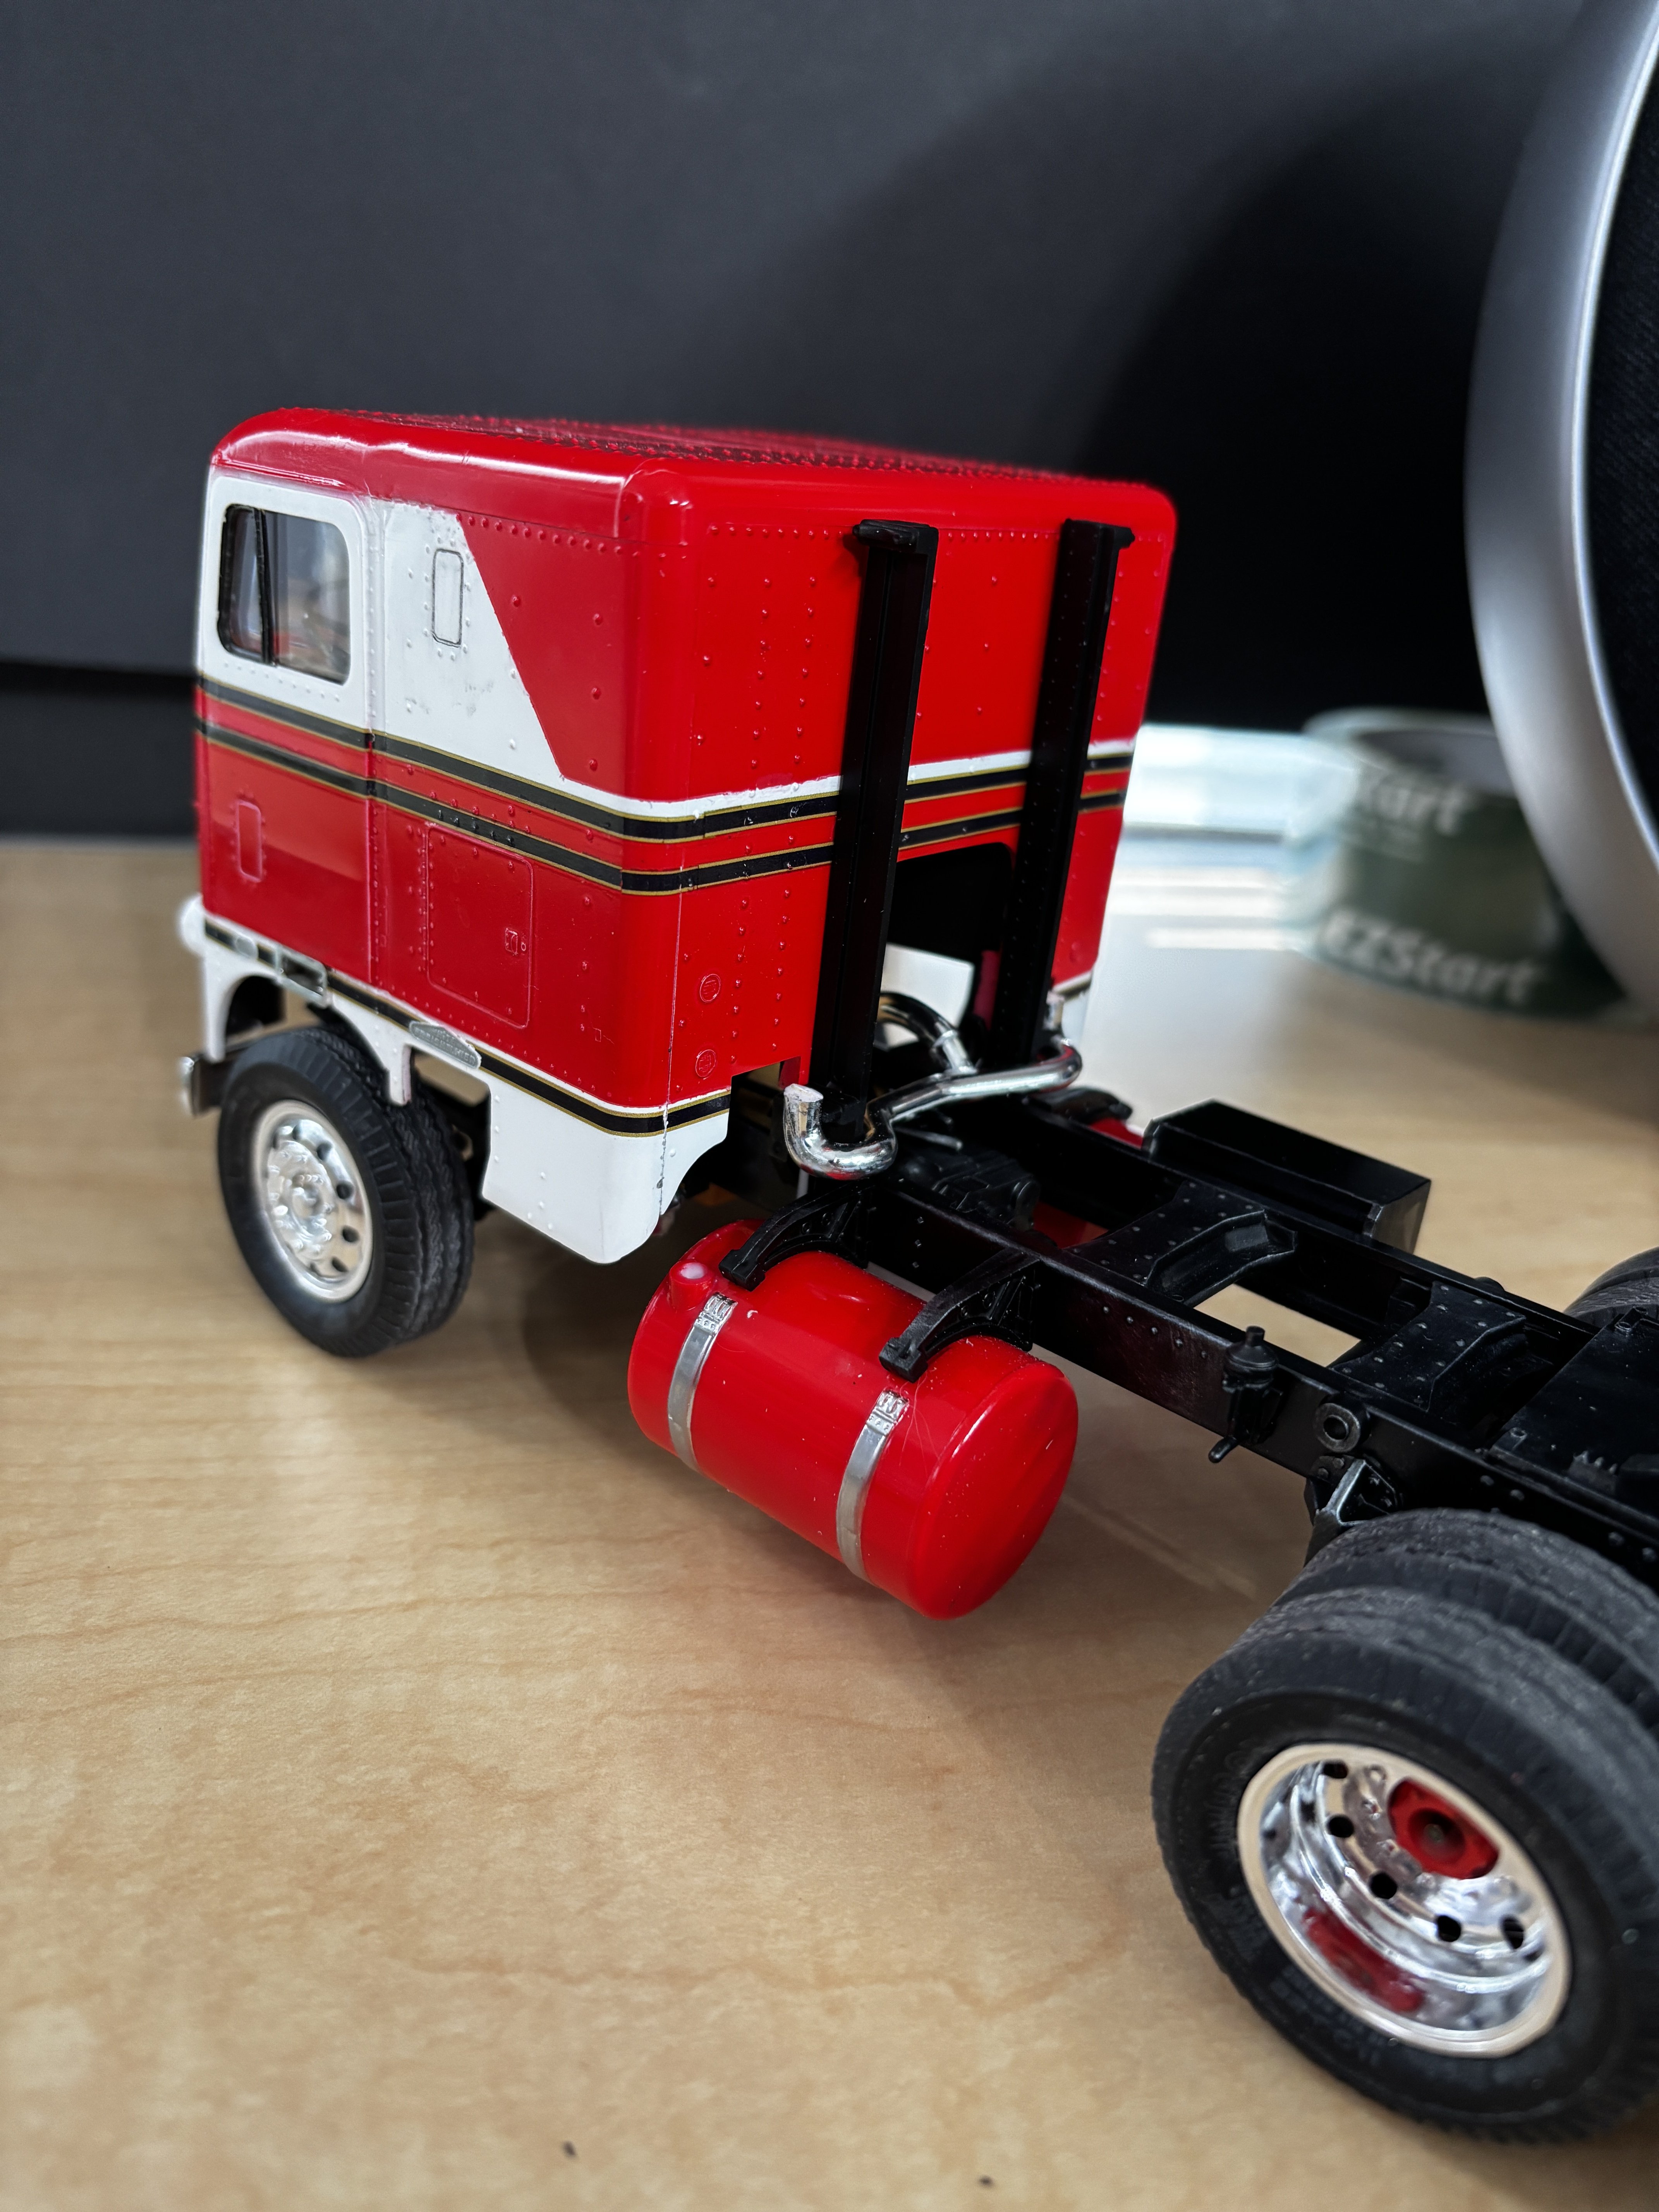
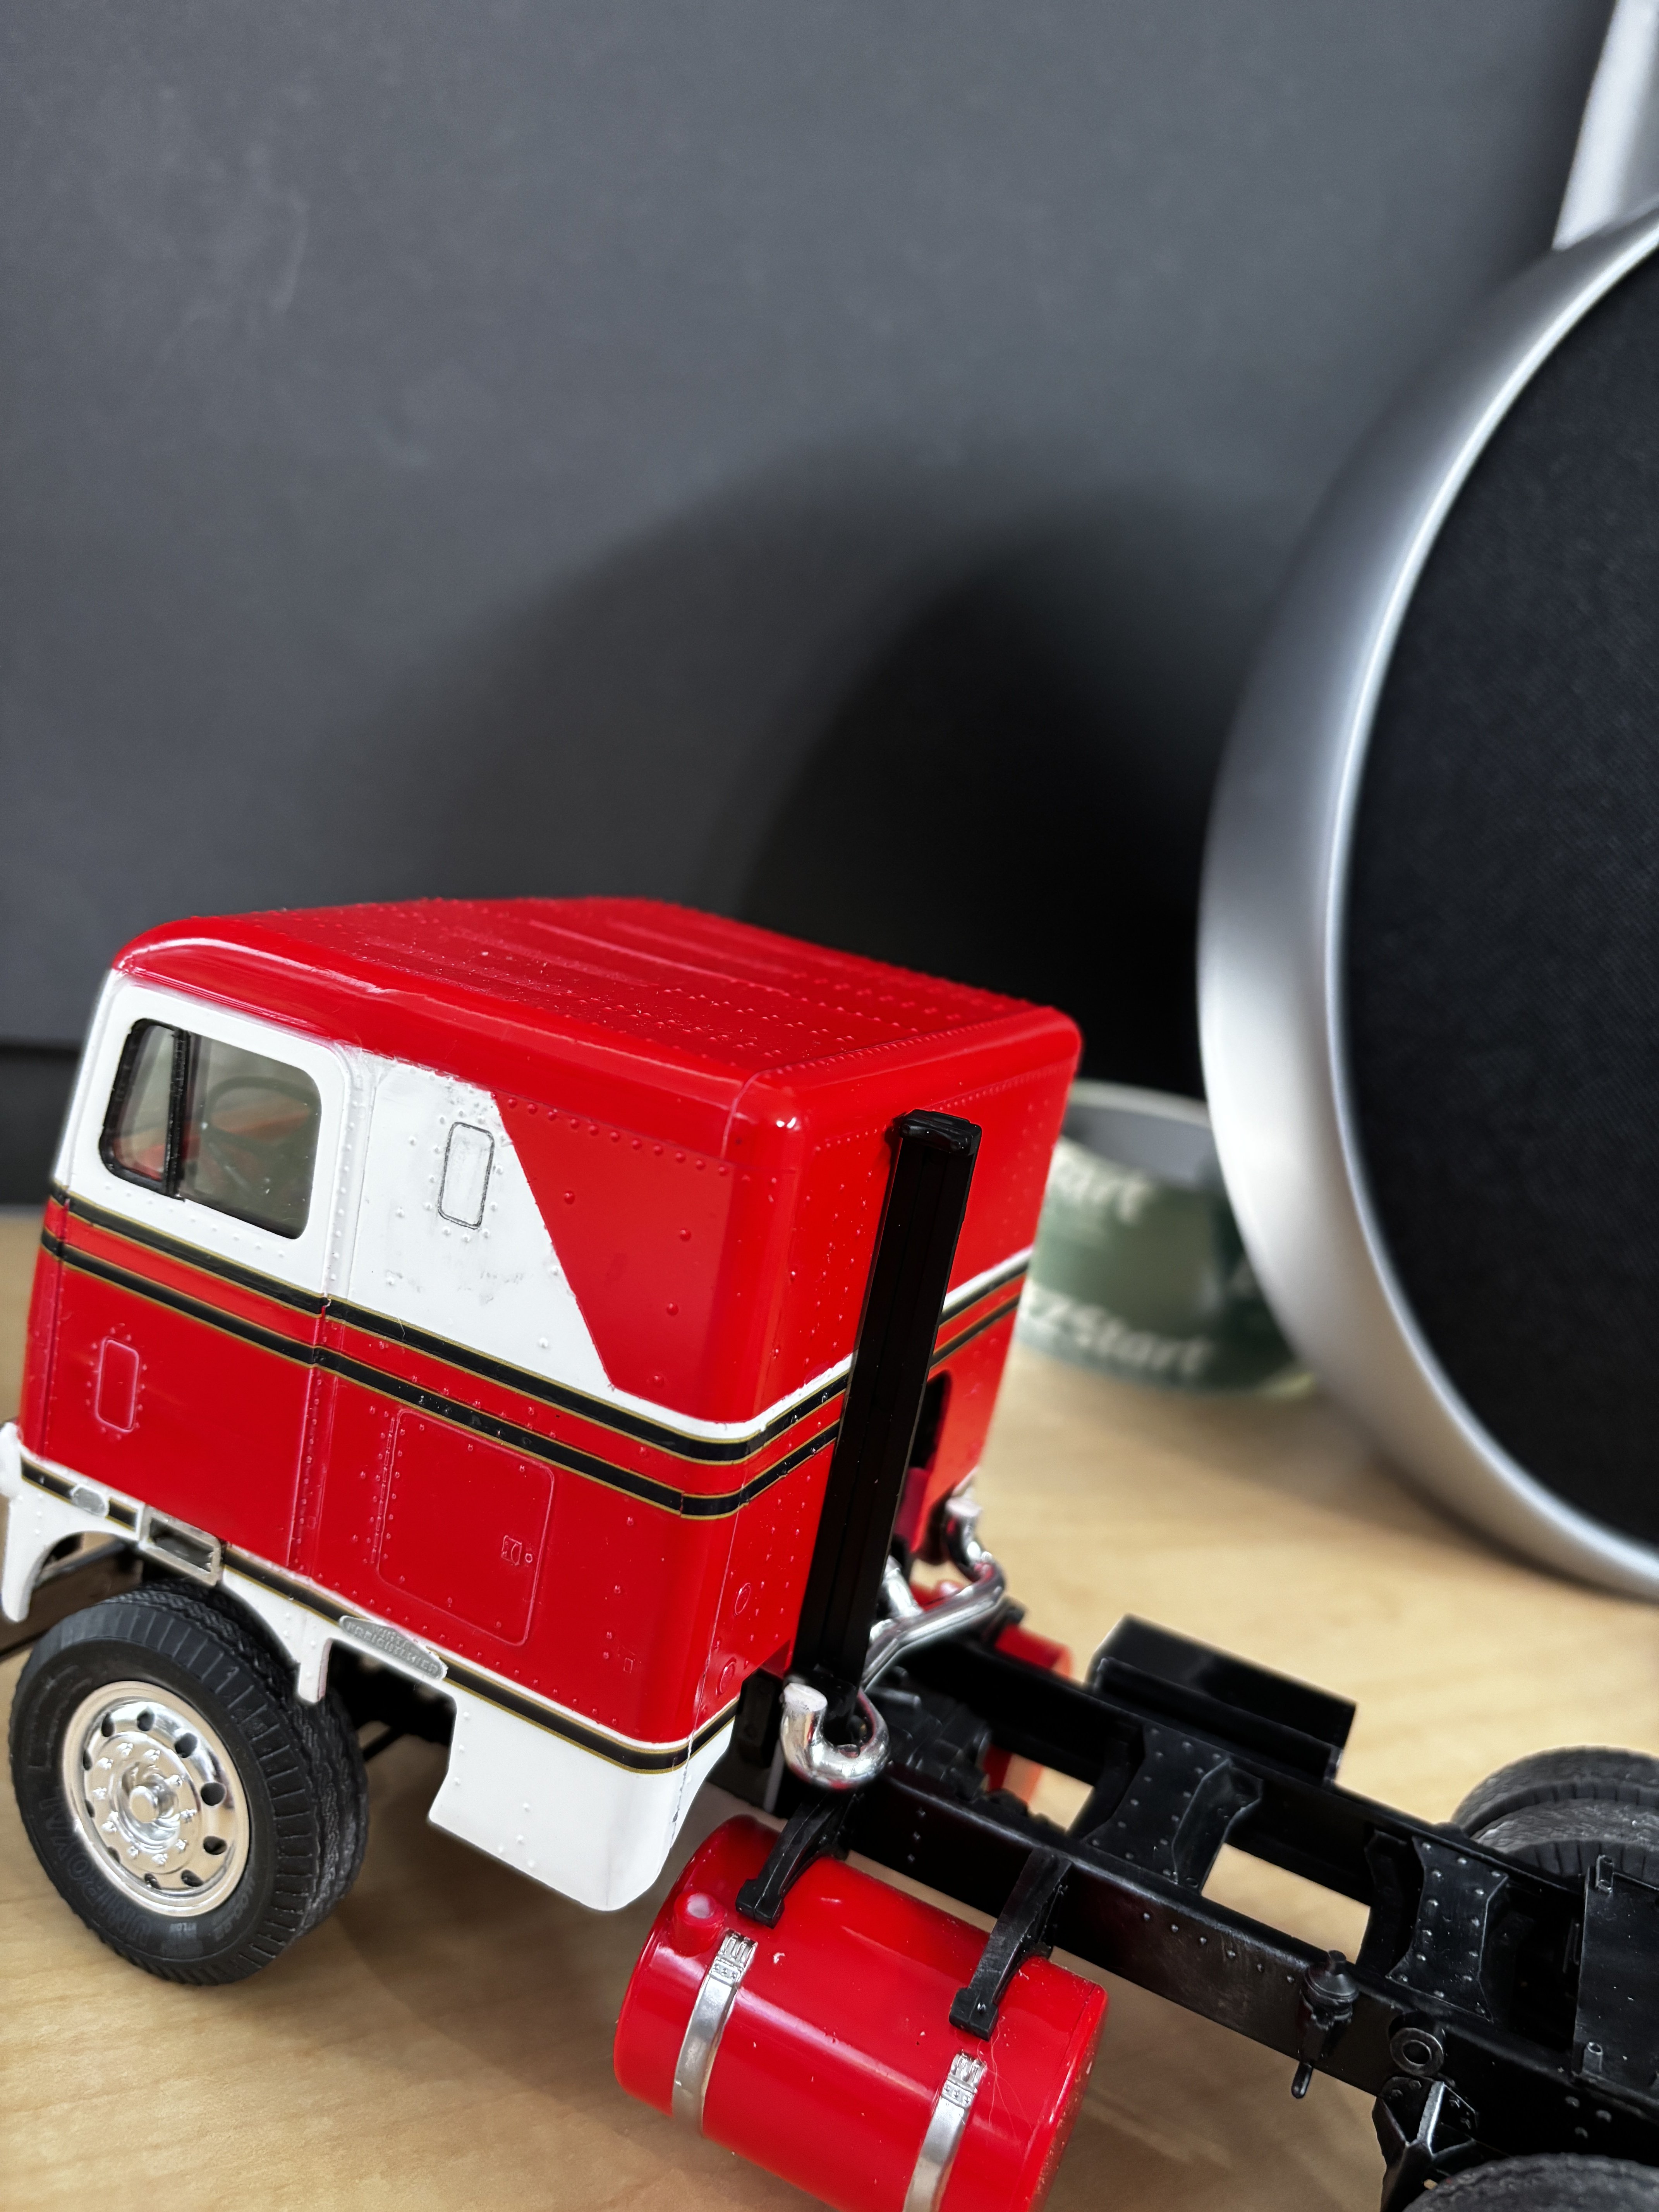
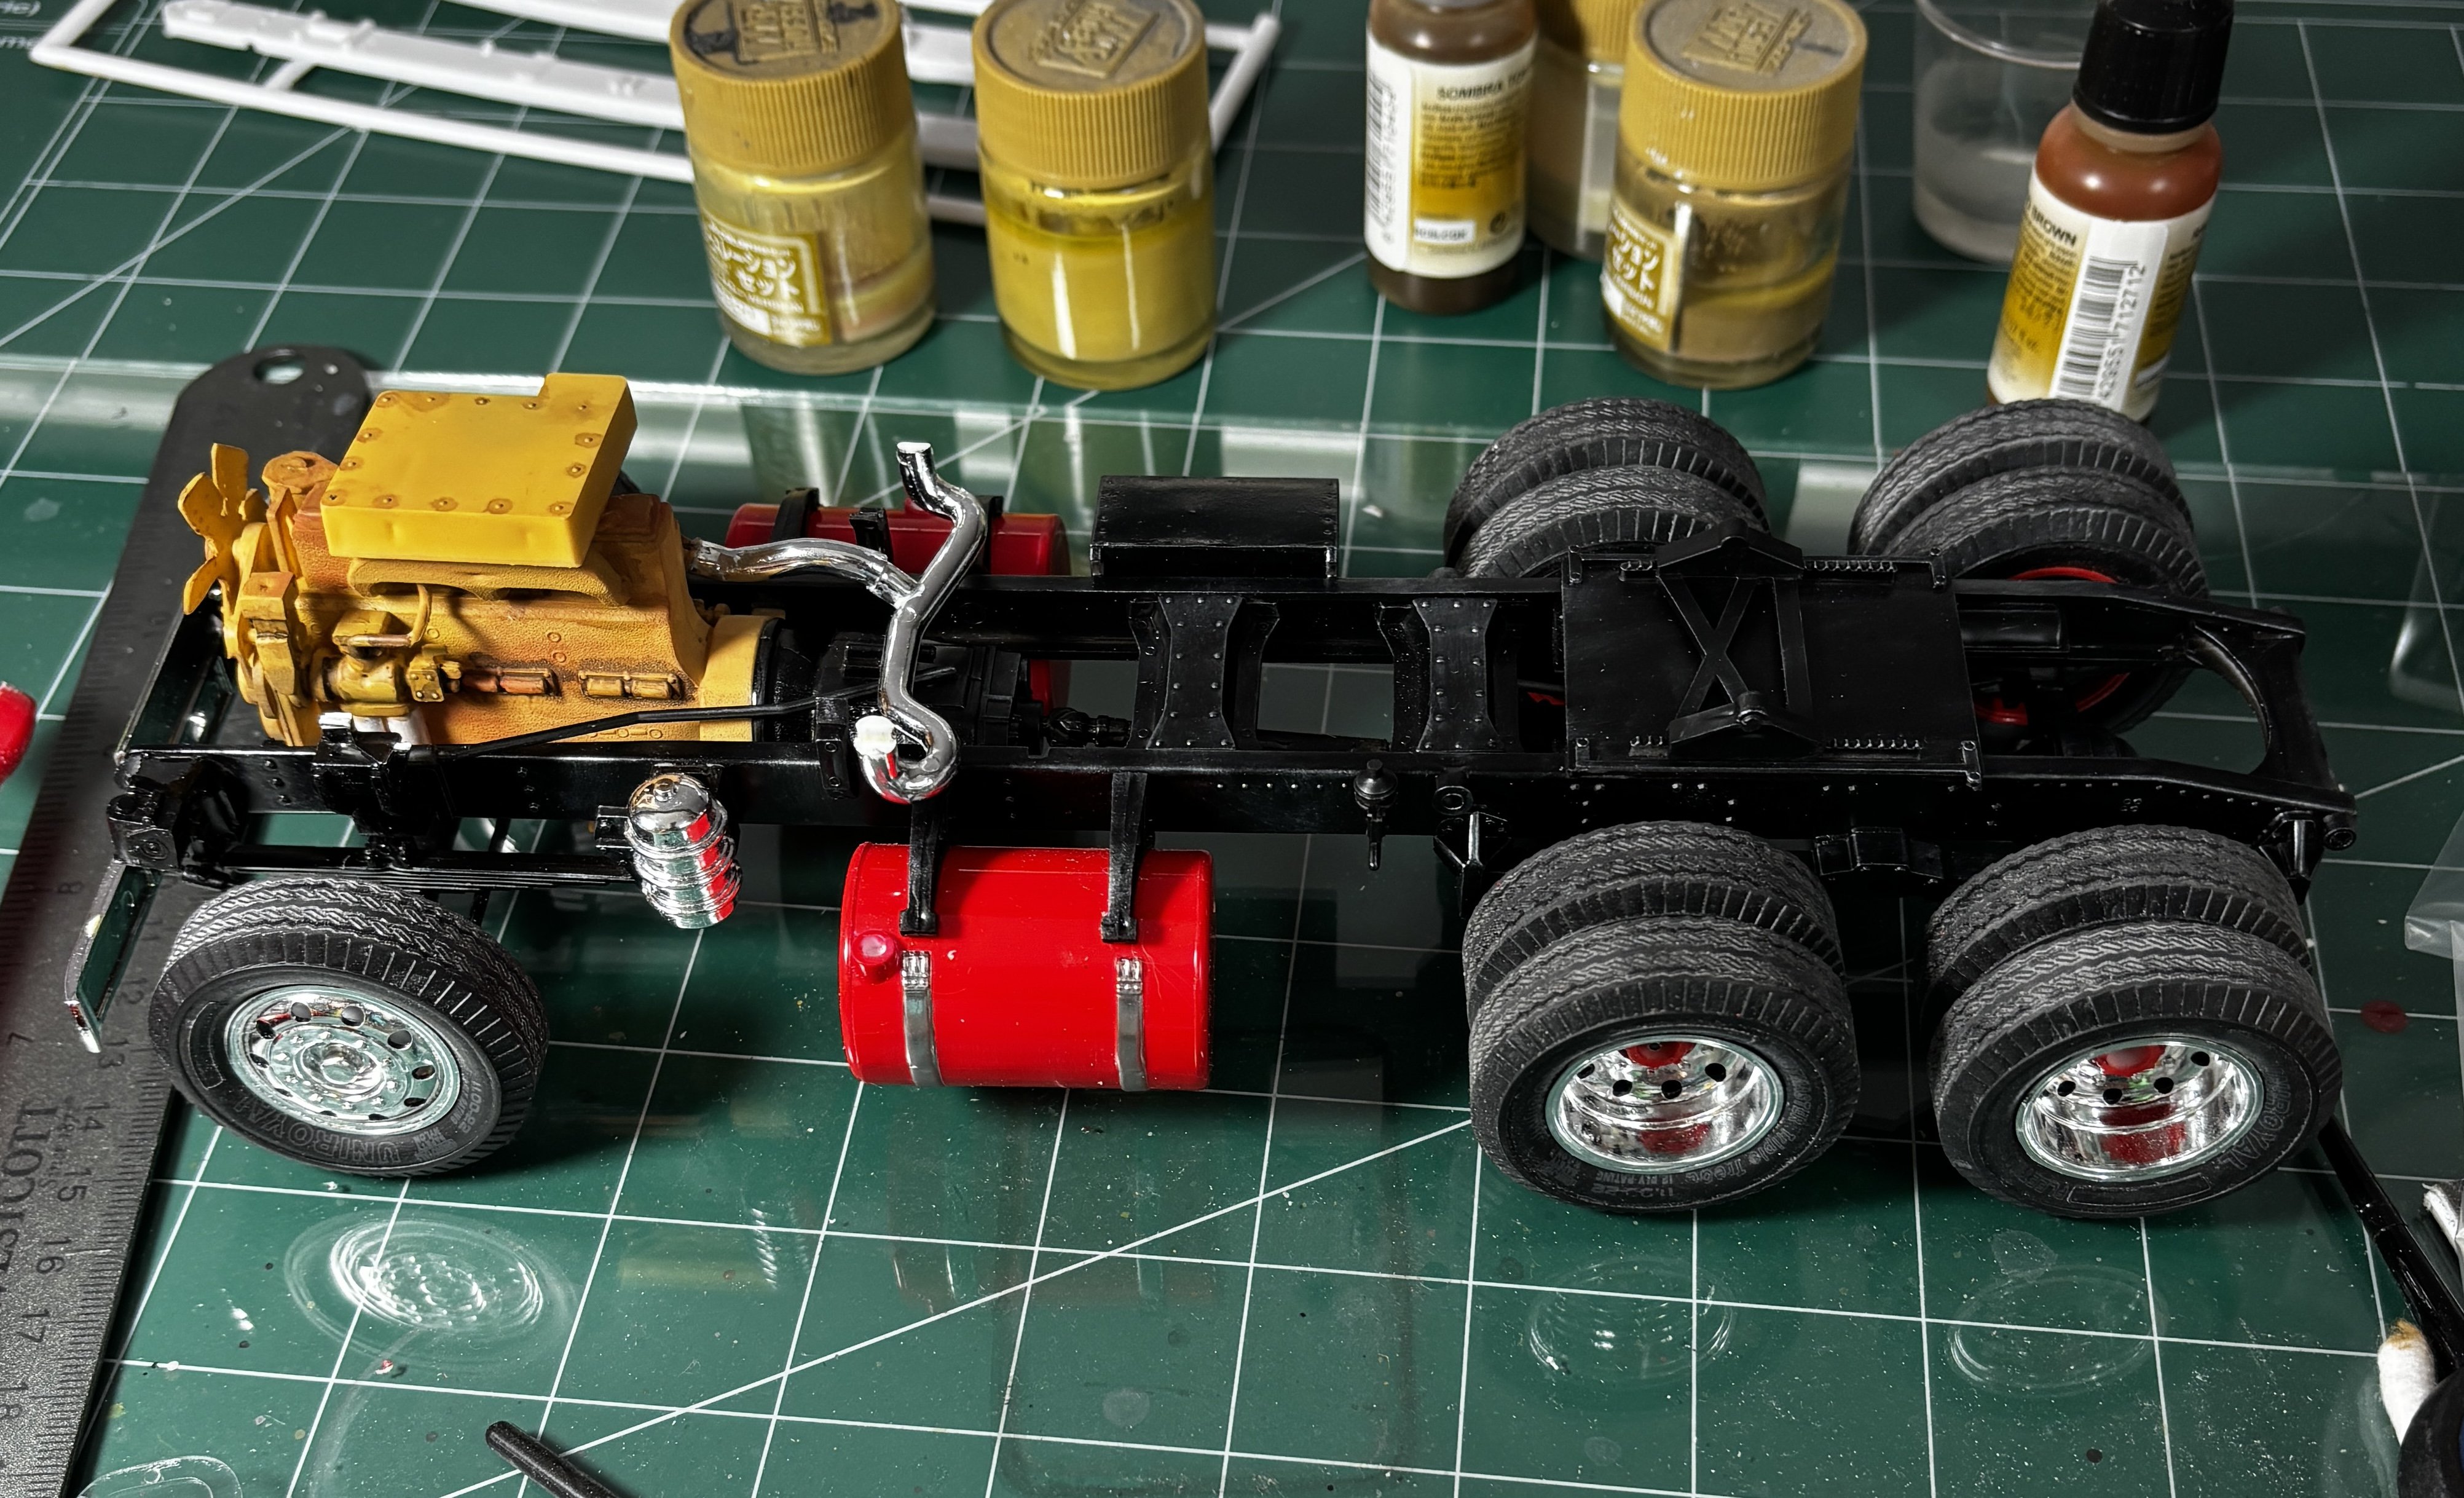
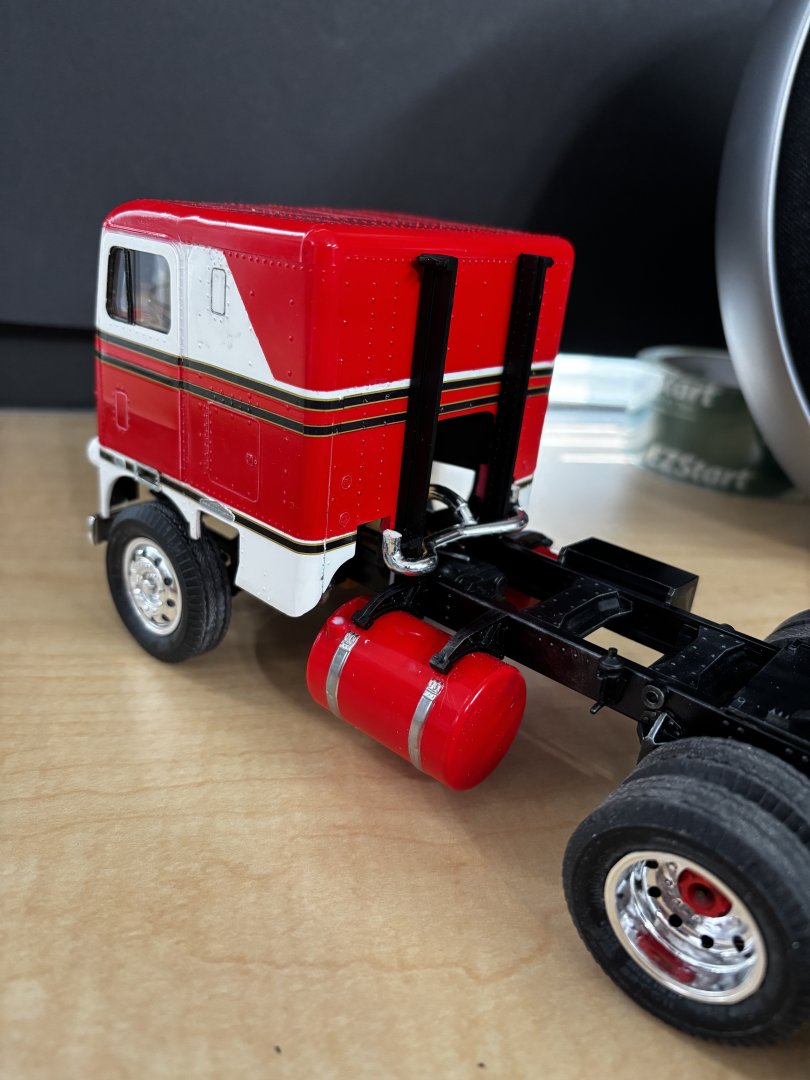
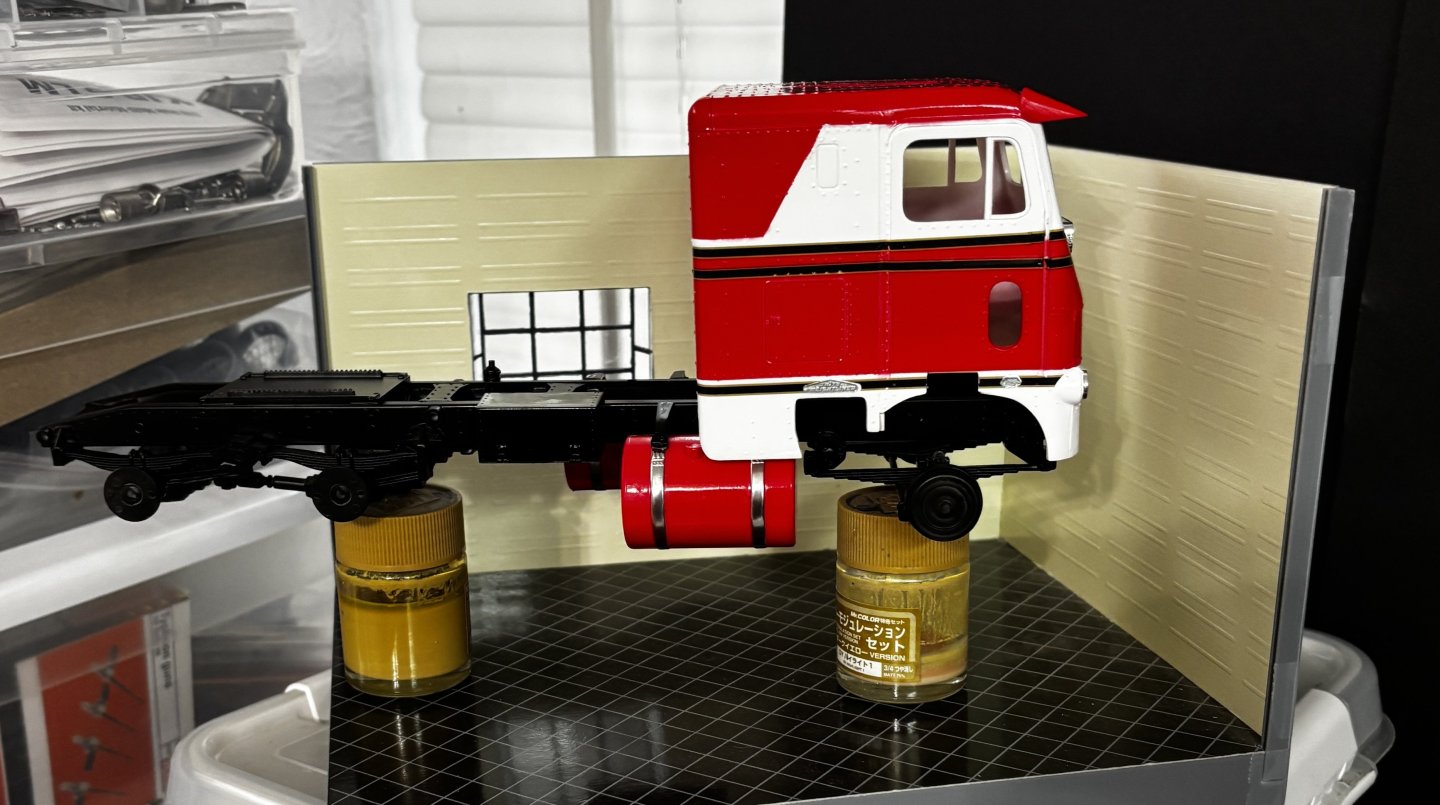
turning attention to the exhaust stacks. Remember, this is an old tool kit. As such, many parts need TLC to make them fit. The exhaust stack supports are no exception. Careful fitting to make sure they line up properly with the cab and the exhaust pipe is required. My exhaust stacks had big, ugly dink marks in the pipes rising above the heat shields, plus they were solid plastic, not hollow as they should be. I just cut them off and replaced with plastruct tubing, then painted the tubing with AK Super Chrome. The stacks will get attached later after the glue on the supports sets up well.


-
White Freightliner DD by CDW - AMT - 1:25 Scale - PLASTIC
CDW replied to CDW's topic in Non-ship/categorised builds
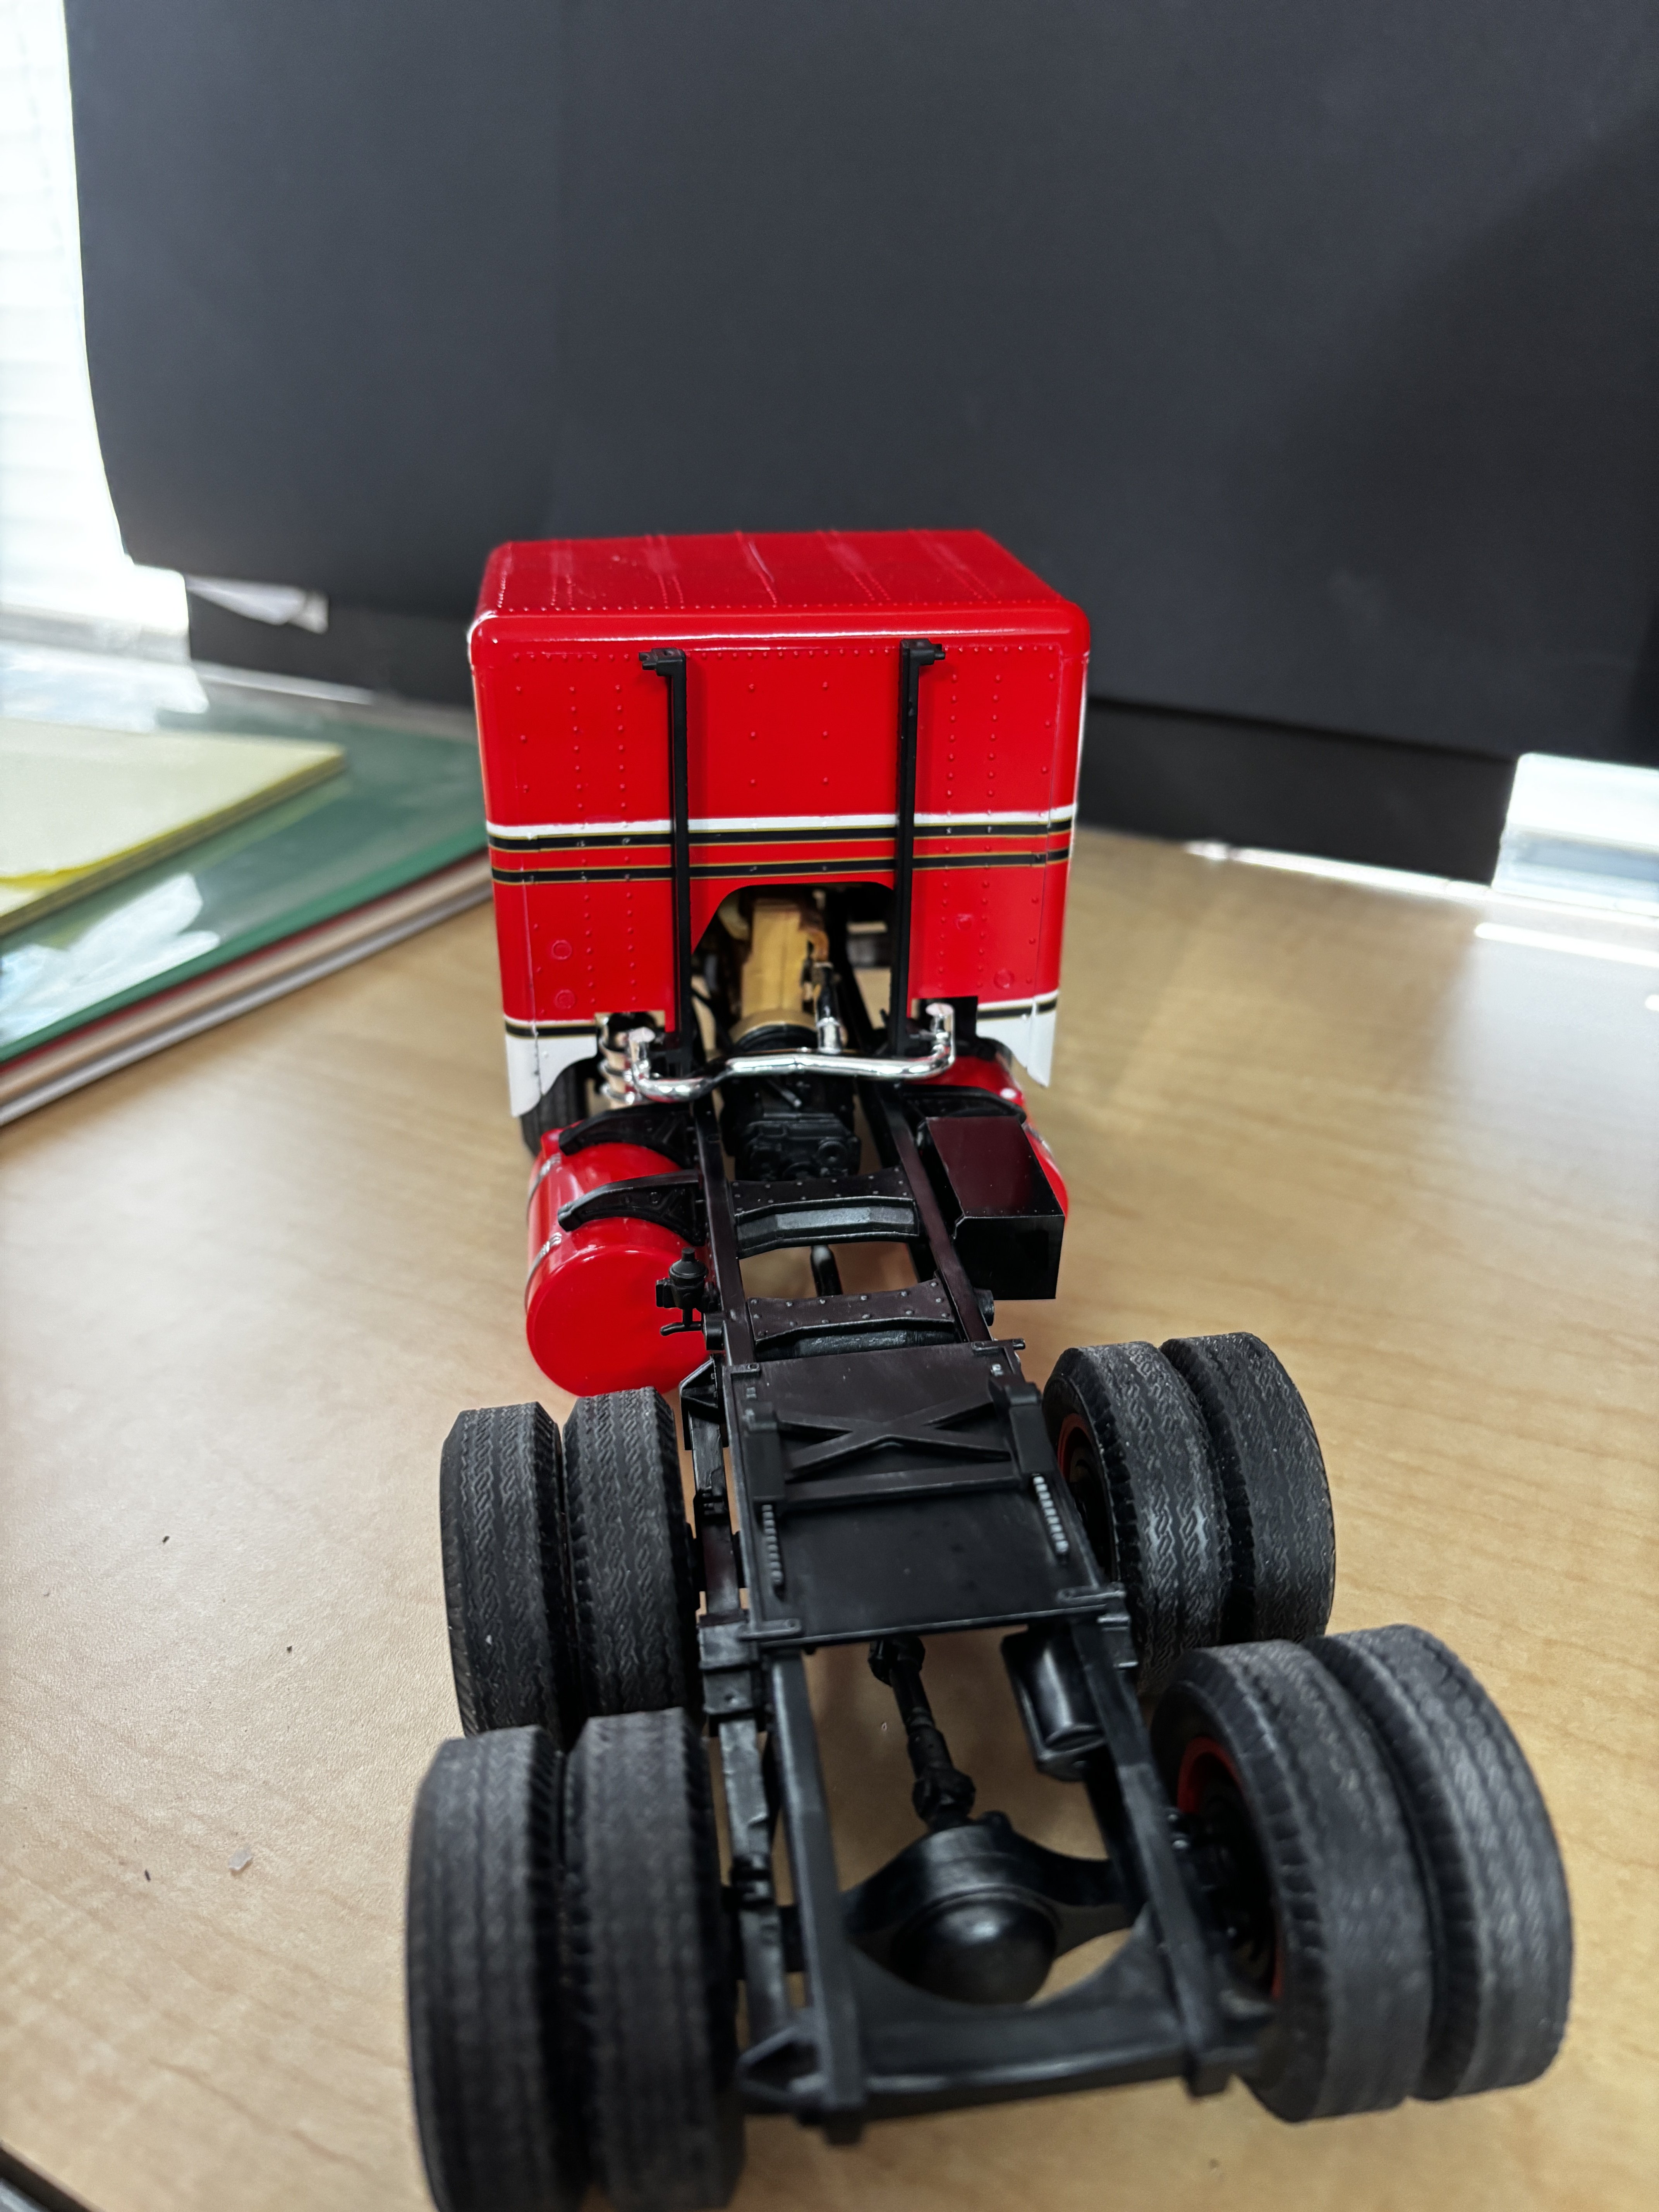
A little dry brushing on the chassis before the exhaust stacks go on.
-
White Freightliner DD by CDW - AMT - 1:25 Scale - PLASTIC
CDW replied to CDW's topic in Non-ship/categorised builds
Slowly shaping up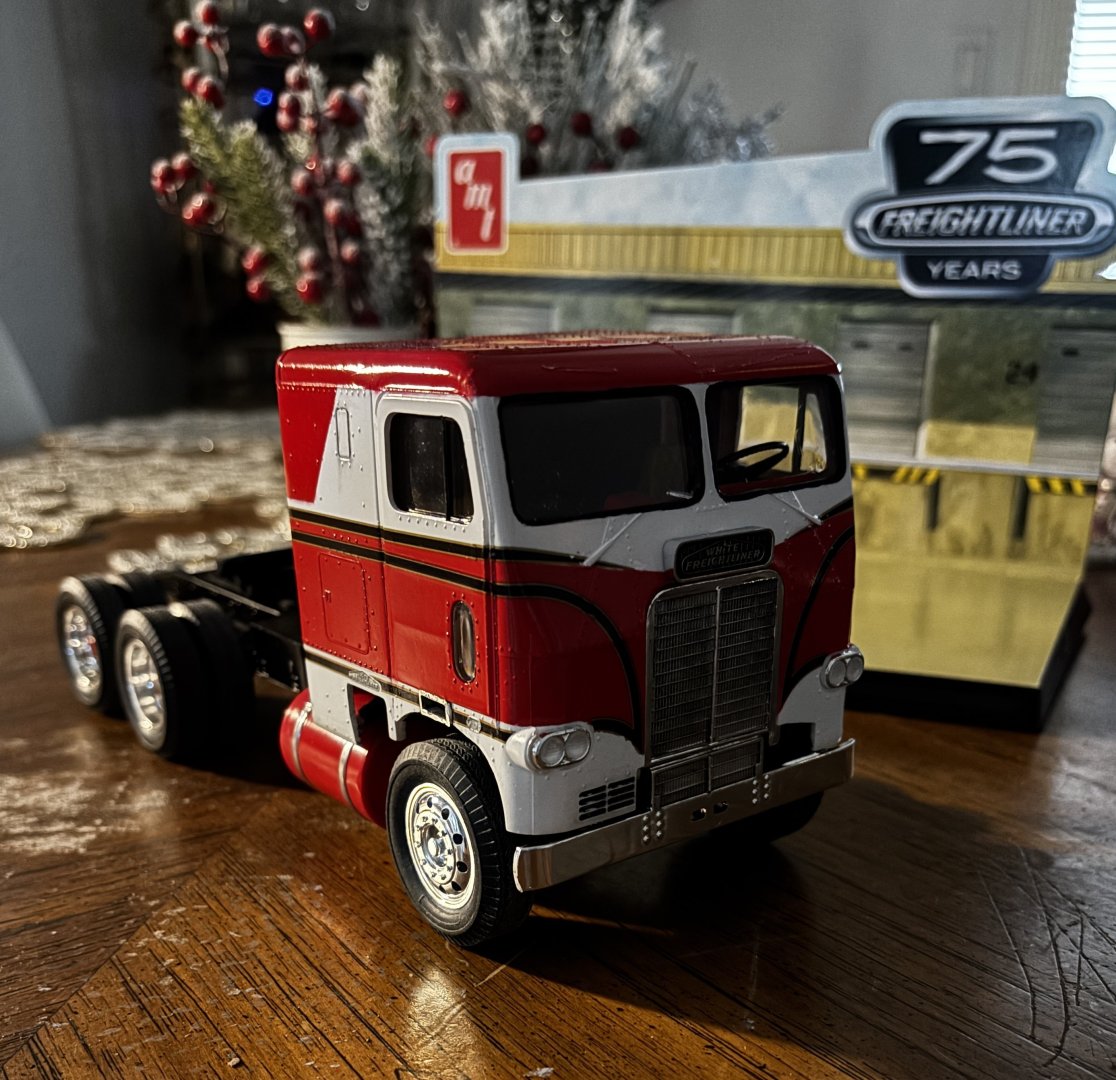
-
White Freightliner DD by CDW - AMT - 1:25 Scale - PLASTIC
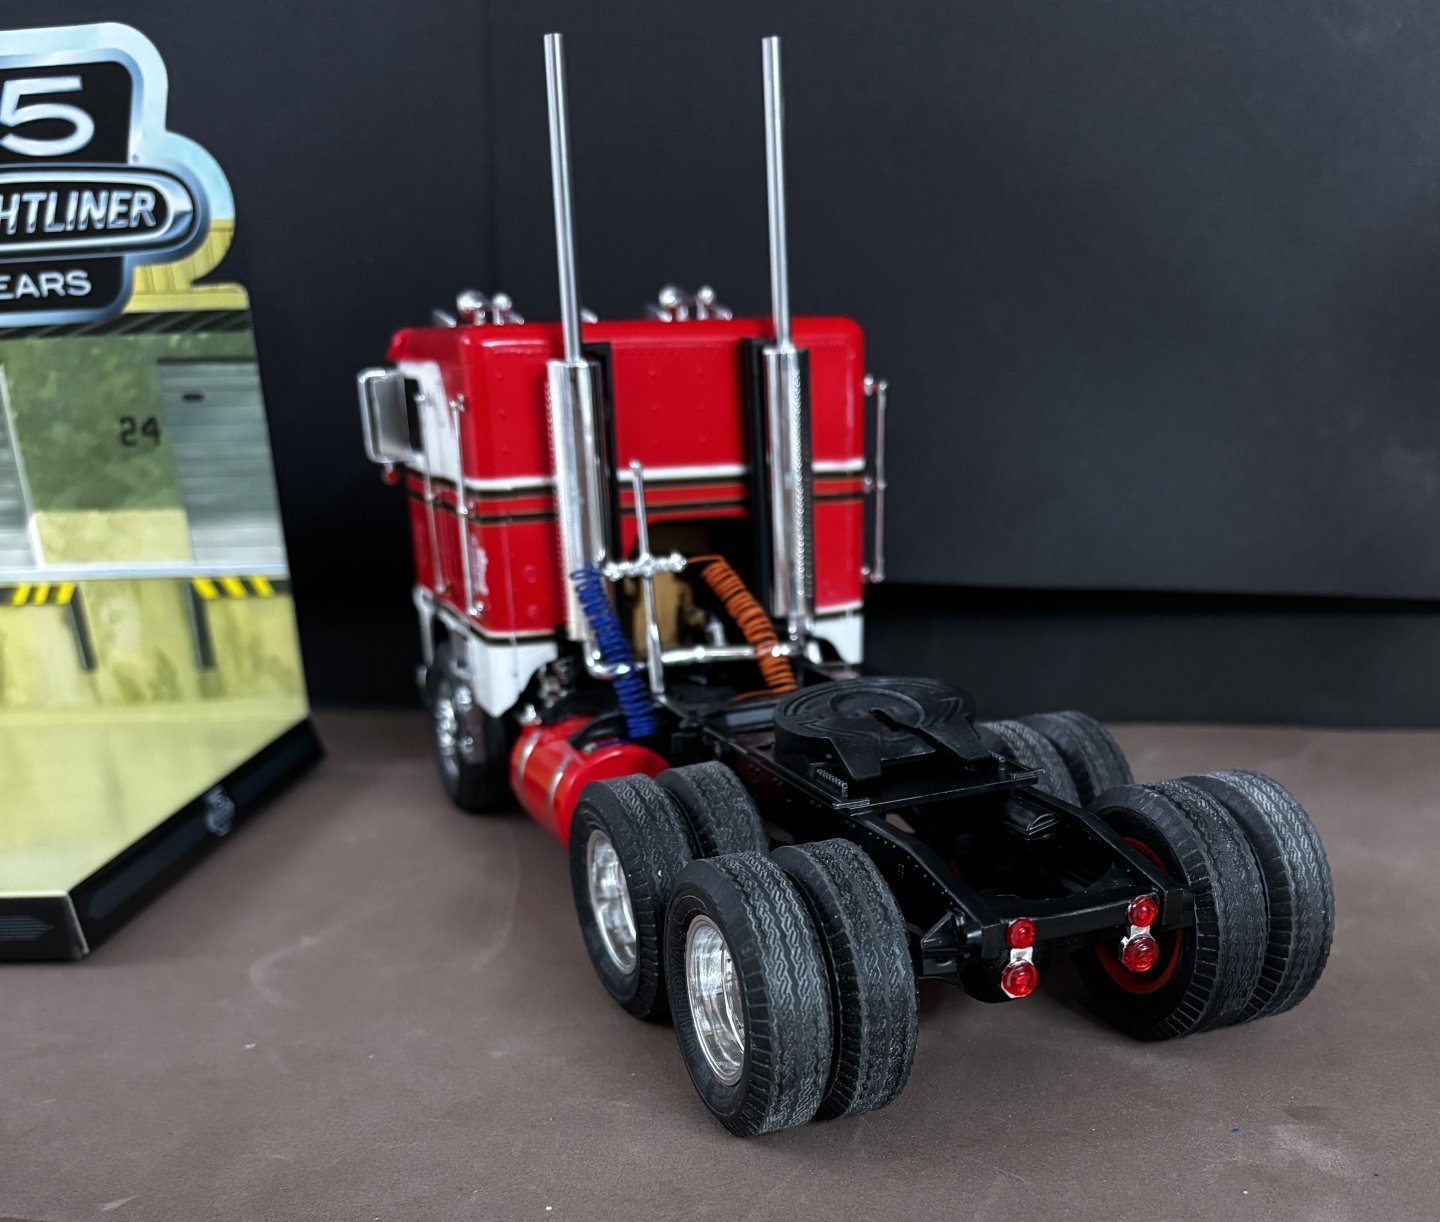
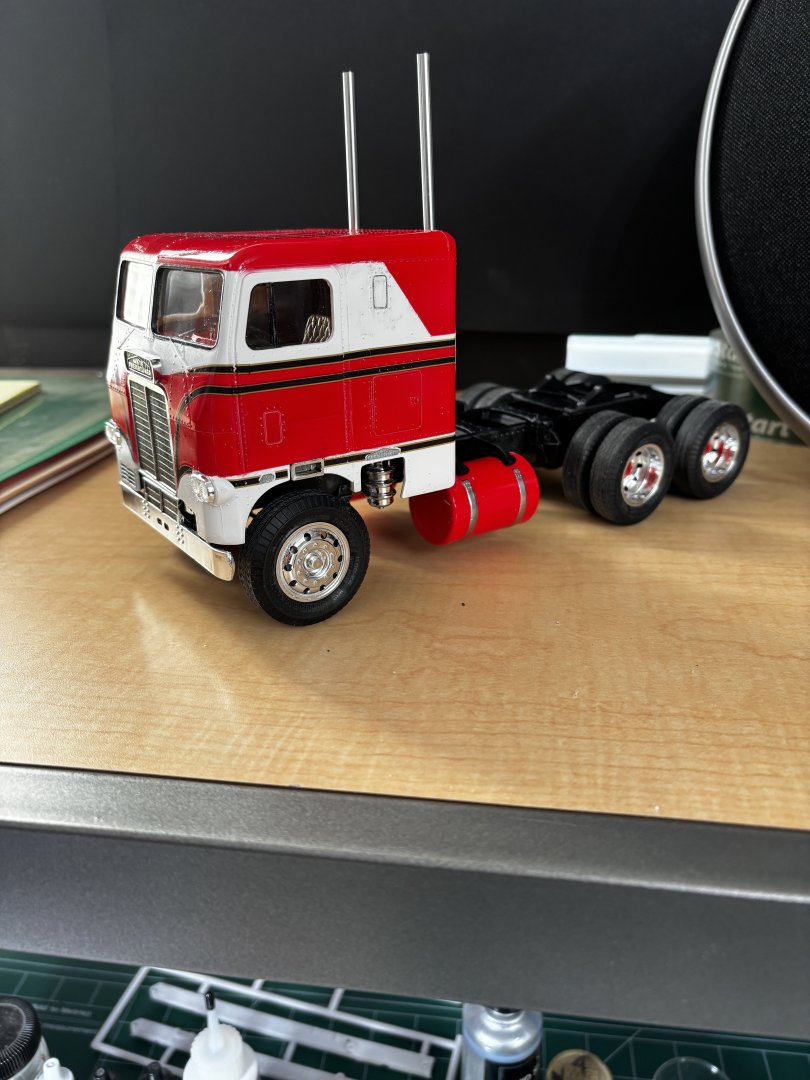
CDW replied to CDW's topic in Non-ship/categorised builds
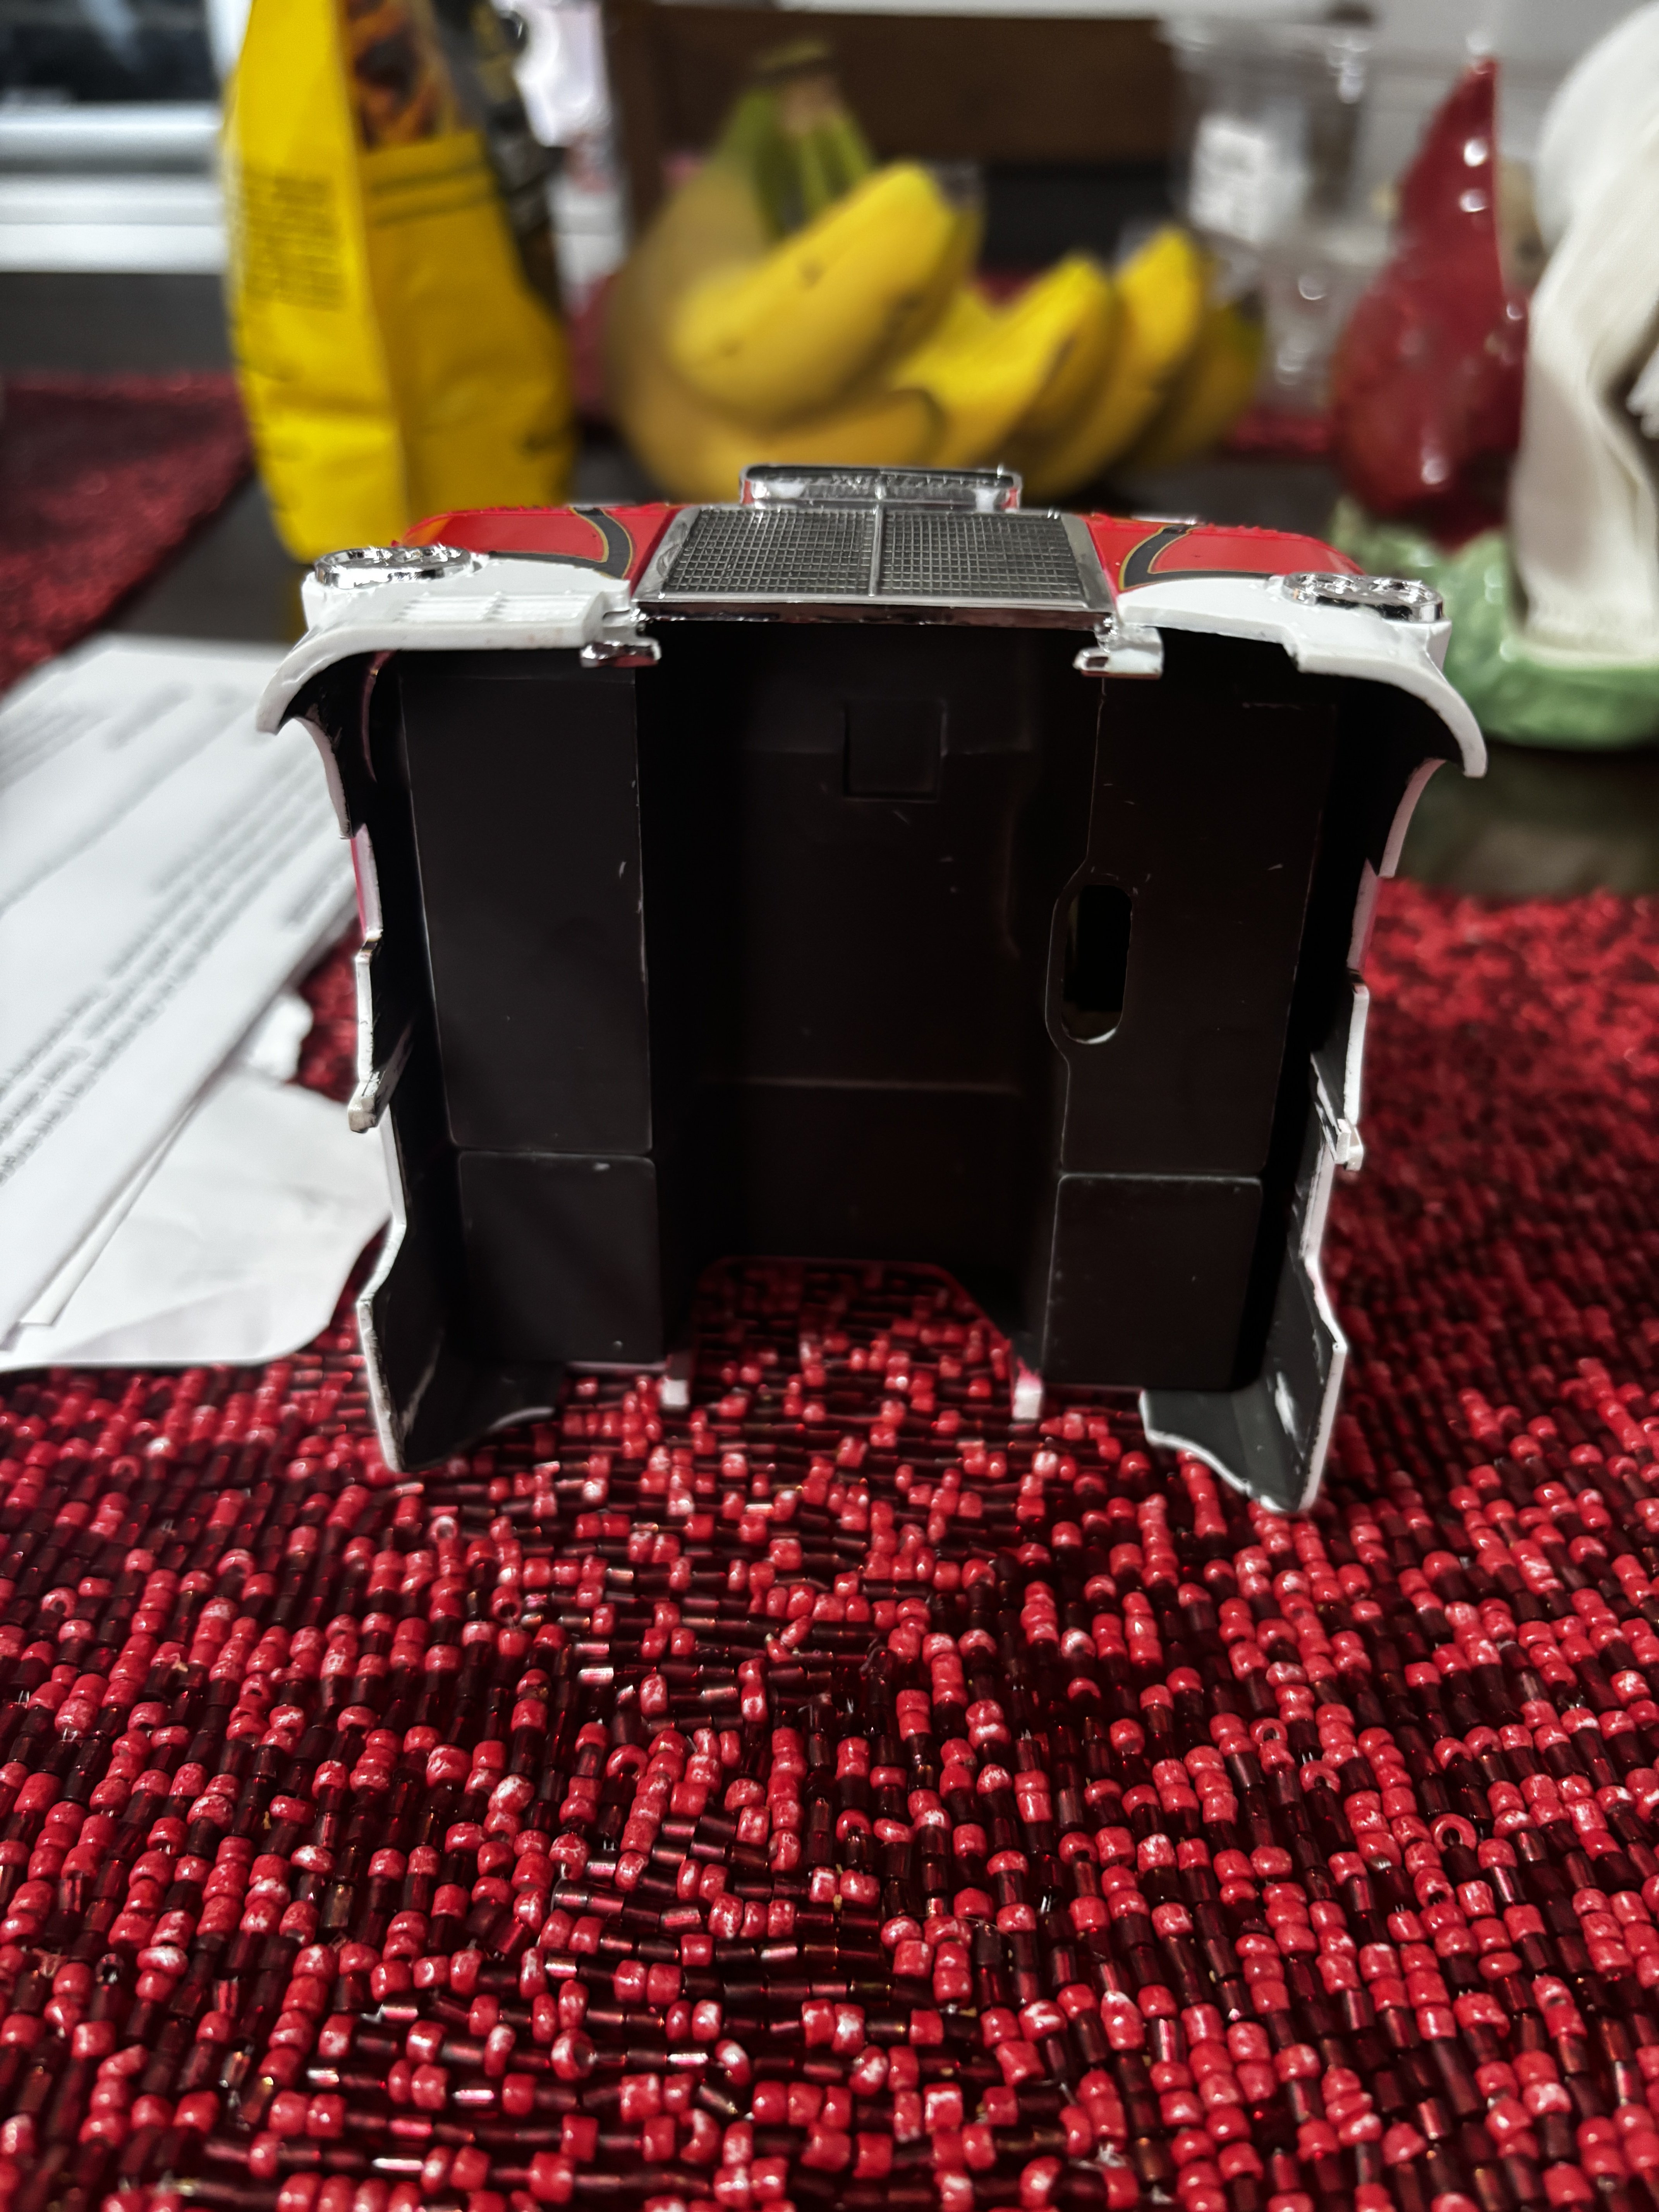
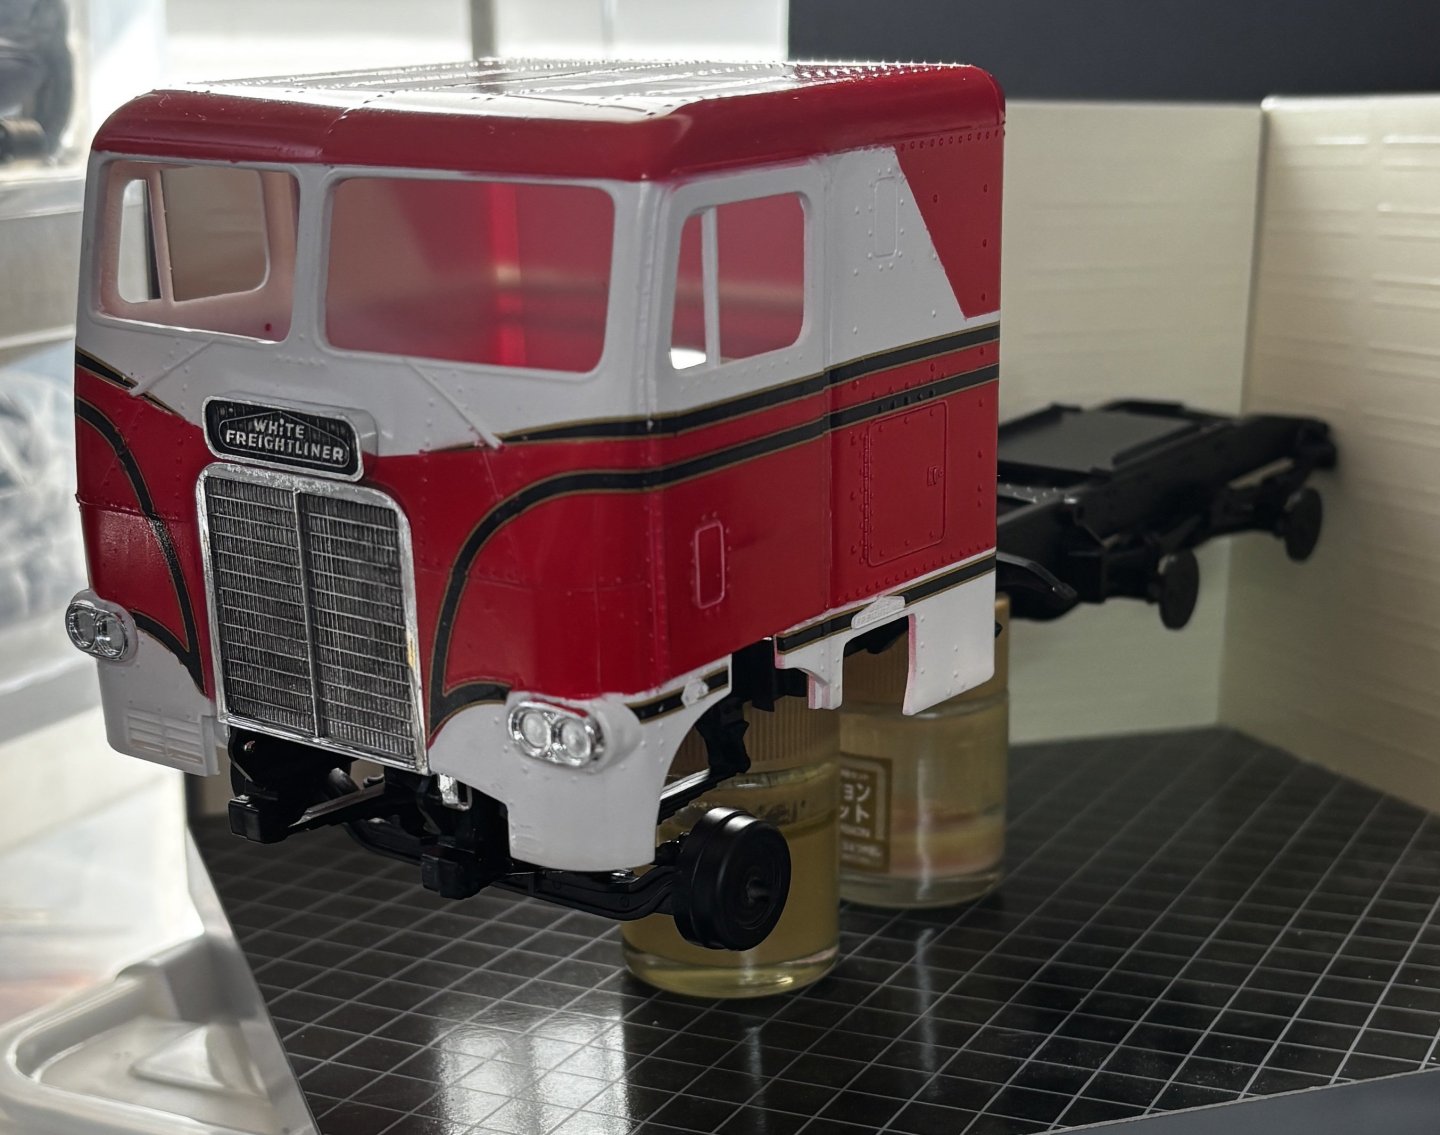
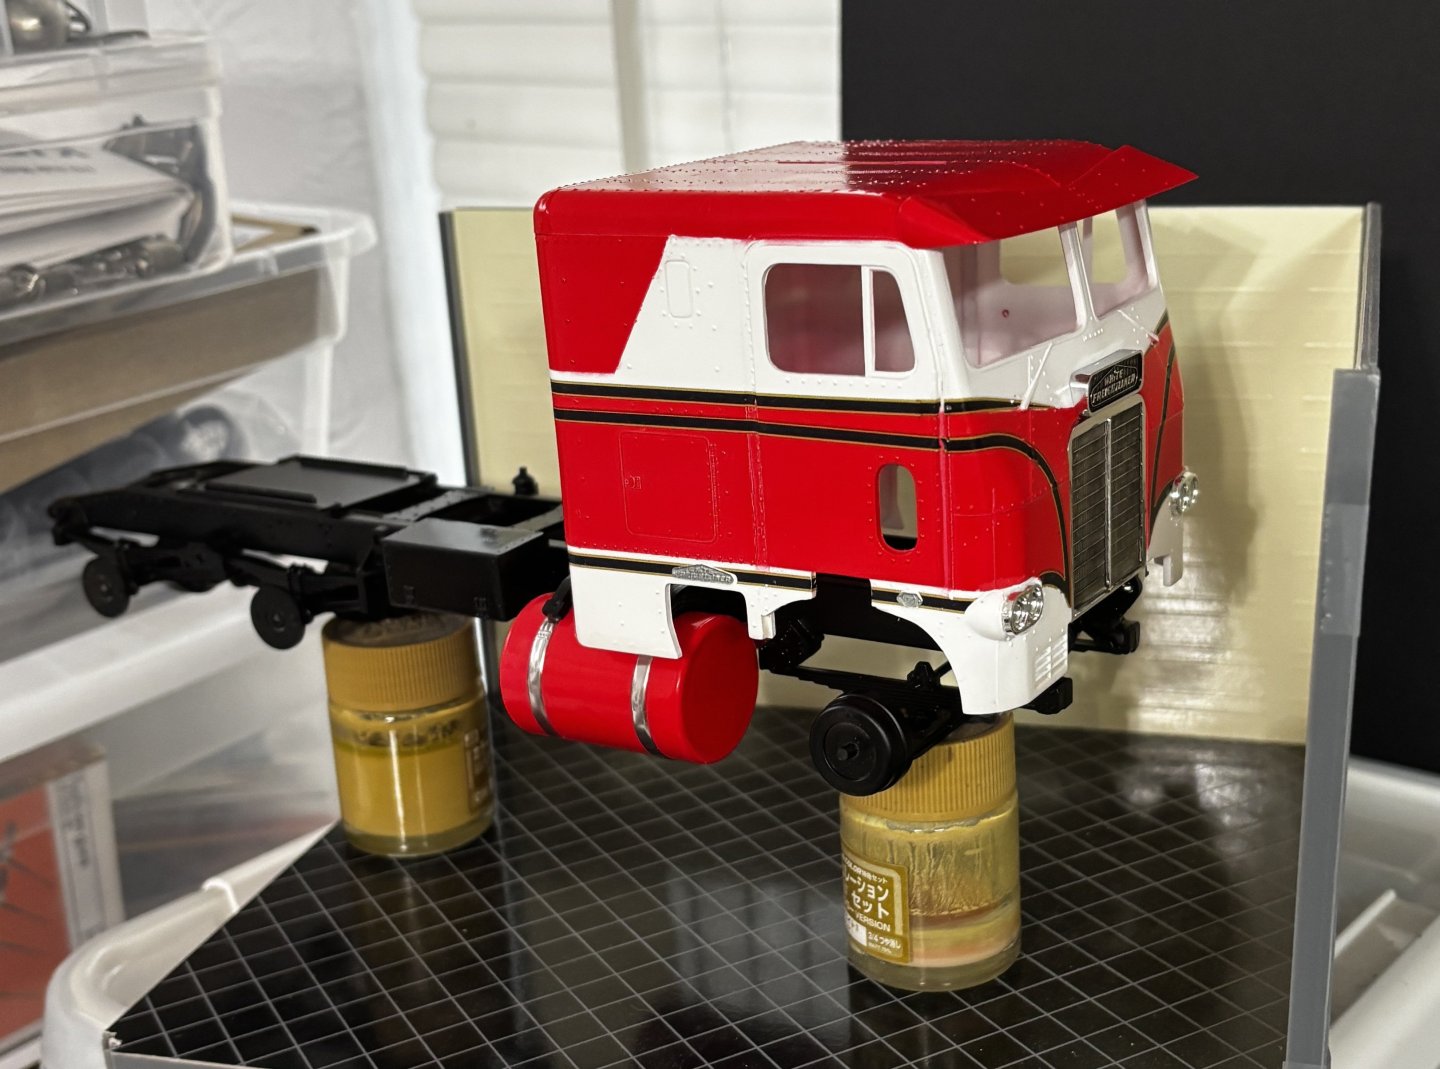
The Freightliner is a very old kit. As such, there are multiple well documented fit issues that I didn’t read about soon enough. One of those issues is the fit of the interior tub inside the cab. It’s one of many but one that seems most difficult to correct without building a new interior from scratch. I’m going to make it work but as such it will be a 10-footer. One of those models that will look okay sitting on the shelf 10 feet away. Nevertheless, I am having fun with it. Some progress photos.


- 30 replies
-
- 11
-
-
White Freightliner DD by CDW - AMT - 1:25 Scale - PLASTIC
CDW replied to CDW's topic in Non-ship/categorised builds
I haven't seen Highway Through Hell (AFAIK) but I have watched some awesome recovery vehicle videos on YouTube. Some where there were two of these same type of large wreckers used to recover and haul away big rig wrecks. Those men operating the wreckers are highly skilled at what they do. it must cost a small fortune to have a vehicle recovered like that. Takes hours sometimes. -
White Freightliner DD by CDW - AMT - 1:25 Scale - PLASTIC
CDW replied to CDW's topic in Non-ship/categorised builds
The kit has three big chrome trees -
White Freightliner DD by CDW - AMT - 1:25 Scale - PLASTIC
CDW replied to CDW's topic in Non-ship/categorised builds
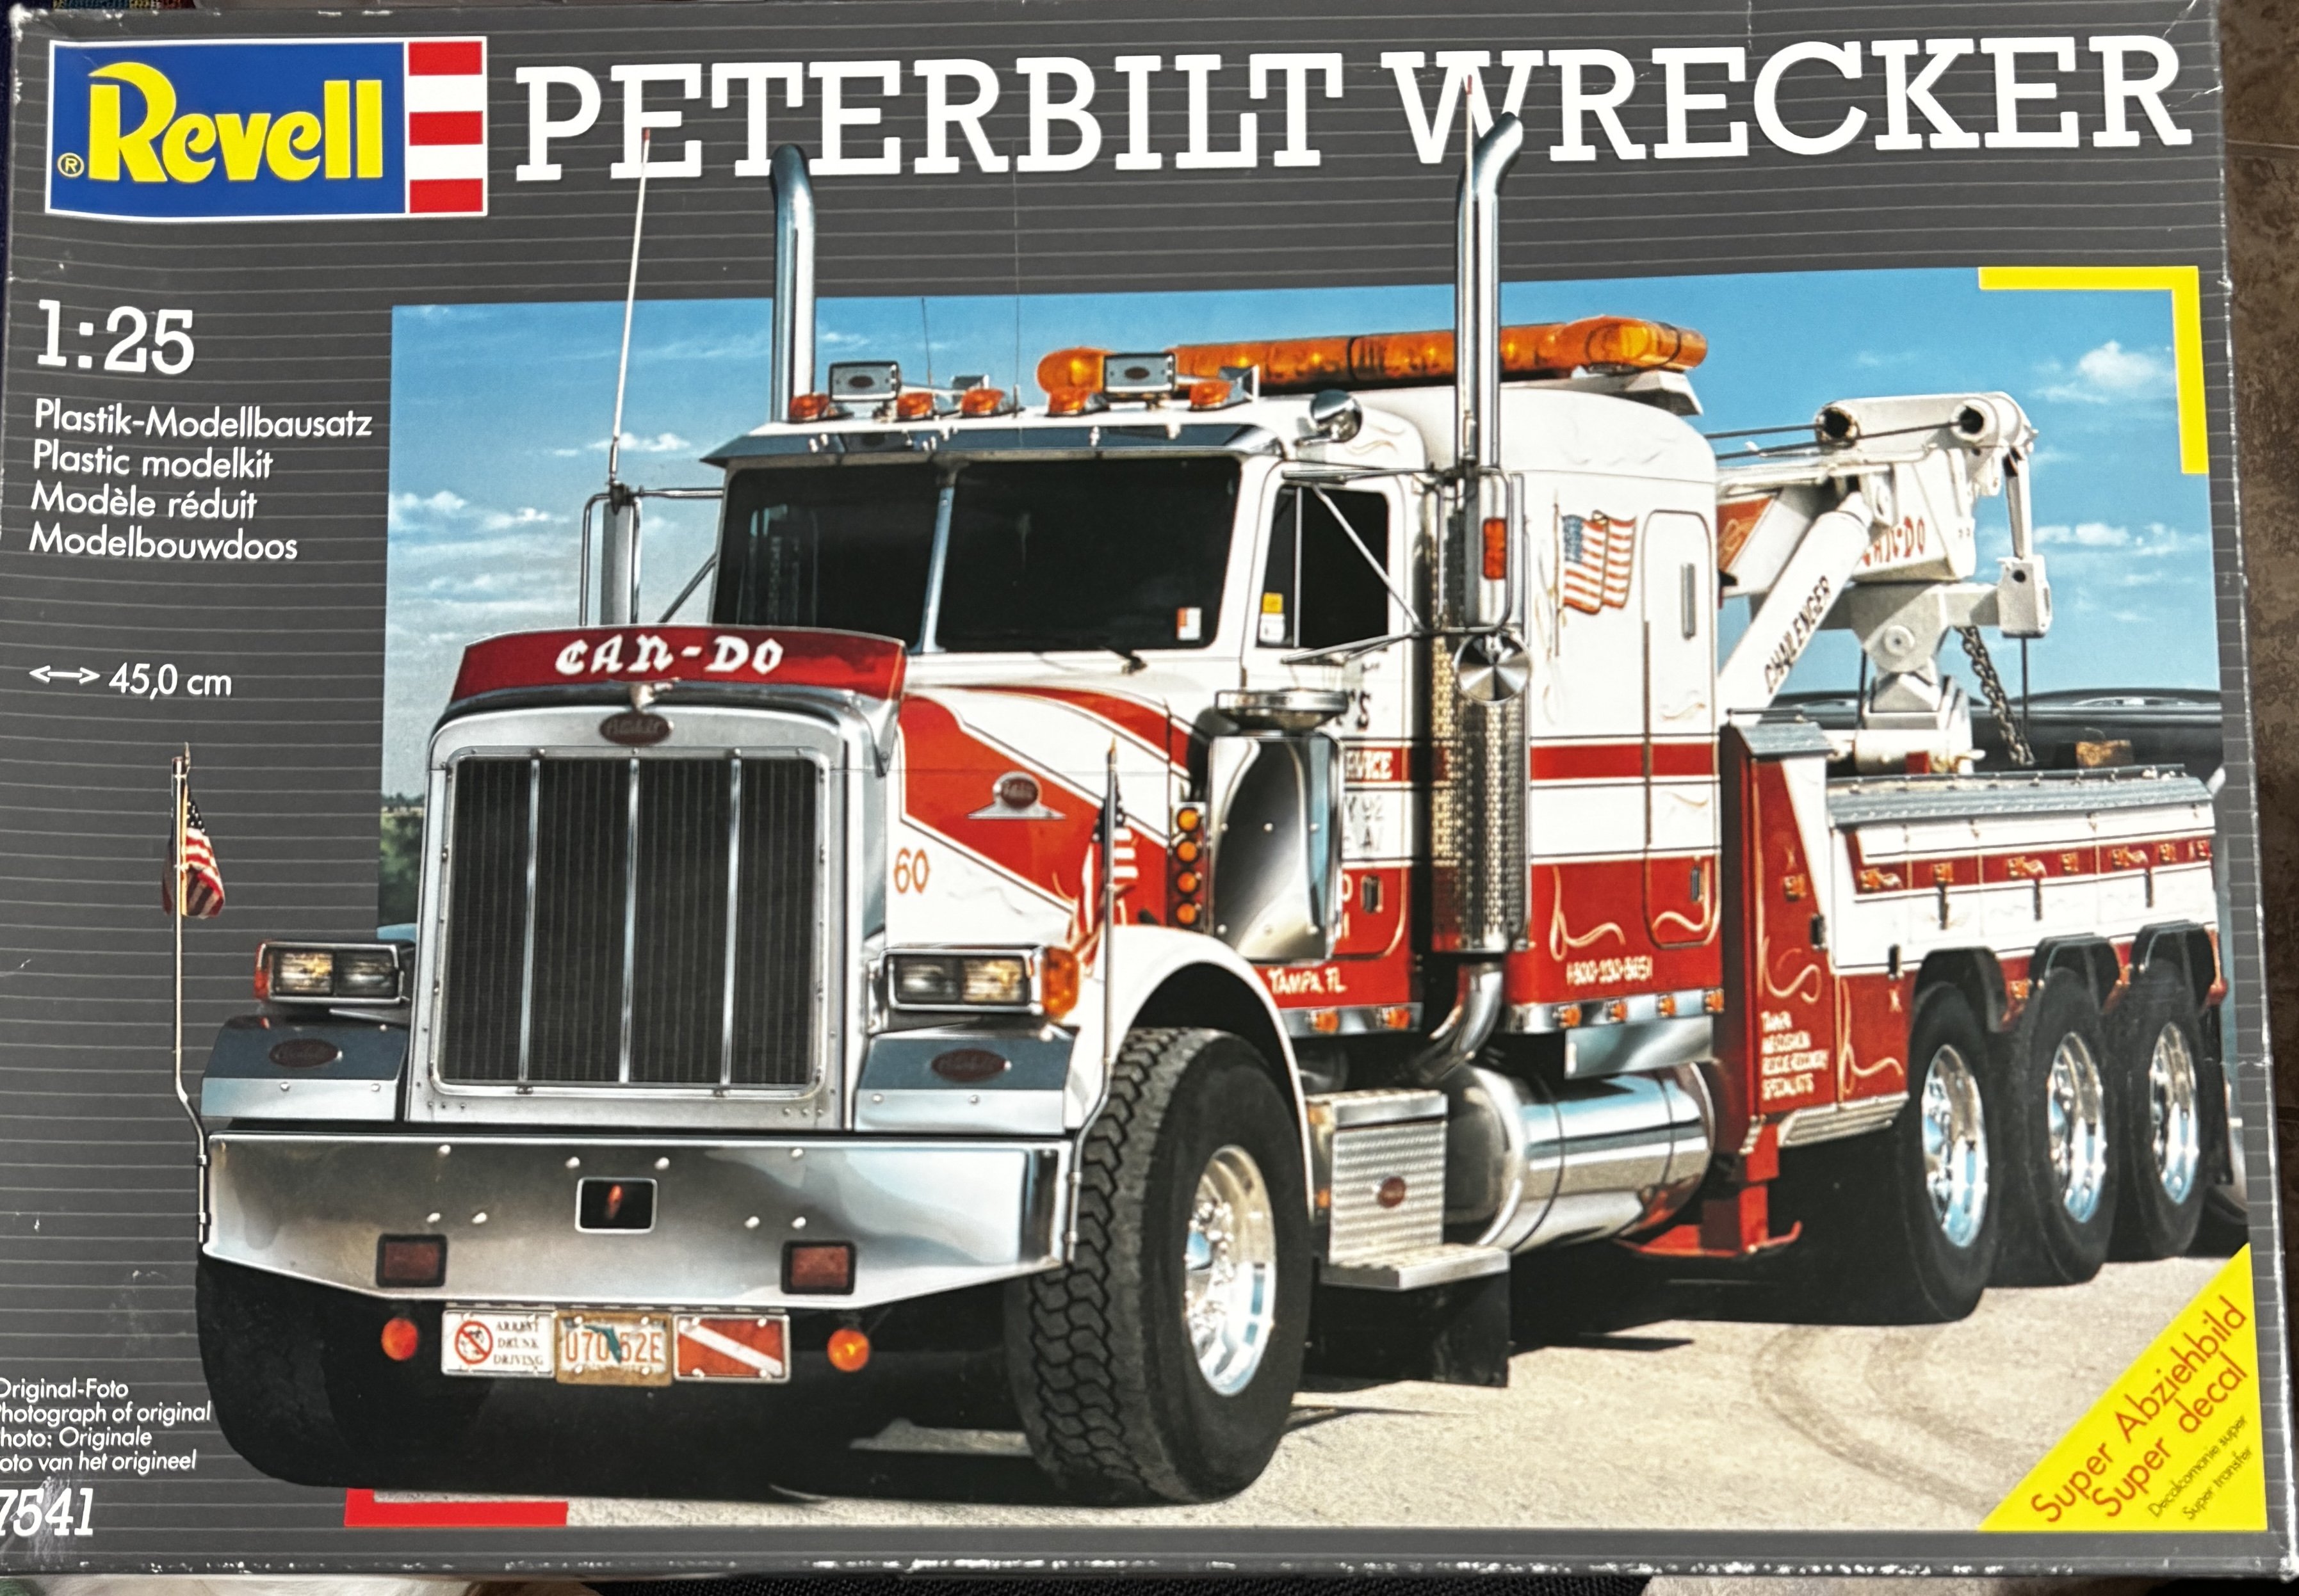
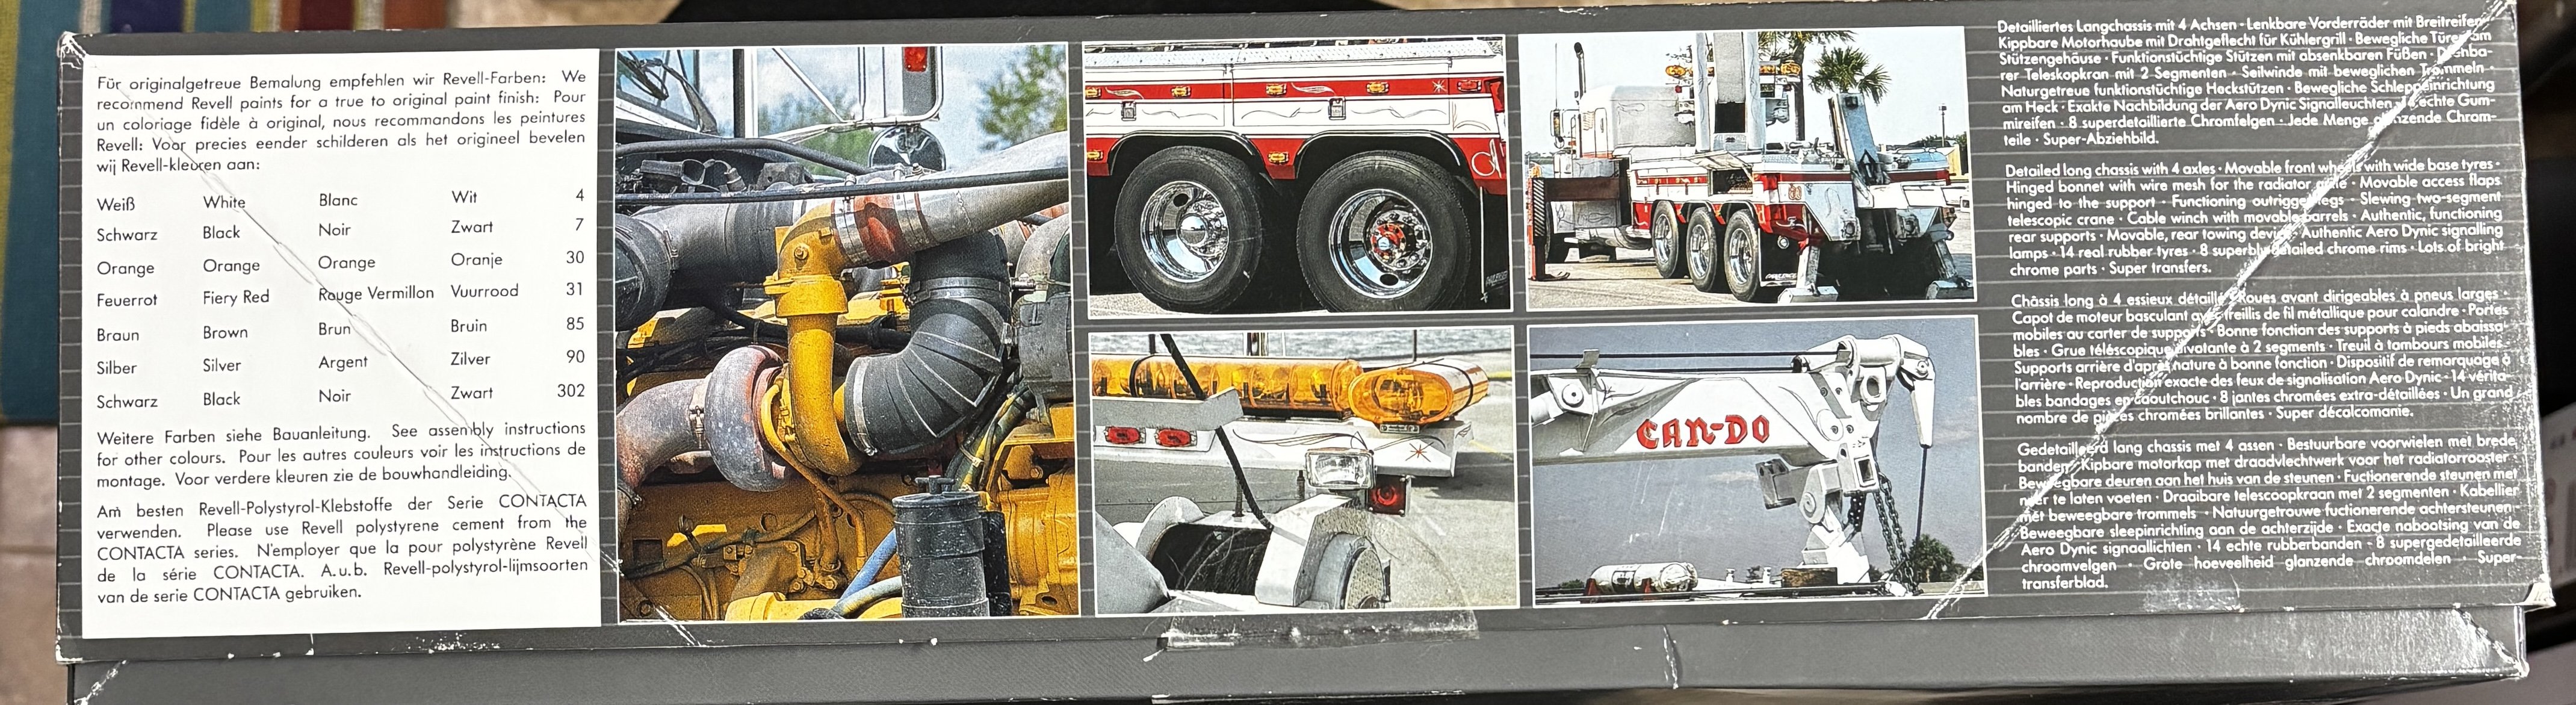
I recently acquired this kit. If you attend a swap meet and see one for sale, grab it. Truly outstanding kit. The model is based on a wrecker that operates from my hometown in Tampa, Fl.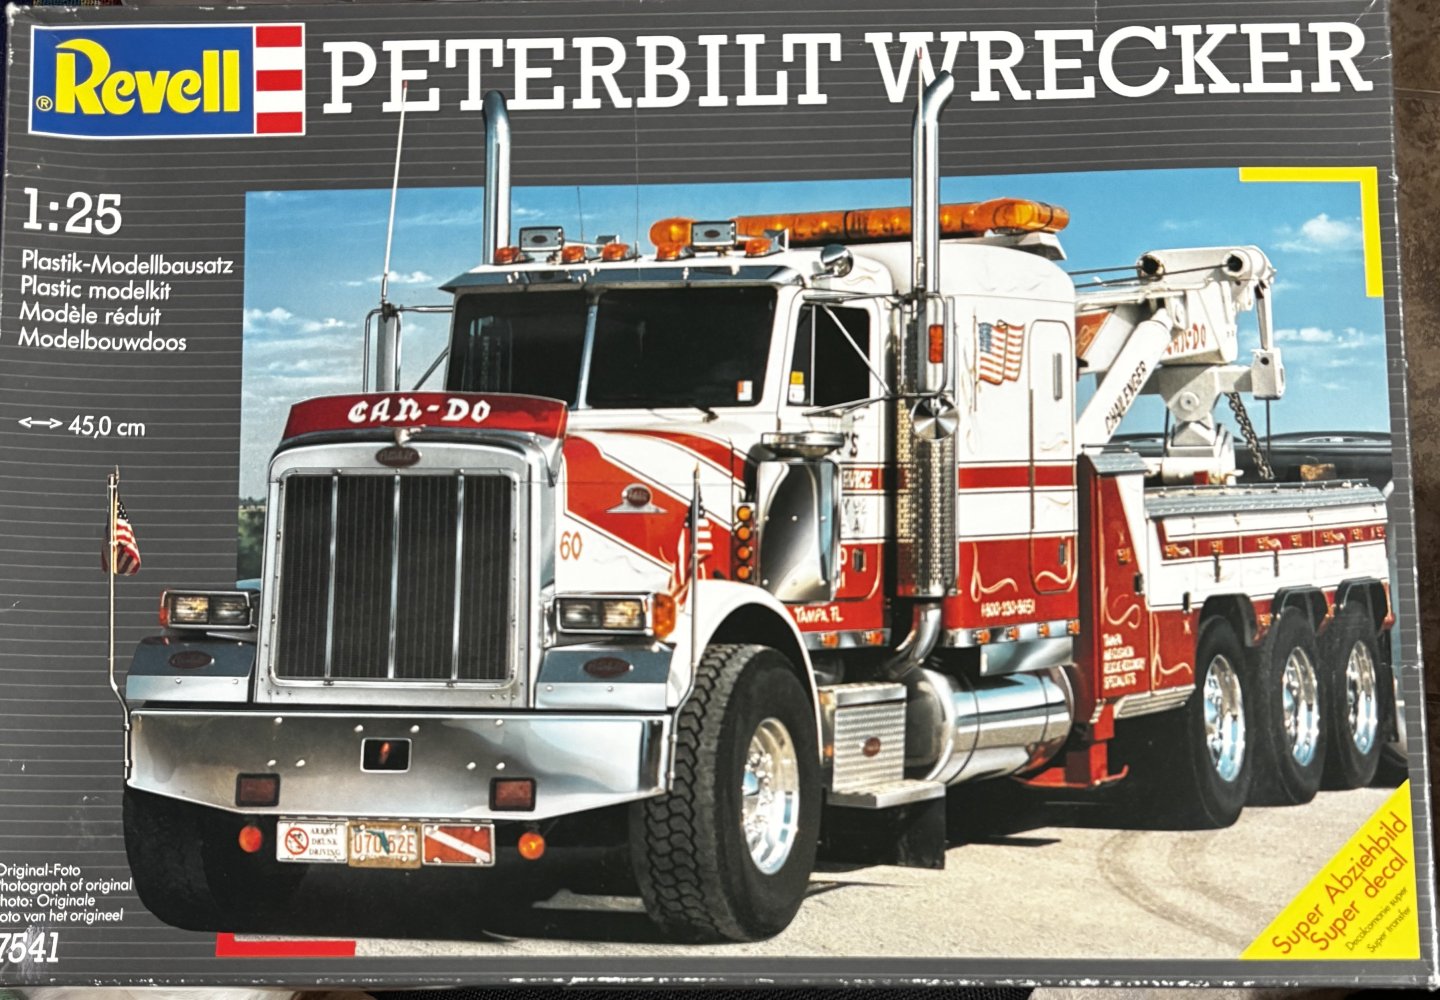
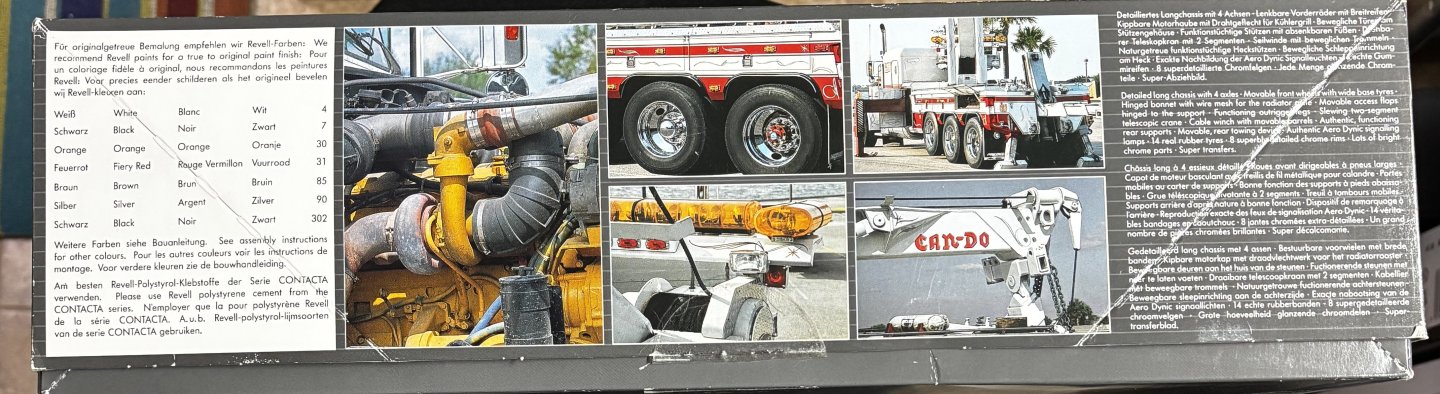
-
White Freightliner DD by CDW - AMT - 1:25 Scale - PLASTIC
CDW replied to CDW's topic in Non-ship/categorised builds
An update on progress. Lots left to do. I need a larger garage. 😀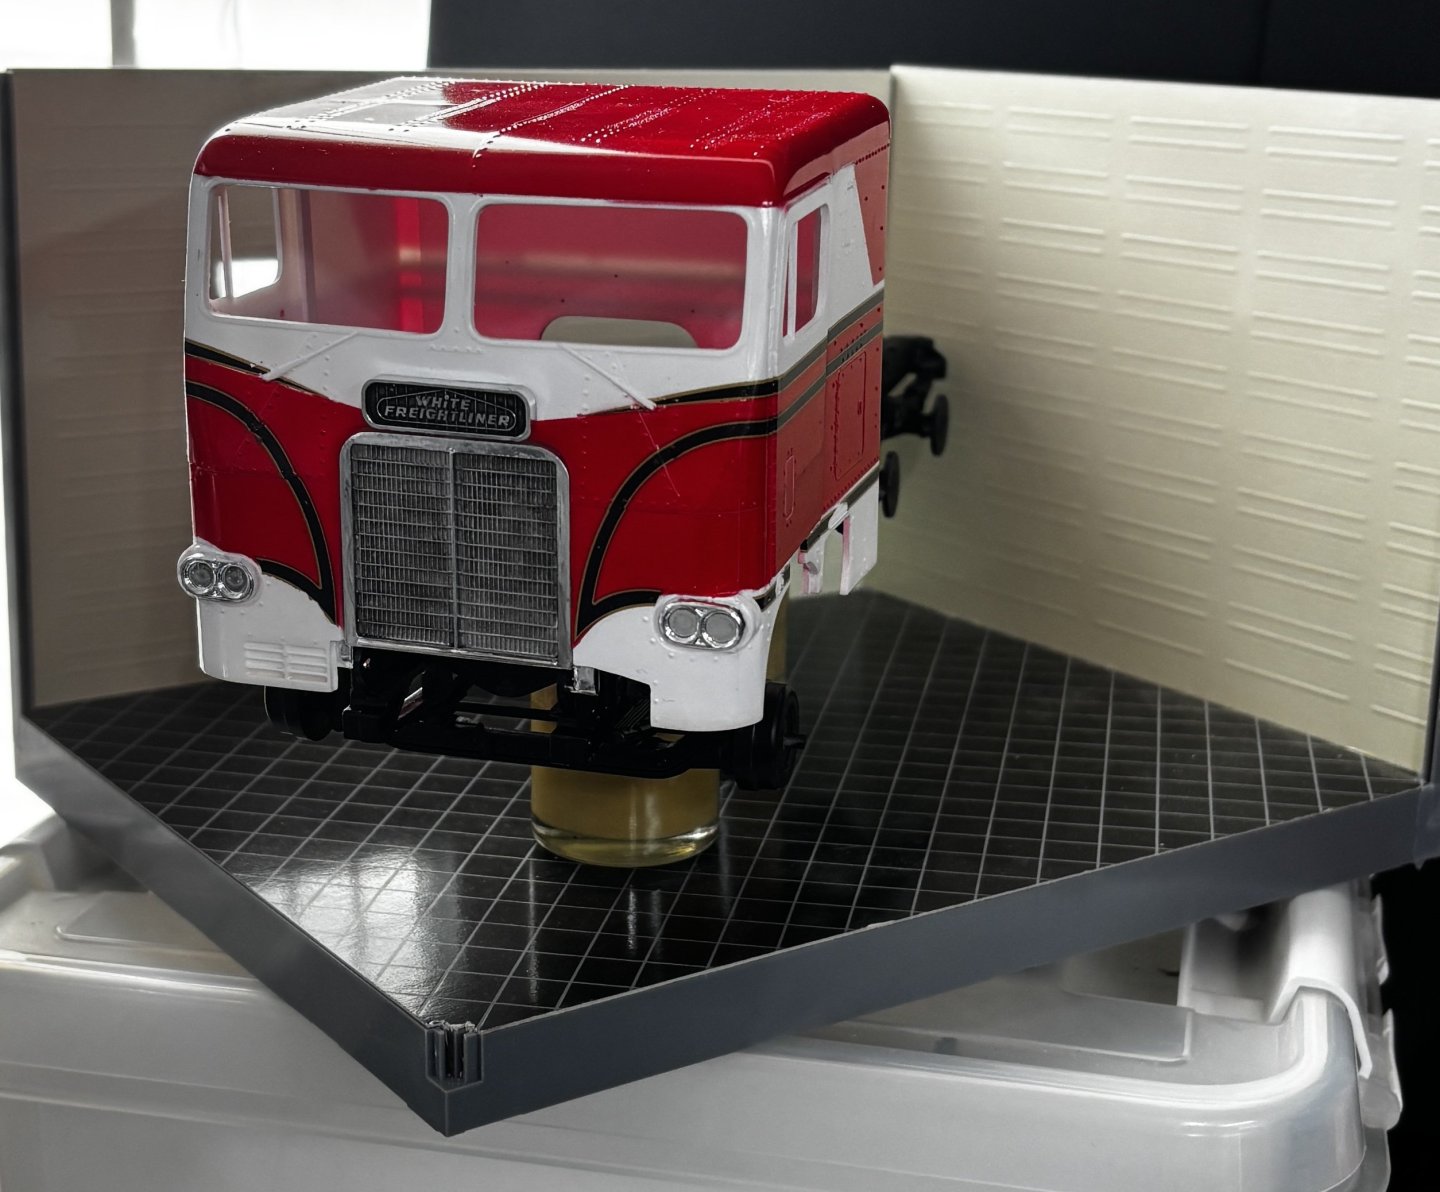
- 30 replies
-
- 10
-