HOLIDAY DONATION DRIVE - SUPPORT MSW - DO YOUR PART TO KEEP THIS GREAT FORUM GOING! (Only 44 donations so far out of 49,000 members - C'mon guys!)
×

CDW
-
Posts
7,747 -
Joined
-
Last visited
Content Type
Profiles
Forums
Gallery
Events
Everything posted by CDW
-
 Following
 -
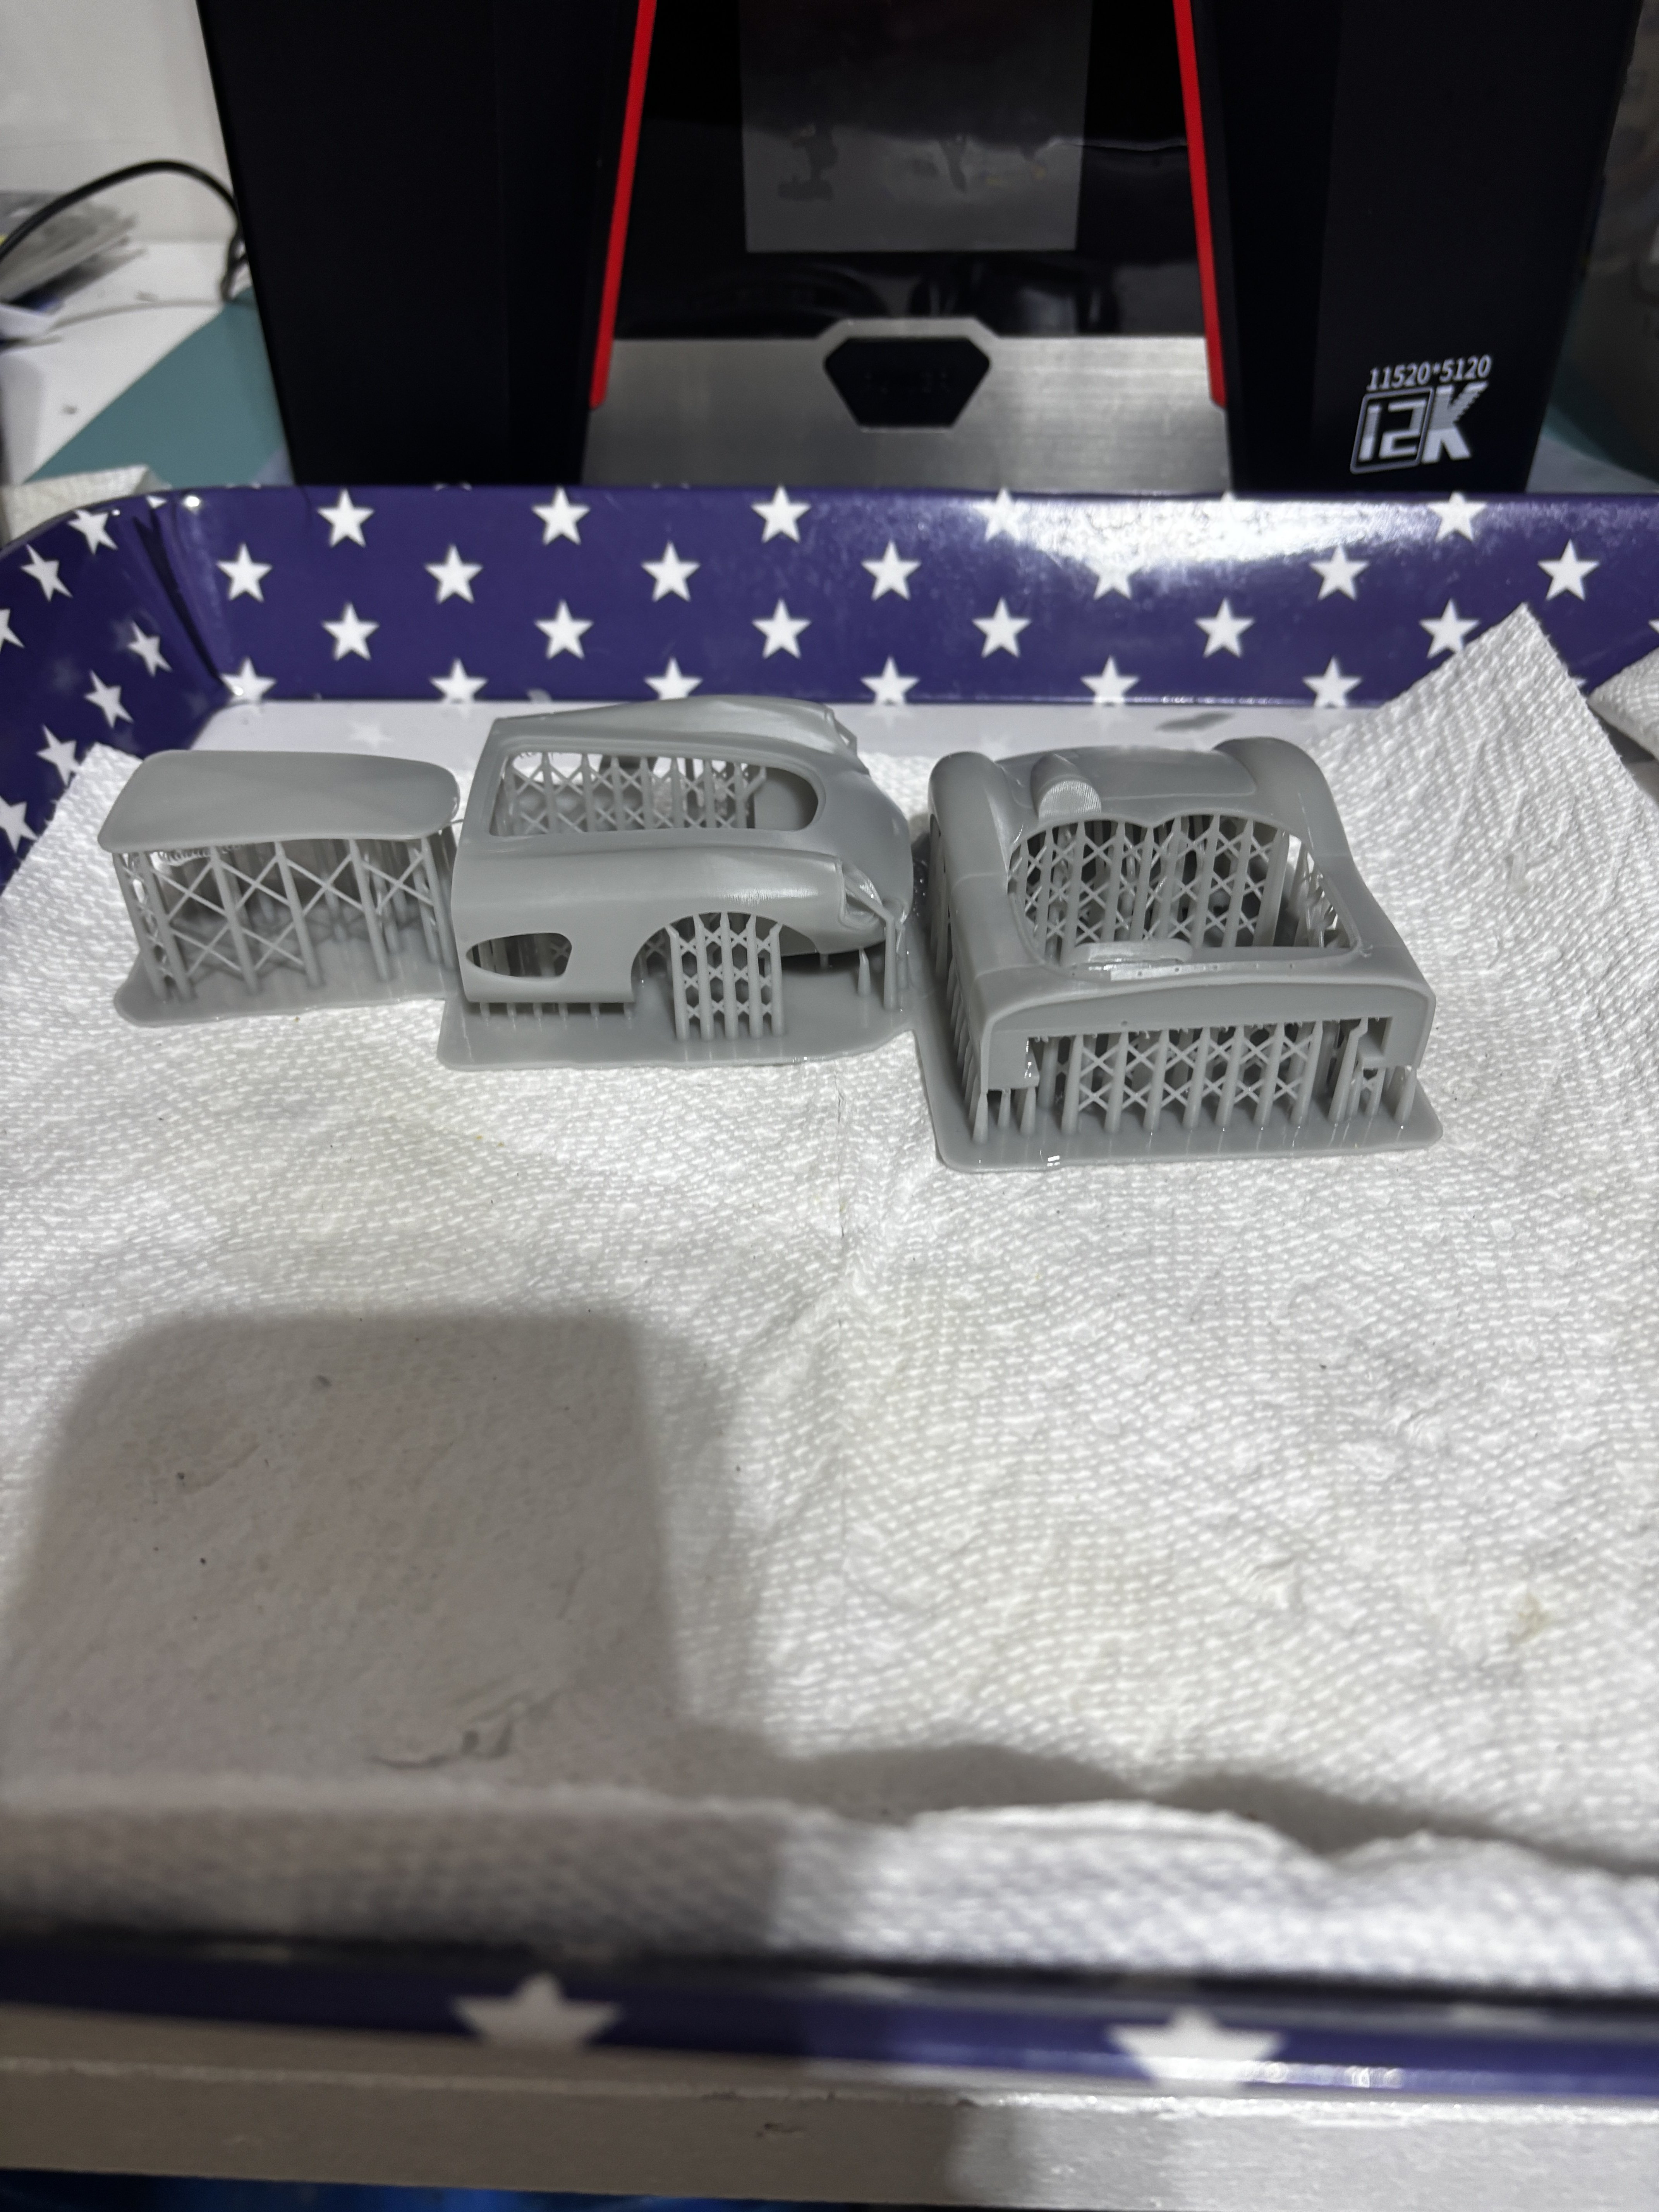
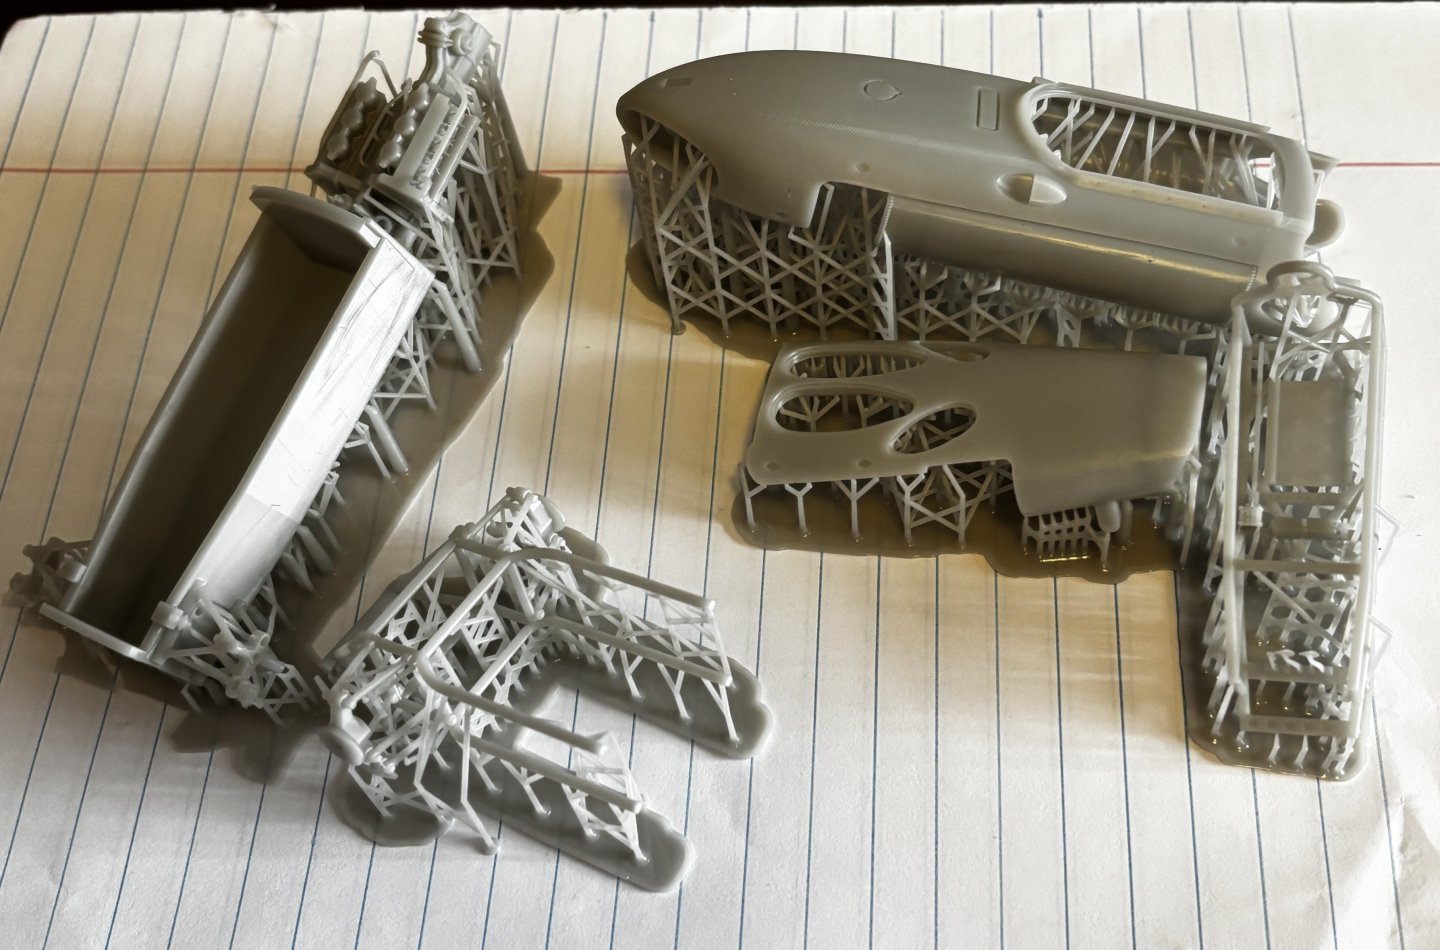
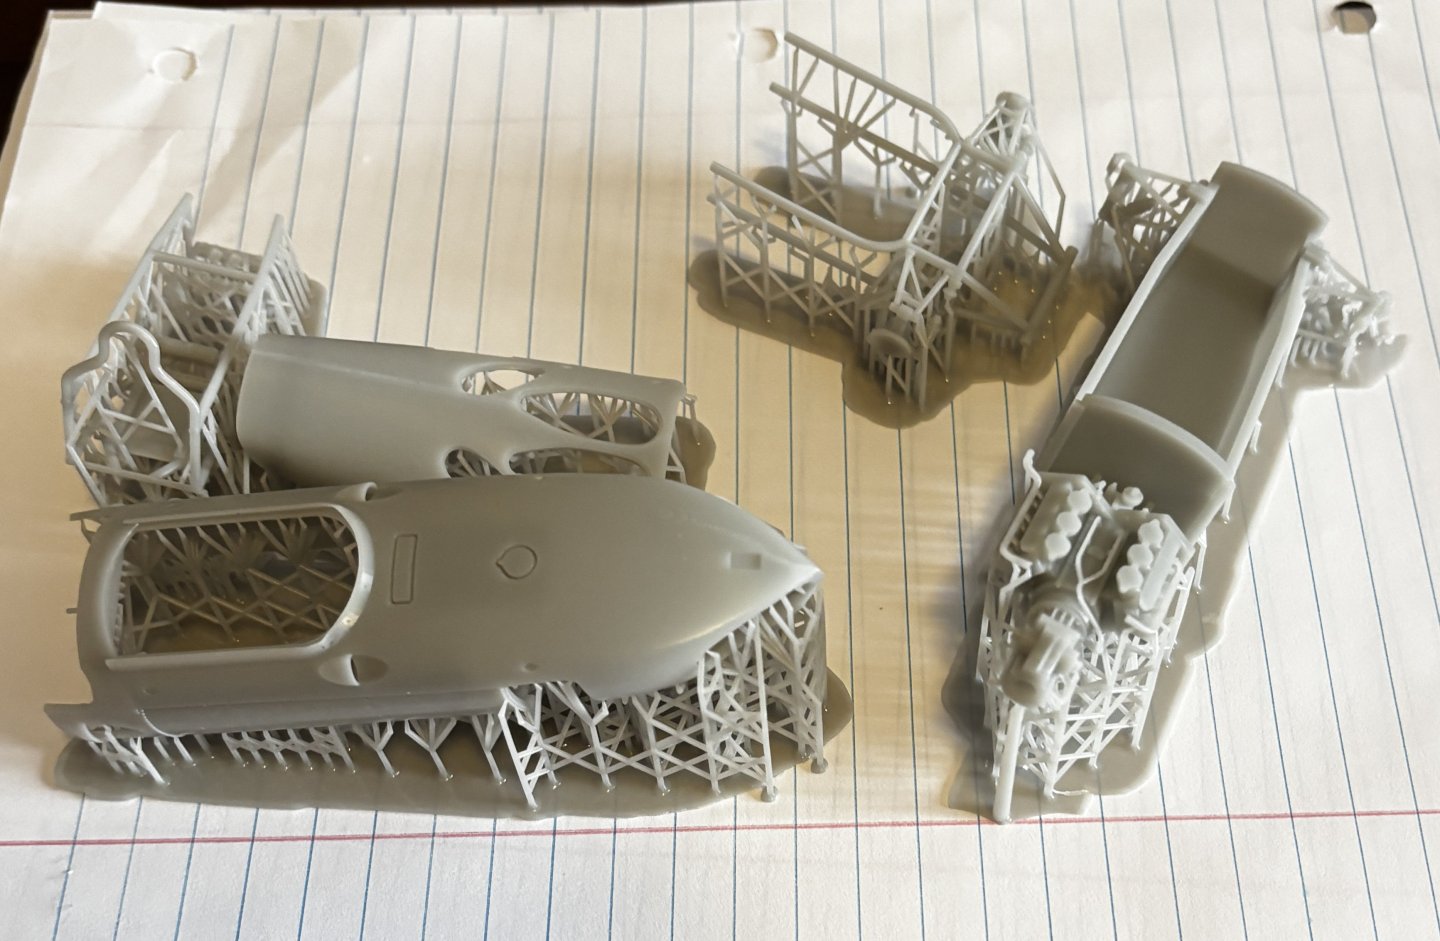
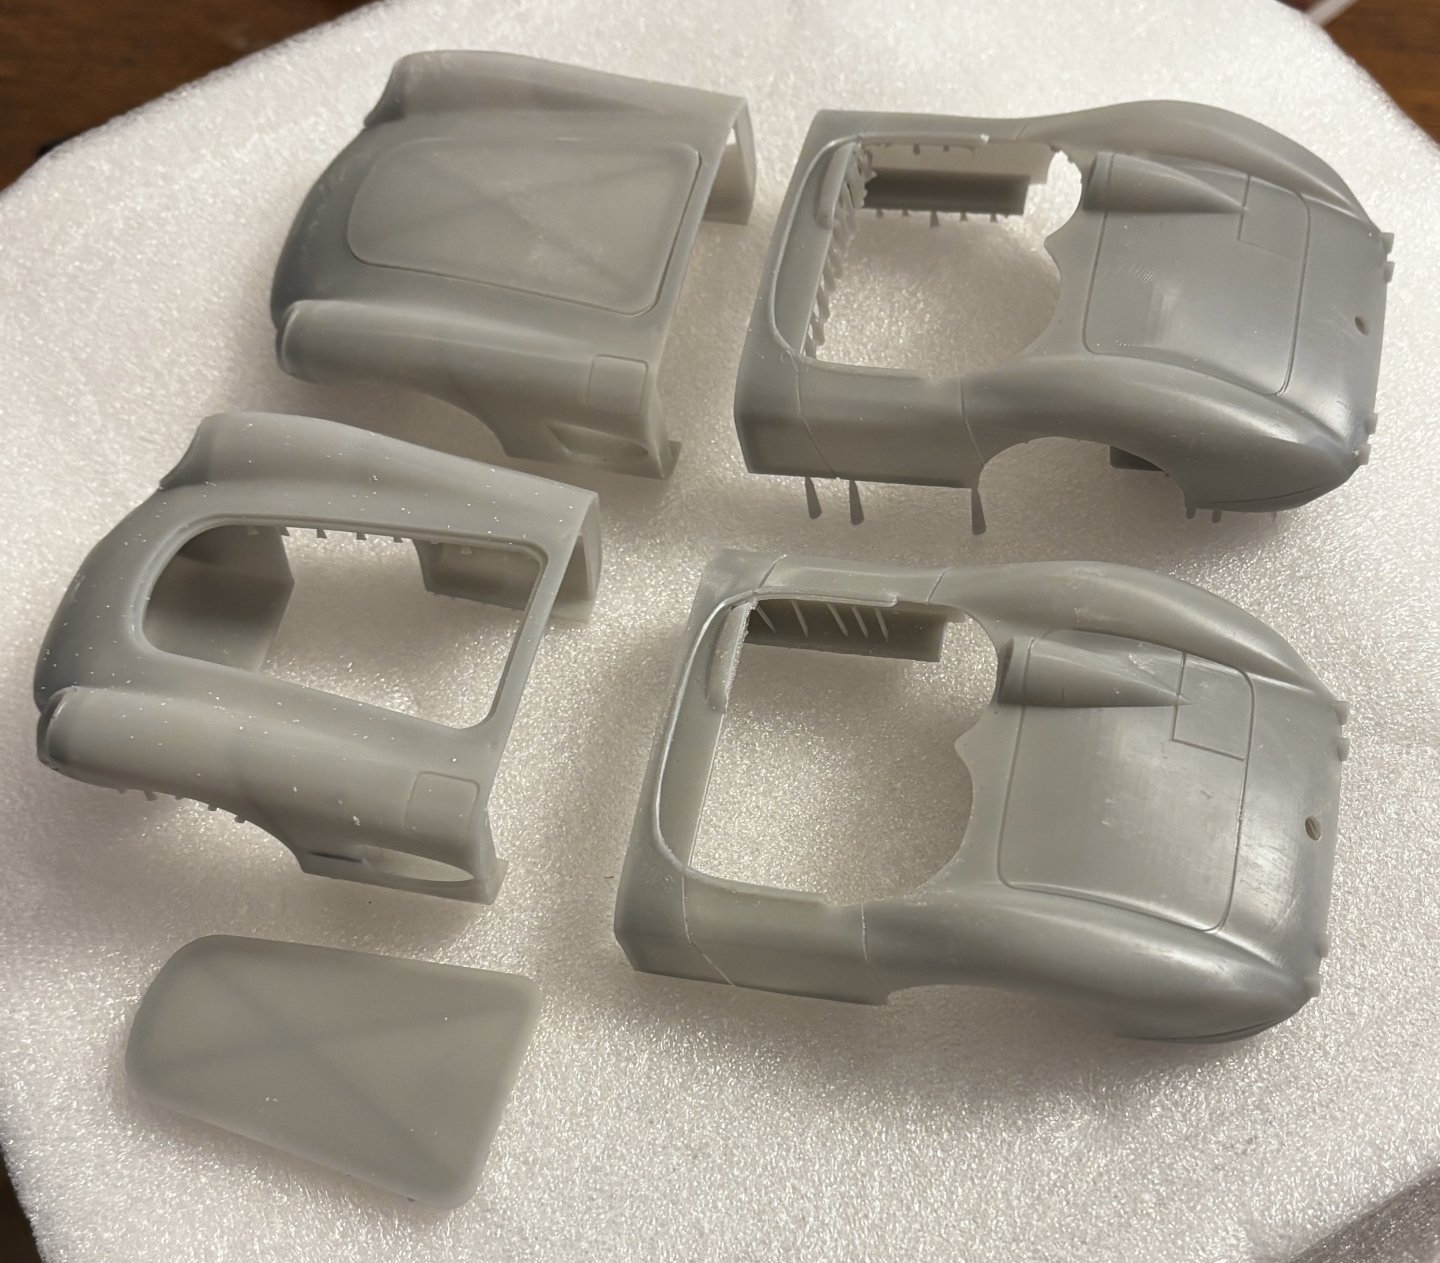
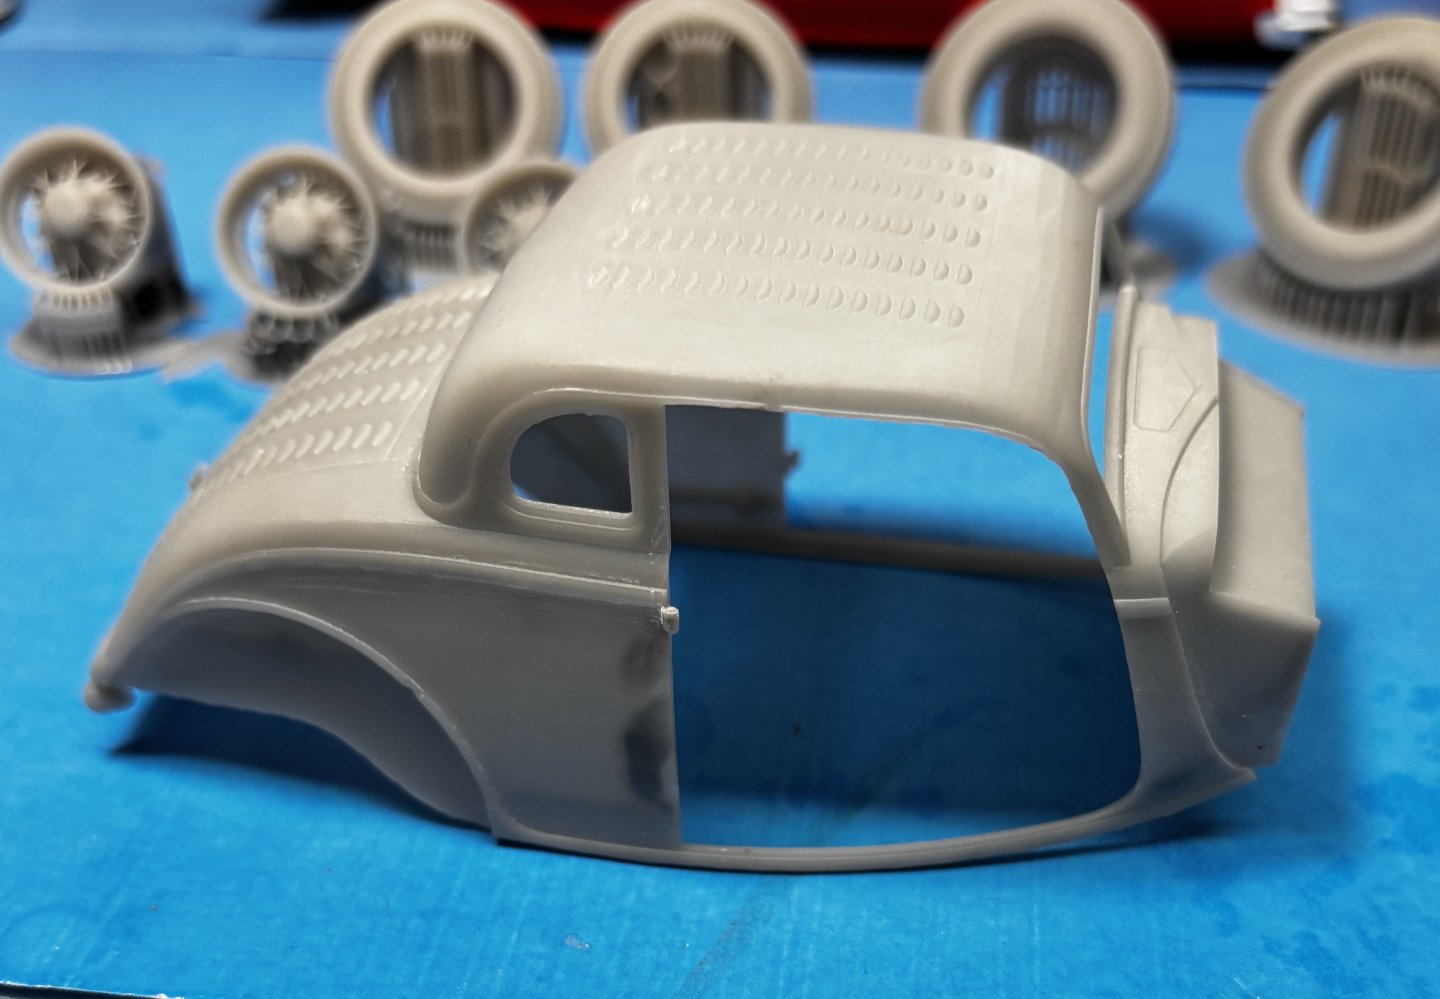
The resin printed bodies need sanding and priming for sure. Being my first print, none of my settings were adjusted, I just ran it as-is which caused issues as well. There is no substitute for trial and error. I am beginning to learn what adjustments to make at a minimum level now and my current prints are turning out much better. Not quite as good as they can or will be with more practice, but better than my first attempts. Here is one that finished printing last night. Just took it off the build plate this morning. 1:24 Ferrari F156 Sharknose. This is about half of the model. The remainder will be printed later today. I keep adjusting my settings as well as trying different resins. All that is necessary to learn the winning combinations.
-
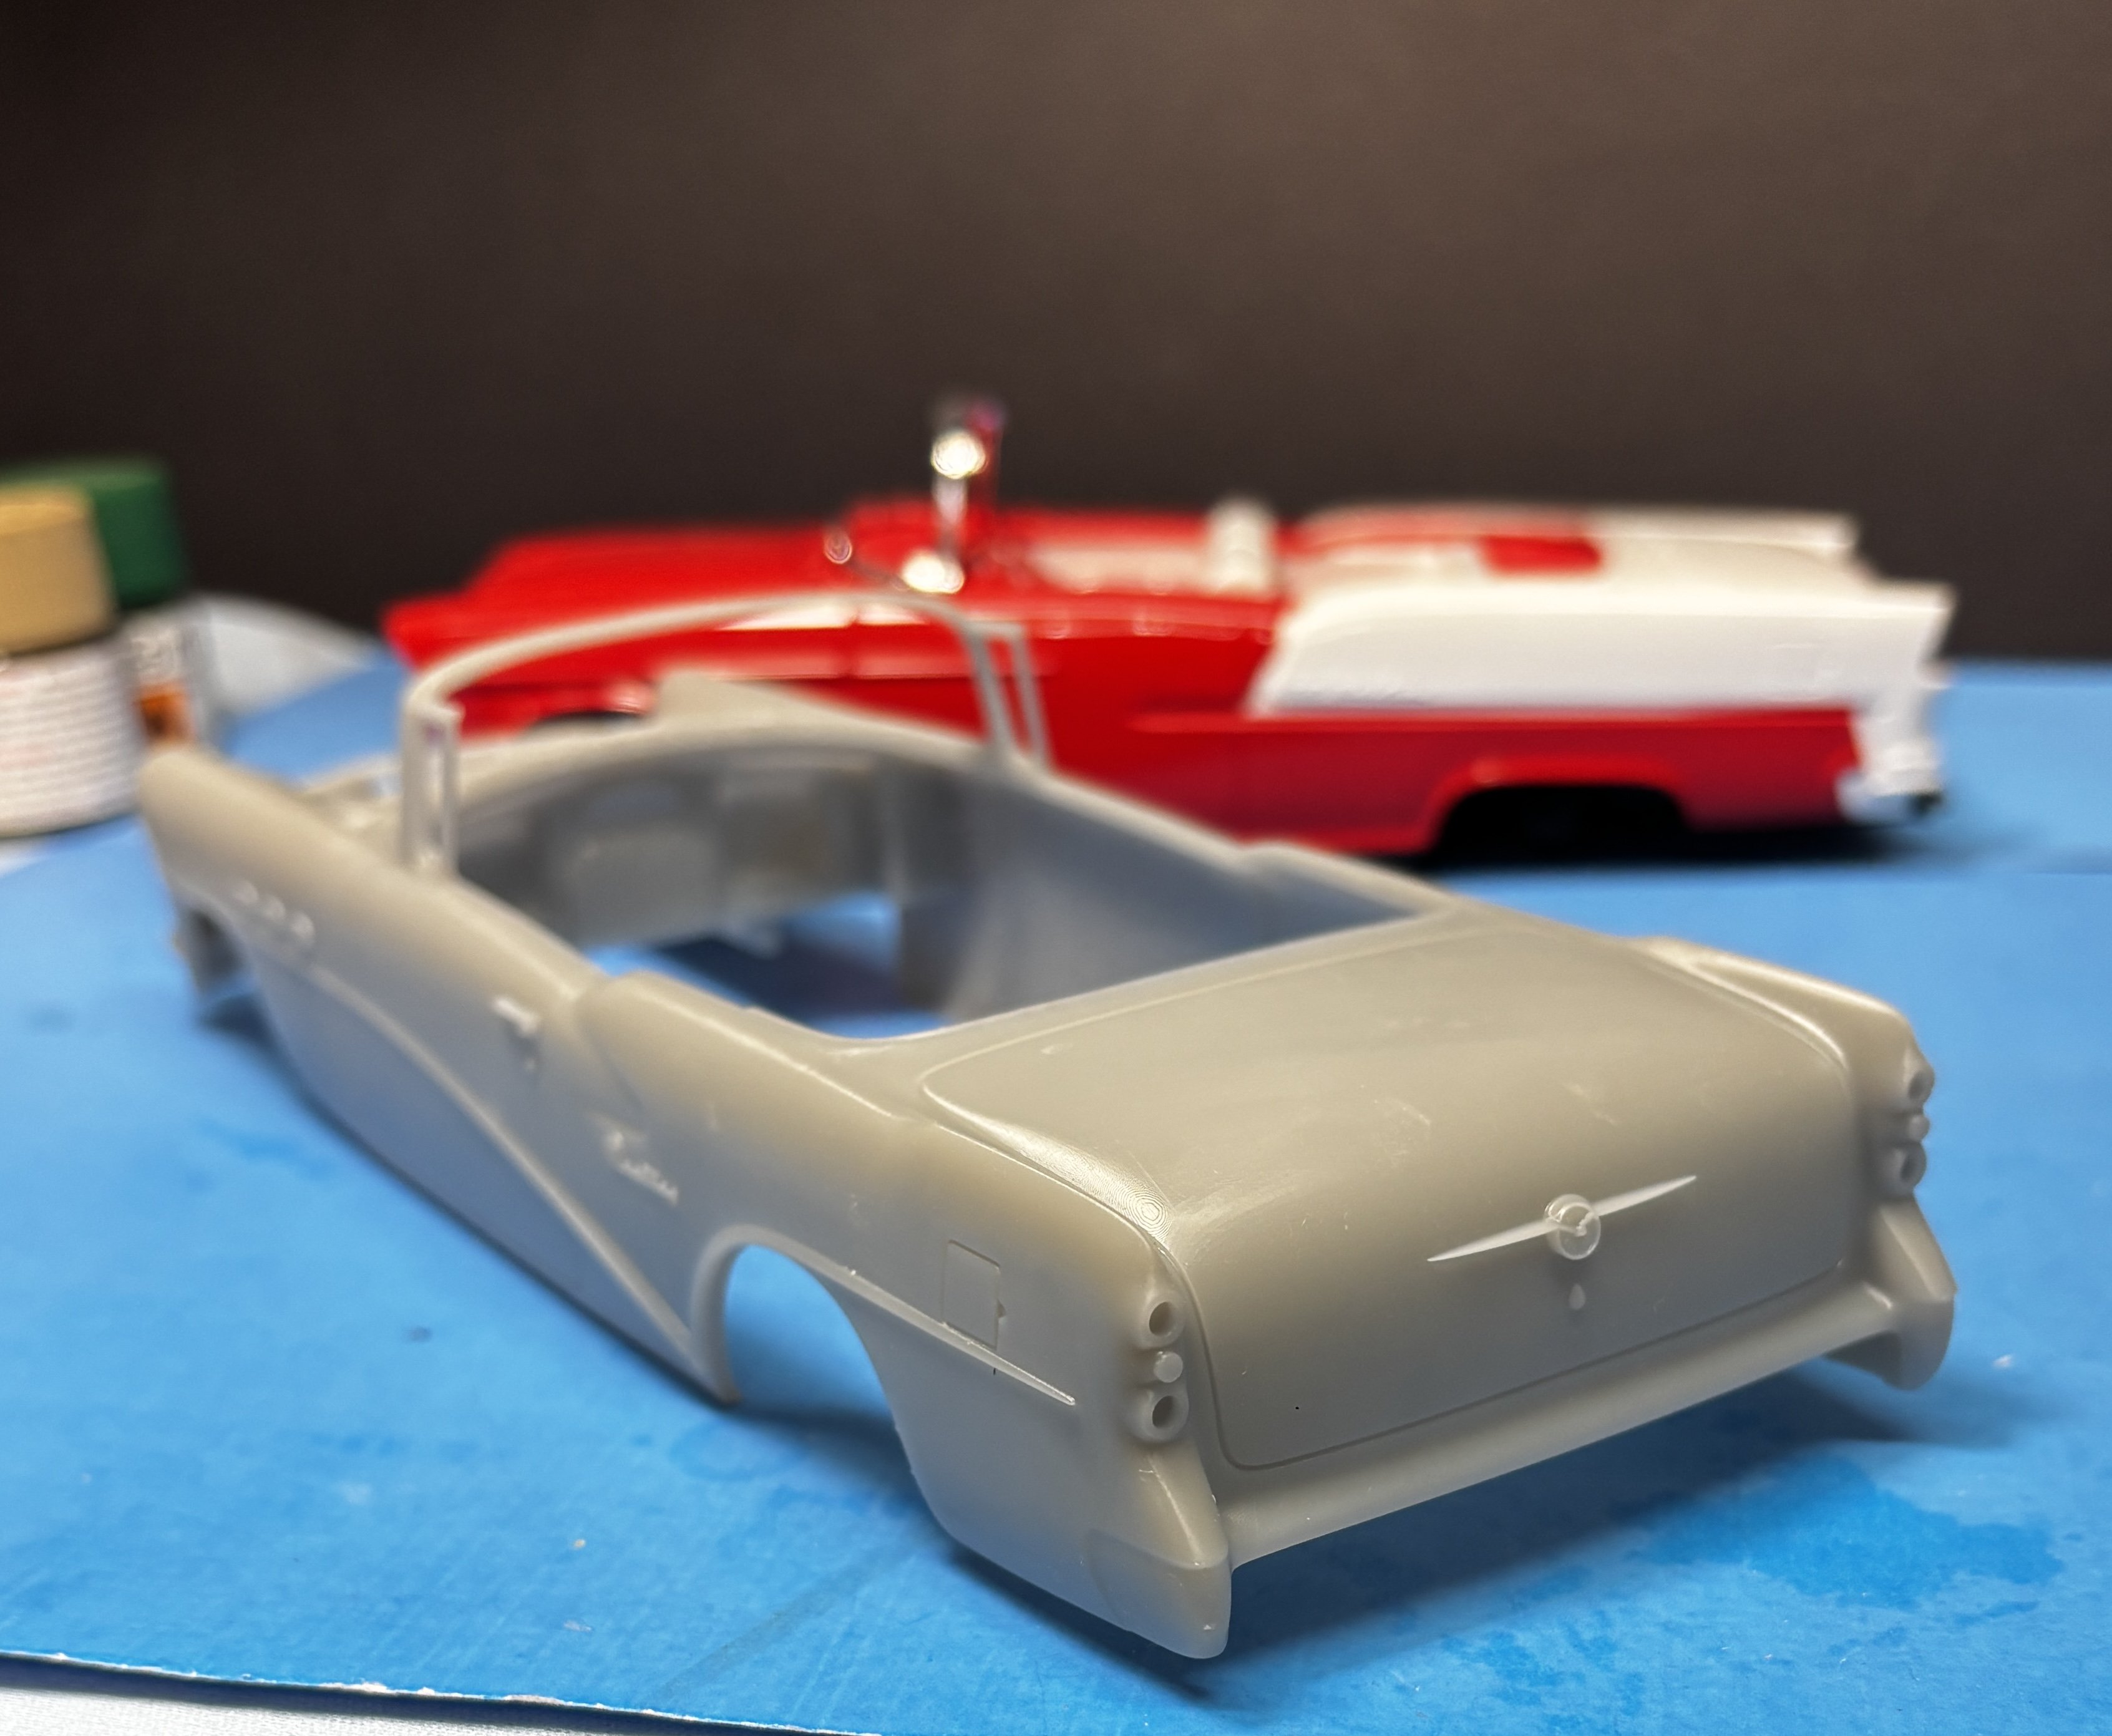
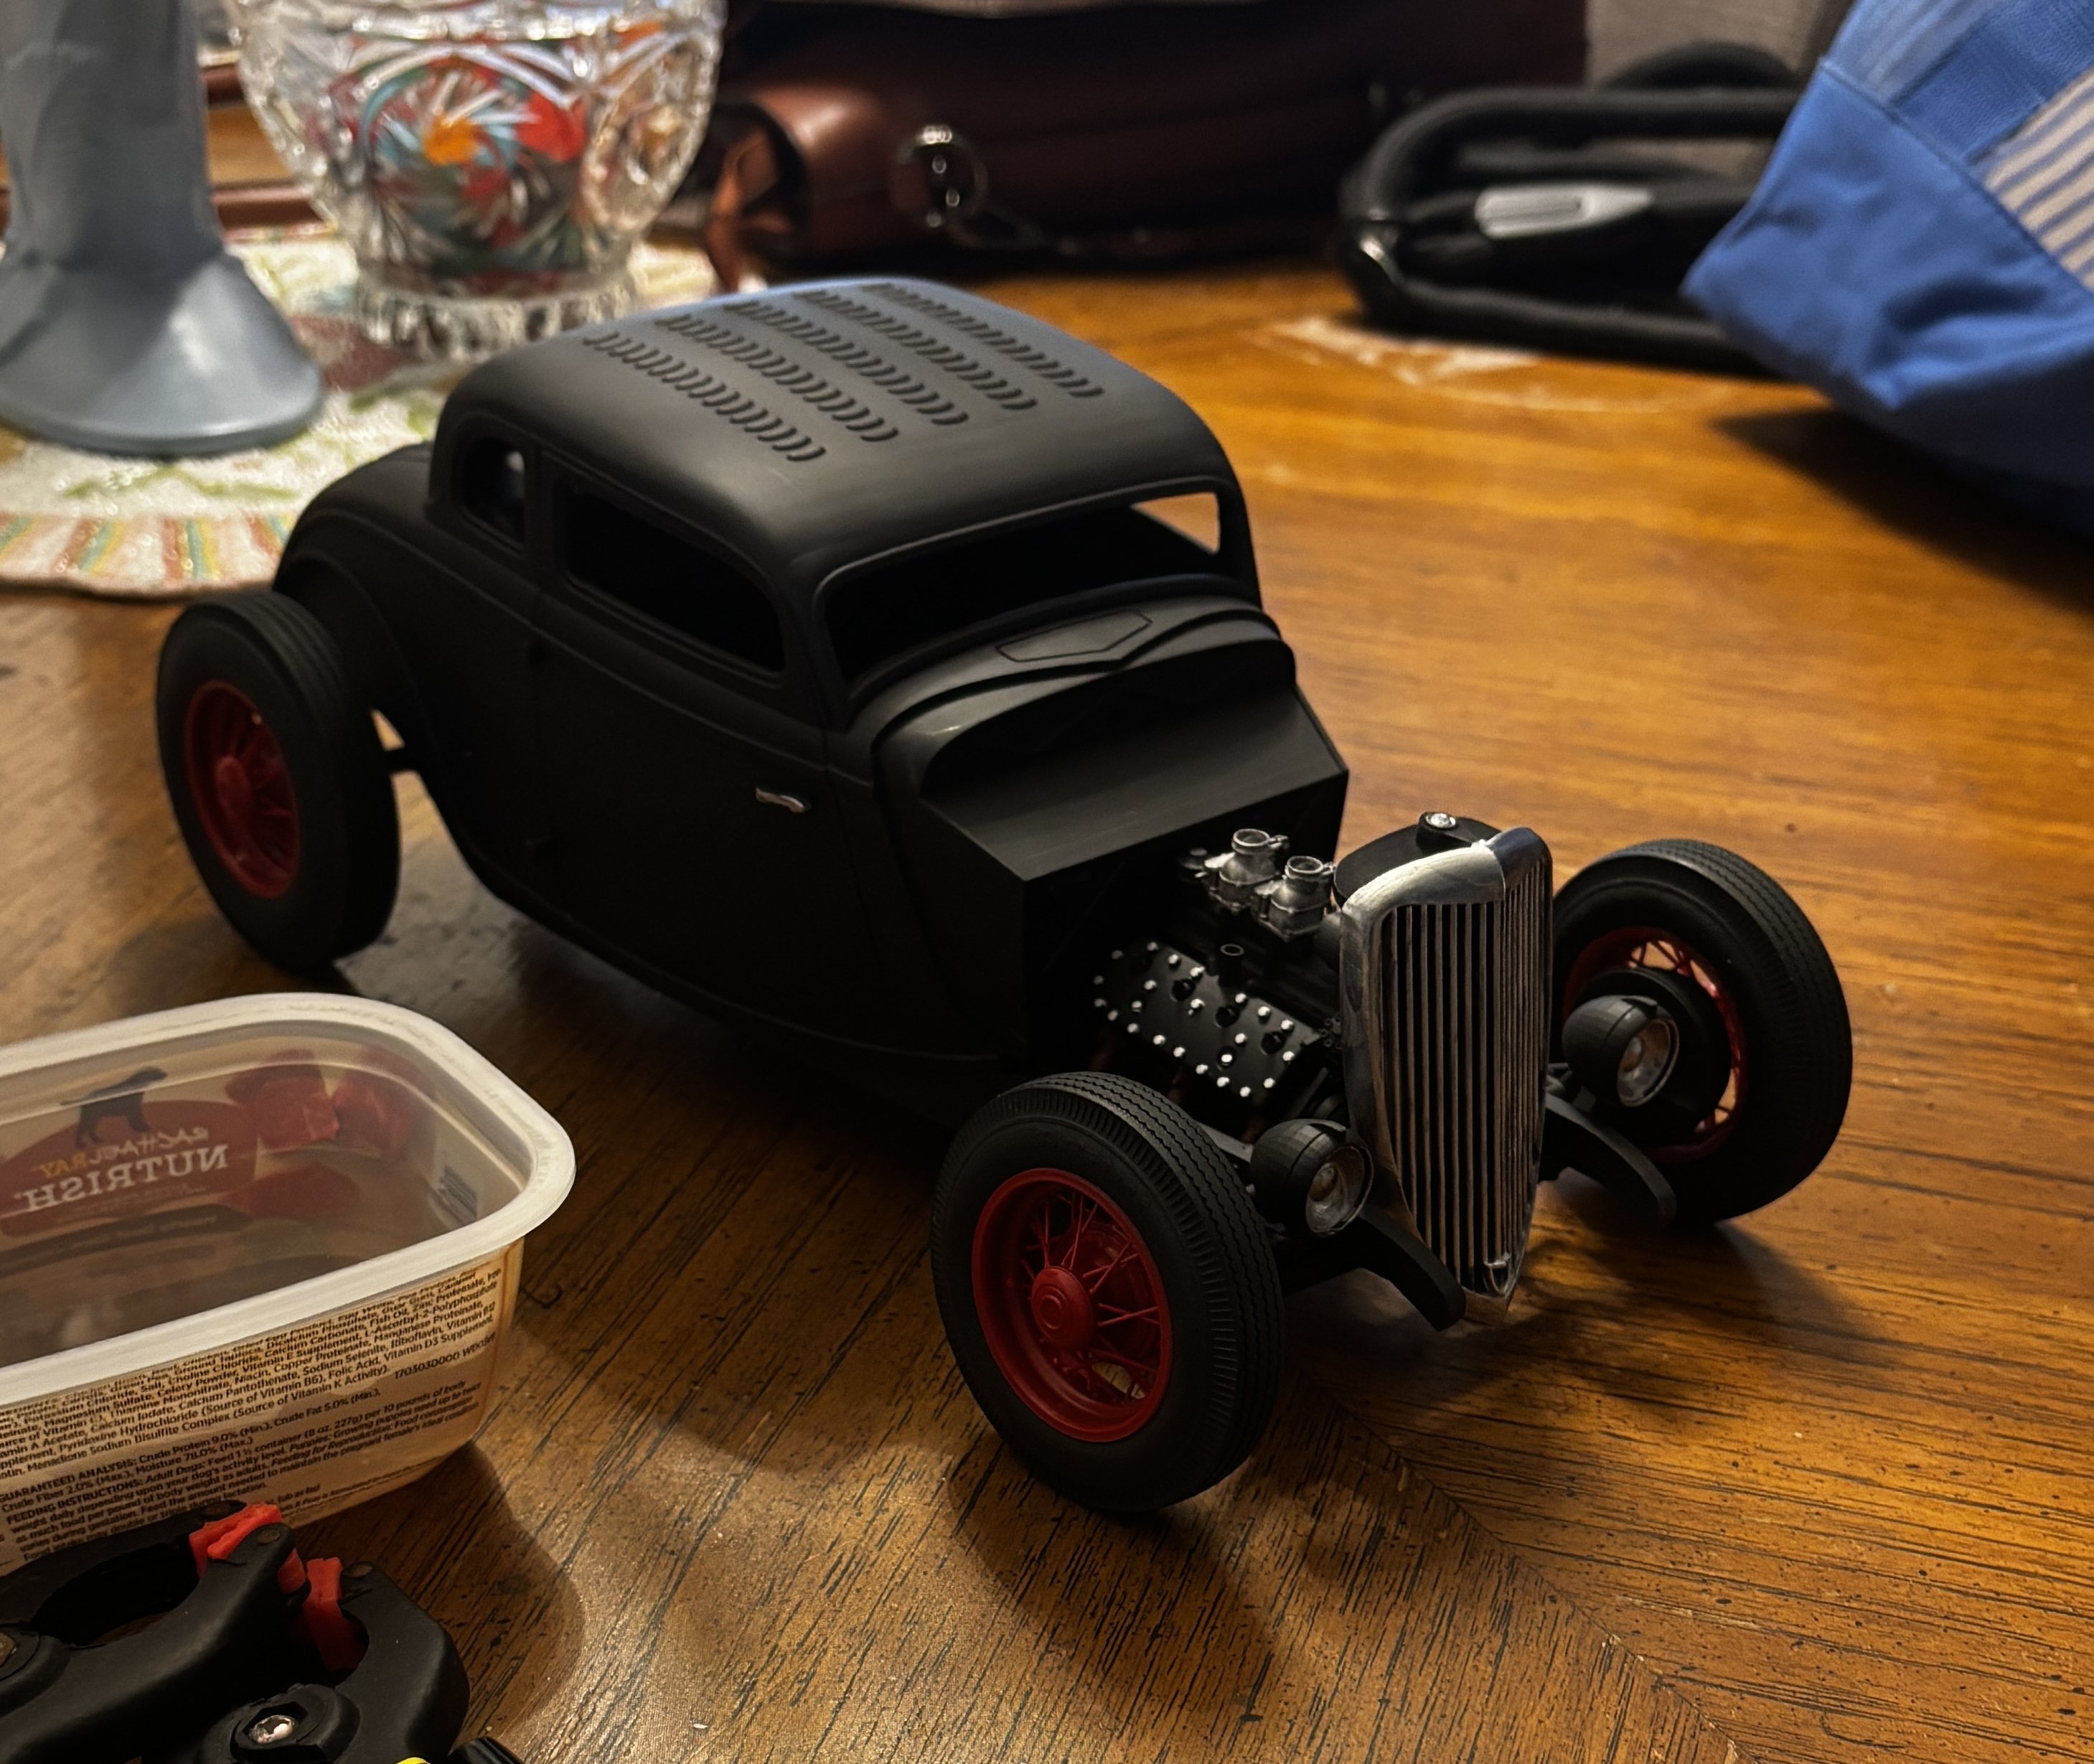
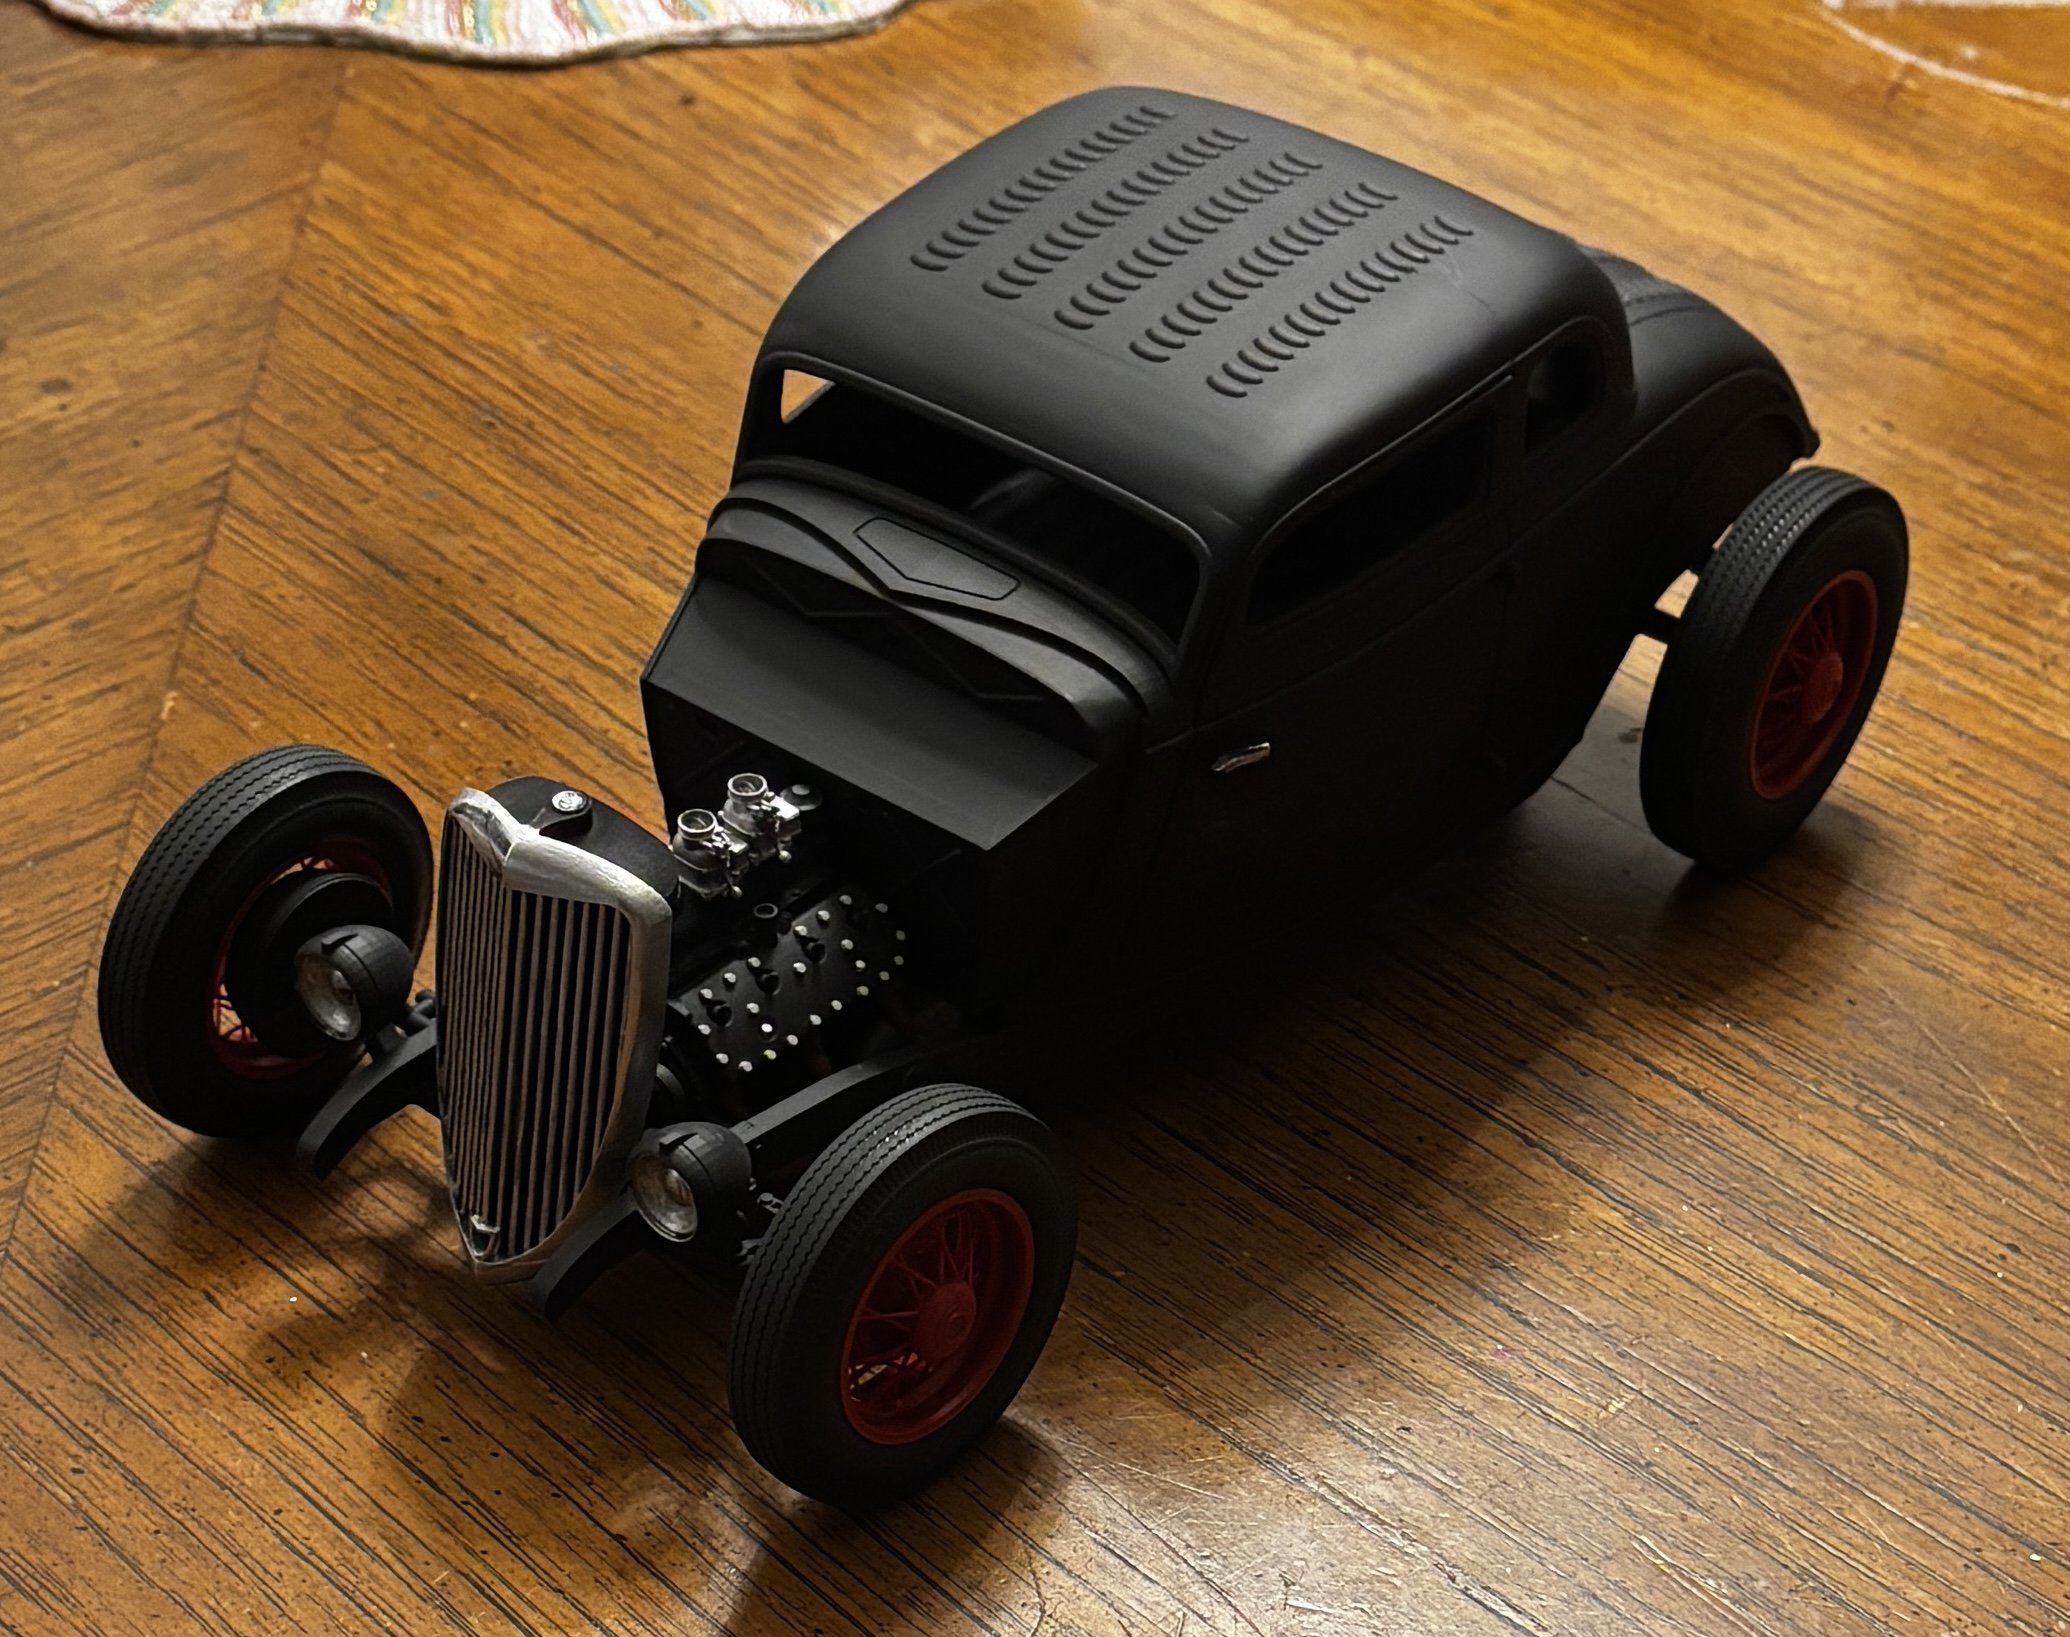
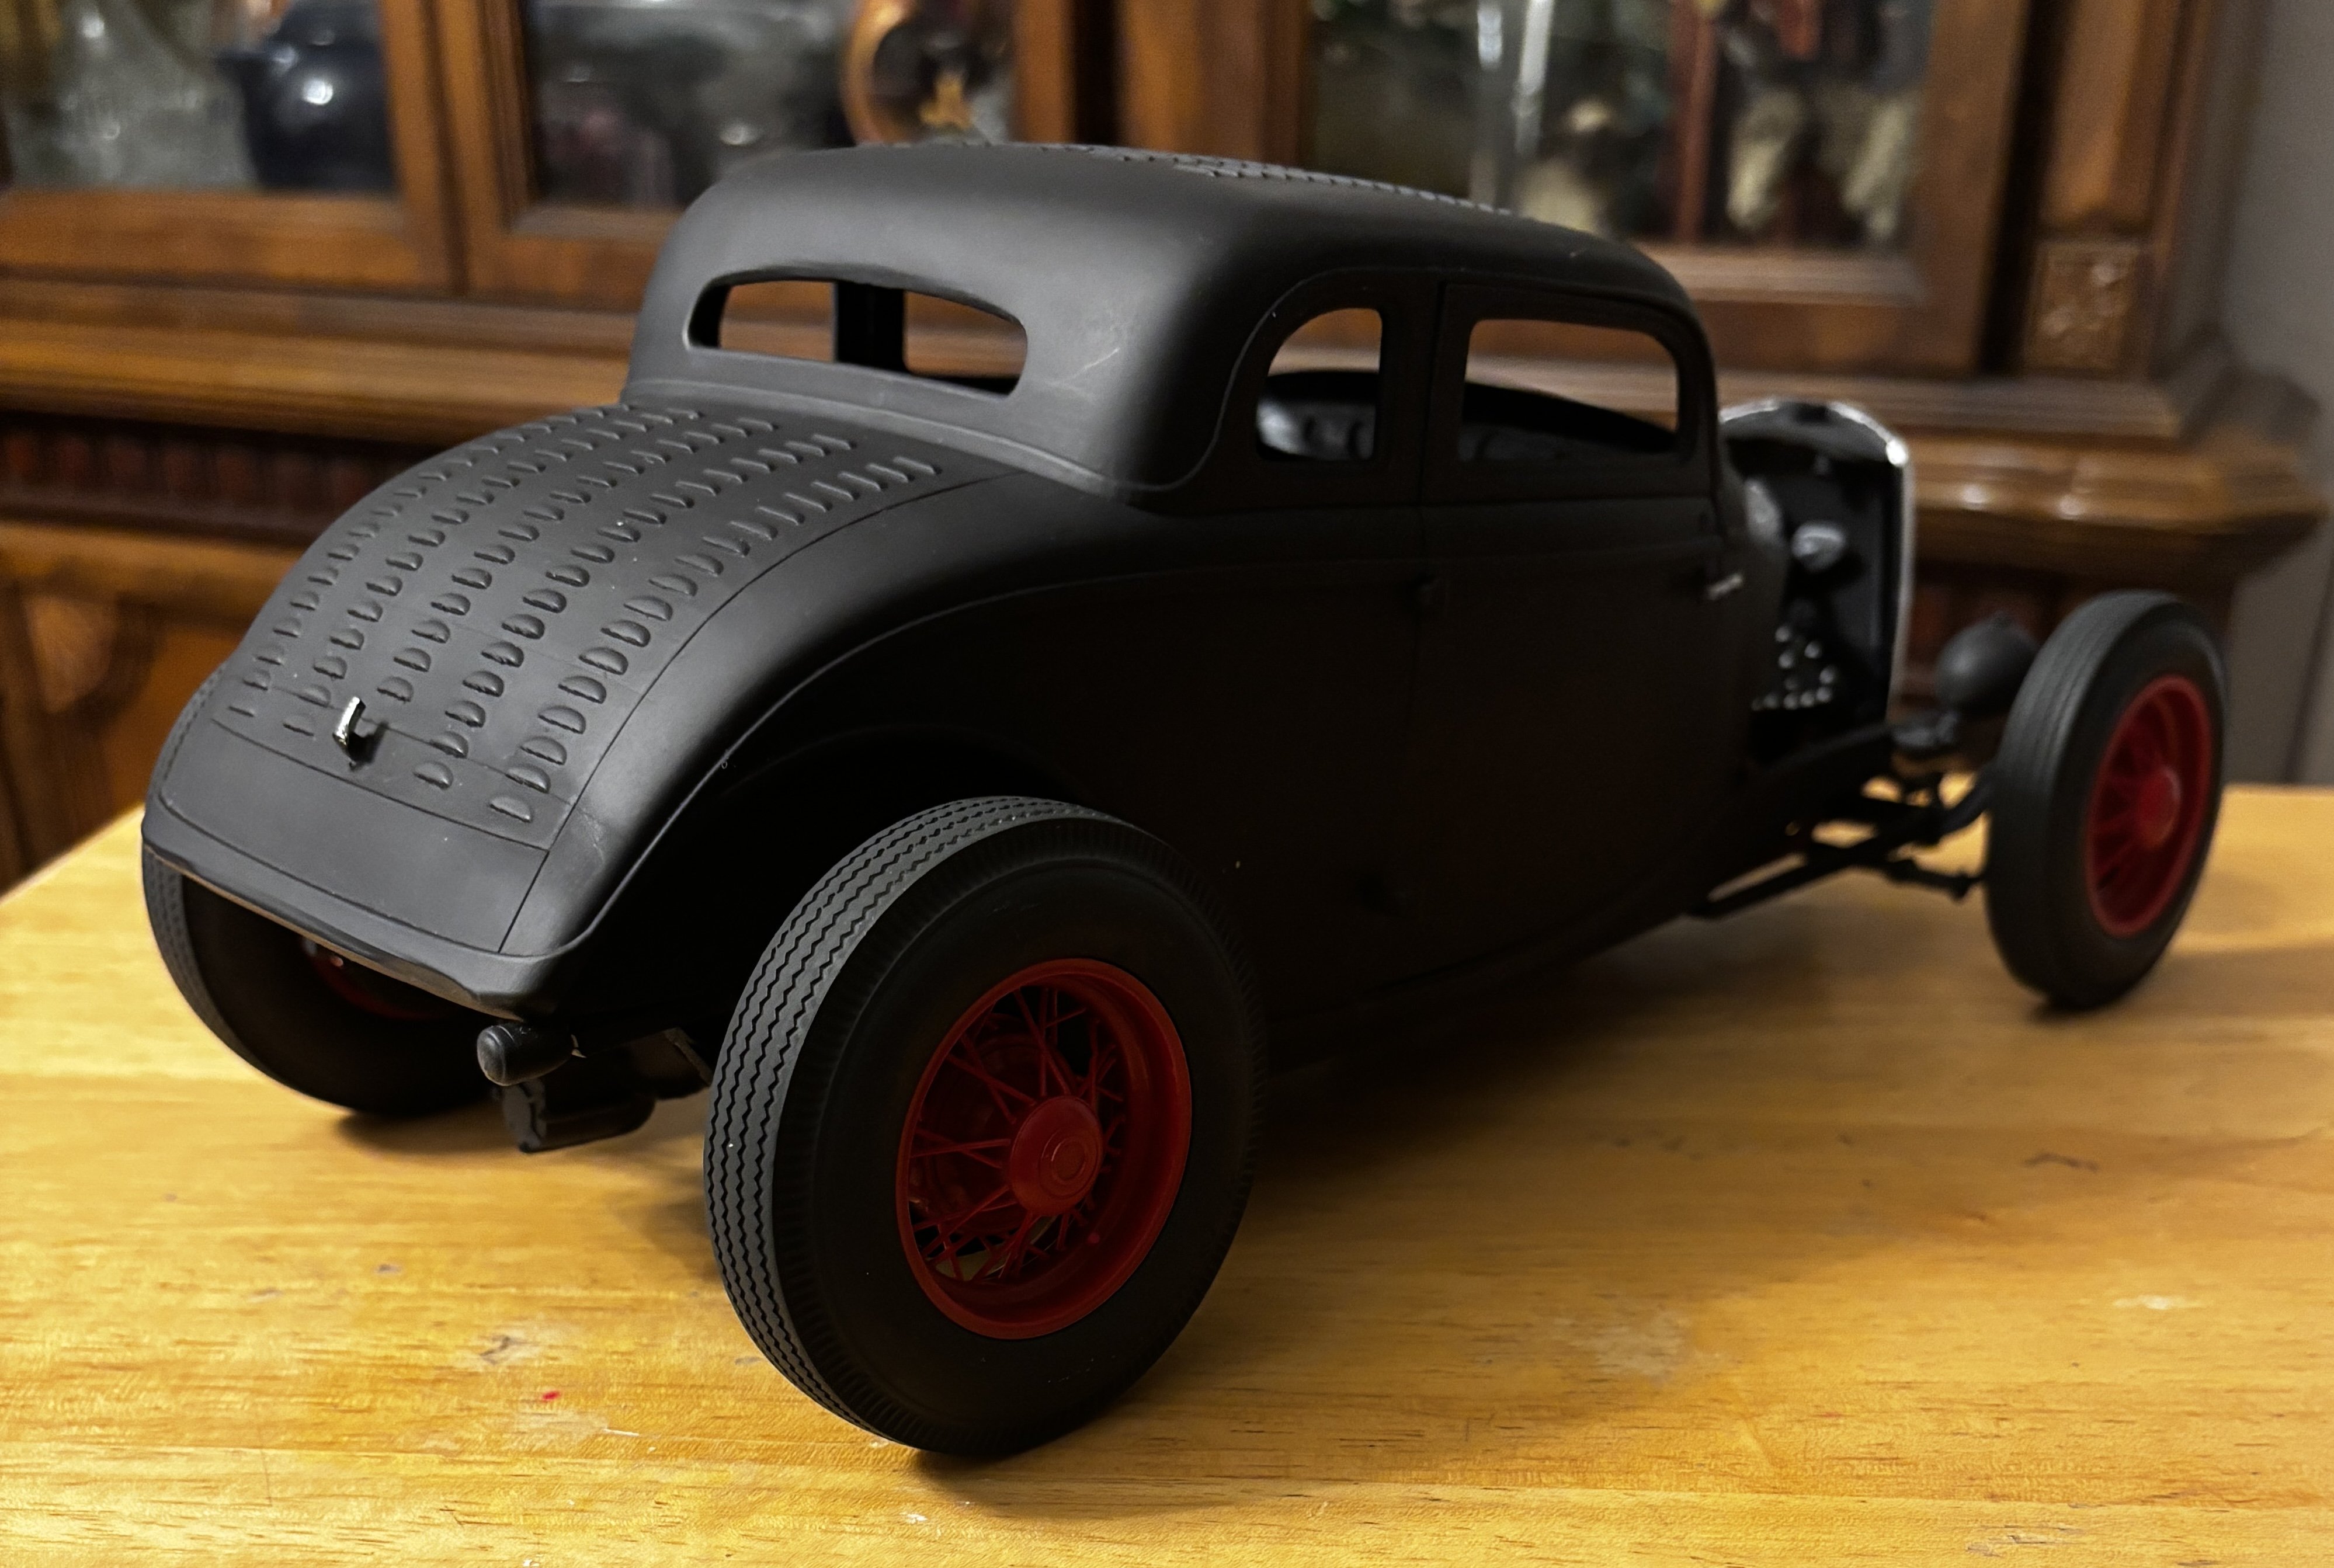
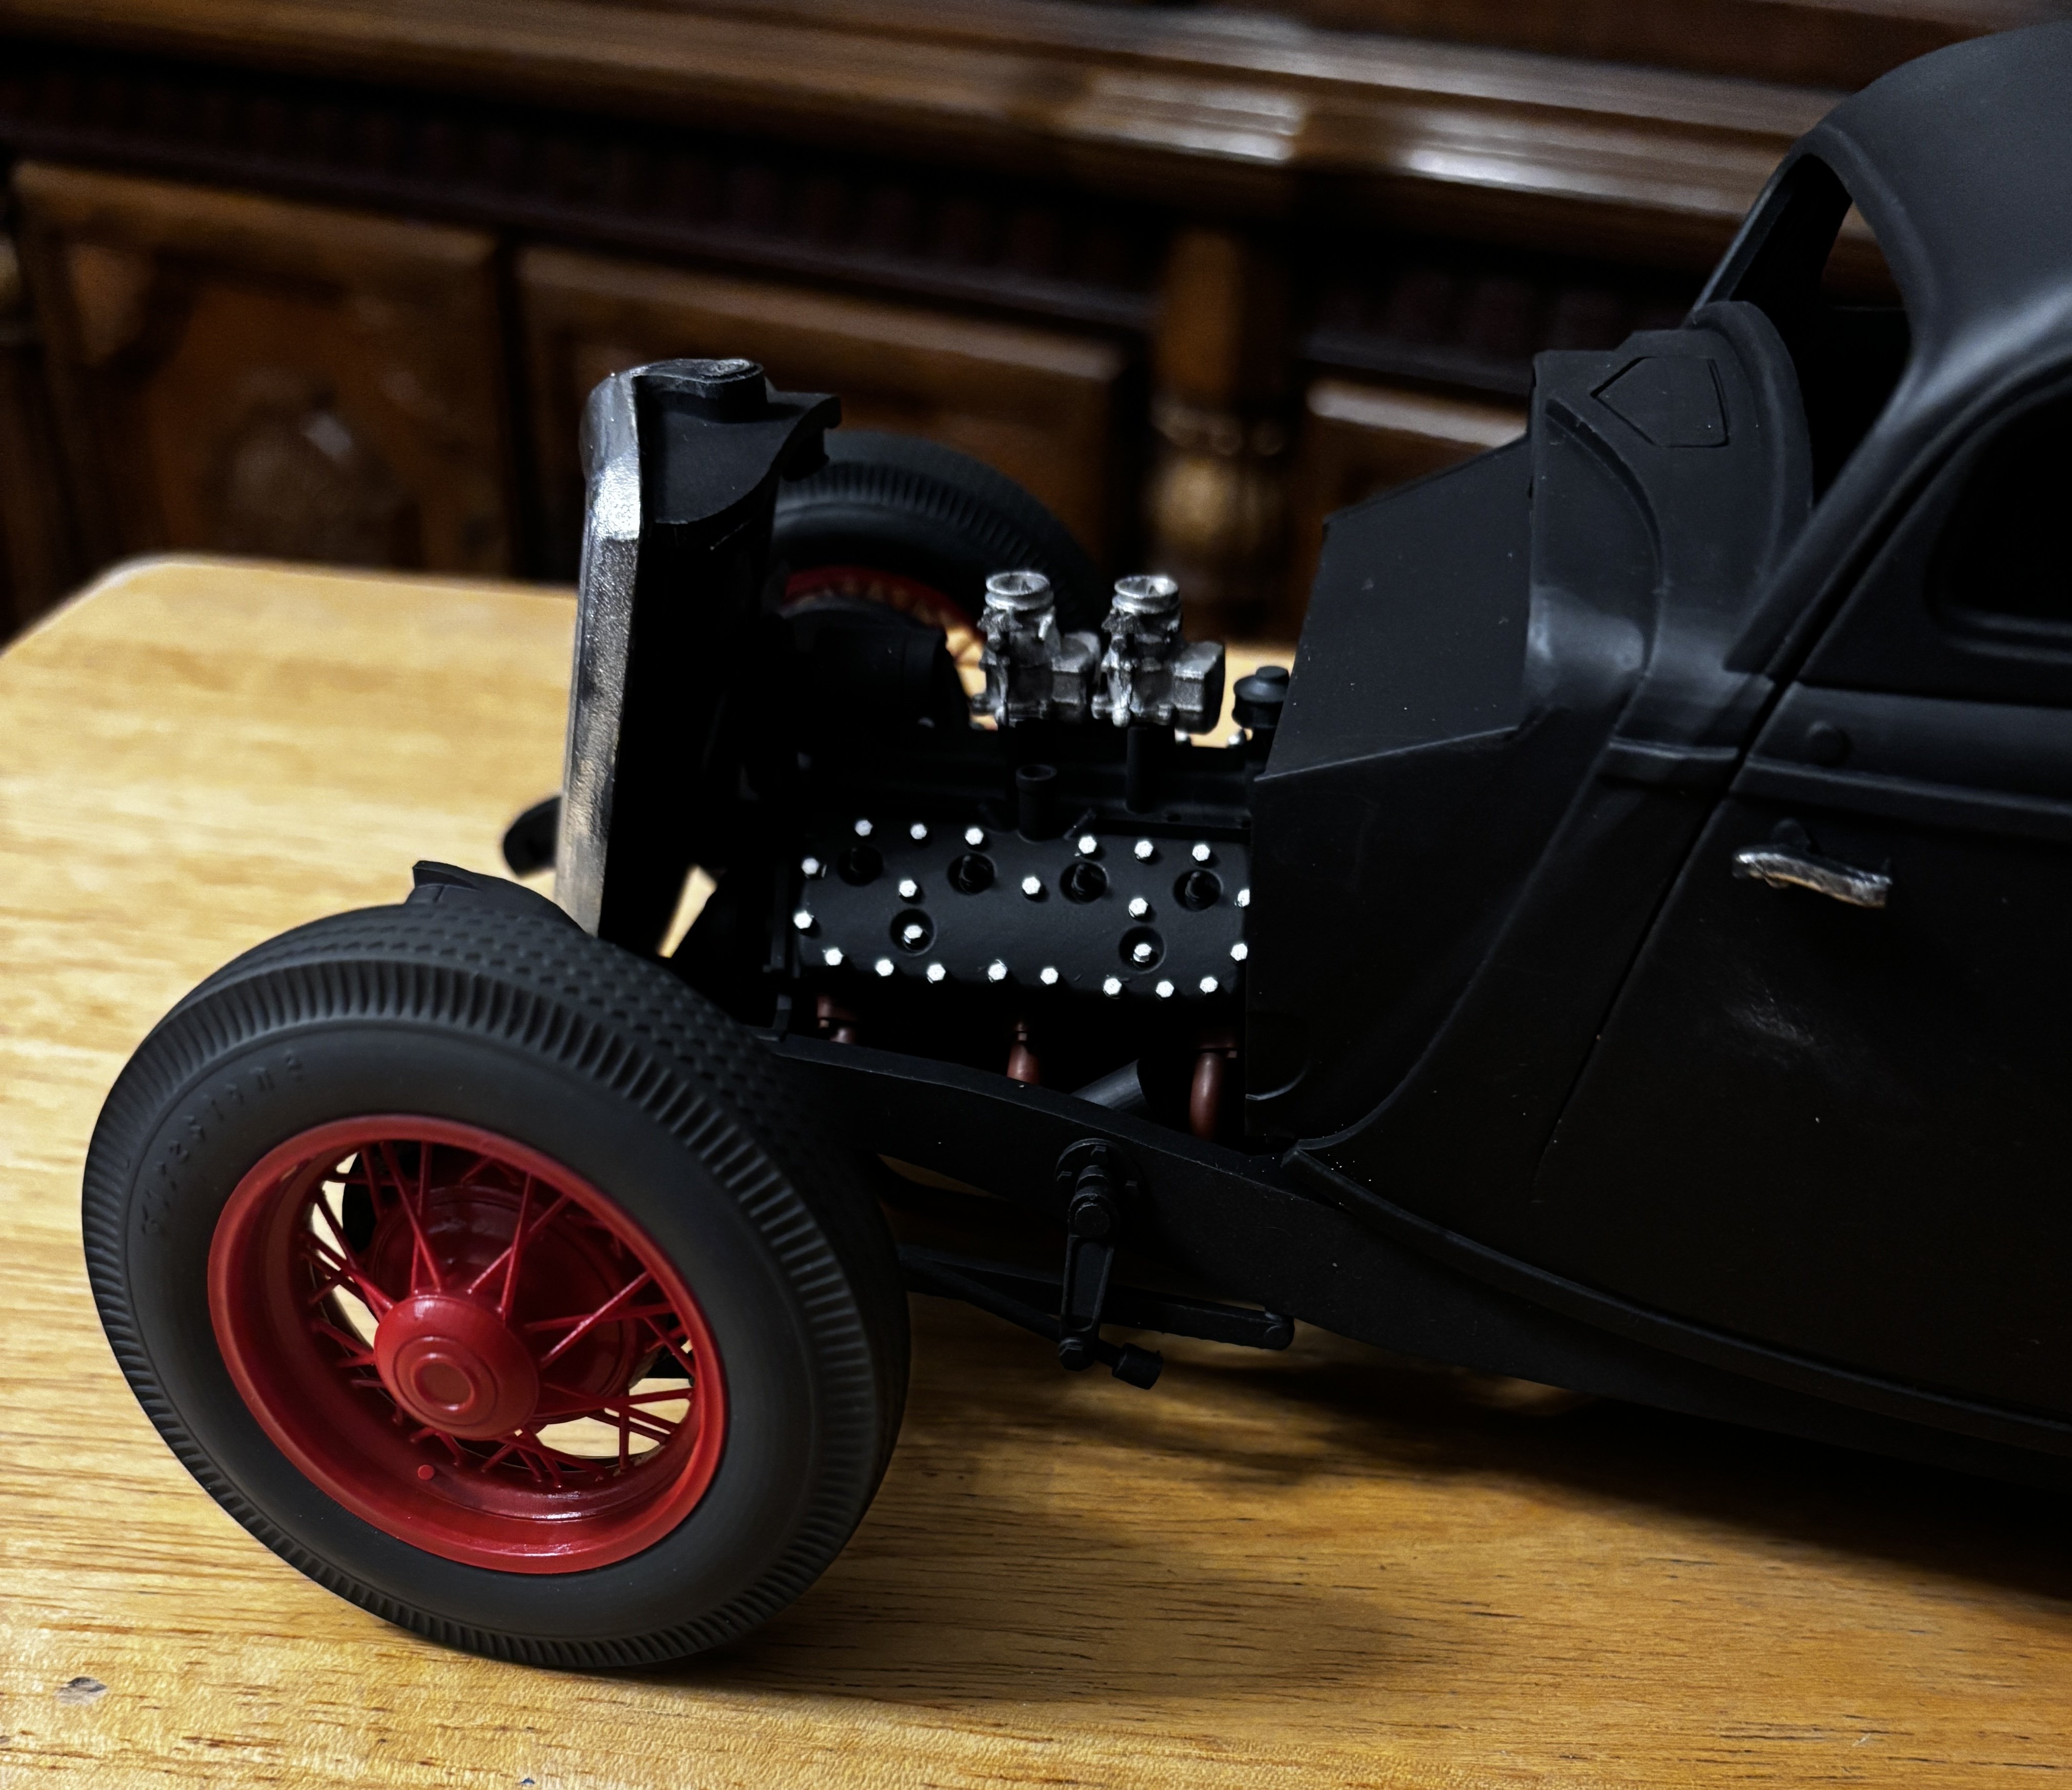
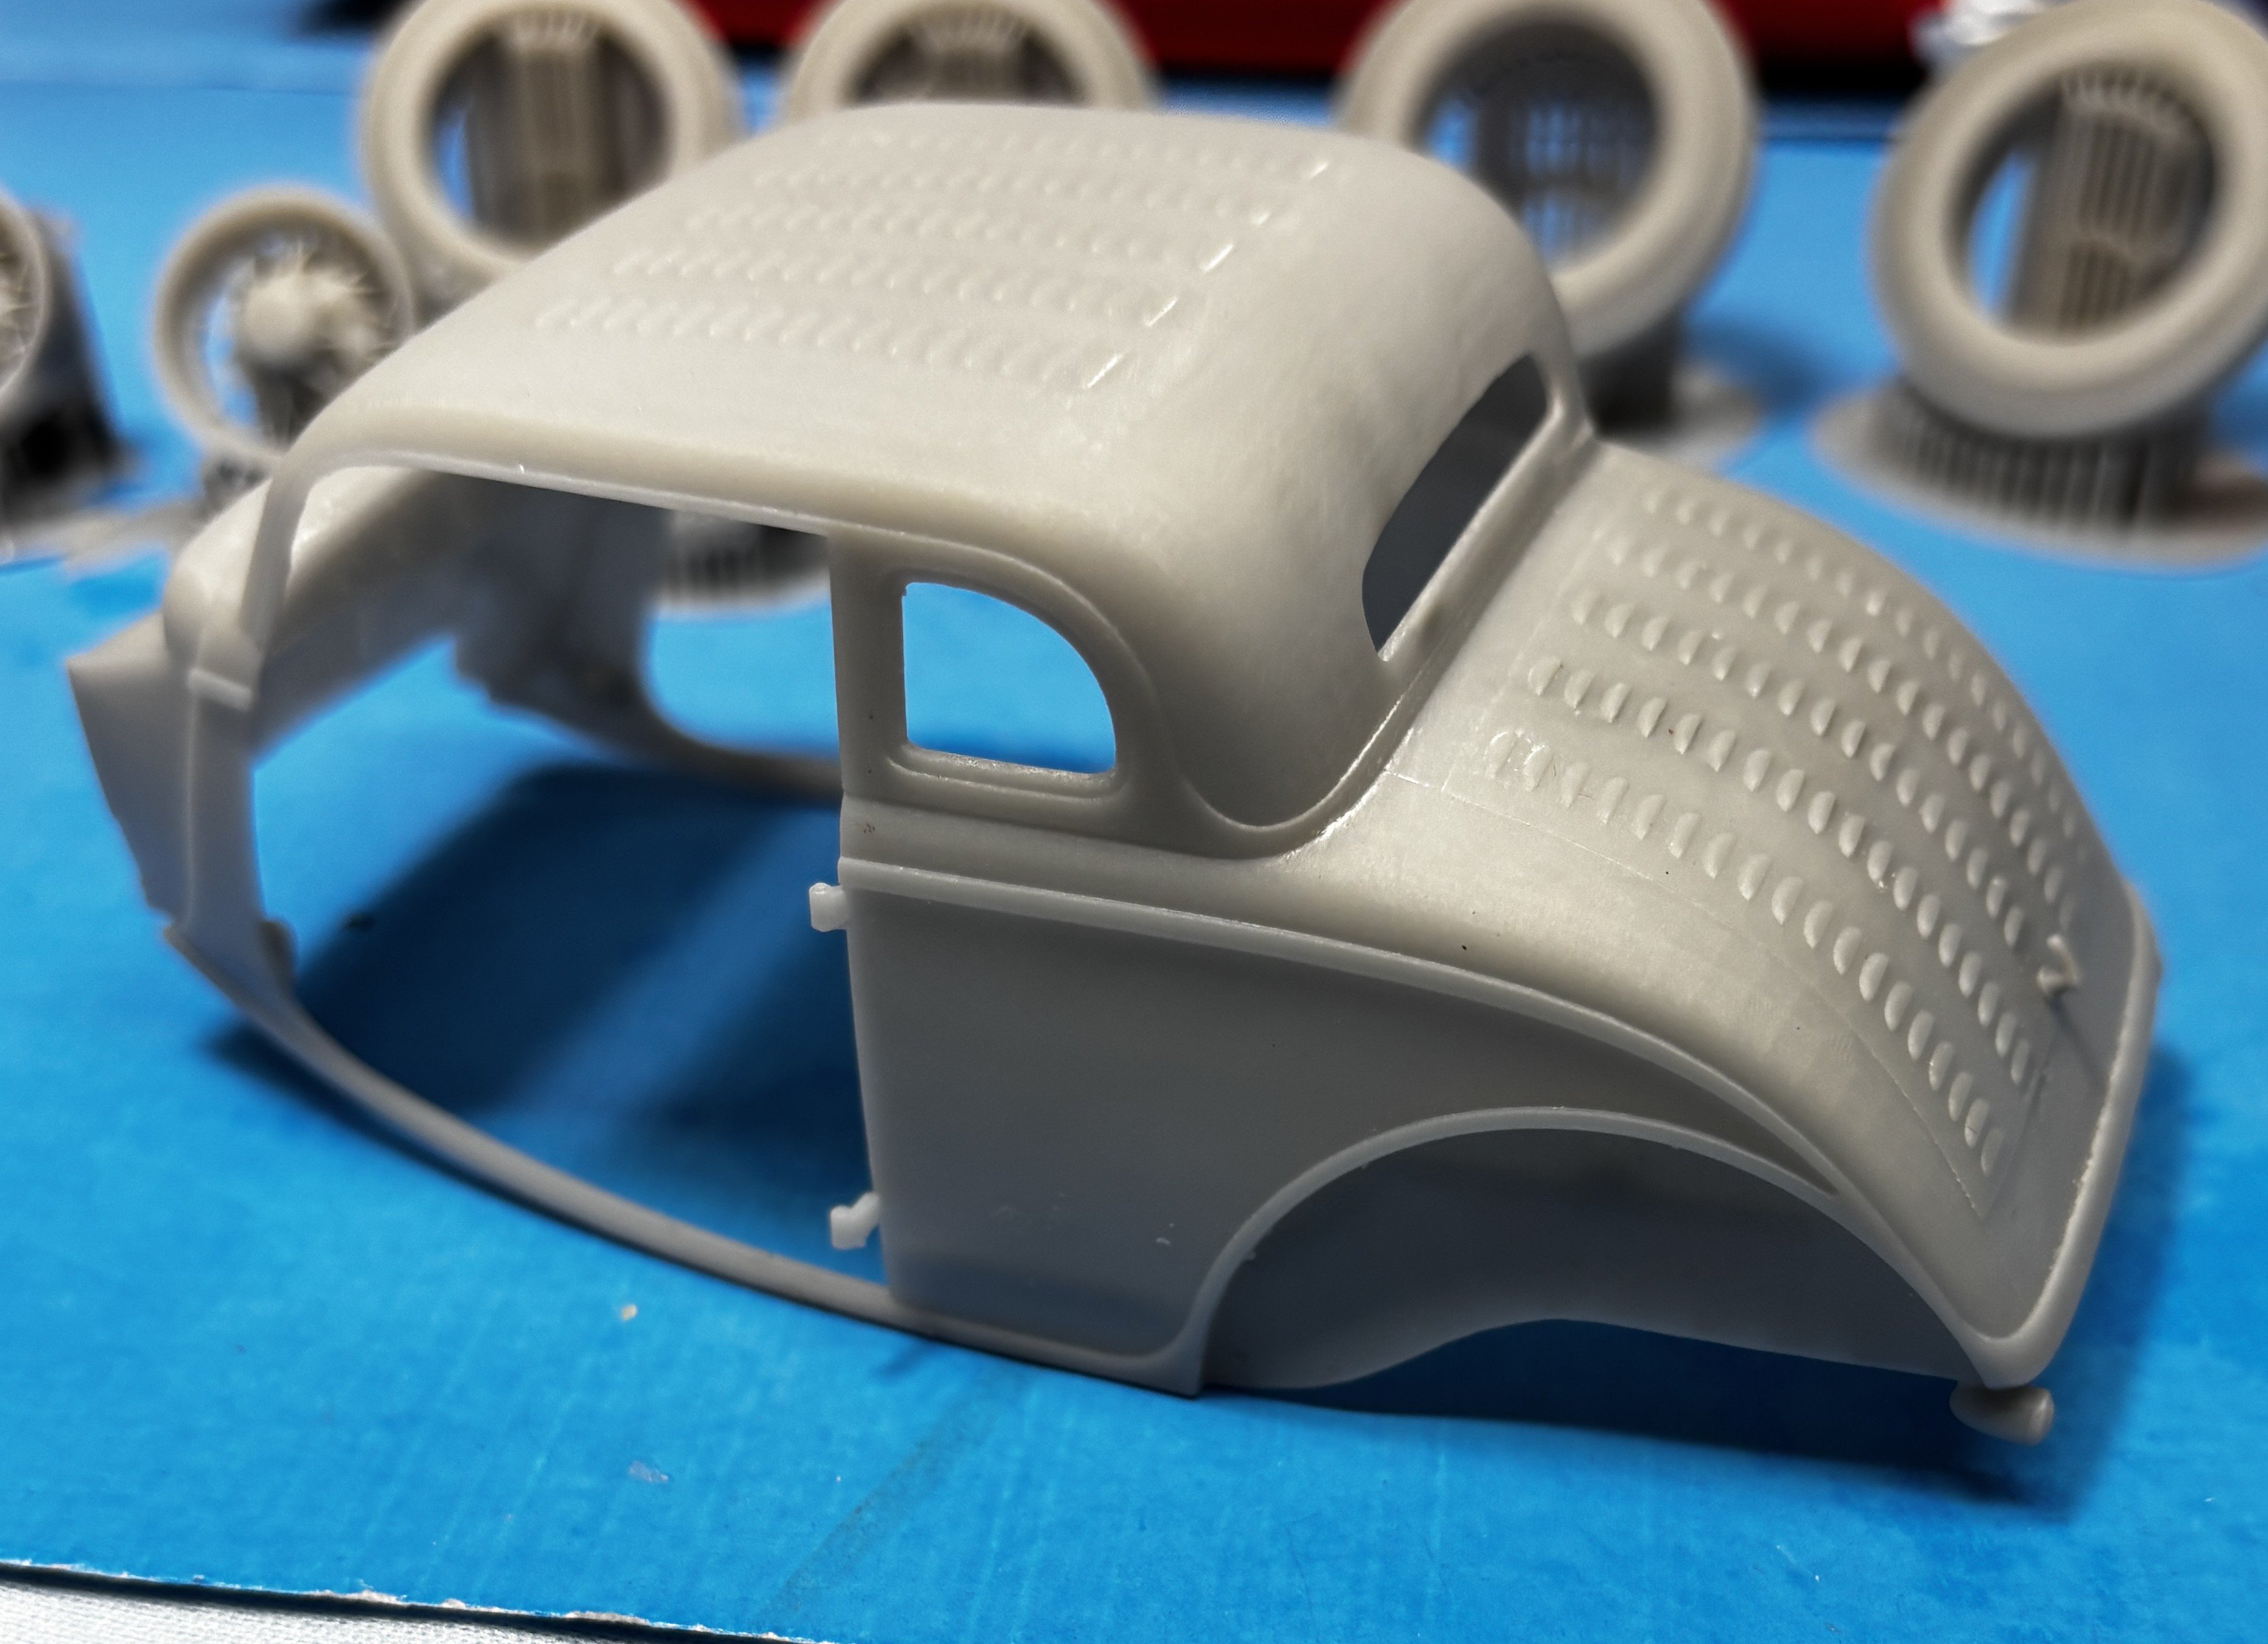
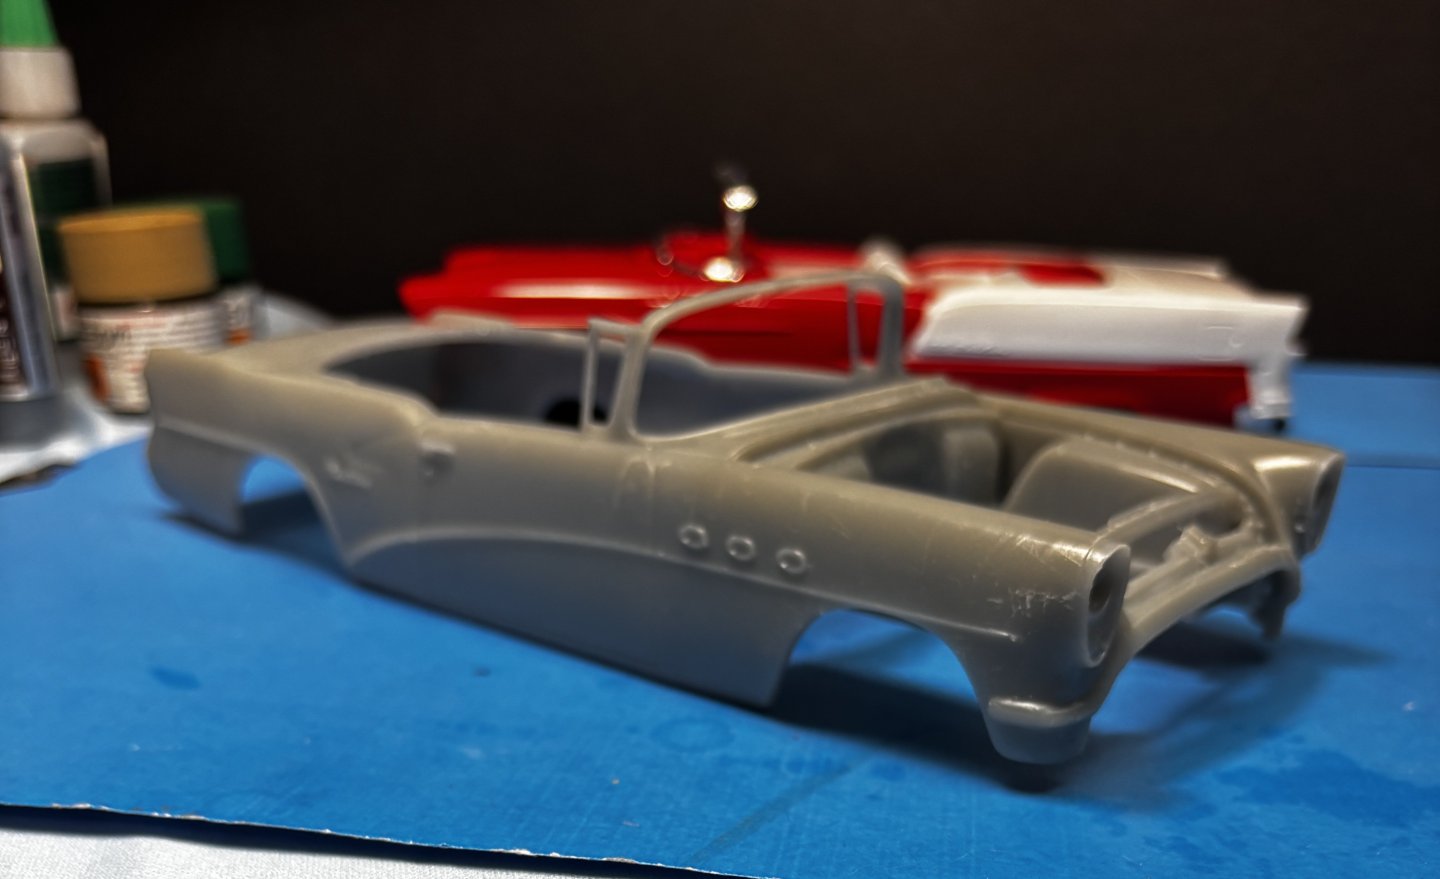
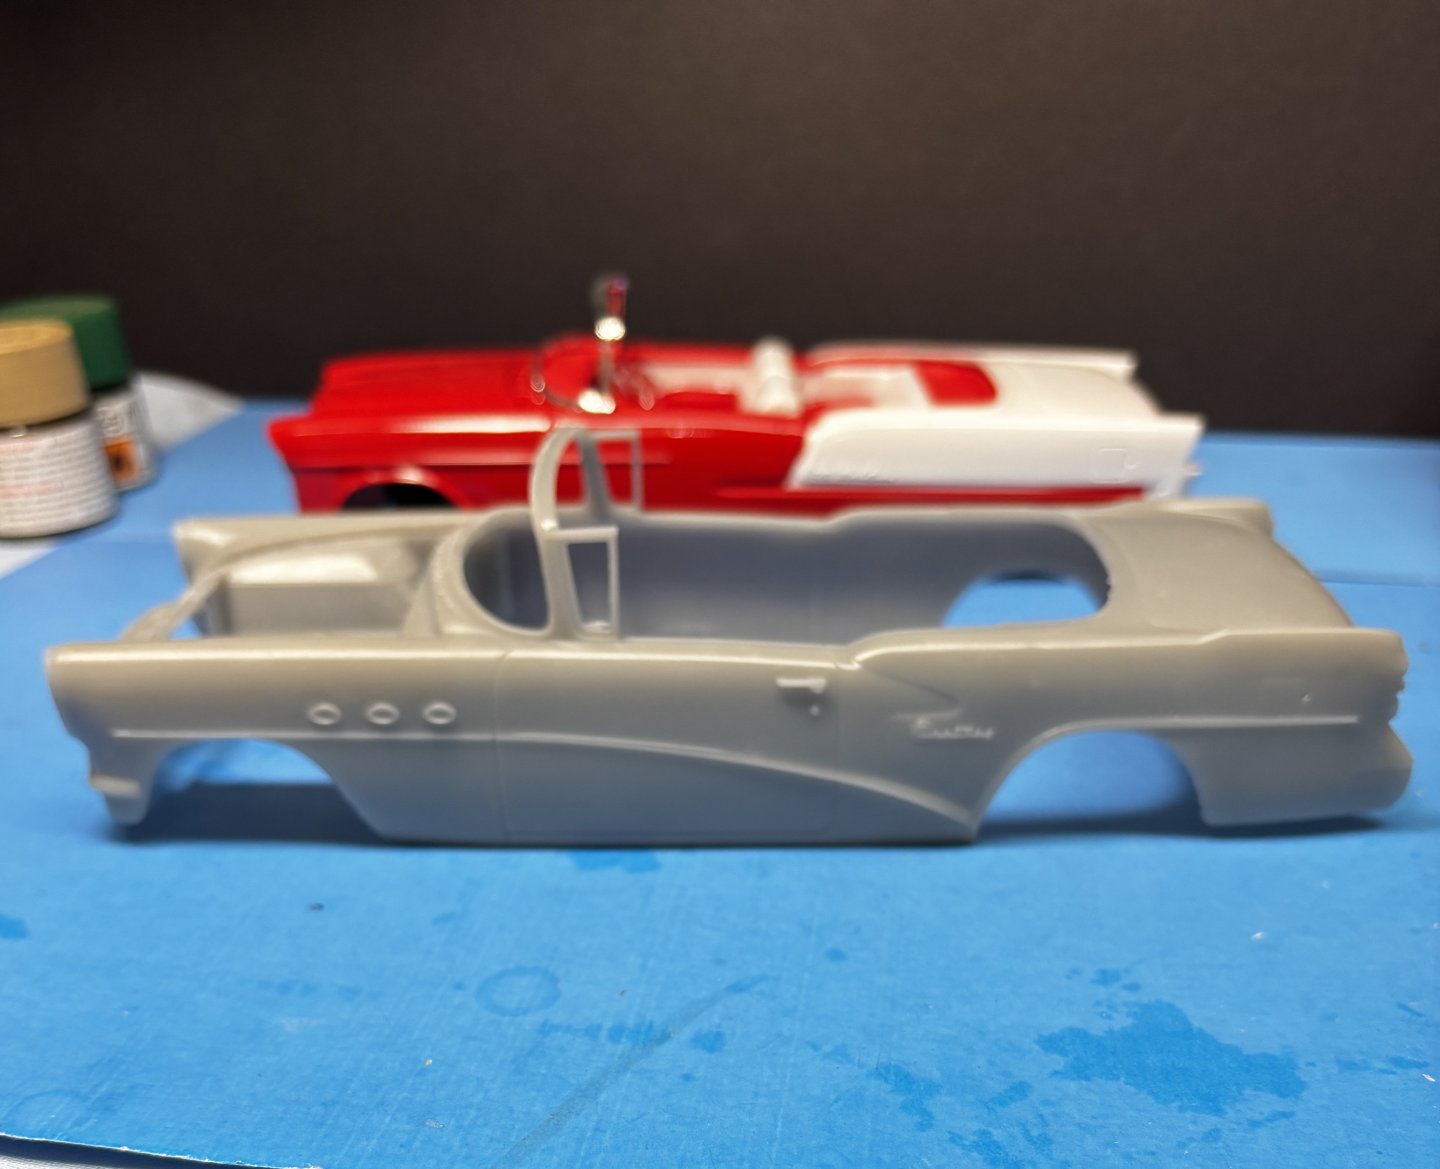
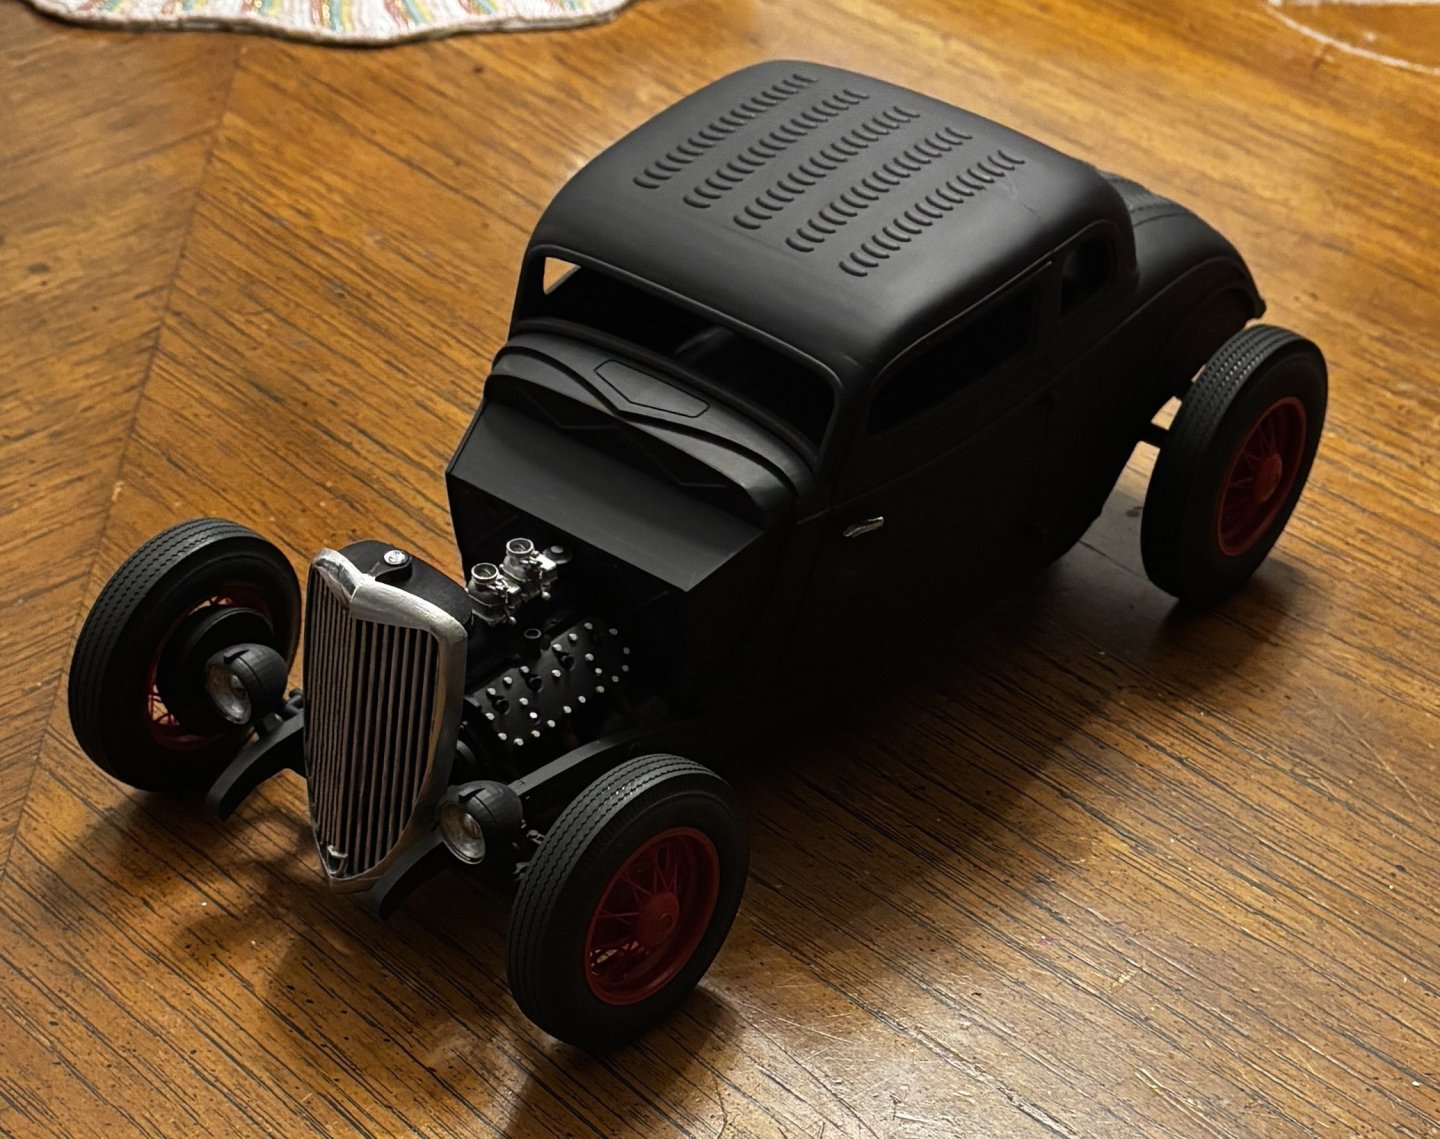
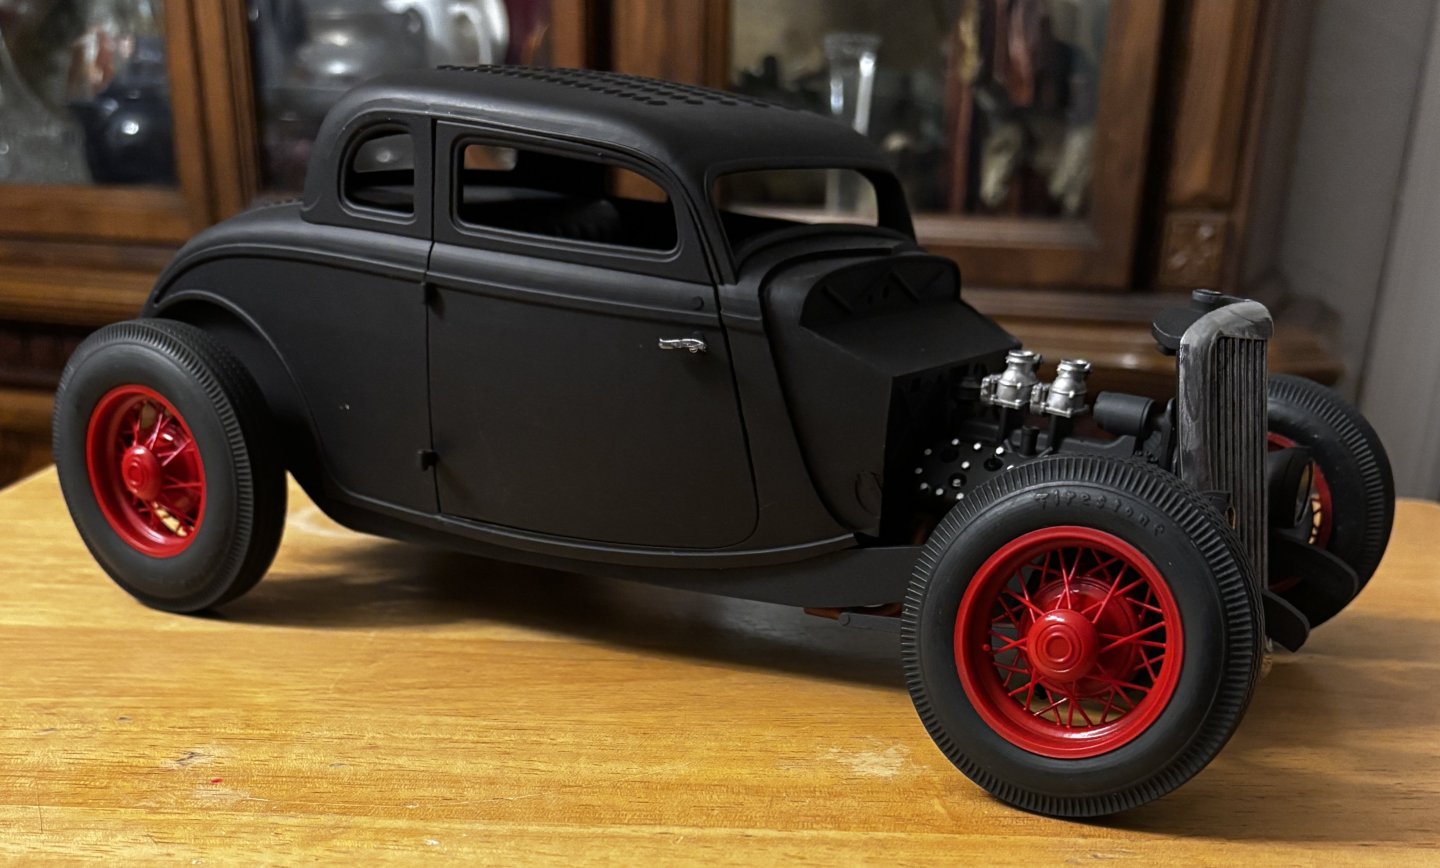
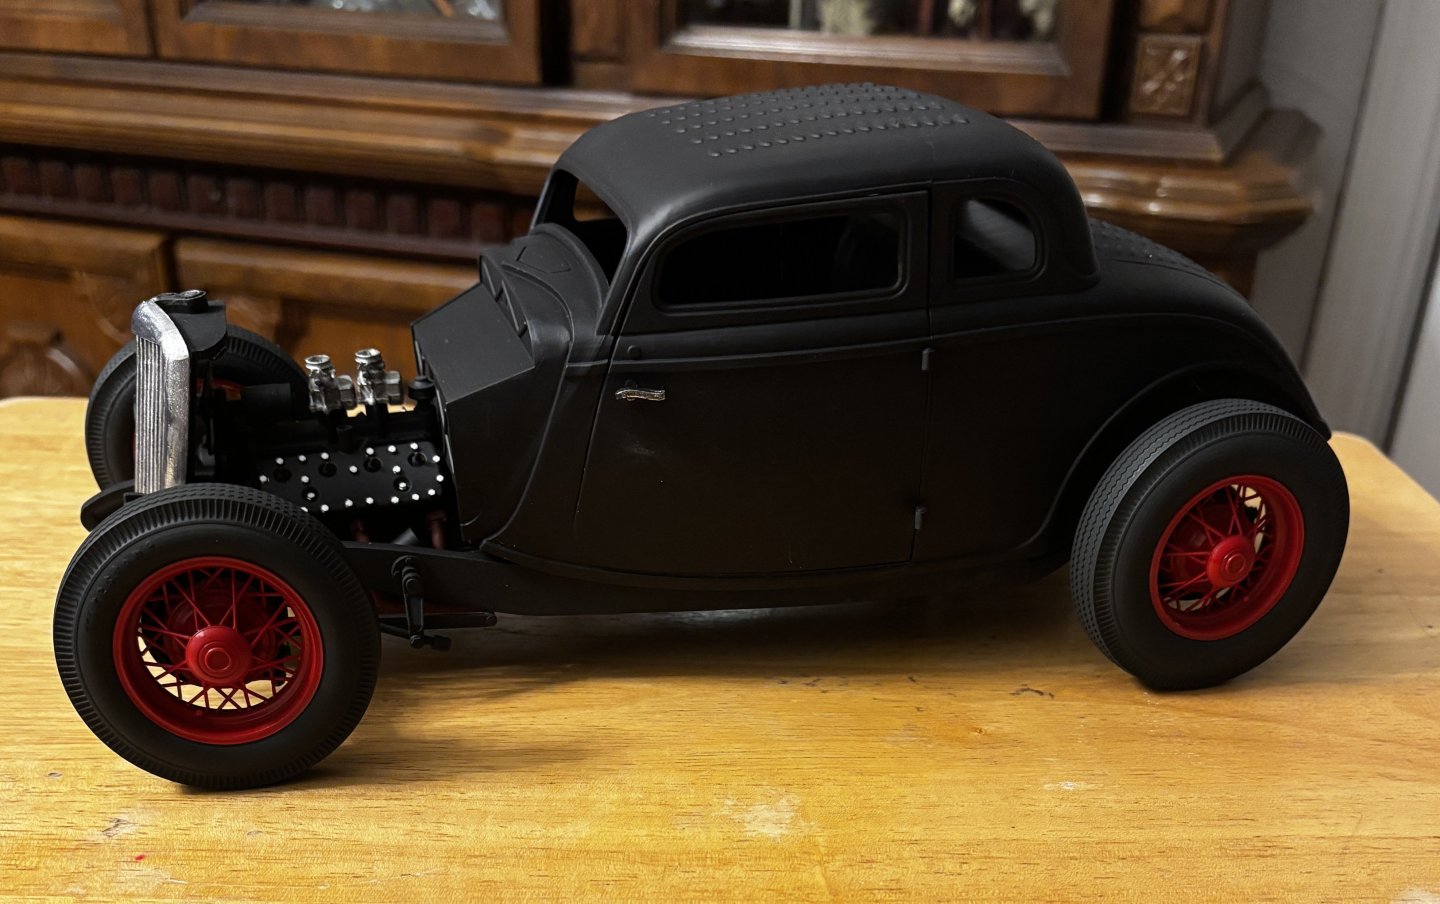
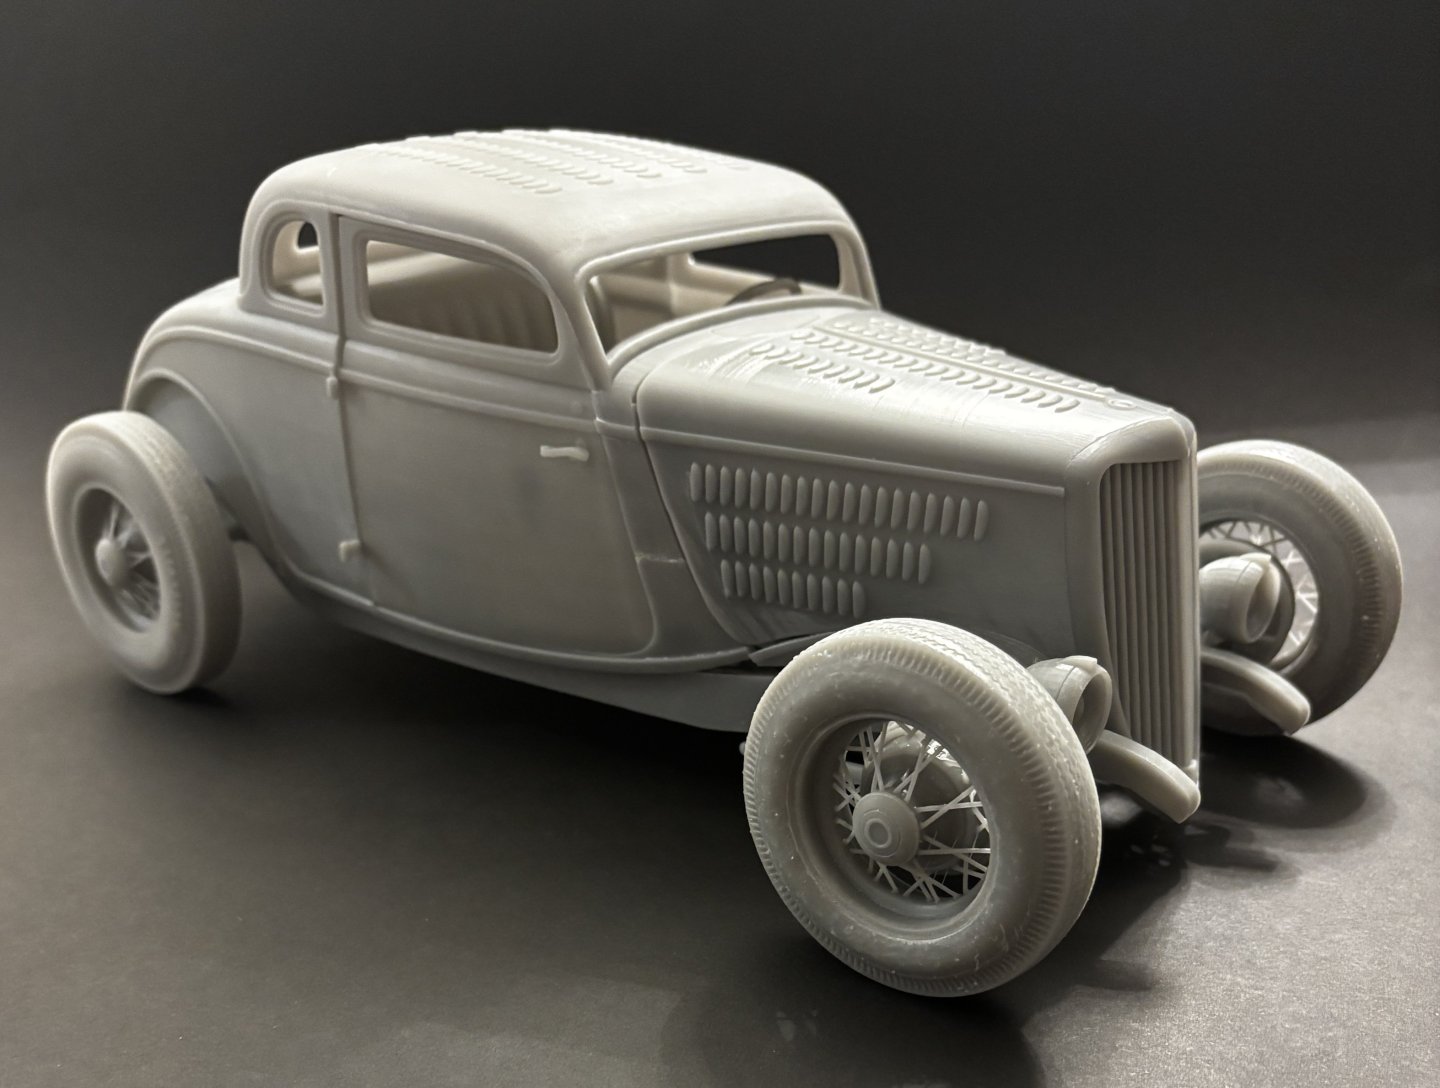
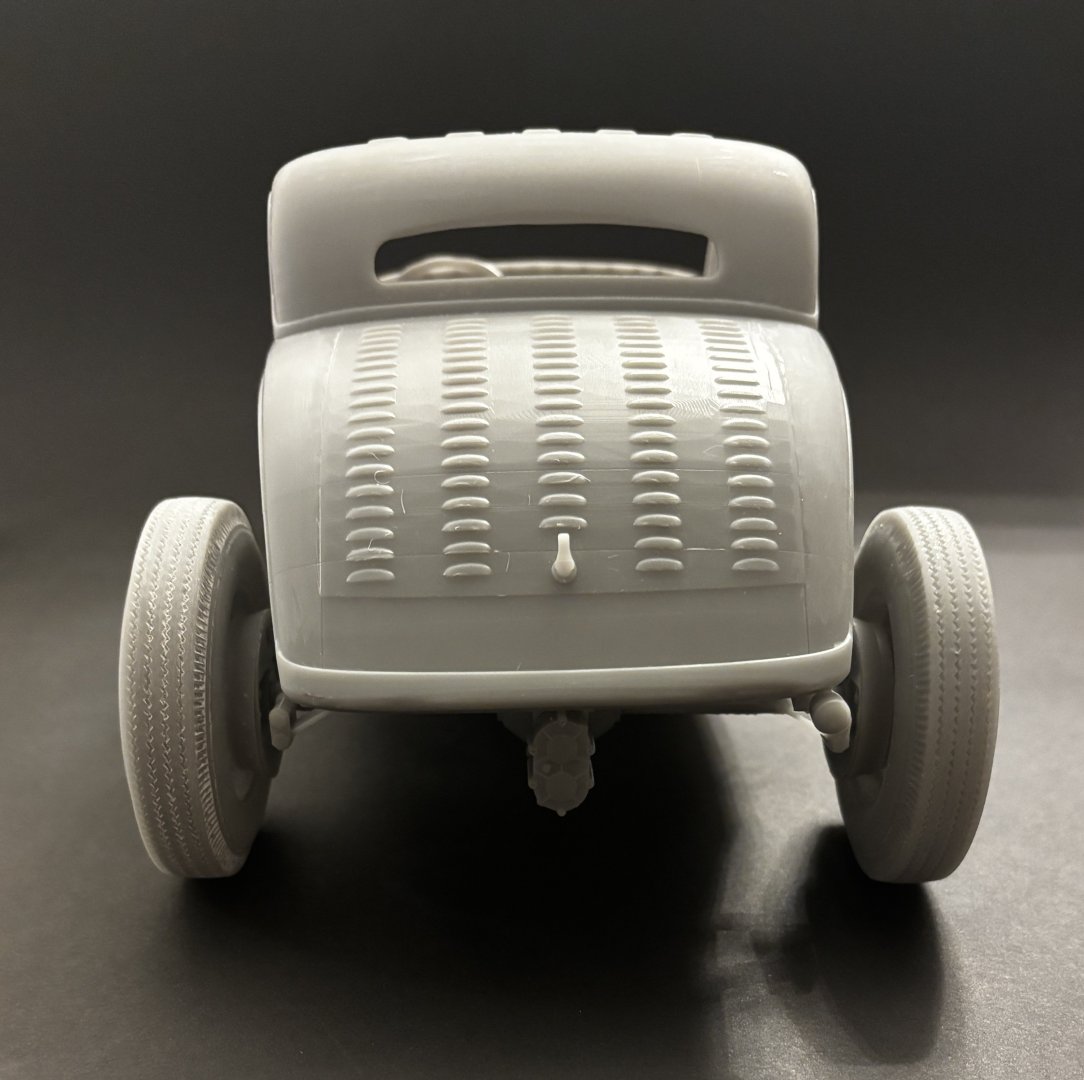
This about all I intend to do with this model as for me it was a proof of concept model as my first 3D printed model. I slapped on some flat black primer and am calling it a rat rod. Learned a few things along the way but still have lots to learn about this aspect of the hobby. Here are some final photos of the 34 Ford and some teaser shots of other models I have printed as part of this learning process. Included is an Aston Martin DB1 and a 54 Buick Century convertible in 1:24 scale. There are many variables to sort out with 3D printing and I do not know a way to learn except to practice, trial and error. It’s fun so far. It offers the chance for models that will likely never be seen in mass production.


- 29 replies
-
- 11
-

-

-
Thanks guys. There is a lot to learn on this subject but most of it will be by trial and error. I have learned about another resin type that may be more shatter resistant. The resin I used will shatter if dropped on a hard floor or is flexed too much. Like I said, trial and error. Don't even think about setting up one of these printers inside your home without a big investment in proper ventilation. It really needs a separate building with ventilation and climate control.
-
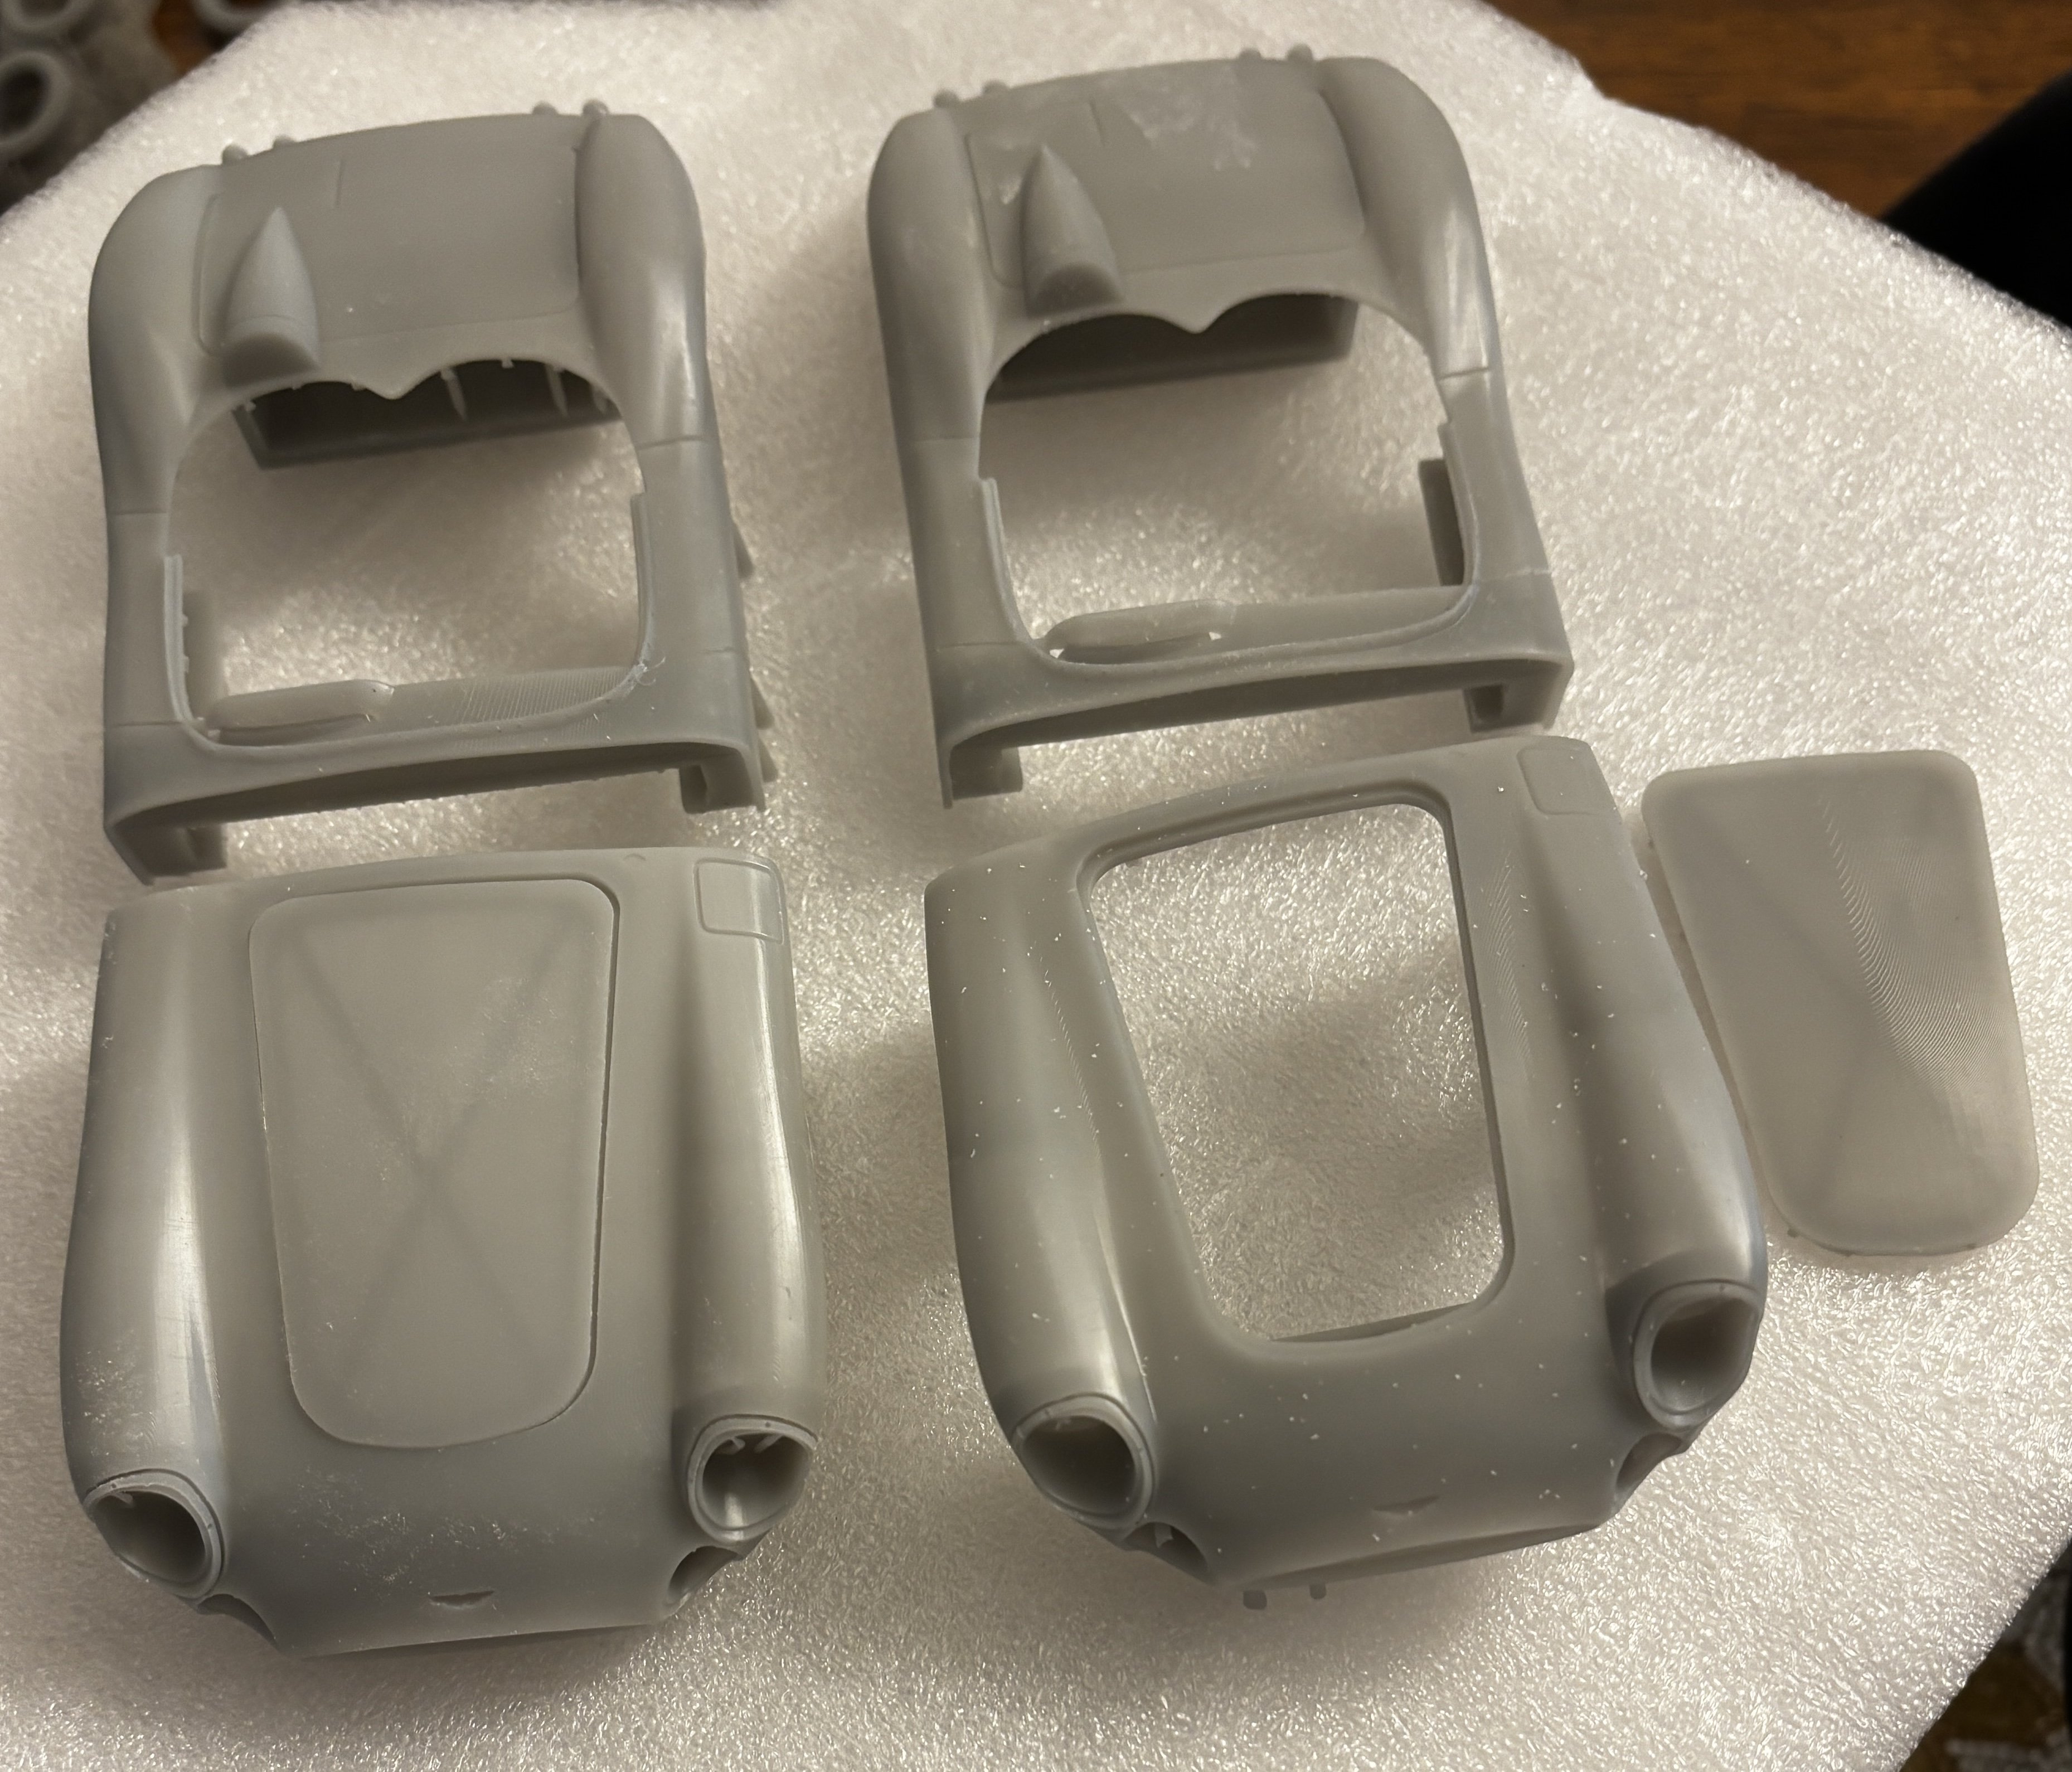
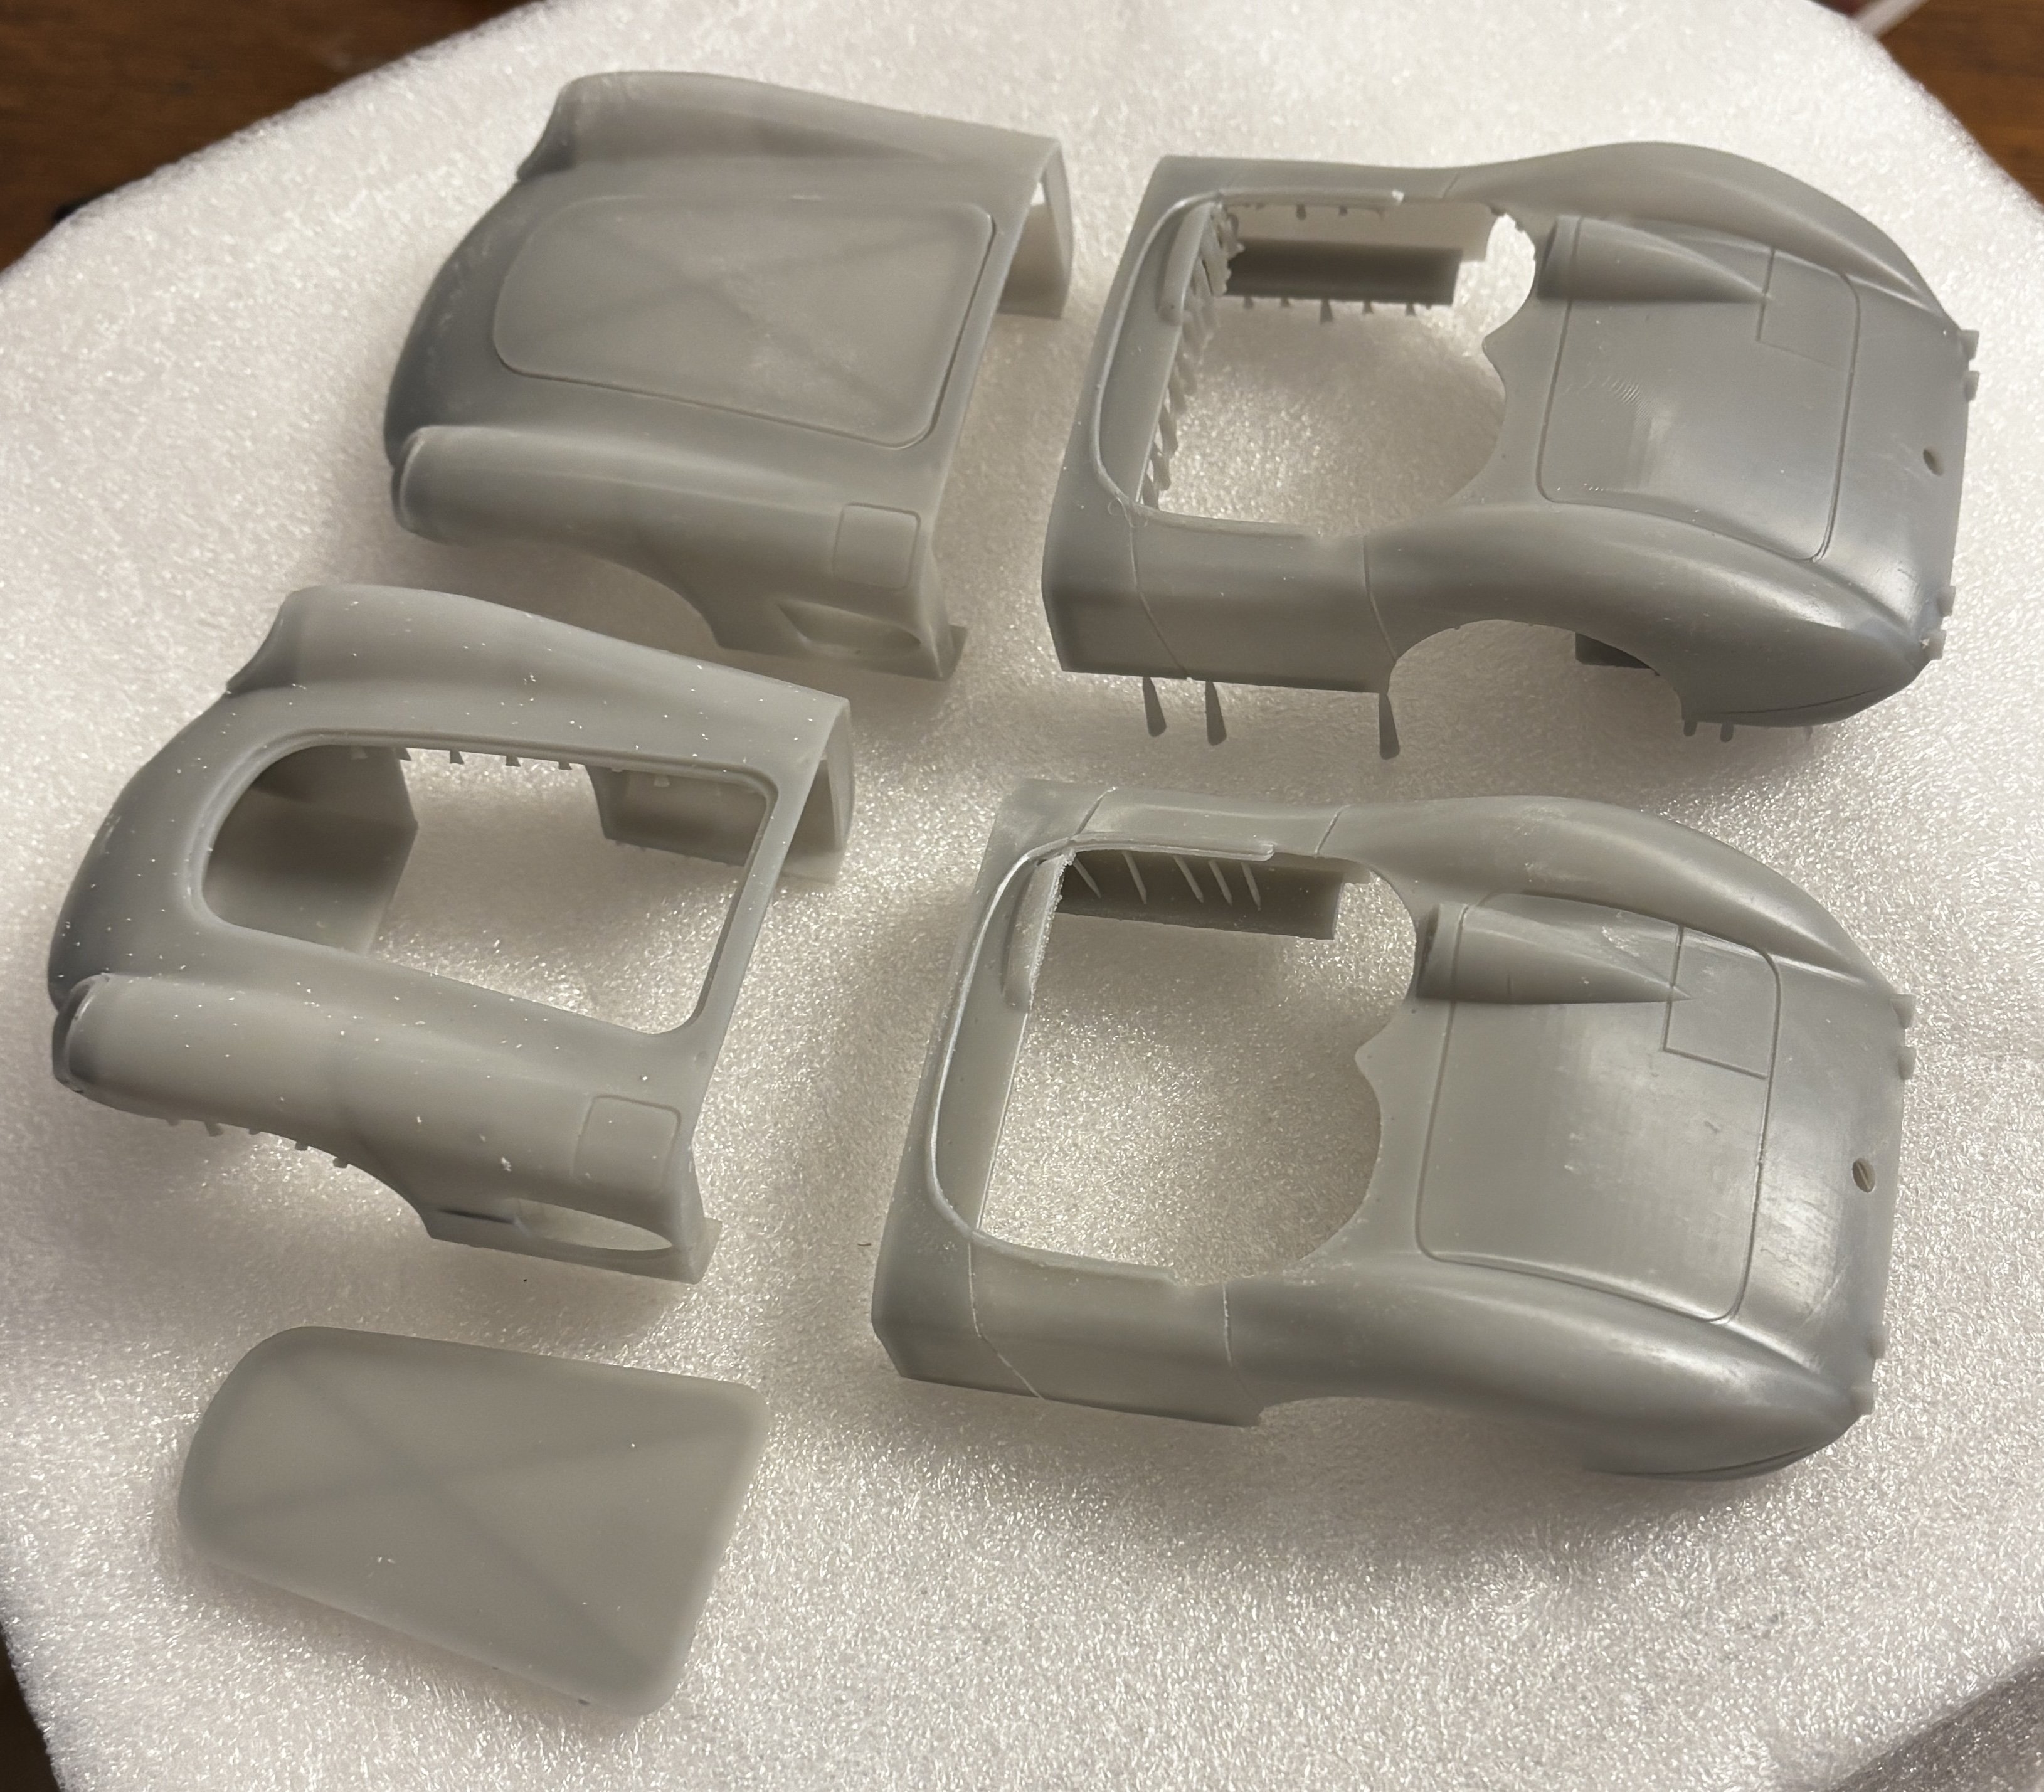
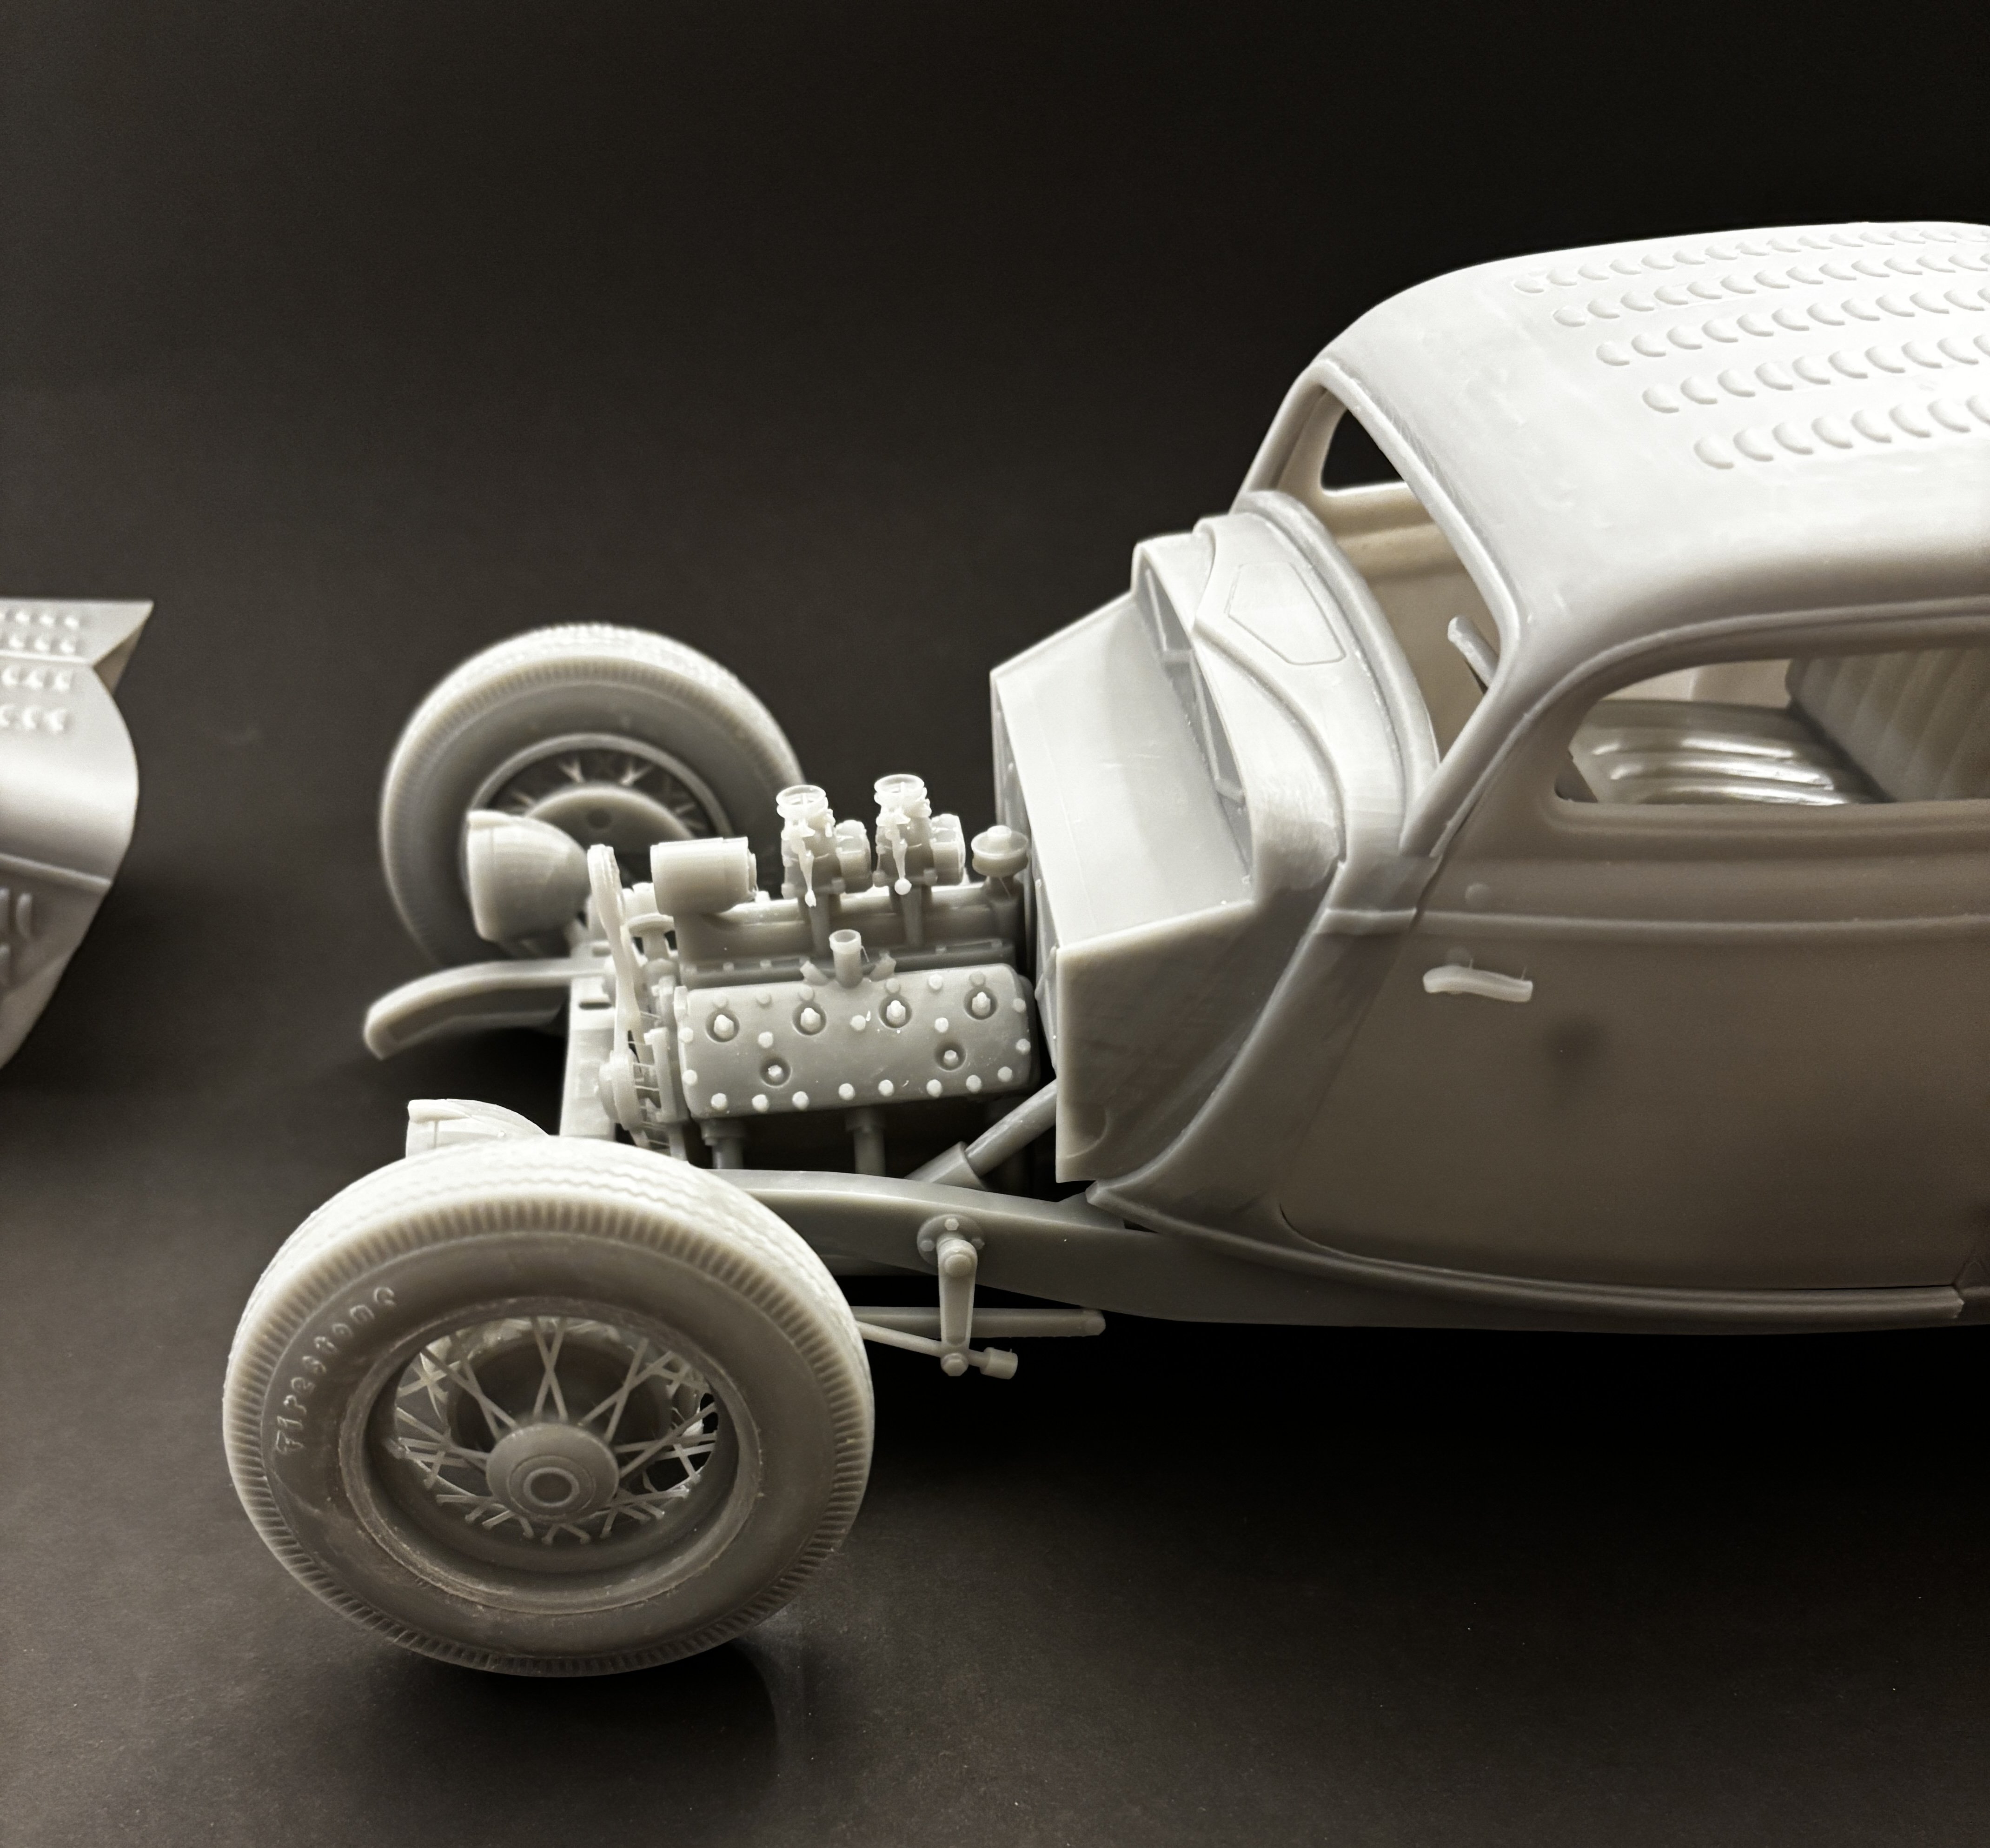
I printed out the model in 1:12 scale, then put it all together with a water soluble acrylic glue to check the parts fit. Needs fine tuning, but that’s to be expected with a 3D print. There was an option for the body to be printed whole or with the doors separate. I think the former would have been a better option in retrospect.

- 29 replies
-
- 11
-
-
I once used it to inquire about a specific canon law. It went on to tell me what experts believed about that particular law, slanted in a particular direction. When I followed up by asking if there were experts who took a different slant on the same question, it admitted that yes, there were experts who saw it in a different way. So, I agree there must be follow up questions to avoid bias, I'm not sure exactly how or why it deals with bias in the way it appears to do. We do know that humans have had a role in developing the code for it to operate, so it may be inevitable there will be bias or perhaps errors as well.
-
Correct me if I'm wrong, but mass and size are two entirely different things, are they not?
-
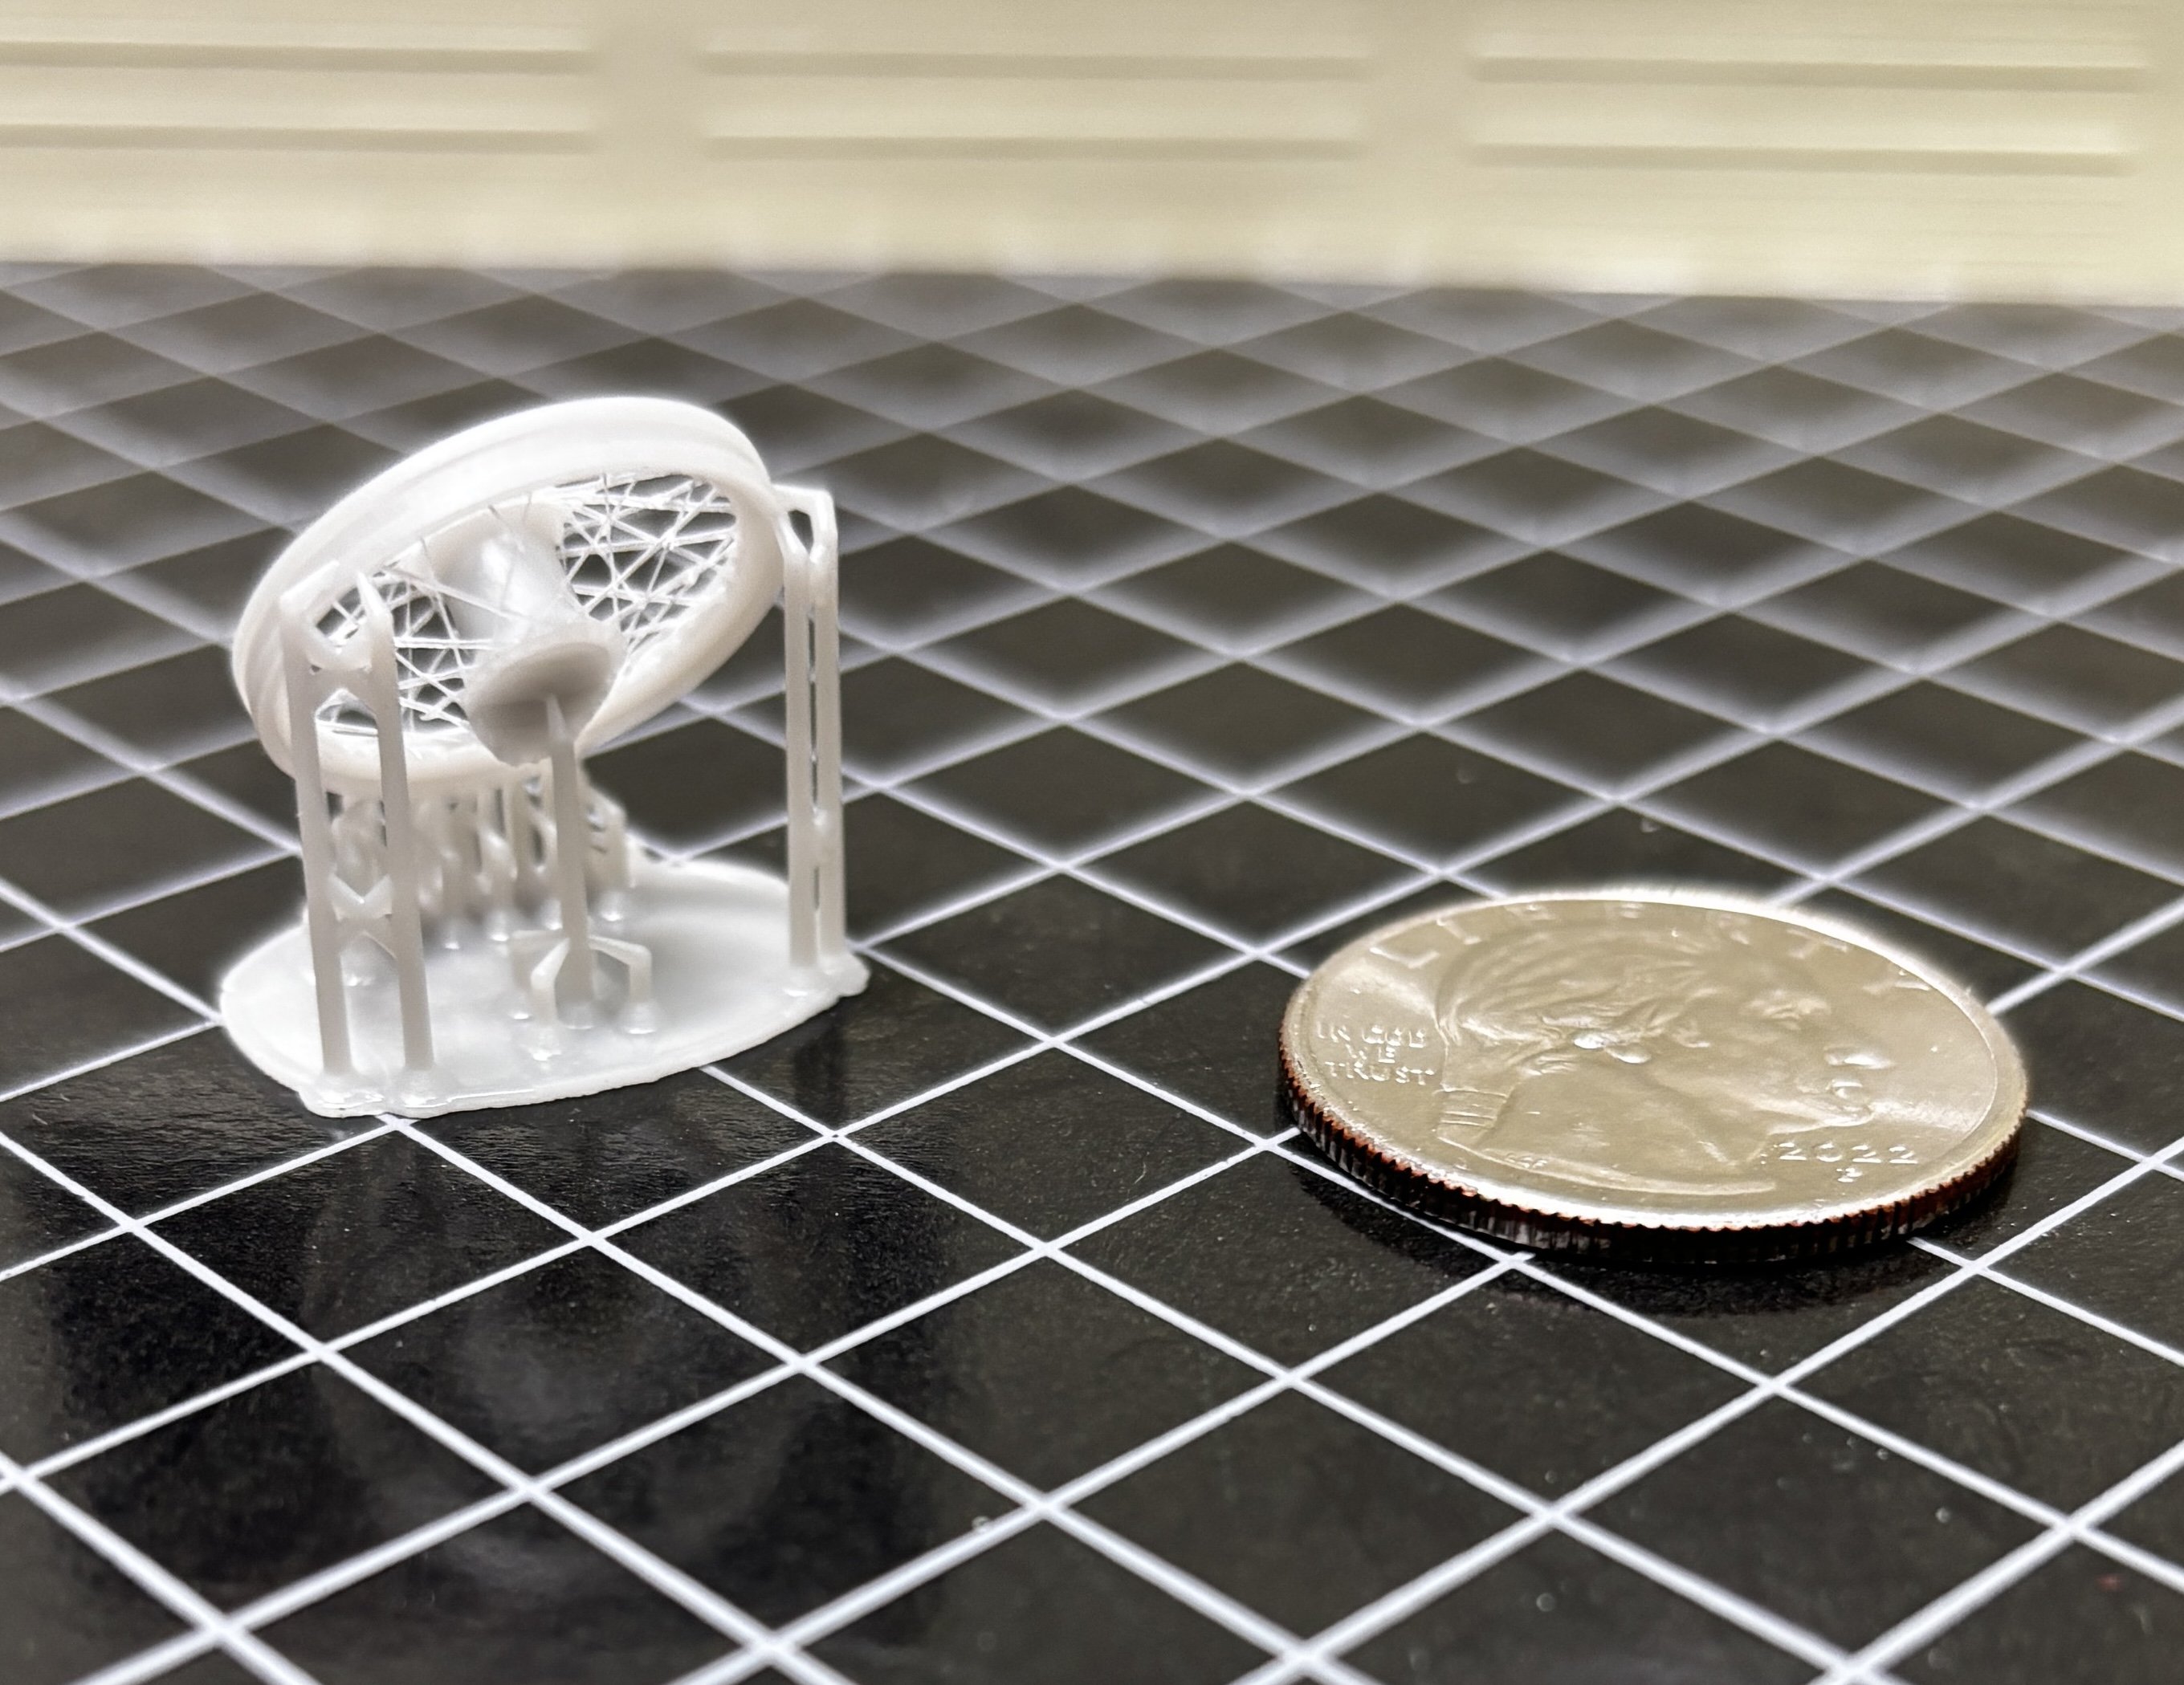
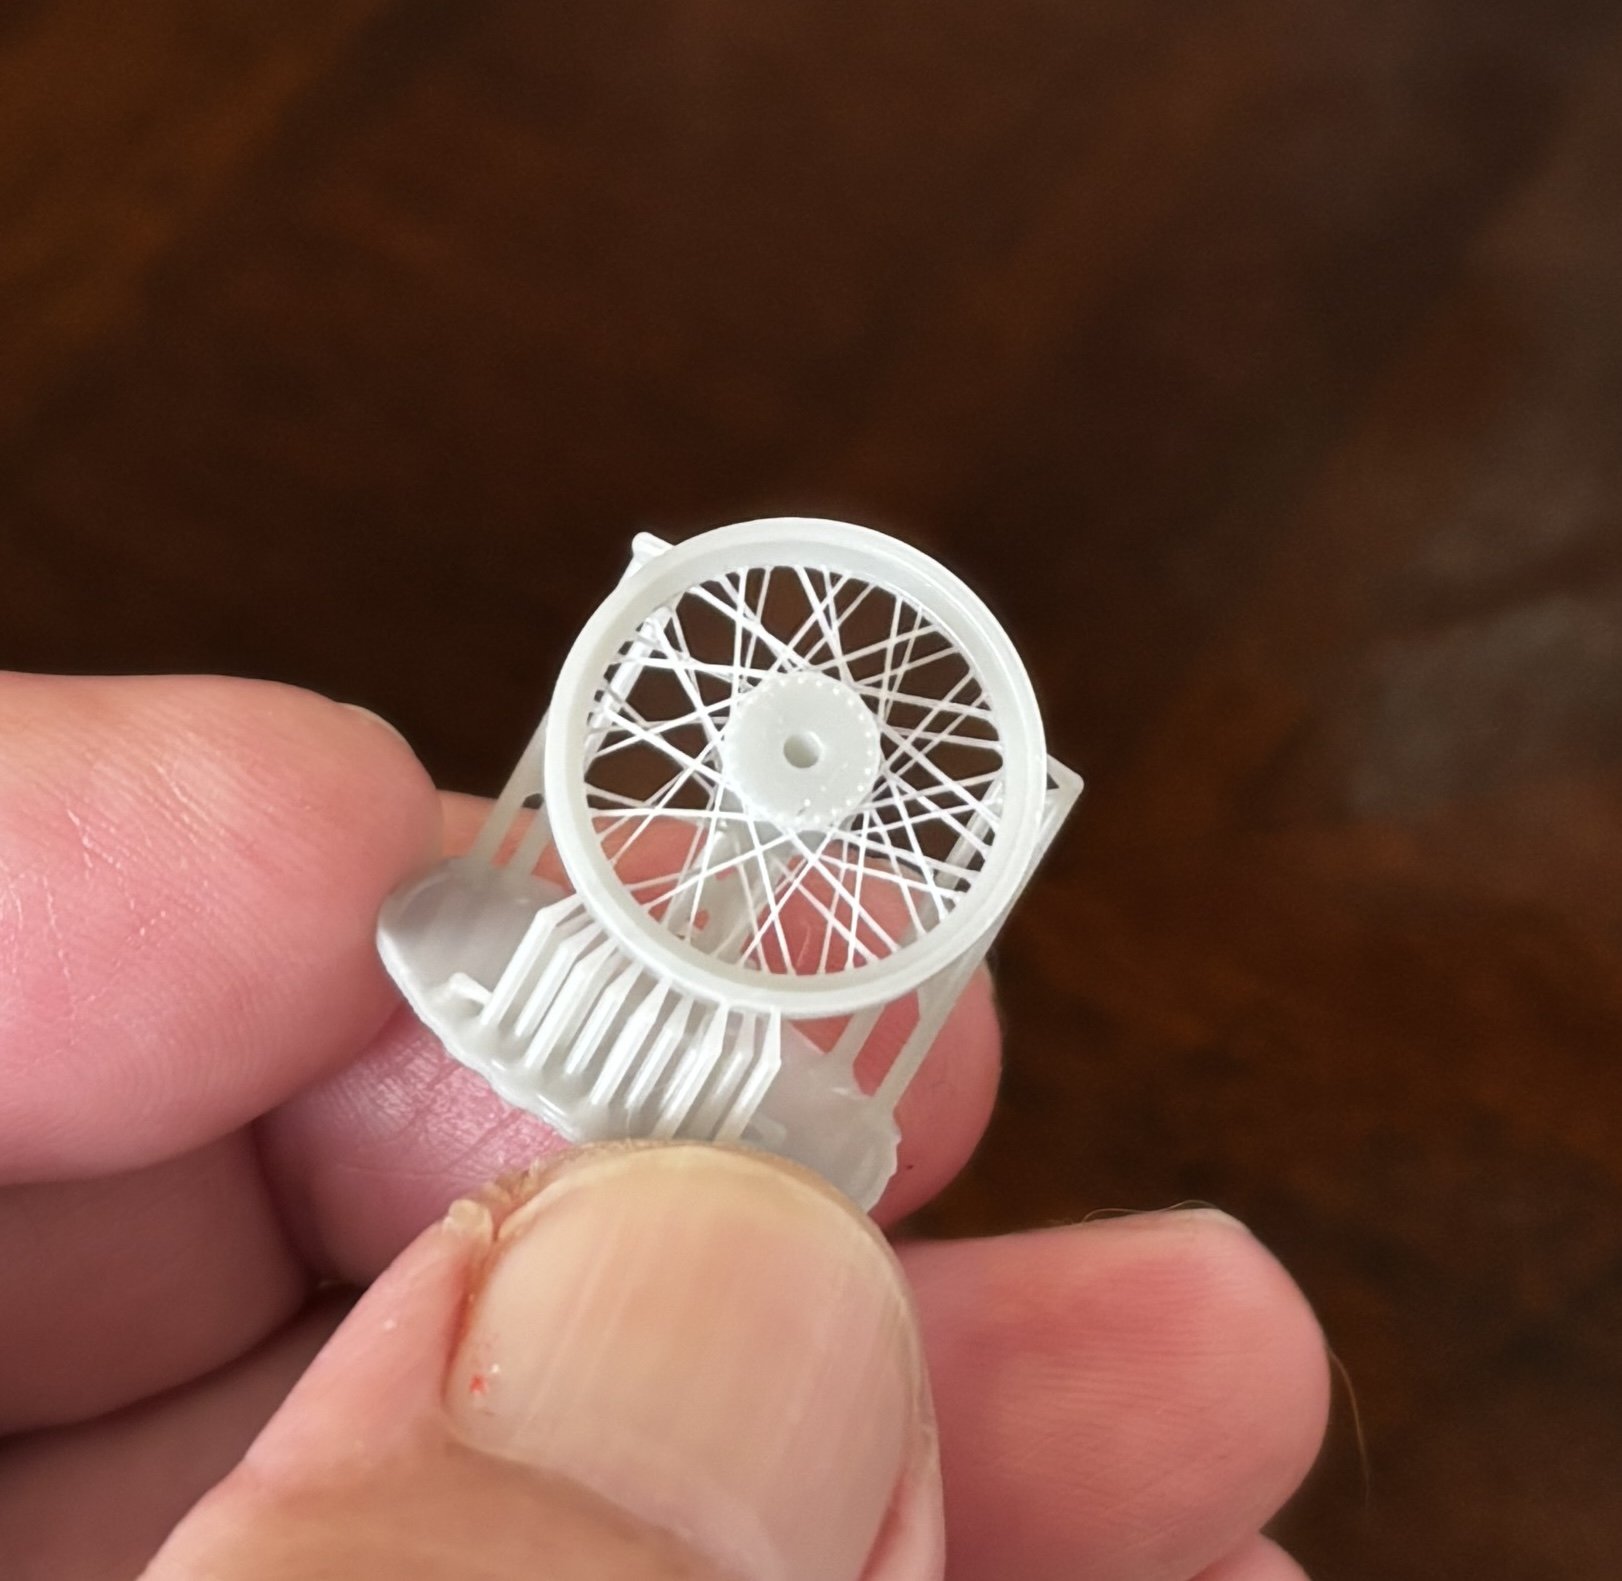
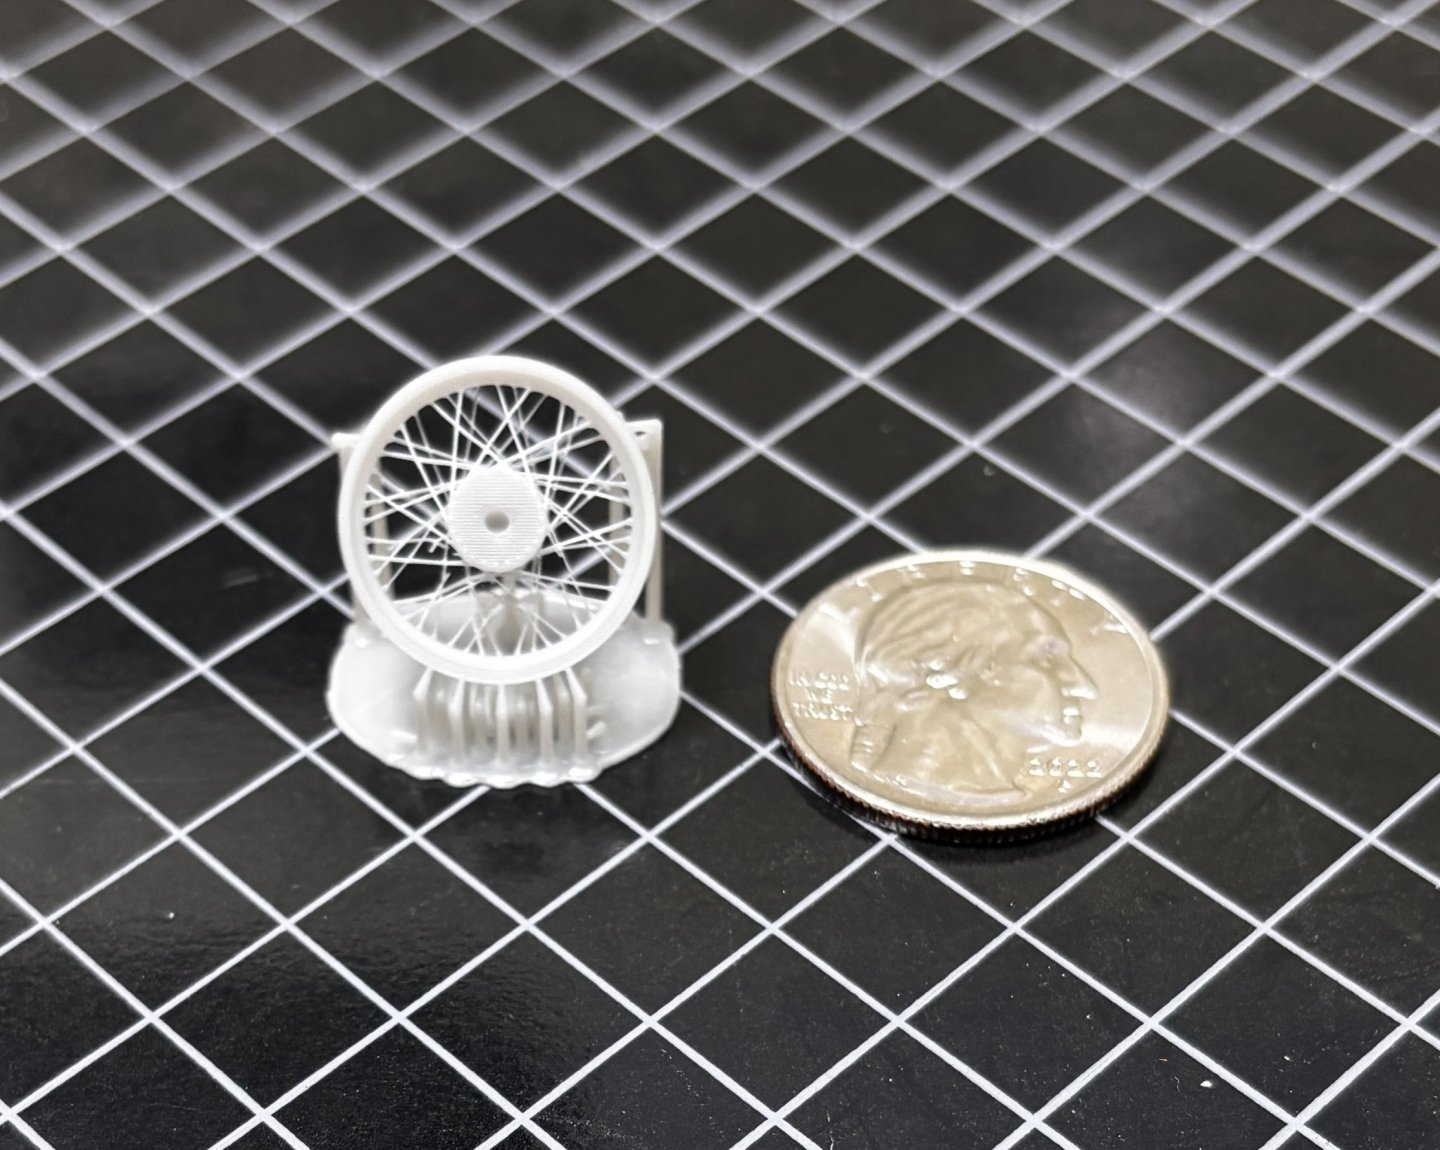
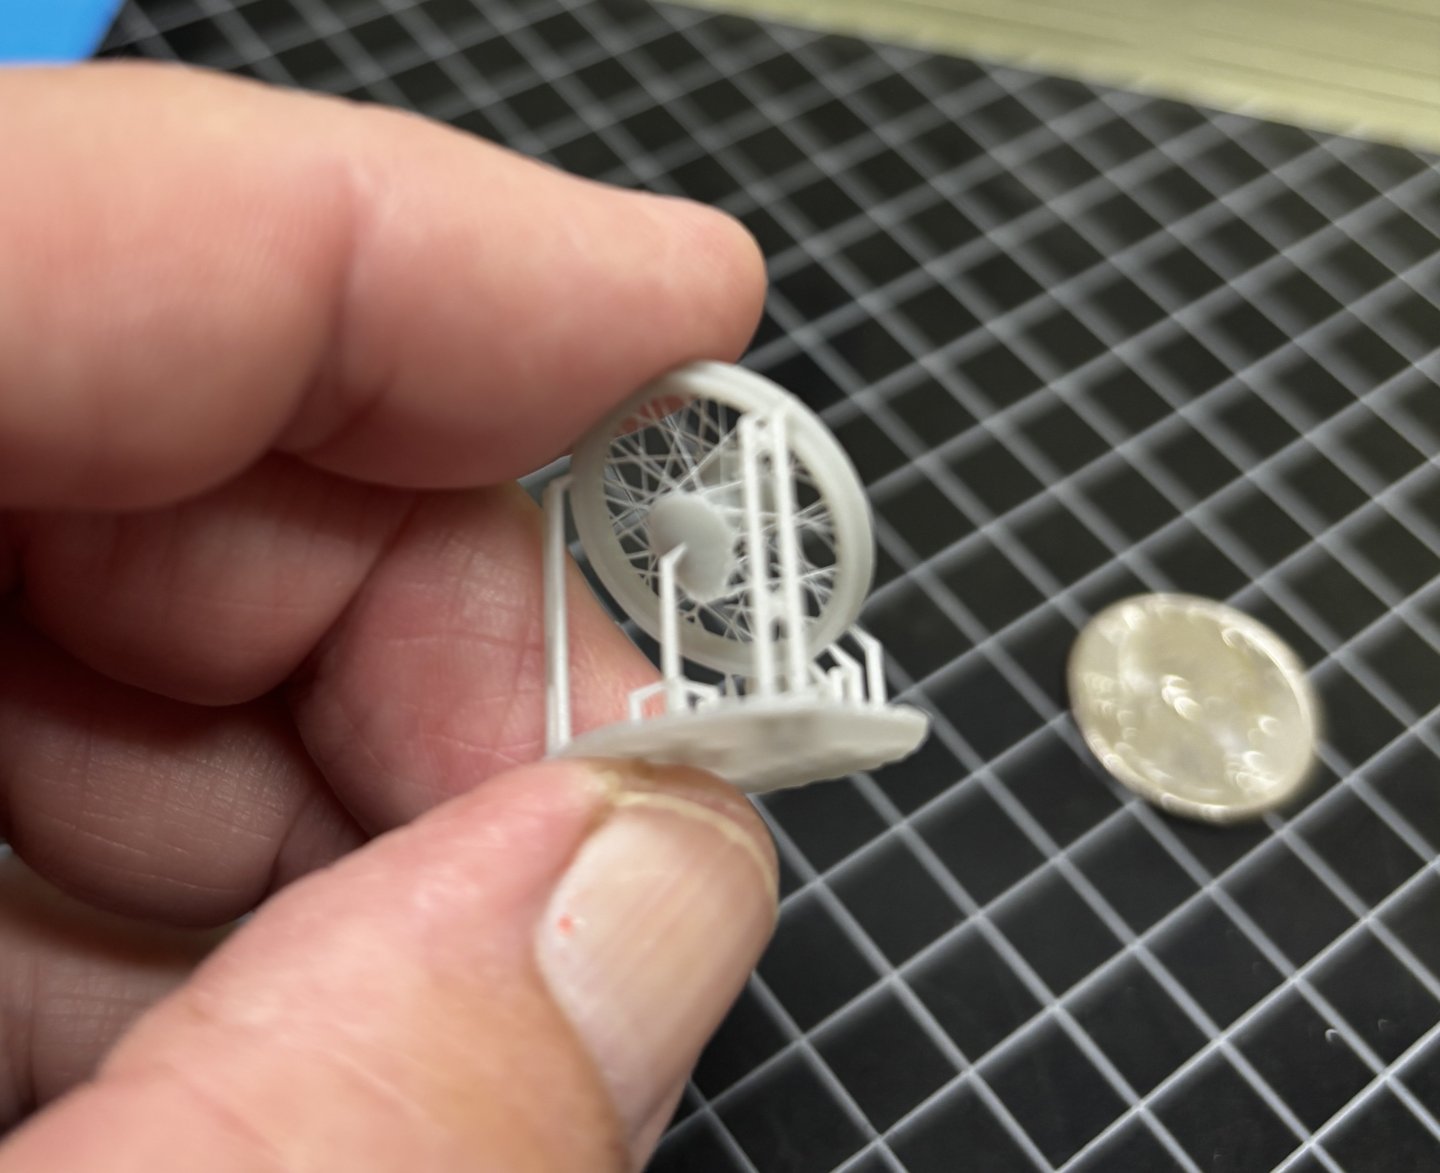
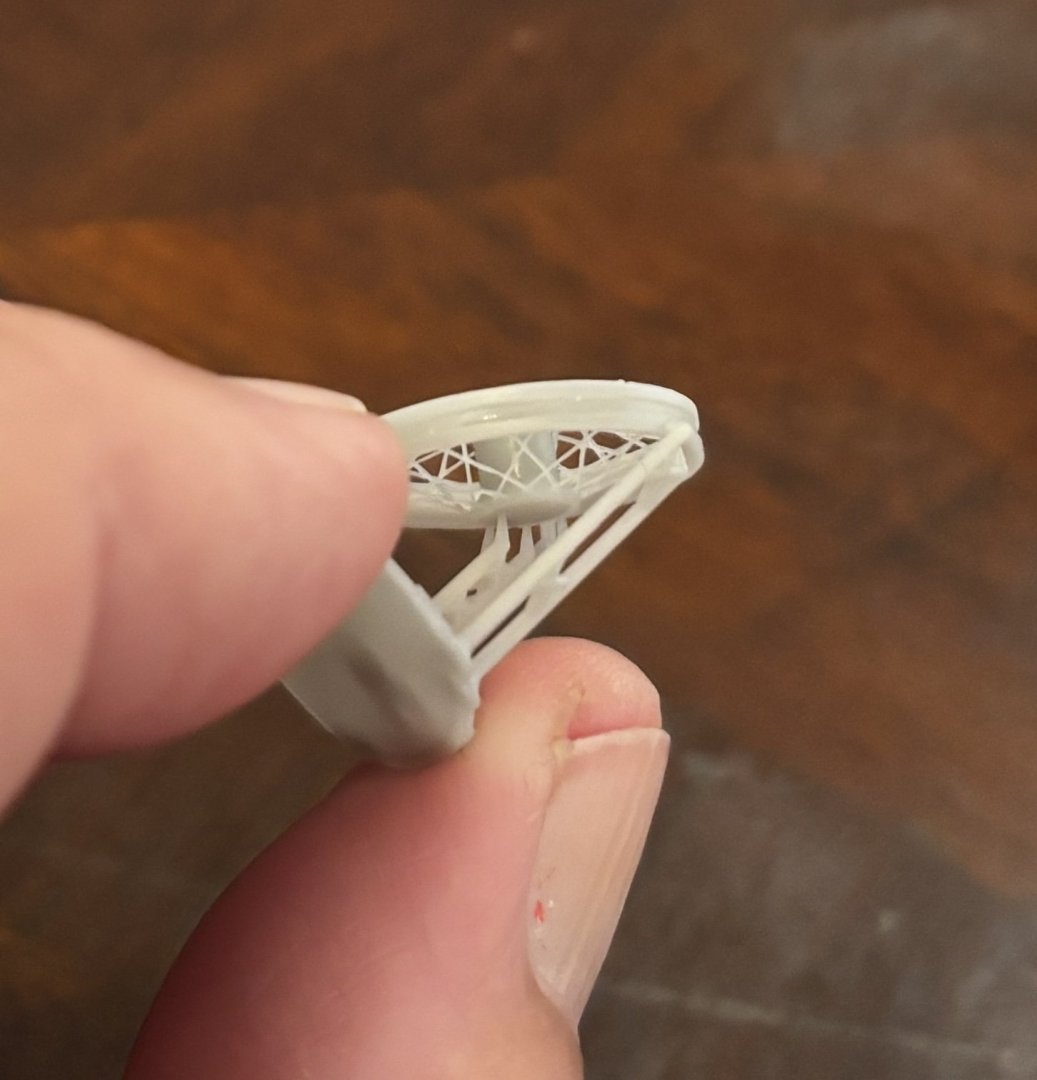
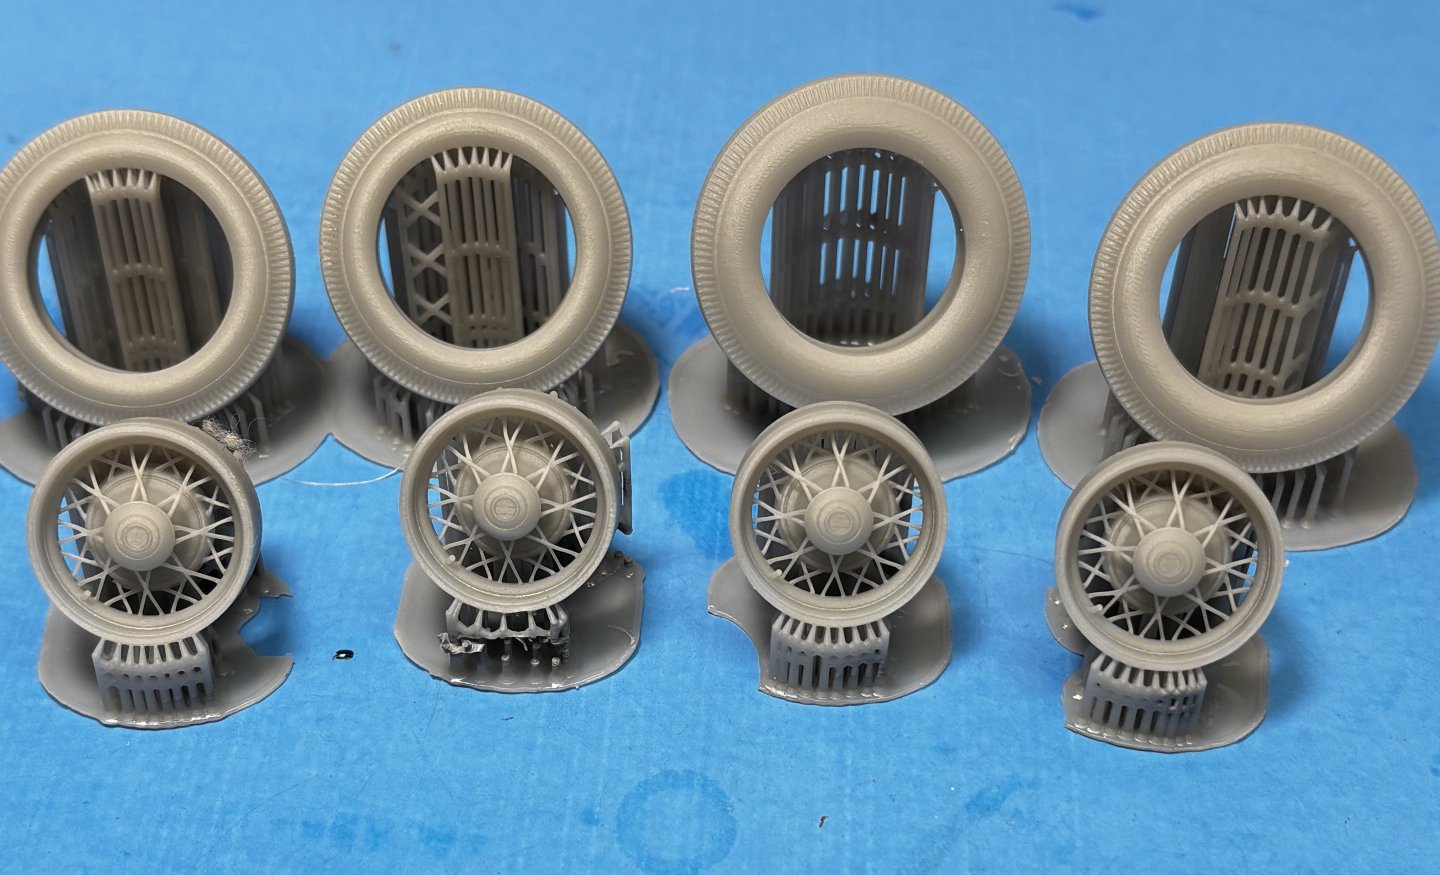
My first test print for this dragster wire wheel was mostly okay, but there was some sagging at the bottom of the hub which in turn caused several spokes to fail. After this first test, adjusted my second test print to include two additional supports at the bottom of the hub. This solved the sagging issue on the first print as well as the failed spokes. Not entirely perfect, but very close now to production status. The interesting thing is, it makes no difference whether you are printing one wheel or thirty wheels all at once, the print time is the same. About four hours.


- 29 replies
-
- 11
-
-
-
Another way to learn your new 3D printer can be the ChatGPT Ai platform. After asking the basic questions about printing wire wheels, ChatGPT gives this detailed recommendation. Pretty cool. I have the test print going as I write this, using the ChatGPT recommendations. This helps take a lot of guesswork out of the equation. "using the elegoo saturn 3 and chitubox software, what are the optimum settings and orientation to print wire wheels" ChatGPT said: Printing wire wheels with an Elegoo Saturn 3 using Chitubox software requires careful setup to preserve fine detail, ensure structural integrity, and prevent print failures. Here are the optimum settings and orientation recommendations, tailored for delicate parts like wire wheels (typically 1/24–1/8 scale for modeling): ⚙️ Printer Overview Printer: Elegoo Saturn 3 (12K resolution, 7” mono screen) Software: Chitubox (latest version recommended) Resin: Use a high-detail standard or ABS-like resin (e.g., Elegoo 8K/12K resin or Siraya Tech Fast Grey/Build) 🧭 Optimal Orientation Goal: Balance print success with minimizing support contact on visible detail. Angle: Tilt the wheel at 30–45° on its vertical axis (like a coin tipped sideways), with the inner hub down and outer rim up. This allows resin to drain and minimizes suction forces. Do NOT print flat on the build plate; it causes layer lines across spokes and high failure risk. Face spokes slightly toward the build plate to reduce overhangs and preserve detail. 🧷 Supports Use custom supports to protect details: Support type: Light and medium supports Density: Medium (80–120 points depending on size) Touchpoint size: ~0.3–0.5 mm Placement: Focus supports under the hub and back of spokes, not on visible outer faces Add a few heavier supports on the base side for structural integrity Raft/Base: Use a skate raft or large base to prevent warping 🧪 Resin Exposure Settings (Baseline for Elegoo 12K resin) Adjust based on your specific resin’s MSDS or test prints Setting Value Layer Height 0.03 mm (for finest detail) Bottom Layer Count 6–8 Bottom Exposure 30–35 s Normal Exposure 2.2–2.5 s (resin dependent) Lift Distance 6 mm Lifting Speed 60 mm/min Retract Speed 80 mm/min Anti-aliasing Level 4–8 Light-off Delay 0.5–1.0 s 💡 Additional Tips Hollowing: Not needed for small wheels. For large-scale wheels (1/8 or bigger), hollow with 1.5–2 mm walls and add drain holes. Mesh Checks: Use Netfabb or Chitubox’s built-in repair to ensure spokes and rims are manifold and error-free. Test Print: Always print one wheel first, inspect for warping, loss of detail, or broken spokes before batch printing. Curing: Post-cure with minimal exposure to avoid brittleness. 1–2 minutes per side with proper rotation. Would you like a visual diagram or STL orientation preview mock-up for your wire wheels in Chitubox? I can generate one for better reference. You said: yes ChatGPT said: Image created https://sdmntprwestus3.oaiusercontent.com/files/00000000-9ad4-61fd-81b9-c69aba8b62b2/raw?se=2025-06-10T18%3A55%3A50Z&sp=r&sv=2024-08-04&sr=b&scid=49646a2b-c71c-59ad-a69f-5f4c8f88053d&skoid=9ccea605-1409-4478-82eb-9c83b25dc1b0&sktid=a48cca56-e6da-484e-a814-9c849652bcb3&skt=2025-06-09T22%3A13%3A46Z&ske=2025-06-10T22%3A13%3A46Z&sks=b&skv=2024-08-04&sig=xr0992qv7eBAYtKF7ooRcSM6yyX7t%2BtWtnZXJ1AvXys%3D https://sdmntprsouthcentralus.oaiusercontent.com/files/00000000-7a74-61f7-964b-017654b18fd6/raw?se=2025-06-10T18%3A55%3A31Z&sp=r&sv=2024-08-04&sr=b&scid=c4de8a54-a504-50c7-97d9-65caeeabff11&skoid=9ccea605-1409-4478-82eb-9c83b25dc1b0&sktid=a48cca56-e6da-484e-a814-9c849652bcb3&skt=2025-06-10T10%3A04%3A38Z&ske=2025-06-11T10%3A04%3A38Z&sks=b&skv=2024-08-04&sig=fwmkmJ%2Bfk3vkyBdeDX2cSM2RUFbNv99eKncmhFMv6Fo%3D
-
Learning where and what size supports, what orientation of the part to the build plate, what settings to use for the particular resin type, just to name a few, are all part of the learning curve for printing the parts. It will take time and practice to achieve acceptable results. No way around that trial and error process.
-
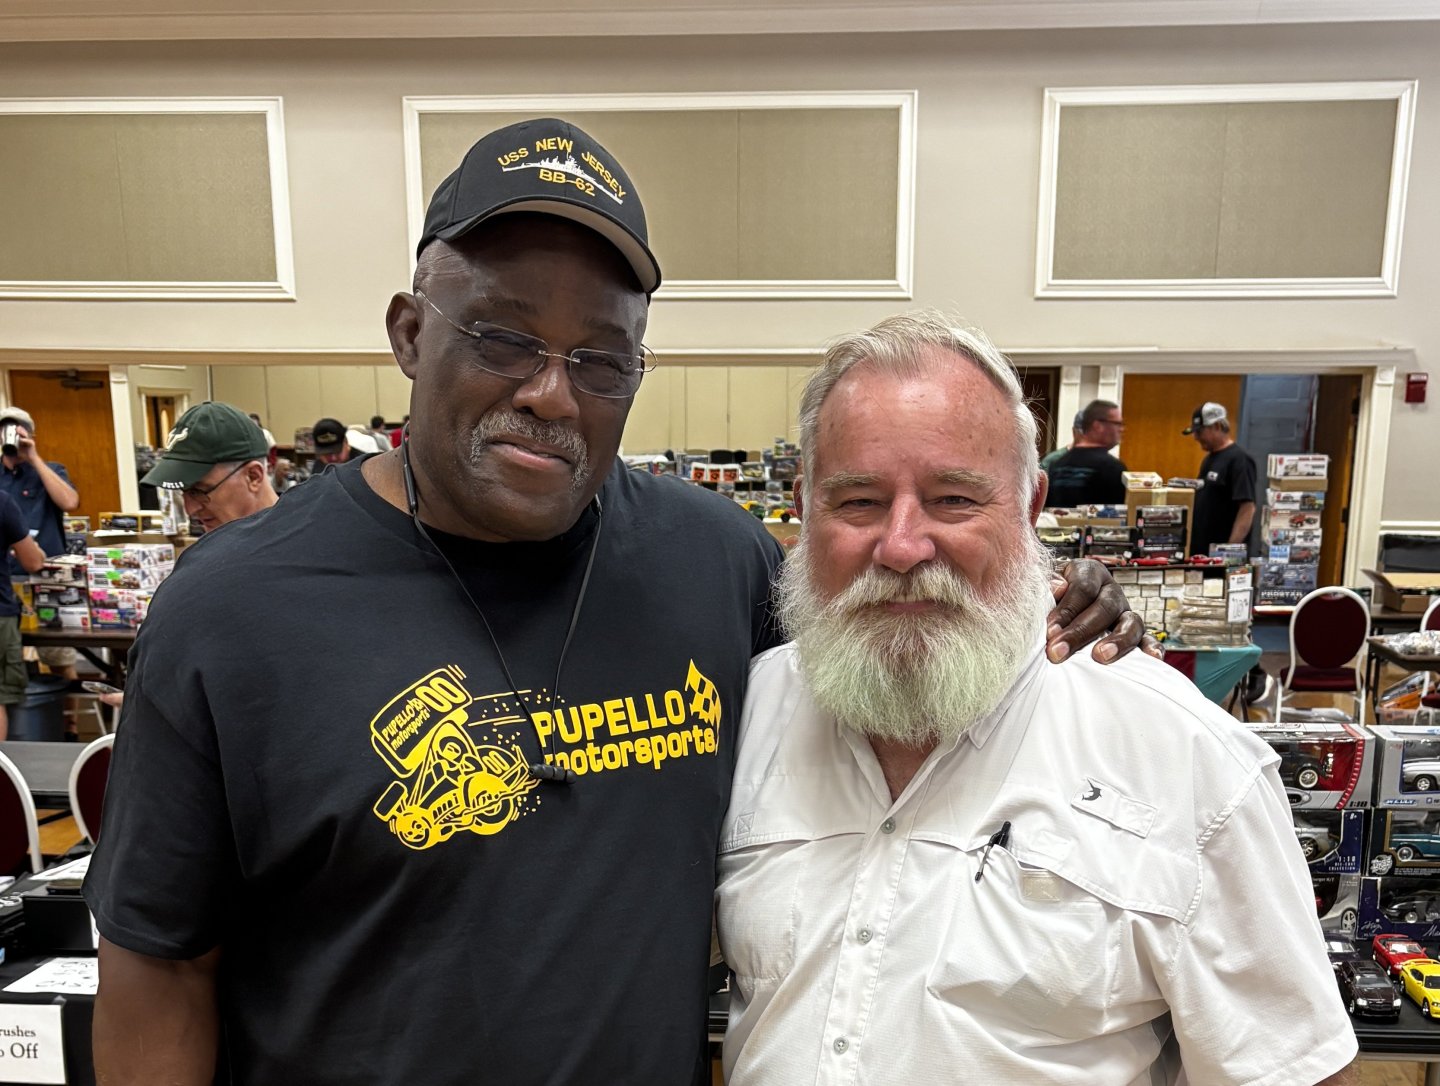
Richard Batman Woods. He’s a model fan but does not build. Building some models for his collection.
- 29 replies
-
- 10
-
-
-
Make sure you have an appropriate environment for your 3D resin printer to live and operate. Outside in a separate building is ideal but a well-ventilated room inside can be done. Read up on it first.
-
After a successful trial run in 1:25 scale, it is my intention to scale this up to 1:12 scale and add even more detail to build a street rod model I want that's unavailable in injection molded kit form.
-
And one rabbit hole leads to another 😄. Another is an Ai program called ChatGPT. For instance, you can go into the ChatGPT program to ask specific questions about 3D printing, and it will provide near-instant answers. When this latest "BBB" was created by the House, I uploaded the entire bill into ChatGPT and asked it to give me a summary on each specific part I was interested in, and it gave me a complete rundown in just seconds. It can read thousands of pages or scan hundreds of photos to give immediate feedback on whatever you want to know. Technology is changing at an exponential rate, Jack.
-
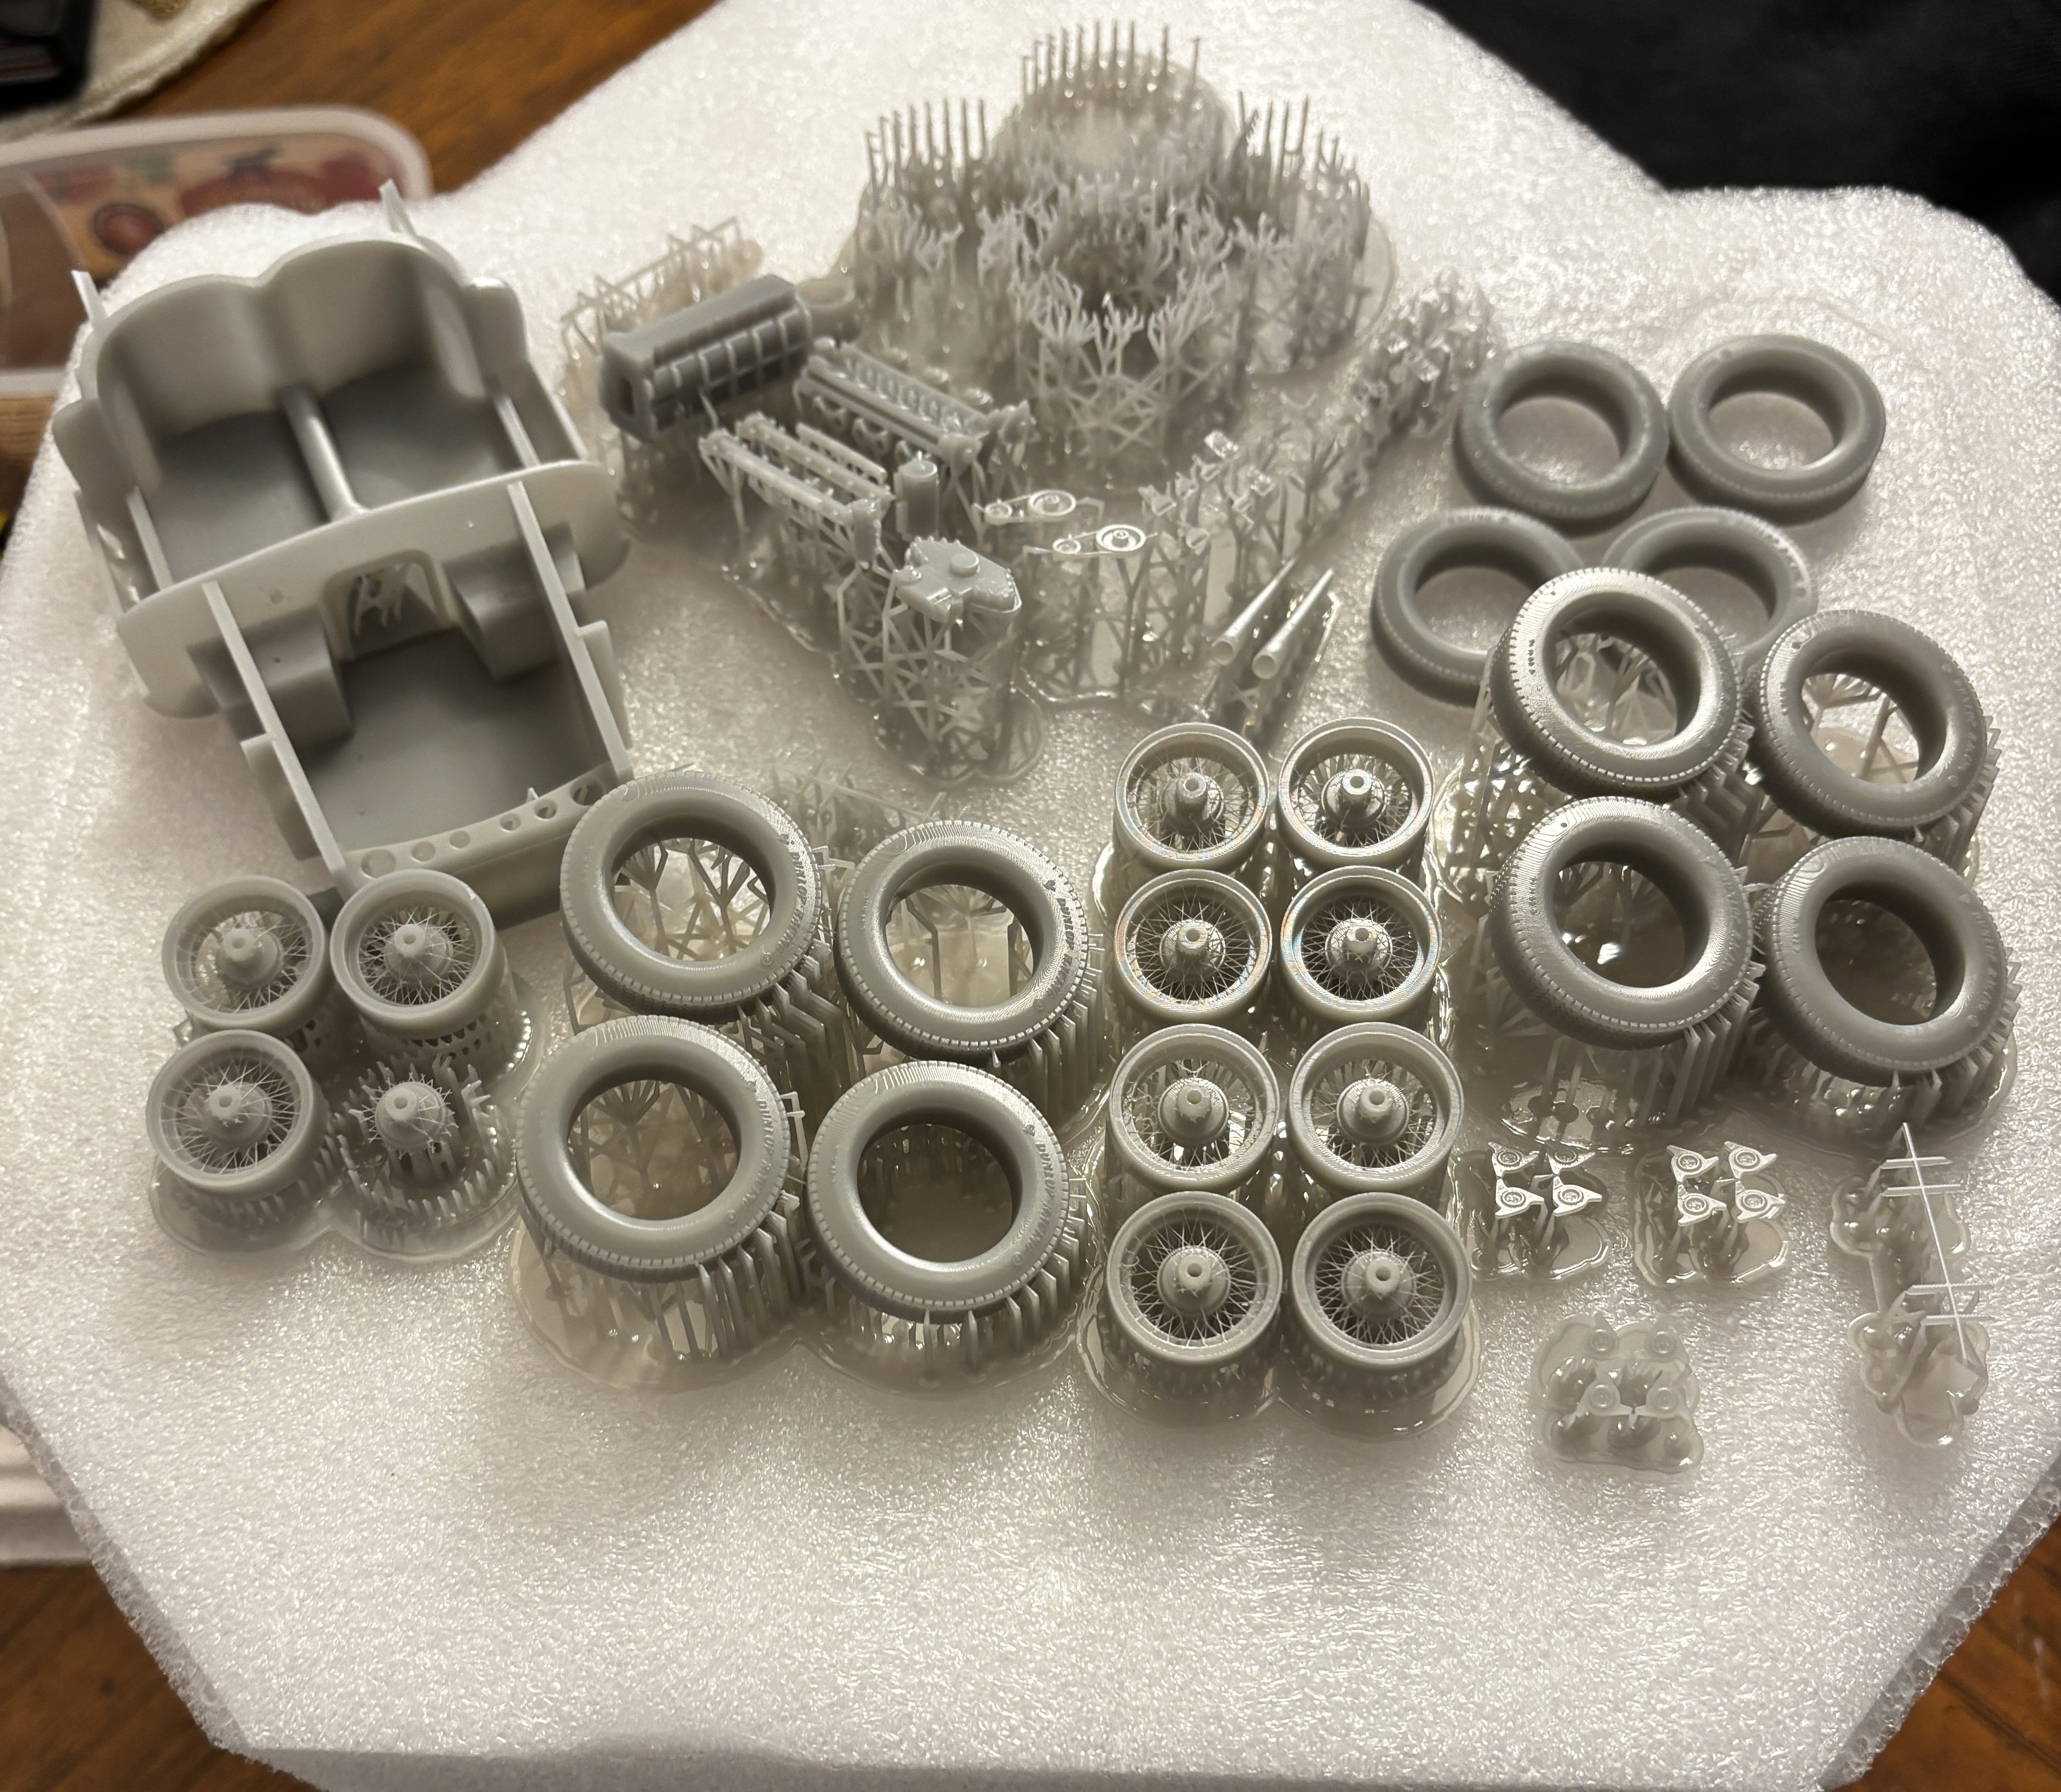
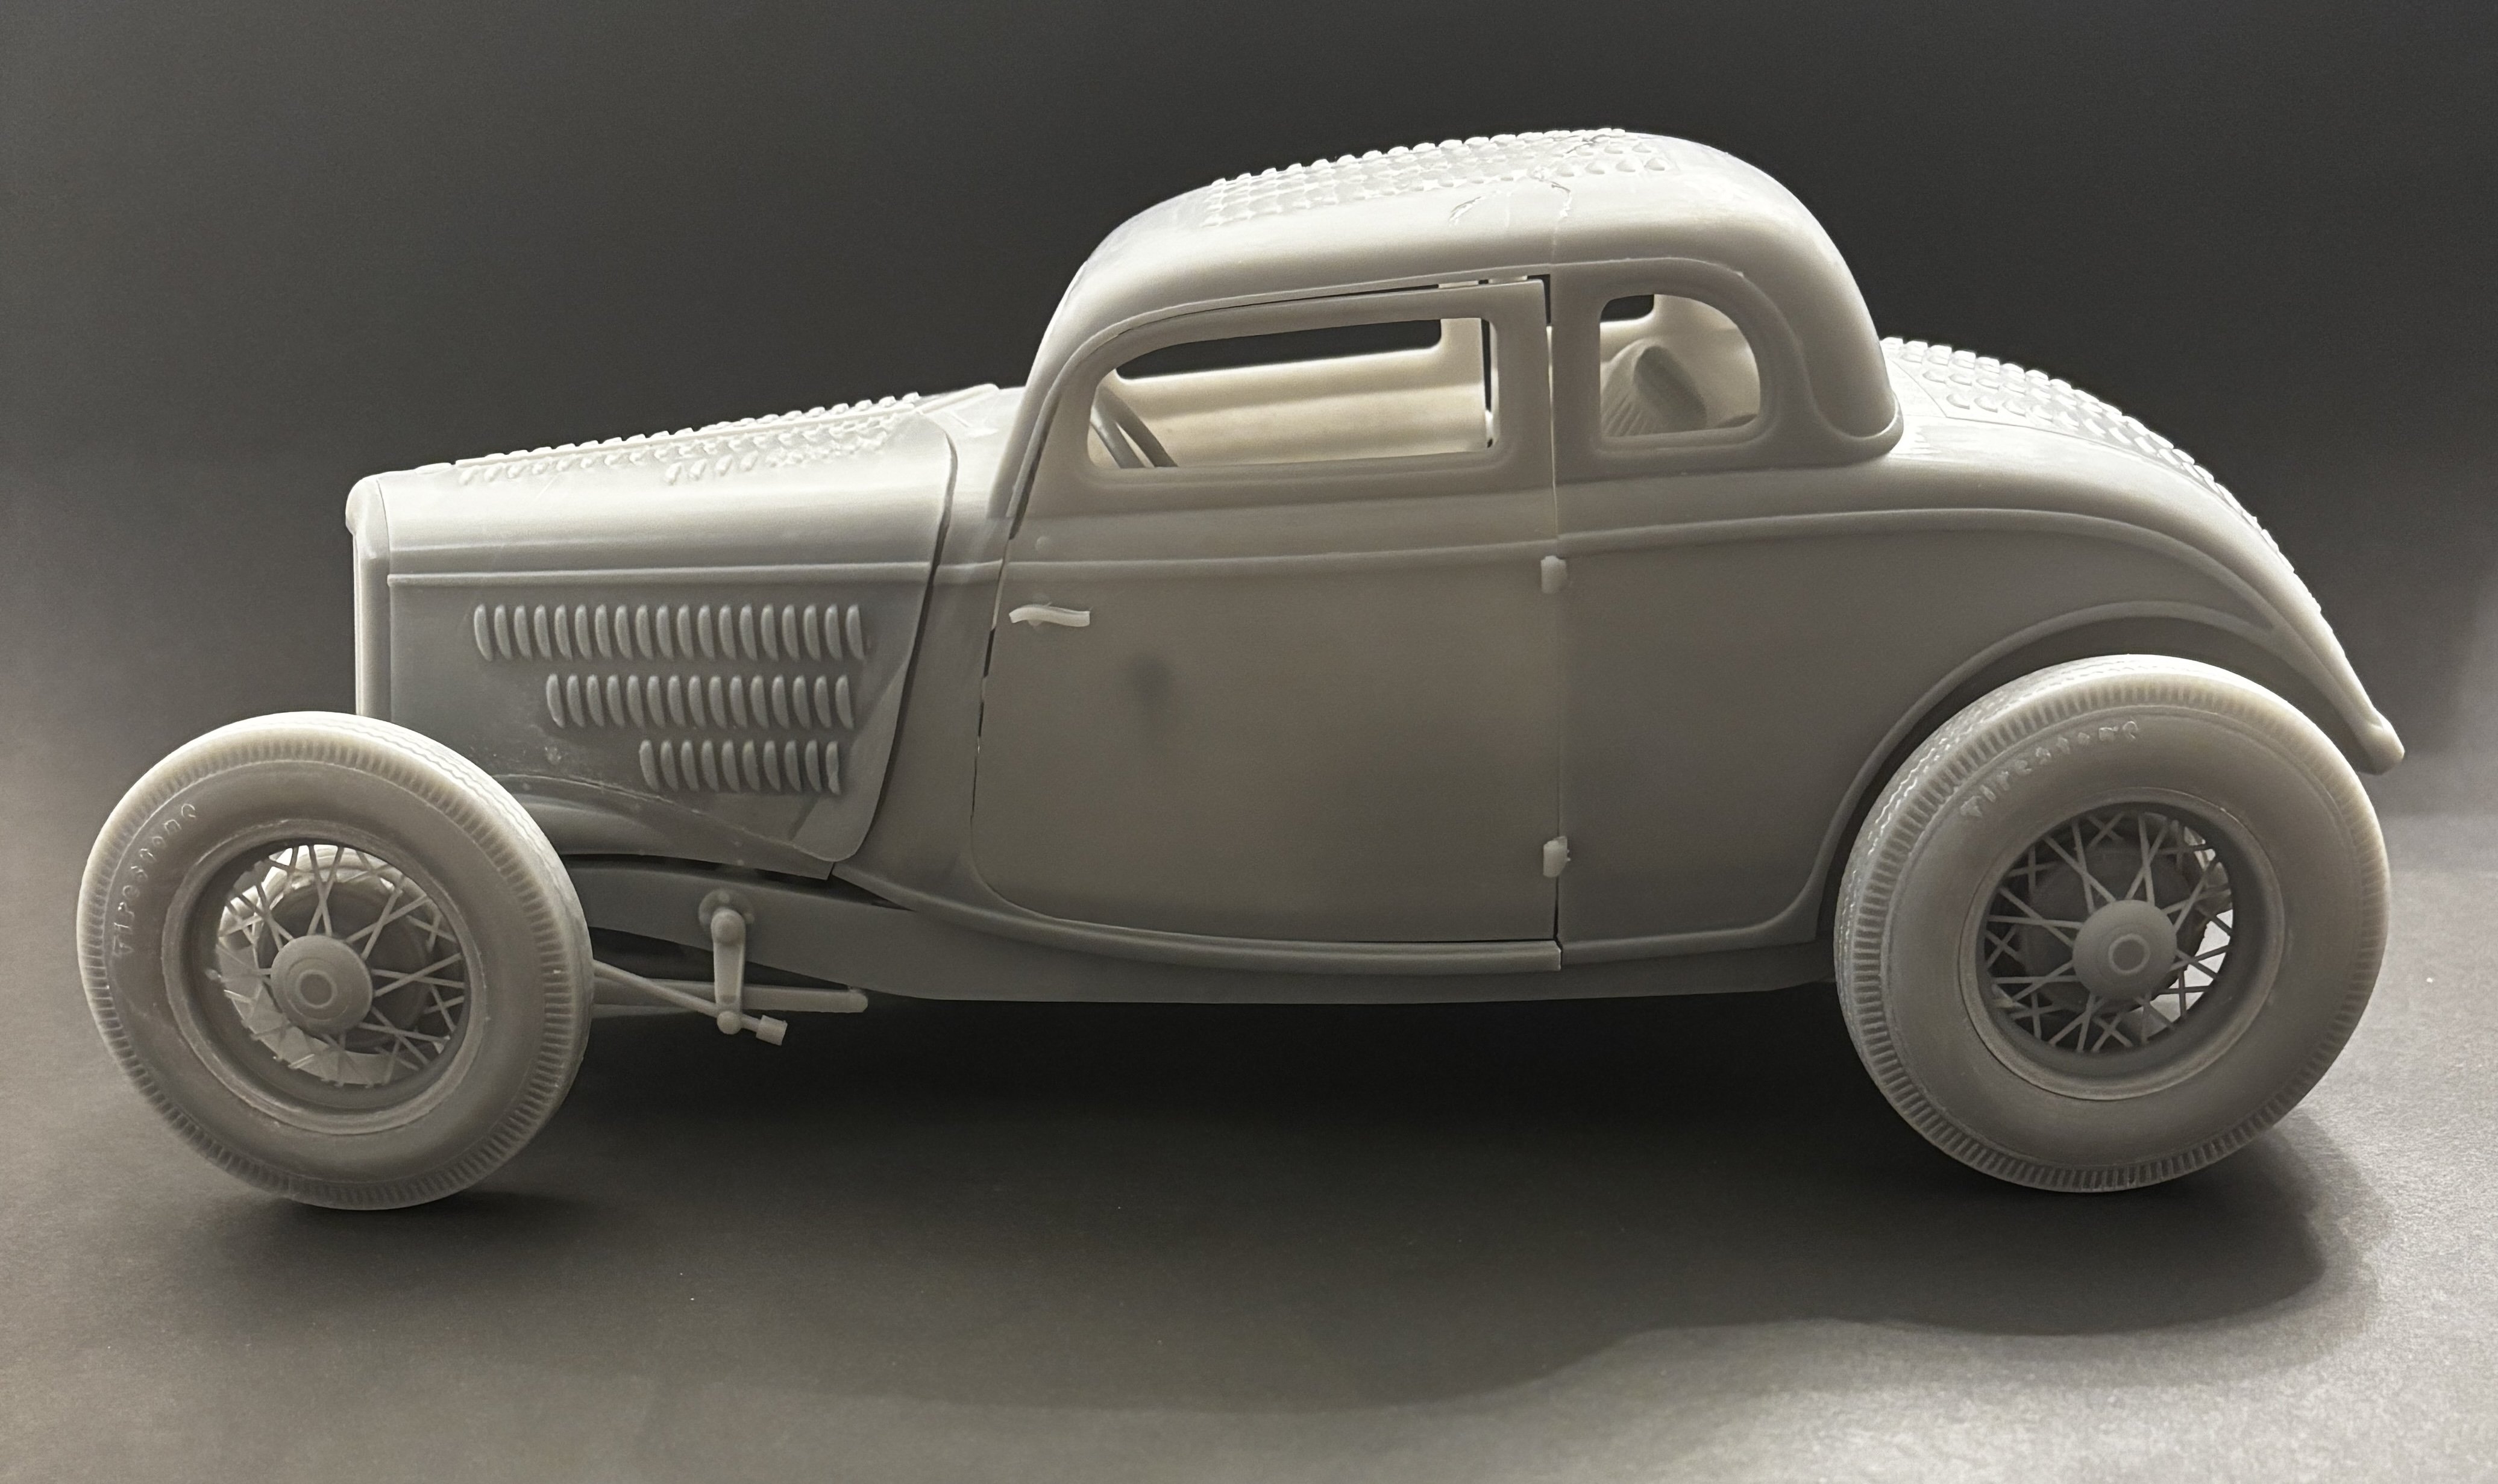
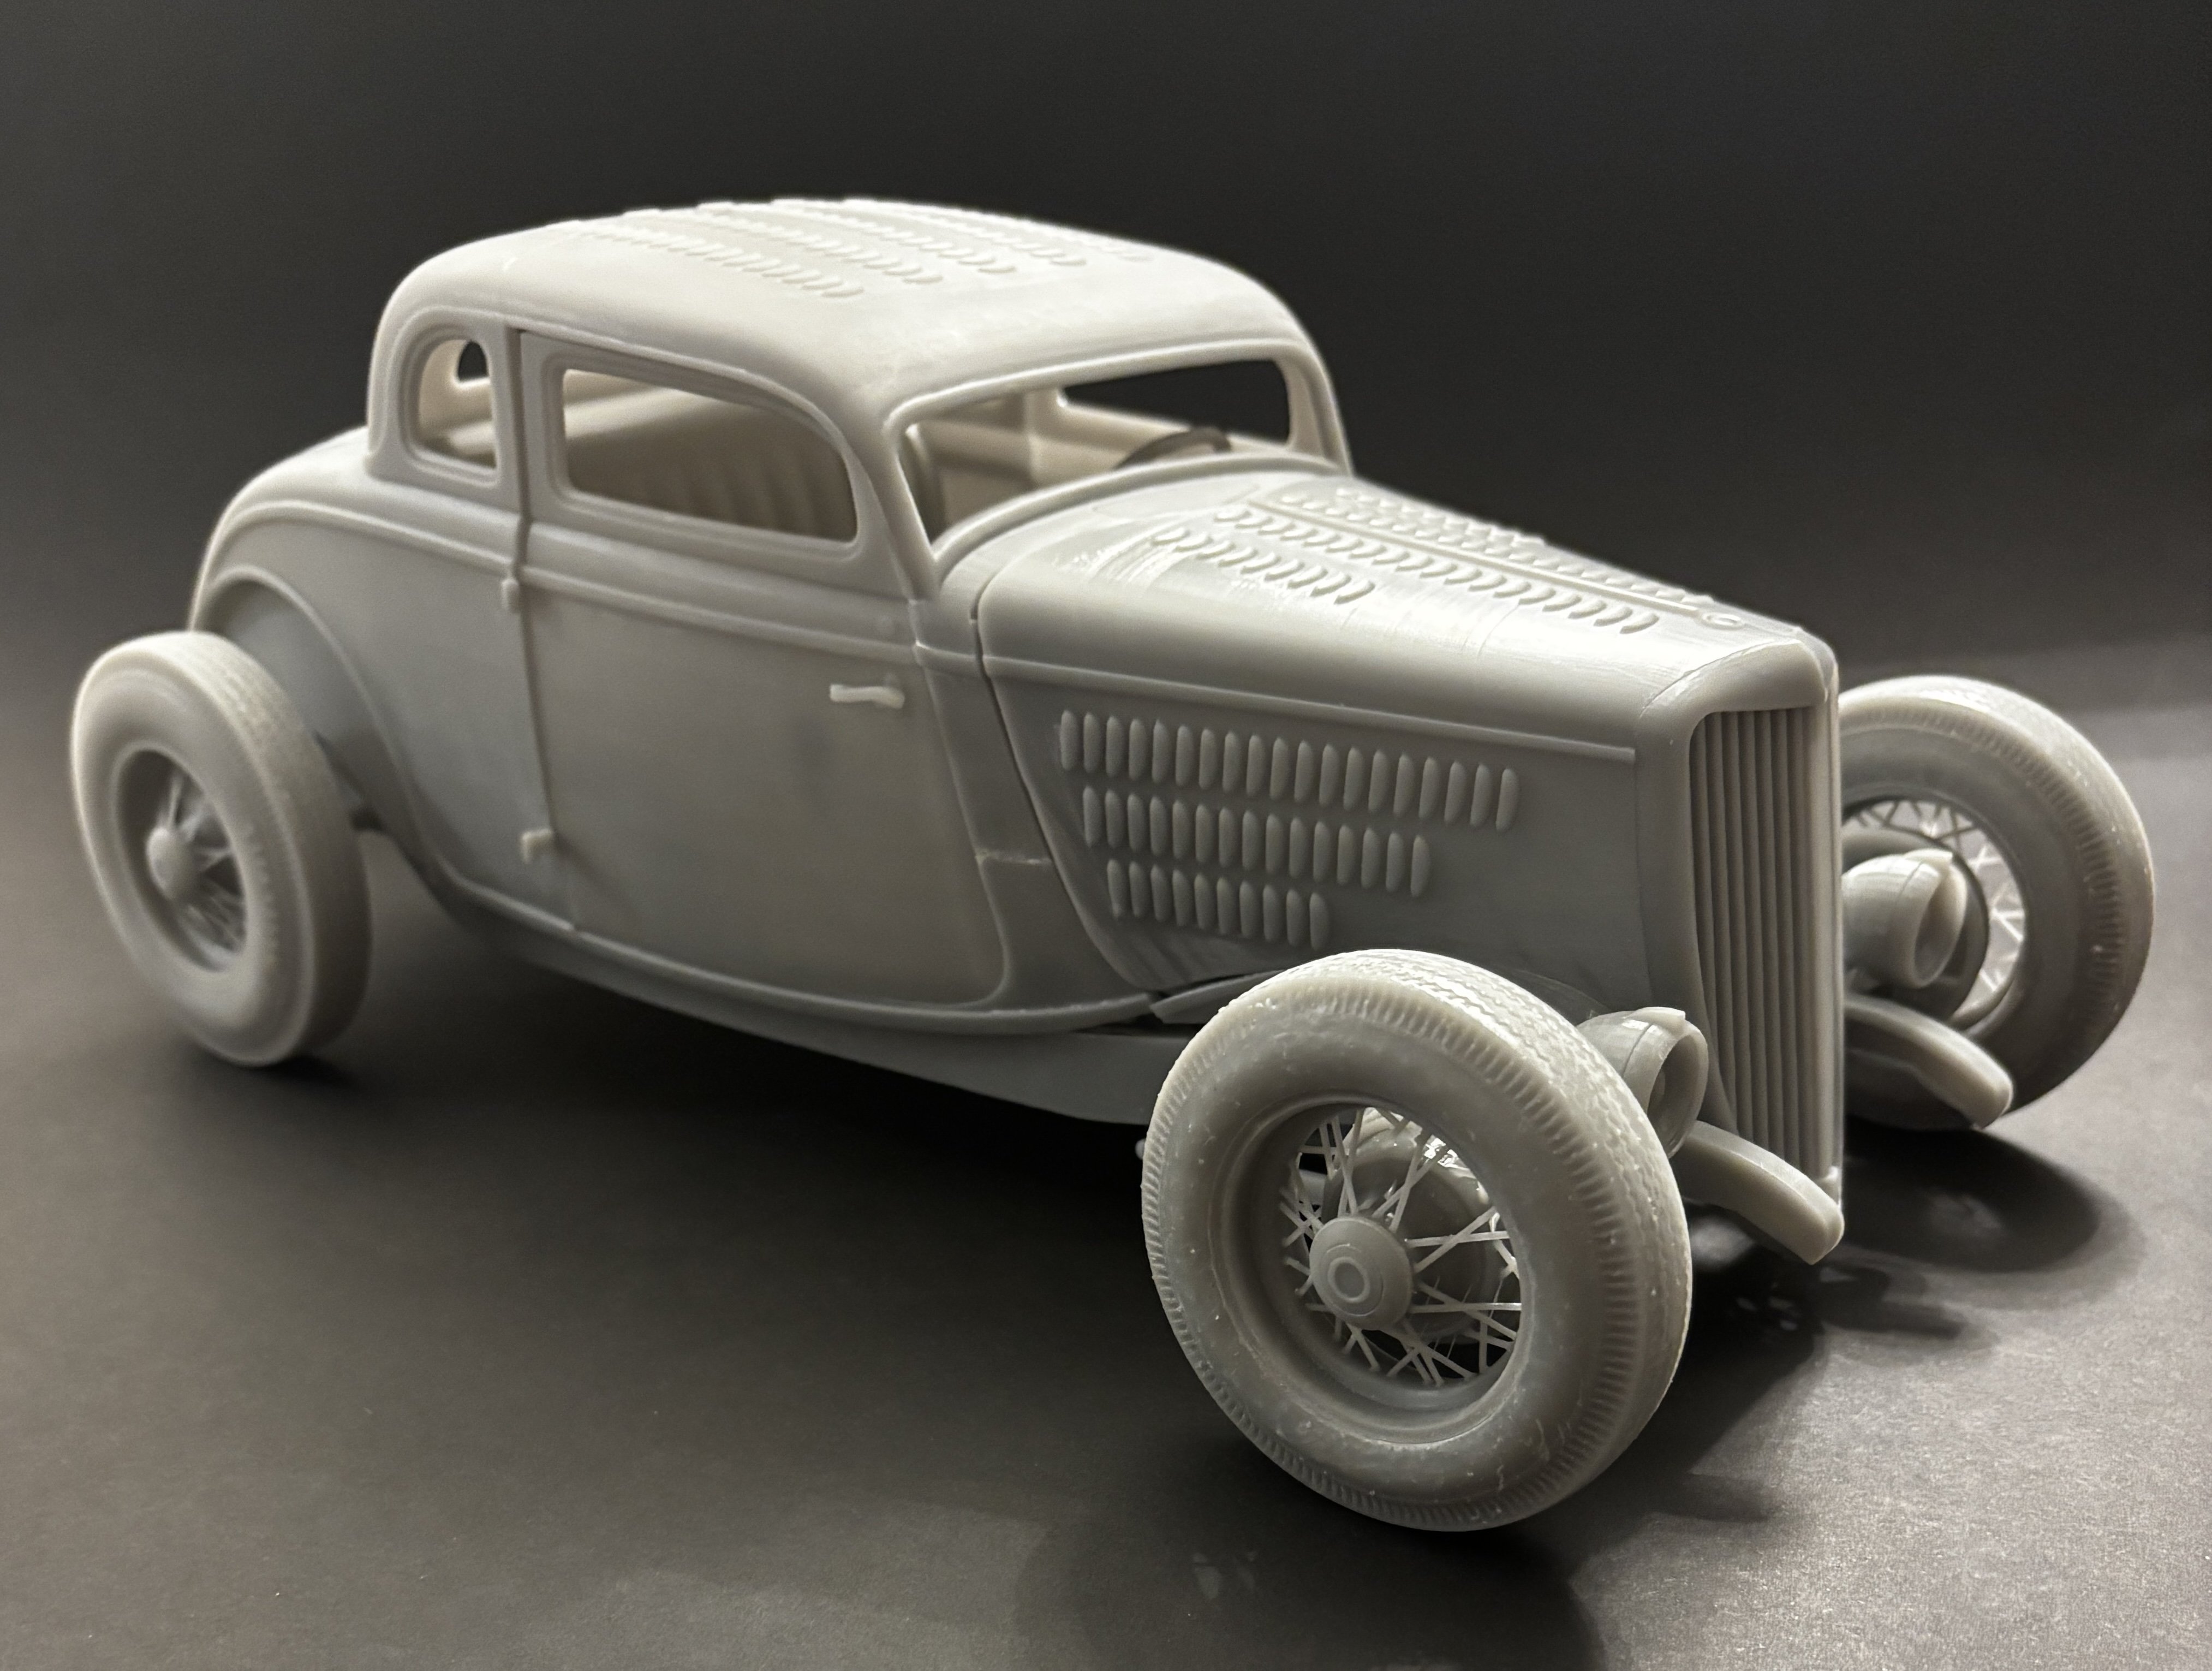
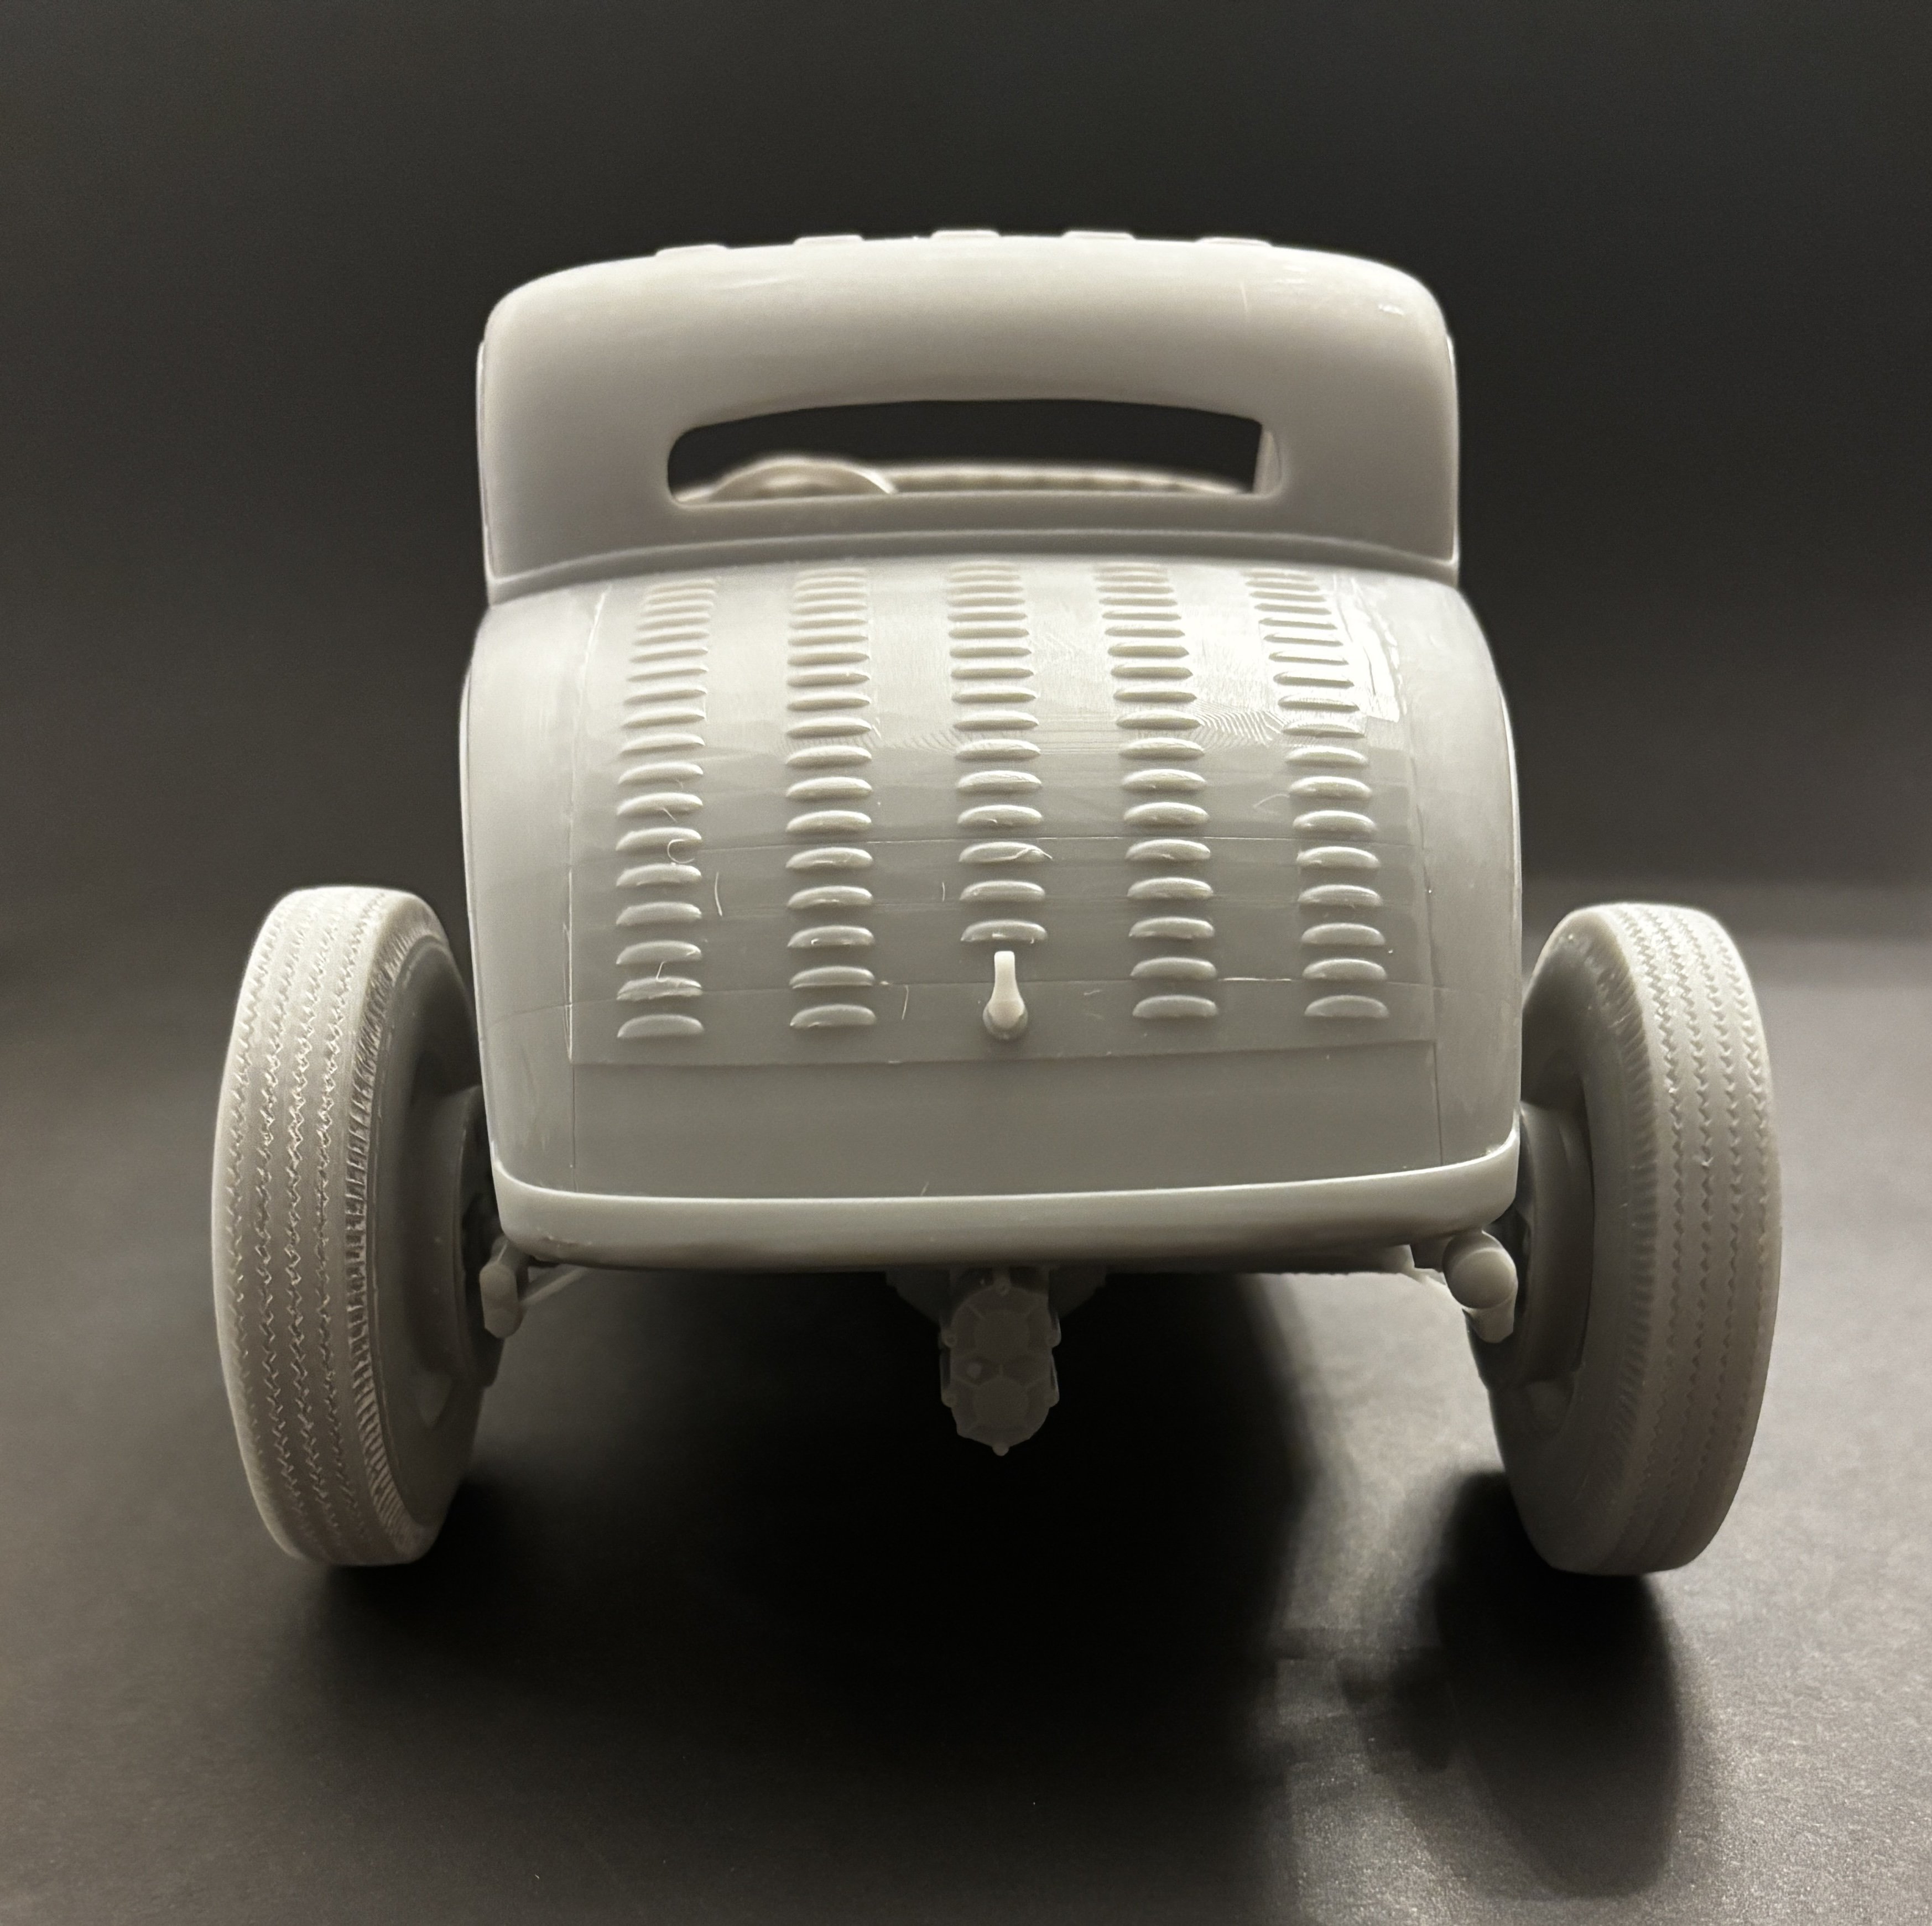
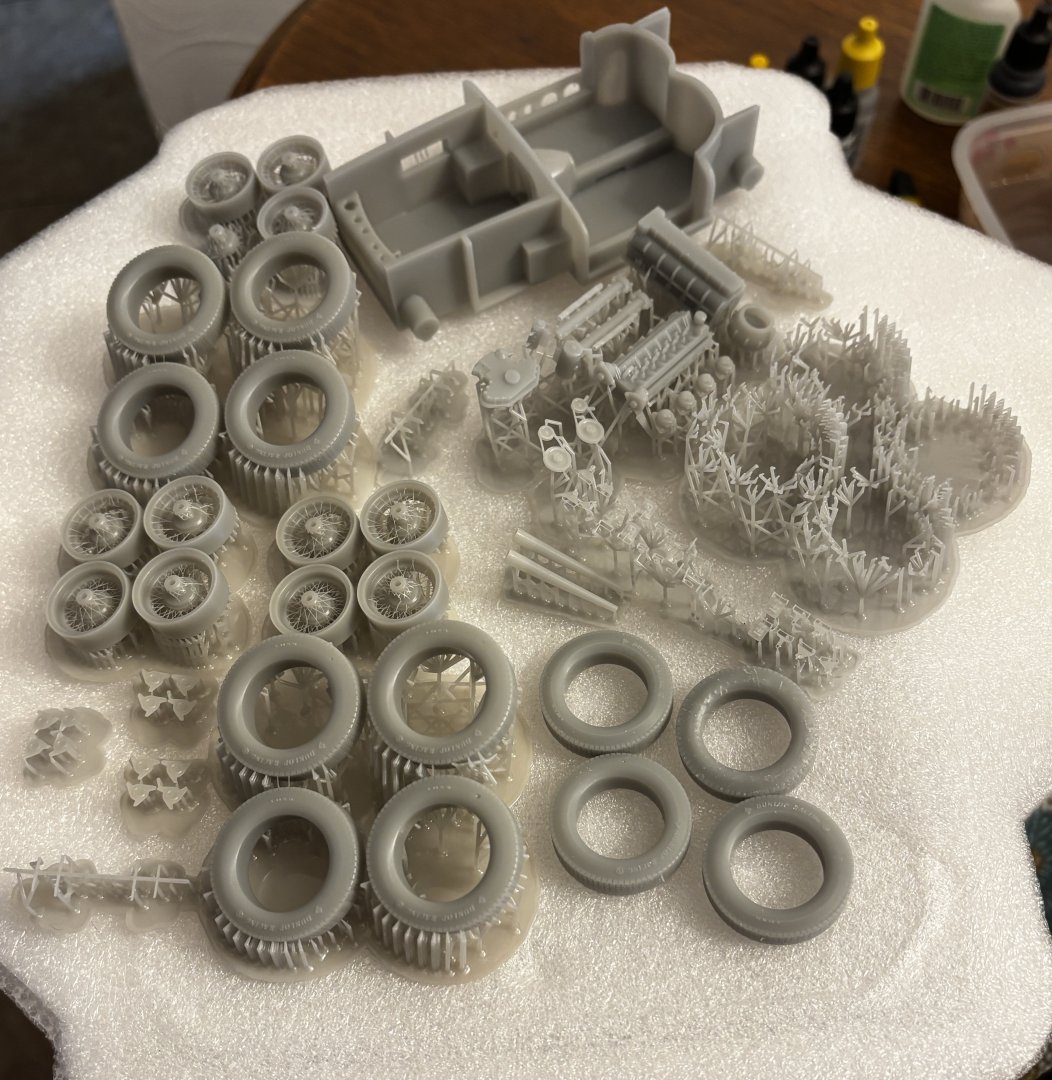
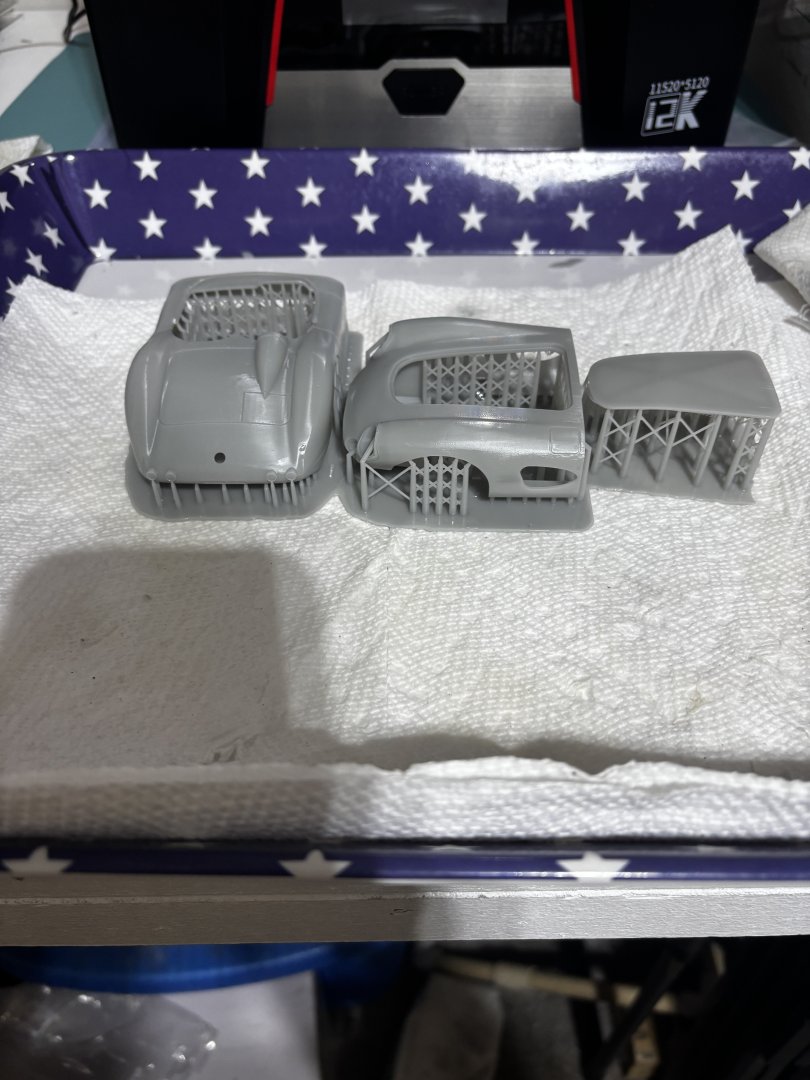
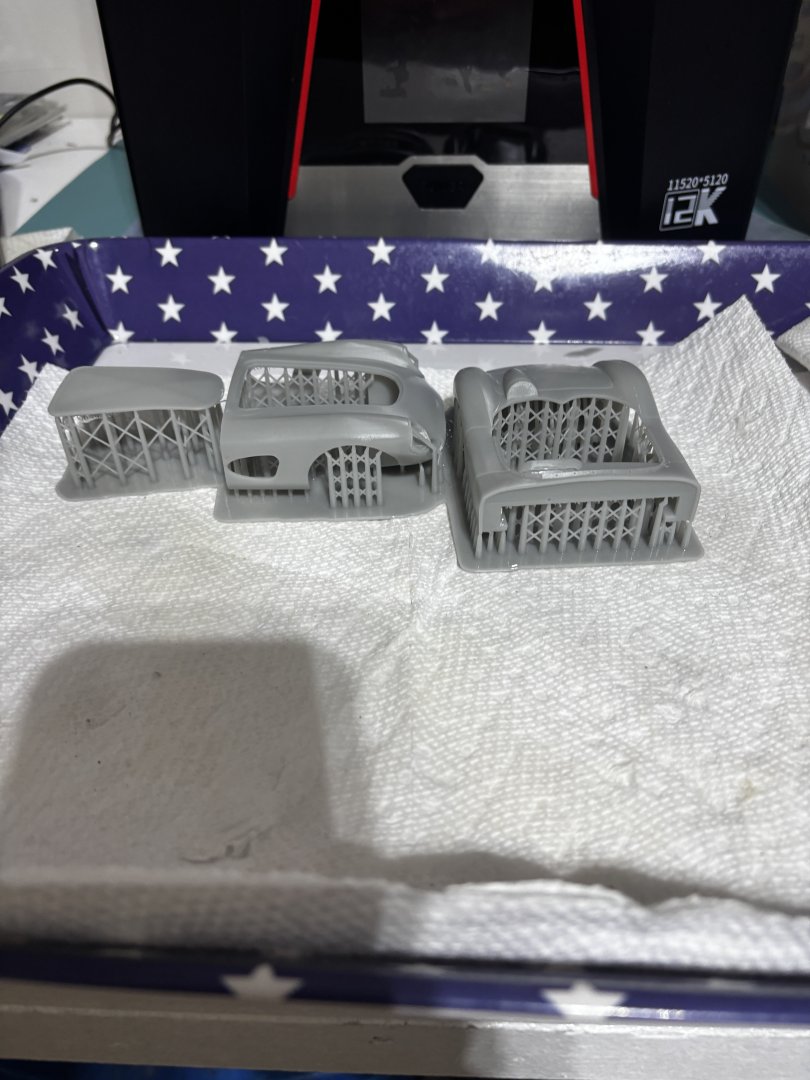
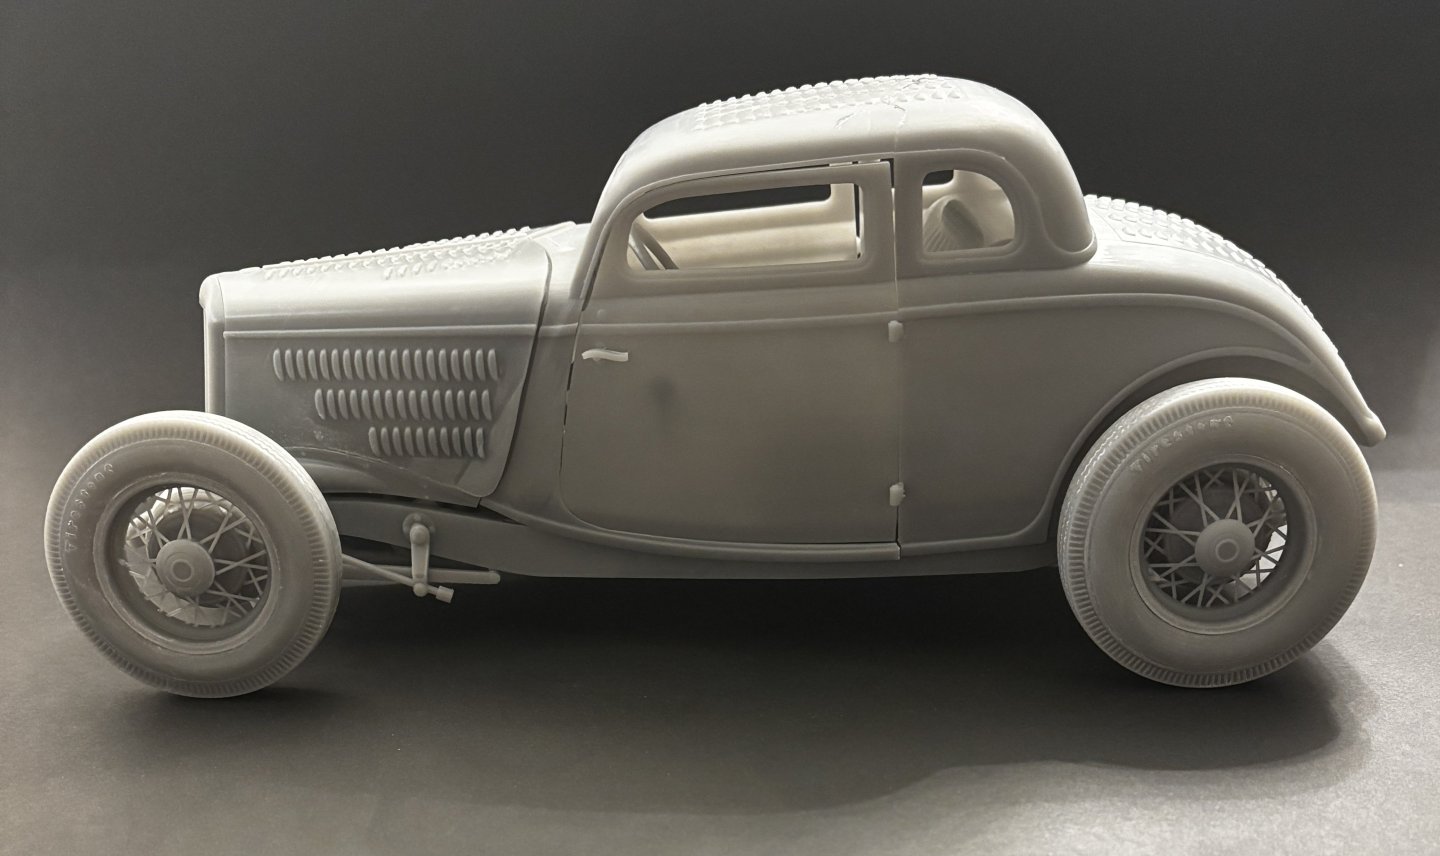
This month, I took the plunge and bought my first 3D resin printer, the Elegoo Saturn 3. Along with it, bought the appropriately sized Elegoo Washer and UV Light Cure Station to match up with the printer. After unboxing and setting up the printer, wash station/curing station, printed out my first test print which came out rather perfect. I found a near-ready-to-print shape file/s kit for the 1934 Ford Chopped Top Coupe. The shape files include most every part needed to build the entire kit. A time-consuming chore for me as a first-time user was to set up the files for proper orientation and to add supports. I cannot over stress how important it is to watch tutorial videos on this subject if you ever decide to give 3D resin printing a try. Following are photos of my first attempt at printing out my own model kit. There are a myriad of different combinations of settings and resin types that could be tried, each combination requiring its own unique series of print parameters and usefulness for the project at hand. Overall, I am satisfied with this first attempt, although there are improvements which I will incorporate in later attempts to refine the process. I am particularly pleased with the way the wire wheels printed out. This technology is amazing and open near unlimited opportunities to take my modeling to the next level with highly detailed 3D resin printed parts. These are not all the parts for this kit. I still have more to set up and print before actually building the kit.

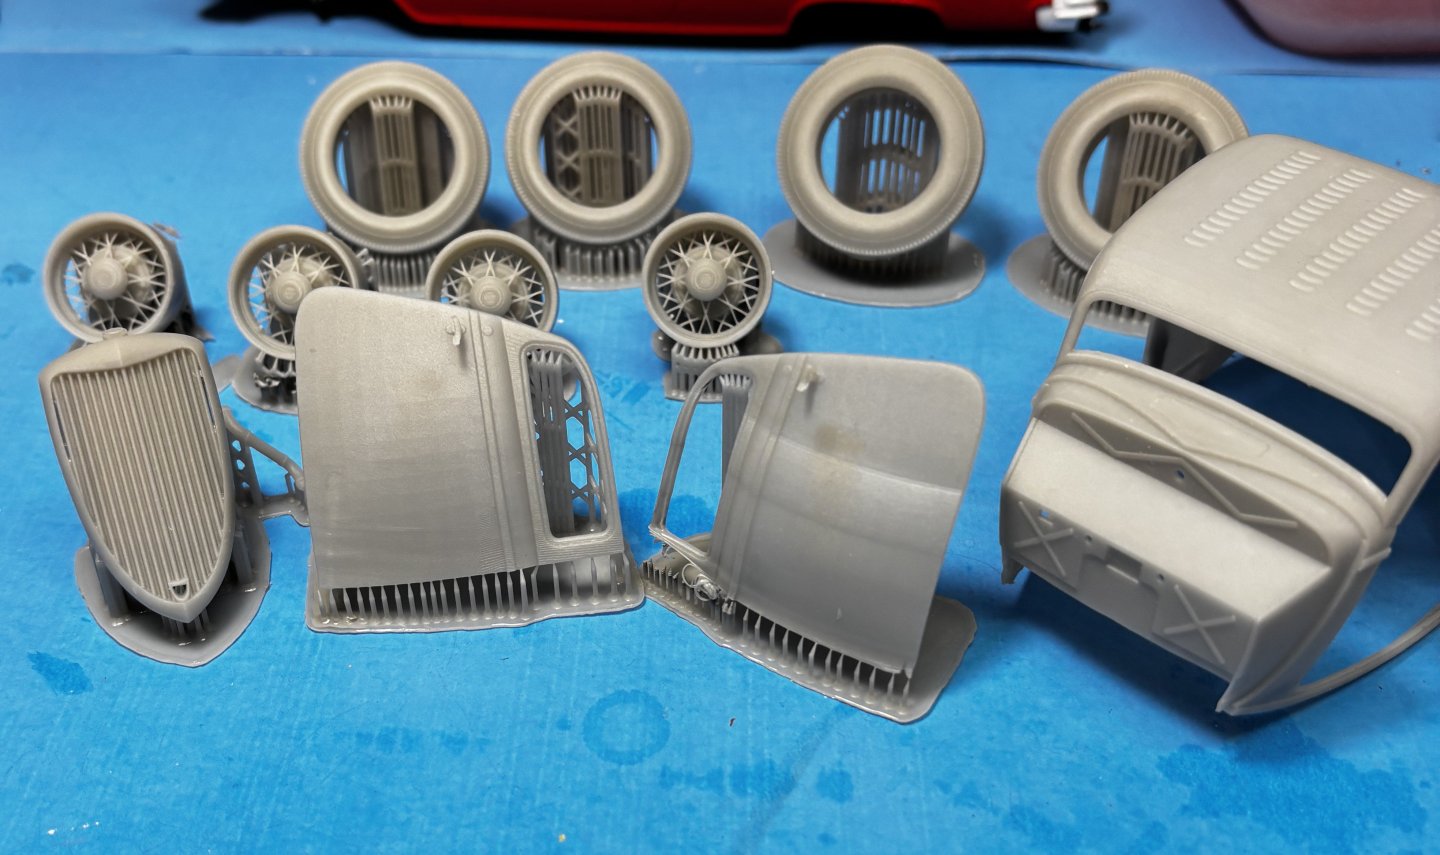
- 29 replies
-
- 13
-
-
-
I'll pass on that. As it is, I have four models that have not been previously entered somewhere. There's no real prohibition I know of to enter a model multiple times, but since I have taken medals with them, it doesn't seem sportsmanlike to do that, so I won't. This Chevy is no show winner, it's just something to help fill the display tables and support the show. I'm glad there are people who take enough interest to spend the time, money, and effort to put on shows like this. Our new great granddaughter is taking up a lot of our spare time nowadays. She's already 4-months-old!
-
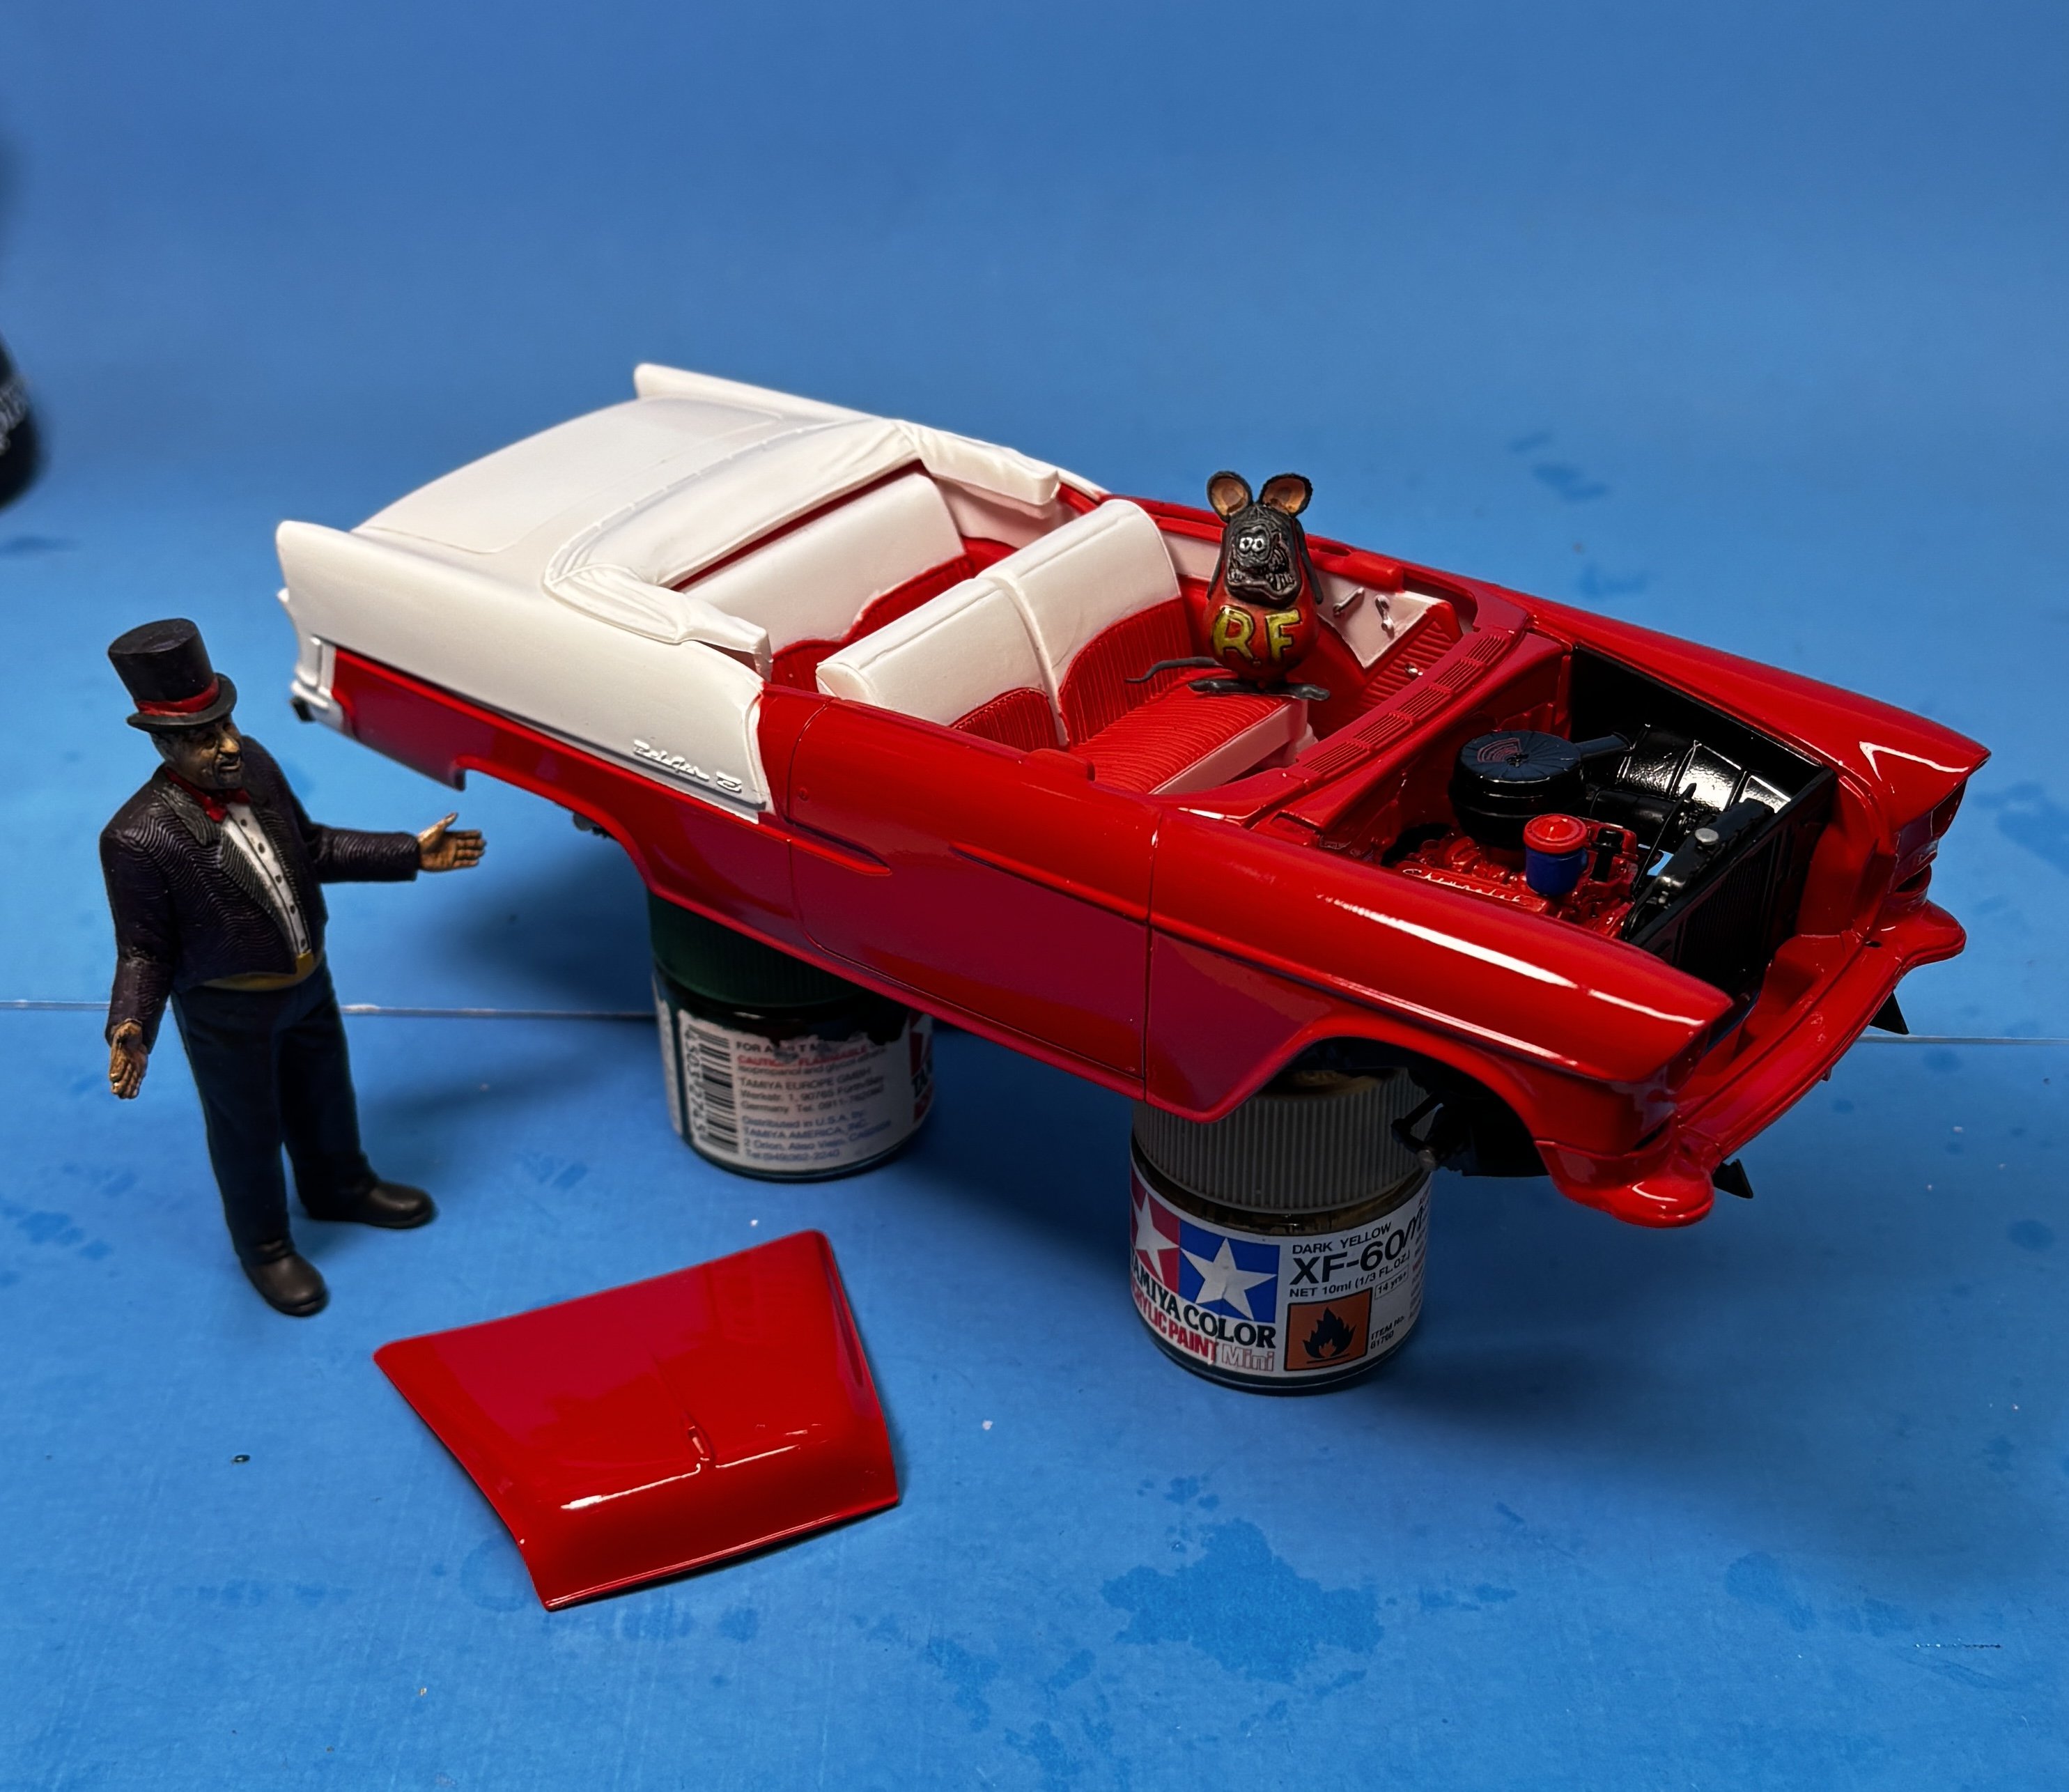
Closing in on a finish for the Southlandz show coming up on Saturday, June 7. Will it be finished by then? Rat Fink and Ed Roth seem to have their doubts. Stay tuned.

-
Very nice progress. Are you following the MFH paint guide or using your own choices? Whichever, it looks very authentic.
-
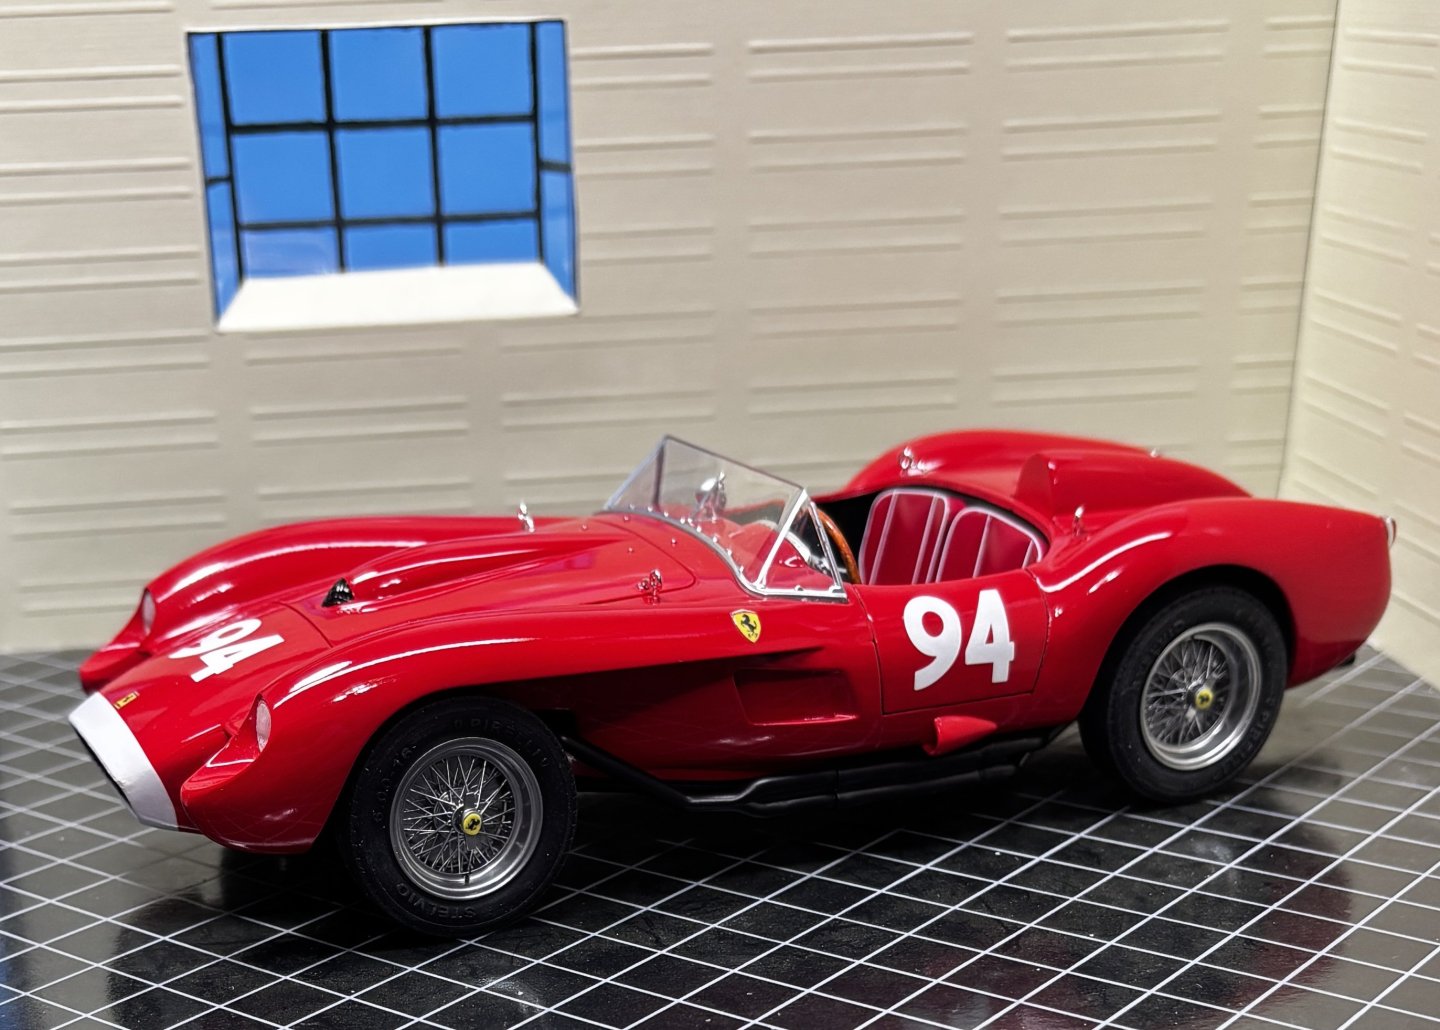
With the last few details added, it’s now time to call this finished. Added a single photo etched windshield wiper, bonnet and trunk straps and buckles, the clear headlamp covers with photo etched trim rings. It’s done and ready for June 7.


- 73 replies
-
- 12
-
-
-
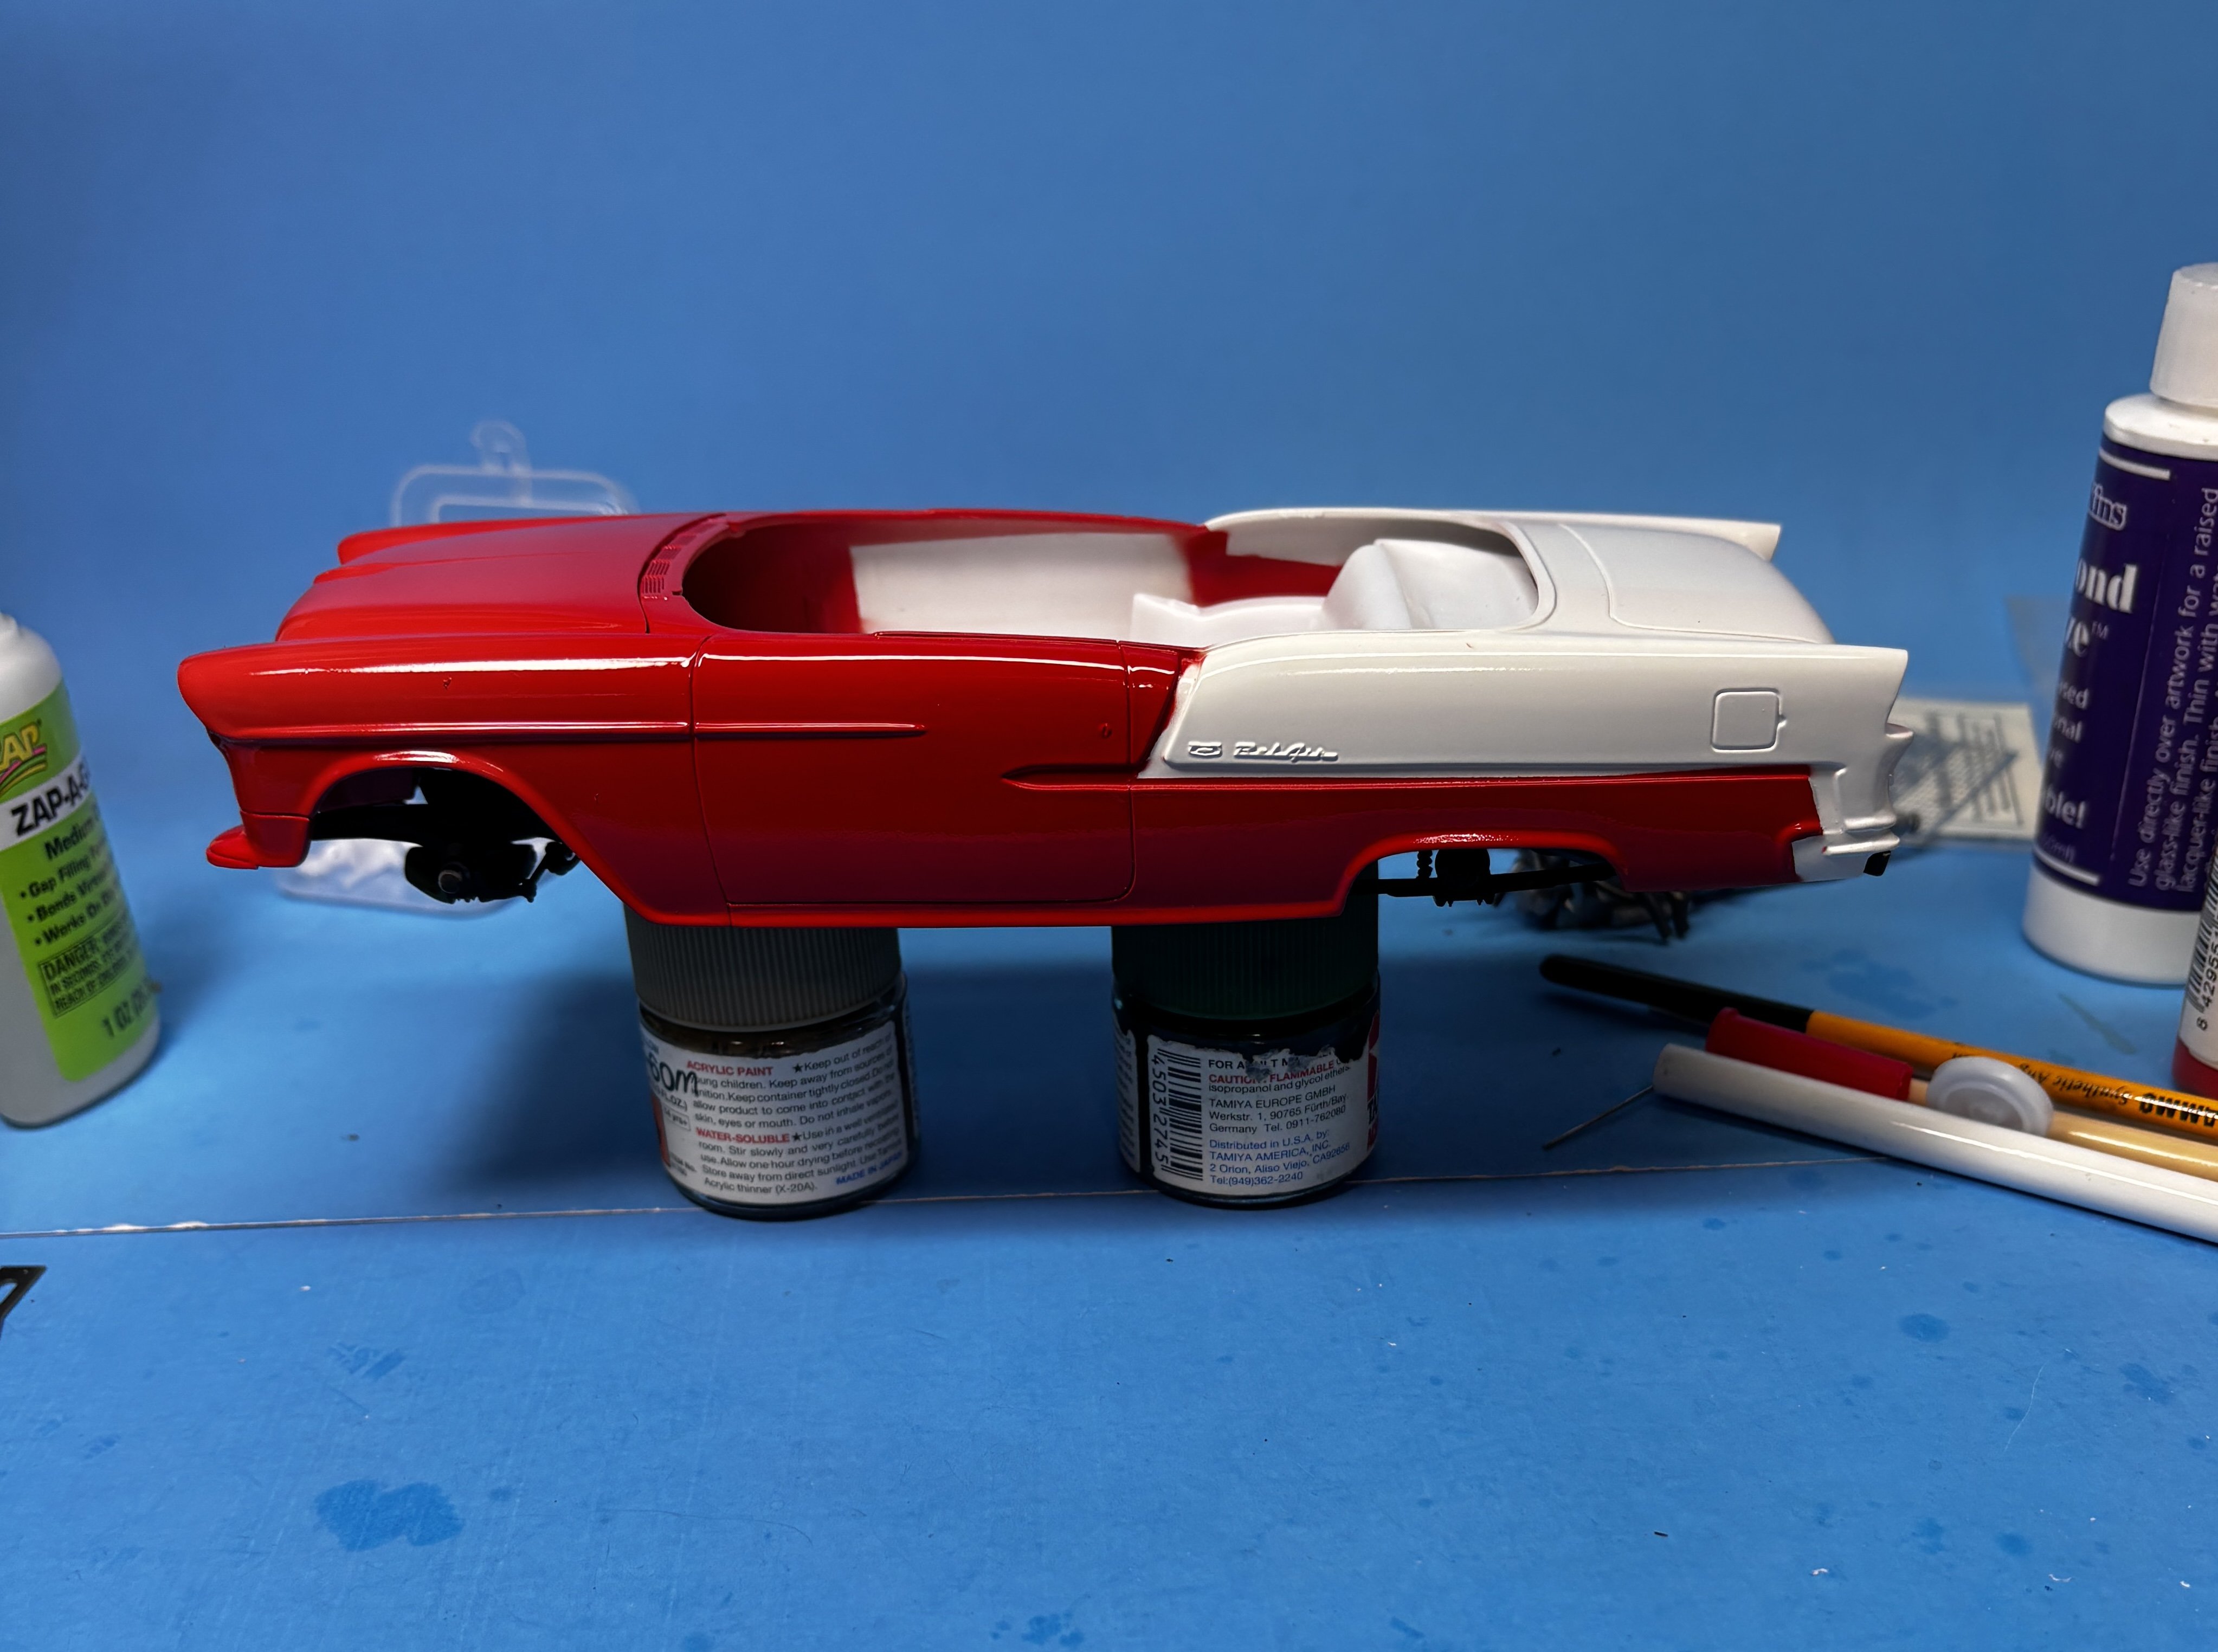
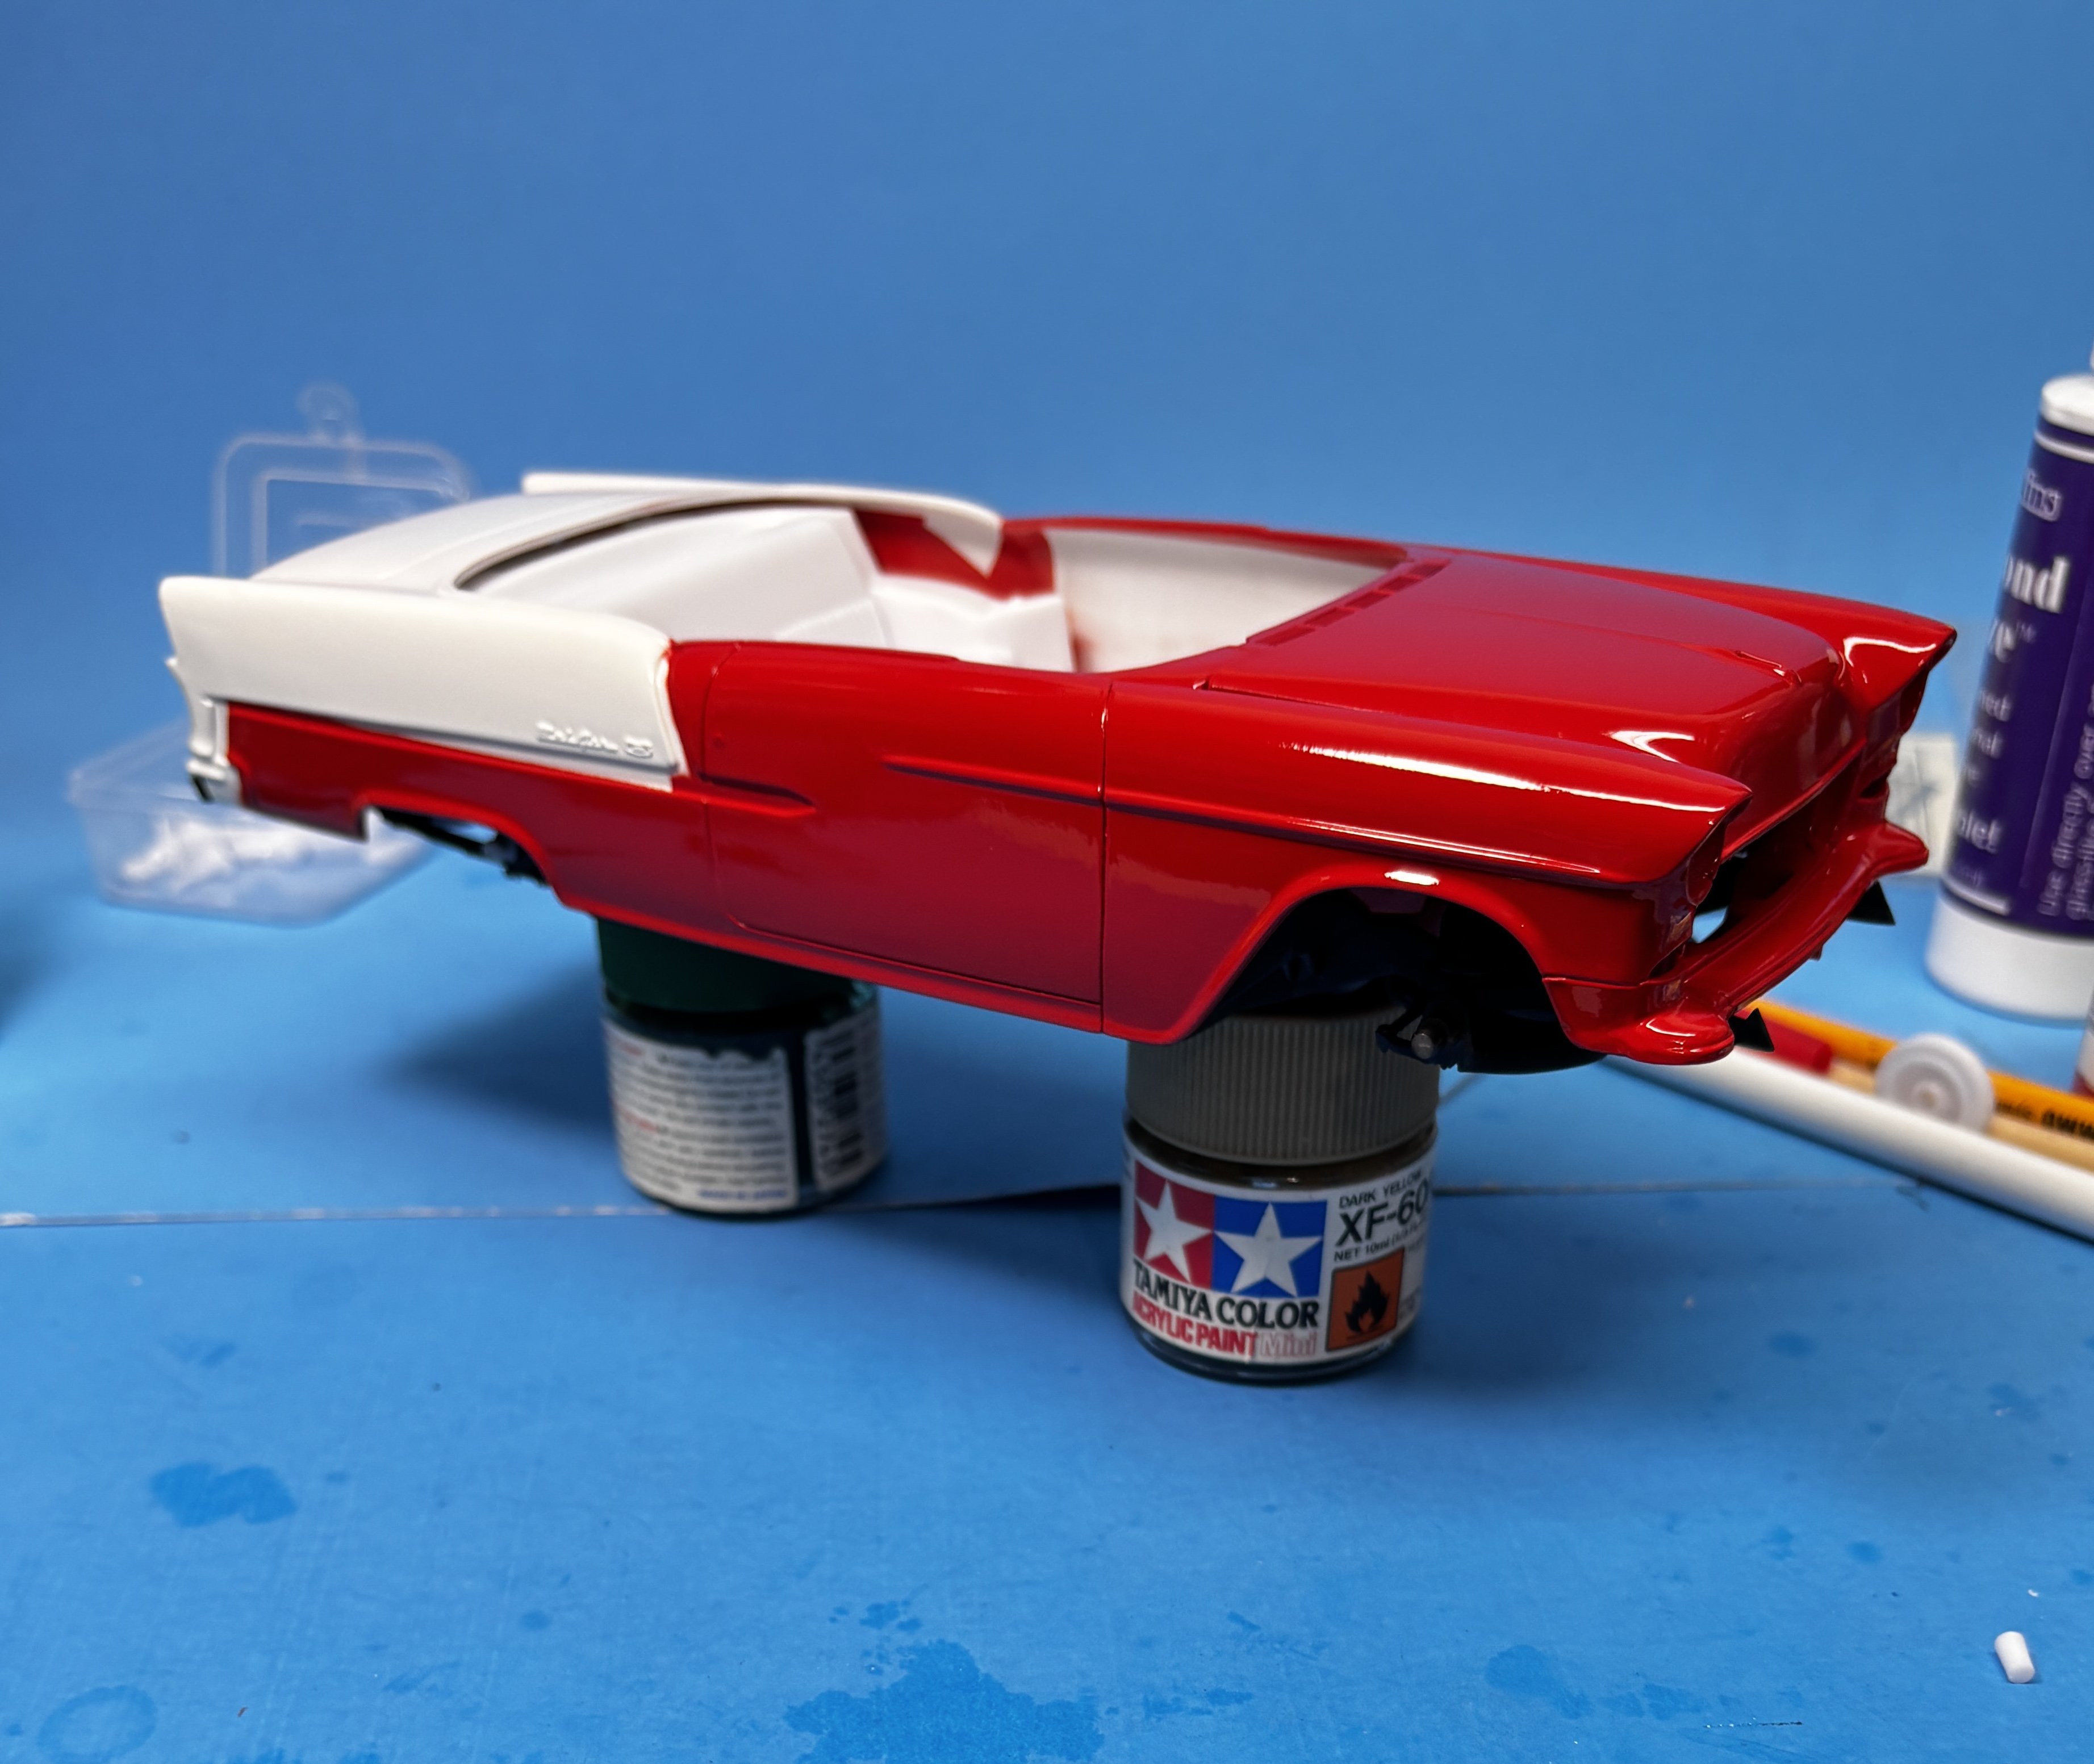
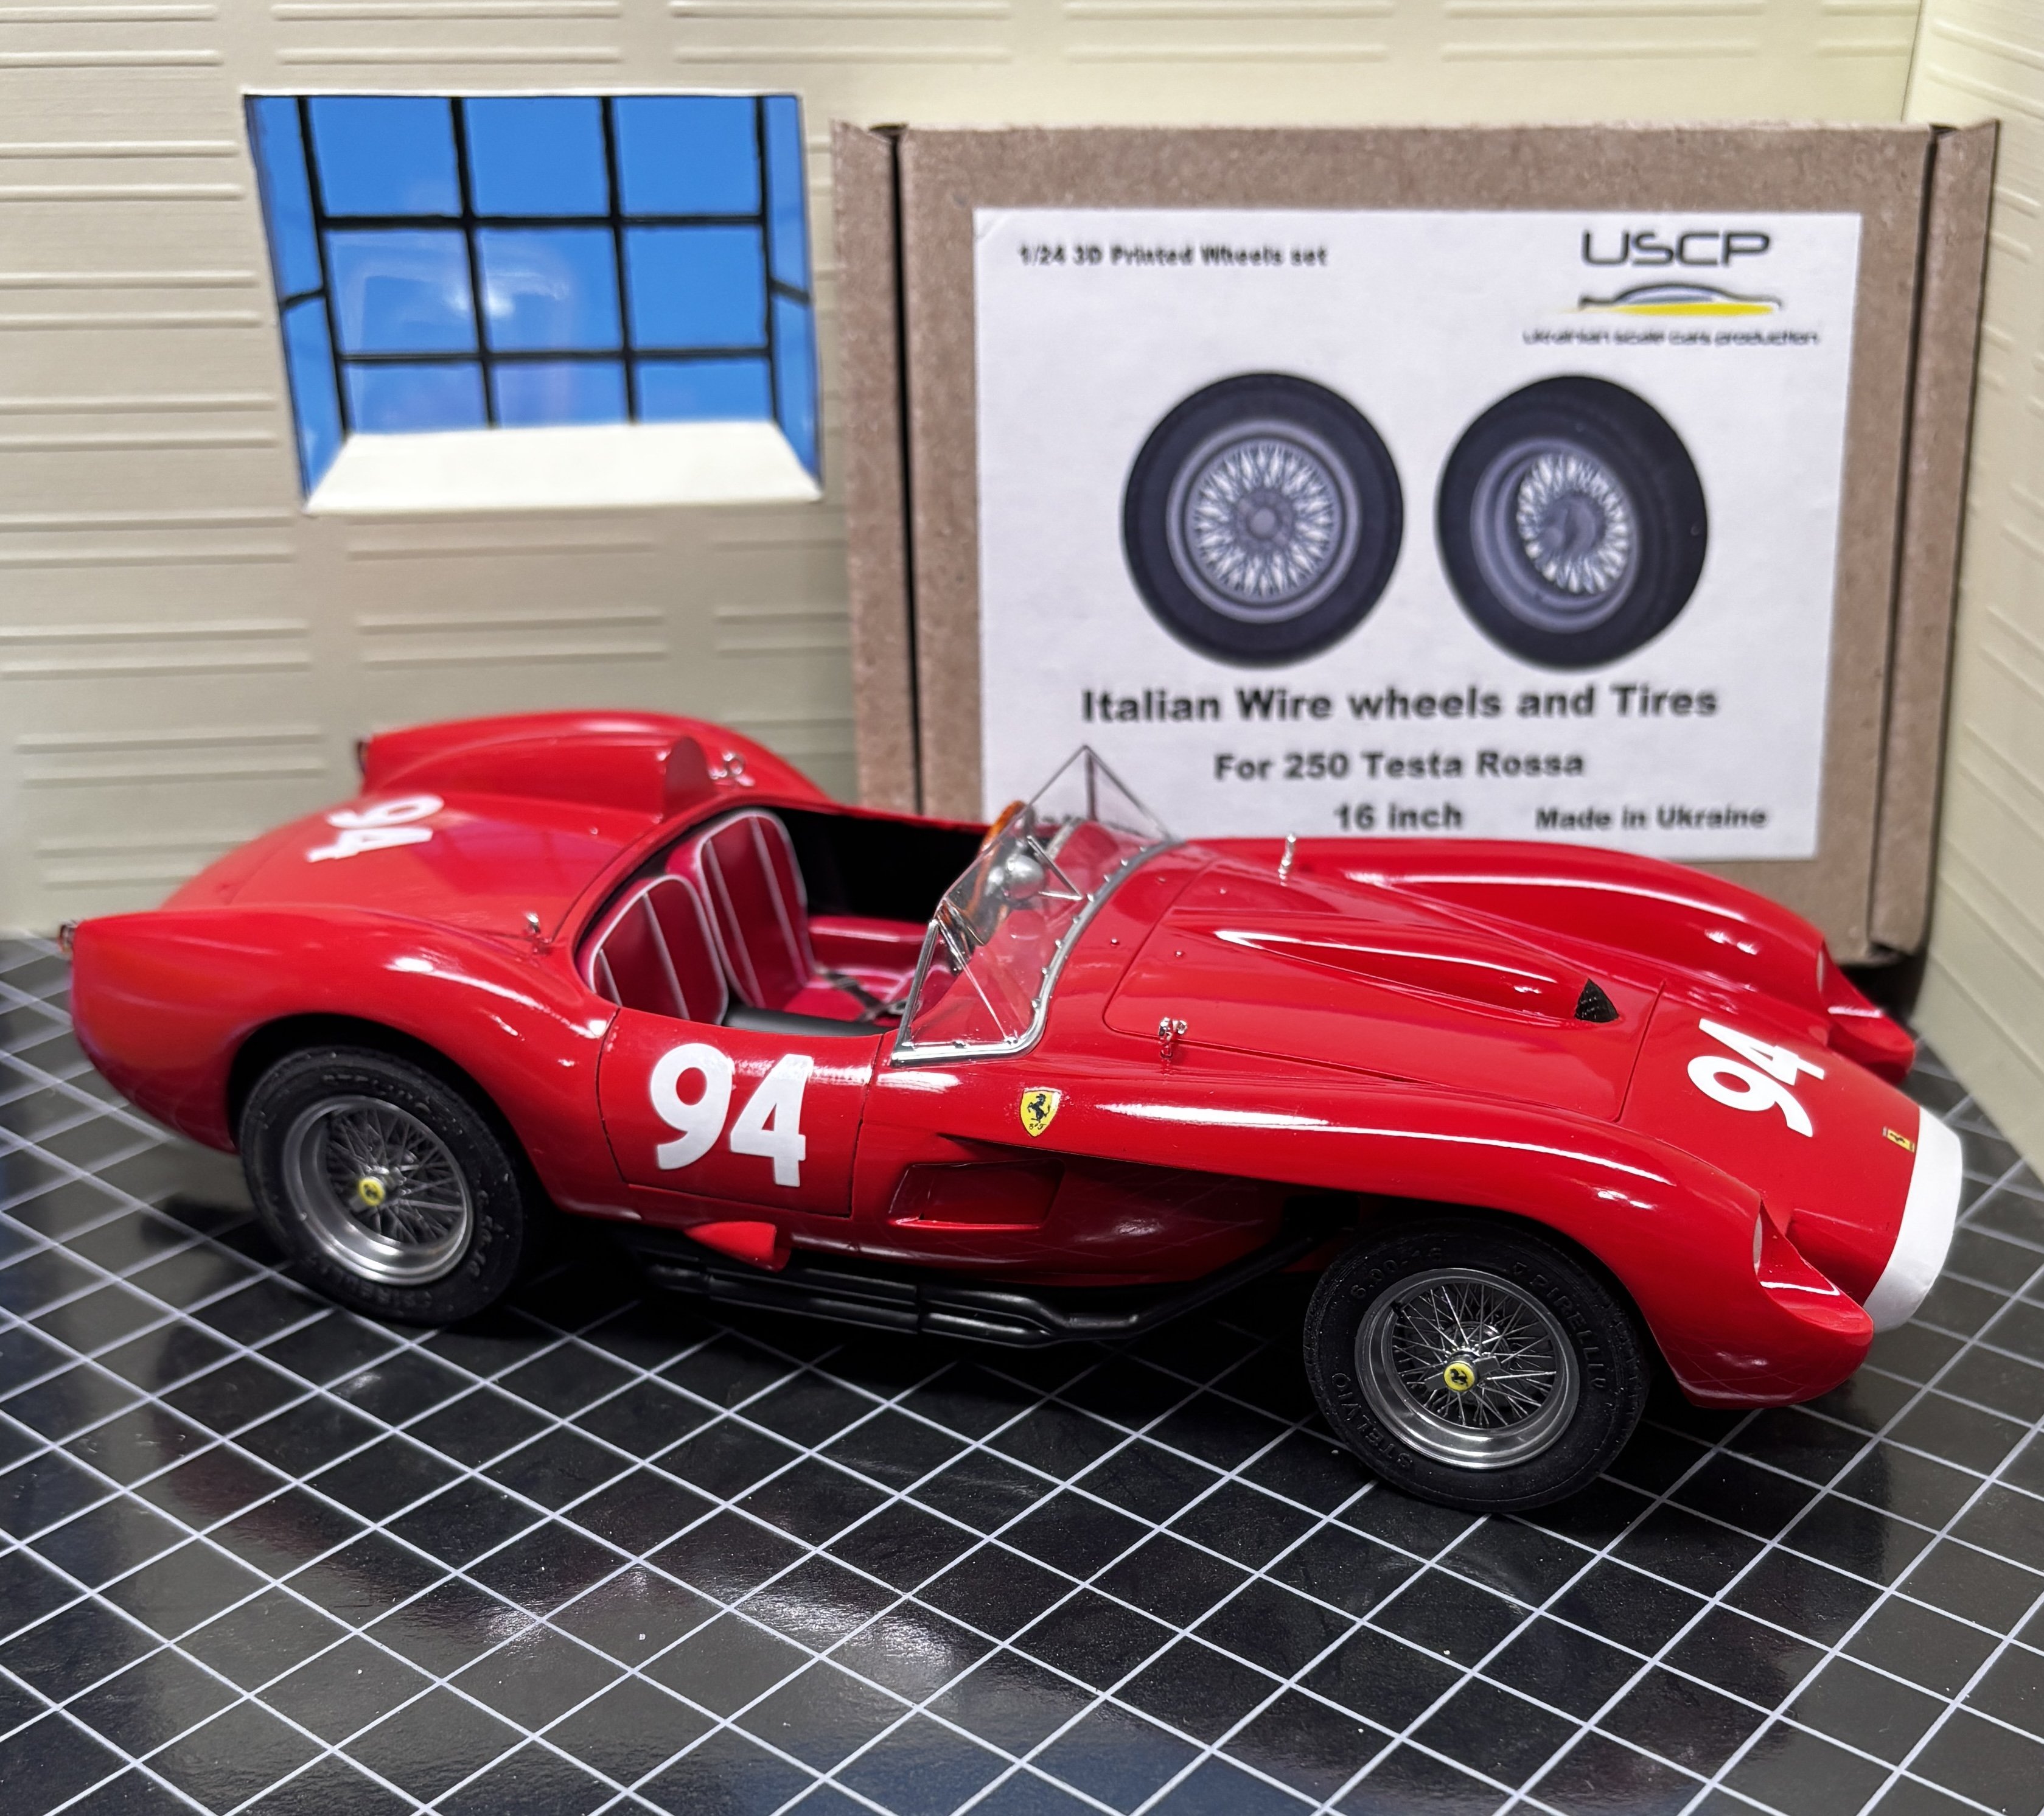
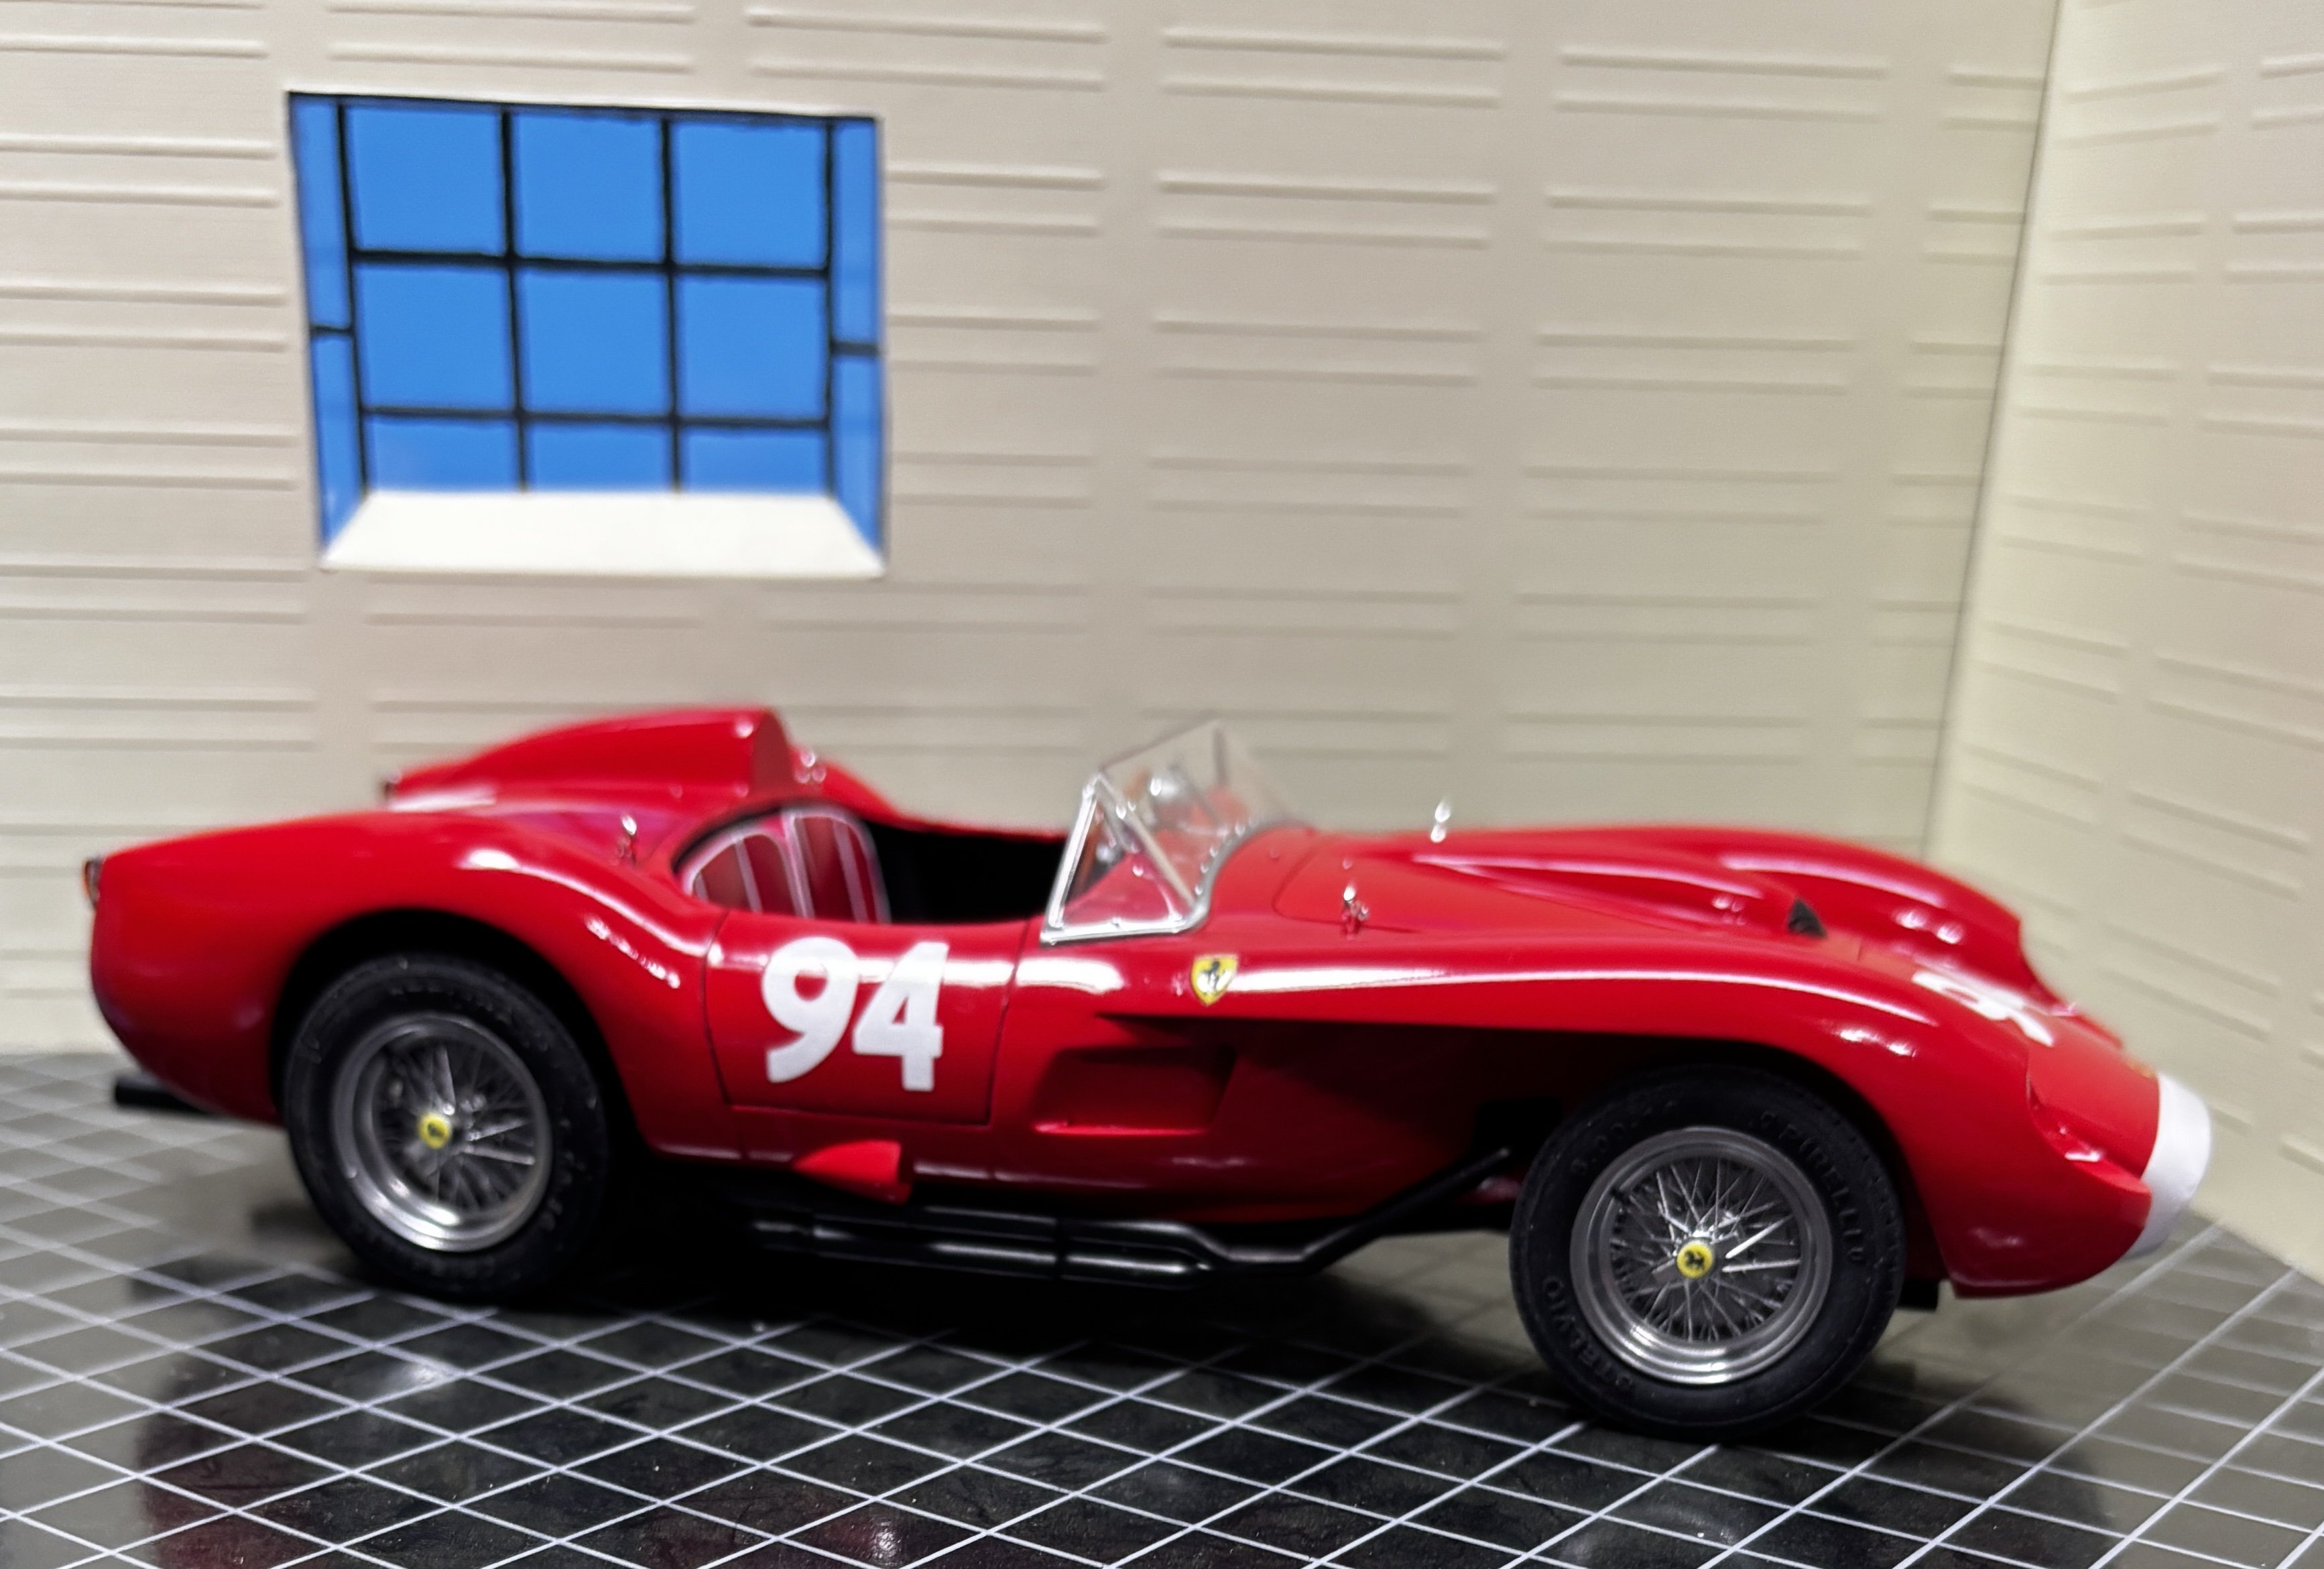
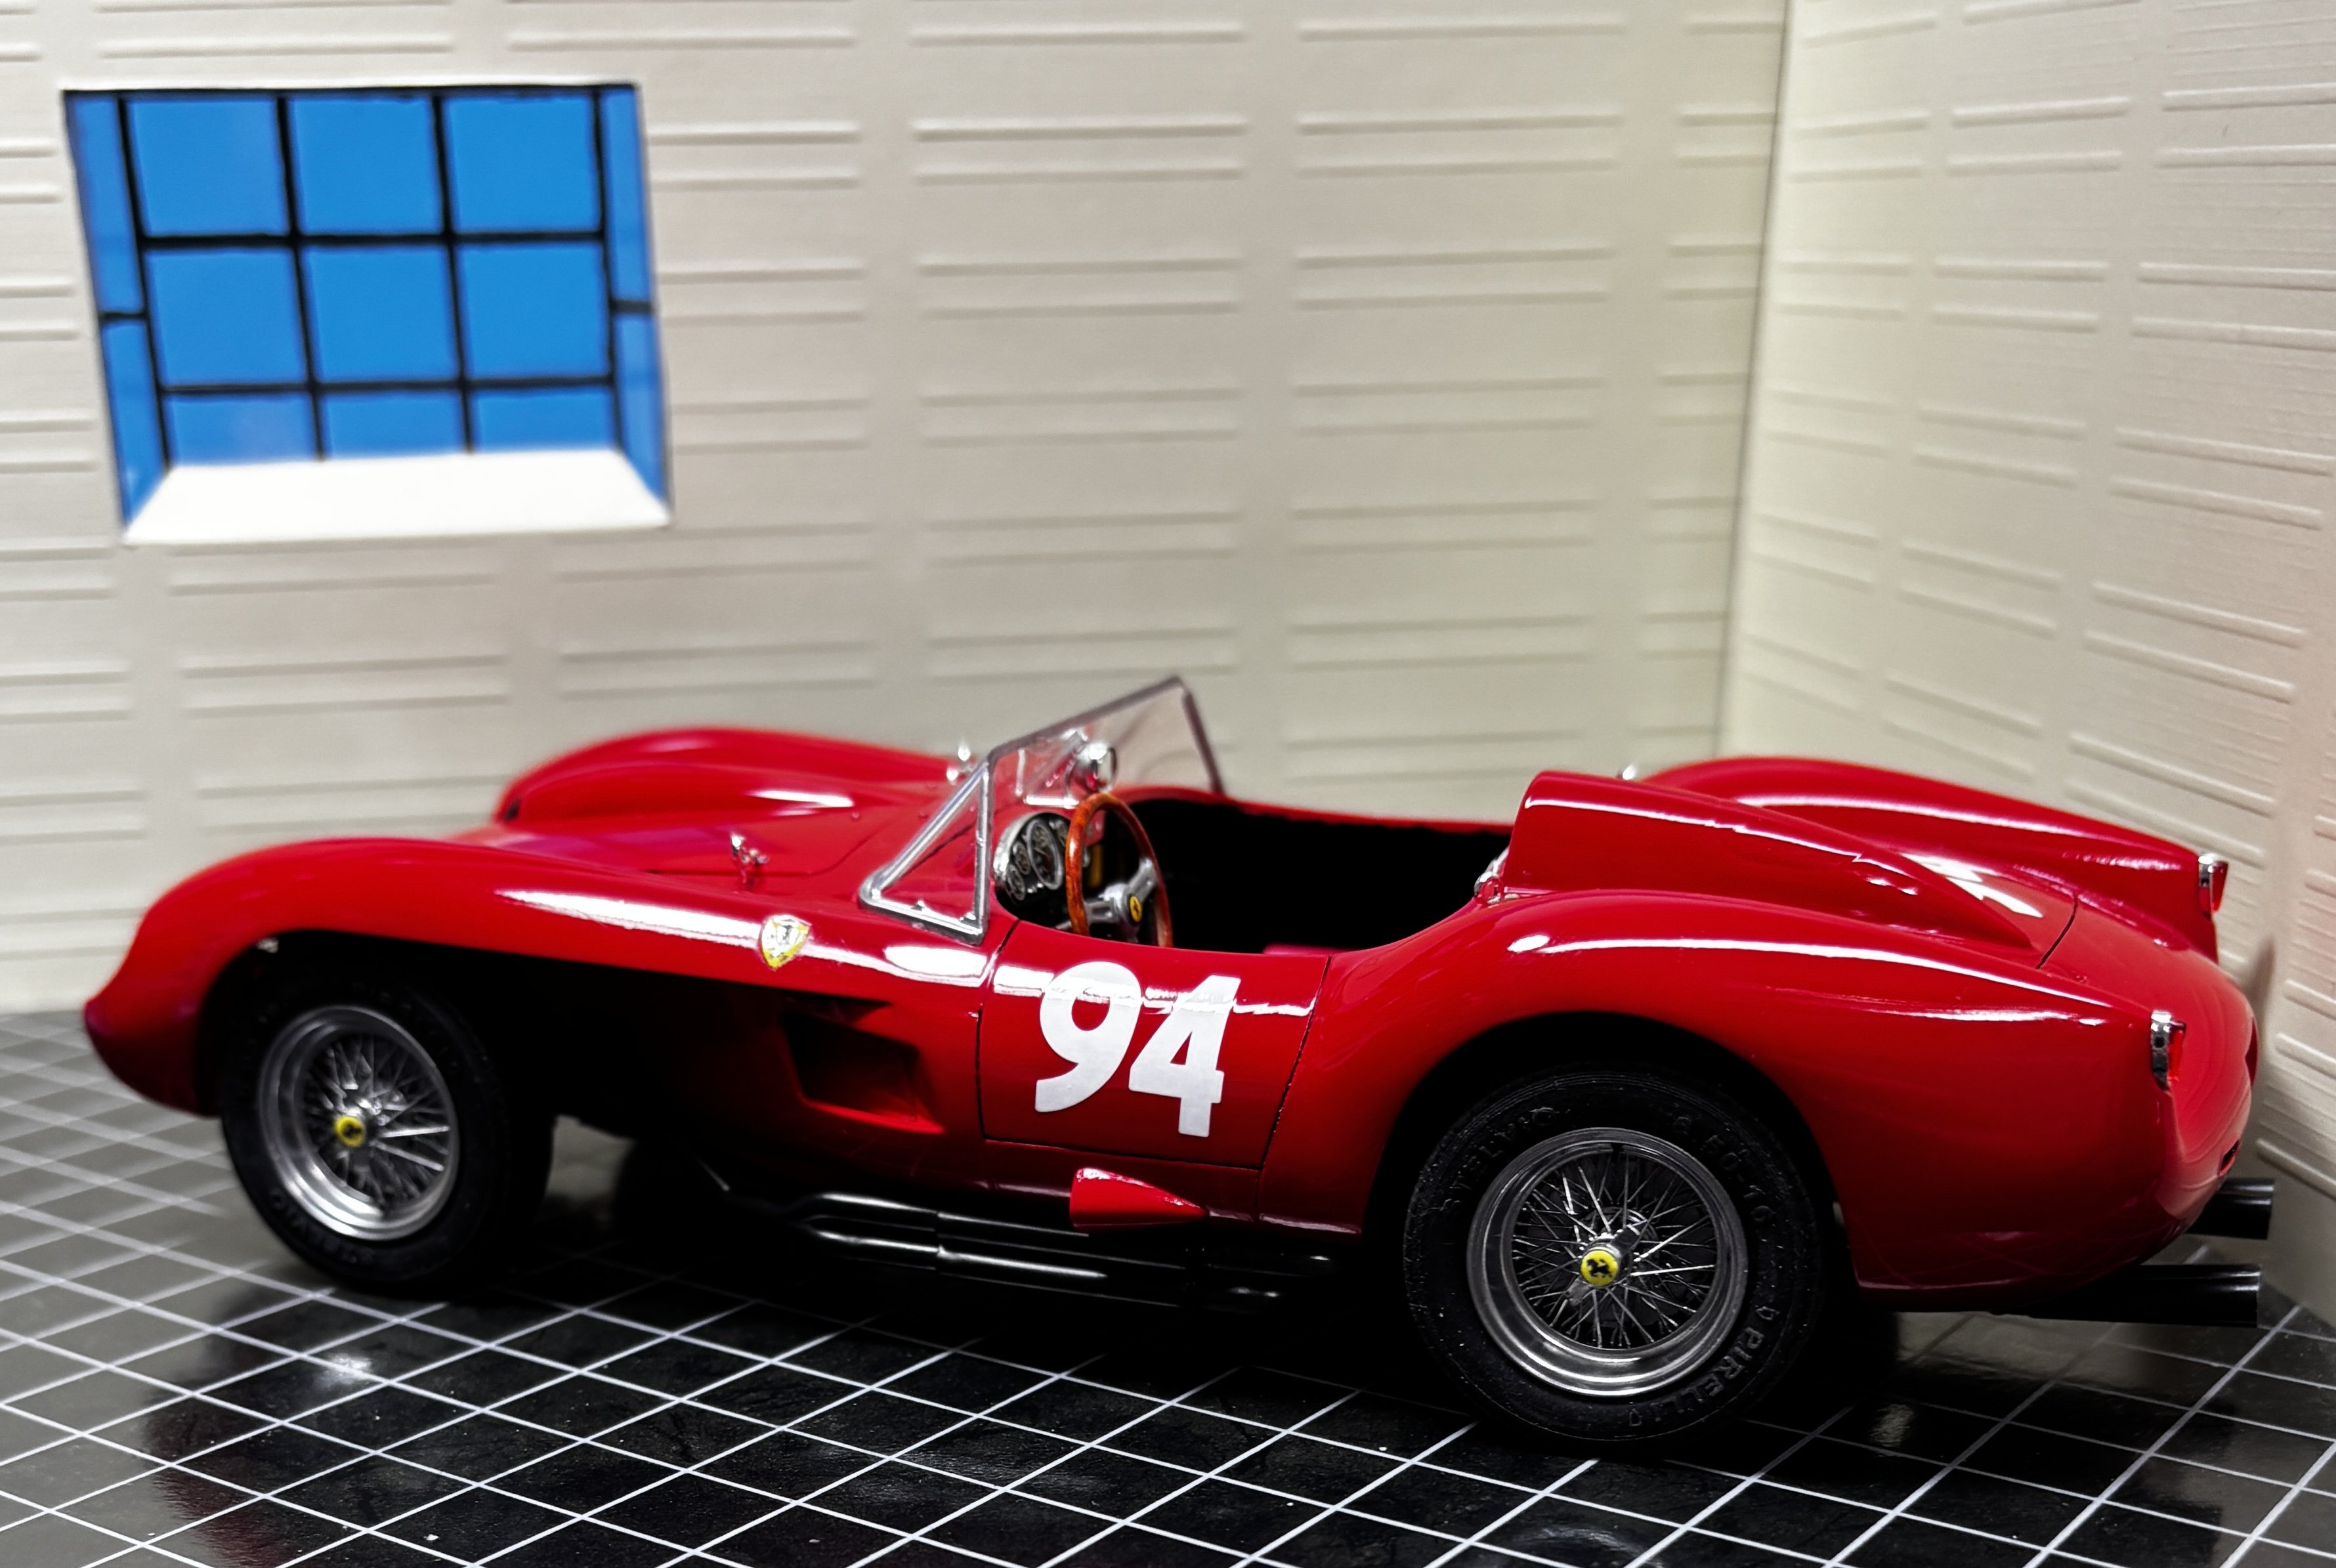
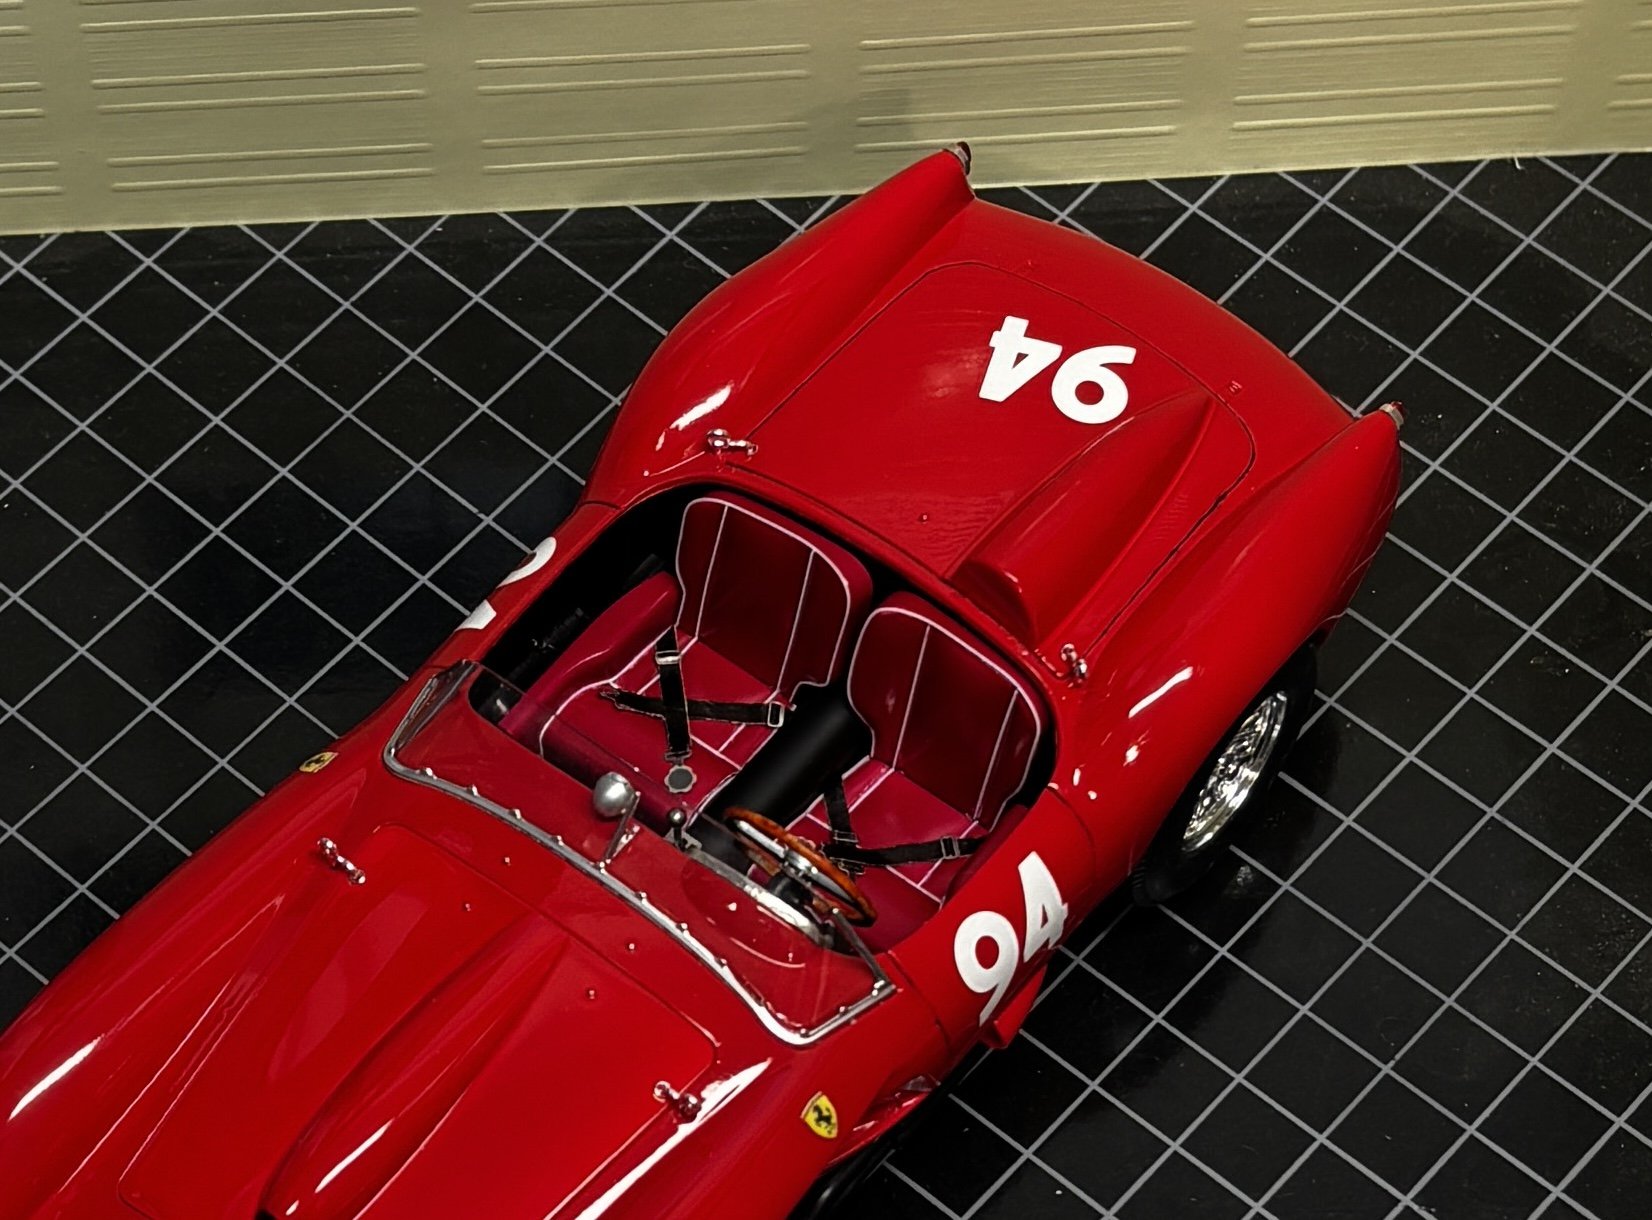
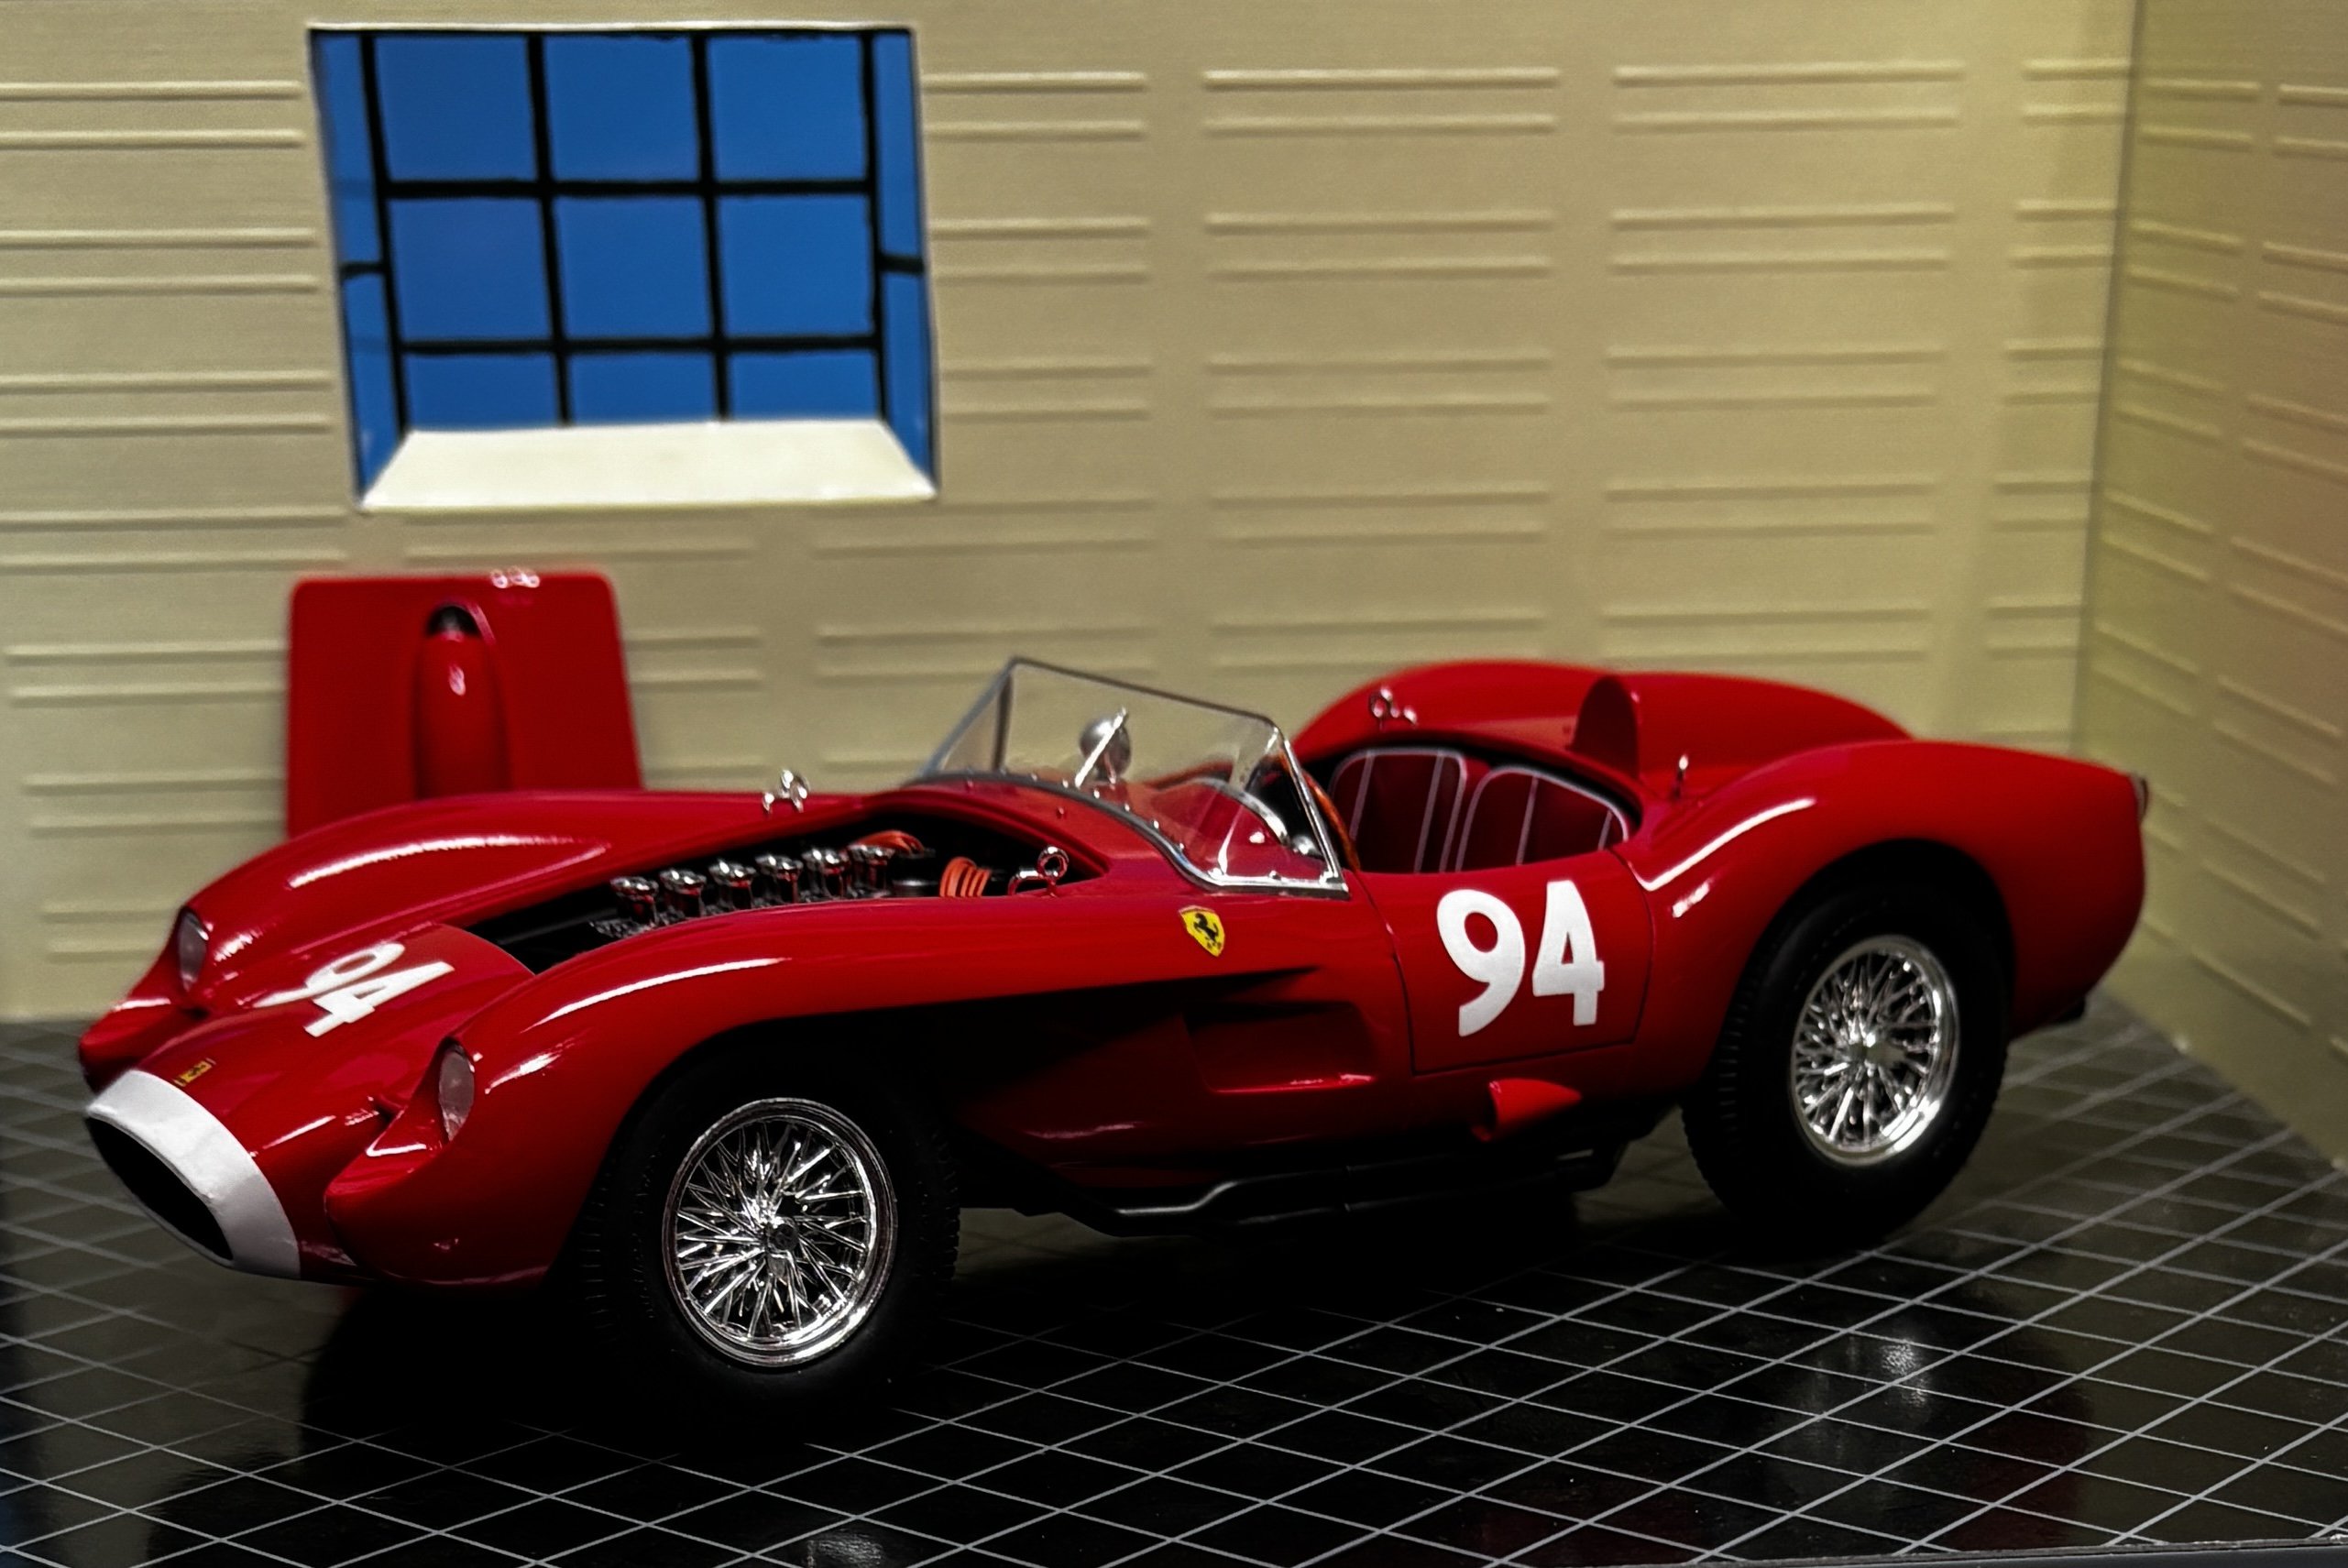
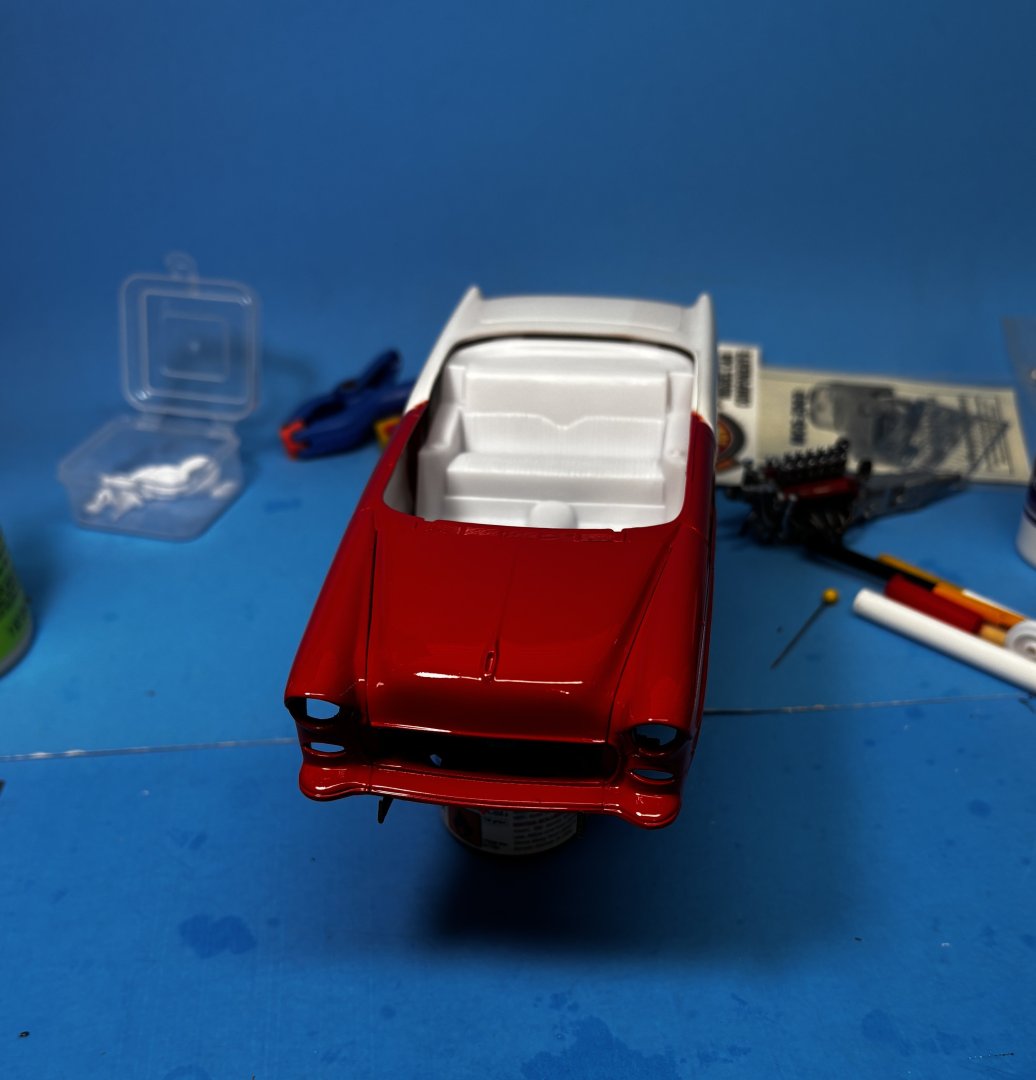
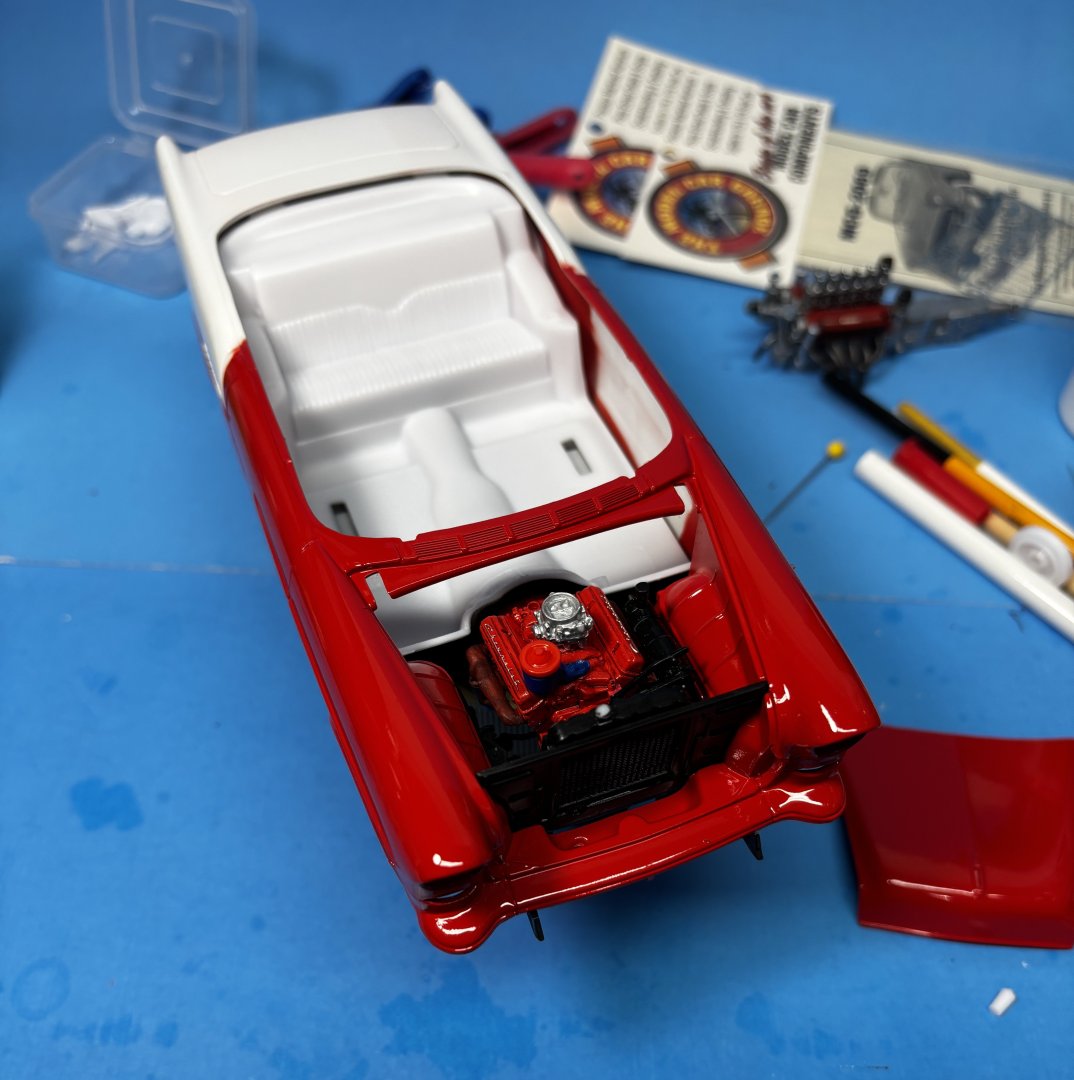
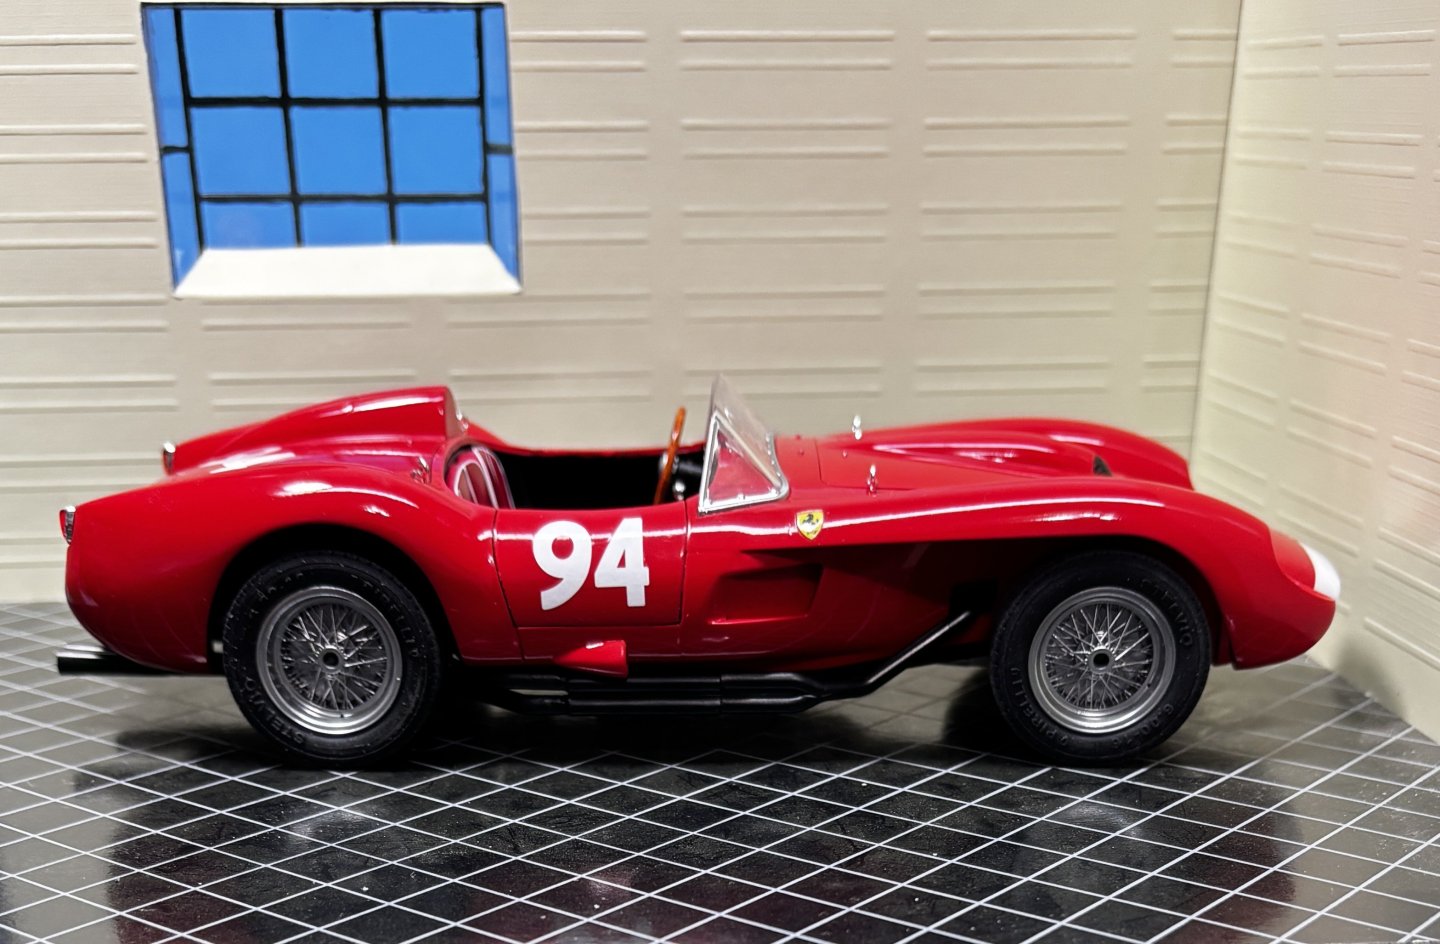
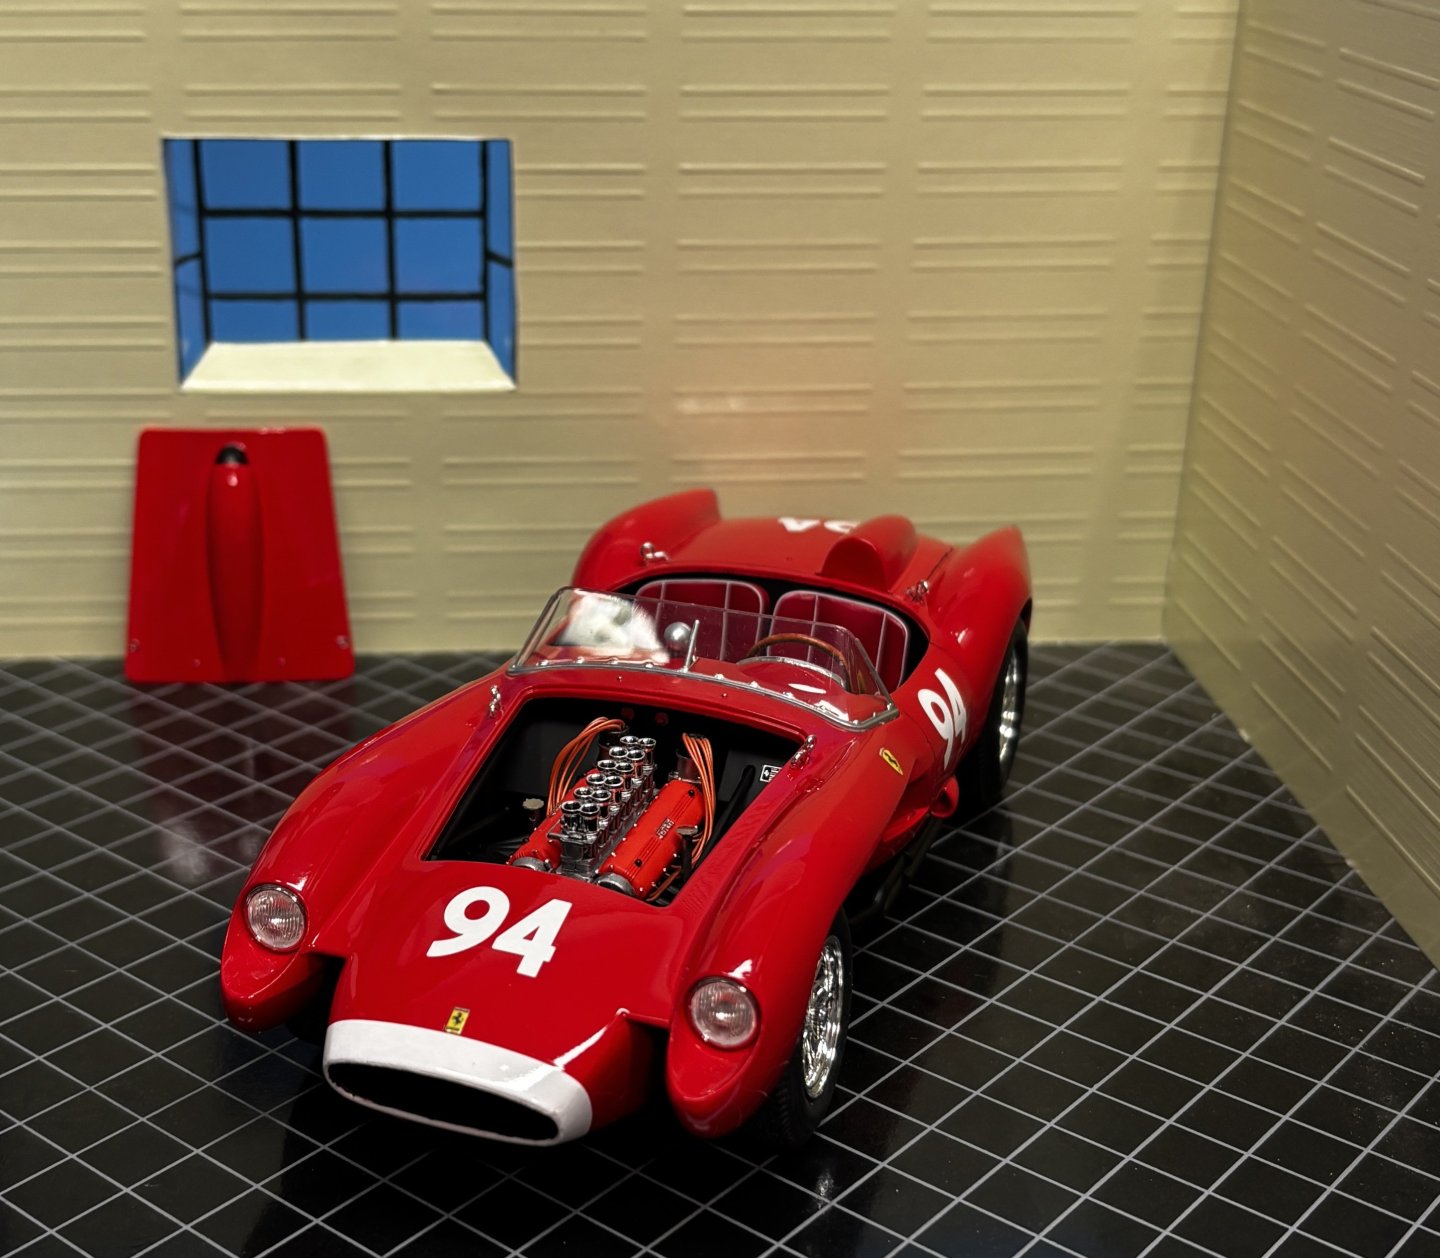
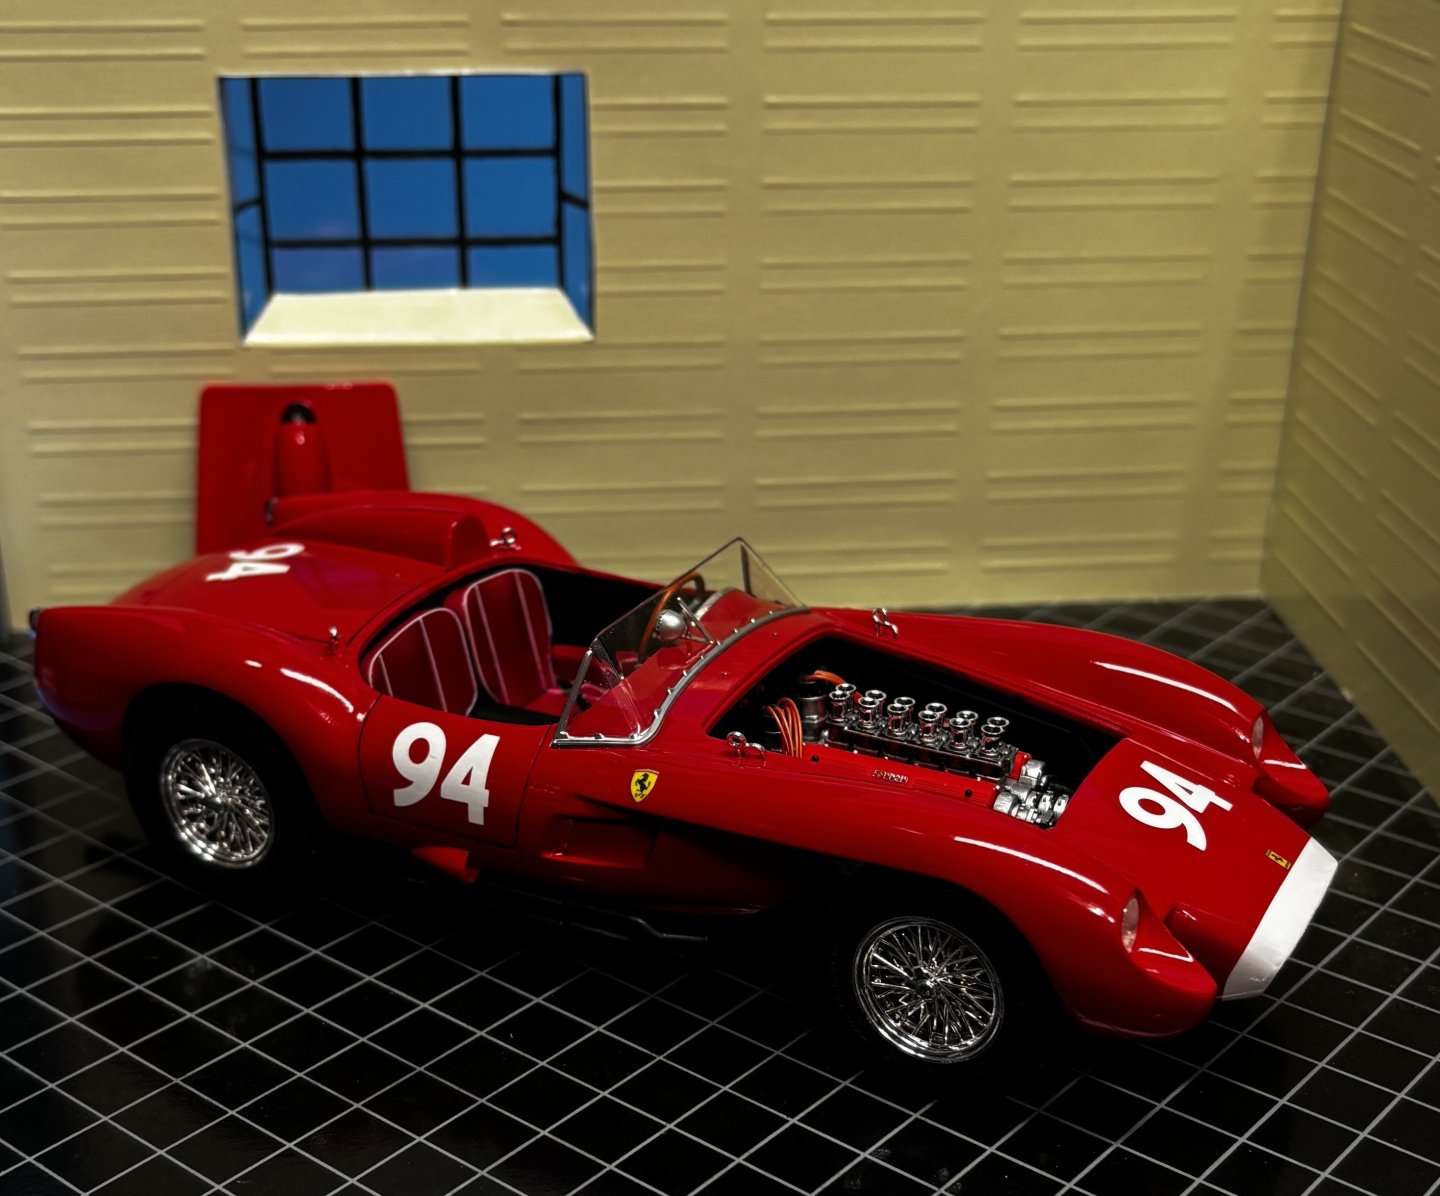
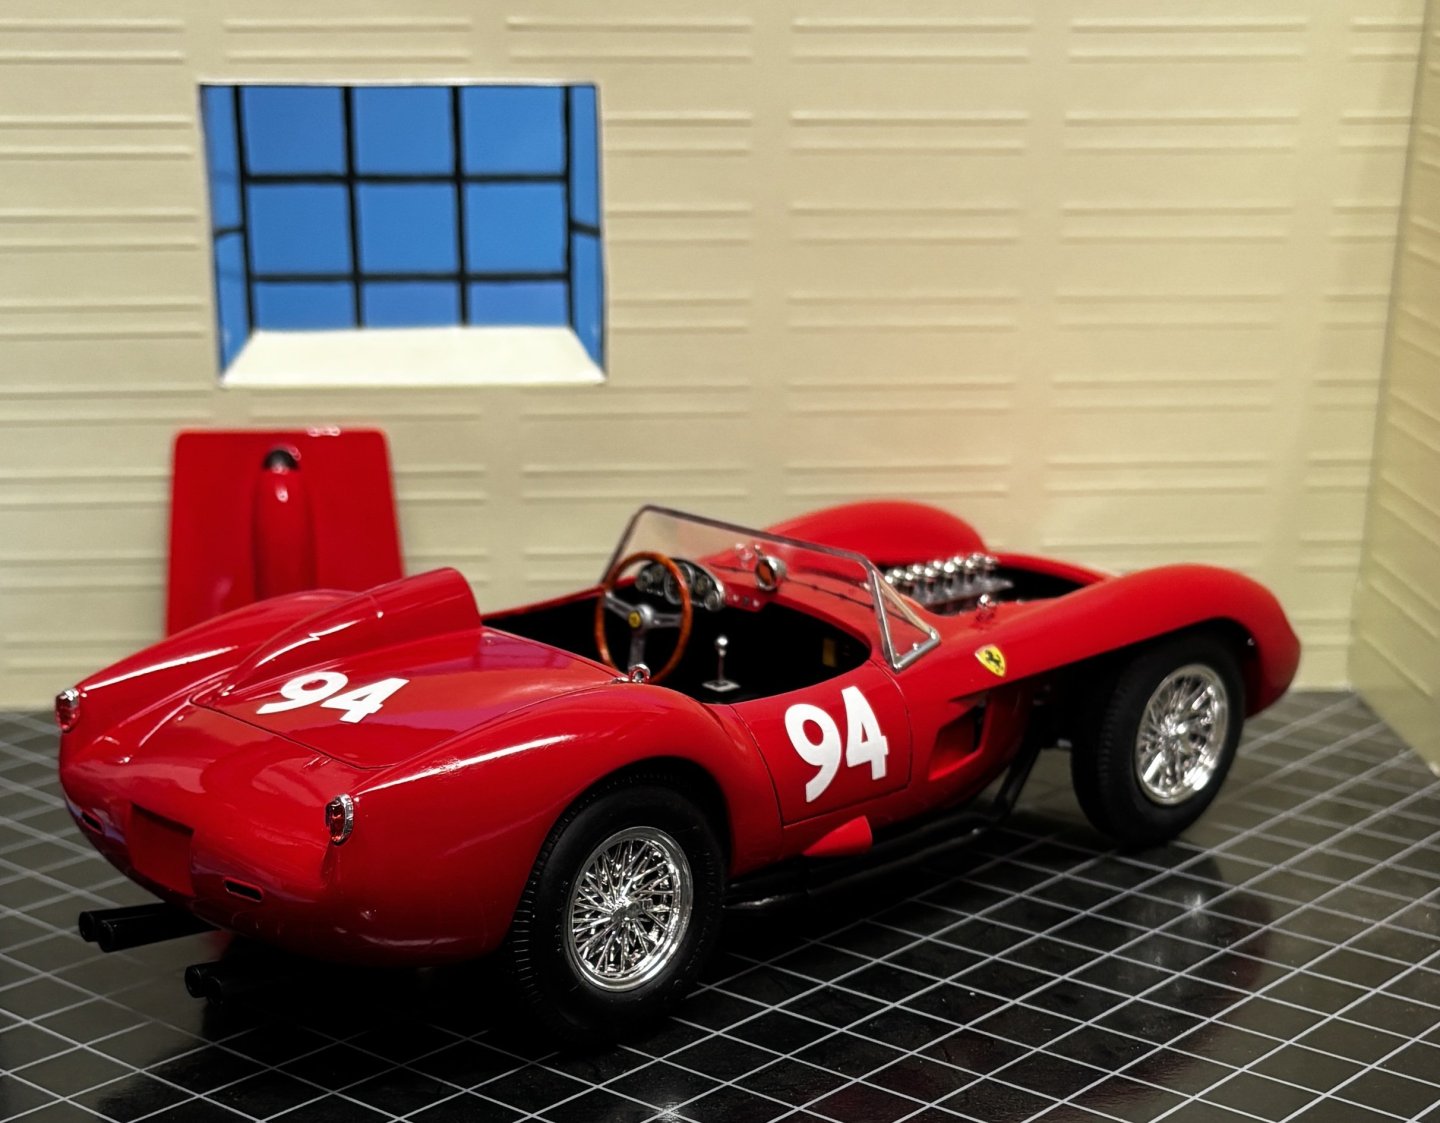
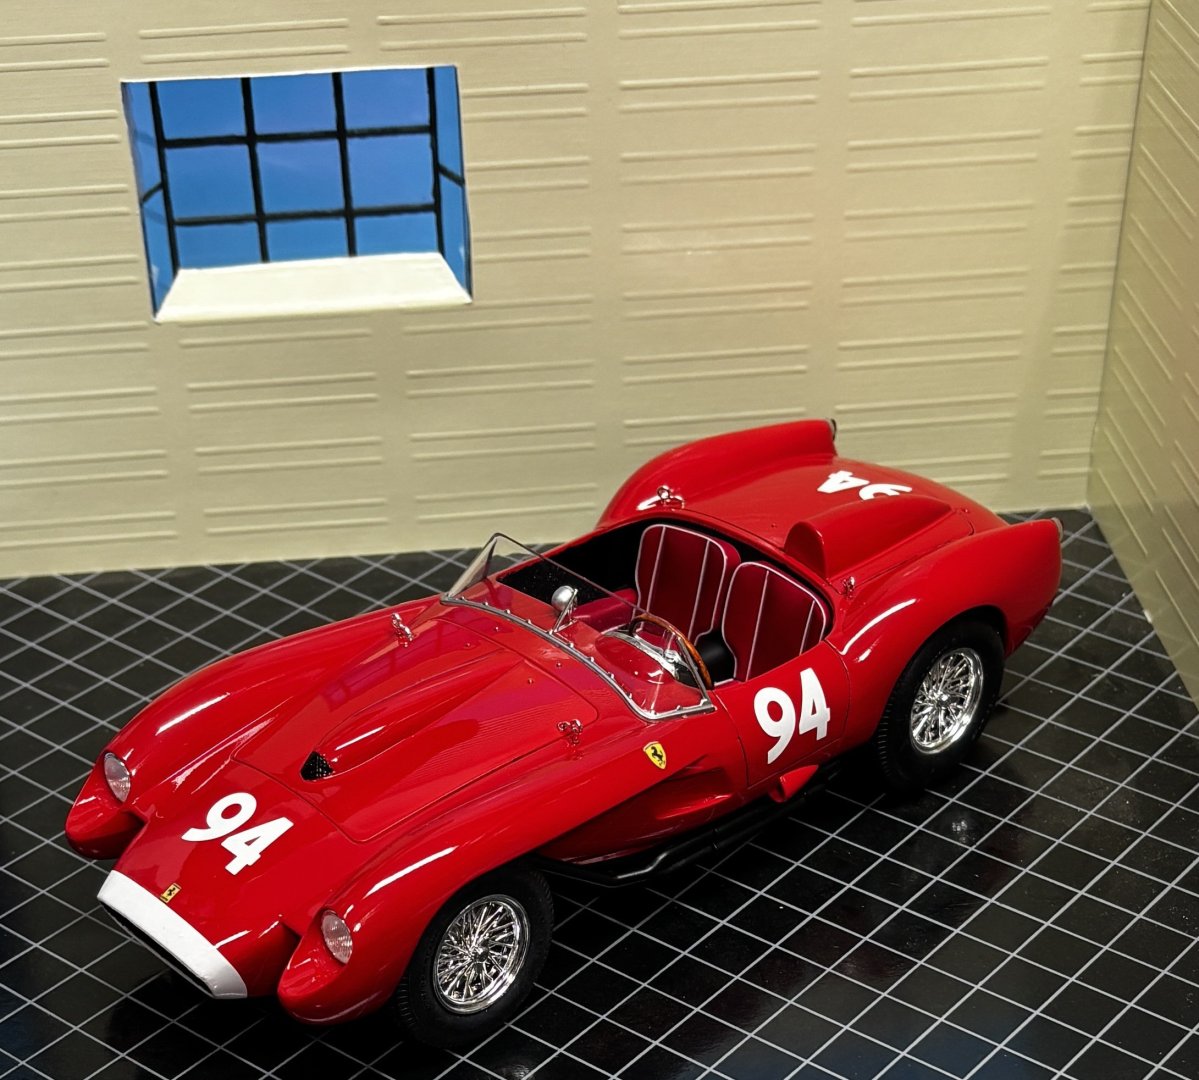
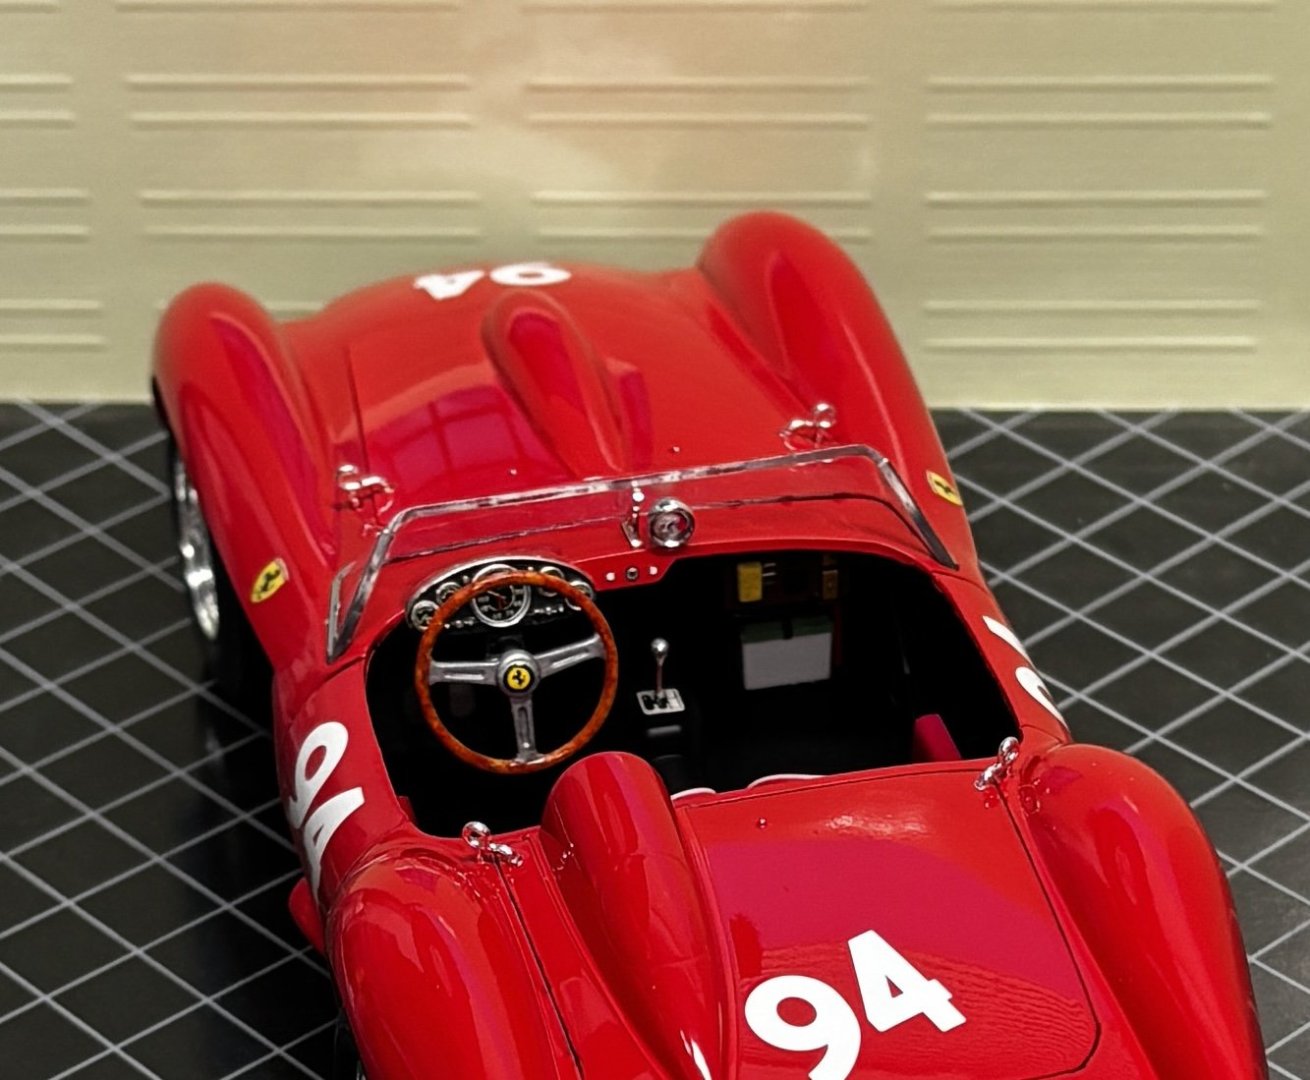
This 55 Chevy Indy Pace Car is the third model of the three I planned to enter in the Southlandz Model Car Show coming up June 7. I previously finished the Audi race car and the Ferrari Testa Rossa for this event. With a little more than two weeks left, I think I am on target to finish the Chevy in time. Most of the painting and construction has been completed with the interior and body trim, decals remaining. To keep things moving quickly, I will make fewer progress posts with this one. Just took the masking off the body this morning. Chrome trim will tidy up the demarcation between red and white. Paint is MCW white and red enamels. The body spent 8 hours in the dehydrator overnight. It can now be safely handled(gently).


-
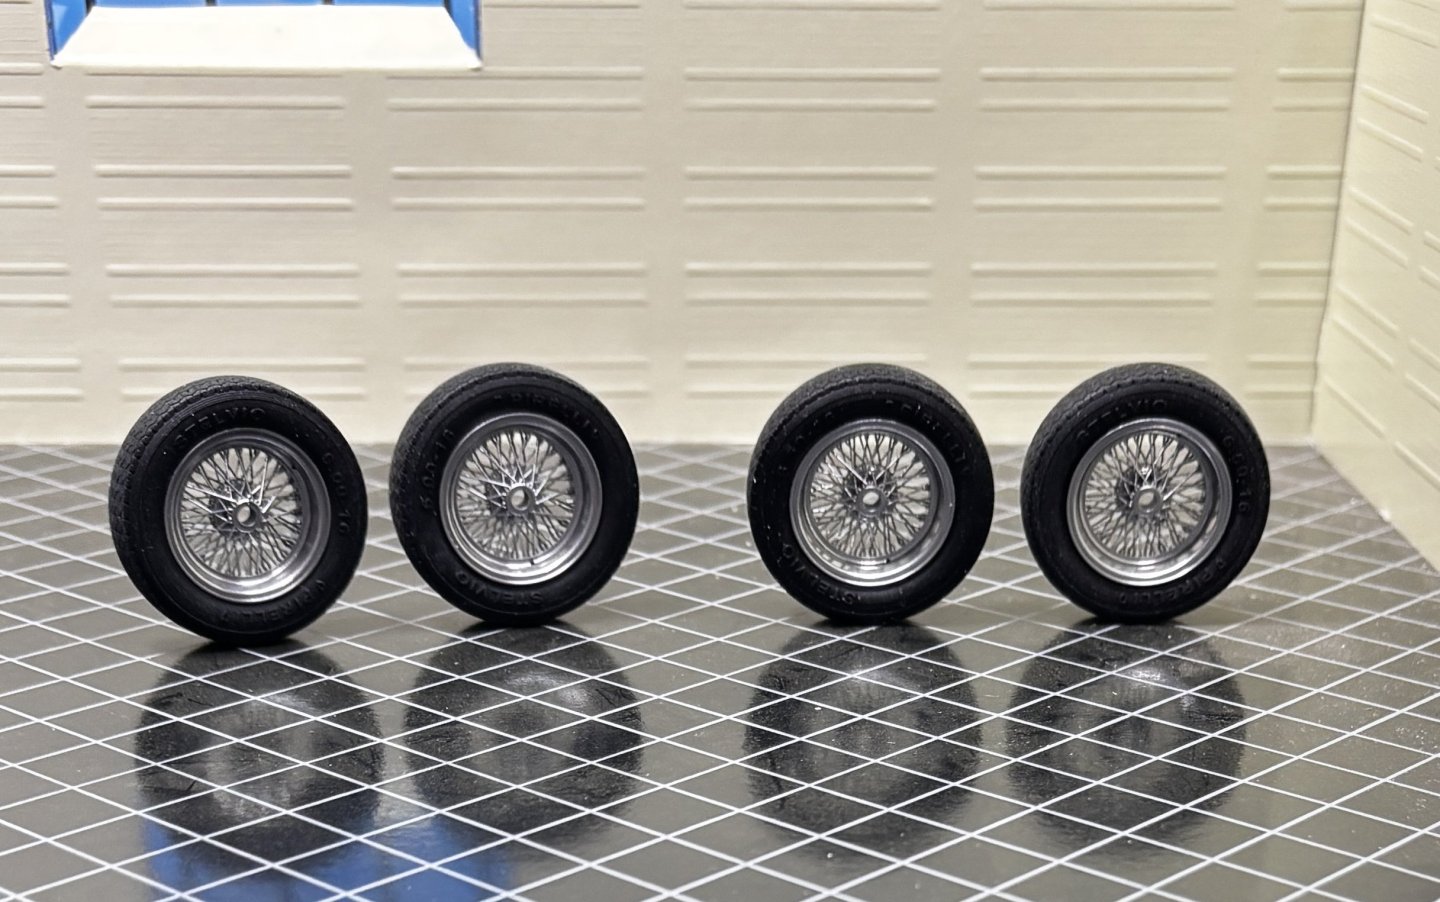
3D printed wire wheels added to replace kit wheels. Set included the correct tires as well.


- 73 replies
-
- 11
-
-
-
I have my preorder in for the DB4 and anxiously awaiting the invoice to come from MFH. One of the skilled MFH builders recently revealed his use of solder balls to replace the rivets in MFH kits. The solder balls can be purchased from Amazon and come in a set consisting of a half dozen or more different diameters all packaged in little glass jars. Being made of very soft solder, the balls are placed on top of predrilled holes then flattened by pressing down on top with a piece of flat metal stock. The result is consistent, perfect-looking rivets. It’s important to choose the right diameter ball for the particular hole size. I bought a set and only paid a small amount for them. I’ll be giving them a try soon on one of my models other than a MFH kit, soon. Will post photos of the results.
-
I agree with your MFH critiques, Rob. Nothing else beats the realism of those cast white metal parts that MFH uses in their kits, but they are not easy to work with in terms of time required to prepare them. The reward comes at the end as can so clearly be seen with your engine. I just hope this family continues to produce their kits. Right now, there is no other even close at taking their place in this hobby of ours.
-
These are the last photos I’ll post for this one until I finish my aftermarket wheels and tires.


- 73 replies
-
- 13
-
-
-
Bugatti is 1:12 Italeri Thanks for the kind words.