MORE HANDBOOKS ARE ON THEIR WAY! We will let you know when they get here.
×


Phill Elston
-
Posts
52 -
Joined
-
Last visited
Content Type
Profiles
Forums
Gallery
Events
Everything posted by Phill Elston
-
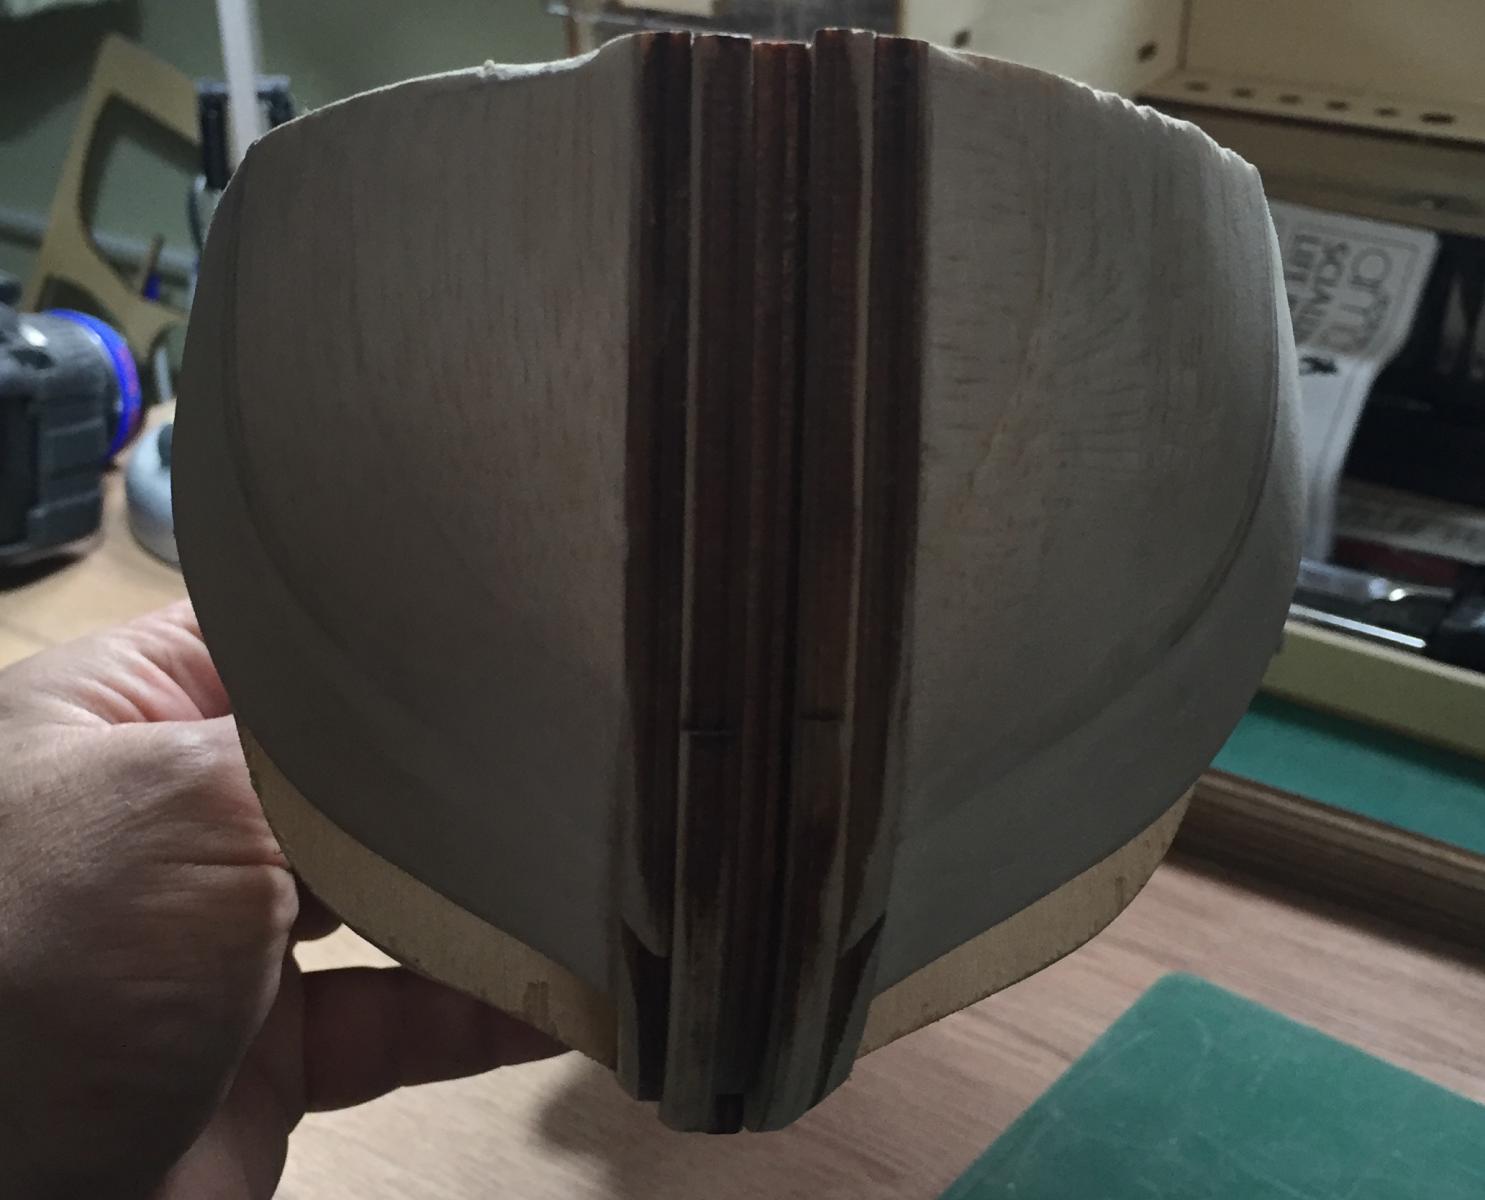
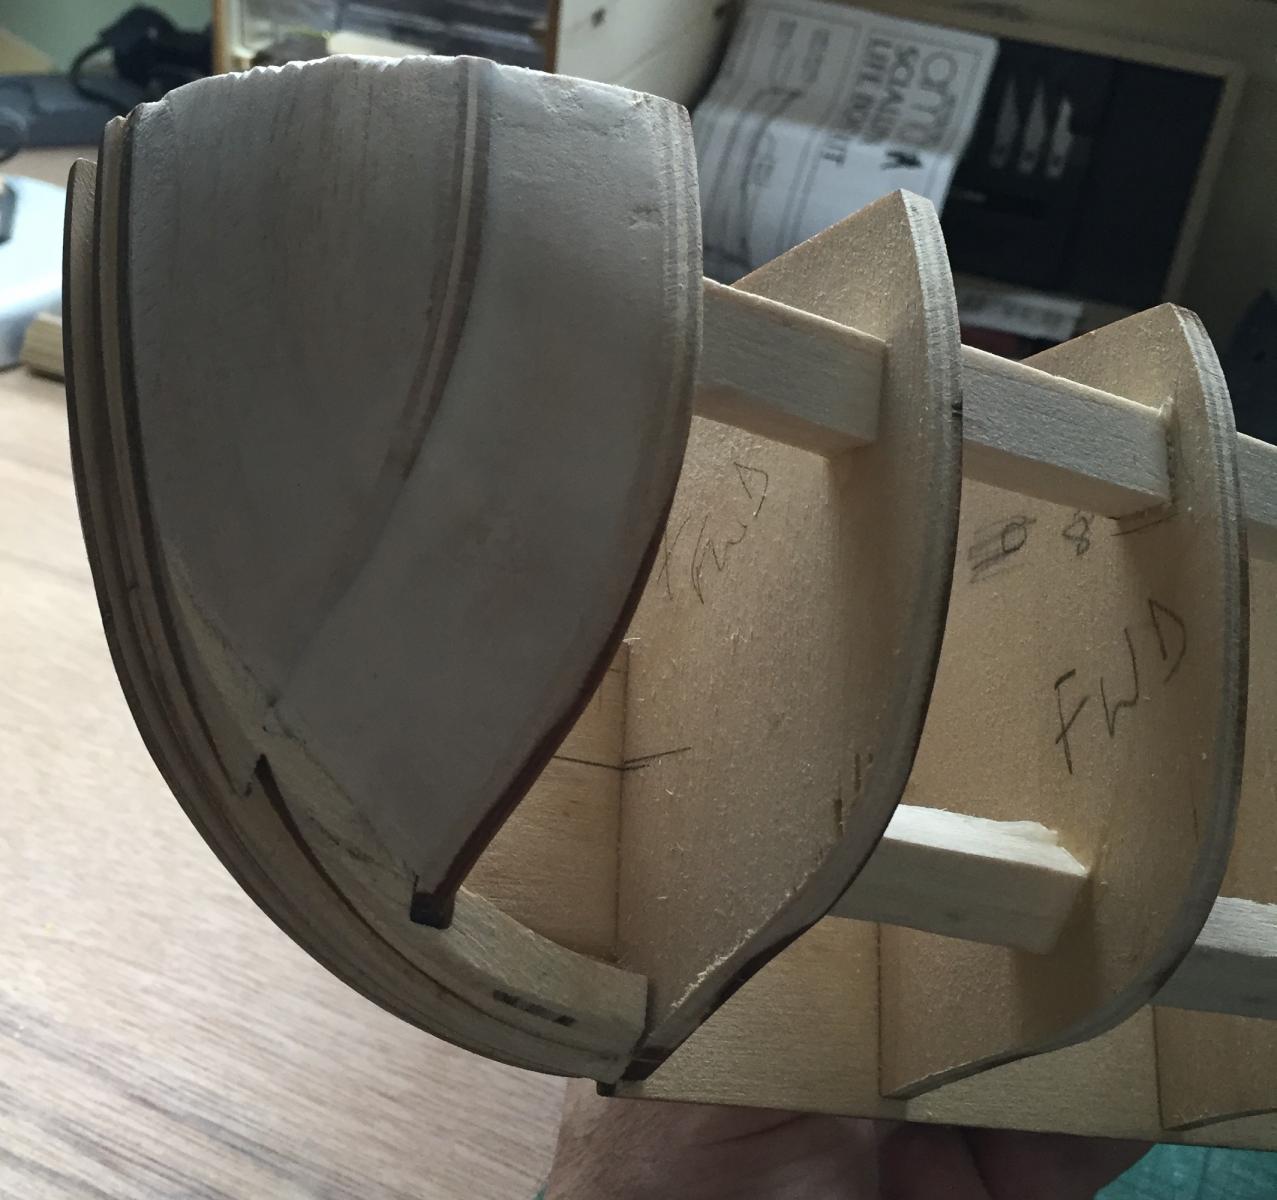
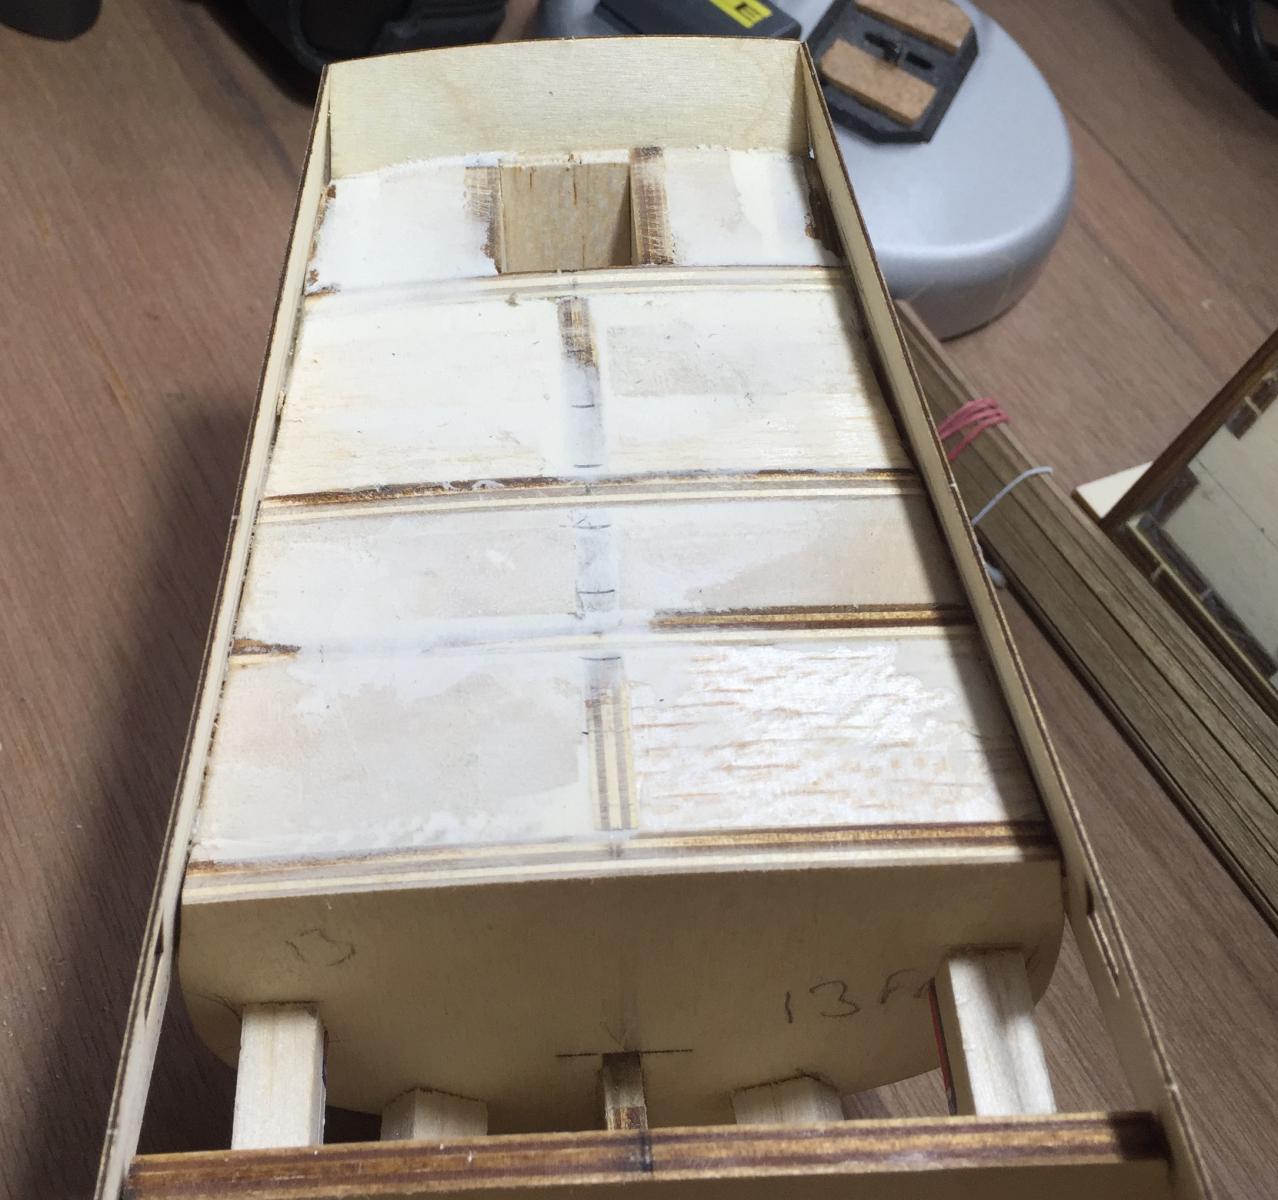
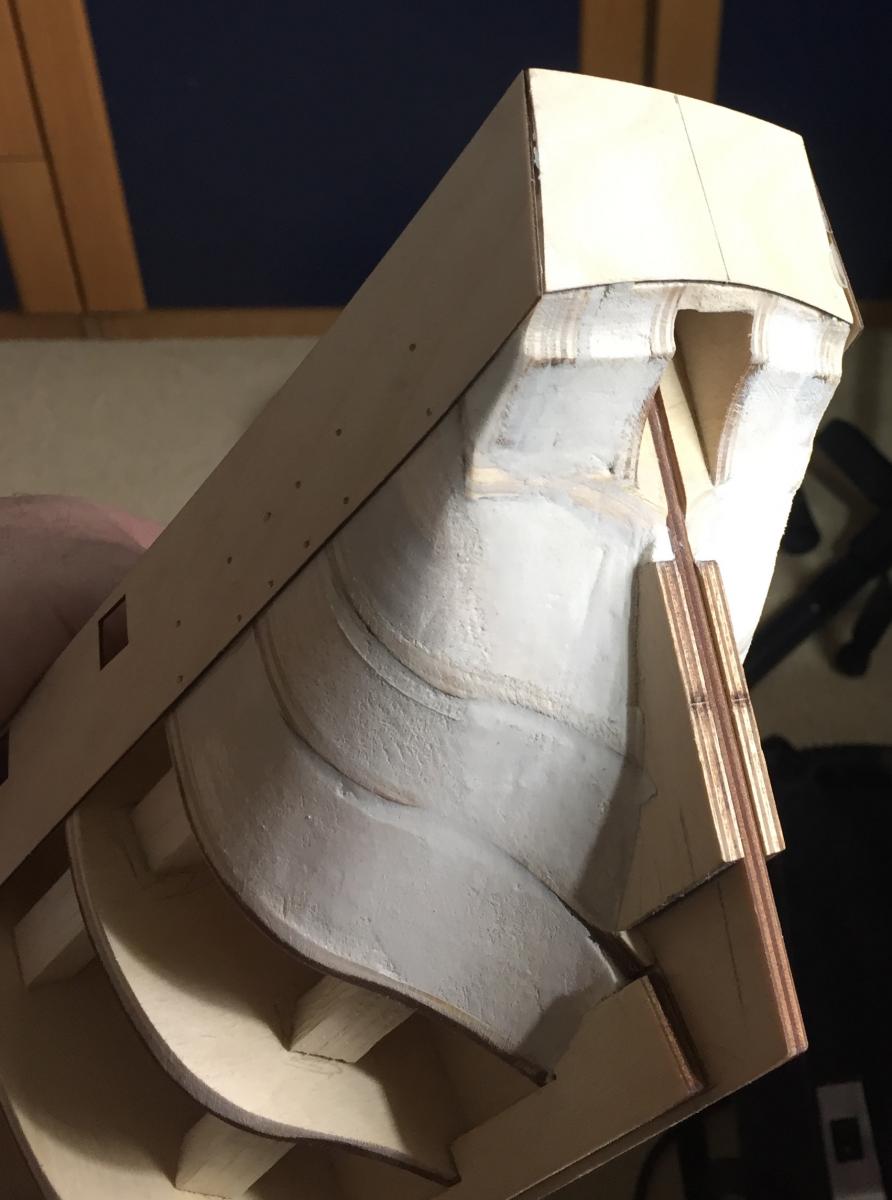
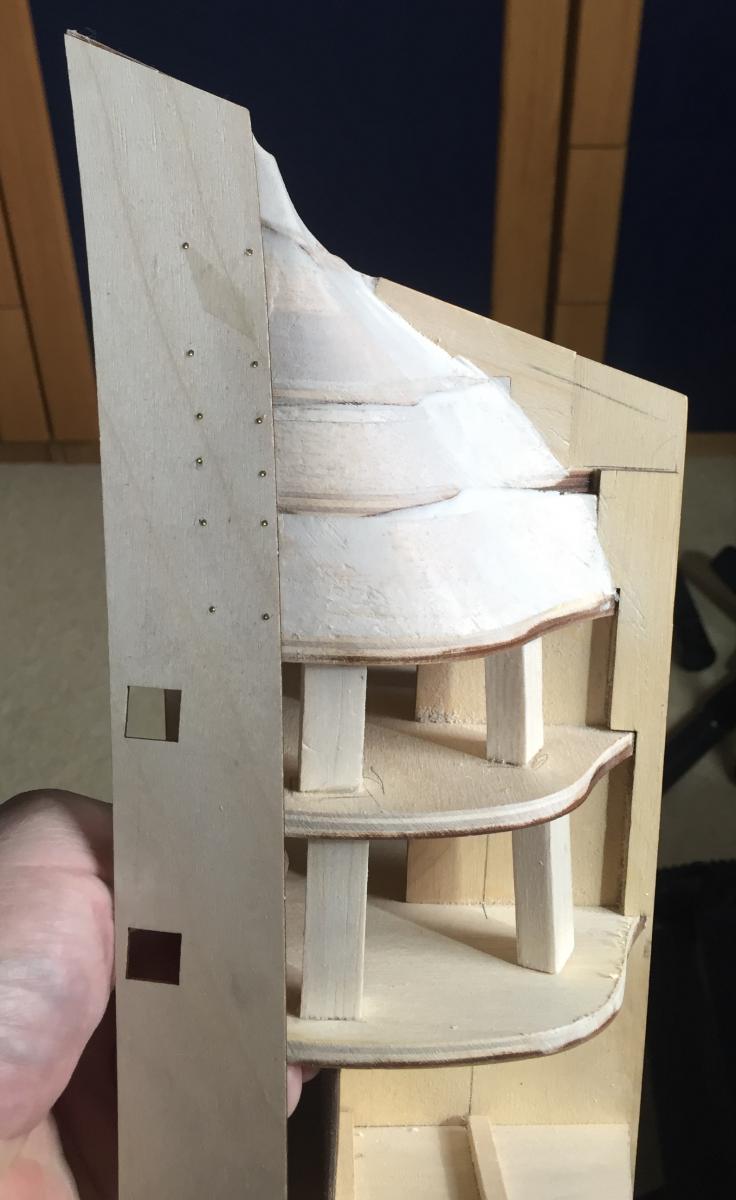
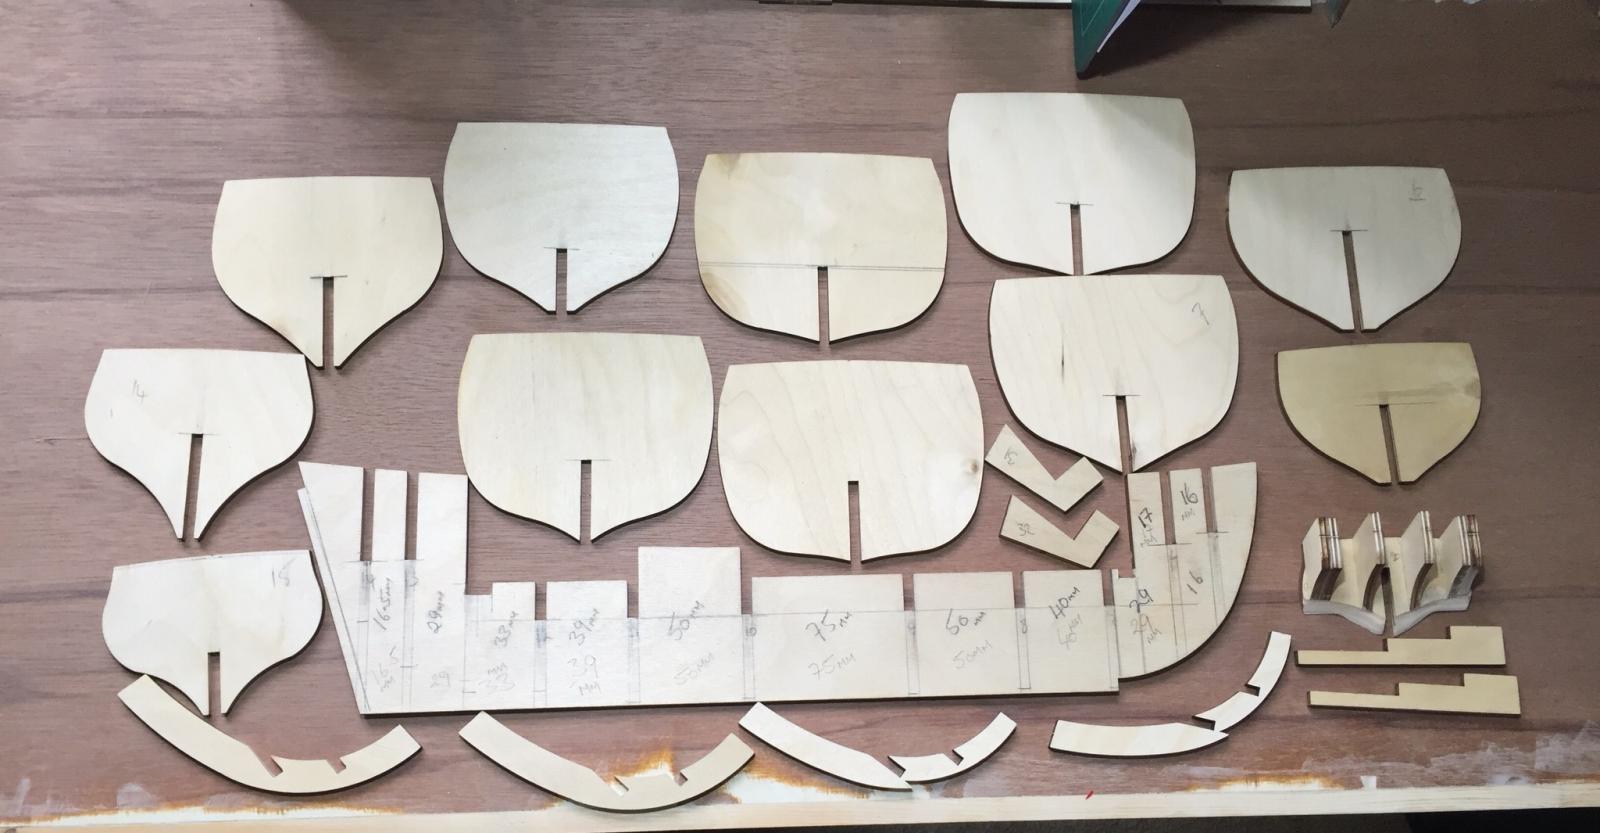
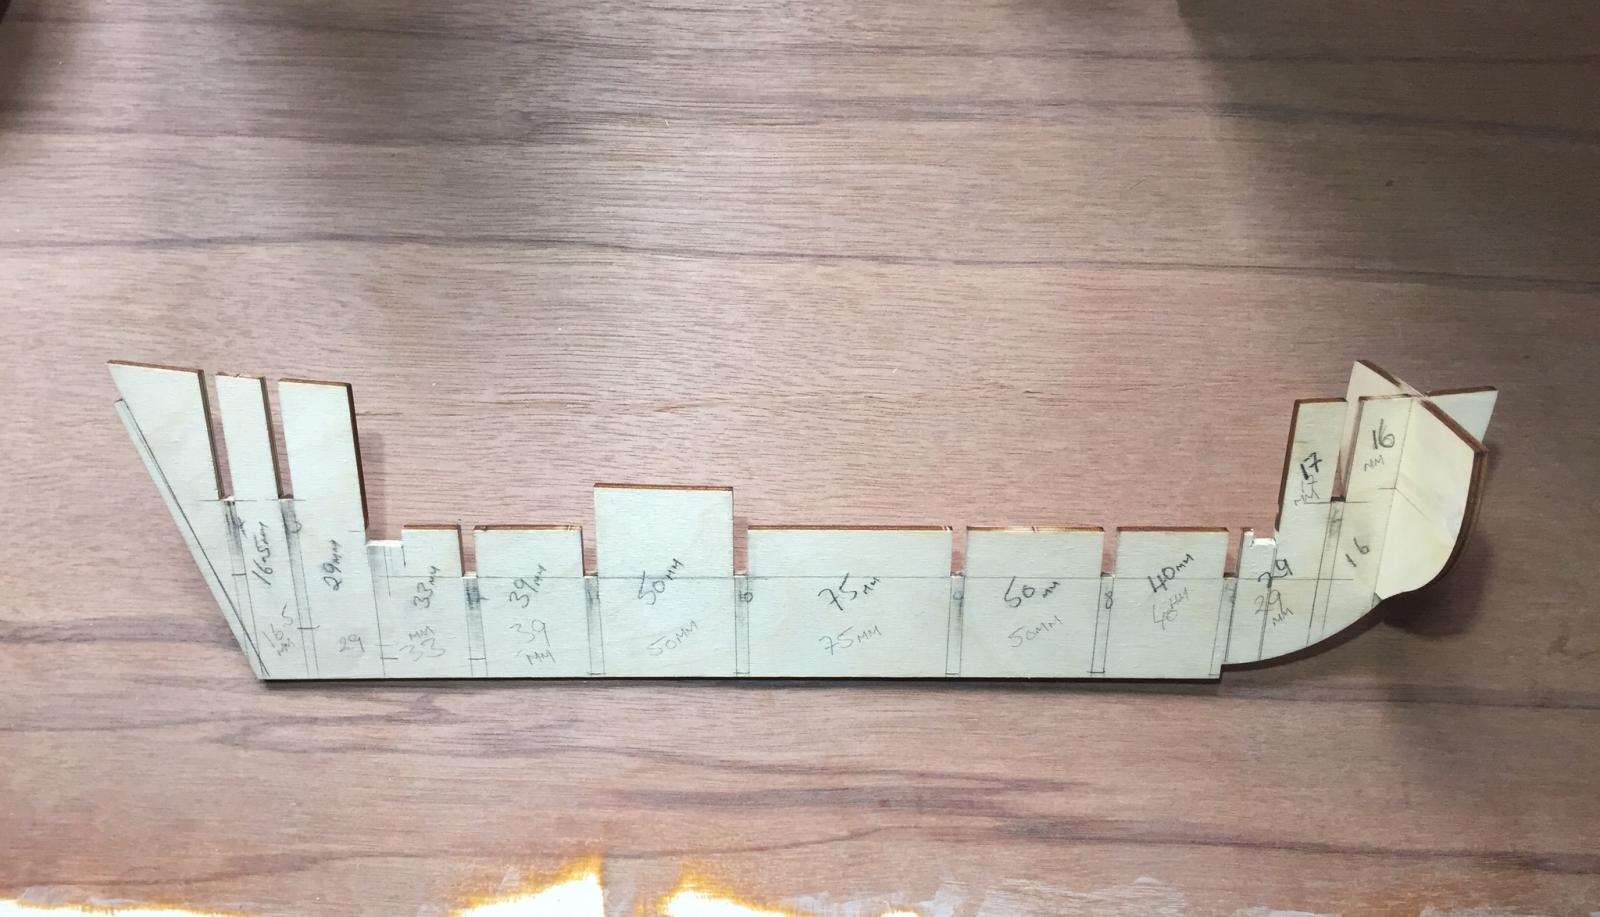
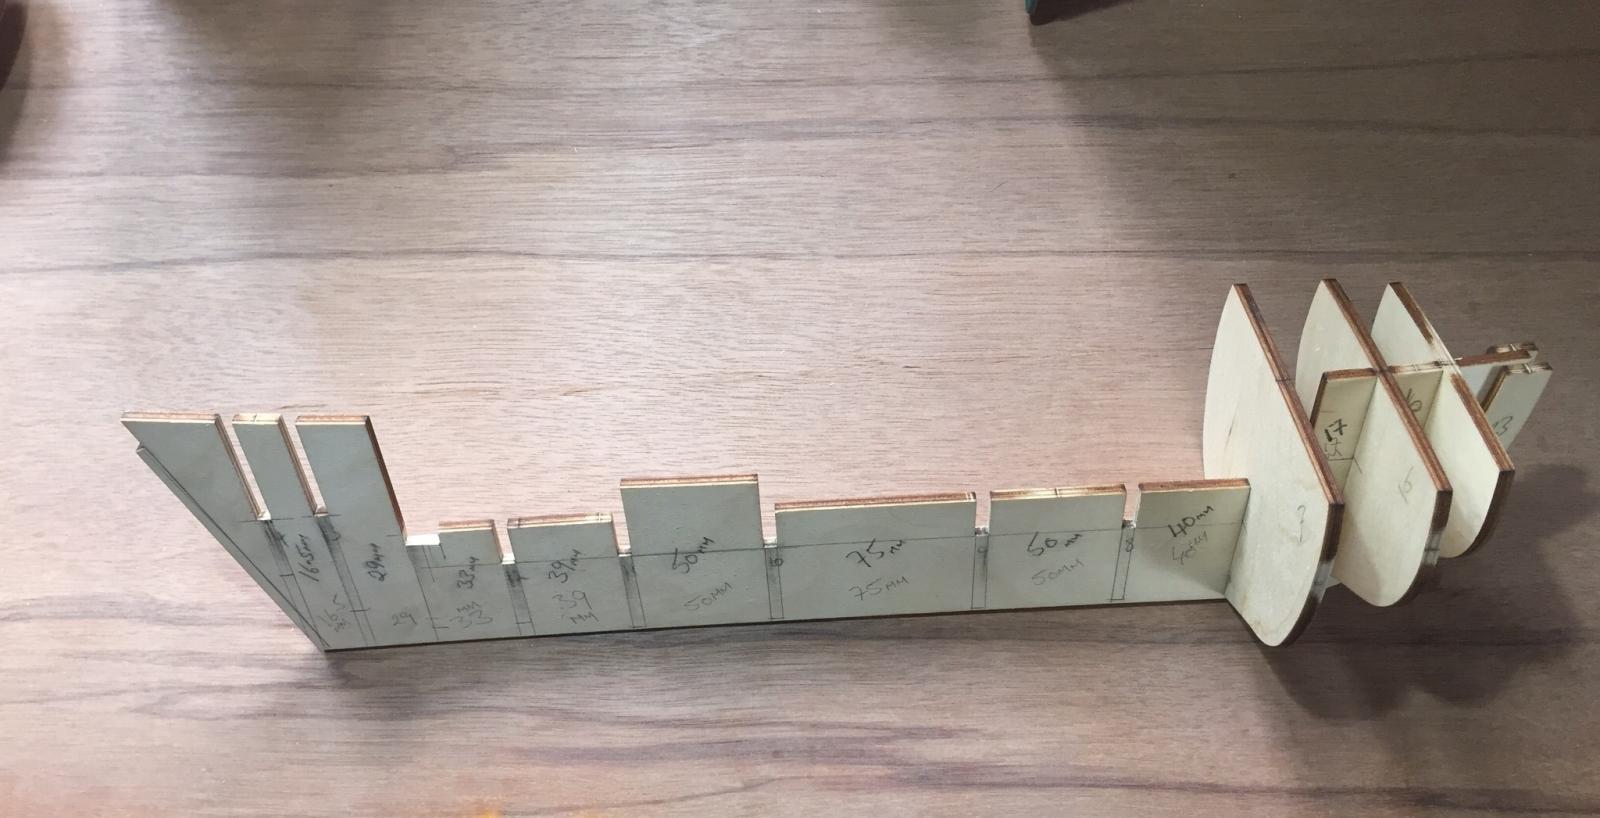
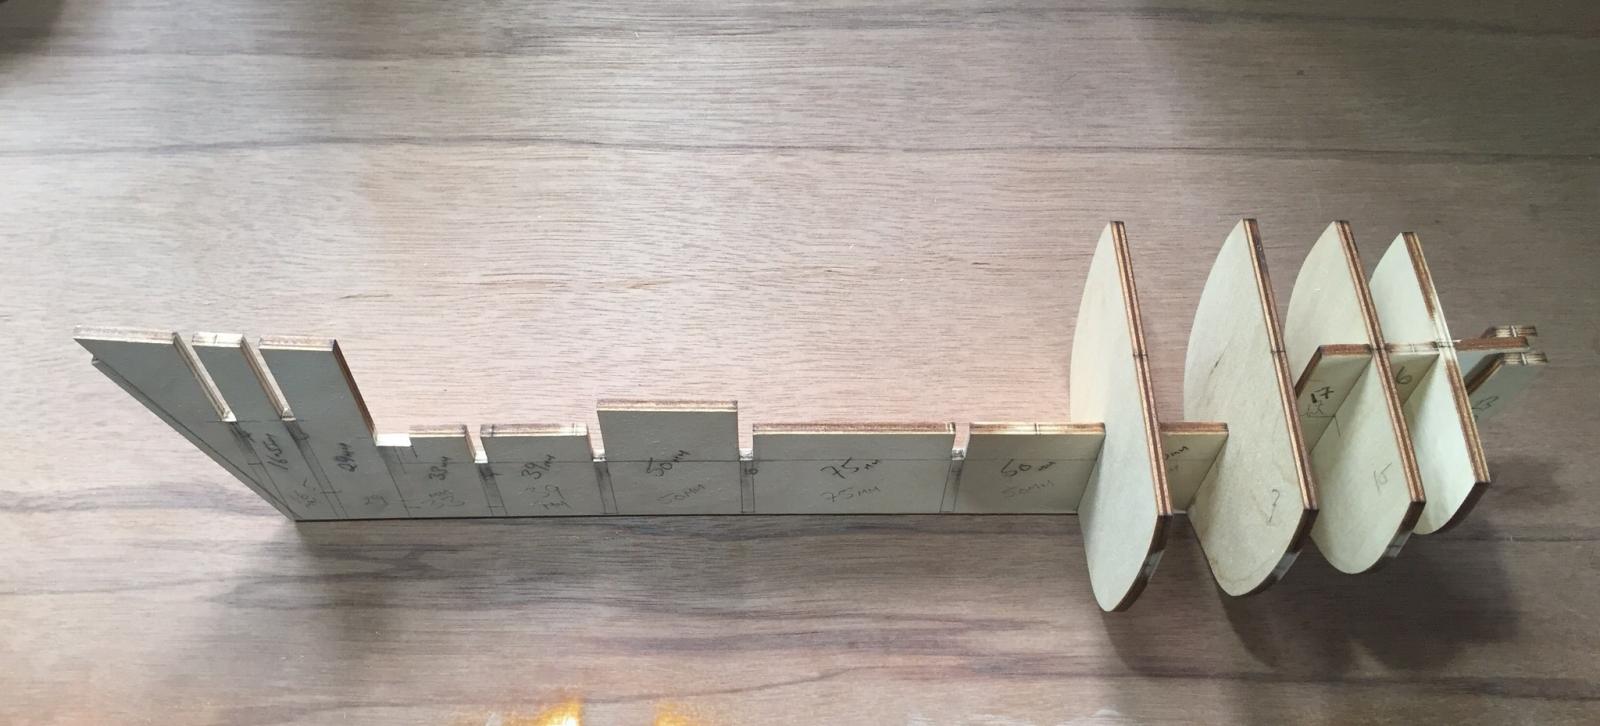
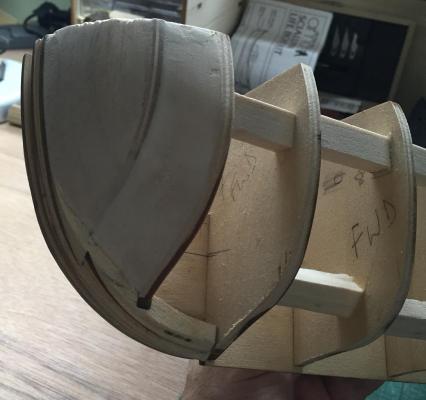
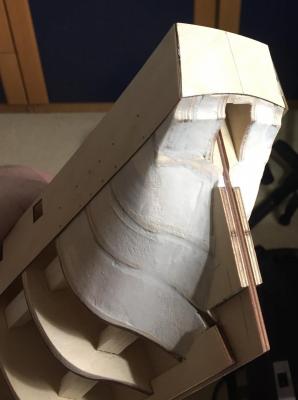
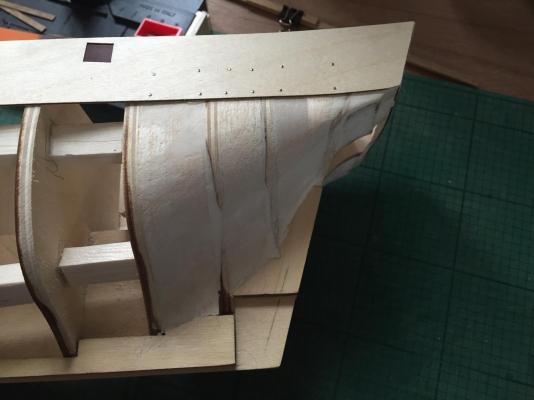
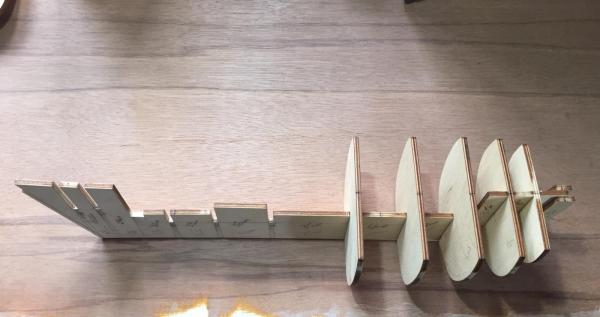
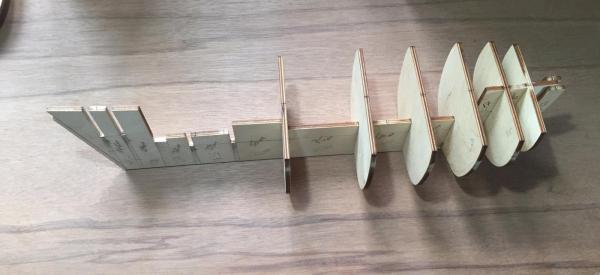
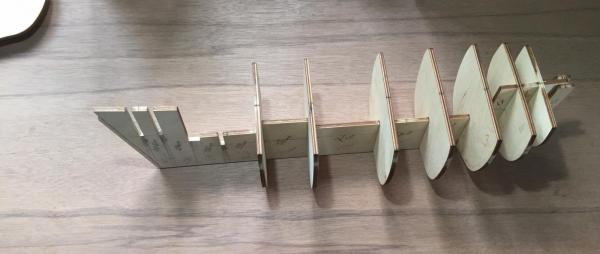
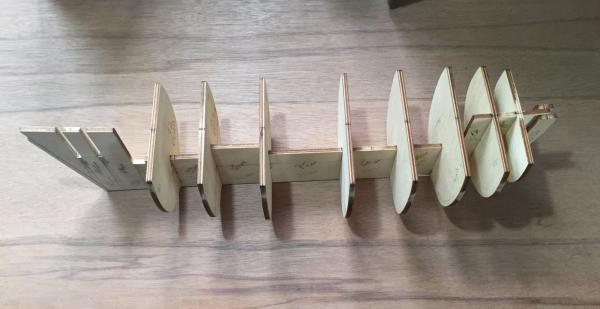
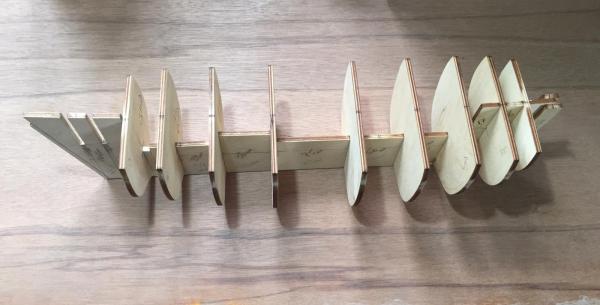
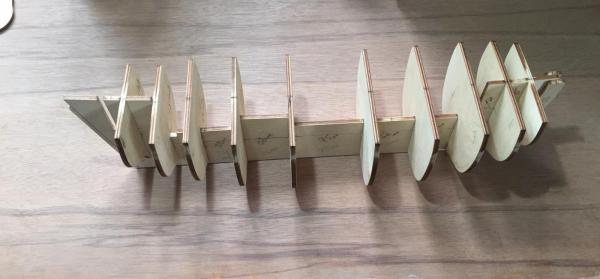
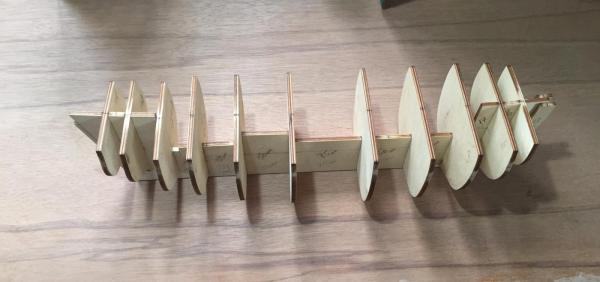
 Hi Jason, Thanks for responding (I'm glad SOMEONE did!) I think though, by the time I read your answer, I'd pretty much worked out the answer and implemented it! I filled the gap with balsa filler and then faired the stern blocks down to (pretty much) the width of the false keel (see photos) I'm pretty sure this will get me toward the required profile. The first layer of planking will take a fairly severe sanding as I've already found with the first couple of planks... But more of that on my build log.
 -
Hi Allan, I'm sure it is and I may be capable... But I wouldn't know quite where to start!
-
Hello all, I am part way through my first ship build, an Amati Bounty in 1:60. I realise that some of the parts aren't as "authentic" as I would prefer. The gun carriages are cast in a "bronzed" white metal - I'm capable of making more authentic wooden ones and that is a plan already being progressed. The kit though, comes with only one boat, whereas Bounty carried two. Again, the supplied boat comes in a cast white metal form (albeit with wood thwarts etc.) It isn't actually one of the boats carried by Bounty but it is approximately the correct scale length for the Bounty's 20' cutter and I think I can "adapt" the bottom planking & aft seating to better represent the cutter. Looks like I may have to scratch build its mast, spars and oars though, as the supplied boat doesn't come with these. So I need (want) to find (if there is one) a kit of the ship's 23' Launch. Does anyone know if there is one out there? Thanks in advance.
-
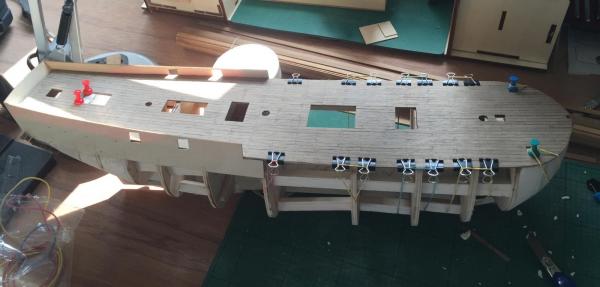
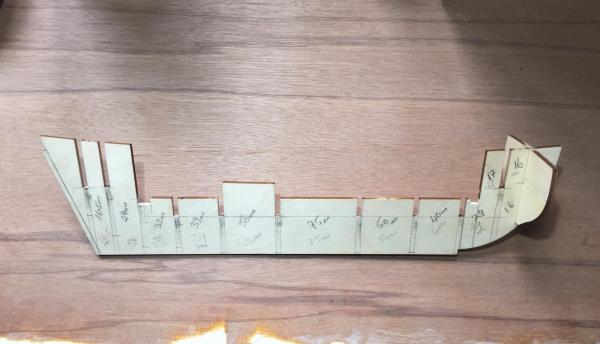
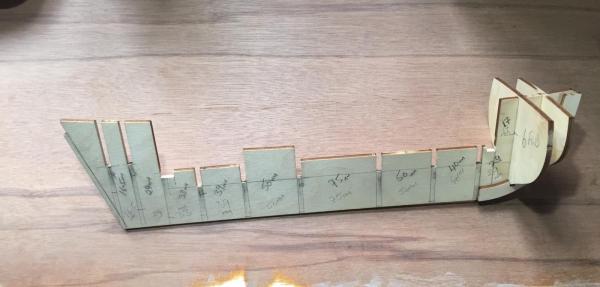
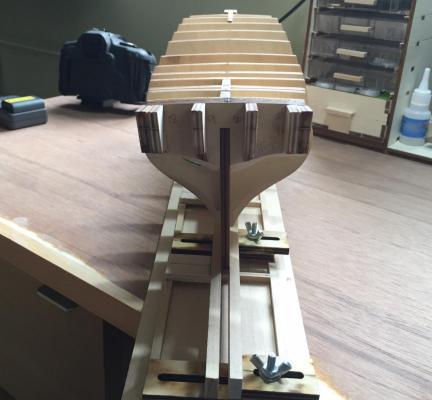
I had an hour free this morning, so thought I'd get the deck glued into place. The Quarterdeck area was held in and down well by the bulwarks, the bow lined up well with the cut out for the cut water... The only thing I had to do then, was to try and get the curvature of the deck formed onto the rib frames. The solution I came up with was to use bulldog clips and rubber bands. if a band needed a little more tension, I jury rigged a little "Spanish windlass with a bit of scrap wood and some more bulldogs.
-
Thanks Dave, Oddly, last night, I started reading Bligh's diary. Need to find out about that stern though...
-
Very impressive! I'm truly enjoying my build and, thanks to you, I have a ready reference to cross look at! LOL
-
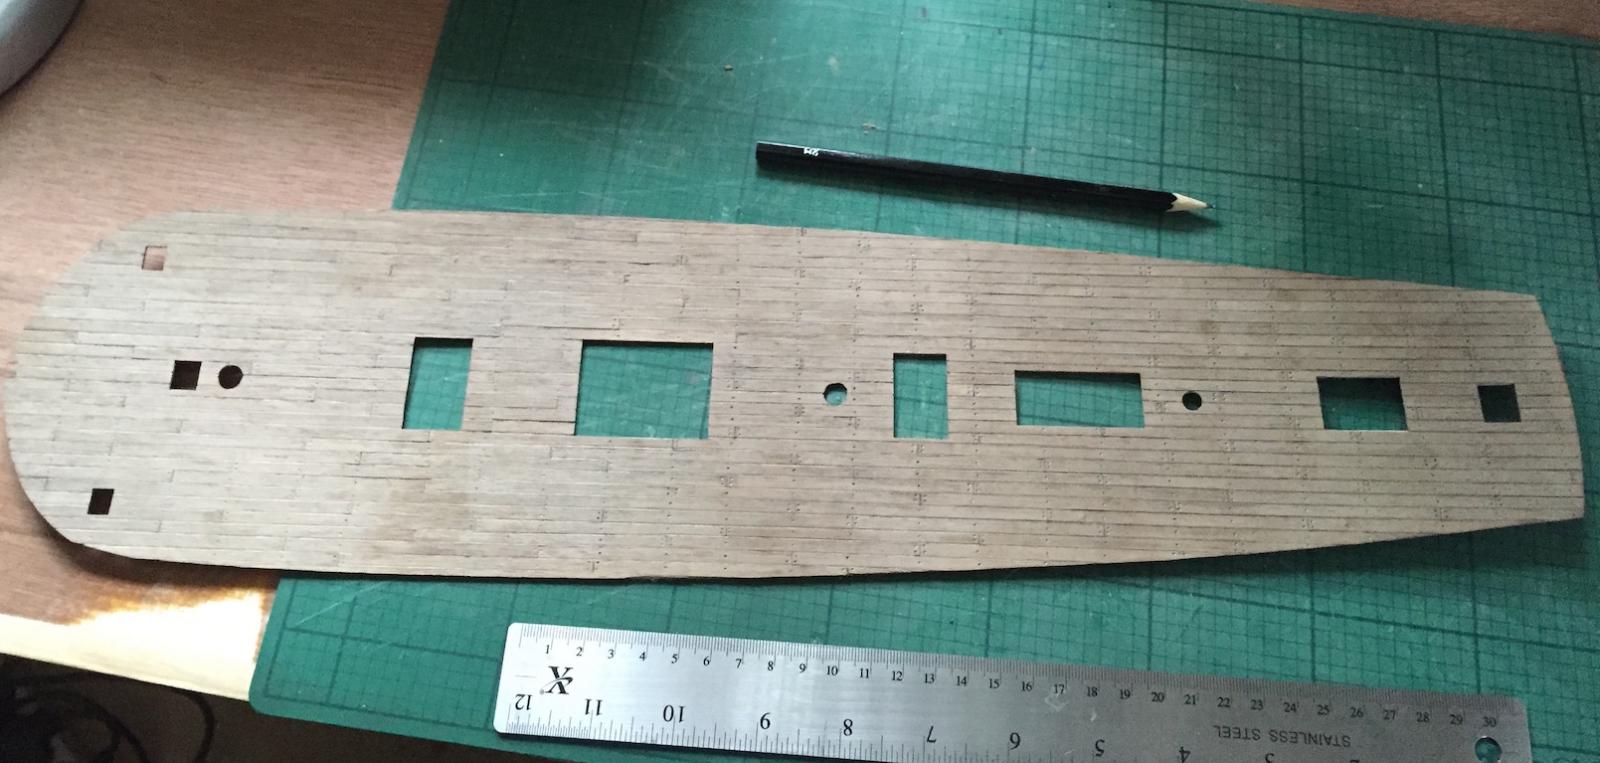
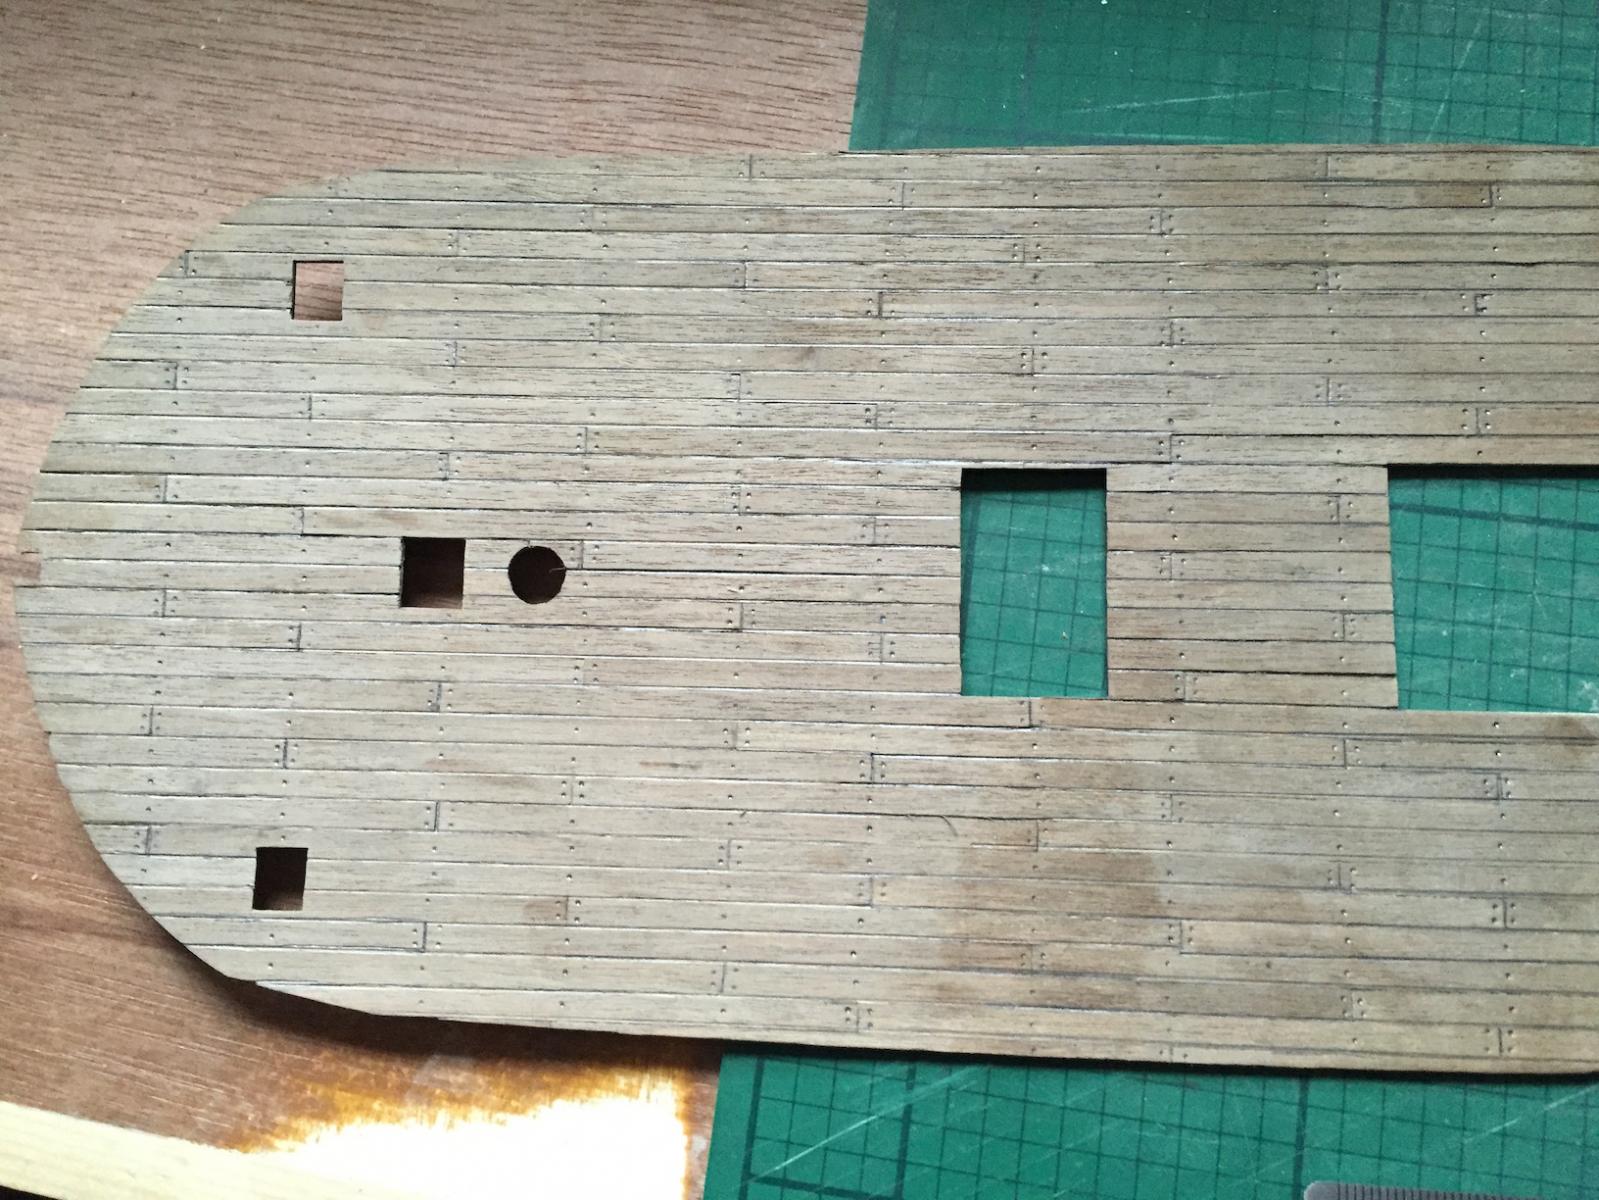
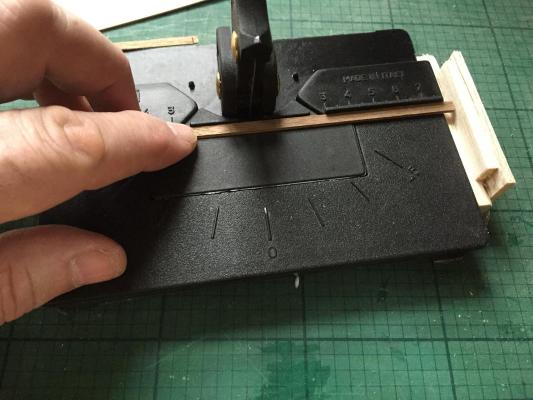
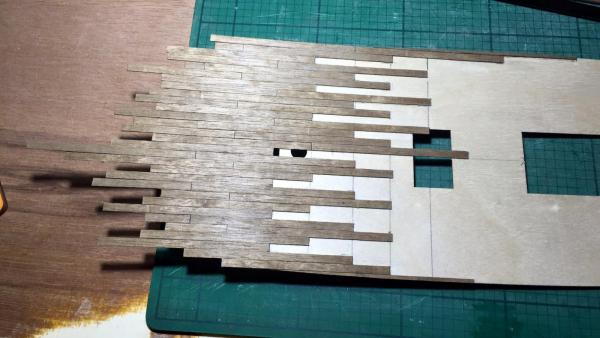
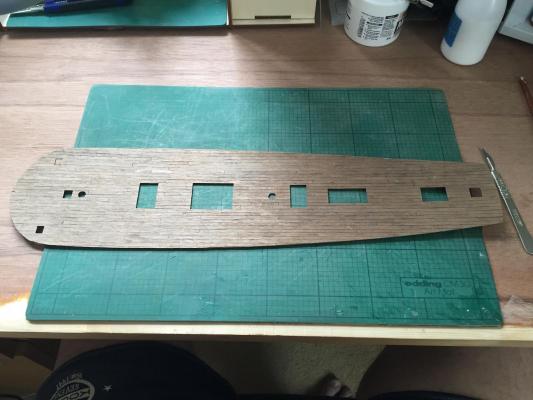
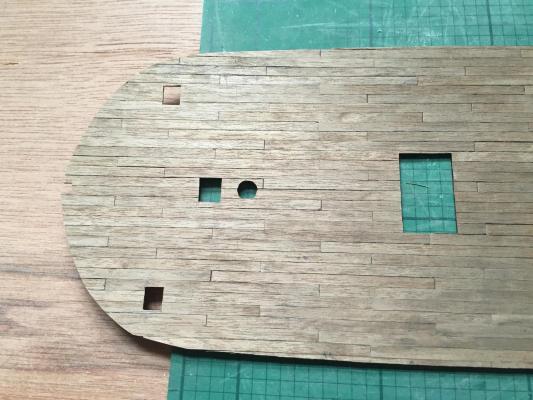
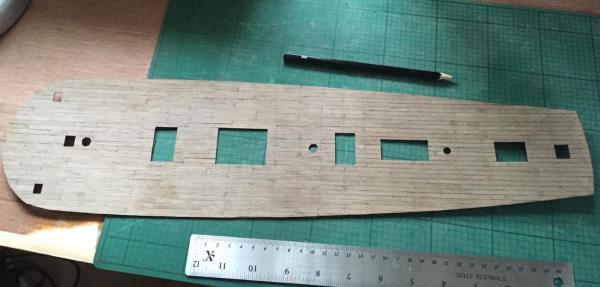
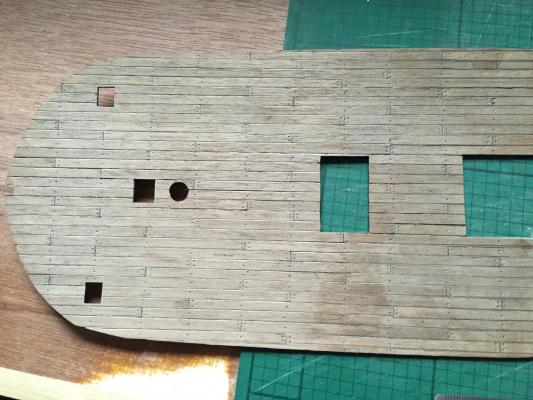
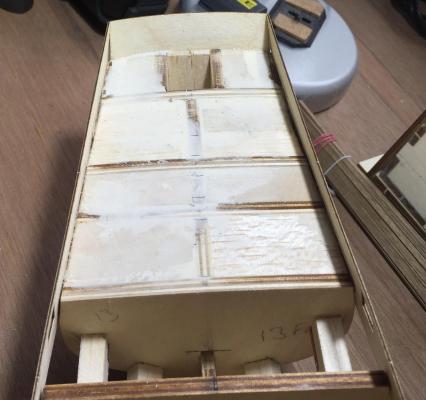
I've also planked, "Caulked" and "nailed" the upper deck. A long and arduous, though ultimately, rewarding job! I made up an end-stop on my plank cutter to ensure that all the upper deck planks were of uniform length, which at this scale, I think I worked out to be 8cm. It seemed to work really quite well! Time in the RN taught me that traditionally there were a couple of planking patterns used in the days that Bounty was afloat. I went for the "three butt shift". I started on the Centre Line of the deck and worked from there. I was quite chuffed that when I had reached the stern, I was only anout a quarter of a mm off the line. I only had to sand about 8 planks to get them fitting flush and nicely... Then it was a question of how do I show the caulking between planks. I thought that picking oakum and forcing it between the planks was taking things just a LITTLE too far, so had the thought to rub one edge and one end of each plank on the graphite edge of a 4B pencil... It worked to a degree, but not as well as I'd liked. So, it was yet another tedious task of stepping in the edges of the planks. This time, I used a 4H pencil as the B grade were just too soft. I also used the 4H pencil to "dot in" all the nails... I don't think that the results I have achieved are too bad - for a newbie!
-
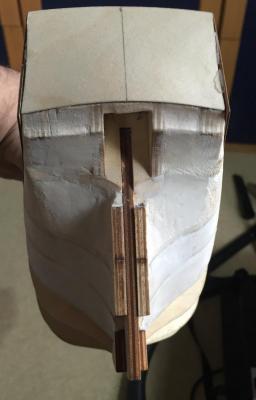
Well things are progressing. The bow and stern are pretty much blocked and faired. I would as that if anyone can guide me as to the way the plywood blocks (supplied with the kit) on the stern need to be faired, please contact me and describe?


-
Hi there all, I'm after some help here please... I've done most of the fairing on my first build (Amati Bounty). I've blocked in the bow and most of the stern. I now need a little help. How (and how much) do I fair down the supplied plywood blocks that are fitted at the stern/keel/rudder post? Could someone possibly describe with words and (if possible), pictures/sketches/photos. Many thanks. Phill
-
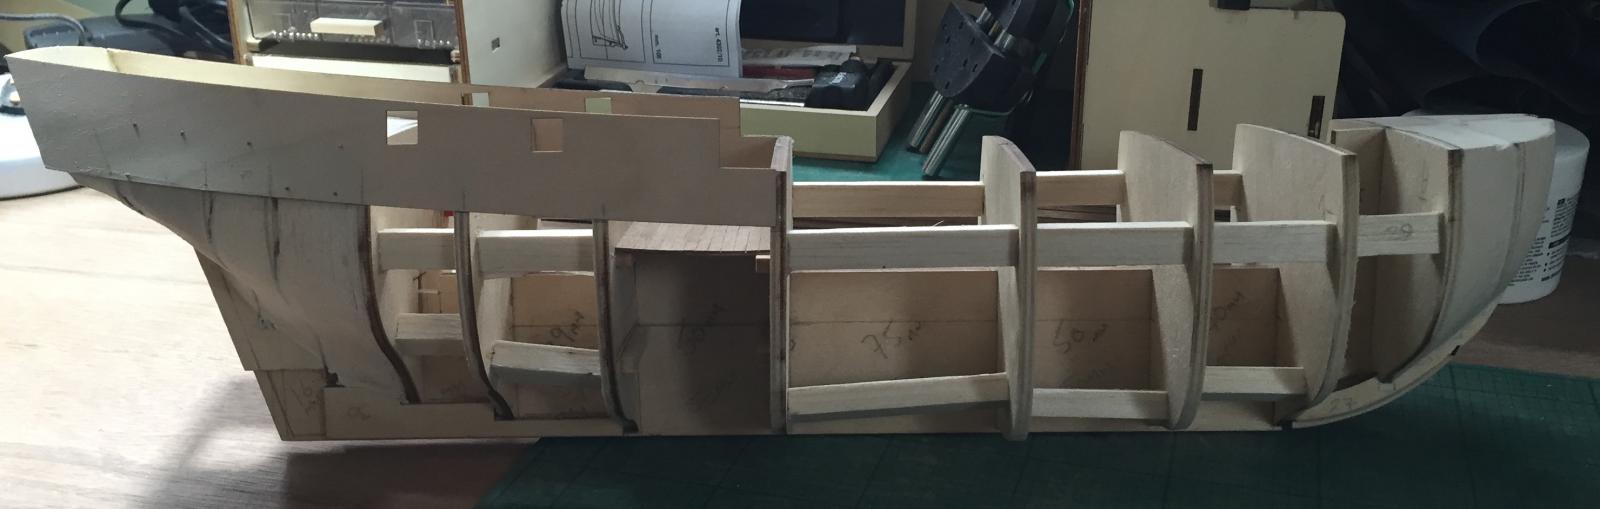
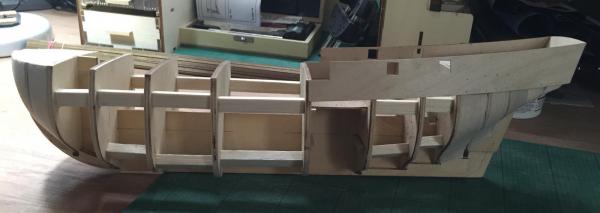
As of this evening, the bow and stern are blocked and filled. The frames, I believe are all faired correctly, the transom is fitted and faired and the stern bulwarks are glued, pinned and set to dry. The main deck is ready to be planked as I believe that once I have done that, the hull should be ready for initial planking... Oh and I went with my gut feeling on the cutwater. Sanded it down and re-planked it and will sand it once the glue has fully gone off. Time to re-read the instructions and plans, then look at other build logs to glean more tricks & tips before making a hash of things! Feeling quite satisfied
-
Thanks guys. Yes, frames are squaed withthe false keel and I think I going to fit baulks between frames to stiffen it all up. Only had a couple of hours "on board" today due to a hospital visit but managed to get a good bit of filling and fairing done. More tomorrow. Still looking for help on the question of the cutwater bow section of keel? Anyone? Thanks. Phill
-
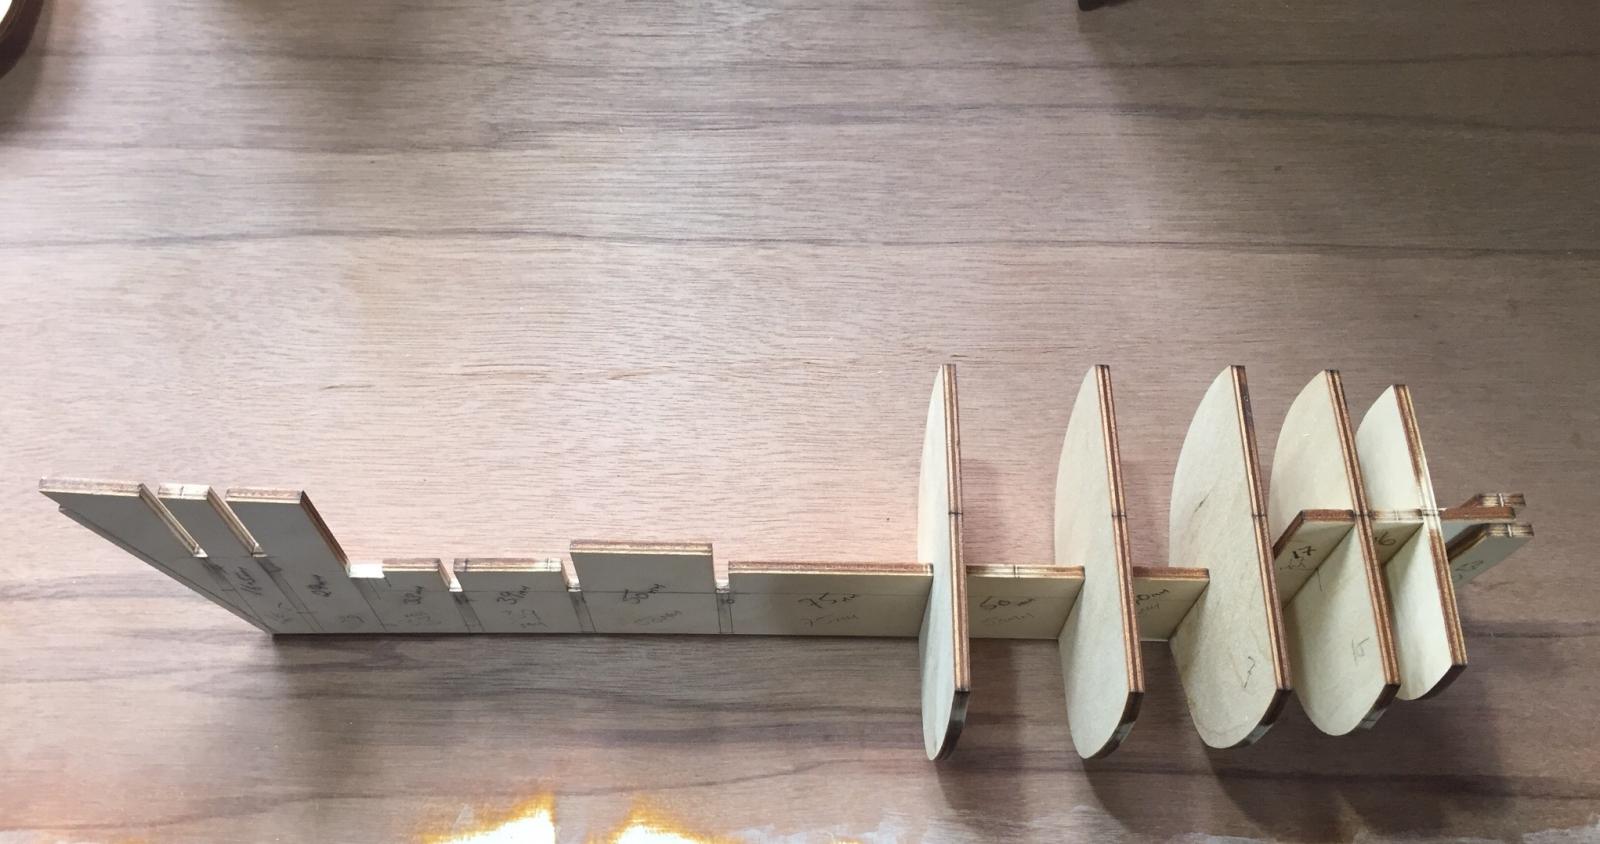
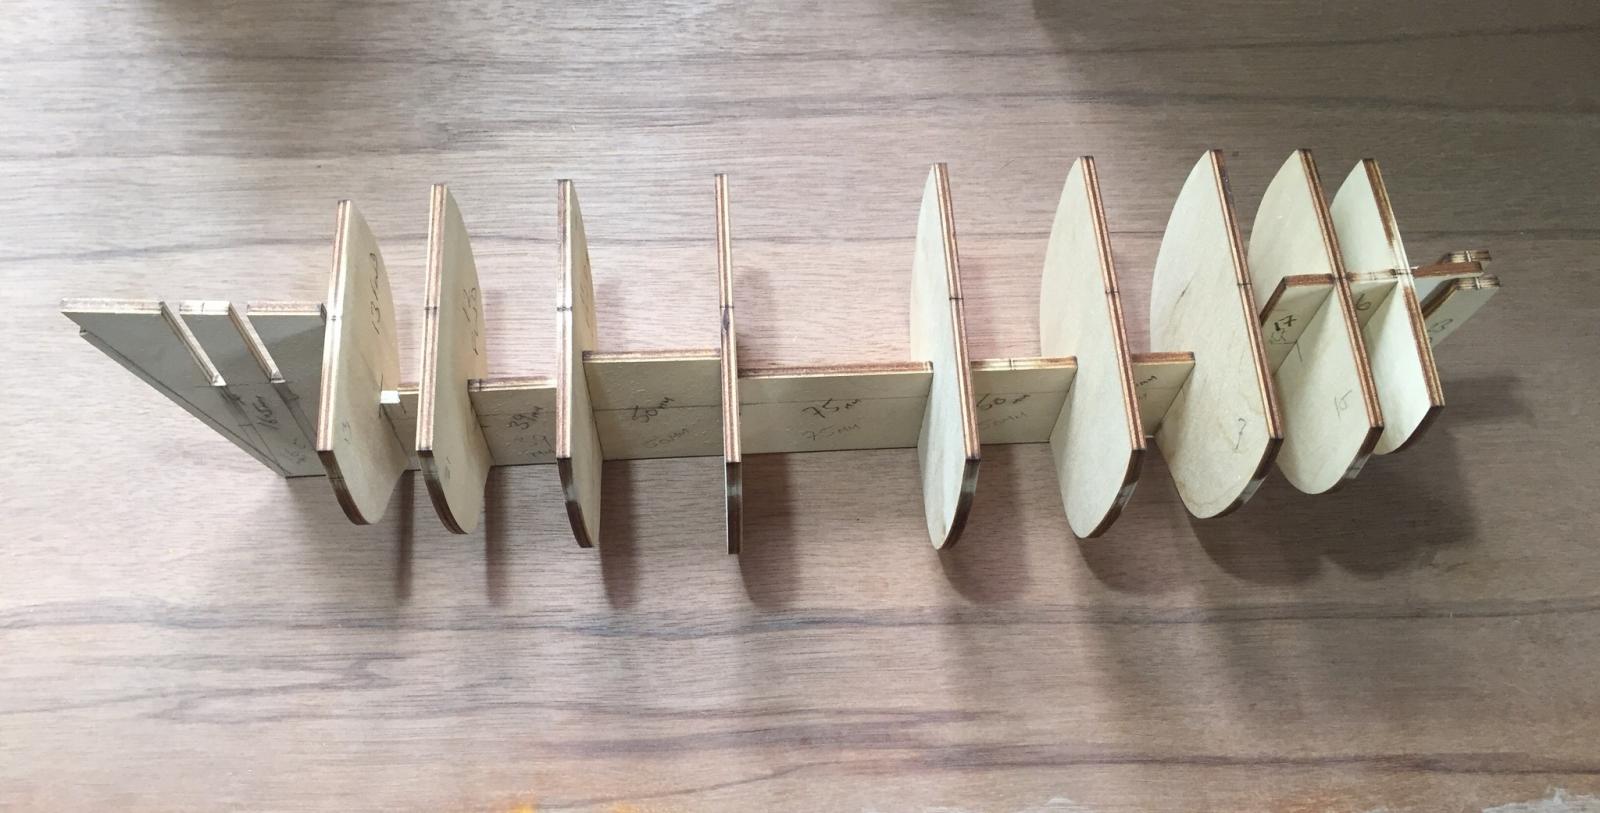
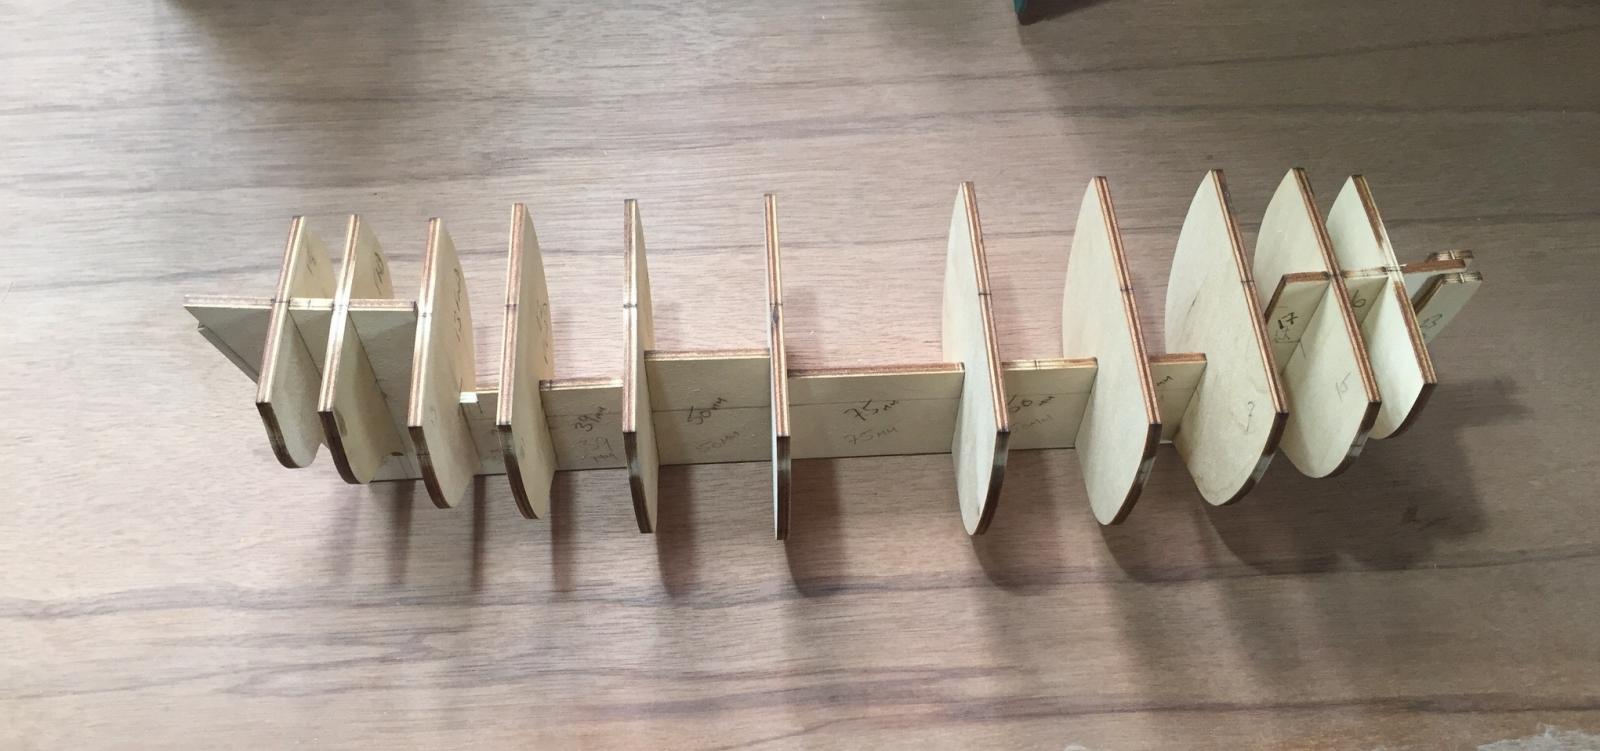
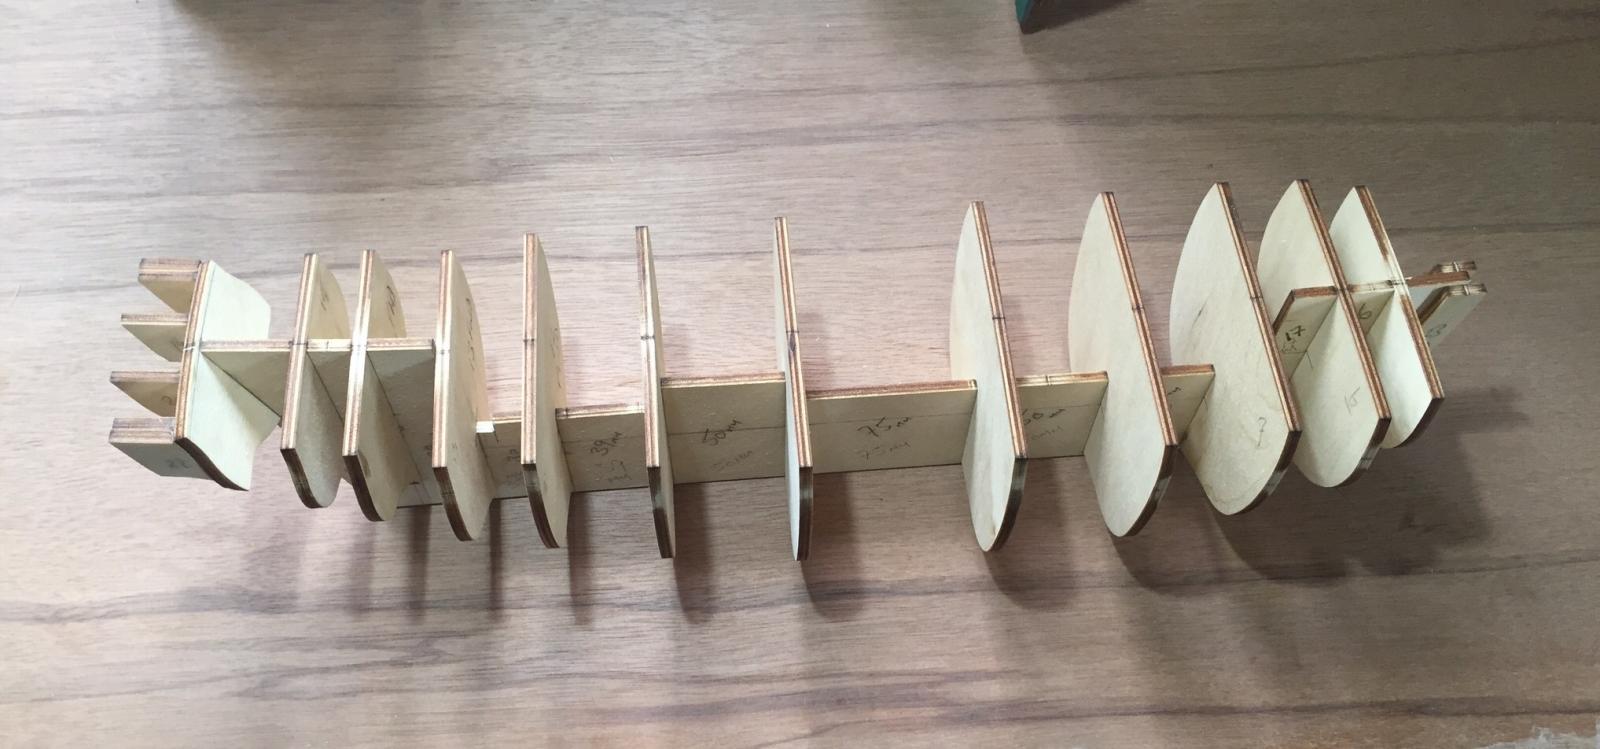
Handy Tool Storeage
Phill Elston replied to Phill Elston's topic in Modeling tools and Workshop Equipment
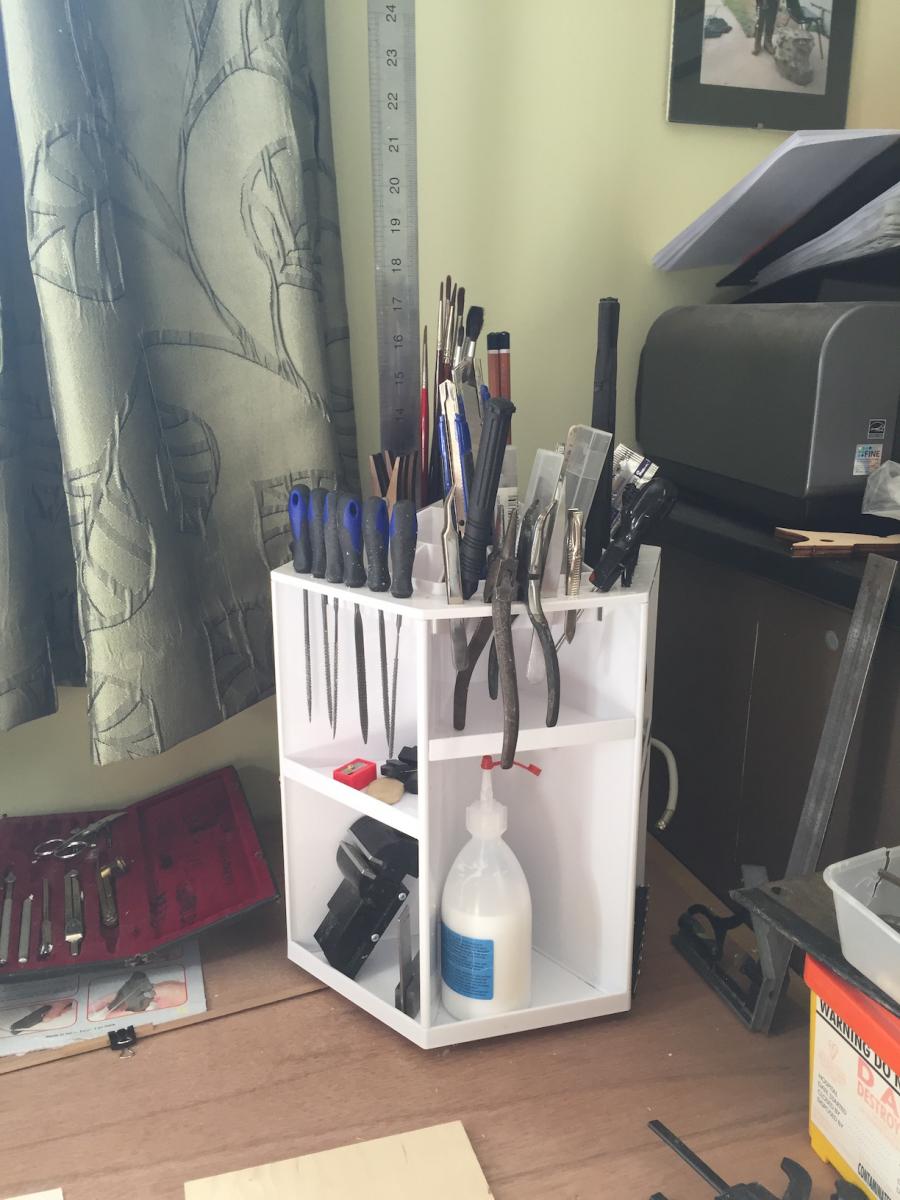
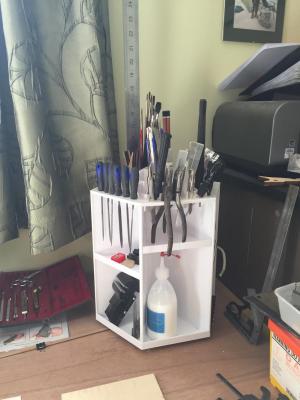
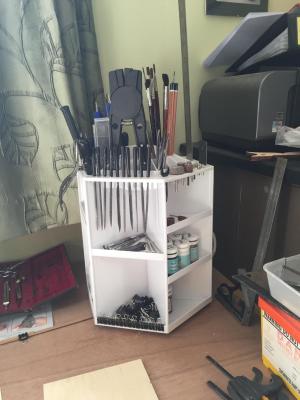
Thanks for the compliments guys. No, it doesn't take up much space (about 10 square inches) on the desk and thus far (2 afternoons) it has been really good. My thought is to cut some wooden triangles to fit into a couple of the shelves and drill the wood out to hold various drill bits and dremmel accessories/cutting heads etc. -
I bought this model years ago... Then "life" got in the way. So it has languished in lofts and cupboards in three houses as well as in a "Lock'n'Store" facility. My father often asked me how "the build" was going, only to be given a Caribbean "soon come mon!". Sadly, my father "crossed the bar" last November, so he never got to see any part of the build. Now I find myself laid up with a plaster on my leg and unable to walk my two dogs (or do much else truth be told...) but what a perfect time to start building!? I went and bought a 'Model Slipway' "Fair-a-frame" that I thought would help me build better... Then I found out how poor the laser charring is on the parts, as well as the poor fit of some of the parts... and don't get me started on the instructions! Add to that the fact that on the Amati Bounty, there is so little false keel, the clamp part has trouble holding it. If you are thinking of getting one of these "tools", save your money! Suffice to say that I haven't labelled it as "money well spent" and I'm hoping to get a refund through the retailer. Anyway... the build. I found the quality and precision of the joint cuts on this kit to be very good - if anything, some had to be filed open a little to allow the free flow of glue or the joints were simply too tight! Dry fitting was good, sometimes needing a little "deck-ape" force to separate them before glue fitting! I've actually pretty much finished block filling and fairing the bow and stern, but haven't taken shots of those yet. Once that task is finished, I'll get the camera out again. I've taken onboard the advice from many other builds and I'm taking my time as I realise that it is going to pay dividends in later stages. Whilst glues were going off on the fairing blocks, I made use of the time to start constructing some of the deck fittings, ladders, hatches etc. I have found though, that I have made a couple of boo-boo's... One which will stay as is because it'll take a real nerd to find it (I planked the half deck under the ladder "thwartships" rather than fore & aft) The other, I'll put a call out for advice on... In line with the instructions, I planked the "Cutwater Keel piece" that is to say, the bow part of the keel. Then realised that with the supplied bow blocks, the cutwater will no longer fit! My thought is to sand off the planking that I have fitted to the cutwater, dry fit it and mark where it butts the bow sections and re-plank it in accordance with the instructions. The thought of sanding out the slot where the cutwater sits by an even 1mm each side is not one I really want to put into practice. As I say, I'd appreciate any steering in the right direction from the more experienced builders out there? Many thanks and I look forward to reading your comments and LEARNING from all of you. Phill


-
Work station clutter
Phill Elston replied to Senior ole salt's topic in Modeling tools and Workshop Equipment
I just posted something on this very topic! My budget is very limited so I can't get to something as luxurious as the Hobby Zone setup. My post is here. http://modelshipworld.com/index.php/topic/12952-handy-tool-storeage/ -
Hi there, I've recently got back into model making. I've never made a wooden model ship (or any other type for that matter!) My forté was 54mm - 75mm scale figures and dioramas. However, a 20 year career in the RN left me with a liking for the sea and I'm now part way through an Amati HMAV Bounty (there's "dust" everywhere in my work area at the moment as I'm filling and fairing!) When I was modelling before, I had a little compartmentalised "tunrntable" that came from a graphics shop that I once worked in. I used it for standing a lot of my tools and things in. The better part of thirty years, umpteen house moves and a couple of kids (now adults) have left my turntable heaven knows where! So now that I've "returned from the cold', I need some way of storing my modelling tools whilst having them easily to hand. This will not only keep my workspace clear, but also keep my tools in better condition and keep me from injuring my self on needlepoint sharp kit! I searched everywhere in stationery stores and suppliers, graphic art shops... Allsorts. Nothing. So I turned my attention to E-Bay. Eventually, I found something... in "Health & Beauty"/"Make Up"/ "Make up tools & accessories" http://www.ebay.co.uk/itm/201479390299?_trksid=p2060353.m2749.l2649&var=500659444906&ssPageName=STRK%3AMEBIDX%3AIT I'm not sure that the full link will show so it was described on E-Bay UK as "360-degree Spinning Cosmetic Organizer Display Makeup Box Case Cleanup Rotating" It arrived in just a few days and I set to, "adapting it" to my needs. It's not finished but I have managed to clear a BIG space on my work table! I thought it might work for someone else, so I've posted it here... I hope it helps someone else.

- 7 replies
-
- 14
-

-
Hi guys, just tripped over this post whist searching for tips & tricks for building my own Amati Bounty. I too want to build her with a coppered hull. It may have been said already, but Amati produce copper plating pre-"rivetted". Vossy... Do I take it from your profile picture that you served in RAN "Leander" class FFH's? I served in several RN leanders, as well as Ton class sweepers, County Class DDGH and many others.
-
Hi Admiral, hi Jerry, That is looking GOOD! I'm very impressed! If mine turns out even one quarter as good, I'll be happy. There is a book... Not easy to track down as its out of print but there are some going second hand in the US at the moment. It's called; "Anatomy Of The Ship - The Armed Transport BOUNTY" by John McKay. Printed by Conway Maritime Press Ltd. ISBN 0-85177-502-0 It gives a little of the ships history and HUGE amounts of data and drawings in both elevation and isometric. My build is coming on, frames are set, the bow and stern are mostly blocked with balsa (that wood has increased in price to an eye watering degree since I bought it last!) and I'm just awaiting some balsa filler to complete the job before starting work on the big cabin part... Gonna need some help there I think.
-
Hi Jerry, hello Admiral, Thank you for your replies. The only problems I've had (so far) with the Amati is the instructions. It does come with an Engilsh translation, but it's still a little sketchy as I'm sure you're aware.the cuts are good and clean, the come away well with little filing or sanding to be done... Although the frames took a little extra to allow the joints to fit well once glue was applied. As it happens, after posting yesterday, I did some web searching and found that Cornwall Model Boats (who I think I must be a shareholder in by now) do indeed sell Coppering kits in 1/64... At least I don't have to order this month! LOL I also found a very informative video on You Tube which I will watch fully prior to that stage of the build. As I can't get to the craft shop before tomorrow, ive taken a little time to build a few "extraneous bits" like the flag locker, pumps, anchors etc. I was going to attempt the two stern lanterns too but cannot, for the life of me find my soldering iron (yes, in England there is an 'L' in there LOL) I had pretty much decided to balsa aft too before I read your reply but I'm glad that my head was going the right way in that respect. I'm hitting hobbycraft in the morning! I considered the caldercraft kits but all the reviews I read, the Amati were the "better". I bought a Model Slipways "Fair -a-Frame" as a building jig... Very unimpressed - to the point that I've contacted the importers. The "overburn" on their laser cutting leaves the parts looking like they were a part of the mayor of Nagasakis desk, the instructions are convoluted (to say the least) and then there is an addendum changing LOTS of measurement specifications. Unfortunately, come of the enlarged measurements haven't been applied to the parts, so I had to adjust some slots. This has left the fit imprecise and so some parts came out of true on the first assembly... Then I find that there is so little false keel on this kit that the fair a frame is 7/8 useless to me anyway! To give them their due, the importers HAVE offered me a refund, though as I continued to construct the thing. I even went as far as to re-write the instructions (with the correct measurements) so that they made sense! We'll see Thank you for your thanks and compliments. Something that sadly doesn't happen in this country... To the degree that servicemen and women often feel like second class citizens (they are seldom allowed to wear uniform off base for fear of "causing offence") and veterans get NOTHING other than their (meagre) pension. Because I was disabled from the military (51% broken) I get a little more but am made to feel beholden for it and it precludes me receiving any benefit if, for instance I am made unemployed! But I'll get off my high horse in that respect... Thanks again and I'll keep in touch. Regards Phill
-
Hi all, I'm a newbie to this site and a returnee to modelling (I used to do a lot of armoured vehicles and figure dioramas in my youth, super detailed cars in my late teens and aircraft in my very early 20's. Since then, a 20 year career in the Royal Navy, two marriages, a couple of kids, houses... No further explanation required I guess.) Anyhow, many years ago, I bought an Amati Bounty kit & then allowed more "life" to get in the way. A few weeks ago, I found myself in the situation where I have a leg in plaster. Feeling initially sorry for myself, I had one of those EUREKA! moments. I pulled the box from the cupboard and set to work spending money on the tools I don't have ans some that I just plain decided to get. At the time of writing, my Bounty is at the stage where I have glued the frames to the false keel and I'm about to start fairing the frame sections, bow etc... Thankfully, I tripped over this thread and saw the idea of balsa blocking the bow section - something that I will certainly be putting into practice! I would like to pick everyone's brains if I may though. Just a few questions for now, I'm sure there will be MANY more in the months to come A) Is it worth doing the balsa block thing at the stern too... To fair the shape in and have something sold to plank to? I will confess to not having read all the way through the instructions yet, so would ask if the kit is designed to be "double planked" as this lovely lady has done? C) I really like the copper on the hull. I haven't ever wanted to get the copper effect with paint but I realise that copper isn't supplied with the kit. Is there a thread that gives tips etc? And if buying copper to do the job, what thickness and do I get sheet or strip etc? Does it come embossed or is it a long slog putting the nail effect on? Thanks in advance for your thoughts, pointers, answers etc.. I look forward to having the Mickey taken! Phill. PS. My "Long Haired Admiral" gives me no end of grief because whilst we both served and both made it to the dizzy heights of Petty Officer, she did 22 years whilst I was retired on medical grounds after "only 20 years".