HOLIDAY DONATION DRIVE - SUPPORT MSW - DO YOUR PART TO KEEP THIS GREAT FORUM GOING! (Only 24 donations so far out of 49,000 members - C'mon guys!)
×


MEPering
-
Posts
91 -
Joined
-
Last visited
Content Type
Profiles
Forums
Gallery
Events
Everything posted by MEPering
-
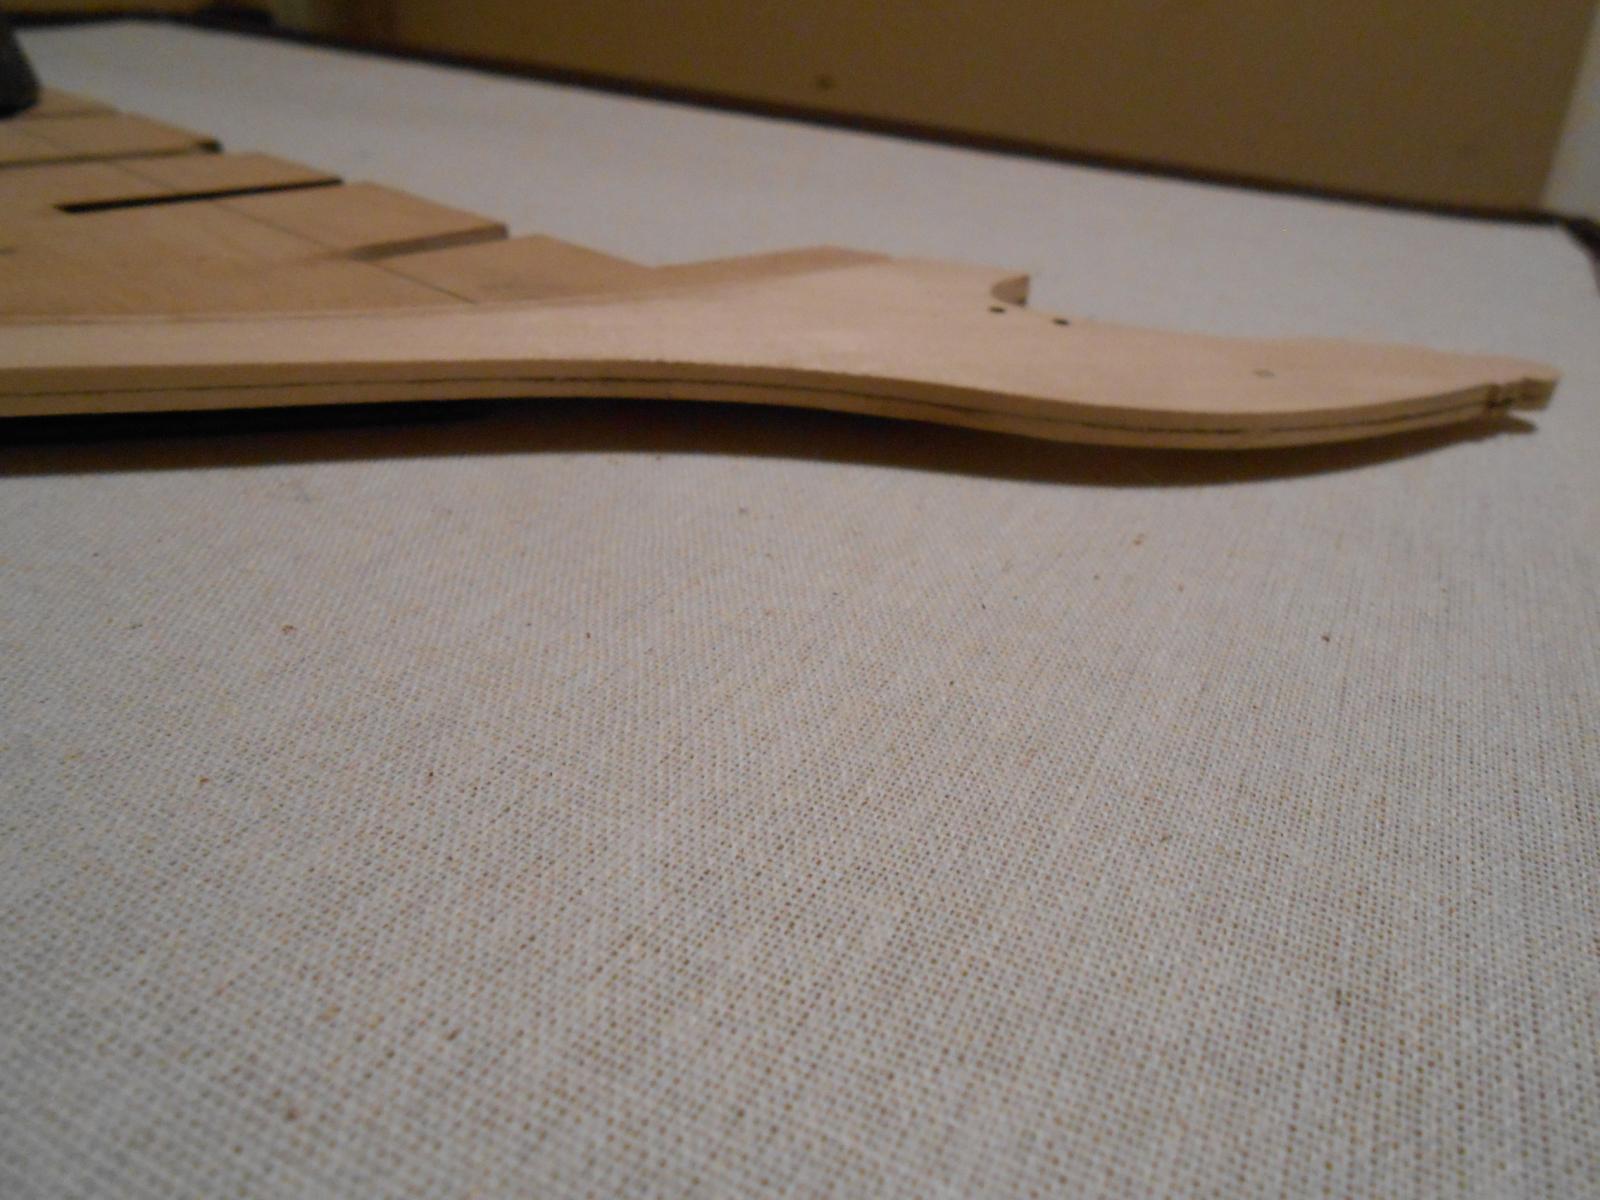
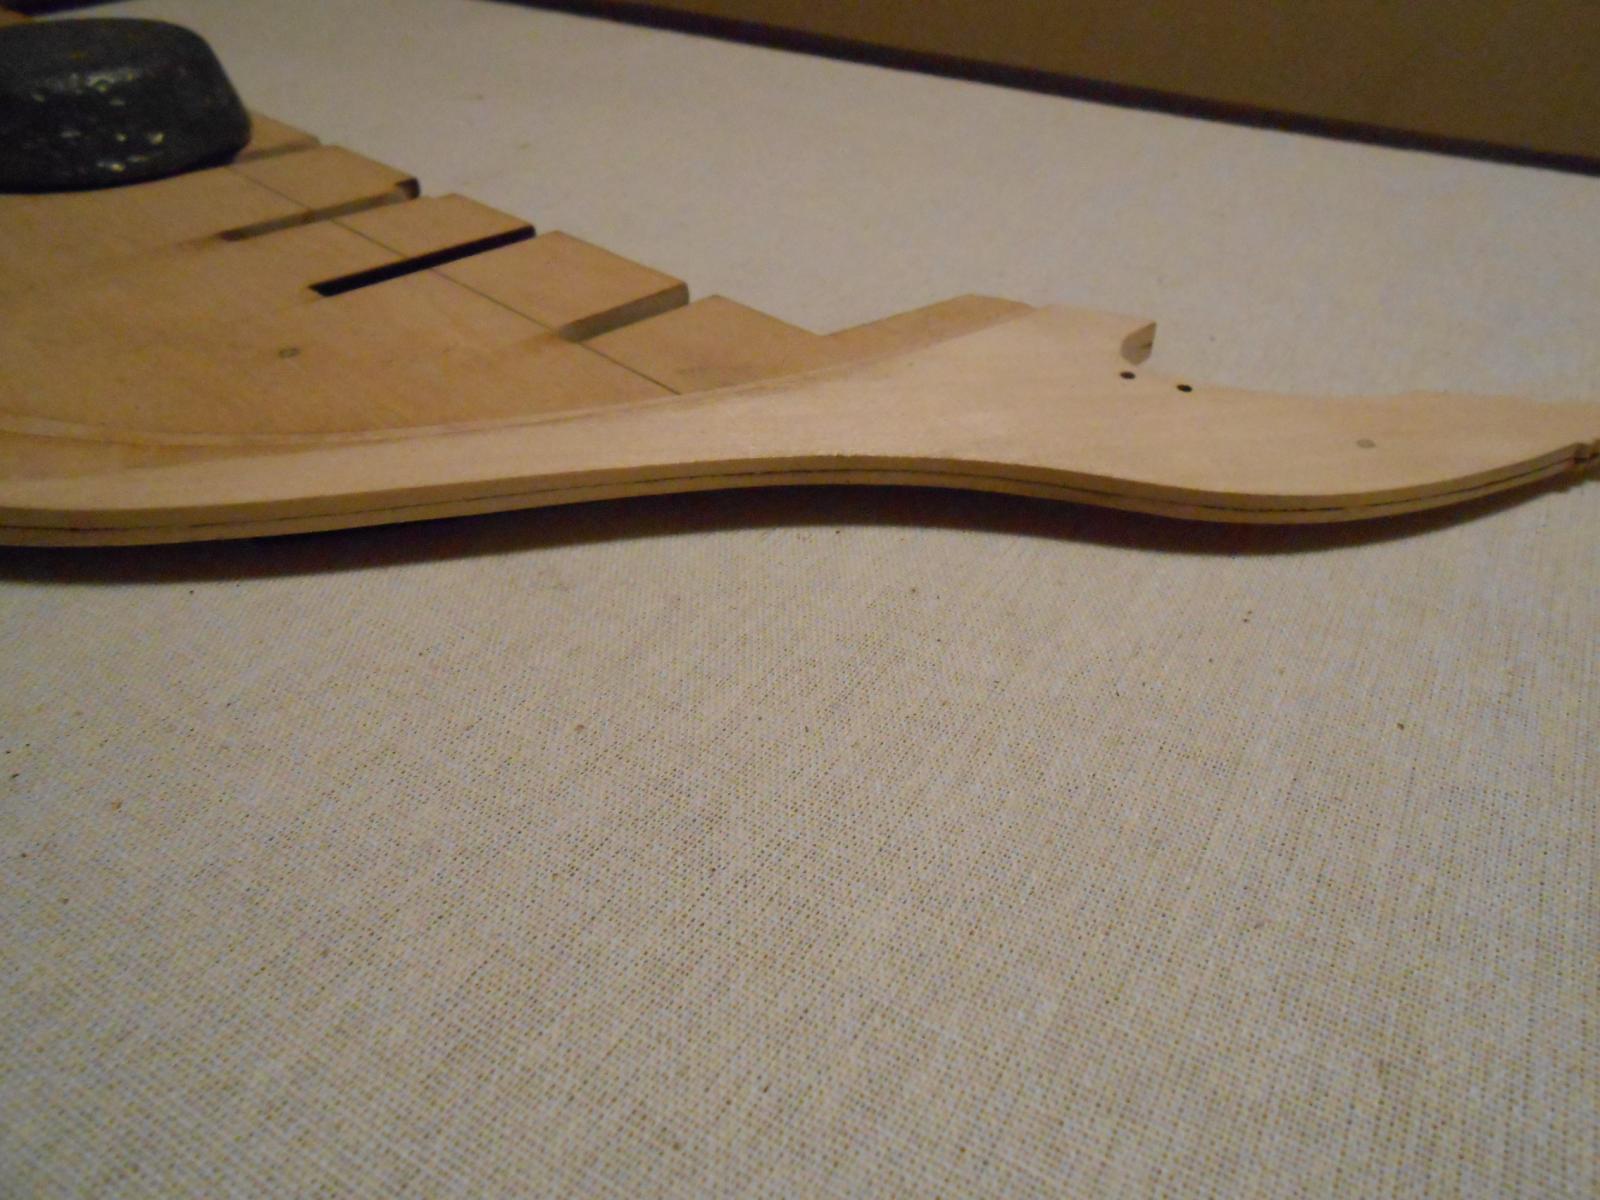
The stem is now tapered for the most part. I did not round it over yet, so that it showed up better in the photos, but also because I don't want it getting dinged up during stages before painting. The sternpost should be a bit easier to taper, though I haven't done it yet. It just doesn't have the complexities of the stem. I am not sure how well the taper can be seen, but here are the pics: I know this might seem to be a minor detail to some, but I think it is still a detail worth modeling in a ship of this size. Most people aren't going to notice it, though, I realize. But then again, I think if I am going to model something, it is worth doing it as much justice as possible with the visible parts. Next update should see the stern completed as well, and the bulkhead fixing begun. Matt


- 117 replies
-
- 9
-

-
- constitution
- model shipways
- (and 1 more)
-
Yes David, you are correct. I decided to study this fine drawing they included, and it is right there on the print. There is an invisible line drawn that shows where the bevel starts on the stem piece, and at the sternpost, it also shows how far down the keel the bevel extends. As many plans, blueprints and schematics I have used for most of my life, I should have known to study the drawing first. Matt
- 117 replies
-
- 3
-
-
- constitution
- model shipways
- (and 1 more)
-
Hello, all. I have a question. On the plans to this kit it appears there is a bevel on the sternpost and the stem. There is no mention I can find in the instructions on this, and would like to know what others think. AOTS shows it slightly in photos, but doesn't point it out well. Another thing, is does this bevel continue for the whole keel, or is it just the stern and stem? The prints imply just the stem and stern. The keel surely beveled, or is it? Is this an oddity for American ships? I have seen other plans where the stem is not beveled. I am just curious. Matt
- 117 replies
-
- 2
-
-
- constitution
- model shipways
- (and 1 more)
-
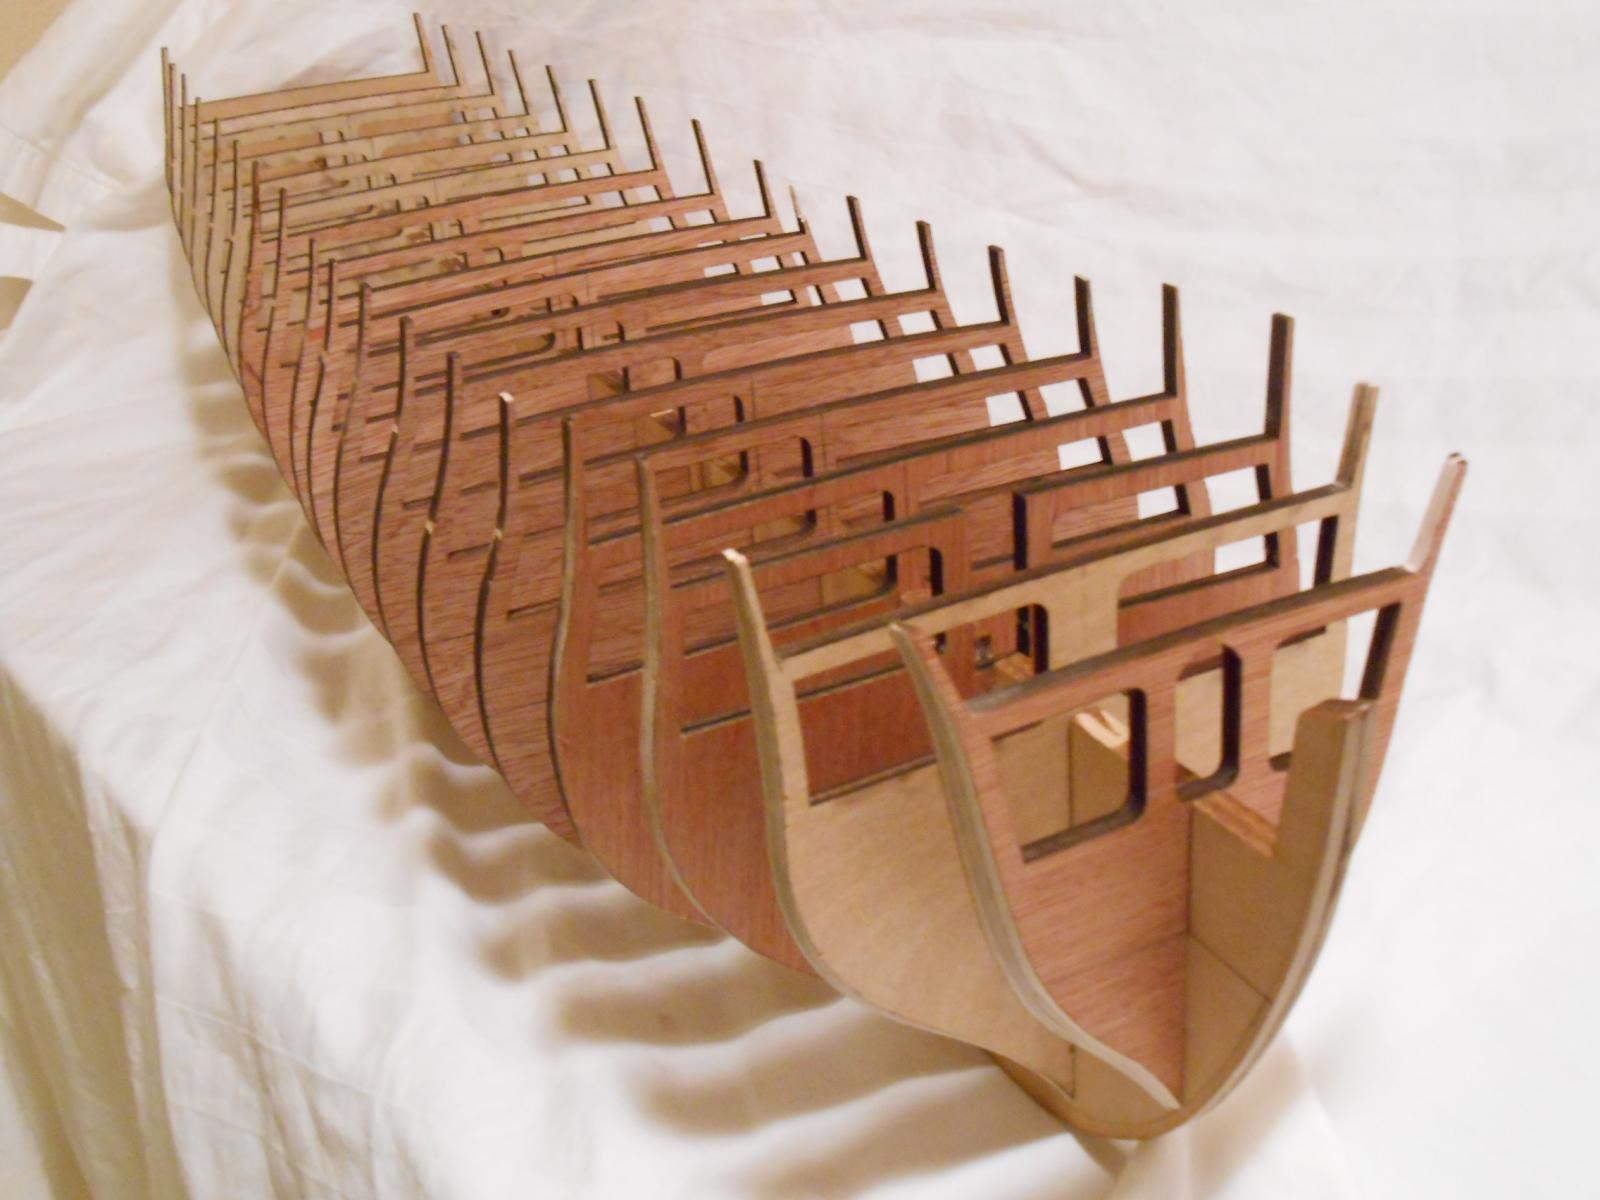
Thanks for the encouragement and the tip, Mrshanks. I decided that was the way to go after beveling bulkheads A, B and C. Bulkhead R on the other hand, I will bevel before fairing. It seems silly to me to cut a 32nd off the rest of them, when fairing will do the job. I did finally get my false keel glued up though. And I decided it would make more sense to cut the rabbet before installing the keel. If I did it that way, I could be sure to keep it even and straight. I am deviating from the instructions here, but I am confident it is a better approach. But it should make no difference structurally. I do have the false keel epoxied up, and weighted, but that is as far as I have gotten today. But I did fit all bulkheads in their slot before I glued up the keel, since it made sense to do it earlier rather than later. I may have saved myself some headache, or maybe not. Upon getting the false keel assembled, I am coming to realize what a huge ship this is. I am now wondering if my wife will let me mount a case in the upper floors of my house. Oh well... It is easier to beg forgiveness that ask for permission. It is an impressive model. I don't really have any pictures for this post. There is really nothing to show unless you like to see epoxy setting. I will have dry fitting of the bulkheads tomorrow though, I hope. I like epoxy to set at least 24 hours, no matter how long it says it sets in, so it might be the day after. But I am confident that the keel is absolutely straight, and that is the important thing. Matt
- 117 replies
-
- 3
-
-
- constitution
- model shipways
- (and 1 more)
-
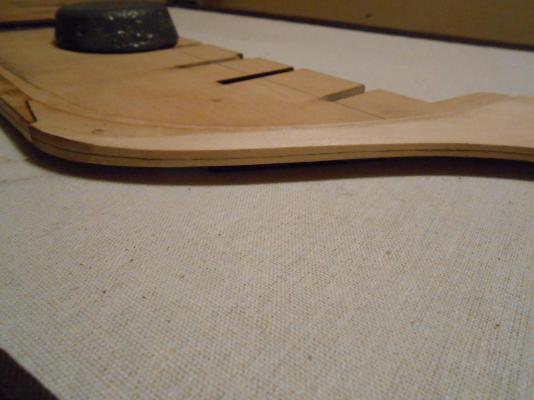
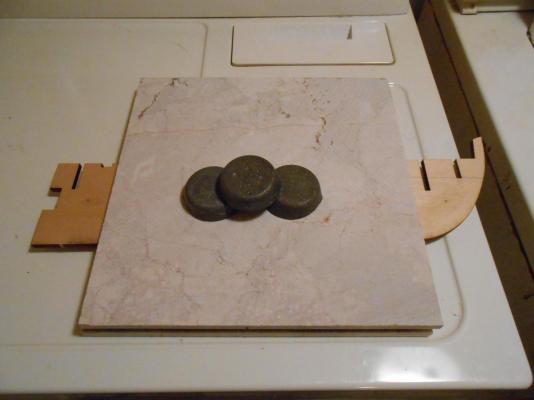
David... I don't see much of anything here to be advice necessarily. I find it hard to follow advice in these logs, since everybody has a different build, and thus, they have different experiences. But it is the experiences that are important, because then we can form our own advice... Our own ideas. Elijah... Glad to see you found my log. As I see it, keeping the keel is not just good advice, but imperative for a proper build. Like building a house, or any other structure, you must start with a foundation. Without a solid keel/bulkhead structure, you are without a solid foundation. More on that later. What I found today while I was working on my bulkheads, is that they are way off from the plan drawings. In some cases, by as much as 2mm in width. Not only that, but I found discrepancies in the laser cut bulkheads as well. I have read other logs here where they have noticed these errors as well. After much head-scratching and cursing (like a sailor, even), I decided this will have to be taken care of in the fairing process. Unless one bulkhead is totally off, then I will take my scroll saw and remake it. A solid foundation starts with a straight keel, and here is how I have chosen to do it. I have some marble tiles left over from tiling my bathroom. These are marble and absolutely dead flat. If you have marble countertops, they would work too. Machined granite is also dead flat usually. In the picture, which is just a mock-up, since I got too concerned about bulkheads today to get to gluing keel sections as I had planned, but this is how it shall be done tomorrow. The 3 ingots on top are lead, 1 pound each. The marble tile is a little over 5 pounds. Make sure that there is no interference from wood splinters or dents to keep the pieces from lying flat. Of course, if this were really epoxied or glued, I would use wax paper to keep anything from sticking to the marble or granite. Matt
- 117 replies
-
- 5
-
-
- constitution
- model shipways
- (and 1 more)
-
Thank you, David, I have seen your log, and it looks like you are making steady and quality progress. For just 10 months, to be getting to masts already seams impressive to me. I am one who also doesn't care for working with styrene, but I am thinking of alternatives. It seems to me like wood is my best option for the fishes. So much head-scratching involved with this model, at least for me. Perhaps that is best tackled when I get to that point. I considered many modifications to the kit, like a full gun deck and Captain's quarters, but I don't know that I want to go to that extreme, since both would be difficult to see under normal viewing circumstances. I really appreciate the efforts of those here who take the time to capture those details, but I come back to whether I want to finish this model before 2030 or not. As it is, I estimate the hull alone will take me at least a year, unless things fall together better than expected. As stated, I am more into precision than speed. That being said, I do expect progress to be to the point where I am ready to plank by the end of the month. This may be too ambitious though, I am not sure. Just a guess based on how fast I usually progress with this kind of thing. Then I expect things to slow a bit. But I expect a complete hull in 12 months. The thing that scares me to death is the rigging. Looking at the plans Model Shipways gives, I am sure I am going to have to consult other resources too. I can tie maybe 5 knots that I know of... Bowline, Clove Hitch, Square, Climbers and a hangman's noose. Doubting those last two will do me much good, so make that 3 knots. Matt
- 117 replies
-
- 5
-
-
- constitution
- model shipways
- (and 1 more)
-
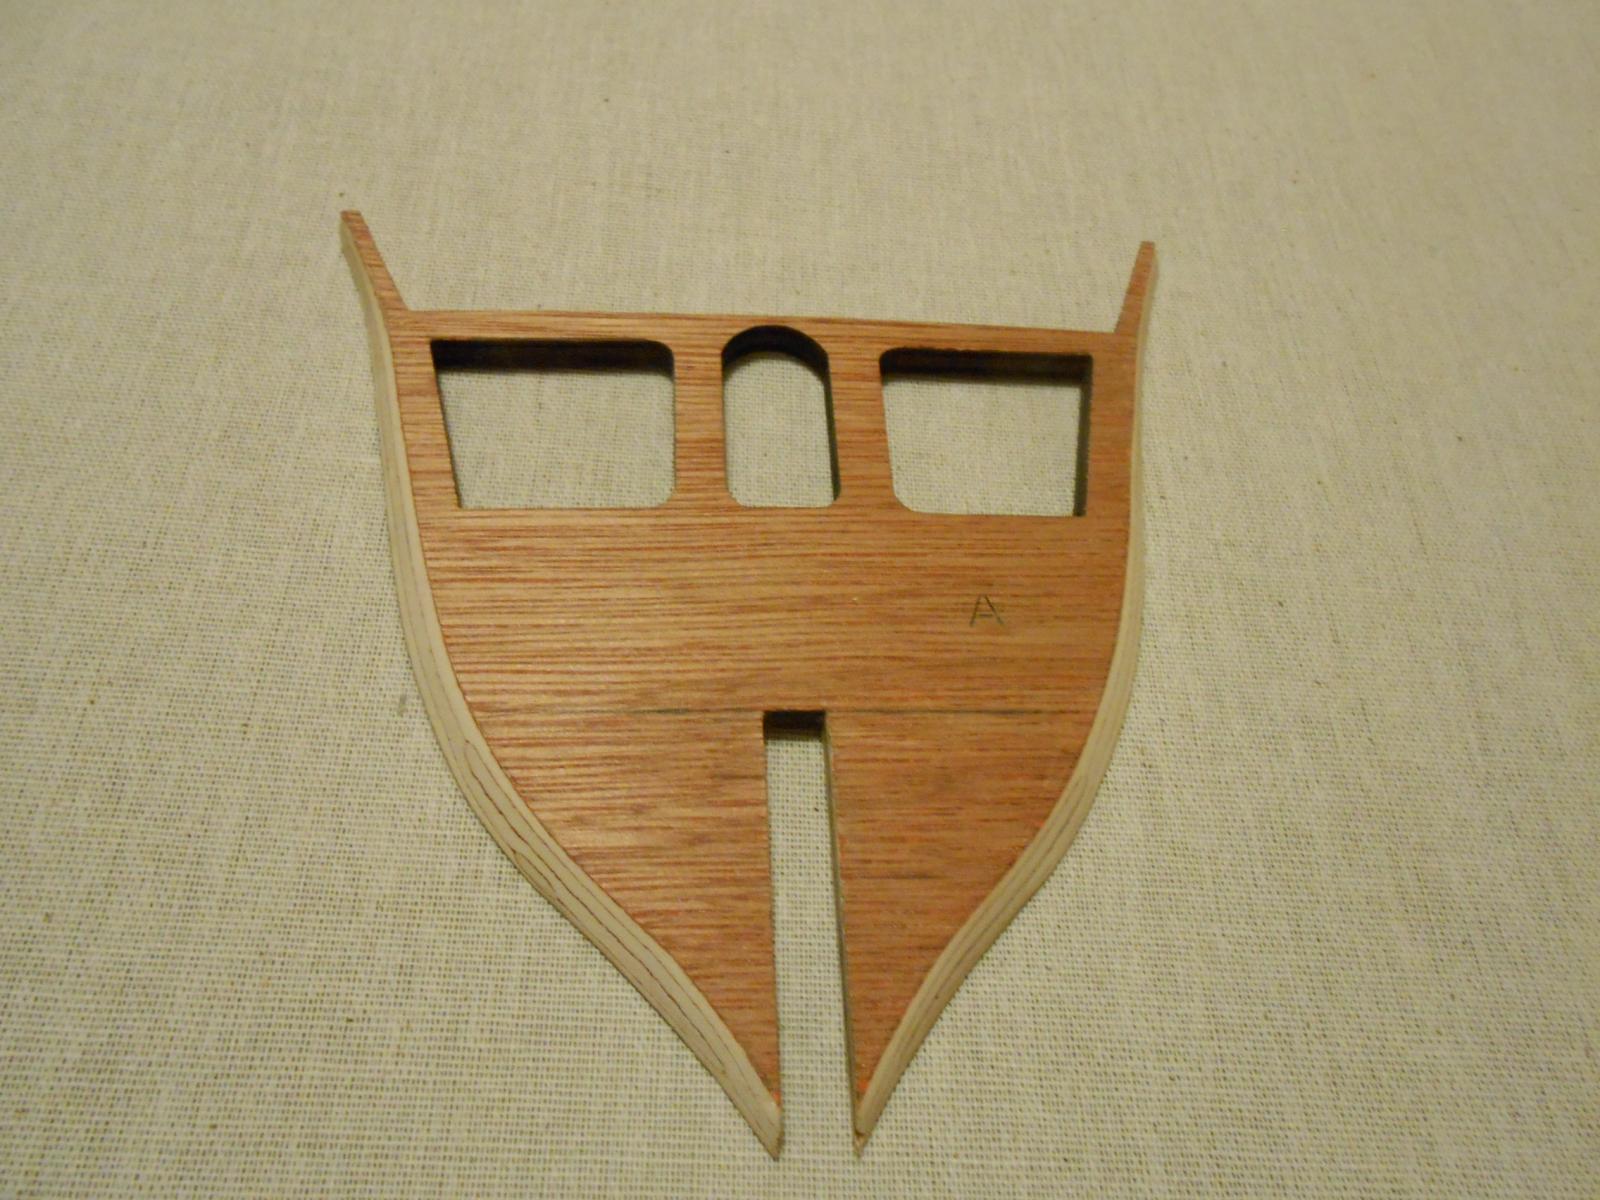
Today, since it was cool and rainy outdoors, I decided to start work on the model. Last month, I downloaded the instruction manual for the build, so I knew pretty much the work to be commenced. So firstly, I glued the two halves of the false keel together, as well as the actual keel pieces. While I waited for those to dry, I worked on bulkheads. Pictures of the keel aren't much different than the others that others have already posted here, so no need to be repetitive here. However, I do have a picture of beveled bulkhead A: This bulkhead took me about an hour to bevel... Told you I was slow. But I think it turned out quite well, and I believe if done carefully and properly, should make for a solid gluing surface for the planking, after fairing, of course. Tomorrow, I plan on connecting the pieces of the false keel, and starting to cut in the rabbet. If I can get that completed, I will be satisfied. I had better go and touch-up my chisels. Matt


- 117 replies
-
- 10
-
-
- constitution
- model shipways
- (and 1 more)
-
Jaager... I have never tried stropping a scraper. If the bevel is right and the burnish is right, I have never seen a need for it. I will not say you are wrong for doing it, but I can't see a need, if you burnish them right. Matt
-
Welcome to the build, Alde. I will be following your Glad Tidings as well. Looks like your planking is coming along well. I am a total noob to ship building, so all info is good info to me. Matt
- 117 replies
-
- 6
-
-
- constitution
- model shipways
- (and 1 more)
-
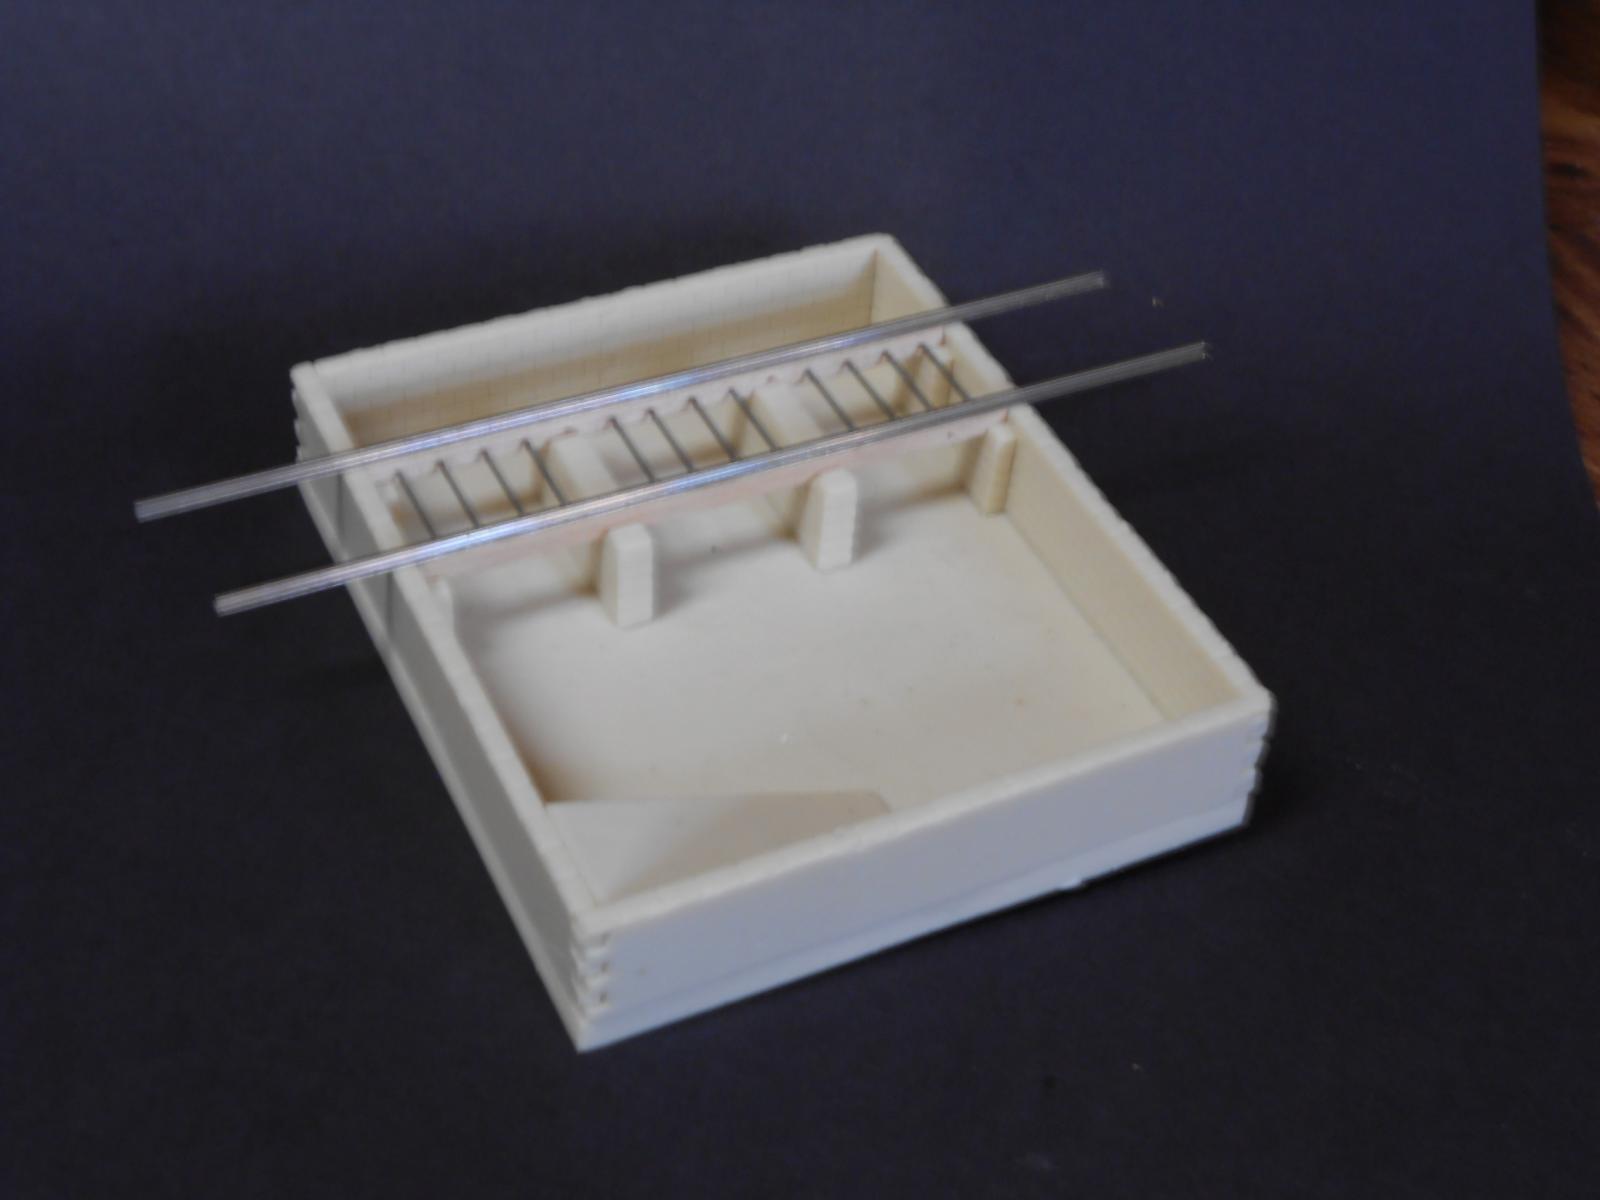
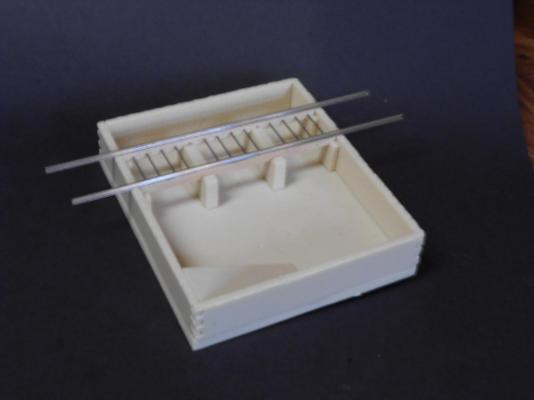
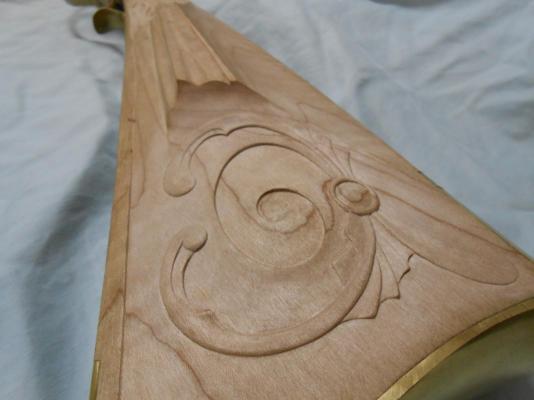
Salutations and welcome to my build log! This is going to be an interesting experience for me. I have never attempted a model ship before, but should probably tell you something of my modeling experience first. This isn't my first model, though. I come from the model railroad world, having scratch built around 30 structures of my own design. Most have been from wood, but I have also made patterns and silicone molds for things like brick and cinderblock and other repetitive things like that. Here is one example of a structure molded in resin: I don't happen to have an example of a structure that I have built from wood, but I do have an example of some of my relief carving: This is the sort of work I do on a daily basis, so I thought I would not be intimidated by the complexity of the Model Shipways model of the USS Constitution, which arrived at my door today. I was wrong. It looks like it is going to be an extreme challenge, and once I got over the initial shock, I started to get excited about it. I found I had a new hobby, that is, checking parts against the parts list! I am still not finished with that task. But I don't see the amount of planking they included will actually do the job. But then again, I am considering cutting my own decking from a pile of maple I have here in my workshop, so it might not be an issue. The plans look absolutely excellent. Though I would prefer a couple of sheets more, but I only spent 2 hours reviewing those, so I may have missed some things. I have only rigged one other plastic model, so this is still intimidating, and I think a little more on that would have been good. As for the instructions, I downloaded those a month ago from the Model Expo website, and they are a bit lacking too. They assume you know more than you actually do, unless you are an experienced ship builder. This is the one thing that has held me back from buying this kit for the last 10 years... They were not telling me how, but what to do. But then I found MSW, and was able to work up the courage to buy the kit. This site is incredible. I thank you that founded this as such a wonderful resource for those of us who never would have completed on of these incredible model, or would have even attempted one. I thank those of you who post your build here as well. I learned more on my first day here reading build posts than I did in a month of my own research. Anyway, I shall soon be posting pics of my build, and will continue to follow others on this long trip. I am going to try and complete the Constitution in 3 years. I am not a fast builder, but I am a precise builder. If you have the patience to see me through this, then we should have a complete ship then. The woodwork should be easy for me, but the rigging still scares me to death. We shall see how it goes, and it will be what it will be. Matt
- 117 replies
-
- 11
-
-
- constitution
- model shipways
- (and 1 more)
-
Mtaylor... That is good advice, but I have a ton of hard (sugar) maple scraps lying about. And silver maple would be fine, since decking really doesn't require that much strength. Q A's Revenge... There is information out there on beveling and burnishing scrapers. It took me a bit of practice to learn to use a scraper properly, but I do prefer the finish to sandpaper now. But learning to get the proper burnished edge was the harder thing for me to get right. And I agree with your comment on masonry nails too... Though I don't know how well they hold an edge, but with the wood we use, it shouldn't be much of an issue. Jaager... It sounds like you might be having a couple of problems. Perhaps your scraper is not sharp enough, perhaps you are using too much pressure on the scraper or the wood you are trying to scrape is too soft. Soft woods can be scraped, but only very light pressure can be applied. I did try it on a piece of basswood, and to my surprise, it worked when I used very light pressure. Matt
-
Robboxxx, if that is what it takes, I am not too proud to do the same. If it were a tool I expected to last, I would use better steel, but if it is something for a one-off job, there is nothing at all wrong with that, as long as it gets the job done. I have done it, actually. I have also made scrapers to do specific jobs. Some people don't know it these days, but scrapers used to be used rather than sandpaper for smoothing wood. And scrapers are much faster than sandpaper, if properly formed and burnished. And they leave a finish that is hard to describe, which sanding doesn't. In fact, I may choose to scrape the decks of my current model rather than sand it... I will have to think on it for a while. Basswood would not be suitable for a scraped surface, but I am considering sugar maple for my decks. It depends mostly if I figure out a way to not have the maple show much figure. Matt
-
Kurtjohnson, First, my apologies for misunderstanding your question. And for me, it depends on the job I have at hand. As I mentioned, I work with chisels on a daily basis to build things which I sell, and one of the main tools I use in that work is a chisel. For relief carving for instance, I will use gouges, skews, a V-gouge and straight chisels mostly. For rapid wood removal, I tend toward your average straight chisel, but also a gouge for certain areas. For silver wire inlay, or any wire inlay work, I have some home made chisels that work quite well. They are home made, because nobody offers them for sale that I know of. And yes... Old files are great steel for making chisels. It sounds like your skiff house may be timber framed, and if that is the case, they use tools identical to the old shipwrights. Large chisels that were struck with a mallet. It really depends on the size of the job you are doing, and what you are trying to accomplish. It would help if we knew what project you are thinking of approaching, and then advice might be more easily acquired. Are you going to attempt a model ship? If so, what scale and how are you going to have to use these chisels? For Boxwood or Pear, they are nice woods to cut/carve, but it depends on the cutting you are attempting as to what chisel should be used. But I am sure you already know this. I work primarily in hard maple, and that doesn't change my chisel, but it does change the way I work compared to nice, smooth basswood or boxwood or pear. Maple can be quite jerky in it's grain structure. The main chisels I use in my work are a straight, a gouge and a skew. That will do probably 99% of the work you need to do to build a model ship. The smallest ones I have are about 1/16th inch across. These are custom made by me out of 1095 steel, and heat treated. I have another set made by Dockyard Models that are about 1/8th inch across, and they are great too. I bought them about 20+ years ago though, so I can't vouche for their current quality, since I have never had to replace them. I still use that same set frequently. Besides, now that I can forge small items, I rarely buy a small chisel these days. Matt
-
Kurtrjohson, I have to concur with druxey and Jaager... It is not so much the brand, but how sharp it is honed too. Sure, some manufacturers use a better quality steel than others, and they hold a keen edge longer, but even a cheap Chinese chisel will hold a good edge for a while, if it is honed well to begin with. The key is to get it sharp and keep it sharp. I work with wood chisels on a daily basis, not just on model ships, but on other things as well. I am not going to mention any brand names I prefer, since there are so many out there that are made of great steel. I probably have close to 50 chisels of various makers, shapes, and sizes. Of course, I also various stones on which I sharpen them. I will say that I prefer a Norton water stone for my 4000 and 8000 grits, which I also use to sharpen the straight-razors I shave with. Also as mentioned above, get yourself a strop. About any old piece of leather will do. For my razor, I have a regular razor strop. For my chisels, I have old pieces of an old leather belt glued to a board, imbedded with stropping compound. If you have carved for 25 years, I am probably telling you nothing new. But my preference is a sharp cheap Chinese tool well honed, to an expensive Sheffield tool that is dull. Matt