


chuckthedragon
-
Posts
16 -
Joined
-
Last visited
Content Type
Profiles
Forums
Gallery
Events
Posts posted by chuckthedragon
-
-
On 2/4/2024 at 4:56 PM, JLong said:
Some sail making progress on the Fair American:
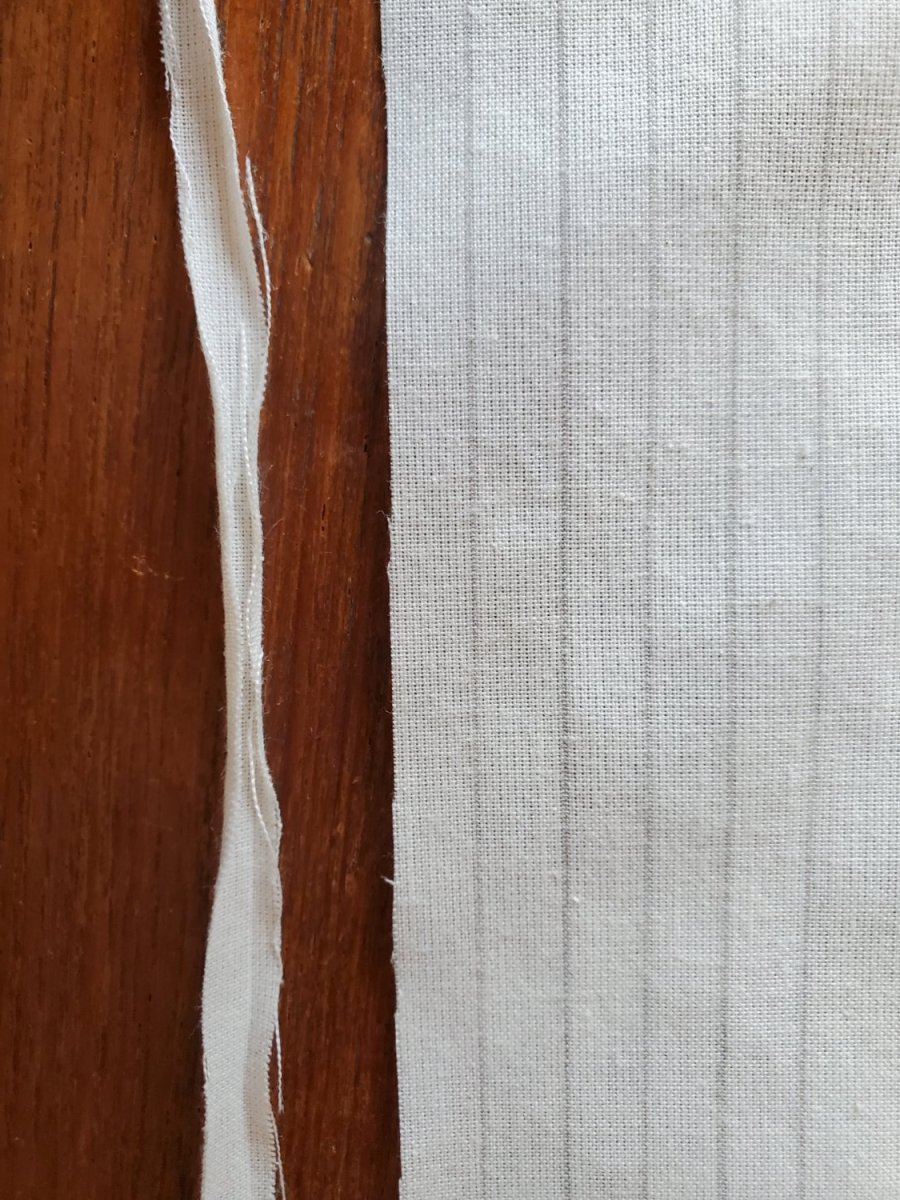
After last time, sewing sails was postponed 2 weeks, as my (retired) mother in law was busy. It was worth the wait.
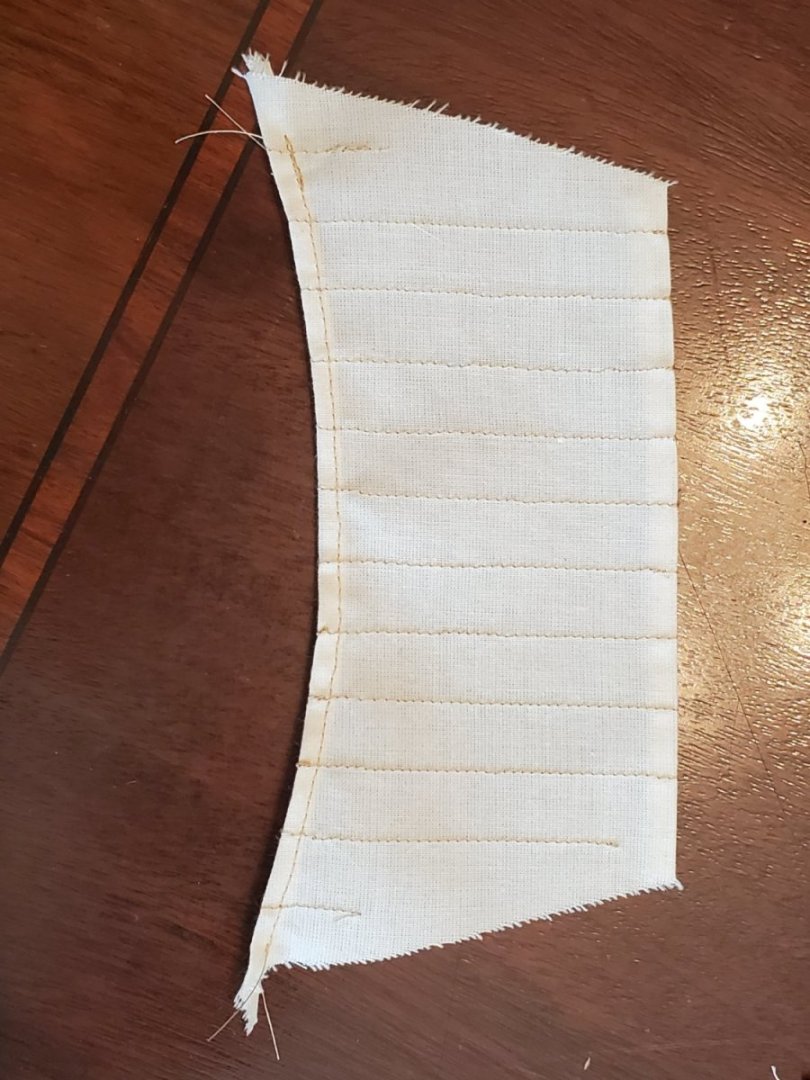
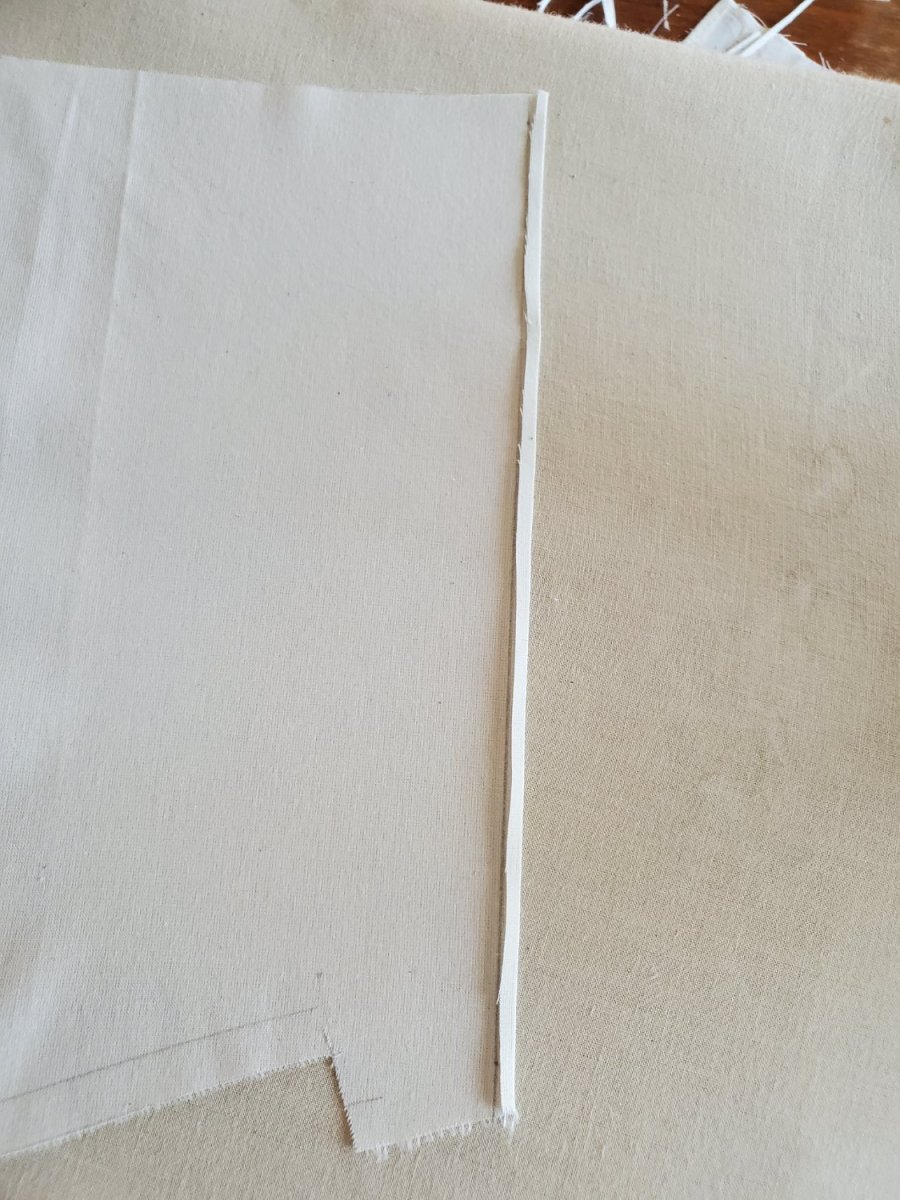
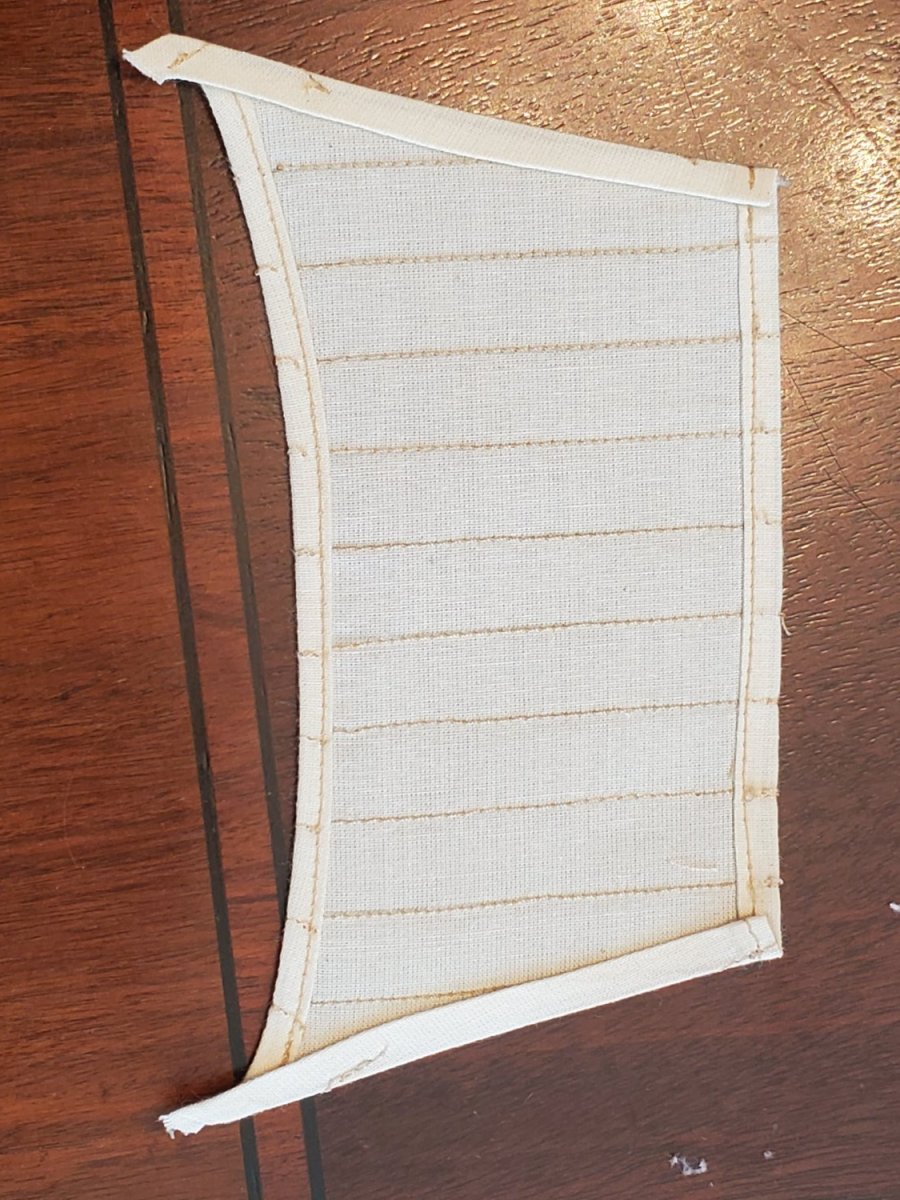
With each sail cut out, I made light pencil marks showing where to sew the seams. These were spaced apart 0.5in, which is scaled 2ft, as dictated in Steel's Sail making section. The thread will cover up the pencil marks, so I'm not too worried about it showing up.
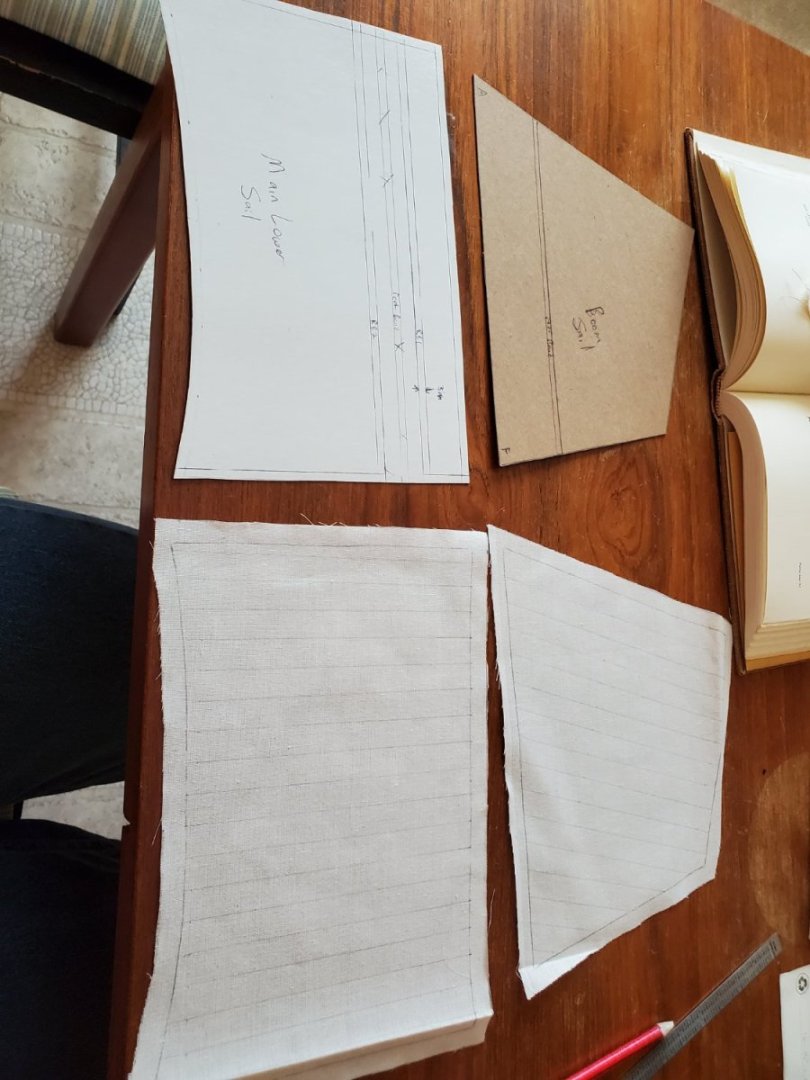
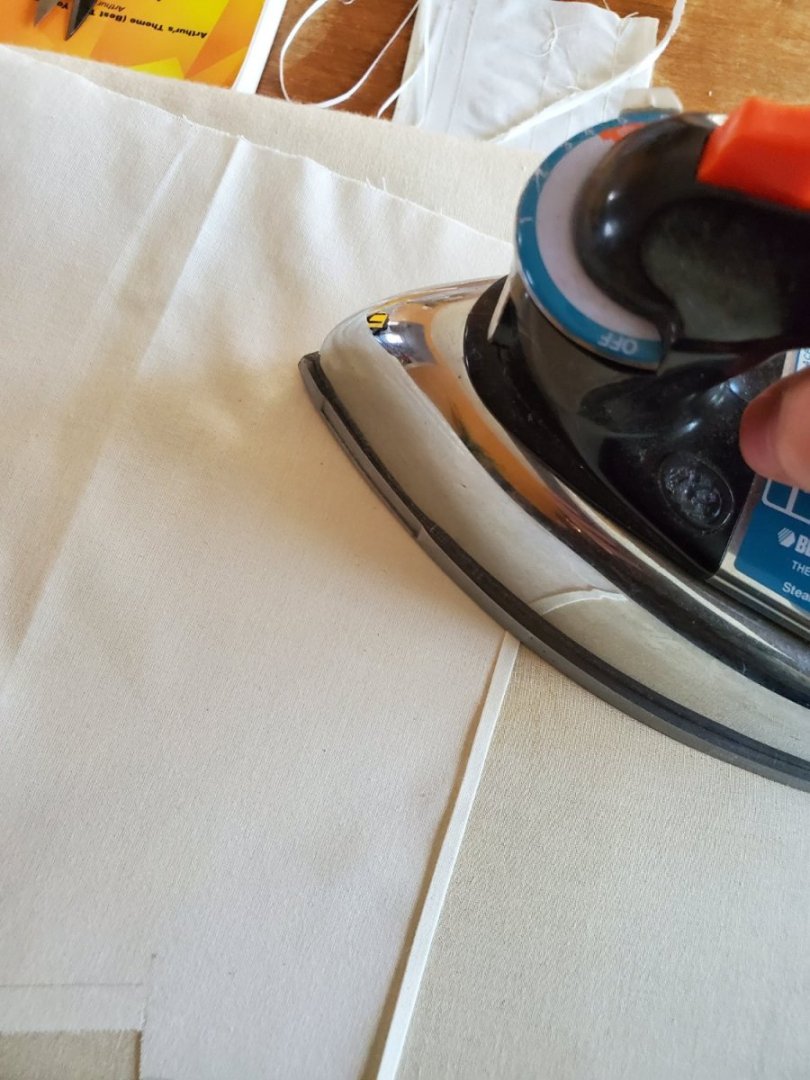
Bottom and Top sails have reef bands. Acccording to Steel's, they are to be 1/3 width of canvas. For practical/folding ability, I targeted 3/16" wide. This fabric is NOT easy to use, and folding them over 2x to prevent unraveling was a nightmare. It got all twisted and rolled, instead of folded. I was going to use the Iron to flatten, but I couldn't even get to that point.

I thought that folding along the weave direction wasn't going to work, so I tried cutting them out from an angle, so the weave would stay more intact (see the angled line I cut). It didn't help. the pieces are just too narrow to handle. Very frustrating.

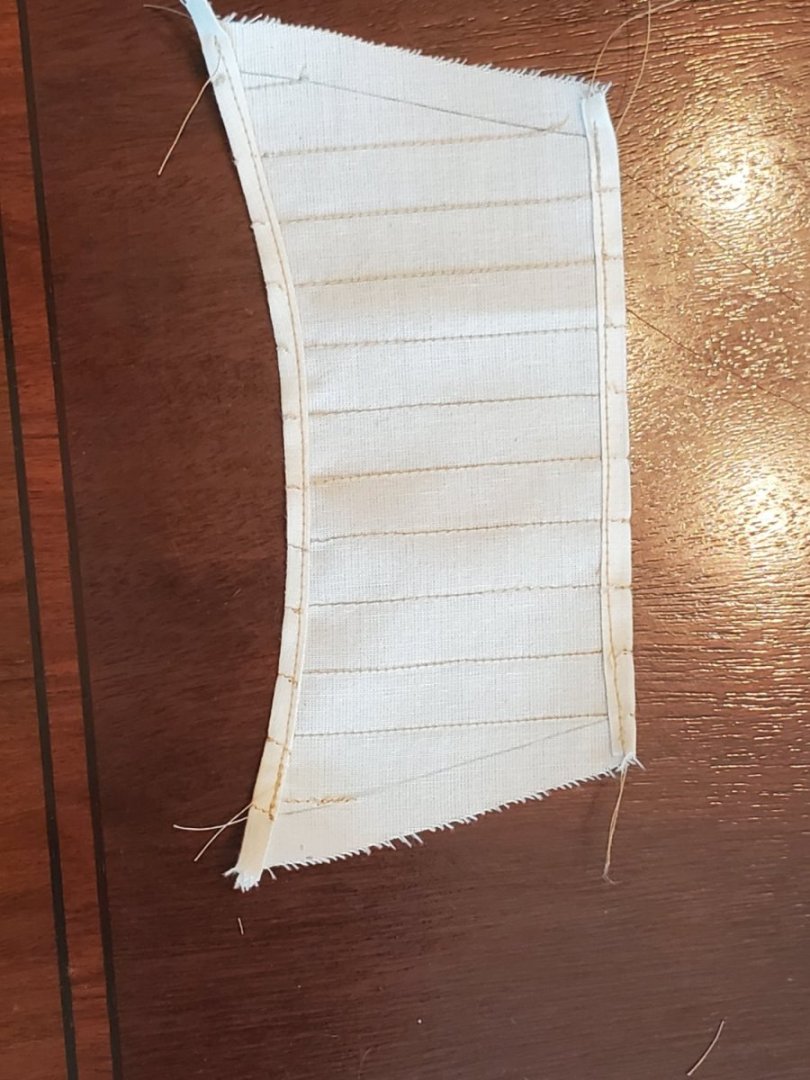
So then I thought, well I need more 'substantial' material to fold with. So I didn't cut the strip free, just folded over 1x....

Then ironed it. Then folded again, ironed again. THIS WORKED! Afterwards, I just cut along the second fold - worked great. I just needed something to 'hold onto'.
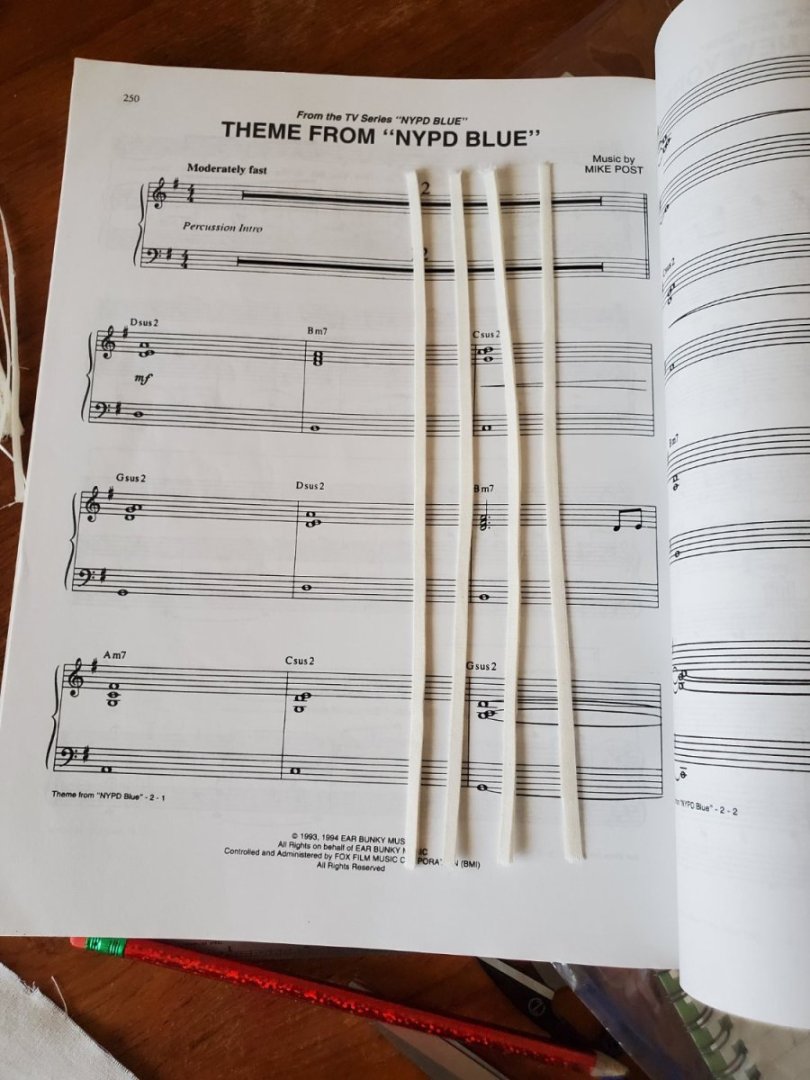
I took the cut reef bands, and placed them in between the pages of a big music book. I play piano, so this is apparently the page I turned too. They'll stay flat and protected until I'm ready for them.
Now for the more fun stuff. Please note: I have no idea what I'm doing - really just trial and error and ''yeah that'll work''. Bob Hunt's practicum on Sail Making is helpful, but I really wish there were more pictures.
Anyway after careful consideration, I decided on a medium tan thread, as the sewing thread for the sails. In hindsight, I probably should have gone with the next lighter shade, but I'll live with it - No turning back now!
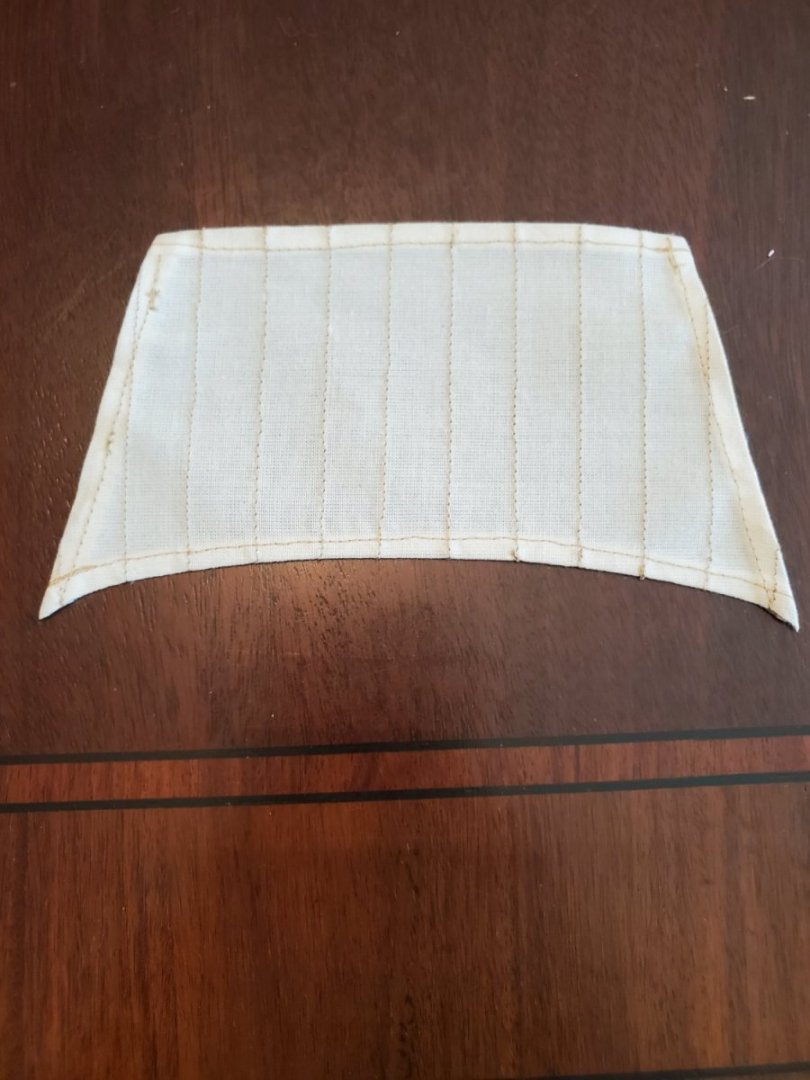
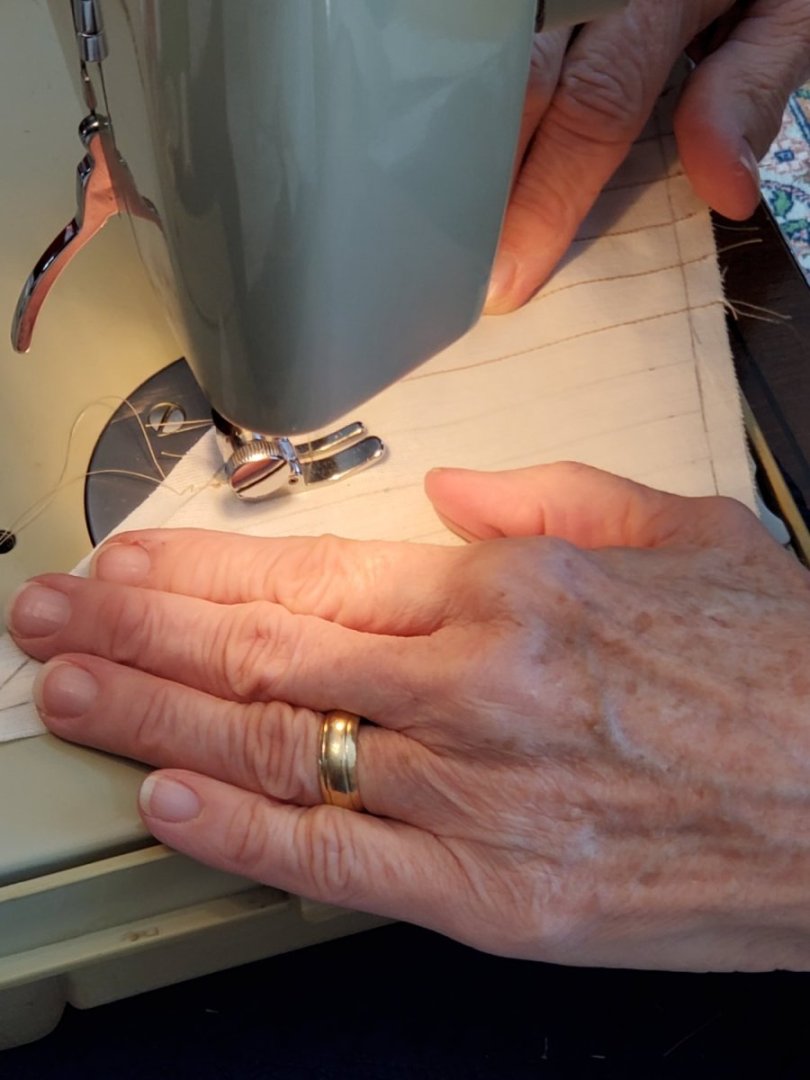
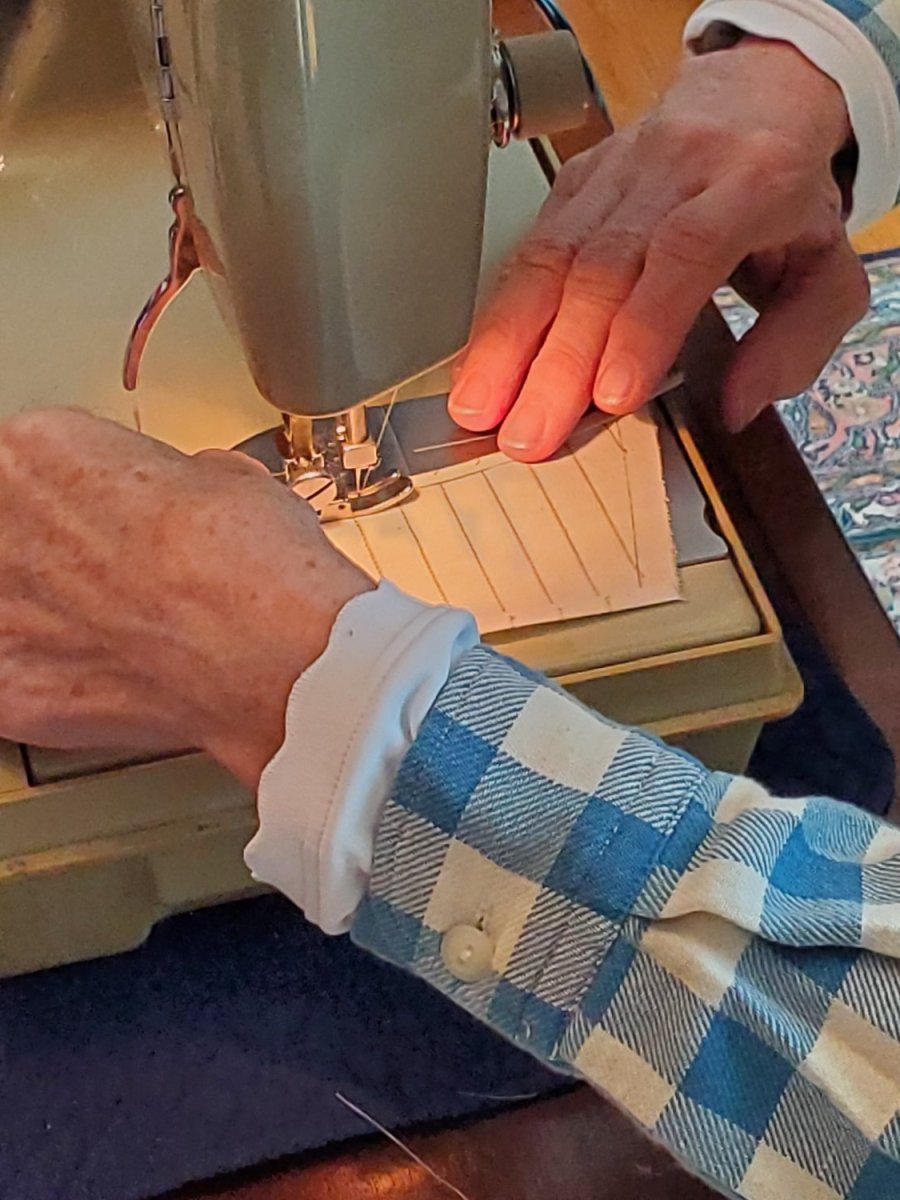
My mother-in-law started with the vertical seams first, following my pencil lines as a guide. We played with the settings for the tension, stitch, and 'that spool up on top' (12, 7, 2, respectively)
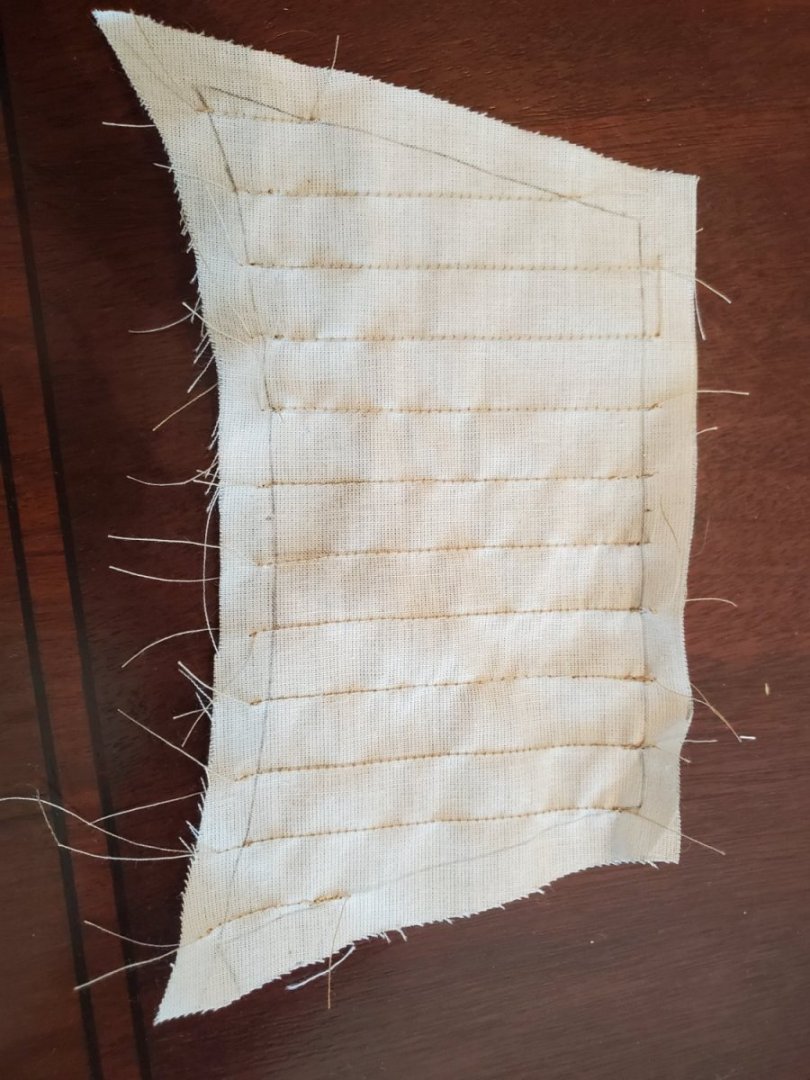
You can see the master at work tabling the ends

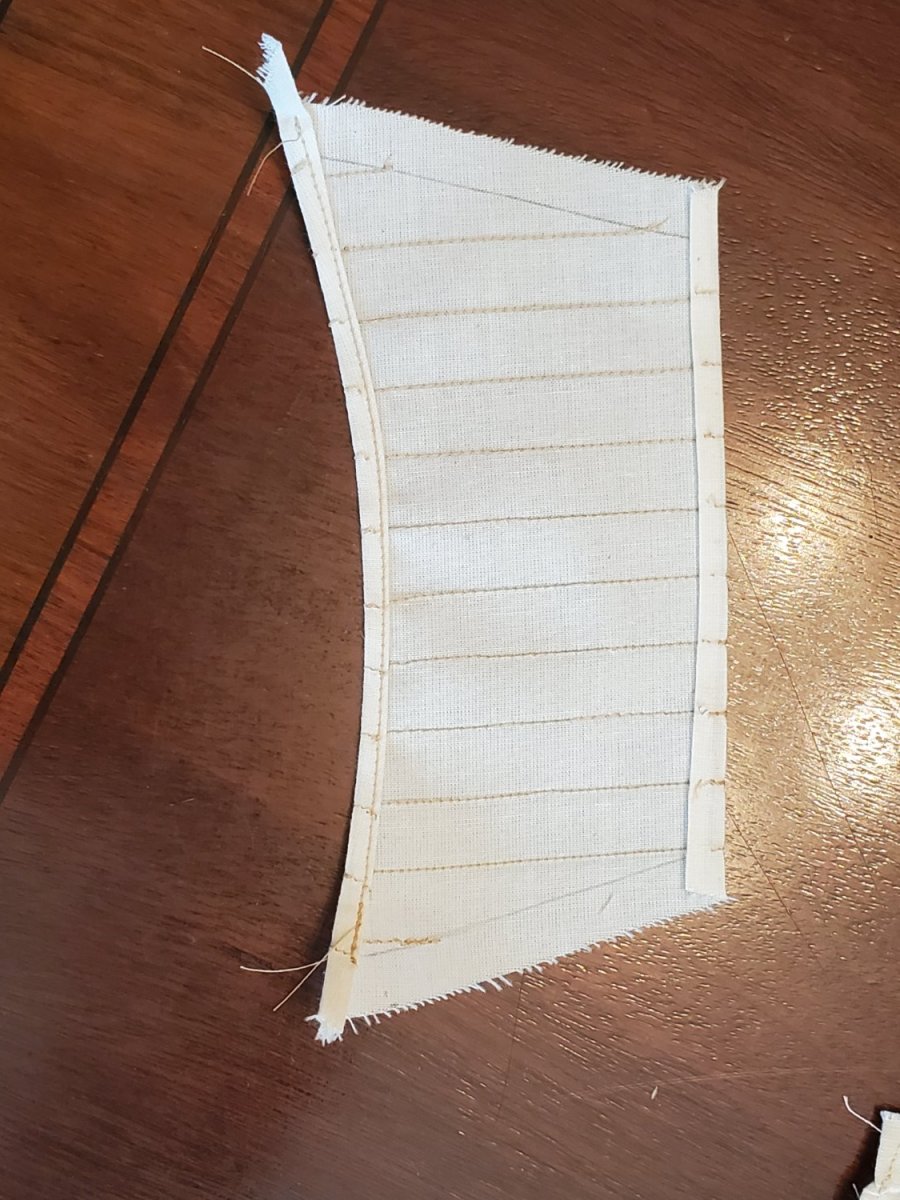
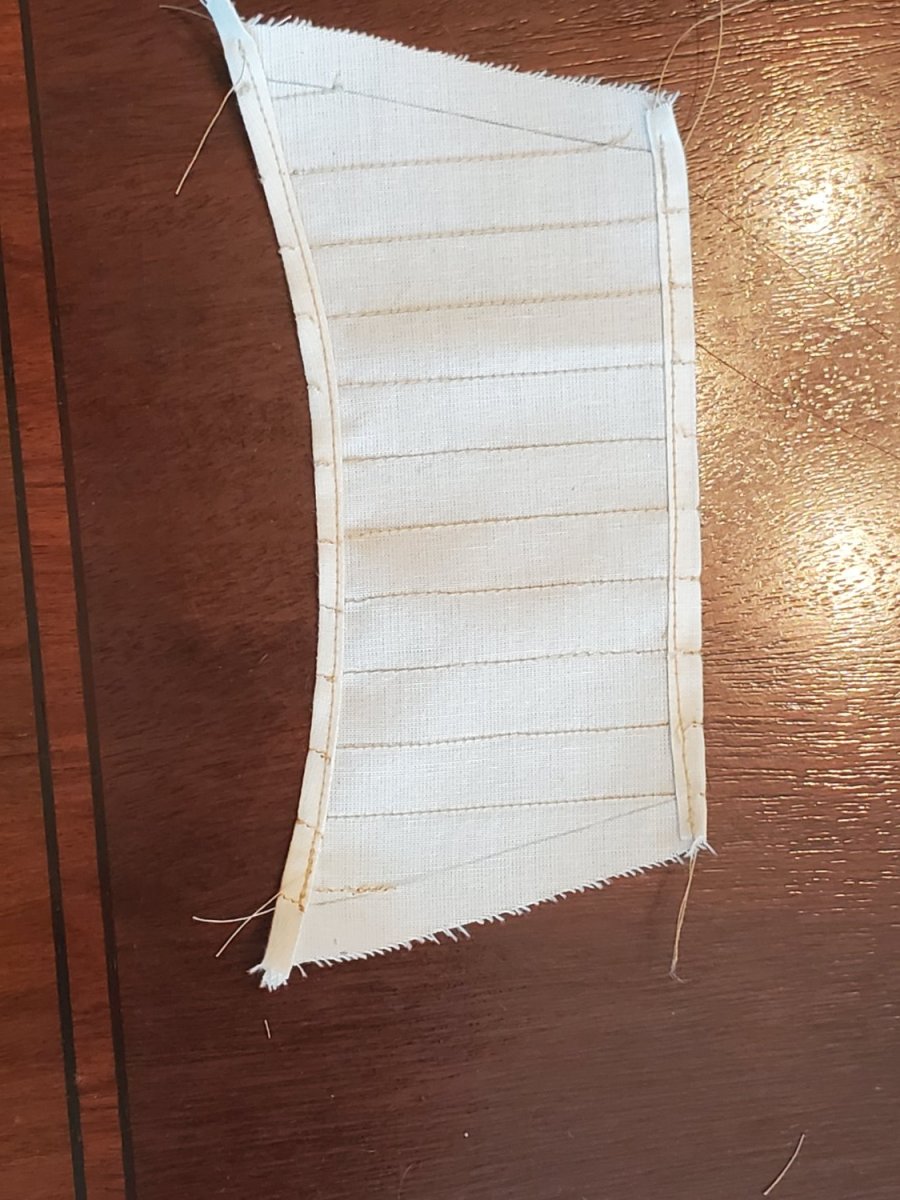
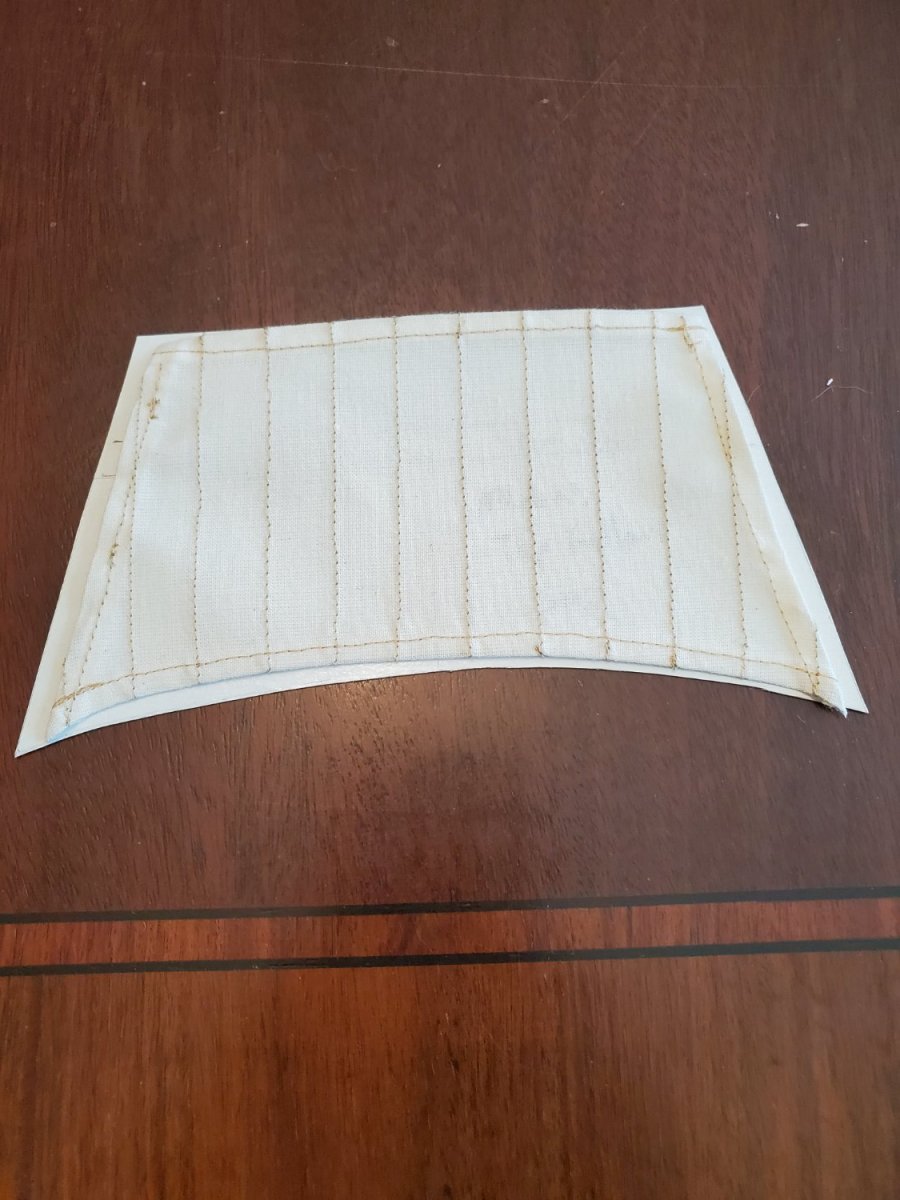
This first Main Topsail had a generous curve on the foot. Folding and ironing this tabling was a challenge. We discussed folding/ironing all 4 tabling ends was not easy to sew - to many layers at once. So we did the head and foot first, then I folded and ironed the leeches afterwards.
Note - Nowhere in my research, or in Steel's, did I find which way the tabling should face: fore or aft. My brain says aft, but I wish I could know for sure. The Rogers model LOOKS LIKE the tabling is aft, but I really can't tell. The reef bands do go on the fore side, so those will be sewn last.

Here's the 'fore' side of the sail, with tabling facing aft.
Here's the head tabling sewn - it looks pretty good. It was hard for her to stay close to the edge of the seam without the stitch walking over the edge. Thus, it's not perfectly straight. Beginning and ending the stitch was very difficult. The material likes to snag in the sewing machine. We had to make adjustments for start/end to get it right, with a couple reverse stitches to keep the thread from unraveling.
After the head and foot were sewn, the leeches were next. I left the folds long, so she had something to grab onto, then trimmed later.

The final sewn sail ended up being slightly smaller than the carboard stencil at-scale. There's some material puckering and my folding wasn't perfect.
When the sail is rigged, it will be bent to the yard anyway, so thank God it didn't end up bigger!

I think it looks pretty good, considering first sail, first time, first material, first ship. Most of the credit goes to Jane, but we made a good team.
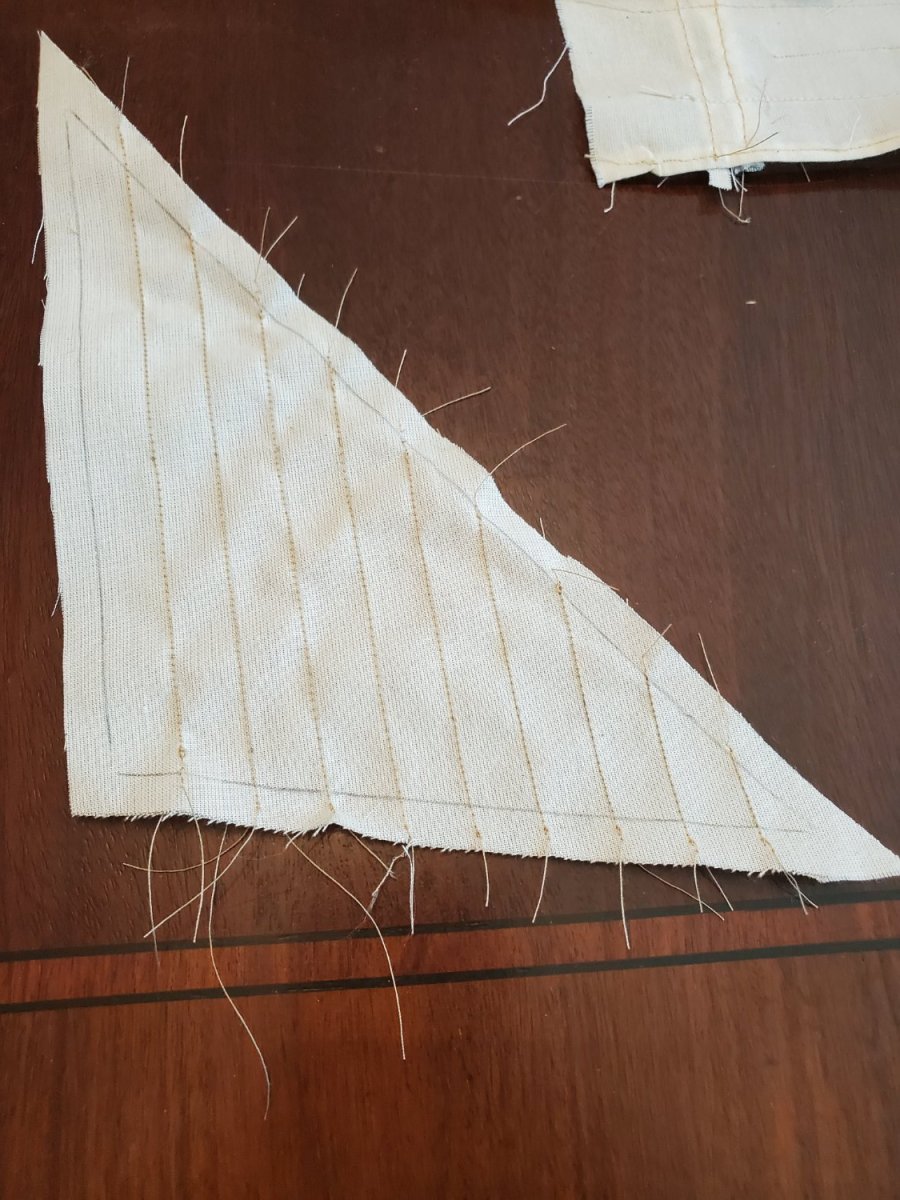
We worked on one of the Jib Sails next -
This was about as far as we got yesterday....

We spent ~1hr deciding on the plan, 1hr with a practice sail/seam, and 1hr of real sail sewing. I'm going to go back later in the week to make more progress. She sews, I fold and iron, she sews some more.
We haven't sewn on the bolt rope yet - that'll be at the end once they're all tabled, and the reef bands are on.
Hopefully more progress in the coming weeks.
Enjoy your week
- Jason -
Nice work with the sails Jason. Hope you're watching carefully - the sewing part I mean
") Keep up the great work!
Keep up the great work!
-
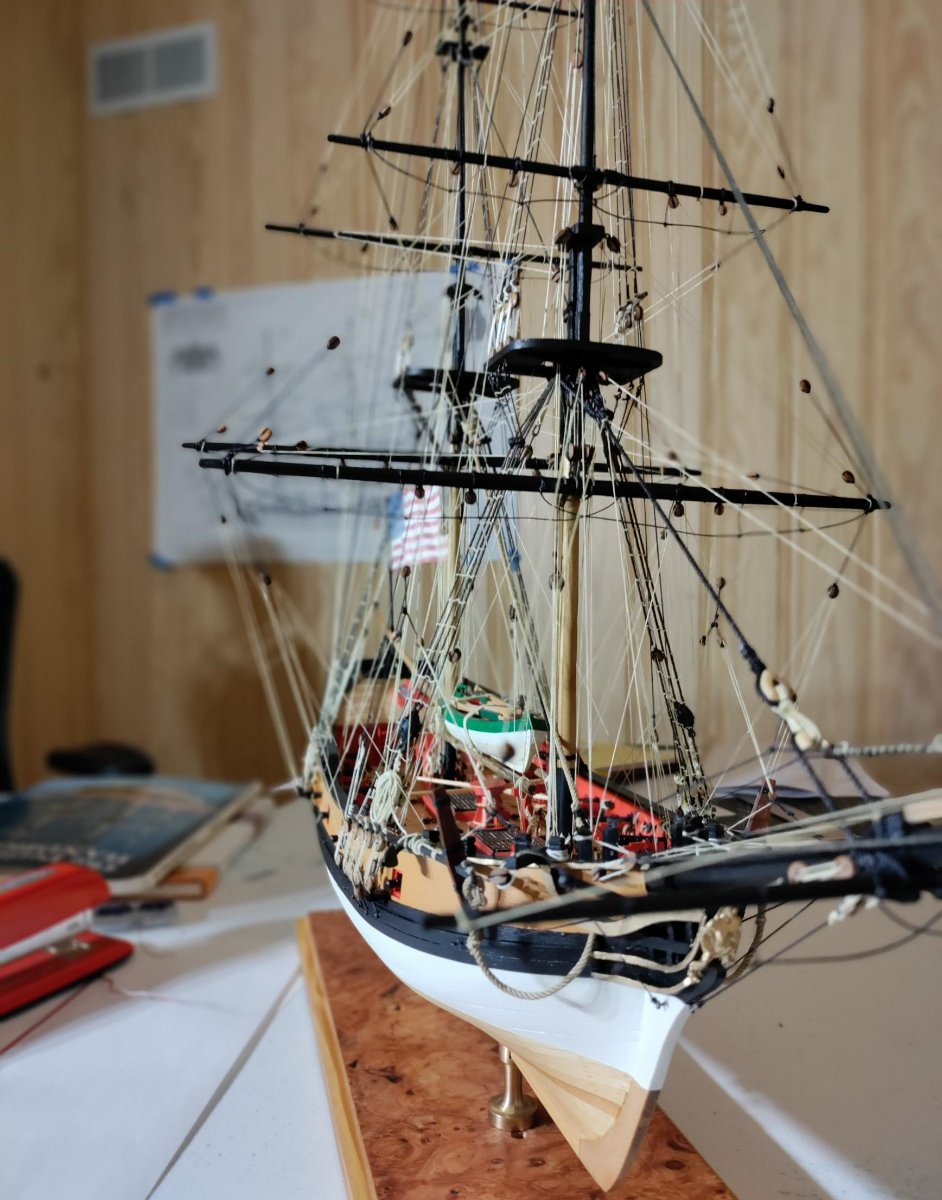
On 12/12/2023 at 7:16 PM, JLong said:
Progress on the Fair American Model Ship:
Again, very overdue, but progress nonetheless...
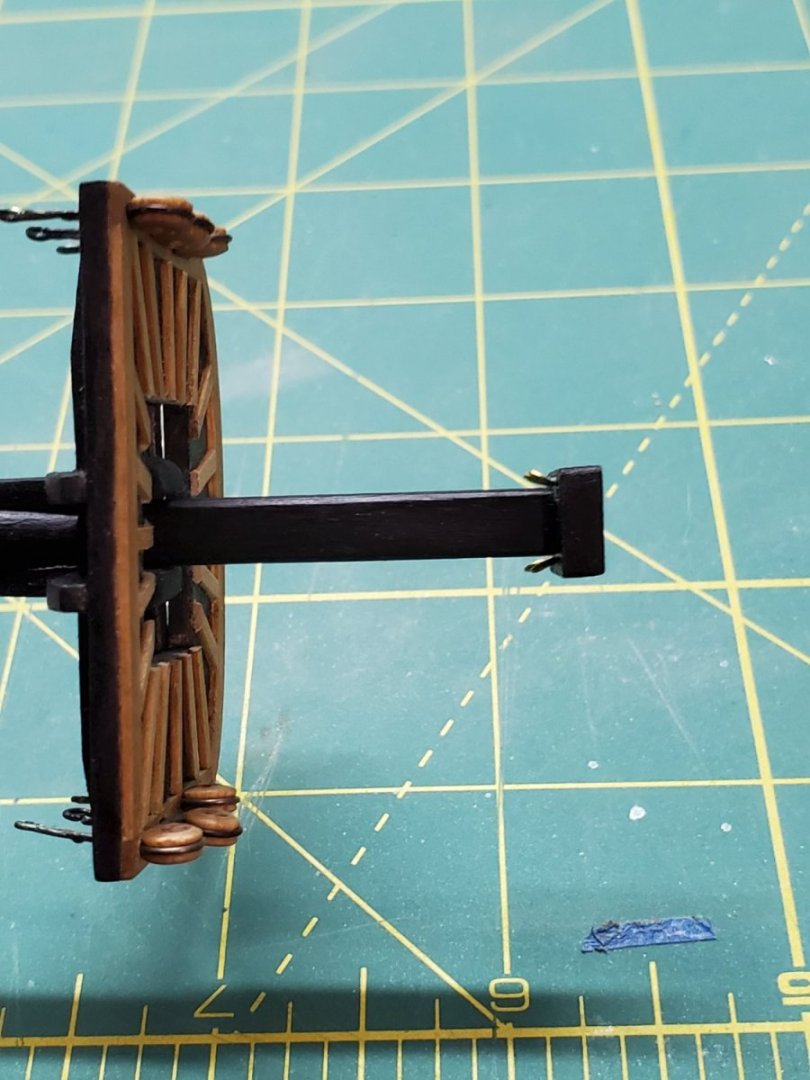
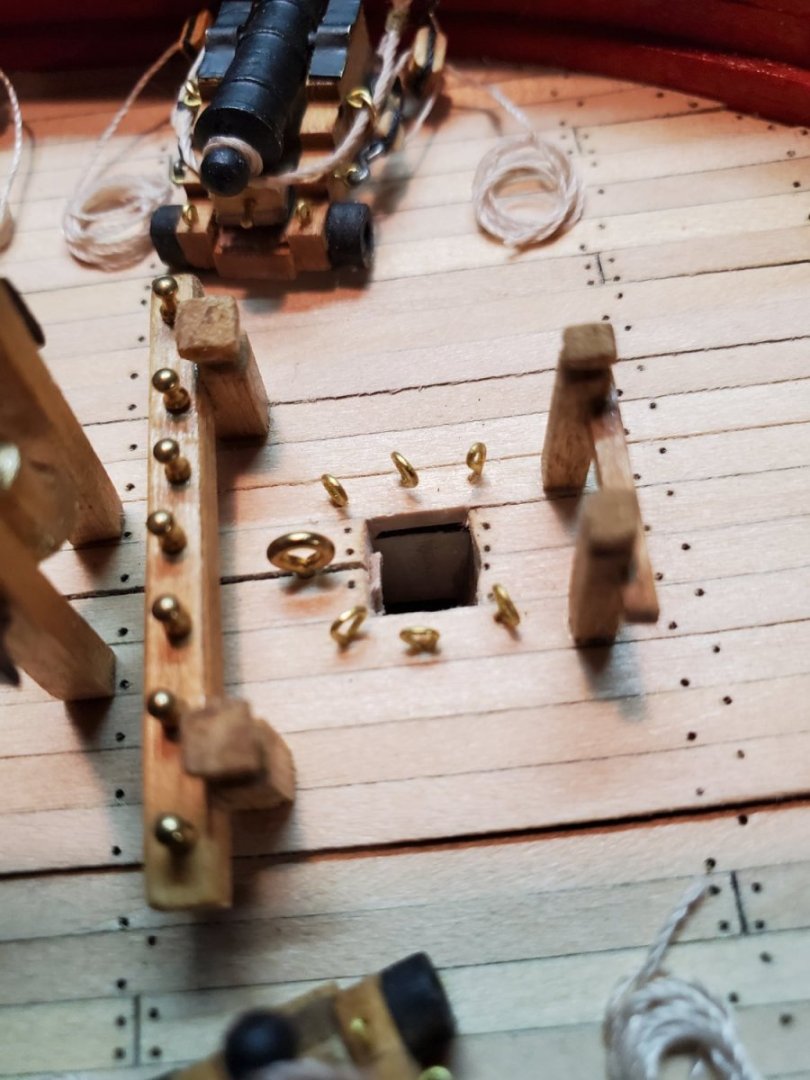
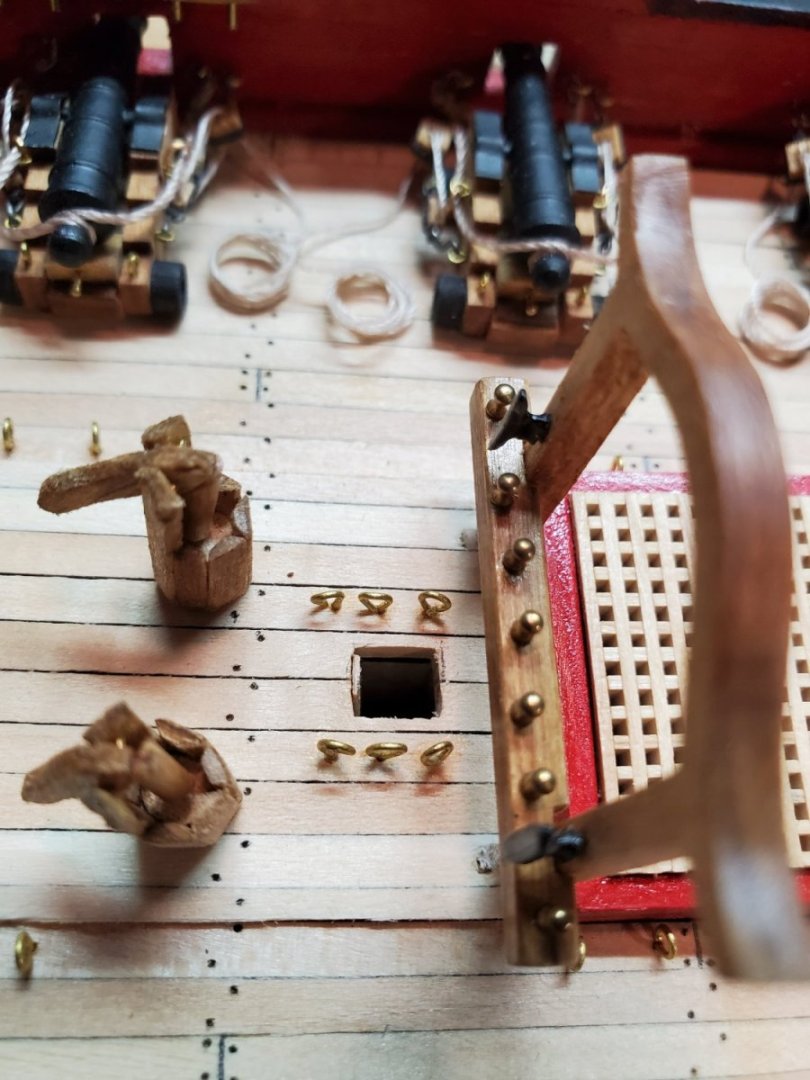
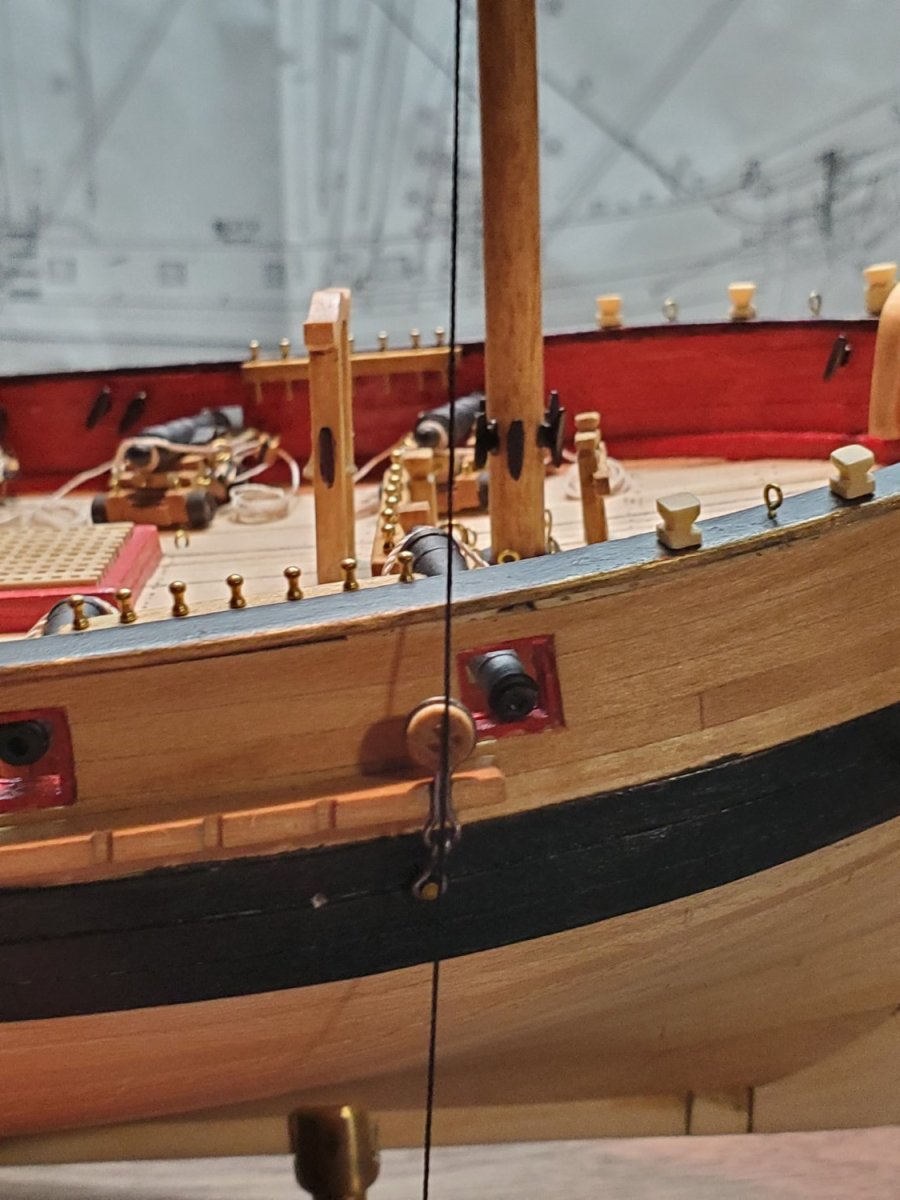
I got all the deadeyes and chain plates mounted. Got them as straight as possible and raked with the masts.
I made sure to line up each deadeye as parallel as possible, before gluing the channel cap. There was a lot of re-working and re-bending chain plates to get them all to look right.

While this was happening, I rigged up a little ''stain-sling'' to help hold the yard while I stained them. It was just two rope loops hung from two helping hands, with the yard in the middle. The Roger's model has the yards black, and the studding yards stained, but I'm staining the main yards in my model.
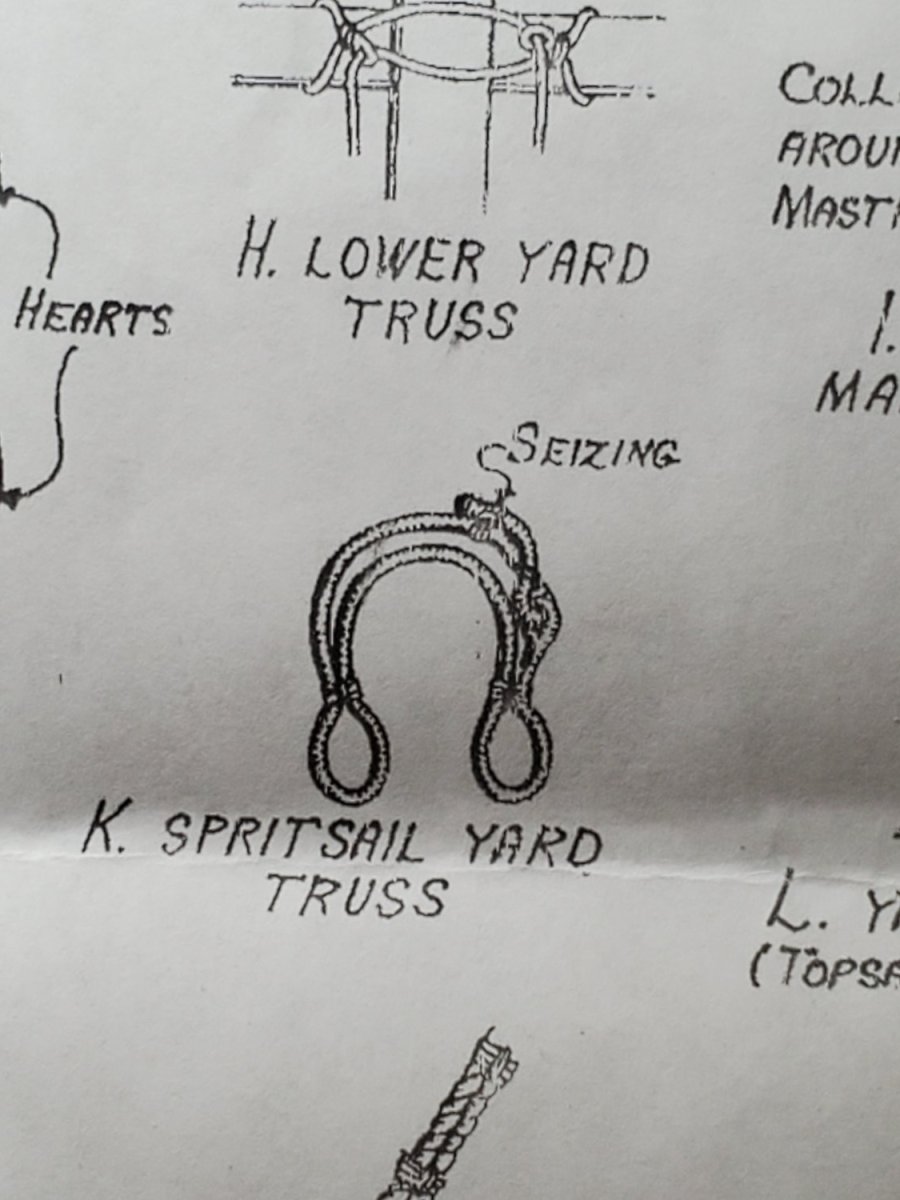
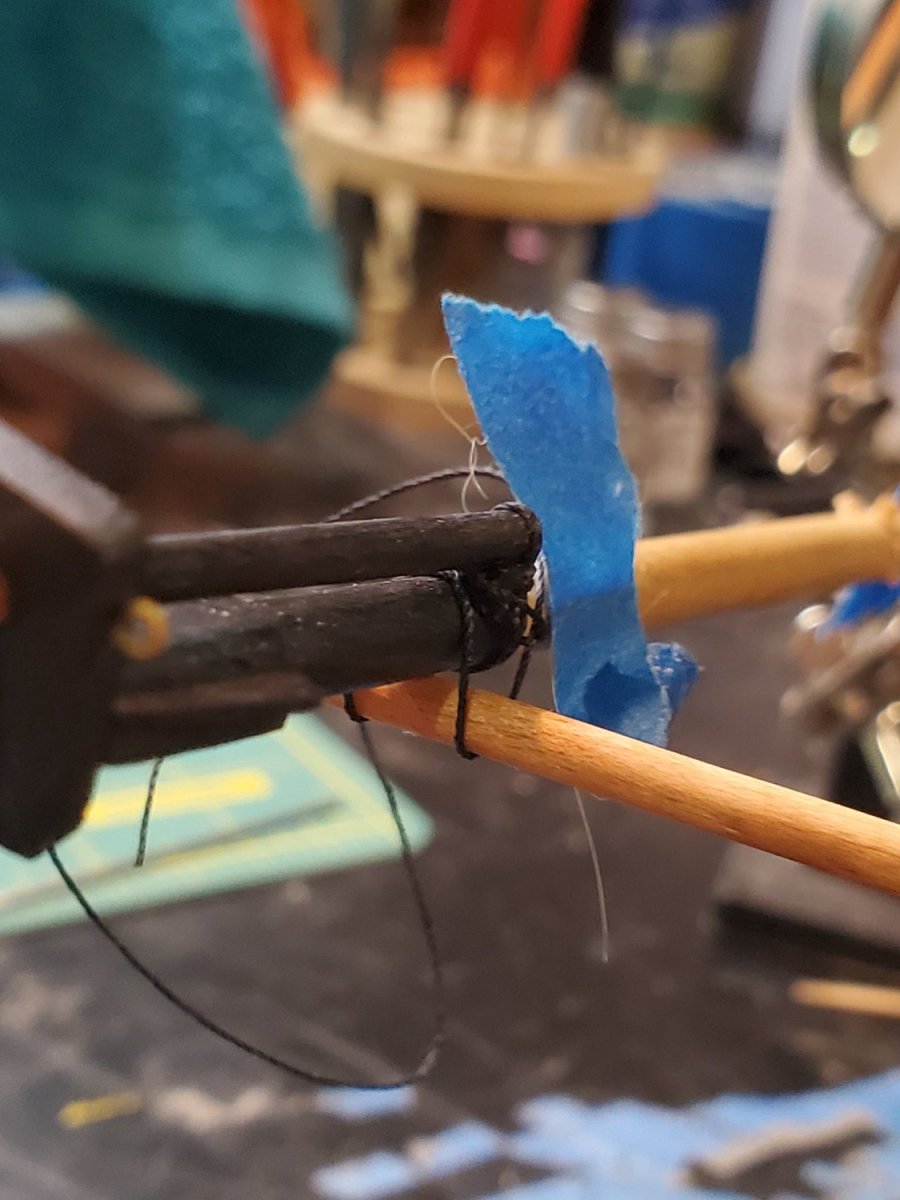
Now was time to do some actual rigging, starting with the Spritsail Yard Truss. No instruction on how to start/stop this thing, so I made up my own method.

I wrapped rope around the Sprit sail yard P&S, then blue taped it to the Bowsprit. Tied a knot on one end as a makeshift ''loop'', and fed under Jib boom.

Then I semi-seized the loops tight on P&S sides with fine thread
Then pulled it tight, and snipped the ends close. The final knot/seizing on the opposite side was just a hidden square knot. I didn't know how else to terminate it.
That's about as neat as I can make it.

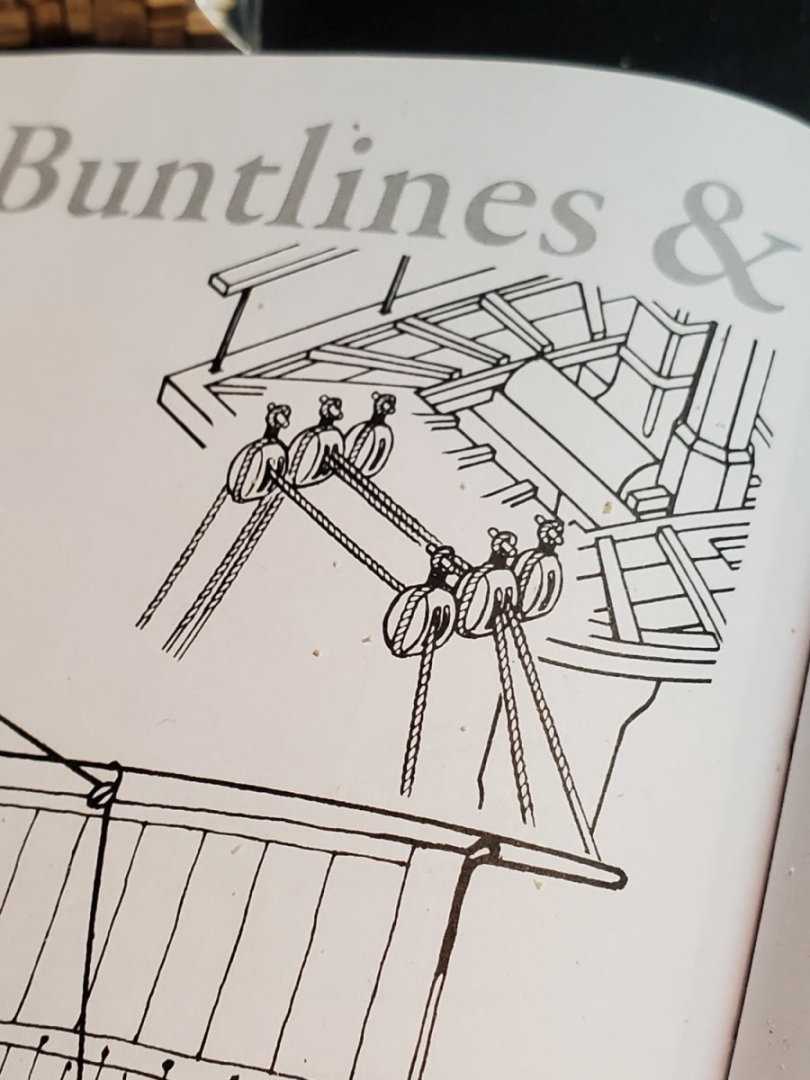
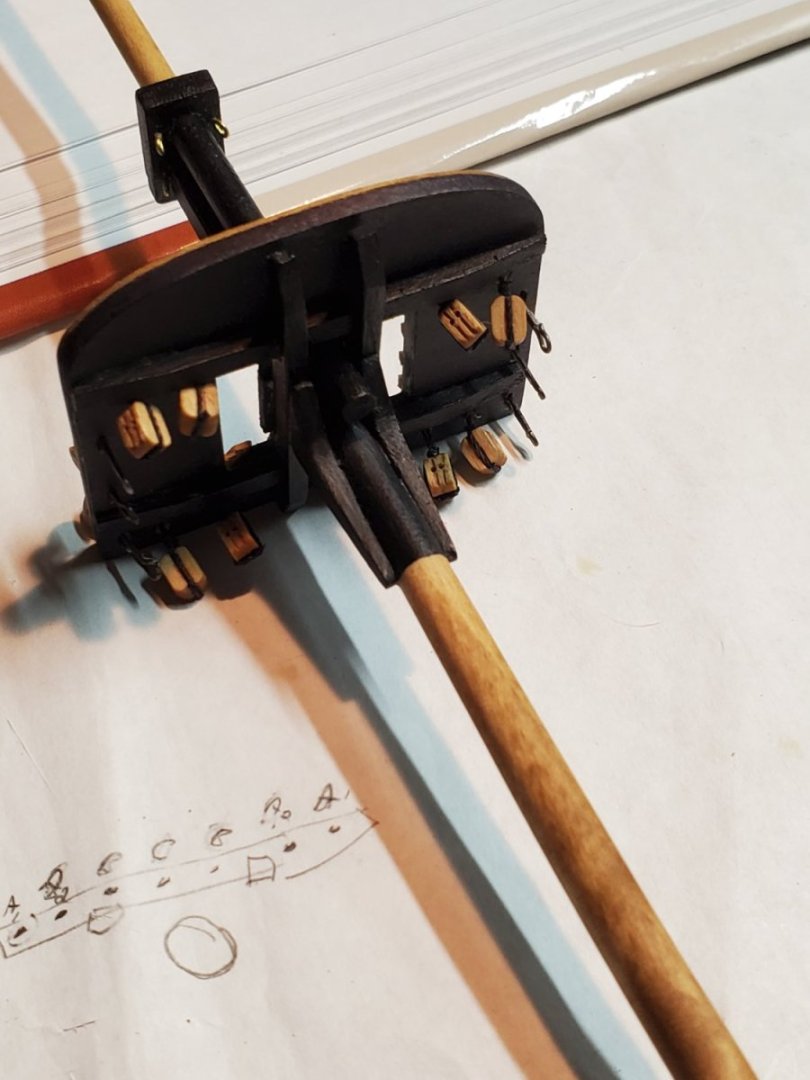
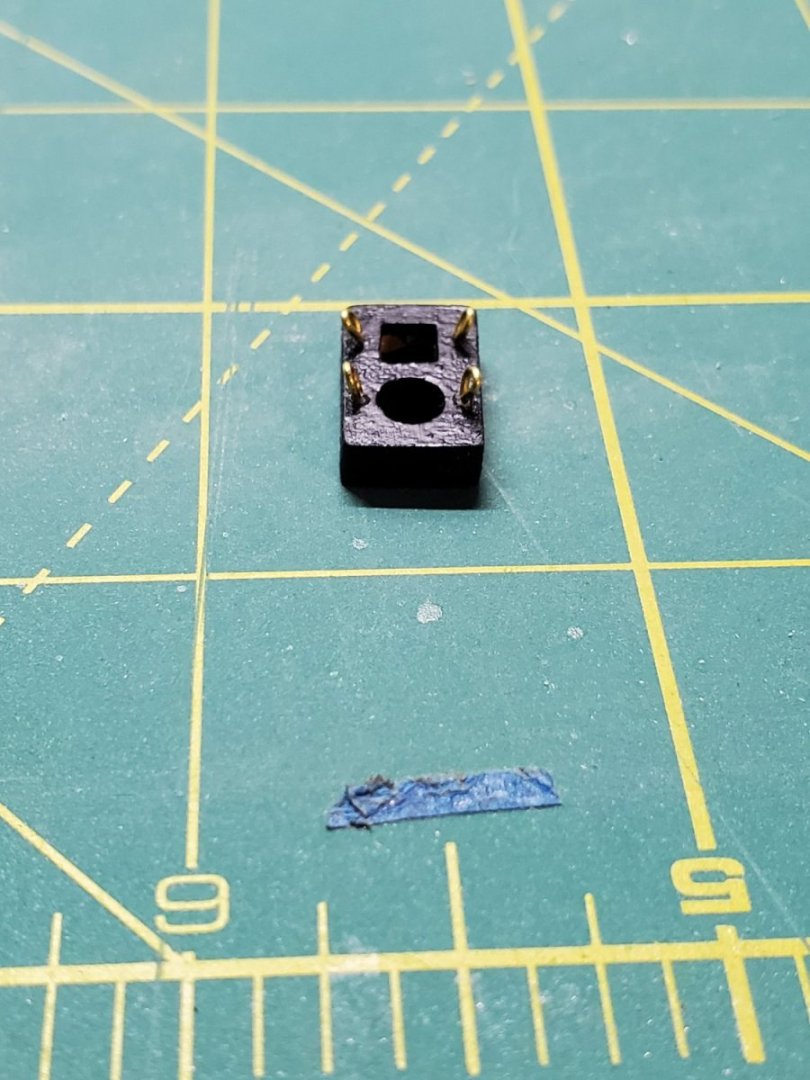
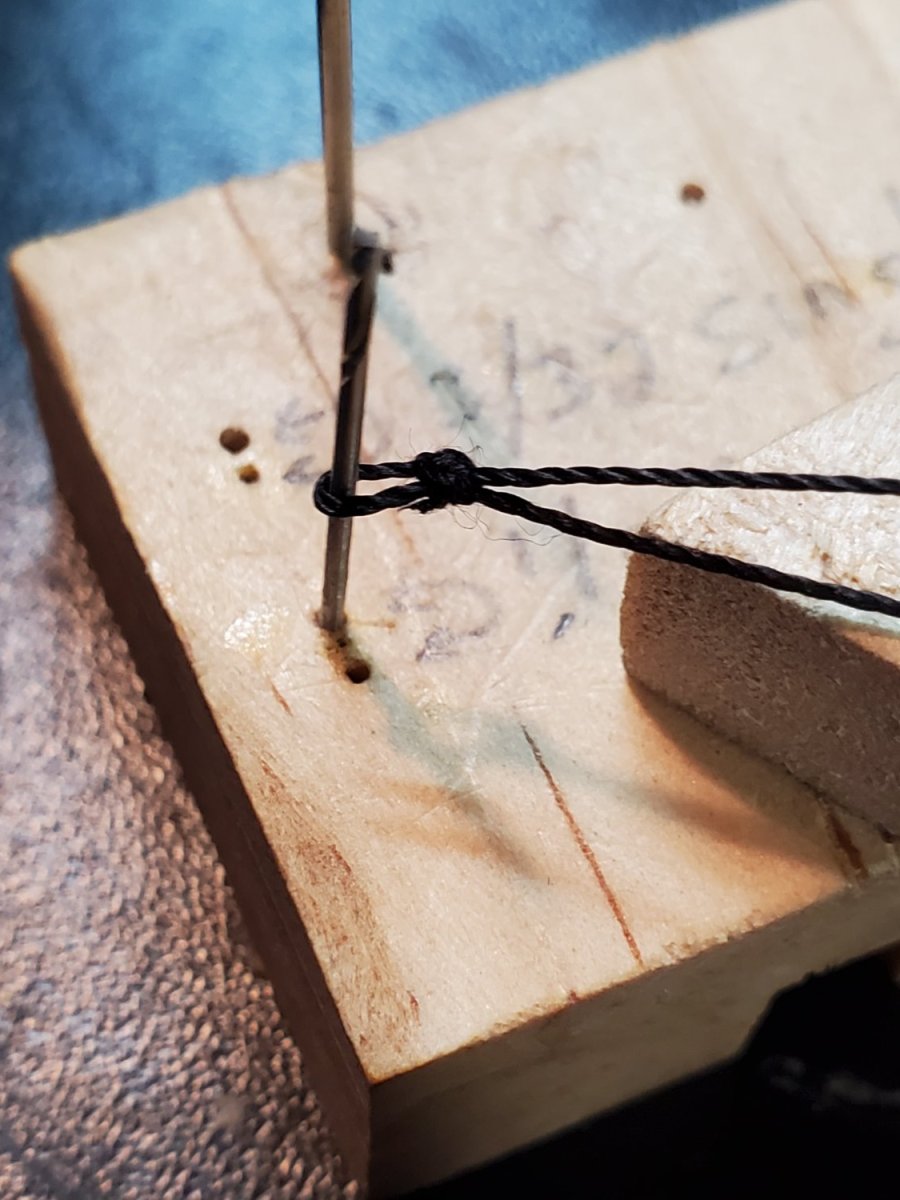
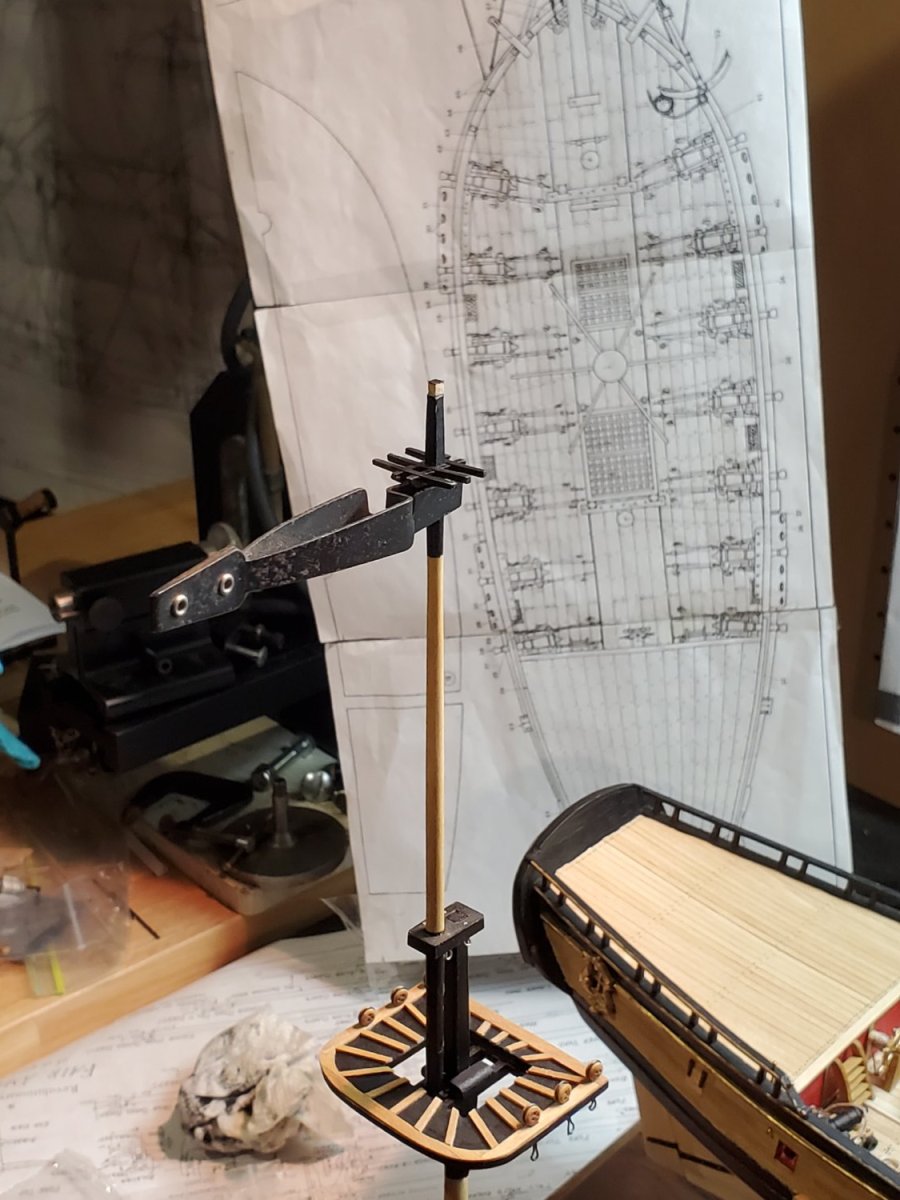
After the Spritsail Yard Truss, I moved onto making double blocks for the leechline, buntlines, and Spritsail yard braces. I took some .012in black rope and made a tight loop around an old drill bit and taped the ends back. Then I could tie two knots to form an upper loop that will feed in the mast top later on.
I did not feel confident in my ability to splice a loop on itself with this size rope. A knotted loop is more my style right now.
And snipped close.

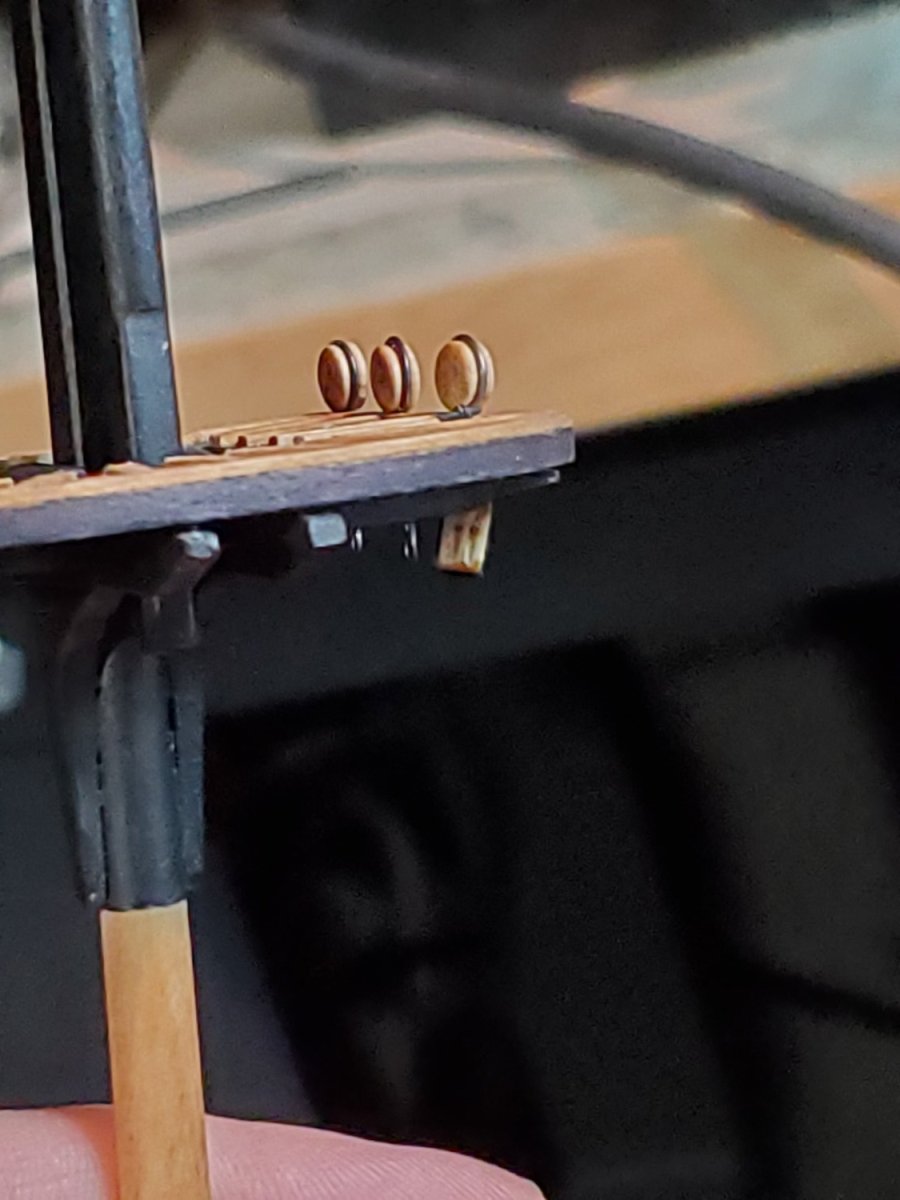
I glue/tacked the knot to the top of a 5/32in double block, and then knotted the bottom with an overhand. I did this with cannon blocks too, and it worked well, but tedious.
the 1/8in blocks were just too small to ''hang'' from the top well enough to access, so I used 5/32in.
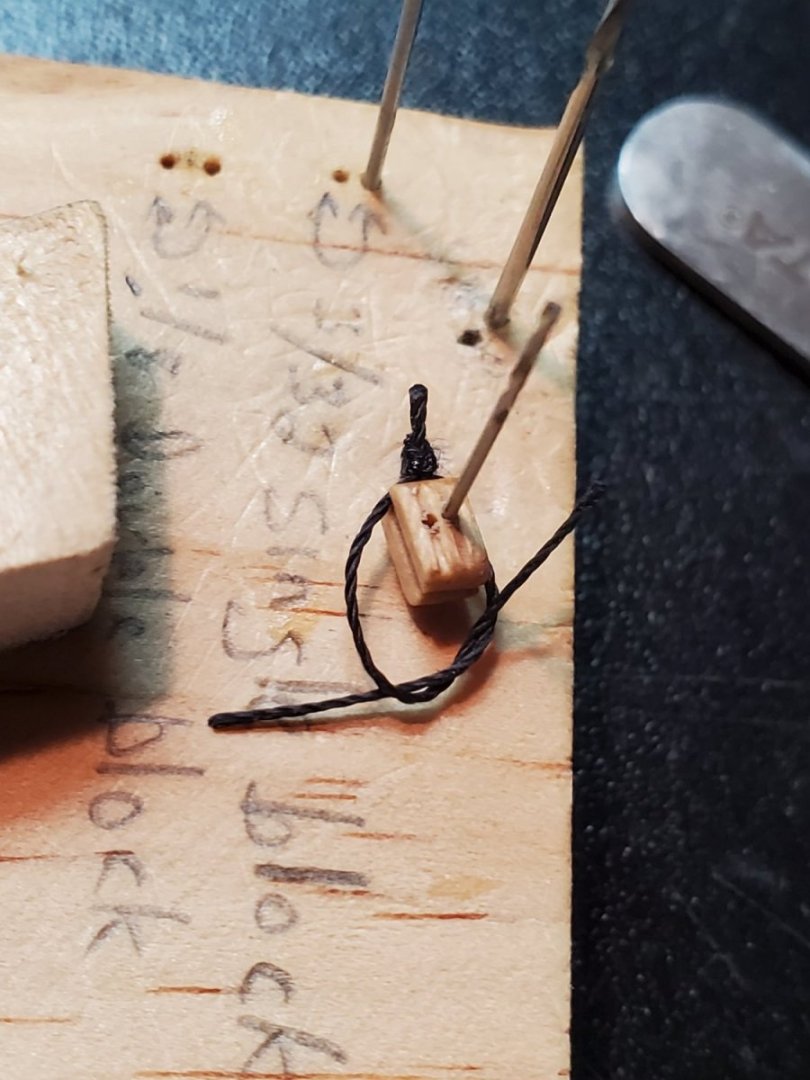
Glued and snipped close again, and it looks alright to me.
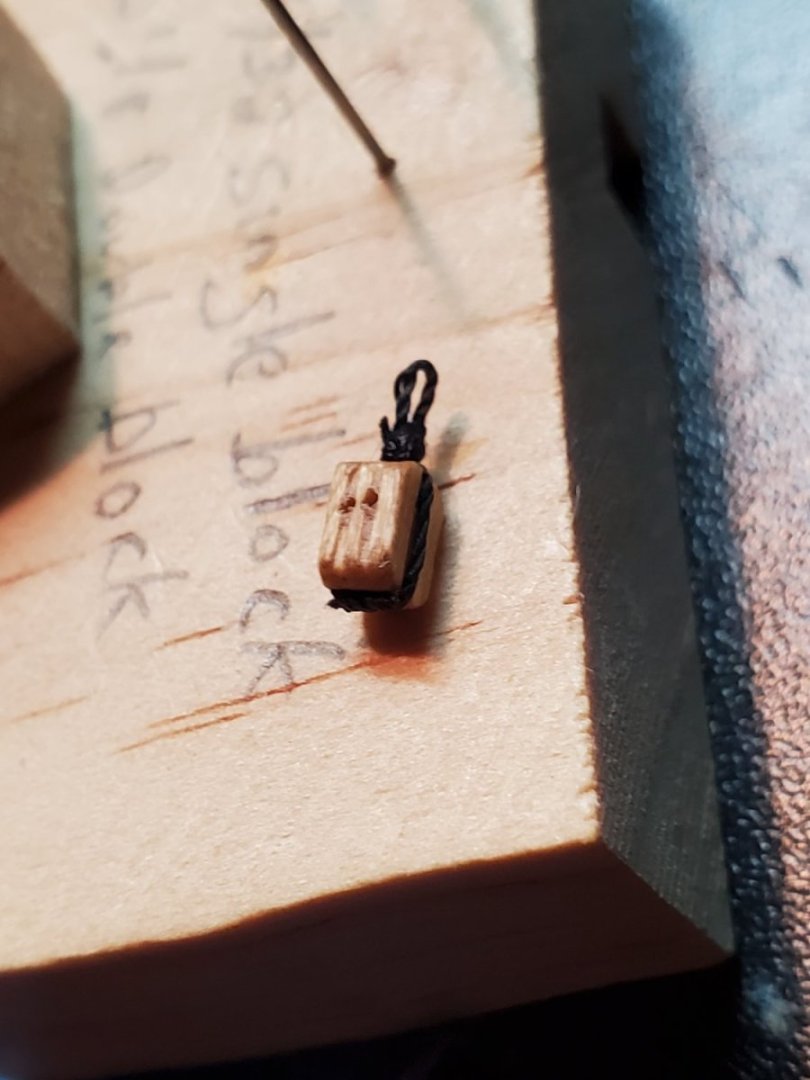
According to Petersson, this is how these blocks will attach to the top. My instructions were useless, as well as the rigging plan. I'm following this approach.
I'm going to reeve ropes for leech, bunt and stays similarly, but make educated guesses for my own model as I get there. I was hoping the Roger's model would make it more clear, but again - difficult to see exact pin assignments through glass.
Petersson also shows blocks fore and aft, so that lines come up and over the yard, then down to their pins without getting tangled. The Rogers model also showed this detail, so I'm doing the same thing here.
Drilled some block-loop-holes in the top, and snipped some .012 annealed wire, and glued in place.
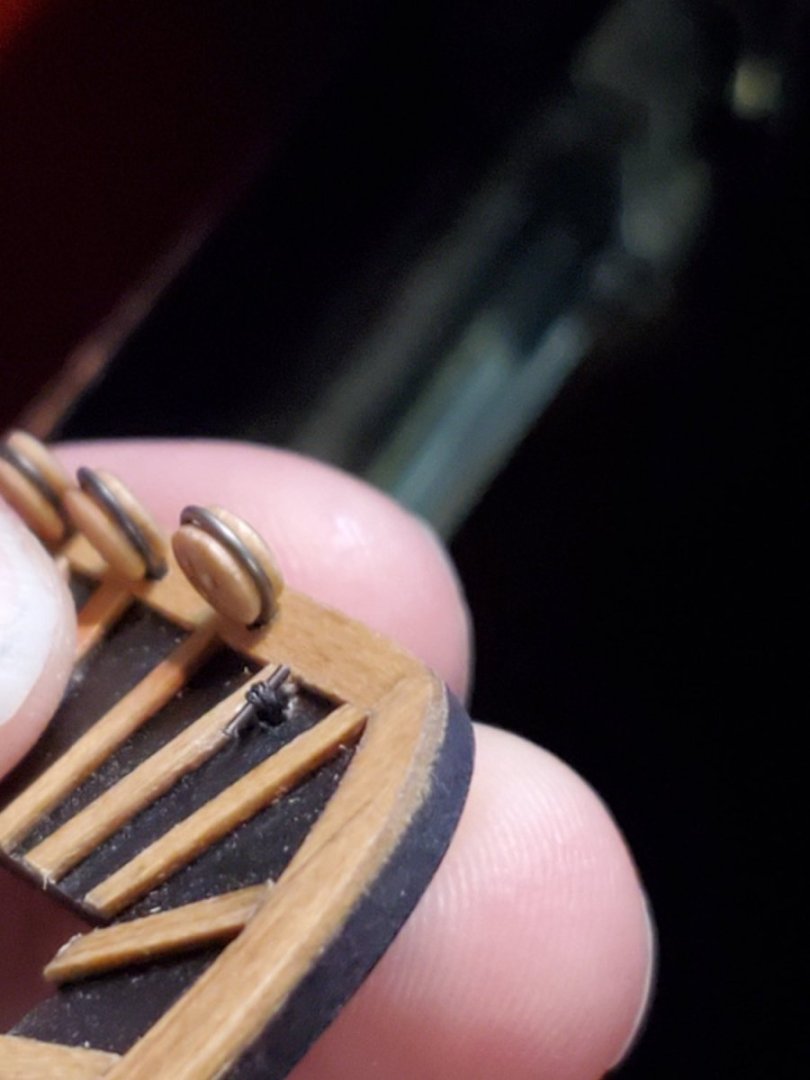
The block hangs pretty well - just accessible.

I now have two blocks fore and aft, and port and starboard. I'm doing all of this with the mast detached from the deck. I haven't stepped it yet. Once it's permanently fastened to the deck, I'll never be able to access the underside again. I'm trying to do everything I can before I can't 'reach' anymore.
I'm sure I'm doing the rigging wrong, but without any help from the instruction manual, I'm doing what I can.
If other modelers have recommendations for HOW they learned to do blocks, or start rigging, I would be eager to learn.
I'll keep plugging away at the main mast blocks next, the same as the fore mast ones.
More progress soon.
- Jason -
Jason you're doing a great job! For your first ship you're really going all in. Good on you! Couple of thoughts, though you're probably well beyond this. I don't know how you are stropping your blocks, but some black thread works wonders. I use a thicker black thread and attach thread to the blocks with Gorilla gel CA. Also, again probably too late, consider getting some aftermarket blocks from Syren or Model Shipways. You've done such great work that the blocks that came with the kit don't do you justice.
-
On 10/9/2023 at 9:11 PM, JLong said:
Fair American progress update:
Lot has happened in September - turned 40, got Covid, missed the Admiralty workshop, brother's bachelor party and still had time to do some work on the ship!
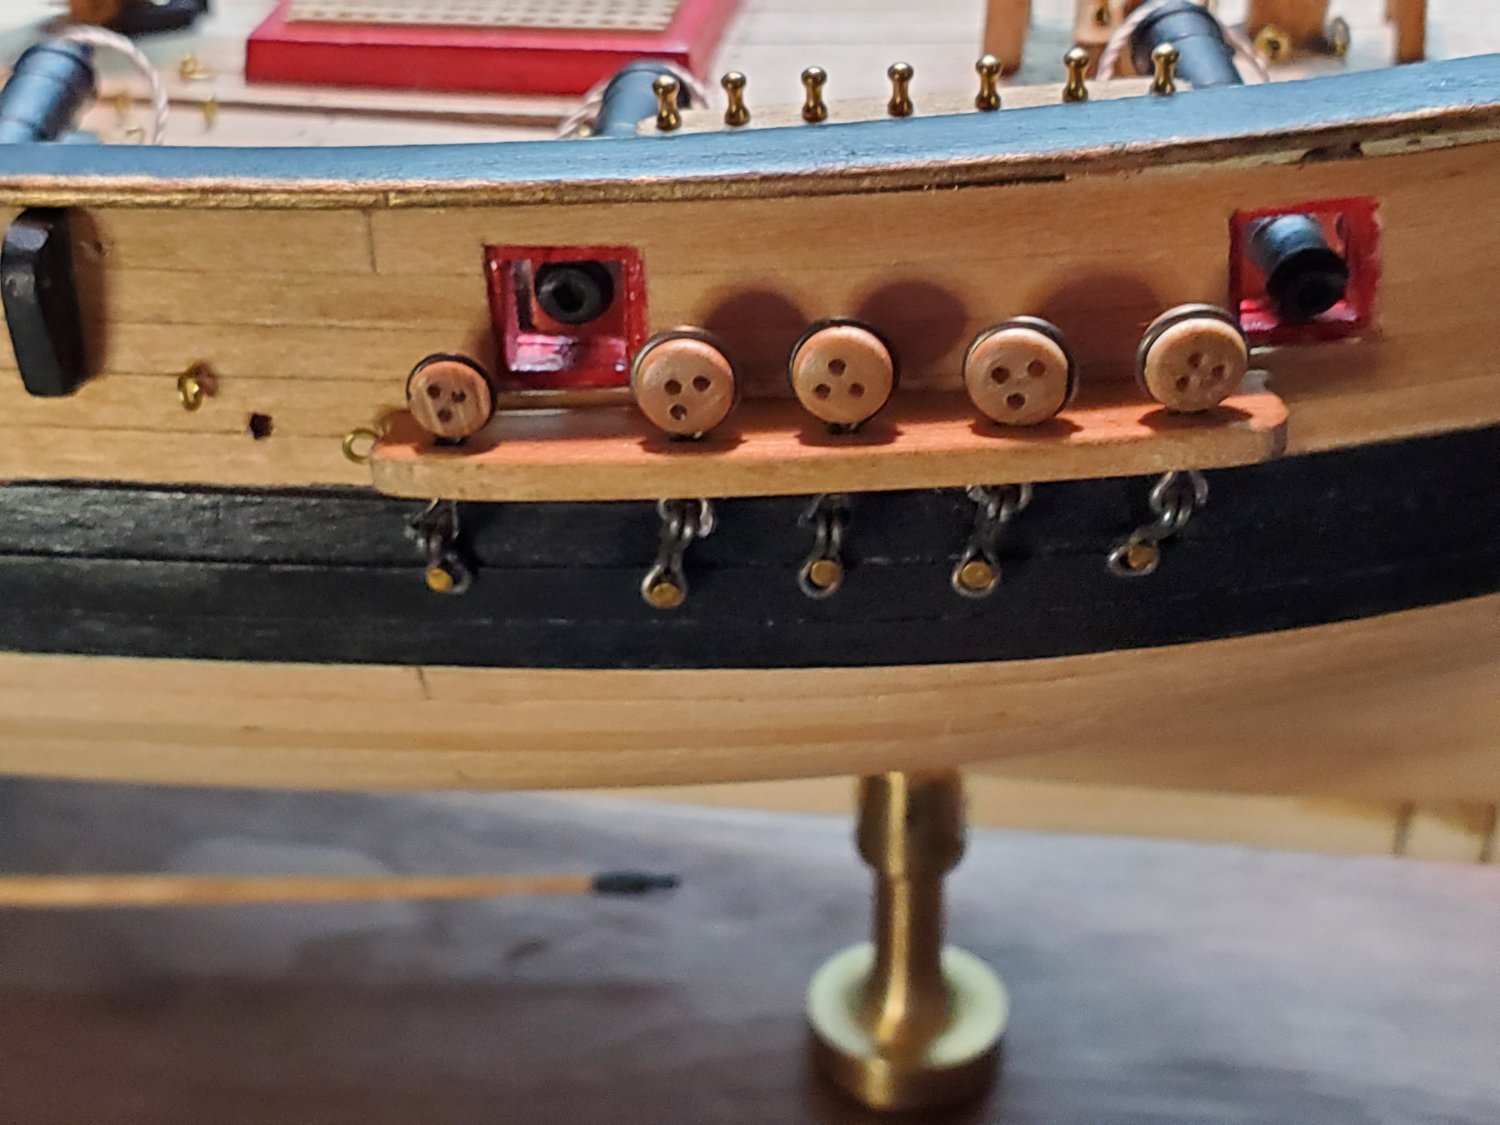
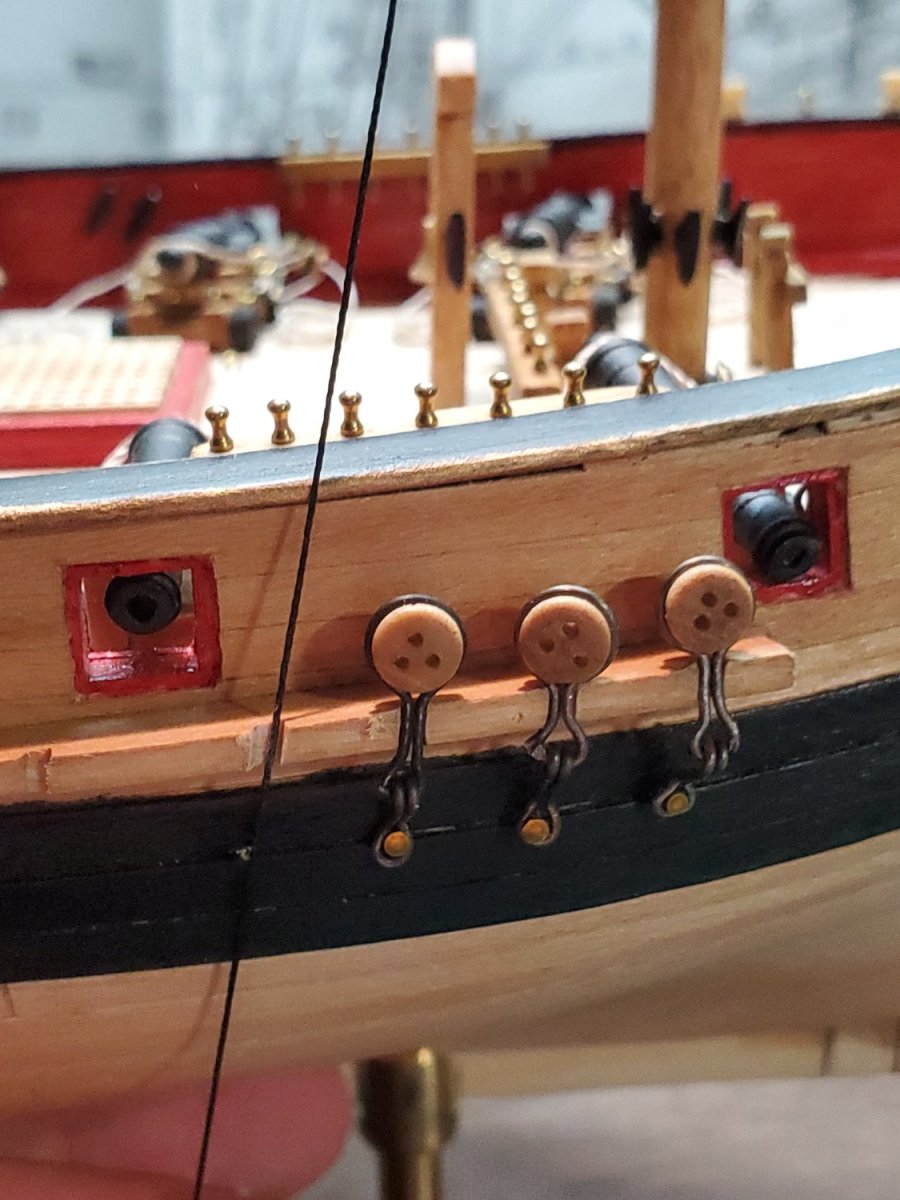
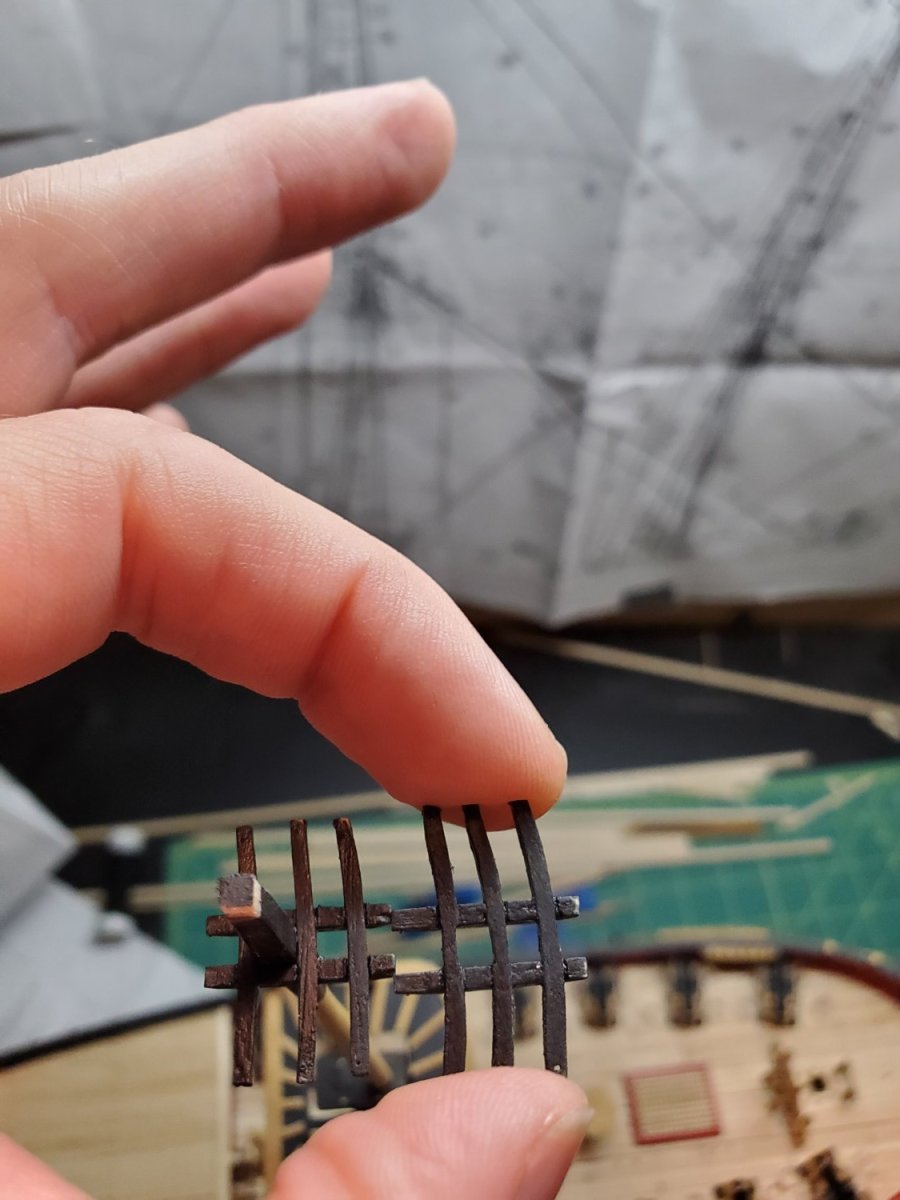
For the mast tops, started adding eyebolts in place. Also started making plans/drawings for where various blocks will go to (not shown).
Had to bend the eyes out slightly, so they could be accessed near the mast.
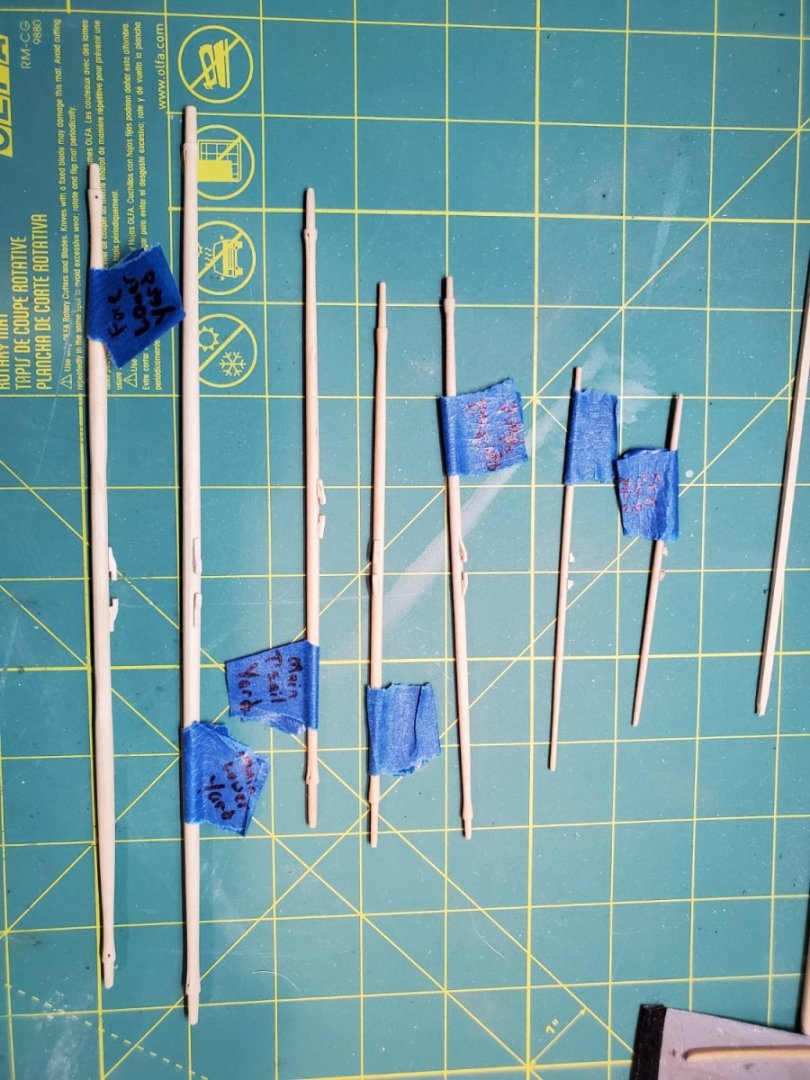
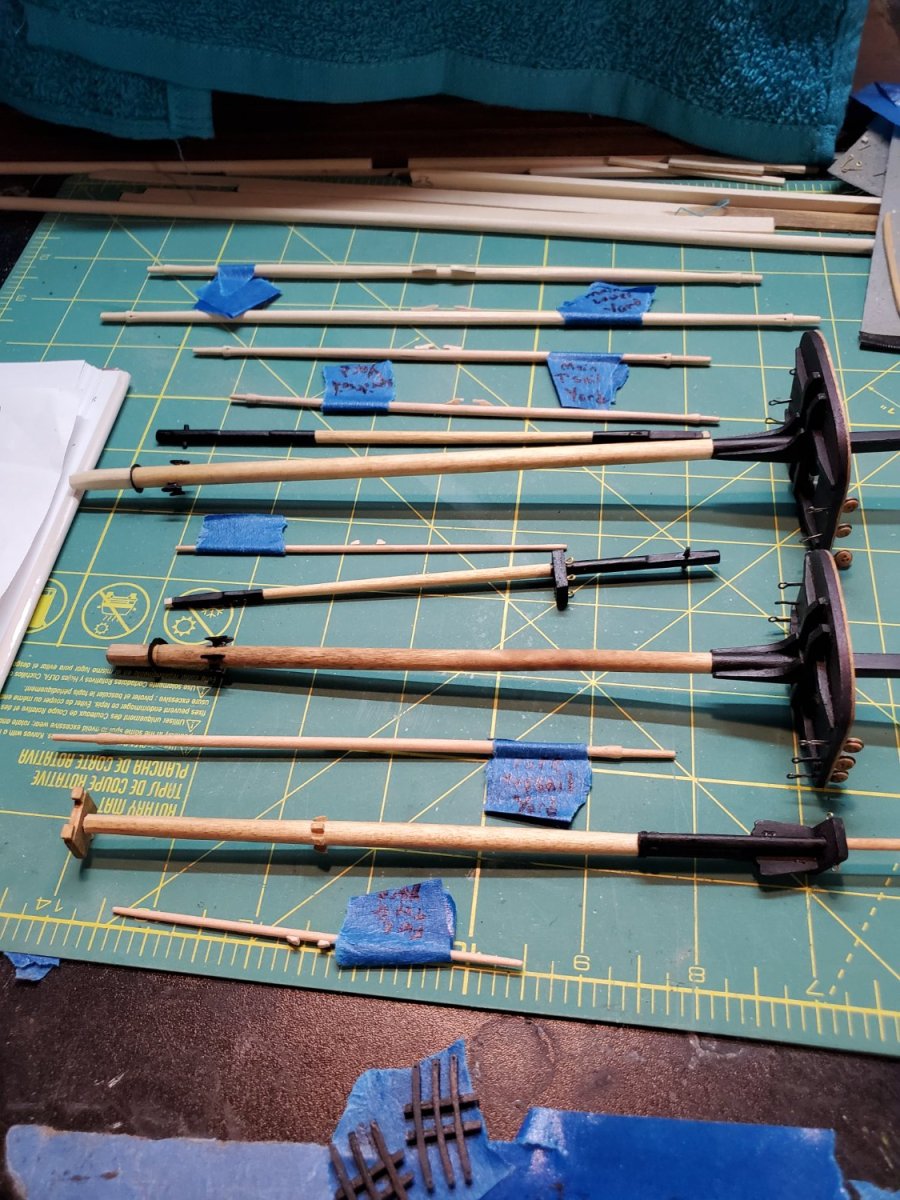
Almost done all the yards too. I like the fine details of the yard shapes - they've been fun to turn on the lathe.

The yards are supposed to be black, via the plans. I'm debating whether I want to stain them instead. I think that black will hide all the great detail, but I'm still not decided.
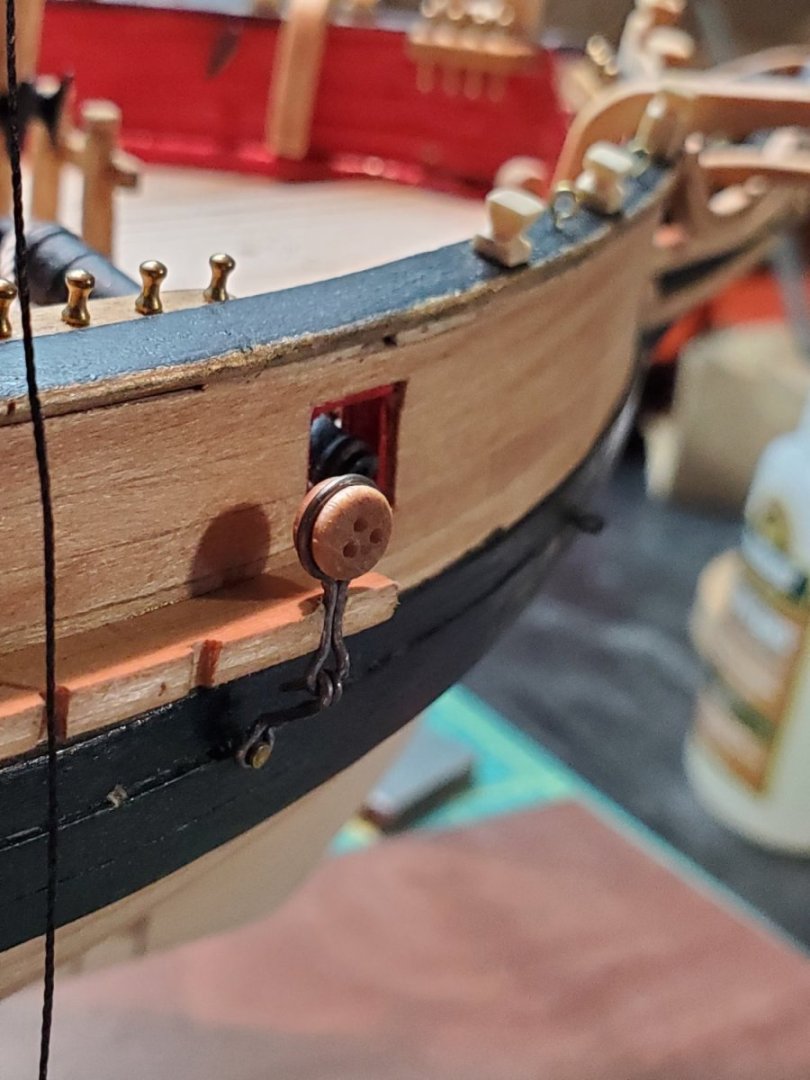
I'm moving onto setting the rake angle for the chain plates/deadeyes next. Before that, I need the rake of the masts to be correct. I needed to add little shims in the deck hole to offset the heel of the mast correctly. You can see the little piece on the left side.
According to the plans, I can use taut string to approximate the angle needed for the chain plates. I'm drilling a hole at the bottom of the black strake where the plate will be pinned.

After the pin hole, I can place the deadeye in. About as aligned as I can do.
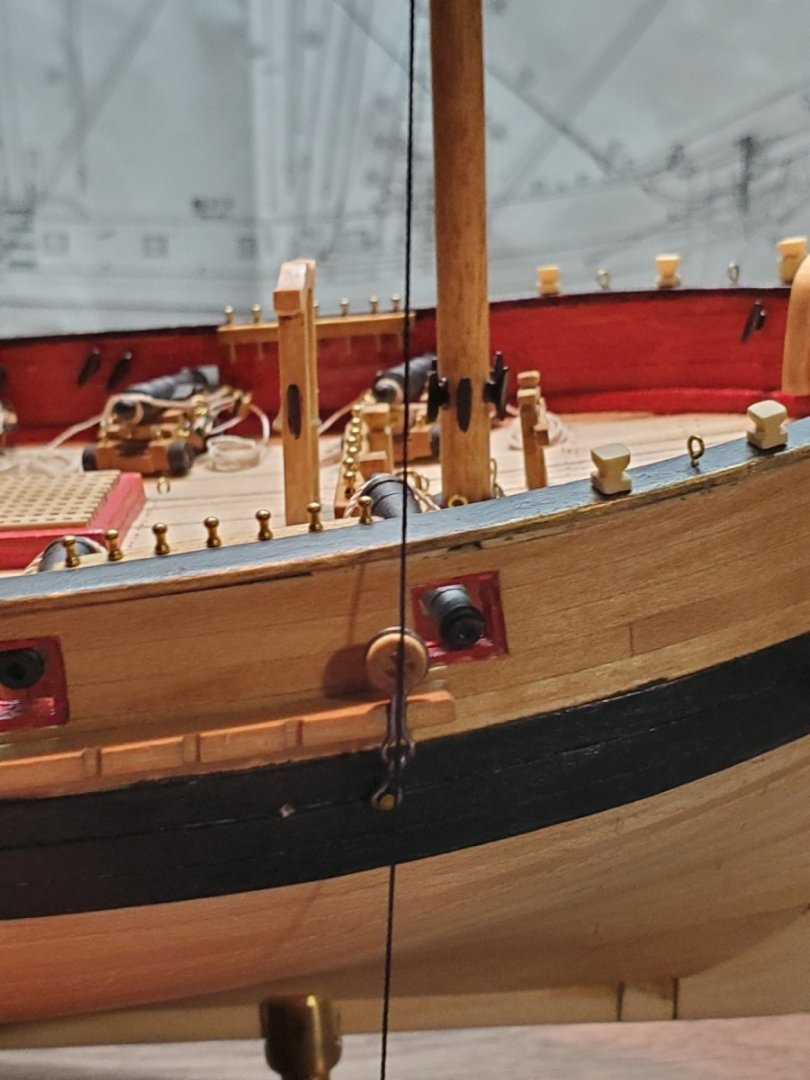
I made mine a little differently, as you can see. The instructions call for a metal strip that isn't available anymore. I pre-measured dimensions from the channel to the black strake, to come up with my hook and loop design for the chain plates. I did have to make some adjustments, but they fit pretty darn nice. I'm really happy with how they turned out!
I also got the top mast and tops glued to the masts. I needed a reverse grip tweezer to hold it straight while the glue dried. The fit was just a little loose.

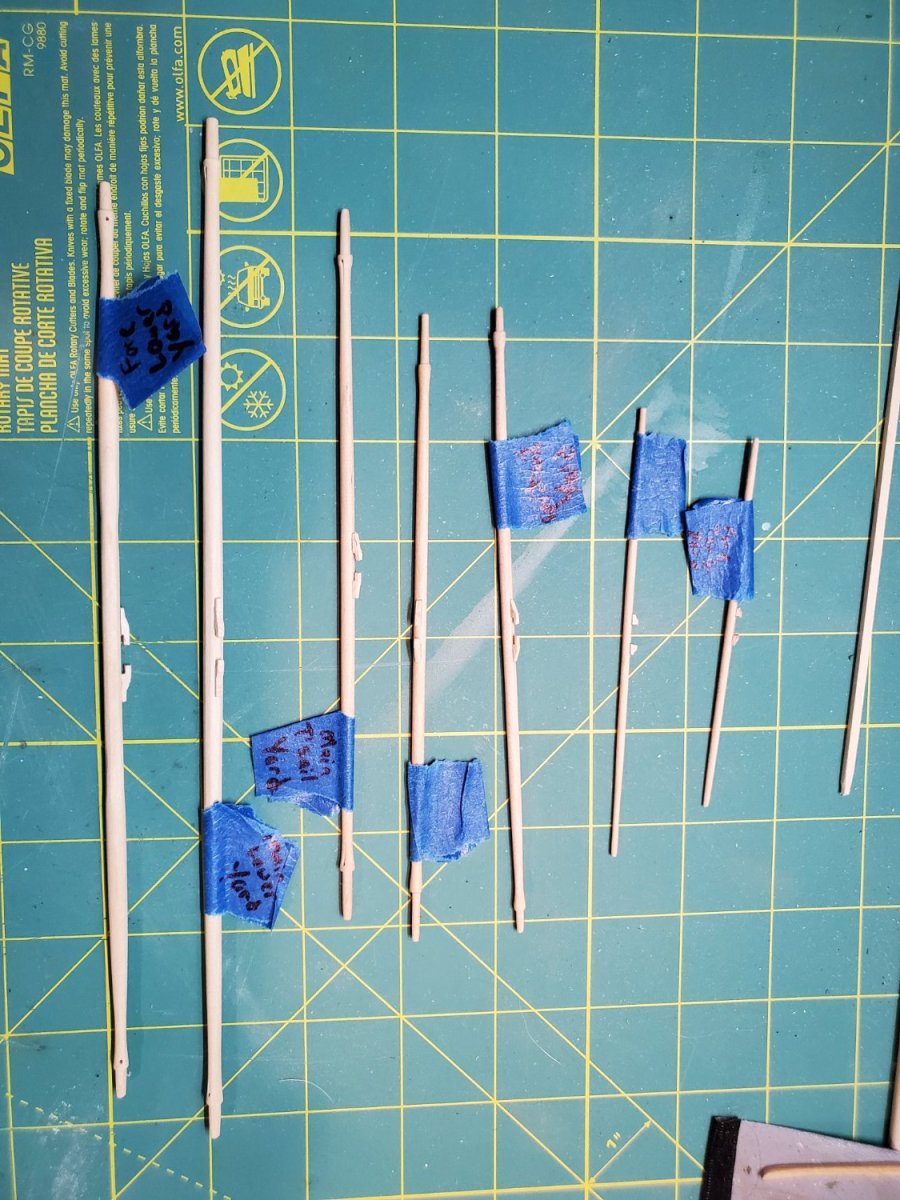
Of course nothing is perfect - especially for me. The Fore and Main tops are NOT the same size. And obviously I grabbed the black one, instead of the black one and now the Fore top is glued to the Main mast. The one in my fingers is the Main Mast top, its just slightly wider than the Fore. I'm going to live with it, but now everyone knows - always label things - like I did for the yards in blue painters tape. Another learning moment.

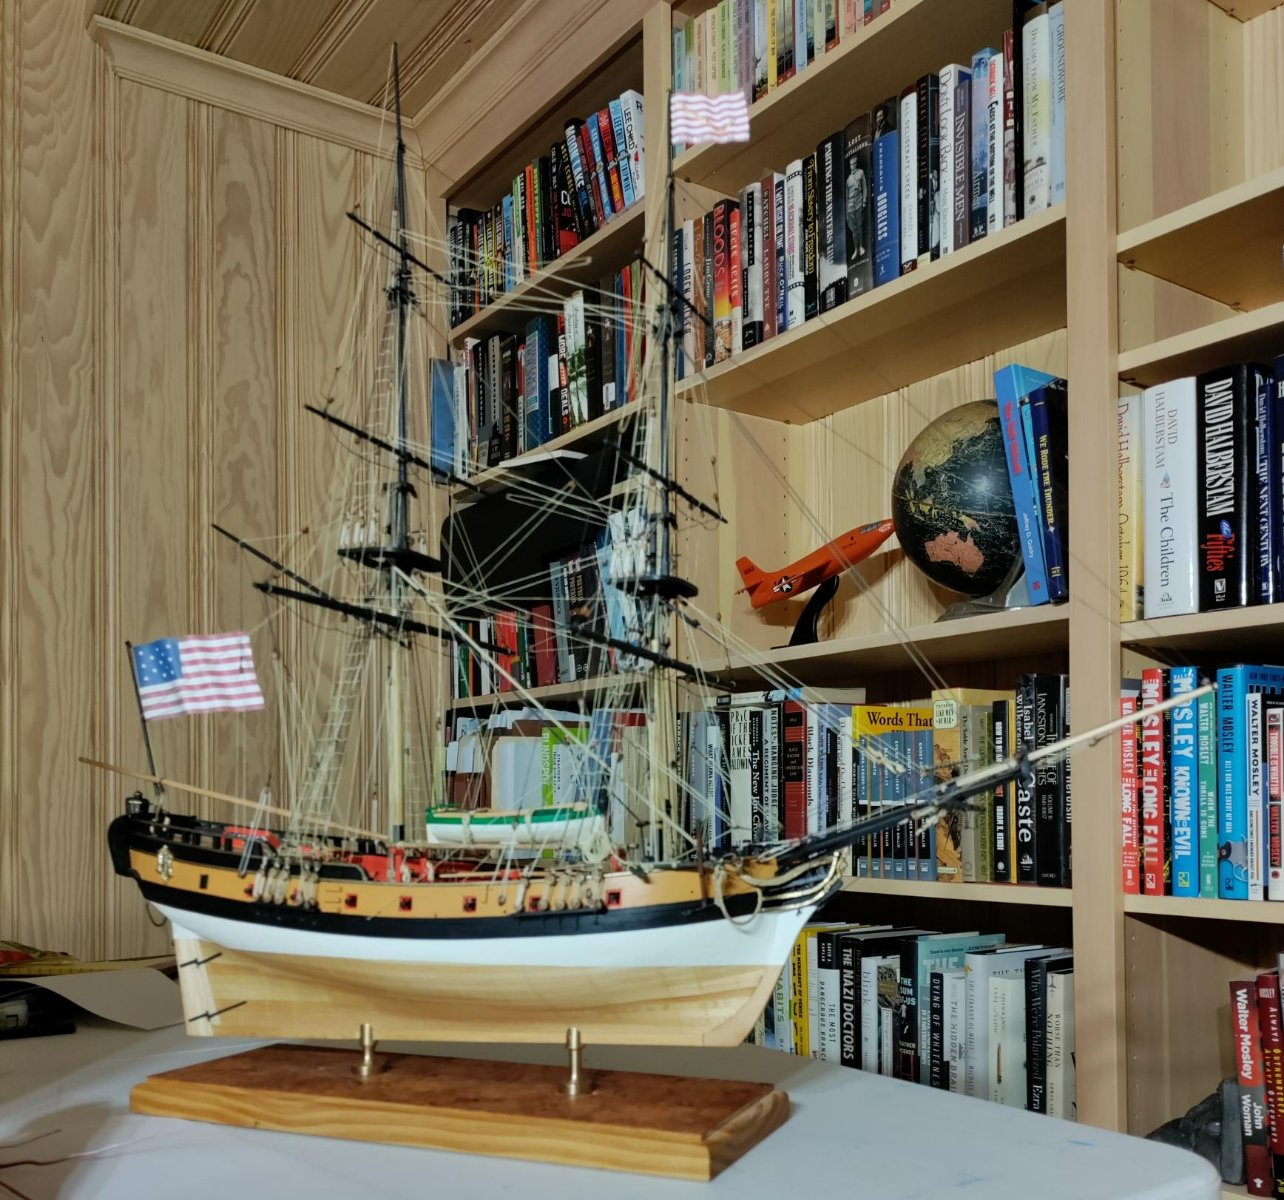
So that's all for now. I'm going to keep chugging away at the chain plates and maybe I'll have the masts glued/stepped next time!!!!
Have a great week,
- Jason -
Jason! Don't know how I missed all of your progress! Your solution to the chain problem looks great!
-
-
Your Harriet Lane is really masterful. I was glad to spot your build log before I started my kit. I'm going to copper her bottom based on your example. I'm going to build her armed as she was in late 1862 just before her capture at the Battle of Galveston, with a X inch Dahlgren on a pivot forward of the foremast and a 30lbr Parrott gun on her fore deck. I look forward to watching your progress!
-
Good for you on the sails! As my Admiral always says, go big or go home! I forgot to mention the pin racks you added to the main gallows and the bits - they will be very handy indeed. I really wish I had thought to add them. Great idea!
- JLong, Dave_E and Oldsalt1950
-
 3
3
-
Jason! She's looking great! I'm excited for you! Depending on how much rigging you'll do, consider adding the shroud cleats suggested in the rigging plans. Given all of the lines that you have to belay, having the extra belaying points greatly helps avoid belaying more than one line to a pin. Keep up the very excellent work!
-
Thanks for the compliments, Jason! I finally go to a point where I thought my planking could tolerate the naked light of day. As to your masting problem, the bottom of the mast passes through and rests on nothing. The fid passes through the fid hole and the fid rests on the trestletrees.
-
-
Jim! Enjoying your progress. I too thought to solve the problem of the cramped space for the aftermost guns. When I built the FA the first time in the late 90's I ended up leaving the aftermost guns off the ship. I tried to take advantage of the logs of more expert modelers and move the cabin bulkhead back a bit and respace the guns. I wish I had moved the bulkhead farther aft. I never did think of the headroom problem for the cabin guns - great catch! Looking forward to pictures of your revision to the stern of the Wendy Kay!
-
I meant to say that I admire your efforts to make replacements for the cast parts that come with the kit. That inspired me to do the same thing. It also inspired me to check for mini-kits of things my "workshop" is not equipped to fabricate. I learned about Chuck Passaro Syren Ship Model Company from the forum and got the ships wheel and stern lantern kit for 1:48 scale. Great kits and excellent instructions.
- Dave_E, Oldsalt1950, Ryland Craze and 2 others
-
5
-
Good morning!
I hear you about the frustration on the chains! Mine came out a bit uneven, but I could live with it. I'm working on moving pictures from my phone to my computer. I thought I would be able to post some and hour ago, but I sent myself full sized images which my computer refused to download. I have since gone back and sent usable reduced sized images. Which look like they finally made it through the interweb!
She absolutely loved it! Her sisters are all jealous!


-
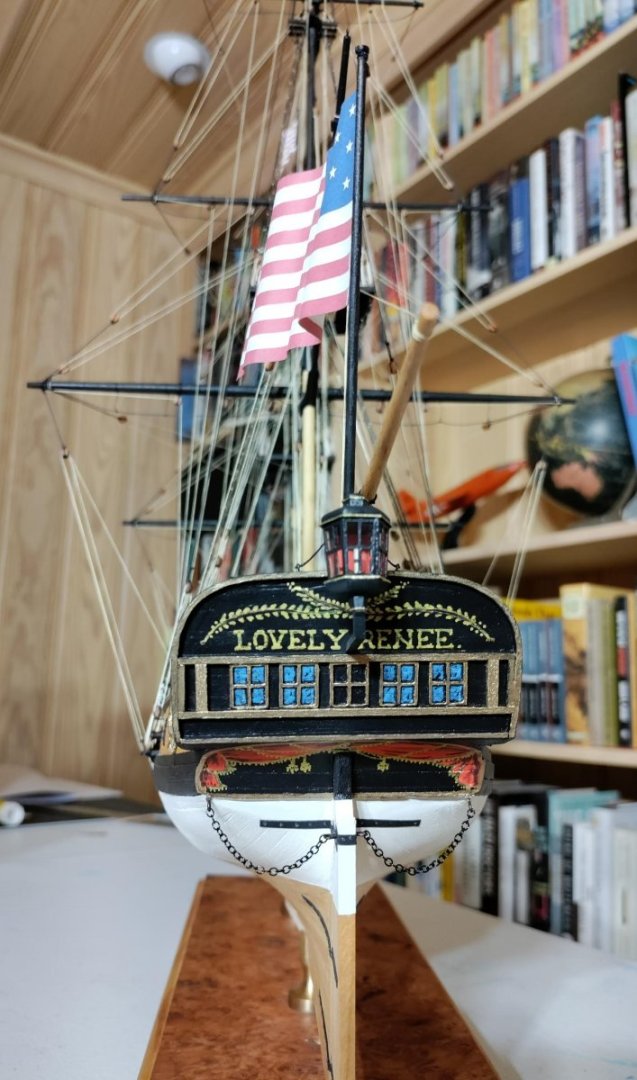
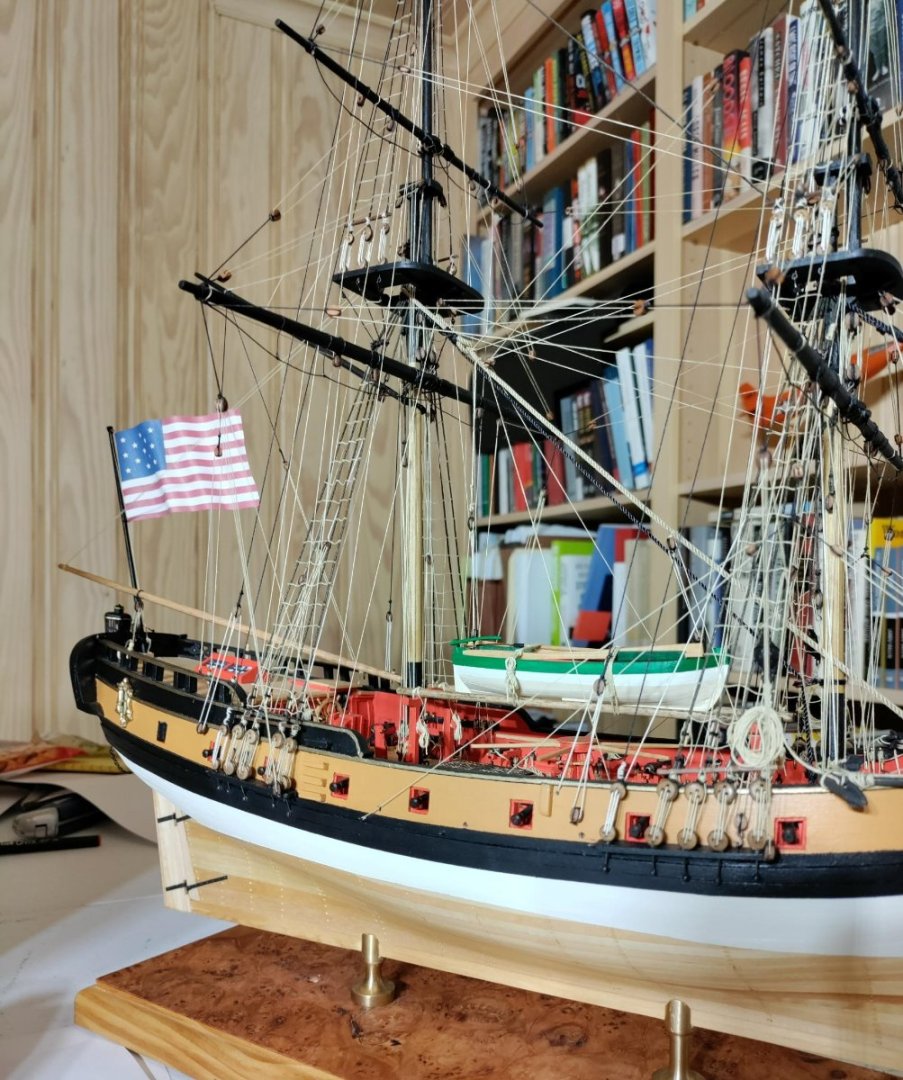
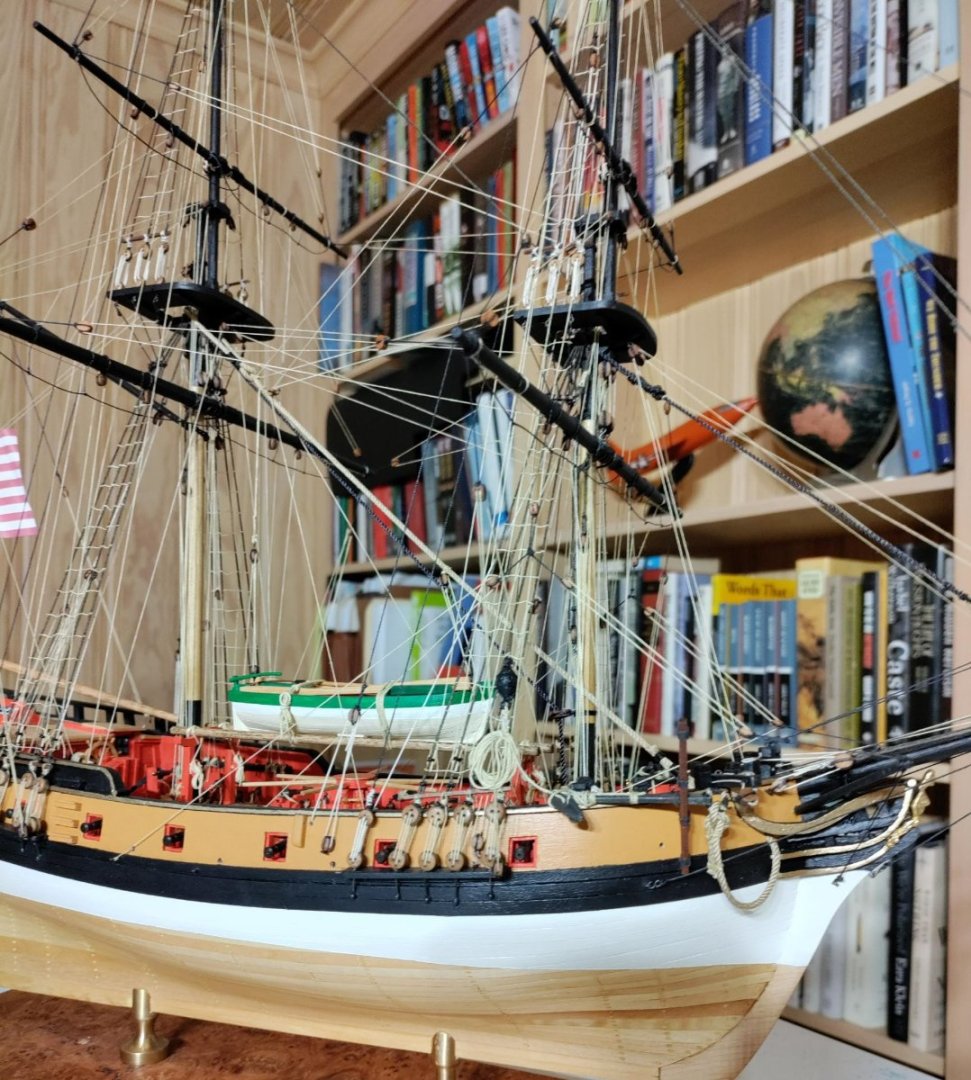
Glad to see your post! After asking about the deadeye problem last summer, I got frustrated and let my Fair American sit for a bit. Thank you for the reply you sent. I apologize for ghosting. I solved the problem by using 24-gauge dark annealed steel wire and my best effort to make the chains a unform length. I was trying to make something that didn't look too clunky. I need to take some pictures on my phone and migrate them to the computer so that I can post them. To make a long story short, I picked back up this winter and recently completed the build. She's been rechristened the Lovely Renee, for my wife. That way I get house room😉. I'm excited to see your progress - really like the contrasting wood on your tops. Since you are about to start the rigging phase soon (fingers crossed) you might get yourself some needle threaders - they work wonders getting the line through the blocks.
-
Dear Jason, enjoying your work and your progress! I hope you'll post more soon. I'm building the Fair American too. Actually, this is my second time on the project. I built my first over about three years between 2000 and 2003. When I finally got it done, I could not believe that I had done it - I hope you experience the same awe and pleasure at what you can accomplish.
Of course, things change over time and ModelExpo made some changes to the kit that I'm a bit puzzled by. In particular, they have the deadeyes being stropped with wire and the chains made of wire as well, but they did not revise the instructions to show the process. How are you managing it?
-
Hello! Your work looks fantastic. I have recently opened my Constructo Enterprise, a gift I received in 2002 or 2003. Unfortunately, I have the kit with only 2 plan sheets and perhaps a page and a half of instructions. I was wondering if you or anyone knew of a way to get what I understand to be the updated plans and instructions. I don't know if it is appropriate and I mean no offense, but if it were possible to purchase a copy I would be happy to do so. Otherwise, I am very glad to havediscovered this site for myself as I get back into this wonderful hobby. My last build was the ModelExpo Fair American which I completed in 2001, but lost in the recent economic collapse. Long story. In any event, I will follow to the best of my ability the superlative work you are doing. Thank you for the wonderful pictures.
Sincerely,
Chuck


ALFRED by schooner - BlueJacket Shipcrafters - scale 1/8" (1:96) - Continental Navy Frigate
in - Kit build logs for subjects built from 1751 - 1800
Posted
Nice job on the nibbing!!!