Wolfman_63
-
Posts
52 -
Joined
-
Last visited
Content Type
Profiles
Forums
Gallery
Events
Everything posted by Wolfman_63
-
UPDATE: On August 8th 2019 We CAREFULLY load the ship in the back of our SUV and drove over 600 miles to the beautiful city of Chattanooga Tennessee to attend the IPMS Nation convention. The model was entered into the contest under class 401 “1/350 Aircraft Carrier” On Saturday August 10th we attended the award ceremony and the USS Carl Vinson won first place in it class! The model survived the trip there and back with no issues. I also would like to mention that the Chattanooga IPMS chapter hosted an awesome show. This was my first time at a national convention and it was great! Check out the photos of the model in my Gallery on my Blog 1/350 USS Carl Vinson Gallery
- 82 replies
-
- 10
-

-
- carl vinson
- trumpeter
- (and 2 more)
-
The only parts of the island that required modifications was the rear of the top two levels and the rear antenna mounts. I used styrene stock. The company that sells it is called Evergreen Scale Models. https://evergreenscalemodels.com
- 82 replies
-
- 3
-
-
- carl vinson
- trumpeter
- (and 2 more)
-
For those interested in seeing this project in person, I will be attending the IPMS Nation Convention August 7th thru 10th in Chattanooga Tennesee!
- 82 replies
-
- 3
-
-
- carl vinson
- trumpeter
- (and 2 more)
-
If you are an IPMS member, You can now read about all the work it took to create my USS Carl Vinson Project. You can see all the build photo's at https://davidsscalemodels.com/build-log/1-350-uss-carl-vinson/ and all the completed photo's at https://davidsscalemodels.com/gallery/uss-carl-vinson-project/
- 82 replies
-
- 6
-
-
- carl vinson
- trumpeter
- (and 2 more)
-
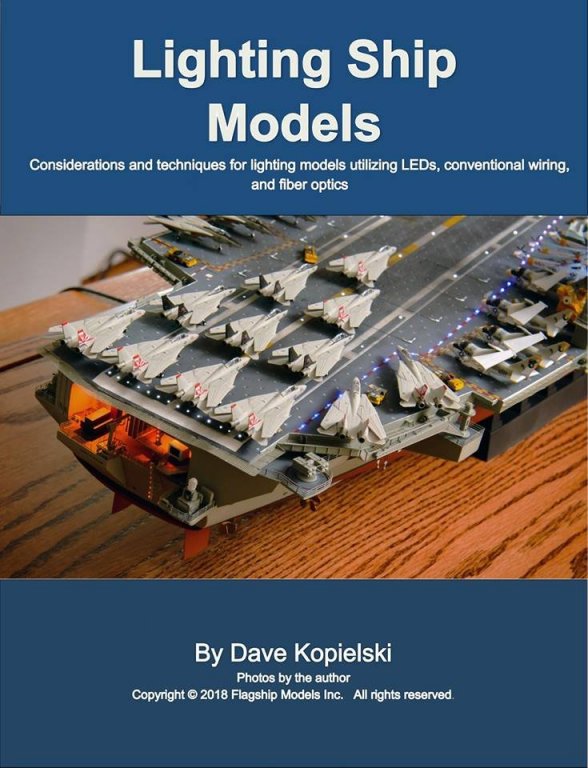
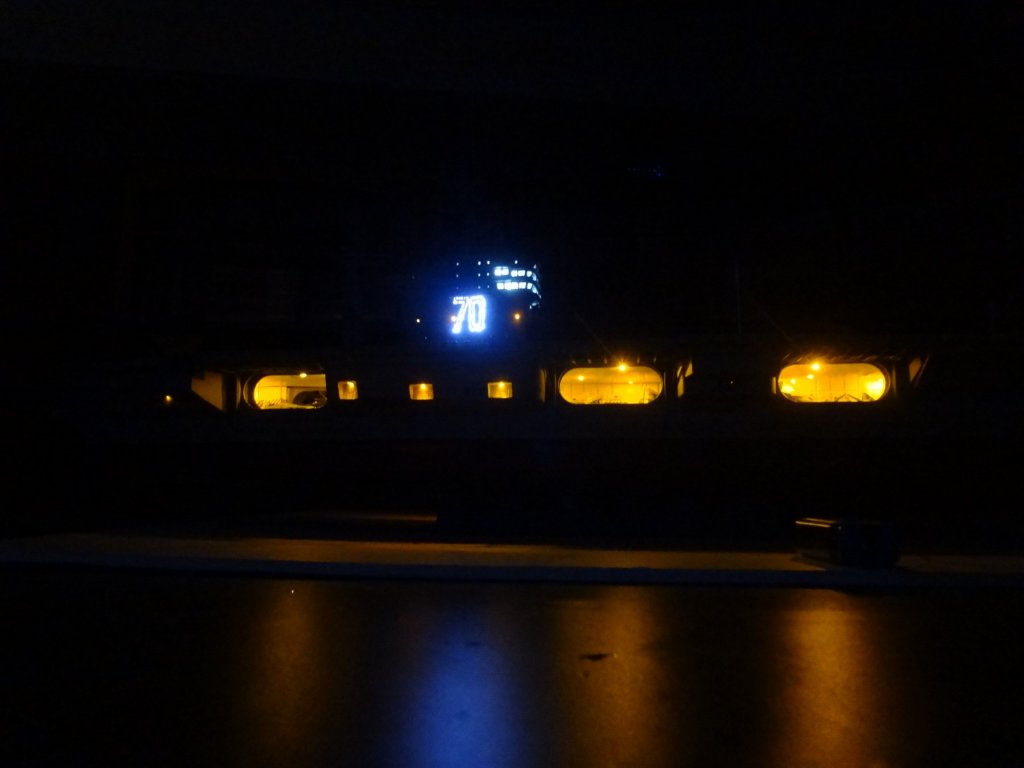
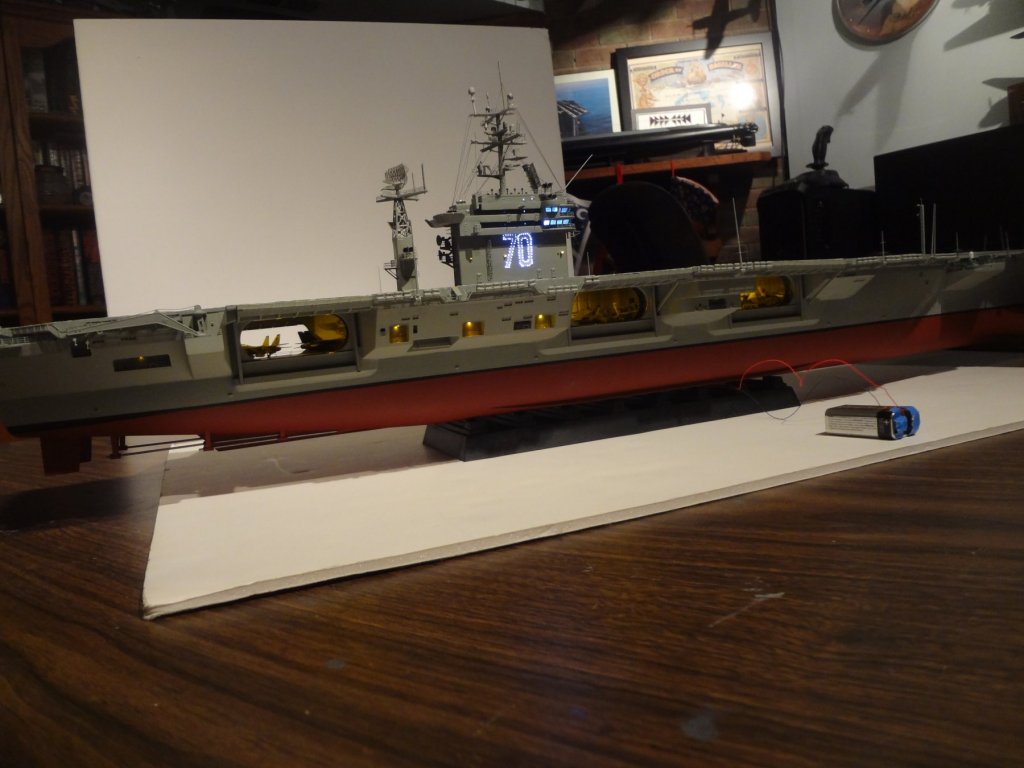
For those interested in lighting their ship models, I wrote a "How To" article for Flagship Models. Coming very soon from Flagship Models Inc. is our latest "How To" ship modeling CD. With so many model ships showing up here and at shows with LED lighting installed, we have been getting lots of requests for a new CD to explain how it's done. Dave Kopielski just completed one the most extensively lit carrier models yet and is the subject of our next how to CD. Check out our web site for the latest details at: www.flagshipmodels.com
- 82 replies
-
- 5
-
-
- carl vinson
- trumpeter
- (and 2 more)
-
I had a friend who owns his own photography business stop by and take some hi-res professional shots. (he took over 200!) All these photo's are from Andy Schneider Photography. (click on picture to zoom in)
- 82 replies
-
- 14
-
-
- carl vinson
- trumpeter
- (and 2 more)
-
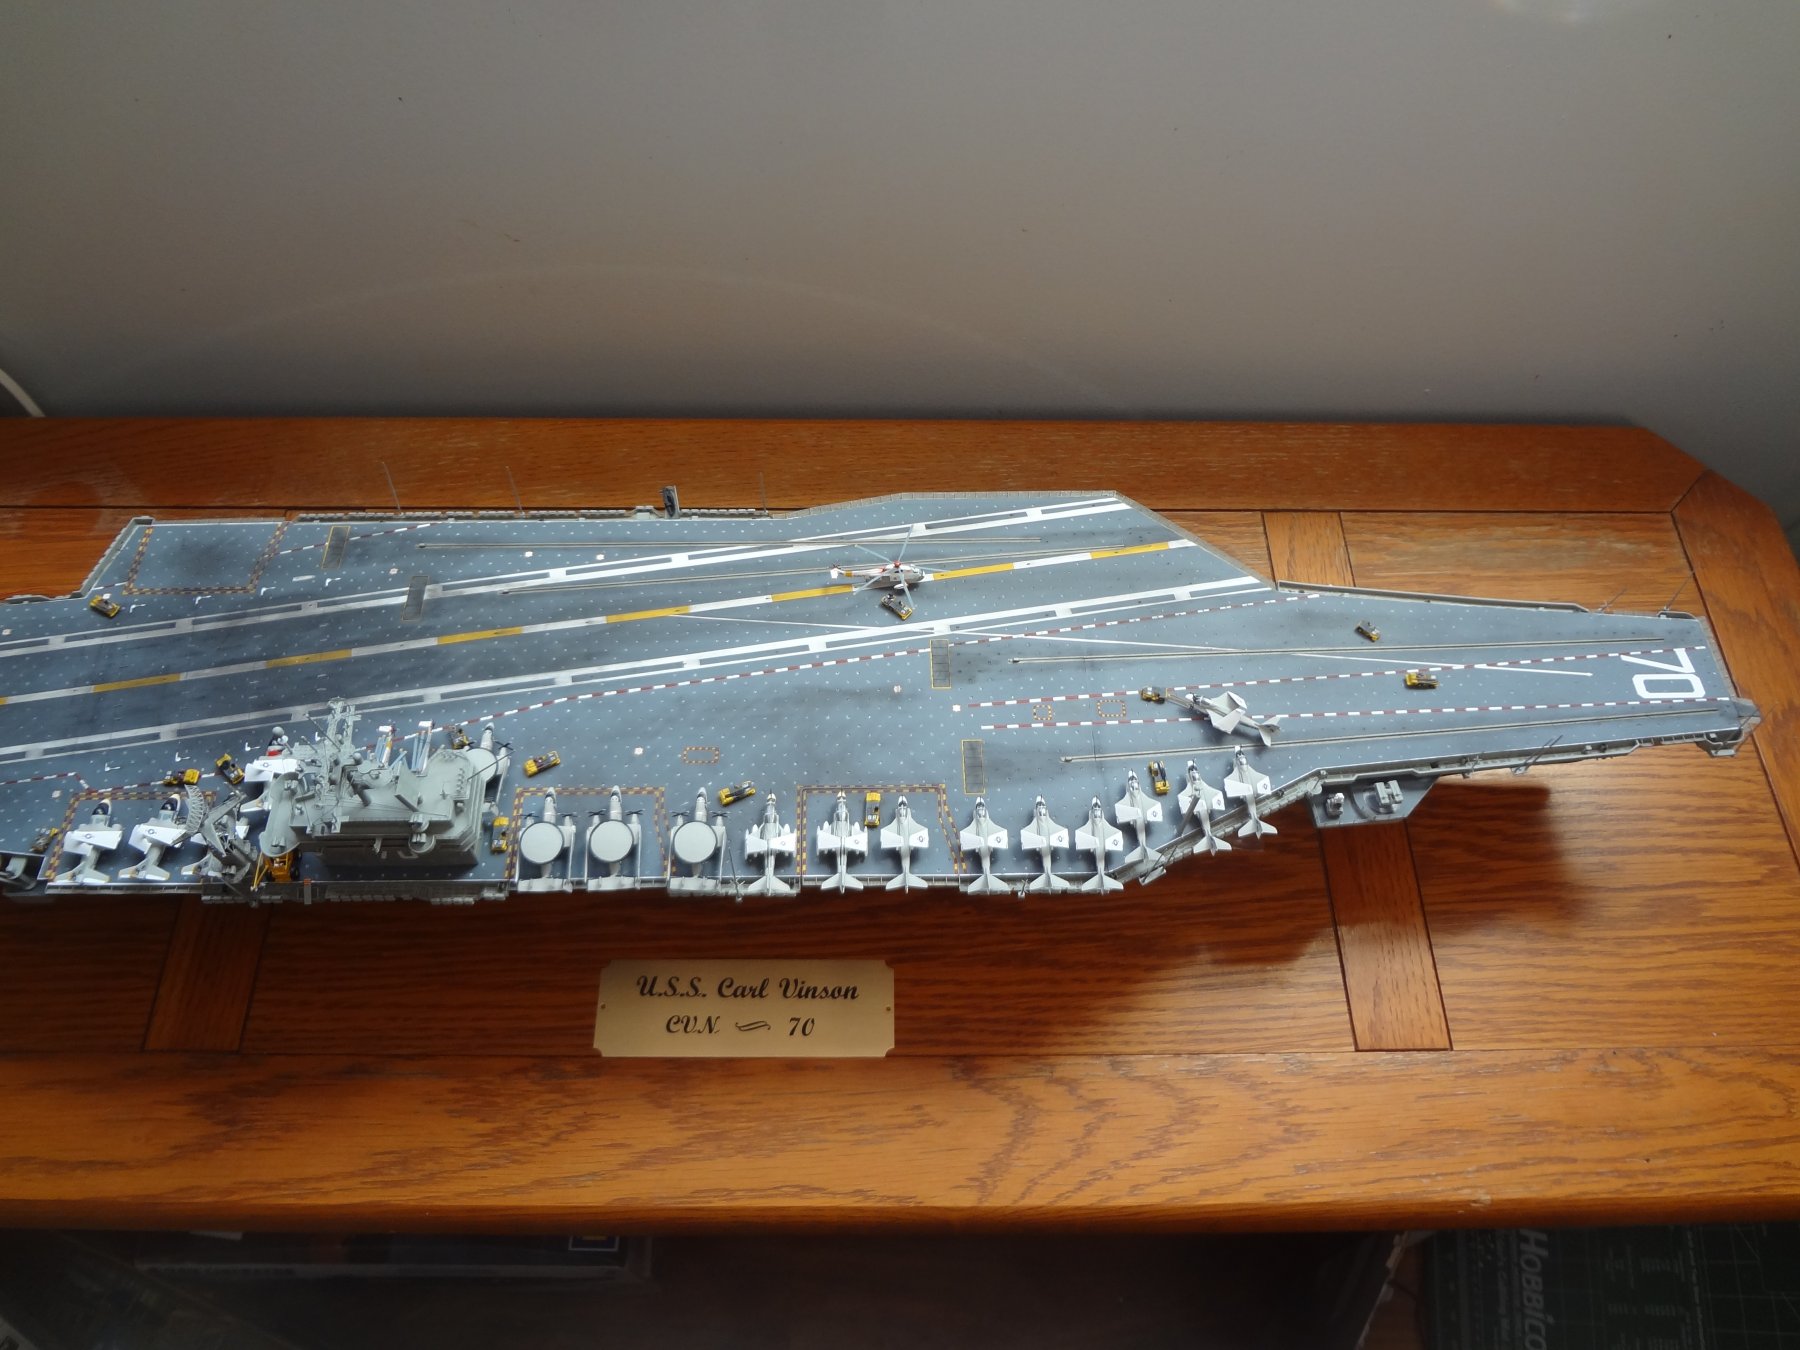
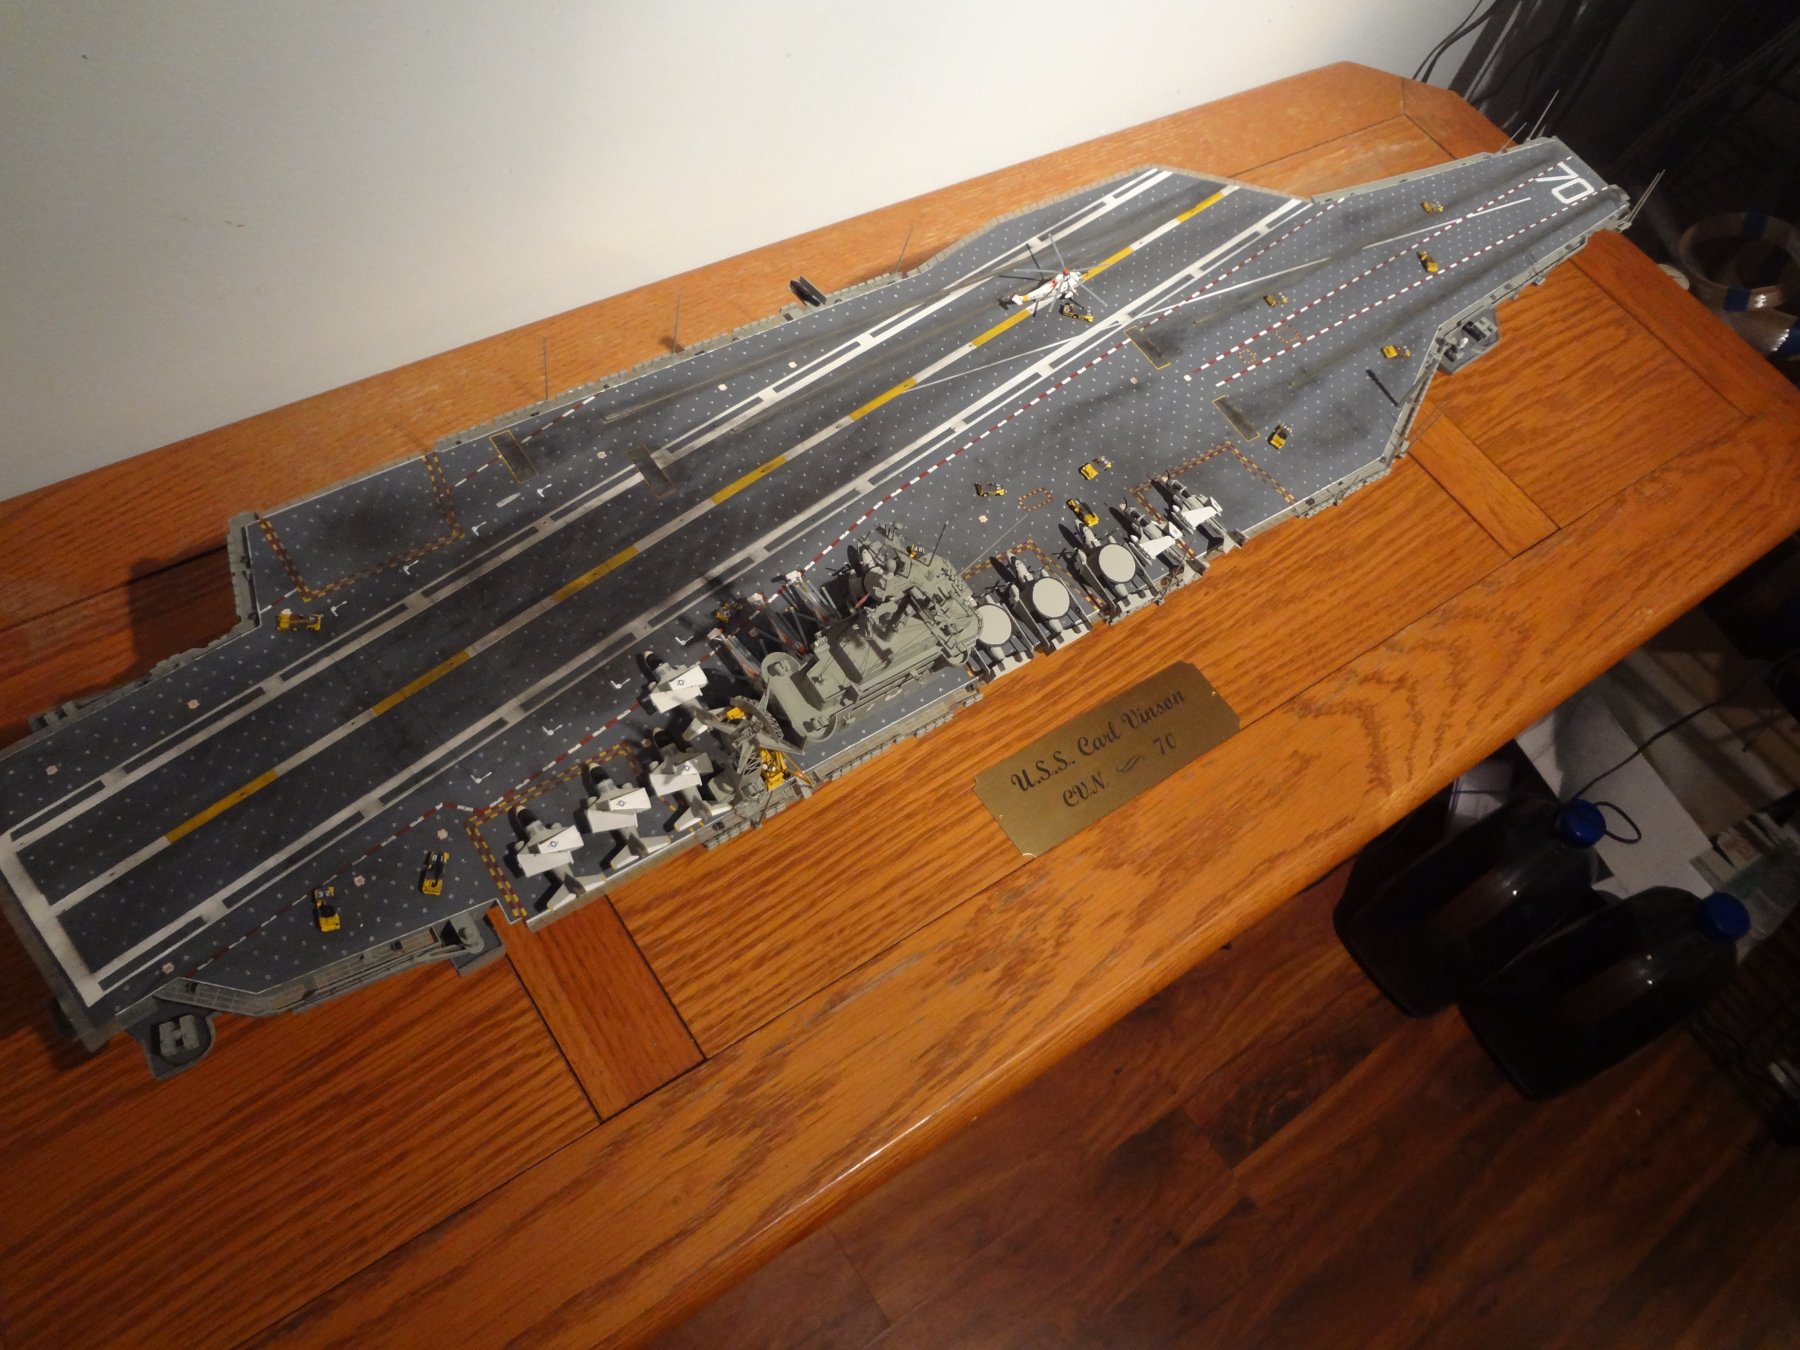
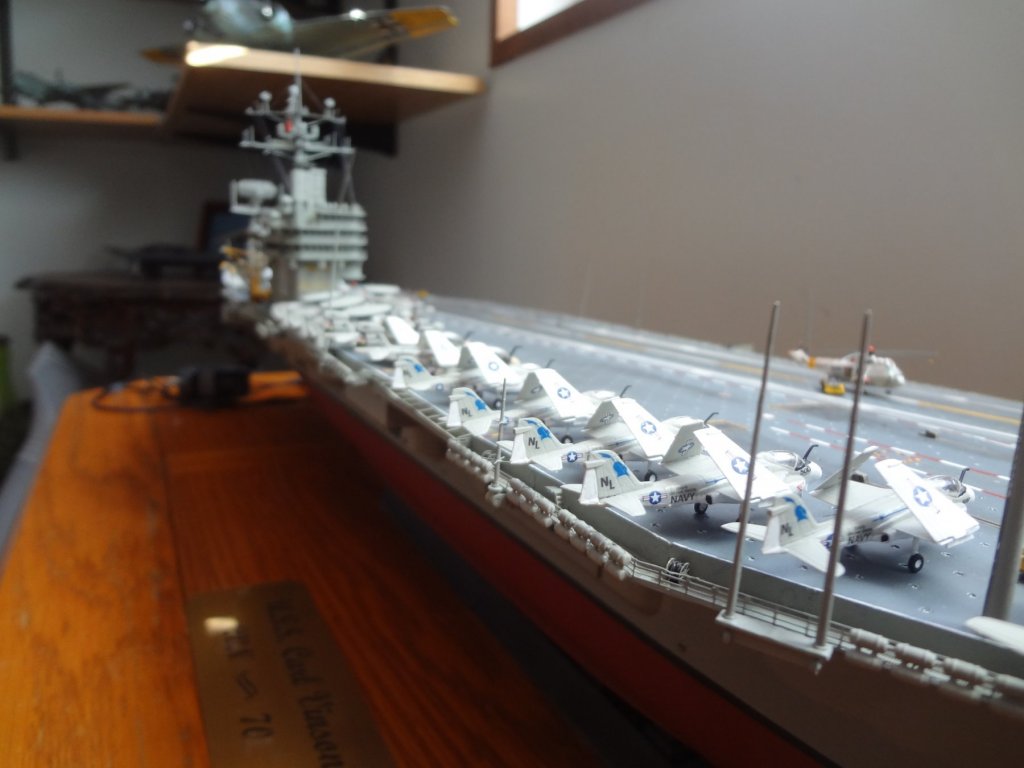
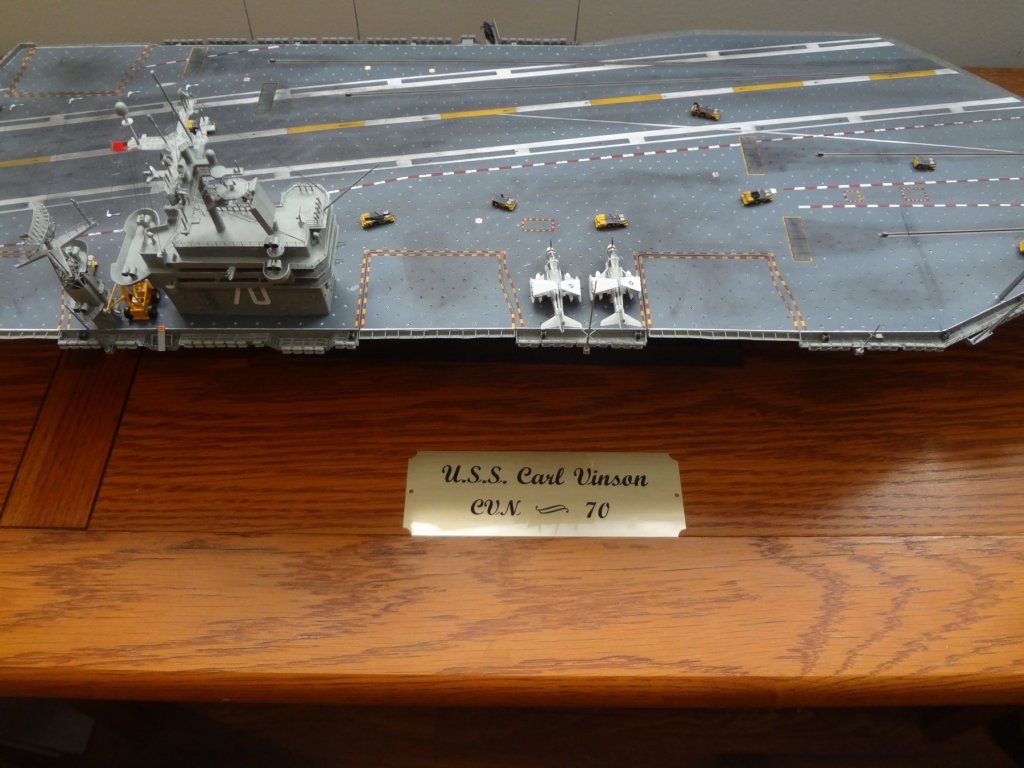
Here are the final pictures. I want to make a special note to Ron at http://www.grandpascabinets.com/model-display-kits/ His display case is awesome. The fit and finish are first class. If you ever need a display case I highly recommend him. Thanks again for following me through this project. I hope it has inspired others to not be afraid to take on a large project.
- 82 replies
-
- 15
-
-
- carl vinson
- trumpeter
- (and 2 more)
-
I have completed the F-14’s and mounted the aircraft to the flight deck. The model is complete. I am waiting for the display case to arrive. I will then attach the screws (propellers for the non-nautical folks) when I attach the model to the display case base and run the wiring. This project has been a challenge but a fun build. I would like to thank all those that followed this build over the past 9 months and all the comments, and critiques you have provided. Build time for this has been 777 hours. Started it on April 23, 2017 and finished January 21, 2018. The display case is on its way and should be here this week. I will post final pictures next weekend. I hope you all have enjoyed this build.
- 82 replies
-
- 7
-
-
- carl vinson
- trumpeter
- (and 2 more)
-
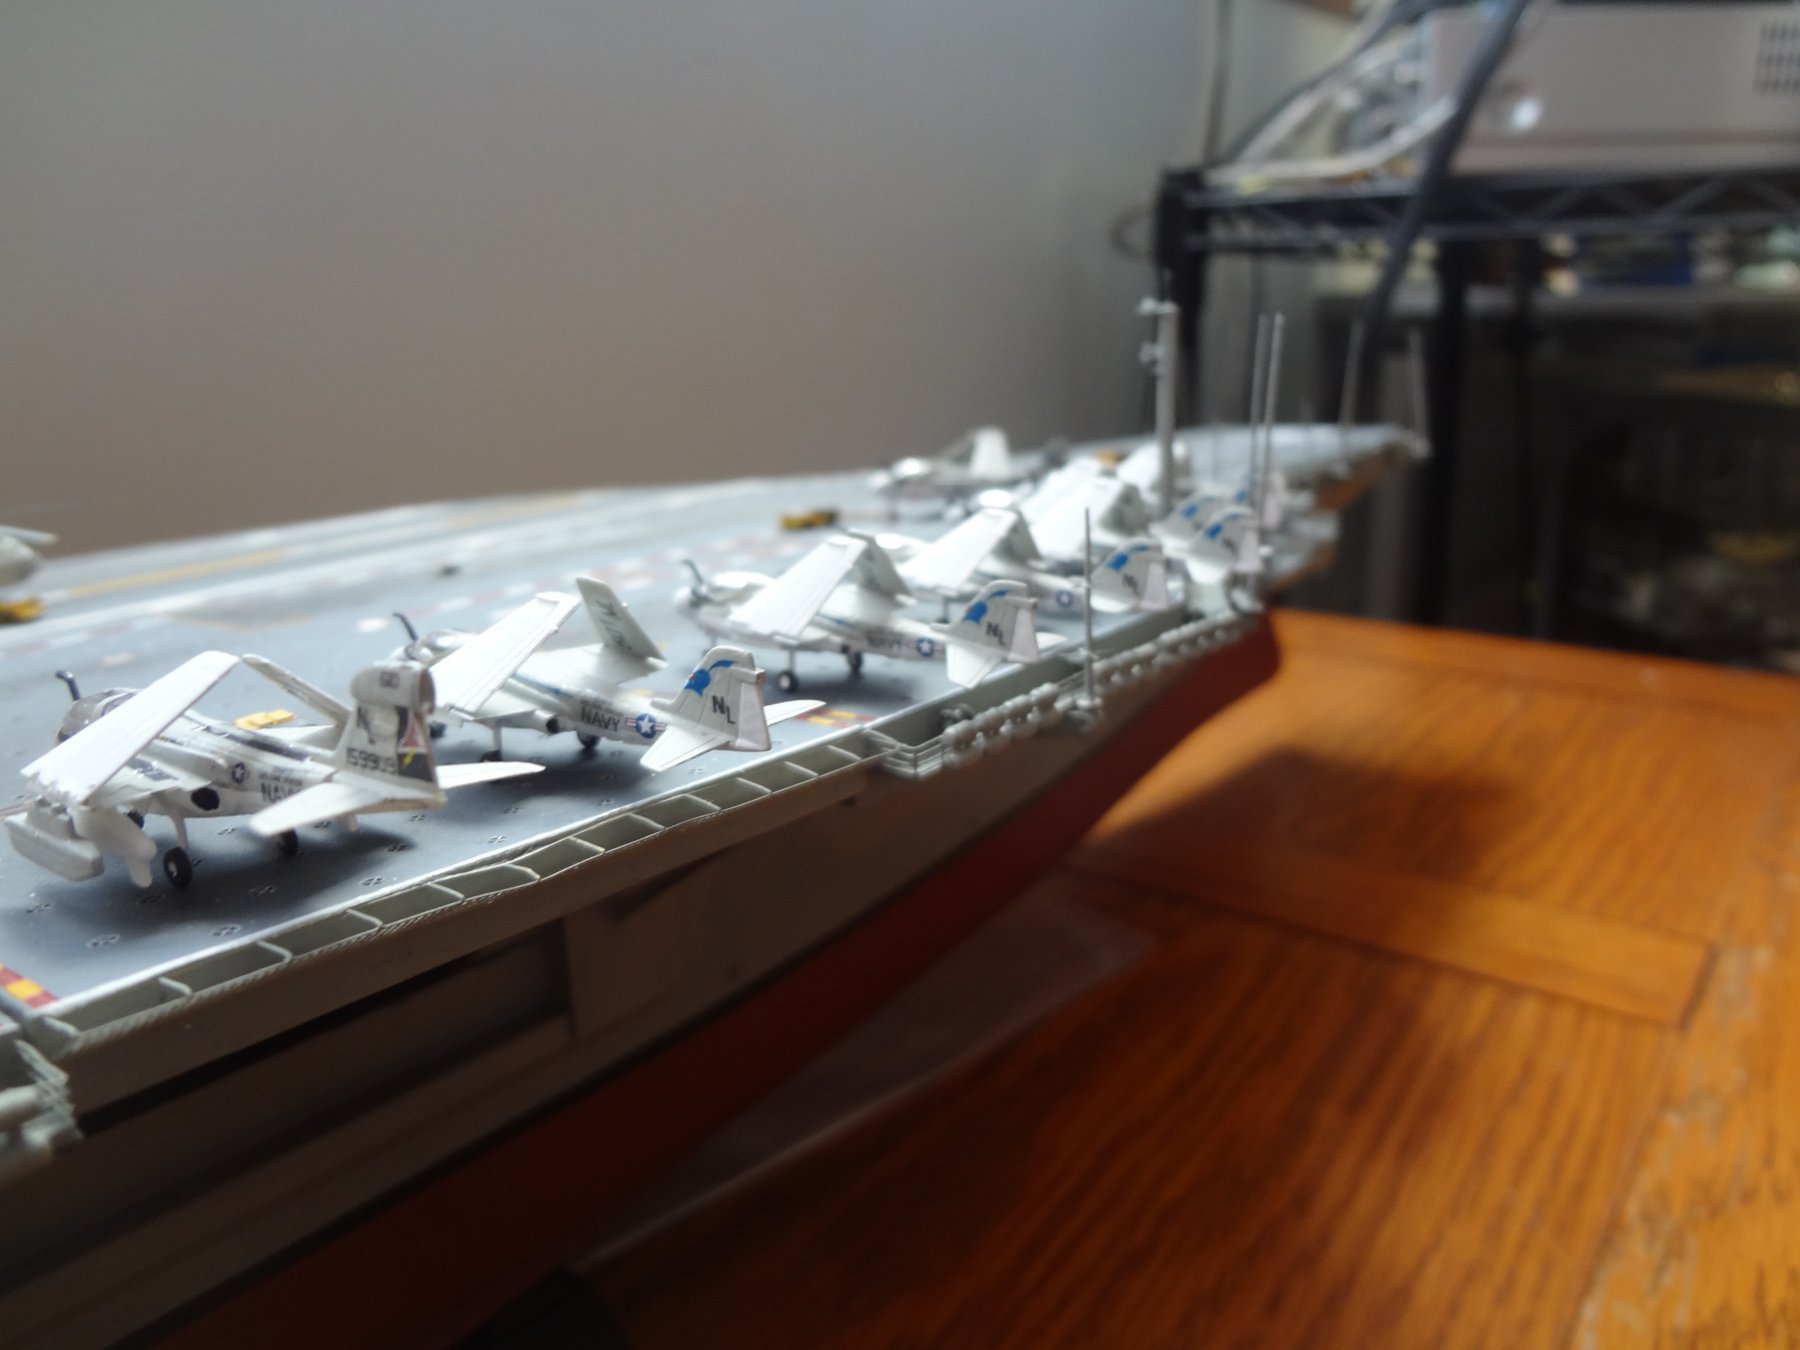
As I head down the final stretch of this long detailed build, The A-7E's from VA-105 and VA-37 are done and sitting on the bow. All that is left to do is the F-14's from VF-51 and VF-111. Here are the pictures:
- 82 replies
-
- 6
-
-
- carl vinson
- trumpeter
- (and 2 more)
-
The A-6E's are completed and now on the flight deck. Starting the A-7E's. Just have 16 of the A-7E's and 16 of the F-14's left to do. I was hoping to finish by today but doing 1/350 scale aircraft is a longer process than I estimated. Just hit 712 hours into this project and estimate about 40 more hours to go to complete. Here are the pictures of the A-6E's on deck.


- 82 replies
-
- 8
-
-
- carl vinson
- trumpeter
- (and 2 more)
-
I use an HP4520 and Adobe Photoshop for my decals. I also print at 1200dpi and use Hi-Res photo mode and satin photo paper mode. Glossy paper mode seems to bleed the ink on the decal film. The higher DPI the less transparent the ink is on the decal film.
- 82 replies
-
- 4
-
-
- carl vinson
- trumpeter
- (and 2 more)
-
What printer are you using? I had issues using an Epson due to the ink. I am using an HP printer now. There is some minor transparency but not as bad as the Epson. Also when making decals on a dark surface I trim out a white base and put the clear on top.
- 82 replies
-
- 3
-
-
- carl vinson
- trumpeter
- (and 2 more)
-
STUDIO DESIGNS Graphix II Workstation, 53.75"W x 31.25"D x 27" - 38.75"H White/Gray 10210 https://www.amazon.com/STUDIO-DESIGNS-Graphix-Workstation-53-75/dp/B00EO93X52?pd_rd_wg=0FK0p&pd_rd_r=6b7e423c-4b27-4a4a-babc-311f83acfd0d&pd_rd_w=TPt5H&ref_=pd_gw_simh&pf_rd_r=9AXJQE1PH2HT81HRBW9F&pf_rd_p=b841581f-e864-5164-afa6-4c18a8348879
- 82 replies
-
- 5
-
-
- carl vinson
- trumpeter
- (and 2 more)
-
As promised, Here are pictures of the new work bench. I had a small wooden drafting/hobby desk. Worked great for about 10 years. For Christmas my Wife bought me a new one. It's 35% larger surface area and steel supports so it is very stable. Used it the first time last night working on 1/350 A-6E's for my Vinson project. Here is what I used for 10+ years: Here are pictures of my new one. I like the tray in front. Very handy. Here is one of the new large Xacto self-healing mats: And here is it in use: Now plenty of room to build:
- 82 replies
-
- 9
-
-
- carl vinson
- trumpeter
- (and 2 more)
-
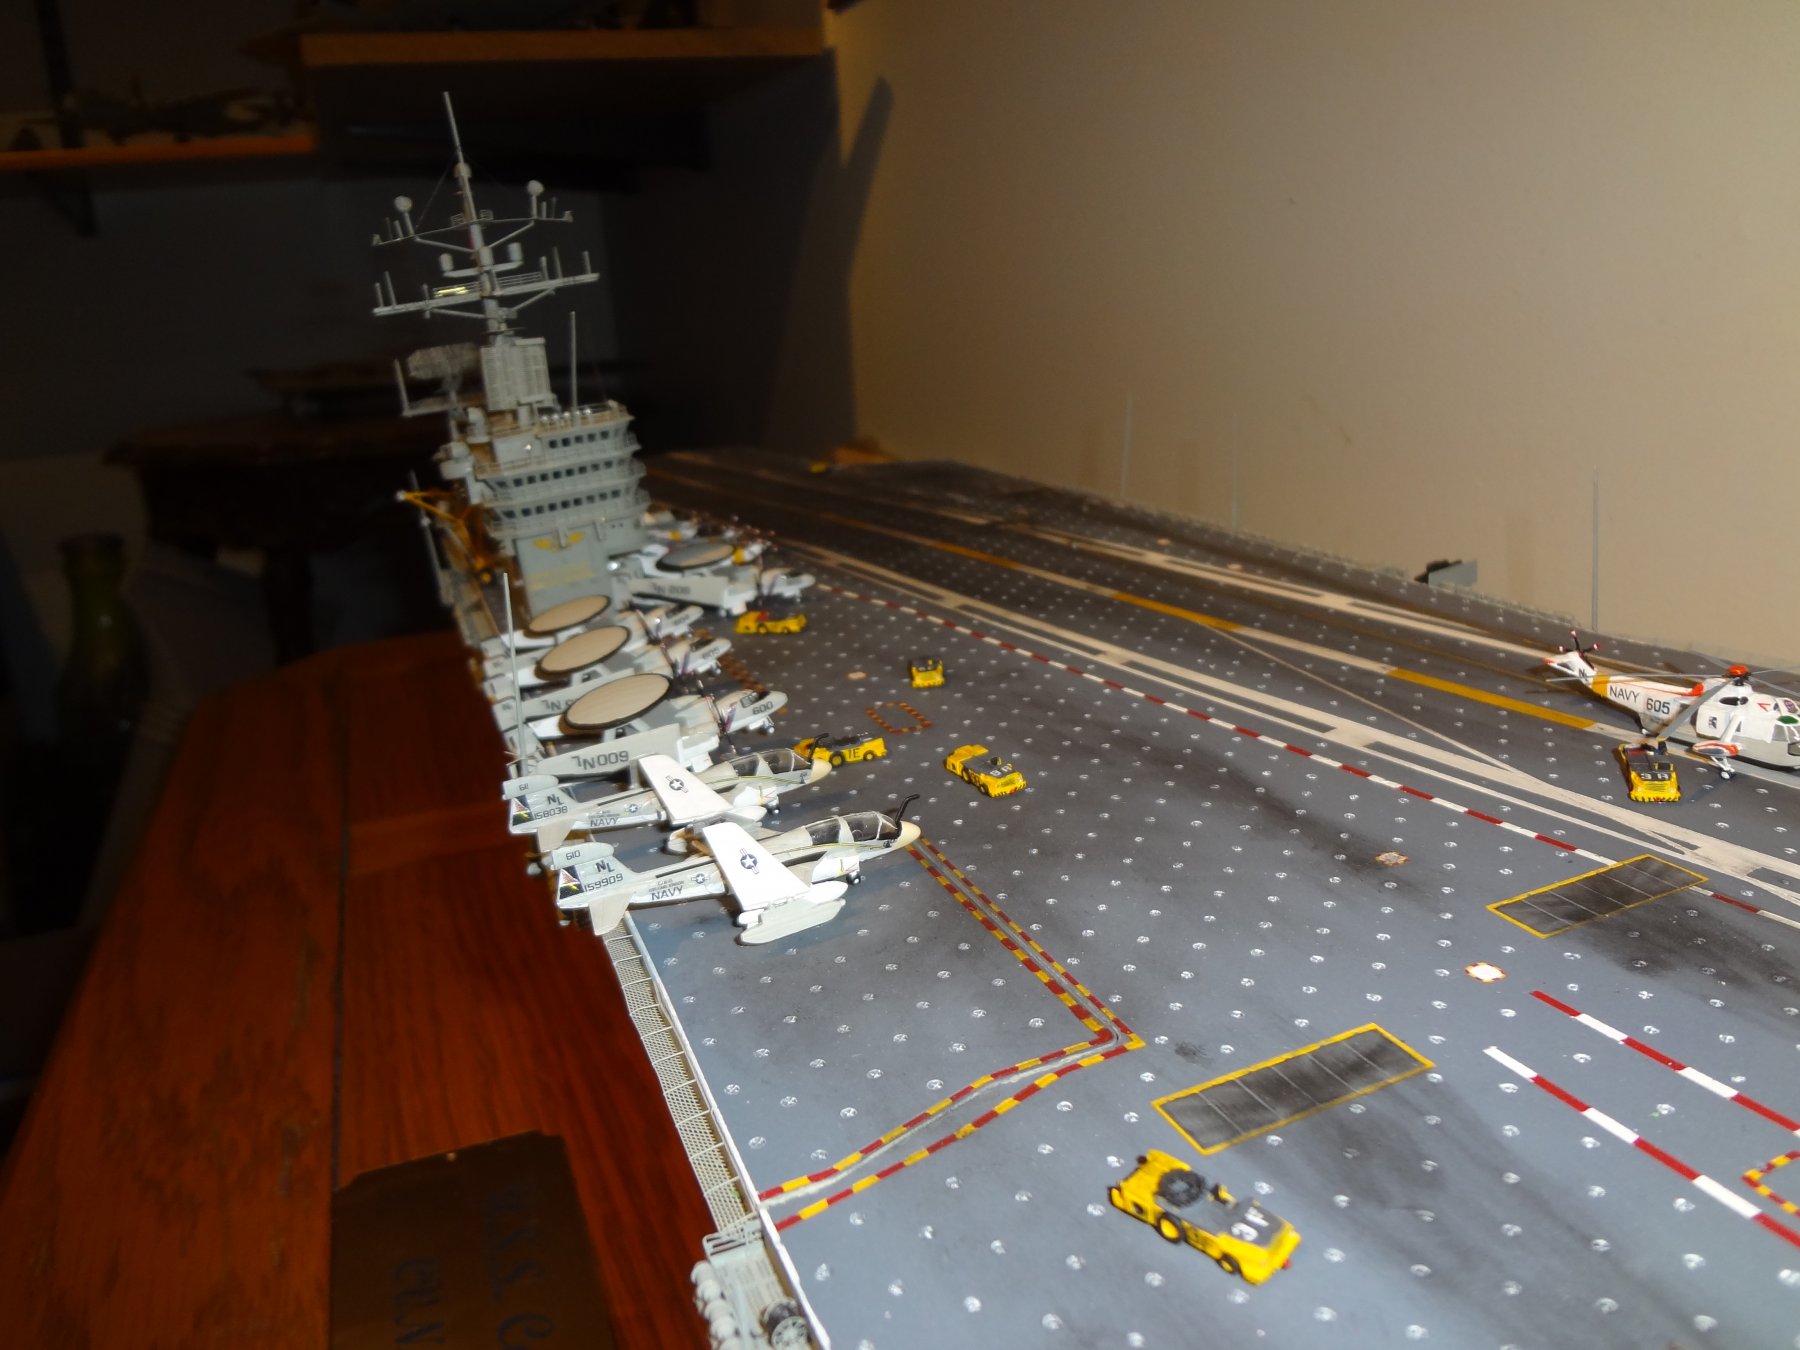
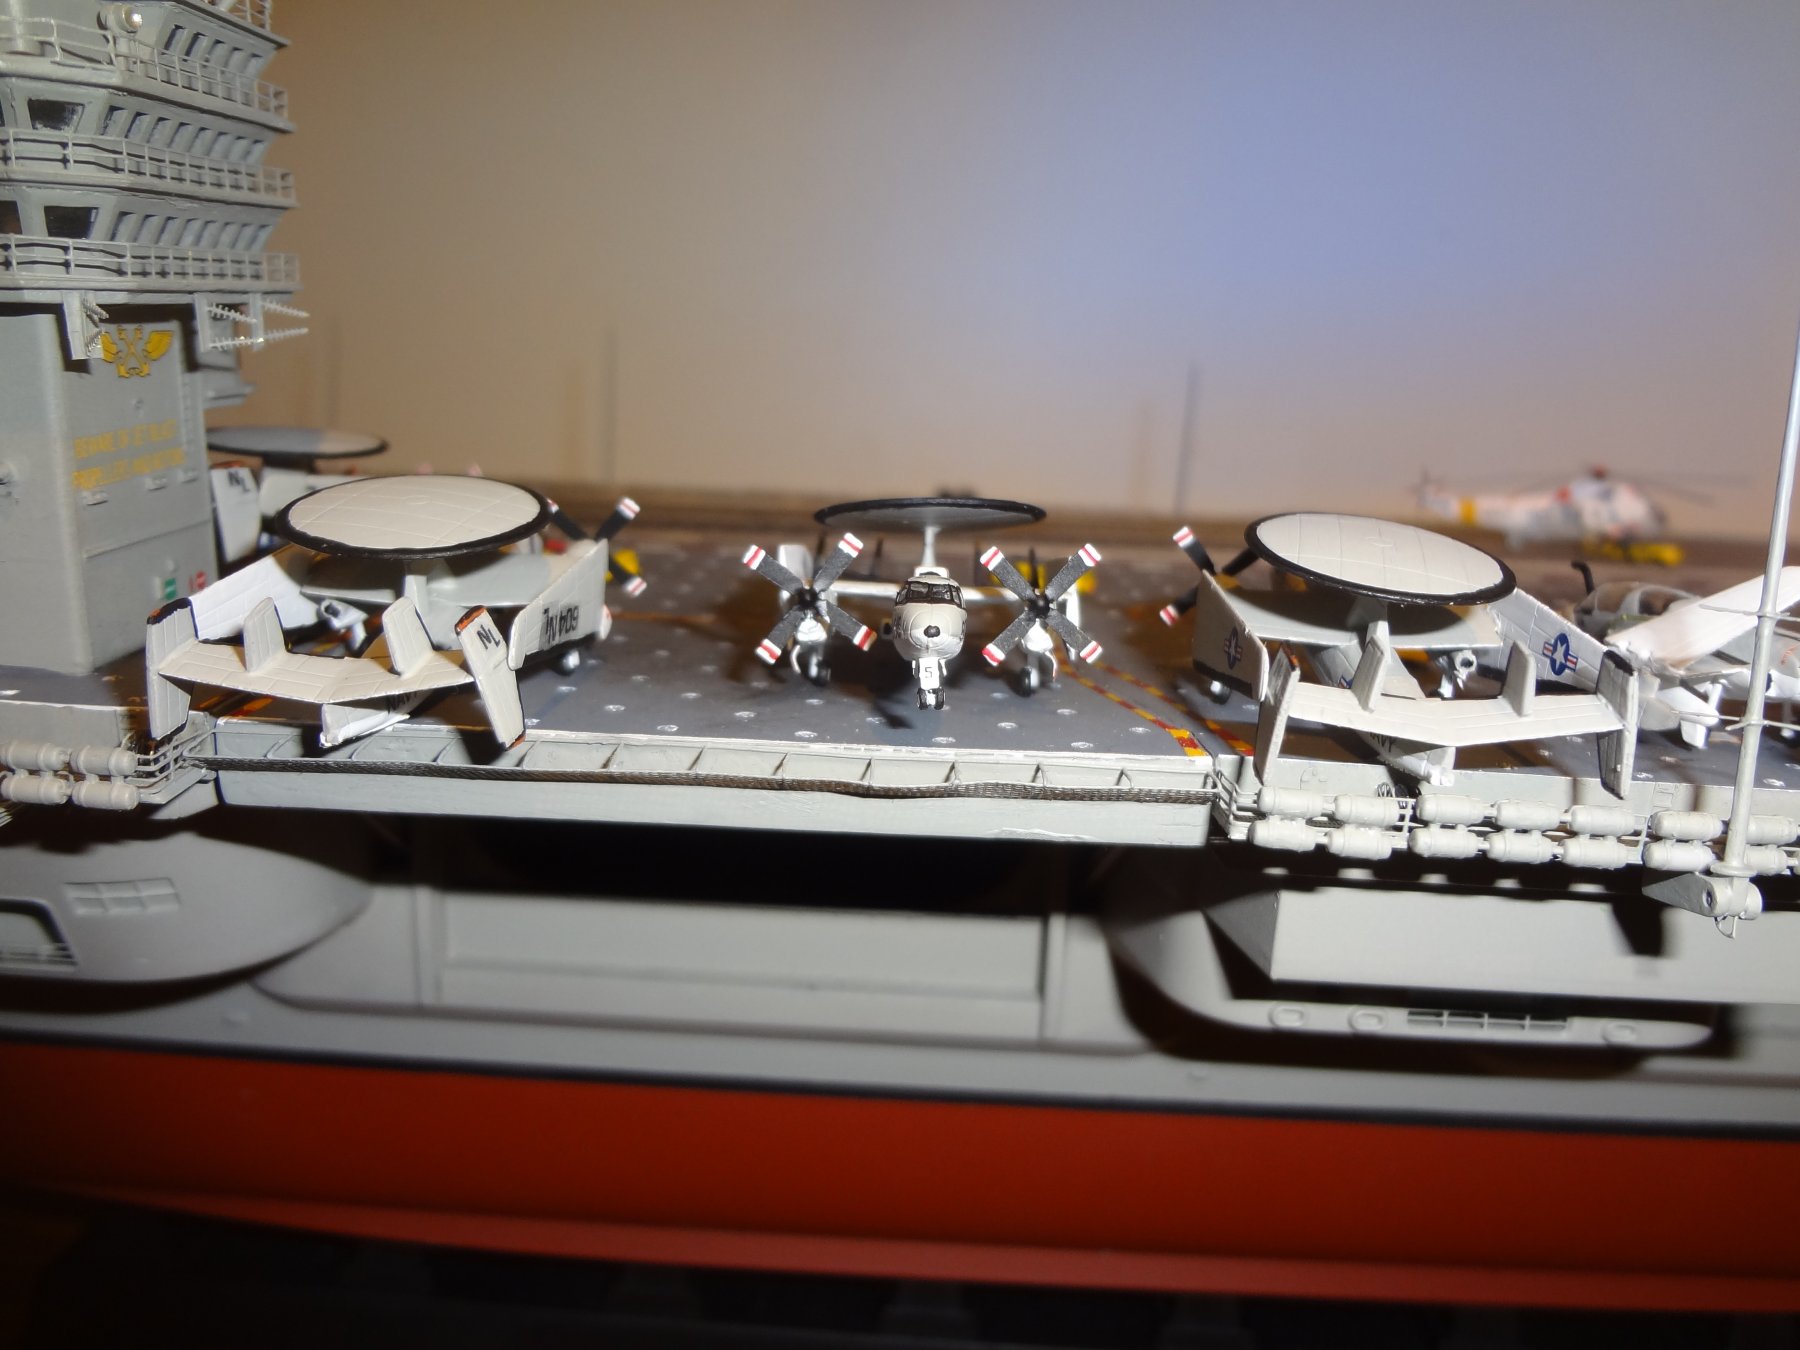
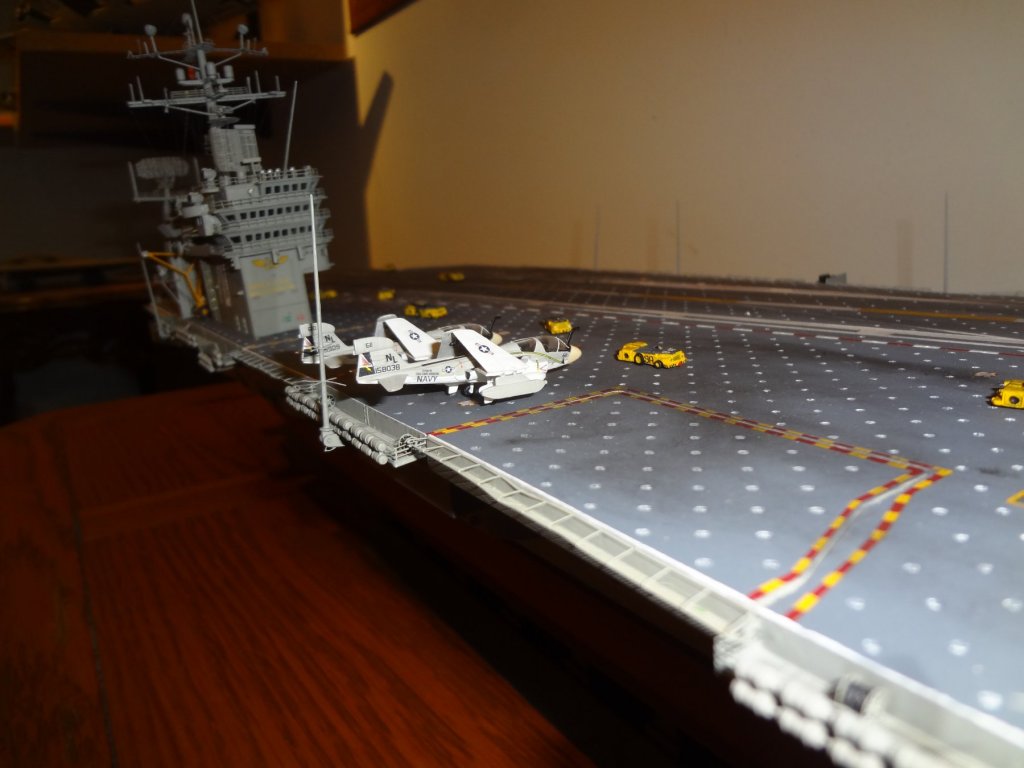
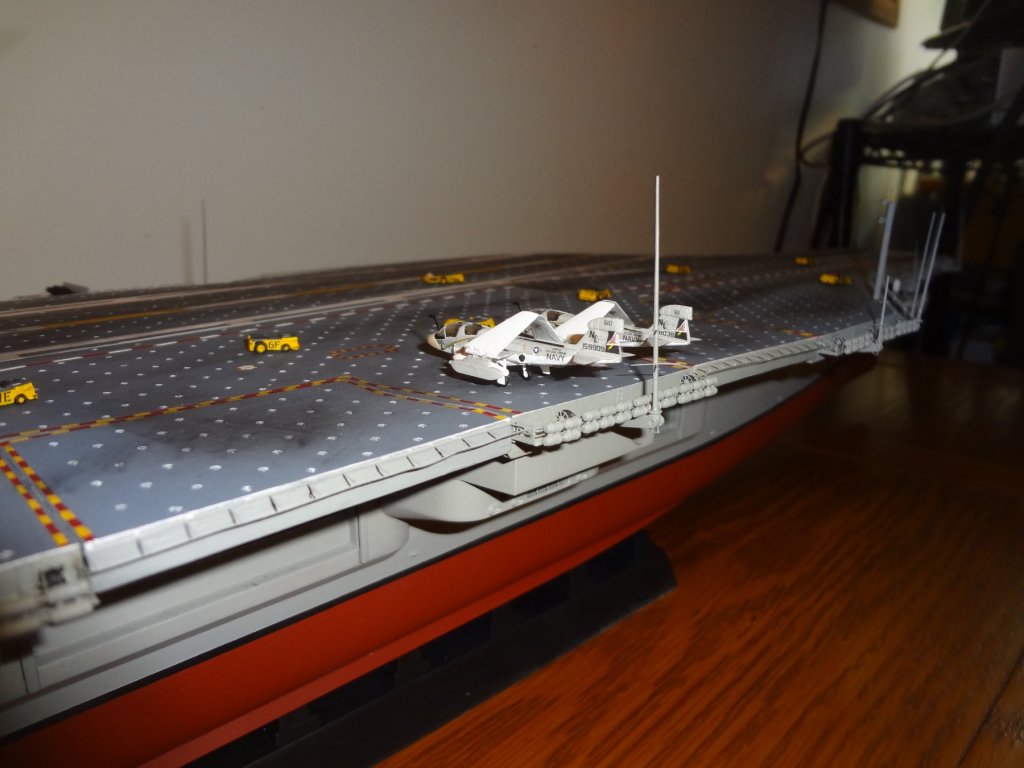
Little late on latest update. Between Christmas and a minor health issue I am hoping to get back to the rest of the aircraft. Here are the E-2C's from VAW-114 on the flight deck. I will be starting on the A-6E's next after I set up my new work bench that my awesome loving Wife got me for Christmas. (Pictures will be posted later) Now on to the E-2C pictures:


- 82 replies
-
- 8
-
-
- carl vinson
- trumpeter
- (and 2 more)
-
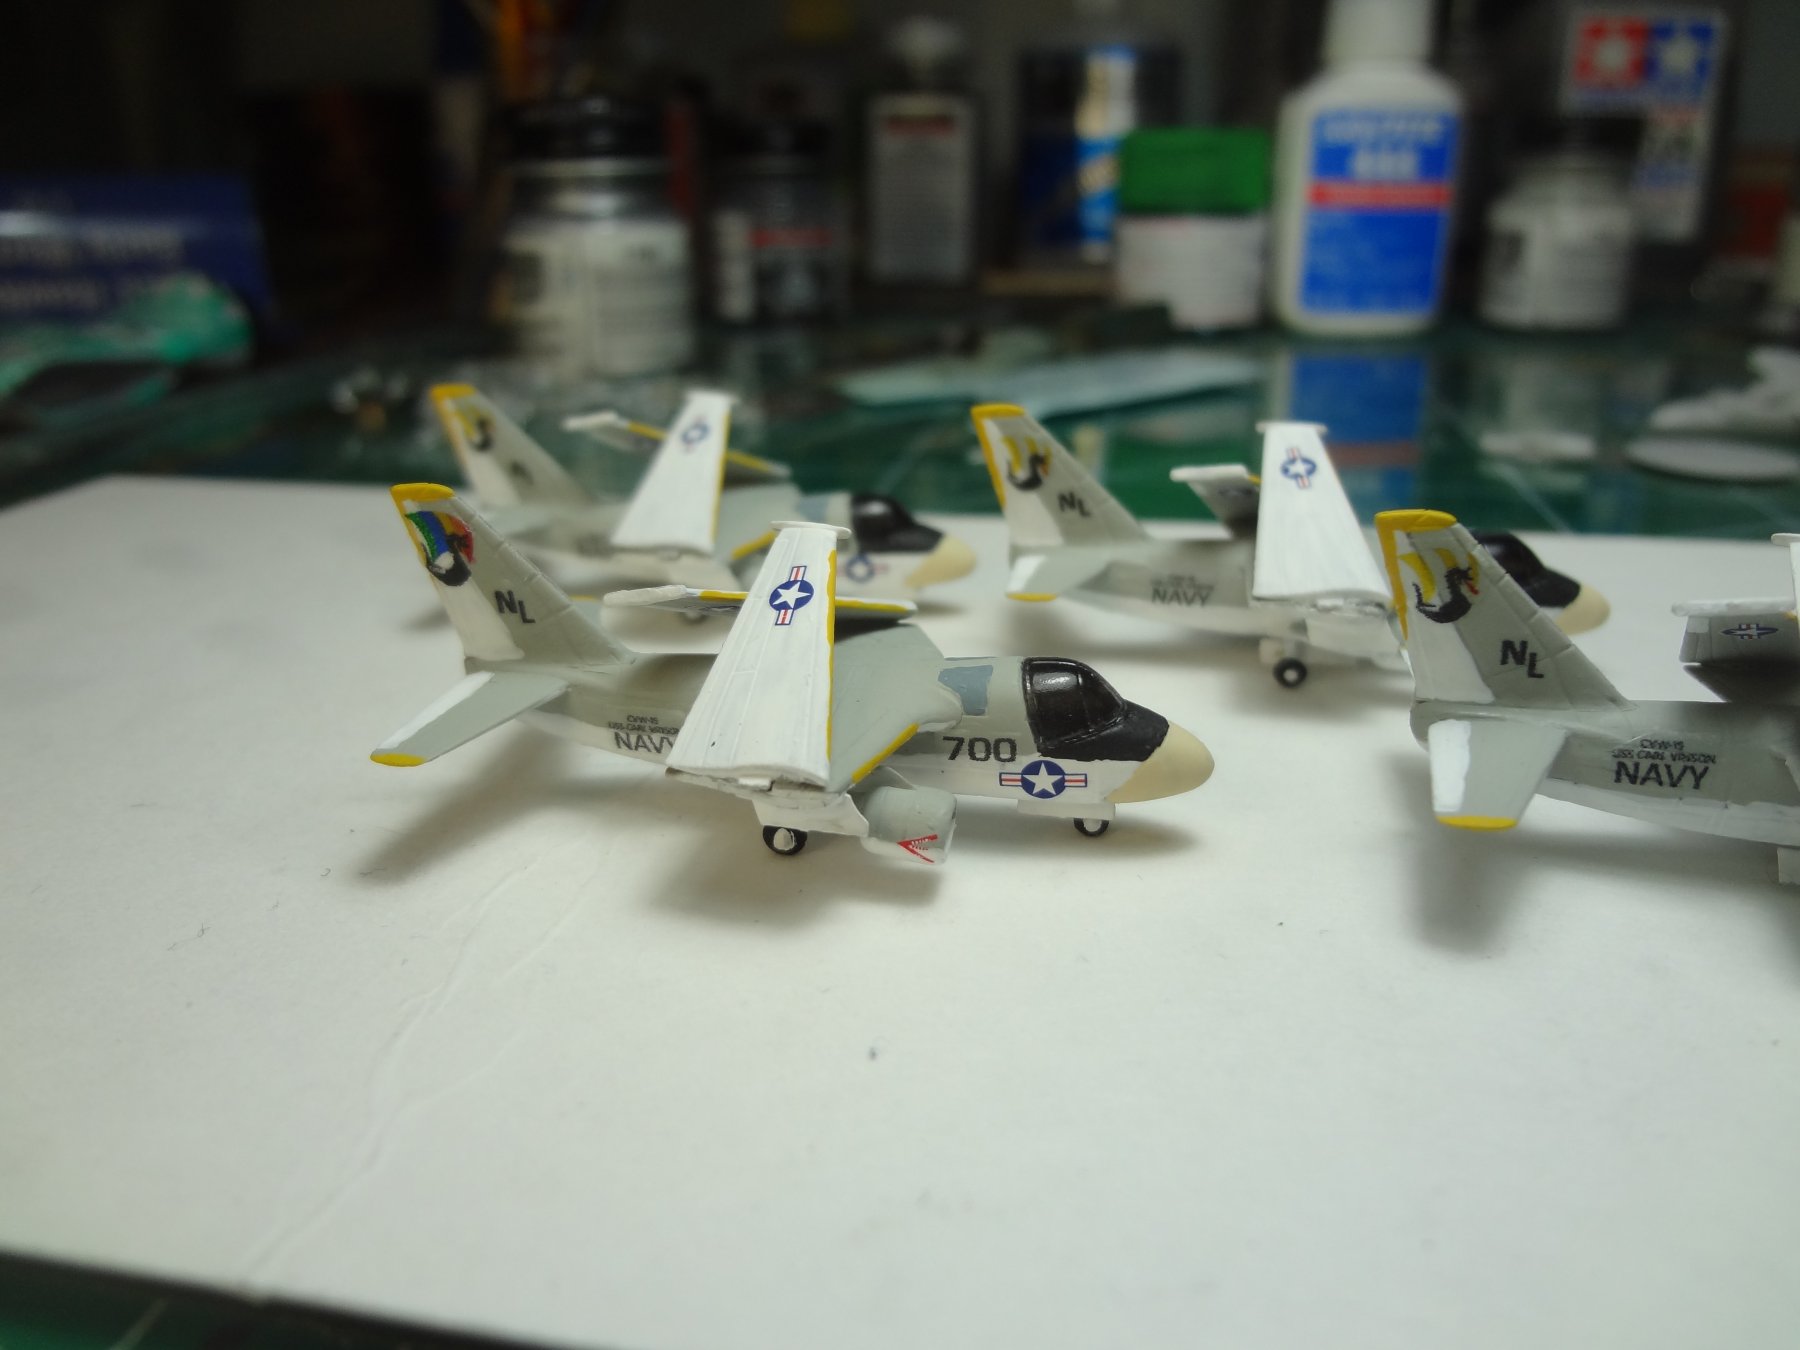
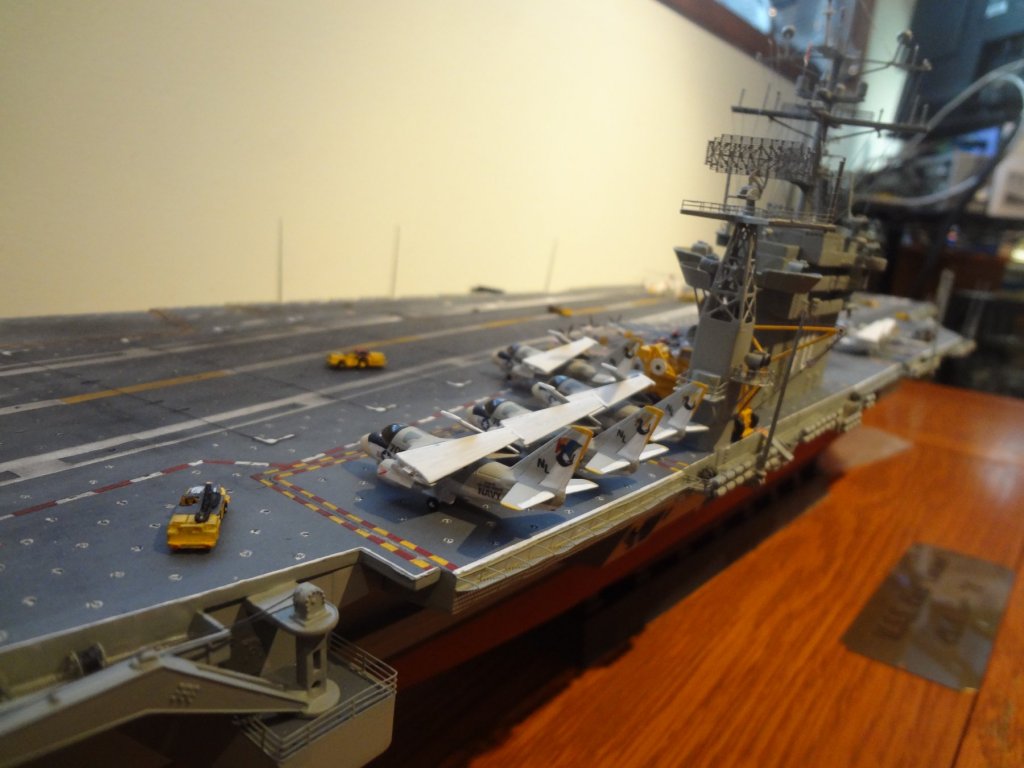
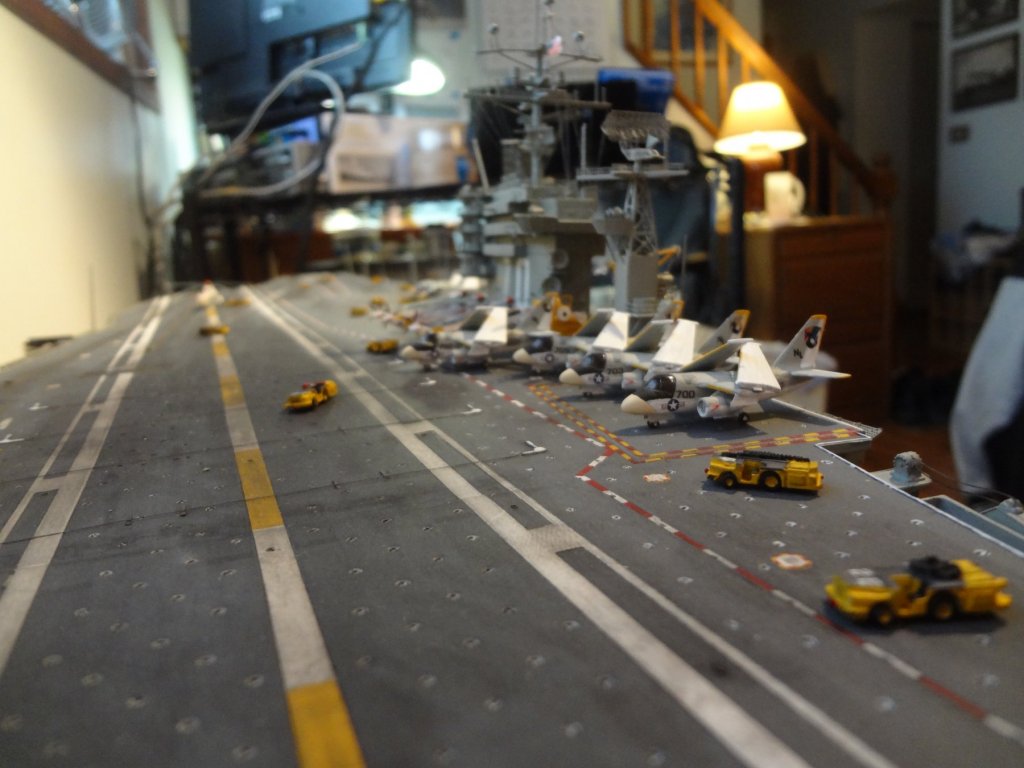
The S-3A's for the flight deck are now complete. Working on the E-2C's now. They are built just need to paint and decal them this weekend.

- 82 replies
-
- 9
-
-
- carl vinson
- trumpeter
- (and 2 more)
-
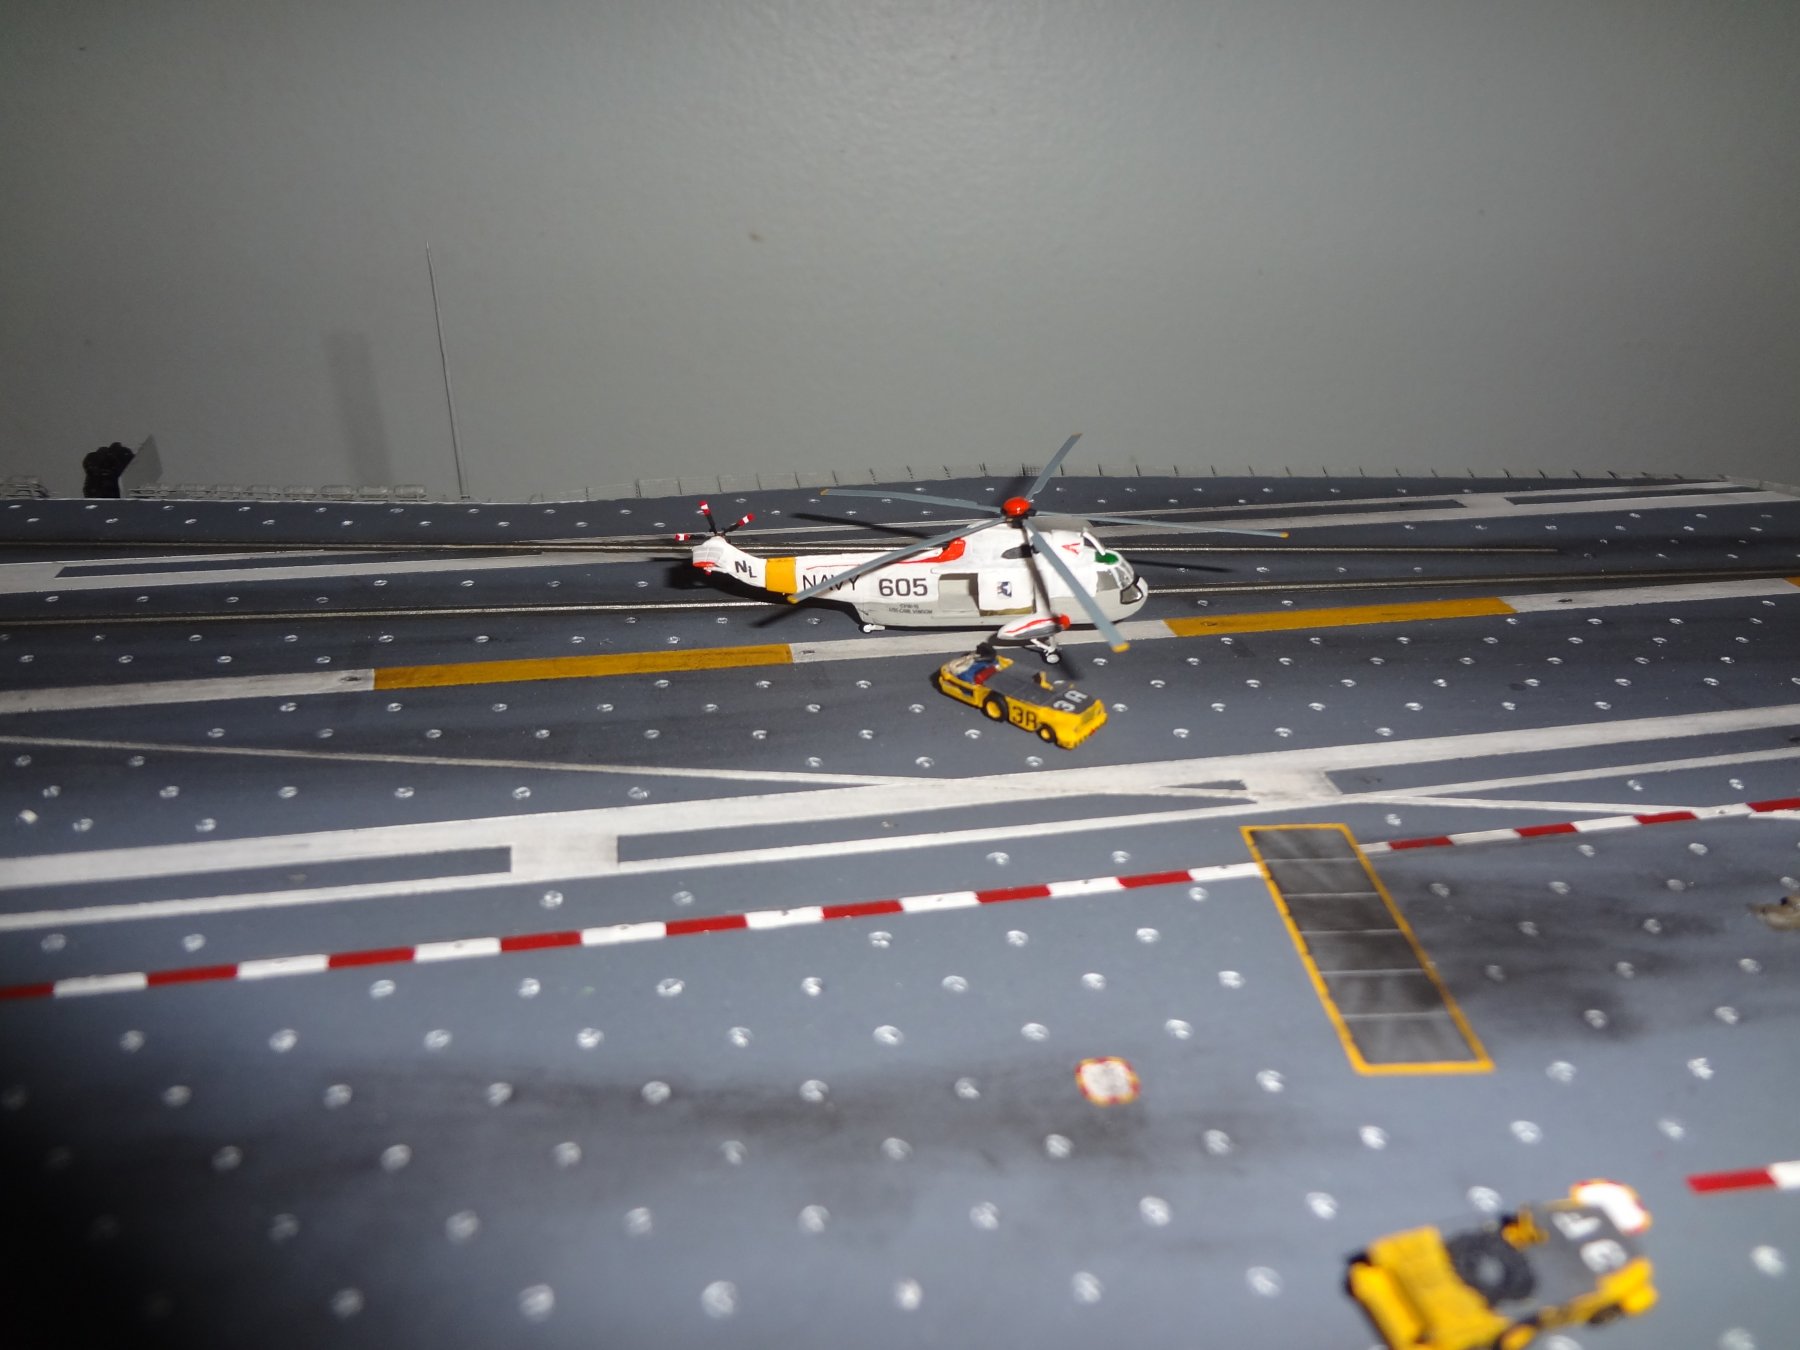
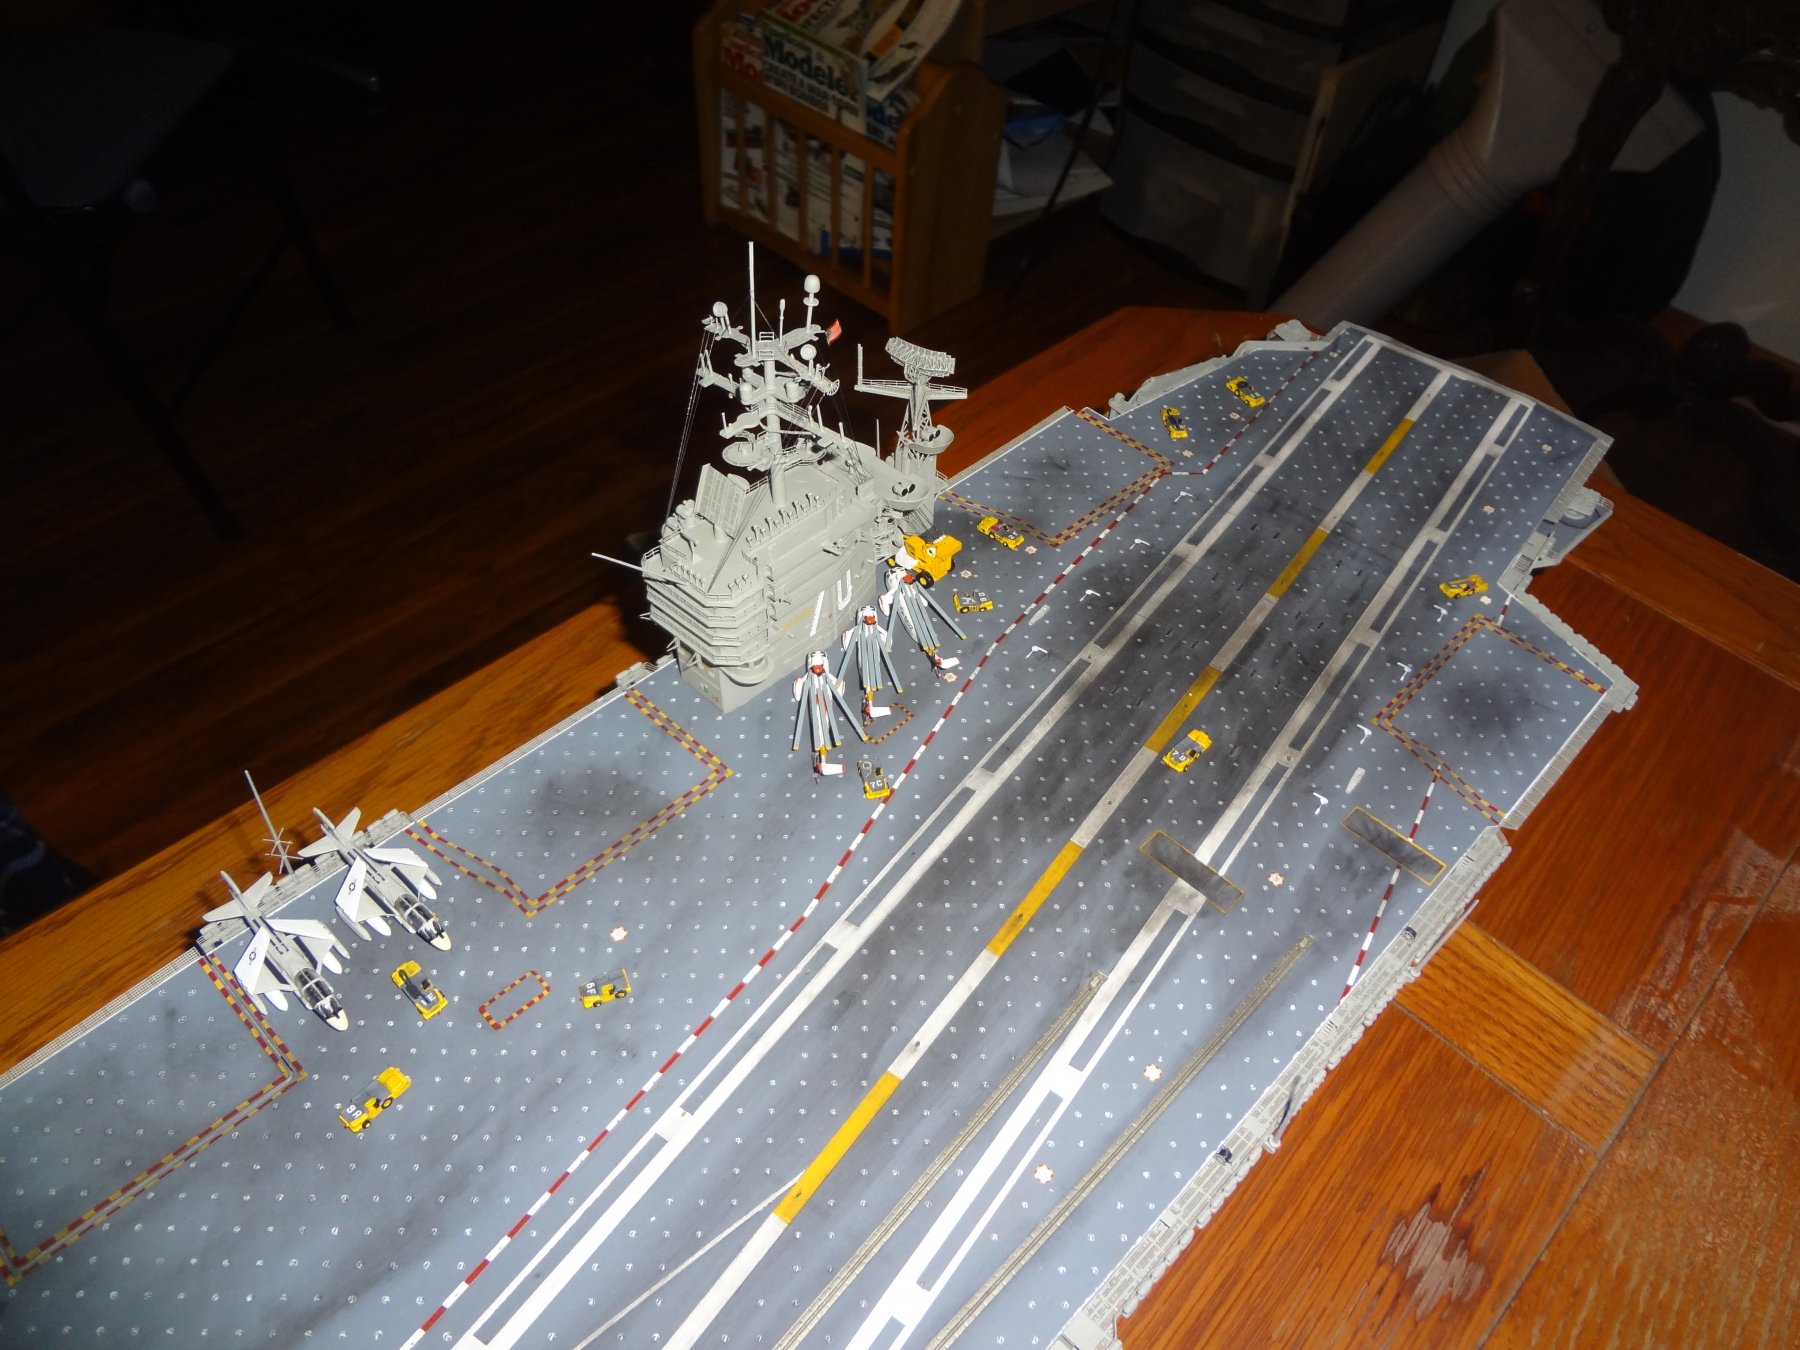
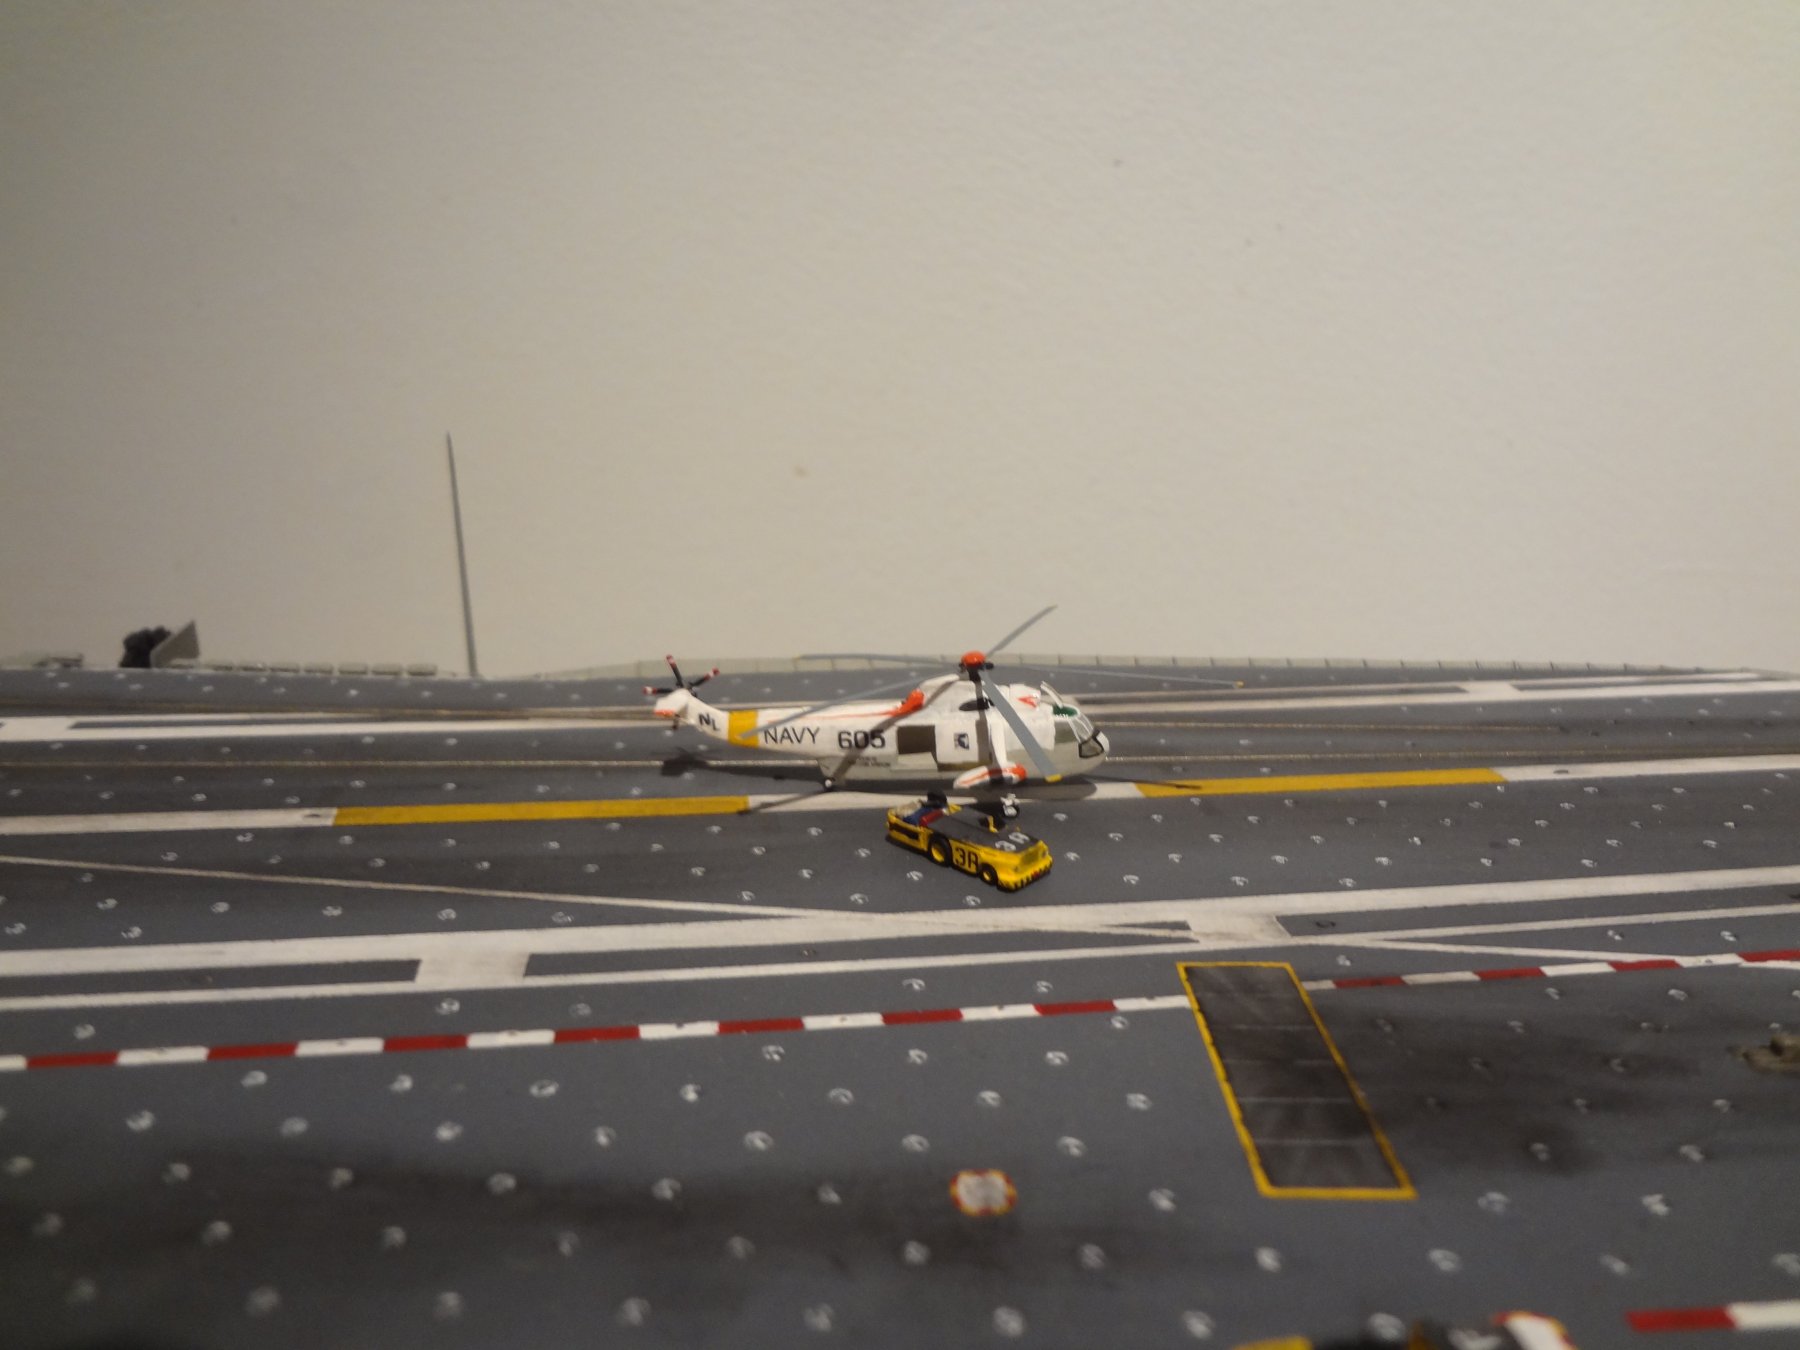
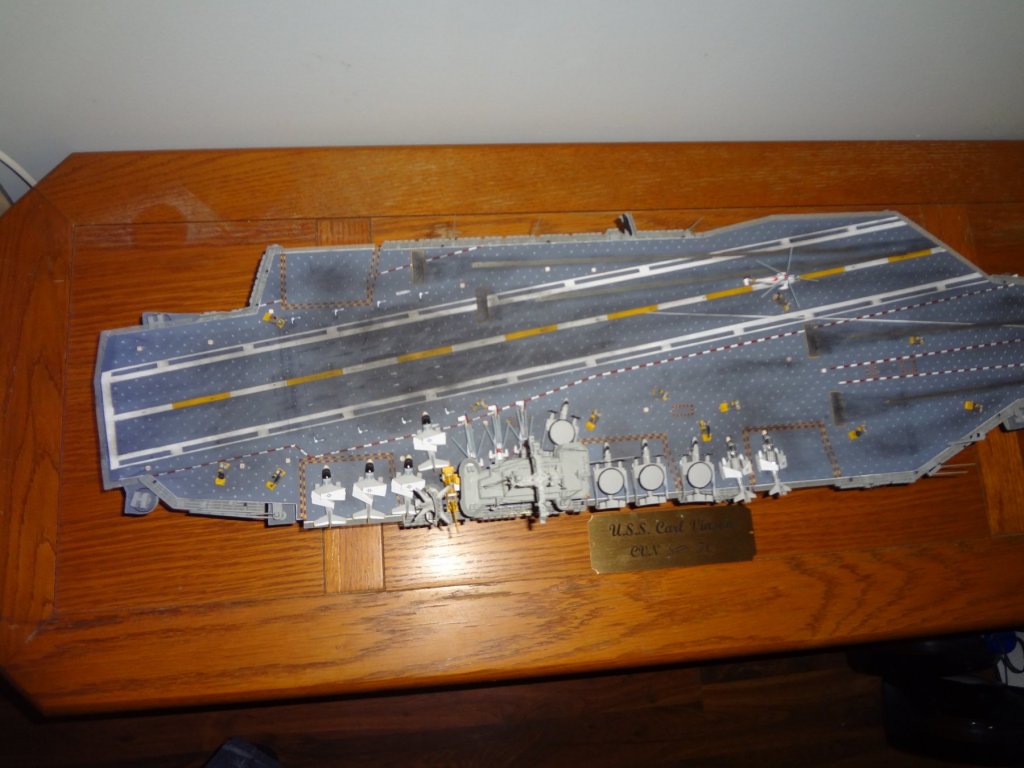
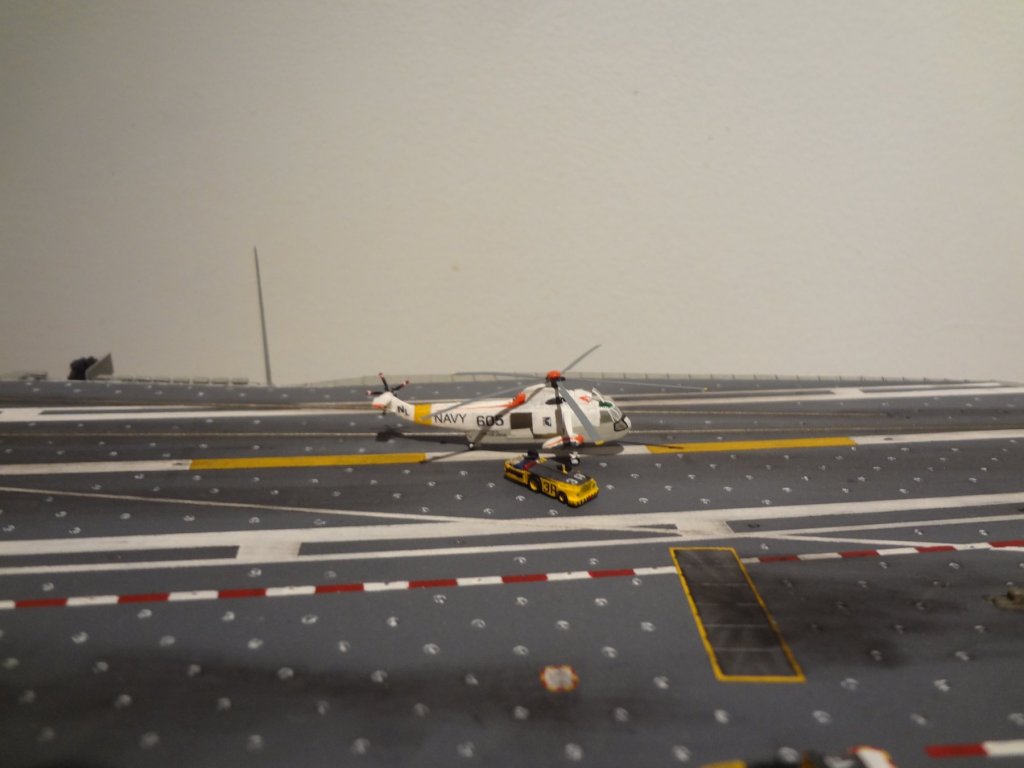
Work is progressing on filling the flight deck. The EA-6B's and the SH-3's are done. So there are only 48 more aircraft to do. I also received the brass plaque which will be mounted on the base of the display case. The final position of the aircraft will be done after all of them are built. Here are the latest pictures:


- 82 replies
-
- 10
-
-
- carl vinson
- trumpeter
- (and 2 more)
-
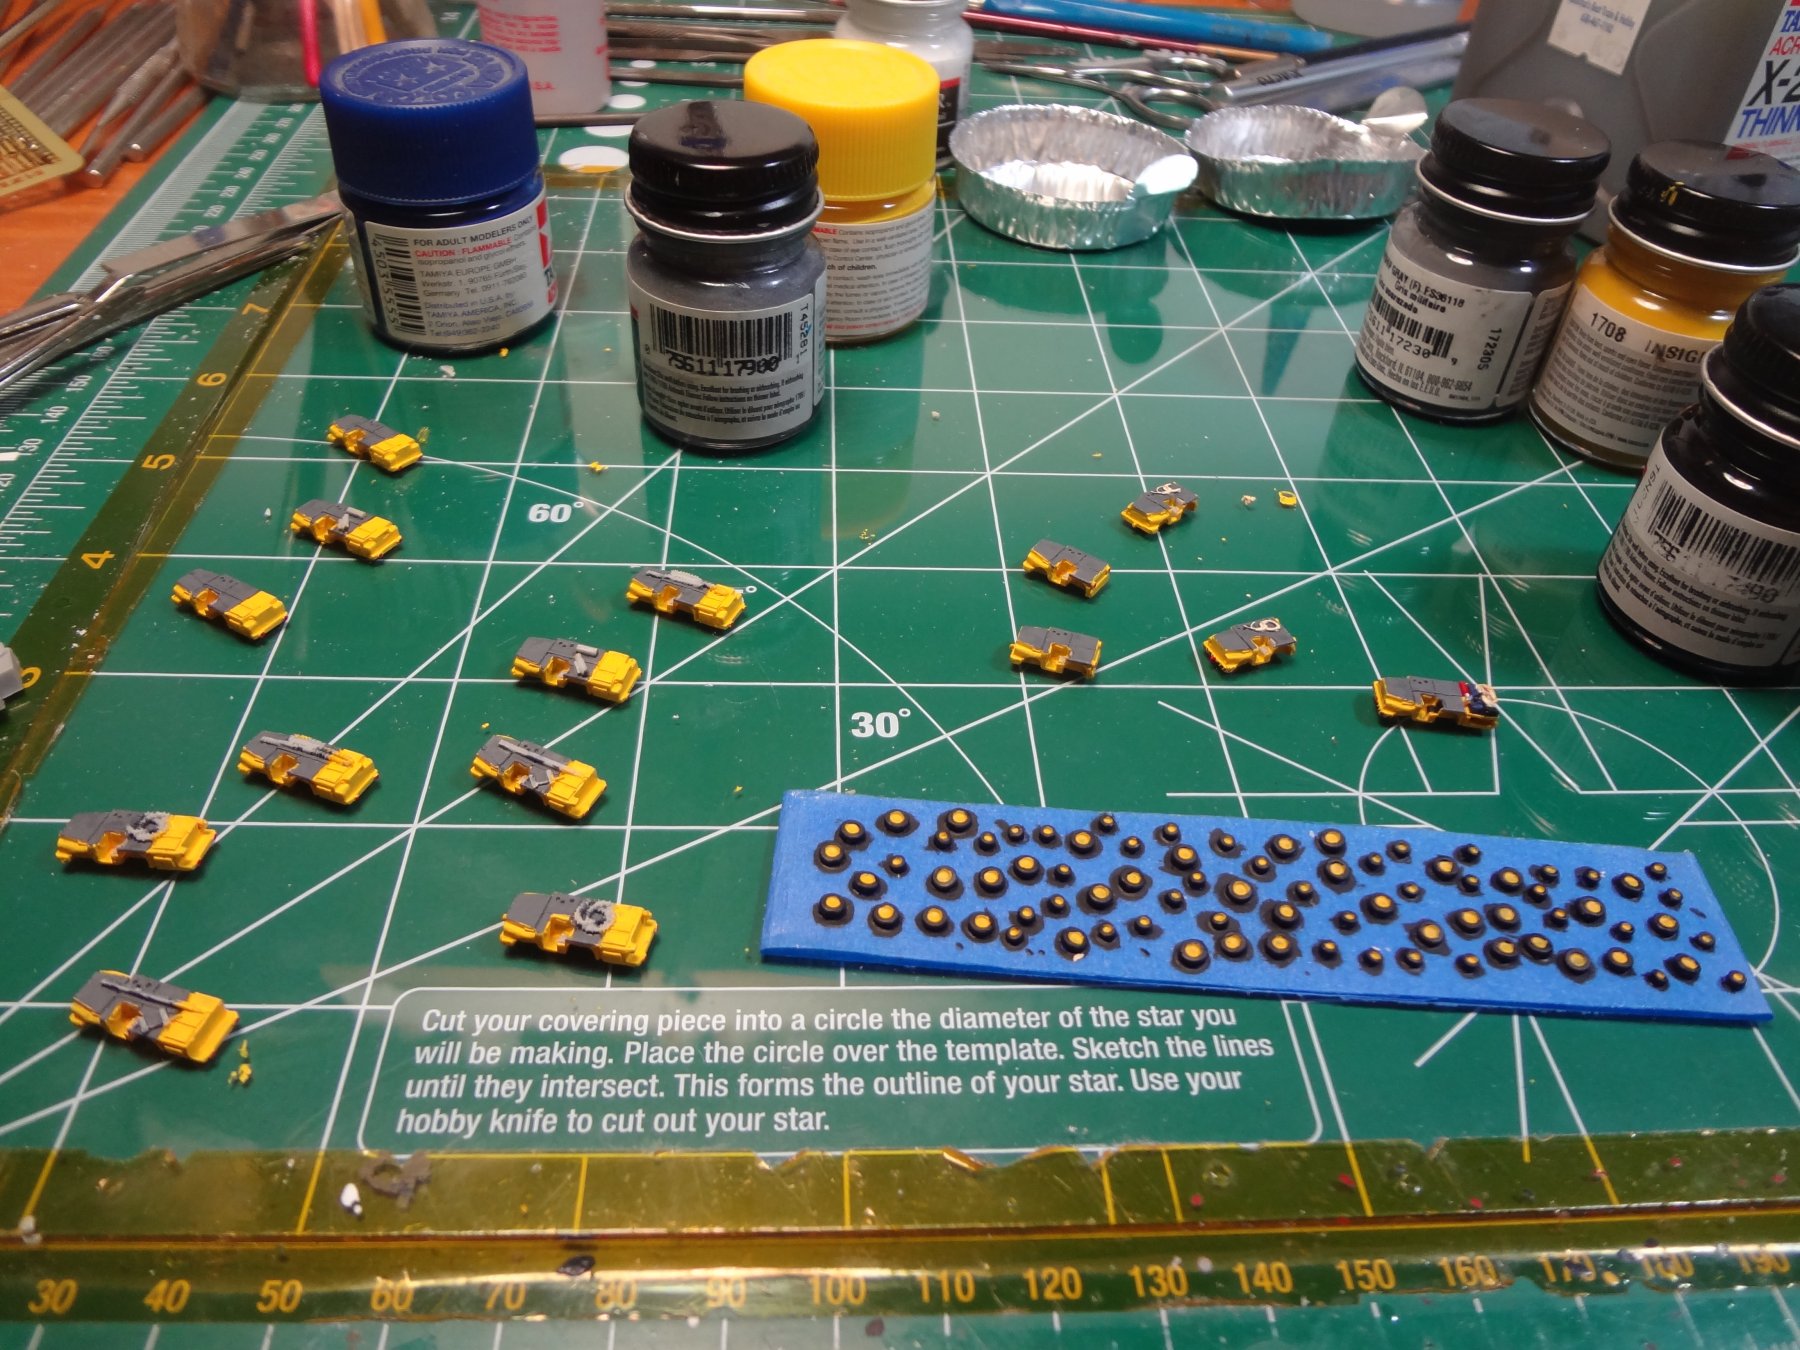
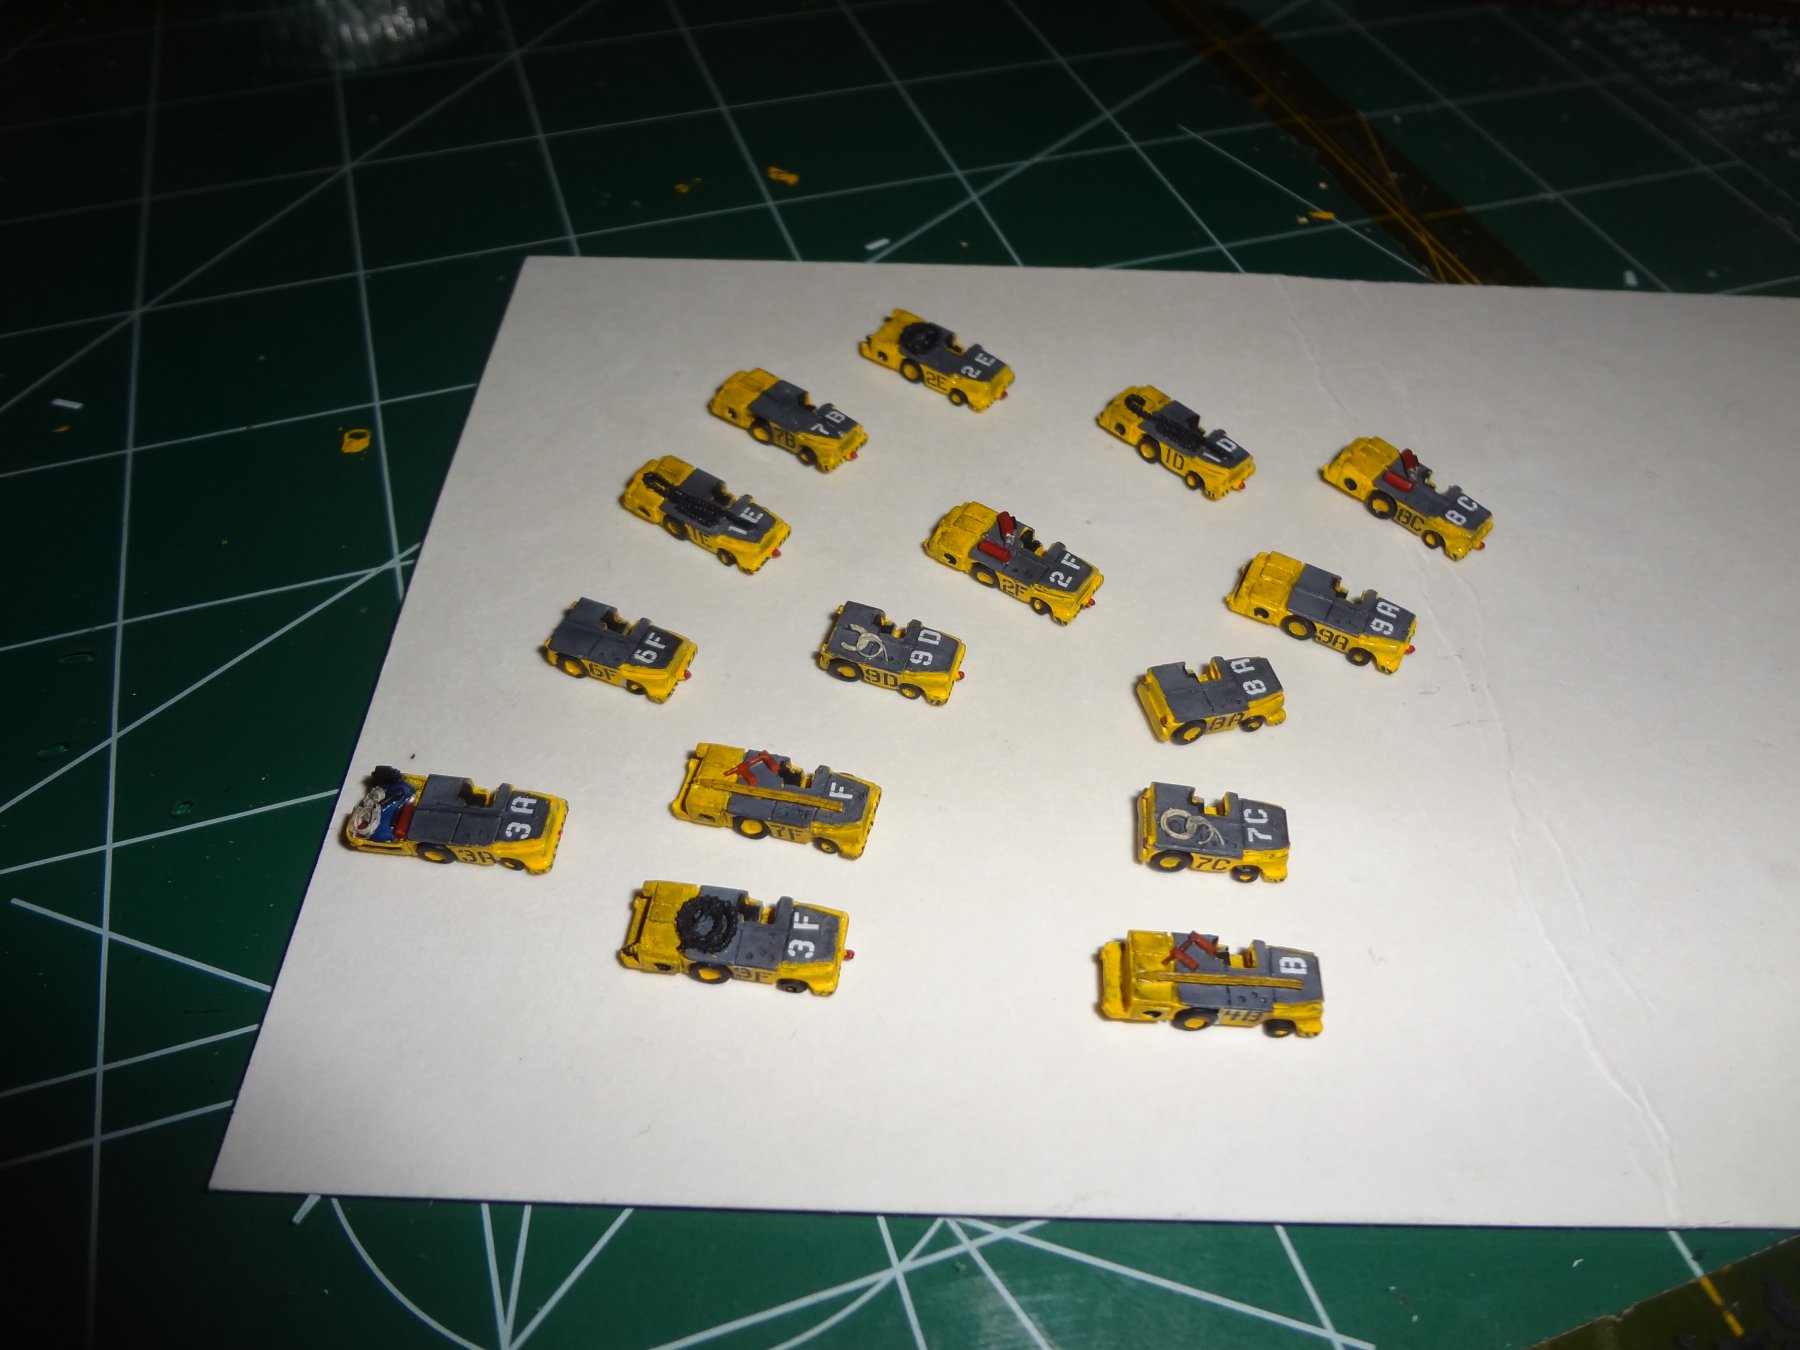
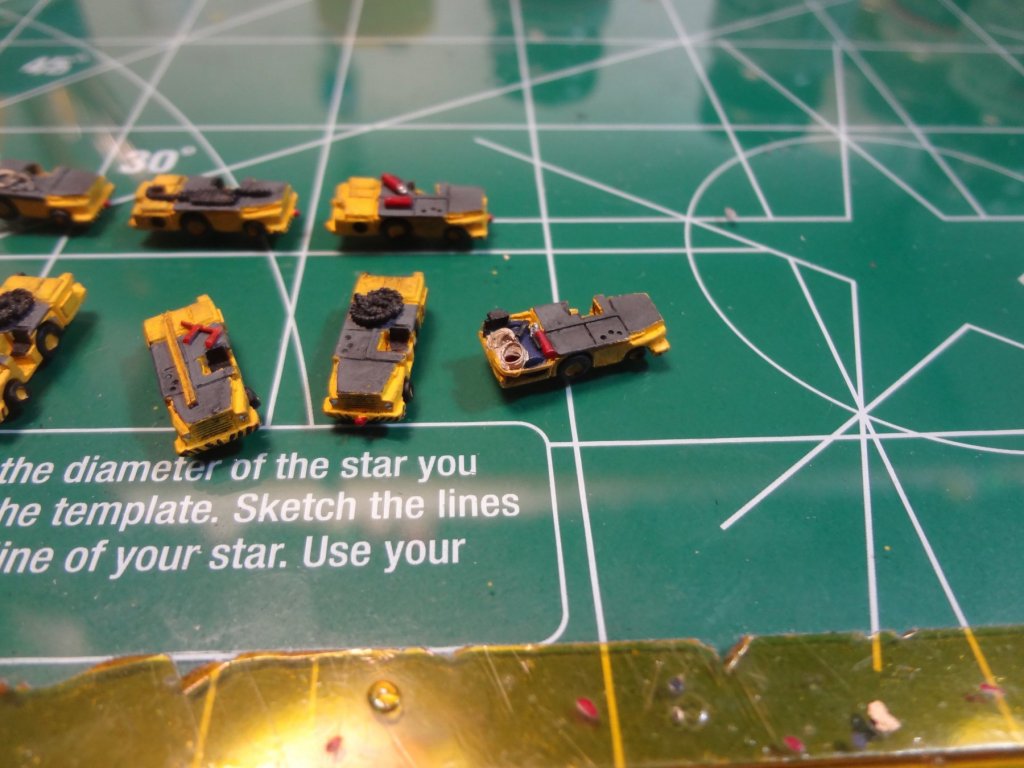
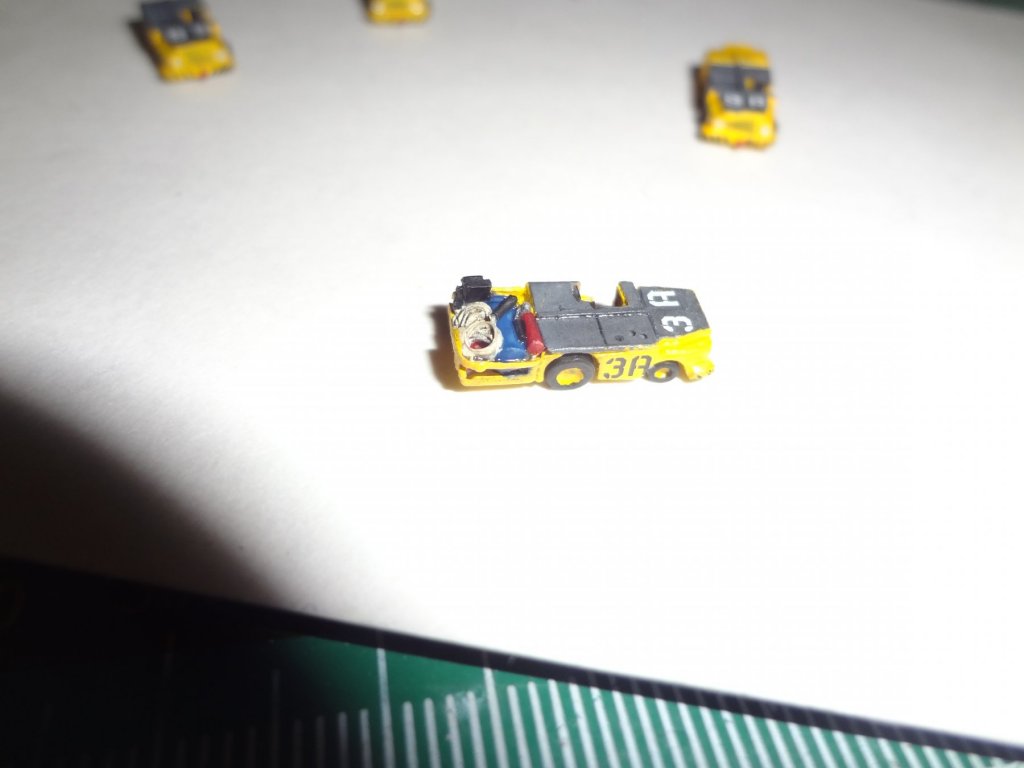
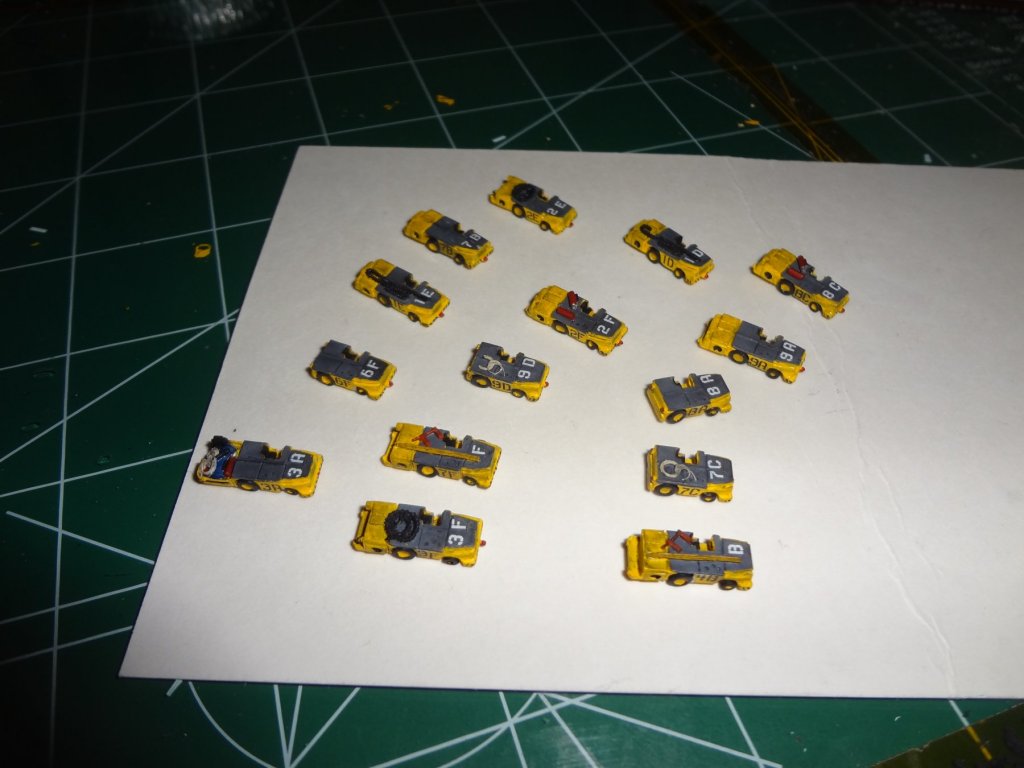
Working on filling the flight deck continues. Here are the deck tractors for the flight deck. These are the Black Dog deck tractor set. The only assembly was the wheels. The decals are from Star Fighter. Next up is to start working on the many aircraft for the flight deck.

- 82 replies
-
- 11
-
-
- carl vinson
- trumpeter
- (and 2 more)
-
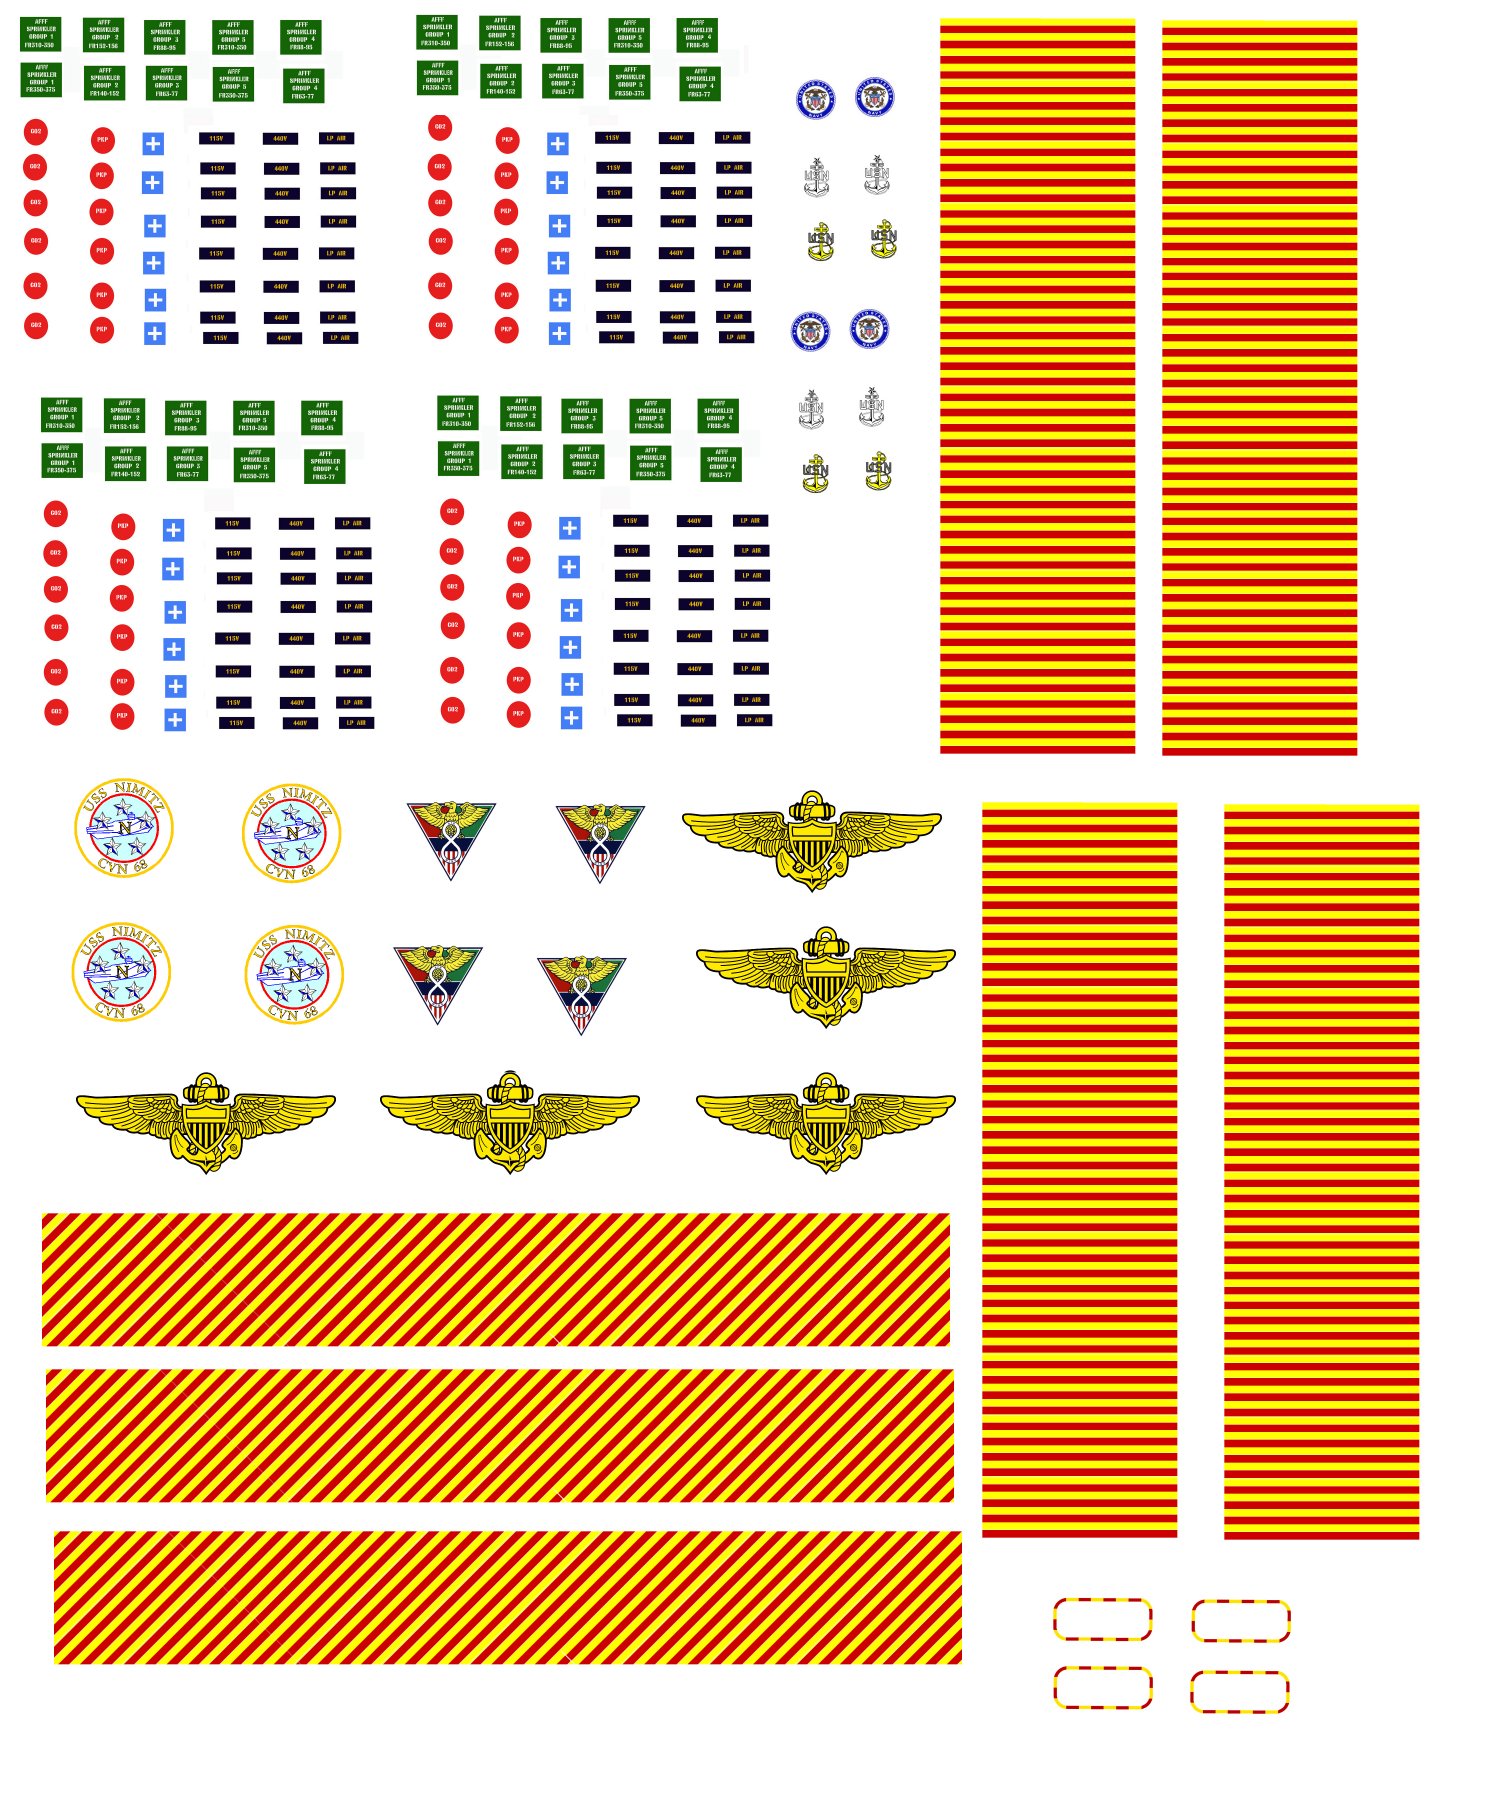
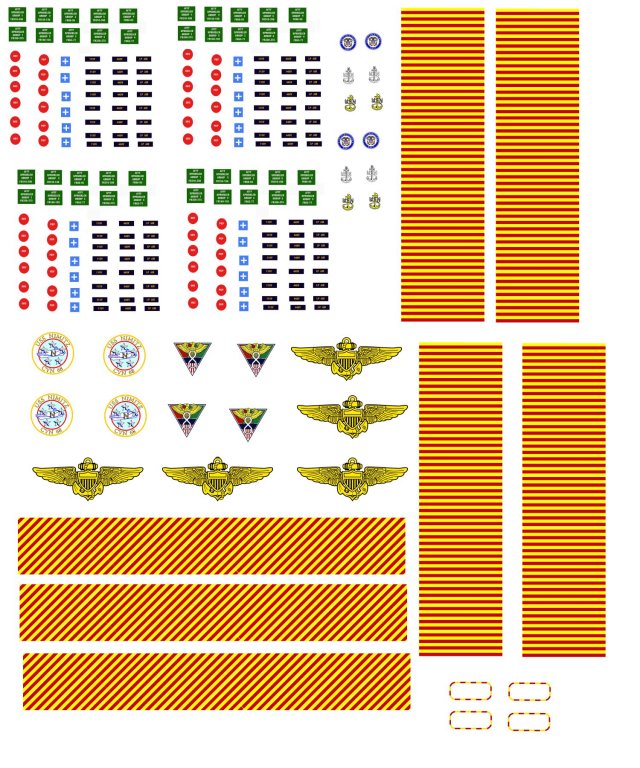
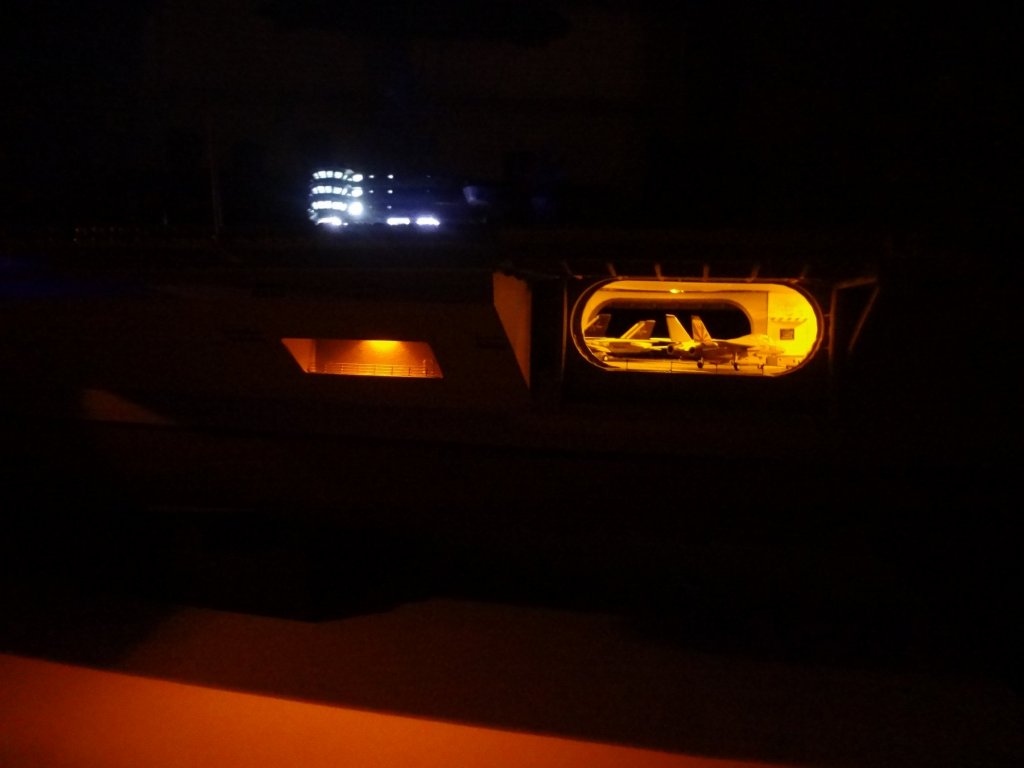
Thanks! If you are going to build the Nimitz, Tell me which air wing you will be using and I can email you a high resolution decal proof sheet to make your own decal sheet of all the hangar bay decals. If you can't make your own decals, I can print out a sheet and mail it to you for about $10. (cost of paper and shipping) Here is a sample of the decal sheet for the Nimitz with air wing 8.
- 82 replies
-
- 6
-
-
- carl vinson
- trumpeter
- (and 2 more)
-
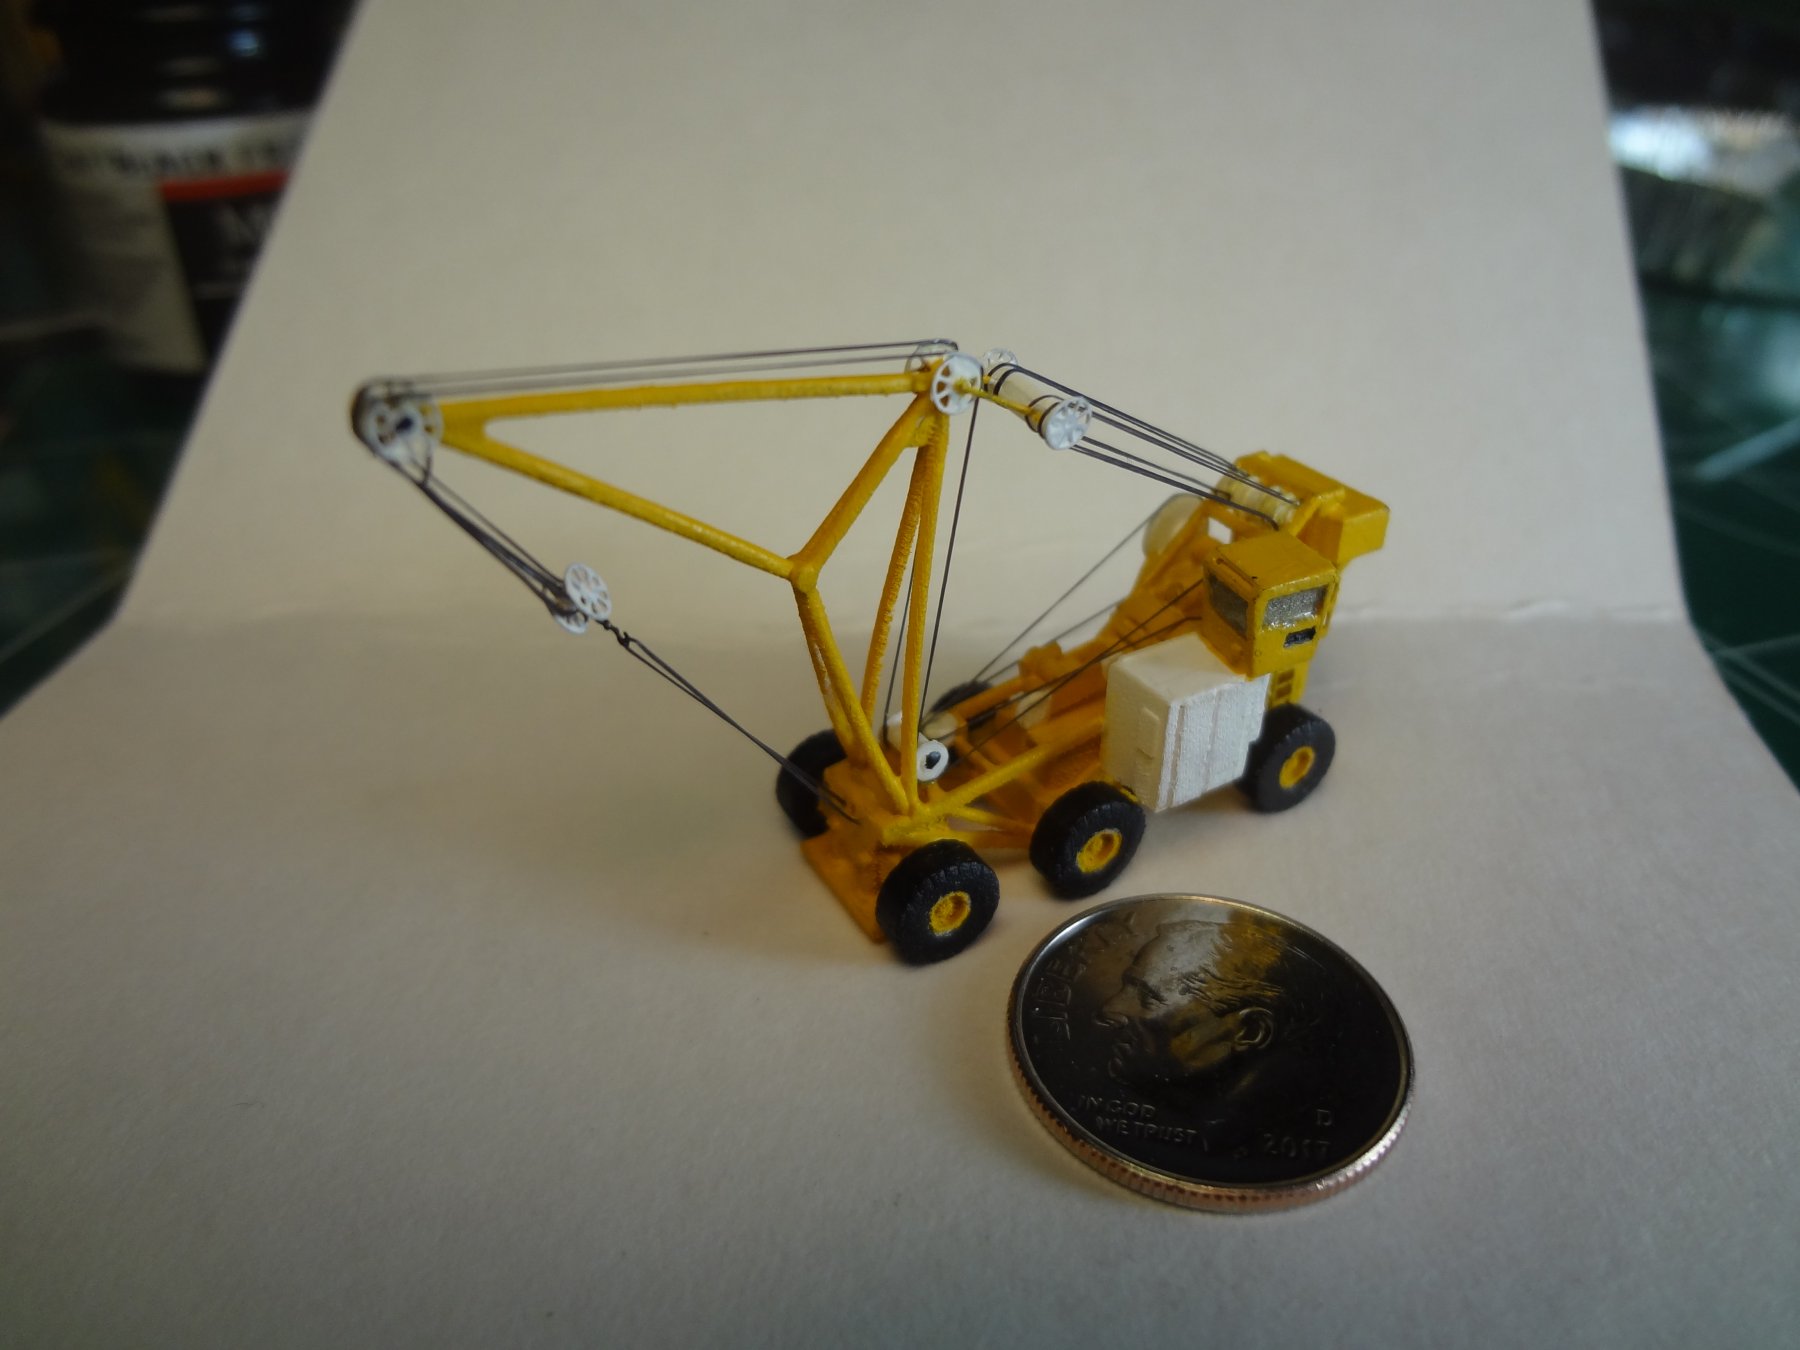
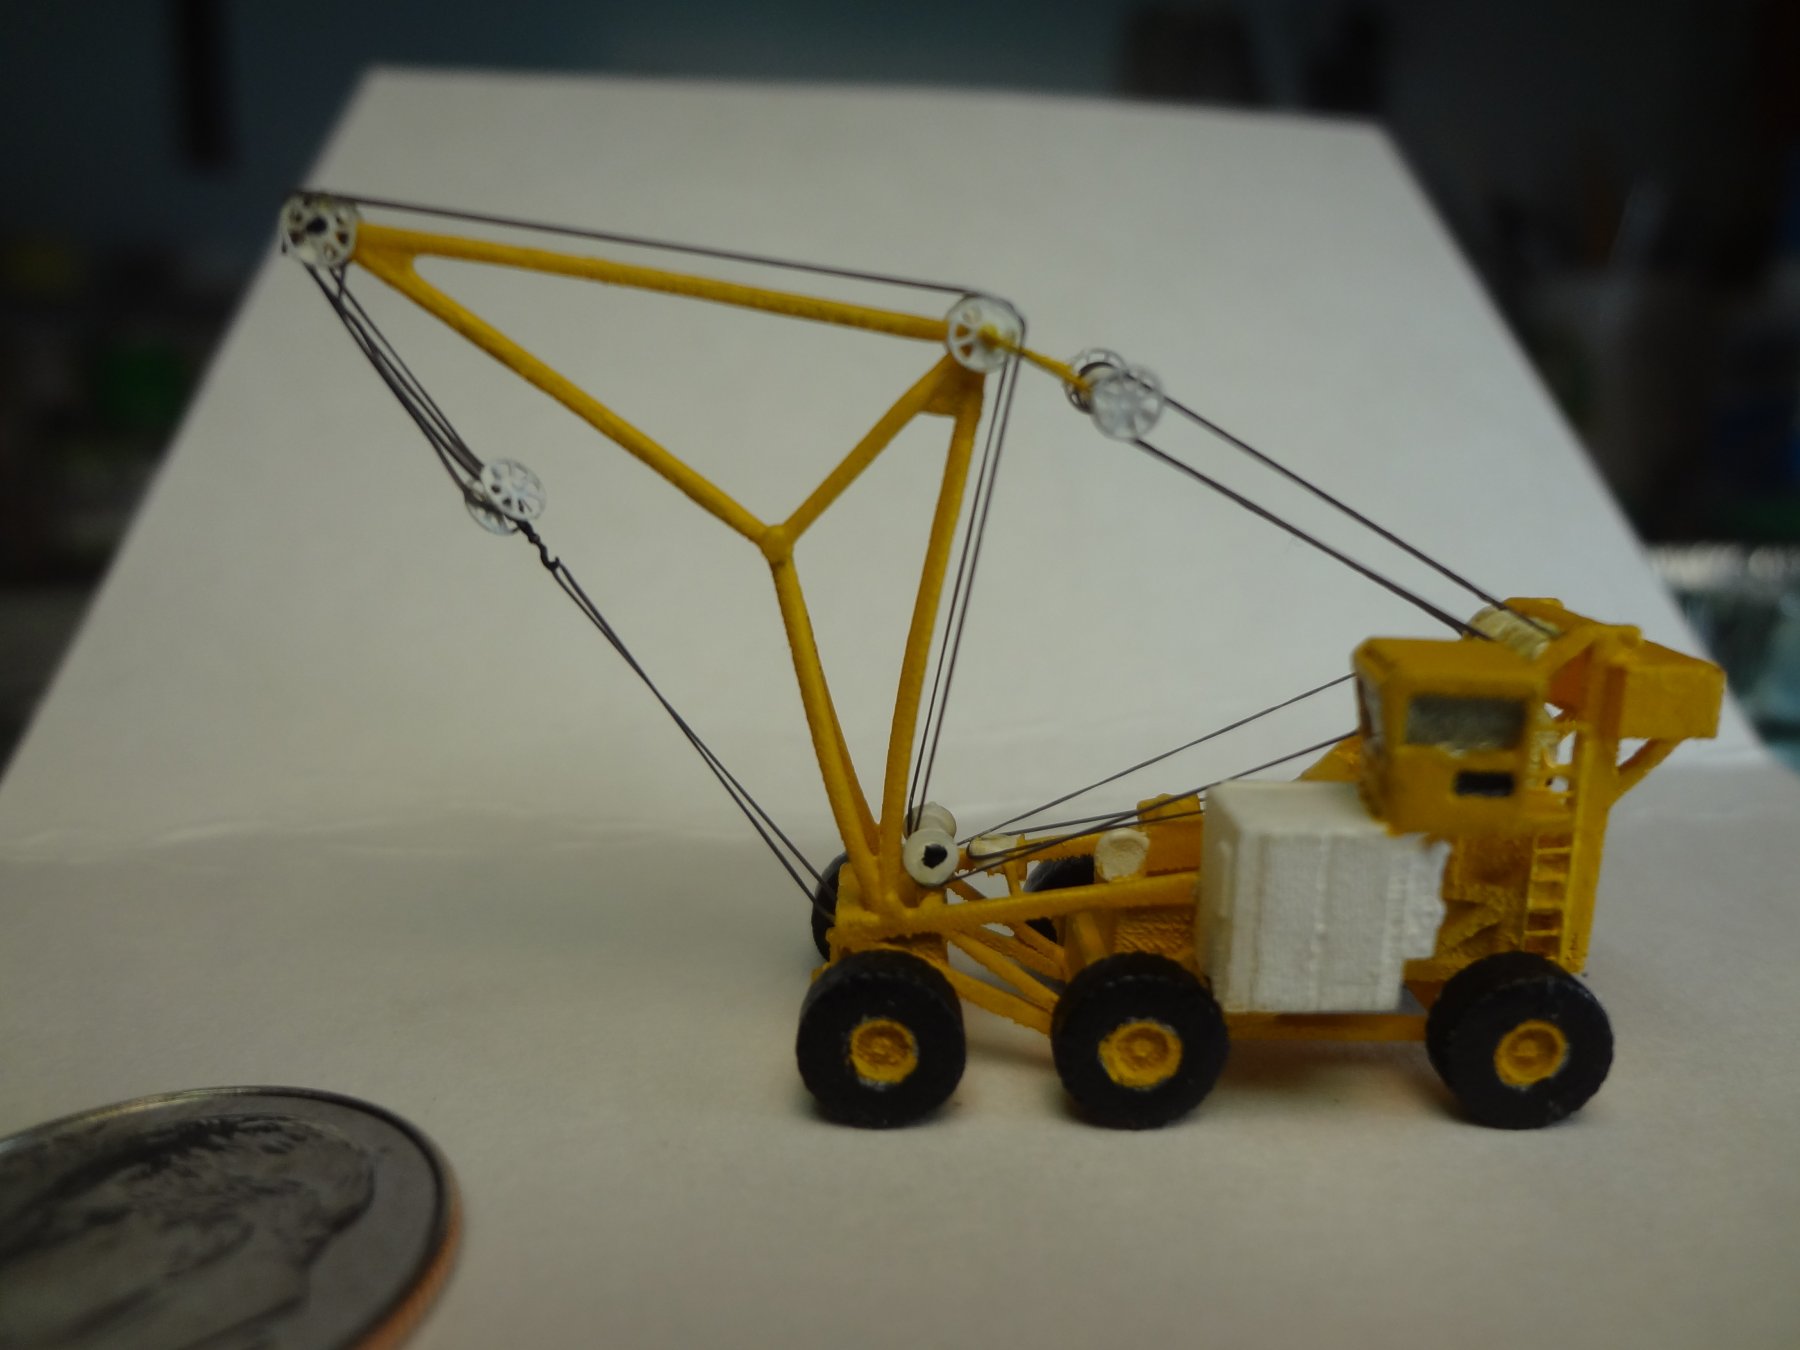
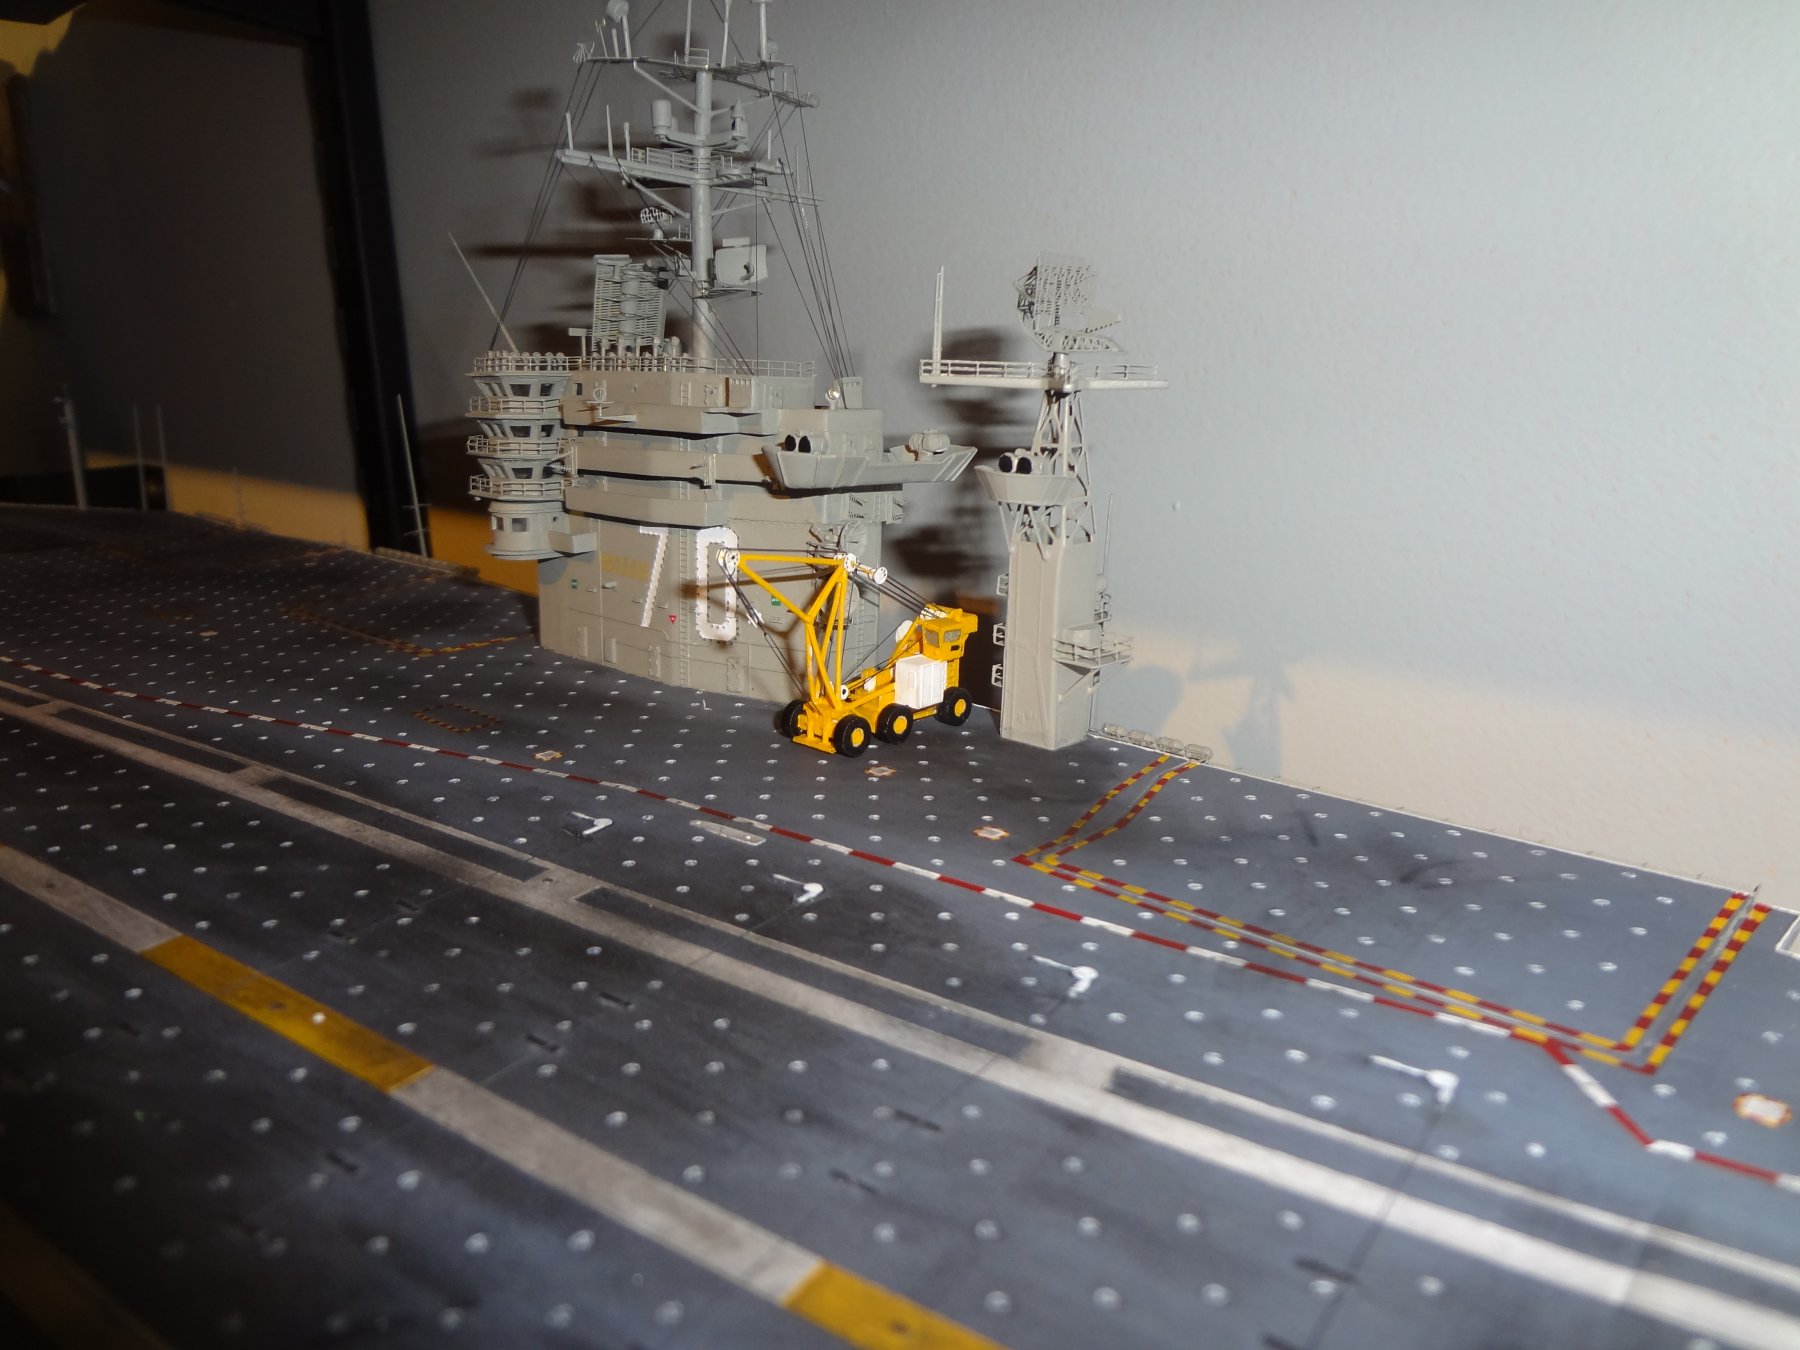
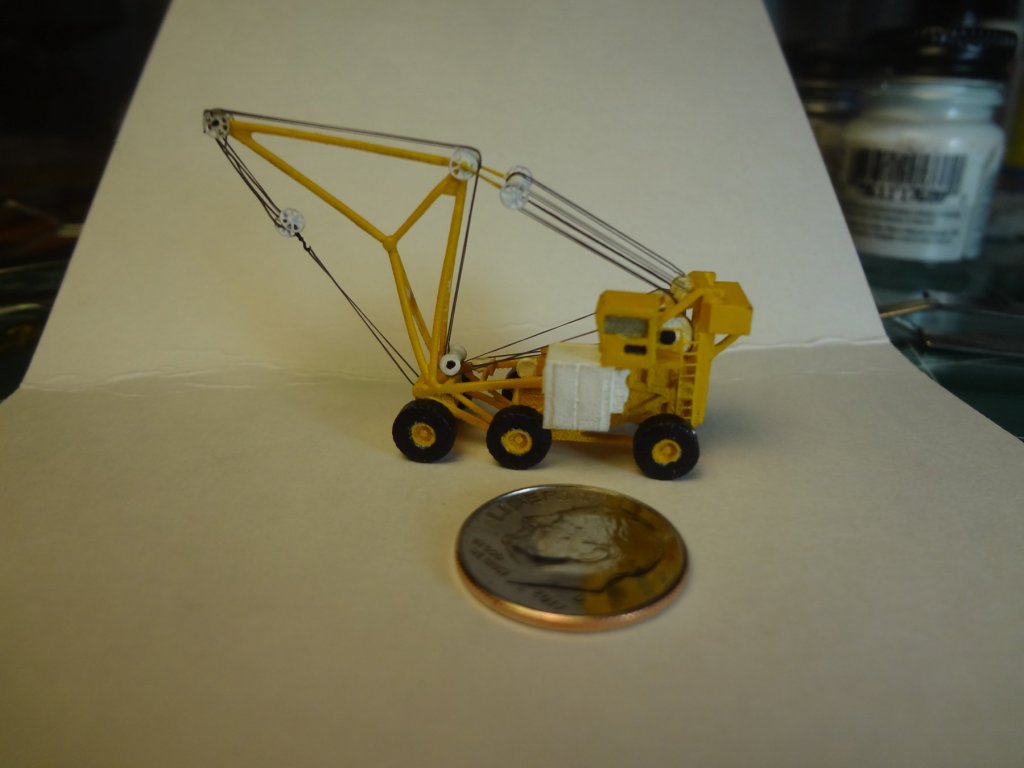
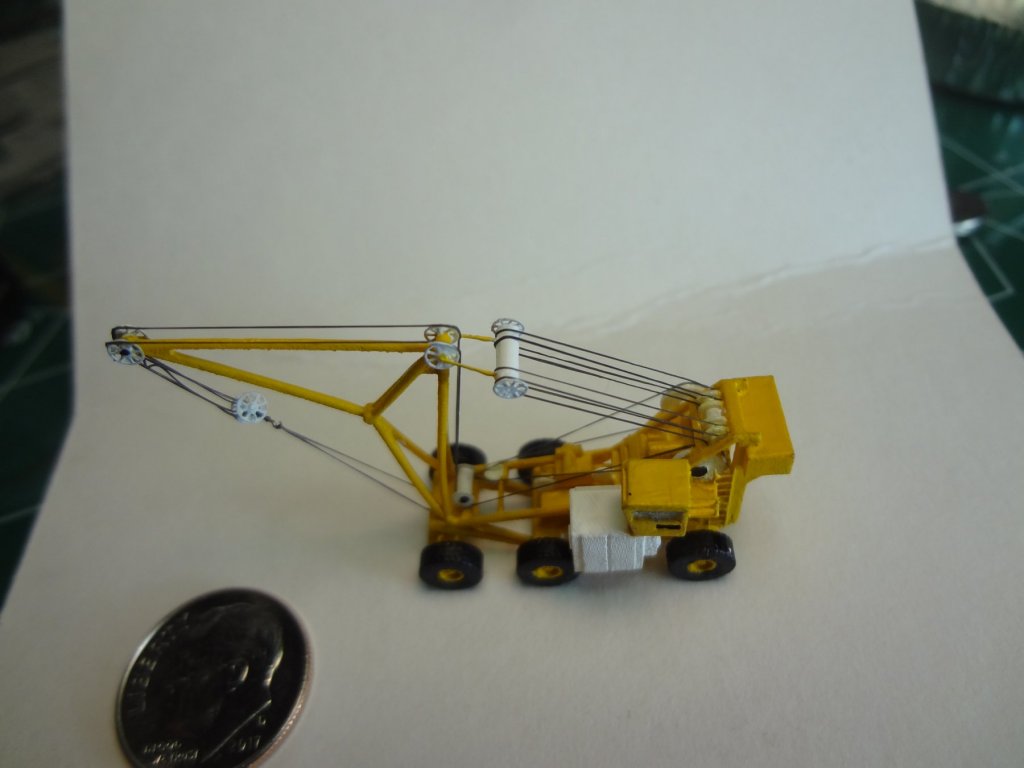
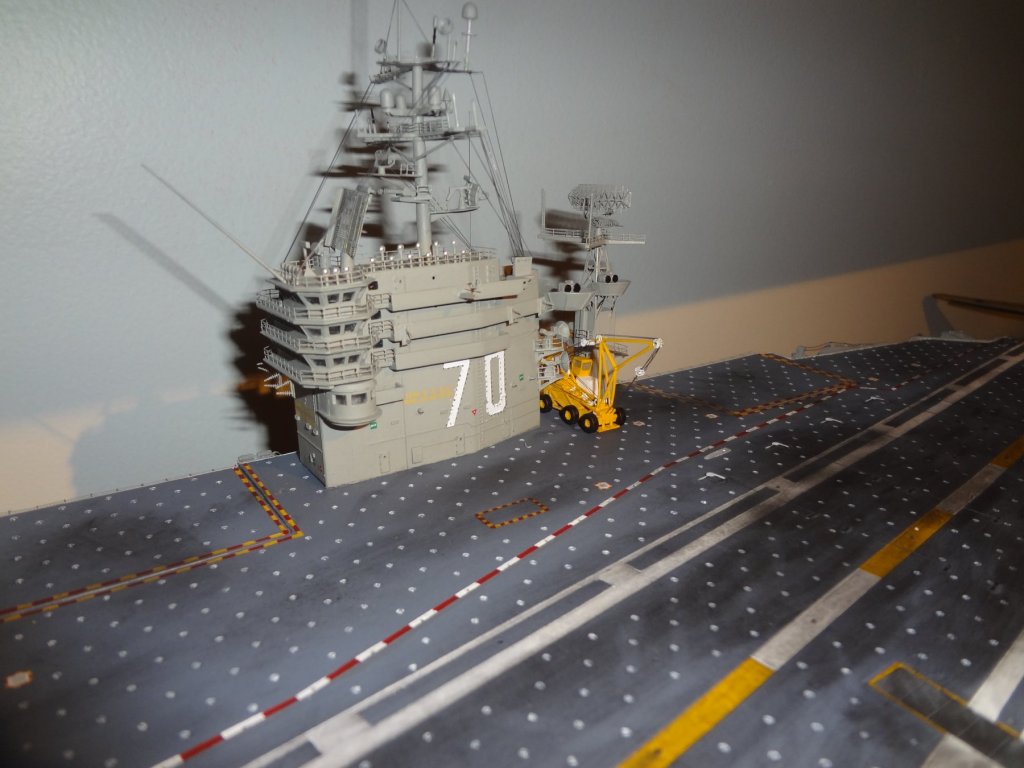
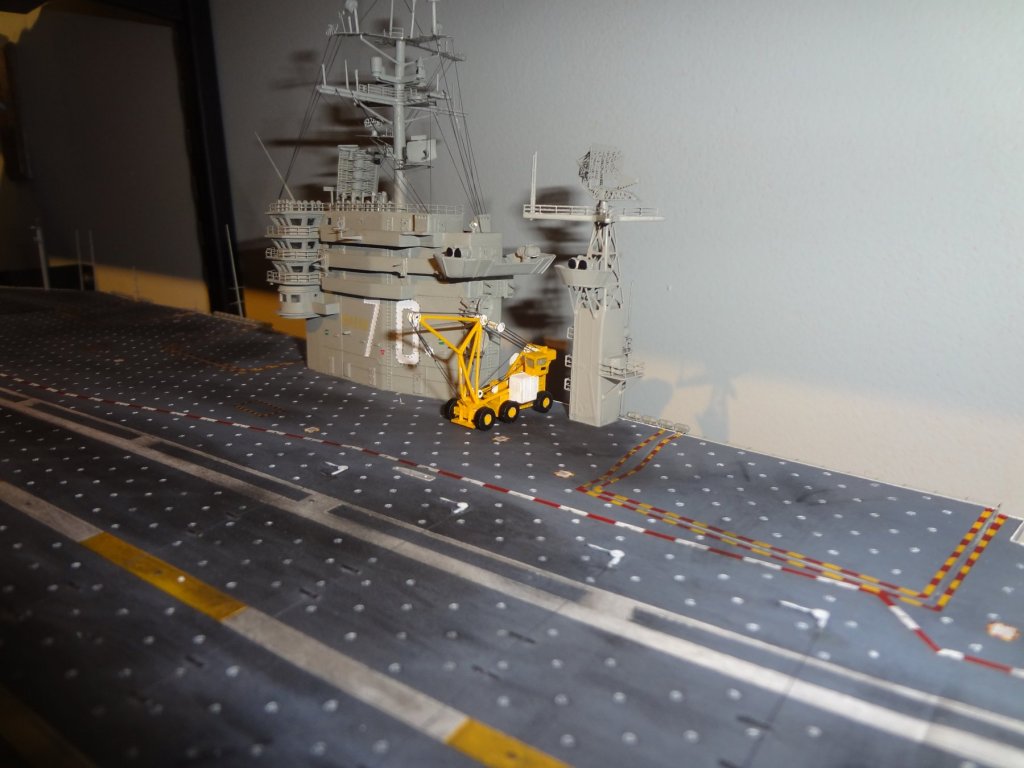
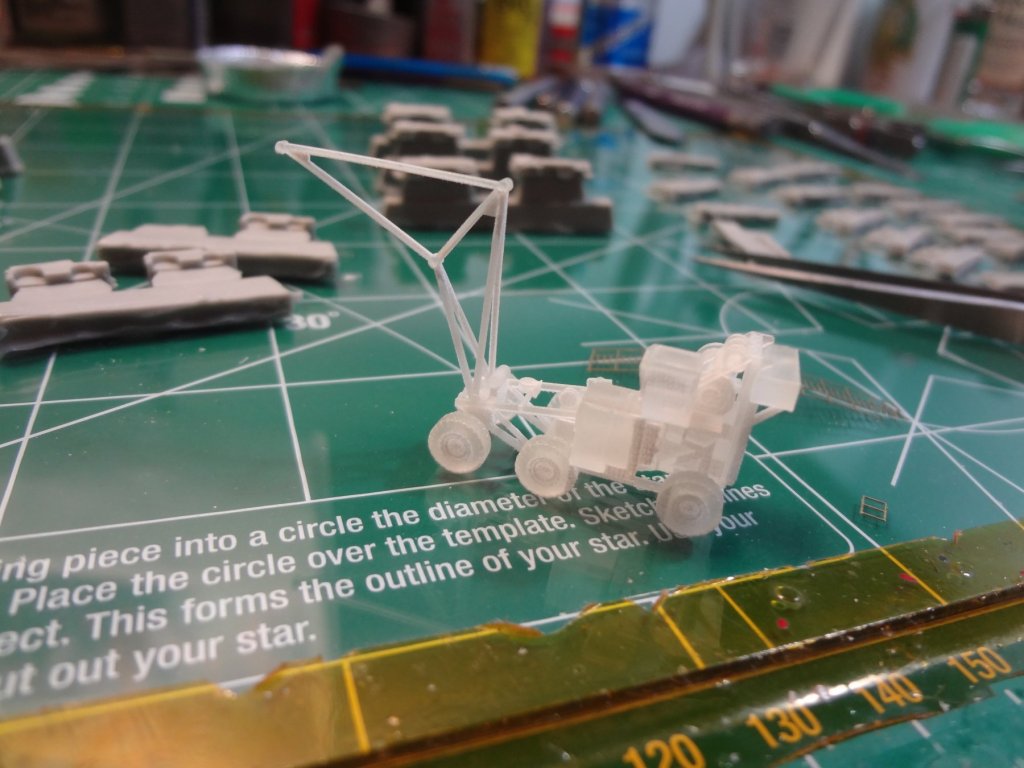
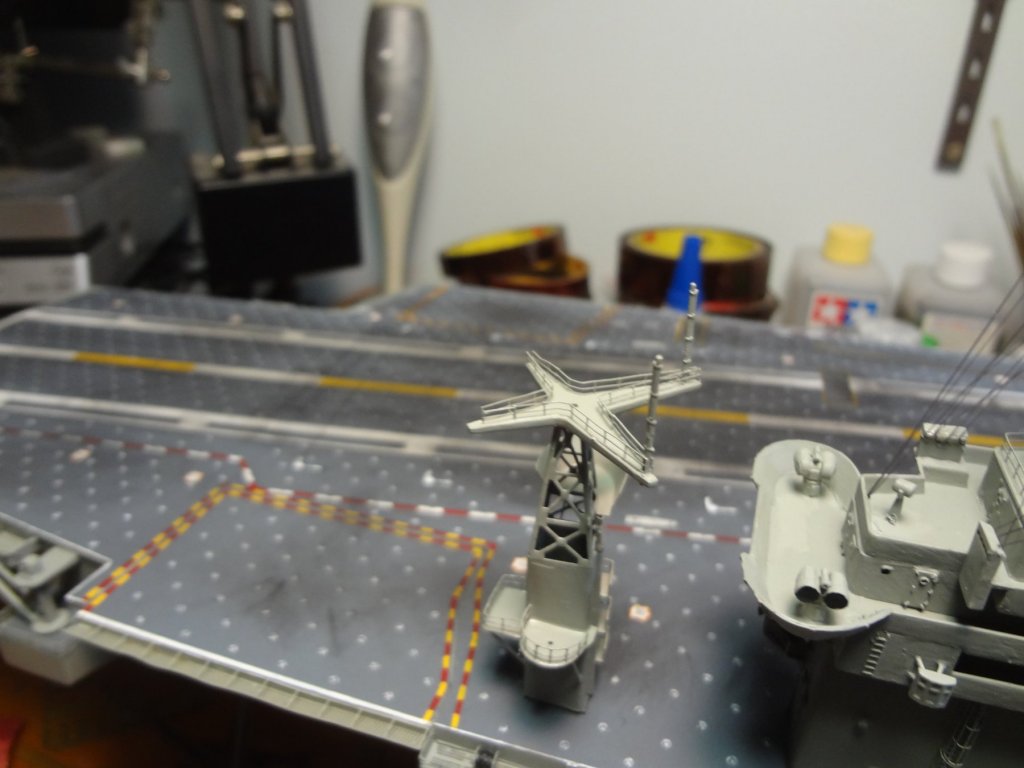
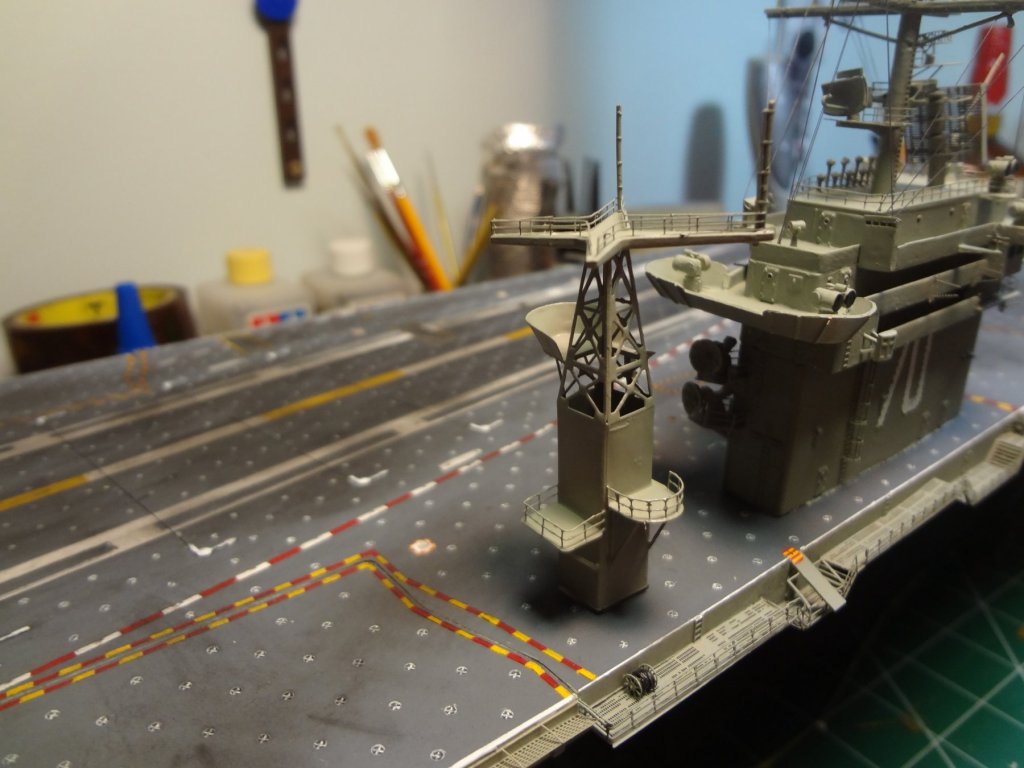
Special Update! Since the ship is done I now need to work on the filling the flight deck. With all the detail I added to the ship, it only makes sense to continue with details. I ordered the Tilly crane from BaconFist on Shapeways (3D printed accessoriesfor Nimitz Class carriers) And here it is after 9.5 hours of detailing.


- 82 replies
-
- 12
-
-
- carl vinson
- trumpeter
- (and 2 more)
-
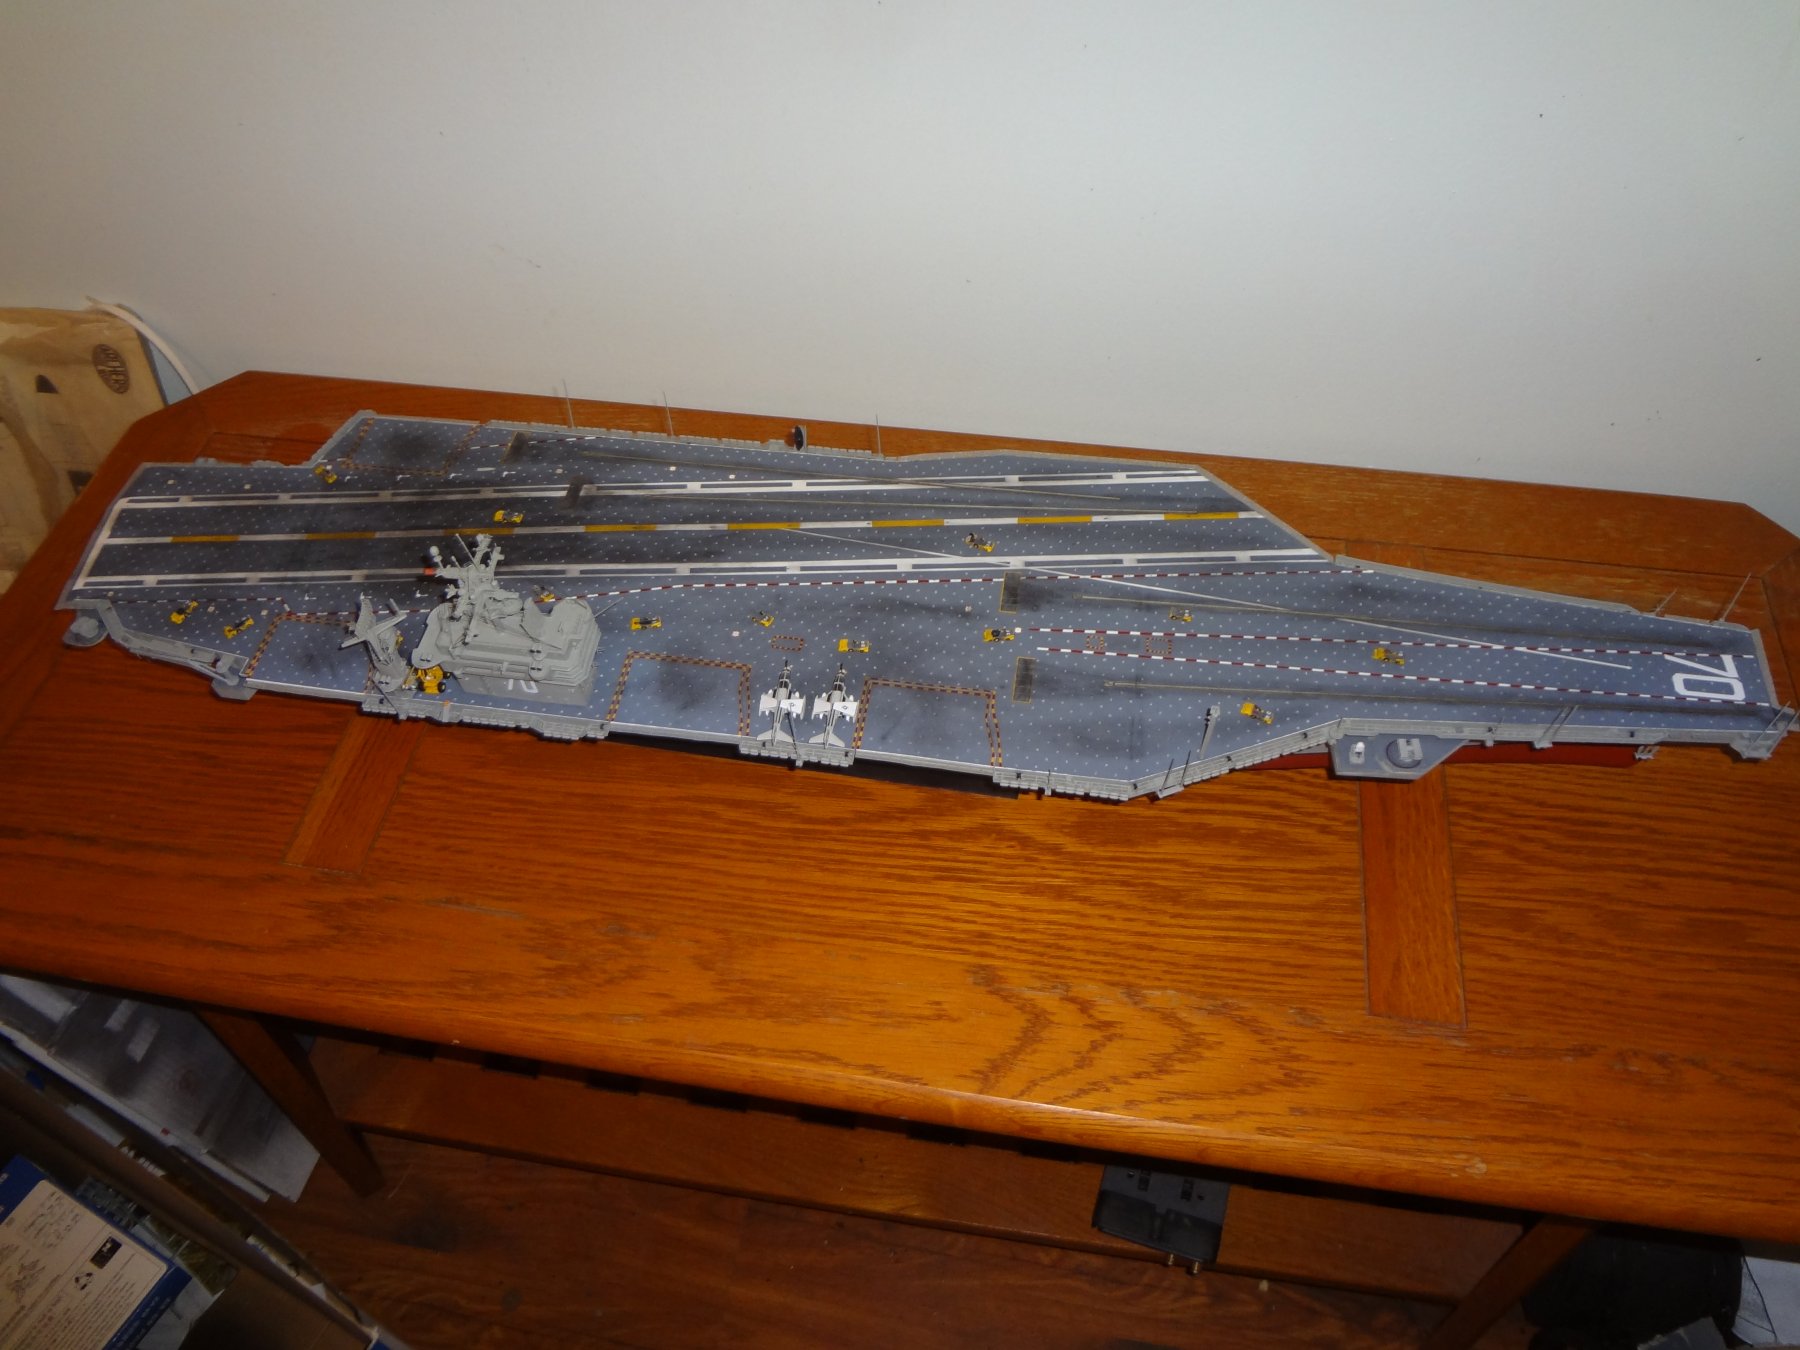
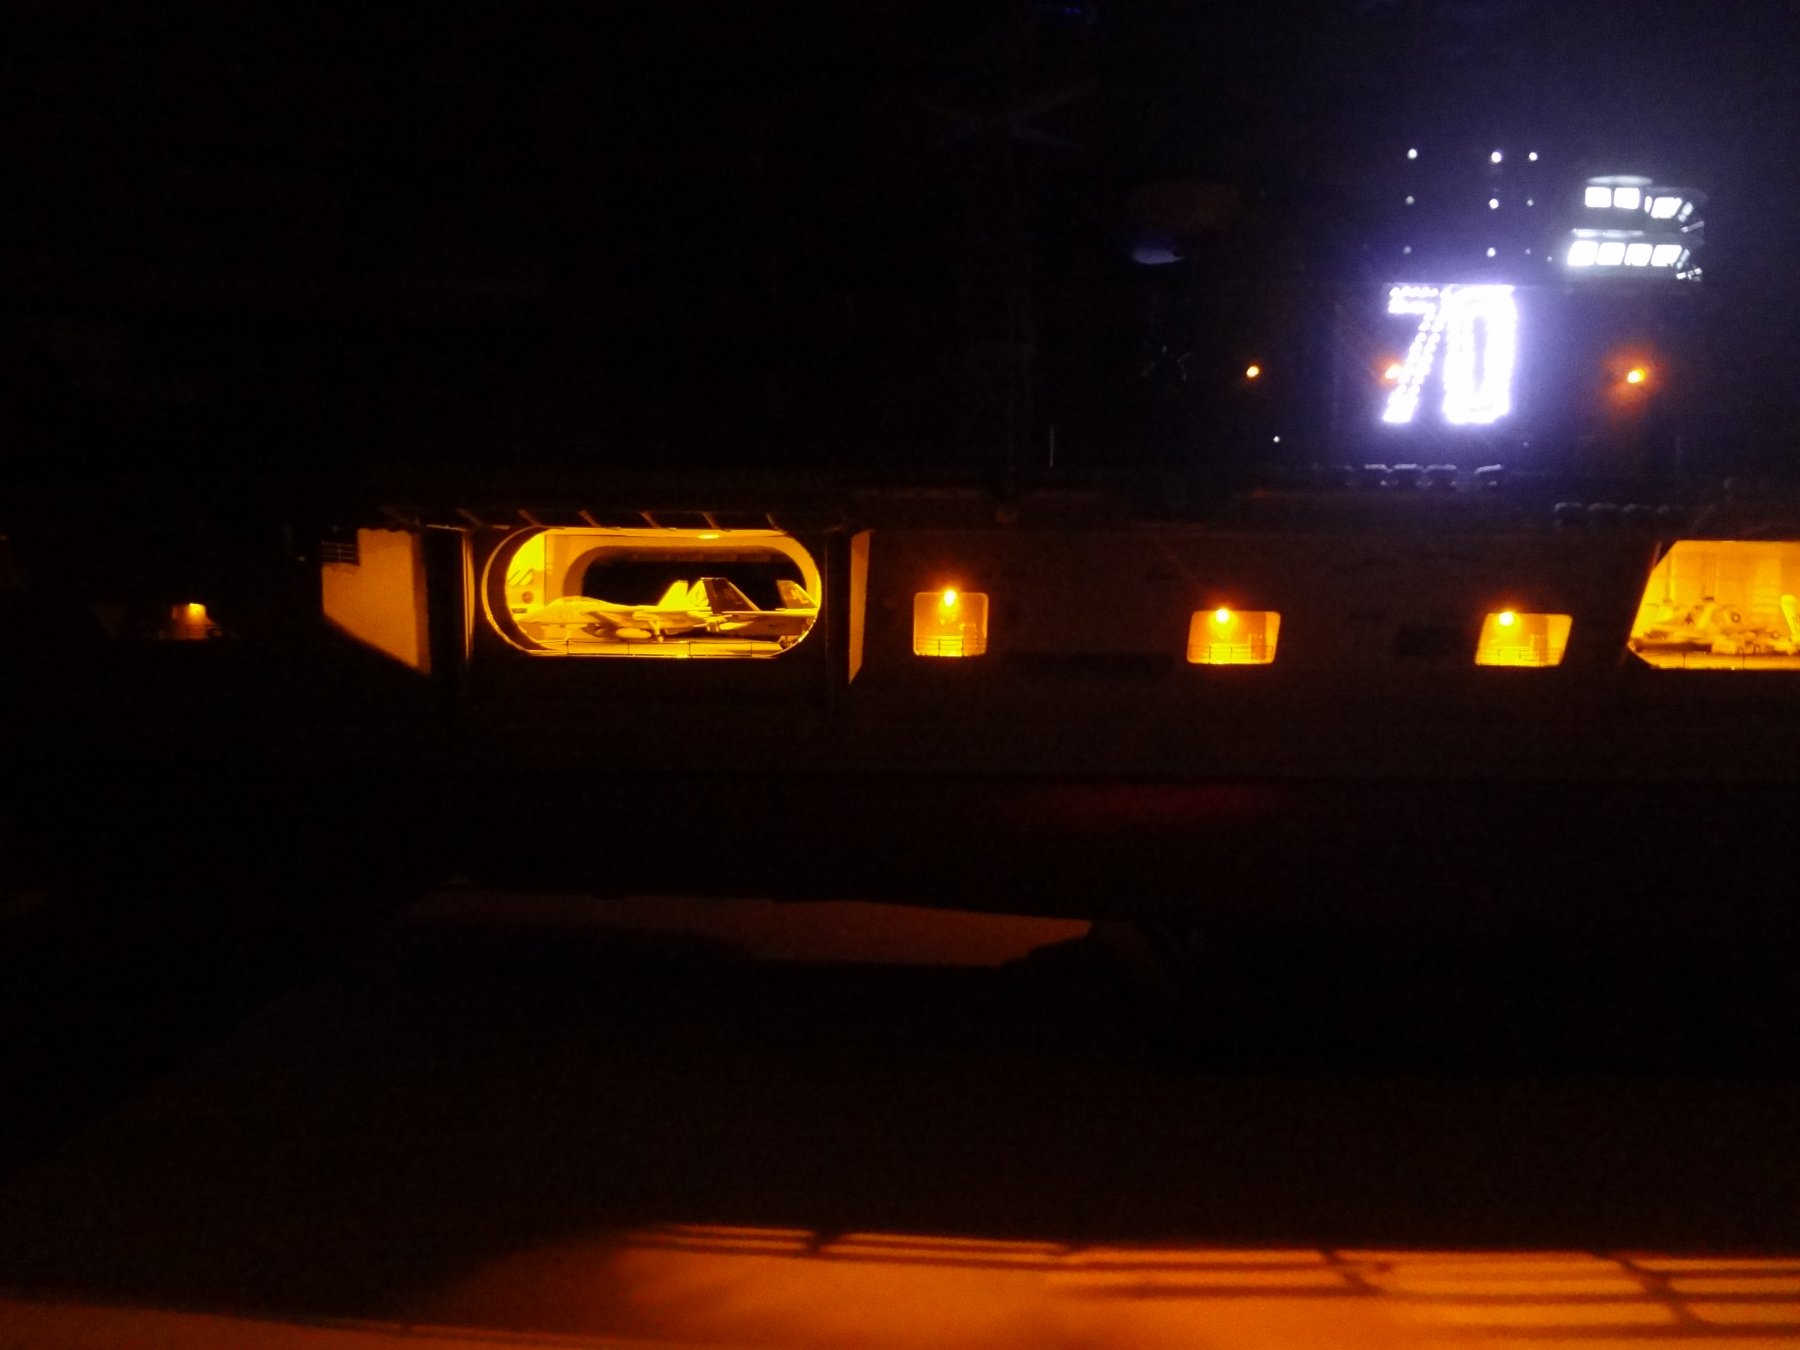
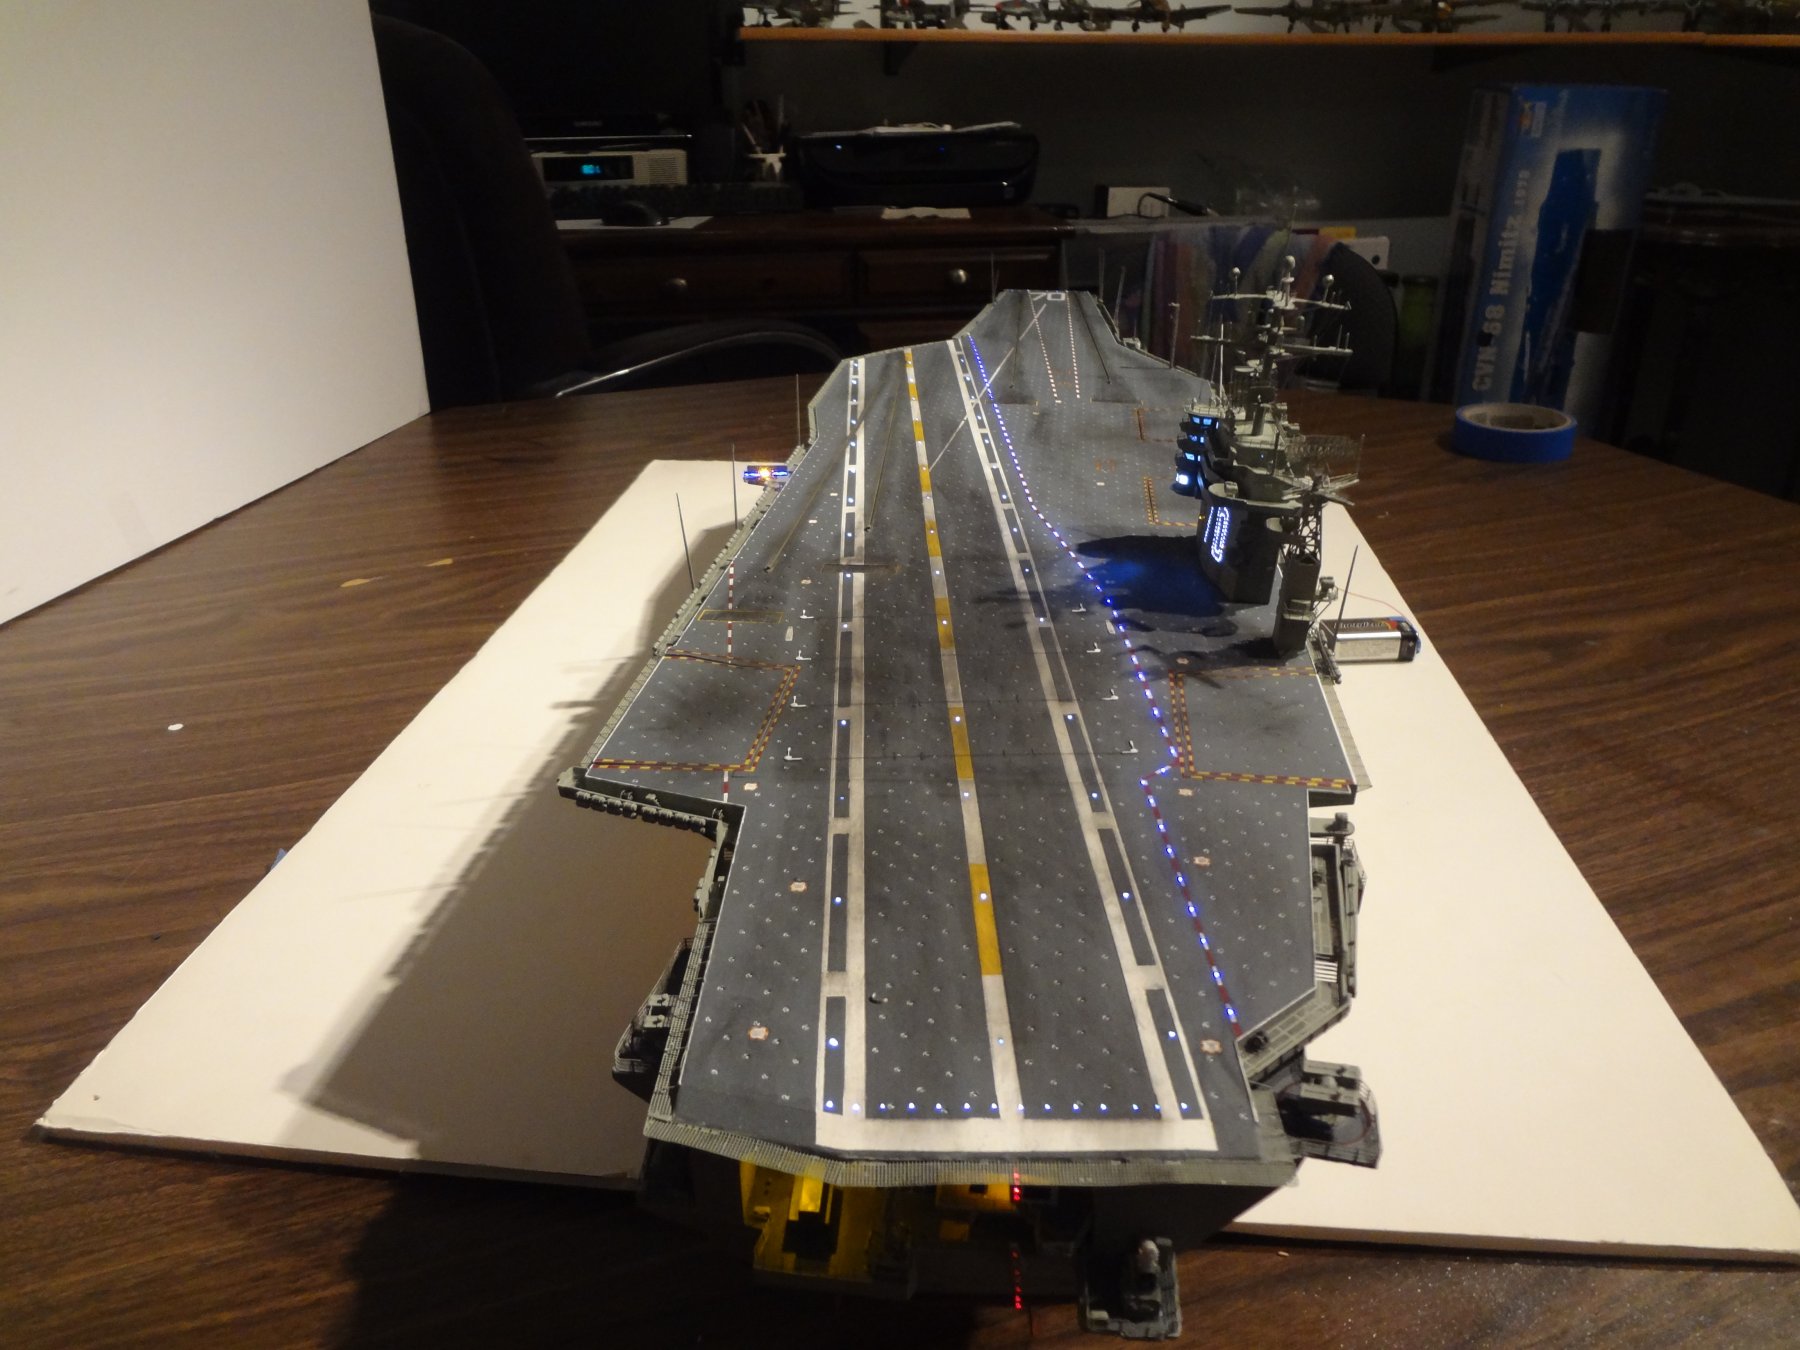
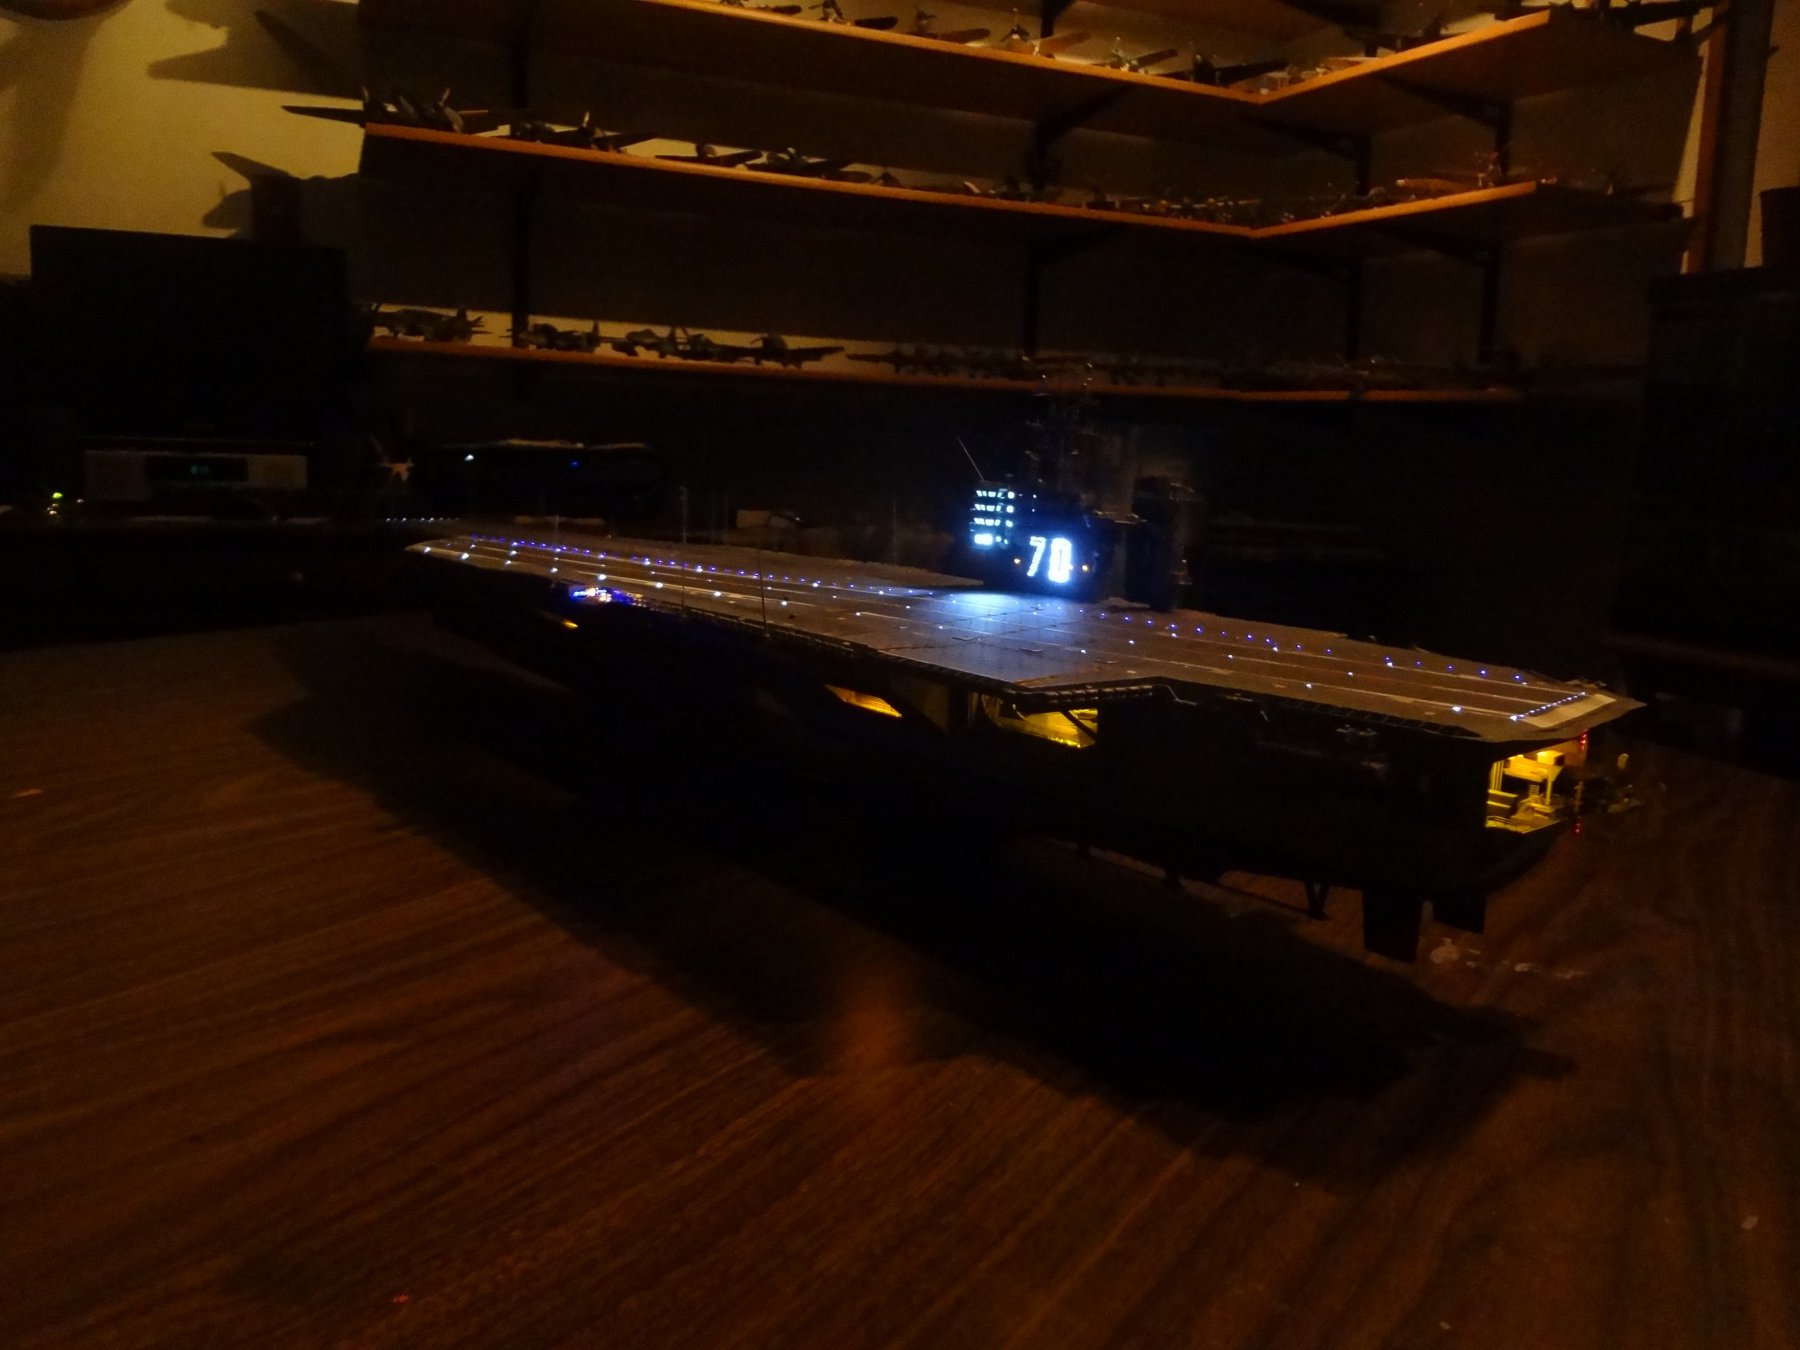
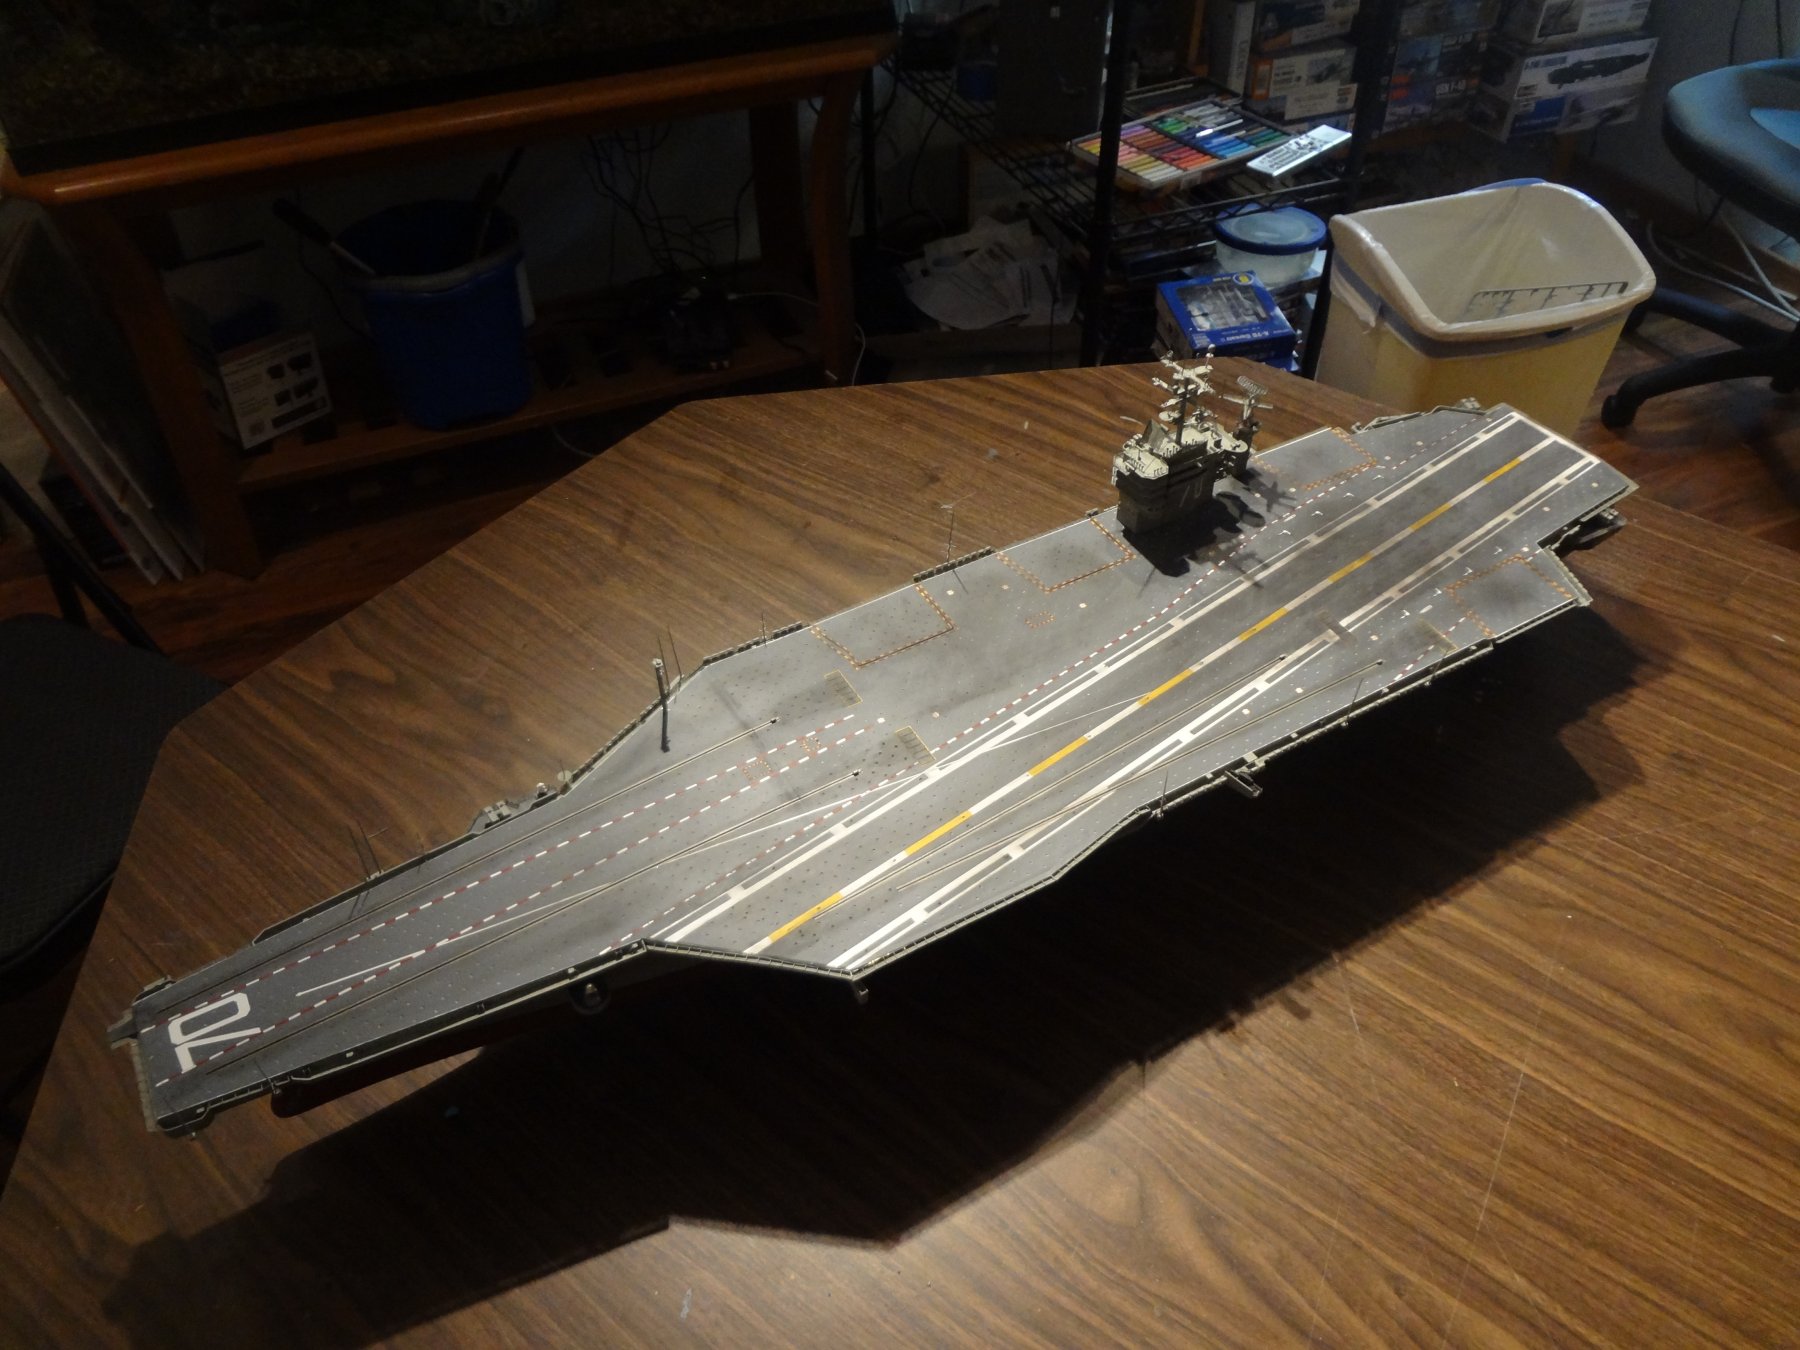
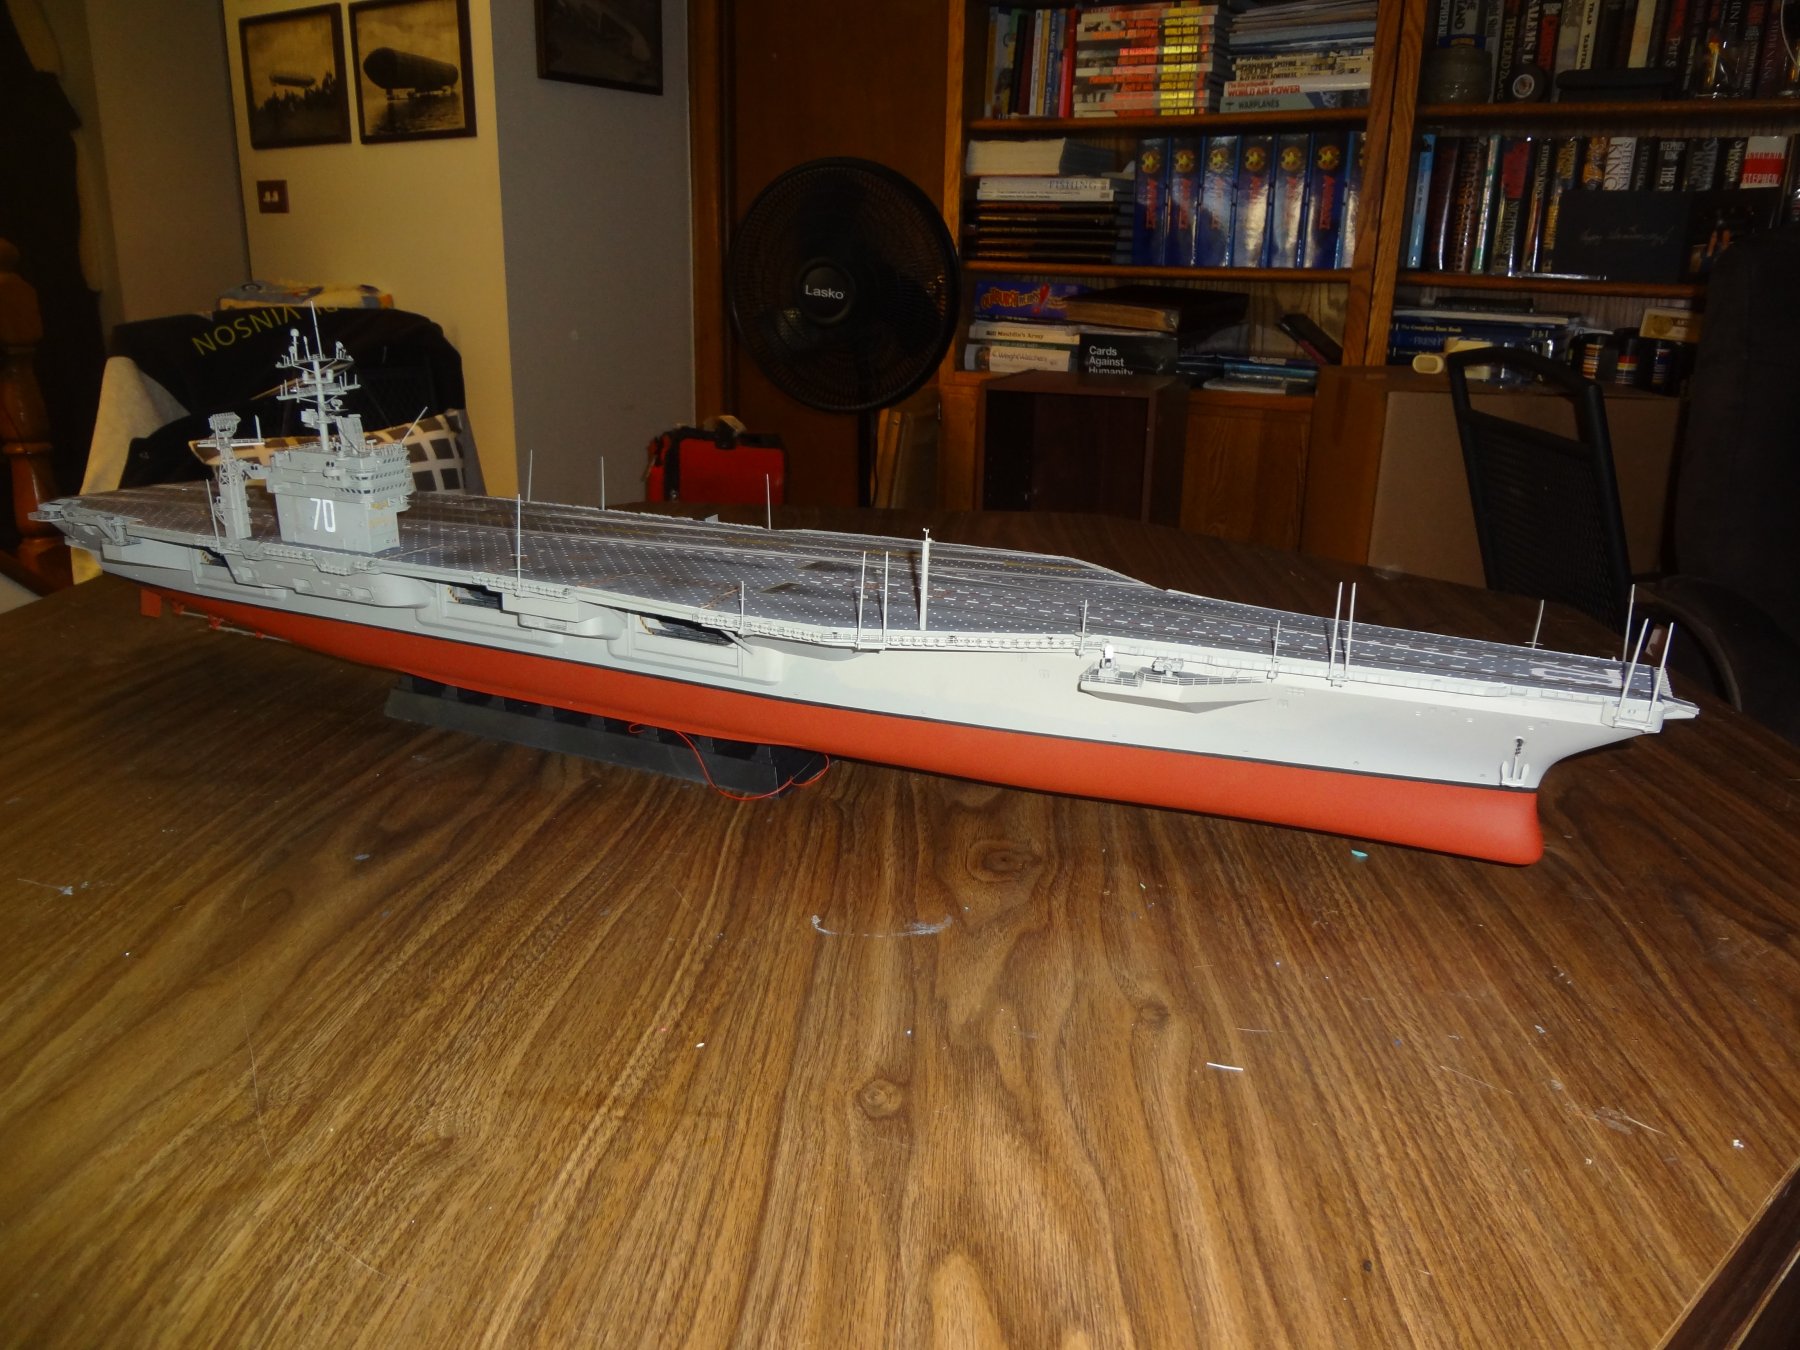
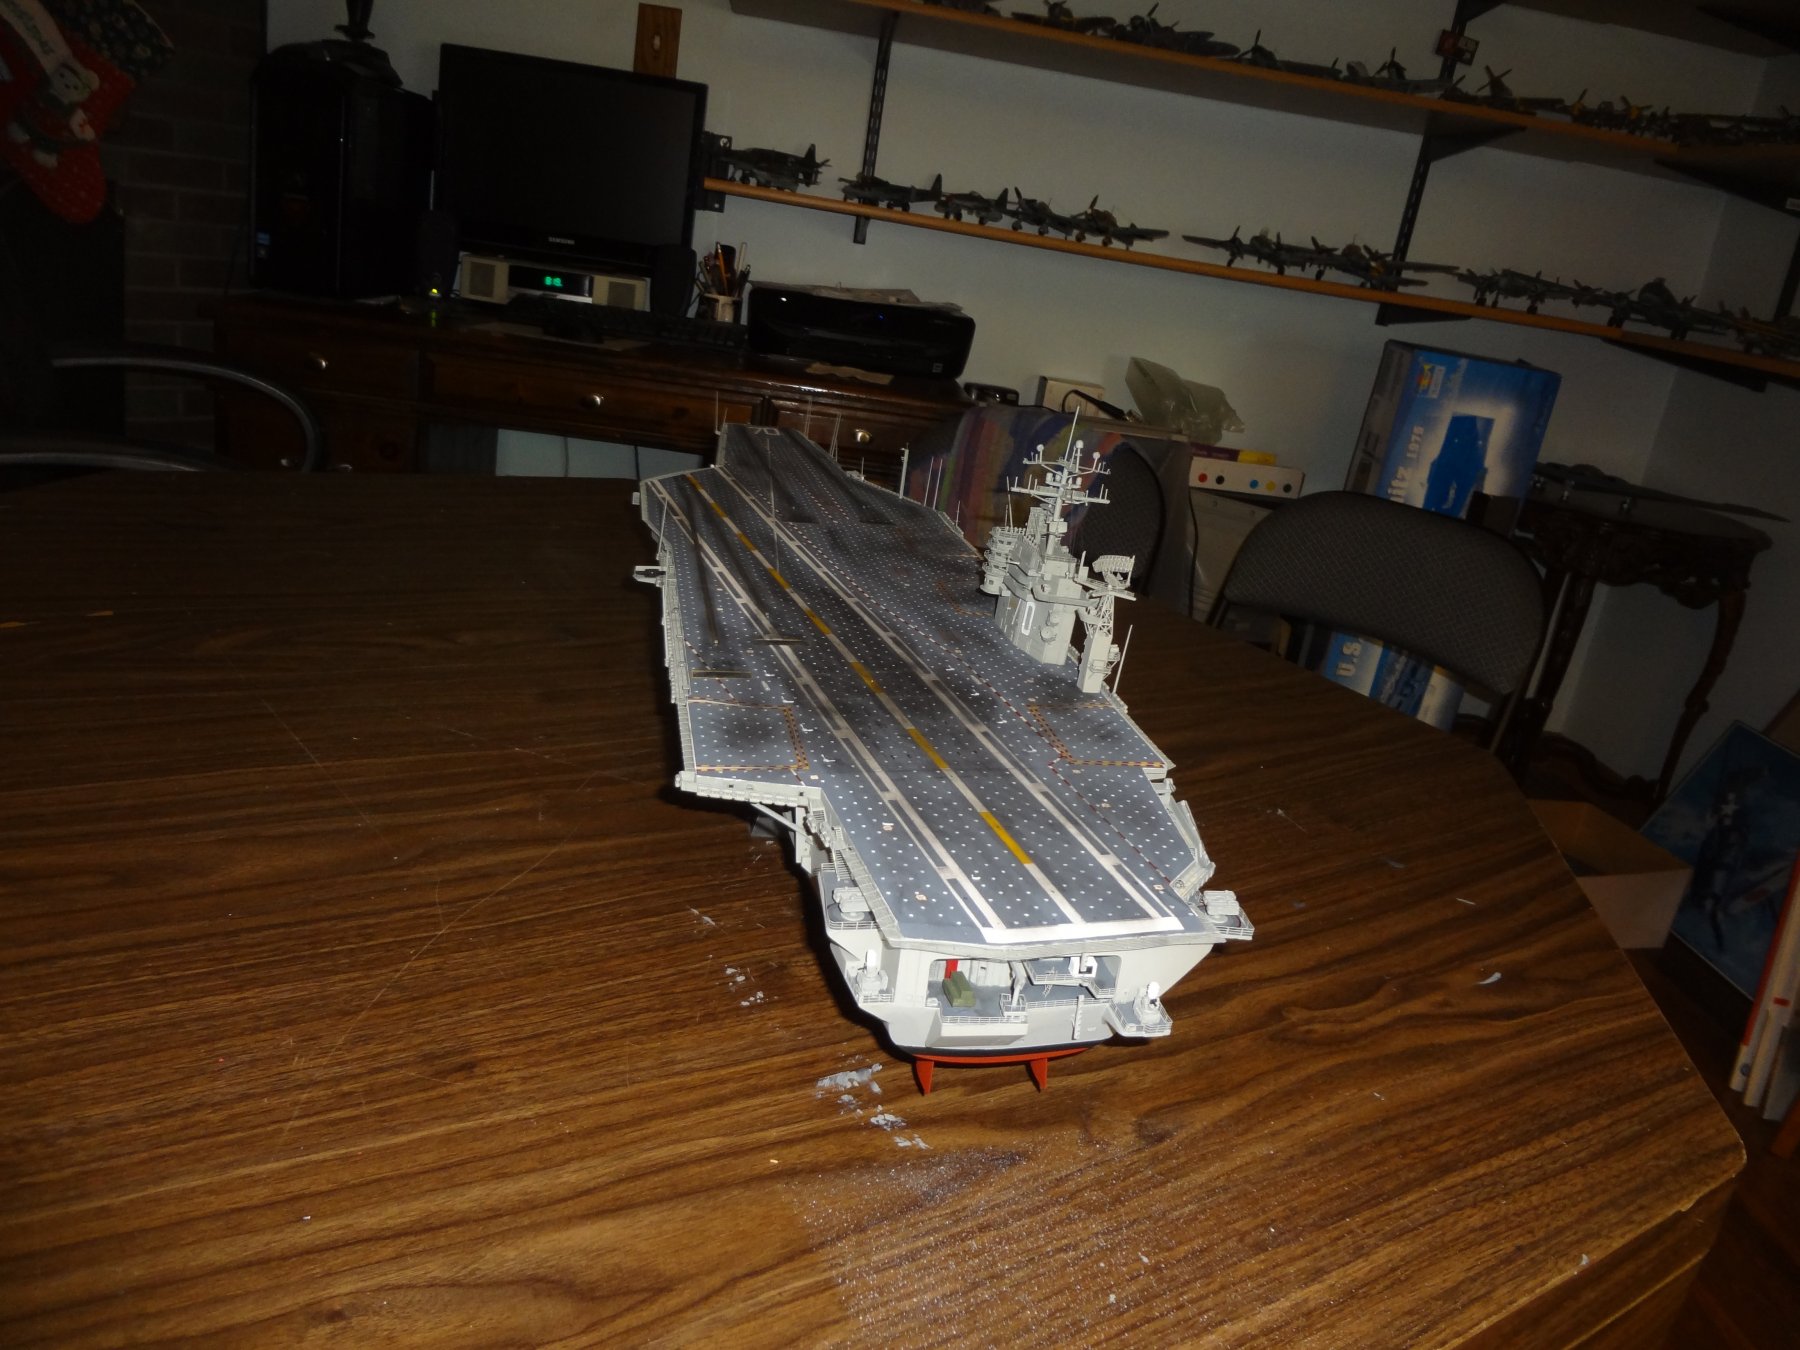
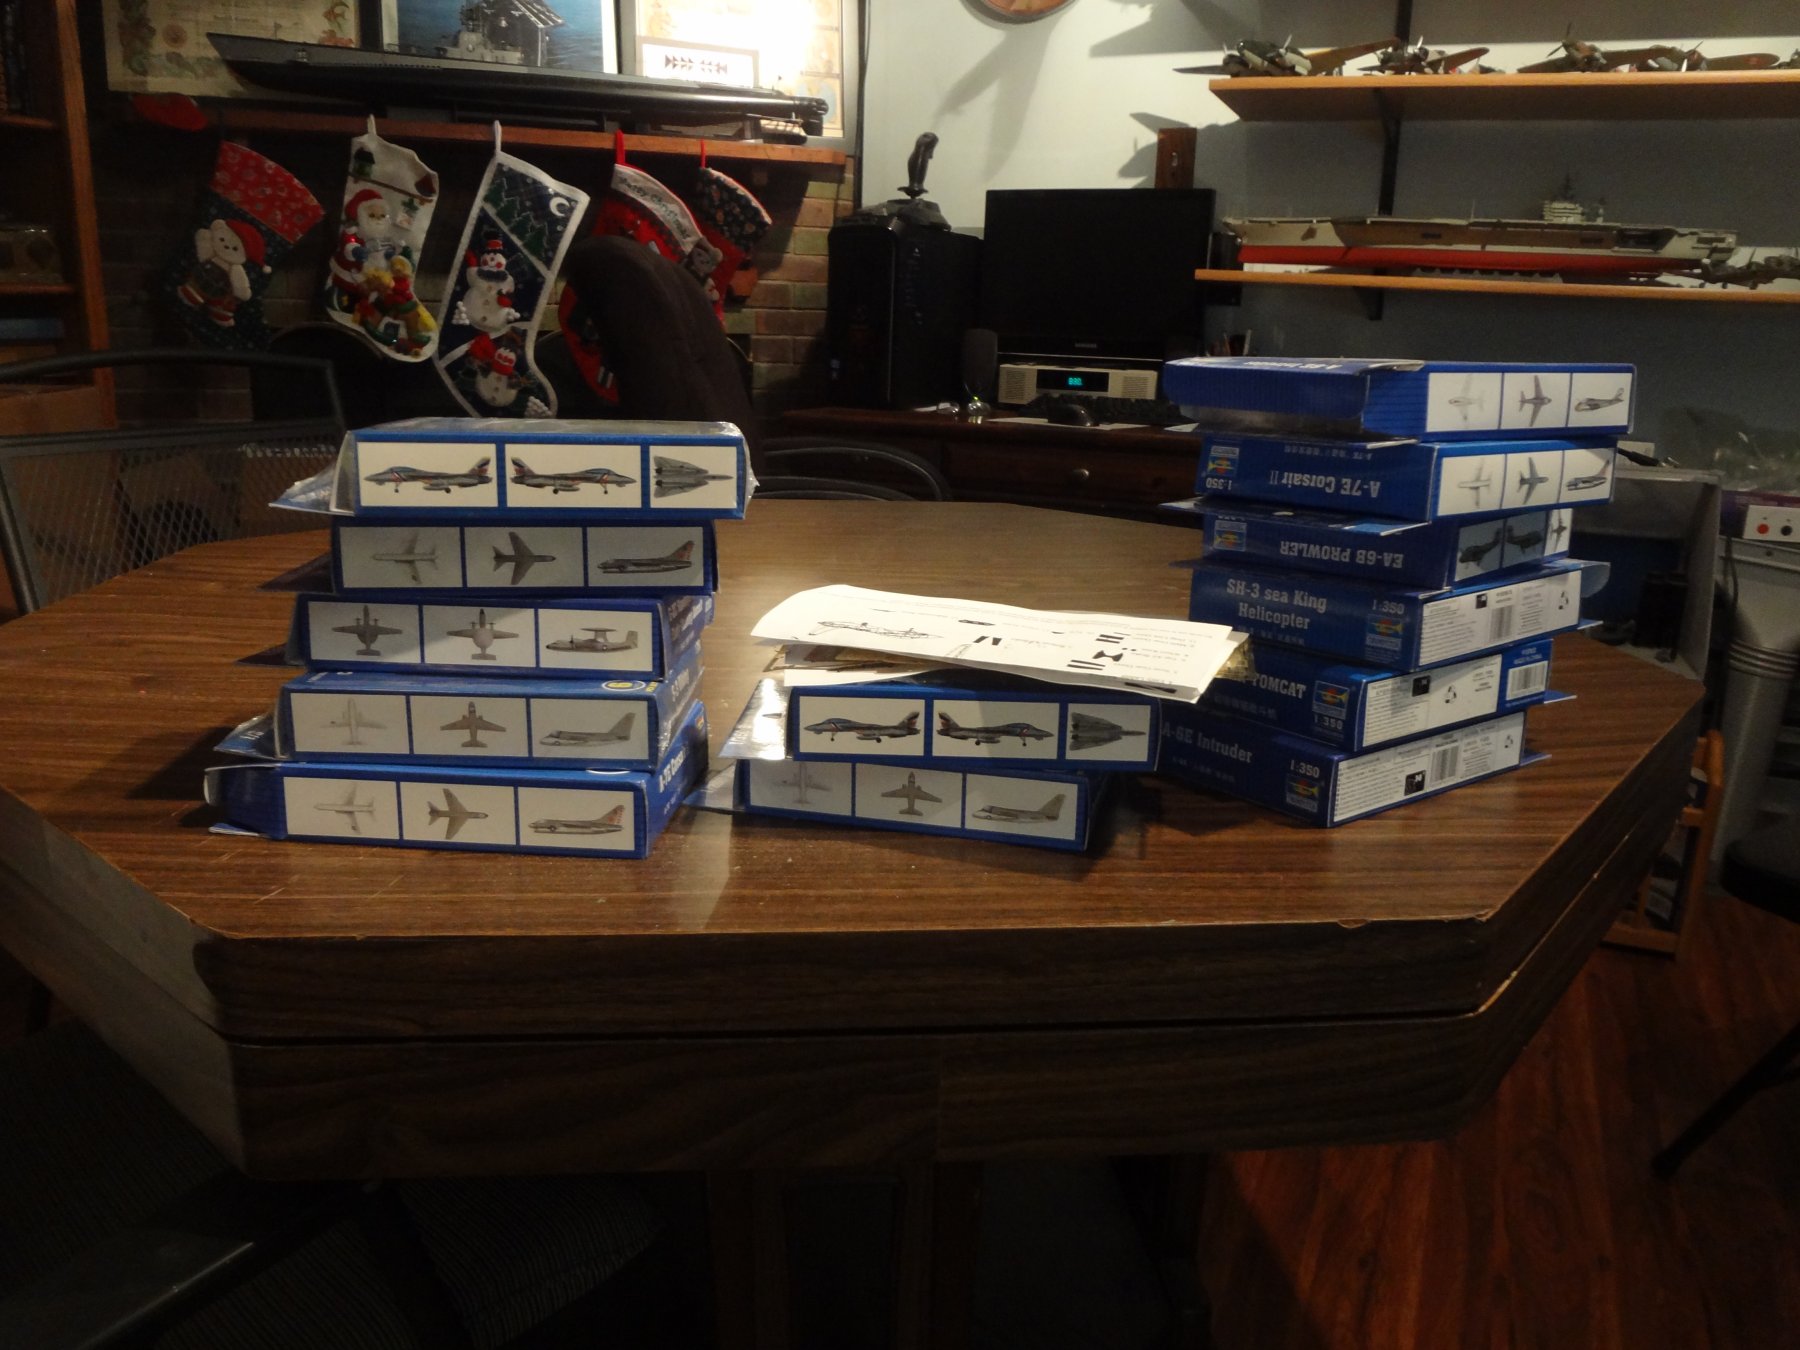
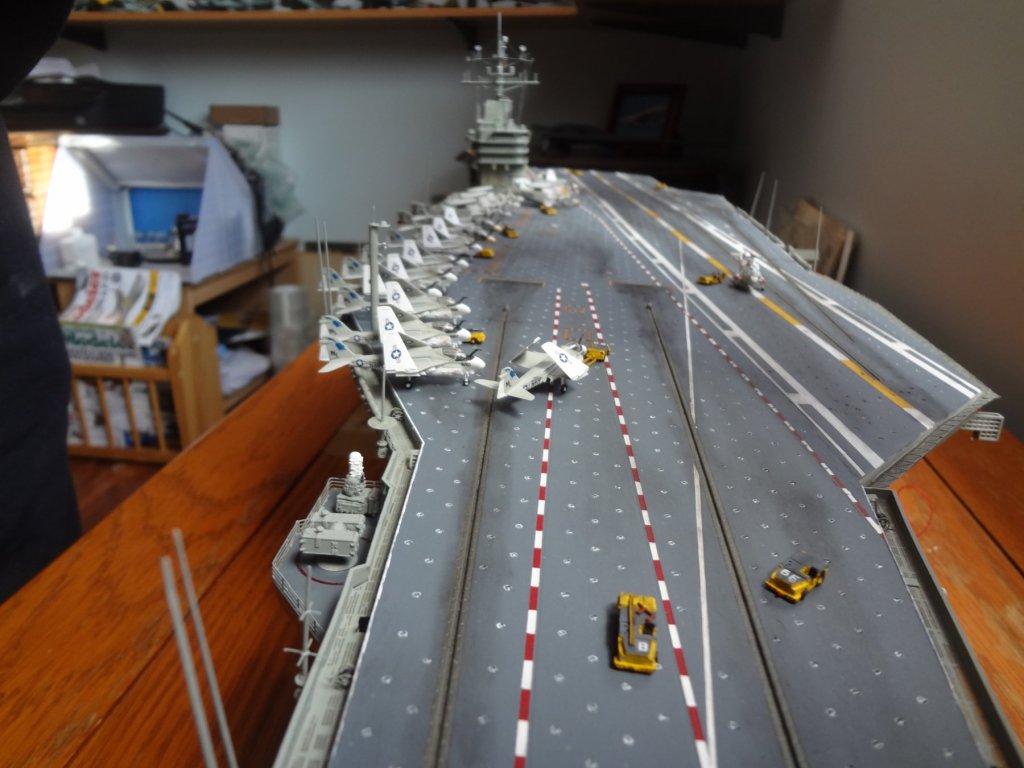
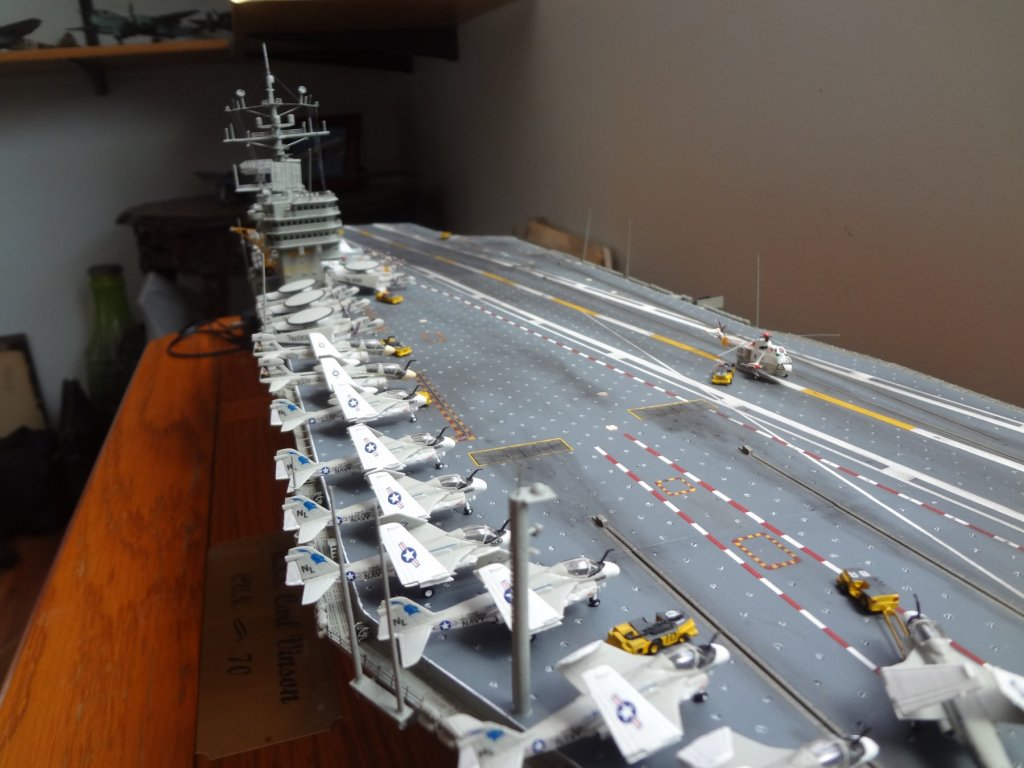
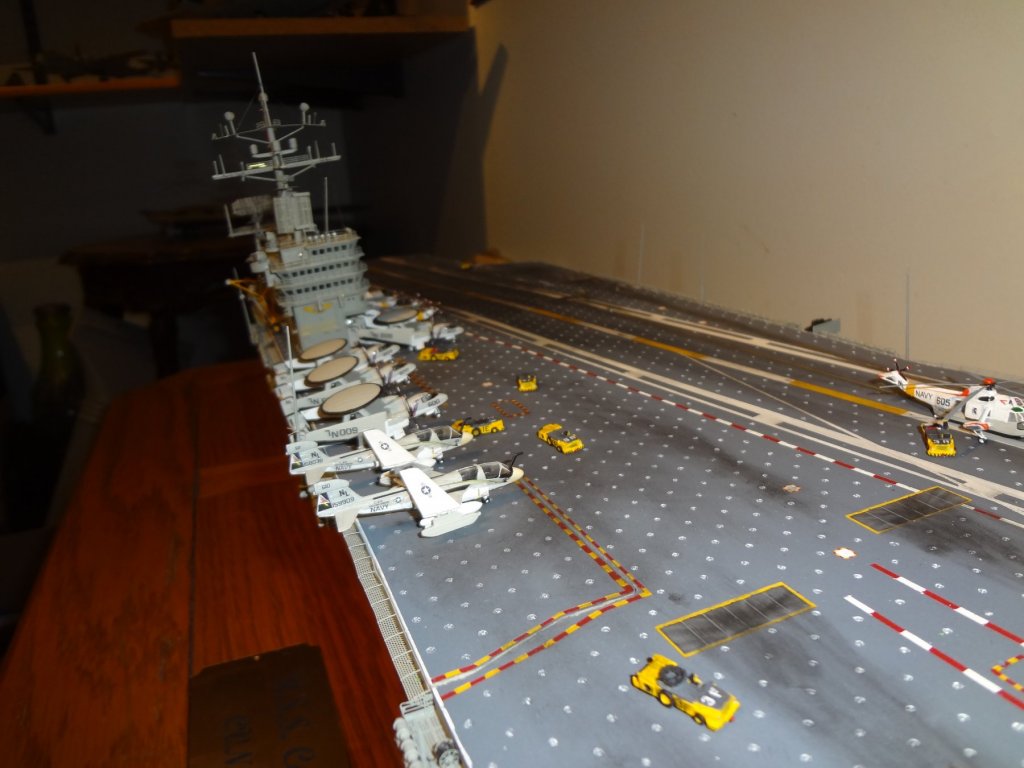
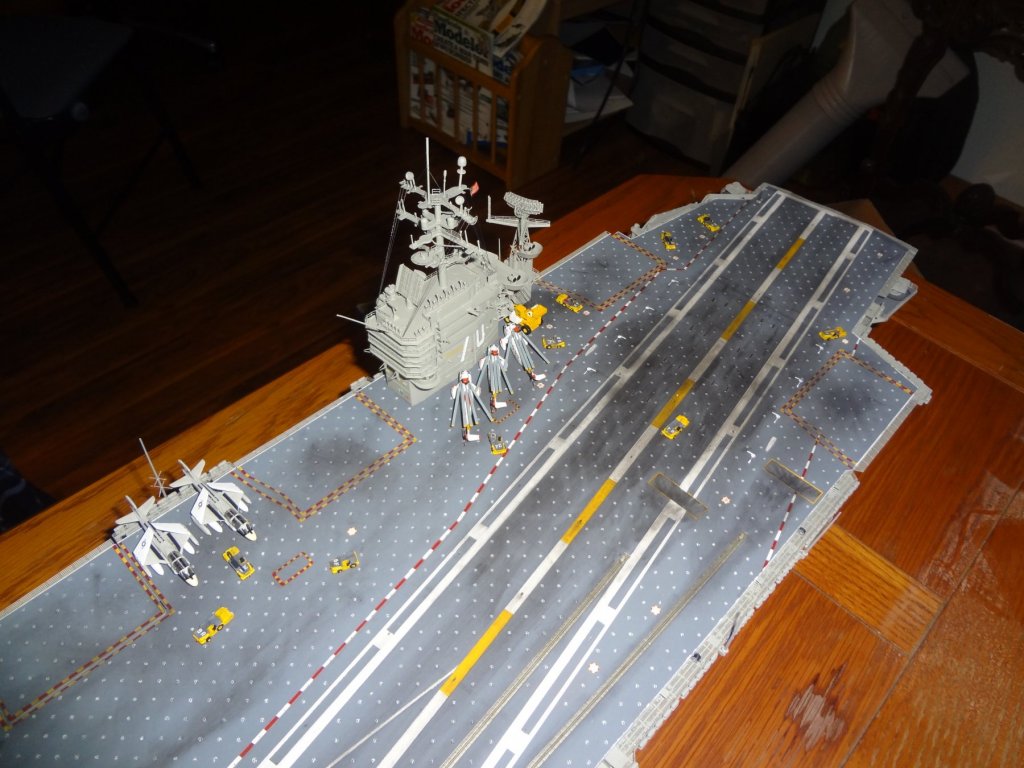
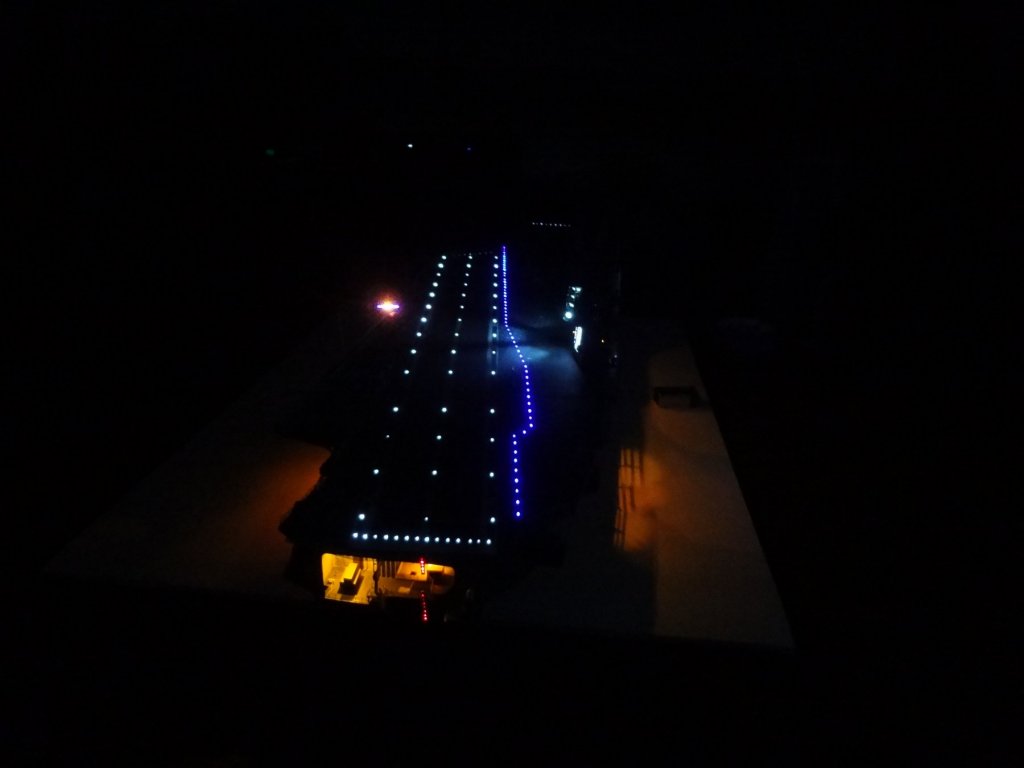
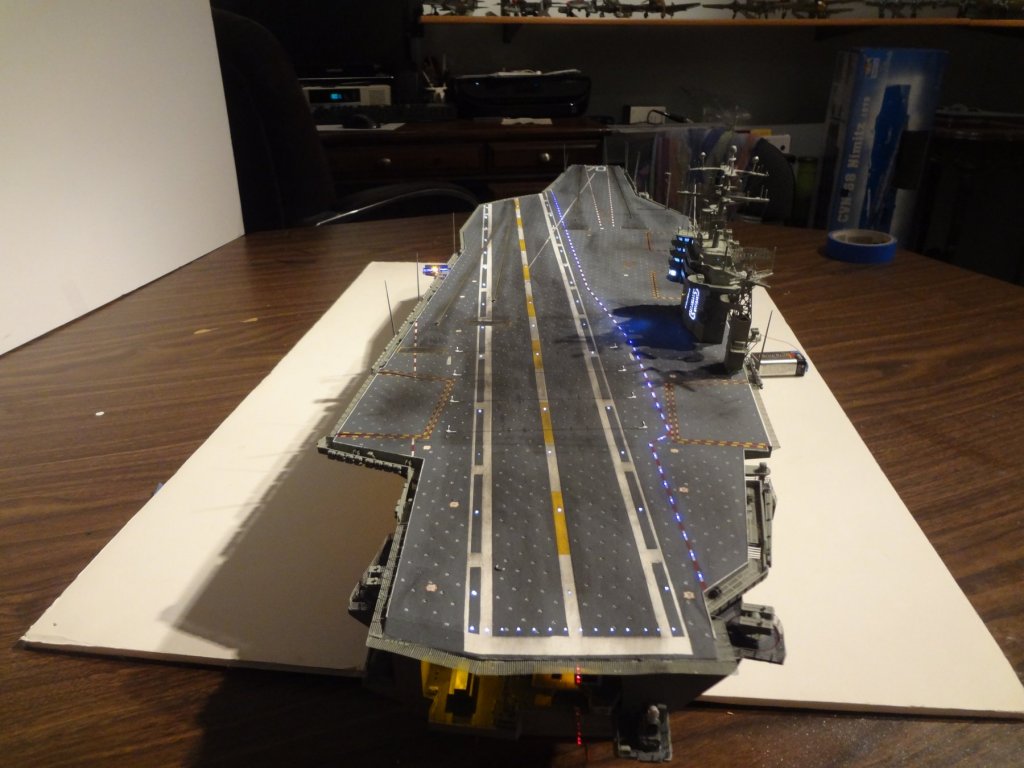
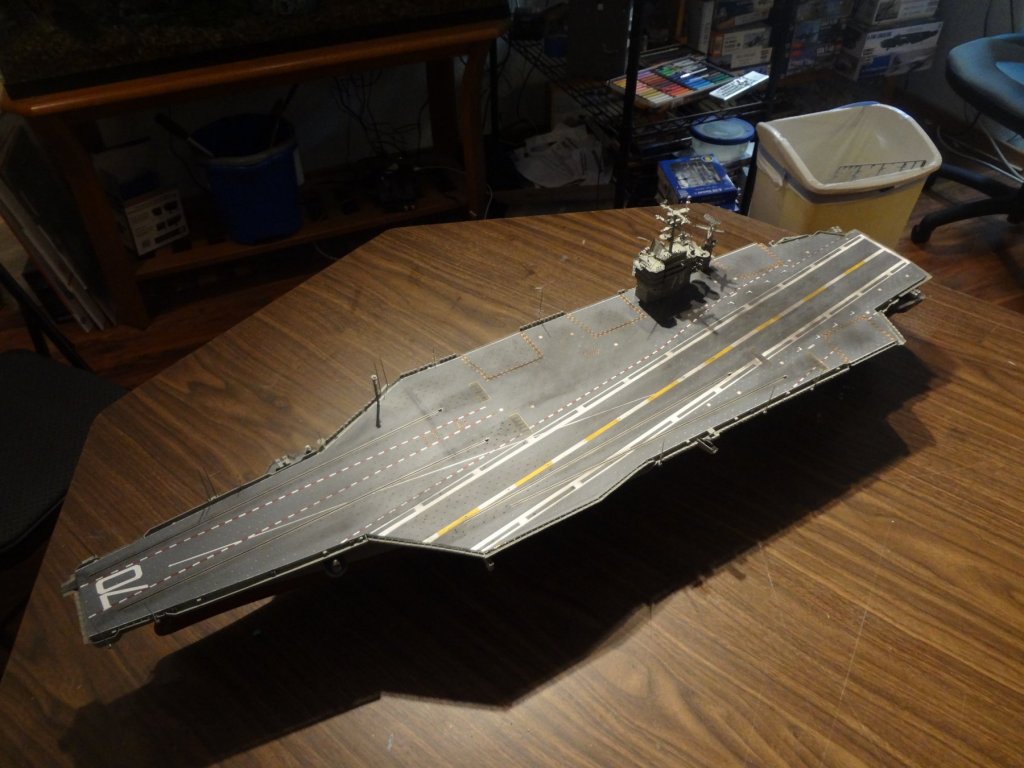
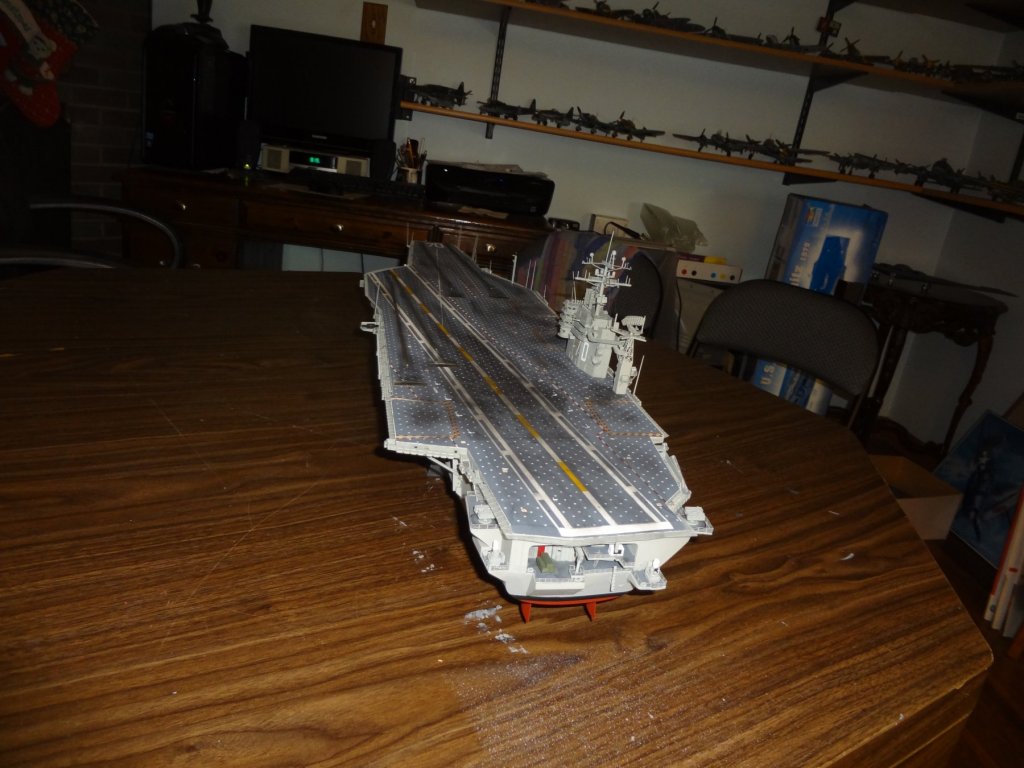
There is light at the end of the flight deck! The ship is basically done. The only two things left to do is to add the screw (props) once it is mounted on the display base and put the flag on it. I did not like how the flat decal flag looked. I do have some ideas on how to make the flag look more realistic. If you have any tips or tricks on making 1/350 scale flags look realistic, please let me know. For now I will be working on the rest of the aircraft for the flight deck, the deck tractors, and the Tilly crane. I purchased the Tilly from BaconFist at Shapeways and am working on detailing it now. The last two pictures are the boxes of aircraft left to build and the Tilly crane without detailing. I am not the best photographer and due to the lighting it is difficult getting a good picture with the compact digital camera. I do plan on having professional pictures taken once it is complete.


- 82 replies
-
- 12
-
-
- carl vinson
- trumpeter
- (and 2 more)
-
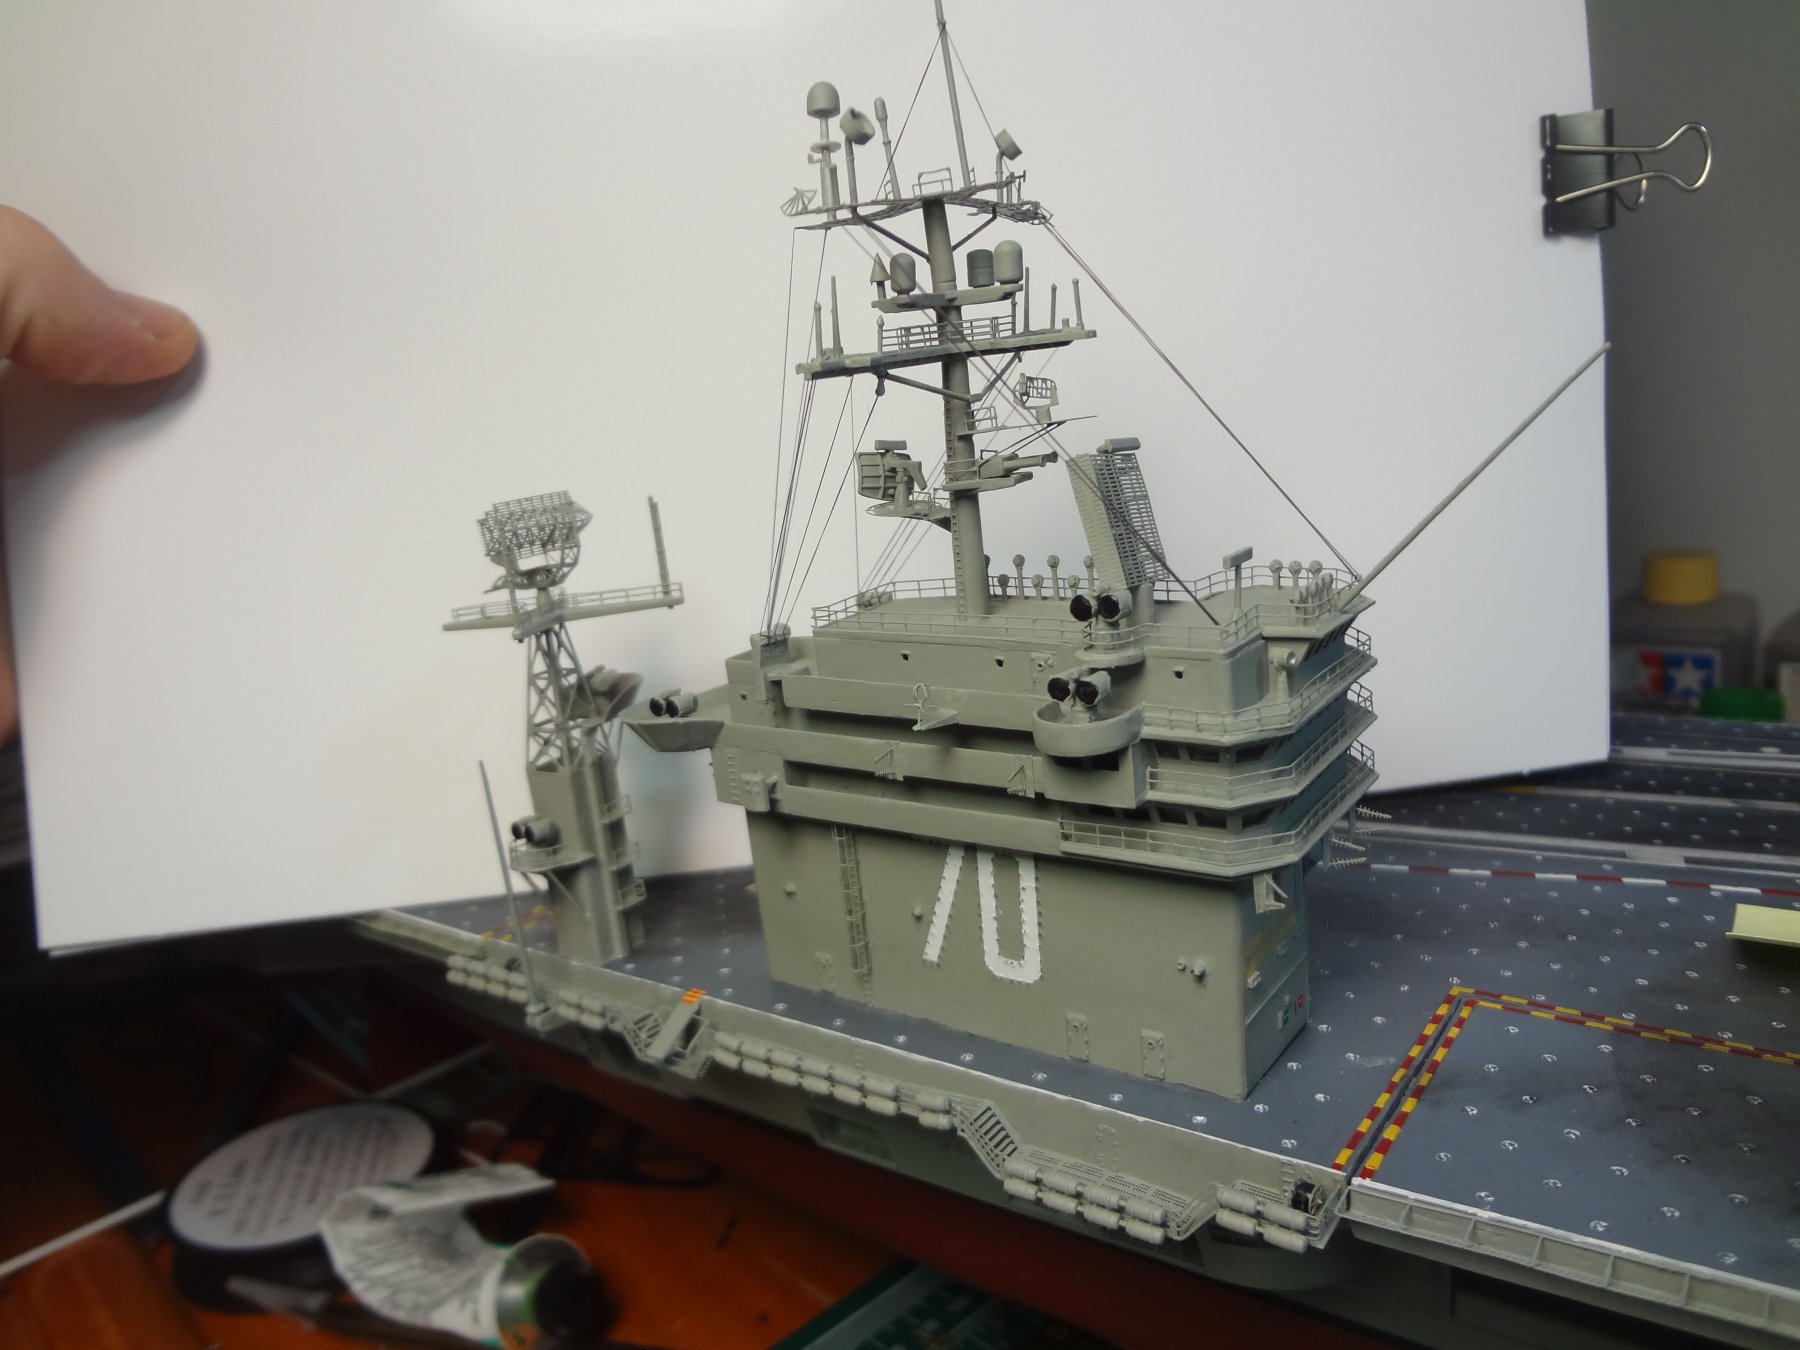
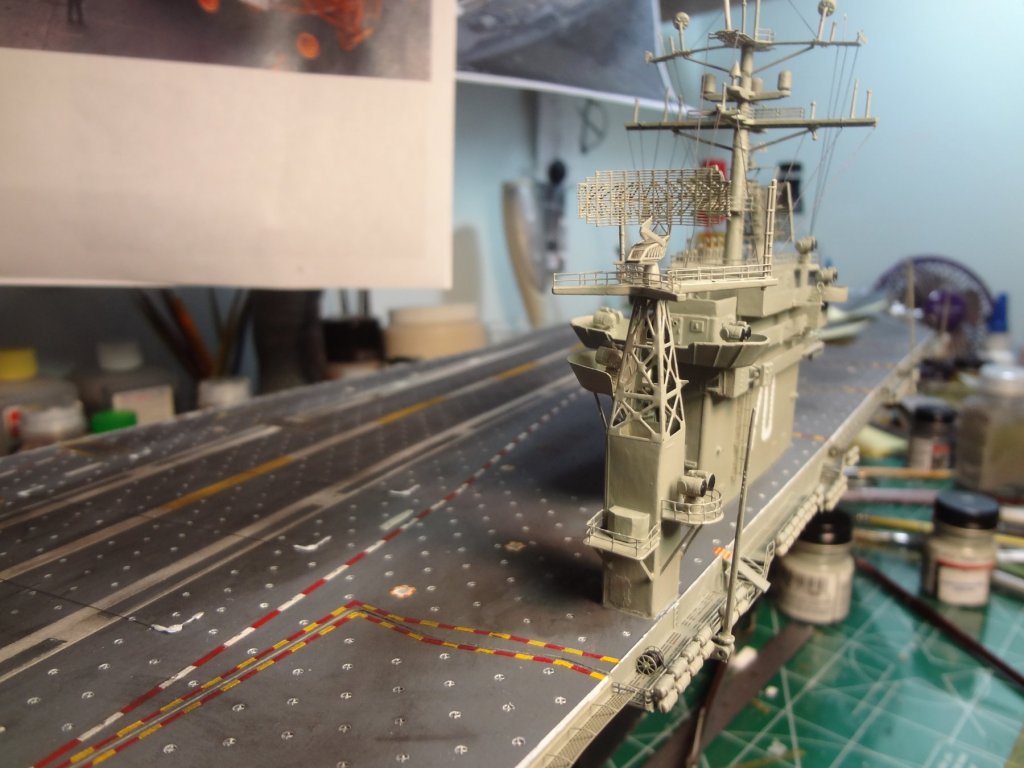
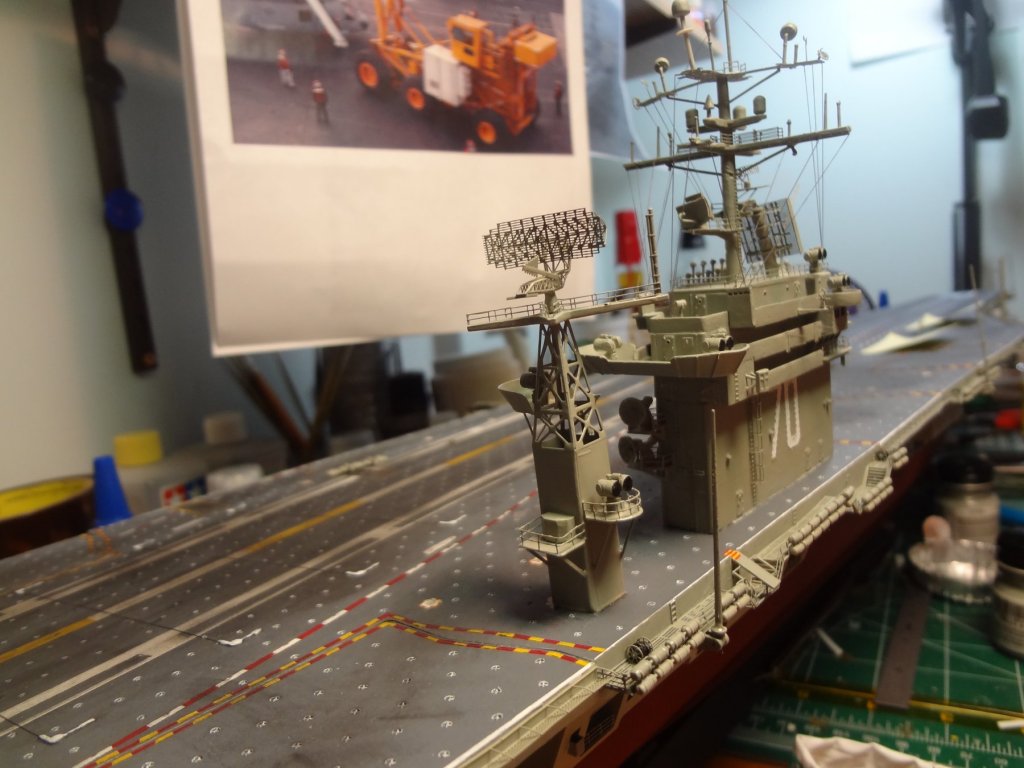
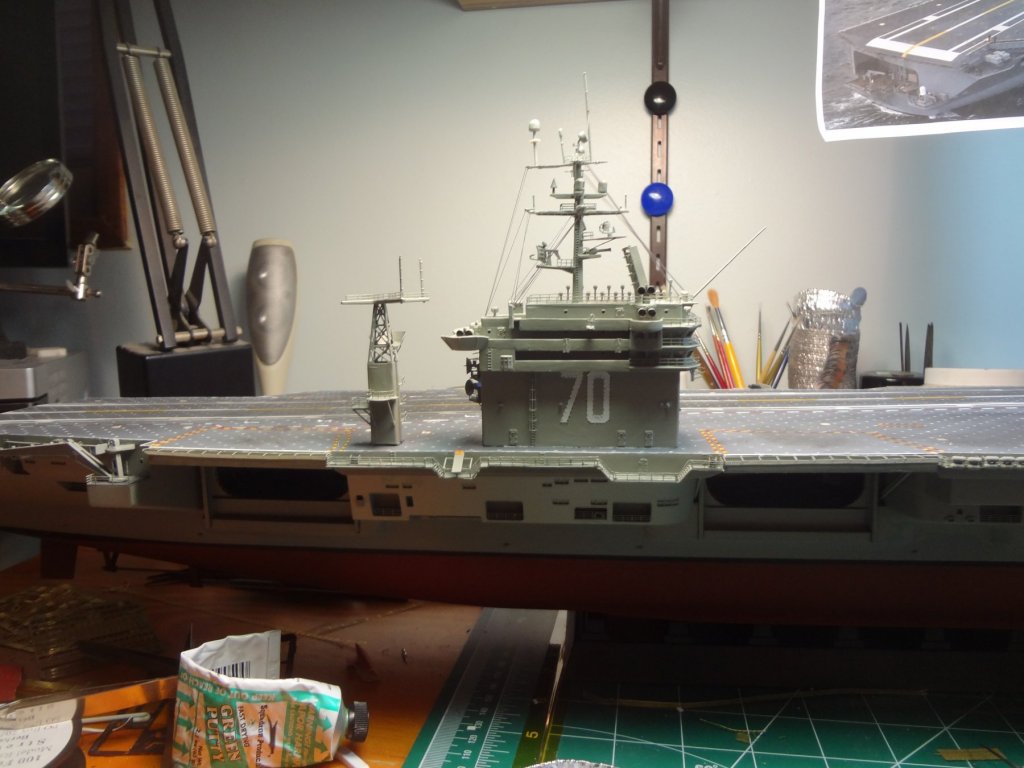
UPDATE: Was informed that the radar tower behind the island is in the wrong position. After some quick research, I have confirmed that Trumpeter has the radar tower in the wrong spot. The tower should be located at the very edge of the flight deck. This is for all Nimitz class carriers. The Nimitz 1975 cruise book clearly shows the tower at the edge. I have relocated the tower.


- 82 replies
-
- 11
-
-
- carl vinson
- trumpeter
- (and 2 more)
-
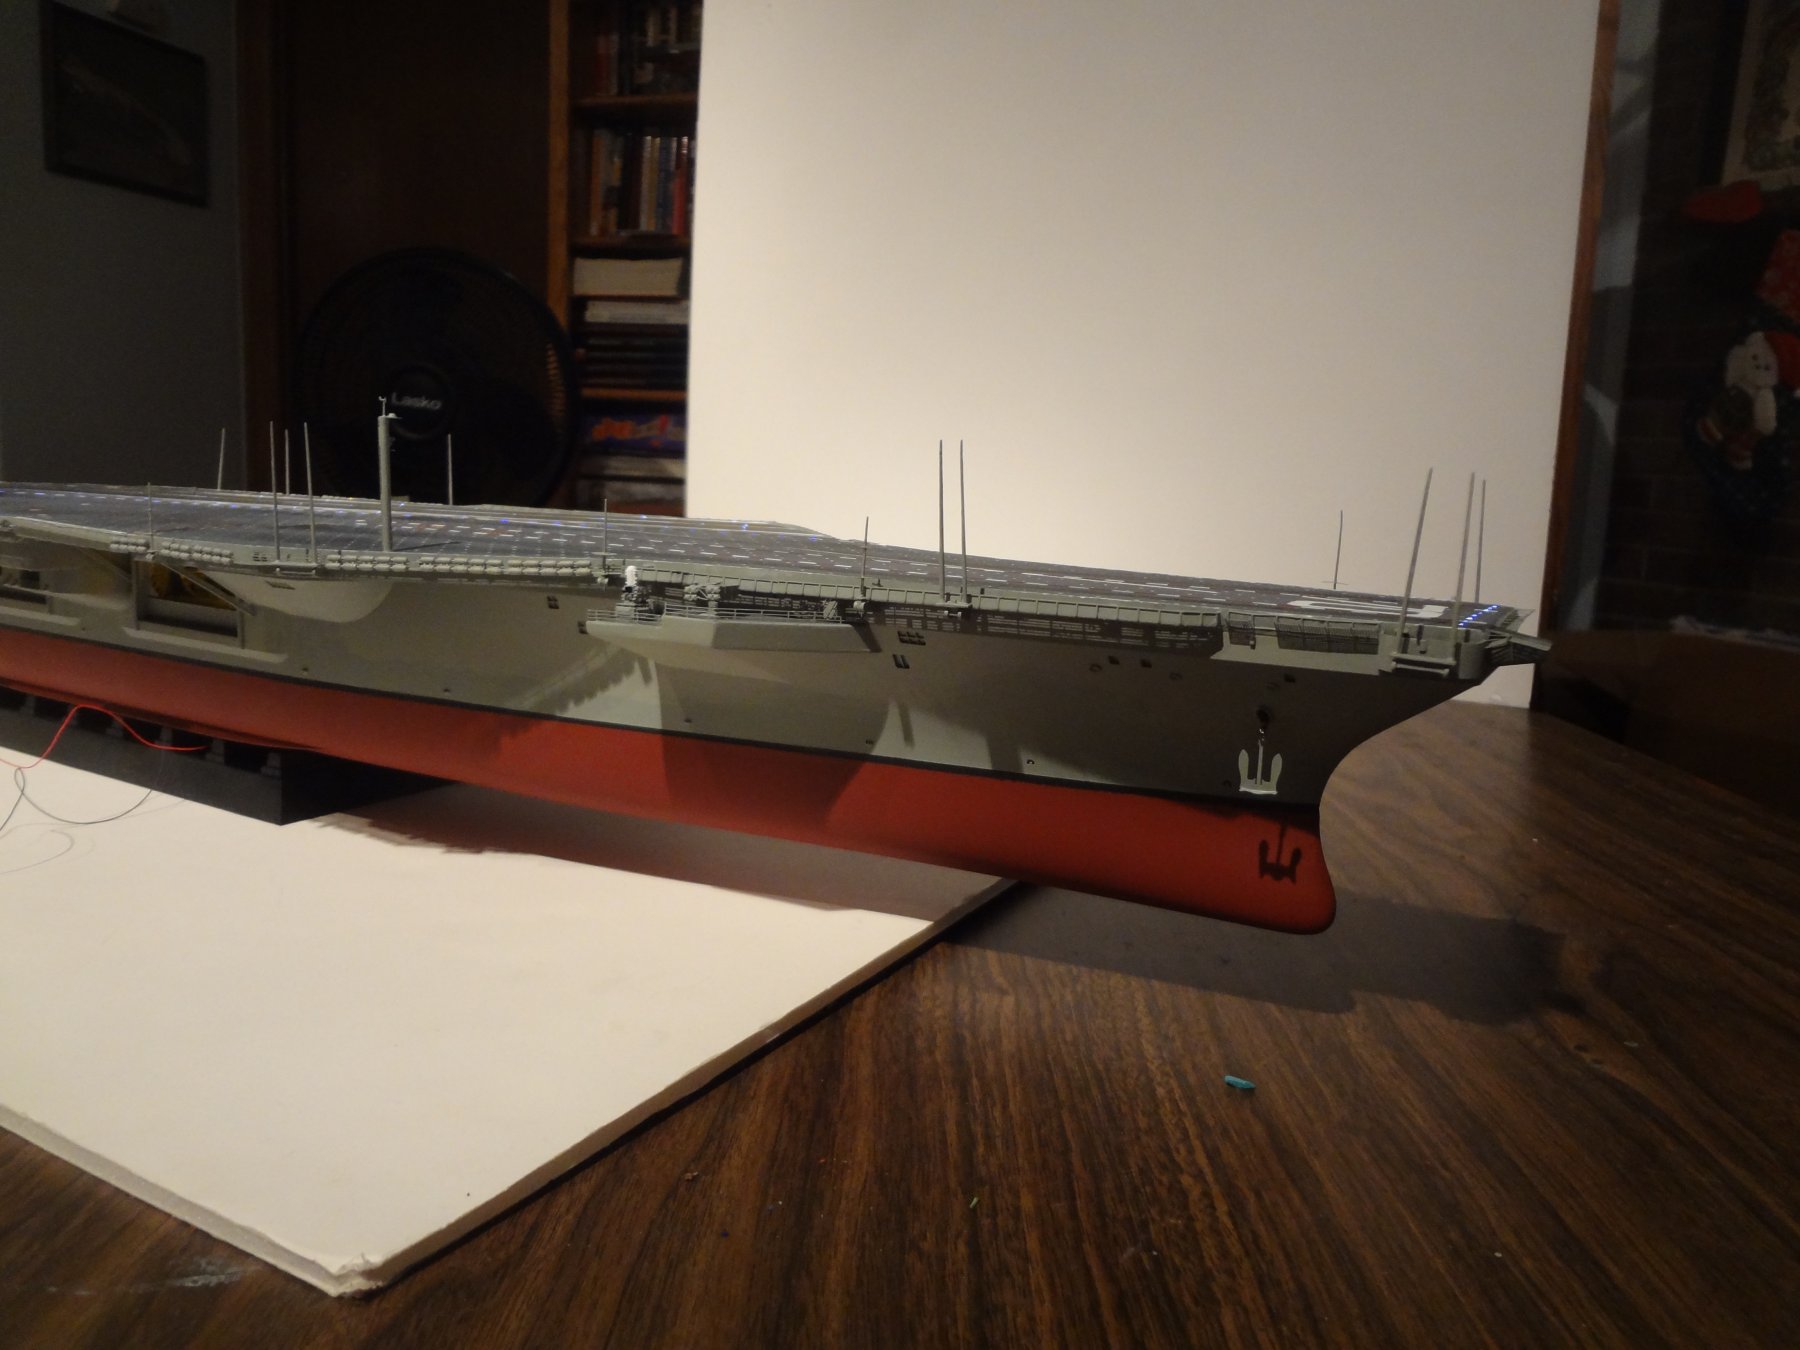
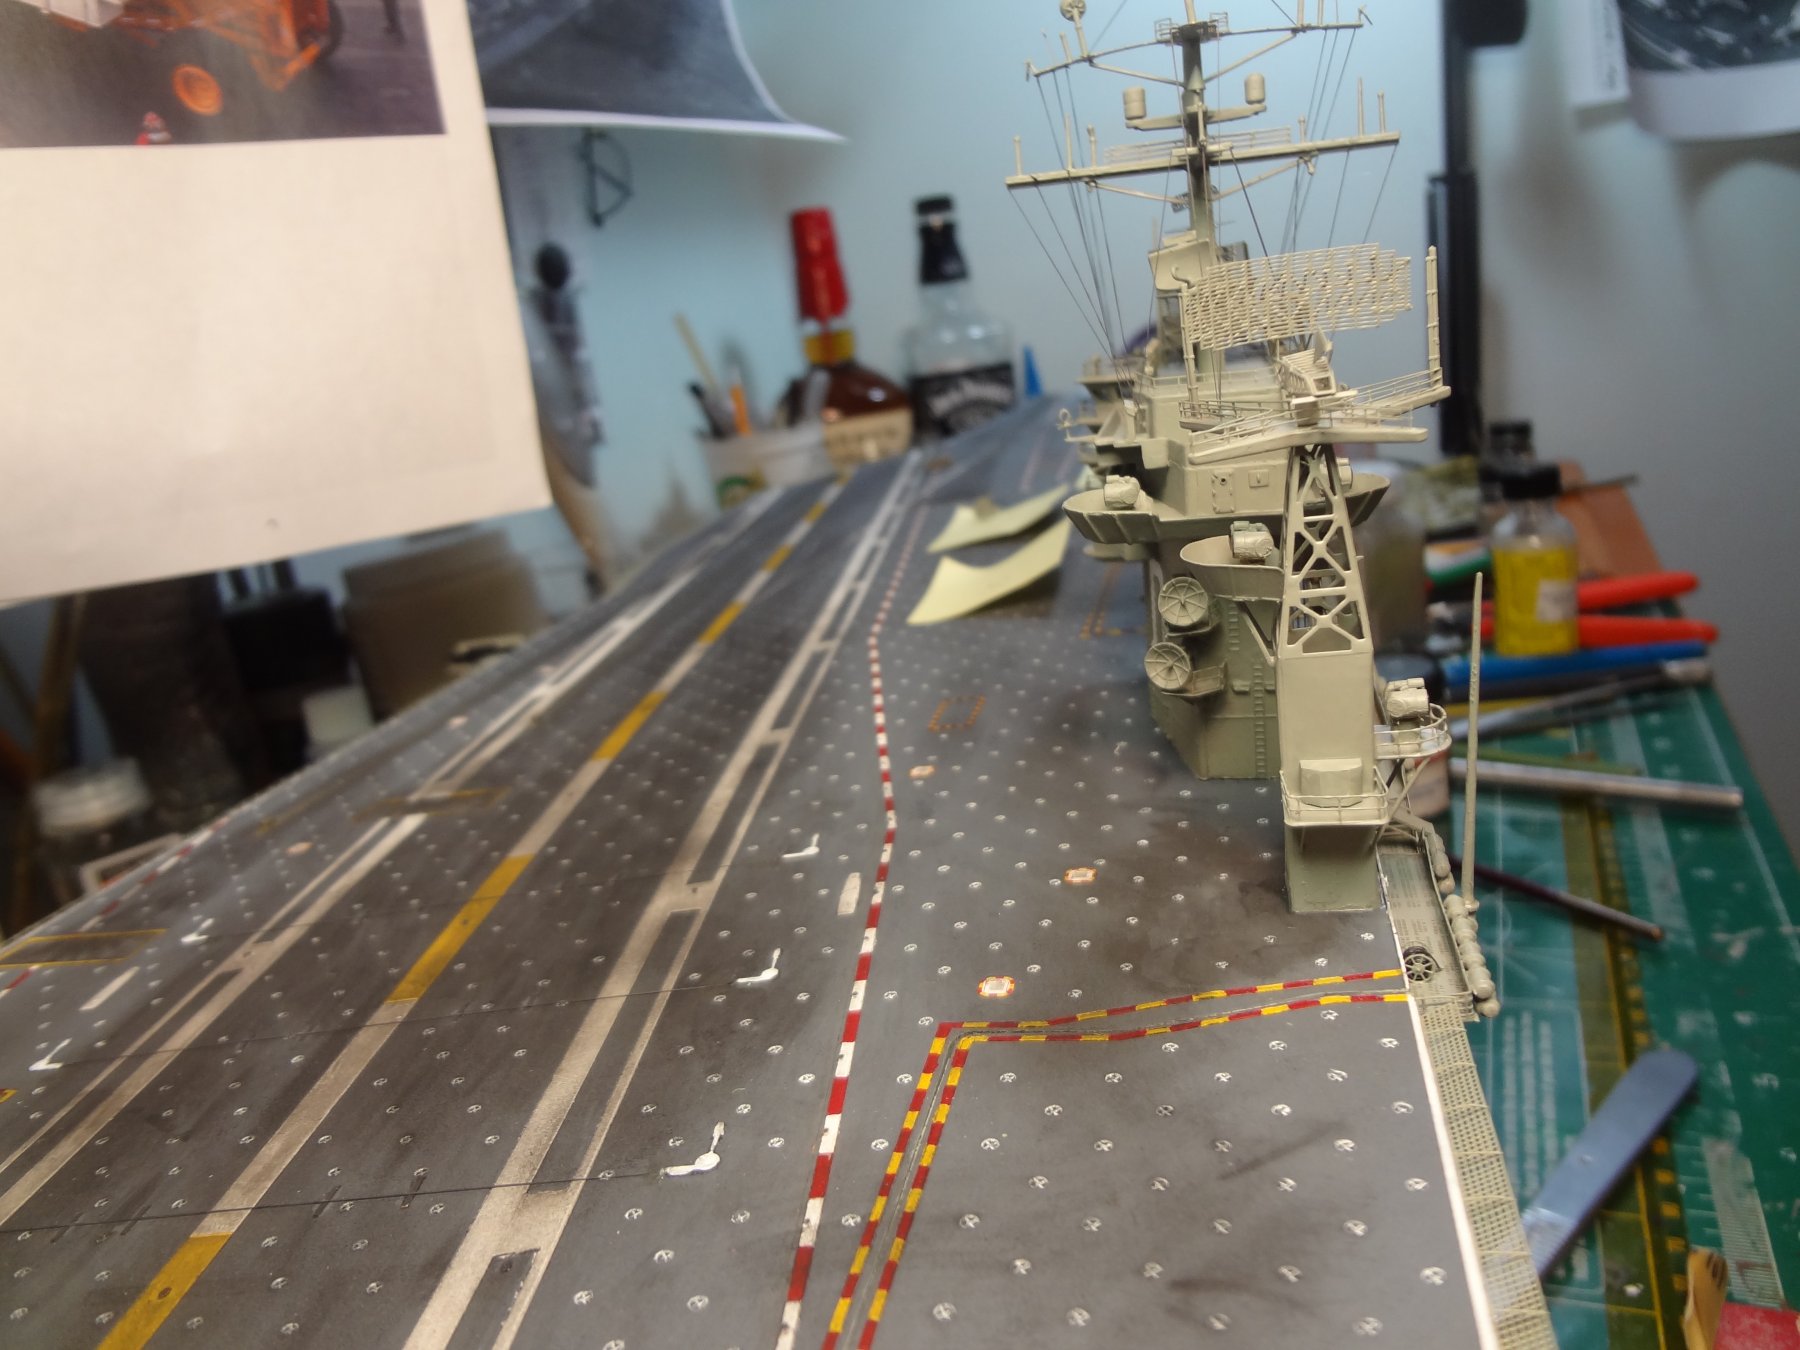
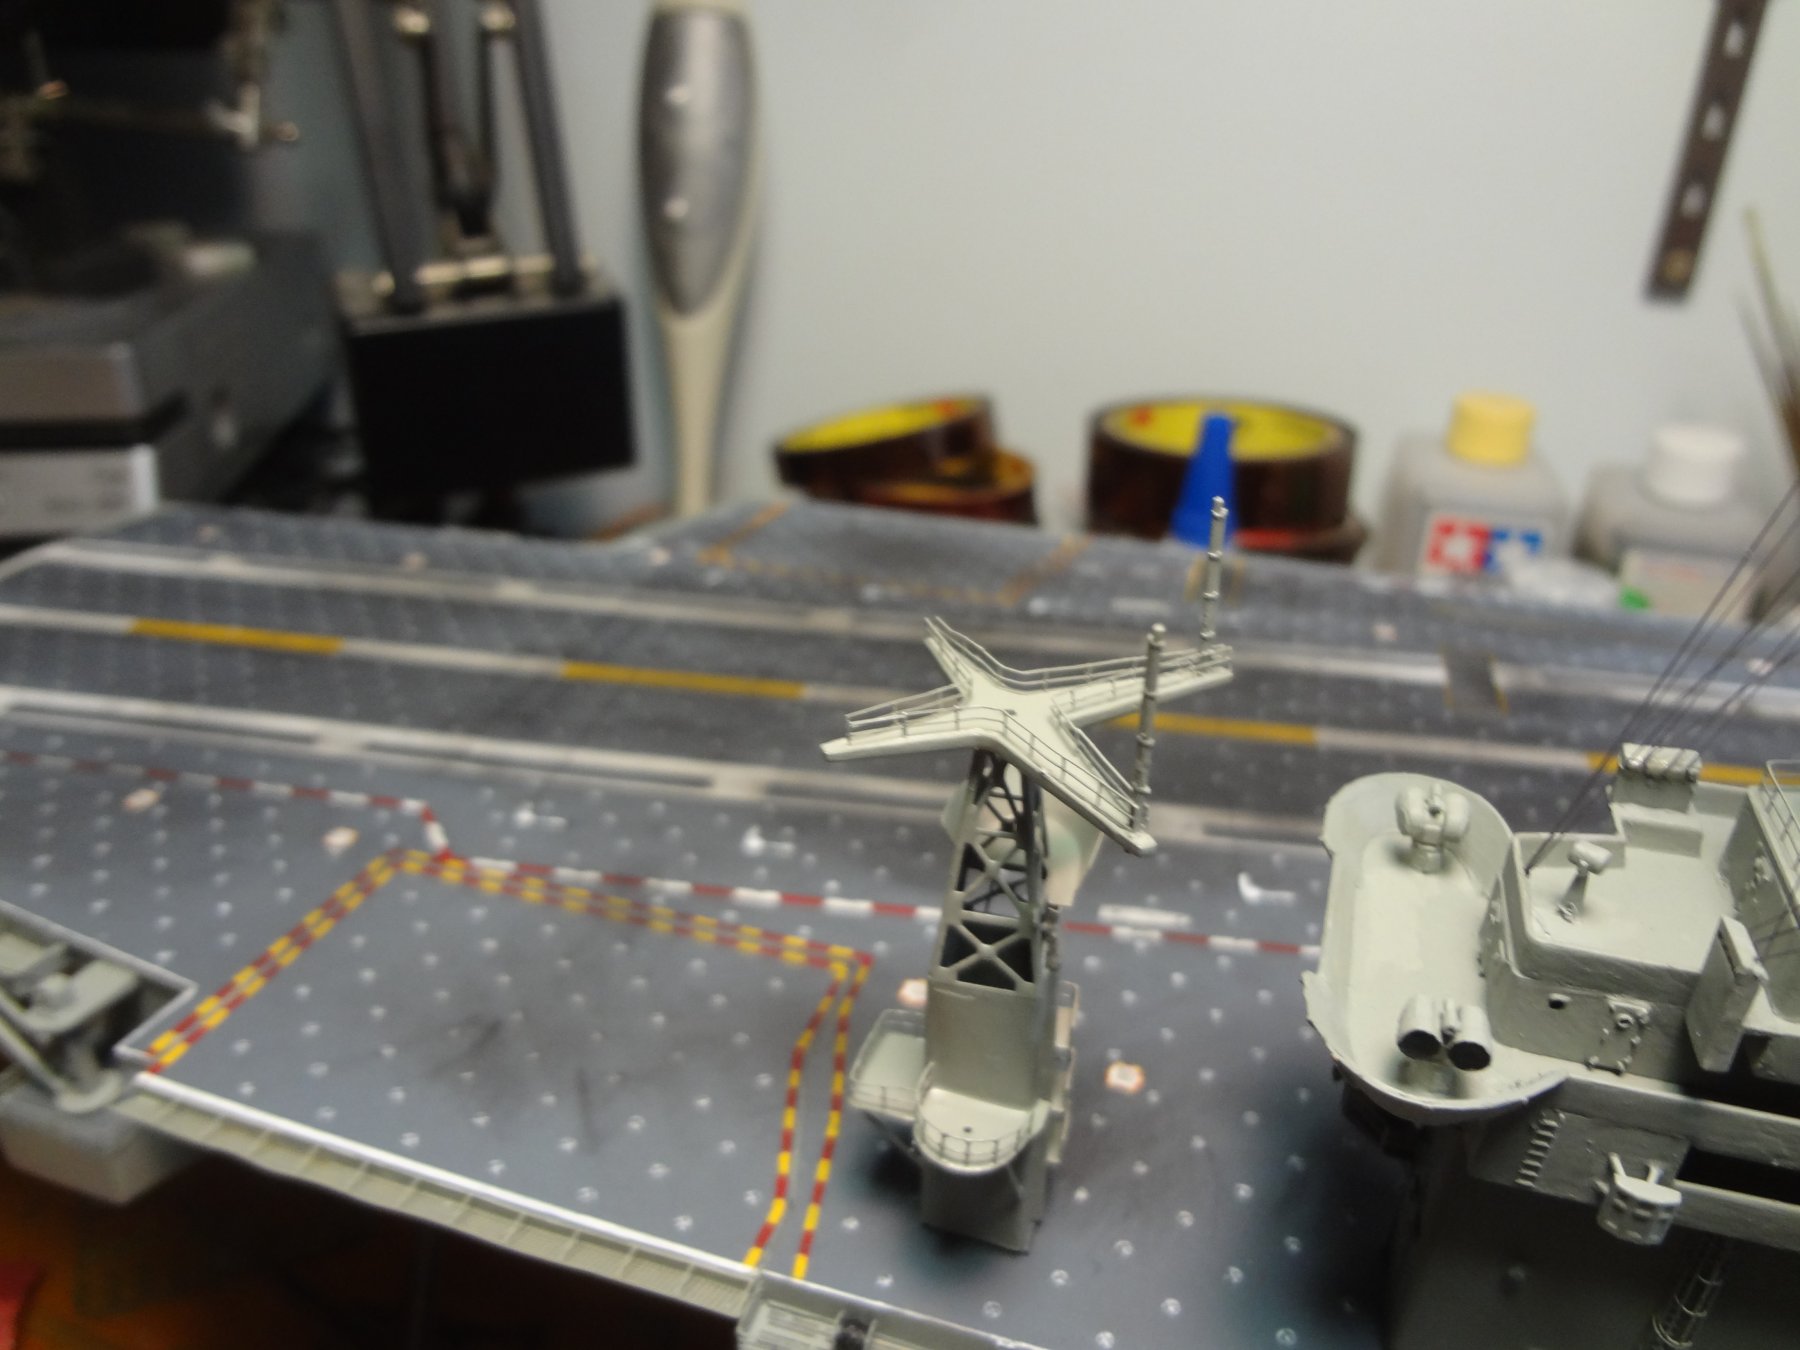
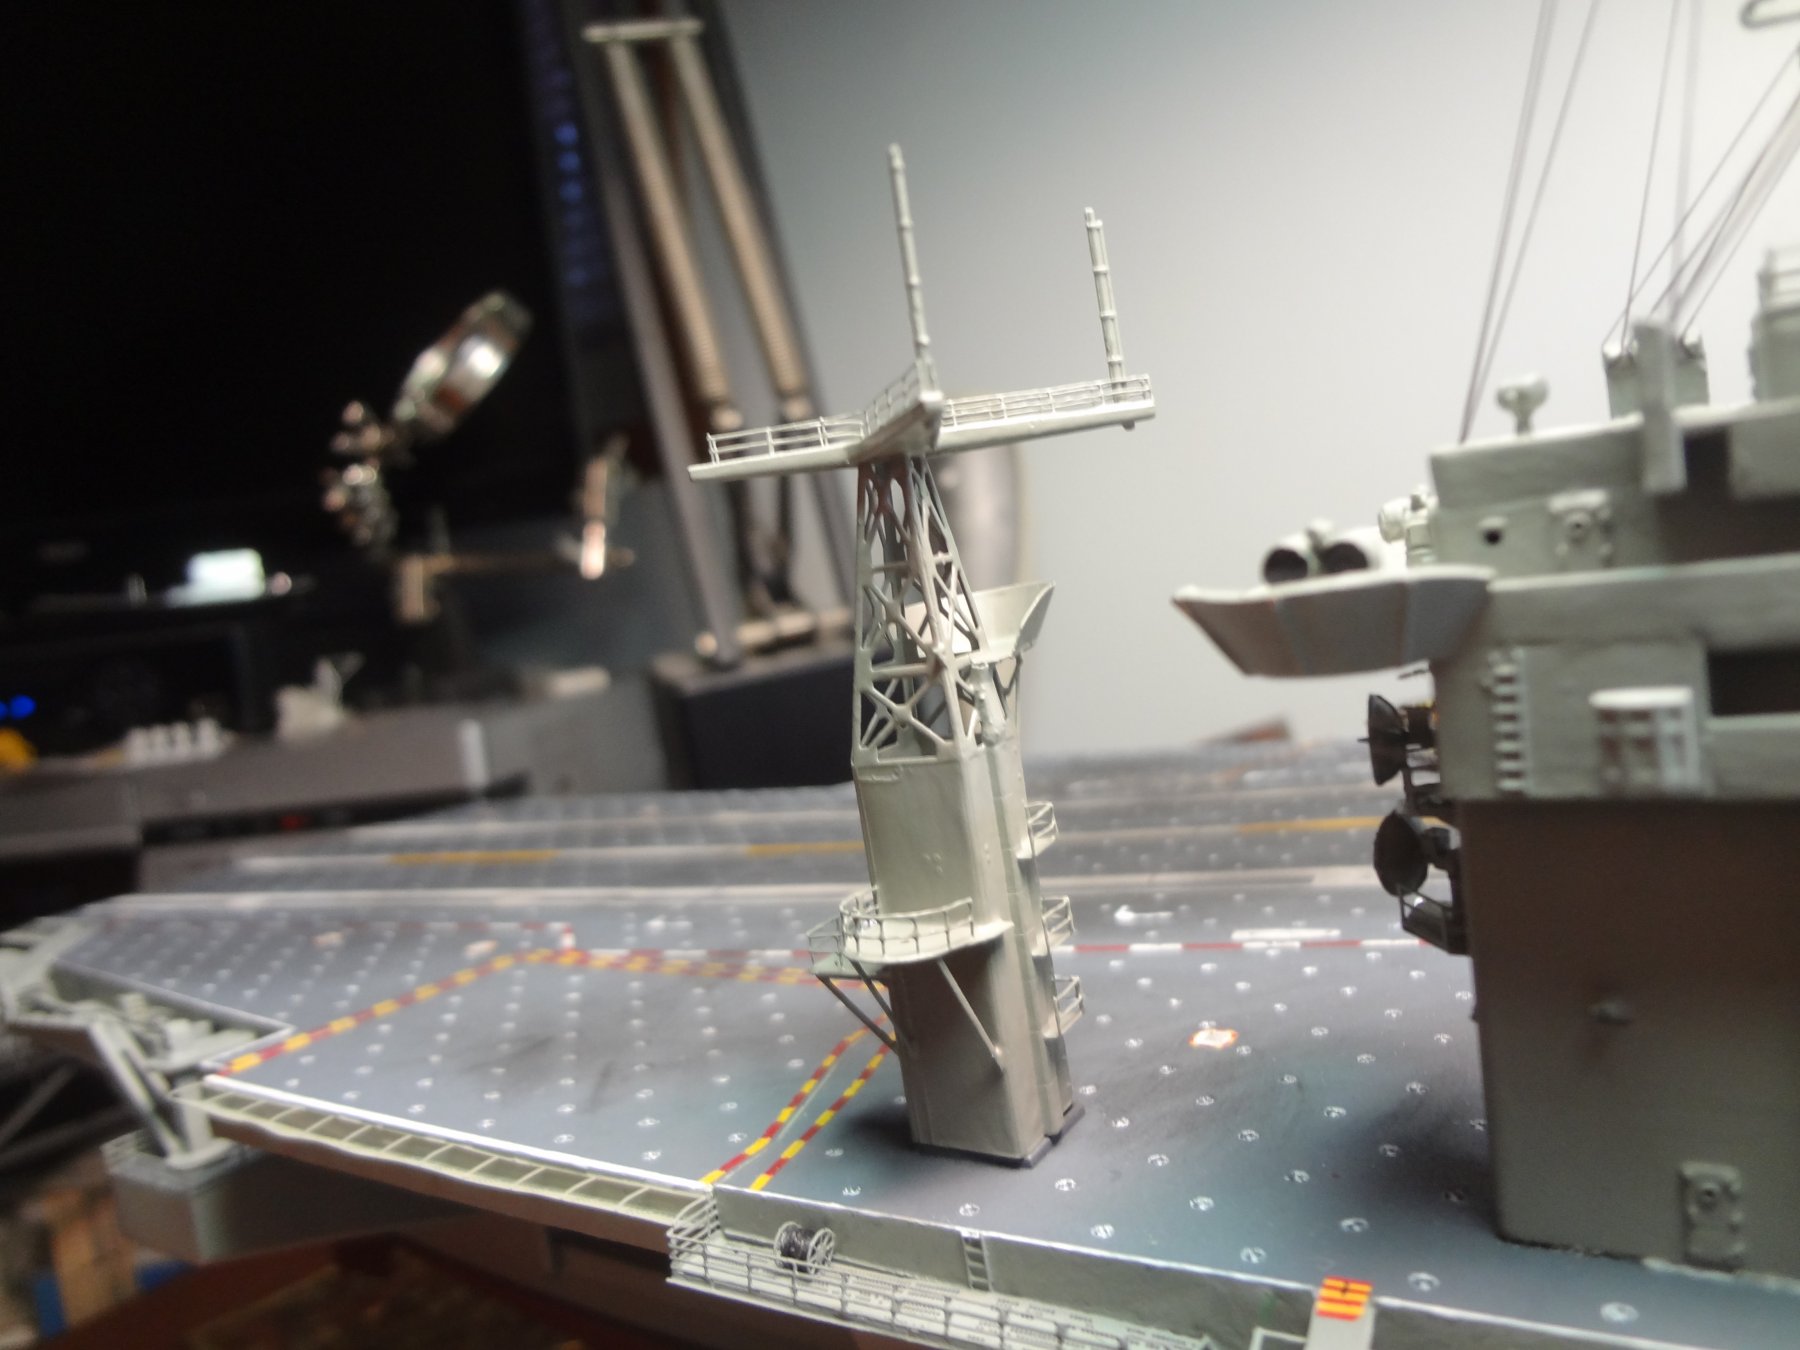
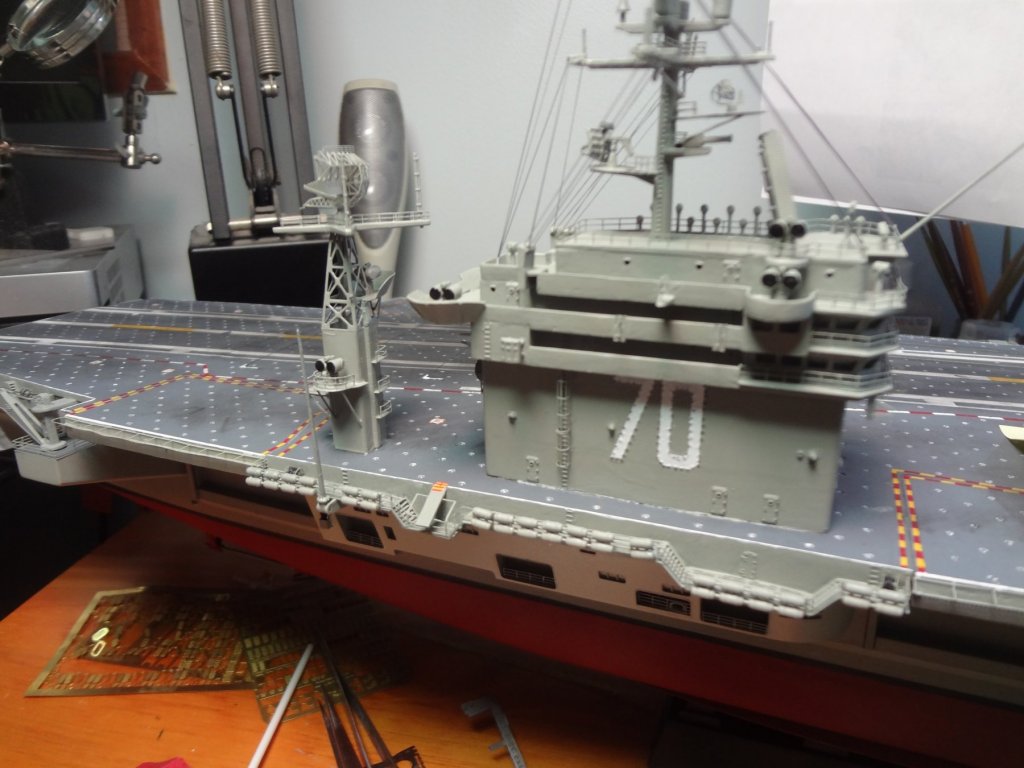
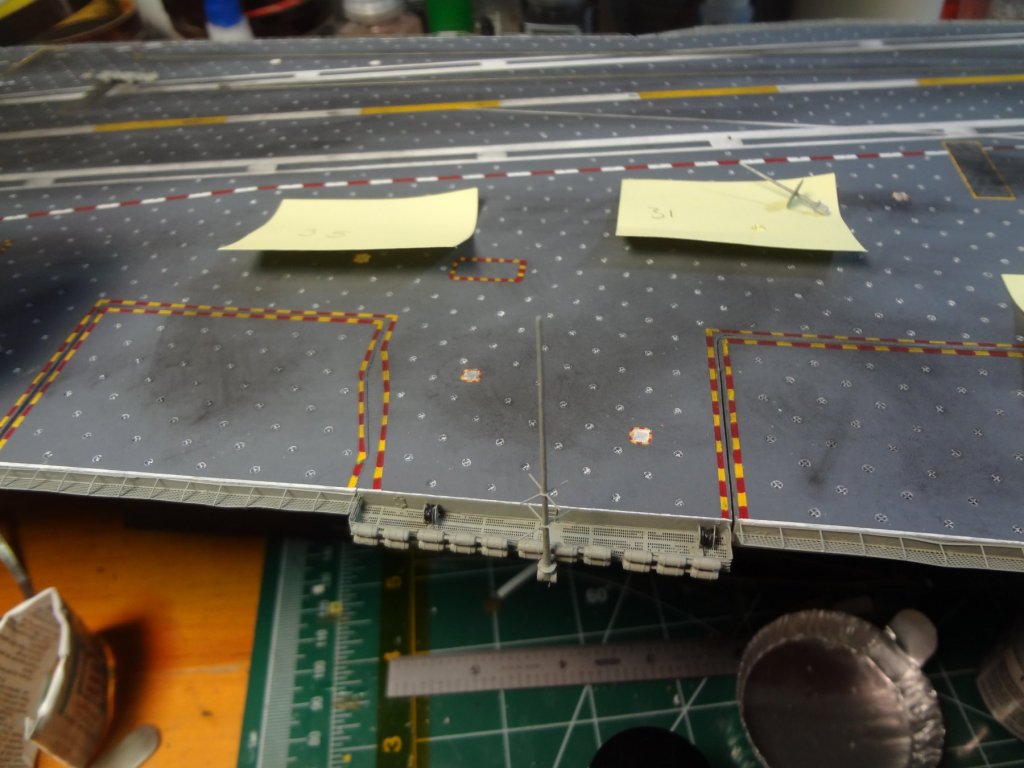
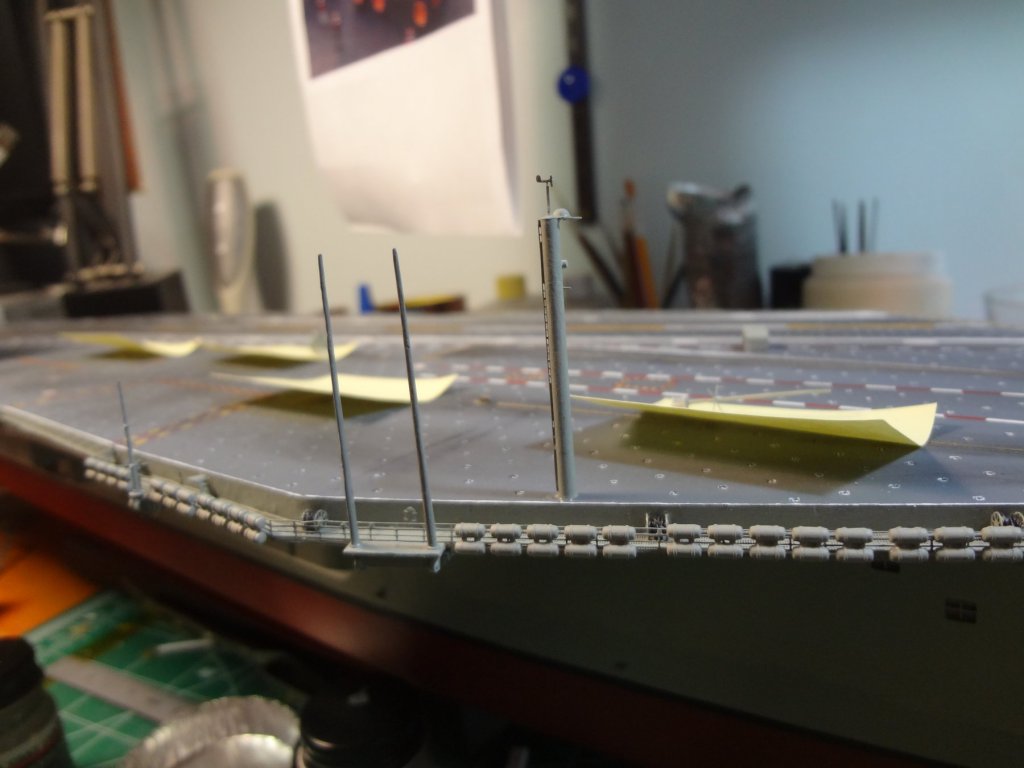
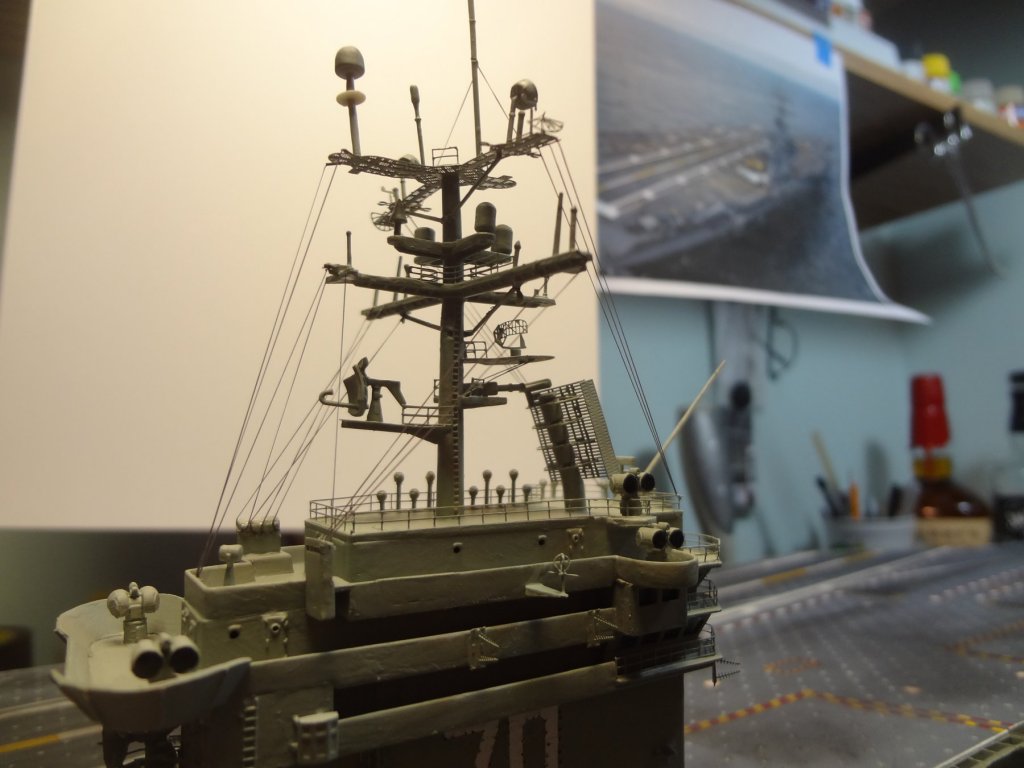
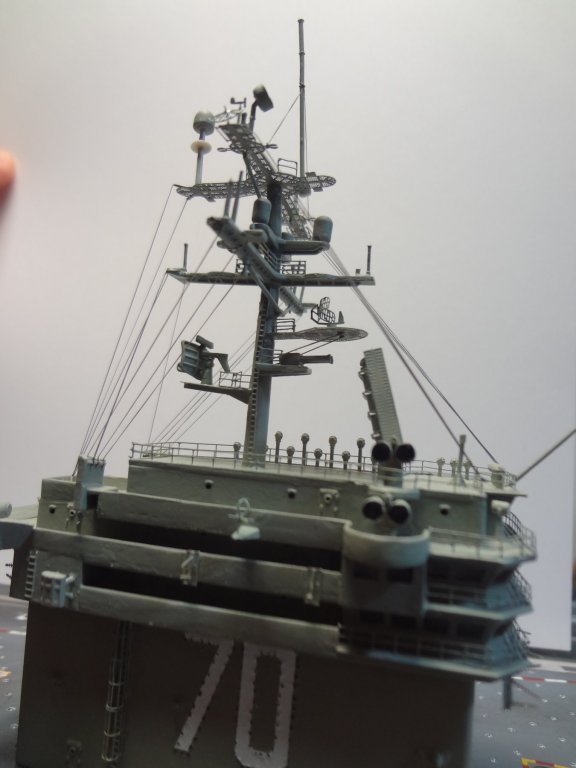
The radar tower is done, The raft canisters, whip antenna's and starboard forward tower (scratch built) are done. Just need to add the whip antenna's and raft canisters to the port side and the anchors. This will basically complete the ship (screws will be put on after the ship is mounted to the display base). All that is left is 56 aircraft, deck tractors, Tilly crane, and the display case.
- 82 replies
-
- 9
-
-
- carl vinson
- trumpeter
- (and 2 more)
-
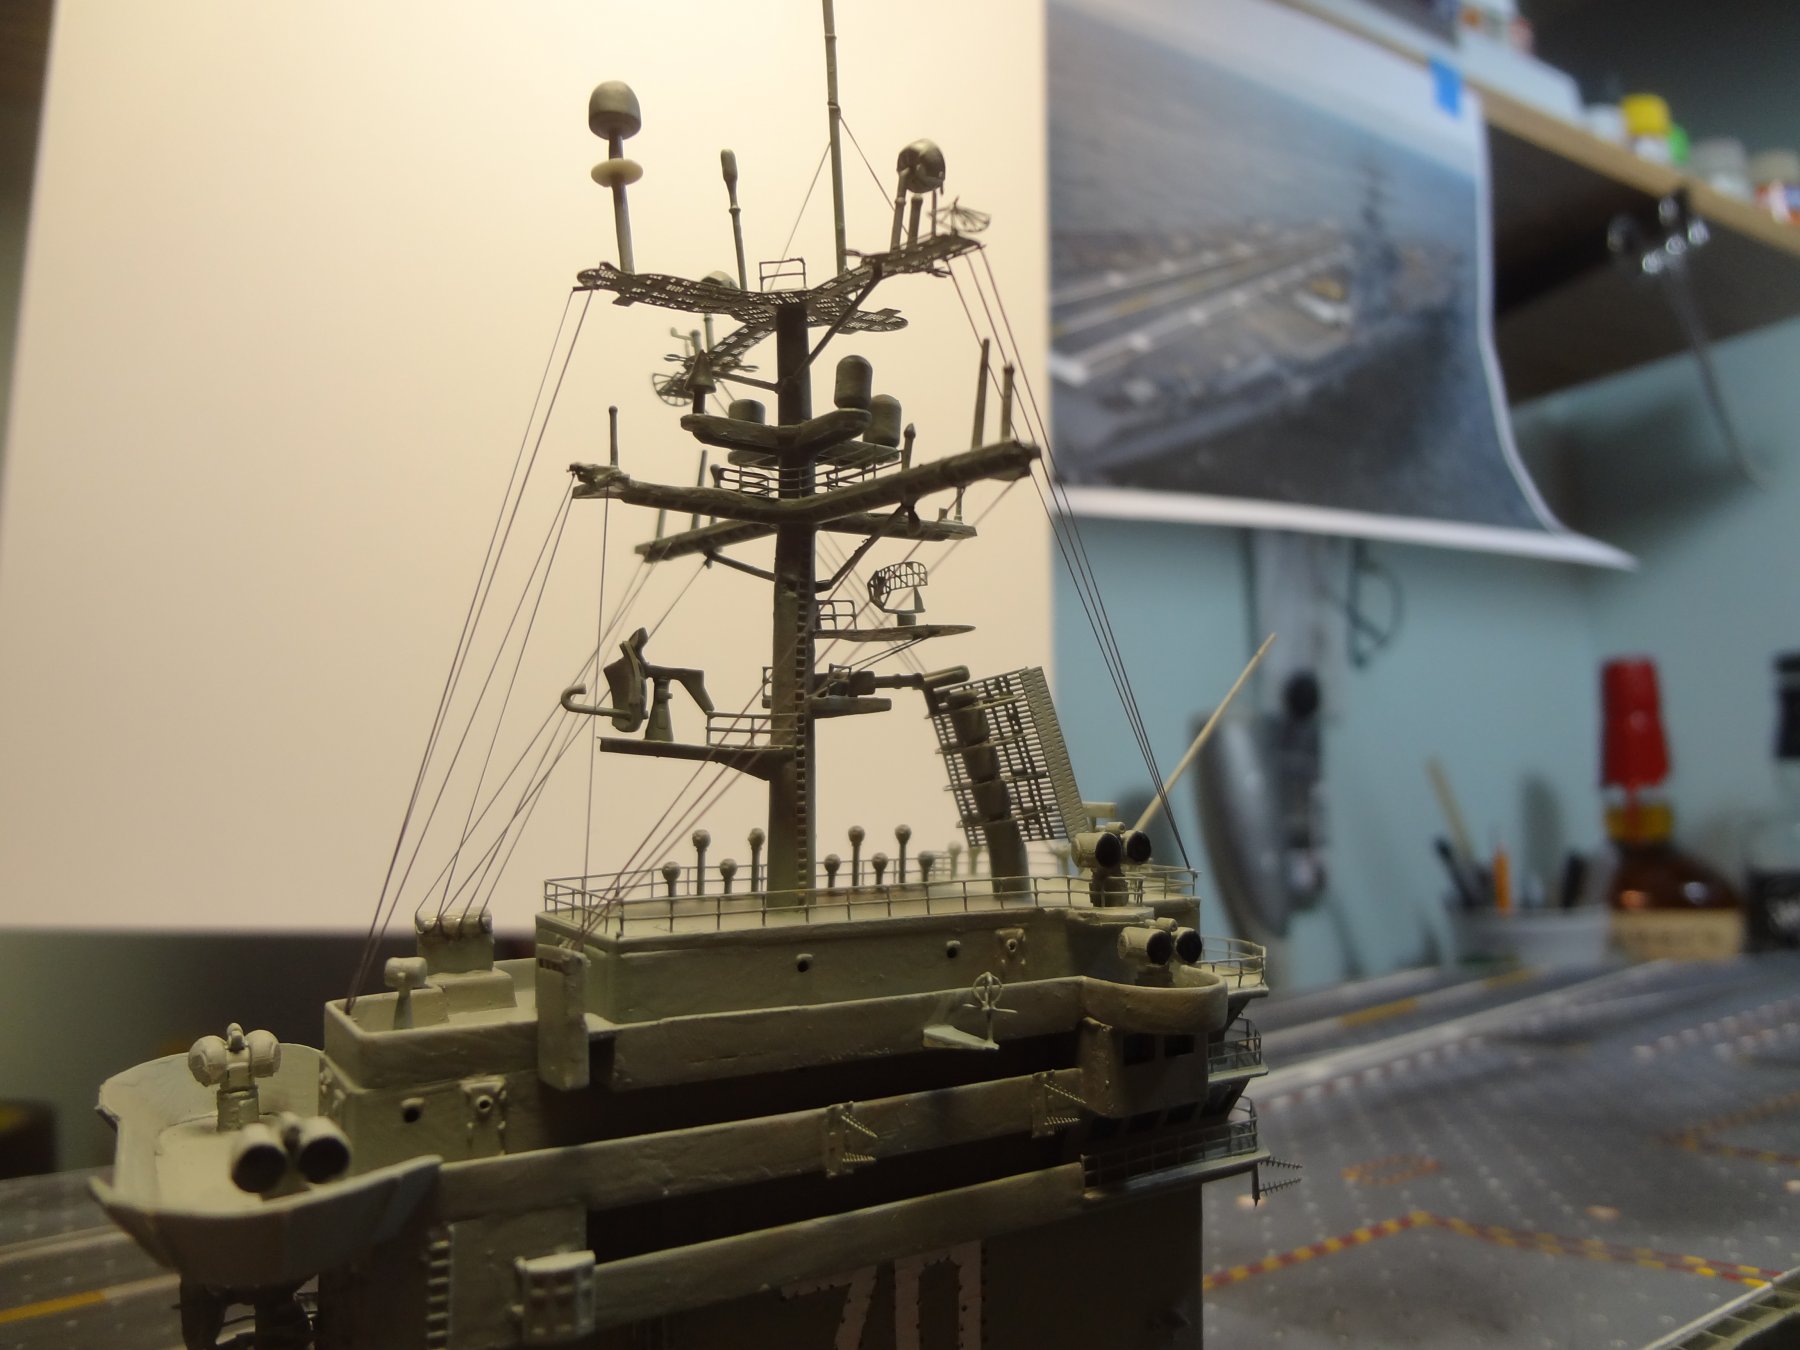
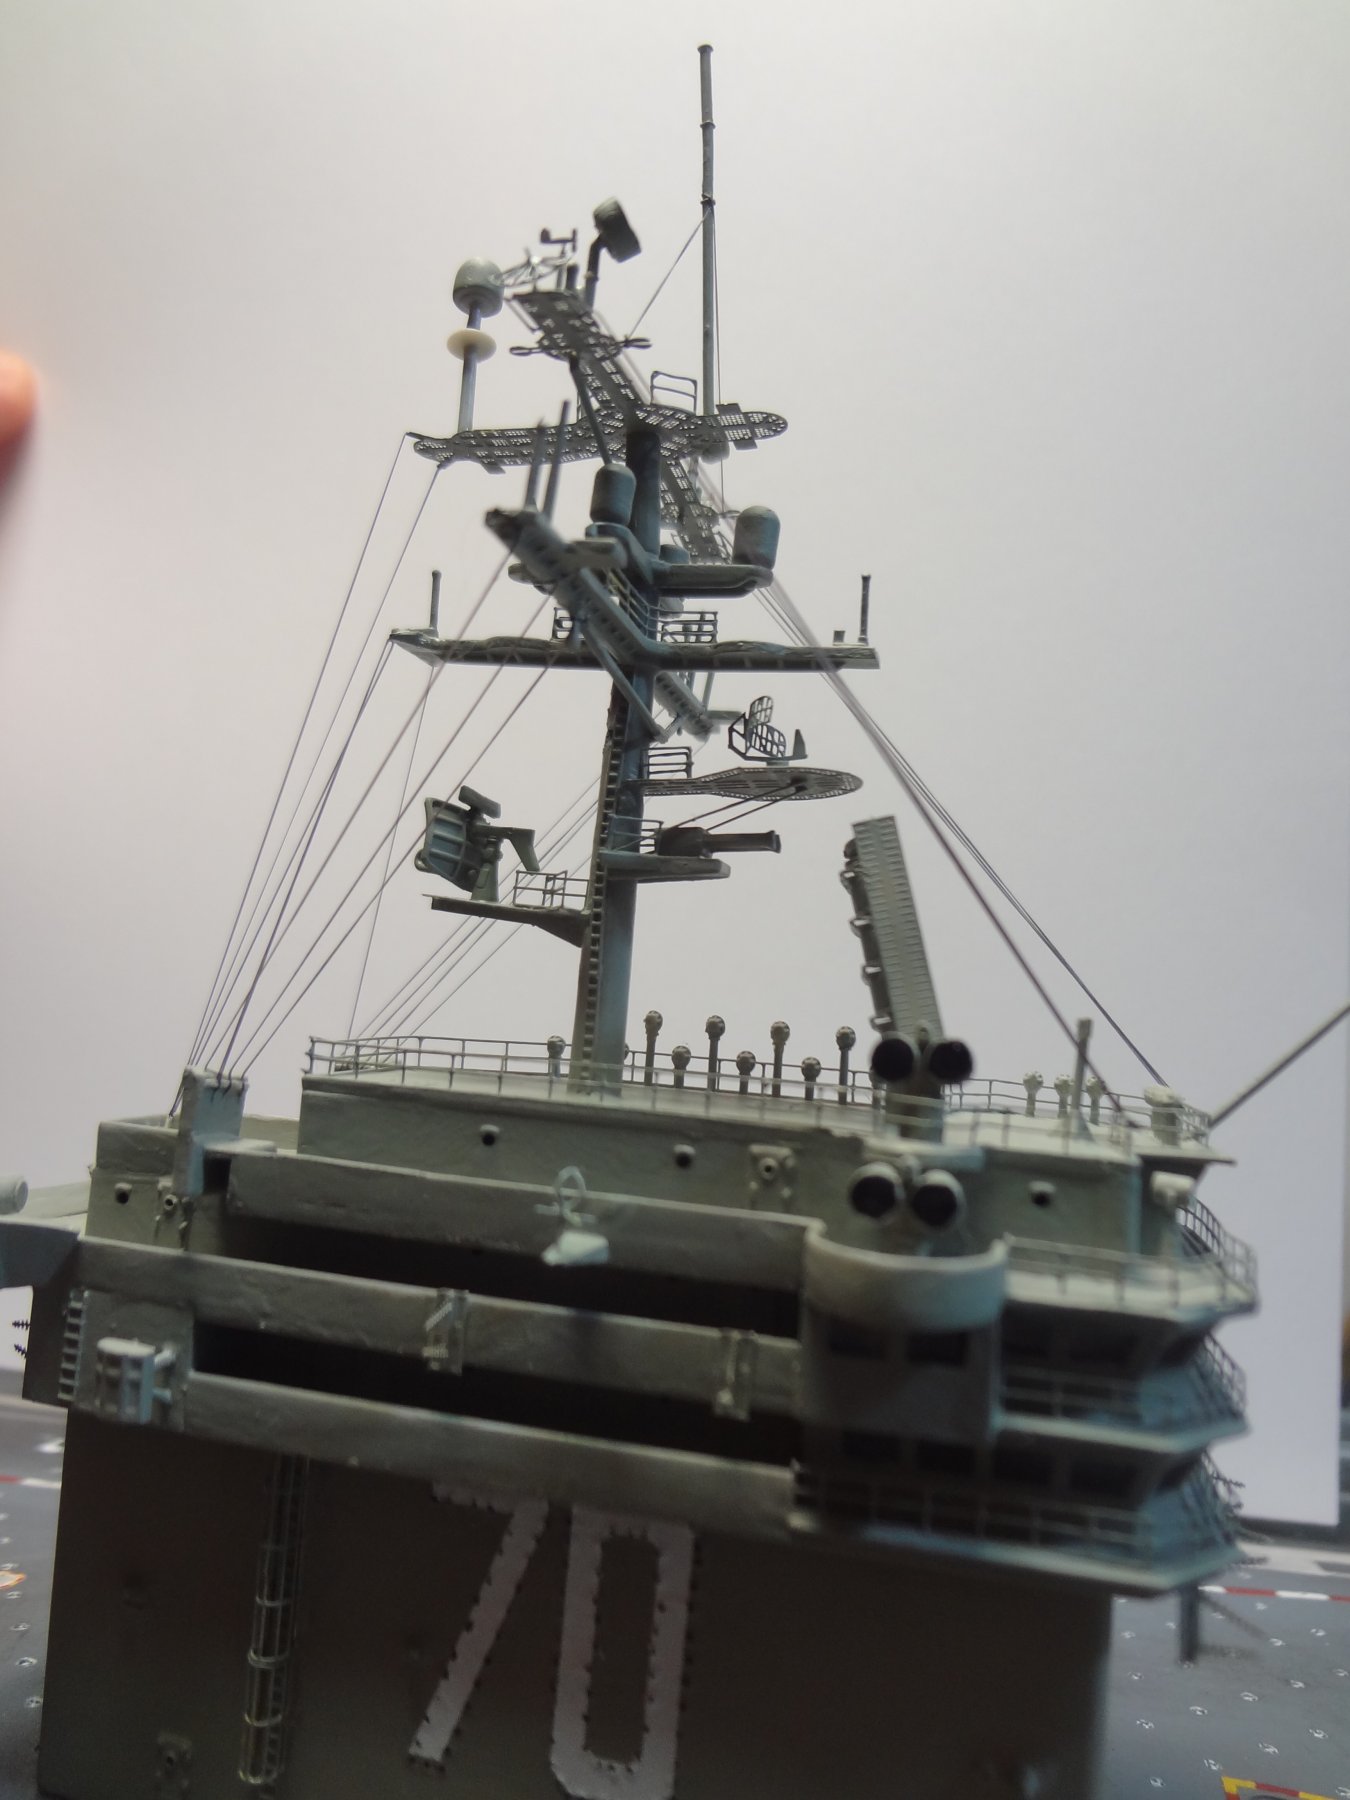
Completed all the rigging on the island. I used EZ Line thin. It works great! Also start the radar tower. This is all photoetch (from White Ensign) Just need to build the antenna and then mount it to the deck.

- 82 replies
-
- 10
-
-
- carl vinson
- trumpeter
- (and 2 more)