


4whelr
-
Posts
93 -
Joined
-
Last visited
Content Type
Profiles
Forums
Gallery
Events
Posts posted by 4whelr
-
-
Just a quick update.
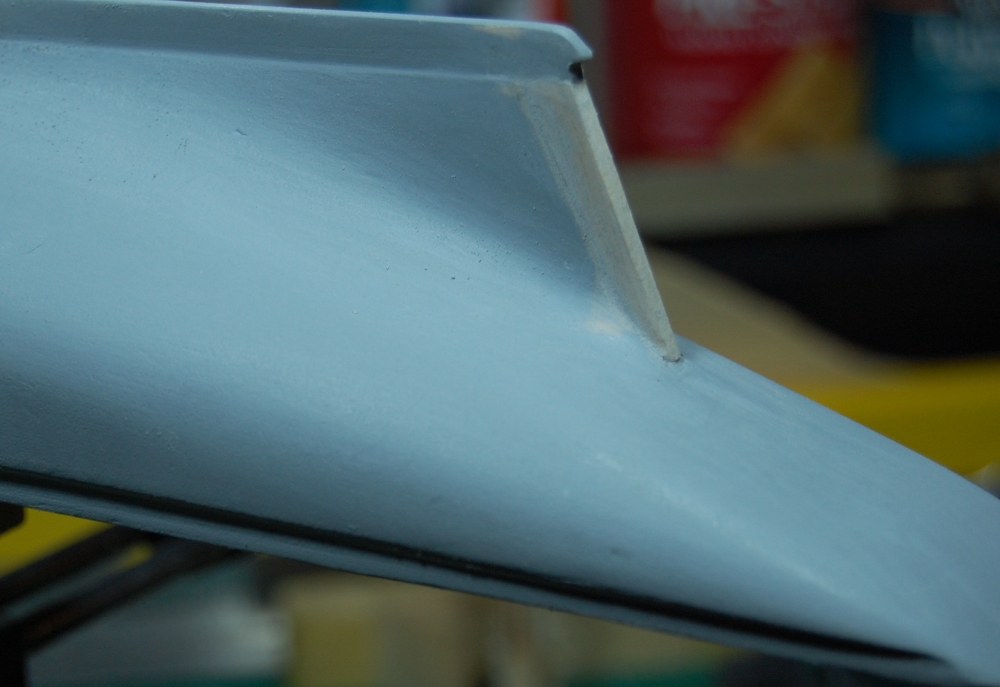
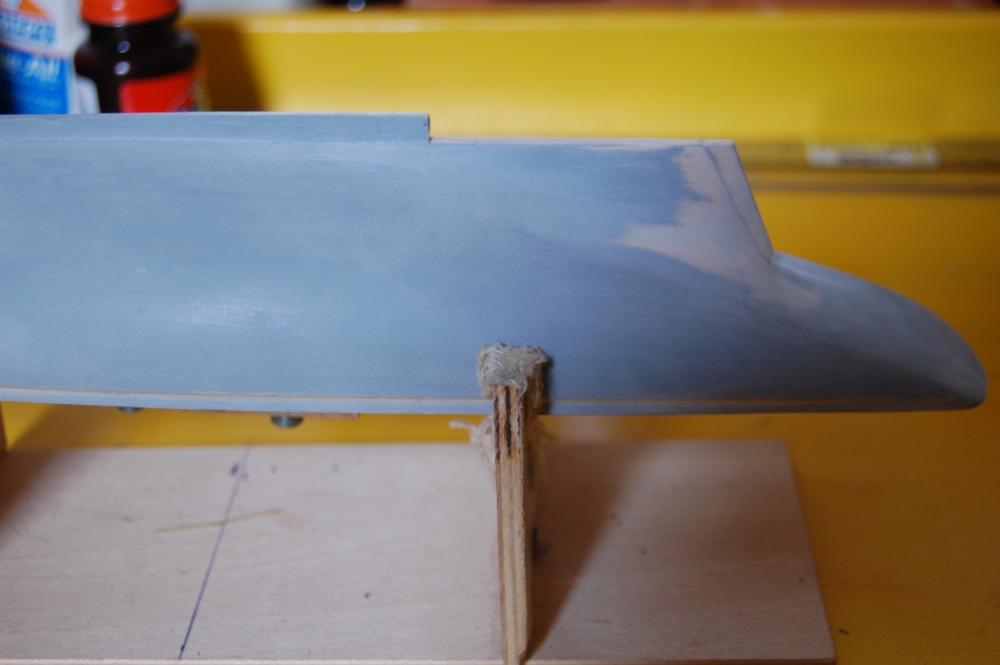
I got the keel repair done and when sanded and primed it didn't look to bad. Then I noticed the sternpost was not right (green circle)! Don't know what I was thinking when I did that.
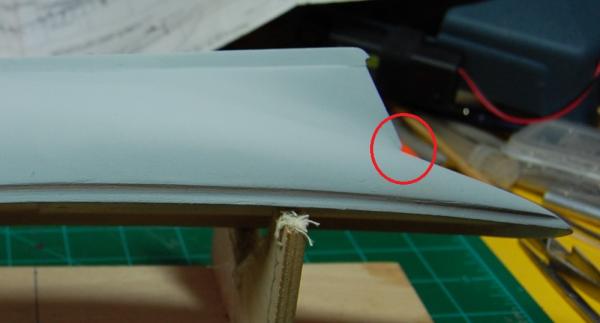
Here is an earlier photo that shows the area better.
I realize that once the ship is mounted this probably couldn't be seen. I can't remember which thread I read it on but someone had a post that said something to the effect that, "if you overlooked a mistake you knew you could repair, that mistake would be all you would see when you looked at the finished build". Didn't want that to happen so off comes the sternpost. Needed to make a trip to the hobby shop for some more material. No easy feat. It's only an 84 mile (135.2km) round trip. On no, the trip takes me right by a liquor store. Hummm, hobby shop or liquor store, that is the question. What the heck, do both!
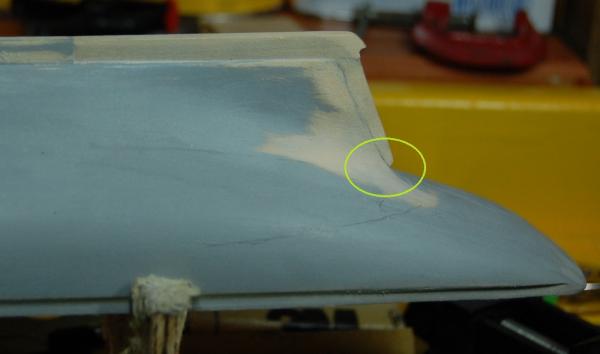
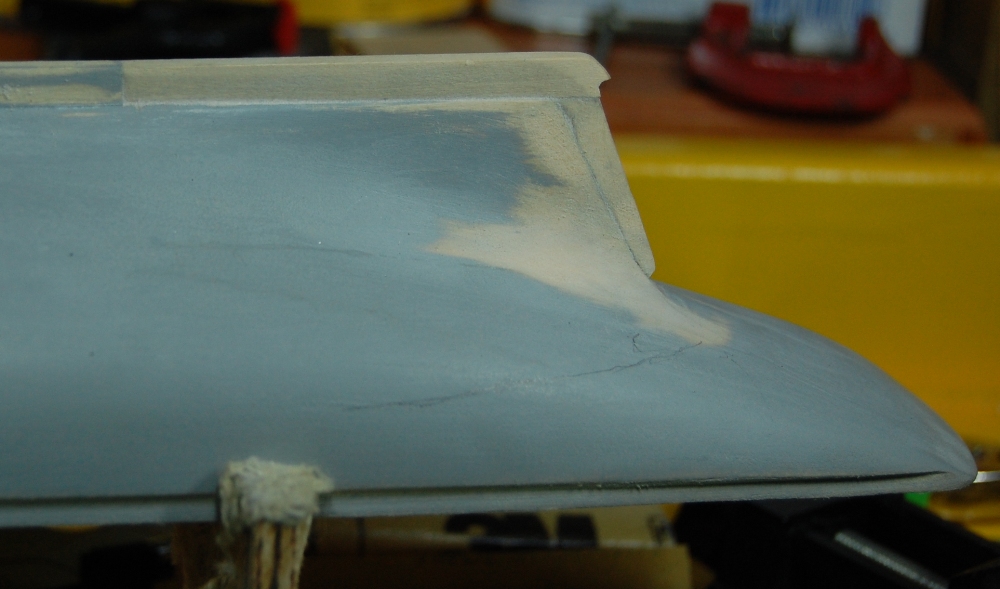
 After a strong drink, back to work. Sternpost finally finished to my liking. Also filled the dents that resulted when I dropped the hull. Couldn't prime it because it rained most all day today.
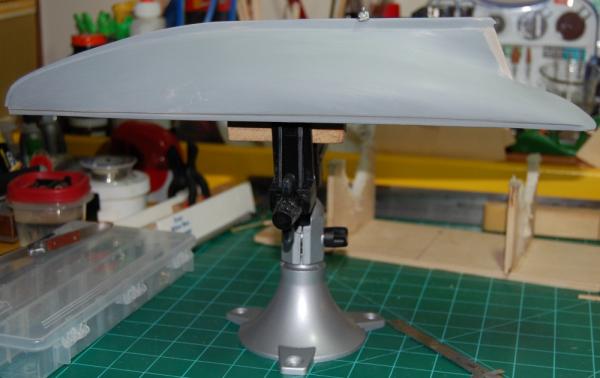
Did pick up a new addition for the shipyard. A Panavise Jr.. Oh Look! A little guy followed me home from the hobby shop and is looking over the ship

Hope to have more to post soon! Well if my paints hurry up and arrive.
Till then, Cheers!

Eddie
- Salty Sea Dog, Anja and trippwj
-
 3
3
-
Tom,
Really beautiful build! Enjoyed your video, that was a nice addition to your log!
Eddie
-
Nigel,
Late coming to the party, but I will be following after today! Very nice, very nice indeed!!
Eddie
-
Randy - So true! Don't know which is worse, continuing to buy tools, books, or materials!

Johann - Thank you! Hope to have a progress report soon!
Ferit KUTFLU - I liked that quote from the first time I read it. Just "felt right" for me!

Lawrence - As I said in my opening post, I like this ship as it was the ship in Captains Courageous. I just may take 10yrs to build this one and that's not taking a break!!!

Have actually completed some more work, well repairing some mistakes, update coming soon!
-
Buck,
Wishing you a smooth move and best of luck in the new job! Will still be here (probably still working on Elsie
) when you get back to building!Eddie
-
Daniel,
Gorgeous, simply gorgeous! Look forward to more pictures!
Eddie
-
Johann,
I don't have the words to describe how fantastic your work is so, WOW, will have to do!!
Eddie
-
Sjors,
Looking really good! Looking forward to seeing more!
Eddie aka Elsie
-
Having dropped my ship, it was not nearly as far along as yours, I know that feeling of "OH NOOOOO"!
Glad yours was followed by, "WHEW, thank goodness it wasn't any worse"!
Happy to hear the damage wasn't worse and it is an easy fix!
Eddie
-
-
Fantastic!! What a beautiful job on the sail and rigging!
All I need to know is when are we going fishing cause she certainly looks seaworthy?
Eddie
-
Thank you Jack. What a really neat way to solve the problem and I don't even have to solder (which I am unbelievably horrible at). Looks like I now know how I will handle attaching the rudder to my Elsie!!
Eddie
-
Going to sit back and watch this one. I am having the same problems Wolf. I used up all the brass strips that came with the kit and had to get some more. Hope some one will throw out a Life Jacket to you and we both can learn something!
Eddie
ETA - Thanks Jay, you are tad faster than me.
-
Ronald,
I certainly am no expert, but so far I have seen that when it comes to modeling power tools you are limited only by the workspace you have and the amount of money you wish to spend.
What comes immediately to my mind, having the funds, I would purchase in the following order:
Dremel, Table Saw, Drill Press, Lathe and Scroll Saw.
Currently I have a drill press, dremel, and scroll saw from woodworking I did before modeling. They have, and as far as I can see will, certainly come in handy during my first kit build. I hope to have the funds for a Table Saw in the near future to replace some of the kit basswood strips with hardwood.
If I intended to do scratch buiIt I would first check out the Logs here on MSW in the Scratch Built Forum paying close attention to what power tools are most often used. I would also look at the threads in this Forum as to tool discussions and their respective merits.
Then check out some modeler's tool sites like:
http://www.modelexpo-online.com/
to get an idea of prices.
(I put those two links in because I have personally used them both and was really happy with their customer service and products)
I would also do a web search for modelers power tools and shop around the various sites I found comparing total cost and reviews.
As I said, I am no expert but this is how I would go about determining what I would aquire when it came to modelers power tools.
Eddie
-
Thank you Anja! For the moment I am awaiting some more "supplies". As soon as they arrive I will begin to work again! They just don't give you enough material to make LOTS of mistakes!
- Salty Sea Dog and Anja
-
2
-
Thank you Wayne!! They are probably going to need it.
Thank you Bob!! We will see if it is good work or not!
Since I haven't gotten any finished work to show right now, I thought I would show some of the novices like me some of the mistakes I have made and I have made plenty! For all you that build those masterpieces, please snicker and laugh behind your hand! Oh, and remember laughing with a mouth full of popcorn is a choking hazard!
My first disaster! While holding the hull in my hand and sanding, Captain Butterfingers here dropped the thing and broke the keel!!
(Note to self: Keep the ship in the clamp!)
Mistake, a chance to learn something new! In this case how to repair broken keel. Repair is done. Need to prime and sand to ensure it is a repair I want to keep or redo.

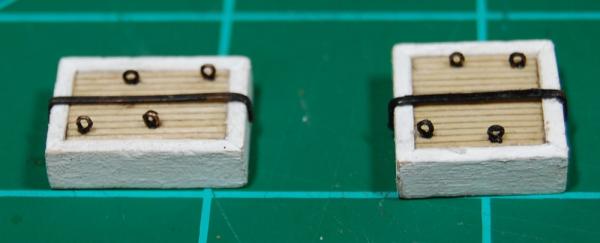
Some of my attempts at rudders, gudgeons and pintles and hatches. Keep in mind these attempts were all made before I found MSW and I had never own any soldering equipment in my life!
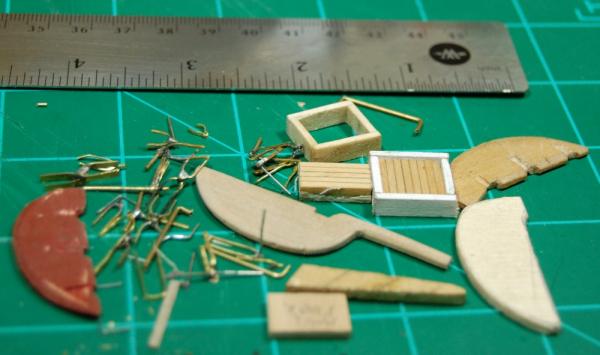
Finally, not so well finished hatches. I have to find some better paints. The ones I have seem to "clump" badly even when thinned. Now I know why most of the scratch builts are constructed out of hardwoods! Basswood is tough to get completely smooth! Have to work on that also! Also, my first experience with Blacken-It didn't go so well. After reading the blackening thread I probably wasn't patient enough and painting over the Blacken-It was a real disaster as you can see, it peeled off! Oh well, back to the worktable!
Comments are welcomed! I put on my big boy panties every morning!
Seriously, I take suggestions and criticism very well. I am here to learn afterall and sometimes learning requires both!
Eddie
-
Robbyn,
Your boat is looking awesome.
As to auctions, I have a family member that works in the auction business. When I asked if I could get any good deals at an auction, he said, "Occasionally, but that people get somewhat aggressive in bidding. It becomes a competition for many people and they are willing to pay any price just to win. Better to just buy the thing new." Just what I learned.
Eddie
-
JPett
If that were my work on that hull, I would need to ask for forgiveness for the Sin of Pride everytime I looked at my model.

It is absolutely gorgeous.
Another vote for no paint, that said, it is your model and you can choose to do it any way you wish!
Eddie
Really, really hope you don't paint it though! :-)
-
For this time only….Hi Elsie
Nice to meet you .

LOL Hi ya Sjors. See I answered to Elsie!
:DAugie - Thanks for the kind words about the table. My Captian Cat's name is Abbey! She's been with me for over 7yrs. I think she has me totally trained by now!!
Randy - I must agree with you about the table size. I have run out of room on the table and I still don't have all the tools I want nor have I built any of the jigs I have seen here on the board that I need to build.
Eddie
-
Thanks Sjors,
LOL call me Elsie, now that's funny!!
Seems I forgot to give my name......they call me lots of things, some not so nice!
But I answer to Eddie quicker than any other name!
Eddie
-

For whatever reason I decided to build my very first model wooden ship. Because it was listed as an Entry Level model and I recognized it as the same type of fishing vessel used in the movie Captain Courageous! (I love that movie) The Model Shipways Kit is: Scale 1/8" = 1' (1:96). The overall length of the finished model will be 21 1/2 " (546.1 mm) and 16" (406.4 mm) tall.
Here is a brief history of the Elsie copied from the Instruction Booklet.
History
ELSIE was designed by Thomas F. McManus of Boston and built in 1910 at the Authur D.
Story Shipyard in Essex, Massachusetts for the Atlantic Maritime Co. of Boston. She was
registered there until 1916. She was later sold to the Frank C. Pearce Co. of Gloucester, and
in 1933 to Gorton Pew & Co. In 1934, the schooner was sold to Captain Levi Kearnly of
Newfoundland. On January 19, 1935, returning from Gloucester after delivering a load of salt
fish, her seams opened at the stem rabbet and she foundered in the Gulf of St. Lawrence.
The ELSIE is a classic, and probably most well known Gloucester schooner, so-named for the
region's principal port. She was fitted with small dories for hand-line fishing the Atlantic
coast. She was designed with a semi-knockabout schooner rig (forestay inboard on the
bowsprit), reflecting the influence of the safer, but costlier, knockabout schooners (no
bowsprit). She was outfitted with power after her 1921 race with the Canadian fishing
schooner BLUENOSE, but it was removed in 1931. An early Howard Chapelle drawing shows
a propeller fitted in the skeg forward of the rudder.
The more you read about the New England fisheries, the more fascinating their history
becomes. Unfortunately, the few substantial reference works available are mostly out of print,
and one must either spend large sums at rare book shops, or ransack libraries to get at them.
The easier volumes to find are those by Church, Chapelle, and Story—all excellent reading.
Goode's The Fisheries and Fishery Industries of the United States is the great work on
fishing methods as practiced in the 19th century. It is now quite rare, but well worth the
trouble to locate. Chapelle's book. The American Fishing Schooner, has become a standard
reference on fishing schooners, their design, and construction.
The 1937 movie, Captain Courageous, with Spencer Tracy, Mickey Rooney, and other great
stars, is an excellent film if you wish to see the fishing schooners in action; very realistic for
a Hollywood production. It was made during a time when these boats were still around.
After opening the box, looking at the parts and reading the instructions, my first thought was what the heck have I gotten myself into! Then my supervisor looked it over and said we need a work table. All that glue, paint, and chemicals will surely destroy the finish on the dining room table.

So the first order of business was to build a work table.

Once the table was done I re-read the instructions and realized I had no tools to do the build. A few months later tools and other supplies covered my work table. In hind sight I should have made a bigger table!
I started trying to decipher the instructions and realized I needed some better guidance. I ordered Ben Lankford's How To Build First-Rate Ship Models From Kits. It was a major help! Using its instruction I was able to sand and shape the hull. I installed the stem post, keel, and stern post. Lankford suggested using automotive spray primer. Since I had some left over from another project that is what I used.
Unsanded and carved hull.

HURRAY..I found MSW! Now I really am feeling confident. Then Oh no! MSW has changed and all my bookmarks no longer work. HURRAY....MSW 2.0 is looking even better than MSW and information is being posted at an unbelievable rate. Thanks to all the info pasted by the members I just might be able to do this!
More to come!
-
Buck - Thank you for the link. Will definitely check them out.
Eddie
-
Holy smack! What amazing work on some tee-tiny features. Dovetail joints?!?!?
My hats off to you!Perrier on a whale. Who would have thought they had it so good!
I have got to get me an Optivisor and LED light system. That is an awesome magnifier. I can see where it would come in very handy with the detail work.
Looking forward to seeing many more photos of your work.
Eddie
-
Thanks to you both!
Will give them both a try to see which effect I like best!


US Brig Syren by Augie - FINISHED - Model Shipways - 1:64
in - Kit build logs for subjects built from 1801 - 1850
Posted
Augie,
Awesome job! She looks beautiful!
Eddie