
Jonny 007
-
Posts
122 -
Joined
-
Last visited
Content Type
Profiles
Forums
Gallery
Events
Everything posted by Jonny 007
-
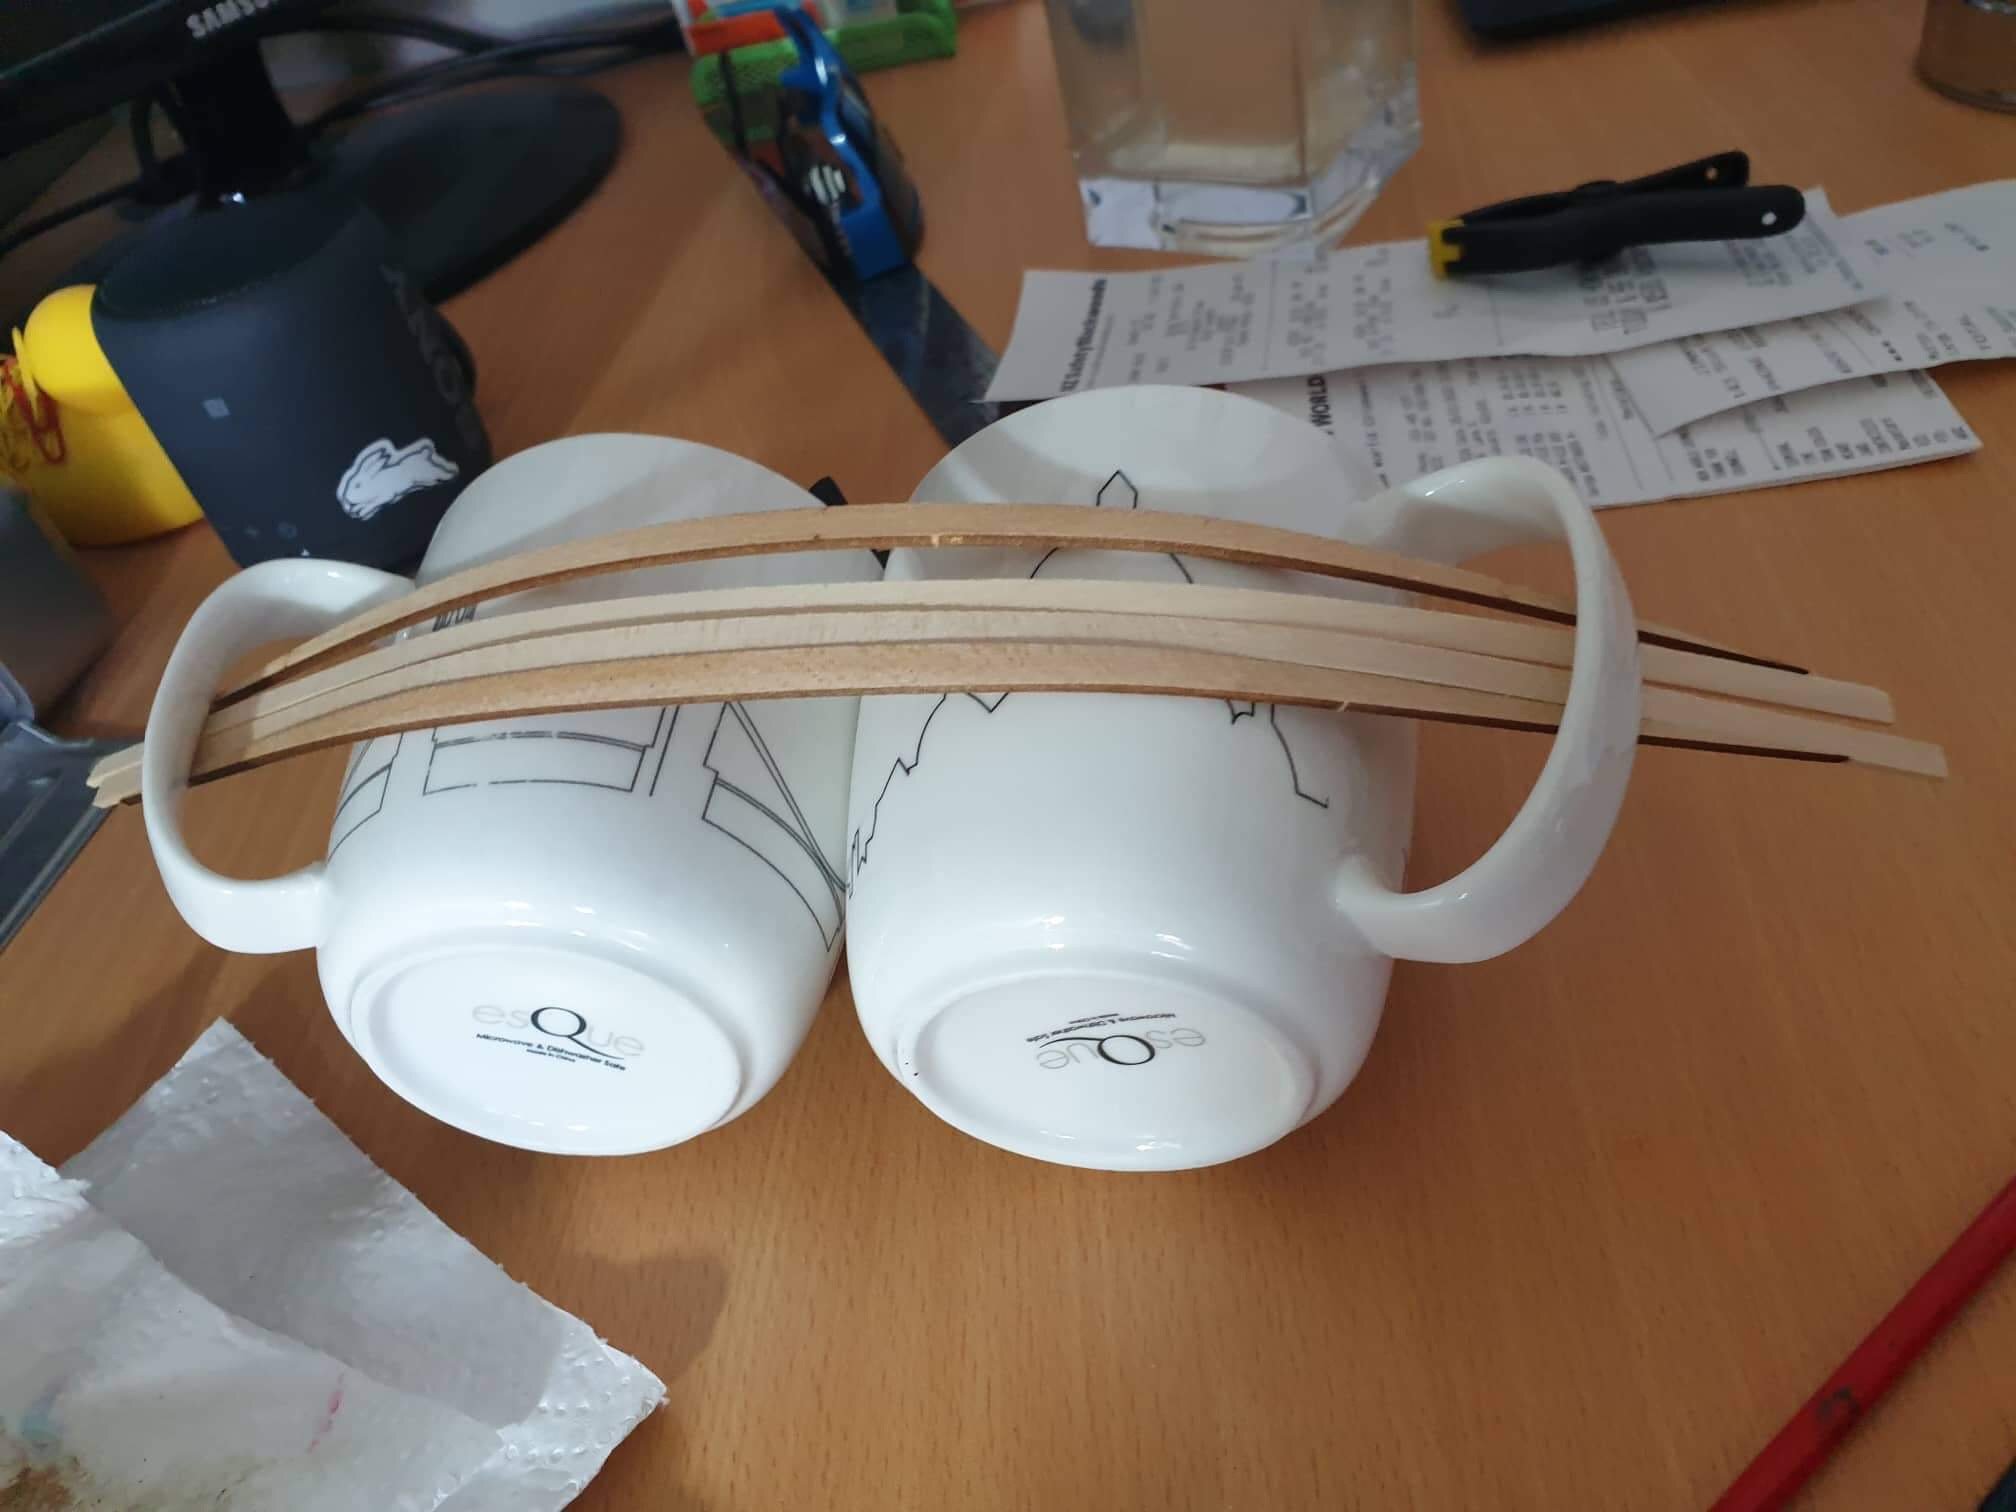
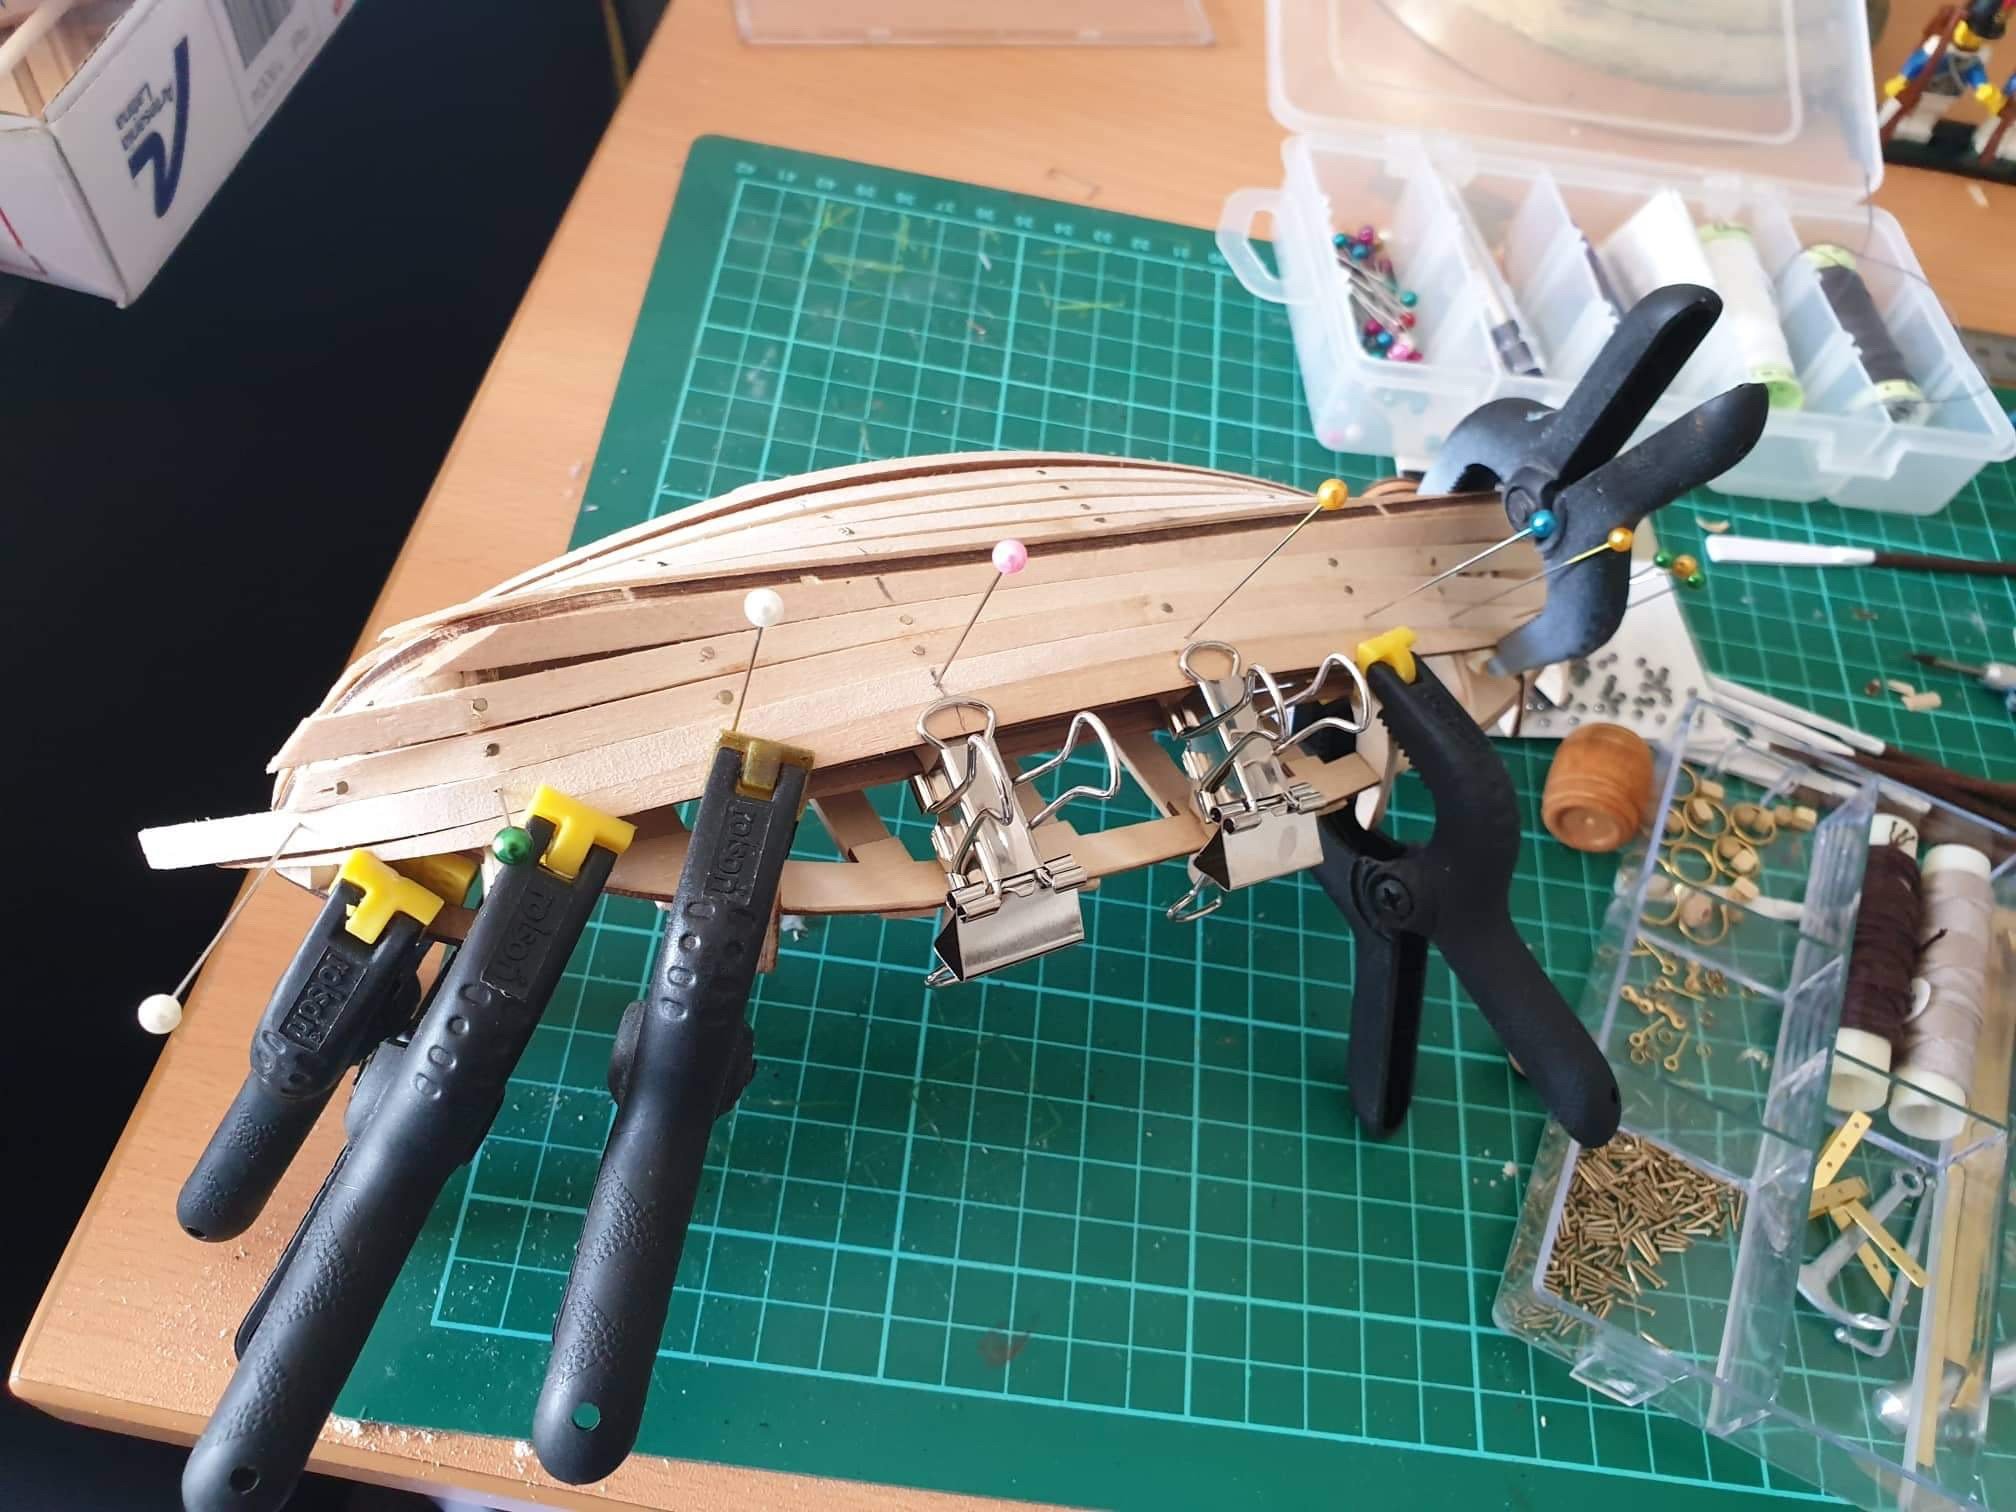
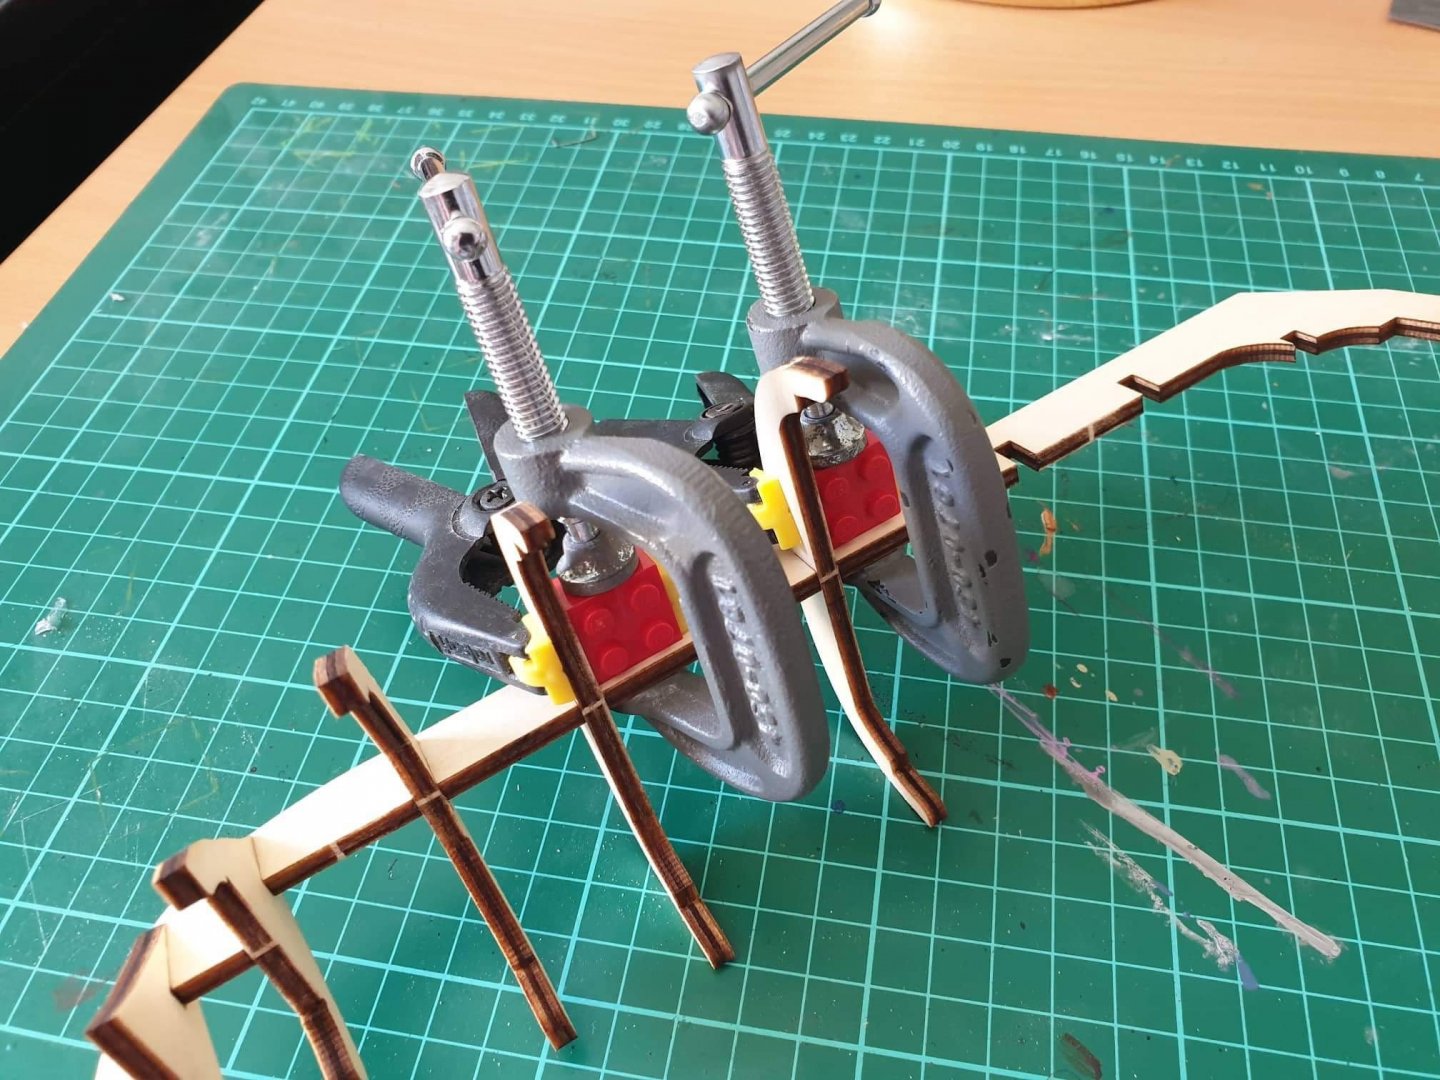
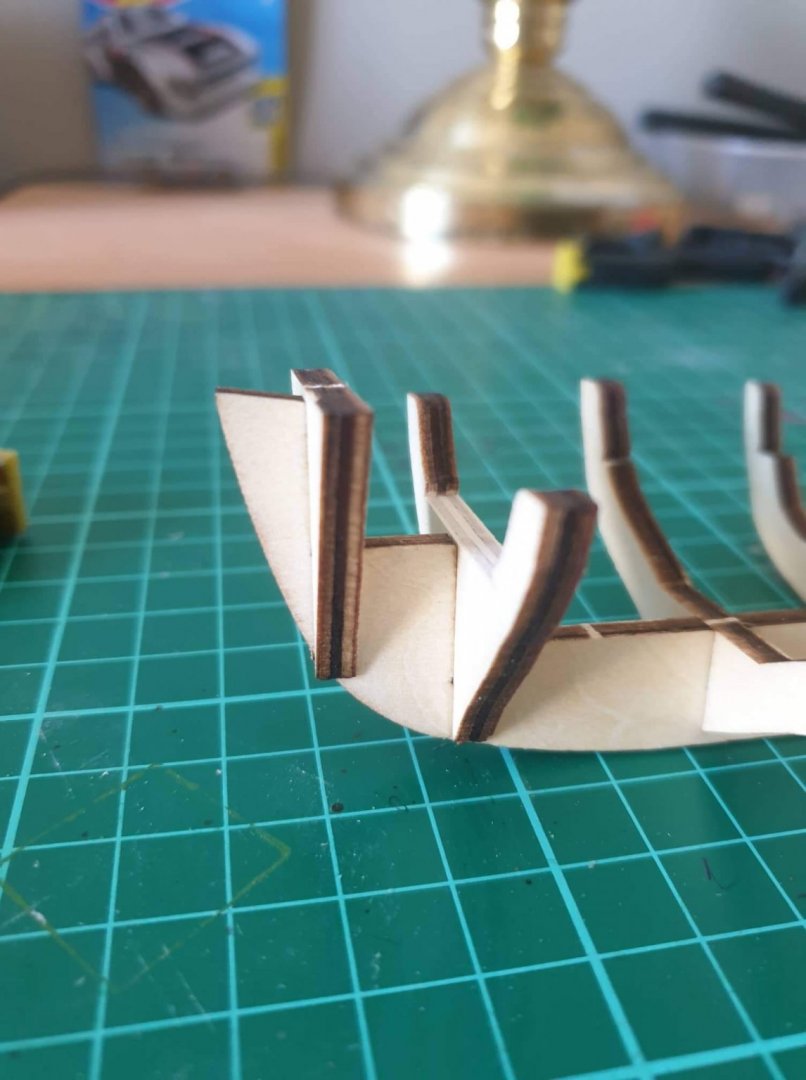
 I wanted to give the planks a bit of a pre-bend before fitting. I tried doing it directly on the model, but could only do one at a time. This was fine for the garboard plank (not a true garboard BTW) but later planks just needed a good soaking and a lite bend. I was going to build a gig but instead I got a bit creative. It actually worked really well haha! Lessons learnt: Although pre bending the planks helped, the first few I put on I didn’t use a plank bender. My rationale was that it would be seen. The reality is that the parts that needed the plank bender we actually hidden. Later in the planking stage I used a plank bender and it made a real difference to the ease of installing the planks around the bow. I intend to paint the model anyway, so some sanding and some filler should fix a couple of my boo boos. A criticism I have with the kit is that the CNC’d pre faired planks are thicker than the supplied planking strips. Its hard to see in the following picture but is kind of visible on the other side. This made them a bit harder to get to site right and will result in a lot of extra sanding. This photo shows the early stages of the single planking. I really struggled (as mentioned earlier) with getting the planks to stay in place so nailed some of them in place. Will file and fill these and cover them in paint. There is also a couple of planks I am not happy with but didn’t want to replace them until I knew I had enough spare planks. It seems there is so I will change out the one that broke due to not using the plank bender. I got the idea for the bull dog clip from another build log on here. Worked well! You may also notice in my plastic box of parts an anchor. This did not come with the kit but will add a nice detail later on. It’s probably not to scale or even the correct one for the boat. But only the people on here will know!
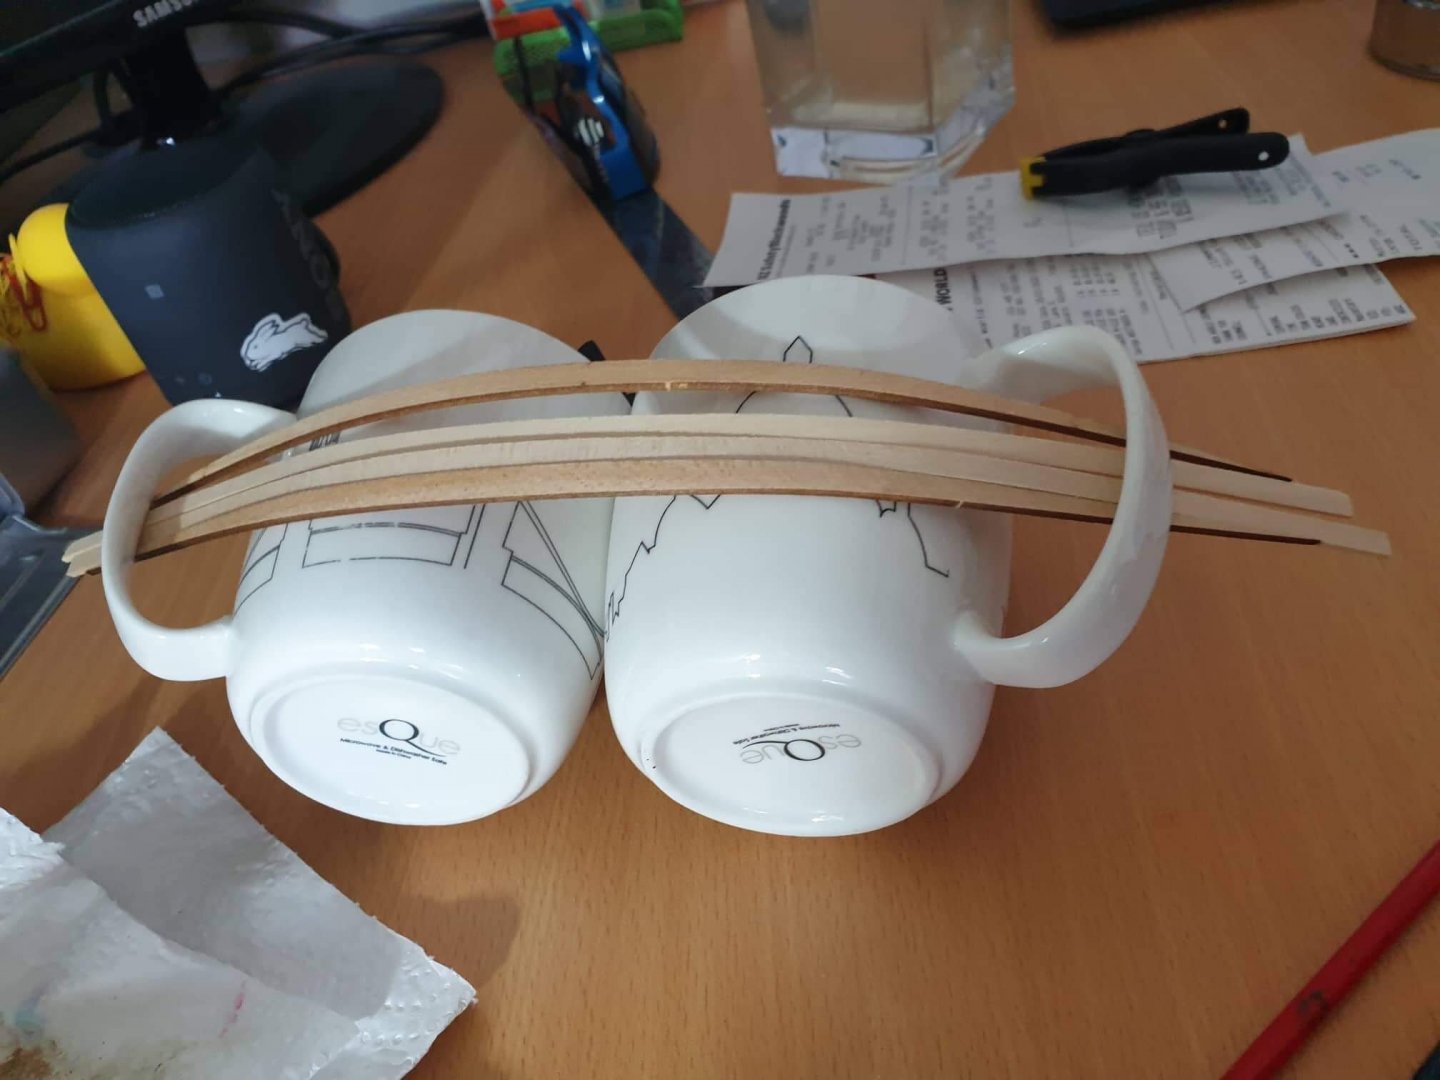

- 60 replies
-
- 5
-

-
- bounty jolly boat
- artesania latina
- (and 2 more)
-
First up is mounting the bulk heads on the false keel. Only one bulkhead sat a little high. I made the decision to file it down. This meant the bit the fitted on top of it sat at an angle when fixed in place. In hindsight it could have been left sitting flat? No biggie. There is also no mention in the instructions about carving a rabbet. This is a detail that will become an issue later when fitting the rudder.
- 60 replies
-
- 9
-
-
- bounty jolly boat
- artesania latina
- (and 2 more)
-
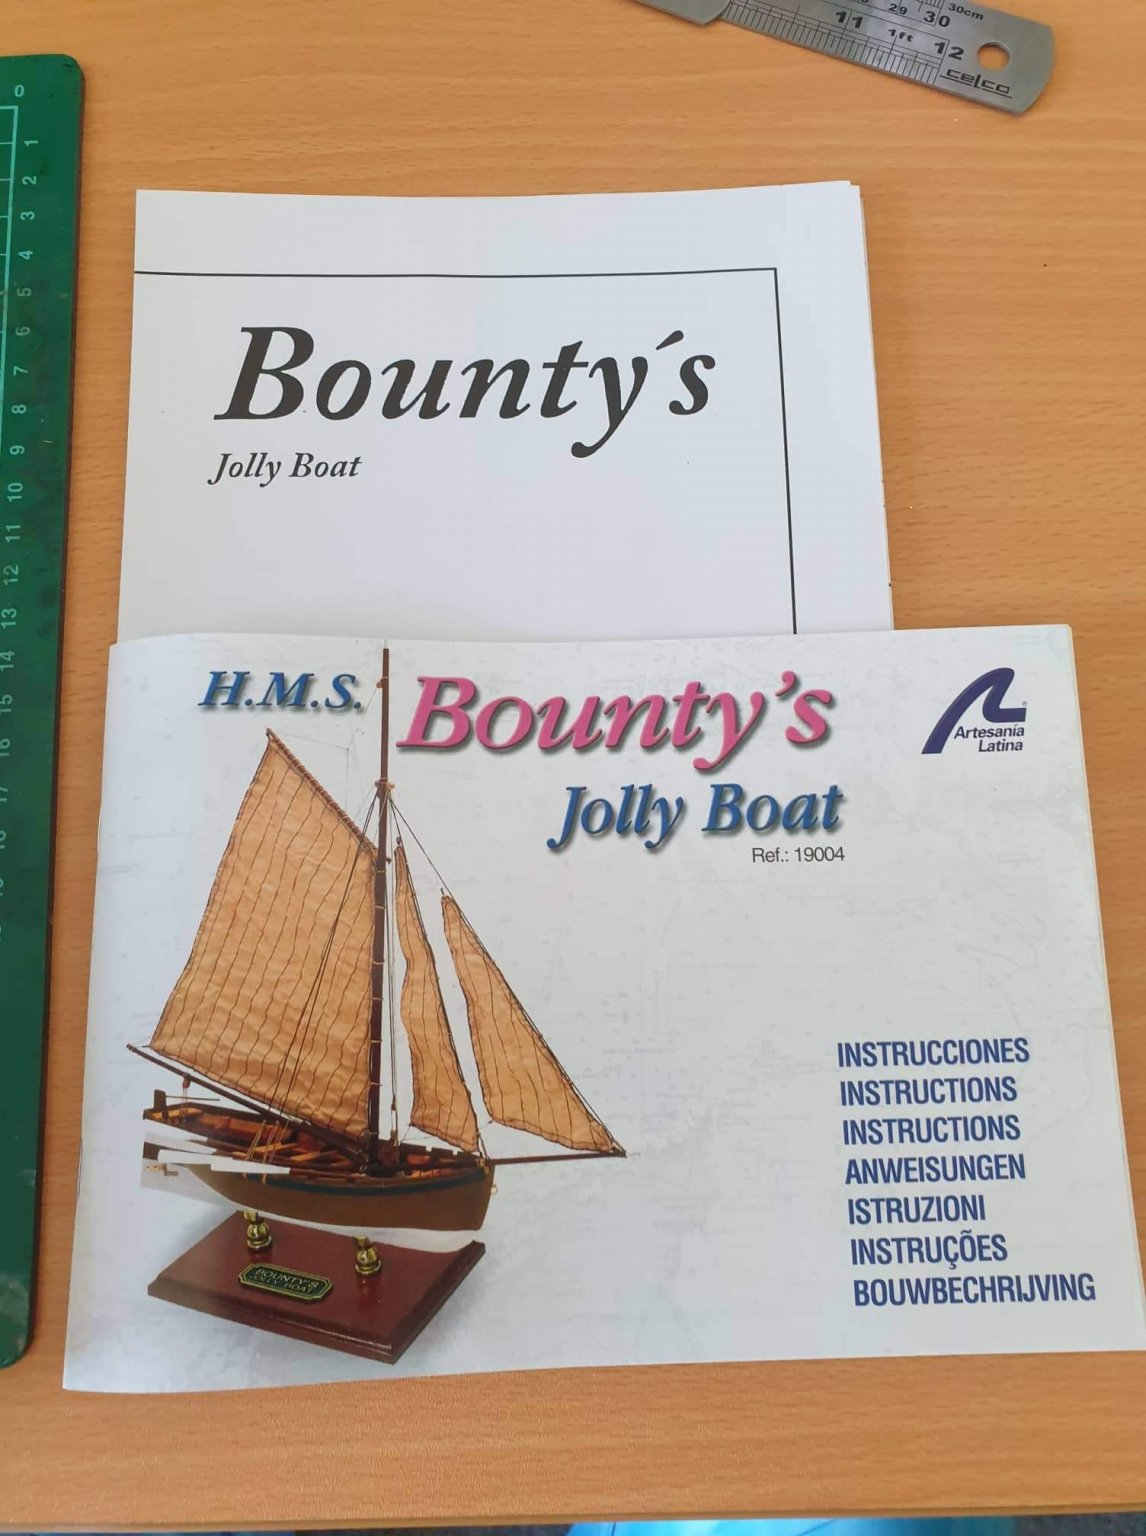
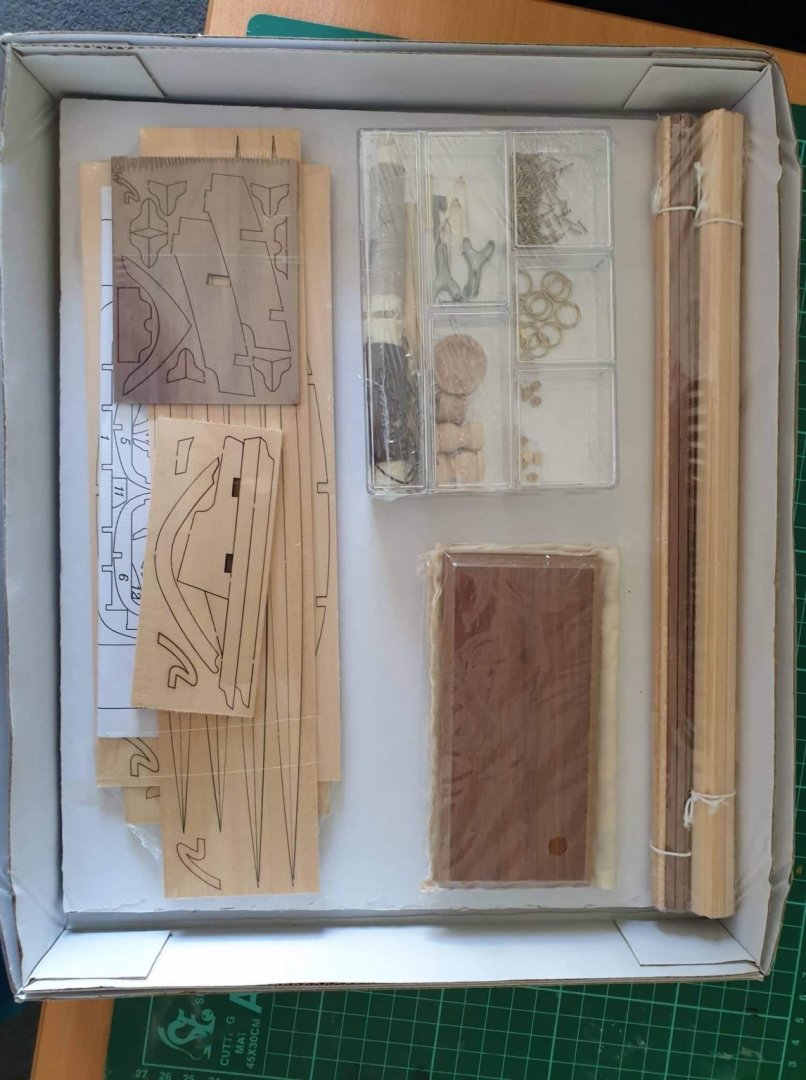
BUILD PLAN After looking at several other build logs on here for the same kit, it’s very tempting to let my enthusiasm over take my actual abilities. So I have decided to build this model exactly as the kit. Once it is complete, I may add some extra rigging detail. But for now, this will be as per the instructions. THE KIT The model comes with one scale plan drawing that has scale details on the other side. It also comes with a colour booklet with step by step instructions. This is a single plank on bulk head model. That means there is no second planking to cover the sins of the first layer. So great care will be needed if this kits isn’t going to be painted. At this point I am going to say that you will need some kind of modelling experience in order to be able to build this kit. The instructions aren’t that clear, and the single planking as per the kit leaves a bit to be desired. The good news is, if you are reading this build log, you are in the right place. And you will receive all the help you will ever need. Here is the mandatory kit unboxing pictures.

- 60 replies
-
- 3
-
-
- bounty jolly boat
- artesania latina
- (and 2 more)
-
PROLOGUE As this is my first ship build log, I thought I would do a bit of a preamble before we get into the build. For those just wanting to jump straight to the cool stuff, please feel free to skip the following monologue. As per my introduction, I am a returning member to the forum after the big crash. I have been building plastic model kits since I was a kid and spent a lot of time (while living in the UK) painting Games Workshop figures and have won several best painted army awards. I grew up on Auckland’s North Shore (NZ) and have always loved the ocean. Auckland is known as the ‘City of Sails’ so it was only natural that I was going to love ships. As a kid I remember lovingly gazing upon two of Auckland’s Tall Ships. The Spirit of New Zealand and the Spirit of Adventure. I have also been a surfer since age 10, so have 30+ years of ocean love. So why wooden ship models now? Well, I have always dreamed of building one. You know, that looked exactly like the ones in the museum. My first attempt was the Del Prado ‘Build the Bounty’ magazine subscription. This was a weekly magazine that promised that even a total amateur could build a museum class wooden ship model. Back then there was no real internet or forums so I was on my own. I was doing okay but before I got to the planking stage I realised that it was not quite as easy as I thought it was going to be. So I put it aside and moved to the UK. I still have the model, and once I have the skills I fully intend to finish it. Next up I’m living in the UK and getting familiar with Internet forums. And found this one. I did a build log for my R/C conversation of the Revell HMCS Snowberry kit. A 1/72 scale Corvette, complete with plenty of weathering. I also put up a build log for several R/C model yachts that I built. But wooden model ships was still my dream. So armed with plenty of enthusiasm and grand ideas, I went looking for a beginners model that would also fit with my enthusiasm. I settled on a Sergal HMS President model. However, it was an early version and wasn’t CNC’d. Which meant I had to use a friends electric fret saw to cut out all the parts. Needless to say this was tedious. At this point I should point out that I am a carpenter by trade and know a thing or two about tools and wood. I started a build log on here and got to the stage of completing the second planking but soon realised that the kit was not not great and the details were very poor. A serious amount of ‘kit bashing’ would be required before the model would look anything like a frigate. So that was wooden model ship attempt number two, and not finished. The best advice consistently given on here is start with something simple. Start simple, build up your skills and work up to building the Victory! PRESENT DAY So I’m back in NZ and it’s time to get serious about building a wooden ship model. I decided to buy something that was relatively simple to build, but more importantly, something I was likely to finish. So I decided on the Bounty’s Jolly Boat. The following build log will not be comprehensive as I don’t think my skills will add anything to the already fantastic models already on here. By completing a Boat, and finishing a build log I’m hoping my experience might help other newbies with this kit. But most importantly give me the skills to help with my next kit (which I have already purchased). I plan to build several kits that will gradually increase my skills so that one day, I will be able to build a decent frigate model. But for now, it’s time to finish my little Jolly Boat.
- 60 replies
-
- 4
-
-
- bounty jolly boat
- artesania latina
- (and 2 more)
-
Newbie just starting needing help
Jonny 007 replied to NomaD7801's topic in New member Introductions
If I can add a bit of advise, one newbie to another here. The first ship kit I intended to make was an early kit, that, like yours was printed on the wood and not laser cut. I found it incredibly frustrating to build with many of the smaller parts breaking and also very very time consuming. In the end I managed to get the hull planked and that’s where I left it. It was a poor kit with poor instructions and it would involve a lot of ‘kit bashing’ (making bits from scratch) to make it a presentable model. Like you, I was no stranger to model making, and I am a carpenter by trade (with a vast array of tools) but I still found it a steep learning curve. So, here is my advise. Put this kit to one side for now and start with something newer and more modern. Build your skills and then once you have a kit or two under your belt come back to this. That way you will be able to do your Grandfathers kit justice and build it into a great model. Just my $0.02 -
Hi there, This kit was released nearly 25 years ago in NZ so it might have changed over the years or been different for other countries. But when it was released here were no large scale plans to work from. Hope that helps. Jonny
-
Hi everyone, a returning modeller now living in NZ.
Jonny 007 replied to Jonny 007's topic in New member Introductions
Just a quick update... So far my summer has been filled with water type activities (jet skiing and wake boarding) but there has been some modelling too. I have been reading through and using exisiting build logs to help with my build and been taking a series of pictures to record my process and progress. Once I return to New Zealand from the West Island I will start my build log to share my progress. I didn’t want to be one of the many build logs that start so promisingly only to fade out once the joys of the planking begins. I would also like to thank everyone for the warm welcome (back). -
Hello! I too used to build plastic ship models. A favourite of mine is the Revell HMCS Snowberry in 1/72 scale. I converted mine to R/C so I could patrol the lake looking for uboats before sending out our Kyosho Seawind yachts out! I also built several plastic sailing ships which are nice. But I have always wanted to build wooden ship models. As a builder by trade I figured if I can build houses hopefully I should be able to build a boat! (That has yet to be proved BTW...)
-
Hi everyone, a returning modeller now living in NZ.
Jonny 007 replied to Jonny 007's topic in New member Introductions
It’s a credit to everyone here that so many build logs were re-loaded for me to gaze at. I am also really liking the new look and layout of the forum. I also like the way the guidelines have been followed for topic headings which makes finding stuff so much easier. It’s also very easy to go down the rabbit hole of build logs! So many excellent builds to gaze upon. And I have also found plenty of other build logs for the same build as mine that I’m looking through. And I’ve already learnt a few things from their experiences. What a wonderful place this is. So glad I came back. -
Hi everyone, I was once a keen a regular newbie on here many moons ago. I had a build log for the HMS Bluebell (plastic) that I converted to RC, a couple of R/C yachts and tried my hand at a Sergal model frigate. Unfortunately I fell for the classic blunder of biting off way more than I could chew with the Sergal kit. I still have the kit and might even finish it some day. But it’s not a great kit TBH. That was all about 10 years ago (or more 😮) and I was based in London at the time. Social Media was still in its infancy and forums were still the place to go to share hobbies. Fast forward to today and I see that something happened to the old forum. I see references to the big crash or a glitch in the matrix but it seems all of my previous information was lost. So I have created a new profile which is fitting as I am now based on the other side of the planet. I have a new kit that I intend to build and am currently looking through several build logs to help with this new endeavour. The kit I have chosen is AL’s HMAV Bounty Jolly Boat. From what I can see it will still be a challenge, but hopefully not a 2 year build. I have a spot set up and construction starts tomorrow. Wish me luck!