HOLIDAY DONATION DRIVE - SUPPORT MSW - DO YOUR PART TO KEEP THIS GREAT FORUM GOING! (Only 20 donations so far - C'mon guys!)
×

Jonny 007
-
Posts
127 -
Joined
-
Last visited
Content Type
Profiles
Forums
Gallery
Events
Everything posted by Jonny 007
-
 I love models of cutters, they are one of my favourite ship models. Looking forward to seeing the rest of your log when you have a chance to post it. I have the Caldercraft Sherbourne kit on the shelf as a future project.
- 55 replies
-
- 1
-

-
- lady nelson
- victory models
- (and 2 more)
-
This is the kit I was thinking of: https://modelexpo-online.com/Model-Shipways-18th-Century-Longboat-Wooden-Model-Ship-Kit-Tools-148-Scale--MS1457CBT_p_3447.html There is another version on this site that comes with tools and everything, but it gets spendy.
- 14 replies
-
- 1
-
-
- hours
- build time
- (and 4 more)
-
Just posted my $0.02 in your link, now I’m off to bed. Luckily a lot of the Moderators will be popping in to say hello and will be able to offer some sage advice.
-
I’m going to say cancel. While it is possible to build a kit like this as a complete novice, that is normally the exception to the rule. You are far better off getting a simpler model, which may also be cheaper and build that. Simpler doesn’t mean any less awesome, it just means you are more likely to finish. This site is full of enthusiastic amateurs who hope to build a museum class model right off the bat. 99% of these people give up and move onto something else. Like stamp collecting. I was almost one of these people. I have nearly finished the HMAV Bounty’s Jolly Boat as my first build. I have really enjoyed the process and learnt that I really like building smaller class model boats. As an FYI, some of the more amazing models on here take several years and thousands of hours to make. A smaller model could be finished in months. I think I started my boat in February, stuffed around, waited on extra bits, played with the RX-7 and will still be finished by this weekend. So, while I have enjoyed the subject matter, I wouldn’t recommend the manufacturer as a first kit. Hopefully, a more learned guru will pop in now and link to the kit I have in mind, but a model Long Boat kit could be a good option. Maybe it is the Model Slipways Midway Longboat that comes with all the tools you need to build it? I can’t remember. It’s 11pm here so I’m going to run along now, but I will report back in the morning. And if no one else has found the kit I’ll find the link and post it.
- 14 replies
-
- 1
-
-
- hours
- build time
- (and 4 more)
-
G’day mate, Welcome aboard! What ship are you starting with? Defo start a build log so we can all follow along. I’ve nearly finished my first boat, have started my second and have my third sitting on the shelf ready to go! Also, Sandoman a reference to the legendary surf hack that was the Holden Sandman?
-
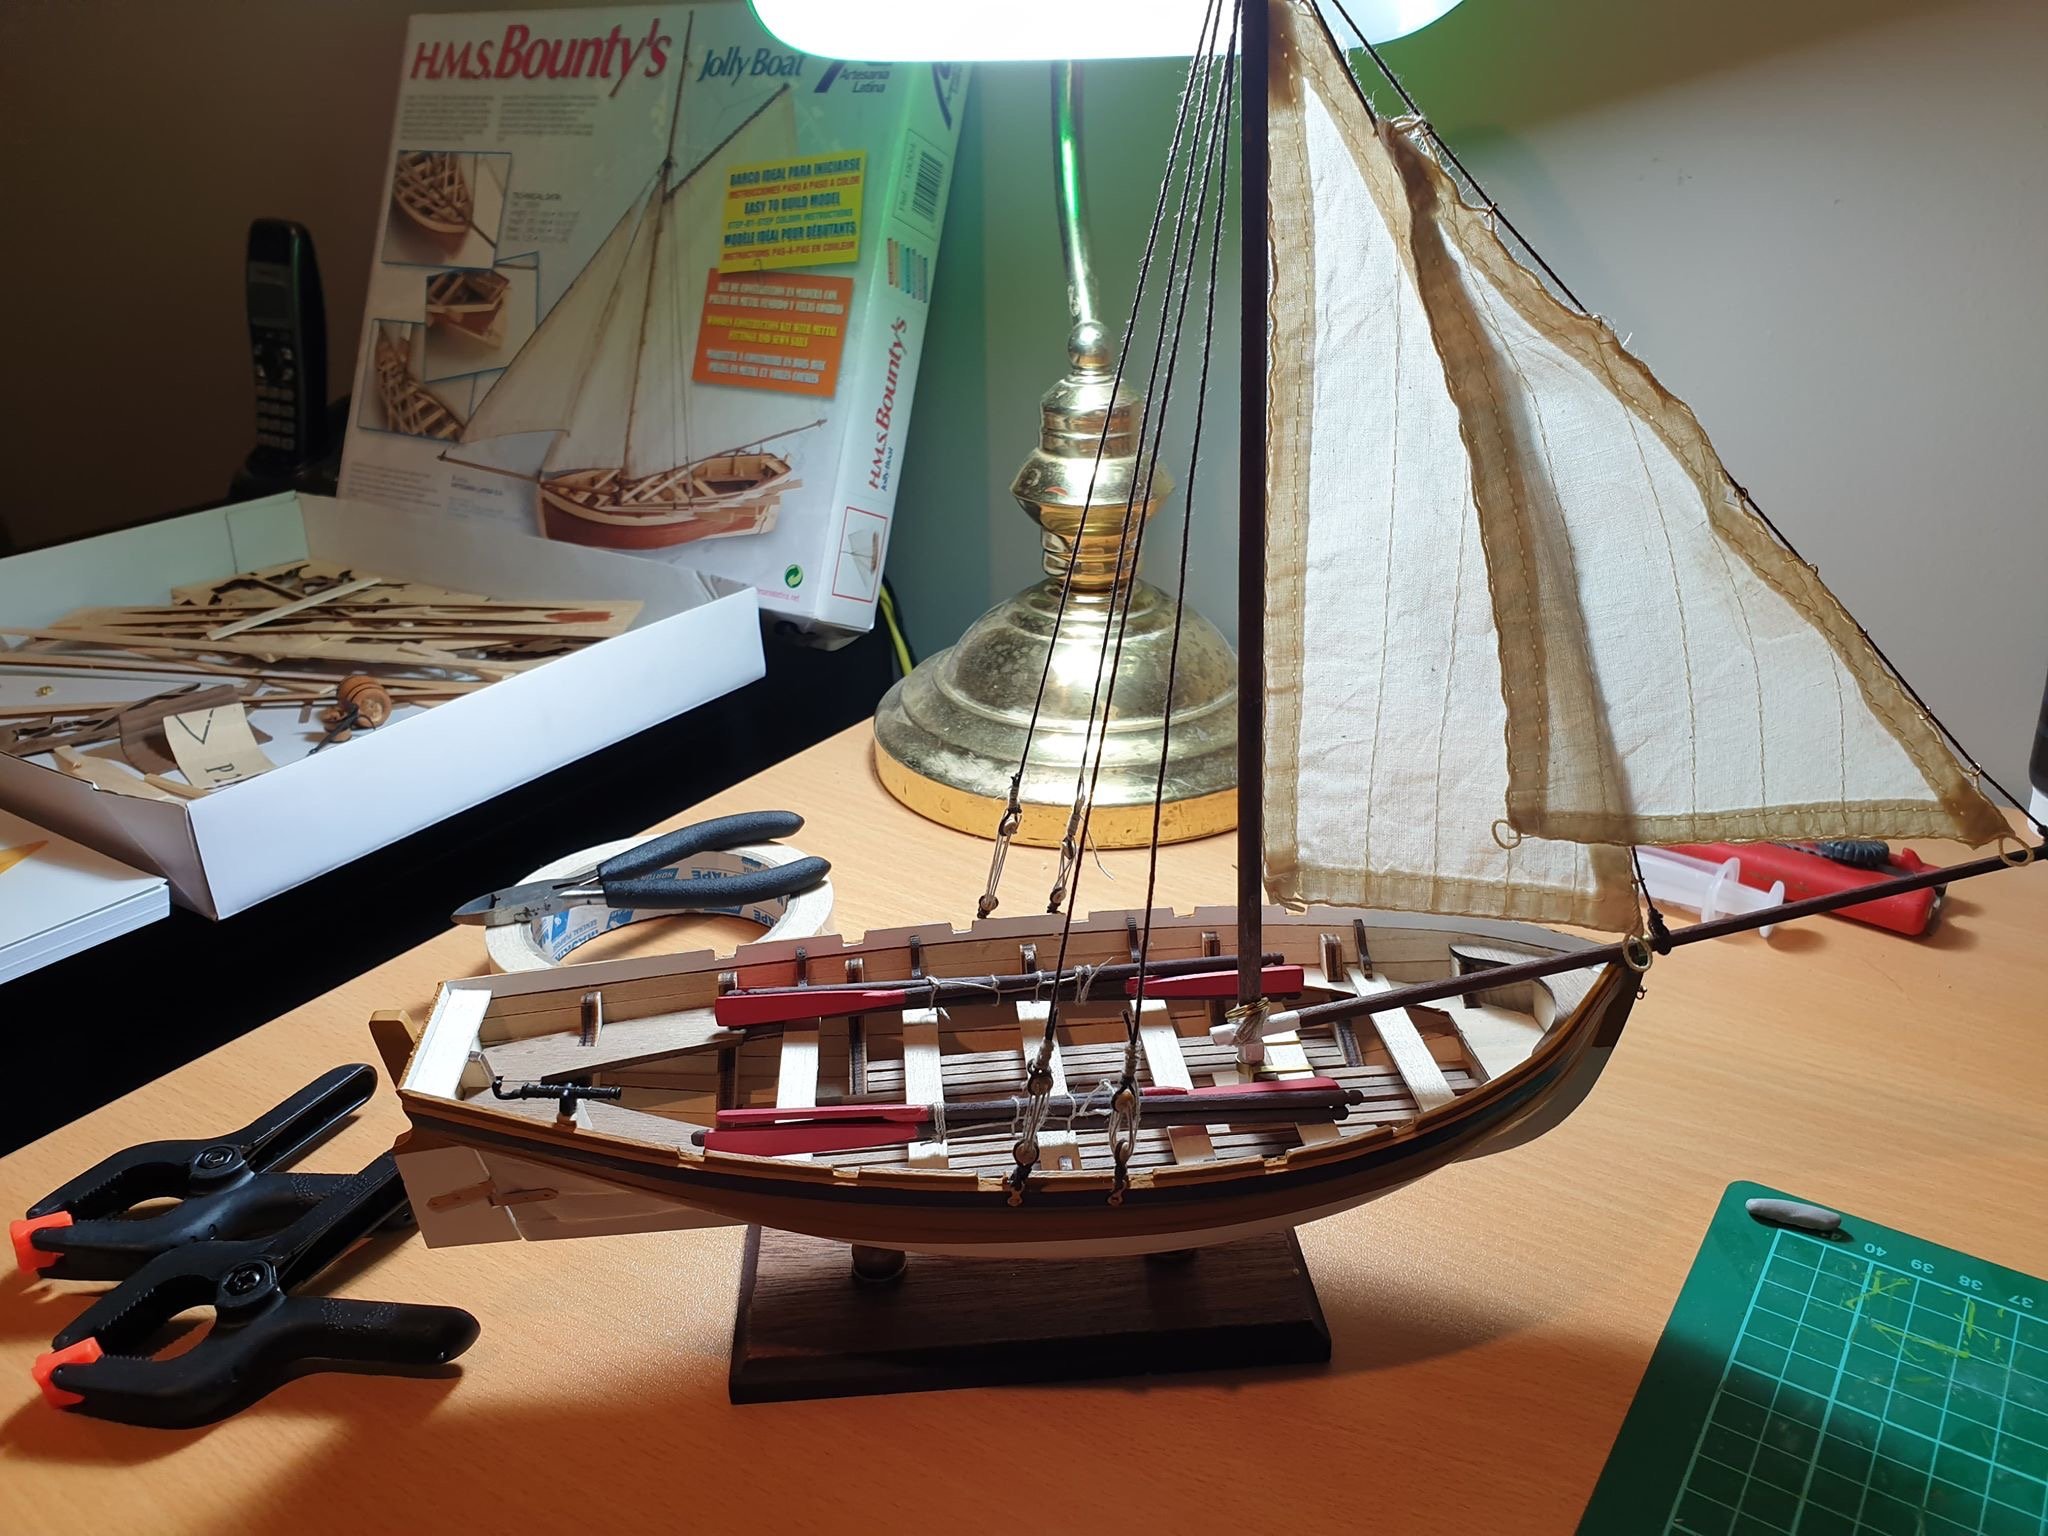
I rigged the sail and left a little extra thread on so I could get a wee glimpse of what she might look like... So, without further ado, I give you my Jolly Boat with sails! Tomorrow I’ll take it down and tie on all the correct and extra rigging I have planned. But for tonight I will just bask in all her glory. I have thoroughly enjoyed myself so far and I am quite pleased with the results thus far. Even if I do say so myself.
- 60 replies
-
- 3
-
-
- bounty jolly boat
- artesania latina
- (and 2 more)
-
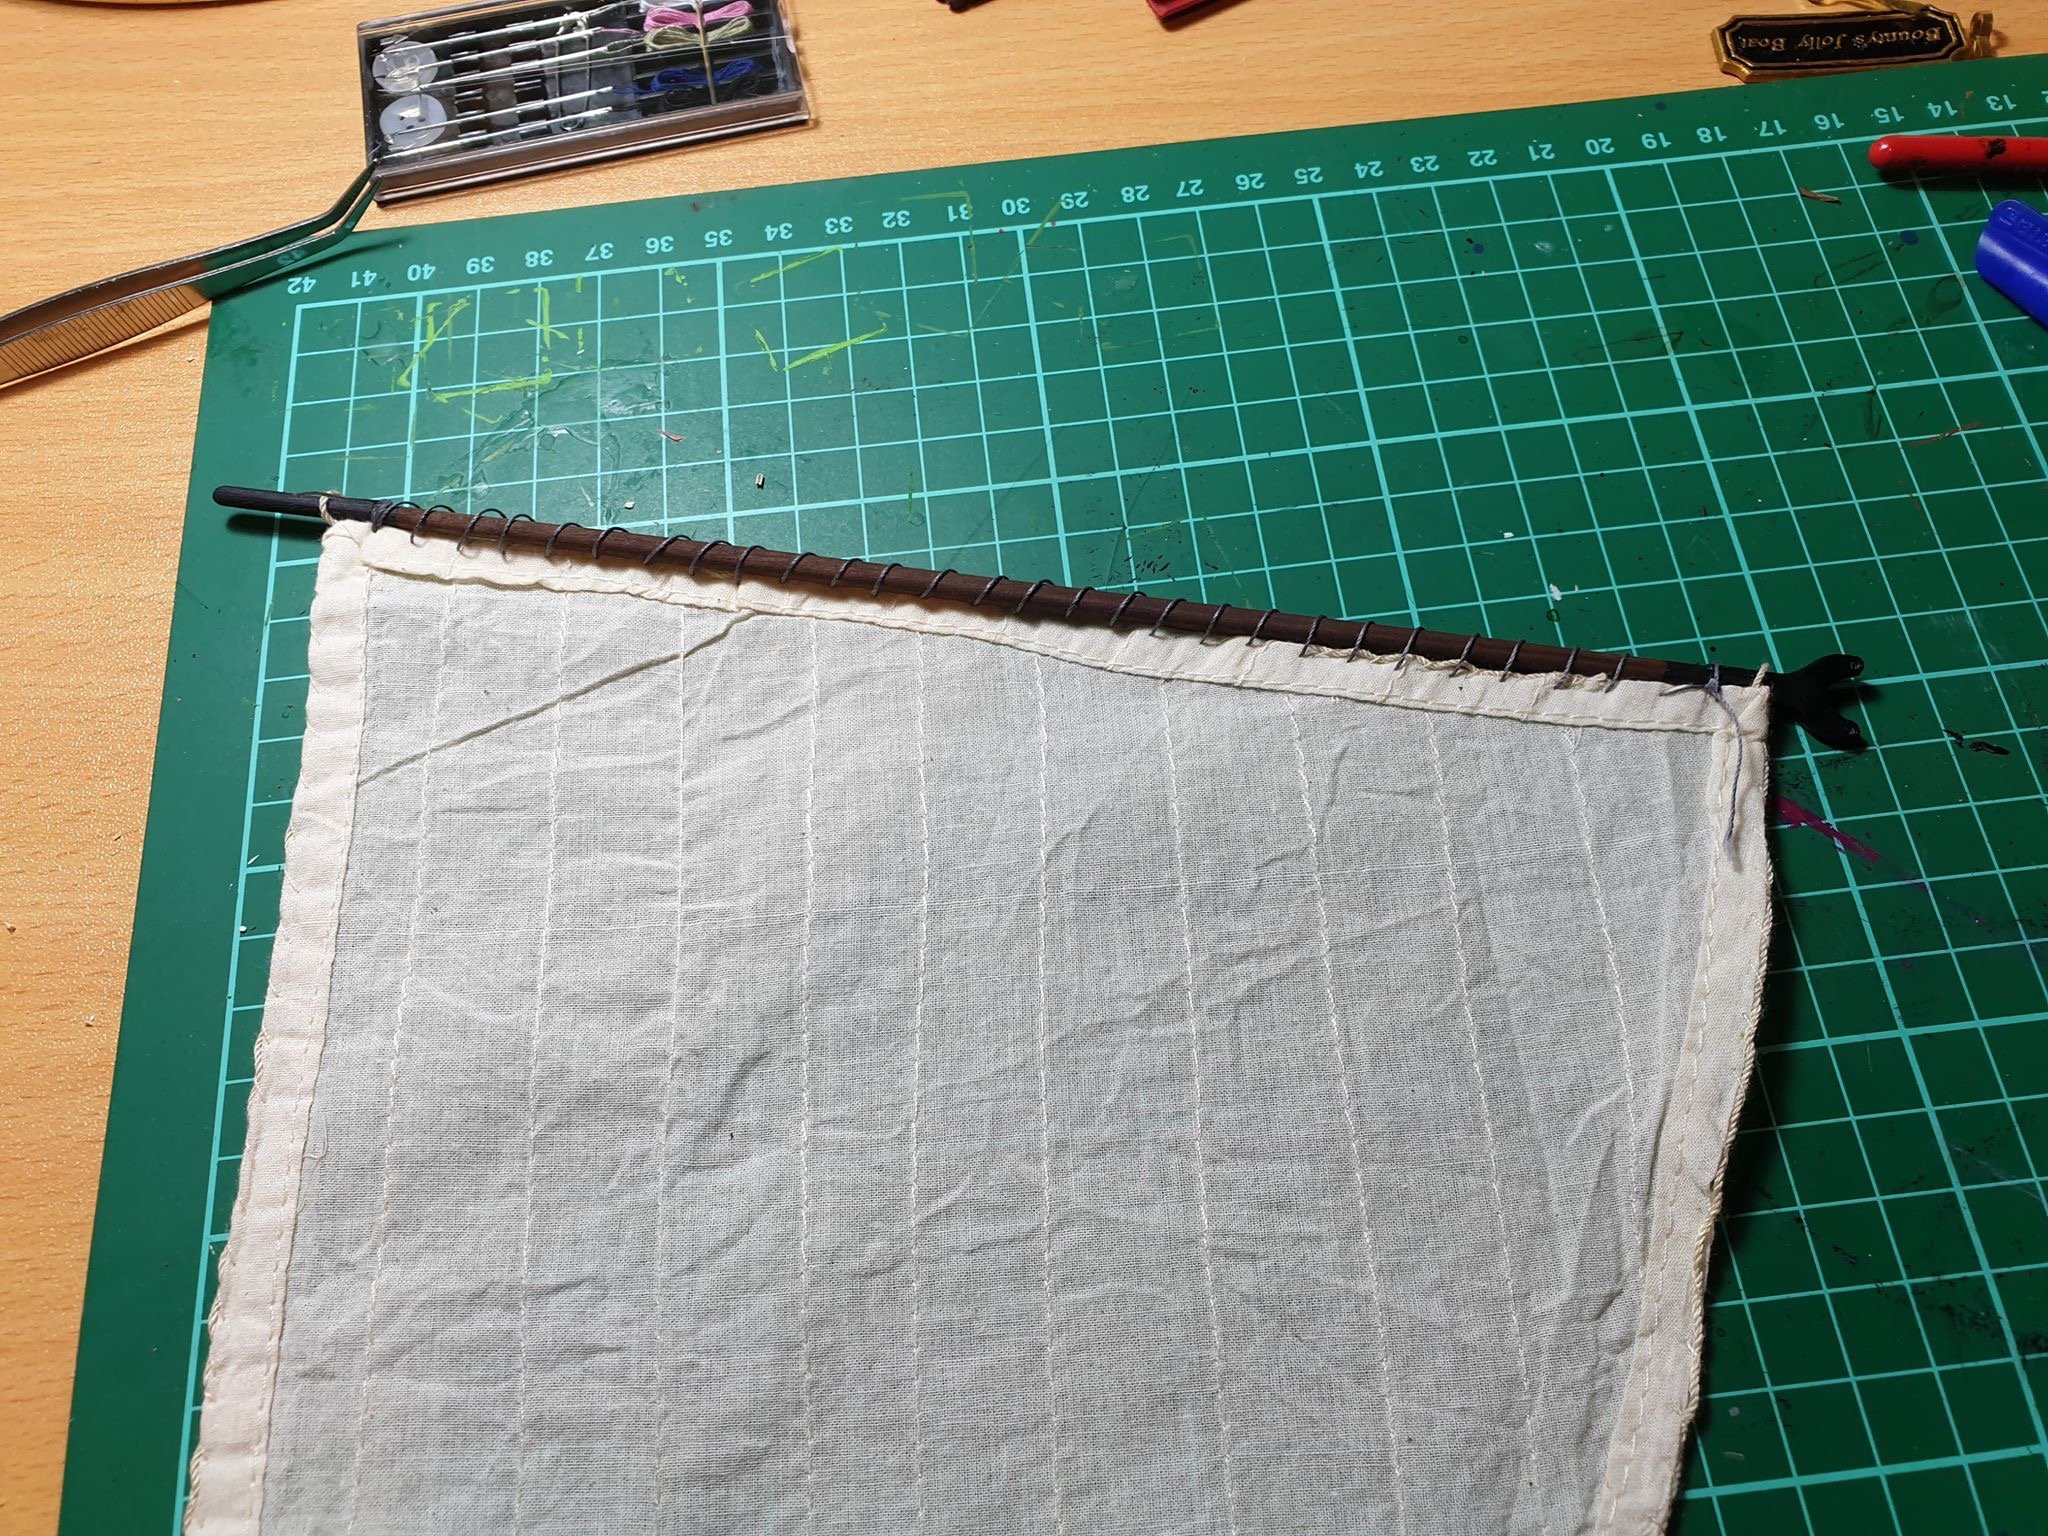
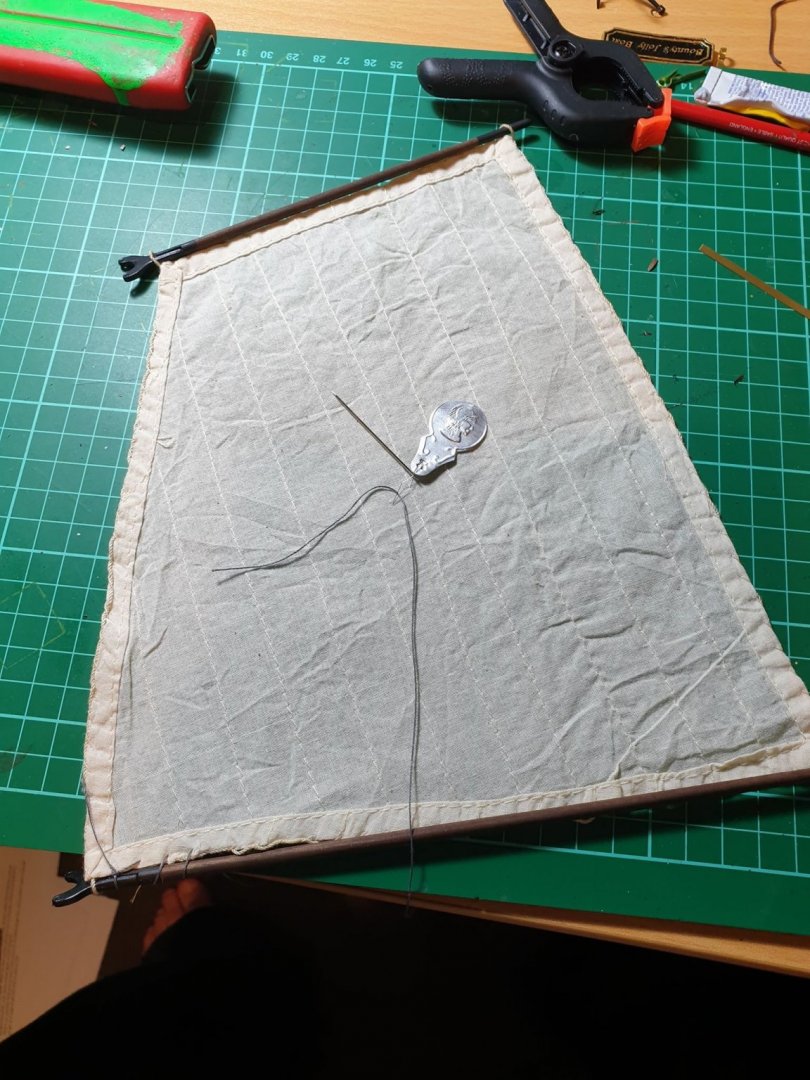
The instructions are bit vague about how to rig the sail, so I took what I hope is the common sense approach. Im going to do most of the rigging off ship. First up, a knot! Held in place with a dab of super glue. Rig a rig a rosies... And that’s the bottom done! Time for the top.

- 60 replies
-
- 1
-
-
- bounty jolly boat
- artesania latina
- (and 2 more)
-
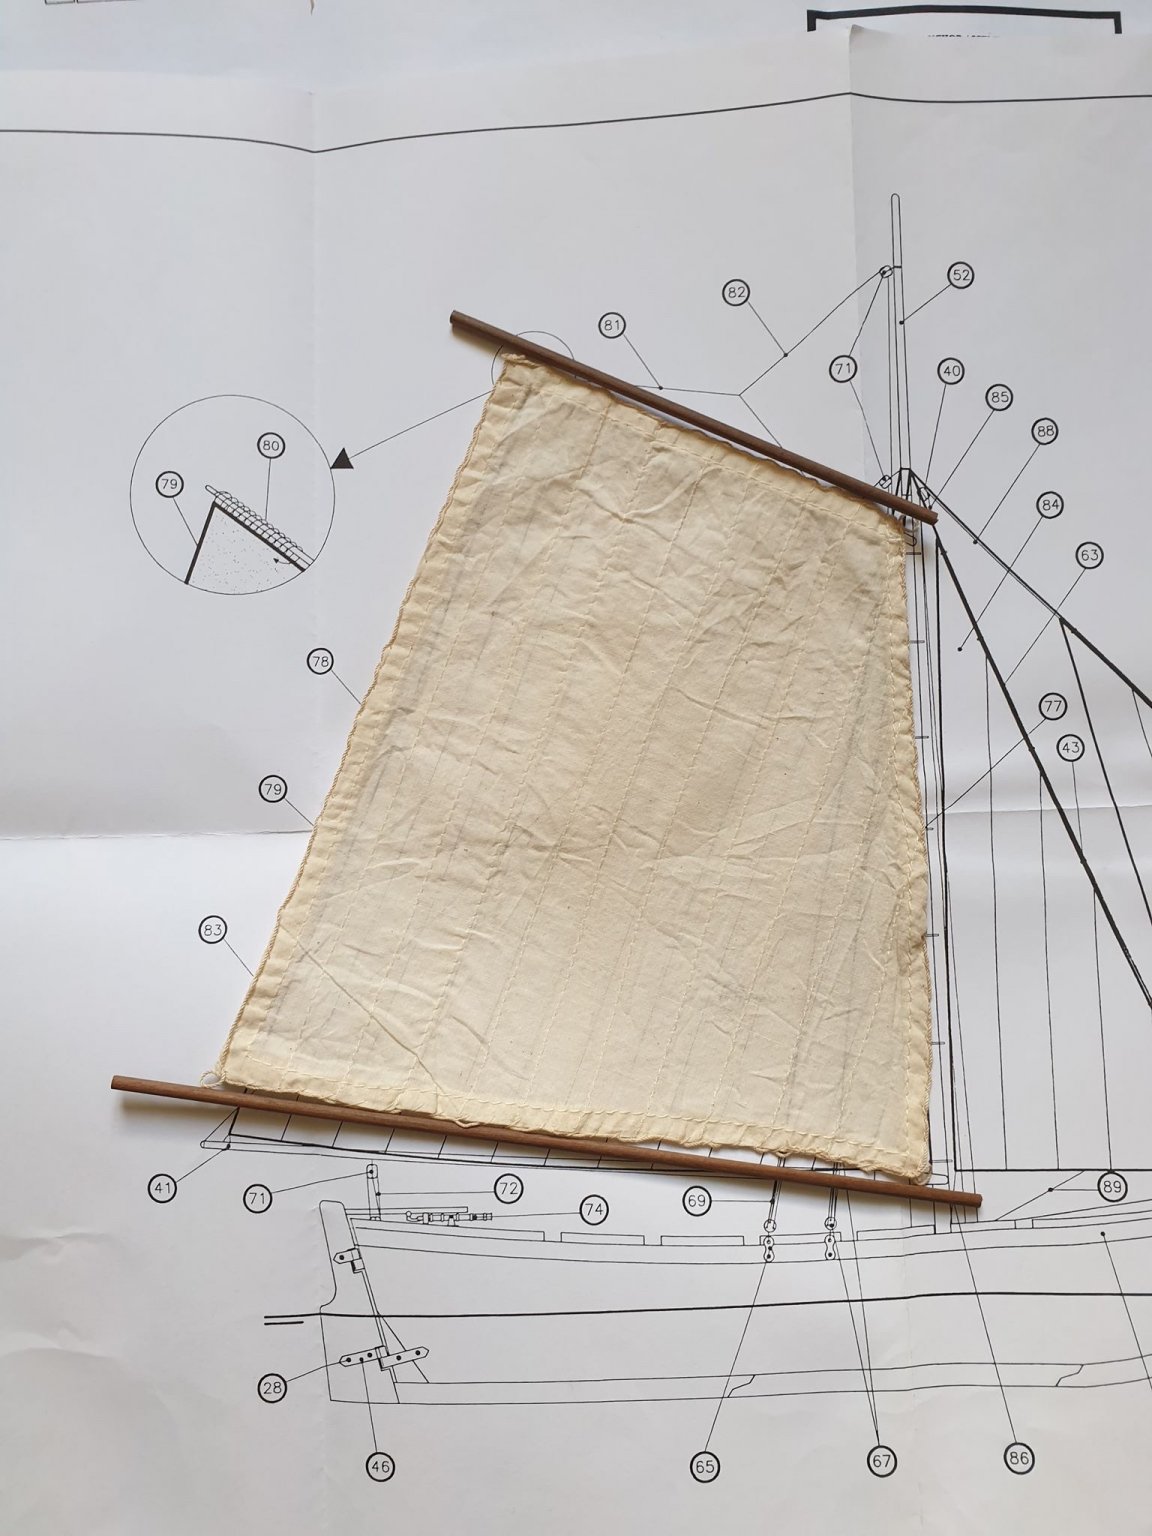
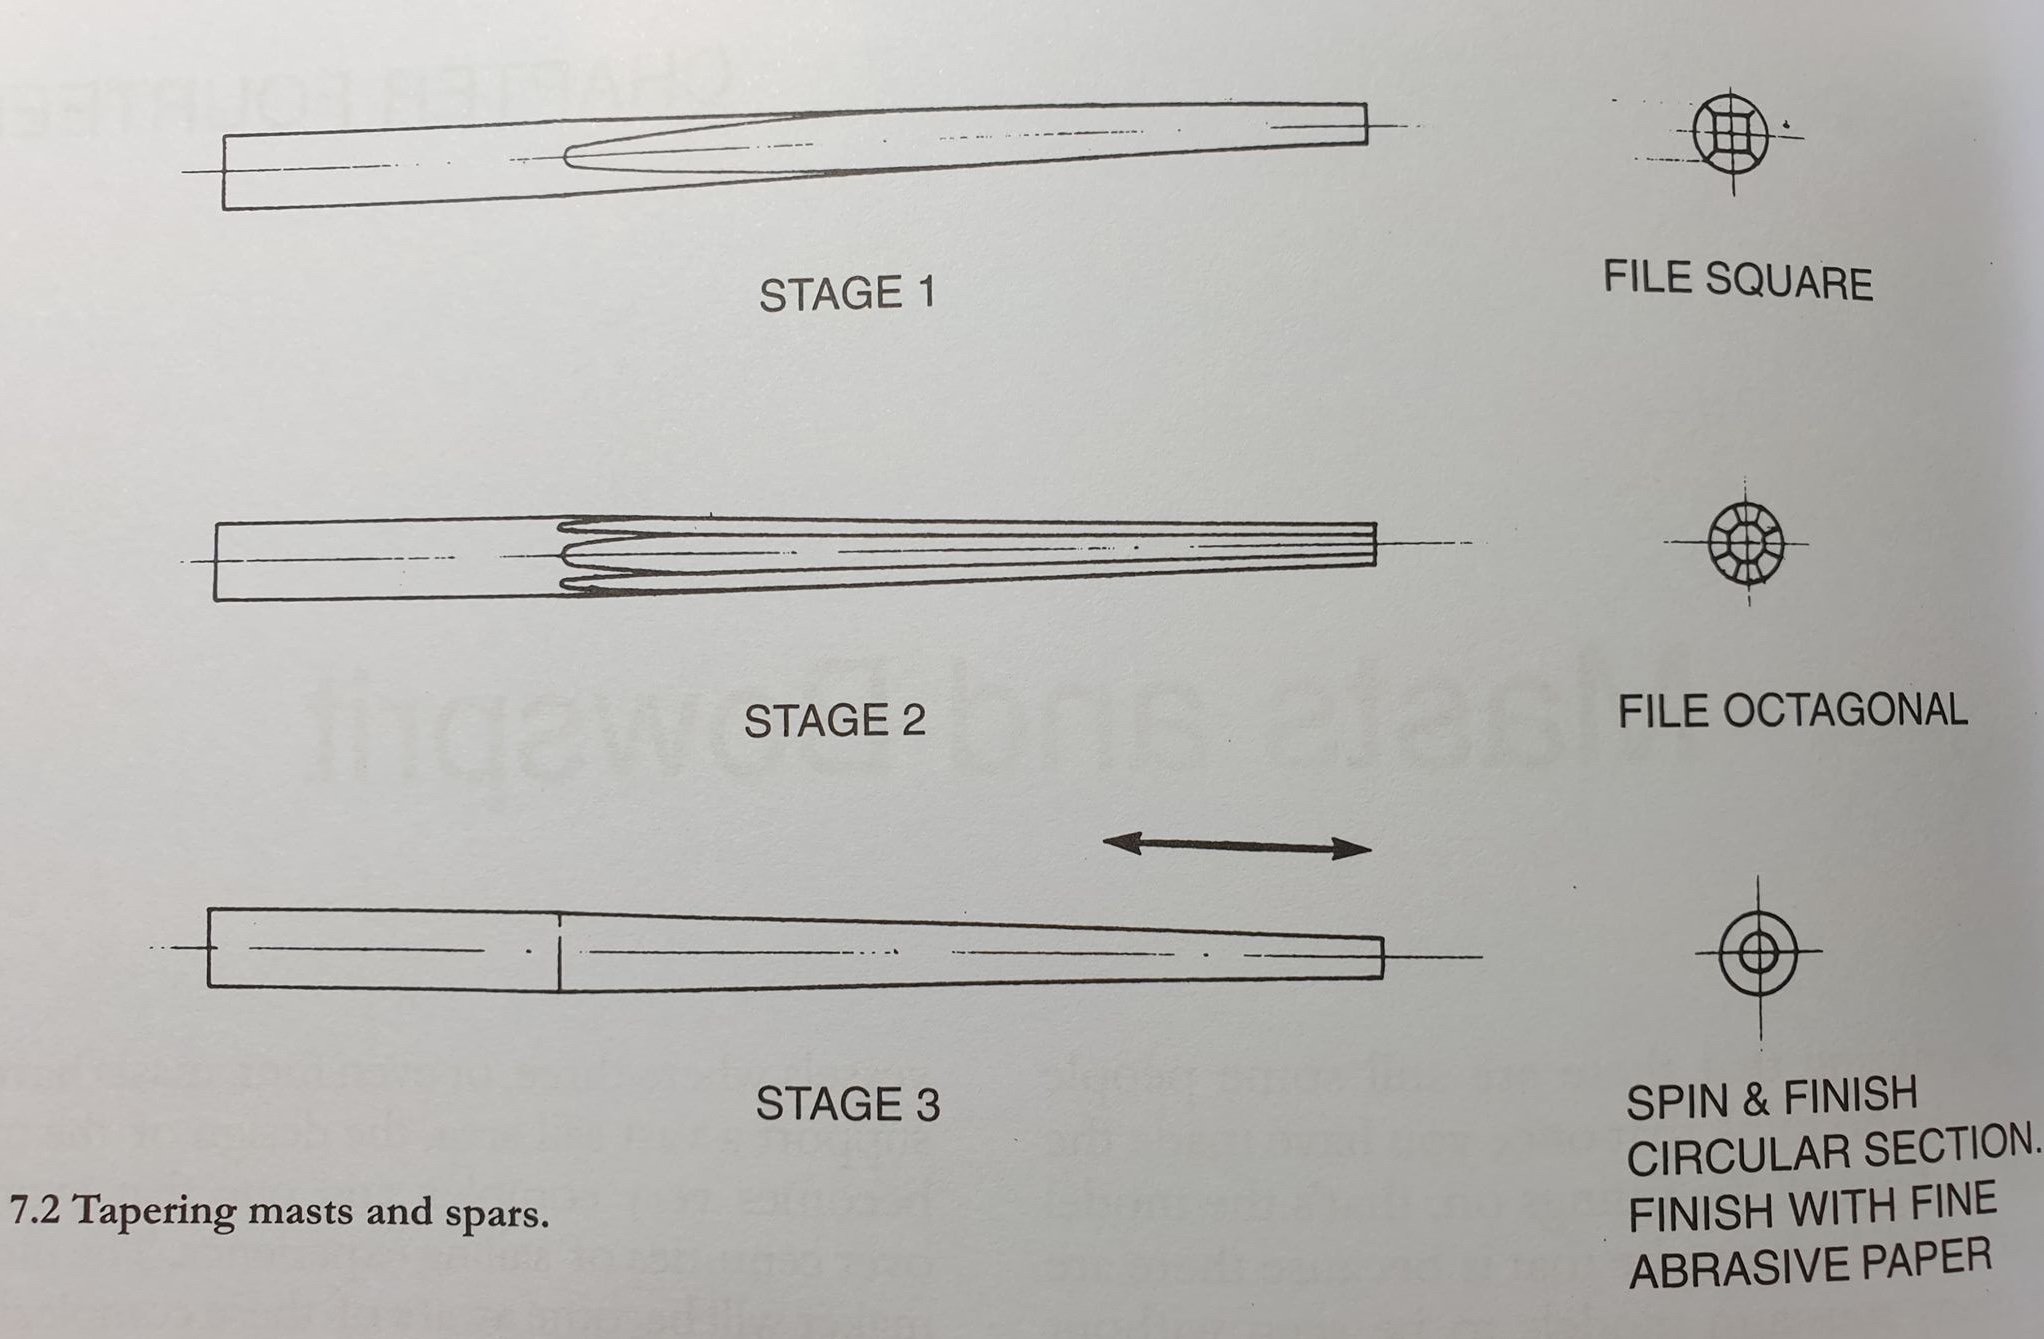
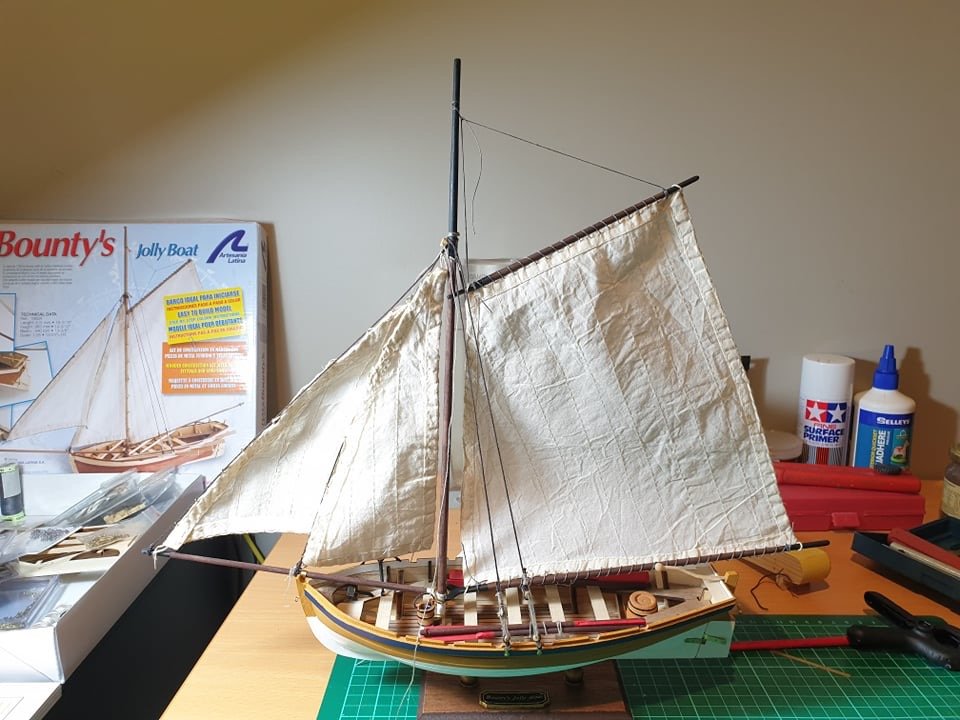
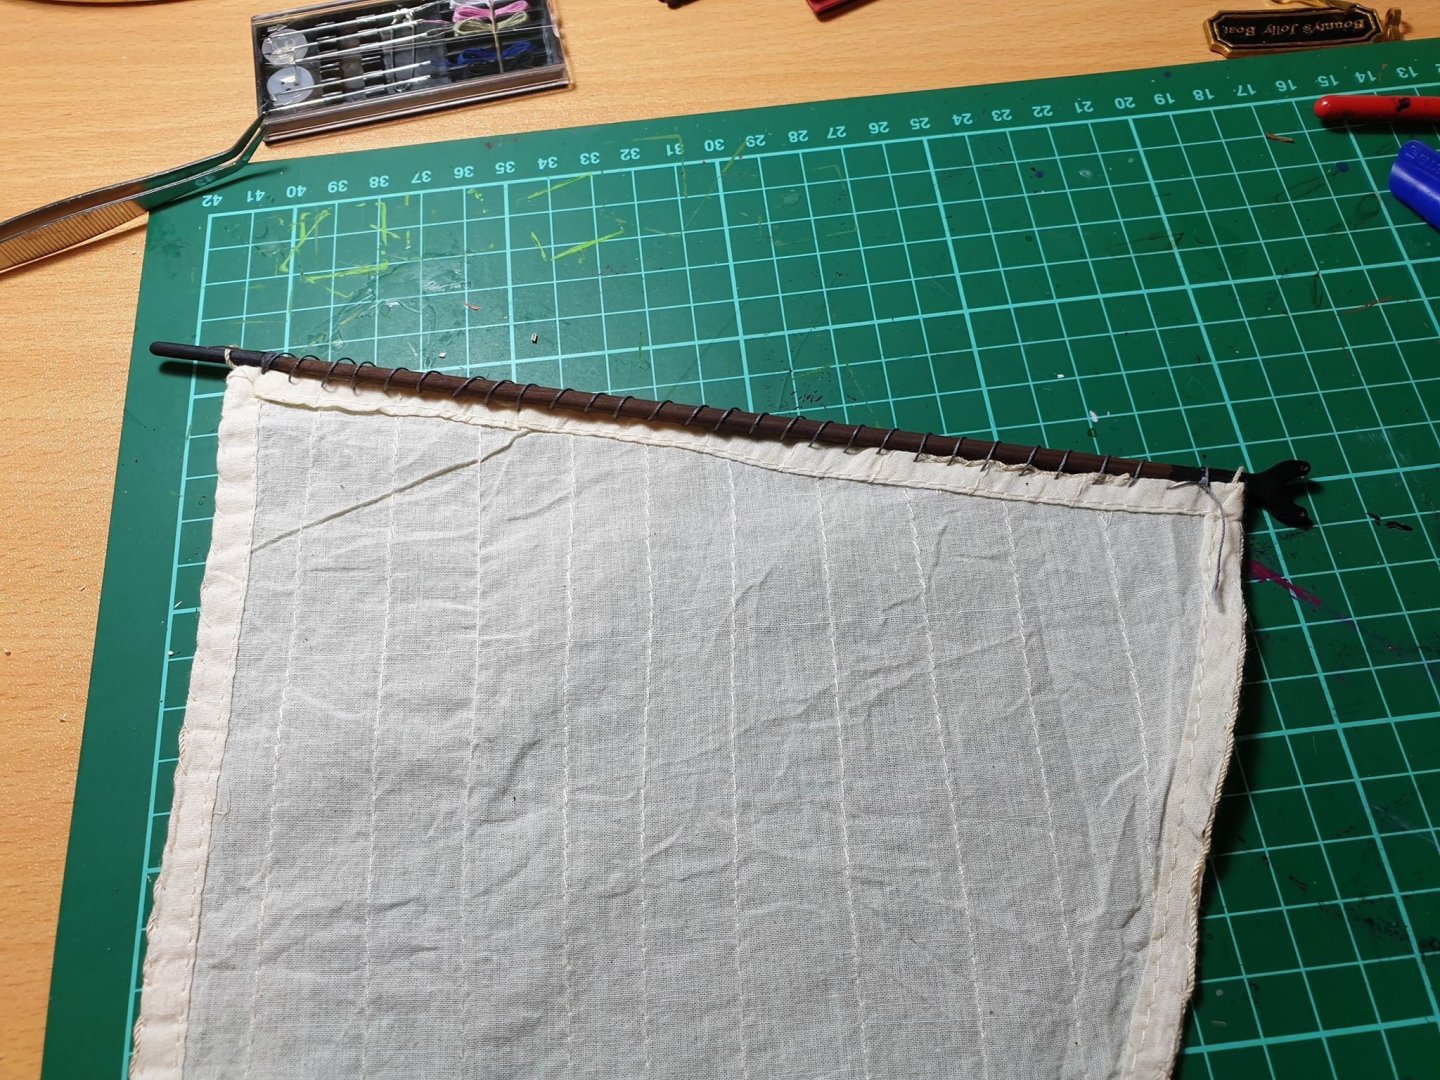
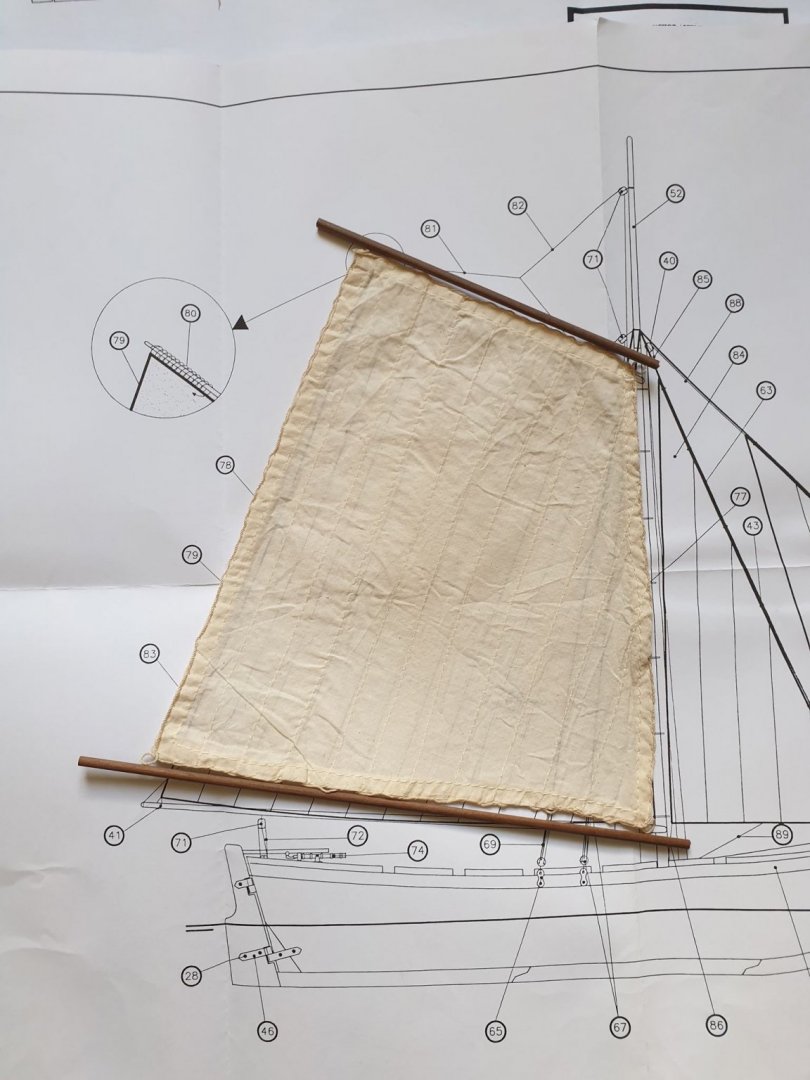
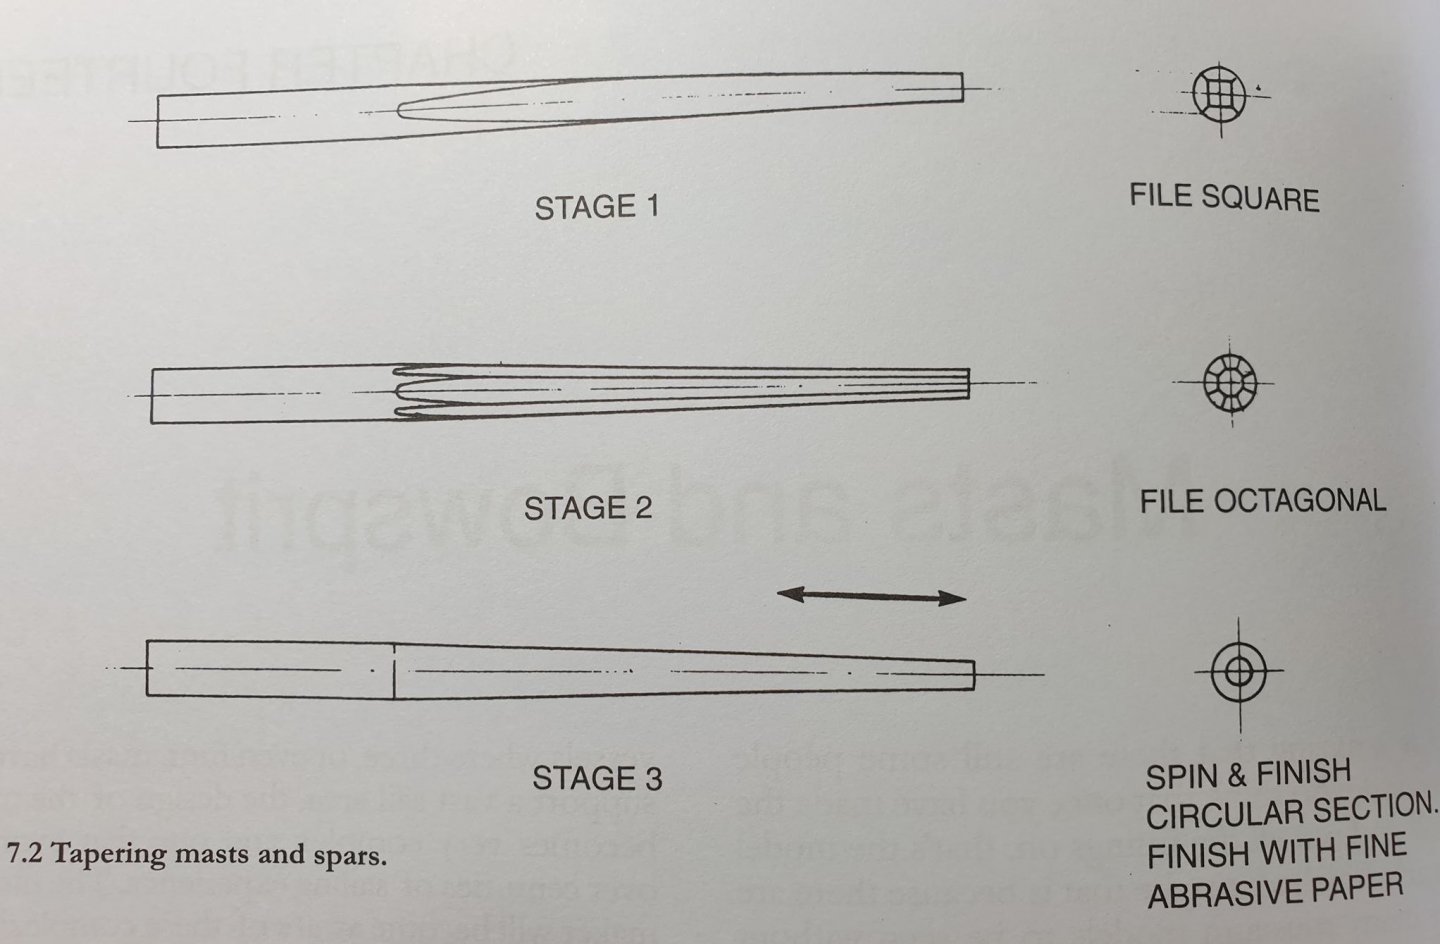
I have been waiting for the post person to bring me some supplies from a well known shop in south west England. However, it doesn’t seem like they will ever arrive now which sucks the big one. Most of the bits were extras to add a bit of extra rigging detail. So not the end of the world (But was an end to the $50 I had spent). They may still show up sometime this century. The big bummer was I had ordered some replacement dowel to remake my boom and spar thingy so I could use the sails as is. No dowel, no finish I then came up with a plan B: This involved a trip out to the garage and a visit to the box of previous attempts at model boat building. I had a look through the bits left over from the ‘President’ build and low and behold, there was some 4mm dowel! There are also some other bits and bobs that may come in handy for future bashing. One thing I noticed, is the quality of the Mantua thread is vastly superior to that of the supplied AL stuff. So much so that it will be something I look at for future builds. The Mantua stuff isn’t all fluffy like the AL stuff. I might redo the rigging completely on this build sometime. With my newly robbed dowel I proceeded to cut each part to fit the sail not the plans. One advantage of doing things twice is the small improvements you can make. Practise makes perfect! On my first attempt I had already glued in the yoke (?) Which made it really fiddle to fit in the drill and I ran the risk of damaging the wood. This time I did it the way everyone else does. Cut the wood longer than you need so you have a piece that goes into the drill that can be cut off later. Also, this timber was much easier to work with. It’s a darker wood (walnut?) but it sands up beautifully. No lathe required! I just used this well documented method. It works remarkably well and I thoroughly enjoy making these. nice to be making progress again!

- 60 replies
-
- 2
-
-
- bounty jolly boat
- artesania latina
- (and 2 more)
-
Making some great progress and she’s looking good! I love cutters and plan to build this at some point in the future. I’ve pulled up a deck chair and will be following along for the journey.
-
Nice work on your Bounty! I have the Del Prado version of this part work. I think the Del Prado was based on the AL model. It certainly looks different to yours. I like you colour scheme. I have seen it on smaller pictures, but seeing it on your model really makes it easier for me to paint mine (when I get back to it) I will be interested to see how you get on with the rigging on your Bounty. Apparently this is a bit average with the Del Prado version.
-
Do you still have the AOS Alert book for sale and would you be willing to post this to NZ? Let me know and we can talk turkey via PM’s. Thanks Jonny
-
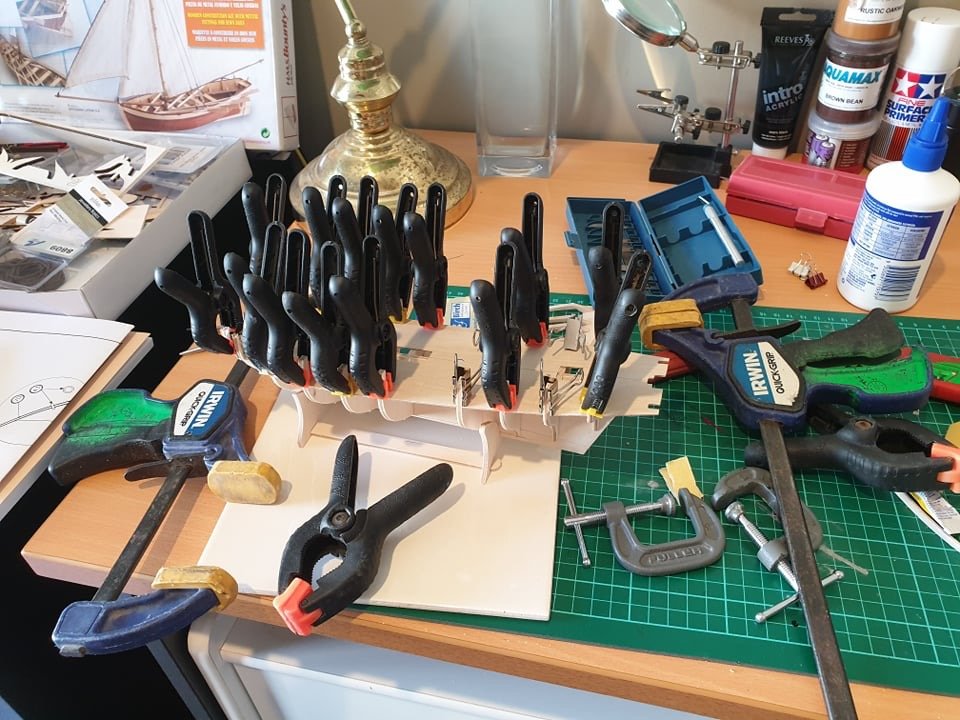
Deck has now been installed via the ‘use all of the clamps’ method. Clamps, clamps, clamps. I love clamps.
-
New Young Model Builder from Minnesota LOOKING FOR ADVICE
Jonny 007 replied to Kenna's topic in New member Introductions
Hi Kenna, As a rookie when it comes to building static model ships I can’t be of much help there, But as a 20 year veteran of the RC world, I could lend some advice in that department. I sail 1 metre (or 3 yards) model yachts and there is a couple of key things to know. Firstly, you need to know if there are any radio frequency requirements where you are going to sail. Once upon a time people had to use various different “crystals” to make sure you were not on the same frequency as someone else. These days we all use 2.4gz which removes this problem. You will then need to think about how many channels you will need and how complex your running gear will be. I’m hoping that your dad and you have some idea about R/C stuff already and know all this stuff. If not, sing out and I can help set you up with a good starting point that won’t break the bank. While there are many cheap suppliers of radio gear these days, there is no substitute for good sail servos. The sail servo is what is going to pull the ropes connected to the sails. There will be a lot of pressure on them so you will need good ones. In my own personal humble opinion, there is no good cheap Chinese knock off sail servo. While there are several Chinese manufacturers who (legally) make okay radio gear, there have never perfected the sail servo. Decent ones are not cheap, but you can’t sail a boat without one. Budget some decent cash here to avoid disappointment. And by decent cash I mean a couple of hundred USD’s. Also, it might be a good idea to find out if there is a local model boat club and go and chat with them. Try looking up ‘International 1 Metre’ too and see if anyone sails model yachts near by and go and say hi. Good luck, and please, start a build log here so we can follow along! -
Hi Eamonn, I have just been looking through your build log. Thanks for posting all the detailed updates! Lots of great ideas and inspiration for my own build.
- 1,039 replies
-
- 1
-
-
- ballahoo
- caldercraft
- (and 2 more)
-
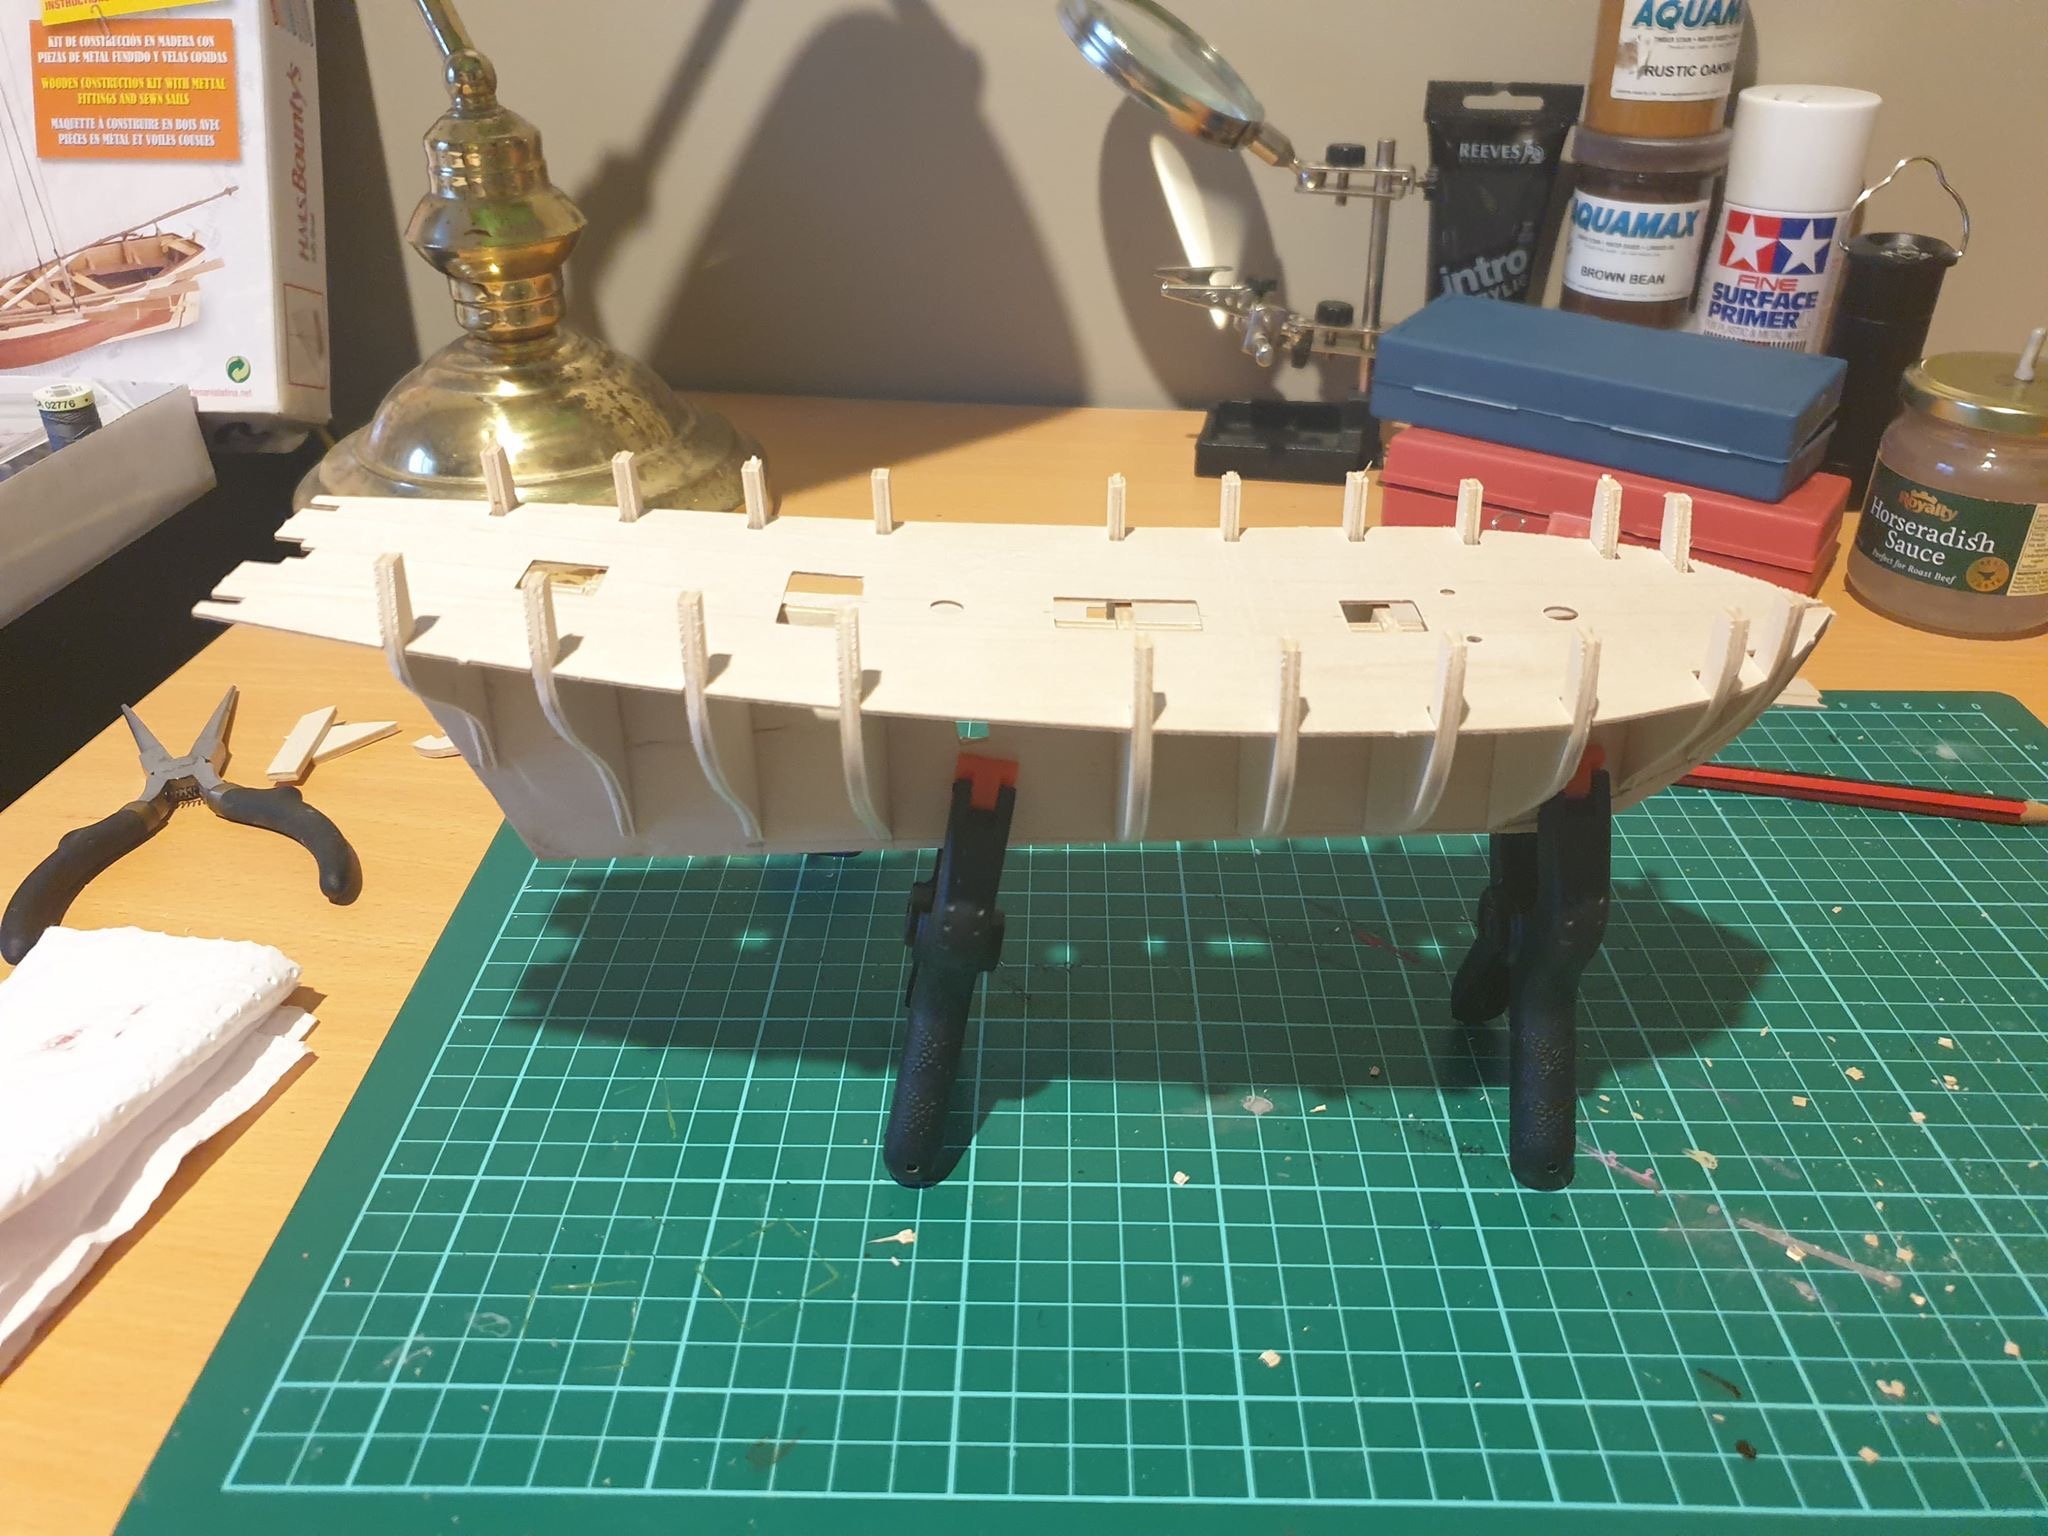
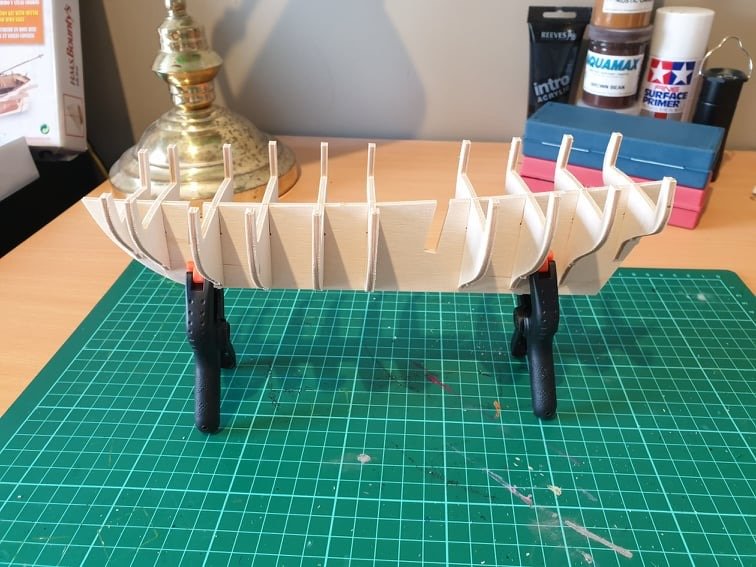
I have glued the frames in place and used the deck to align things. I will leave it for 24 hours and then look to glue the deck down and insert some filler blocks fore and aft.

-
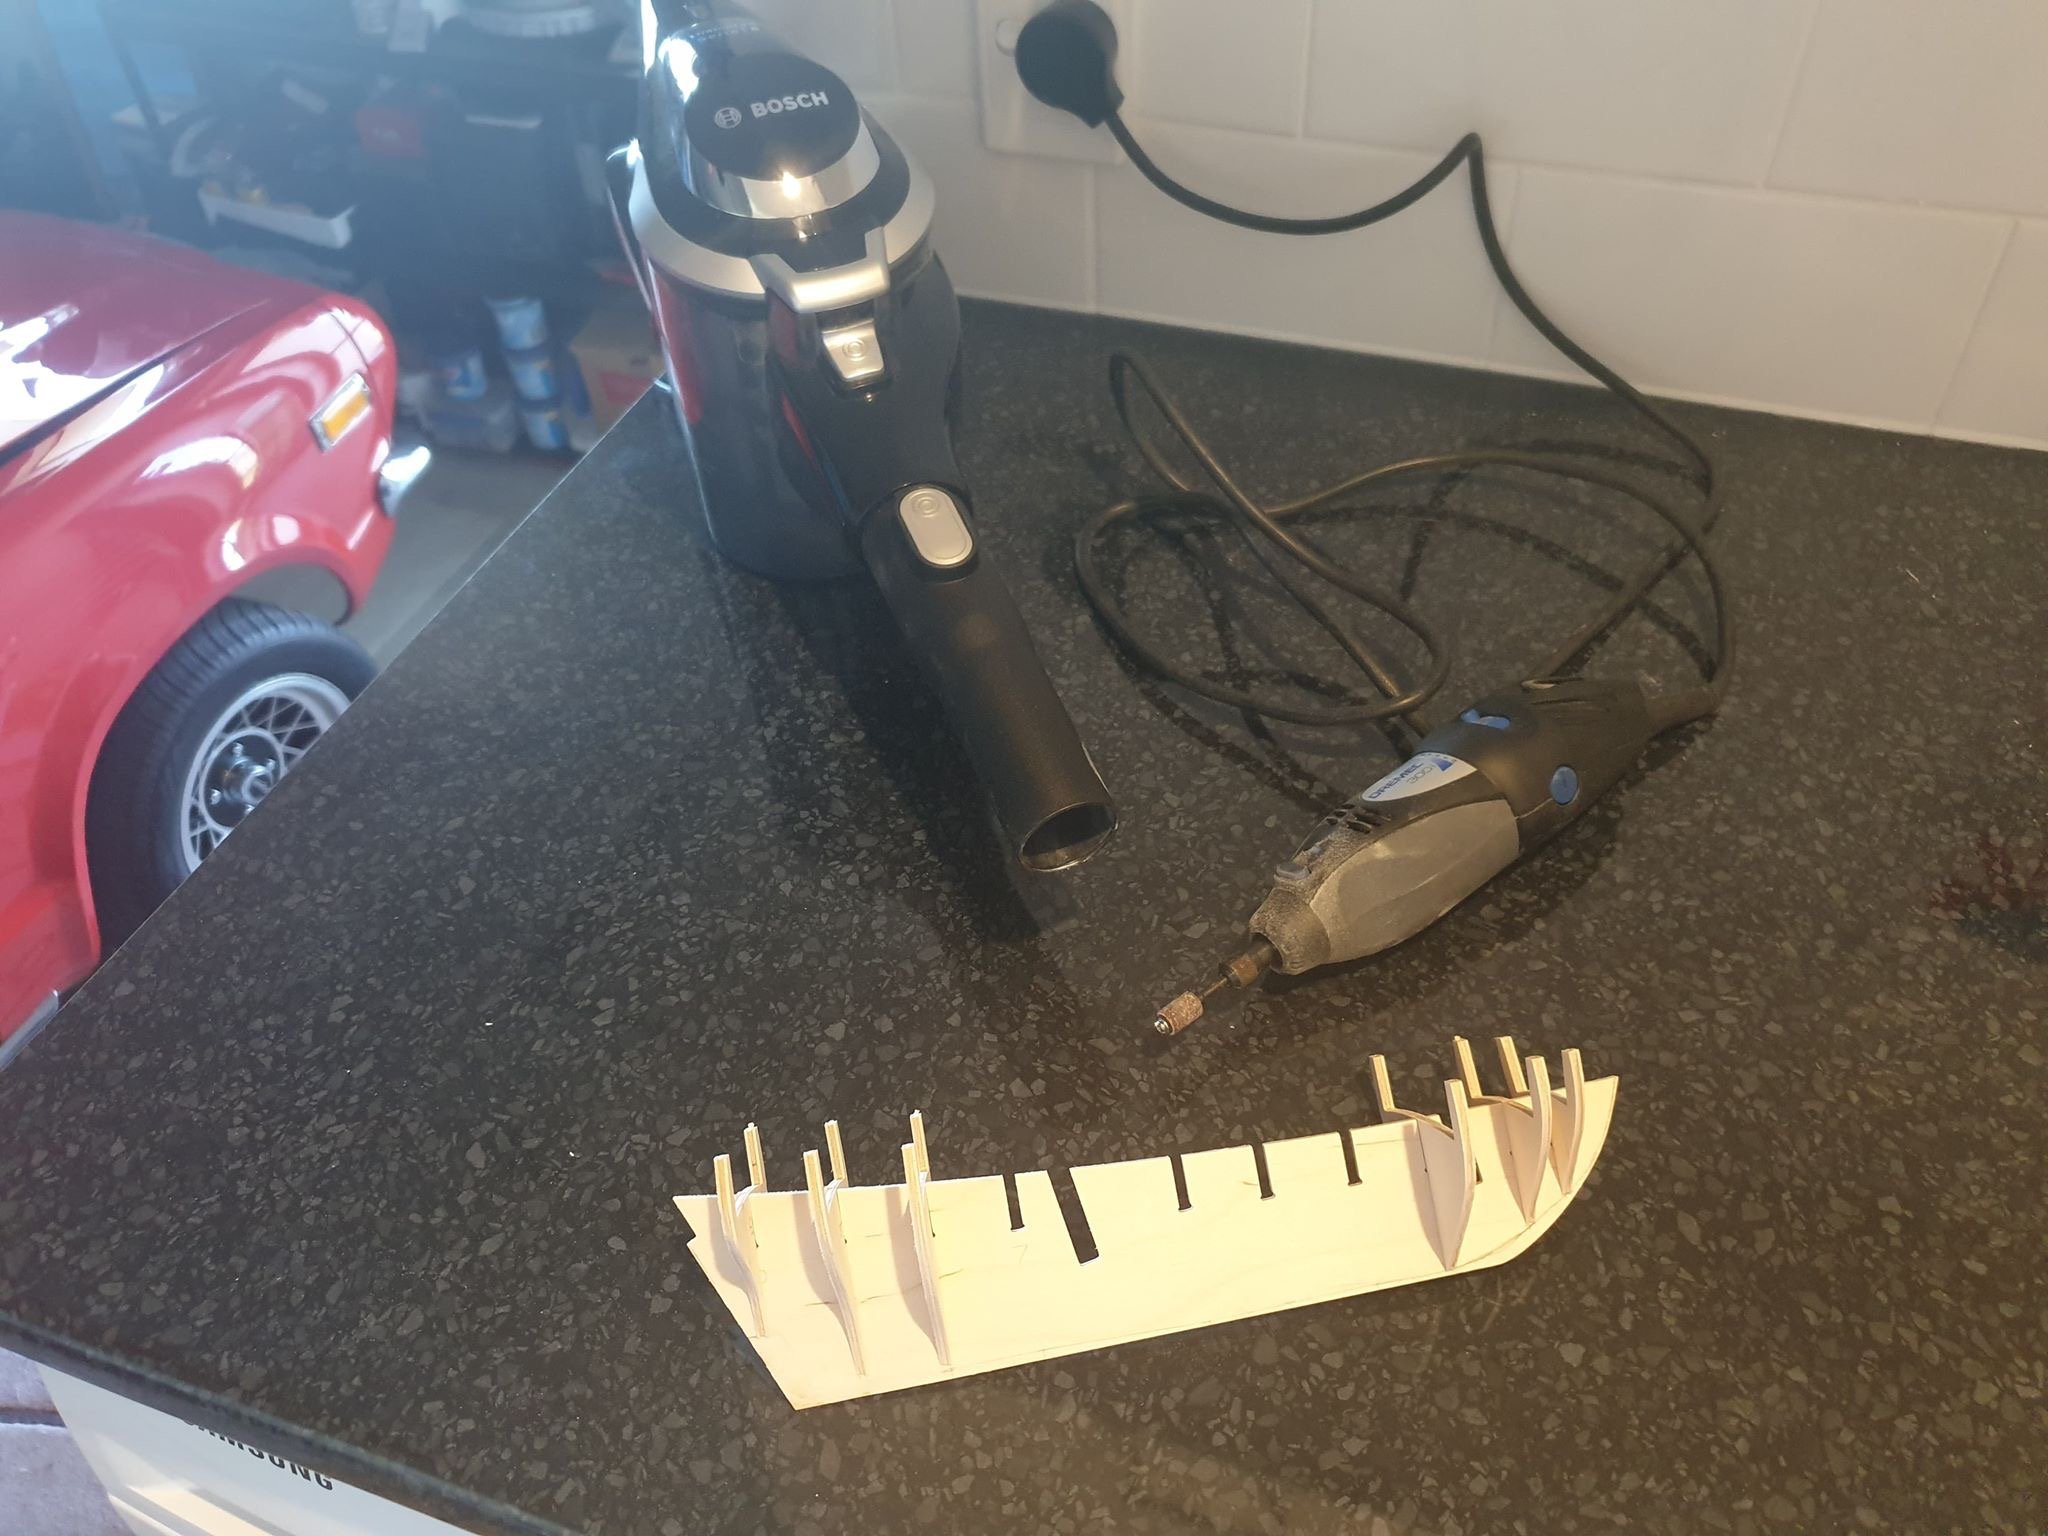
Today I marked the bottom of each frame to give me some idea of where the rabbet was likely to be. I followed @egkb‘s log and have decide to only complete the rabbet at the completion of the first planking. But I did reduce the amount of material at the stern. I then partial faired frames 1-3 and 8-9 using my improvised sanding station in the laundry. My little red Mazda did not like getting covered in dust. I will need to attend to her tomorrow...


-
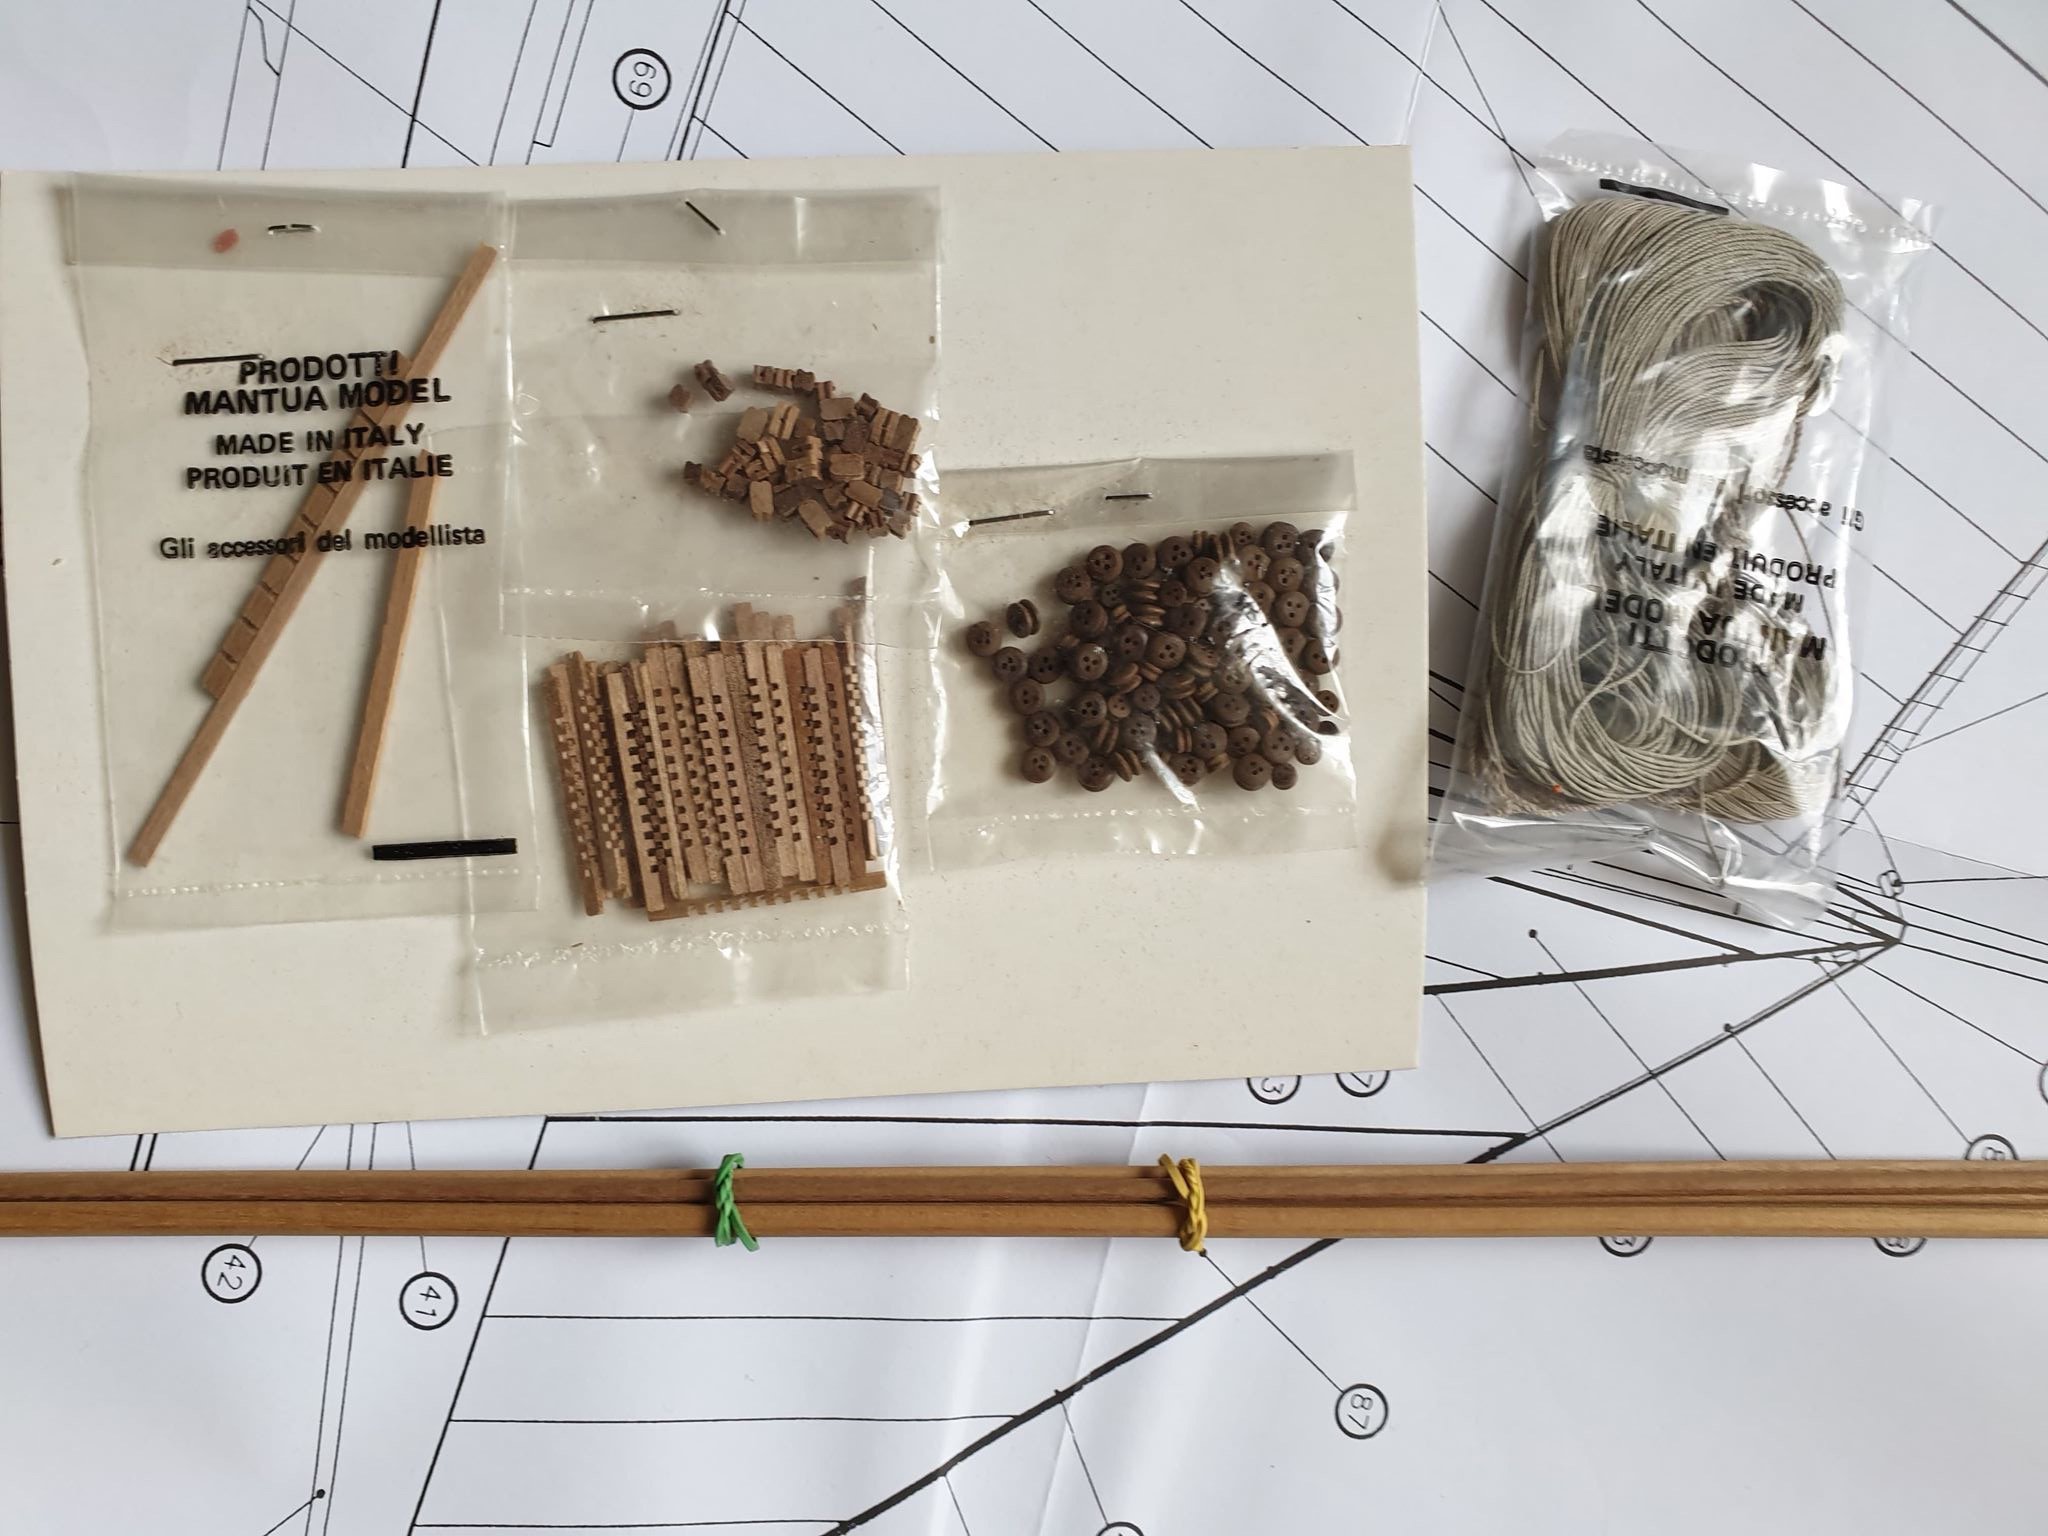
Some of my goodies have shown up. Still waiting on wood though so I can finish. Not all of this is for the Jolly Boat. Some will be used on a future build too. But I guess it can’t hurt to have spare bits lying around.

- 60 replies
-
- 2
-
-
- bounty jolly boat
- artesania latina
- (and 2 more)
-
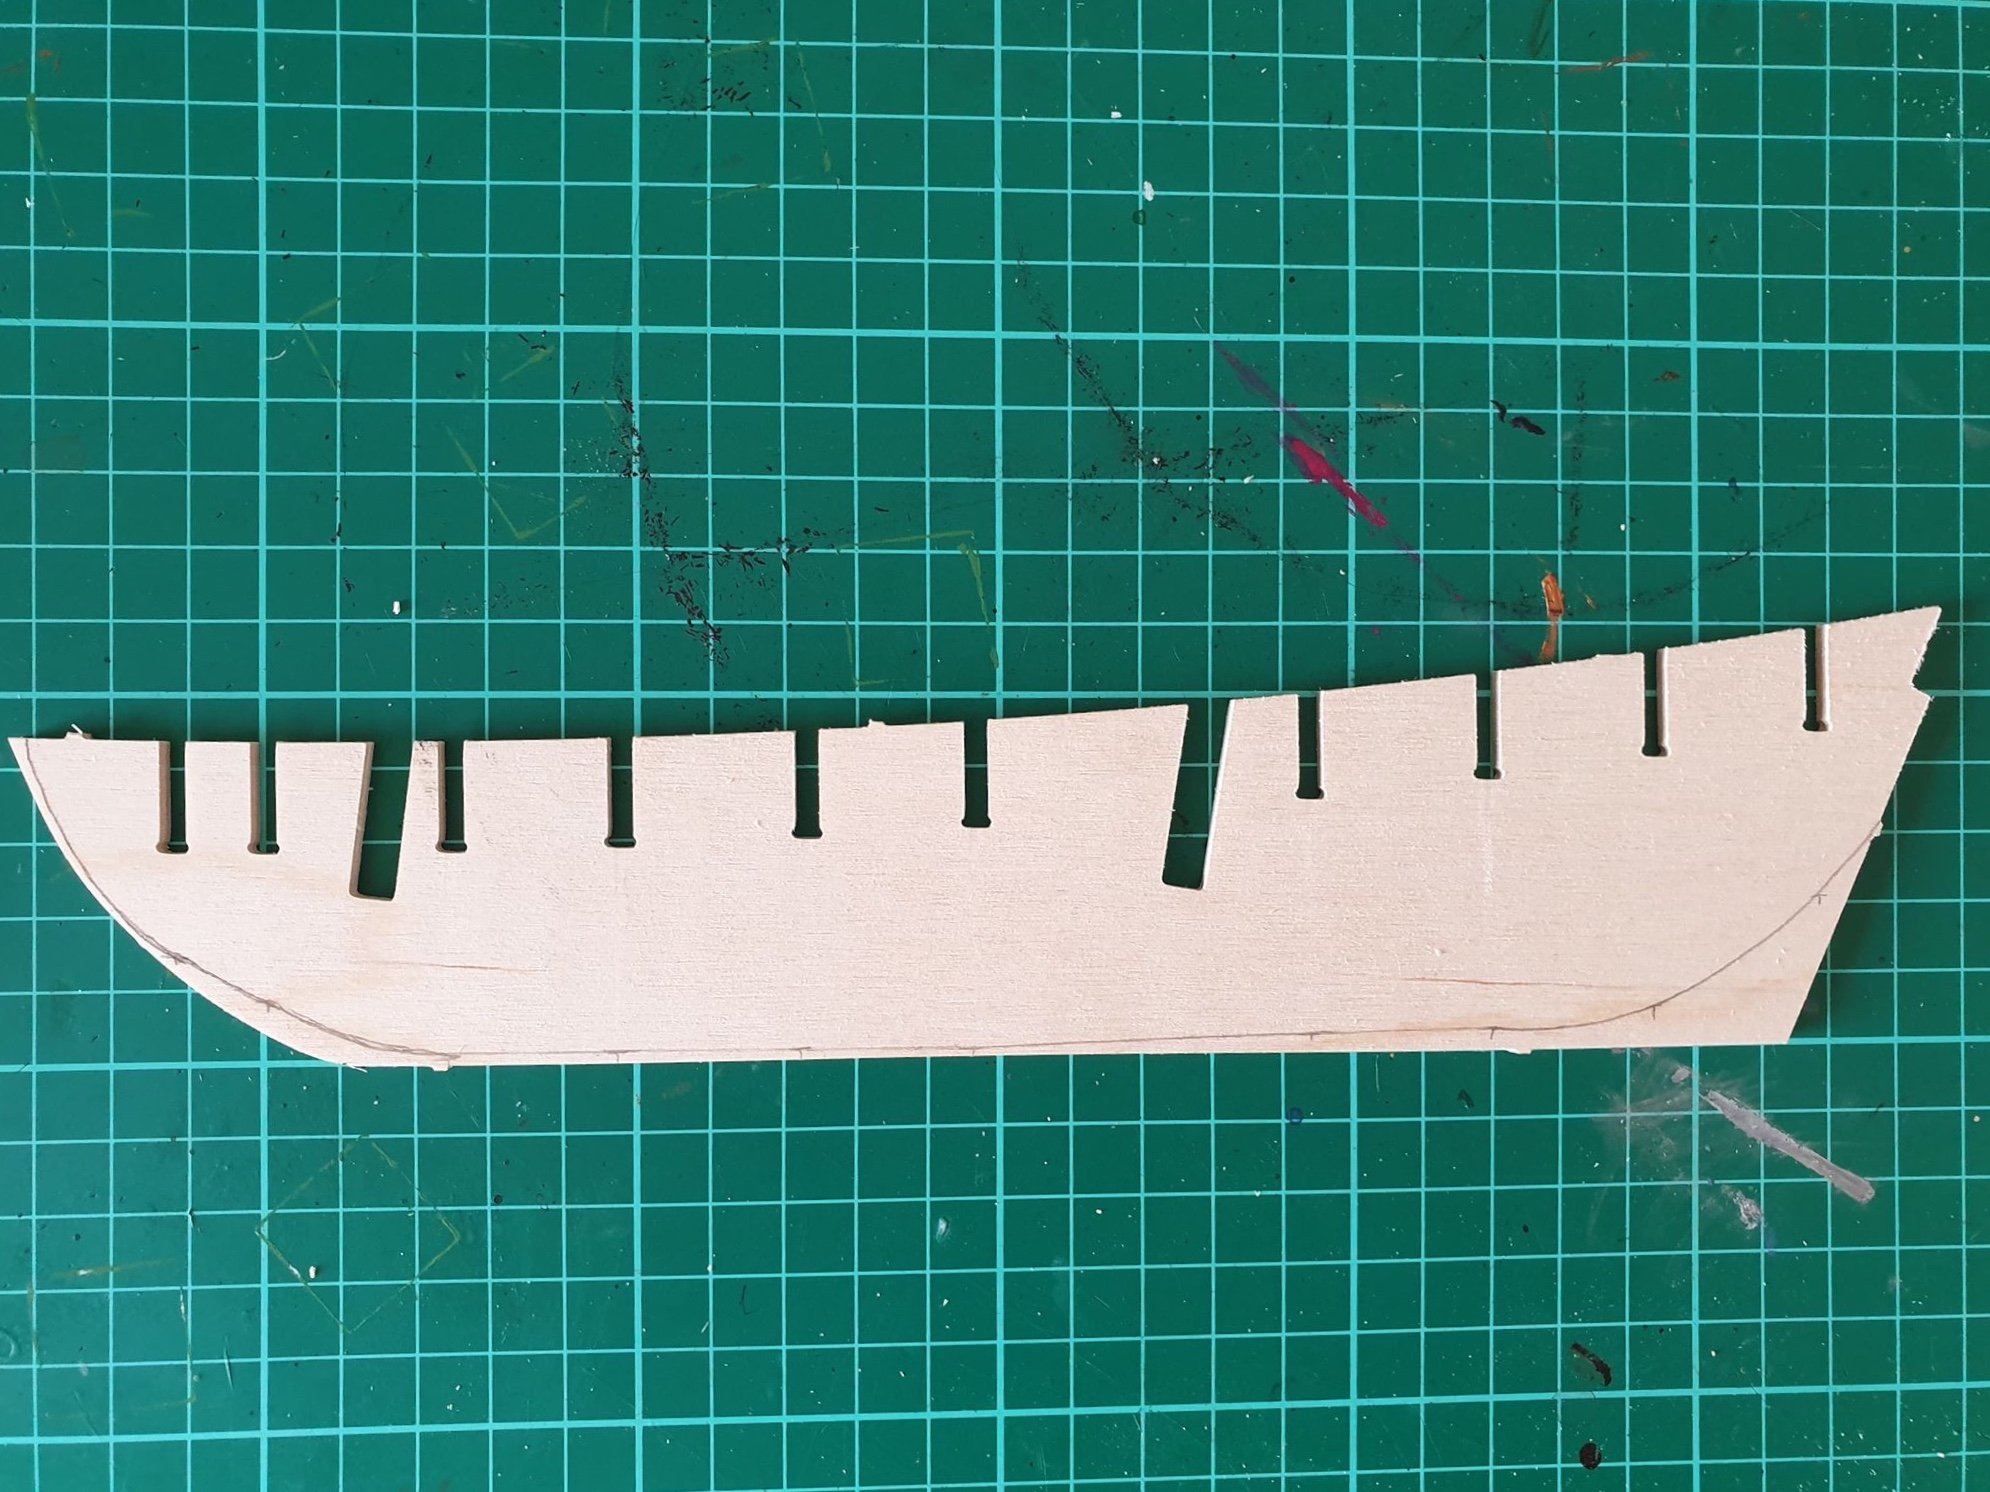
The first two frames are a little loose. This will require some Lego when glueing. The rest are snug which is great. I now need to mark the boarding line and carve the rabbet. It’s has also been mention that feathering the bulkheads prior to glueing can ease the process so I will try that. I will also be adding mast supports with some scrap wood.
-
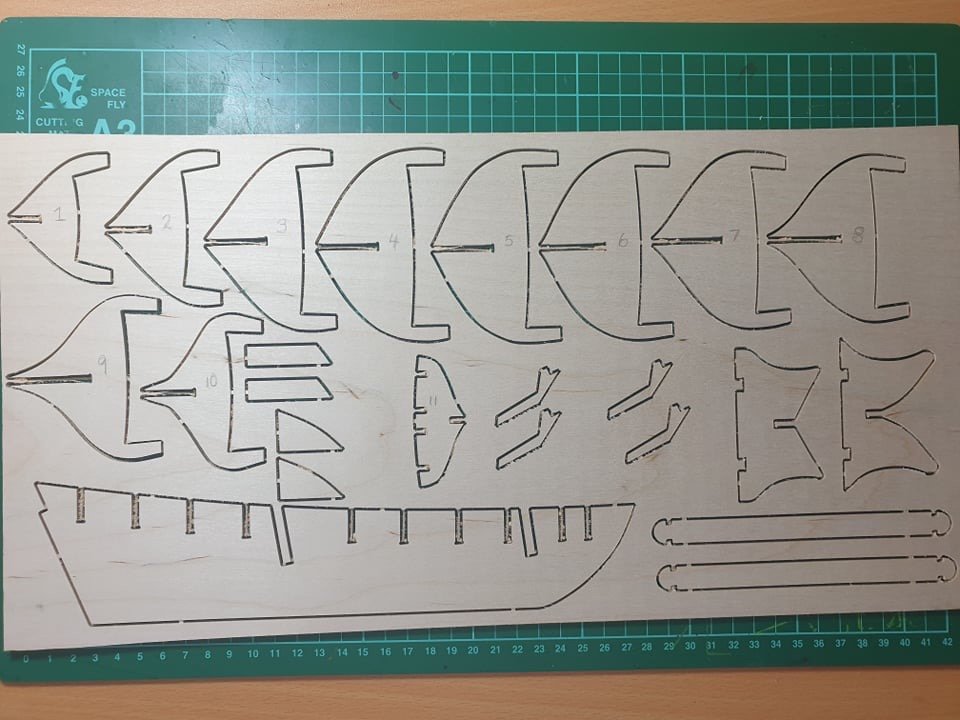
First up is to get familiar with all the plans and locate all the various pieces. Seems simple enough. The next thing I did was vacuum all the sawdust out of the frame and bulkhead sheet. I saw this on another build log and it seem a great way to reduce the amount of sawdust I was going to get. I then went and labelled the bulk heads as per the instructions. Now it’s time to remove them all and test fit.
-
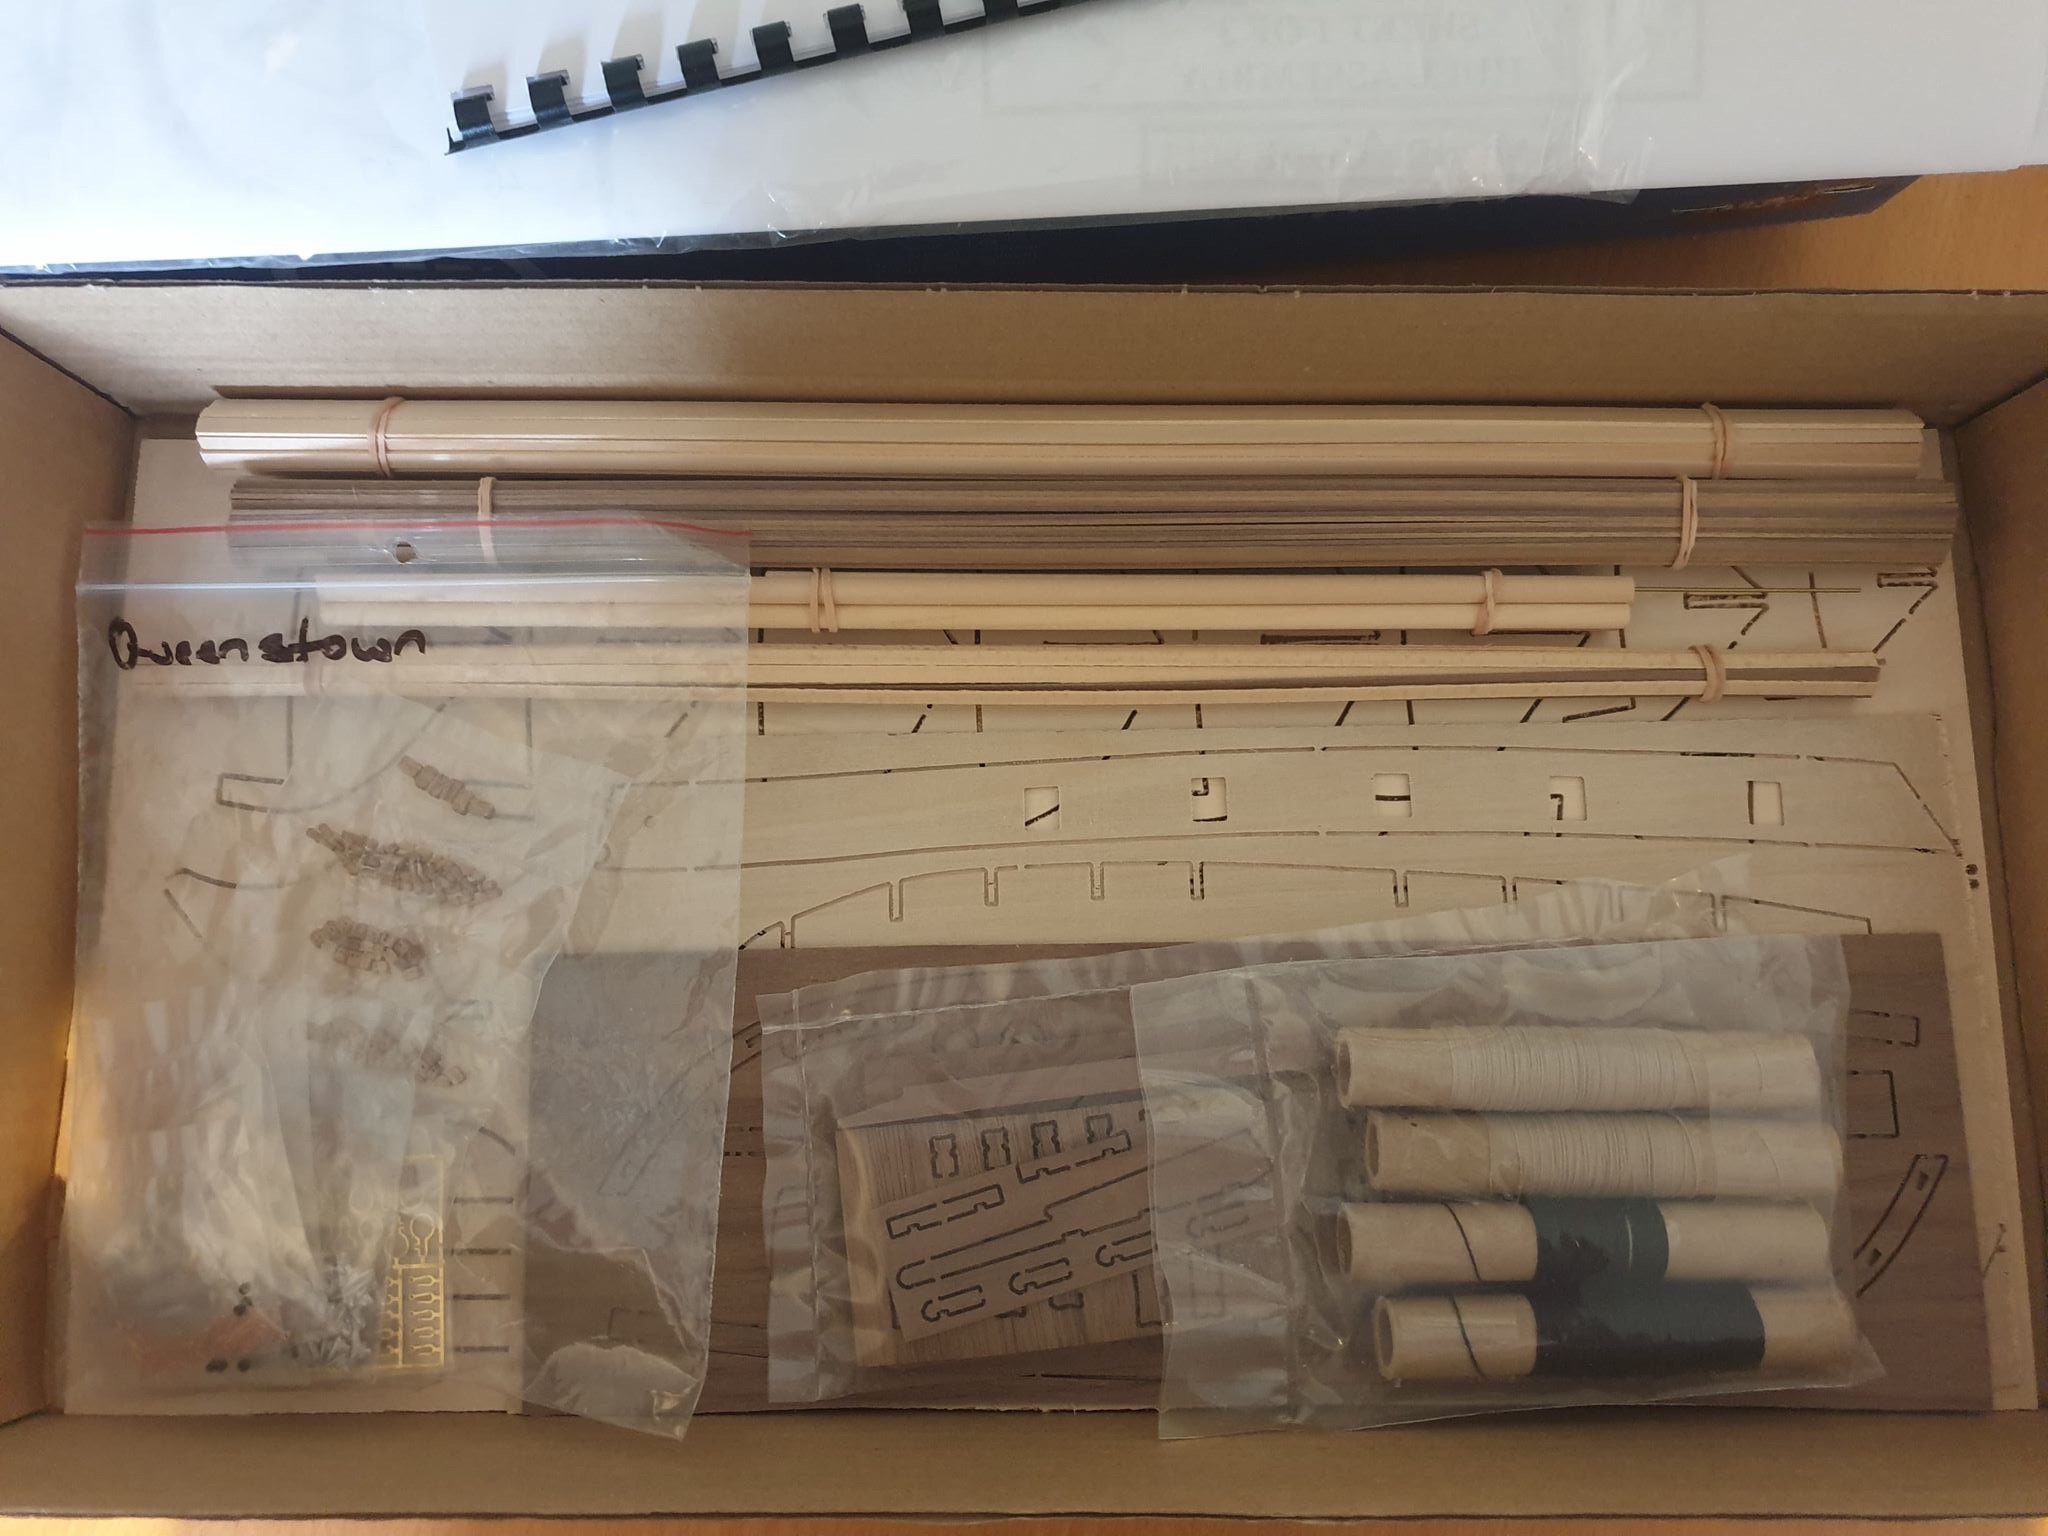
I won’t spend a lot of time talking about what’s in the box. Mainly because I’m not really that sure what I am supposed to report on. The timber strips all look good, not a lot of ‘fur’ The CNC pieces look okay too. Now for some pictures. Stuff in the box There are several sets of plans and a small instruction booklet to explain the different build sections. There are 3 pages to explain the build. The plans are excellent and provide a lot of detail. Glad I have a vague idea what I’m doing...


-
Hello, and welcome to my second model ship build. As I wait on the arrival of some additional parts to finish my Jolly Boat, I though I would get a head start on my next project. As normal, There will be a bit of a preamble before the actual build log, so feel free to skip ahead to the next post. I thought long and hard about my next boat build and decided on HM Schooner for a number of reasons. Some of which are: a) It seemed like a good next build as it isn’t too complicated. b) Double plank on bulkhead construction (Jolly Boat is single PoB) c) As a smaller kit I should be able to finish it in a reasonable time frame (kit instructions say 1 month of evening work) d) Has a deck to plank and deck features to build including Cannonades e) Has slightly more complicated rigging but not too much of a step up f) Some other good build logs for inspiration g) Cheap (came in the same as my Jolly Boat) h) I like Caldercraft kits and have two more to build after this Having other quality build logs to follow really helped a lot with my first build. There are several for the Ballahoo that I have been looking at. I will using these as a reference and source of inspiration. I also learnt a valuable lesson building my Jolly Boat. I like smaller boats. I like the quicker build times and I like having room for them. I can built them in my office inside. Bigger boats may mean a move to one of our garages (which is another story...) I also like the look of a bit of paint. Paint hid a lot of my mistakes in my first build! Don’t get me wrong, I still hope to build Caldercraft’s Diana kit some day and maybe even the victory. But I am fully aware that my skills are a long way away from those dreams. Or the 8000 hours it can take to build one!!! So, here we are. Build number two...
-
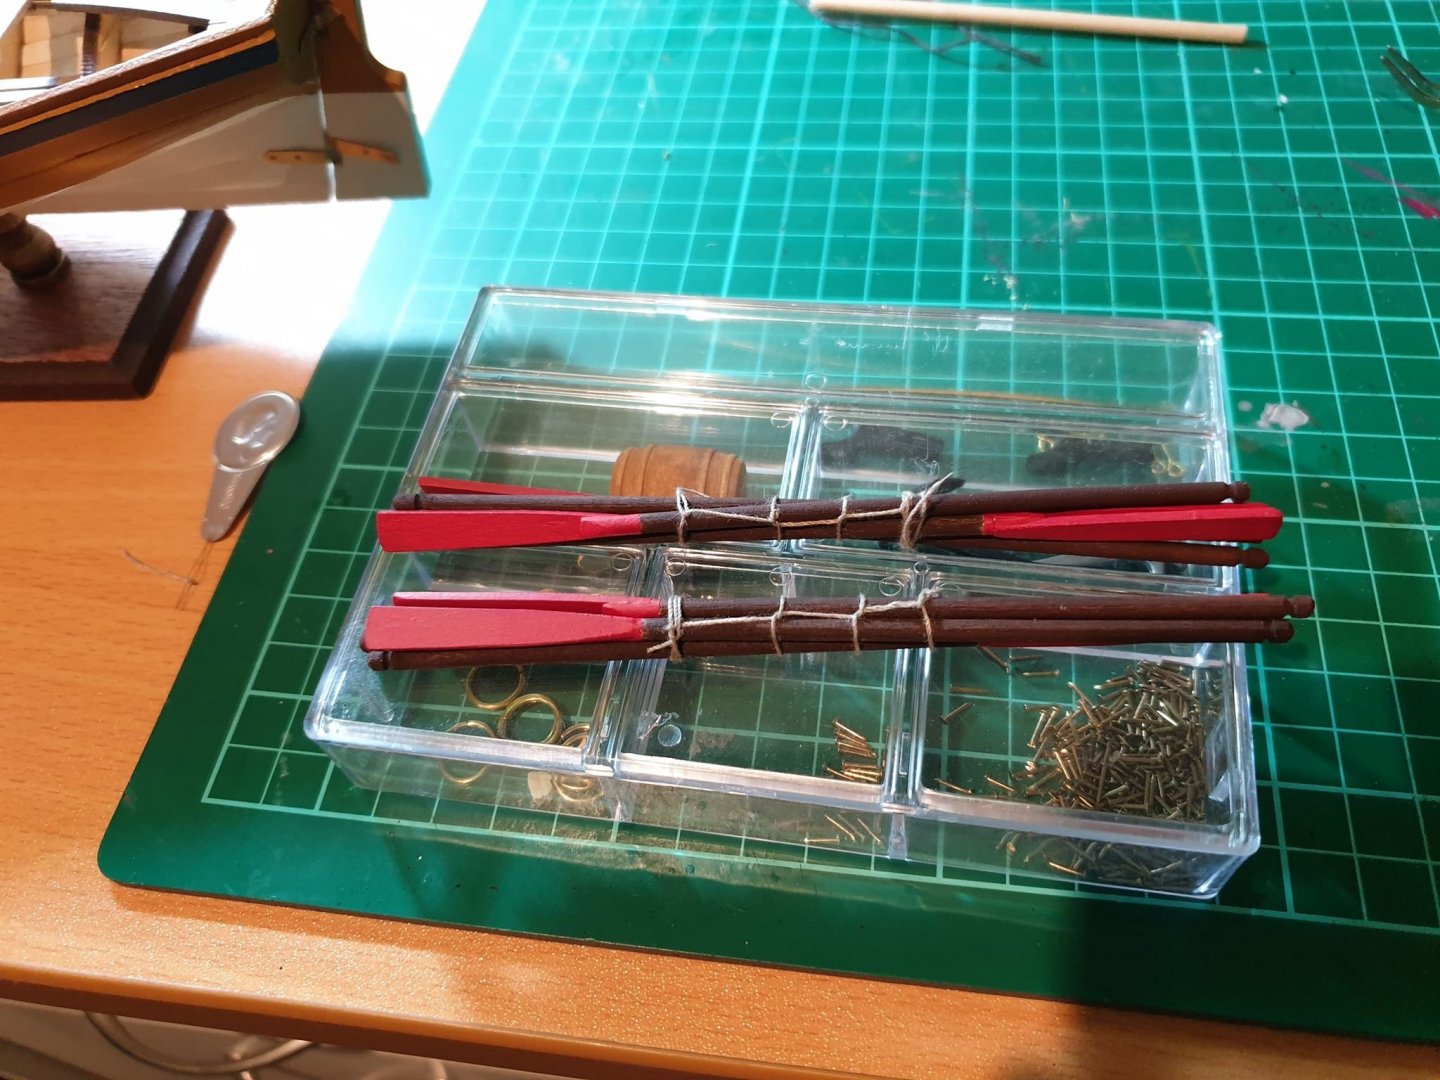
I’m waiting on the post person to deliver some of my extra goodies I ordered, including some timber so I can finish up. Sooo close now. I finished rigging the dead eyes. It wasn’t till I did the fourth one that it looked like they are supposed to. Practise will make perfect I guess. I also ran into the problem of adding tension to one line, could cause another line to slacken off. It only happen to one line (and only a little) and you can’t notice it. But it will be something I keep an eye on in the future. I’ve also been looking at my technique and it might not be the best option for rigging larger ships, but I will cross that bridge when I come to it. One is longer than the others, but it was also the neatest. At this point I am going to leave it as is. My rational is that this is a learning curve, and this will show my learning. While I’m waiting on the postal person I started wrapping up some of the other details. Like lashing the oars. I have also had a look through Chuck’s rigging guide for the Midway Longboat. It has really cleared up a few rigging questions I had. My plan is still to add a lot of additional rigging, but this is just going to be for fun and to add some extra detail.

- 60 replies
-
- 1
-
-
- bounty jolly boat
- artesania latina
- (and 2 more)
-
@HardeeHarHar and @Modelkiwi thanks for stopping by and kind words of encouragement. And thanks to everyone for all the likes!
-
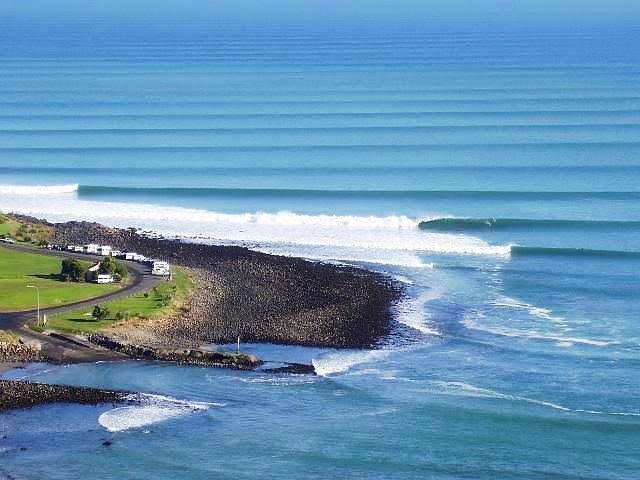
kia ora! Welcome to MSW. There are a few Kiwi’s lurking around on here and quite a few people from the West Island. @StuC I have spent a lot of time surfing Maori Bay, so much so, at one stage my nick name was Mr Mudbay (Maori Bay’s local name). I still have lots of friends that live out Muriwai. It’s a awesome beach. Not much of a fisherman myself, but here in Wanaka there are lots people that do. Apparently there is a local here who makes the best fly fishing rods in the world (world famous in NZ?) Personally, we use the lake for wakeboarding or Jetskiing! I look forward to following your build log for Lady Nelson.
-
Hello and welcome! I am currently working on my Jolly Boat and am at the rigging stage. Yours looks great! I can’t help with your sail question but there could be some answer in one of the sub sections on here? Anyway, I’d love to see some more pictures of your Jolly Boat, and look forward to seeing your next build.