DONATION DRIVE - SUPPORT MSW - DO YOUR PART TO KEEP THIS GREAT FORUM GOING!
×


Vicnelson
-
Posts
44 -
Joined
-
Last visited
Content Type
Profiles
Forums
Gallery
Events
Everything posted by Vicnelson
-
 Hi Lin Loved the video very nice build. Thank you Ian
 -
Jason Thanks for this - I had not come across a Tub Sander before but will look it up. Many Thanks Ian
-
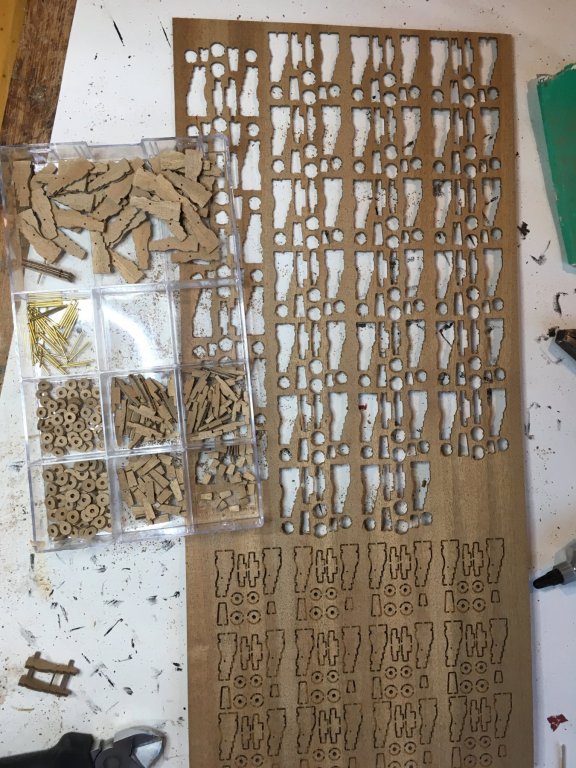
Working on 18lb gun carriages - all cut out and sanded. No finger prints left! I'm unsure about what size pulley blocks for running the carriages out, etc to use as the plans only specify the retaining ropes. I'm thinking of 3mm double blocks (equating to about 7 - 8 inches scaled up). Any help appreciated.
-
Great idea as I'm about to start on the carriages for my build...after all imitation is the greatest form of flattery!
-
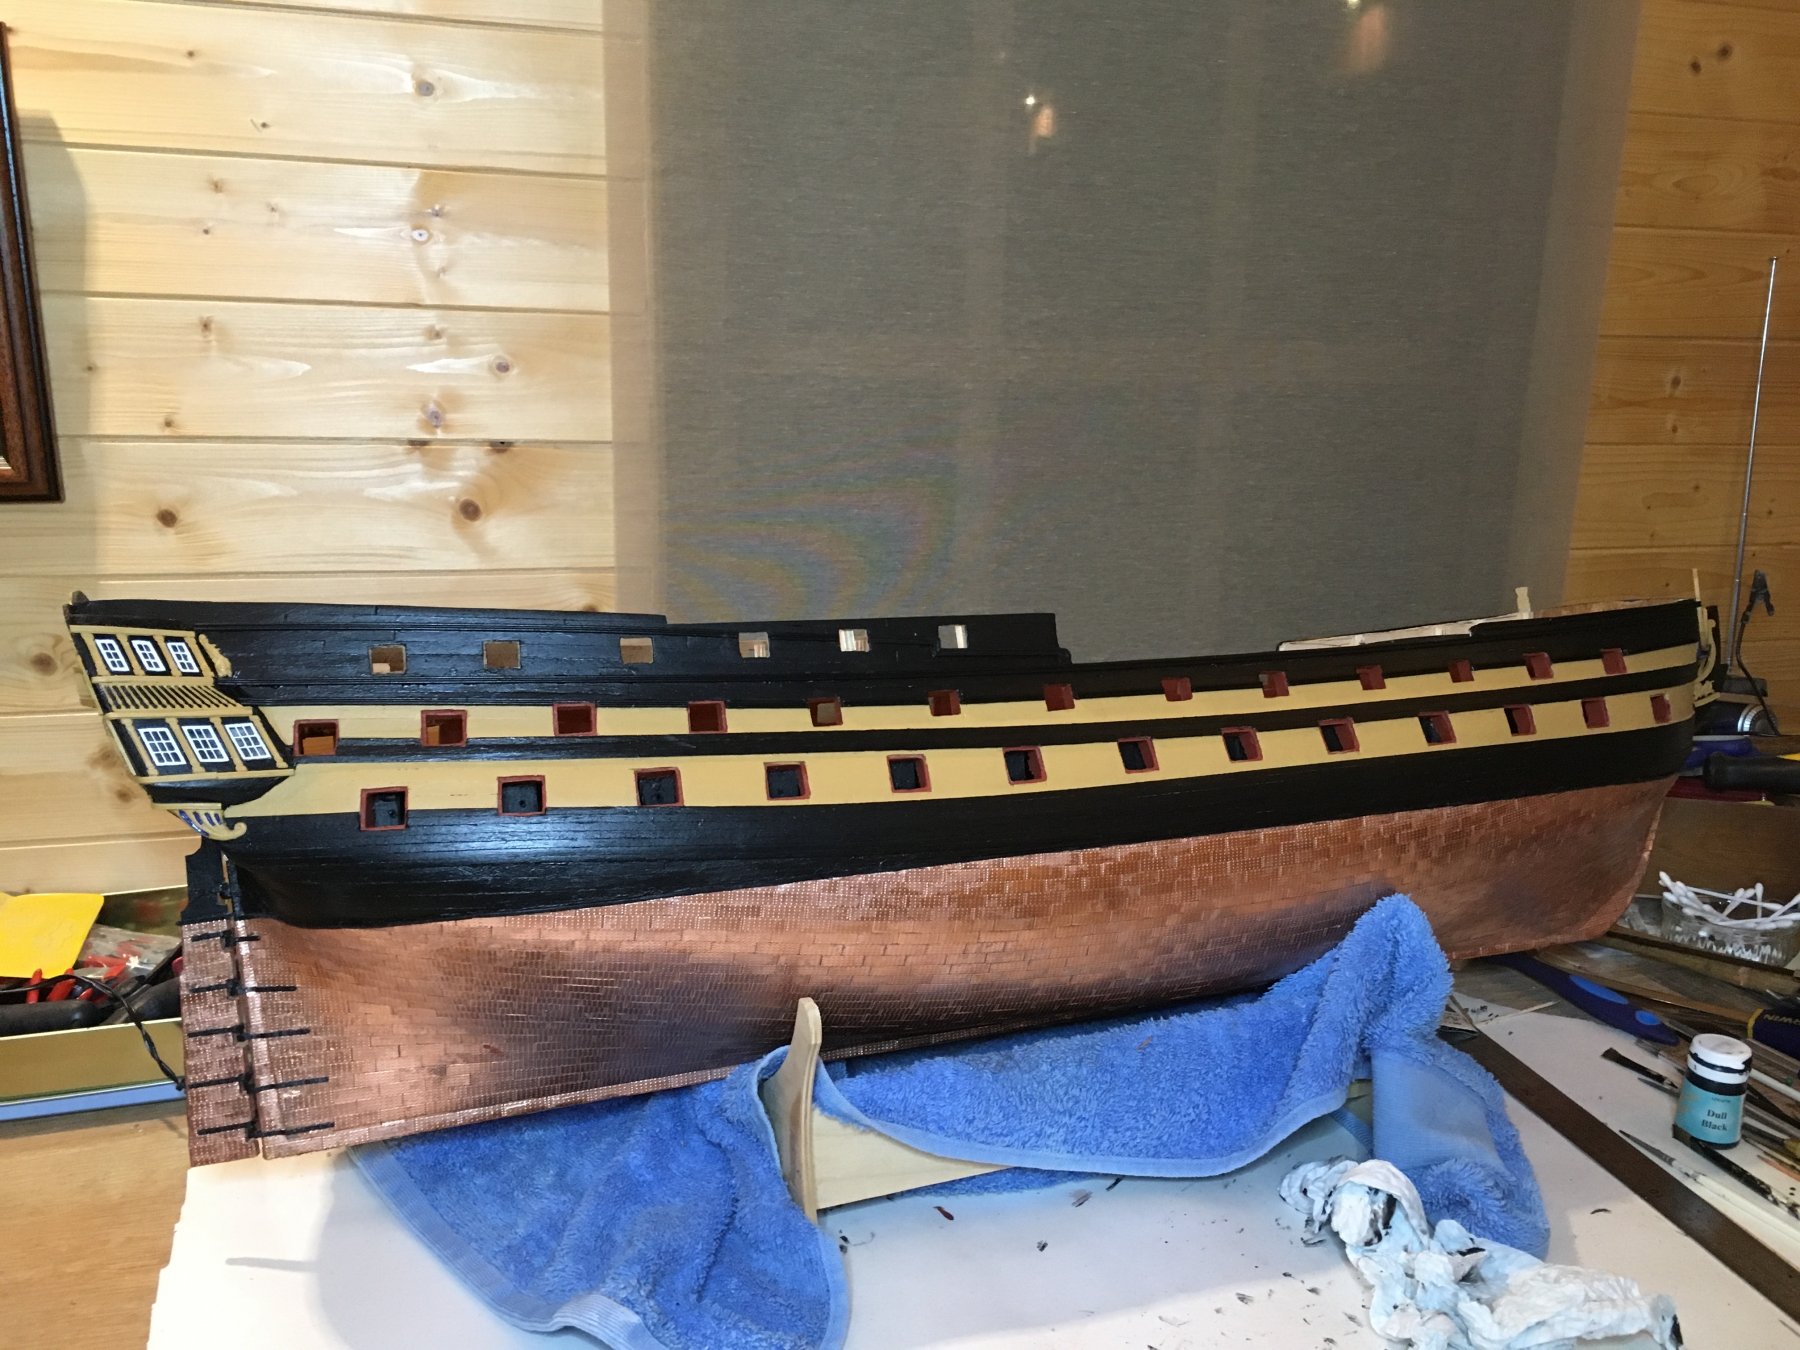
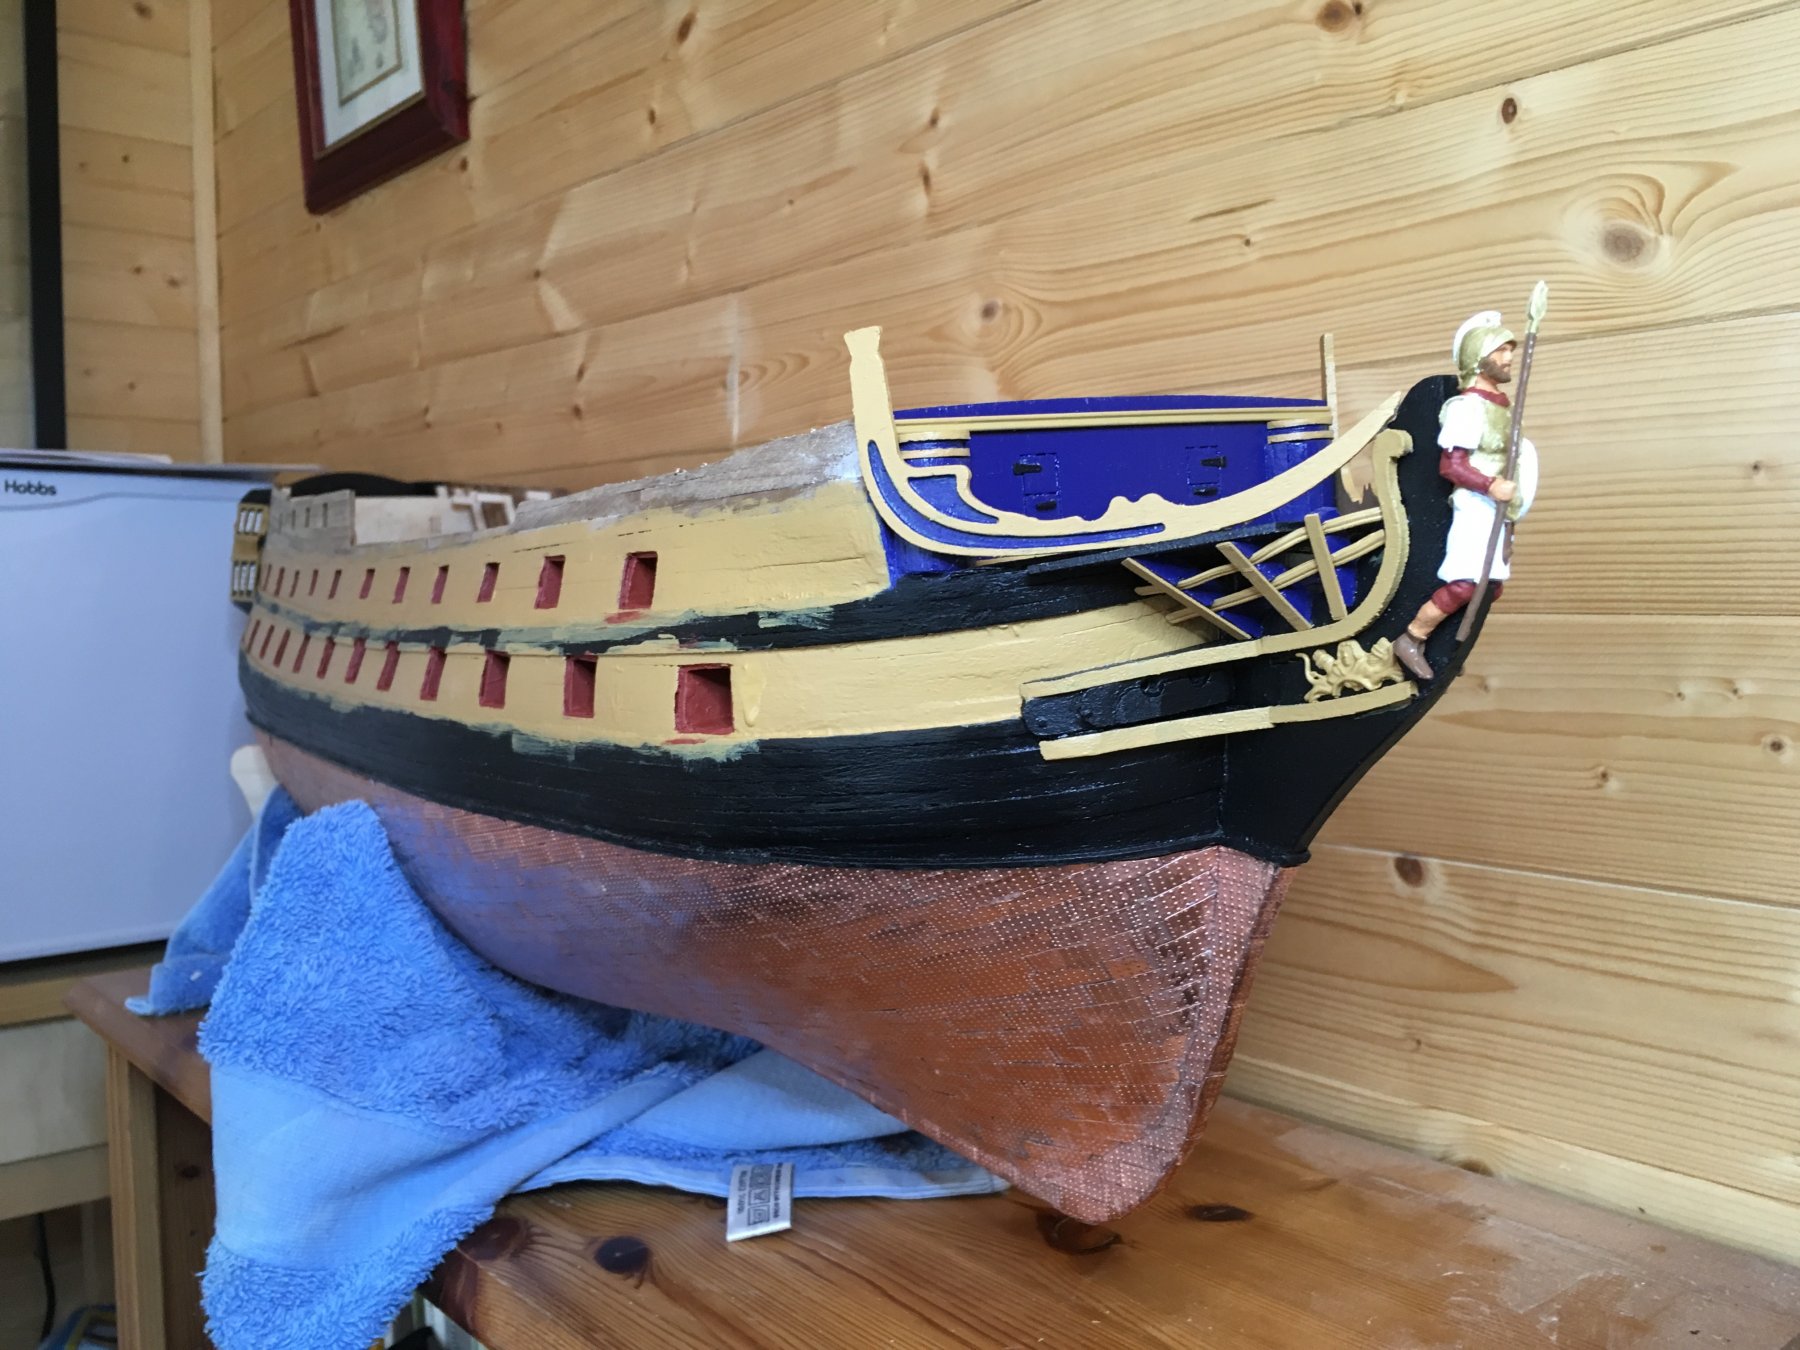
Apart for some touching up, painting of hull just about there. I like this part of a build as the ship starts to look like the finished article and everything from now on can be seen in the final build.

-
Alan Thanks for warning keep them coming! I had dry fitted the bowsprit and Agamemnon has already been lowered to fit. Ian
-
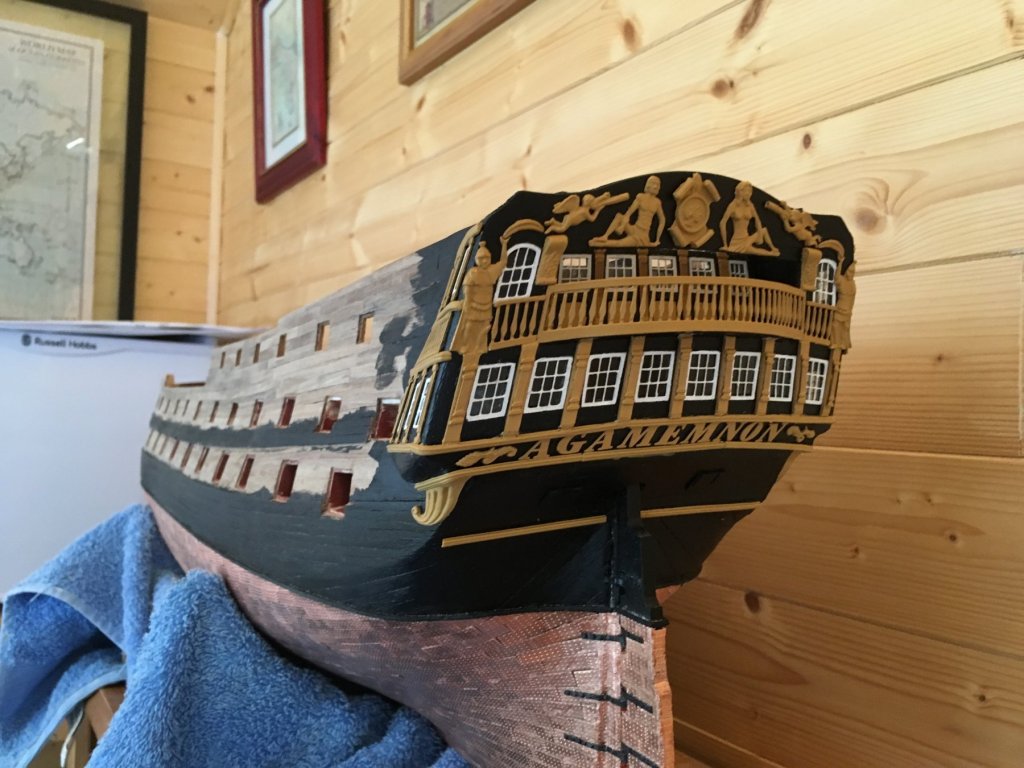
Bow elements complete. Agamemnon dry fitted for now as I won't attach until bowsprit in place to avoid any damage to it. Also his helmet plume needs a lick of black paint! Painting of hull started in earnest (and yes that paint run to be removed:-( ).

-
Great build, mind if I follow along? Ian
-
Alan Thank you Ian
-
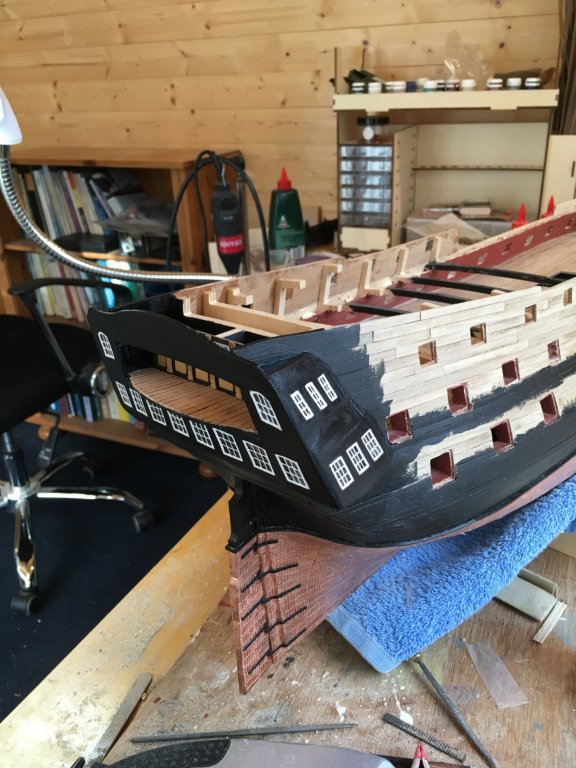
Hi Jason Follow along. The stern was a bit fiddly and confession time; there is some wood filler in there to mask the (not so) deliberate gaps! Many thanks for your kind comments. Ian
-
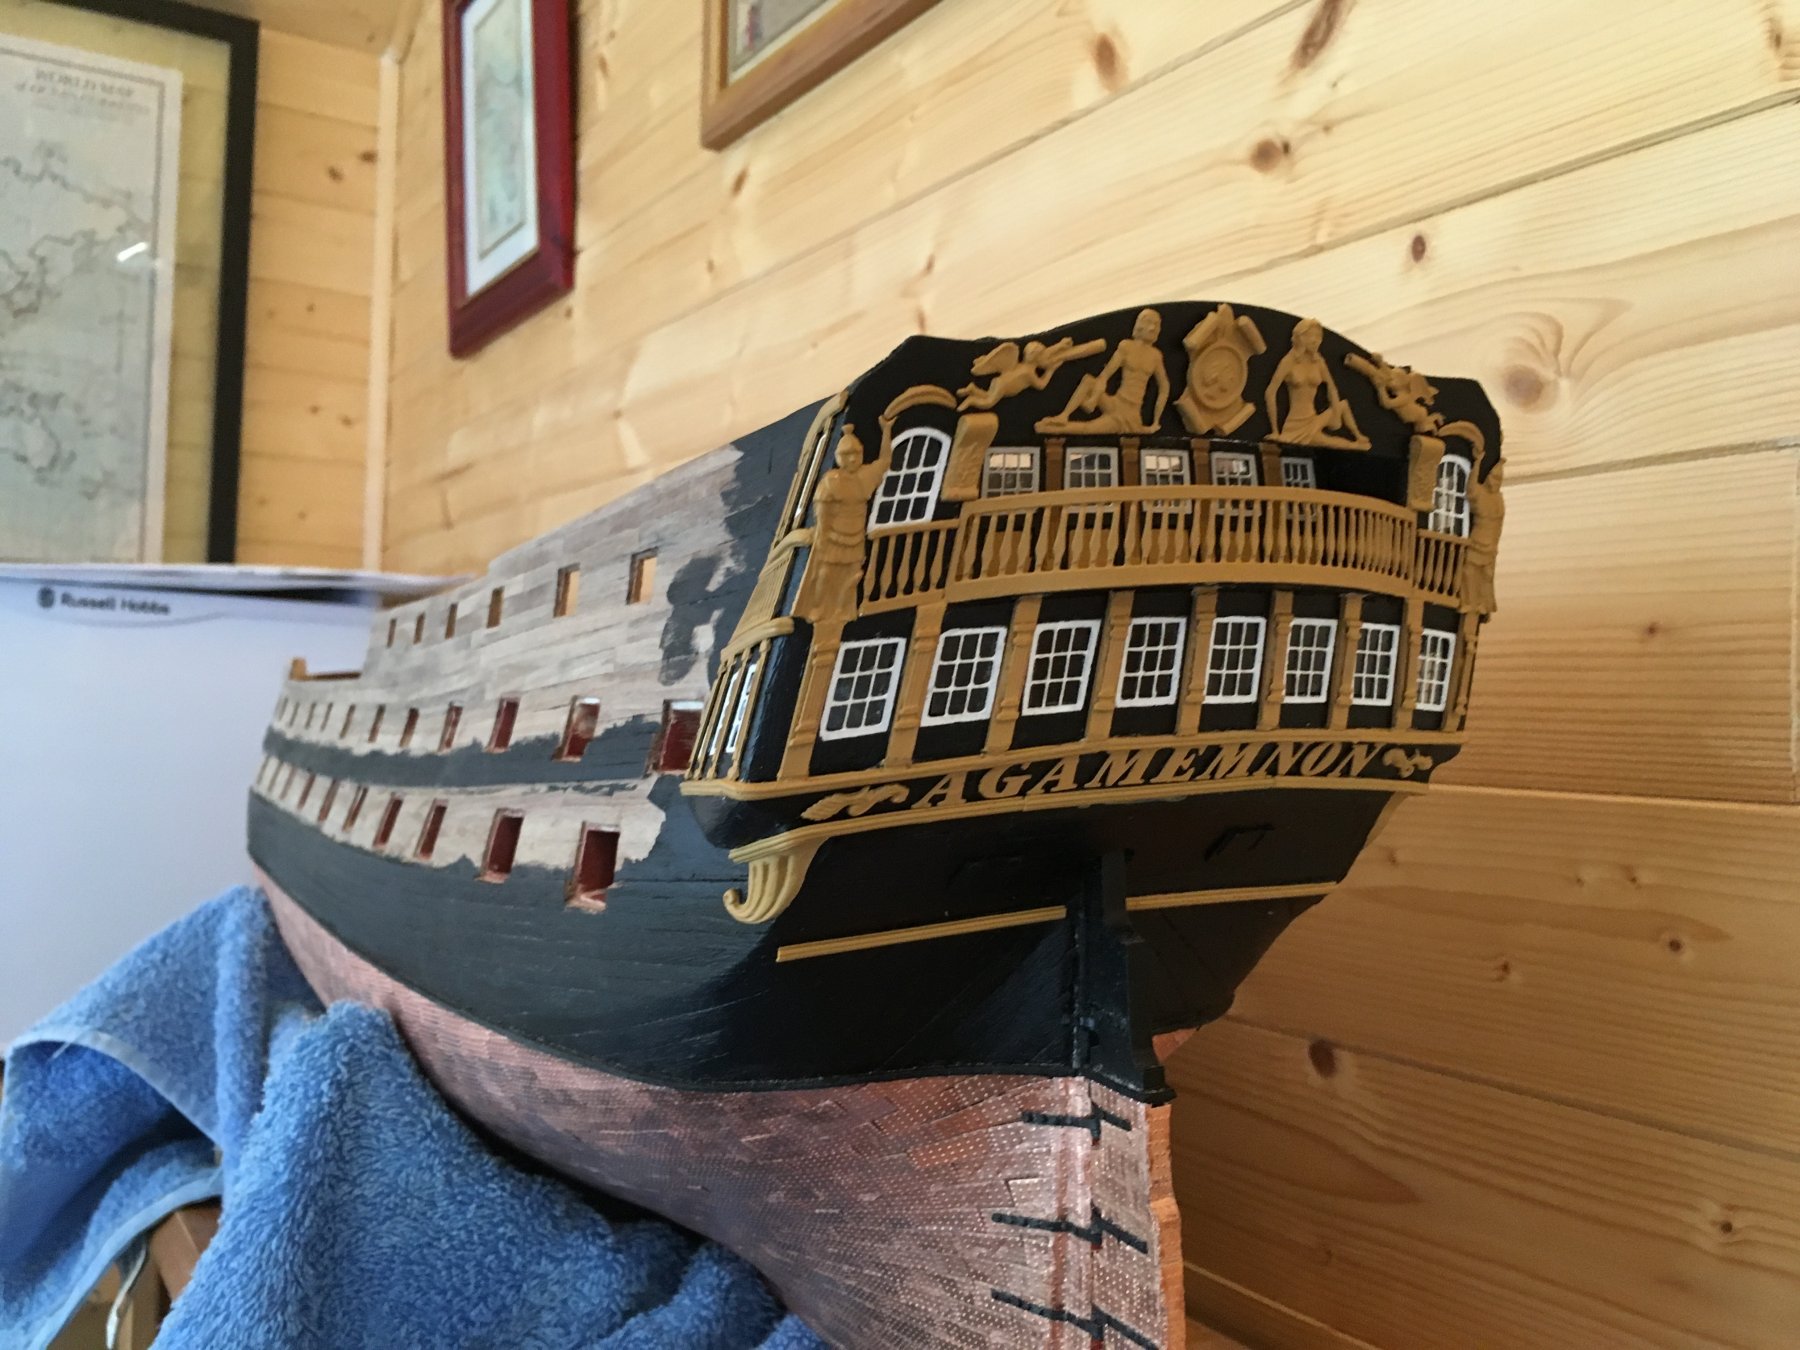
Just about finished the stern transom and galleries; just some painting to tidy up. Now that she has her name I thought about a naming ceremony; unfortunately as it is sober October my wife has locked the champagne away. I'll just have to wait until canny remember November!!
-
Just back from a holiday and back to "eggs and bacon". A bit cooler in the man cave now with autumn in full swing in the West of Scotland. Stern galleries attached and decoration started.
-
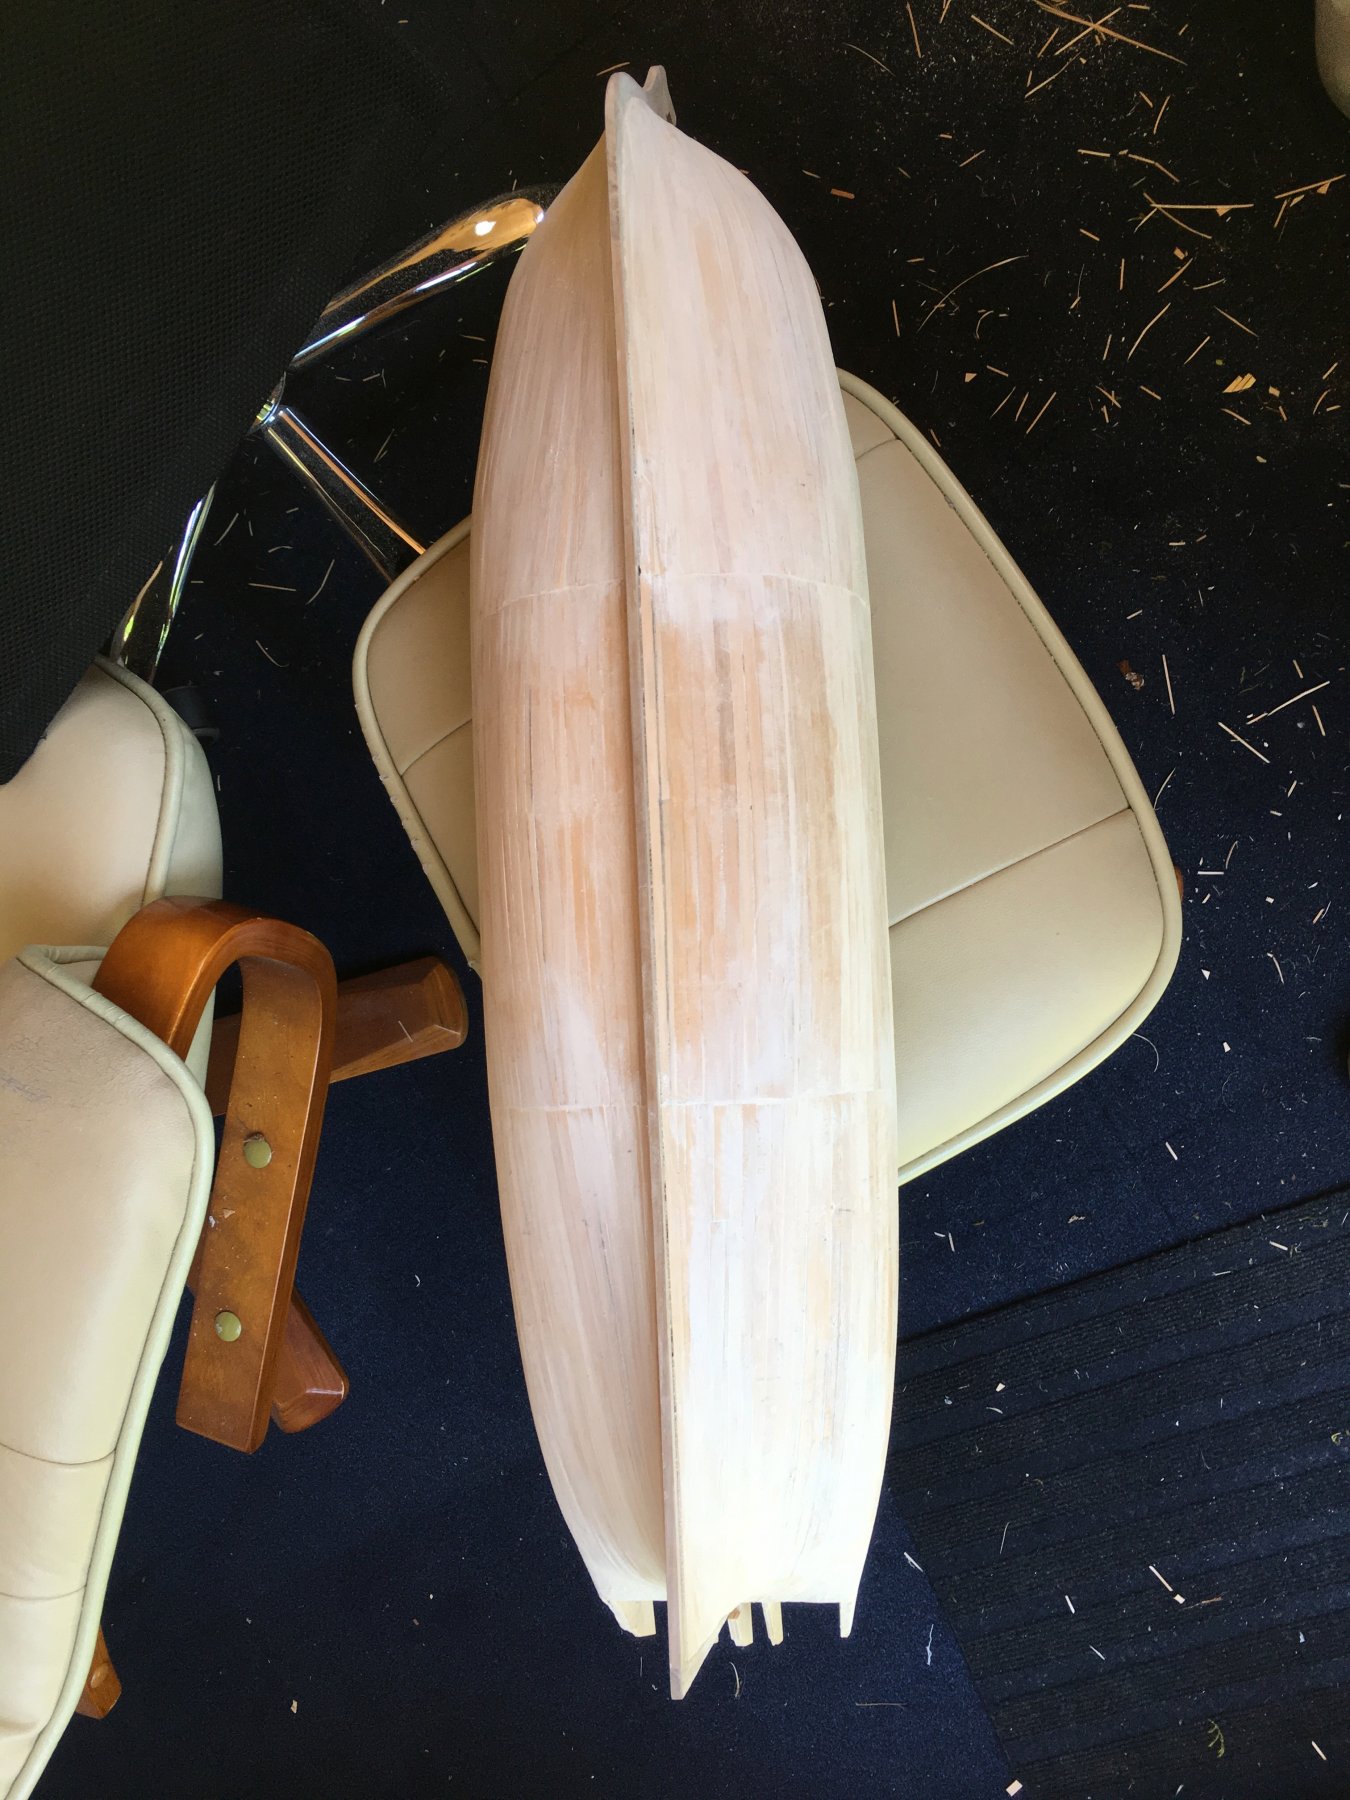
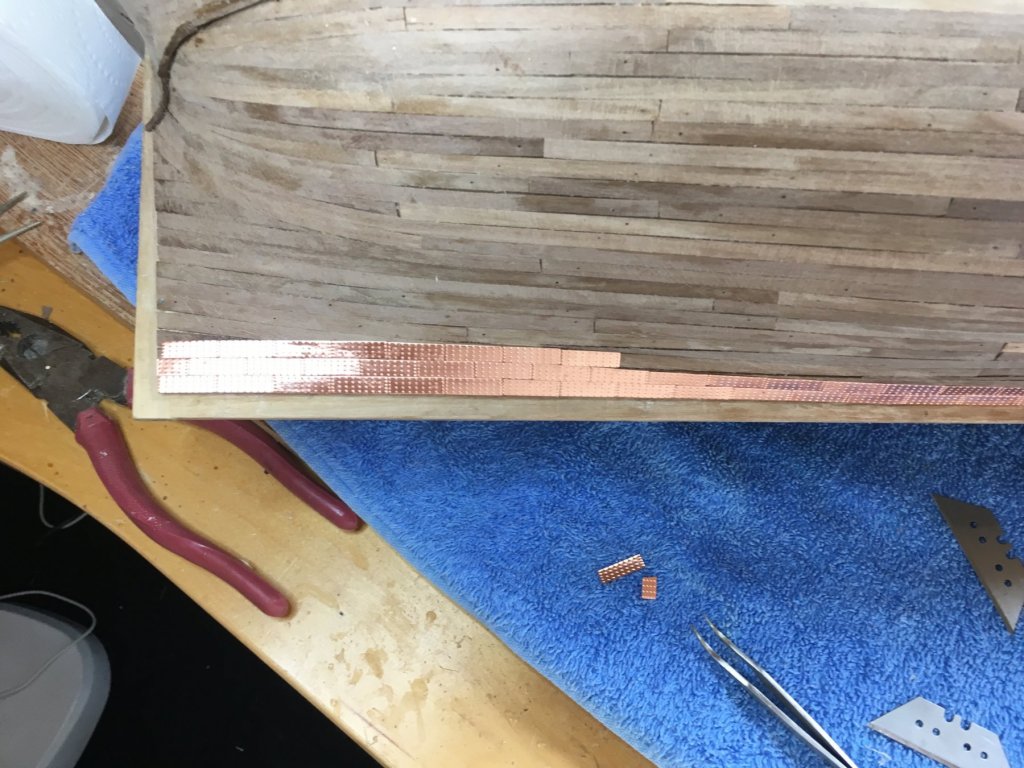
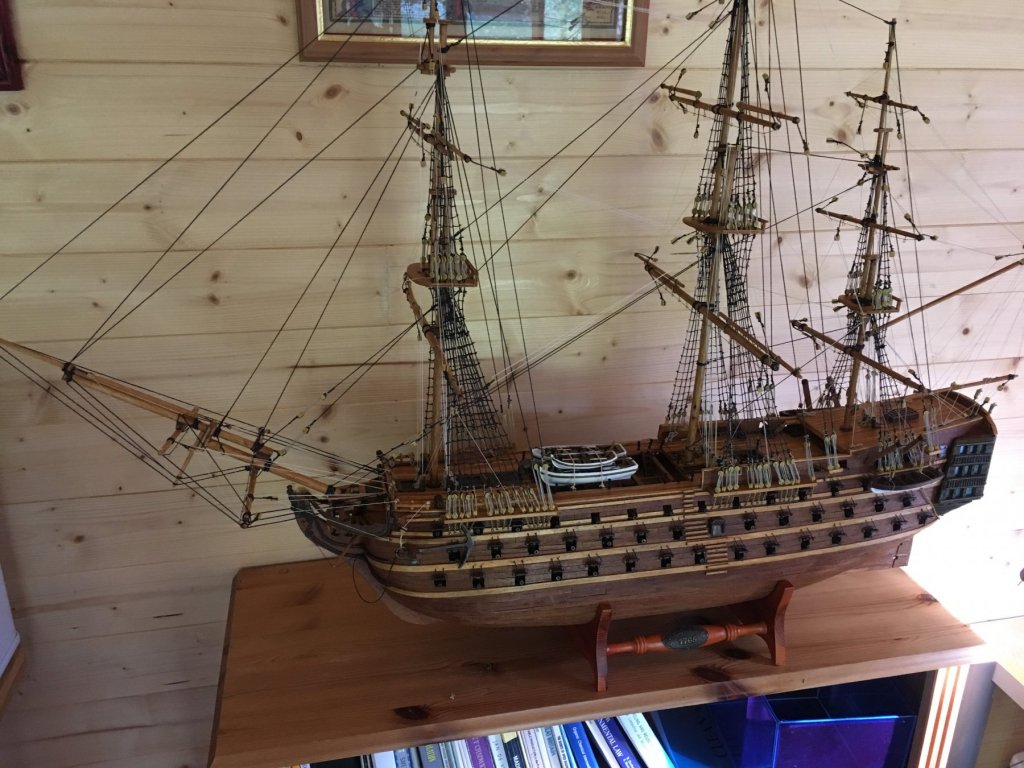
Finally that's the hull coppered. As you can see the coppering highlighted a couple of defects in my planking at the stern leaving a bit of ridge to get around. Next ship I'll rabit the keel first before assembly of the main structure. One learns! The Evo 'serious glue' worked out ok. It left a few glue marks on the copper which I think a white spirit wash and some elbow grease will fix. It'll also identify any loose copper tiles. Then to tidy up the keel and complete and fit the rudder so I can start working on the upper hull. I think transom/rear galleries first which I see from a few other recent posts are a bit fiddly!

-
It's not too bad. I think the really smelly (high as a kite glue) is the impact adhesive. The 'seriously strong' brand is clear with little smell. Problem is it takes a couple of minutes to cure so I have to put a spot on a piece of scrap wood to get really sticky before using it. I'm going through a lot of glue - just ordered another 2 tubes to keep me going. That said its better than the allergy; superglue gives me head cold symptoms for 3 days after even a whiff of the stuff. I was fine until a couple of years ago and it took me ages and lots of tissues and lem-sip before I found the cause of a whole series of miserable "colds"!
-
Gunwales on and coppering started. Using 'Evostick Seriously strong adhesive' as I'm allergic to superglue. Taking a bit longer! 150 laid at time of post, only 1100 to go on this side..... I plan to burnish the plates when complete to help with any rough edges and to give it a smoother effect....any ideas out there on what best to use. I was thinking Brasso which I used to shine up my trumpet when I played in a brass band in school ( a very long time ago).
-
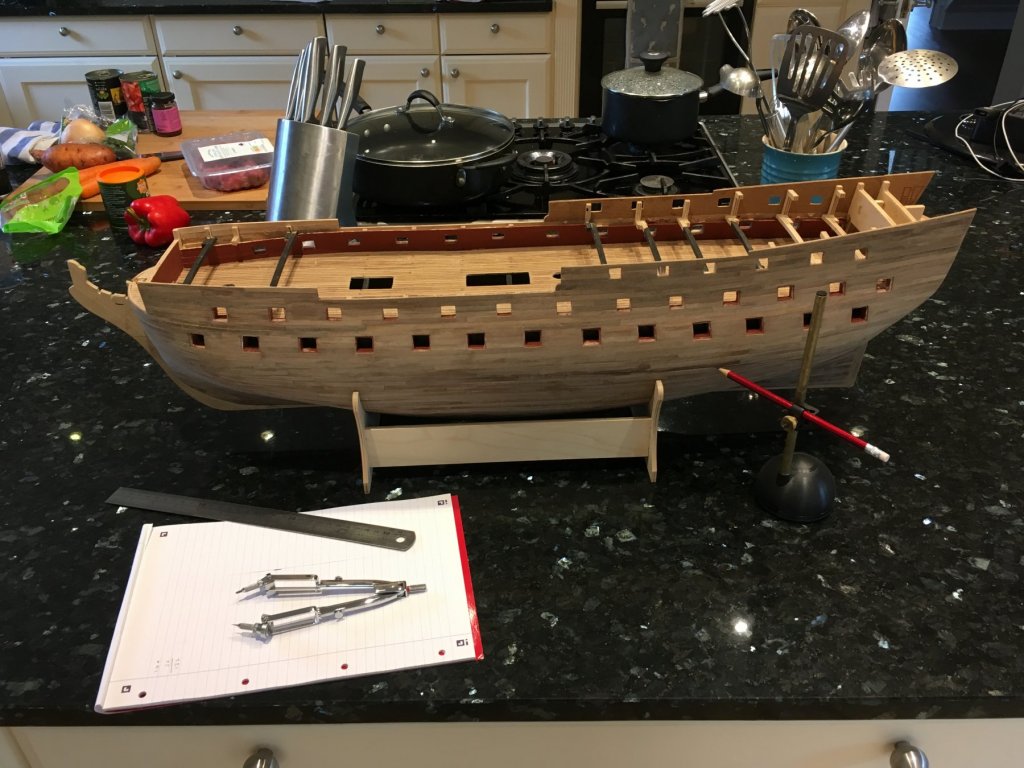
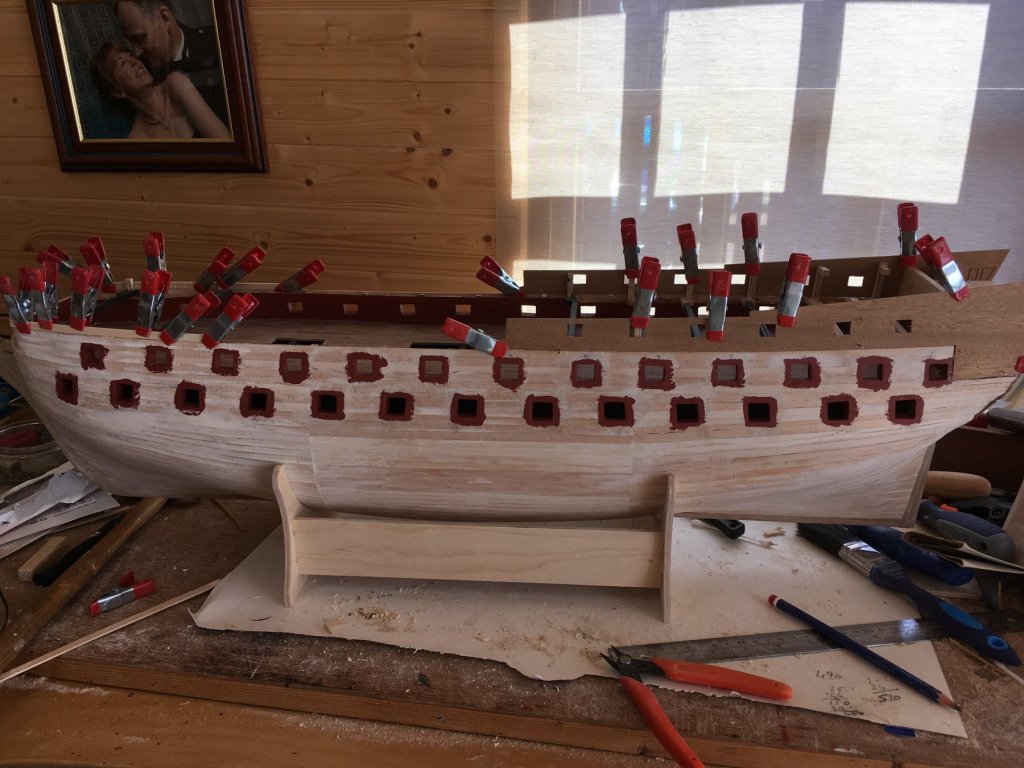
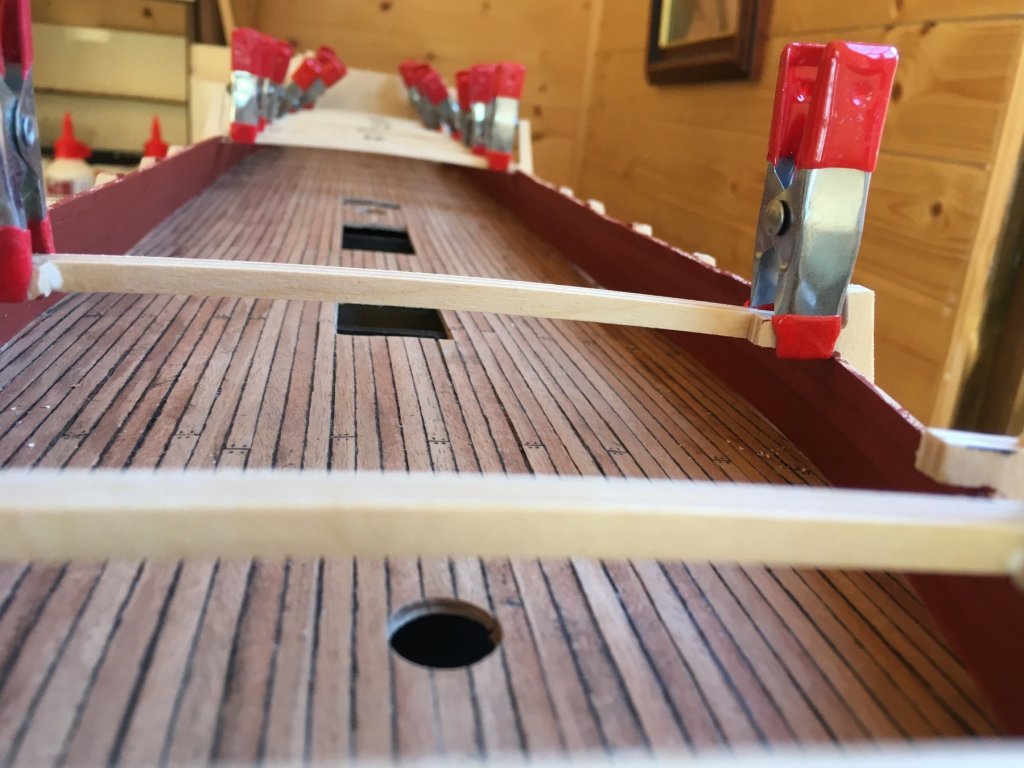
That's second planking complete with gun ports cut out. Used the kitchen island as a base to mark out the waterline as this is the largest flat area in the house. That's the makings of Sunday's dinner (my wife's take on Moroccan lamb - very tasty it was too) in the background. Gunwales and coppering next up.
-
Cheers, thank you
-
Gunports cut out and lined using tube method that Hartmut on another forum used - I just couldn't get walnut lining to stick to 1.5mm of strip wood with out using CA (and I'm allergic to that). The tube method worked a treat. Now preparing hull for second planking. I've also added some photos of my previous completion - HMS Victory 1:100 by Del Prado. As you can see it's not a faithful representation as I liked the wooden finish with metal work on this one. Photos - Victory completed autumn 2017. Photo - Gunport lining with tube method. Photo - Getting ready for 2nd planking (without superglue!!)
.thumb.jpg.8af61fd3fed2d747a1fa957d1acfc226.jpg)
-
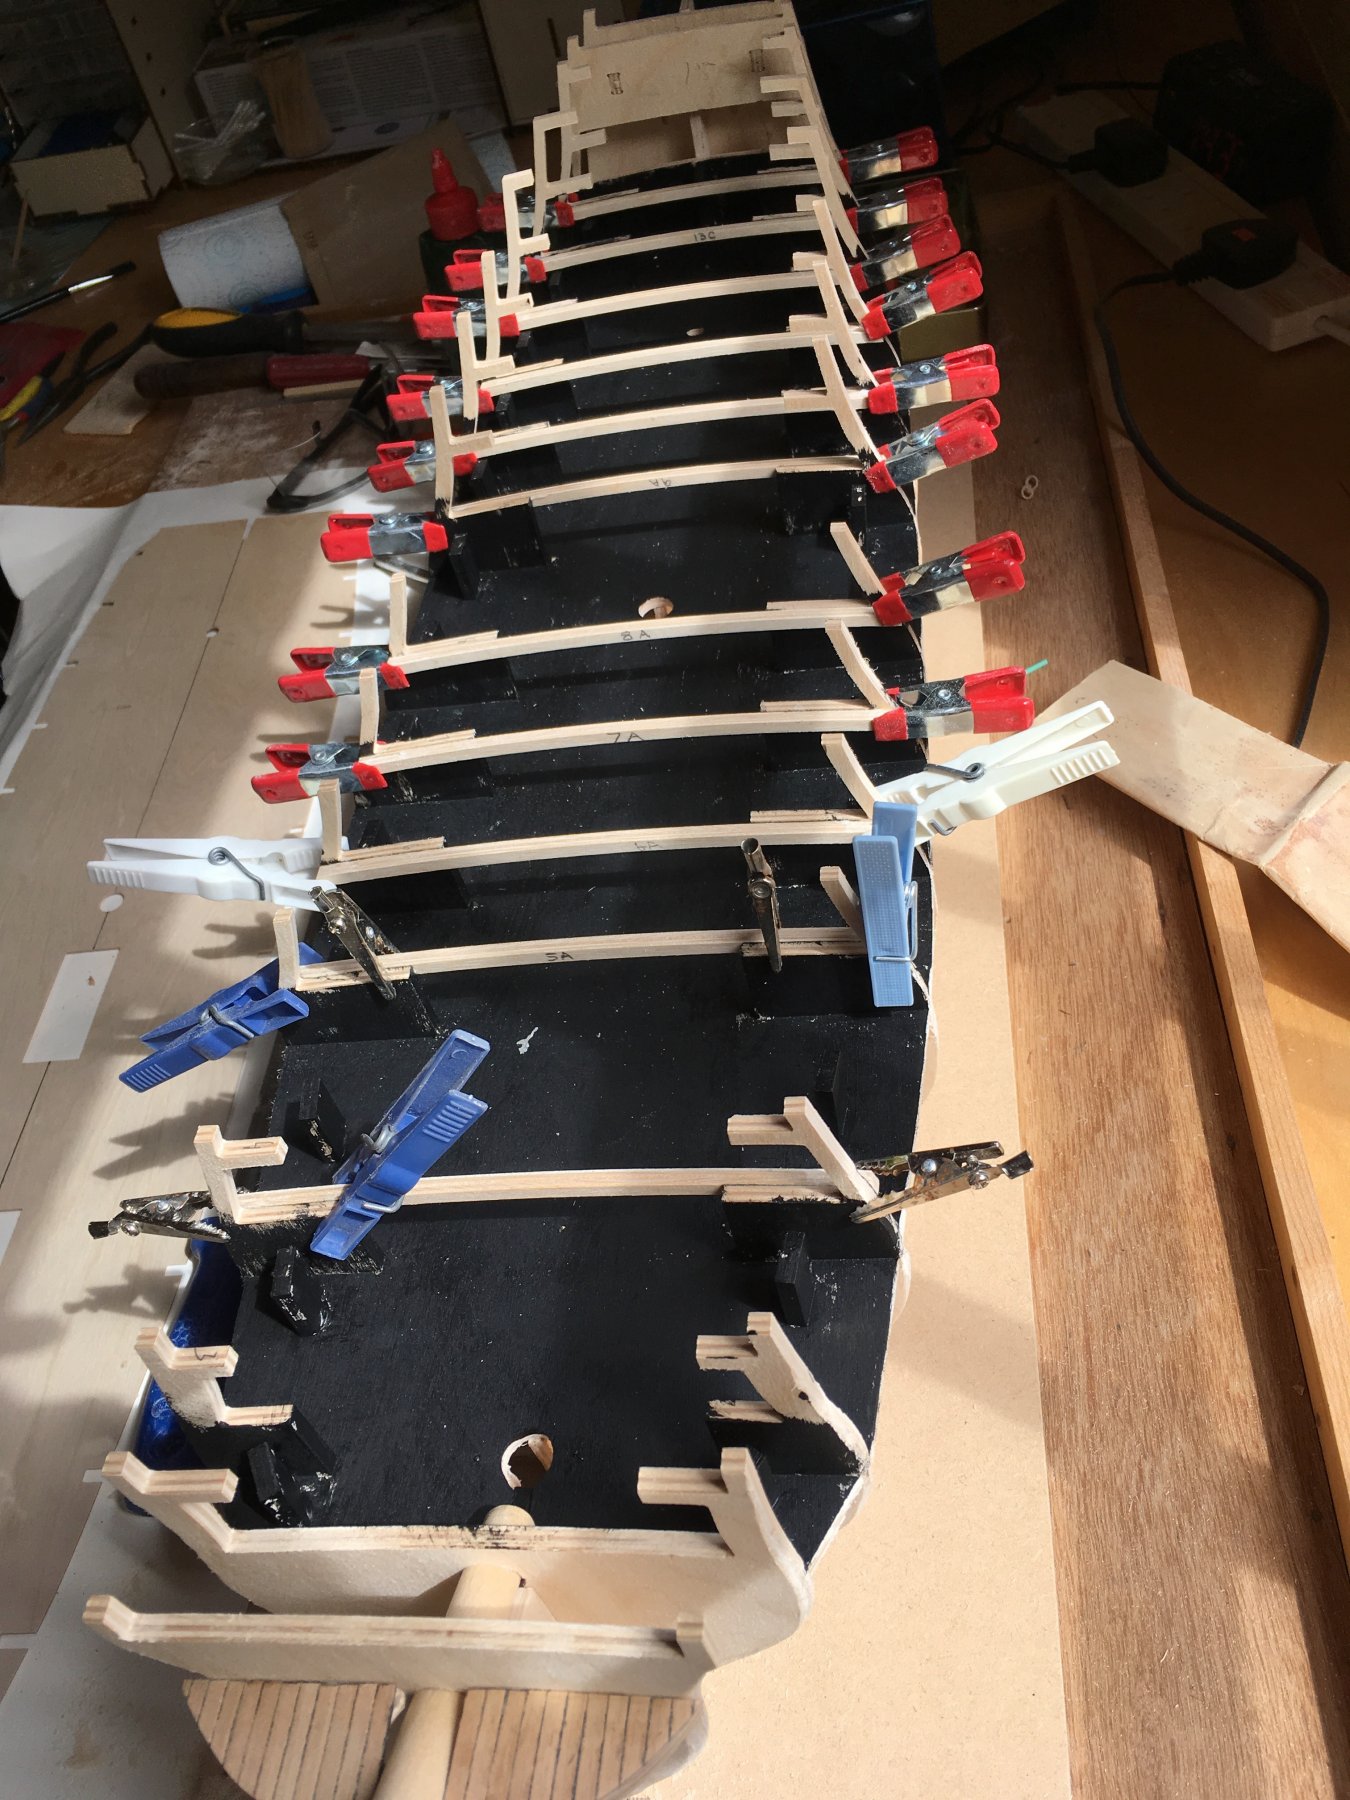
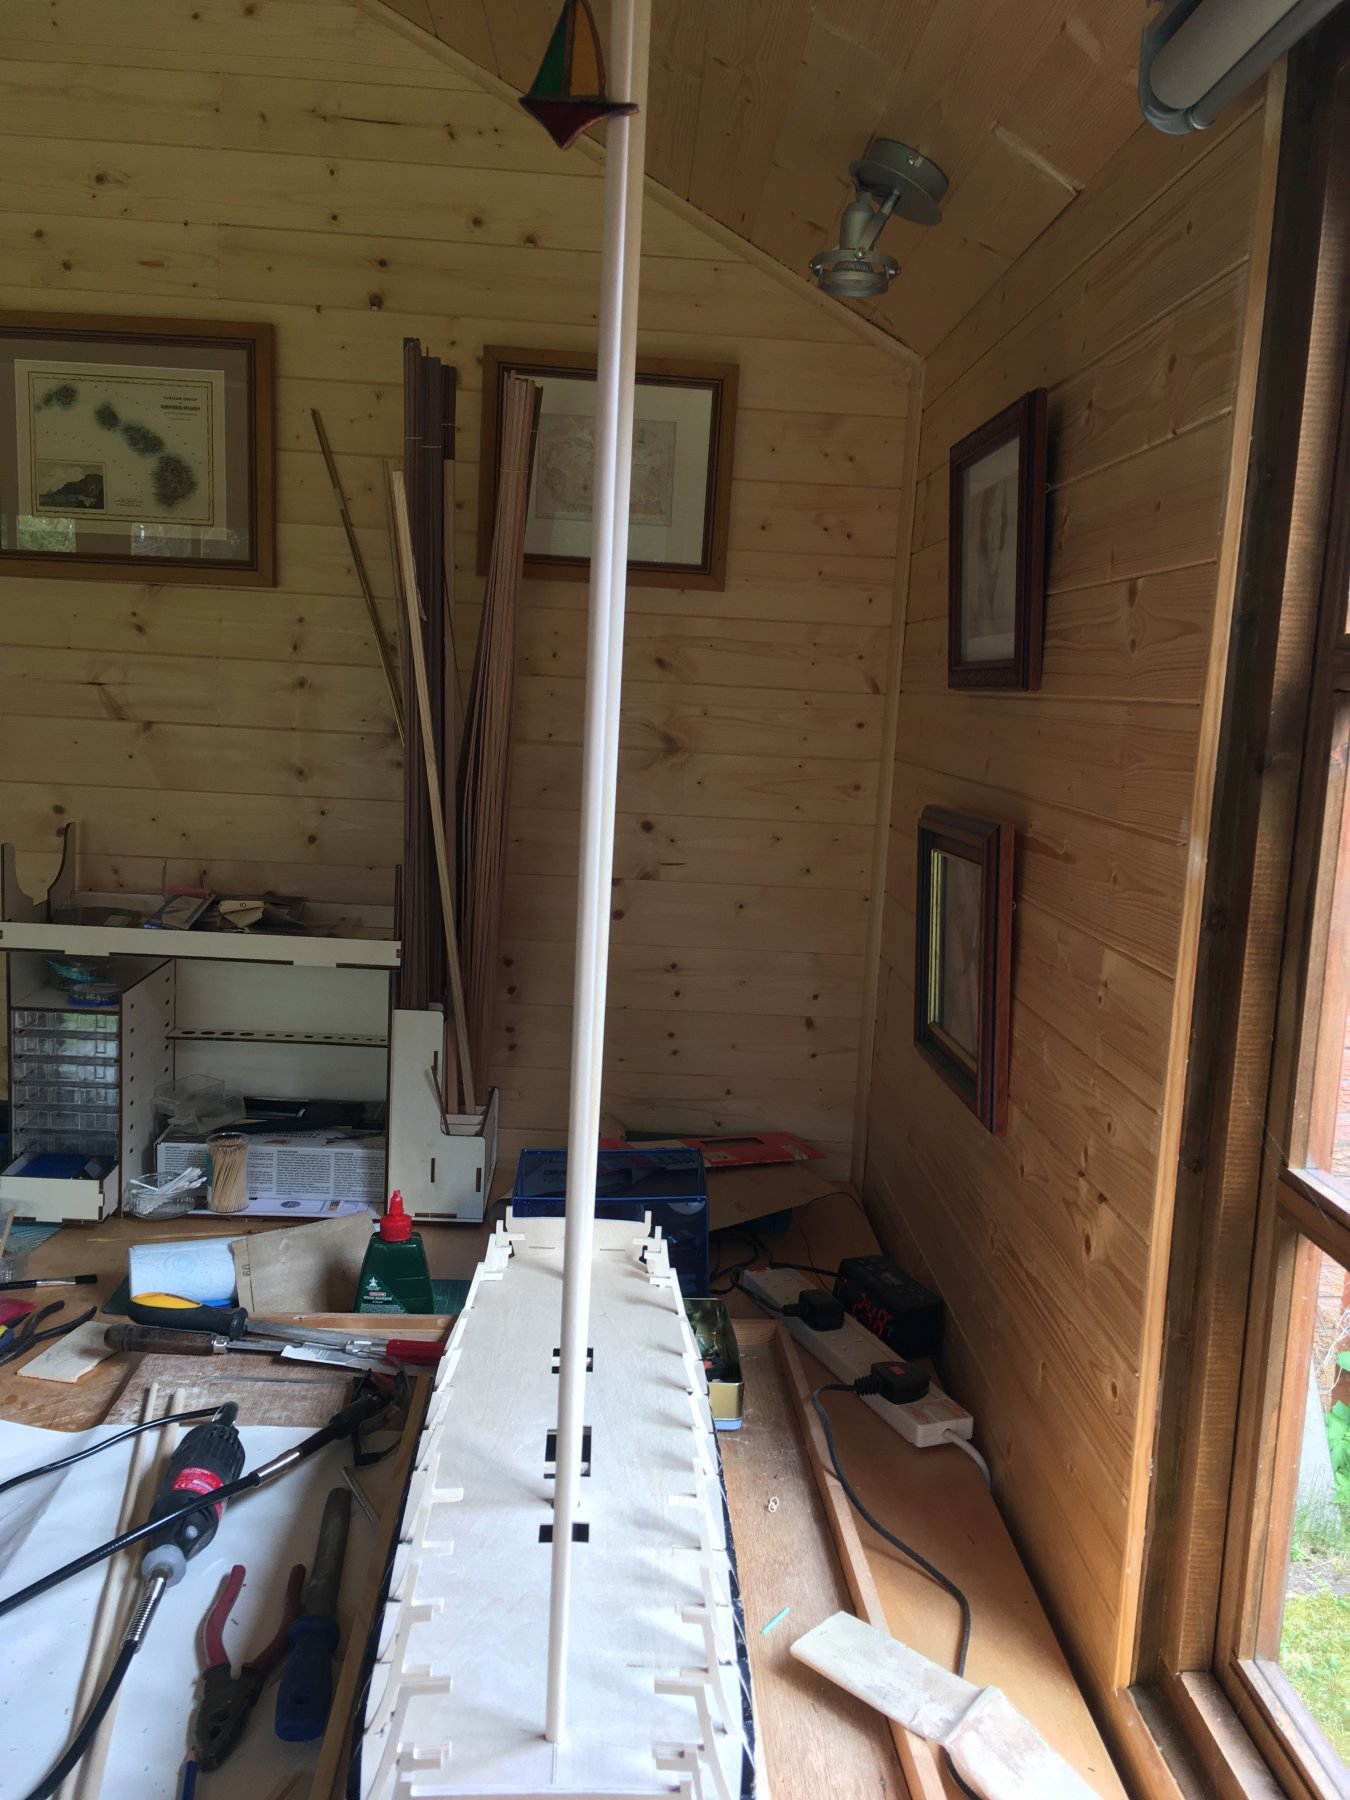
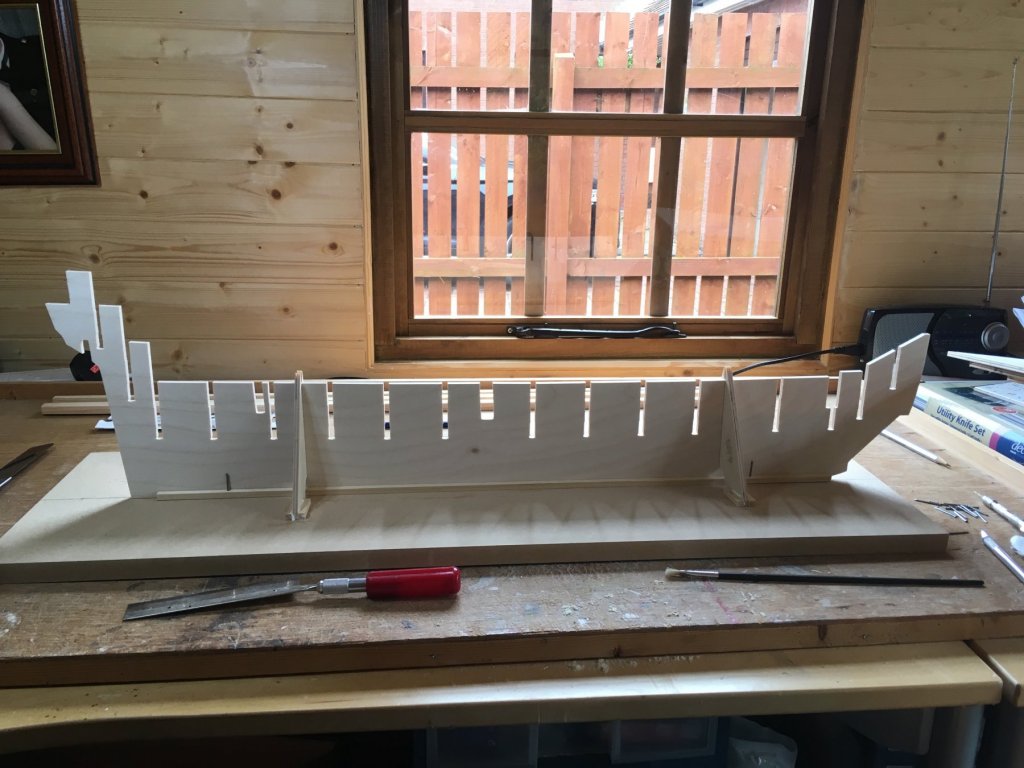
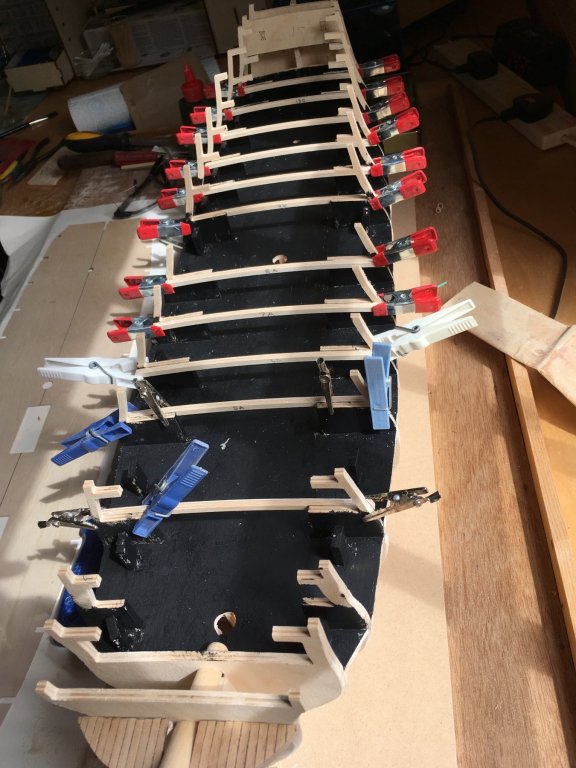
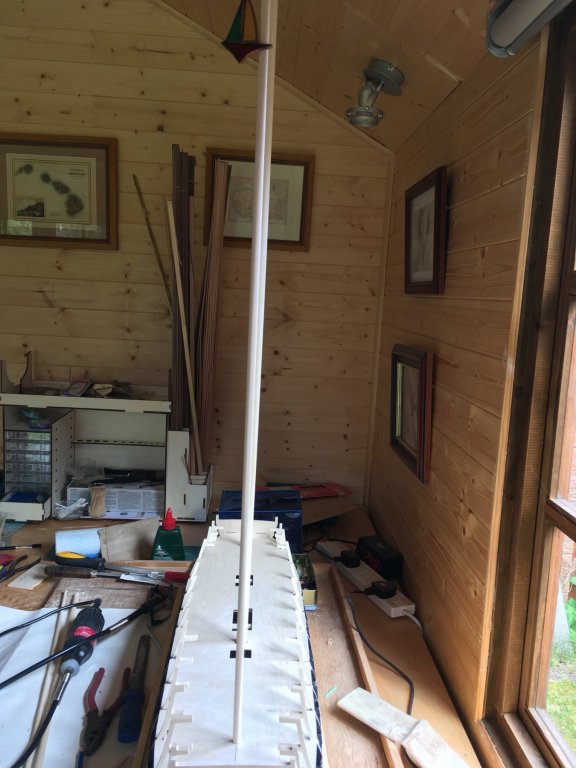
I'm new to this forum, or any forum for that matter. HMS Agamemnon is my most ambitious model yet. Supplied by Cornwall Models in the UK. I was inspired to get this kit by Sandercott's build log http://www.sandercott.ca/modelships/agamemnon/agamemnon_build_page1.php and Harmut's log on Pete Coleman's site http://pete-coleman.com/forum/viewtopic.php?f=137&t=1593. I've been building model boats both wood and plastic since I was a wee one. I now prefer wood but still occasionally dabble in plastic, my last being a Tamiya kit of KGV completed in 2017. That said I'm still learning. My previous two kits came from the Del Prado magazine the Bounty and the Victory (1:100) which I enjoyed building but after seeing the very good quality of the Caldercraft kit I now realise these kits weren't all that great. Back to HMS Agamemnon (or Aggy as I call her when discussing my time in my 'man cave' to my wife - I think she understands) this was a Christmas present from her but I only started in early May due to other commitments (and waiting on some better weather to allow sitting for hours in a shed) but I have been getting on very well with the first planking completed and gunport construction underway just now. I've posted some photos which I hope others will enjoy and would appreciate positive feedback. I do have one initial question though - I've recently developed an allergic reaction to superglue (CA) and am now using Hypo cement as a replacement. Does anyone have a better alternative than this as I'm not looking forward to coppering the hull without a fast bonding adhesive. Vicnelson Photo 1. Starting on 4 May. Photo 2. Initial tructure complete and lower gundeck painted. Photo 3. making sure masts line up properly Photo 4. Upper gundeck planked Photo 5. 1st planking complete just some filling and sanding to finish. Gunports next...


.jpg.37df34f97b711ec6c8ae5cbfced9d21e.jpg)