HOLIDAY DONATION DRIVE - SUPPORT MSW - DO YOUR PART TO KEEP THIS GREAT FORUM GOING! (Only 24 donations so far out of 49,000 members - C'mon guys!)
×


Tjalle58
-
Posts
82 -
Joined
-
Last visited
Content Type
Profiles
Forums
Gallery
Events
Everything posted by Tjalle58
-
 The numbered bags is good but so far I'm not impressed but I have just started it so I'll guess I'll have to wait and see.
 -
Thanks Piotrek, I need all the help I can get. Even though I realized that I had to cut those elements
-
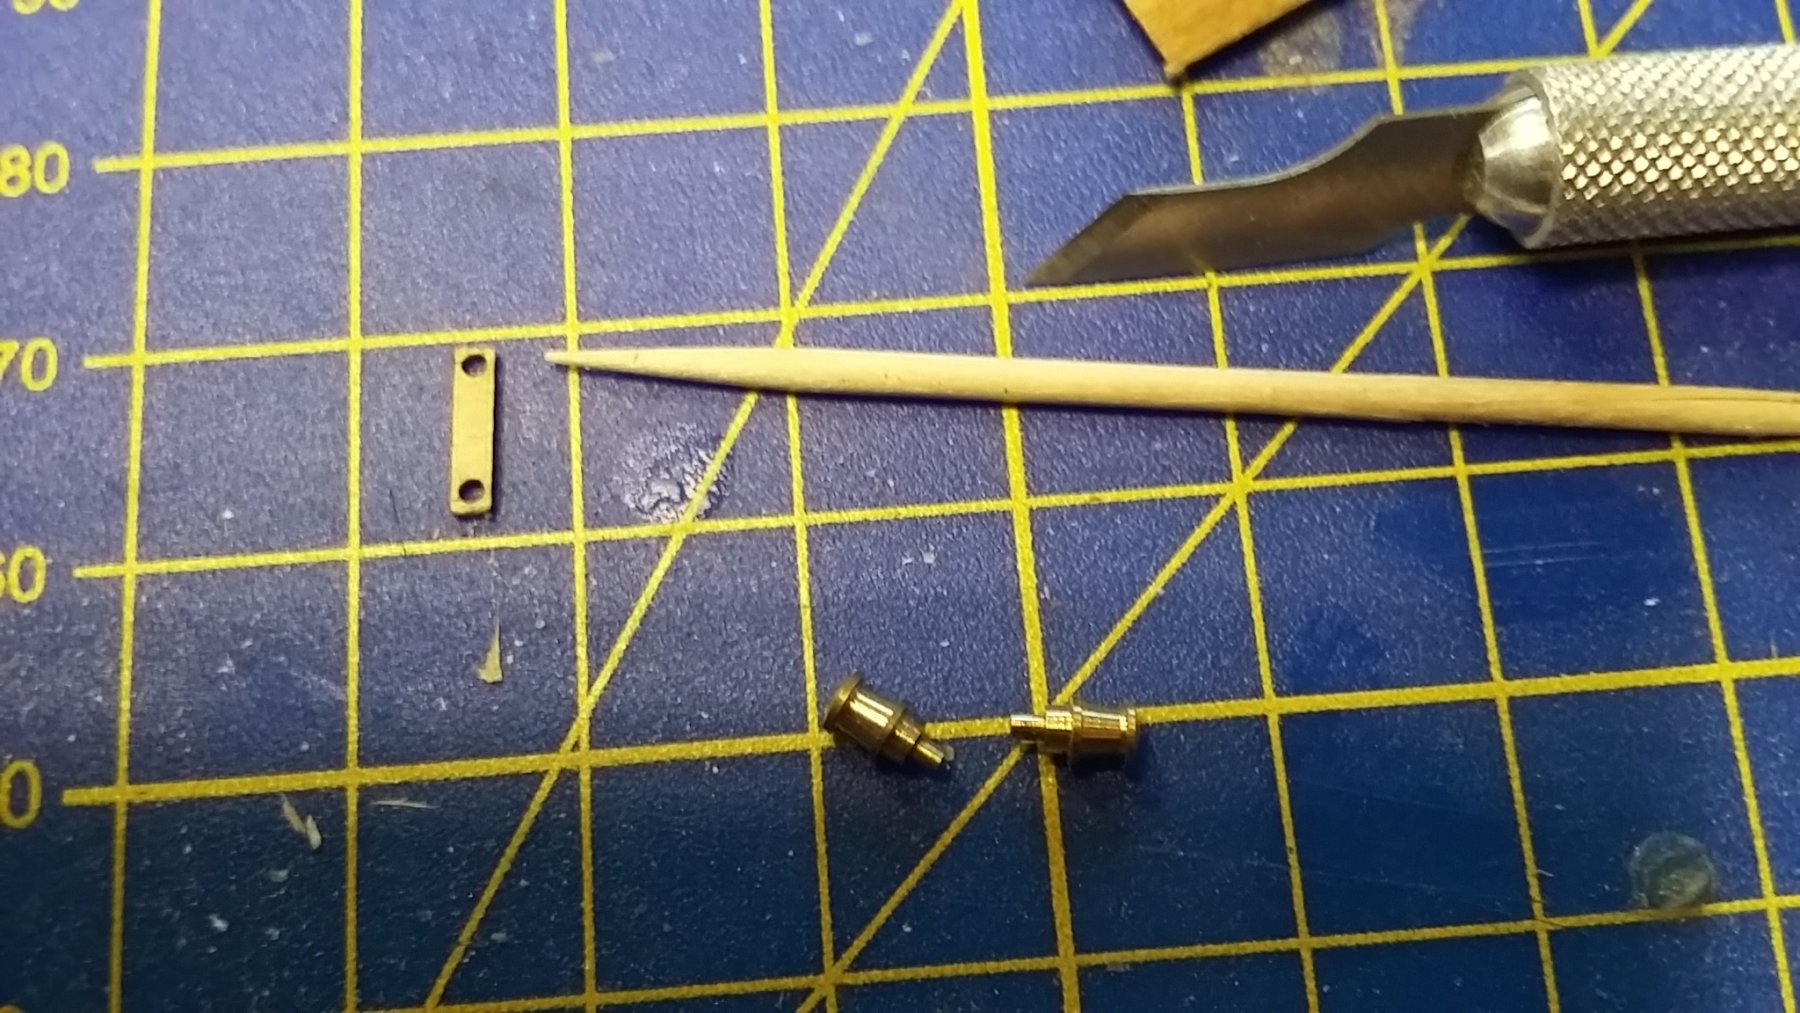
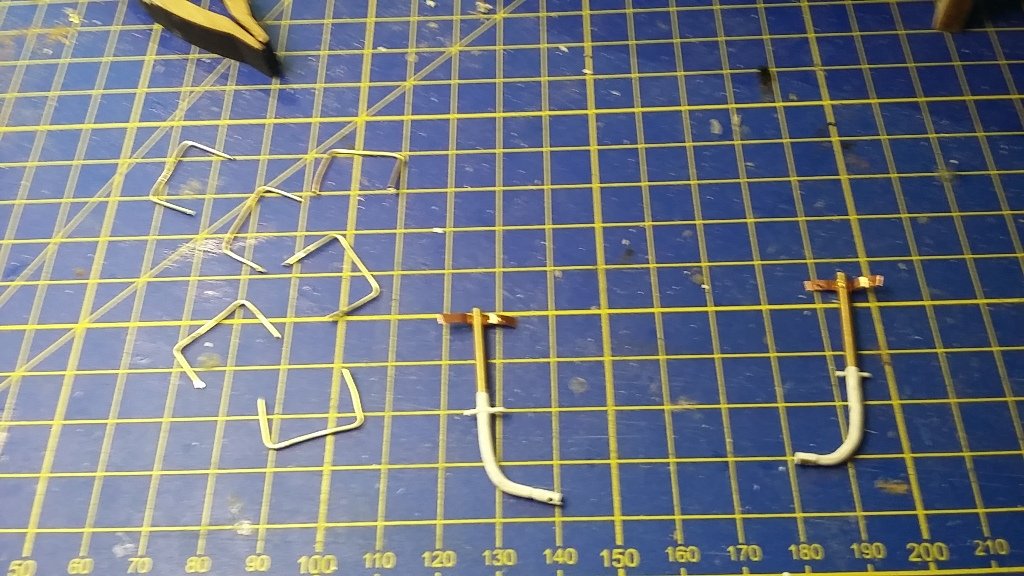
It has been a week since my last update but not very much has happened. It´s all this small things that takes forever to make. But I have finished the railing at the bow and the rudder is in place so it is moving forward. But slowly. I started to prepare the lifeboat davits and filed them before I bent them so of course one of them went off. Ok,I got one spare since I'm not gonna use for the compnionway. So I drilled holes but did not file it before I bent it, I thought I had learned from my mistake. This went off easier than the first one because of the hole in the middle. I am not too smart sometimes I have ordered new brass rods and this time ..... 😂

- 105 replies
-
- 3
-

-
- thermopylae
- sergal
- (and 2 more)
-
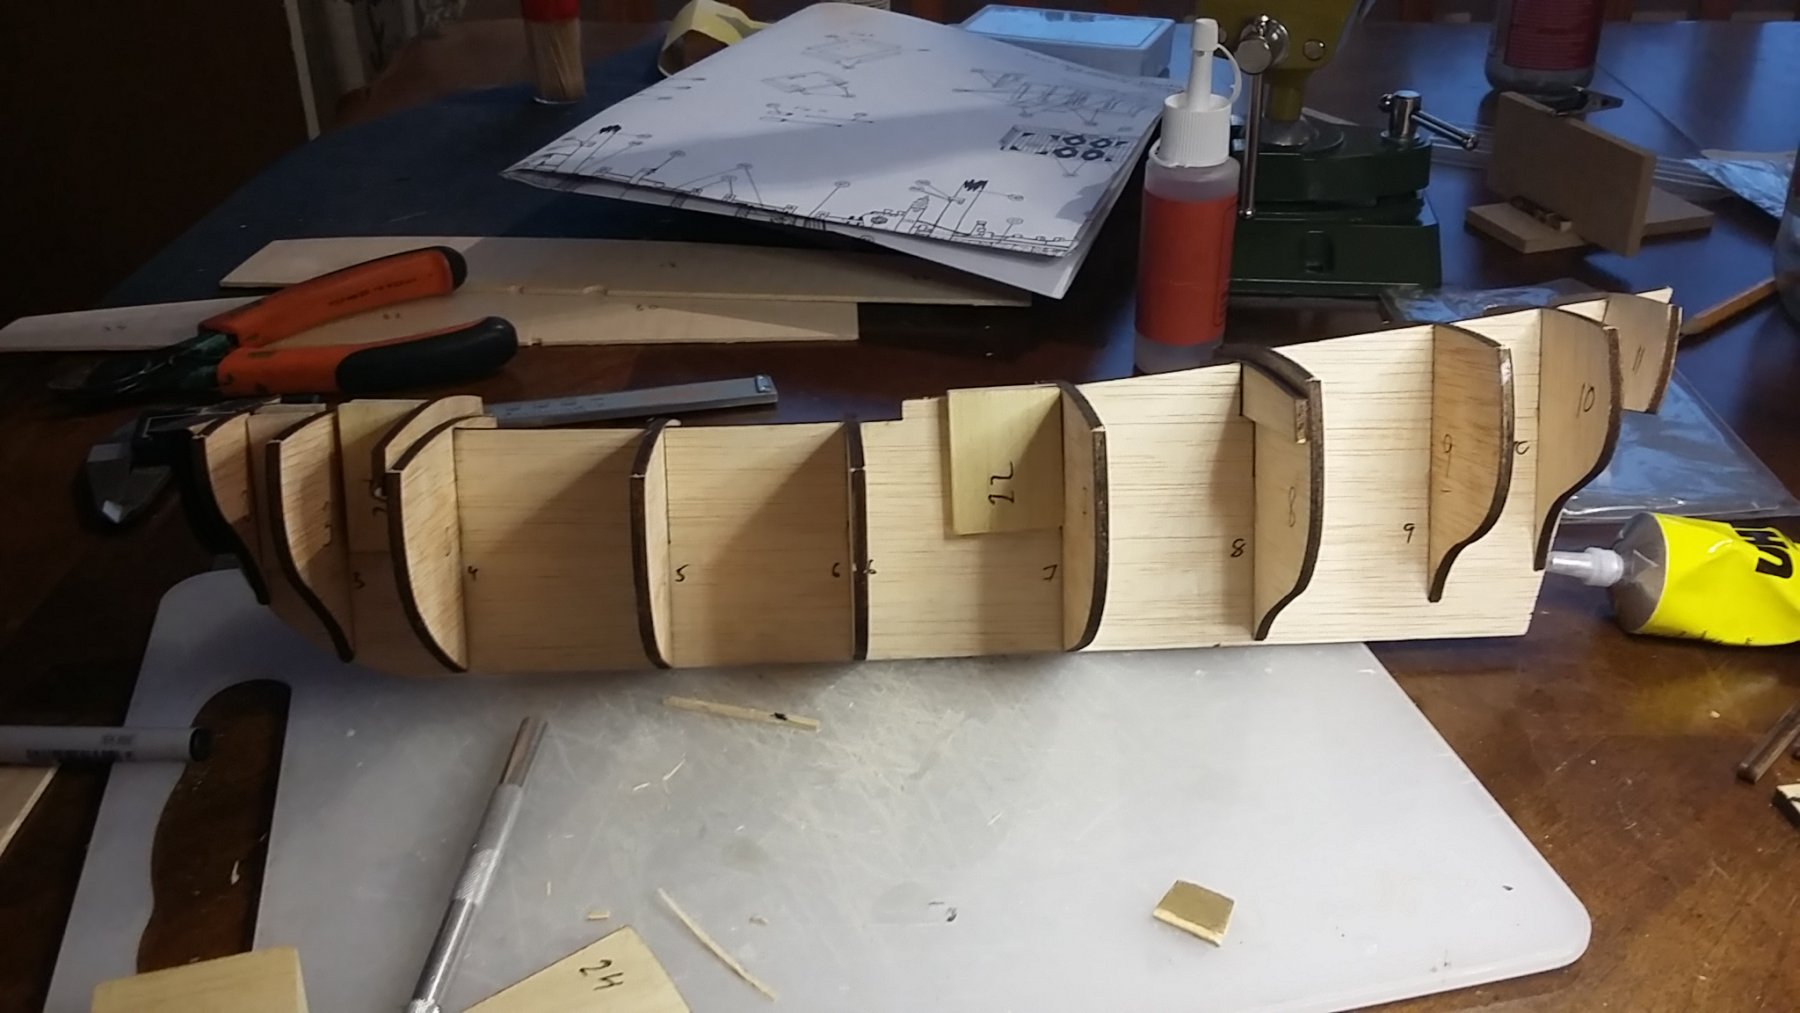
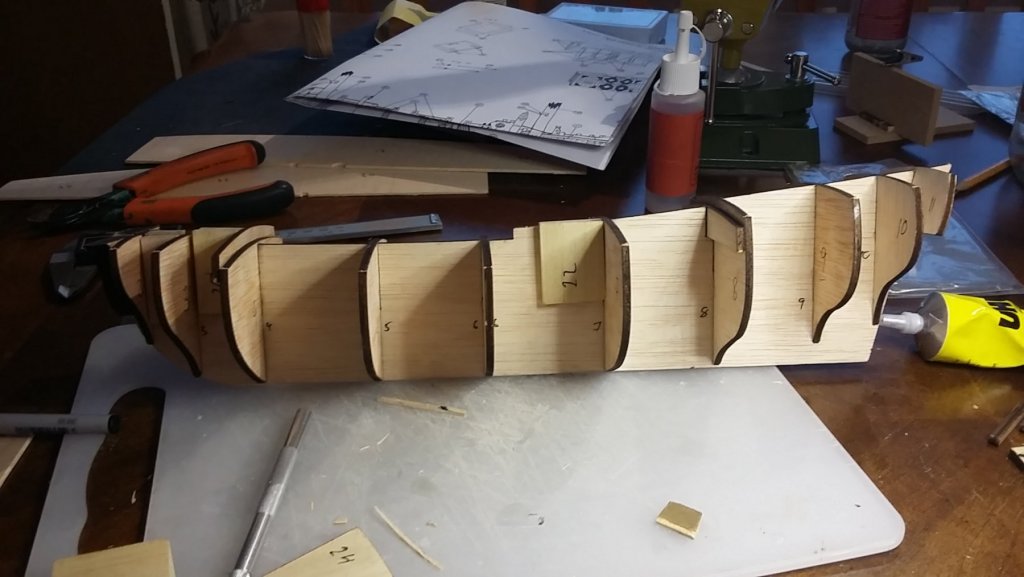
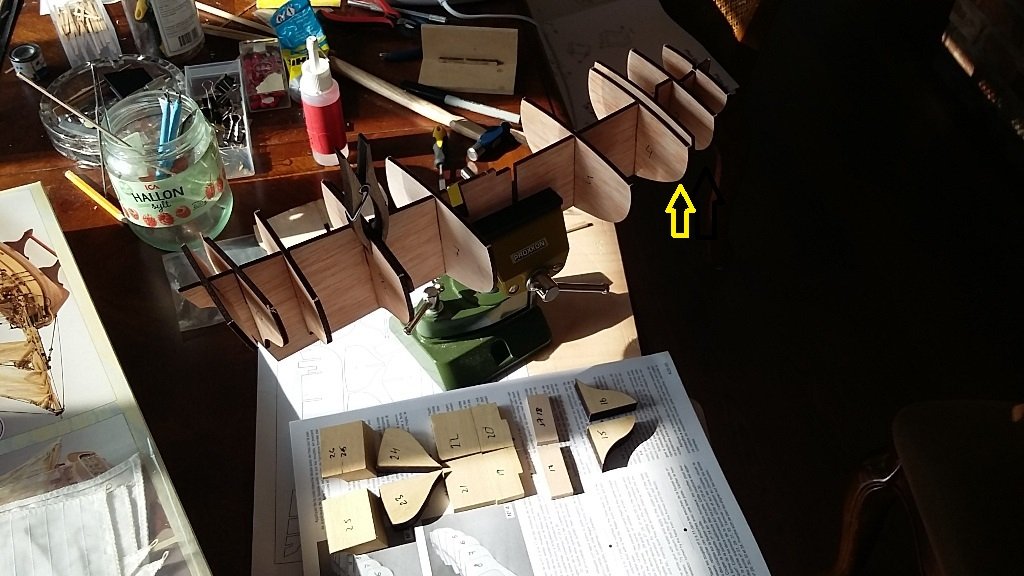
I have glued all the frames and it is time to glue the filler blocks in the stern. The fit is terrible and the instruction is wrong so this is going to be an interesting journey

-
Hi! That is what I meant, it looked stupid to file the mast. But I should have thought of that I could drill. Well well, everyone is a beginner in the beginning 😂
-
They will without a doubt not flopp'in around. My avatar is a picture taken from my music "studio" but I am sort of tired with the music that is why started this new hobby. And now this has taken over. I hardly play anymore, I don't have time for that
- 105 replies
-
- 2
-
-
- thermopylae
- sergal
- (and 2 more)
-
Aha! Thanks so much Piotrek!
-
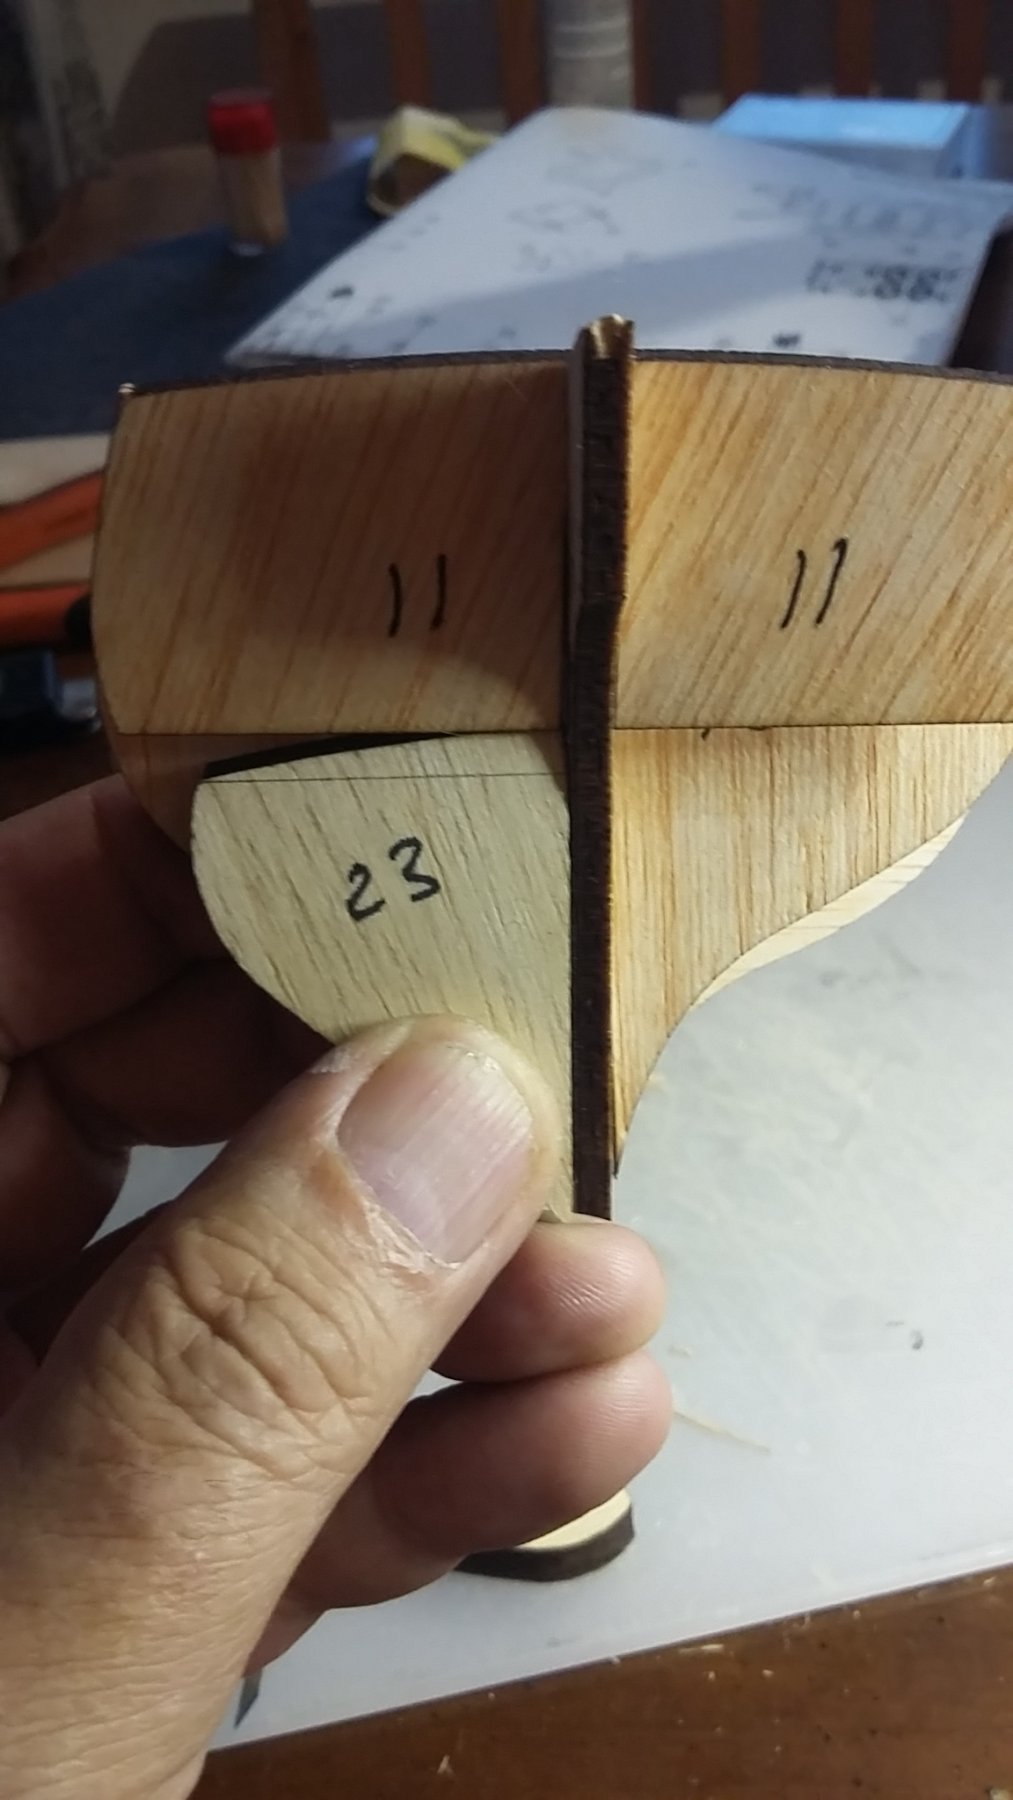
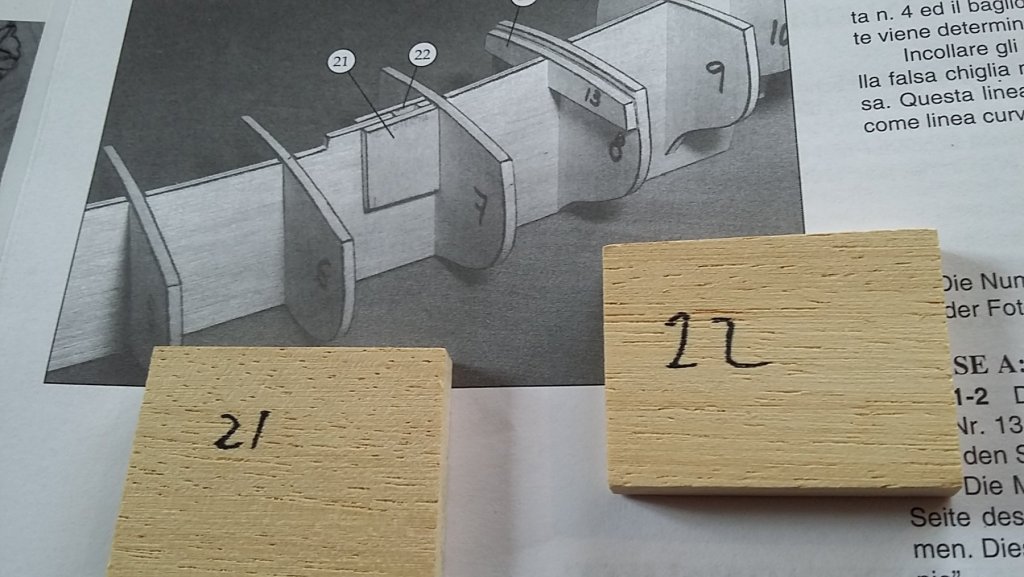
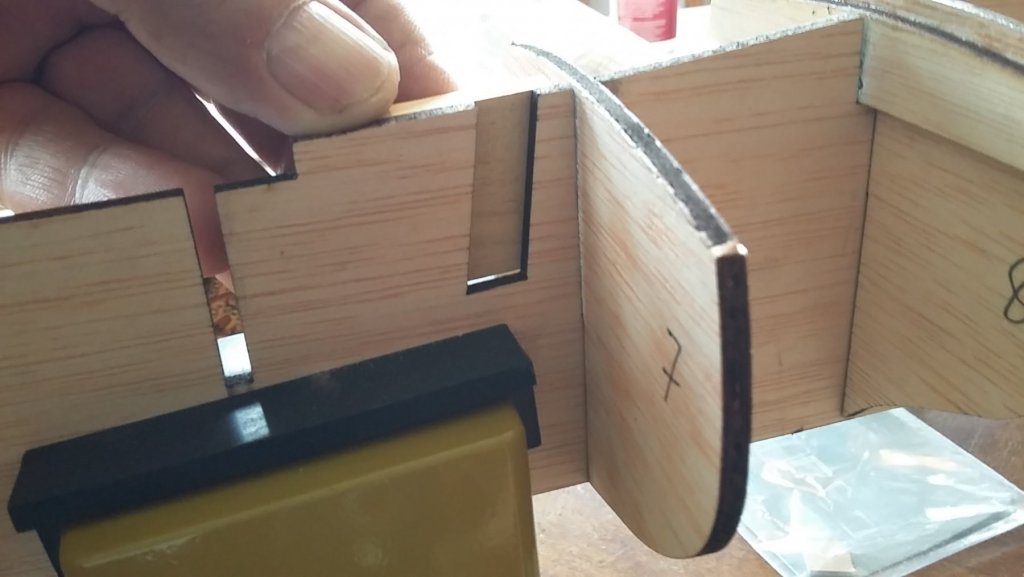
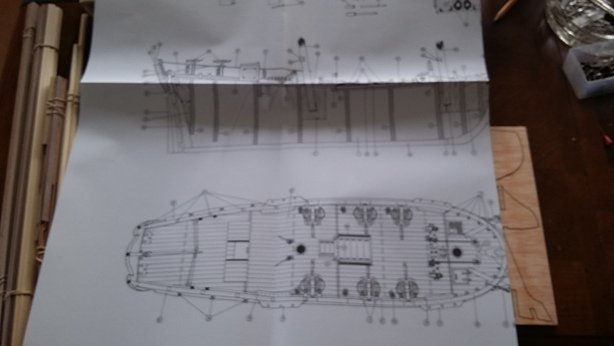
And the first question pops up immediately. Why put this "filler block", nos 21 and 22, beside the masthole? They are called capelage in the instruction, Google translate don't have that word. This means I need to file the mast to a thin square in order to fit the in hole. Or to cut out the block but in that case, why put it there. It's the same with the other masthole.
-
I just have to start. Dryfitting the frames the slots are a bit wide. I glued the beams at the arrow and the clamp and today I will glue the filler blocks. They are big! Gonna take a lot of sanding after they have dried.
-
This forum is actually better than the swedish I'm a member of. People here are more kind and helpful and I get faster response.
-
Thanks. I was extremely lucky because I made the channels with 4 mm deadeys and changed to 5mm. Very tight but they fit.
- 105 replies
-
- 1
-
-
- thermopylae
- sergal
- (and 2 more)
-
Thank you so much for the offer but the new straps seems to be good. I am very thankful for all your help so it feels like I'm pushing it a bit too far if I ask you to send me stuff You must be a very nice person👍. Yes, I think this ship is difficult so it's going quite slowly. But I do think that it will a nice ship when I'm done. I managed to scratch the hull when I did the bowbox so I will repair that with a bit of new paint
- 105 replies
-
- 4
-
-
- thermopylae
- sergal
- (and 2 more)
-
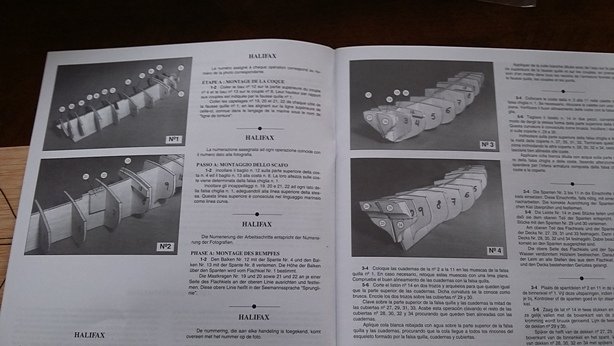
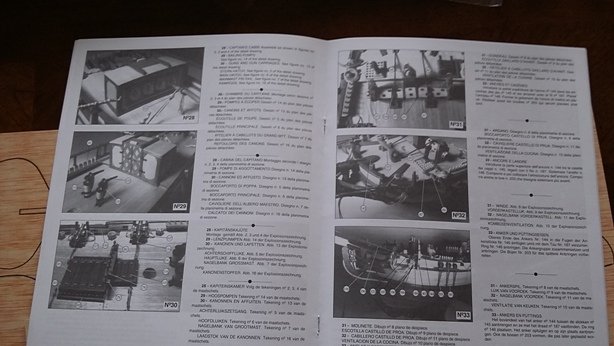
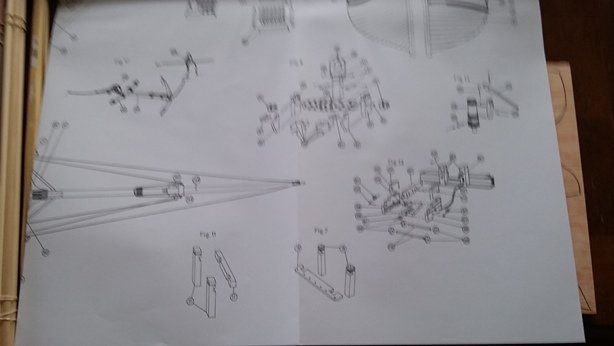
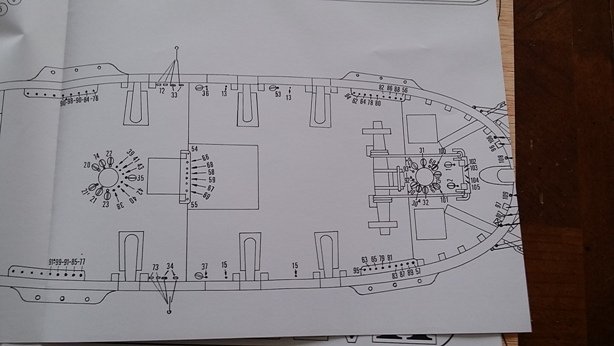
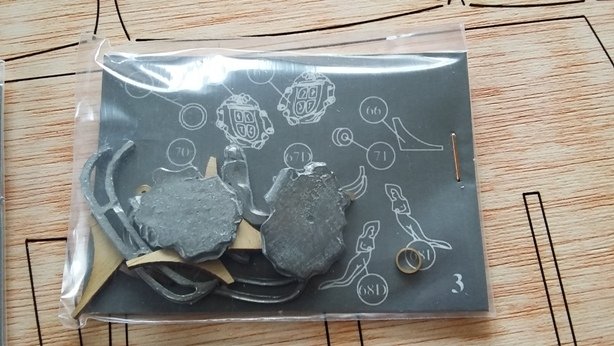
Christmas came early this yaear I just got my new model Halifax. After I ordered this I looked around and found an Italian forum and they said that this was not a ship for everyone, pretty hard to build and I found some pictures of the keel with frames that was was very comlicated. Each frame were to build of 9 pieces and a special jig came with the kit. But the was not good so he had to make a new, And so on. So I was a bit worried but when I opened it today it looks good. No strange frames, the step-by-step instructions seems to be good and they even have pictures for every step. I'm really looking forward to start to build it and I will do that parallel with the Thermopylae. I will probably ask thousands of of questions and I hop someone is kind enough to help me on the way Booklet with step-by-step instruction and photos The bags with parts have the part numbers in it so it's easy to find everything Wish me good luck

-
Life is hard sometimes. At least model ship building is The chainplate included in the kit were too short (left) So i bought new ones. 5 mm. But the deadeyes included is 4 mm. So now I have to buy 5 mm. deadeyes. Just hope they don't look too big.
- 105 replies
-
- 1
-
-
- thermopylae
- sergal
- (and 2 more)
-
Thanks. I am quite happy actually but I know all the mistakes and that disturbes me
- 105 replies
-
- 2
-
-
- thermopylae
- sergal
- (and 2 more)
-
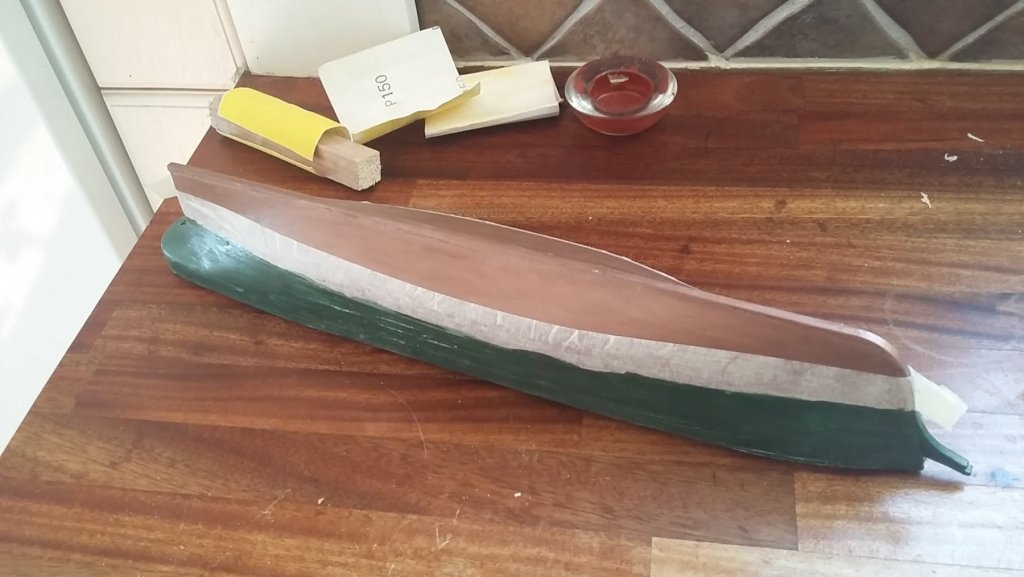
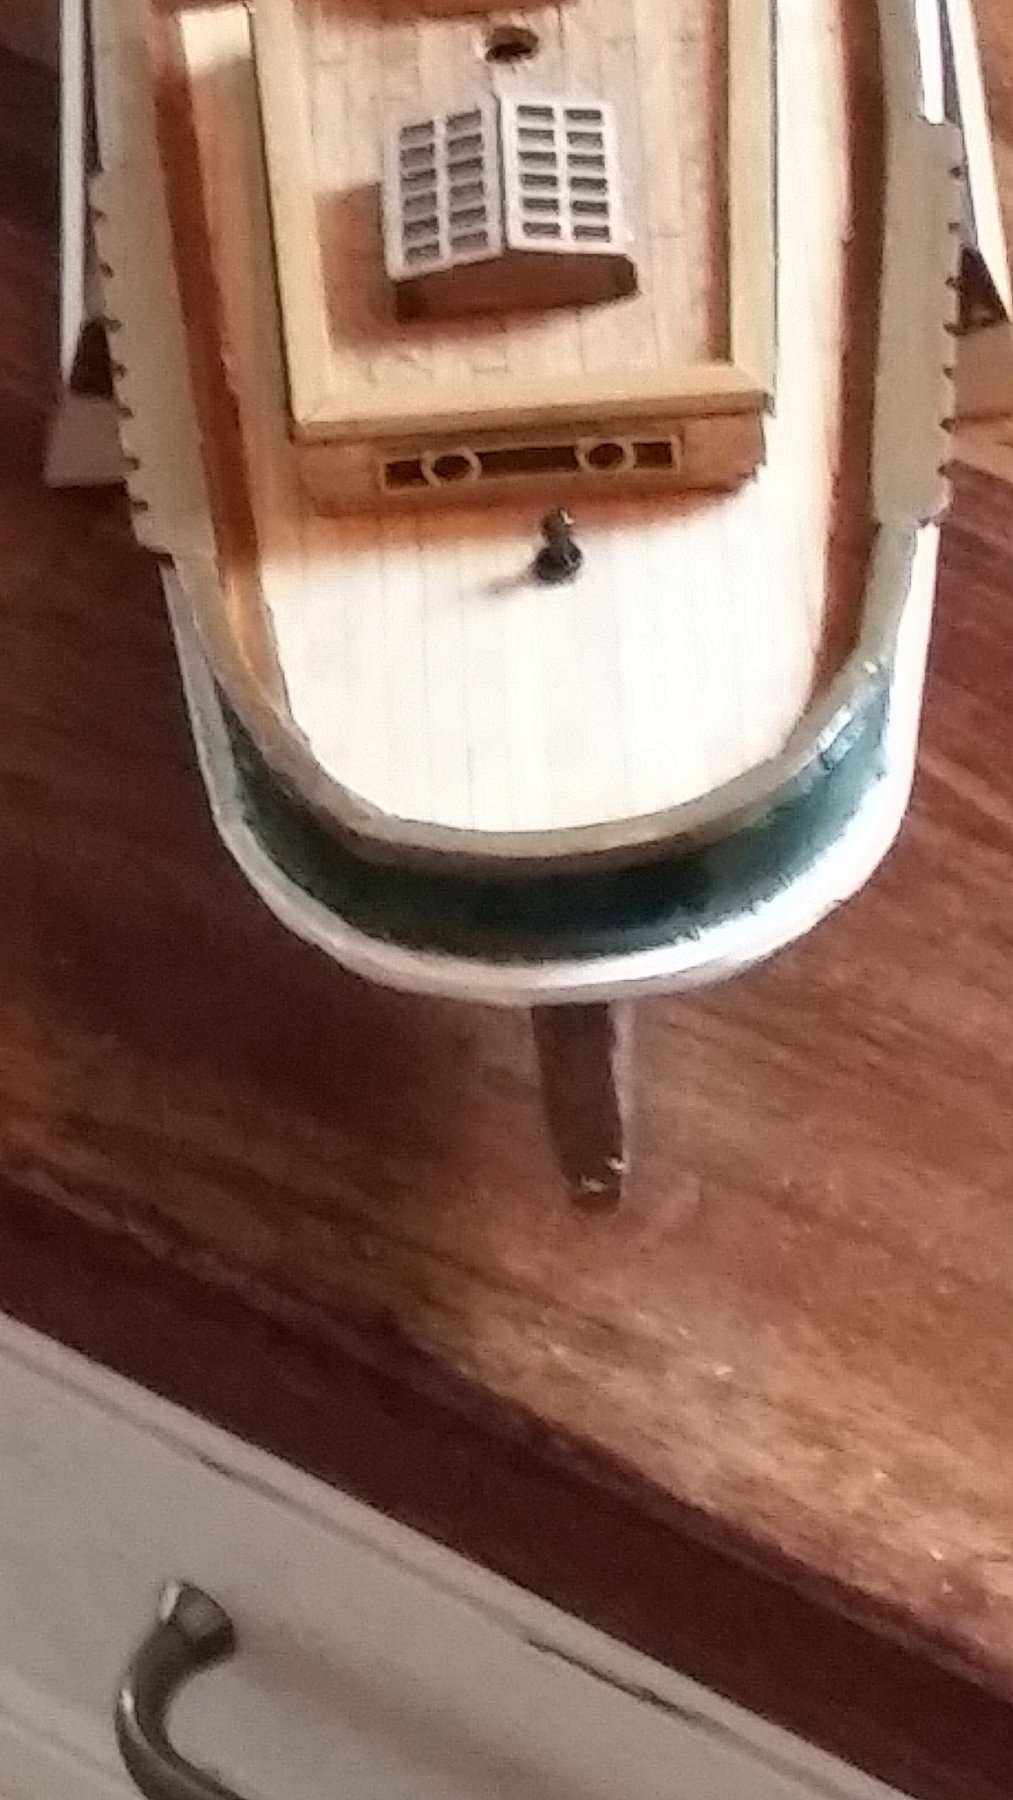
I'm sorry to say that I'm NOT happy with the transom. I'll see if I can put some more effort to it to make it look a bit better. Otherwise, I think I know what I have done wrong so I'll keep that in mind until next ship, wich will be Halifax by the way. I have also varnished the hull with one layer semi-gloss varnish. I had planned to paint a white stripe betwwen the green and the copper and I totally forgot that yesterday when I vanished it. I guess I can paint anyway?. For a beginner I think the ship is ok. Not good but ok


- 105 replies
-
- 5
-
-
- thermopylae
- sergal
- (and 2 more)
-
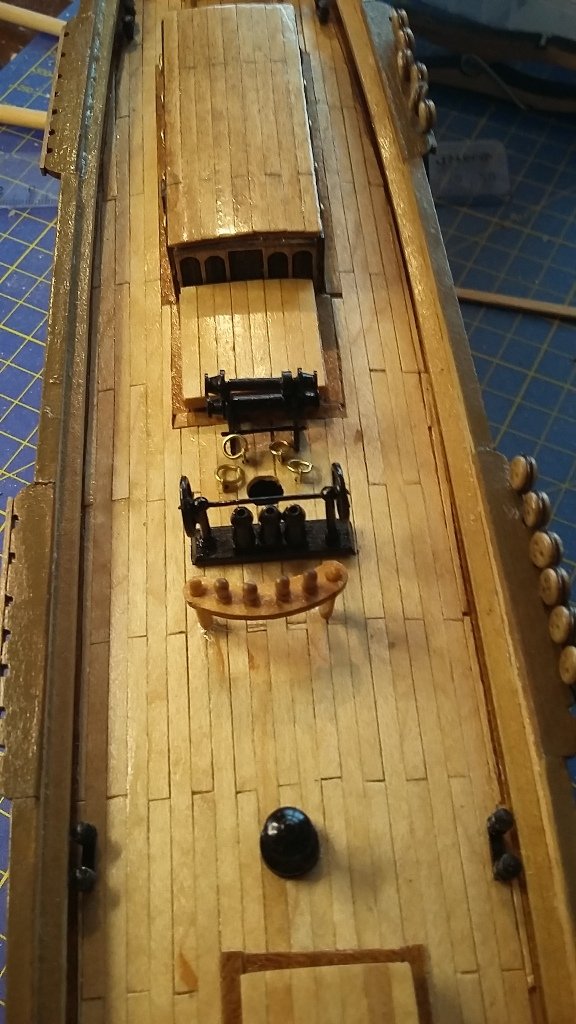
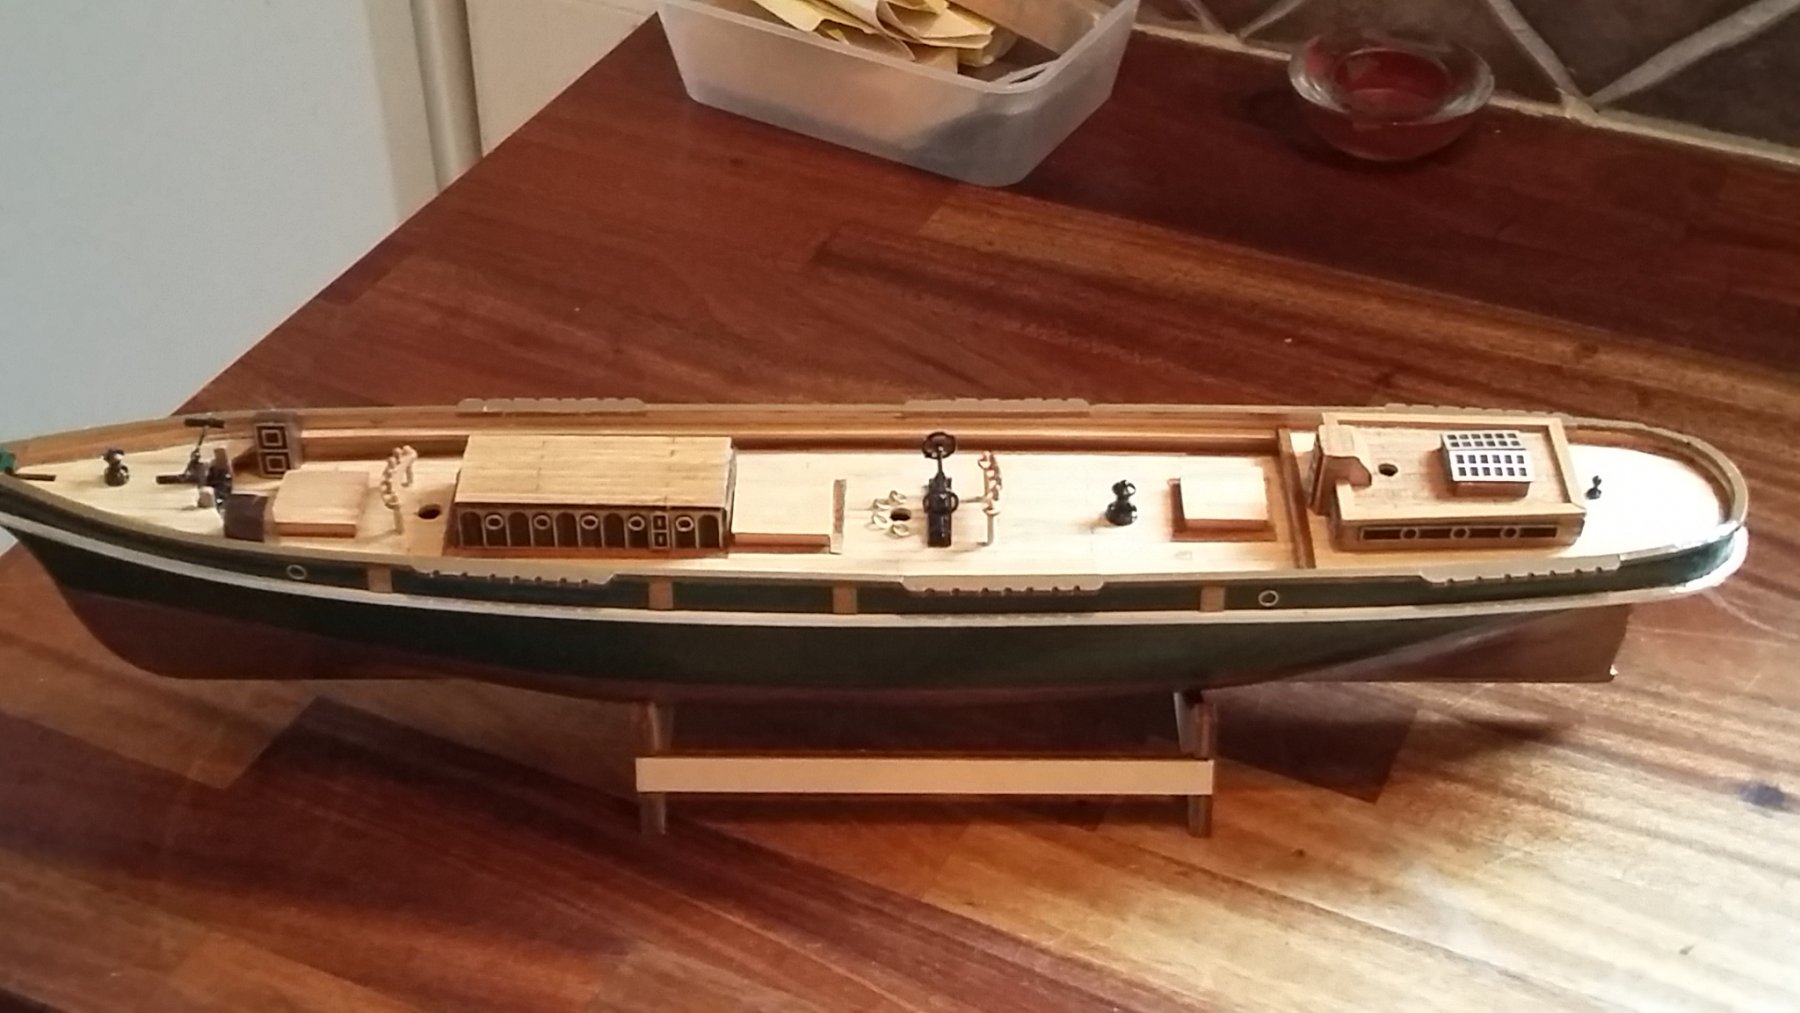
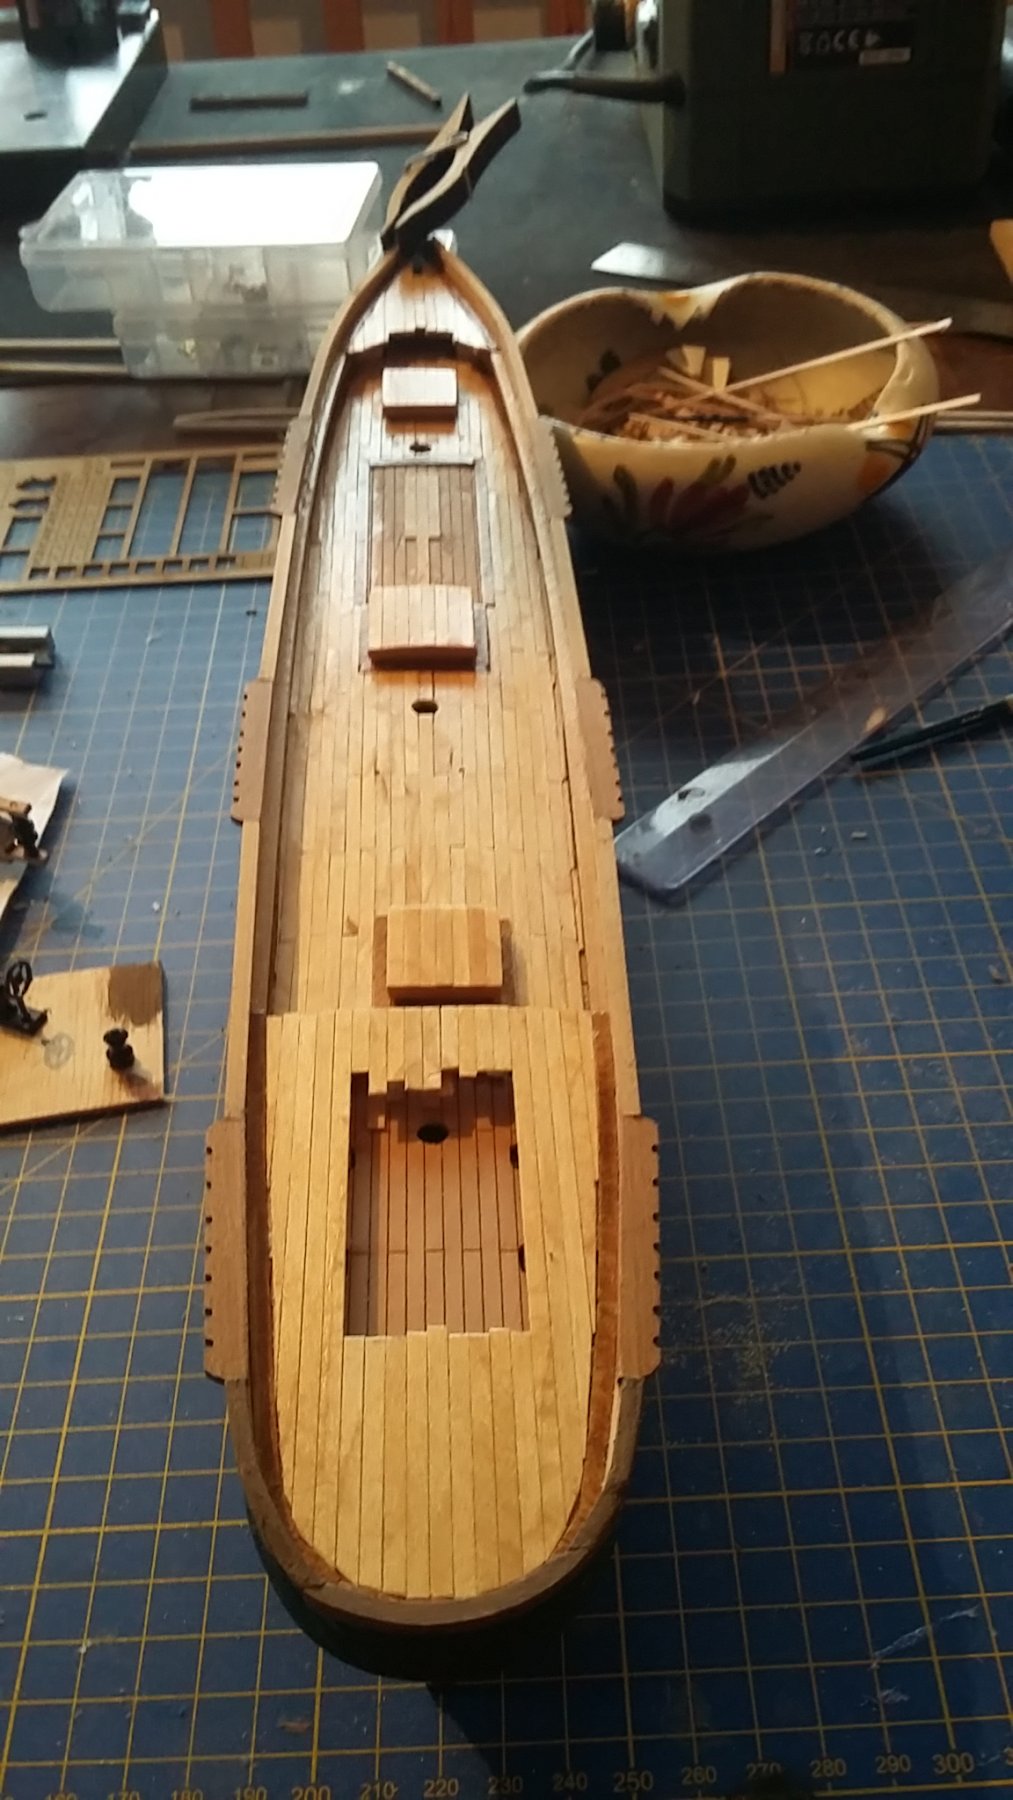
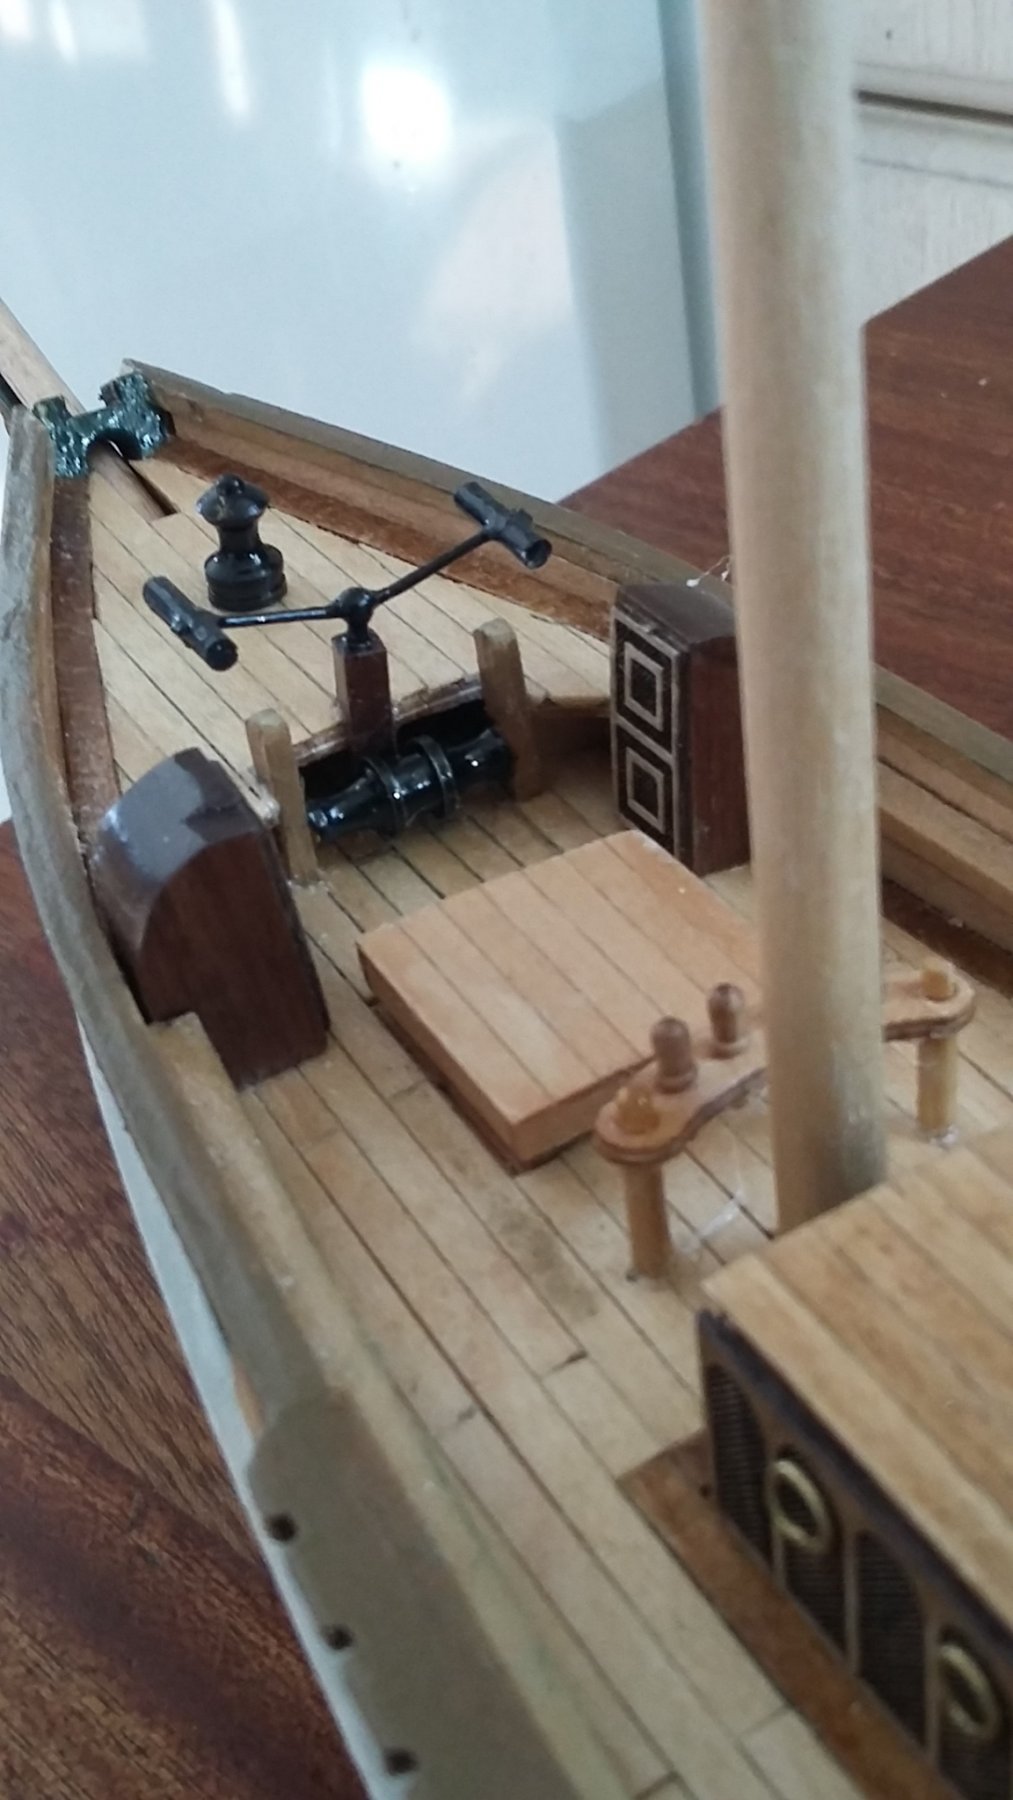
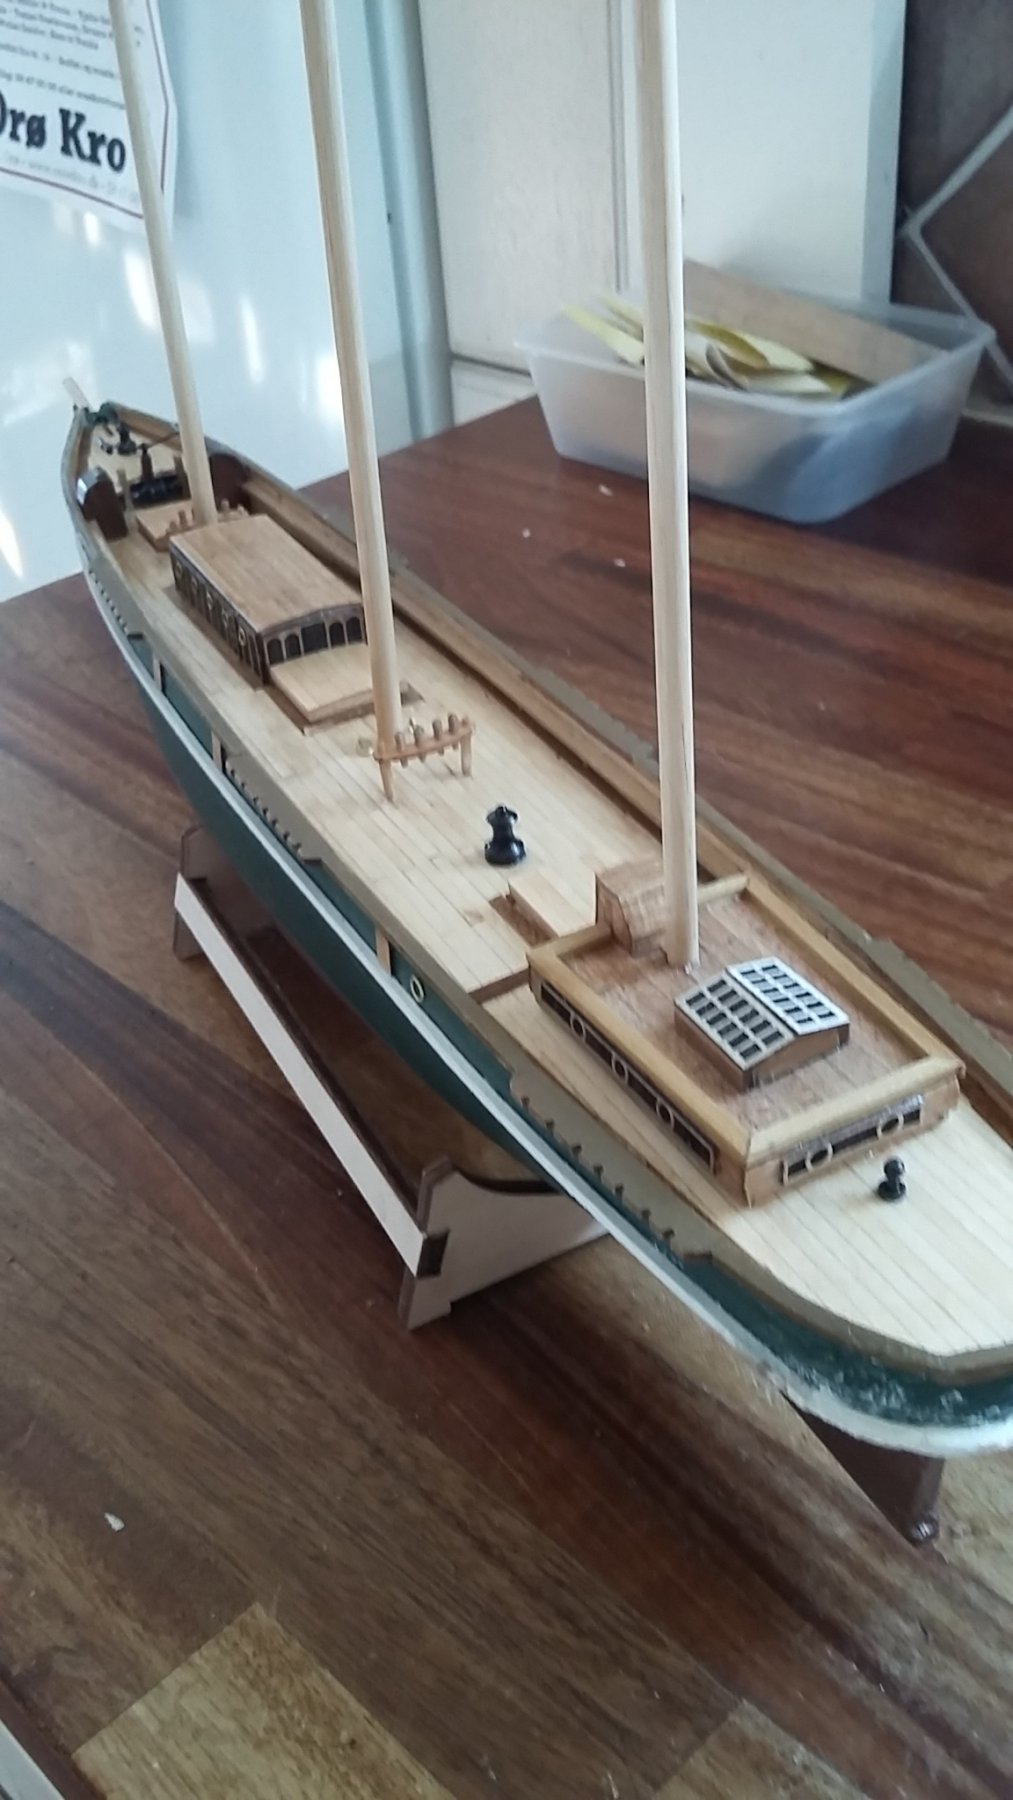
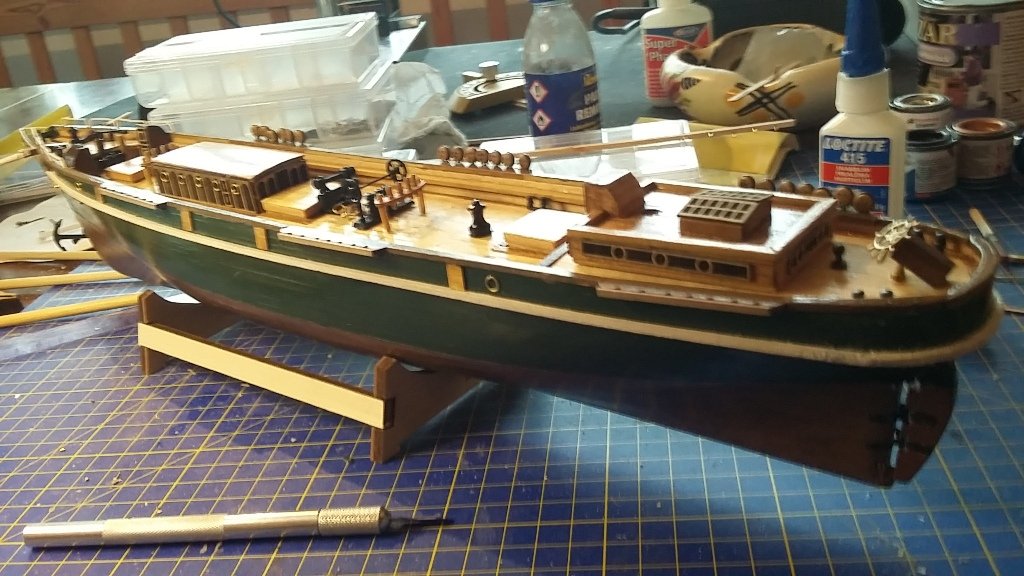
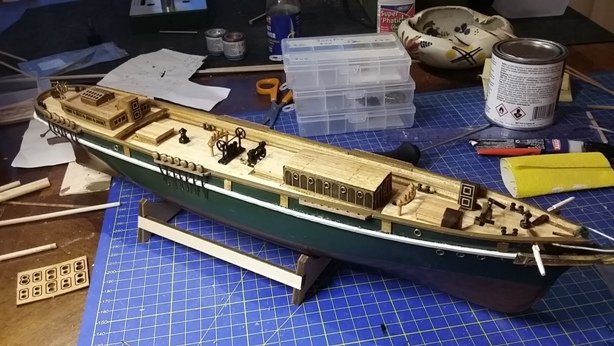
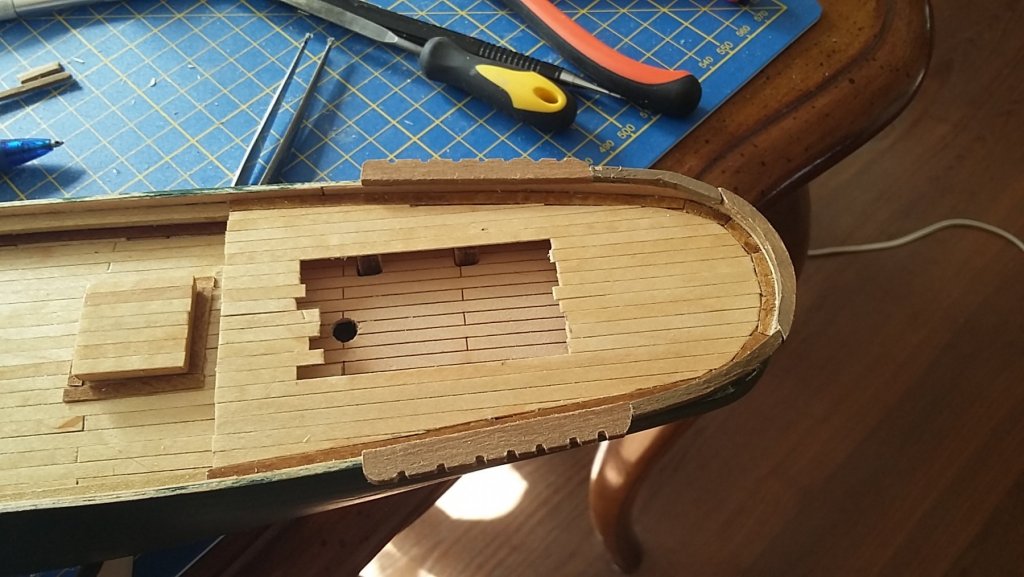
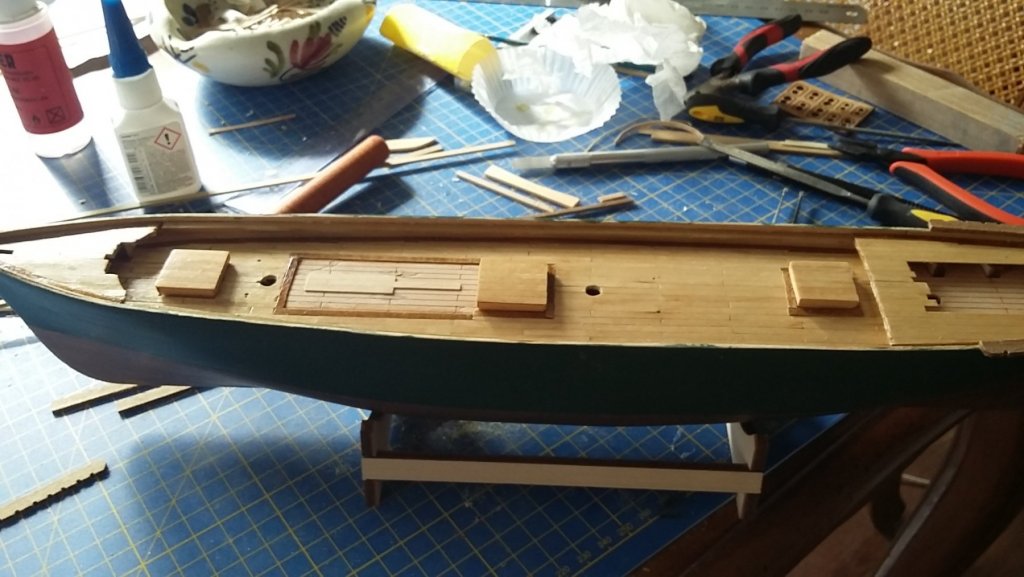
Next step is to glue the channels and the handrail in place. The transom is tough fo me we'll see what it looks like when finished And all six channels and the handrail is in place. Now it's time to see what i can dp to correct the transom. Filler and paint and filler and paint and...... After this it's time for the deck fittings. Then hopfully it will start to look like a ship Fittings are prepared The bollards were tricky The foot (?) was very small to cut out but that went out well The fittings starts to come in place


- 105 replies
-
- 7
-
-
- thermopylae
- sergal
- (and 2 more)
-
Thanks Popeye. Yes, they are very small so I'll try to cut them out without brekaing them 😟. I drilled them while they were still on the sheet, that went fine. The bulding is going slowly forward. Soon time for more pictures. i have started to glue the deck riggings. The rub rail is on and became ....... you'll see soon How do I edit my signature so it shows in every post, I can't find it in my profile
- 105 replies
-
- 1
-
-
- thermopylae
- sergal
- (and 2 more)
-
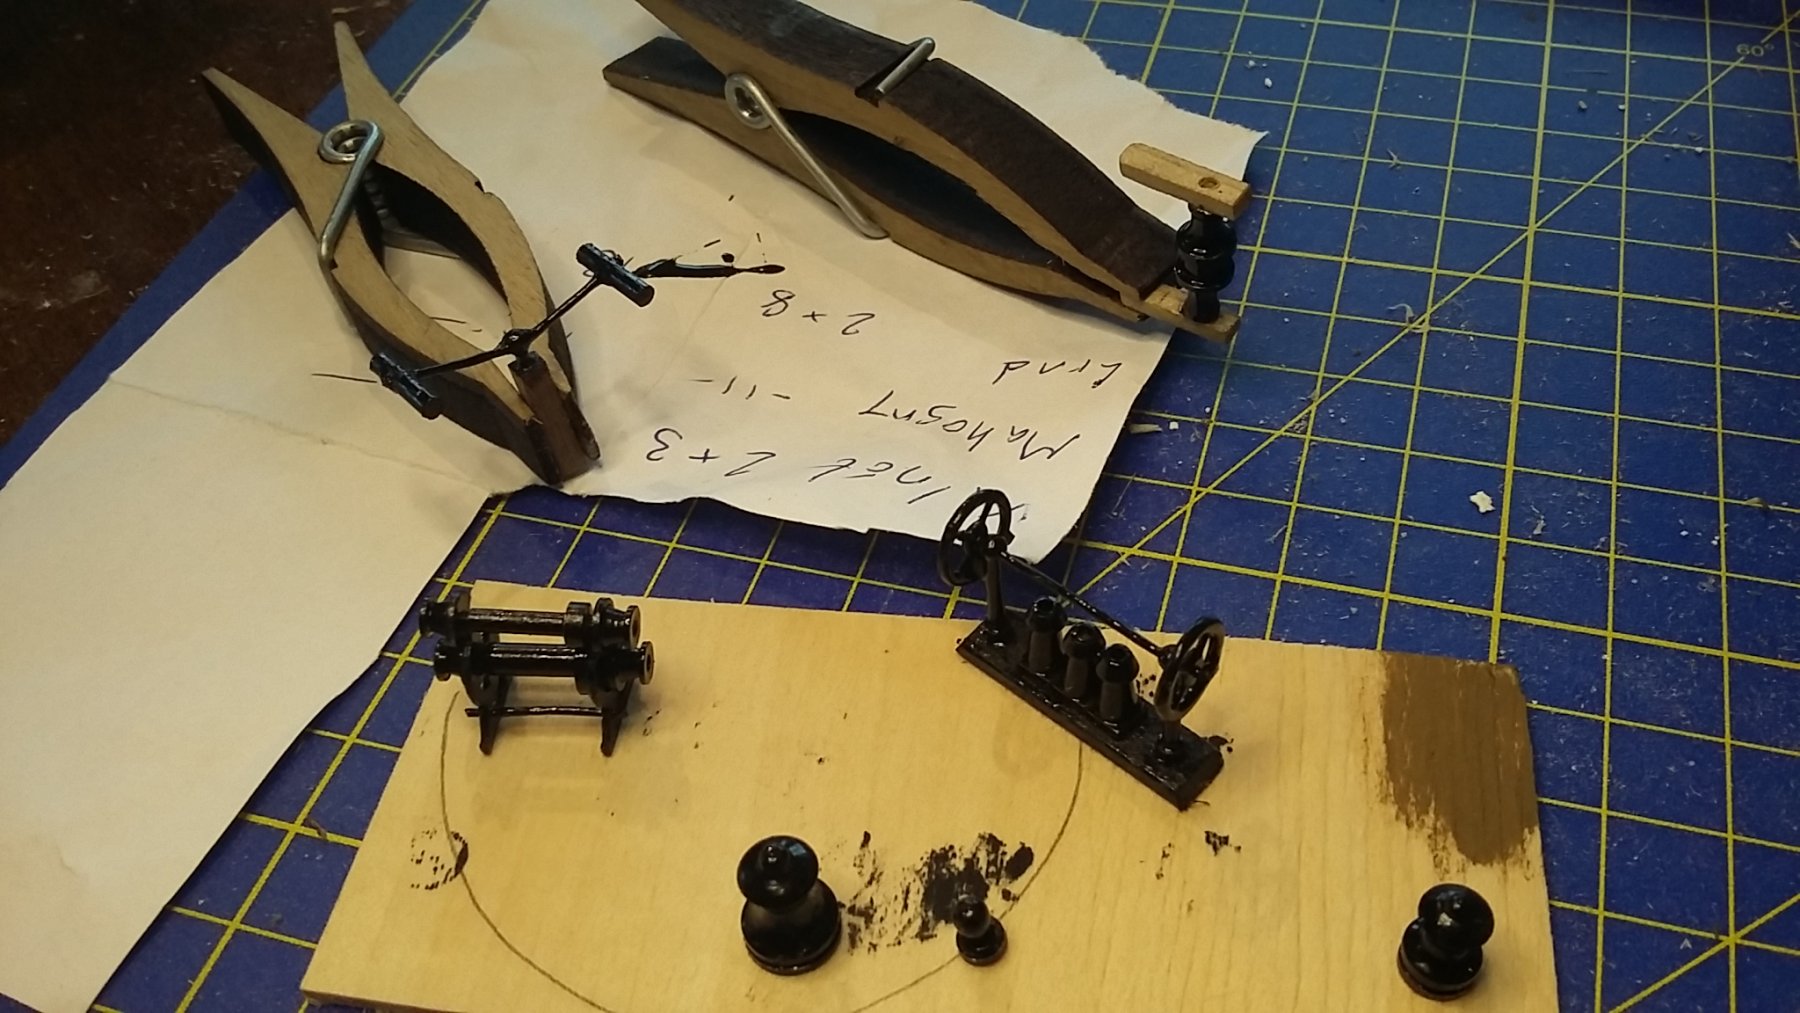
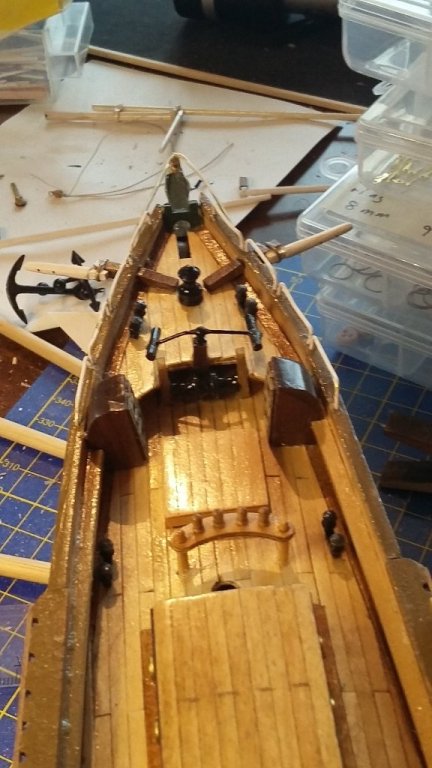
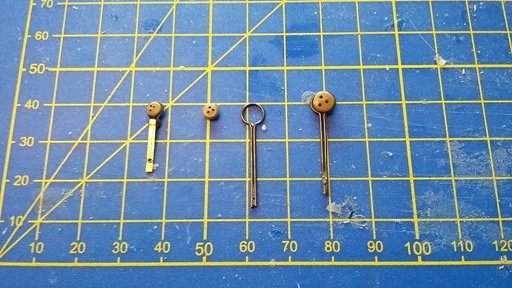
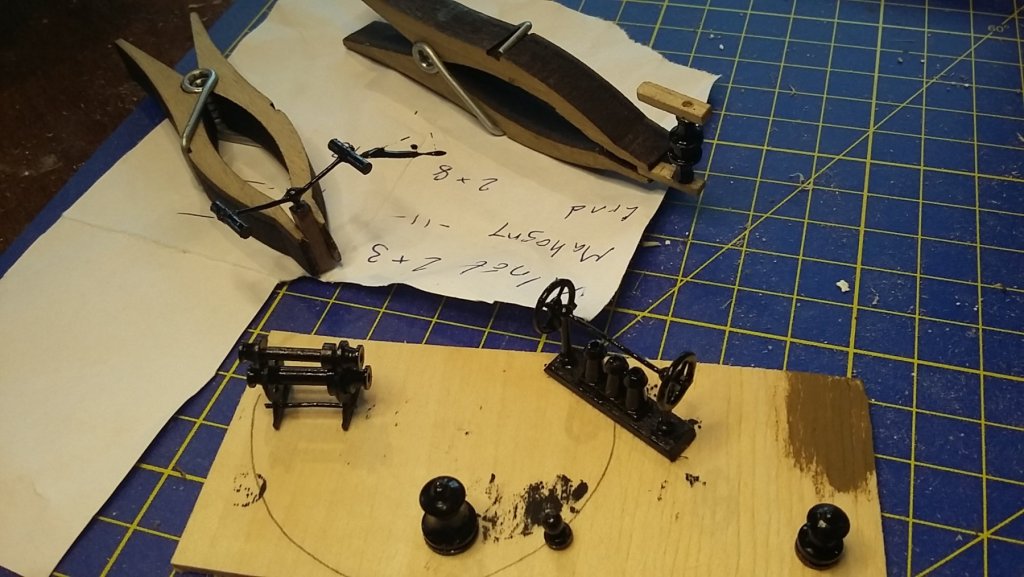
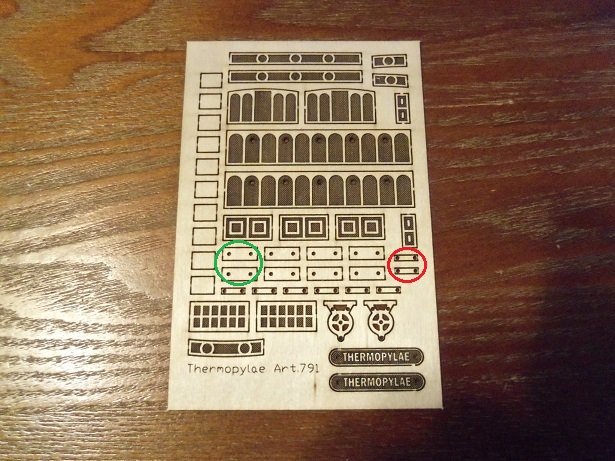
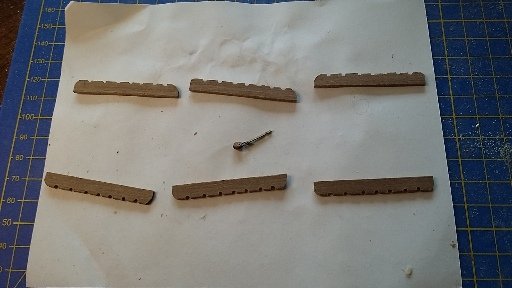
I am going to prepare the bollards and I think I am going to use the small plates (red circle) for bottom but what are are the big plates for? (green circle). Or is it optional?
- 105 replies
-
- 2
-
-
- thermopylae
- sergal
- (and 2 more)
-
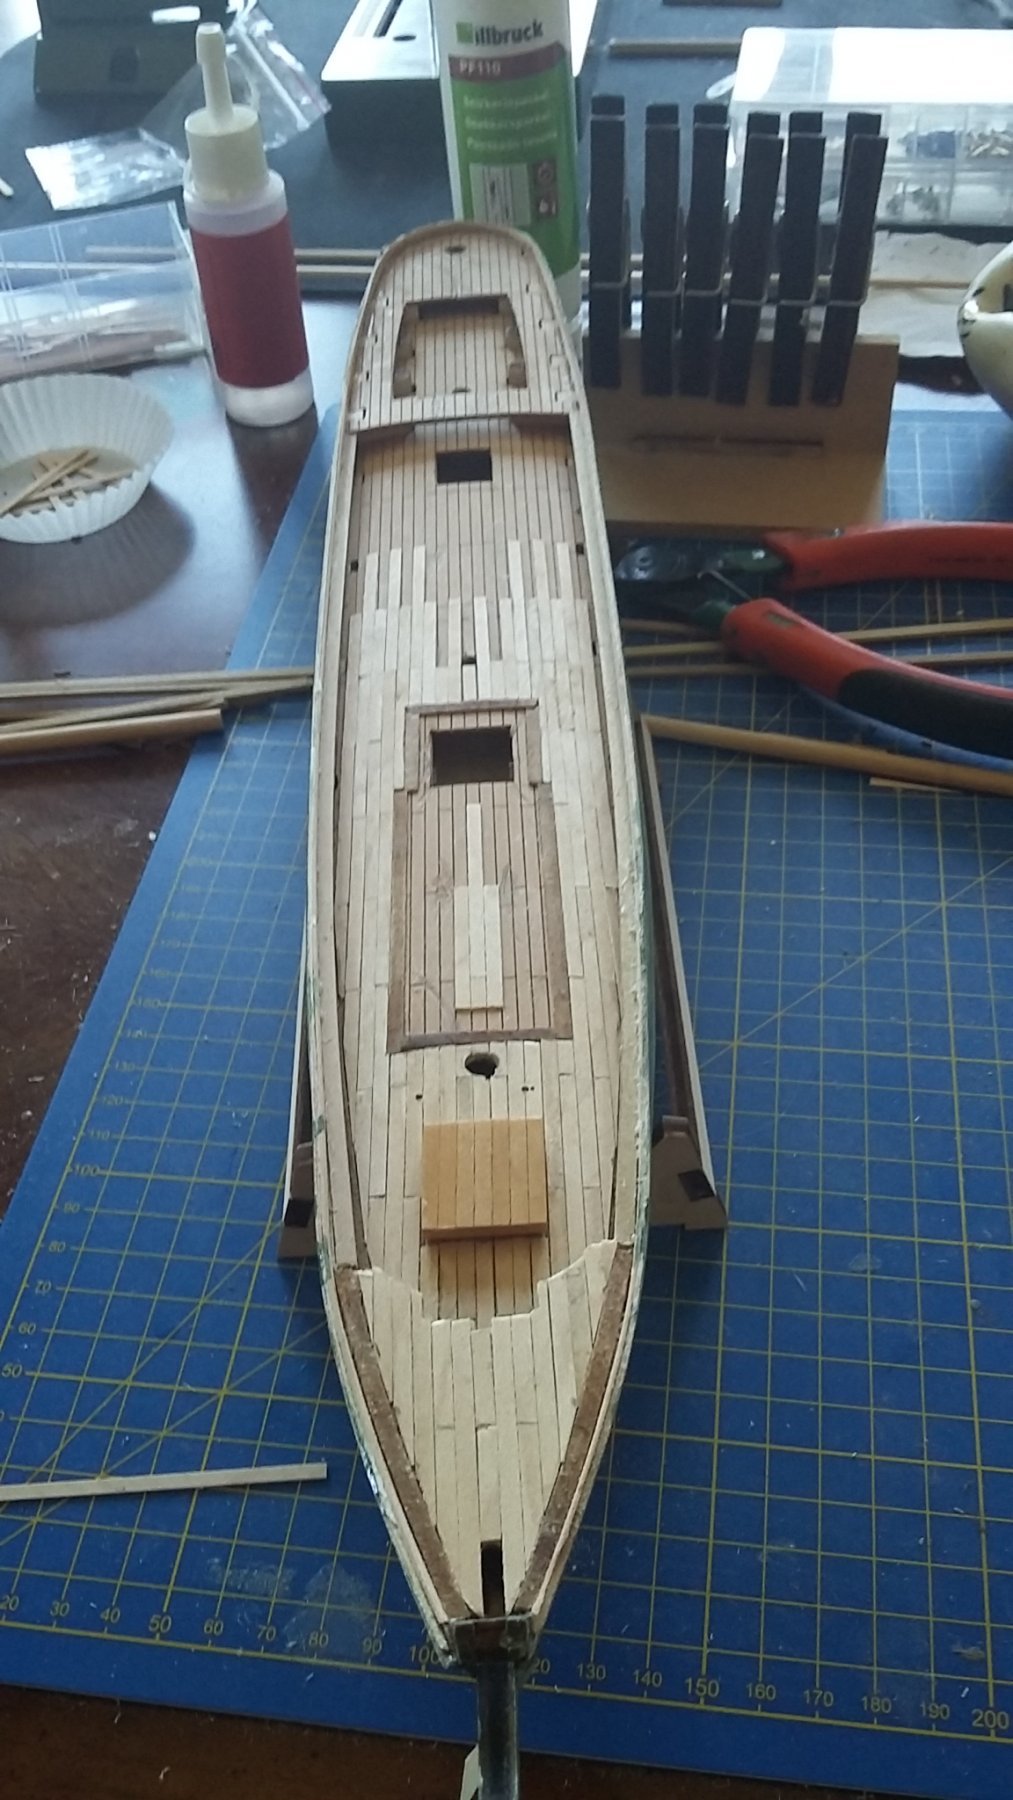
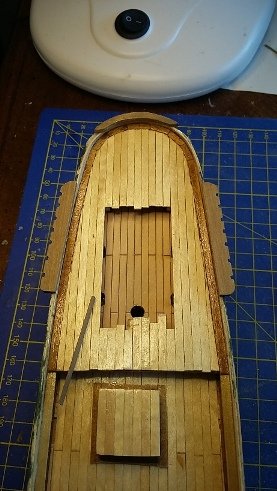
The printed deck is very clean and nice but lifeless so that's way I decided to plank it anyway and it gives more "life" to the deck. I have already drilled the holes on the pinracks for the included belaying pins, 1,2 mm but if brass pins is narrower that might be a good idea to use for the the strip along the inner bulwarks. I have a couple of shops nearby who are very cheap on these stuff. I have only sibngle blocks included and the instruction says "Blocks are all the same dimension and one-hole". I thought that was a bit suprising but I'll have to deal with that when I come to the rigging. Today I will continue with the rub rail around the transom, I was not happy with the one I did yesterday. It cracked and I tried to glue it but....
- 105 replies
-
- 1
-
-
- thermopylae
- sergal
- (and 2 more)
-
This is what I am doing right now. I have prepared the 6 channels and will fit them together with the transom handrail that I hope will be ok after spackling (Google translate), sanding and painting The surface on wich to glue the looks a bit thin so I will put a 1 x 2 mm support under them, that's the small plank on the deck. And finally a picture of the bulwark. I planked it with ,5 x 3 mm palnk and the pinrail (right word?) is 2 x 3 mm plank from deck to deck. The instruction says it's gonna go from the bow all the way to the stern and just lie on the fore deck and poop deck but I think this sollution was better, I stole it from Popeye.s log. Next step will be the wale (rub rail) before I finish all the chainplates. I was a bit insecure how to bend it around the transom so what to do. Of course, study Popeyes log and there it was. Ok, it confirmed what I was thinking but know I'm sure. Thanks again Popeye Thats it for today.
- 105 replies
-
- 4
-
-
- thermopylae
- sergal
- (and 2 more)
-
Hi Popeye! Thanks for the comments about hull and deck. The hull is better than the deck but I think I can hide most of the mistakes with the deck so it's ok. I got that same sheet as you with the model Art. 791 but I don't know what everything is for yet but that will be clear as the journey continoues . Yes my deck was printed with the pattern how to lay the planks. I noticed the difference from your log so it must be different edidtions. I notice thar our outriggers on the davits differs. I made my outrigger from 3mm dowel and drilled two holes in hem for the rigging lines and then sanded them. I noticed that too from your log. I am going to upload some pictures now and now it's up to date where I am right now in project..
- 105 replies
-
- 2
-
-
- thermopylae
- sergal
- (and 2 more)
-
For me, as a beginner I must say it's a difficult one so it's going to take quite some time. But it's a beatiful ship.
- 105 replies
-
- 1
-
-
- thermopylae
- sergal
- (and 2 more)
-
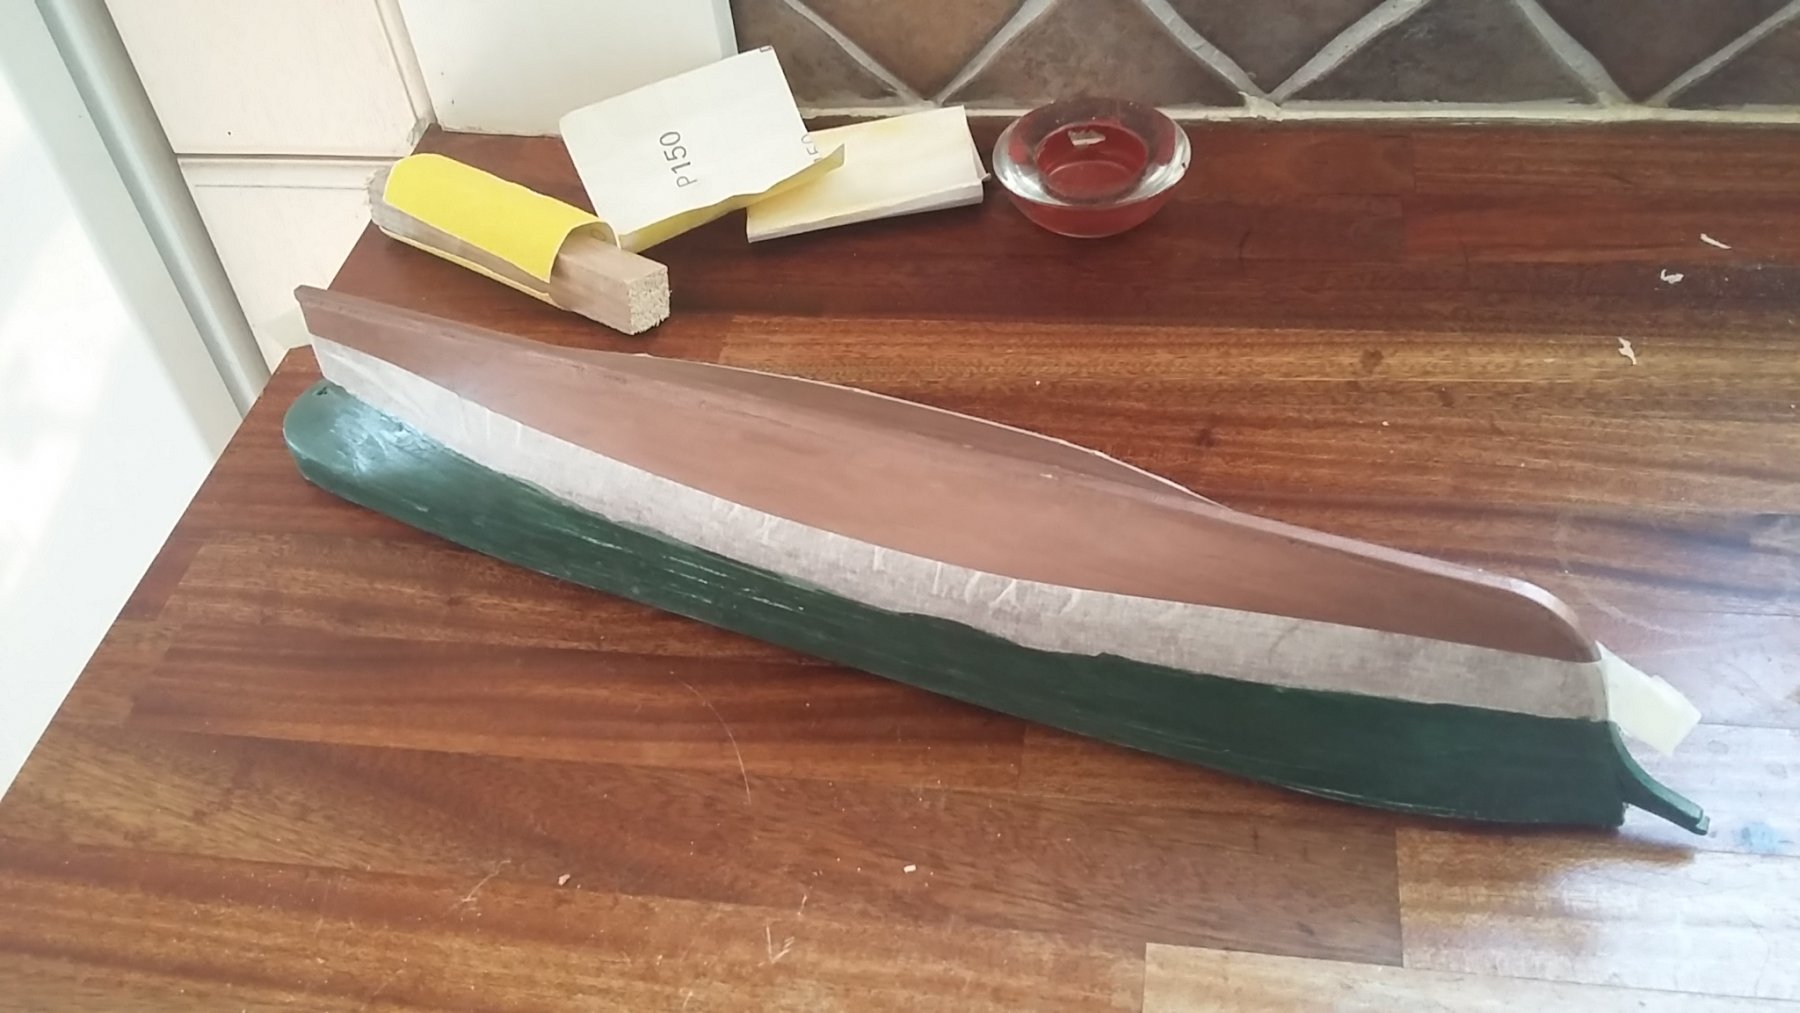
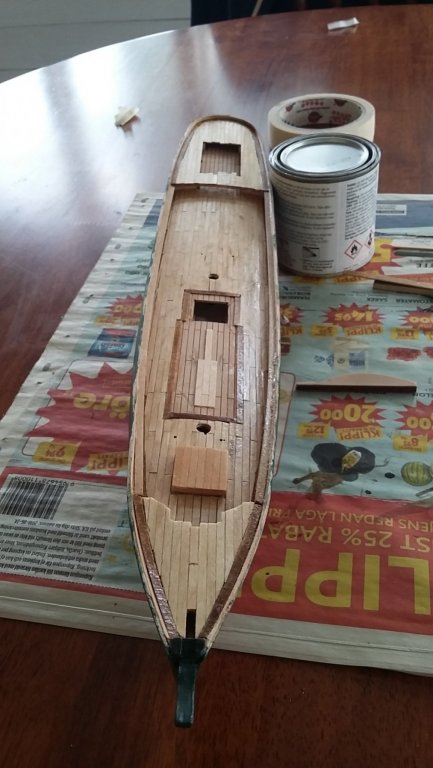
And here is the hull and deck finished (maybe ) Two layers of semi-gloss varnish on the deck. I will probably varnish the hull too. It's a bit gloomy (right word?). I want toa dd a bit of shine to it.

- 105 replies
-
- 3
-
-
- thermopylae
- sergal
- (and 2 more)
-
Time to plank the deck and paint the hull. For the hull I choose copper in the bottom and dark green for the upper half. I painted one layer, set it to dry for 5 - 6 hrs and then planked a bit on the deck. Nextday, same procedure. Totally three layers of paint.