-
Posts
142 -
Joined
-
Last visited
About JamesBhm
- Birthday June 29
Profile Information
-
Gender
Male
-
Location
Birmingham, Alabama, USA
-
Interests
Pen and ink drawing, photography, gardening, working on my old house, history.
Recent Profile Visitors
The recent visitors block is disabled and is not being shown to other users.
-
 Mr Whippy reacted to a post in a topic:
HM Cutter Mermaid 1817 by JamesBhm - Modellers Shipyard - Scale 1:48 - first build
-
 Mr Whippy reacted to a post in a topic:
HM Cutter Mermaid 1817 by JamesBhm - Modellers Shipyard - Scale 1:48 - first build
-
 Mr Whippy reacted to a post in a topic:
HM Cutter Mermaid 1817 by JamesBhm - Modellers Shipyard - Scale 1:48 - first build
-
 Prowler901 reacted to a post in a topic:
HM Cutter Mermaid 1817 by JamesBhm - Modellers Shipyard - Scale 1:48 - first build
-
 Fernando E reacted to a post in a topic:
HM Cutter Mermaid 1817 by JamesBhm - Modellers Shipyard - Scale 1:48 - first build
-
 Rick01 reacted to a post in a topic:
HM Cutter Mermaid 1817 by JamesBhm - Modellers Shipyard - Scale 1:48 - first build
-
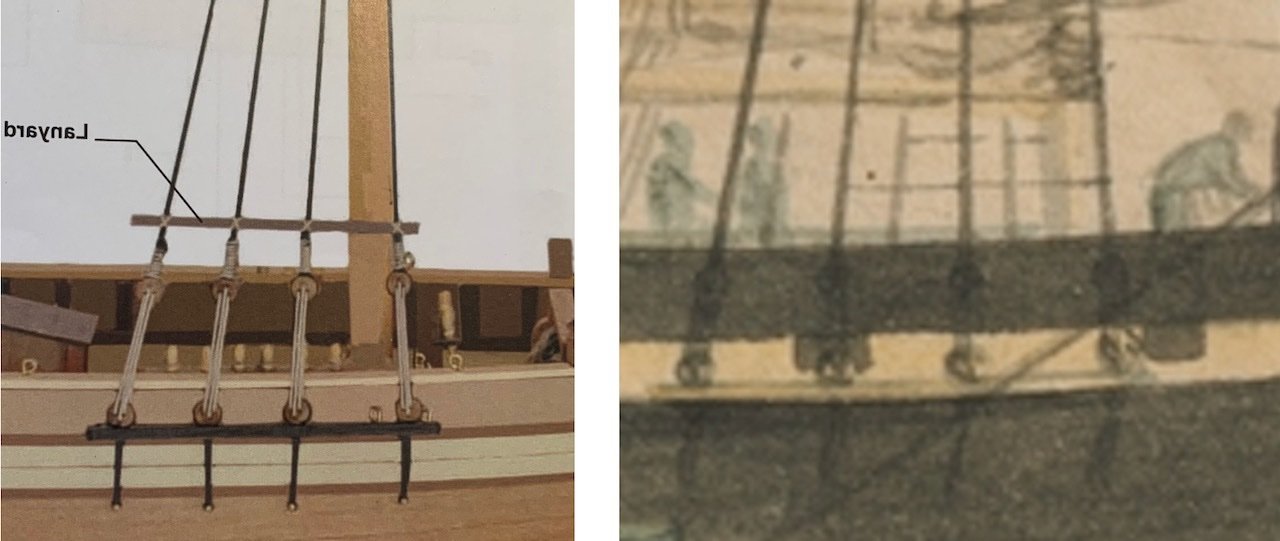
I won’t lie…the shrouds and deadeyes just about broke my will. Just a clear weak spot in my skill set. I almost took a hiatus from the build, but I promised Rick I’d get this done so we can both move on with our lives! I read up (and watched a video or two) on the wire jig technique for deadeye spacing, but it was just a struggle with everything moving, rotating, falling, etc. I finally ended up using a couple of tiny globs of polymer clay to help stabilize the wire jig while I got the shroud attached to the deadeye in the right orientation. If I had more of them (or two masts), I might explore some alternate jig engineering. There was a little bit of a learning curve with the lanyards, but they weren’t as bad. My seizings are enough to cost a bosun his warrant, so I “tarred” them with a little flat black paint. I read on a post that someone liked lines and seizings of contrasting colors because they highlighted the detail. I’m definitely NOT looking to highlight my seizings just yet. I think I may also have a barely perceptible rake in my mast (to port, unfortunately…lol) Not really discernible unless you’re turning the model and scrutinizing carefully. Also…not clear why the kit has the channels placed above the wale/wale trim with such long lanyards, when in King’s sketch, the channels are below the wale and the upper deadeyes are maybe just below the cap rail. My channels are below the wale. For my wire jigs, I spaced them exactly 3 deadeye widths apart and the upper deadeye height seems right (slight variations notwithstanding).
- 241 replies
-
- mermaid
- modellers shipyard
-
(and 1 more)
Tagged with:
-
 JamesBhm reacted to a post in a topic:
HM Cutter Mermaid 1817 by JamesBhm - Modellers Shipyard - Scale 1:48 - first build
-
Just did that with mine also. Of course I had JUST tied the block and ring assemblies to the eyelets. Had to cut them off and re-build them. I was wondering about that too! That, and anchor operation with the bowsprit guys (not just on this model, but on others) are things that leave me scratching my head. I'm content with my model, but God help it if it was real and actually had to sail! BTW...what did you make the mast rings from? I watched a video of a guy making them from shaped and sanded wood shavings.
- 241 replies
-
- mermaid
- modellers shipyard
-
(and 1 more)
Tagged with:
-
 JamesBhm reacted to a post in a topic:
HM Cutter Mermaid 1817 by JamesBhm - Modellers Shipyard - Scale 1:48 - first build
-
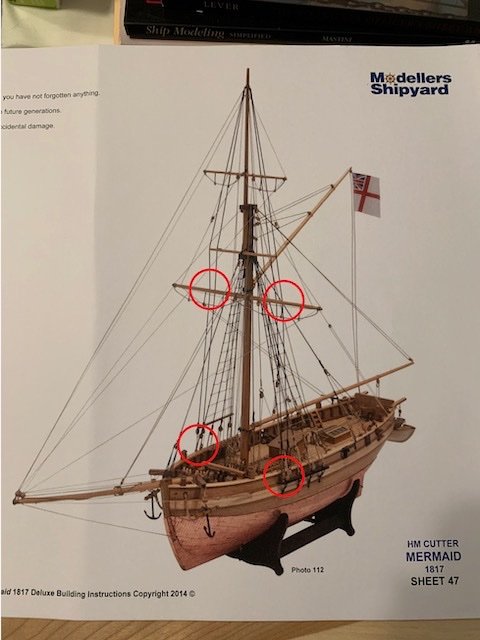
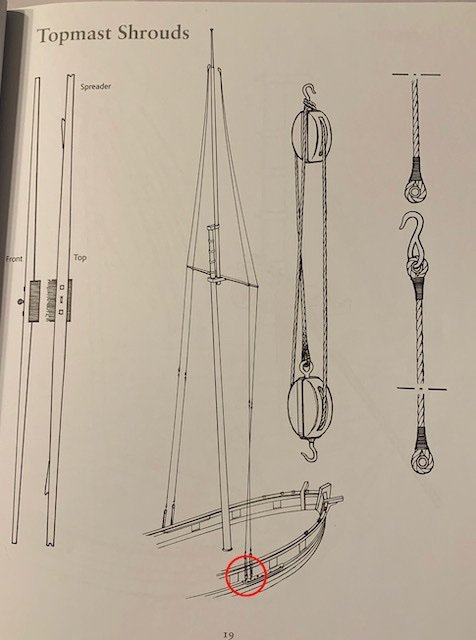
I’ve been sidetracked with Spring projects for the last couple of weekends, but hoping to get back to the build this weekend. Meanwhile, I noticed a rigging anomaly: The kit has the topmast shrouds terminating on eyelets at the forward aspect of the channels which (at least in the pics) seems to make the shrouds come in contact with the squaresail (i.e., “lower”) yard. They actually look like they bend around it slightly in the pics. On P. 19 of Petersson, the termination points are at the aft aspect of the channels, which presumably makes the shrouds lead back a little bit away from the squaresail yard. I might shift my eyelets aft because my channels may be a few mm further forward than is optimal, and I’m pretty sure the shrouds would hit the yard. I can't find anything in King's drawings that clarifies one way or the other. Hard to make out in some of the contemporary models in the gallery. Rick, I wish I'd thought of that! The mast isn't mounted, but it's fully assembled with stuff on both ends that would preclude getting rings in there.
- 241 replies
-
- mermaid
- modellers shipyard
-
(and 1 more)
Tagged with:
-
 berhard reacted to a post in a topic:
HM Cutter Mermaid 1817 by JamesBhm - Modellers Shipyard - Scale 1:48 - first build
-
 Prowler901 reacted to a post in a topic:
HM Cutter Mermaid 1817 by JamesBhm - Modellers Shipyard - Scale 1:48 - first build
-
 bruce d reacted to a post in a topic:
HM Cutter Mermaid 1817 by JamesBhm - Modellers Shipyard - Scale 1:48 - first build
-
 Ghost029 reacted to a post in a topic:
HM Cutter Mermaid 1817 by JamesBhm - Modellers Shipyard - Scale 1:48 - first build
-
 JamesBhm reacted to a post in a topic:
HM Cutter Mermaid 1817 by JamesBhm - Modellers Shipyard - Scale 1:48 - first build
-
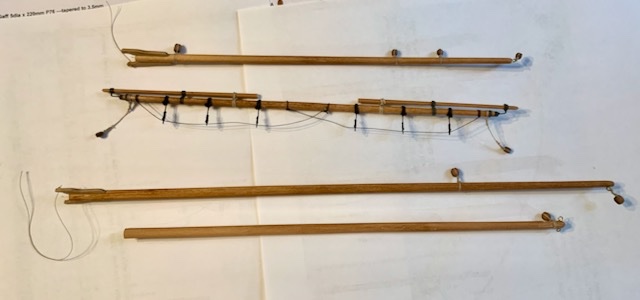
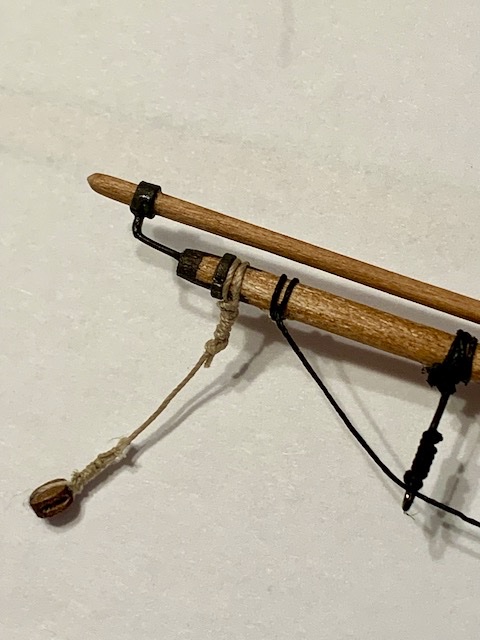
I think I have blocks and attachments done for masts and spars. My knots and seizings are still a little awkward and inconsistent, but it’s a first model and there’s a learning curve developing. As I had mentioned before, I repurposed the upper yard dowel to make studdingsail booms. I ended up using a method that is a hybrid between the kit instructions and Chuck Passasro’s article on yard details. I tried using the 28 guage wire he recommends, but realized it was wrong for the scale of the model (and ended up breaking it from metal fatigue as I fiddled with it). The studdingsail boom irons are painted strips of thick artist’s watercolor paper. The booms are attached to the yard with bent, cut, and painted brass pins (I have some that are a bit thinner and more malleable than the ones that came with the kit). The stirrups are brass pins with a (somewhat) more natural loop in the end, a faux seizing with rigging cord, and painted flat black. All in all, a good skill building experience, but I can’t imagine repeating this process for multiple yards/masts!
- 241 replies
-
- mermaid
- modellers shipyard
-
(and 1 more)
Tagged with:
-
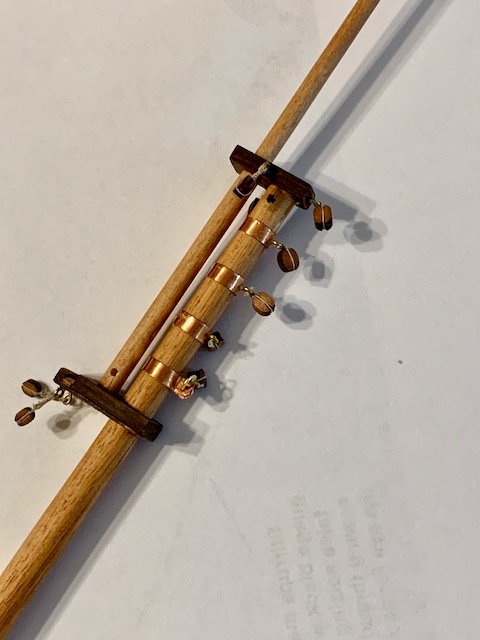
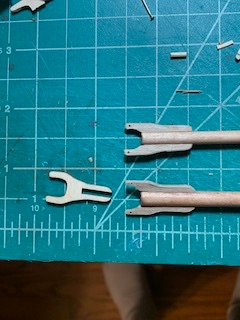
Working on spars and fittings, and reading/watching anything I can find about knots, seizings, etc. Otherwise, got to the gaff and realized the little laser cut plywood yokes for the gaff and boom are little odd. They don’t fit the mast without shaping, and I have no idea how I would get them onto the gaff and boom without cutting some major grooves in both (with great risk of destroying both!). I opted to engineer new yokes out of some leftover walnut strip stock. They hug the mast nicely. not looking forward to the string and parrels though.
- 241 replies
-
- mermaid
- modellers shipyard
-
(and 1 more)
Tagged with:
-
Rick, I had the same thought the more I looked at the two (a reasonable choice for the kit designers in the absence of any other definitive sources for this particular vessel). I think Petersson is a must-have for builders of this kit, especially first-time or less experienced builders. I'm taking the slow one-thing-at-a-time approach as you mentioned. I'm actually making a quick spreadsheet "auditing" all of the contact/belaying points on the spars, deck, hull, etc to verify a few apparent anomalies and to make sure I'm accounting for changes when the topsail yard is eliminated. Overall, I would reiterate that I'm frustrated with some aspects of the instructions, but still happy with the kit. Designing these things to be mass produced for builders of multiple skill levels at a reasonable price point can't be easy, and the headscratching parts that I've had to research, ask questions, and figure out have been really good learning experiences. BTW...I've decided to keep the existing topsail haliard for the flying topsail, and I'm going to try to add another modeled on your description for the gafftopsail.
- 241 replies
-
- mermaid
- modellers shipyard
-
(and 1 more)
Tagged with:
-
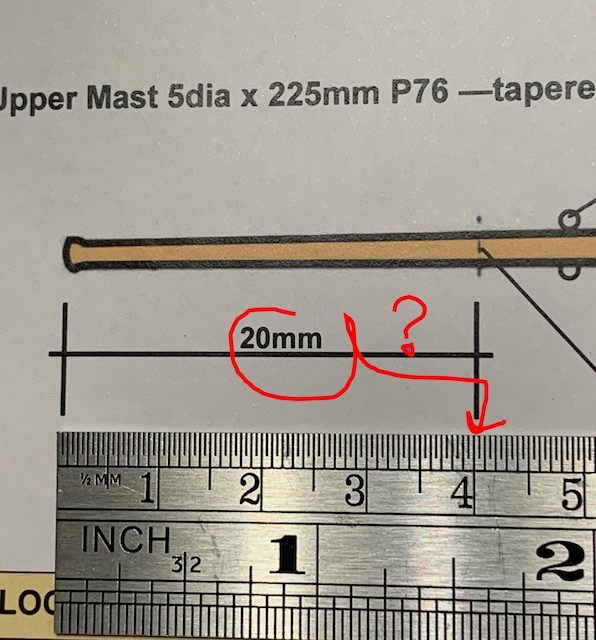
Just a quick pause to gripe. I’m having some frustration with the masts and rigging section of the instruction booklet. A scale drawing of the topmast has conflicting measurements, the instructions are sparse (“attach xxx as shown”), and other drawings are difficult to make out. The image for the bowsprit guy is just a tangle of colored lines (luckily there’s a decent image in Petersson). I’m glad I’m skipping the topsail yard because in some images it is lashed to the topmast well above the upper mast cap, and in others it is slung below the upper mast cap from what looks like an eyelet. The images seem to come from two different models. I want to go back and watch parts of the DVD, but I’m having trouble finding a device to play it on…heh. OK. Done whining. I’ll just figure it out.
- 241 replies
-
- mermaid
- modellers shipyard
-
(and 1 more)
Tagged with:
-
 JamesBhm reacted to a post in a topic:
HM Cutter Mermaid 1817 by JamesBhm - Modellers Shipyard - Scale 1:48 - first build
-
 JamesBhm reacted to a post in a topic:
HM Cutter Mermaid 1817 by JamesBhm - Modellers Shipyard - Scale 1:48 - first build
-
Rick...thank you for the reminder! I've been so focused on "no topsail or topsail yard" that I forgot the flying topsail doesn't just levitate up. As for rigging, sounds like I should keep the topsail yard halliard as it is in the instructions but bring the other end down to the deck or a mast cleat (sounds like more or less what you did?) BTW...there is an interesting omission in Petersson. Both the kit and Petersson show cluelines and sheets for the topsail, but the main (lower) yard has nothing but lifts and braces. I'm guessing this is because the cluelines and sheets for the main squaresail attach to the sail itself. He depicts sails in the other chapters, including cluelines and sheets (and buntlines) on a lower square sail for the American Schooner (p. 103). It makes sense to leave them off if there are no sails on the model, but if I were modeling with sails, I'd be out of luck with Petersson on that one. I've found a couple of models that include lower cluelines and sheets hoisted up near the yard where they would be if a sail were furled. Not sure I'm that ambitious, though.
- 241 replies
-
- mermaid
- modellers shipyard
-
(and 1 more)
Tagged with:
-
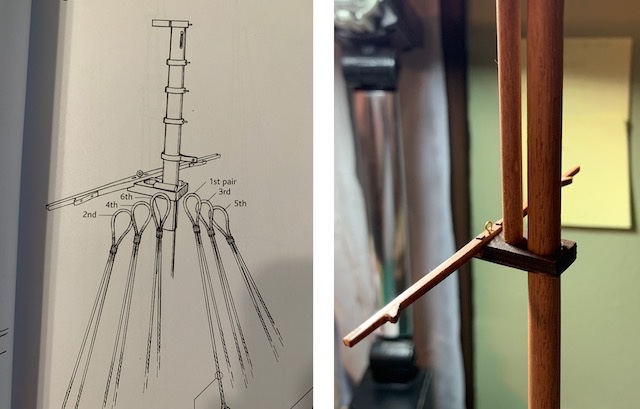
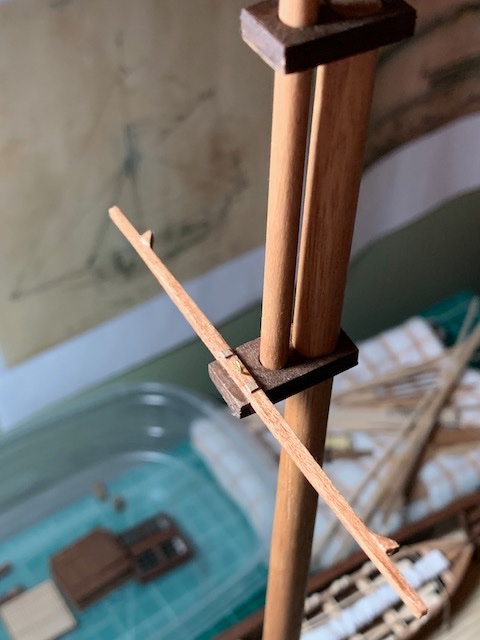
I managed to modify the mast caps that came with the kit to get a pretty good approximation of the spreader shown in Petersson p. 17-18. Also spent time “reverse engineering” the implications of omitting the topsail yard (i.e., blocks, holes, eyelets, belaying points not needed) before I start adding things to masts and spars.
- 241 replies
-
- mermaid
- modellers shipyard
-
(and 1 more)
Tagged with:
-
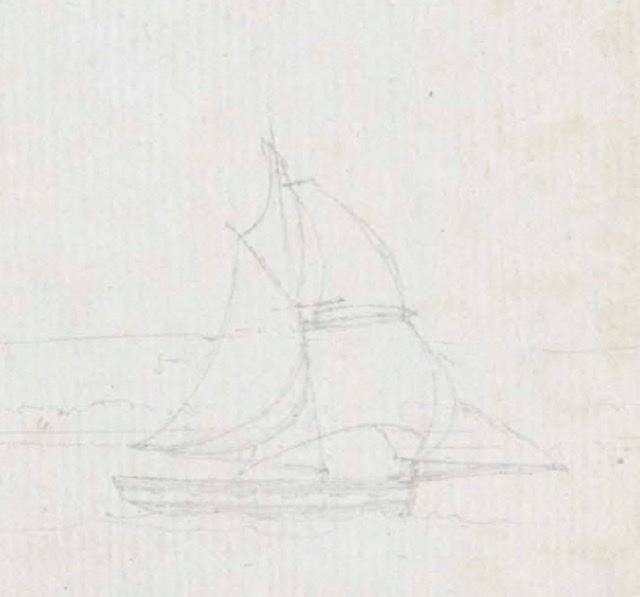
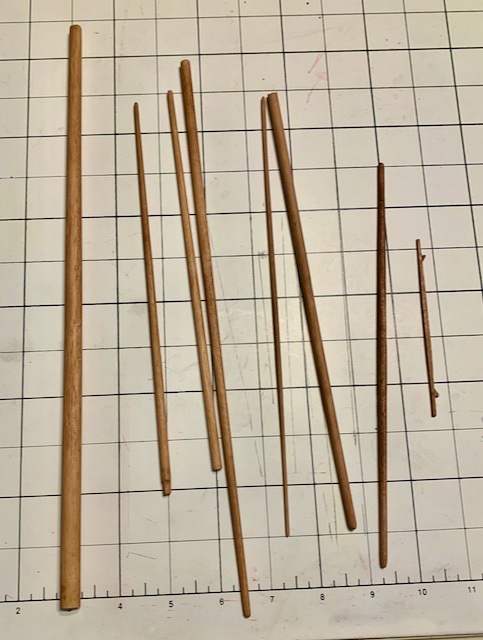
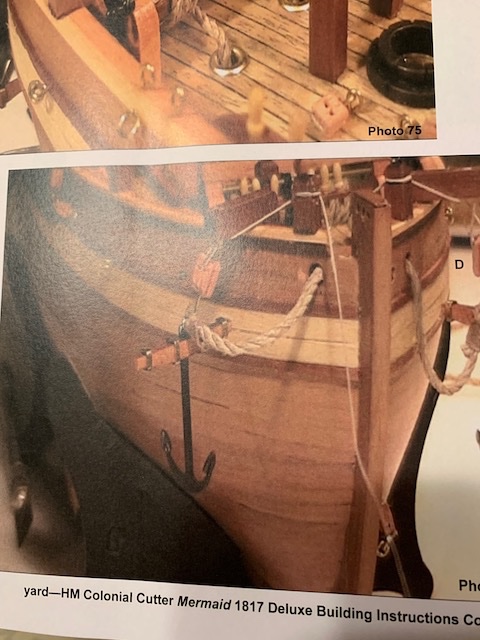
Got the anchor ropes in place and the cathead anchor tackle rigged. Will hold off before working out a final solution for securing the anchors to a bitt head. Now, time to turn to masts, spars, etc. Rick has pointed out a couple of issues with the kit: lack of decent placement for the spreader with the mast caps that come with the kit, and that the Mermaid does not seem to have had a topsail yard. From the cutter’s log, here are the spars and sails I find reference to: Yards, Spars, etc: Mast & topmast Bowsprit (reefing) Boom Squaresail yard Topmast studdingsail boom Flying jib boom Sails: Squaresail 1st jib 2nd jib 3rd jib (infrequent) Storm jib Jib topsail Lower studdingsails Topmast studdingsails Flying topsail Gafftopsail Mainsail Trysail Foresail The main arguments for no topsail yard are: As Rick points out, there is no topsail yard in any of King’s drawings The log refers only to a flying topsail and a gafftopsail (which also appears to be set flying in the cutaway drawing). Both are pictured (as flying) in one of King’s pencil sketches in the log There are no references to a topsail yard in the log “The squaresail” and “the squaresail yard” are always referred to in the singular in the log A couple of decent museum models also omit the upper yard. So here are my plans: Custom mast caps and spreader in line with Lennarth Peterssen p. 17-18 Omit topsail yard Use topsail yard dowel to make simple studdingsail booms on the squaresail yard The actual shaping of the masts and spars went much quicker and easier than I expected. I gave them a light stain just to bring out a little wood grain.
- 241 replies
-
- mermaid
- modellers shipyard
-
(and 1 more)
Tagged with:
-
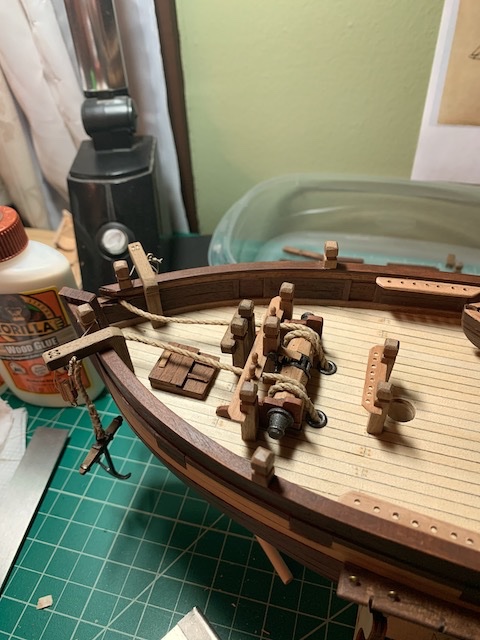
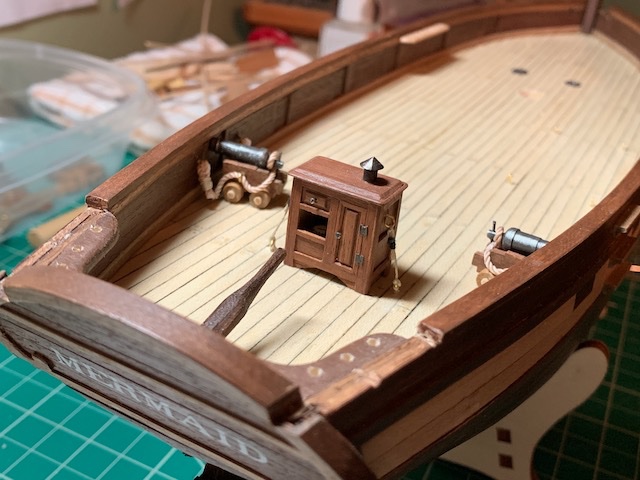
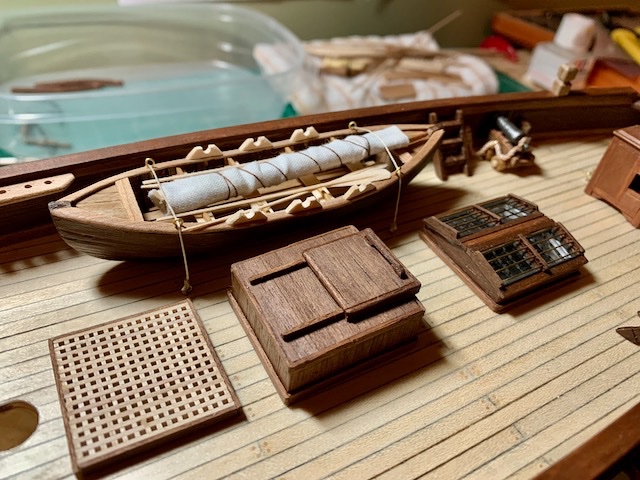
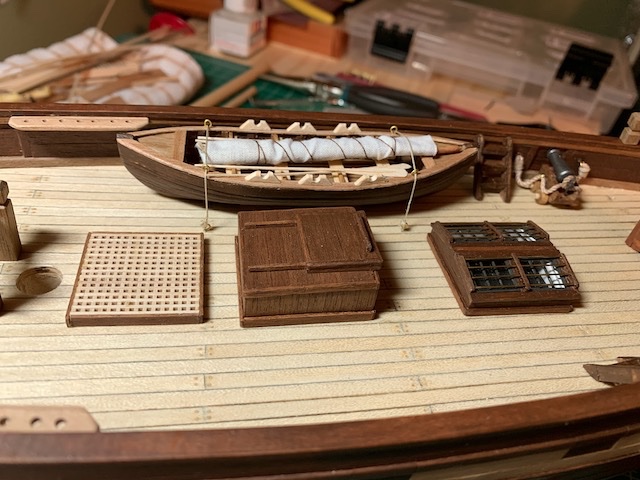
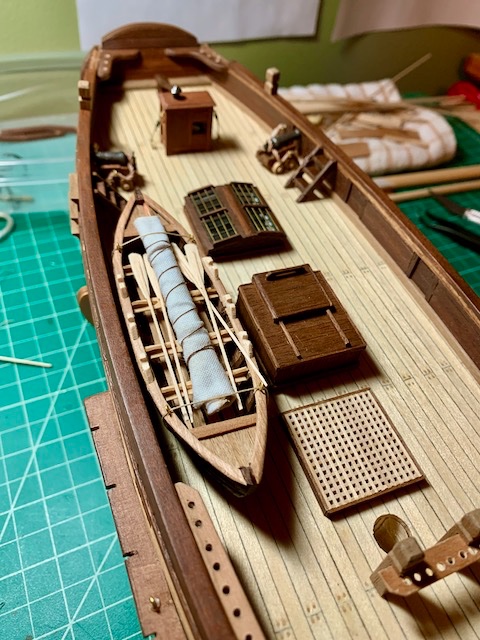
Getting most of the deck fixtures in place including some simple “tackle” for the carronades (just a breech line, really) and lines to secure the binnacle and whaleboat. I’m struggling a bit with the small lines/knots, but hopefully the learning curve will shape up. Keeping it fairly simple for now. Not the showpiece of my skill set. I placed the catheads and will be doing the anchor/cathead tackle soon. I realized that the instructions (and the finished model pic on the box and instructions) just have the anchor dangling loose from the cathead tackle. I’ll have to figure out how to address that (Rick, any thoughts?). I’m not above adding another pair of bitt heads on the cap rail just for the anchor.
- 241 replies
-
- mermaid
- modellers shipyard
-
(and 1 more)
Tagged with:
-
 JamesBhm reacted to a post in a topic:
HM Cutter Mermaid 1817 by JamesBhm - Modellers Shipyard - Scale 1:48 - first build
-
- 241 replies
-
- mermaid
- modellers shipyard
-
(and 1 more)
Tagged with:
-
Rick, I remember you mentioning that and it's entirely possible. You'd think the bulwark might be a little lower aft, but it's about the same (or even 1-2mm higher). At some point there's almost comfort in knowing there's nothing you can really do but just make it work. As for the three forepeak holes...I was definitely eyeing them and the bowsprit for a long time as I was dry fitting everything. I'll have to drill those holes and run the forestay line before permanently attaching and rigging the bowsprit. Settling the bowsprit in a slightly deeper notch looks like it has helped a bit, but we'll see. There are a couple of other things I'll probably do in a different order than the instructions (like not putting the boat(s) on the stern davits FIRST, where it's just begging to accidentally get smashed while handling the model). Thanks as always for your input. You've been a big help. As for the glitches in the instructions and a few idiosyncracies in the kit, I'm still weirdly satisfied with it all. I like the boat and I've enjoyed the build. The instruction booklet and I have settled into sortof a hostage/terrorist Stockholm Syndrome situation, so I'm just rolling with it!
- 241 replies
-
- mermaid
- modellers shipyard
-
(and 1 more)
Tagged with:
-
 JamesBhm reacted to a post in a topic:
HM Cutter Mermaid 1817 by JamesBhm - Modellers Shipyard - Scale 1:48 - first build
-
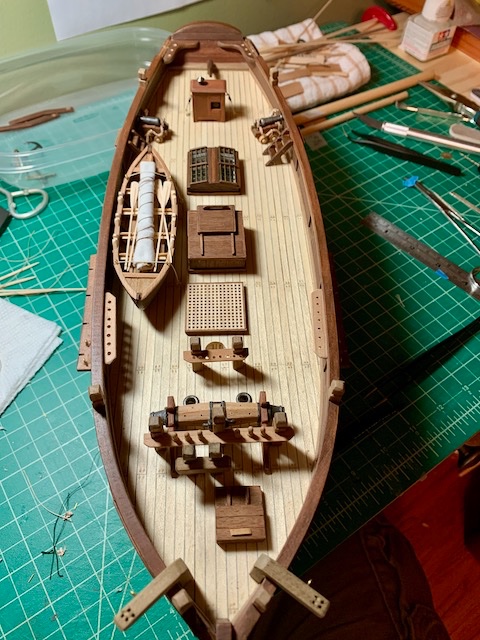
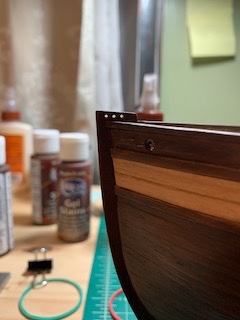
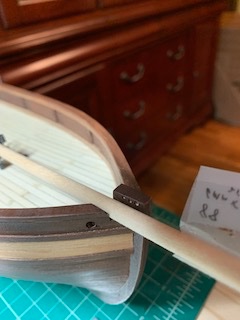
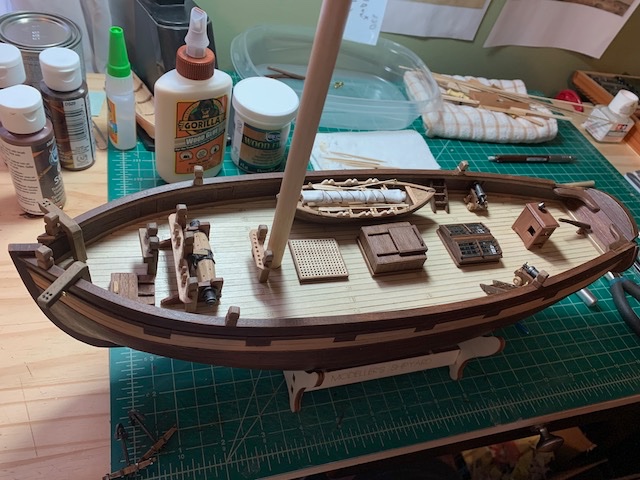
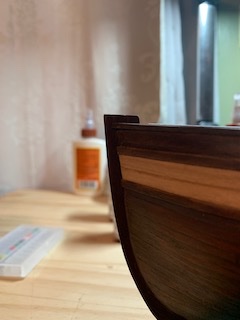
I’ve been busy on a final push to finish all the deck fittings and fixtures. Spent the week making bitts, cat heads, steps, pin rails, anchors, and more. The top pic is just a “dry fit” to start thinking about where exactly to place things. I still need to drill all the various holes and get the channels and bulwark pin rails in place to make sure nothing is going to interfere with rigging, belaying points, etc (a risk given how much I’ve customized my deck features). Meanwhile, I’m grappling again with the bulwark height issue that we have touched on before. The instructions say to cut a 15mm lower portion of the catheads for the upper “arm” to clear the cap rail. Deck to top of the cap rail for me is 19mm. That’s 4mm high! I went back through the instructions and pics of my build and I can’t identify anything I did wrong. The bulwark pieces are meant to be fitted above a first hull plank that is .4mm down from the top of the frames. My earlier pics look fairly on target. The main implications right now relate to the bowsprit. I either need an extra deep notch for it to sit in, or the base needs to be anchored a little higher on deck. Otherwise, it will angle upward too much. I’ll probably try to split the difference between both, but raising the base of the bowsprit might make it a little trickier to use the windlass pin rail for lines coming off the bowsprit. I’ll probably keep the knight head pin rail from the instructions so I have a couple of extra belaying points. The other issue it causes is that I barely have much stem post clearance to drill three holes for the forestay, but I think I can make it work.
- 241 replies
-
- mermaid
- modellers shipyard
-
(and 1 more)
Tagged with:
-
 JamesBhm reacted to a post in a topic:
Location of bell on a cutter
-
 JamesBhm reacted to a post in a topic:
HM Cutter Mermaid 1817 by JamesBhm - Modellers Shipyard - Scale 1:48 - first build
-
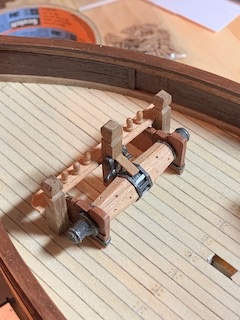
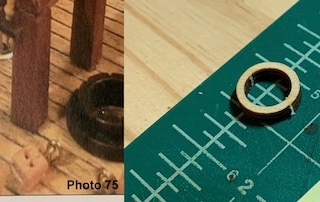
The windlass is done (pawl, bitts, and pin rail added). I think I’m at a key point in the build. I’ve had fun customizing, scratchbuilding, and kitbashing some of the deck fixtures, but it’s time to get the overall “big picture” build back on the rails. I’m going back through the instruction booklet and encountering some minor points of frustration. Some of the instructions for deck fittings explicitly say to glue them in place, others don’t (but make no reference to gluing later). Instructions for one pin rail say to glue pins in it, instructions for the other say to attach the pin rail but make no mention of pins, etc. The anchors suddenly appear fully assembled (although they’re pretty self-explanatory). I also looked everywhere for the mast heel pictured in one of the photos before discovering it’s just a simple ring in the laser cut plywood sheet. I’m sure these are all non-issues for experienced builders, but as a first-timer I worry about “assuming” something not explicitly stated in the instructions. I might have to dust off the build DVD and watch a bit. That being said, my plan is to first drill and/or shape all of the necessary holes in the deck or bulwarks before attaching any deck fixtures, then get pin rails, channels, and rigging-related parts in place. That way I can double-check placement of my deck fixtures and make sure I haven’t painted myself into a corner with any of my custom pieces (e.g., the whaleboat and the starboard pin rail may be a bit tricky, my windlass takes up a bit more real estate, etc). I also need to finish making all of the less glamorous pieces (catheads, bitts, forward hatch, etc). One issue for future builders who might read this: Rick and I discussed the issue of the forward bulwark height earlier in this log (i.e., the bulwark pieces seem to be a bit high at the bow). This means I may need a deeper “scoop” for the bowsprit (or the base may need to be anchored a bit higher) in order to maintain the correct angle. It also means I have precious little clearance for the rigging holes that will need to be drilled at the top of the stem. Both may take some fiddling.
- 241 replies
-
- mermaid
- modellers shipyard
-
(and 1 more)
Tagged with:
About us
Modelshipworld - Advancing Ship Modeling through Research
SSL Secured
Your security is important for us so this Website is SSL-Secured
NRG Mailing Address
Nautical Research Guild
237 South Lincoln Street
Westmont IL, 60559-1917
Model Ship World ® and the MSW logo are Registered Trademarks, and belong to the Nautical Research Guild (United States Patent and Trademark Office: No. 6,929,264 & No. 6,929,274, registered Dec. 20, 2022)
Helpful Links
About the NRG
If you enjoy building ship models that are historically accurate as well as beautiful, then The Nautical Research Guild (NRG) is just right for you.
The Guild is a non-profit educational organization whose mission is to “Advance Ship Modeling Through Research”. We provide support to our members in their efforts to raise the quality of their model ships.
The Nautical Research Guild has published our world-renowned quarterly magazine, The Nautical Research Journal, since 1955. The pages of the Journal are full of articles by accomplished ship modelers who show you how they create those exquisite details on their models, and by maritime historians who show you the correct details to build. The Journal is available in both print and digital editions. Go to the NRG web site (www.thenrg.org) to download a complimentary digital copy of the Journal. The NRG also publishes plan sets, books and compilations of back issues of the Journal and the former Ships in Scale and Model Ship Builder magazines.


