GeorgeKapas
-
Posts
297 -
Joined
-
Last visited
Content Type
Profiles
Forums
Gallery
Events
Everything posted by GeorgeKapas
-
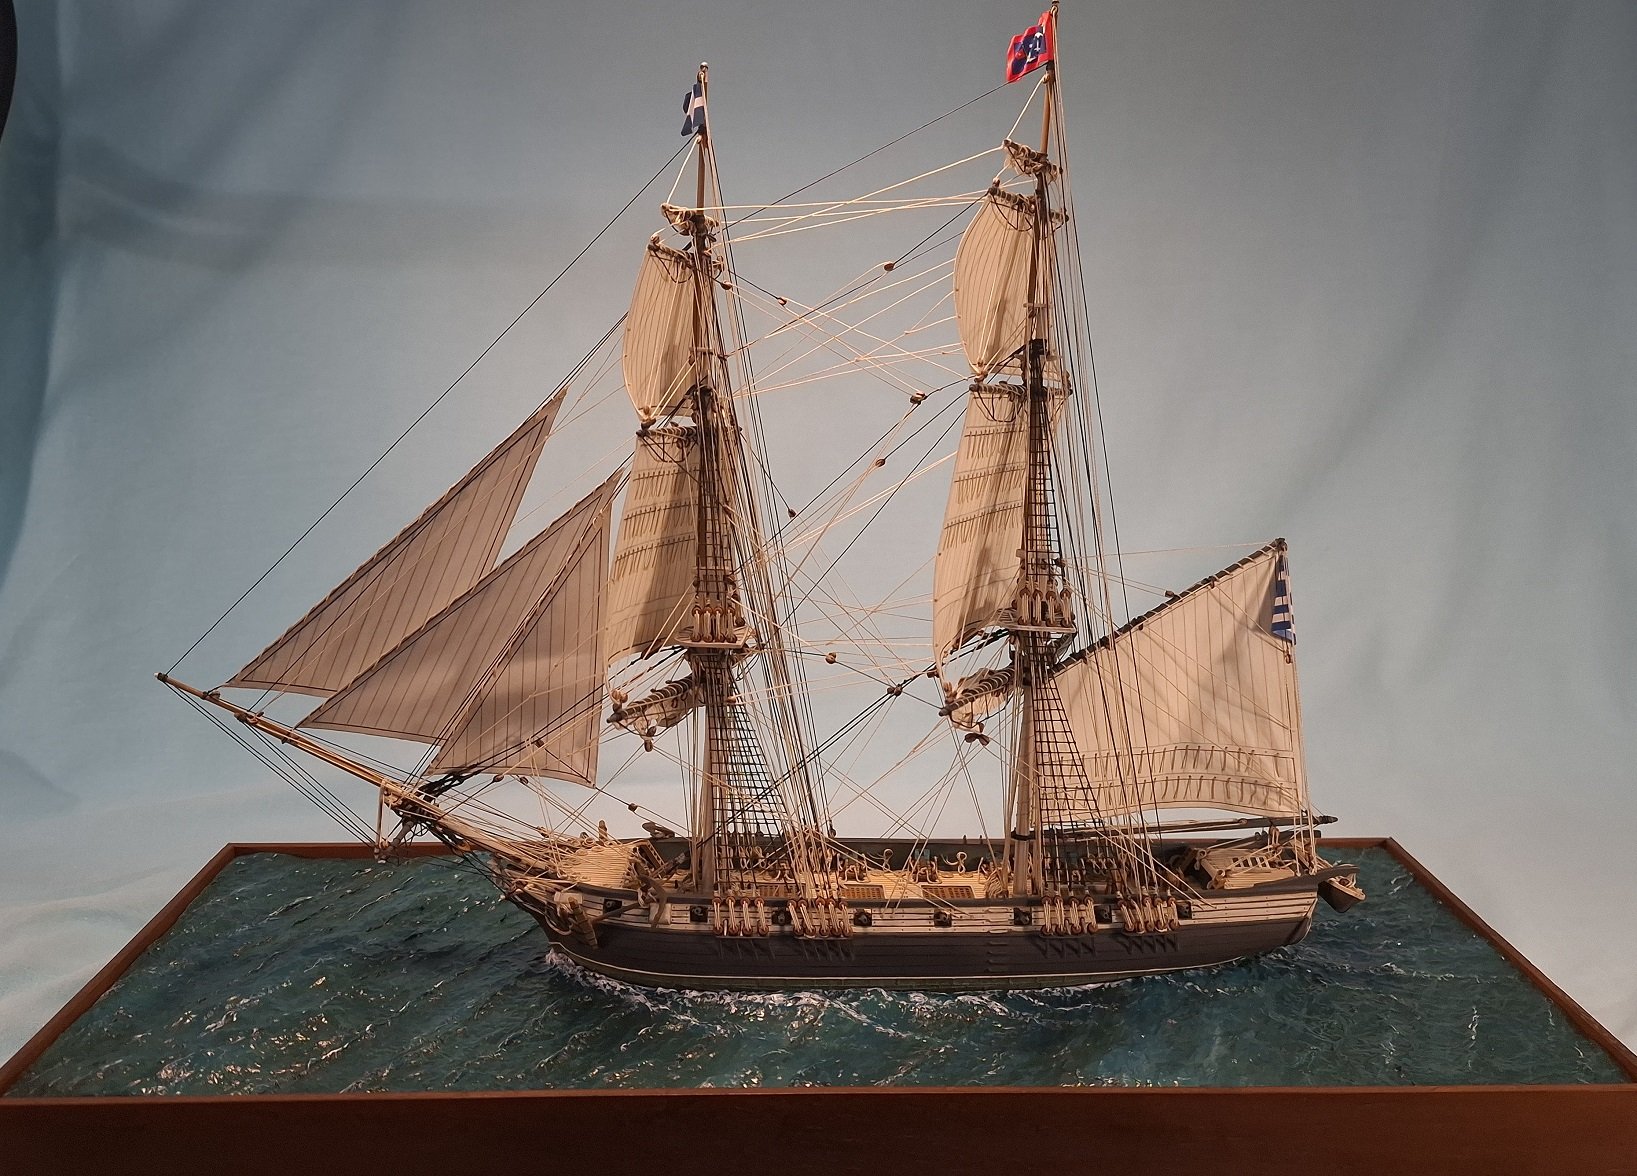
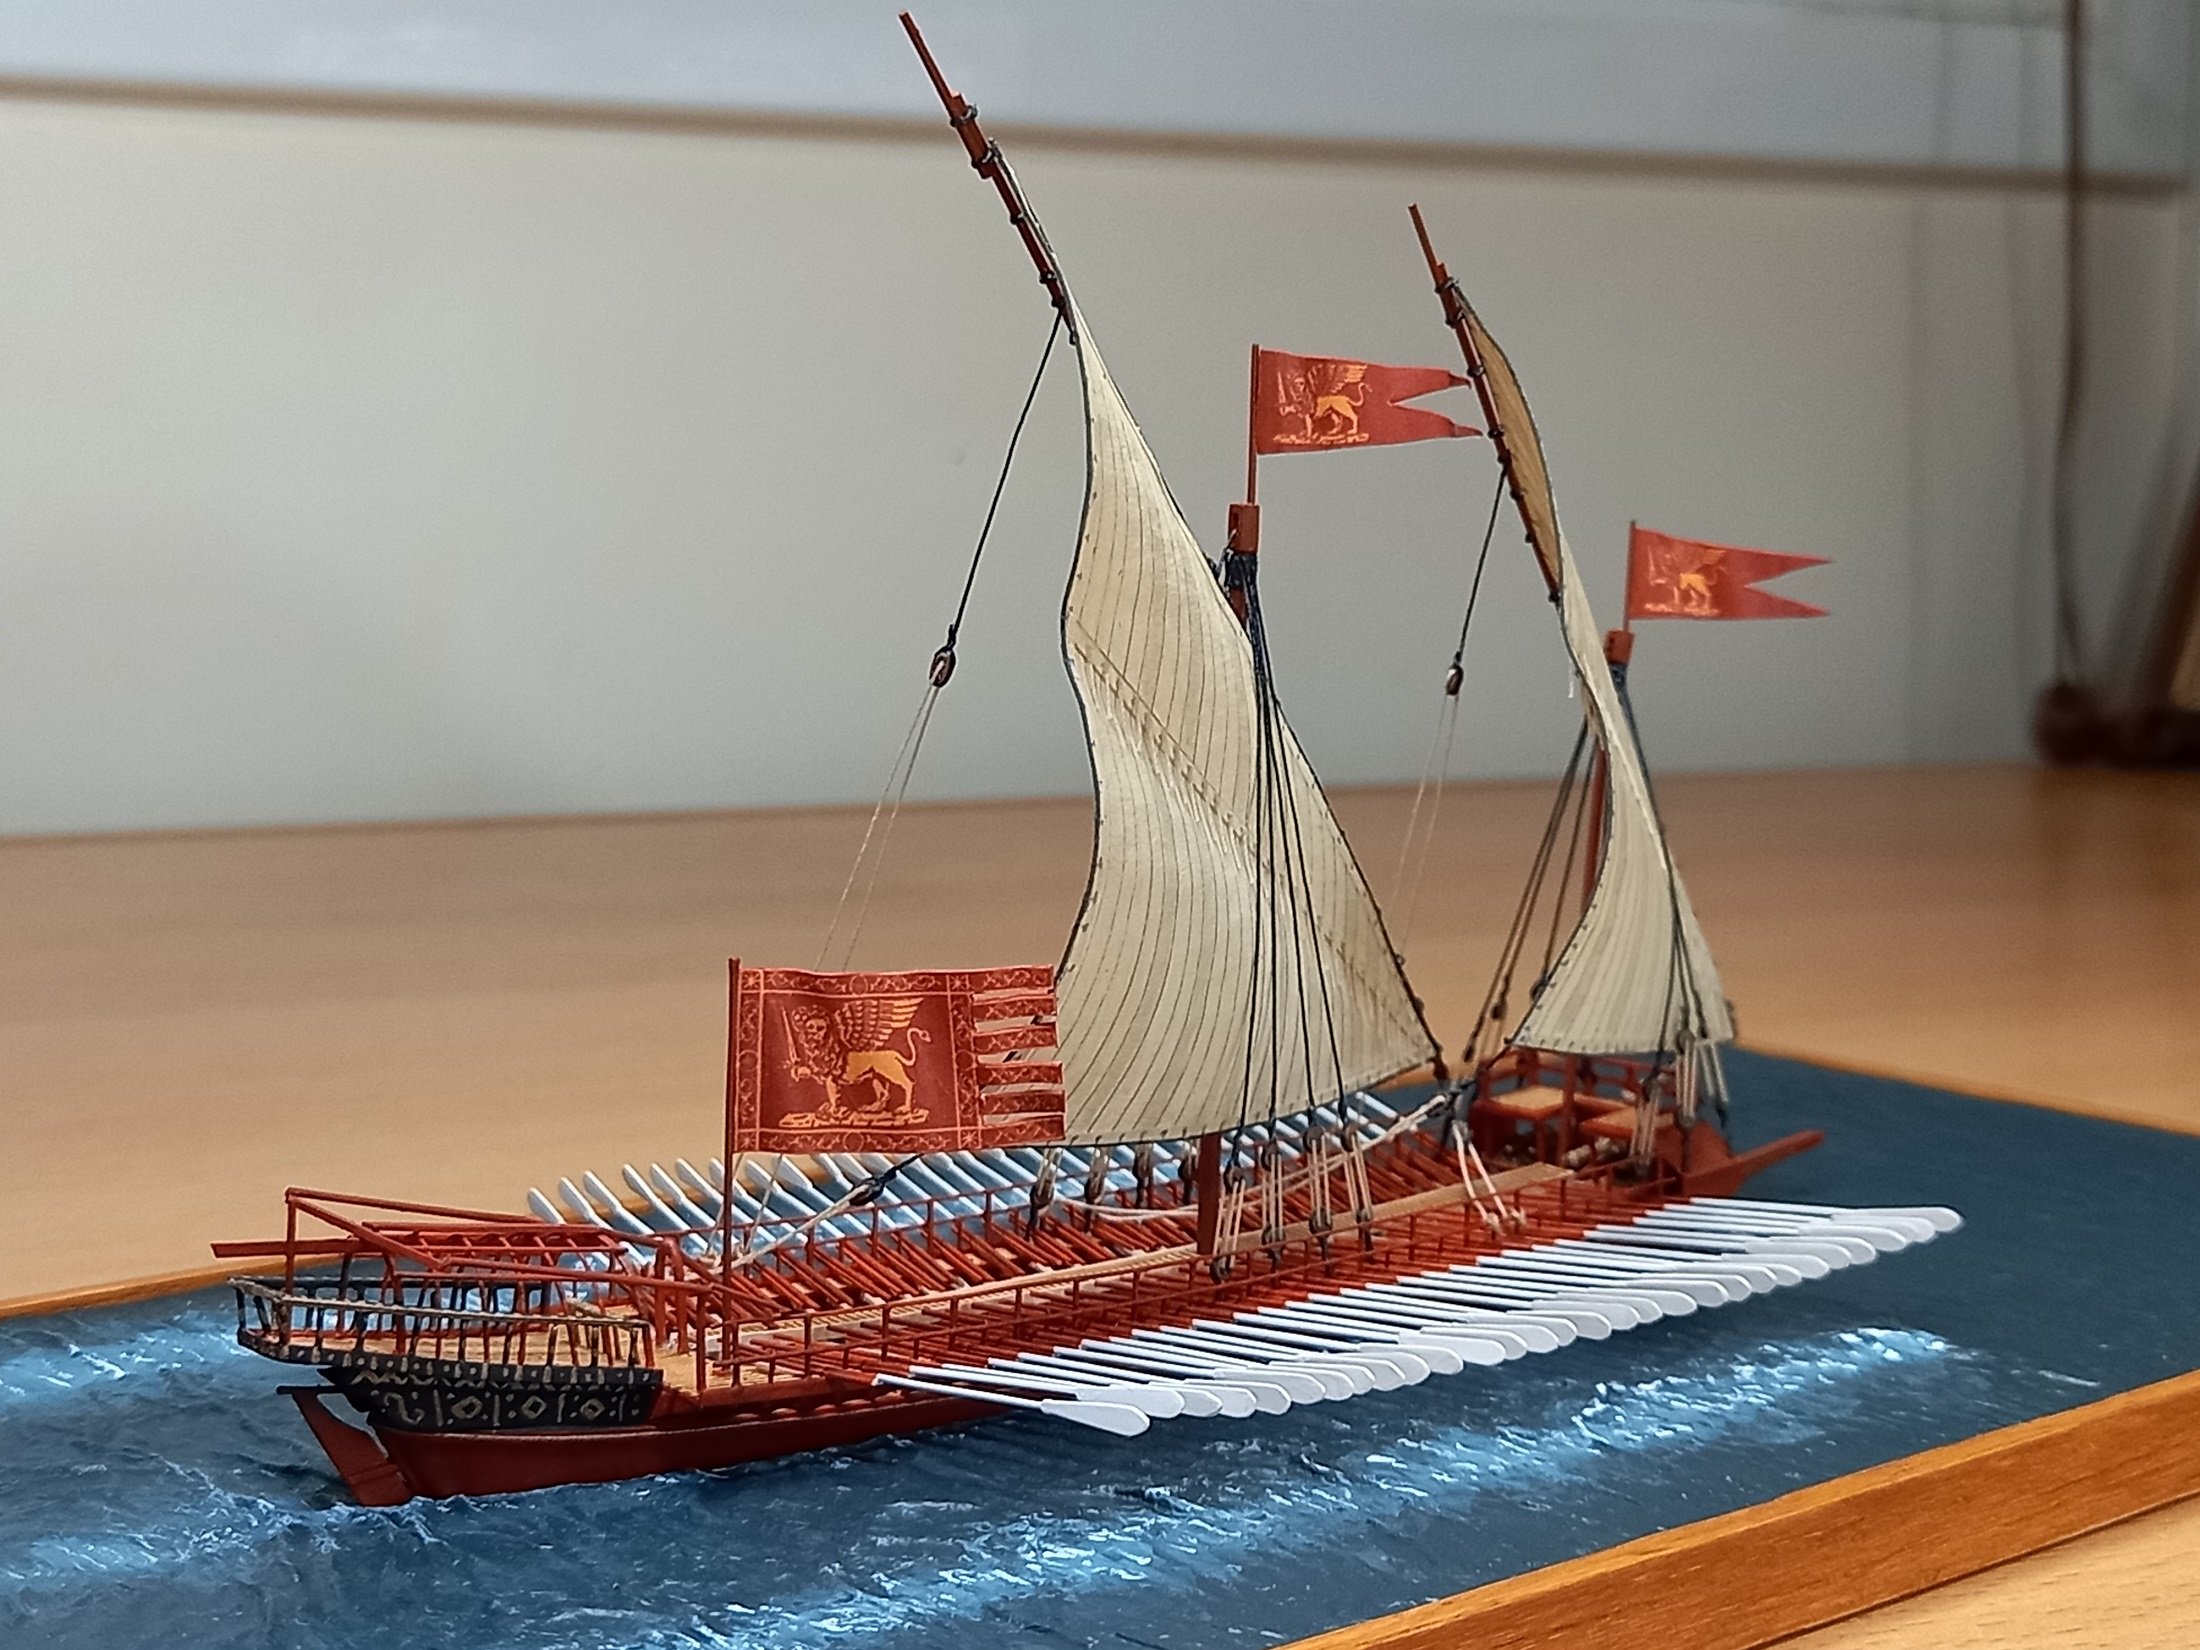
 Here is most of the equipment. The guns were an issue. Greek sources state the armament as 4 armstrongs. One source described them as 40lb. The engravings and the one ottoman painting showed no gunports or folding bulwarks etc. As far as I could see these blockade runners were not armed in confederate service. With civilian crew, arming ships is an act of piracy. My idea was that the guns were land pieces that were later disembarked on Crete. Long story short, the consensus was to put them in naval carriages and open 4 small gunports.

- 17 replies
-
- 5
-

-
- Greek
- blockade runner
- (and 4 more)
-
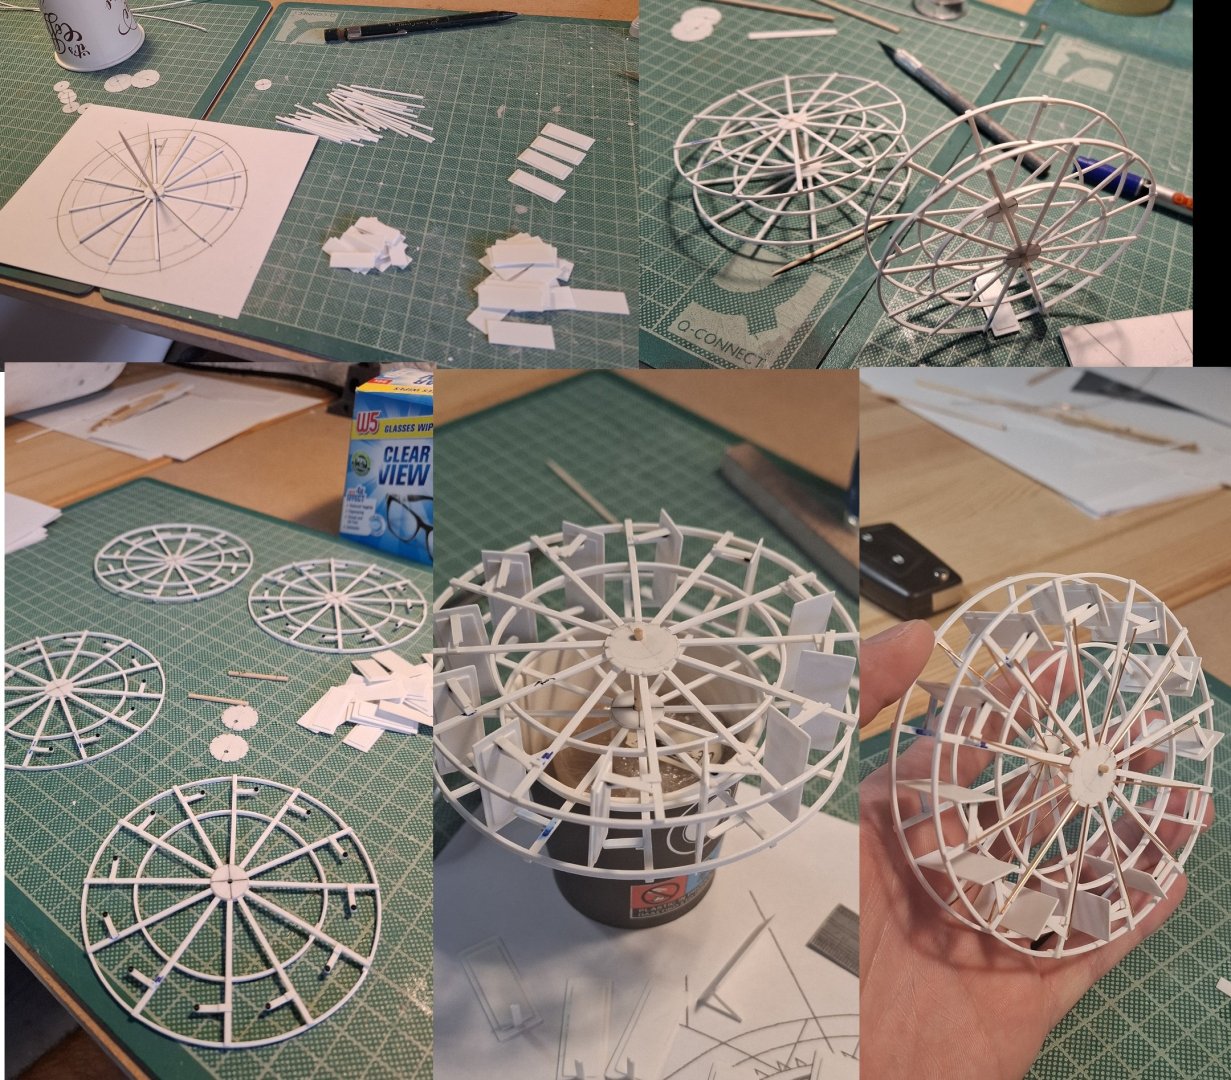
The prossess of making one of the winches. Once again I was trying to match details from the few similar models of blockade runners I could find.

- 17 replies
-
- 5
-
-
- Greek
- blockade runner
- (and 4 more)
-
The whaleback cover for the forecastle was another problem for me. The ribs underneath were visible, so I had to make them, but the Hope plans had no lines for them. I had to make them myself. Not ideal, but the end result was fair enought. Eventually little was visible looking across the deck.

- 17 replies
-
- 6
-
-
- Greek
- blockade runner
- (and 4 more)
-
The feathered paddleswheels were done mostly with styrene. They dont articulate, I did them like that mostly to suggest the mechanism. They were also done all the way around (as opposed to only the lower halfs) because they are visible throught the openings of the side of the covers. In any case, it was a fashinating experiment of such a built for me
- 17 replies
-
- 6
-
-
- Greek
- blockade runner
- (and 4 more)
-
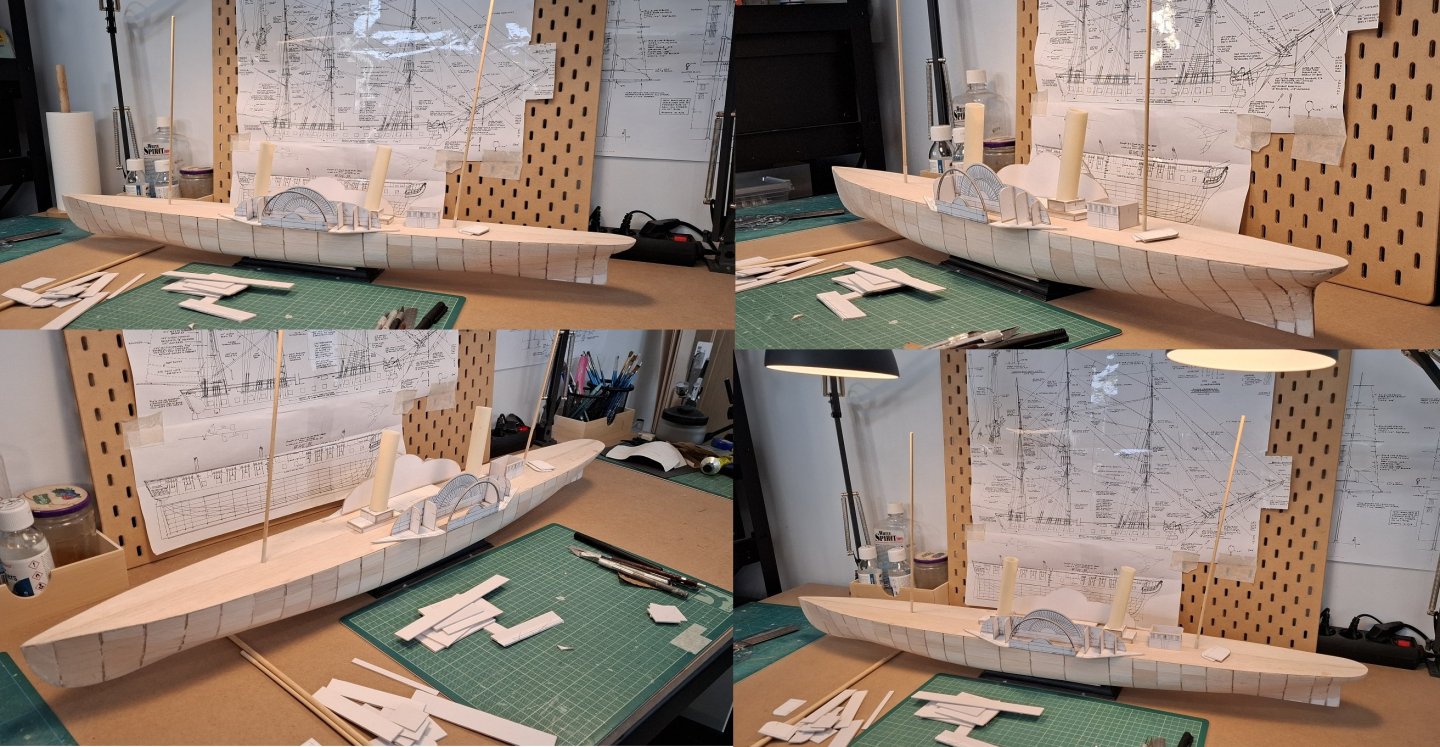
The two paddlewheel covers were done with a compination of balsa and strips of plastic styrene. The funnels are plastic piping. Originally I had designed to have the wheel on the bridge covered with a panelled wheelhouse, then decided to have it in the open. The cover was very visible when viewed from the profile, and the engraving of the ship showed no such thing, so...

- 17 replies
-
- 6
-
-
- Greek
- blockade runner
- (and 4 more)
-
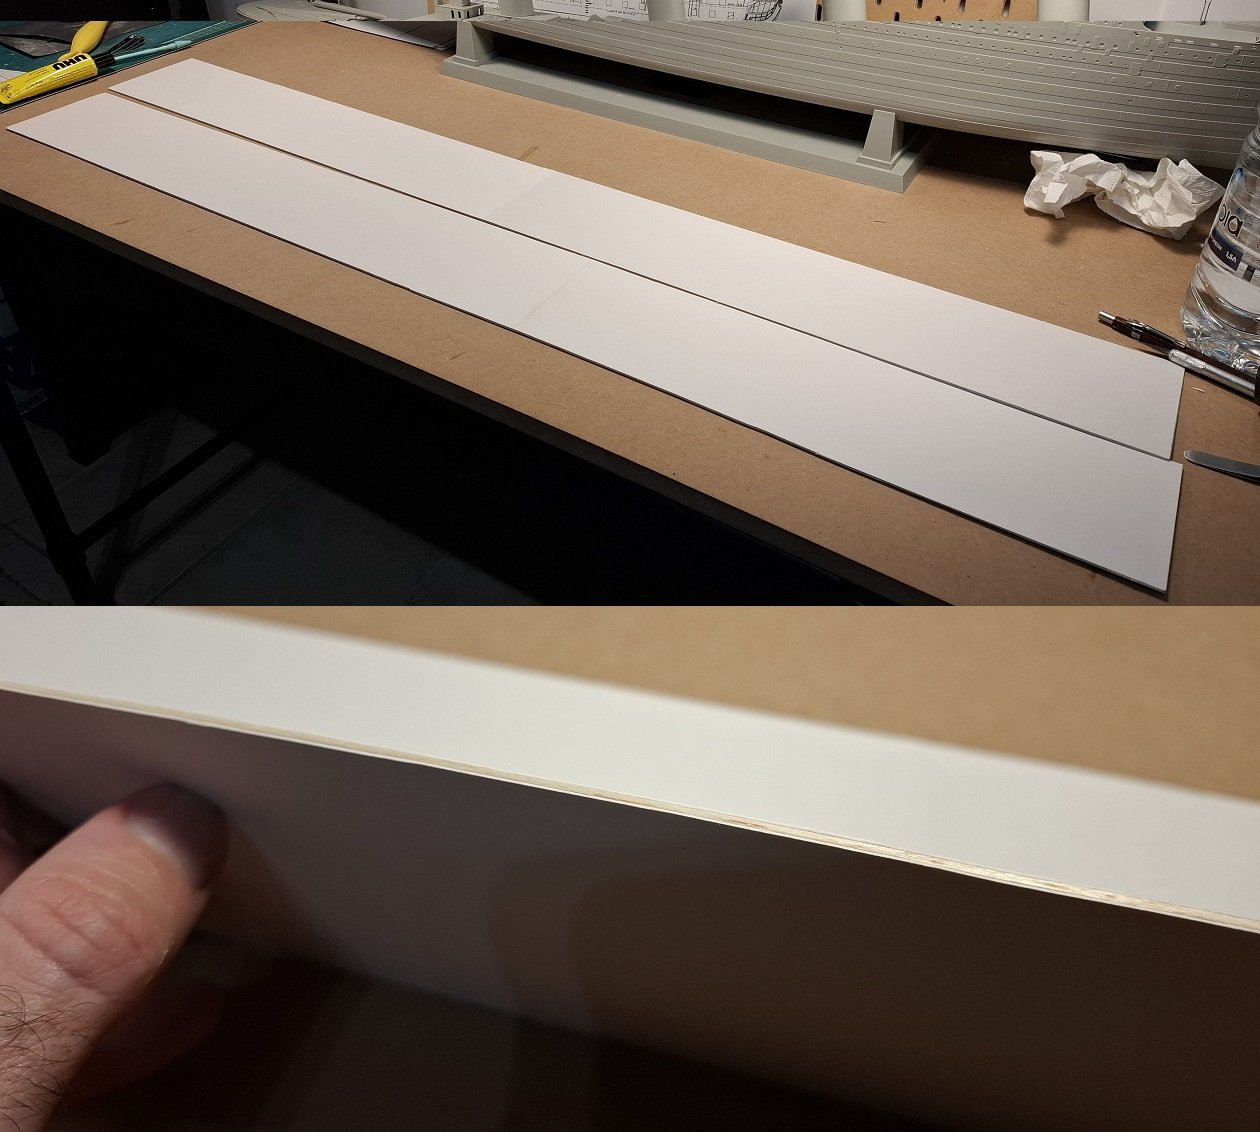
Above the balsa, just like the rest of my projects, I "plank" it with stripes of thick paper and coat it with thinned woodglue that hardens and protects the balsa underneath. Then a coat of filler.

- 17 replies
-
- 4
-
-
- Greek
- blockade runner
- (and 4 more)
-
So this is the ship talking shape. It is not solid balsa all the way through, I just put plugs between the frames (which are hardened with superglue) and sand them down
- 17 replies
-
- 5
-
-
- Greek
- blockade runner
- (and 4 more)
-
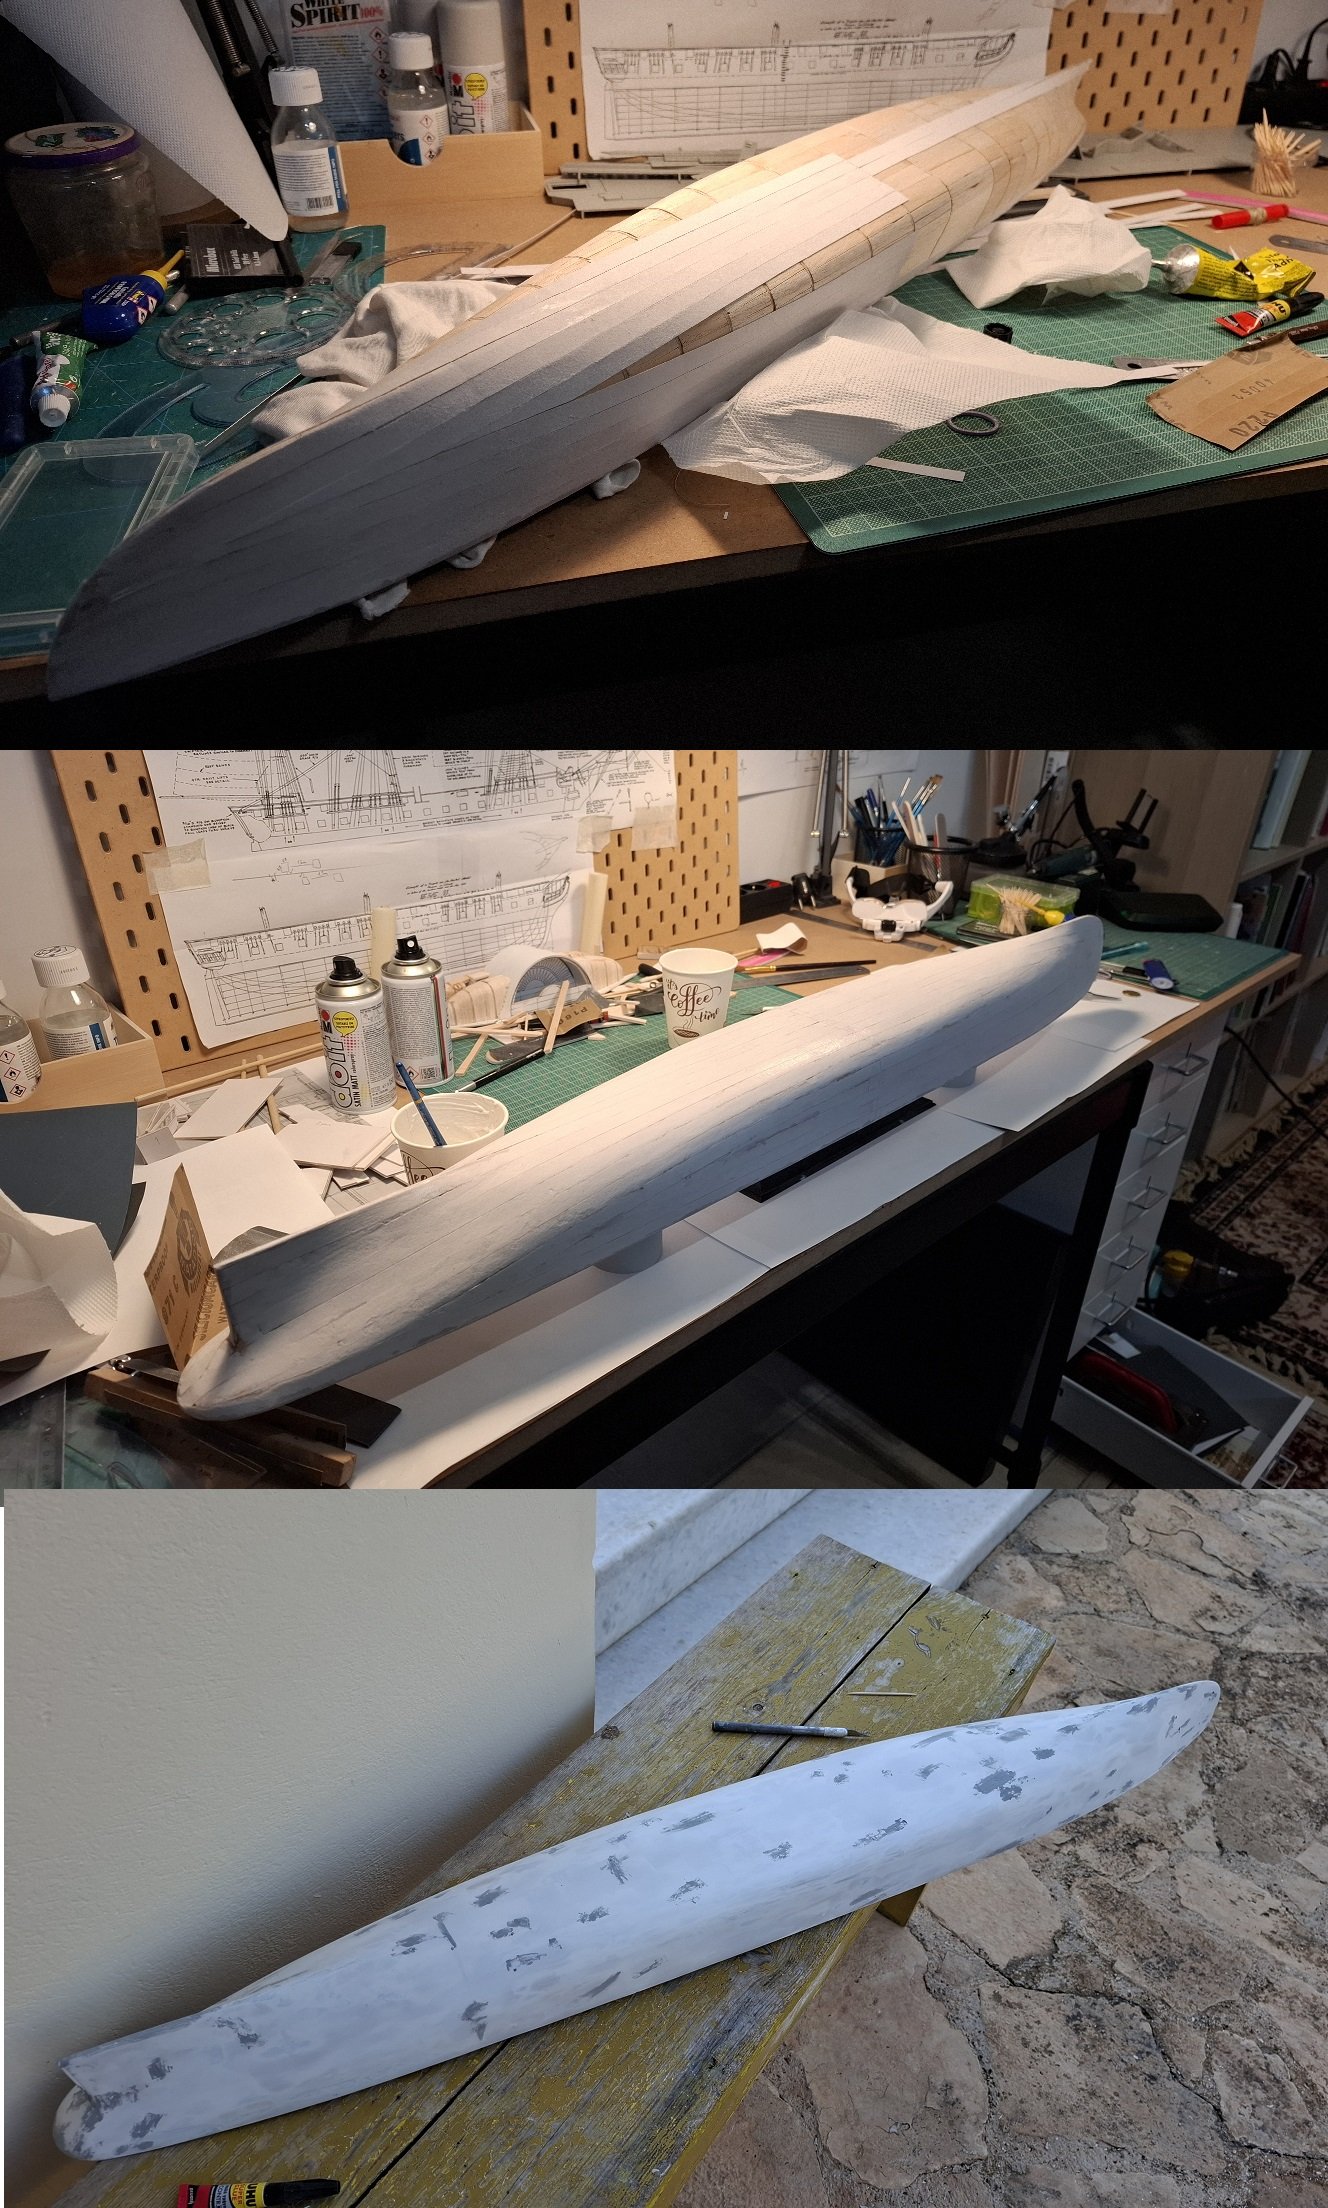
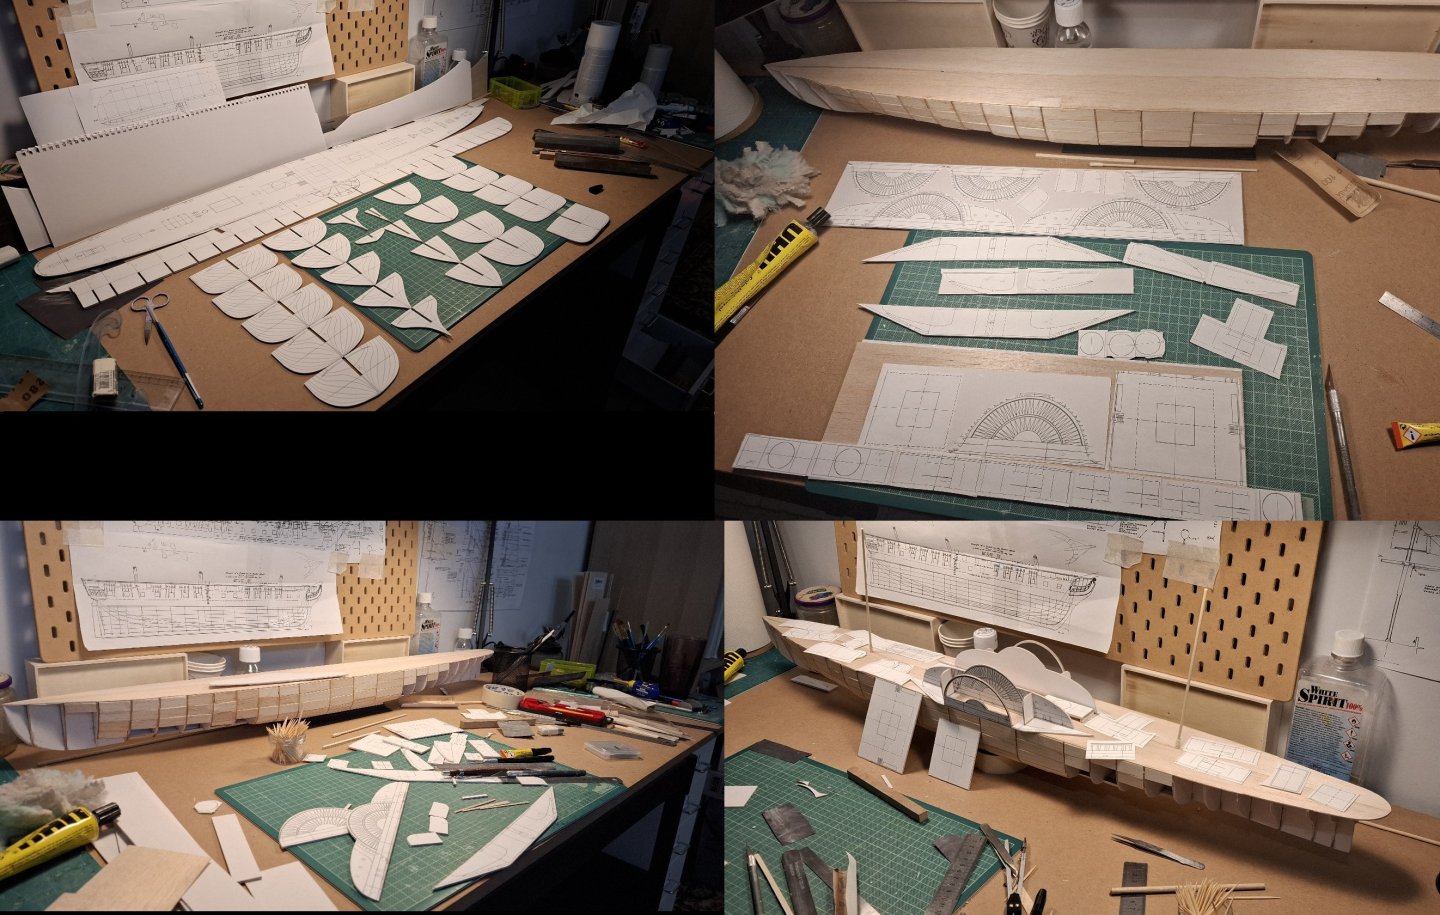
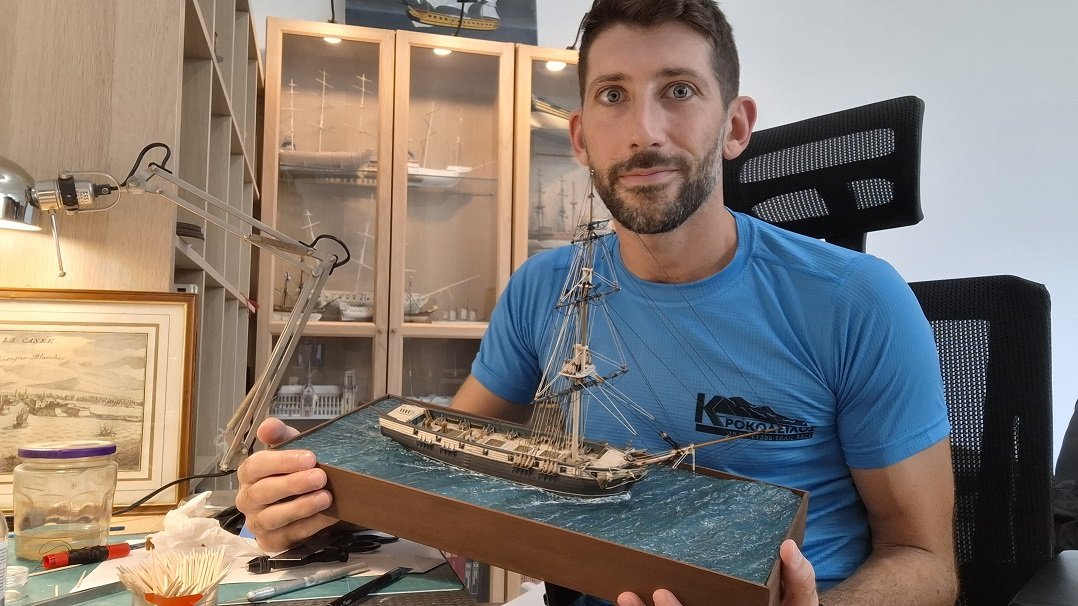
Today and tomorow I'll slowly post all the built. My building method is rather unique, similar to that of the brig Ares, but it suits me, so it is what it is. The museum insisted on a a large model and not the kit-sized ones I prefer. We found the middle road at 1/72 for a meter long model, which was at the upper limit of what I can do with my methods. The frames are made out of 1 or 2 mm balsa sandwiched between two sheets thick paper. It strengthens the balsa amazingly a lot, while i can still cut and shape it with the modeling knife. In fact the entire ship was done with the exacto knife.

- 17 replies
-
- 4
-
-
- Greek
- blockade runner
- (and 4 more)
-
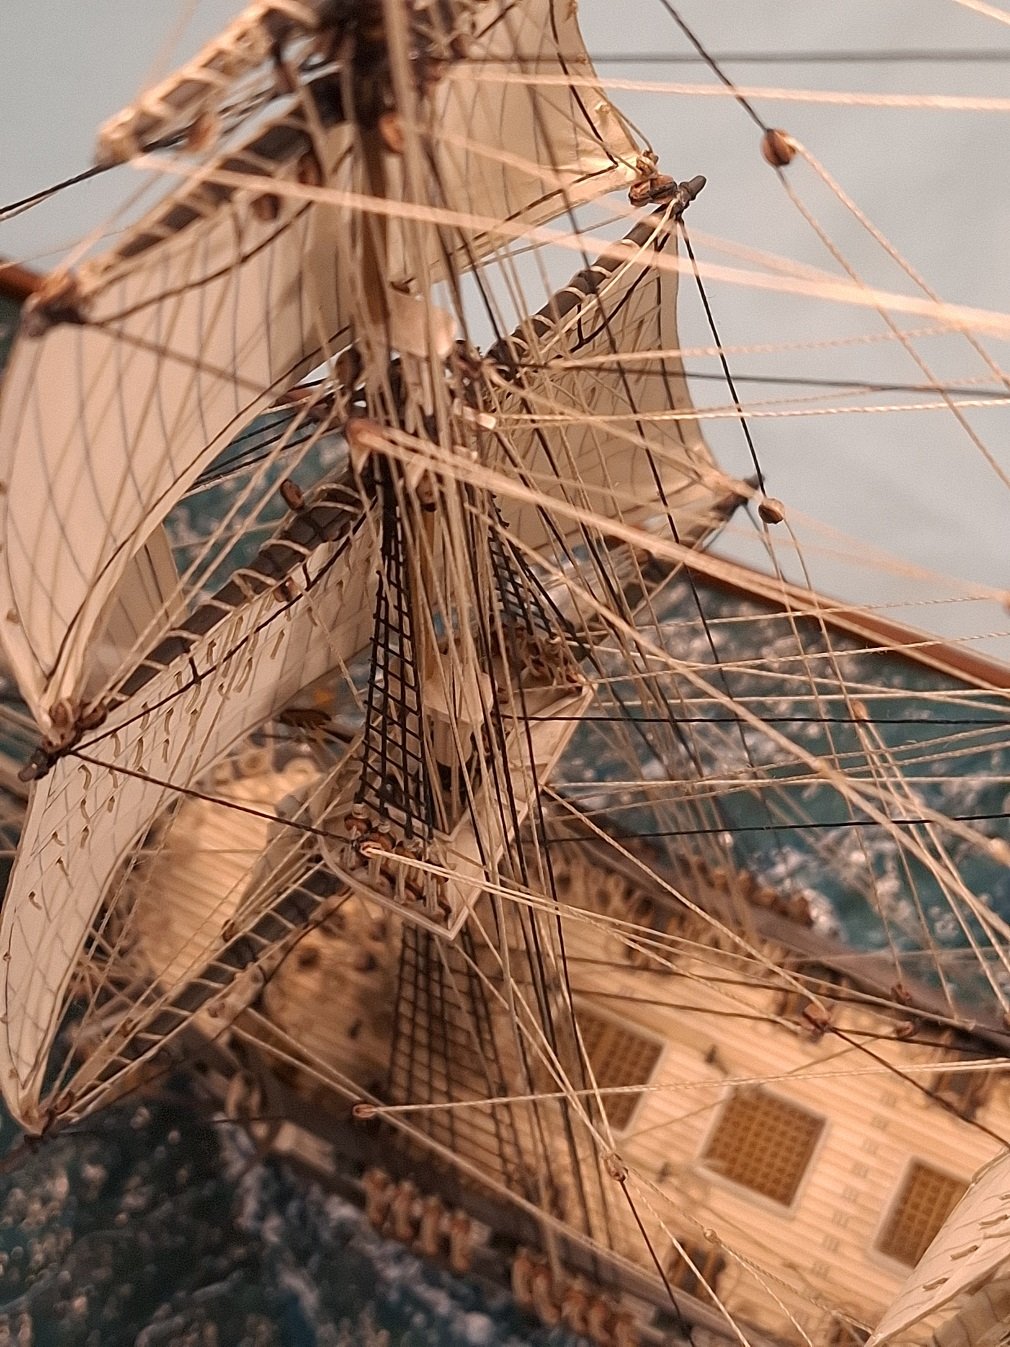
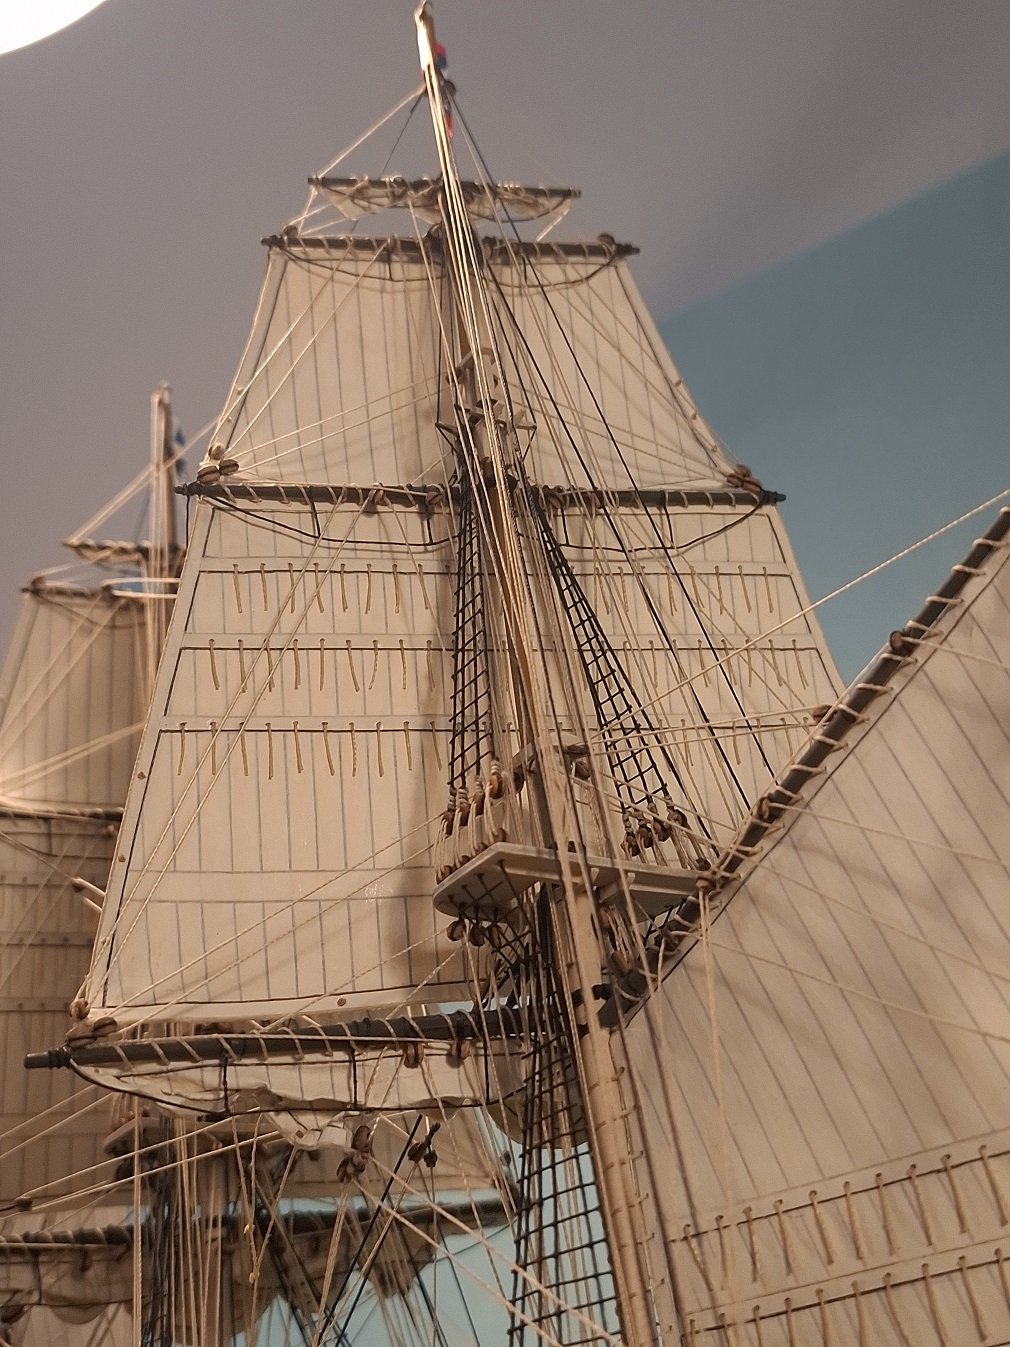
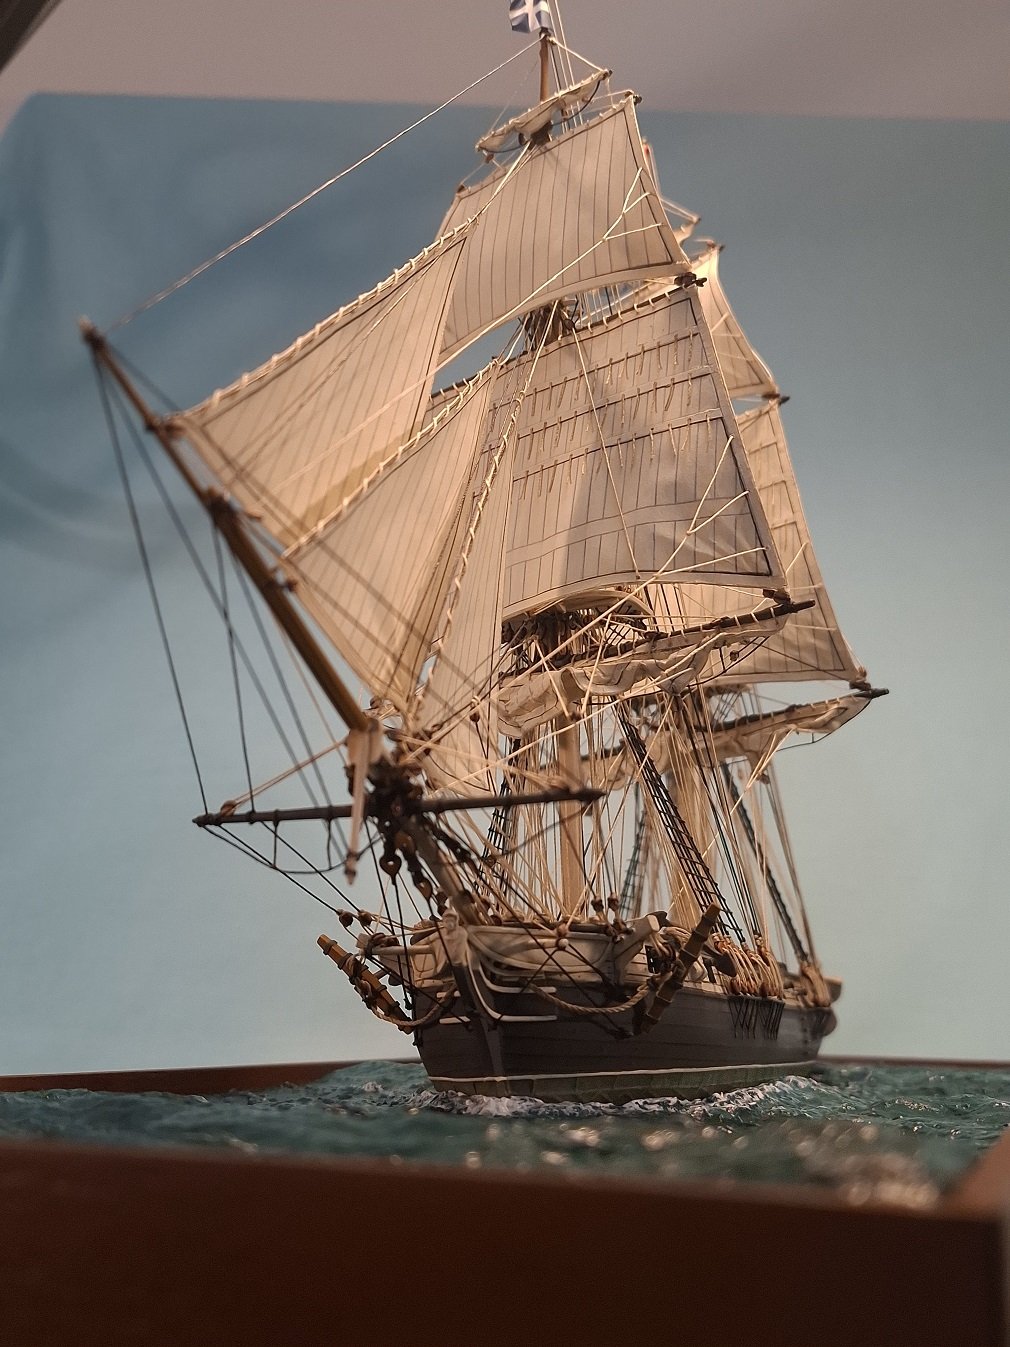
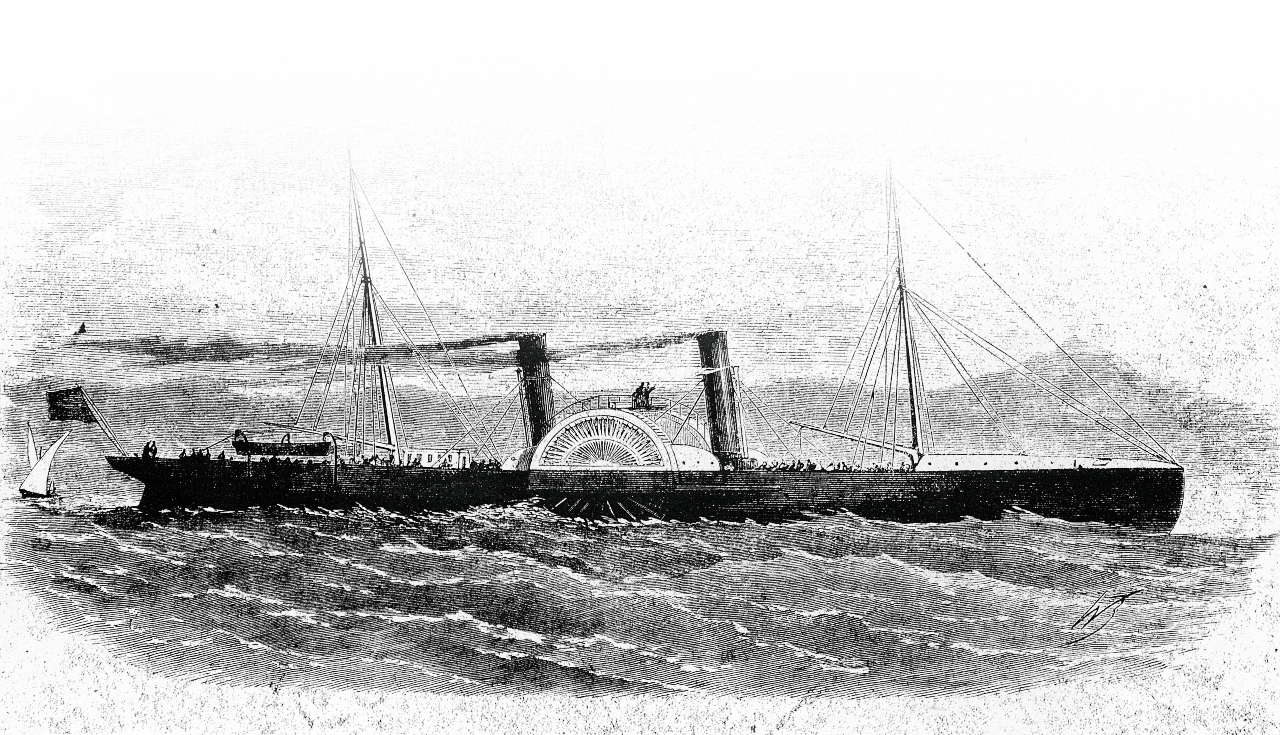
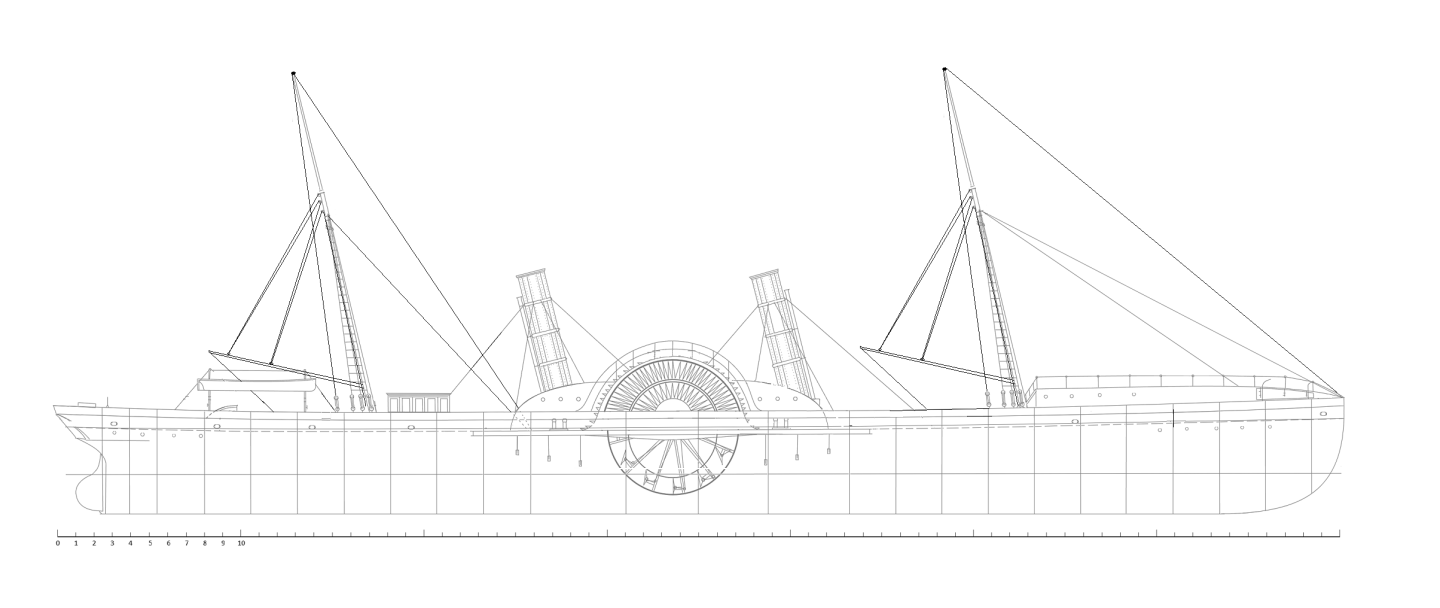
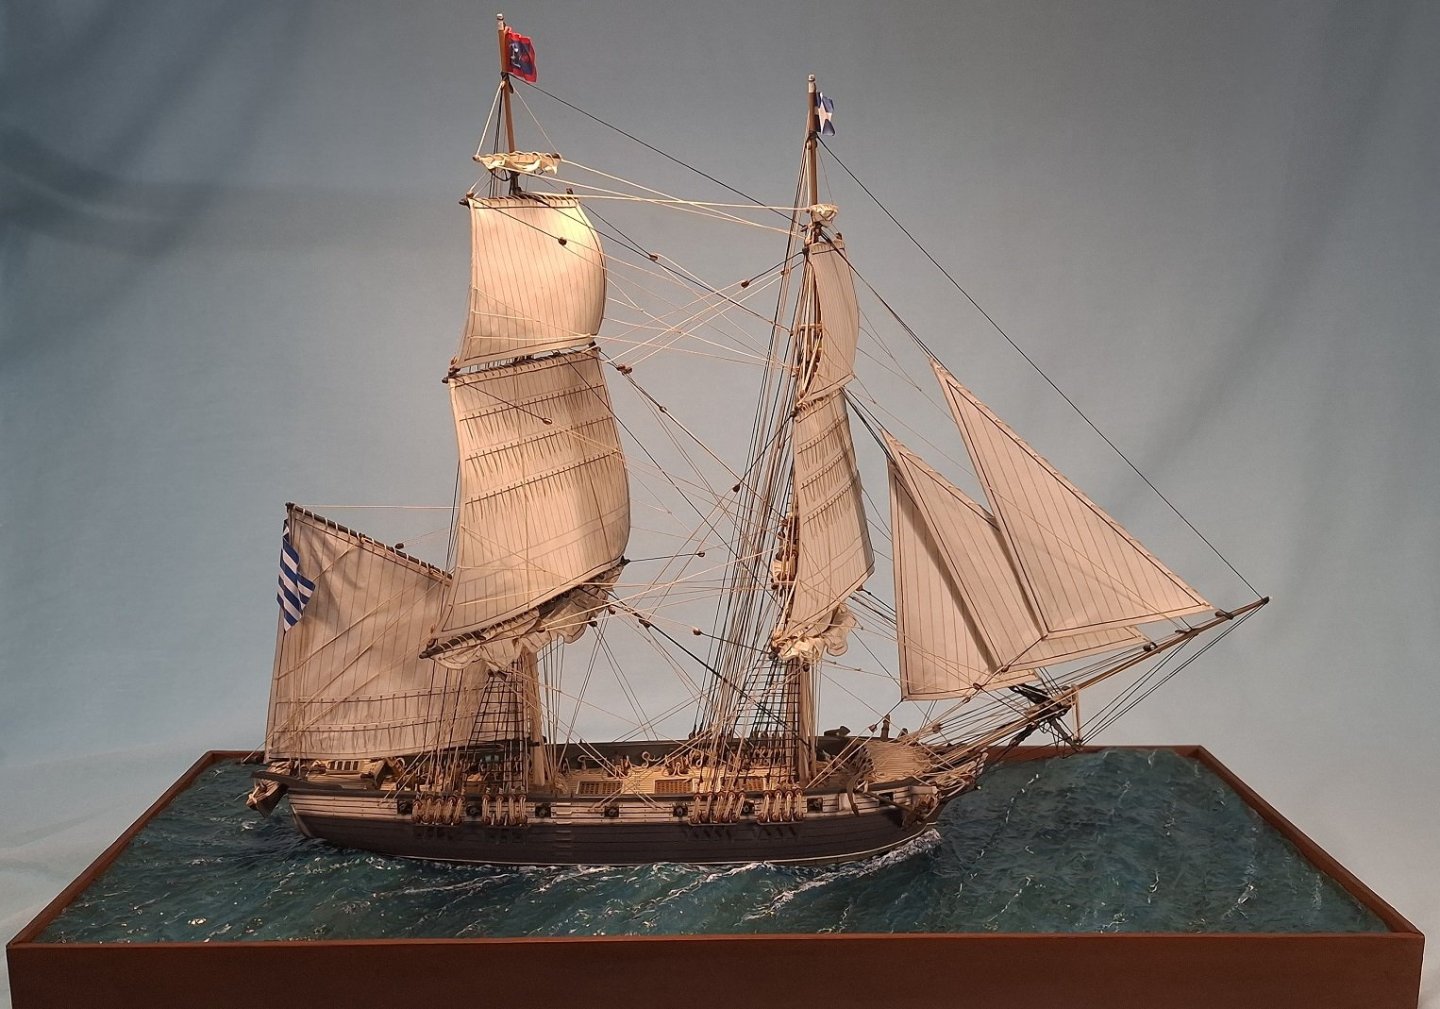
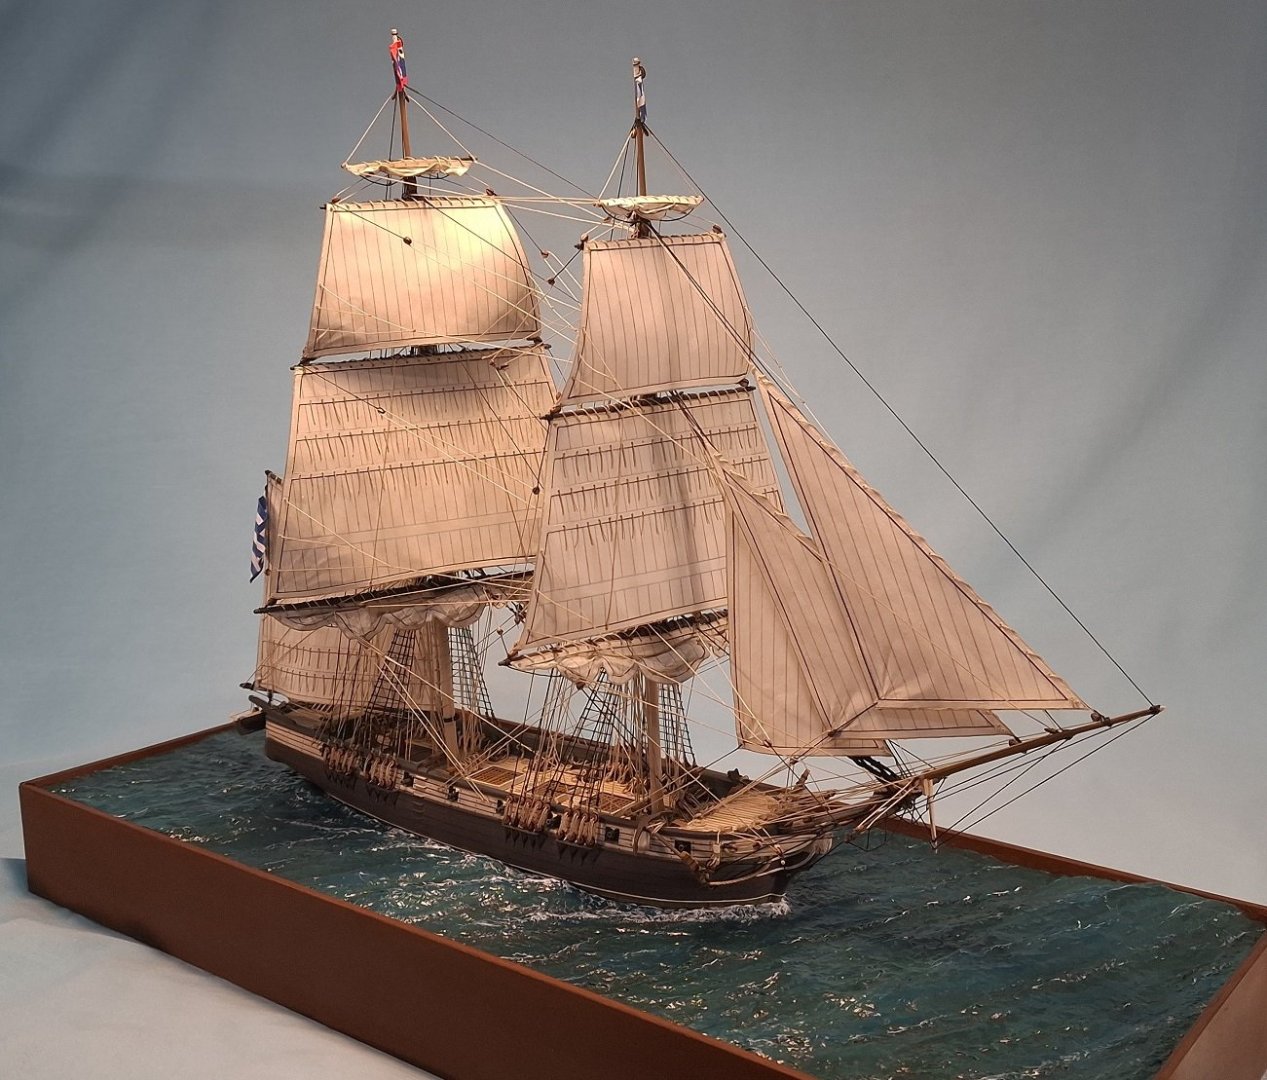
Good evening all! So once again I have not posted for a while, but this year was different. Many projects were finished, and many more are on the way. In fact I have been modeling quite a lot, including commisions. Arkadion was originally ordered by the Confederate states as CSS Dream, but the end of the American civil war in 1865 found it still at the stocks in Liverpool. The following year, 1866, the Cretan revolt began, and the Greek state bought several of these unfinished confederate blockade runners in order to supply the revolutionaries on the island. Arkadion was the first such ship, and managed 23 such supply runs until the Ottoman navy managed to intercept it. It is indeed a historic ship for my island, and I wanted to make a model of her, donating it to the Maritime Museum of Crete. The museum has a large collection of post WW2 vessels, but no earlier historic ships. The plans of such ships are extremely rare. In fact none I could find of Dream. Never the less, the plans of CSS Hope, the next "class" of blockade runners were abailable, and so I modified them to approach Arkadion as best as I could. The lines were re-formed to match Arkadion's dimensions, the deck arrangement and superstructure was moved around to match the only depiction of her that we have. Obviously all these were done respecting the opinions of the Museum's curators, since I had informed them of my intention to donate the finished model. Here is the early version of the plans
- 17 replies
-
- 4
-
-
- Greek
- blockade runner
- (and 4 more)
-
Thank you all! Although Ares is technically finished, I'll return to her in a couple of weeks, to replace some rigging that need improvement. She is a test for me as well, so I might as well continue with experiments. Also, since many suggested it in other social media, It would be a good idea to populated the decks with some sailors. Nevertheless, 1/144 scale (14-15mm tall) figures are quite rare. And even if I could get some printed, I would prefer quite a number of them, so it would be difficult. In any case, if anyone has suggestions, or links, they would be most greatly appreciated. In fact I was thinking of a 2d-partial 3d figure built, where I would print color pictures of sailors on paper, and add hats, shoes etc to give 3d effect. If you know nice drawings/plates of such a thing, I would be indebted to you as well.
-
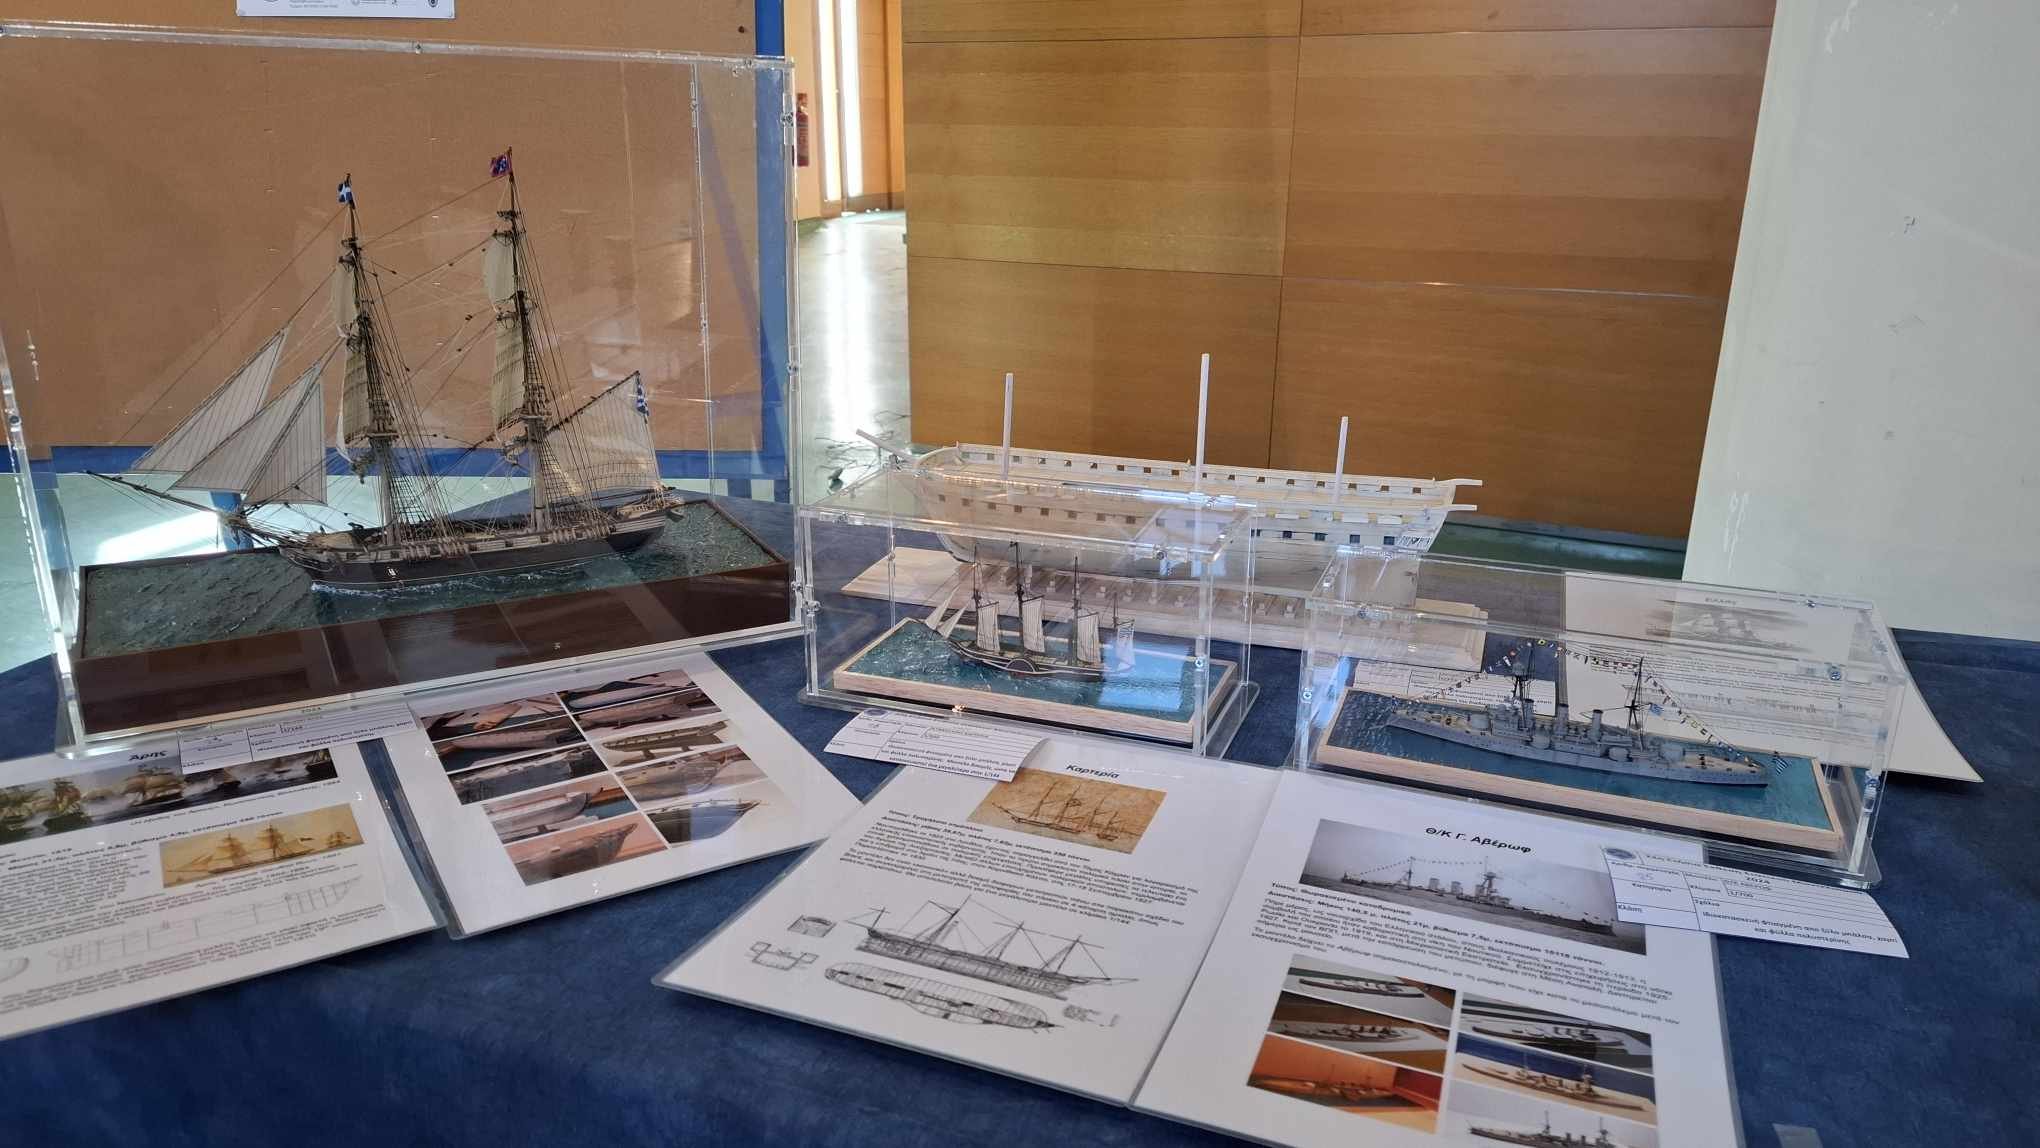
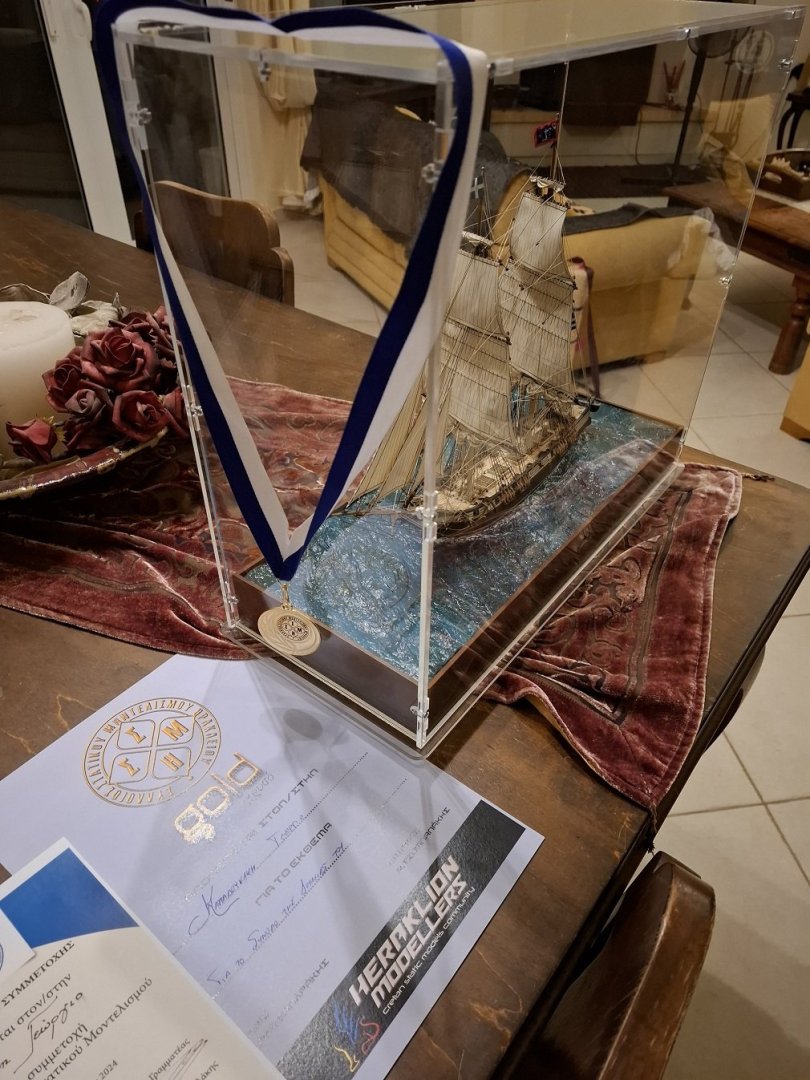
Thank you all. This was my corner, basically my first proper exhibition. And the gold medal, honorary, since we didnt organize a competition, but the three best models were given some recognition regardless. The small 1/350 paddlesteamer Karteria, which I havent made a thread, and the bigger 1/144 frigate Hellas, u/c, also needing a thread.

-
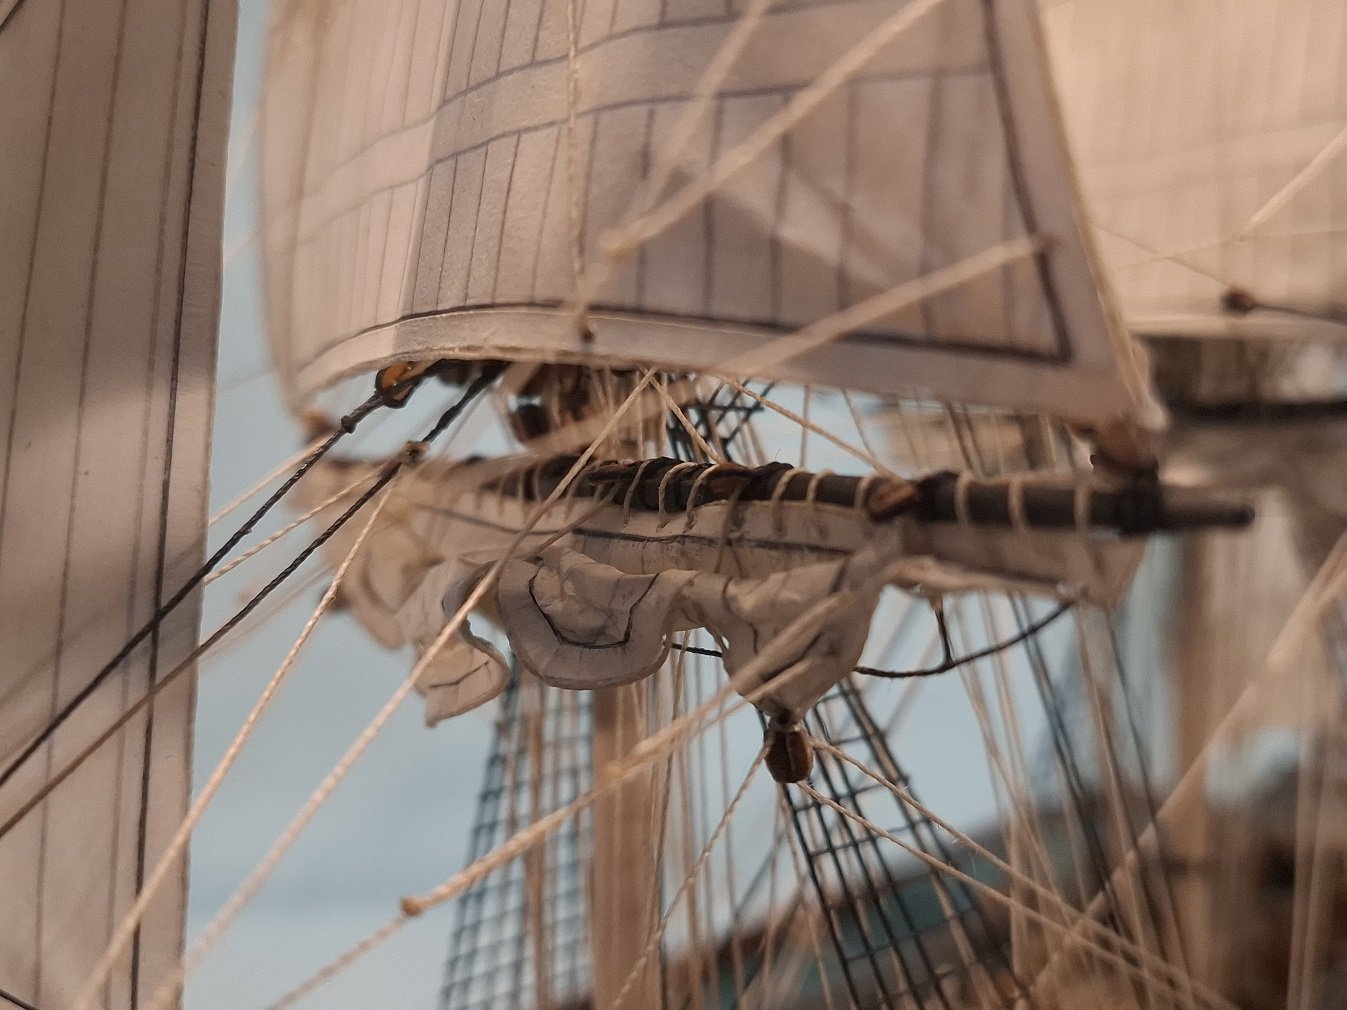
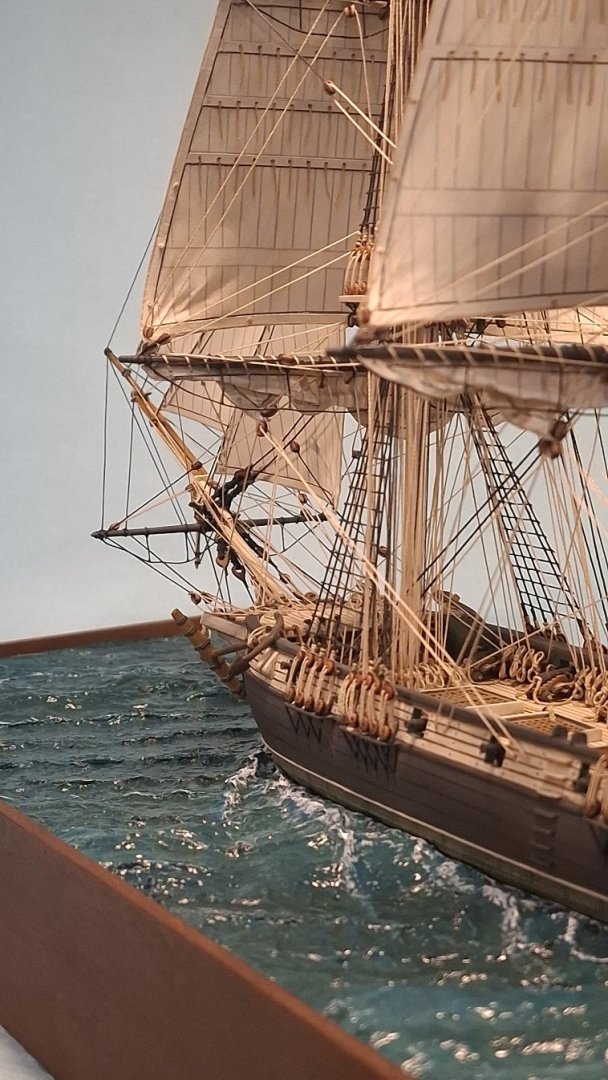
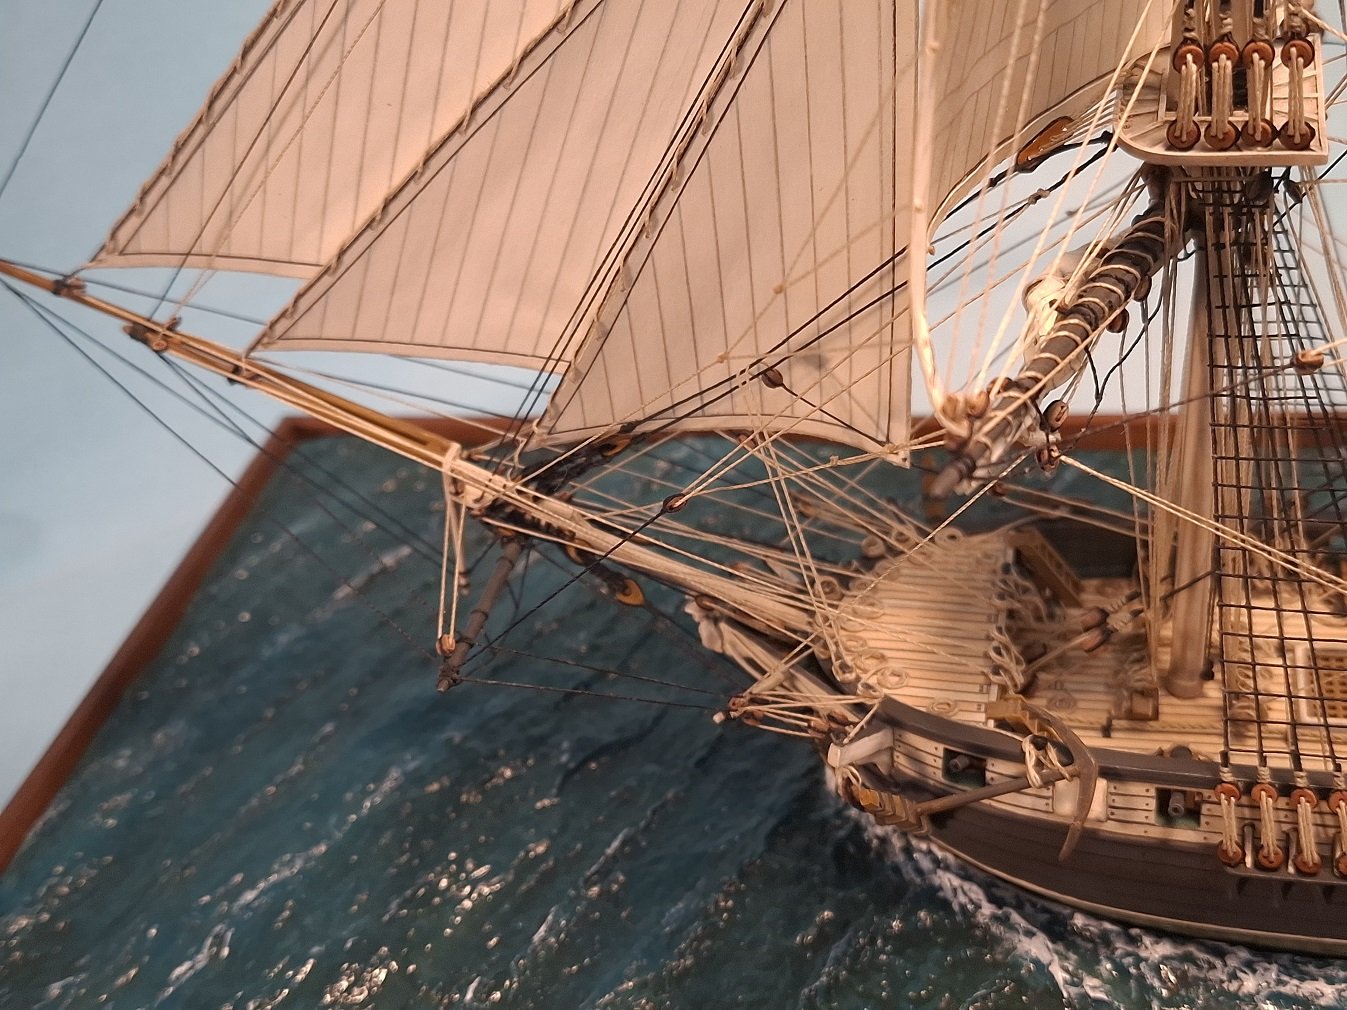
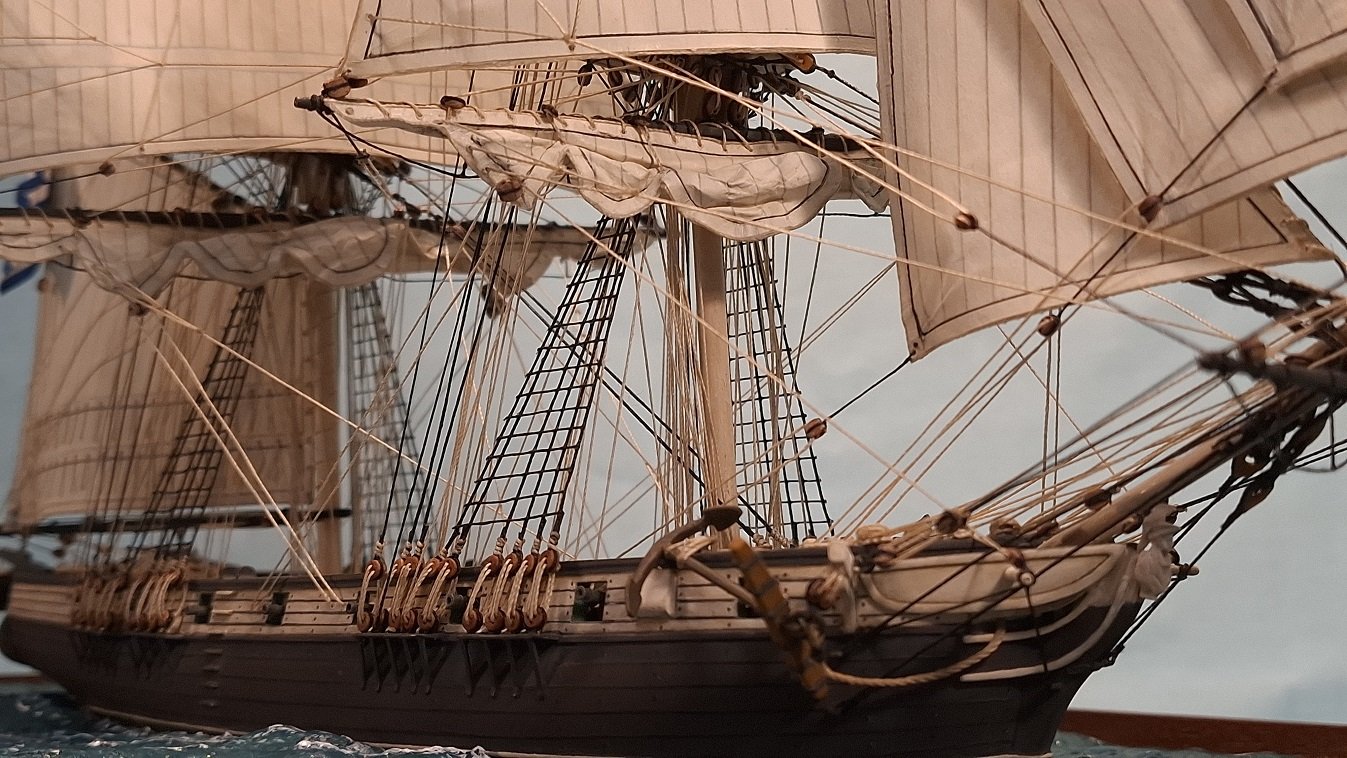
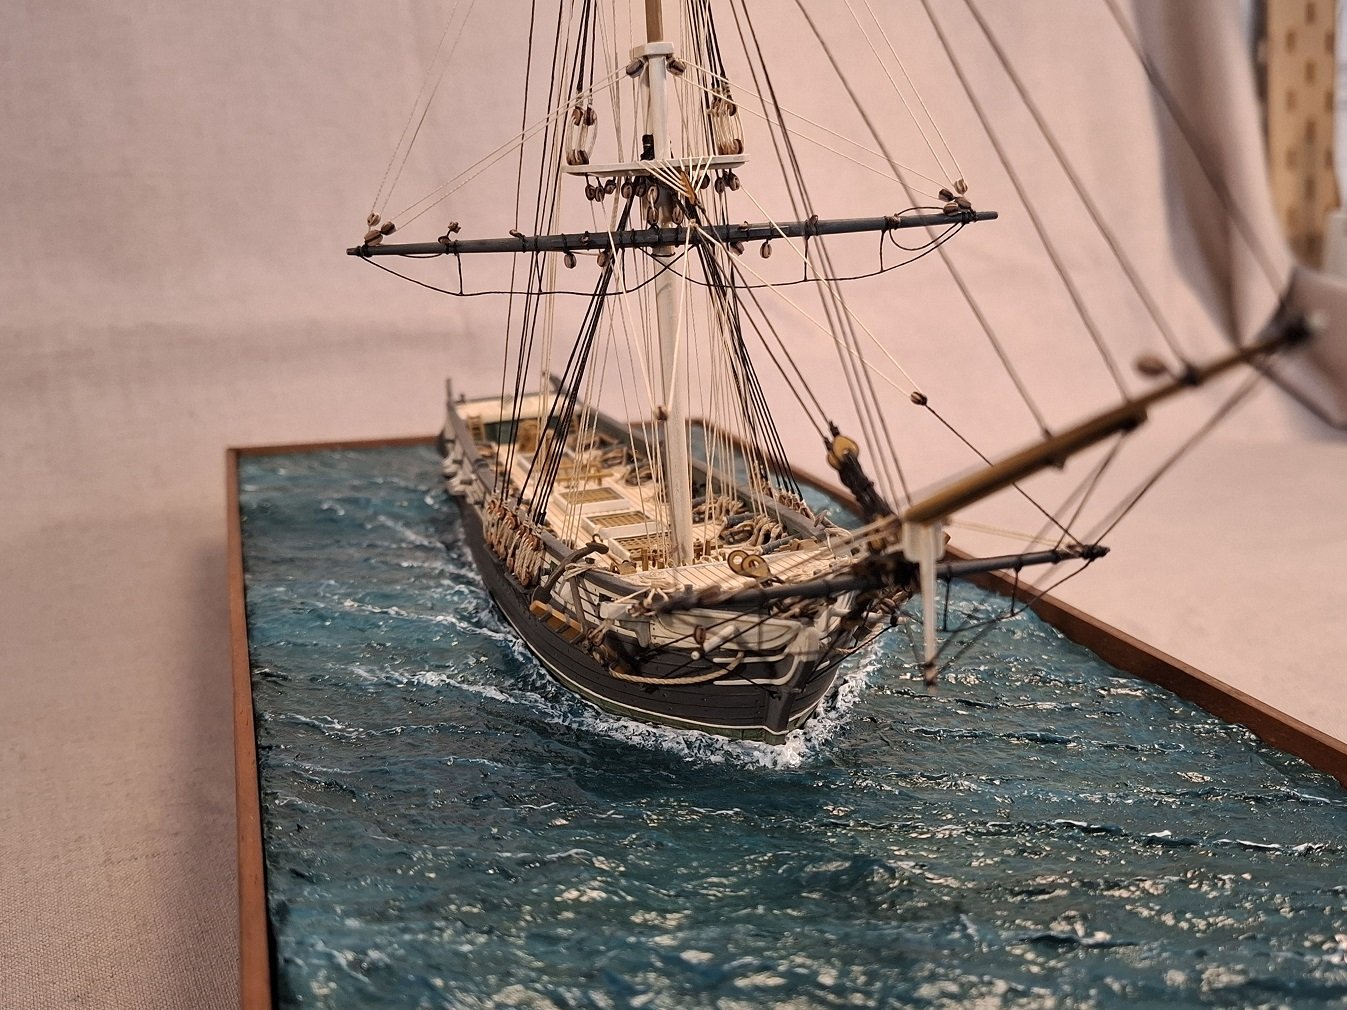
Some more details on the rigging


-
More deck details
-
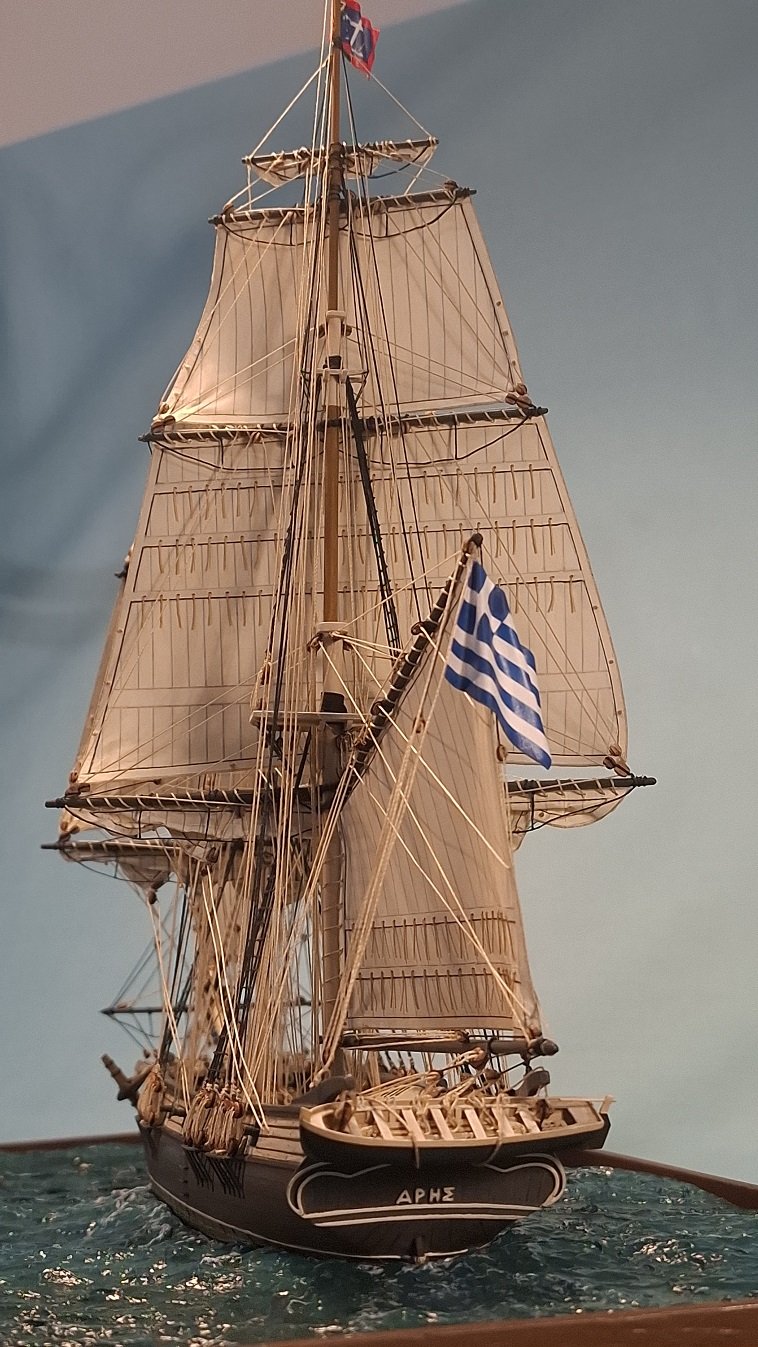
Sails are A4 paper, used pencil, acrylics and an enamel coat on top. Re-did them a couple of times, very tiring process indeed..
-
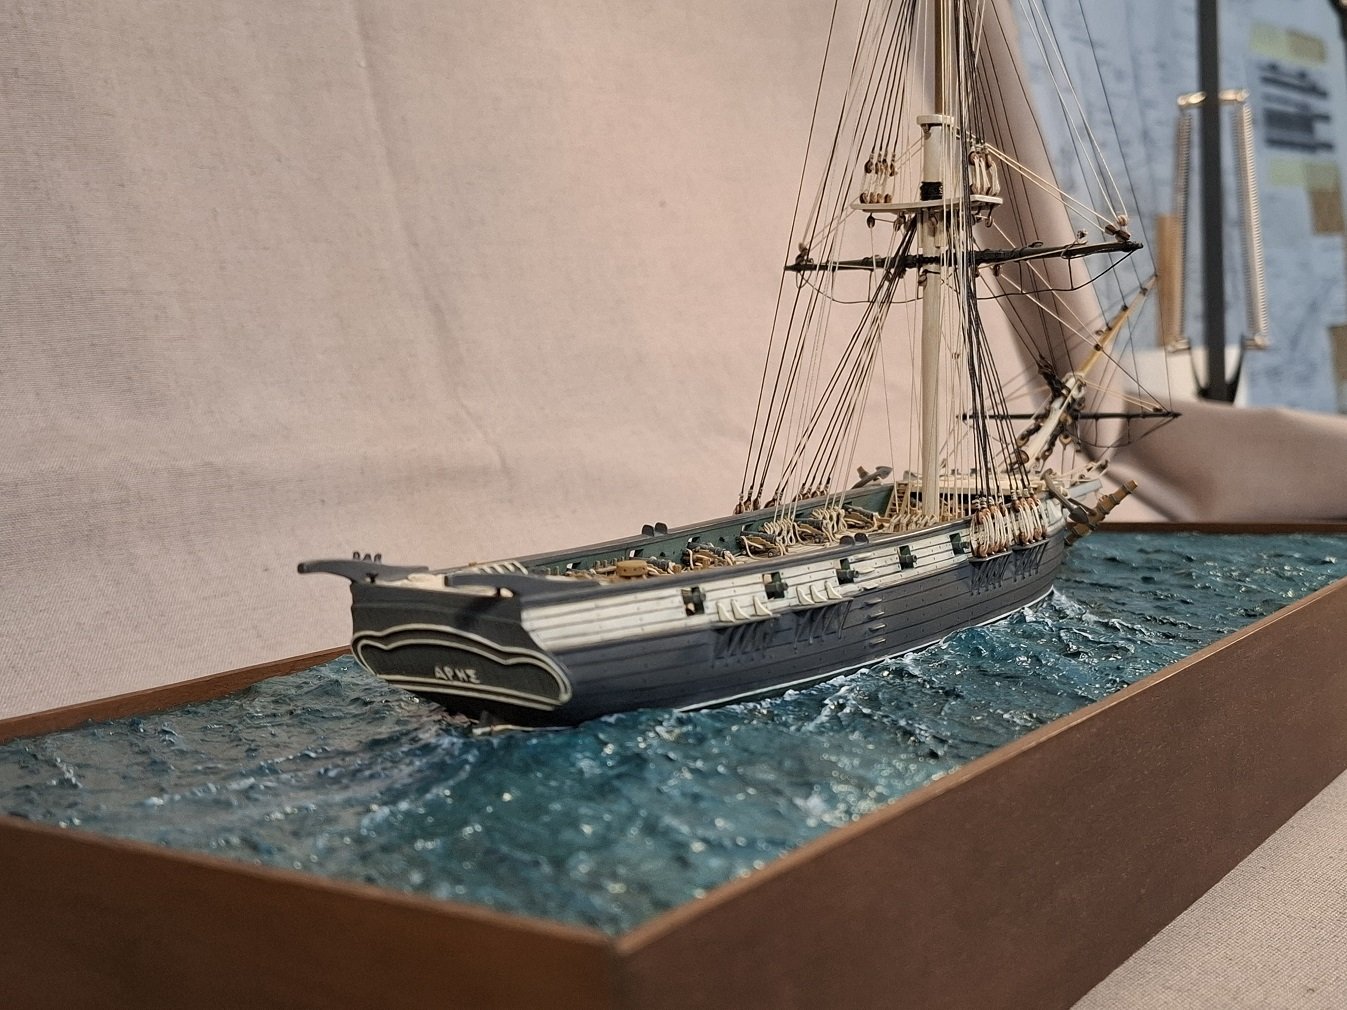
The tiny carving of Ares came out quite well

-
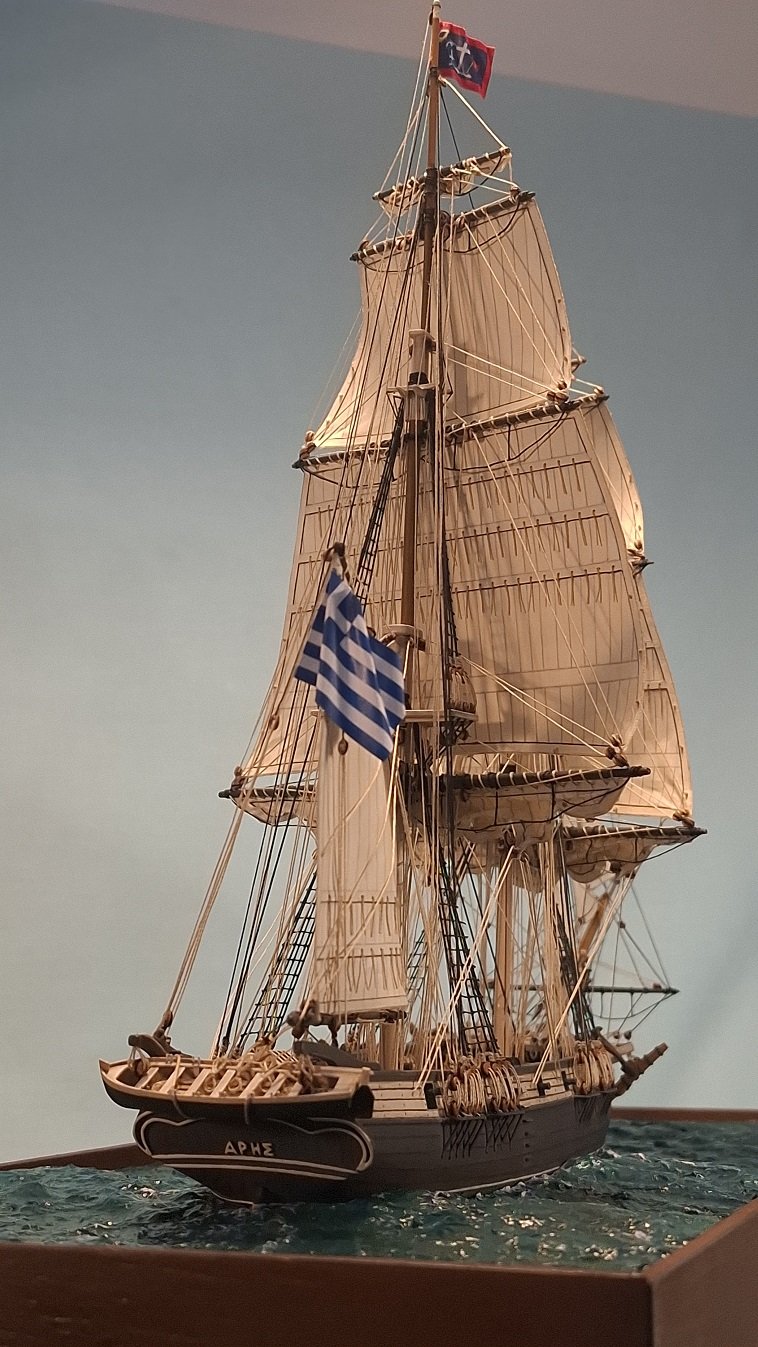
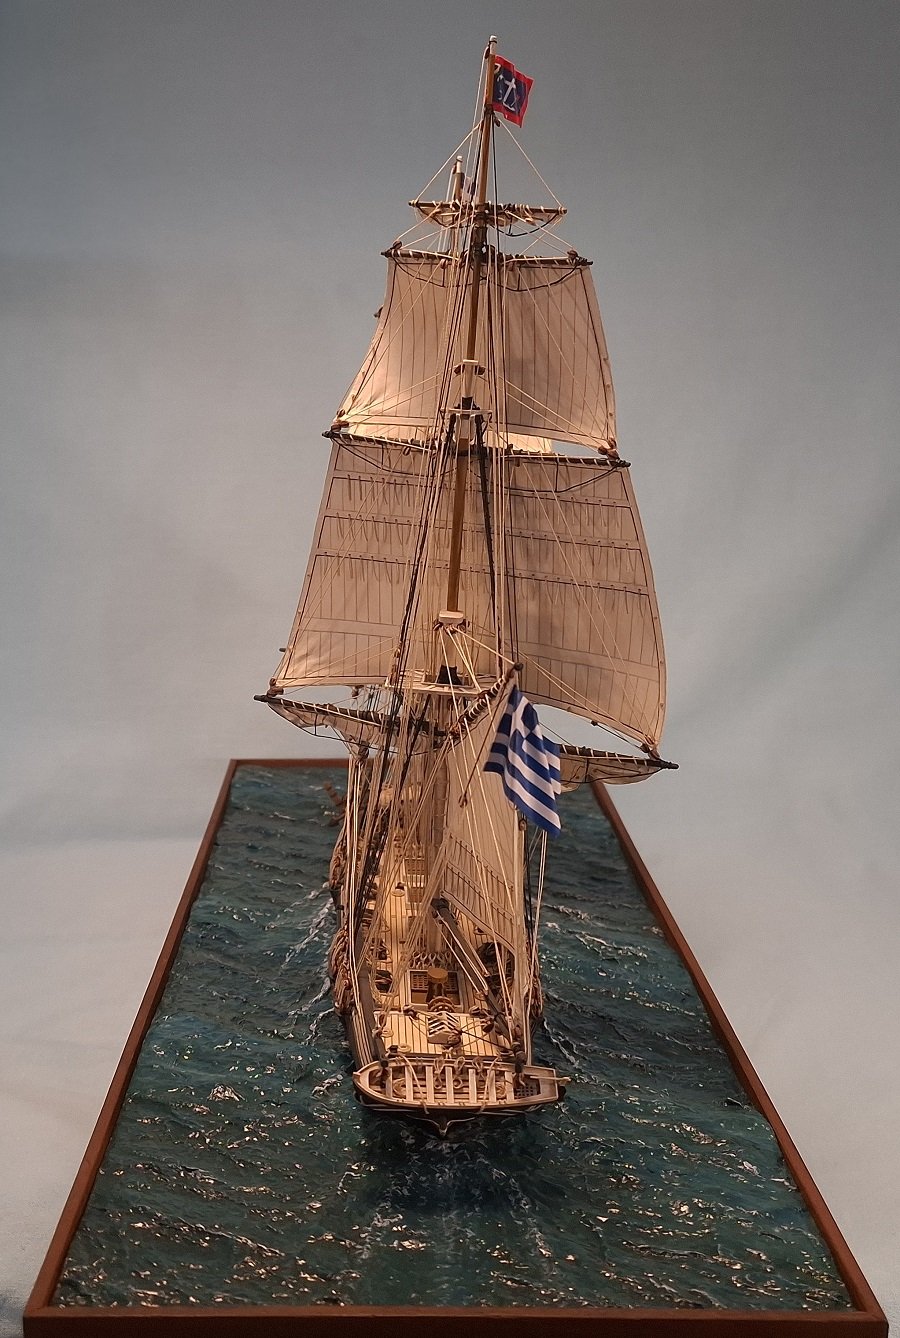
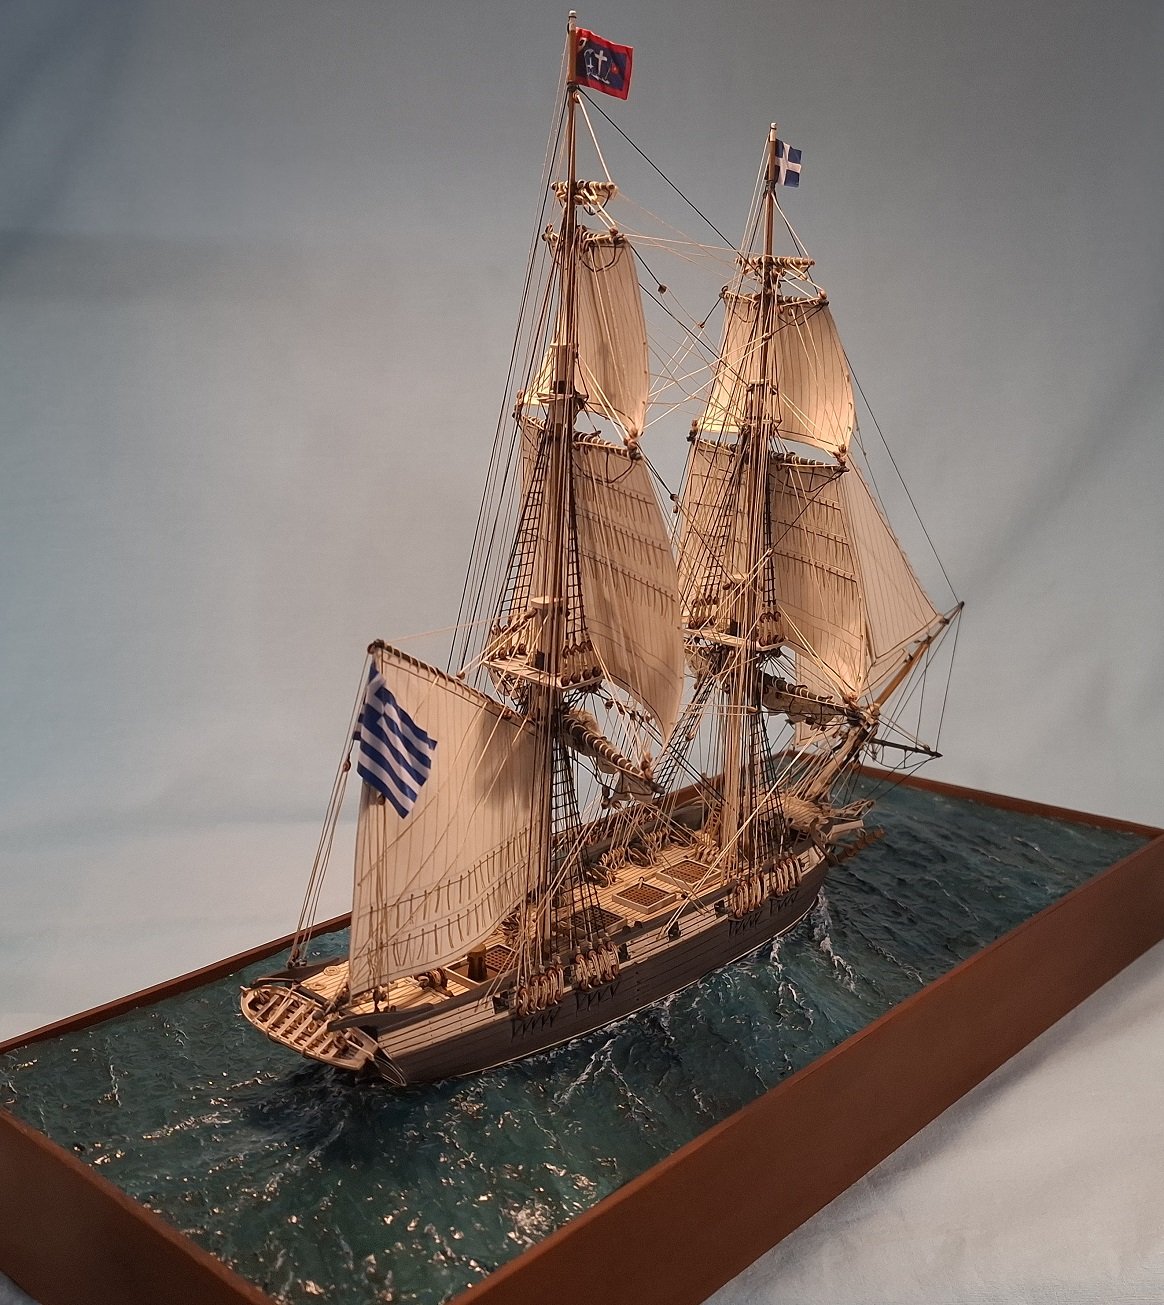
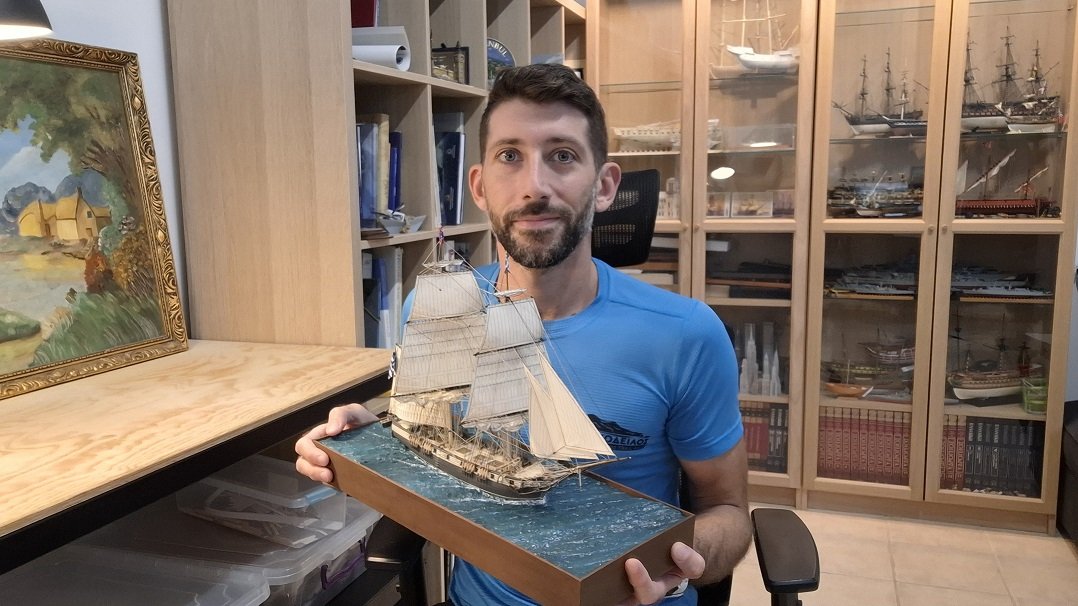
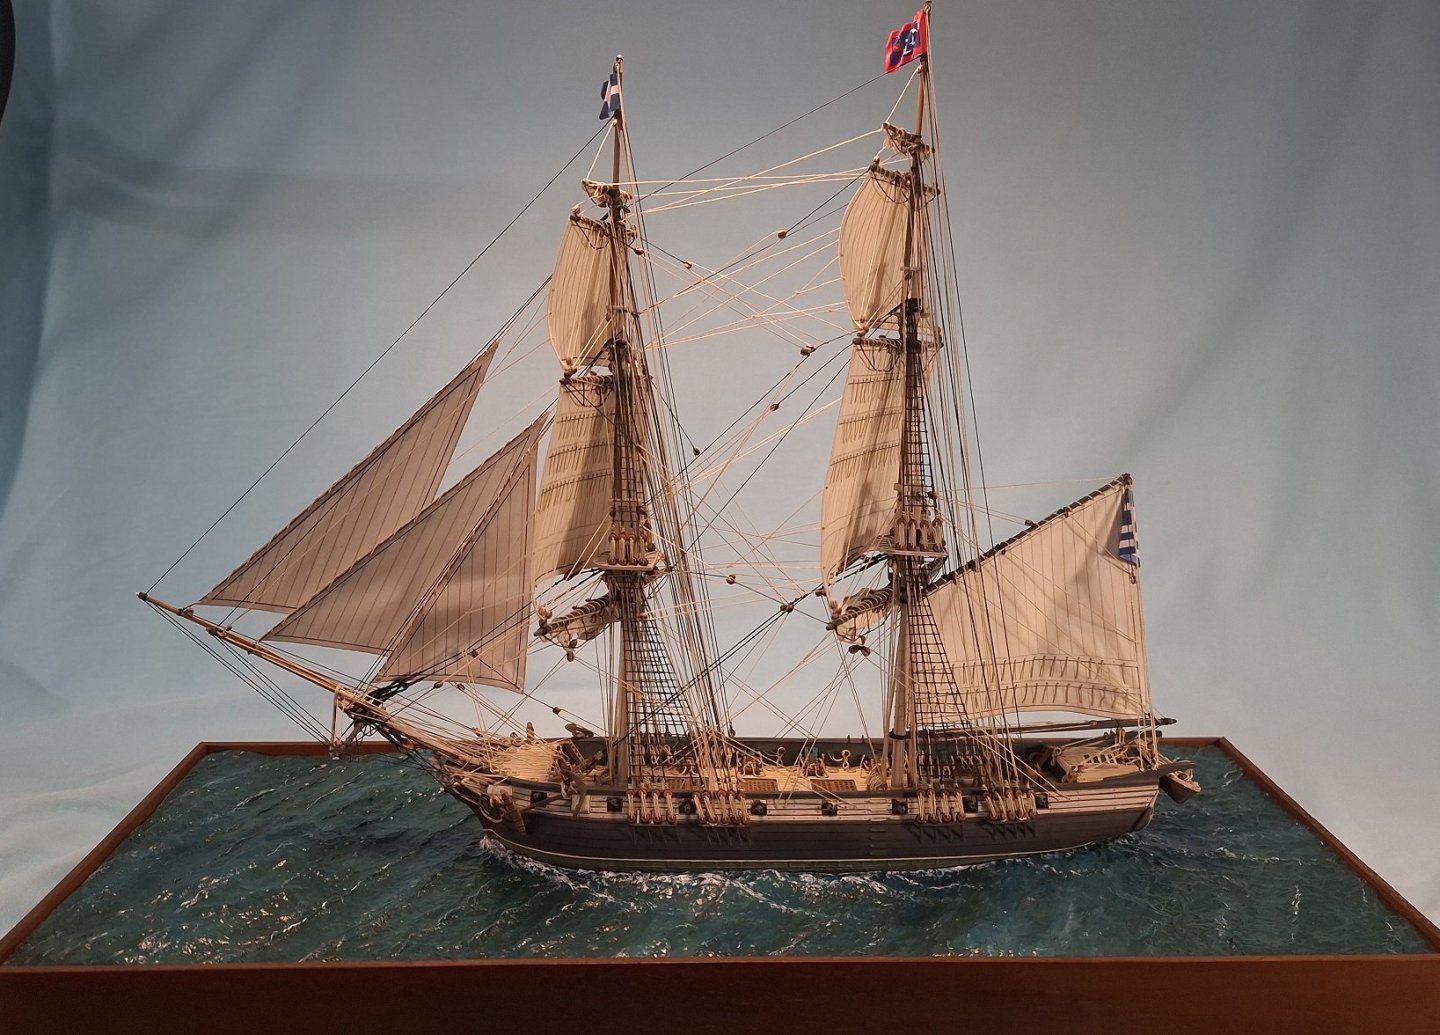
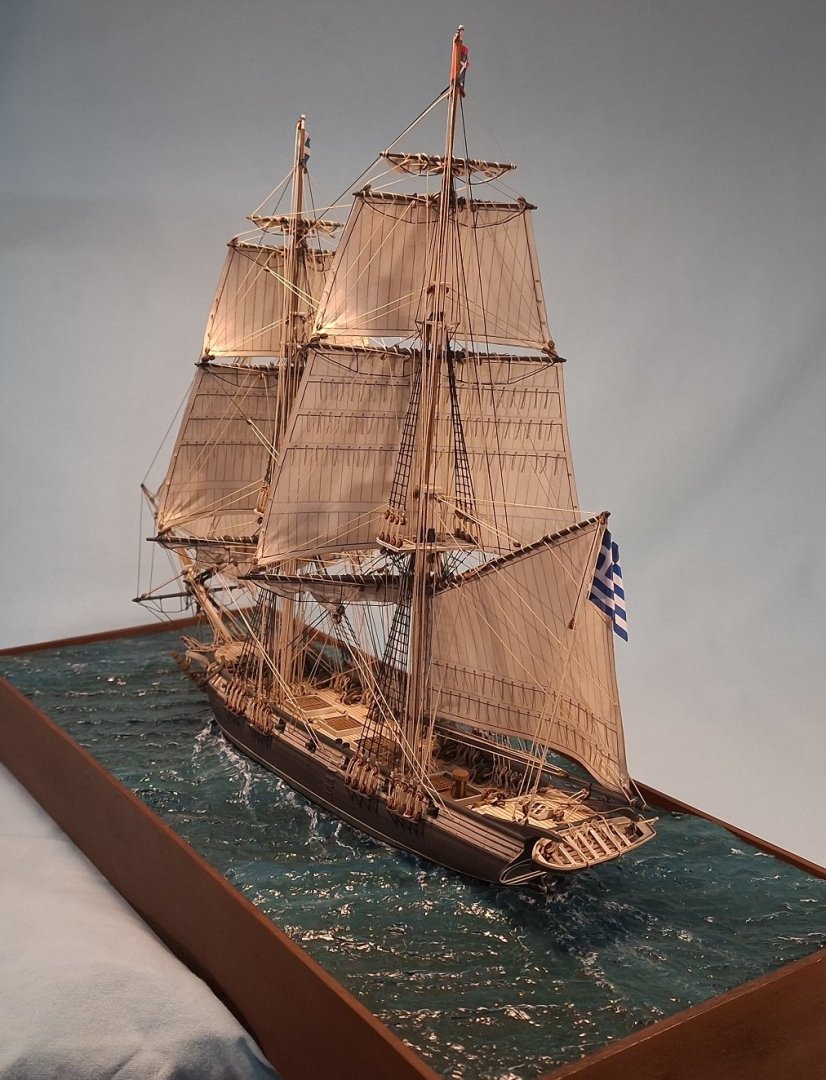
Ares is ready! Actually she is ready for quite some time, I participated to our local modeling exhibition here in Chania last week. Unfortunatelly I had to work on her with a tight schedule to have her completed in time, and therefore took almost next to no photos of the rest of the rigging process. Needless to say it drove me mad, but I learned quite a lot, to say the least.


-
Thank you wefalck! I know this Ares, an old style traditional model, the few ones displayed in the other Greek museums are based on that. In fact mine is 1/3 the scale, and since it goes for all dimensions, it is 27 times smaller in volume, hehehehe
-
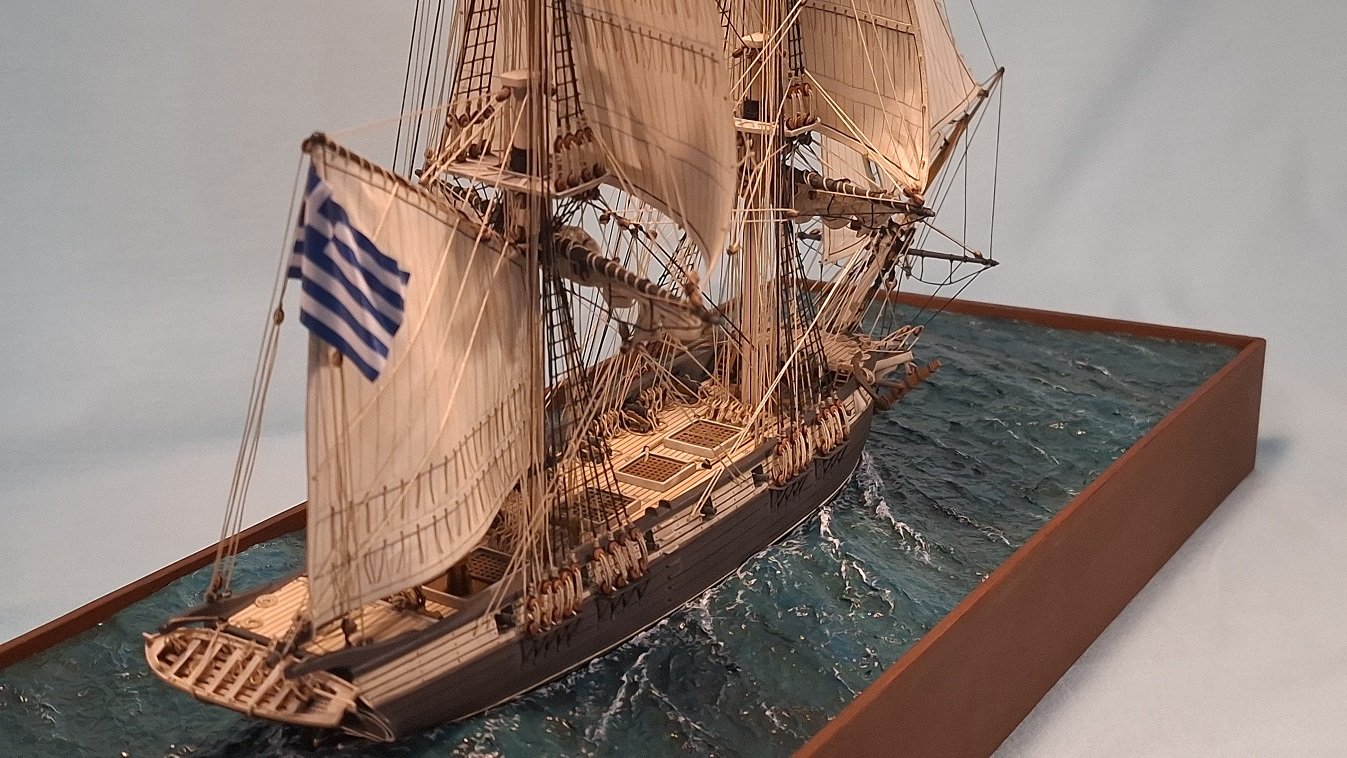
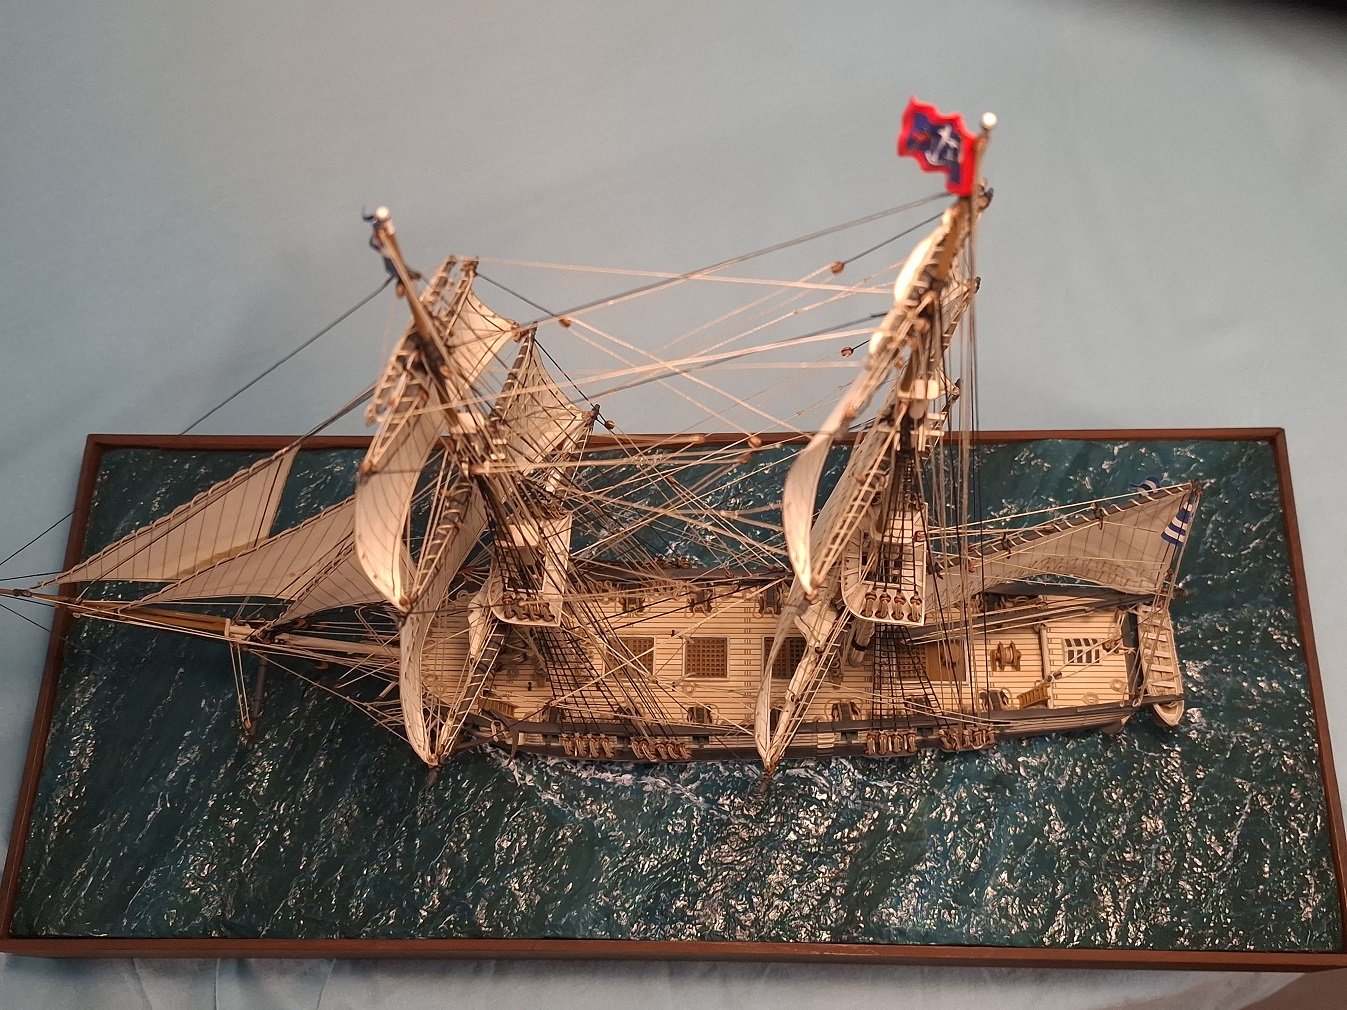
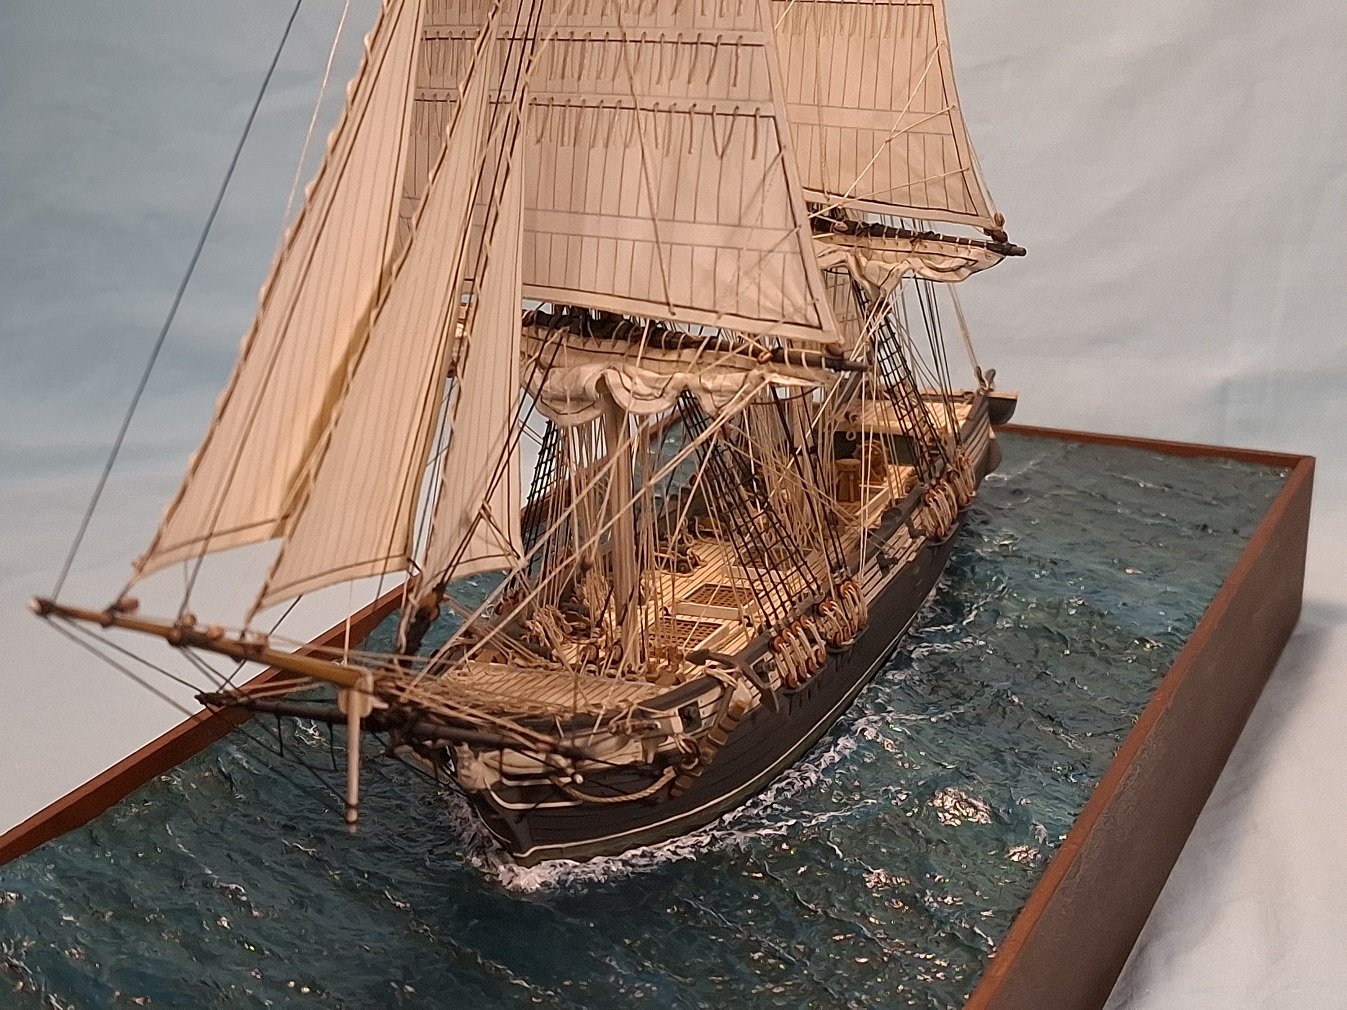
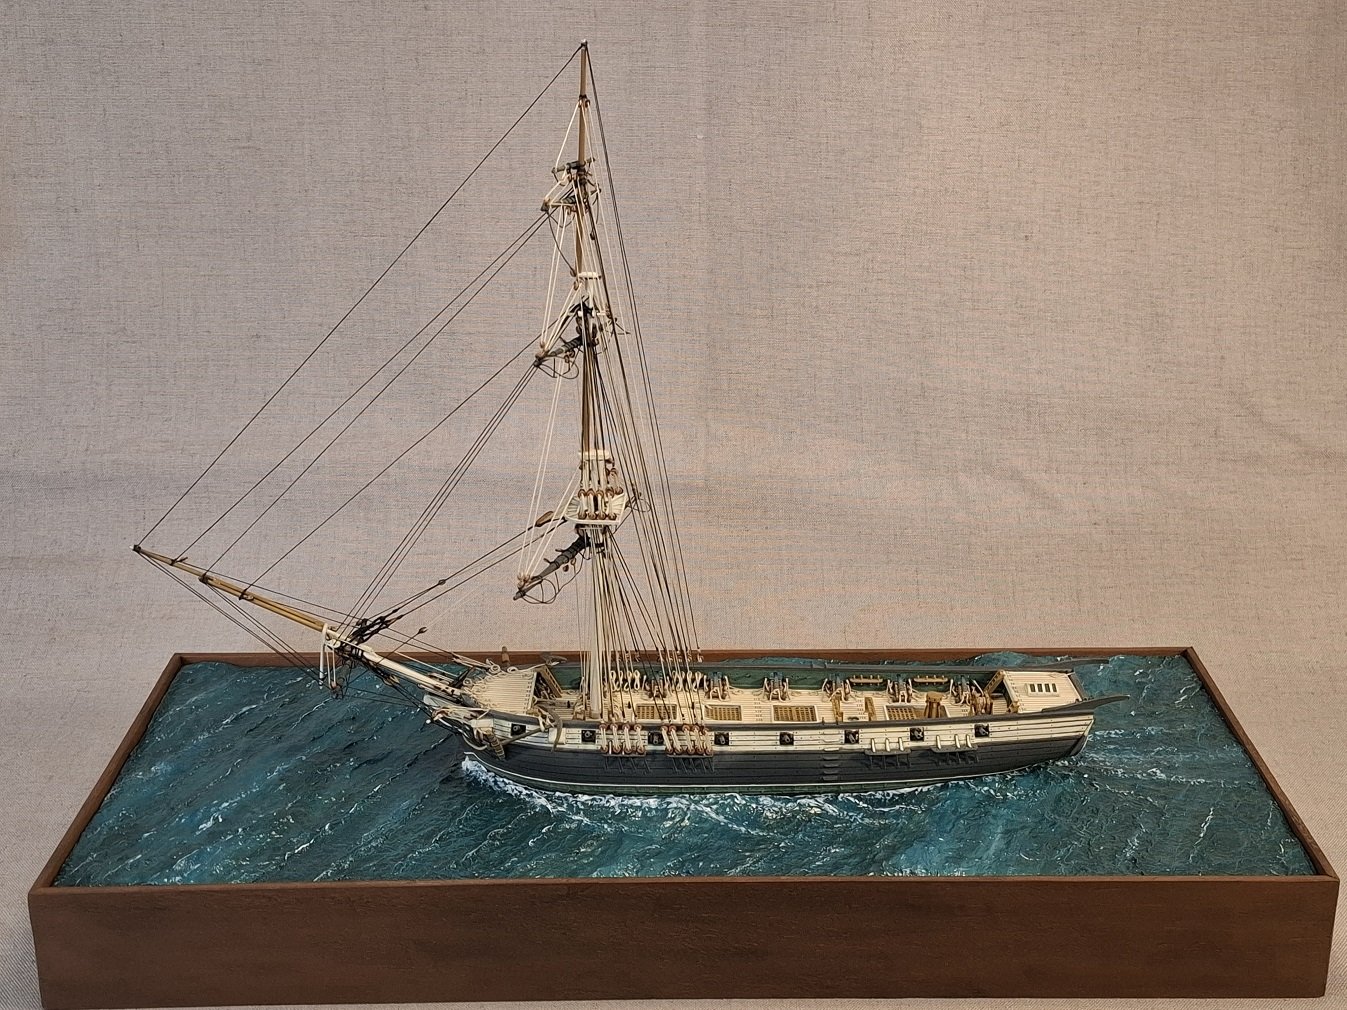
For scale:
-
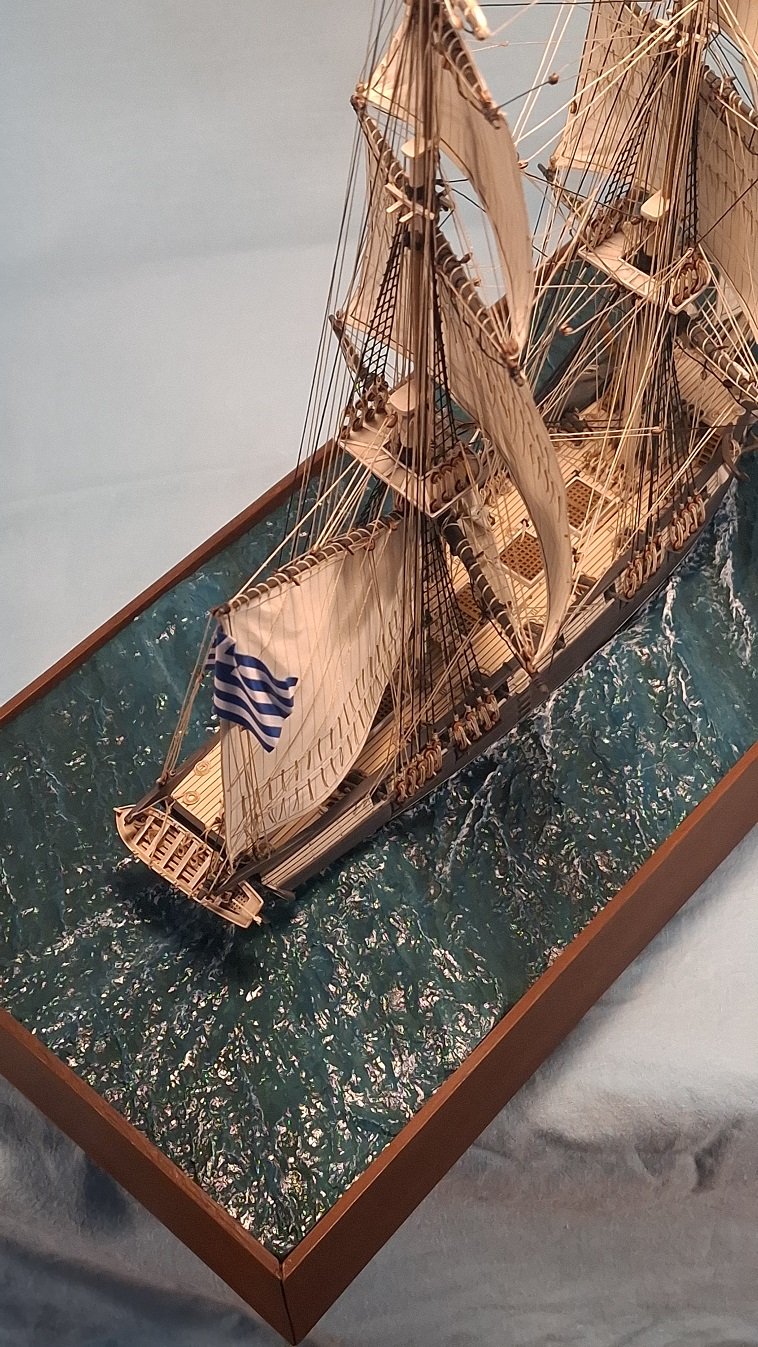
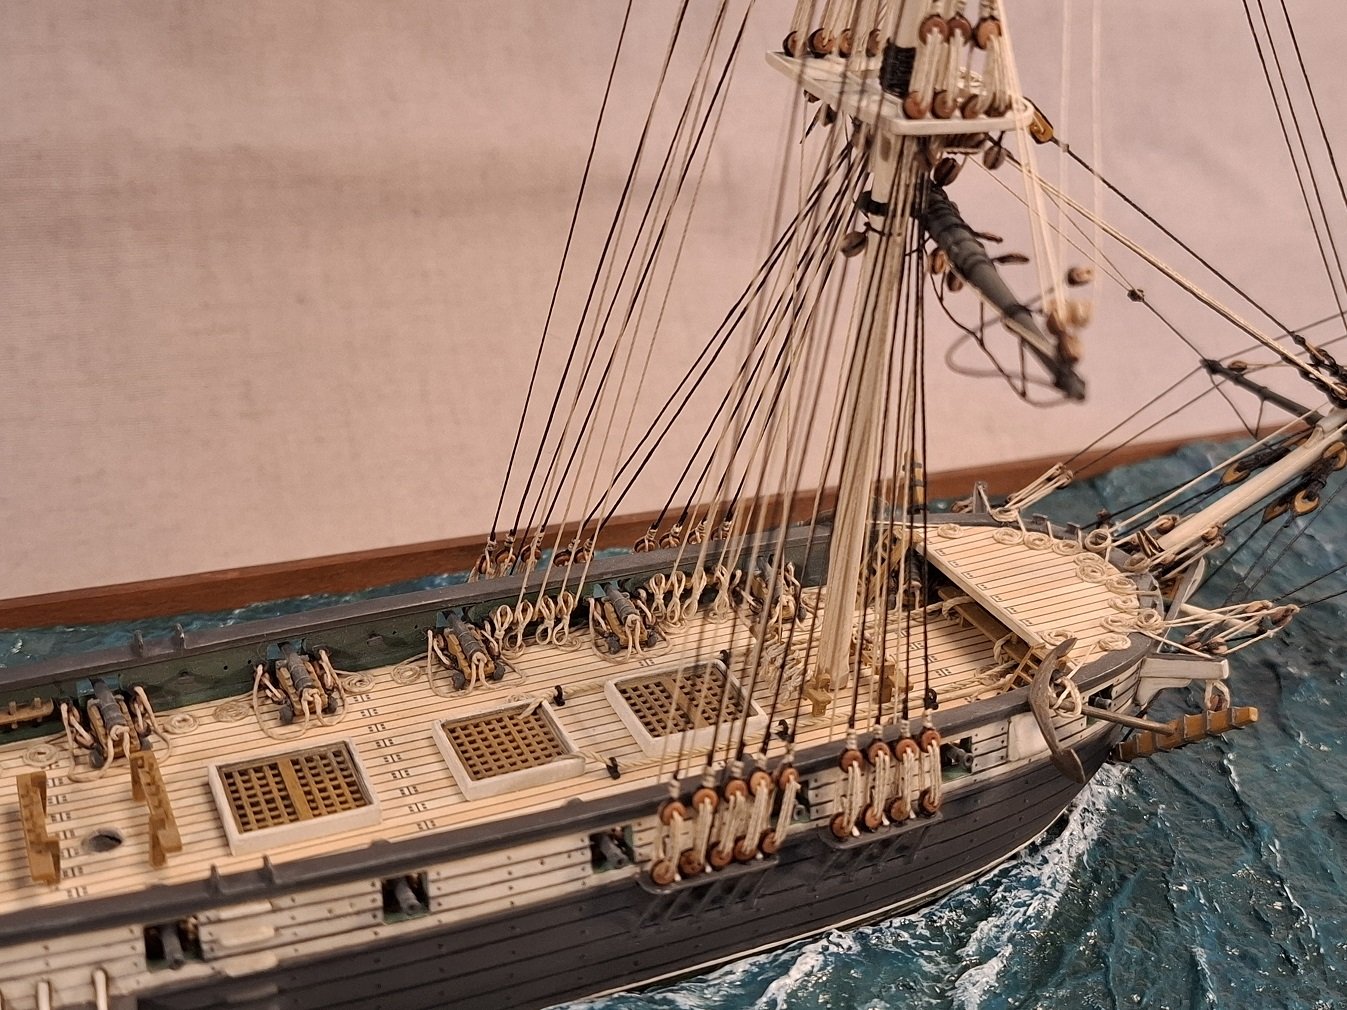
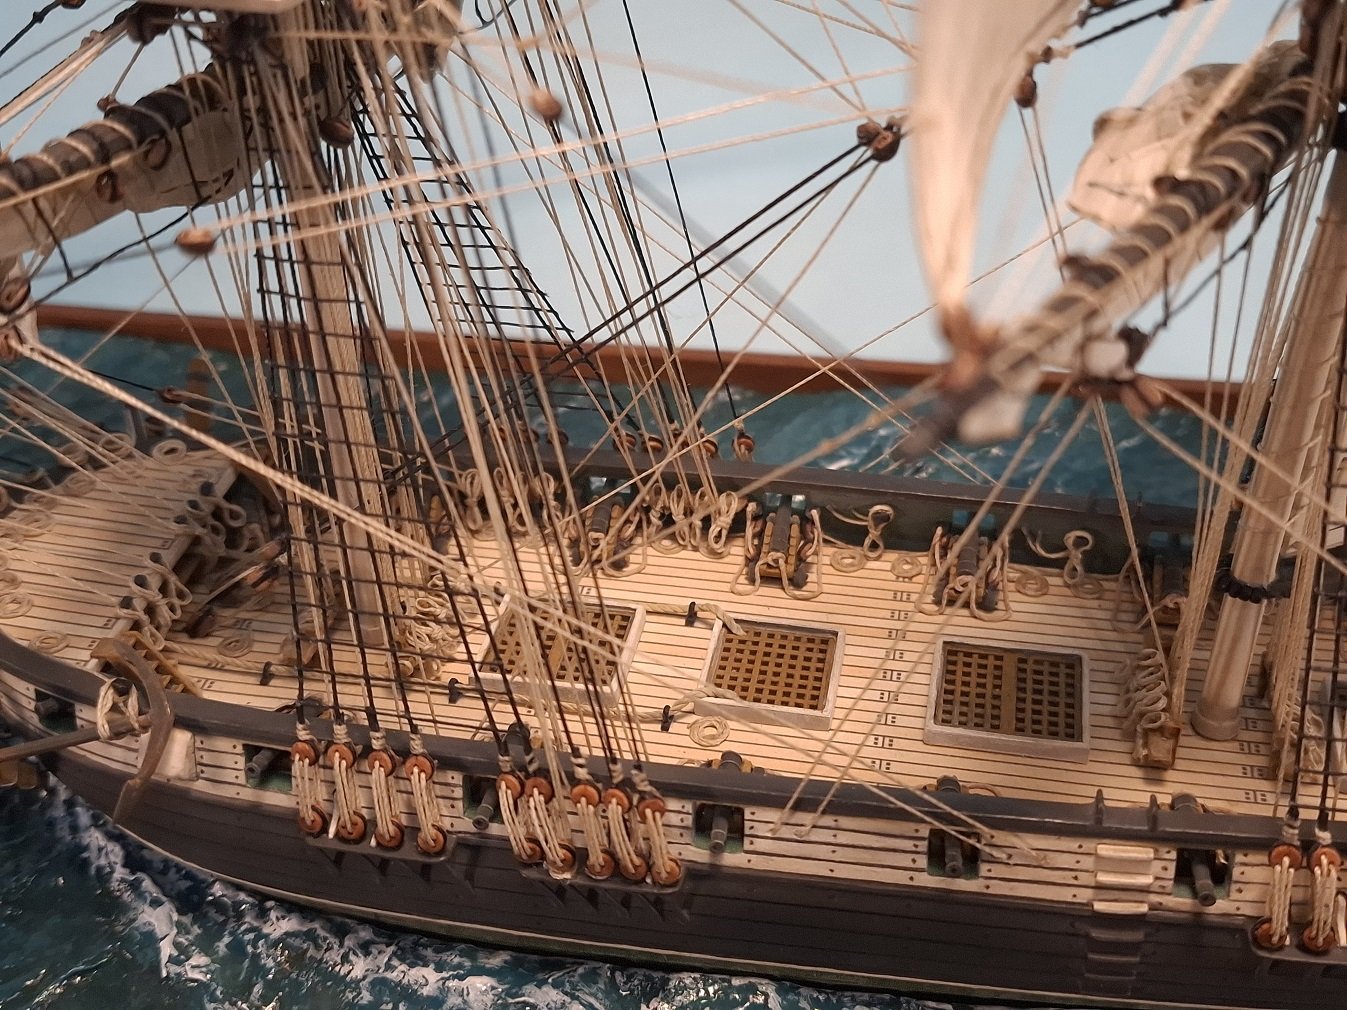
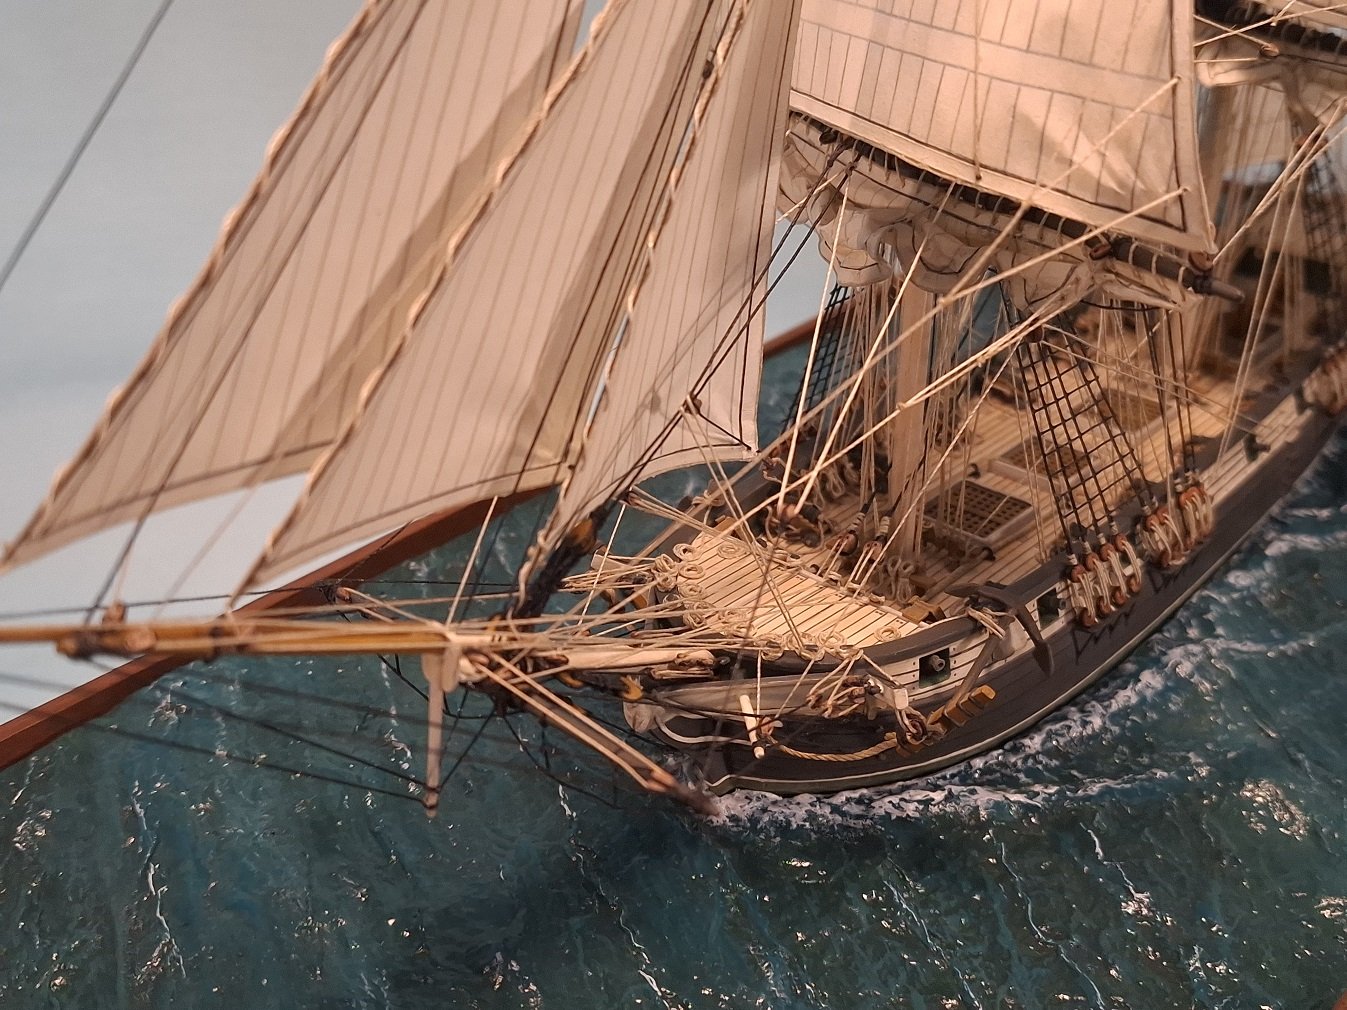
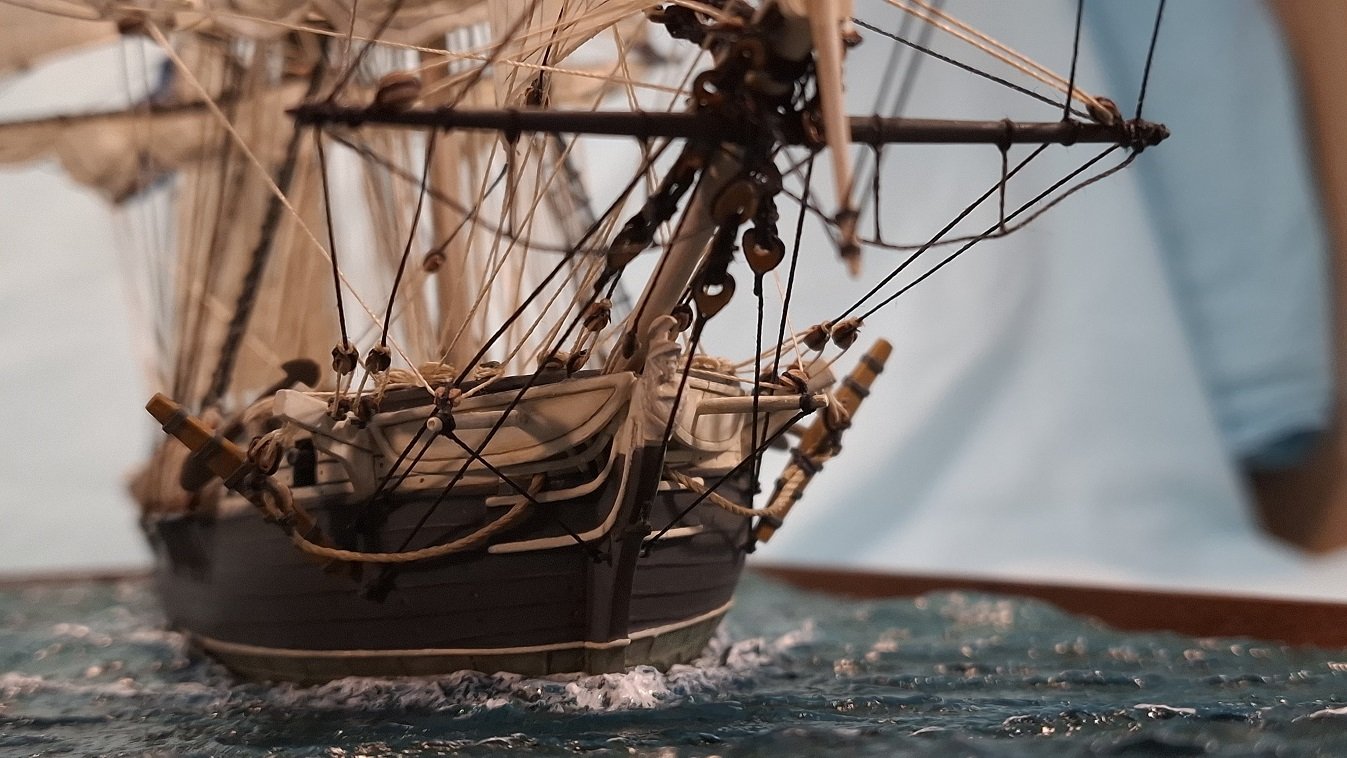
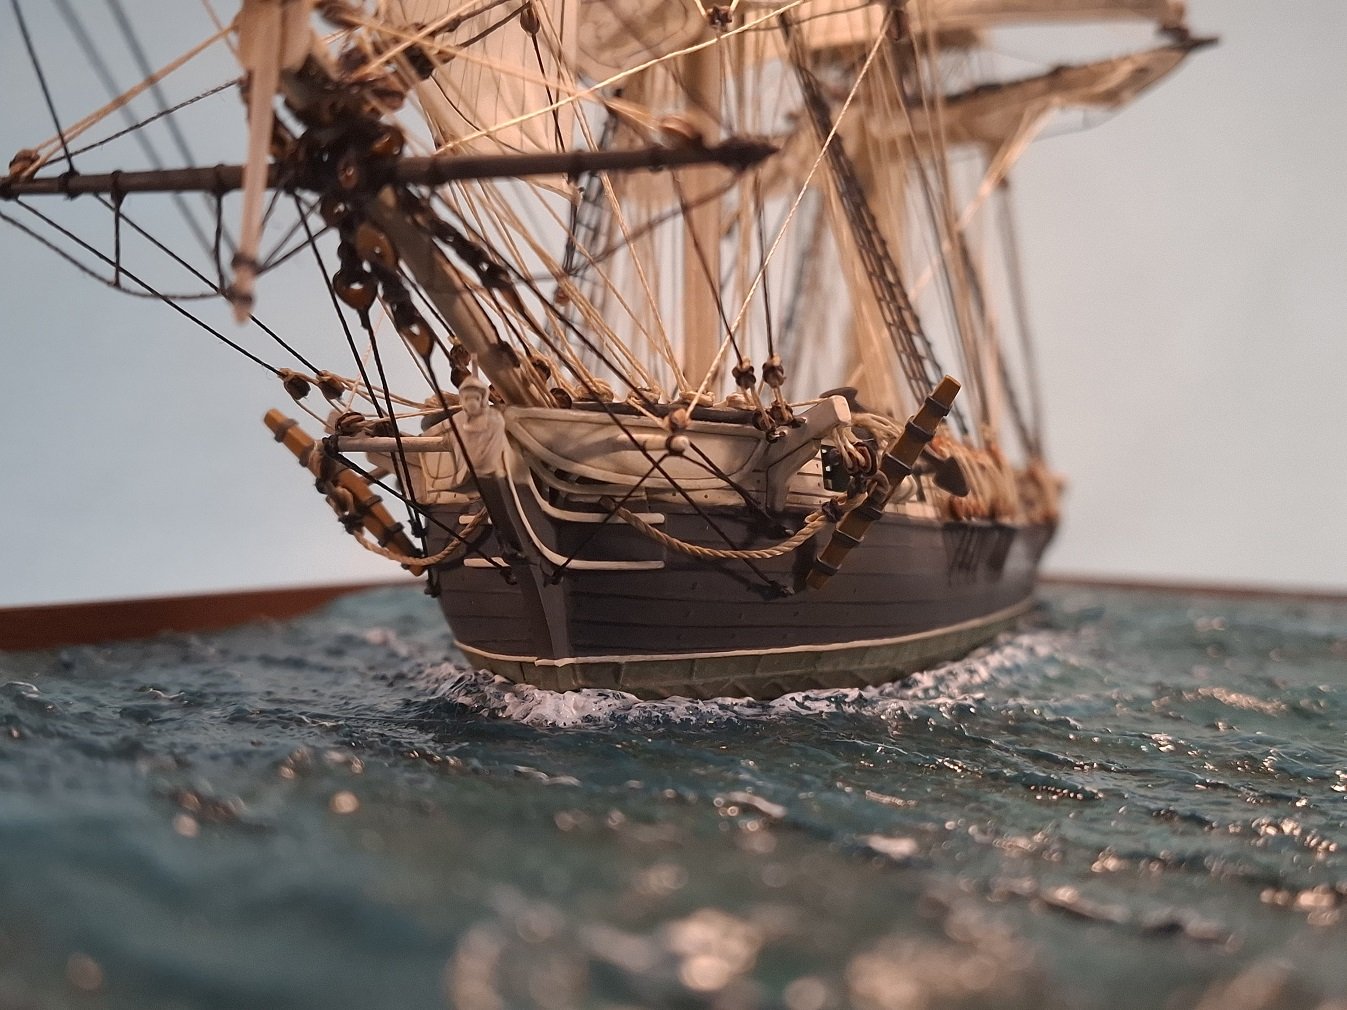
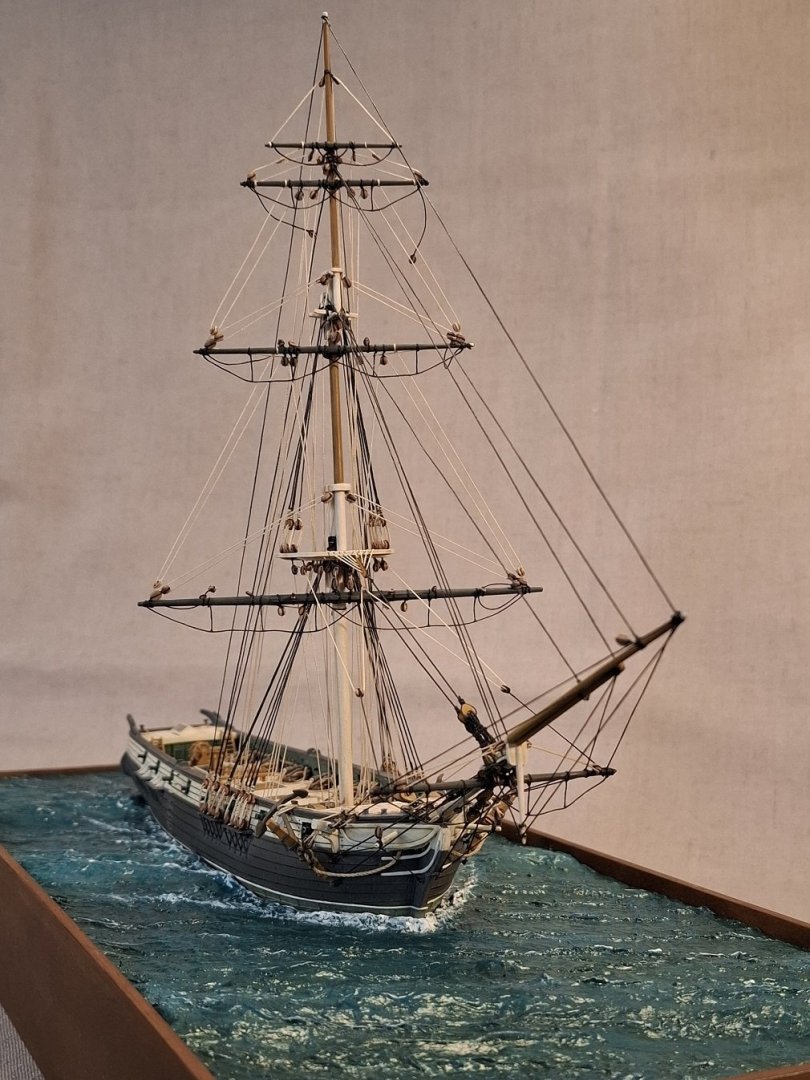
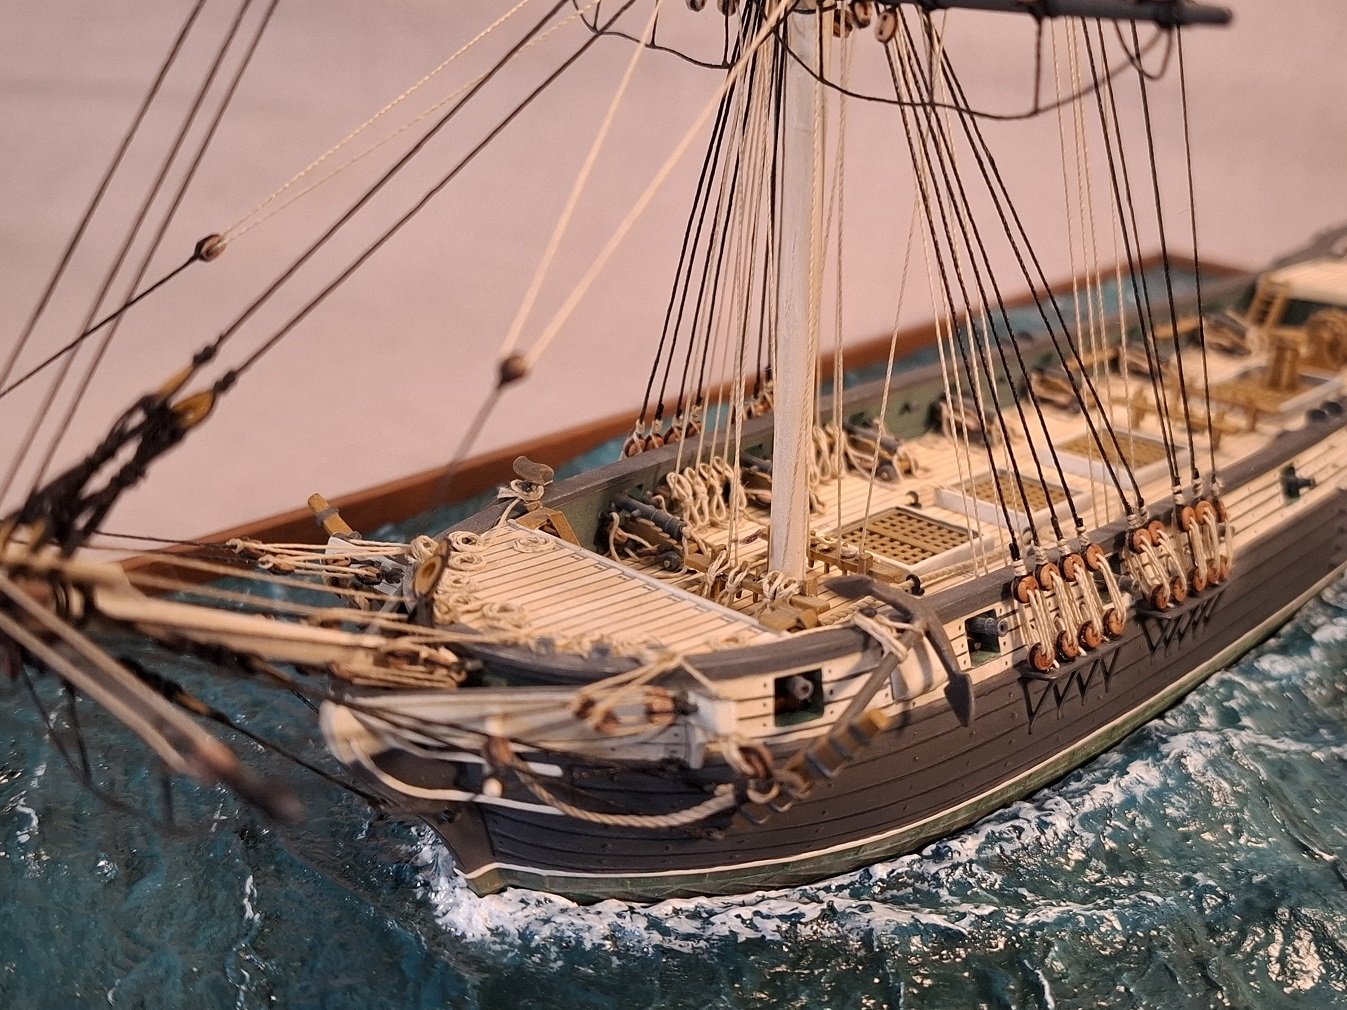
The water caused me a bit of a trouble, as I added swell as well as waves. I added the anchors, properly rigged the guns, and added all the folded ropes on the foremast

-
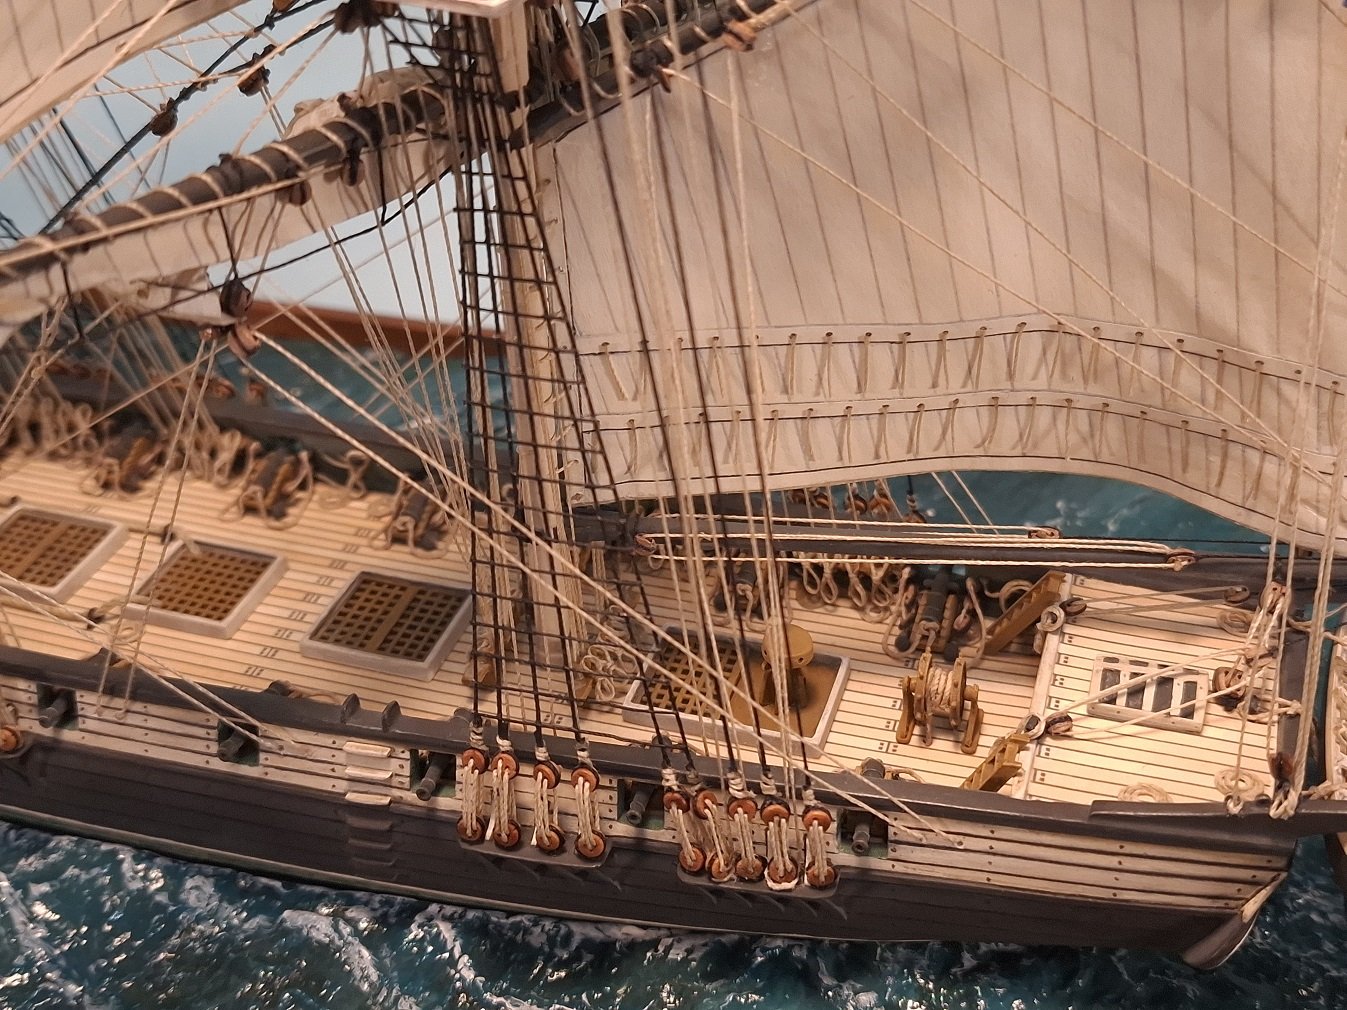
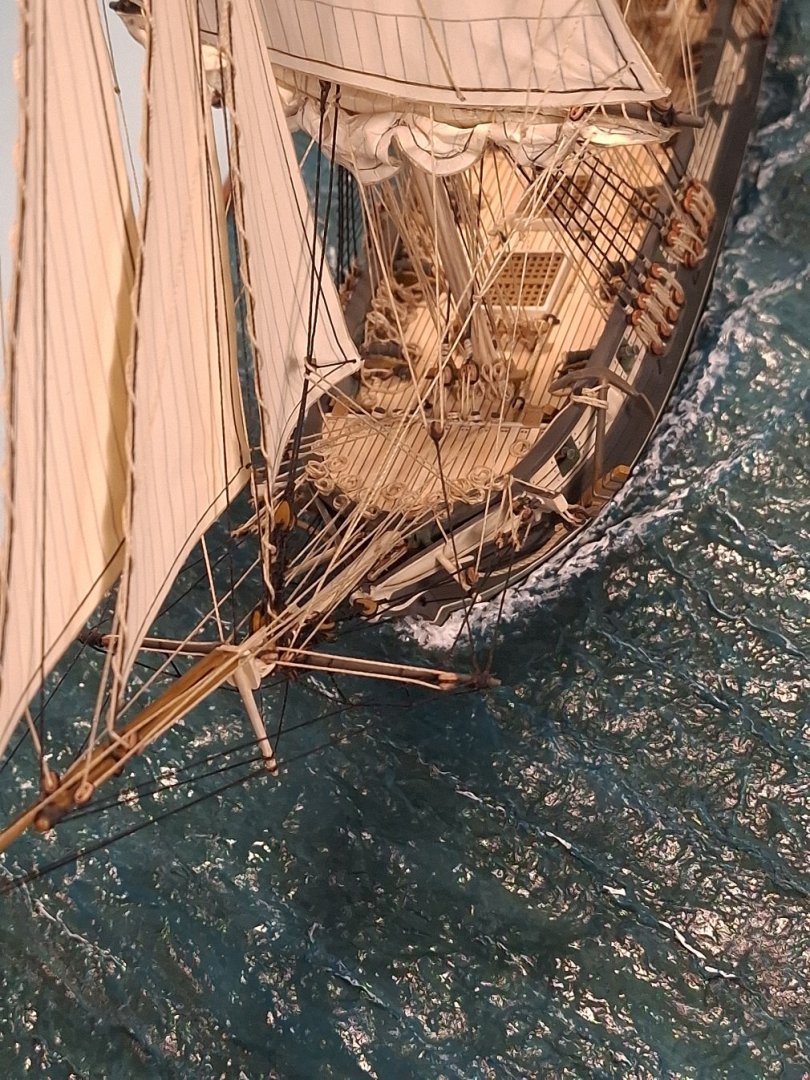
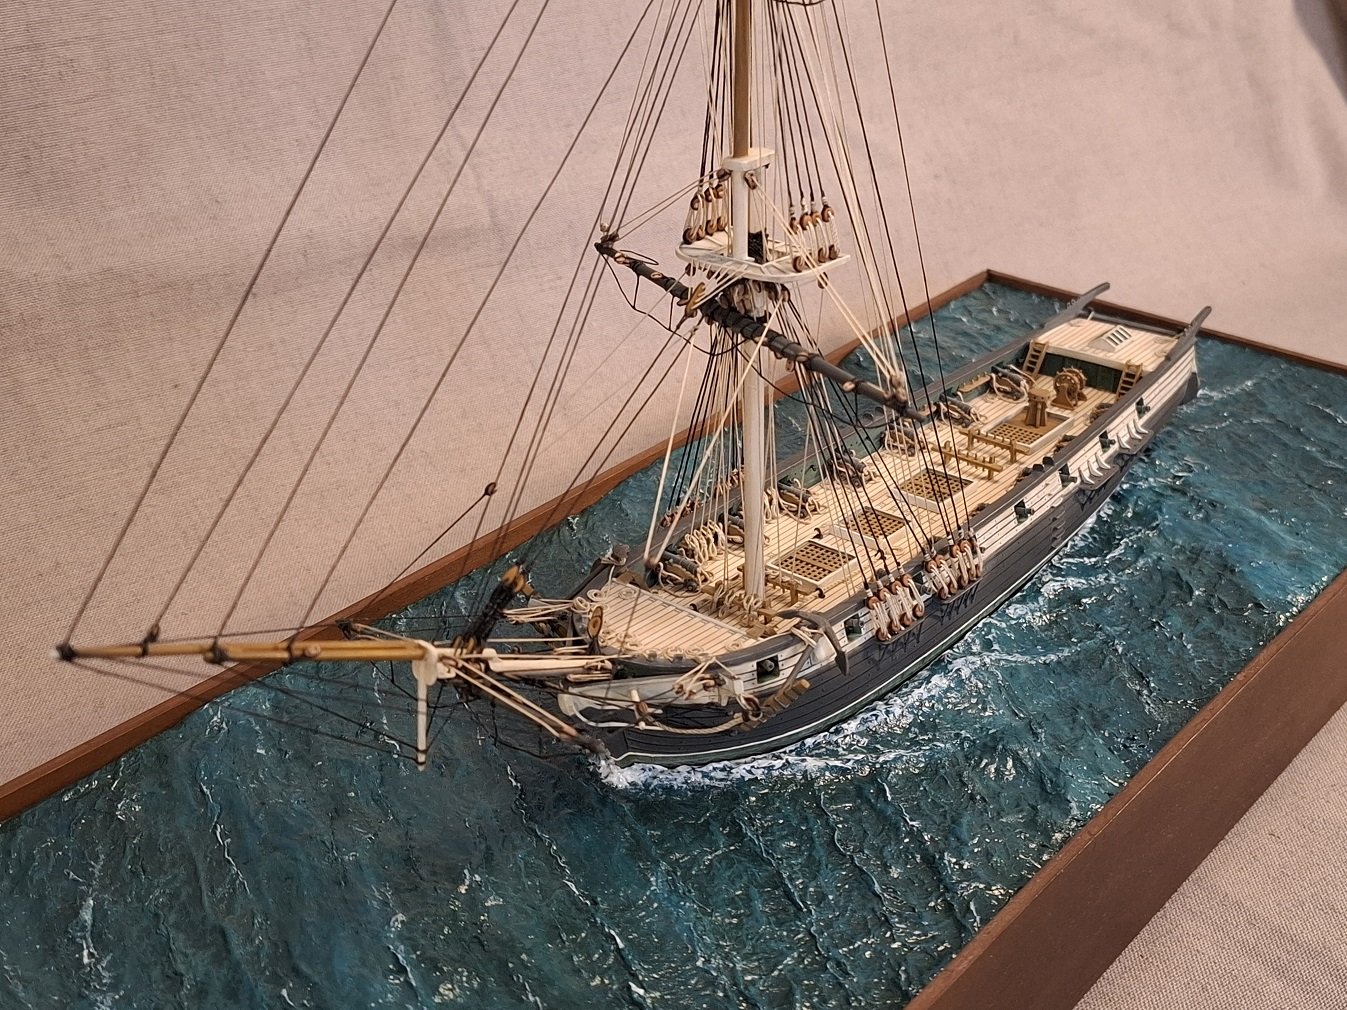
Good evening all! So the past month I had some changes done on the ship. I was not really happy with the rigging, both the running ones, and the ropes for the guns and anchors. Also I changed my mind on how I want her displayed.... Long story short, I built a sea diorama base for Ares, I almost completely re-rigged her, and changed all the gun and anchor ropes etc. I'll spare you the back and forth, and post some photos of her updated situation
-
The additional waxing helped. Again, the scale is so small I am not sure it is even noticeable in real life to anyone other than me. Some of these details will be covered by the sails that I plan to add, but I still dont know how to streamline the process, since this is my first time that I have gone that far.


-
Indeed!! We have to reduce a lot of the rigging details at such scale. Making thes kind of dicisions is sometimes harder than following rigging instructions Thank you Ian! Because the limited number of schrouds and the gunports breaking up the continuity of the bulwark, the aft pinrails went further aft than usual, I really wanted to hear the opinion of the fellow modelers, before doing anything I would regret. Today I spend most of the time rewaxing the lines, as the tiny blocks had fizzed them up a bit. Oh well.. Here is one for scale:


-
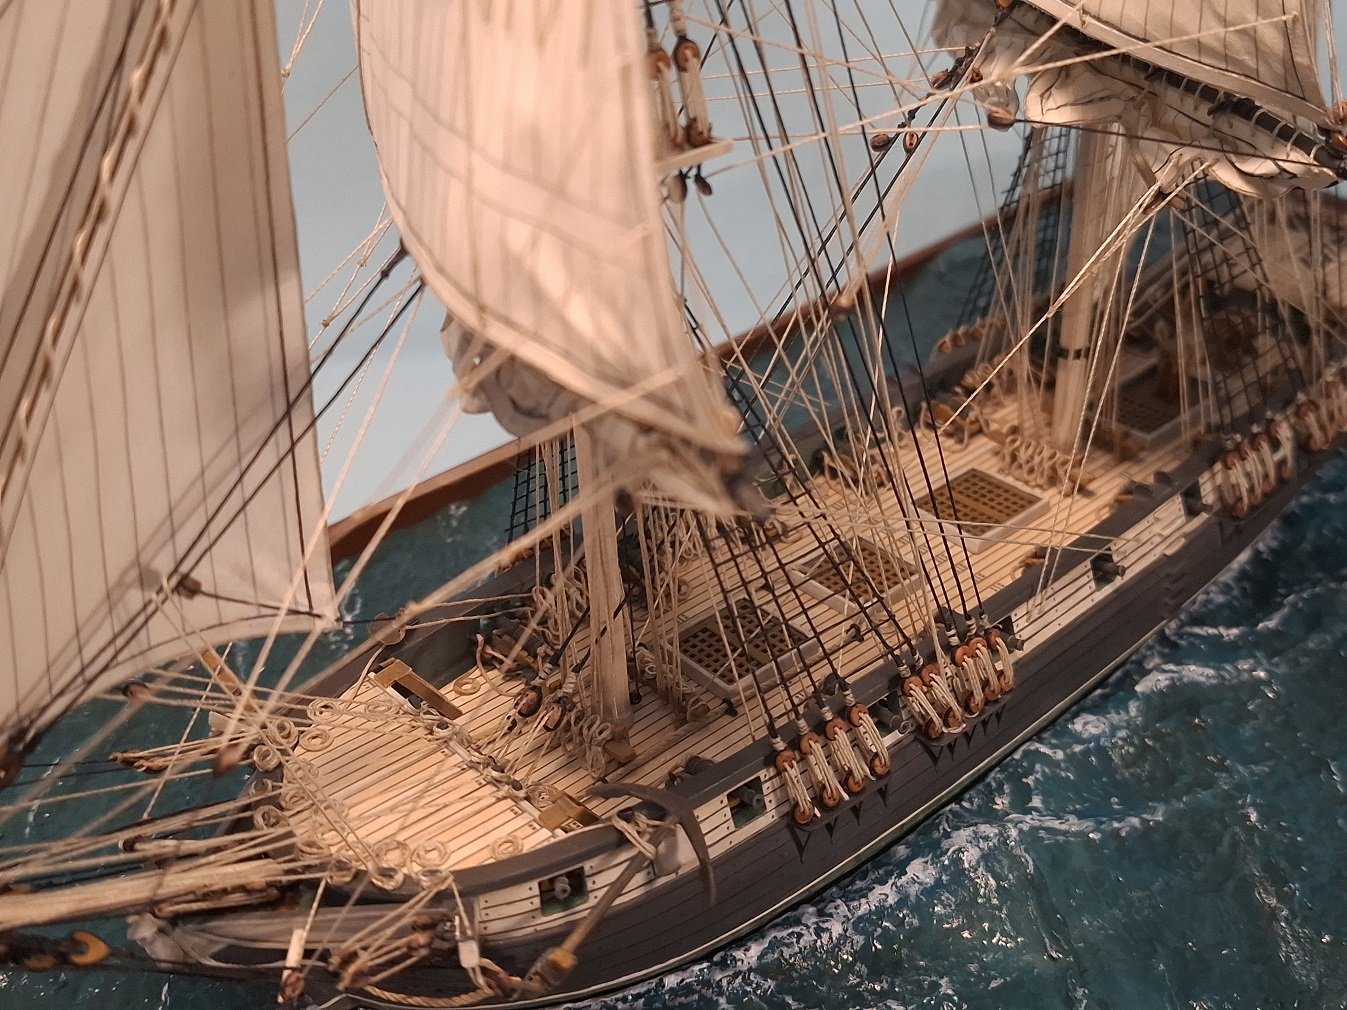
more closeups on the foremast.