HOLIDAY DONATION DRIVE - SUPPORT MSW - DO YOUR PART TO KEEP THIS GREAT FORUM GOING! (Only 44 donations so far out of 49,000 members - C'mon guys!)
×

Zbip57
-
Posts
55 -
Joined
-
Last visited
Content Type
Profiles
Forums
Gallery
Events
Everything posted by Zbip57
-
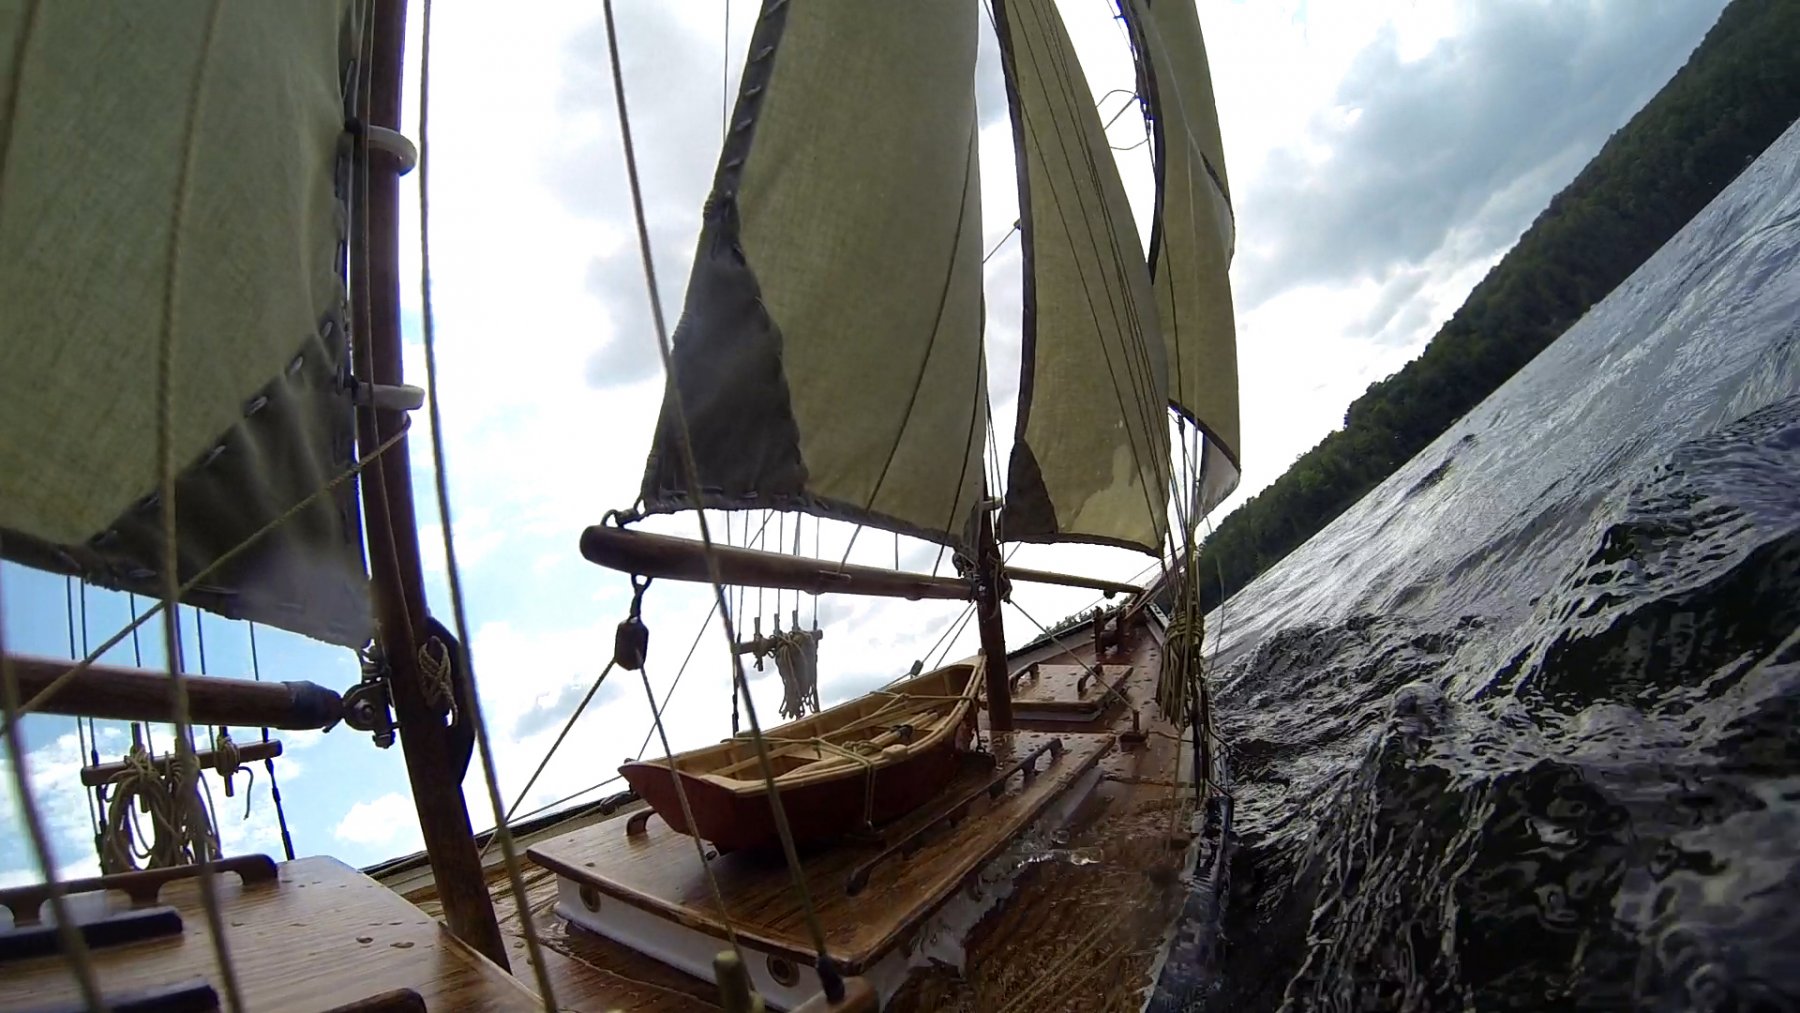
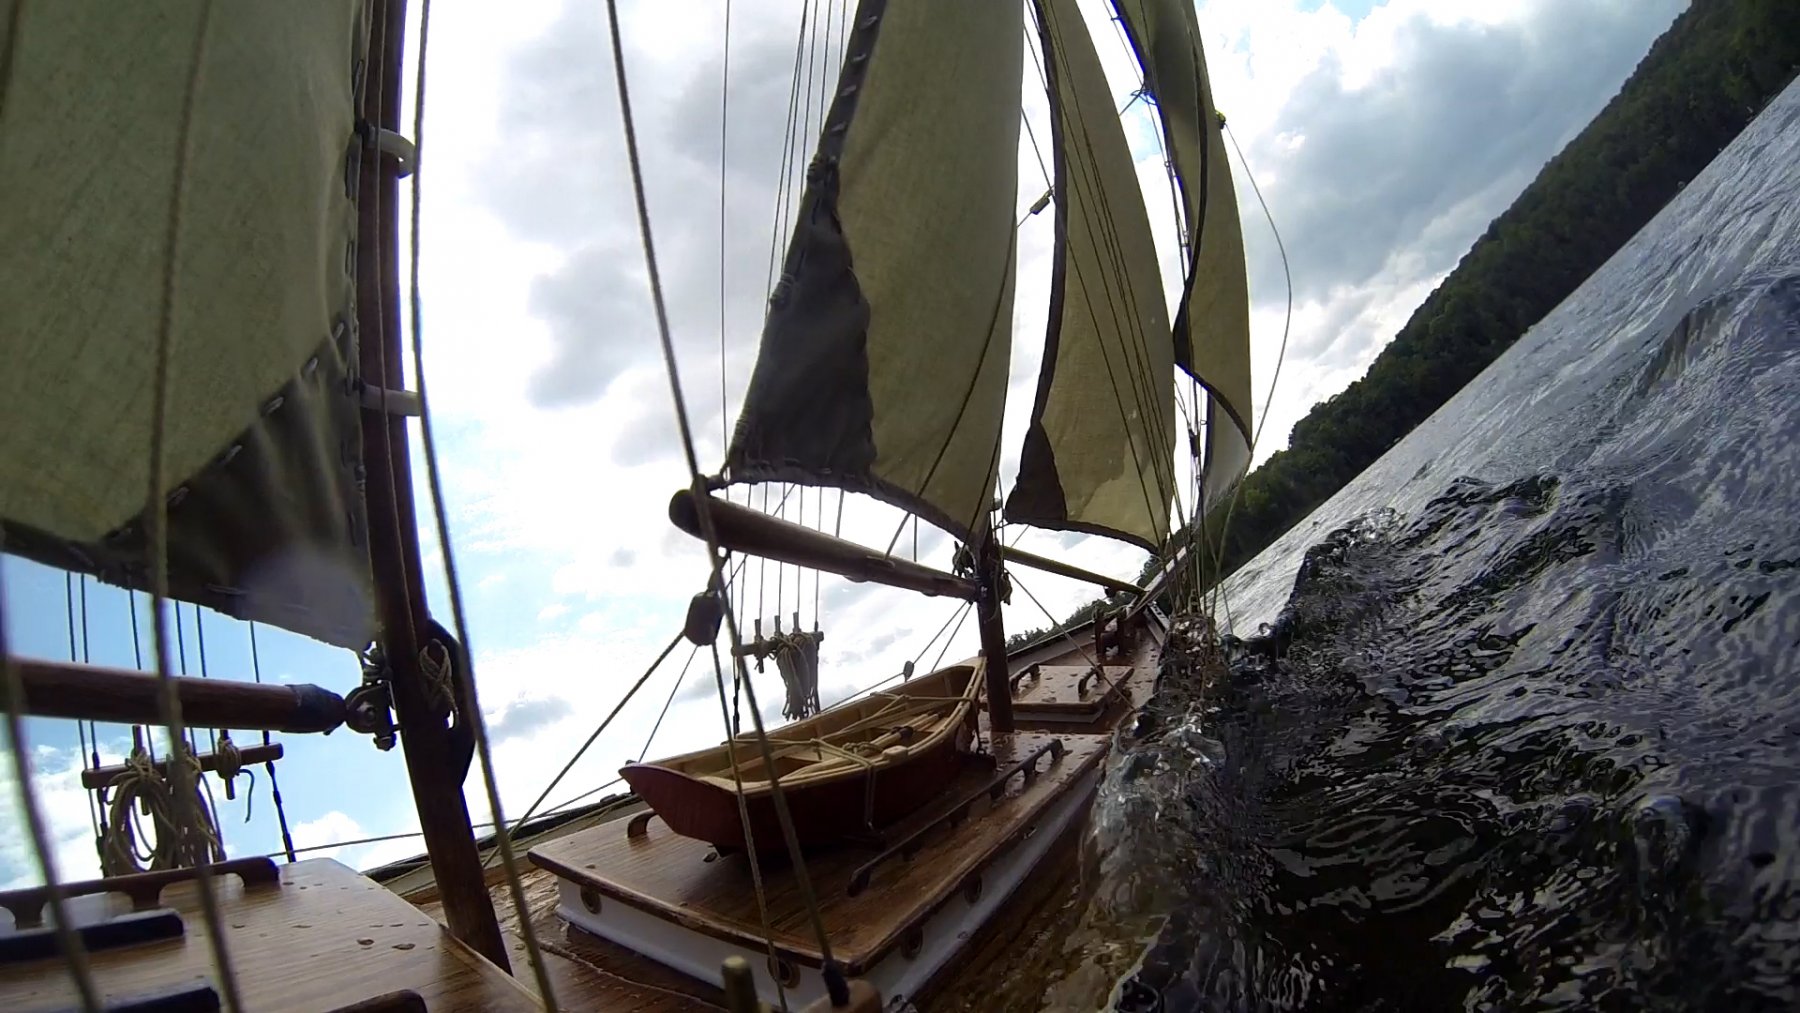
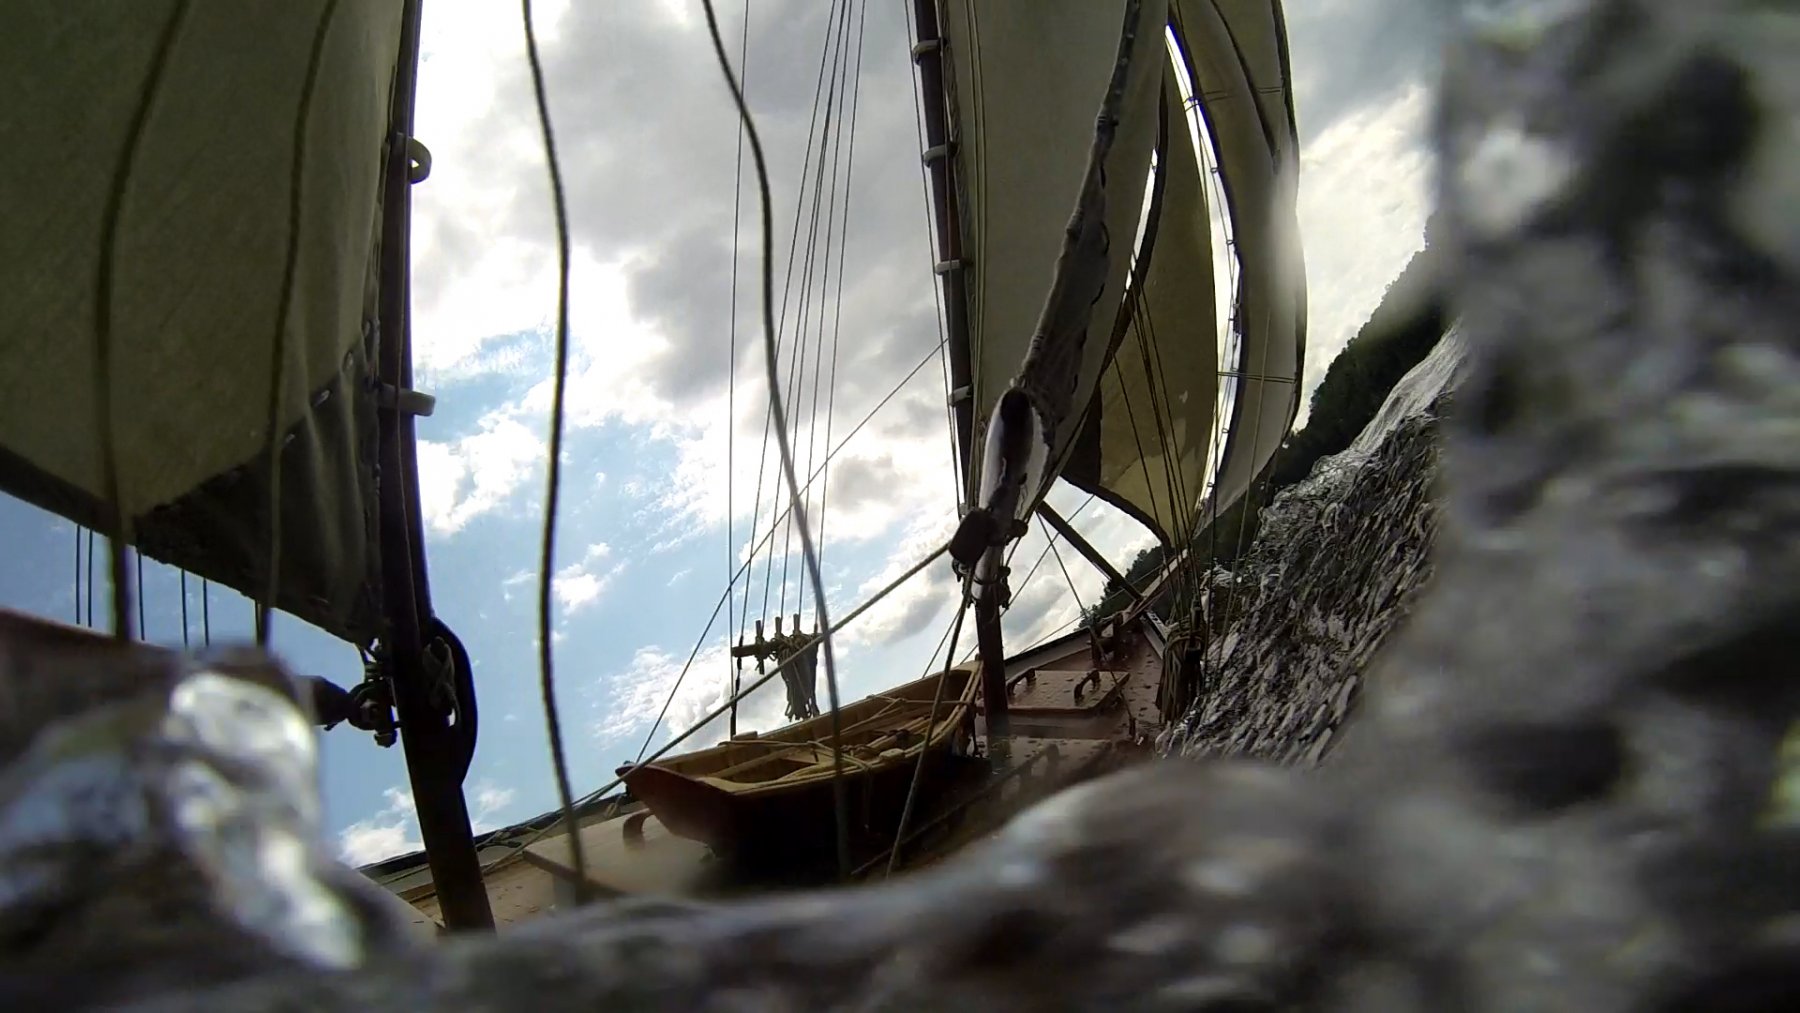
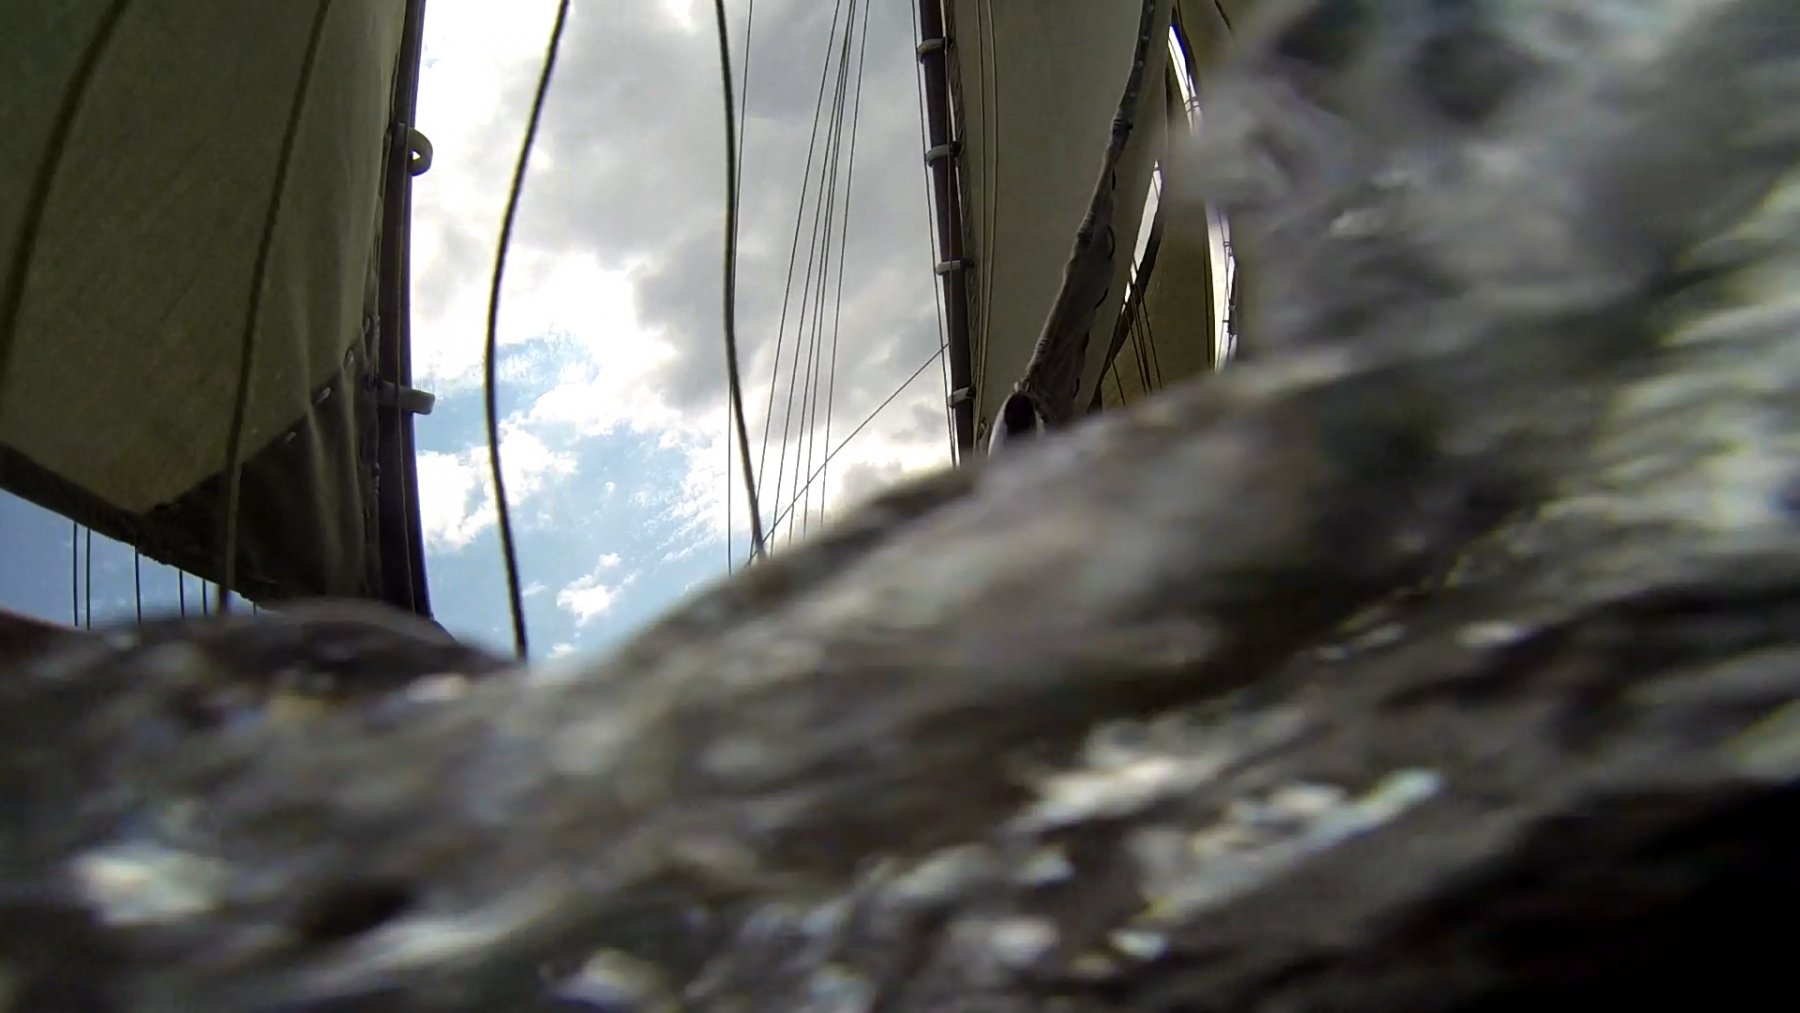
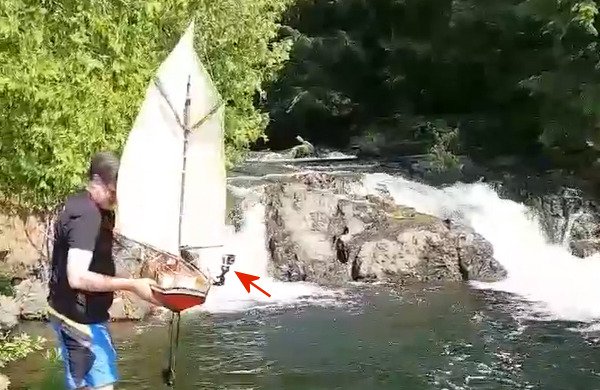
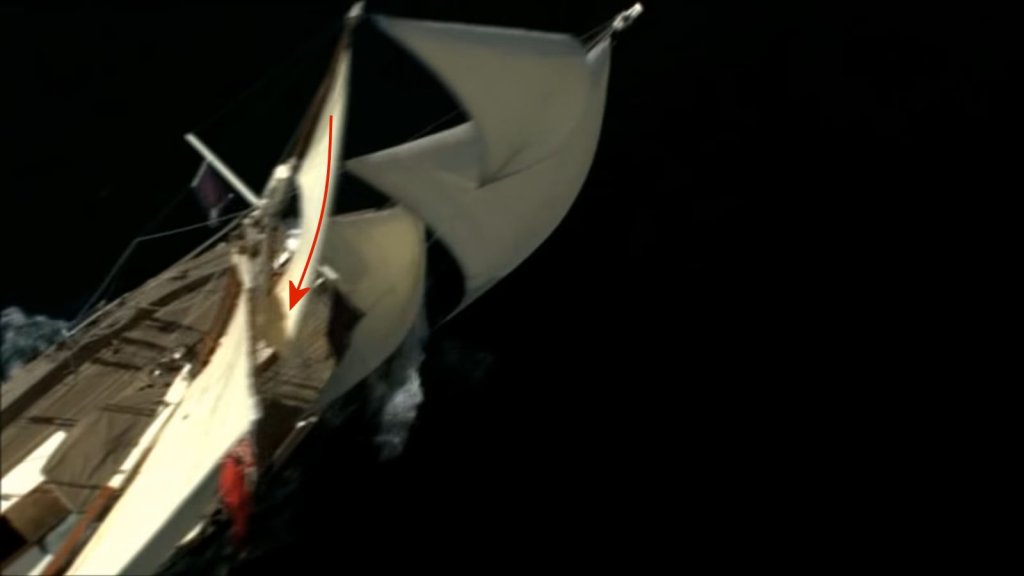
I put Kamanik through some challenging conditions this week. There was a thunderstorm on the way, with strong gusty winds kicking up a few waves. This first image shows (red arrow) how high the GoPro camera sat mounted amidship on the gunwale railing. This series of shots from the GoPro show the boat heeling hard over to starboard under a sudden strong gust of wind. Check out how there's already water flowing past the high side of the deck house. Then we got slammed by another wave. I quickly let out the sheets, but the boat still rolled to starboard far enough to submerge the GoPro camera! That was exciting. Amazingly there was only a tiny bit of water in the bilges after that adventure. It probably came in through the mast boots. Love this boat! 😍


-
Thank you! There were also a few moments that were less than beautiful or graceful... But with the benefit of hindsight in video editing, I deleted those. Who would have guessed that it's surprisingly difficult to coordinate the operation of two control sticks on a transmitter while simultaneously trying to shoot handheld video using a cellphone? I stupidly ran the boat aground on the rocks in front of my neighbour's dock, on the opposite side of the waterfall from our dock. I had to go fetch my canoe in order to retrieve the sailboat. D'oh!
-
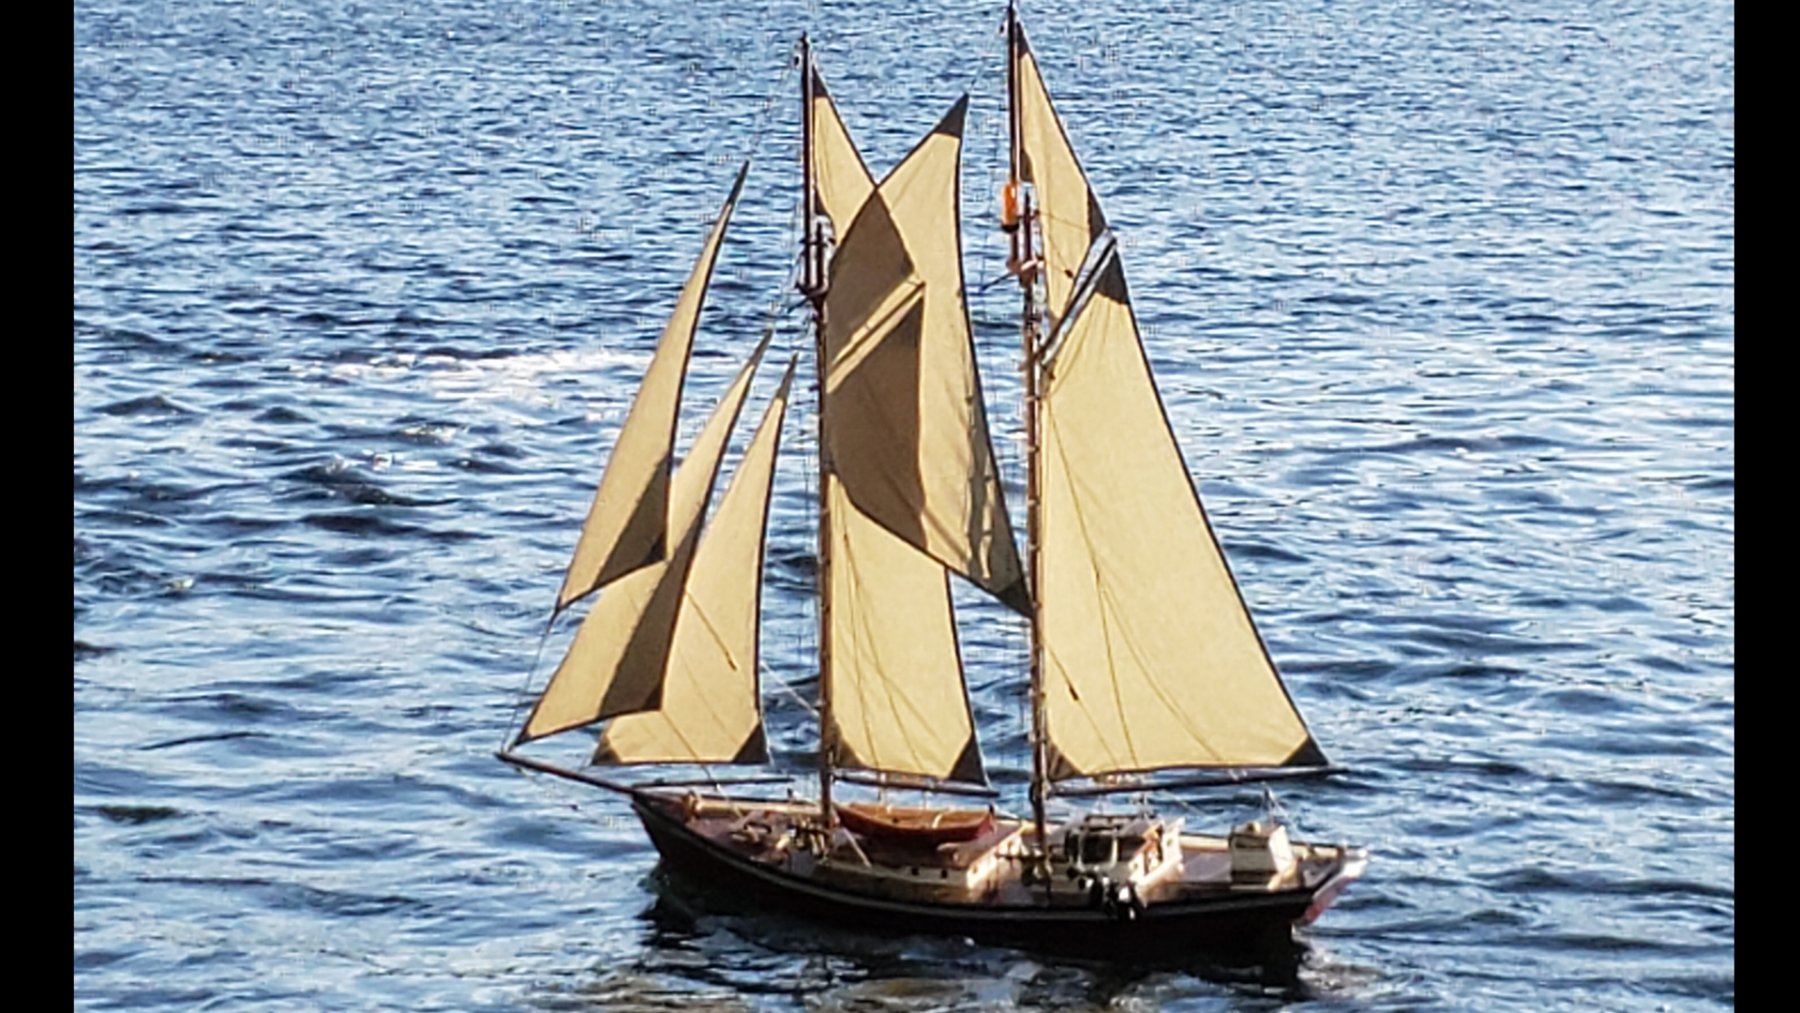
Eureka! It works! I've been itching to get Kamanik back in the water to test out my new sail configuration, but first had to wait for the ice to melt off the lake. Then I couldn't do it because of the high water levels and strong currents from the spring melt runoff. When that finally settled down, I still couldn't go sailing because the black flies were horrendous and would have eaten me alive. We finally had a really nice day yesterday, so I worked up the nerve to give her a test. With all the additional new sail area and increased height of the topmasts, there was a very real possibility of the thing simply capsizing and sinking to the bottom of the lake the first time it encountered a strong gust of wind. So I've been rather hesitant and reluctant to rush things until the water has warmed up at least enough that an emergency rescue jump into the lake to retrieve a sinking boat might be possible. Turns out, she sails beautifully! Phew. Huge relief. This video was actually three separate quick trips, with brief landings for minor tweaks to the rigging and to reposition the camera. It'll require a more comprehensive test day to better figure out what effects can be achieved with all the various trim adjustments. But overall I'm already thrilled with how well this turned out! https://www.youtube.com/watch?v=v7ai9jwqLGU

-
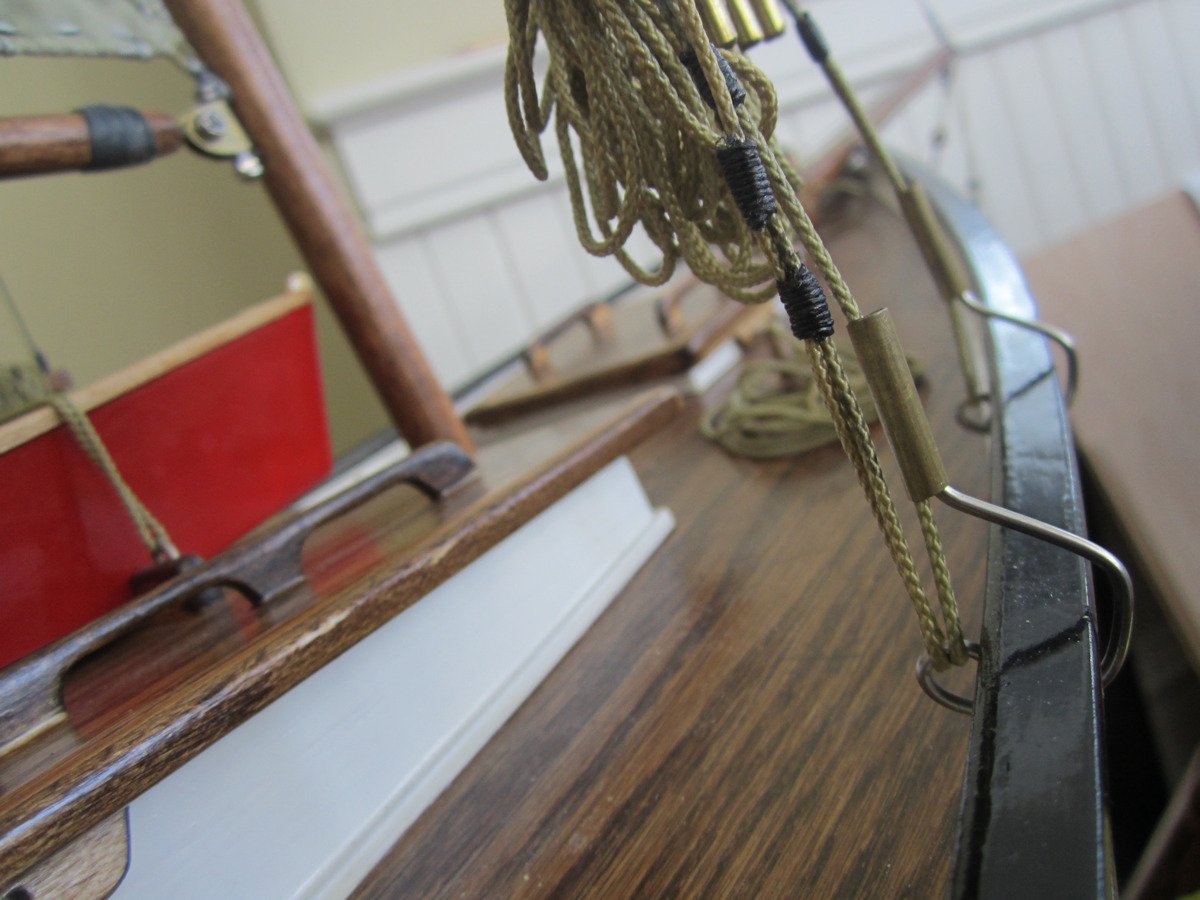
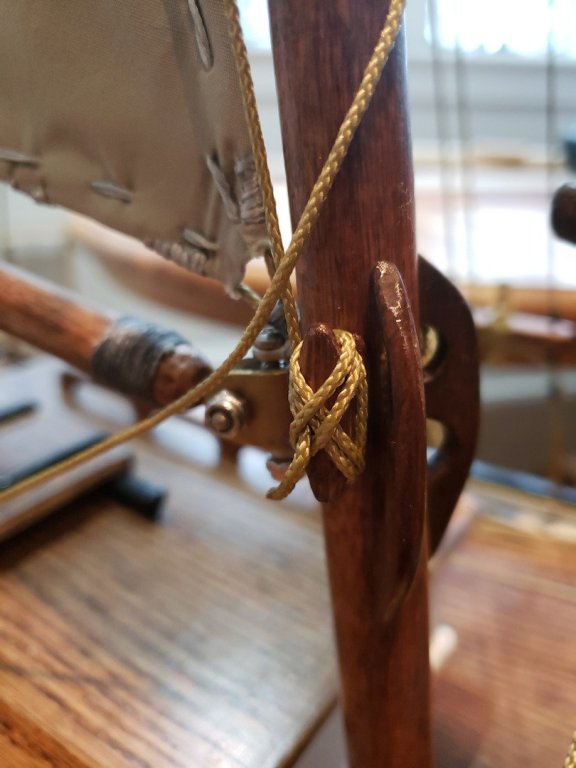
I should also have mentioned, it wouldn't be difficult to abandon altogether the extra sail modifications. It's all reversible and can easily be returned to the original 3-sail configuration, which worked great. Another minor hiccup became apparent after I decided not to drill the extra holes through the deck. Rather than passing the control sheets straight down through the deck, I needed to add some cleats to the bottom of the masts to instead tie off those lines. That was simple enough. However, of the two sheets leading to the foot of the fisherman's staysail, the loose side would sometimes drape under that new cleat causing the winch servo to bind whenever the sheet was next pulled tight. I solved that by fashioning a little rail alongside the cleat, so that now the sheet rides up and over rather than snagging under the cleat.

-
On 4/9/2019 at 7:17 PM, Bob Cleek said: Turning turtle would certainly be less than ideal... I haven't had a chance to try it out yet. The ice has finally melted off the lake, but we've had huge amounts of flooding in the region and there's still a raging torrent streaming past our dock. Once the water warms up a bit I will do some stability tests to determine whether capsizing is likely. I'm fairly confident it won't present too big a danger. The headsails and additional weight aloft will surely cause the boat to be more tender than it was, but the 12-lb lead bulb at the bottom of her long aluminum keel fin gives the boat amazing stability. Even in the strongest gusts, the previous 3-sail configuration only rarely ever caused her to momentarily dip her midship gunwale. It's certainly something to be wary of, but I'm not too worried, um, yet... It surely is complicated. But I was convinced I could get it to work. Unfortunately, for the moment, I've had to concede defeat. The three boom sheets are all controlled simultaneously by a single winch servo. Tacking the flying jibs and the foot of the fisherman's staysail is successfully being accomplished with a second winch servo. A third servo was going to handle tacking the topsails and passing the peak of the staysail down and under the triatic stays. I had the rigging all figured out and, last step, only needed to drill some more holes through the deck to join the working lines to the winch line below deck. But, before committing to drilling more holes, I first tried pulling the lines by hand and soon discovered it just wasn't going to work. The problem is that my crude sails, cut from bedsheets, are simply too heavy. They snag and bunch up as they're being pulled up and over the gaff peak halyards and triatic stays. I suspect the winch servo is strong enough to pull those rigging lines apart. That wouldn't be good. This would probably work better with smoother lighter sail material, something like silk. In the meantime, I'm just going to leave the topsails fixed in place and remove the triatic stays, keeping only a single stay joining the peaks of the topmasts. Then again, the whole challenge of how to tack the topsails will become moot if the boat turns turtle and sinks the first time I sail it this year. 🙃
-
Thank you, Keith. I was totally blown away by your Altair project, and am now following your Germania build with great interest. Your fabrication skills are absolutely astounding.
-
 Mark - I spent a long time wondering about this when I was building Altair. Here is by best shot at the answer: The worst case is the obstruction caused by the (fixed) stays that brace the fore and main masts. Clearly the topsails have to be rigged on one tack and they are unobstructed by the rigging on the tack they are hoisted on. When going about, one option is to take them down and re rig them. I think only the most dedicated of crews would do this - and then not often. Most crews seem to ignore the problem and just accept the loss of efficiency by letting the sails lie on the rigging lines. I have only ever sailed sloops so I'm not an expert and would welcome any other views. Hi Keith. I was searching for an answer to exactly this question, how are topsails re-positioned when changing tack? It was actually your astoundingly beautiful Altair build which brought me to this forum. At first I thought you were intending to build a functioning model of Altair to be sailed by radio control, in which case I had hoped you would solve for us how to tack the topsails. But, totally understandable, your priceless Altair and now Germania are both far too valuable to risk losing at sea. I built a much simpler plywood gaff-rigged model schooner according to the "Irene" plans purchased from Gary Webb at Bearospace, and successfully sailed it all last summer. For video of the boat in action, see YouTube playlist: http://tinyurl.com/kamanik The original plans featured a 3-sail rig of mainsail, foresail, and jib, which works really well. But, over this past winter I decided to add topmasts to support a more complicated 8-sail configuration including topsails. That led me to thinking about how those topsails could be tacked. Since a radio-controlled model is notably lacking in "dedicated crew" required to take down and re-rig the sails during each tacking manoeuvre, I tried to come up with a way it could be done (in theory) using a winch servo. Similar to flying jibs using two sheets, one to port and another to starboard, to pull the jib forward and across when tacking, topsails can use two tack lines to pull the foot of the sail up and over the obstructing rigging when changing tack. I've explained with photos and video in this thread: Newbie from Ottawa Unfortunately I've since had to admit defeat on this idea. The problem is my crude sails are much too heavy. They're basically cut out of bedsheets, eh. The heavy sails tend to bunch and snag while being pulled over the gaff peak halyards and triatic stays. If the sail material were something much lighter and smoother, like silk, I'm sure it would work fine. For now, even though it offends the purist in me, I'm just going to leave the topsails fixed and delete the triatic stays, with only a single stay joining the peaks of the topmasts. Once the lake warms up a bit, I'm itching to try it out like this.
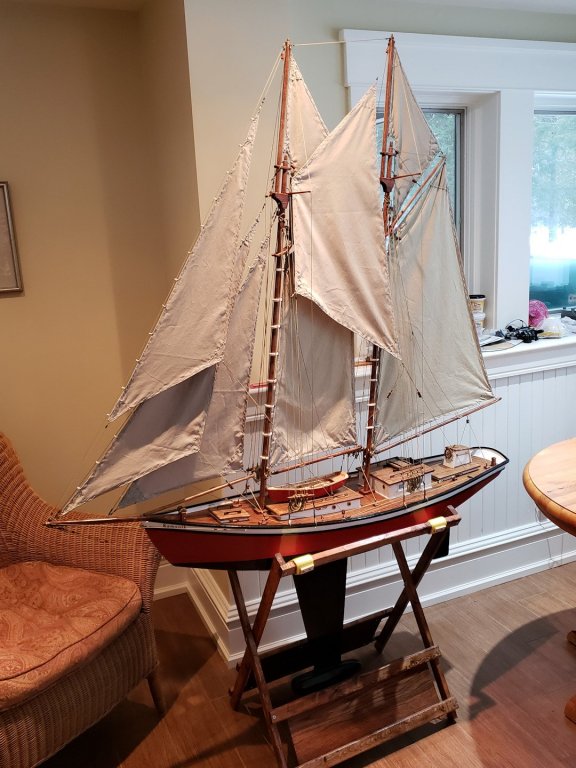
-
Reaffirming my inept newbie status, I have to admit I don't know how to move pics from here to a different thread. Are you saying I should start a new thread and cross-post the same images again there, and delete the ones here? Confused. Meanwhile, here are the new sails rigged and ready to try out. Unless something really embarrassing happens, like it immediately capsizes and sinks first time out, I might have some new sailing videos to post later. I'm just waiting for the ice to melt off the lake.
-
Hey Scott, I'm in Ottawa too! Well, actually Val-des-Monts, but close. We should get together sometime. If you're looking for a suitable project, check out my build in this thread. I've gone a little beyond what the original simpler plans called for, but it's an easily do-able ship.
-
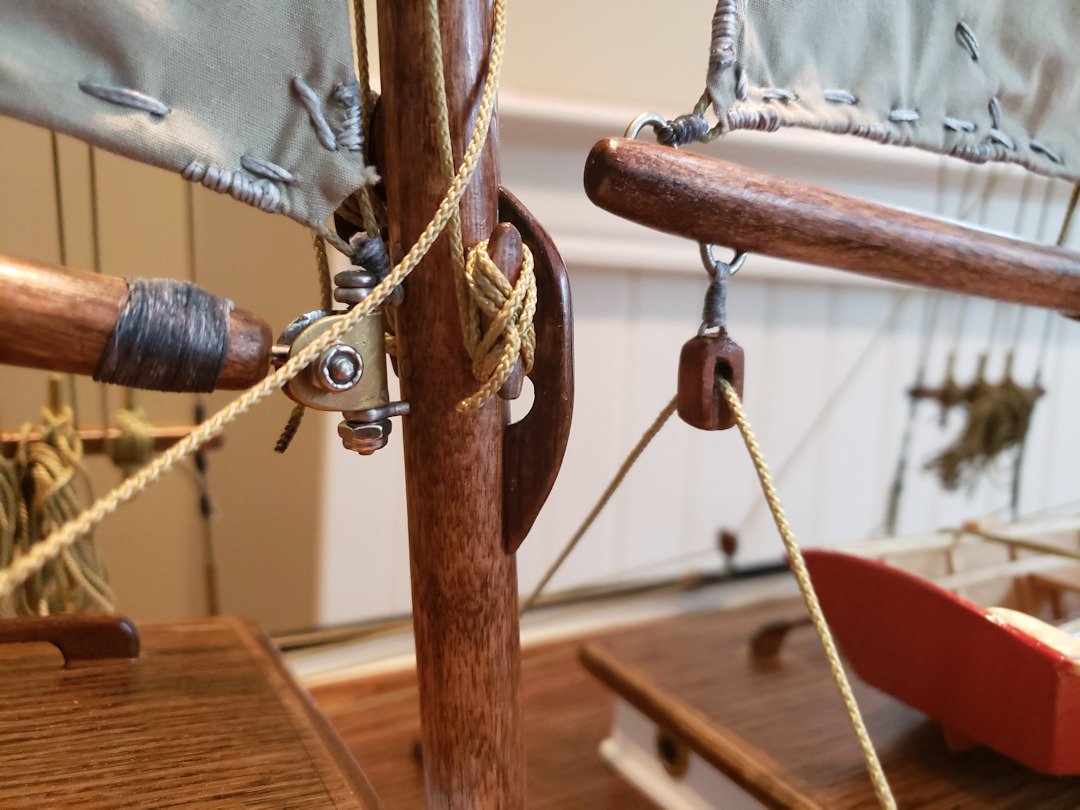
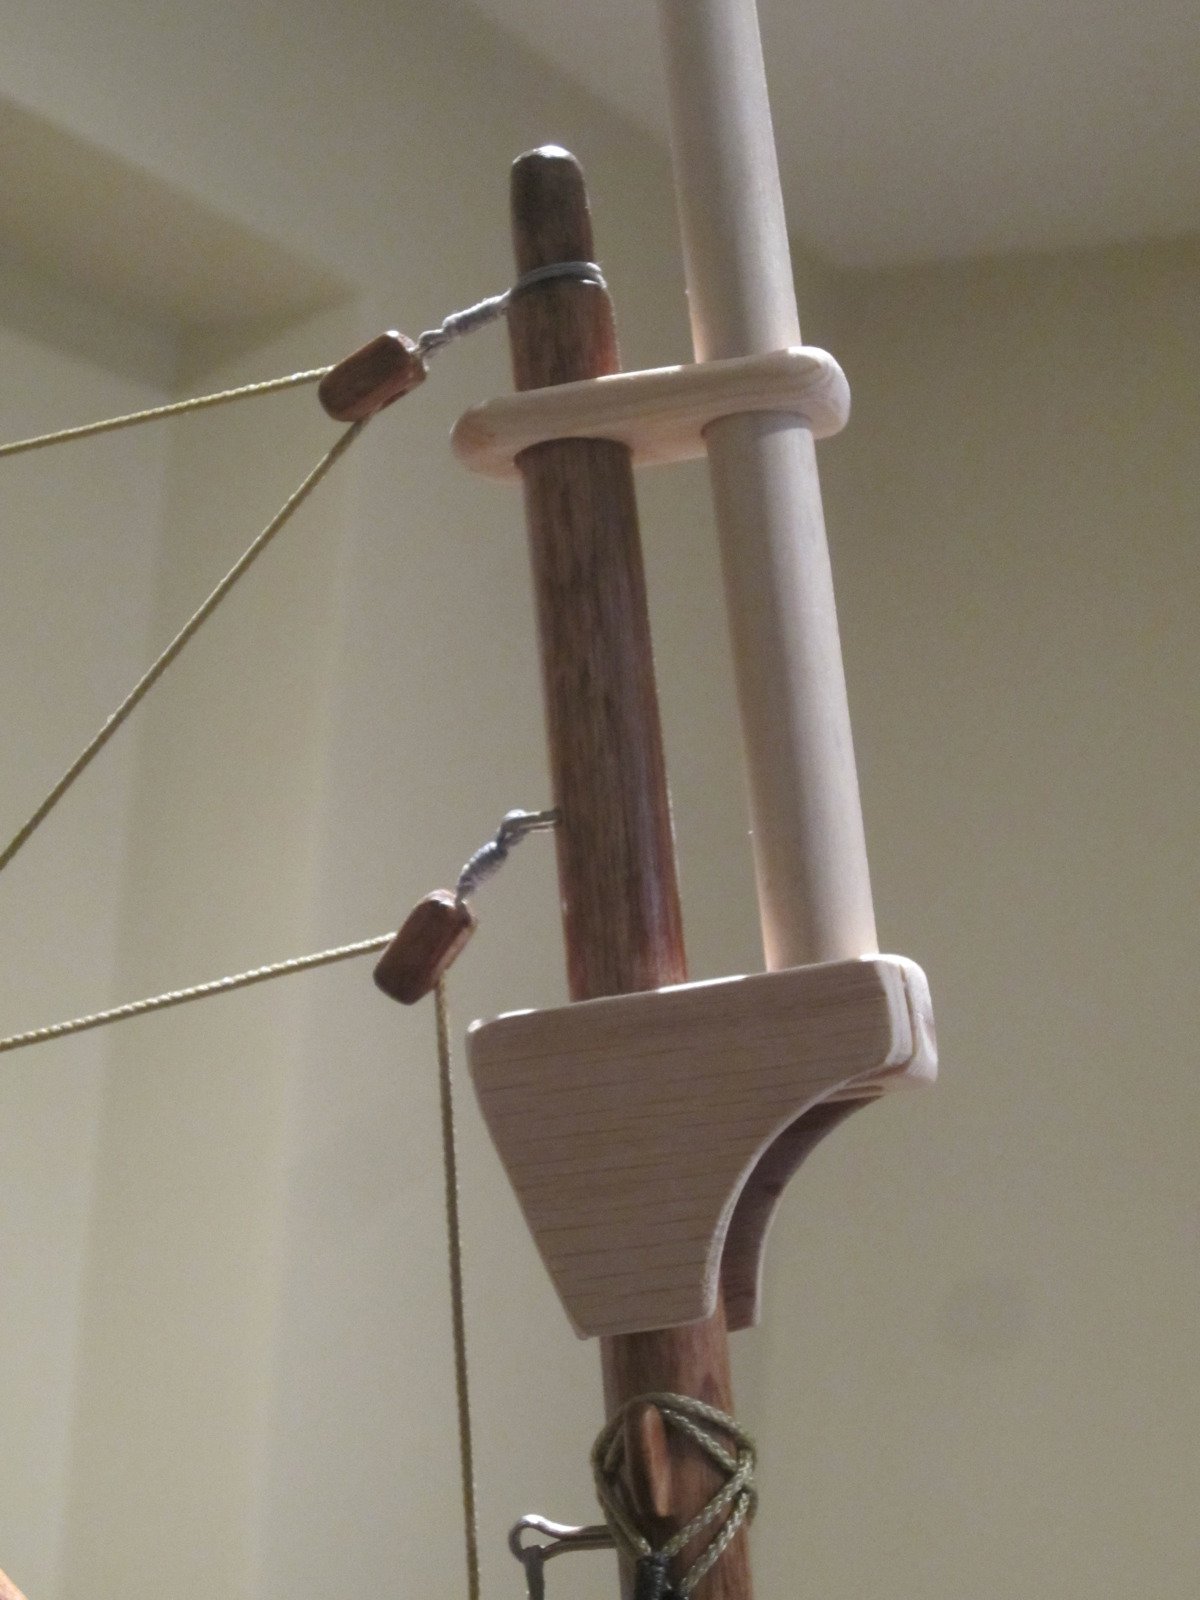
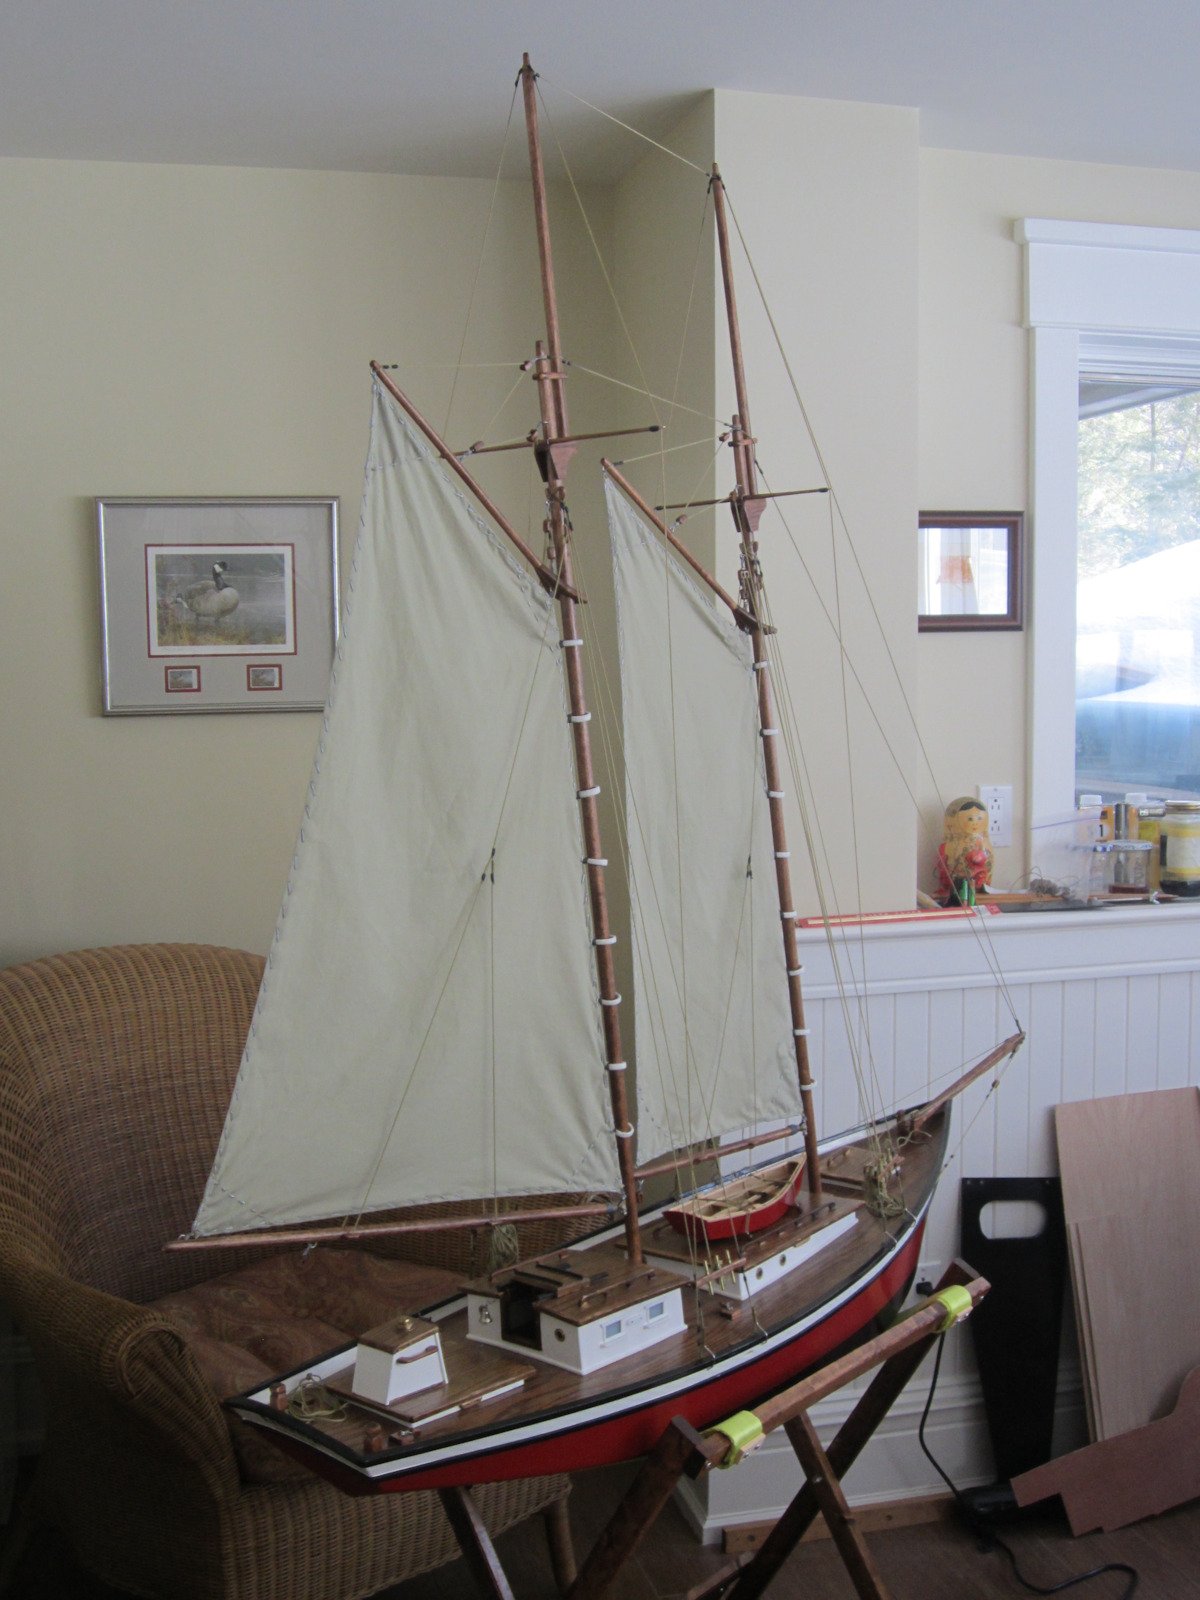
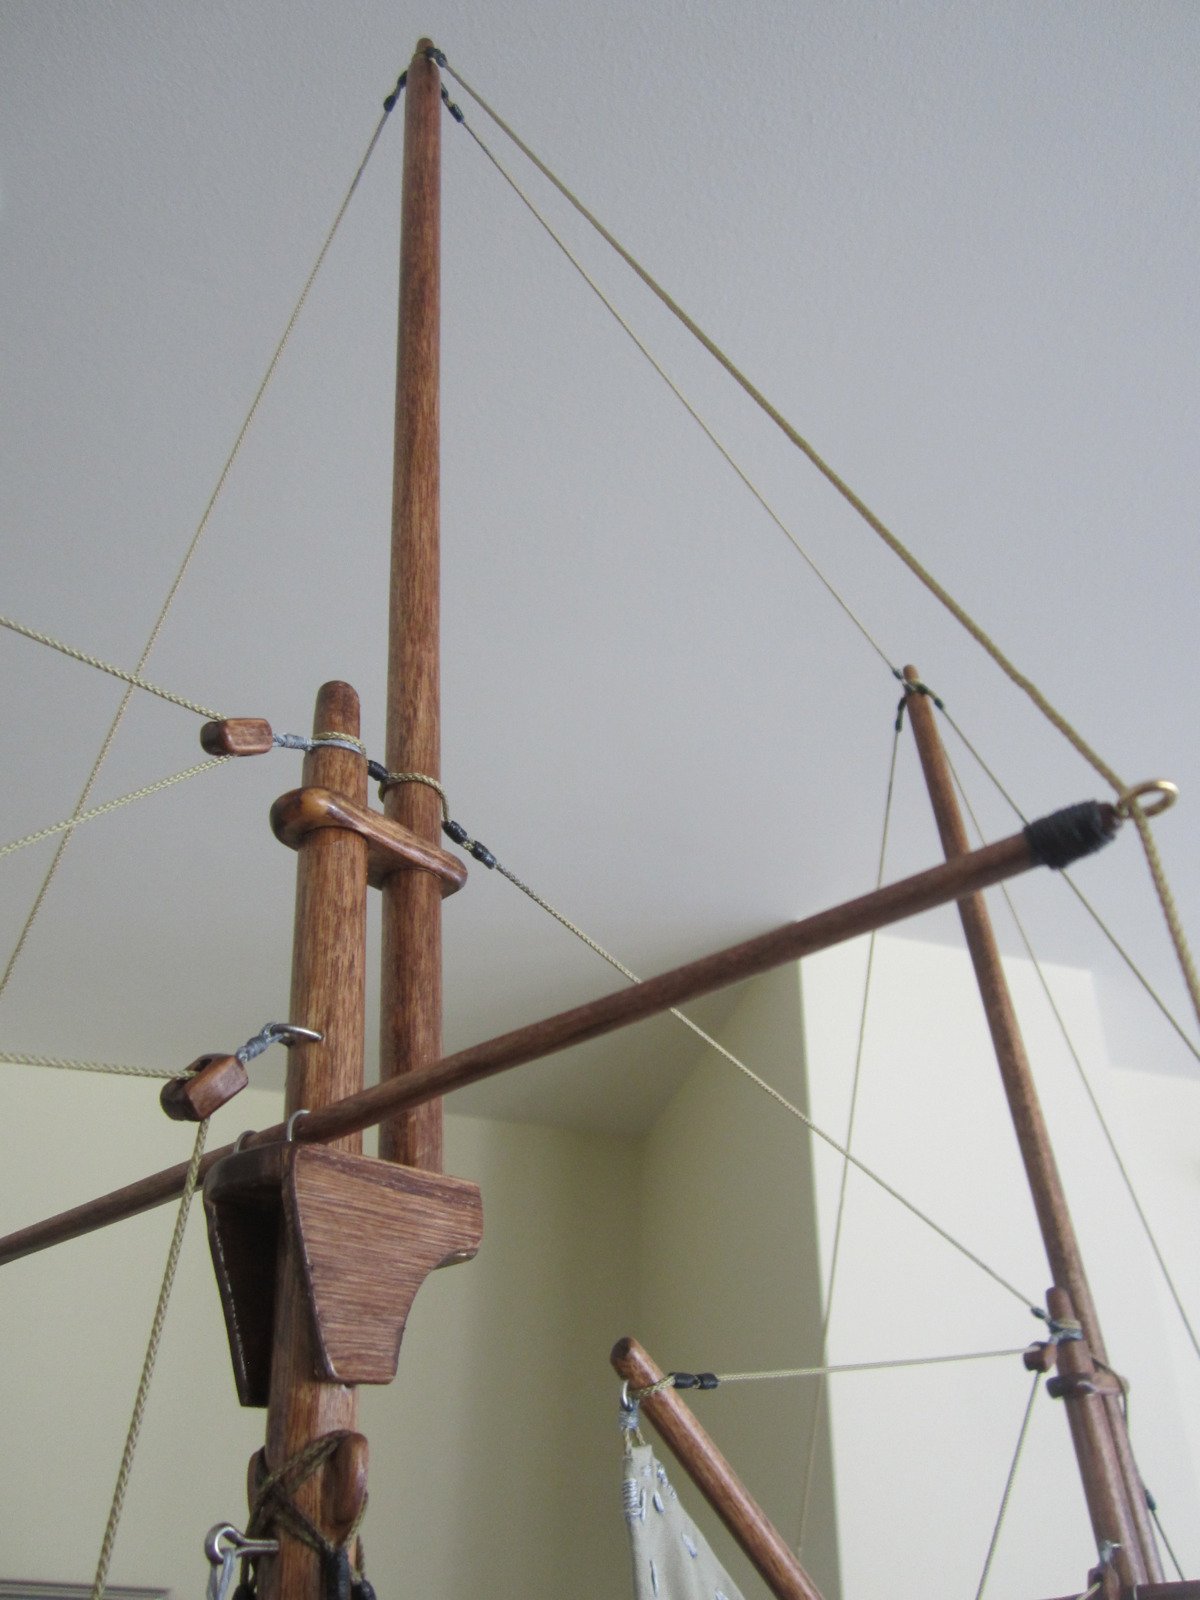
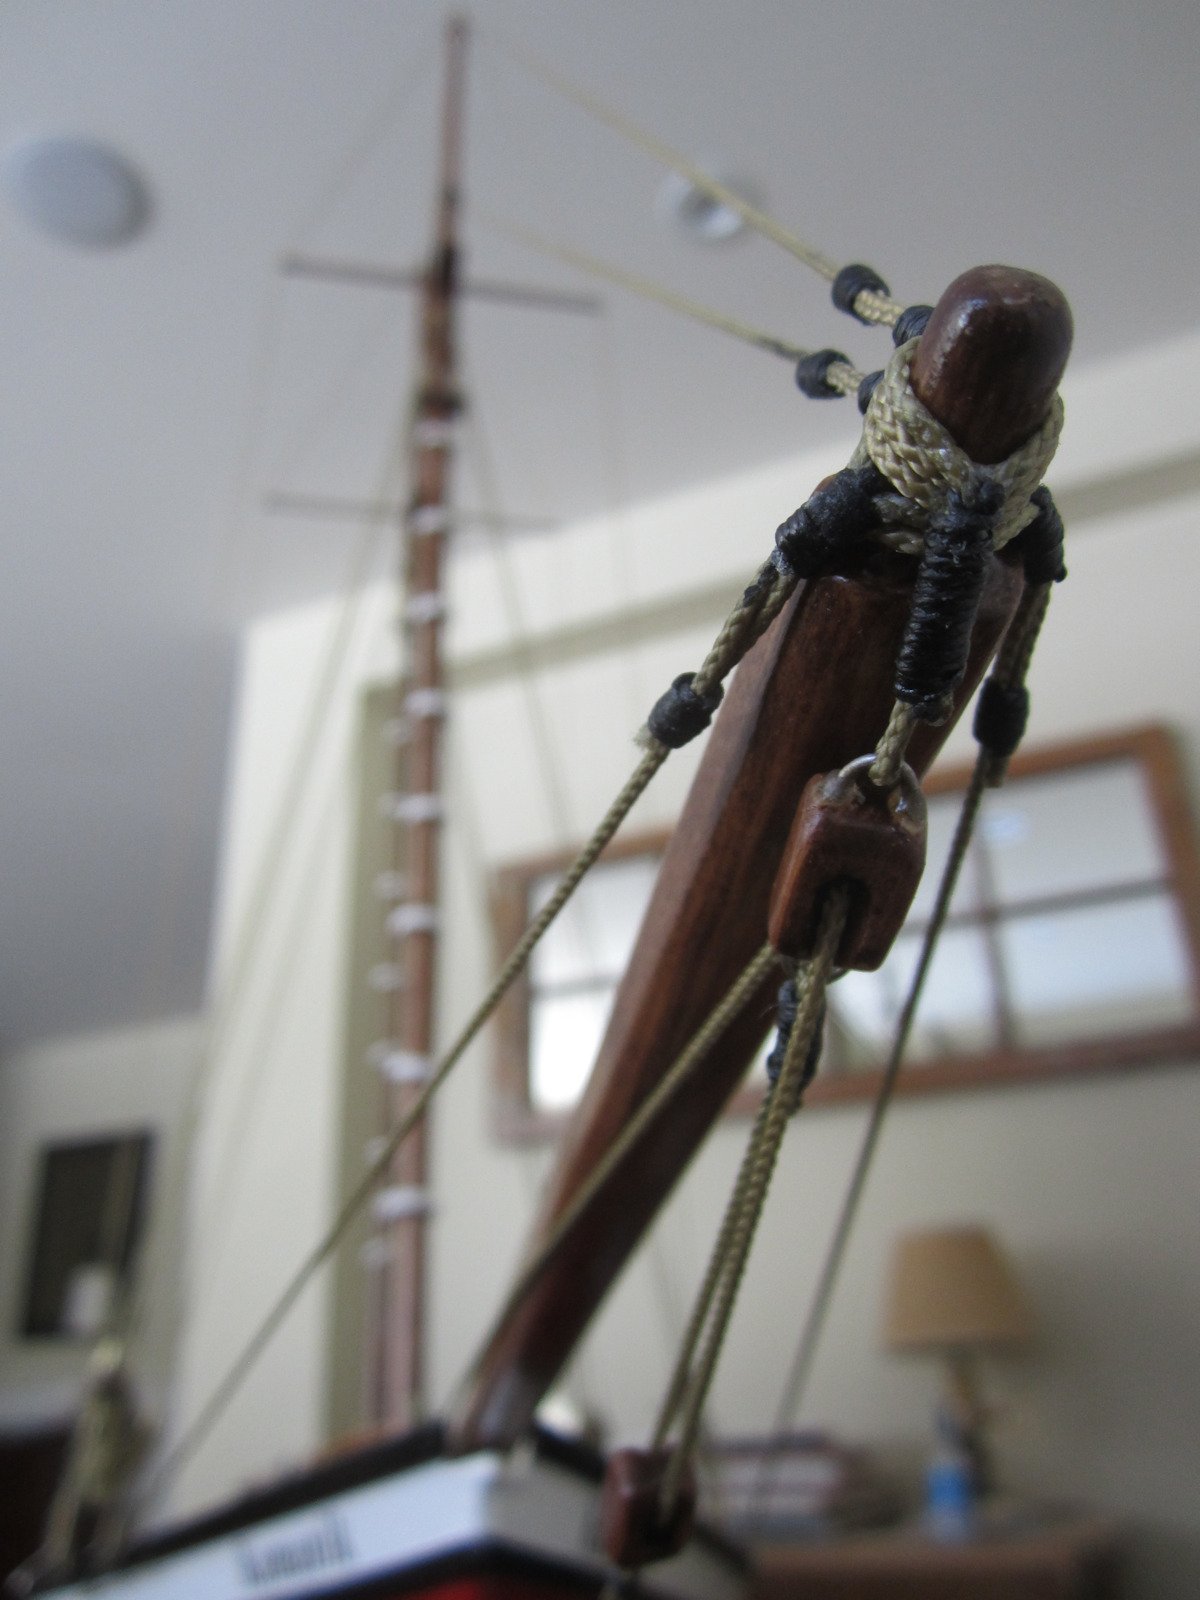
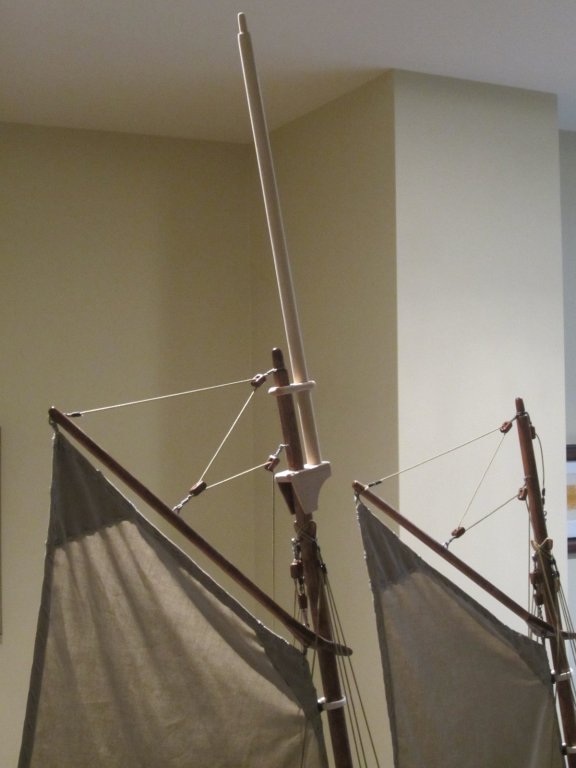
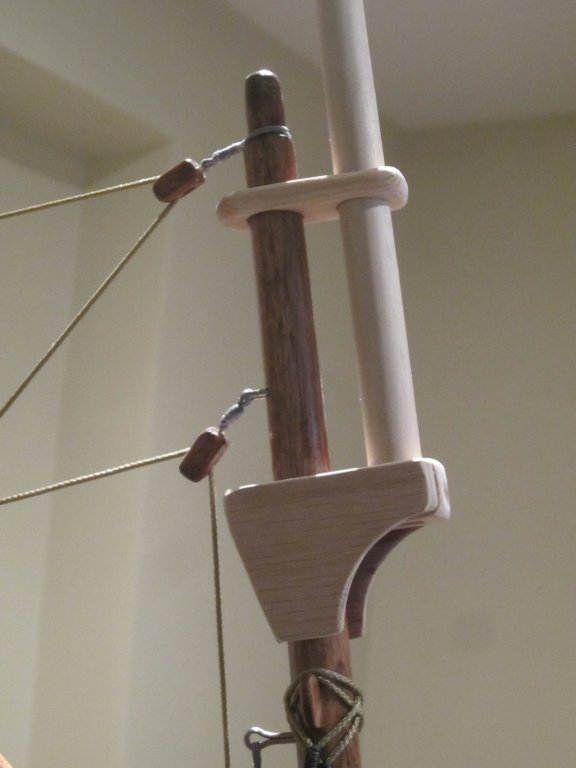
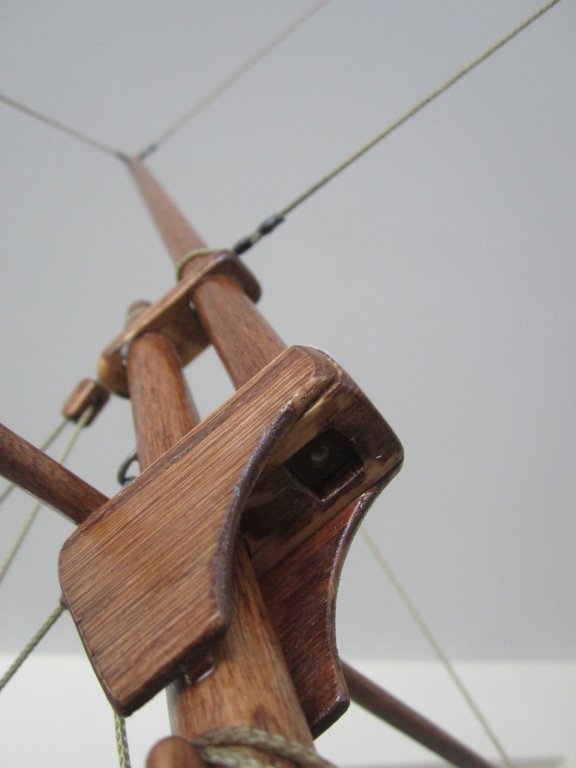
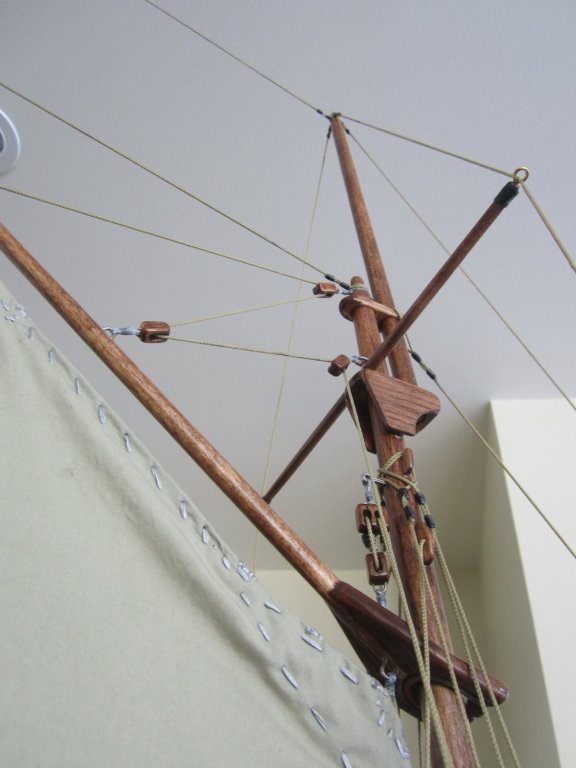
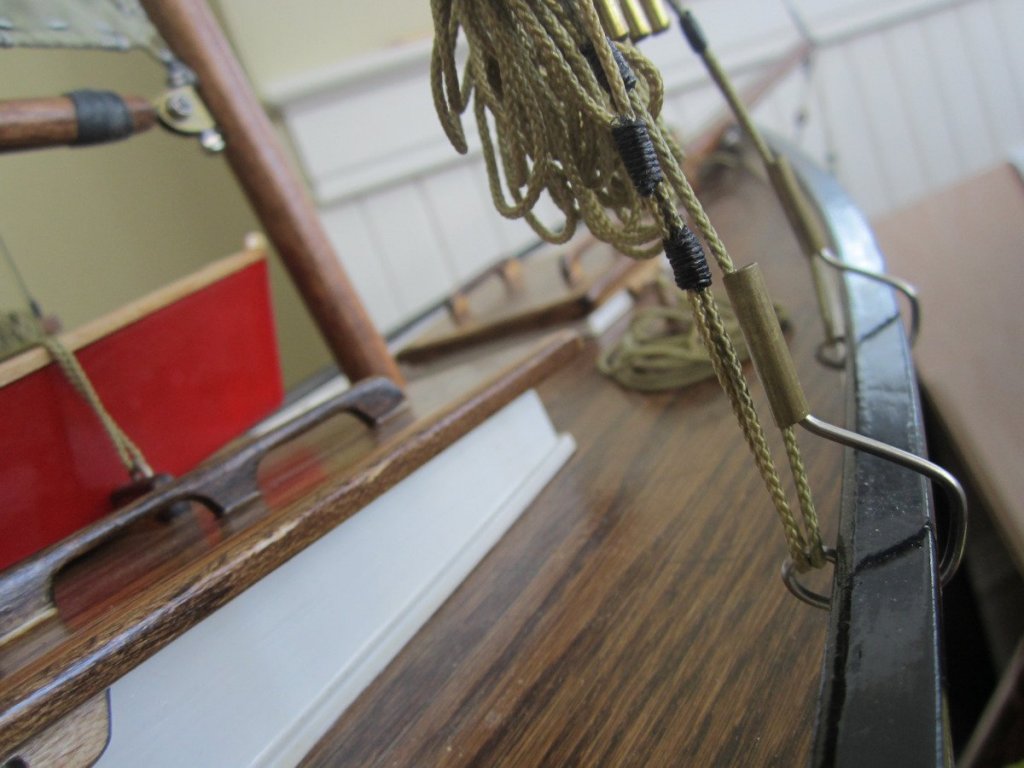
Meanwhile, Phase-2 has now been completed. I've added topmasts! This has already completely changed the look of this ship. It's much taller now. I'm starting to wonder how it'll fit out the door when it's time to carry it down to the lake. The topmasts are both removable. They slide down to seat snugly into a square socket on the masthead pedestals. The tension on the shrouds going down through the spreaders prevents the topmasts from coming out of their seats. Those shrouds are fastened to the rear quick-release pelican hooks which fasten the mast shrouds to the gunwale rail. Popping the pelican hooks loose relieves the tension on the shrouds, allowing either just the topmasts to be removed, or the complete masts with topmasts attached to be removed as one assembly. The stays for the two flying jibs are in place now, but I have yet to add a shortened jib boom and another stay for the jib sail. It's getting a little busy on the end of the bowsprit. I'm considering beefing up the two blocks in the bobstay which holds down the bowsprit. There will be quite a bit more upward tension on that now. There are no actual rolling sheaves in those blocks. It's just a solid wooden block with a hole and couple of slots cut in it. The little metal loop at the top of each block is a short length of wire glued into the block. That wire is prone to pulling out if the block is over-stressed. I'm thinking it'll require a strap around the entire block. Next up I need to start sewing some new sails, making a few more rigging blocks, and figuring out the routing of all the control sheets...


-
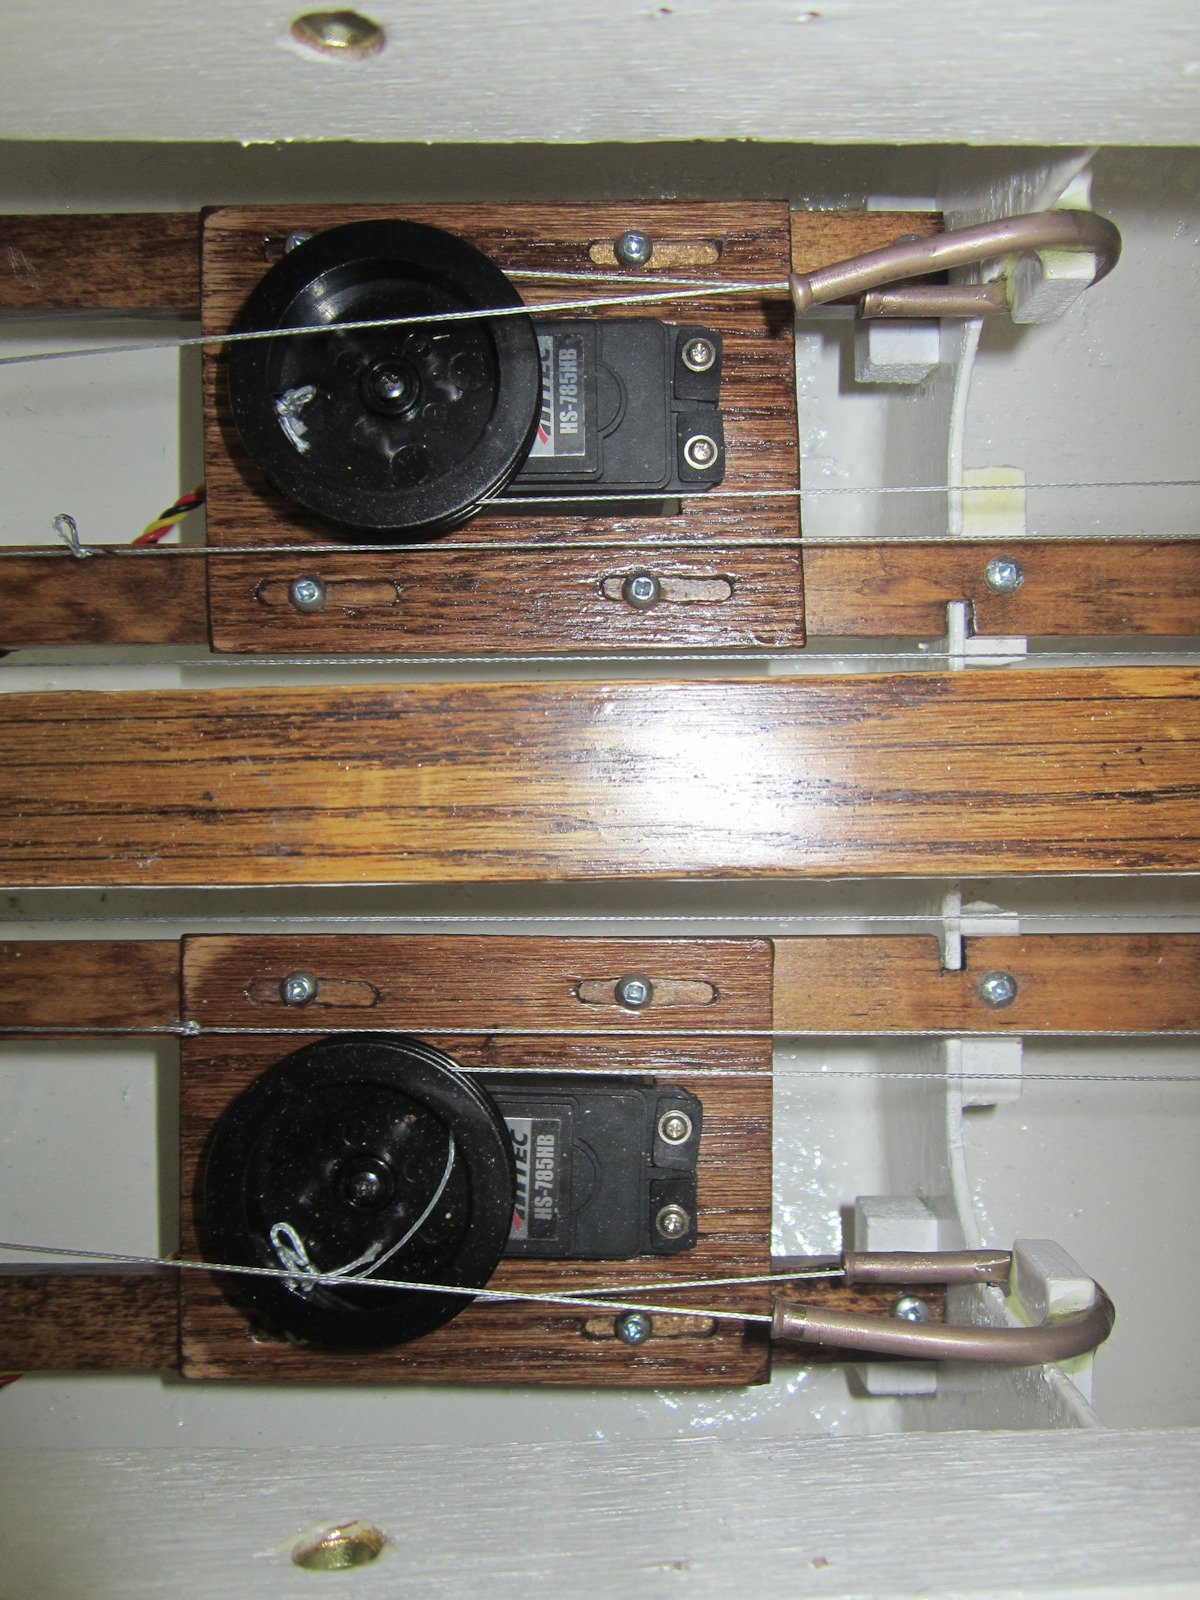
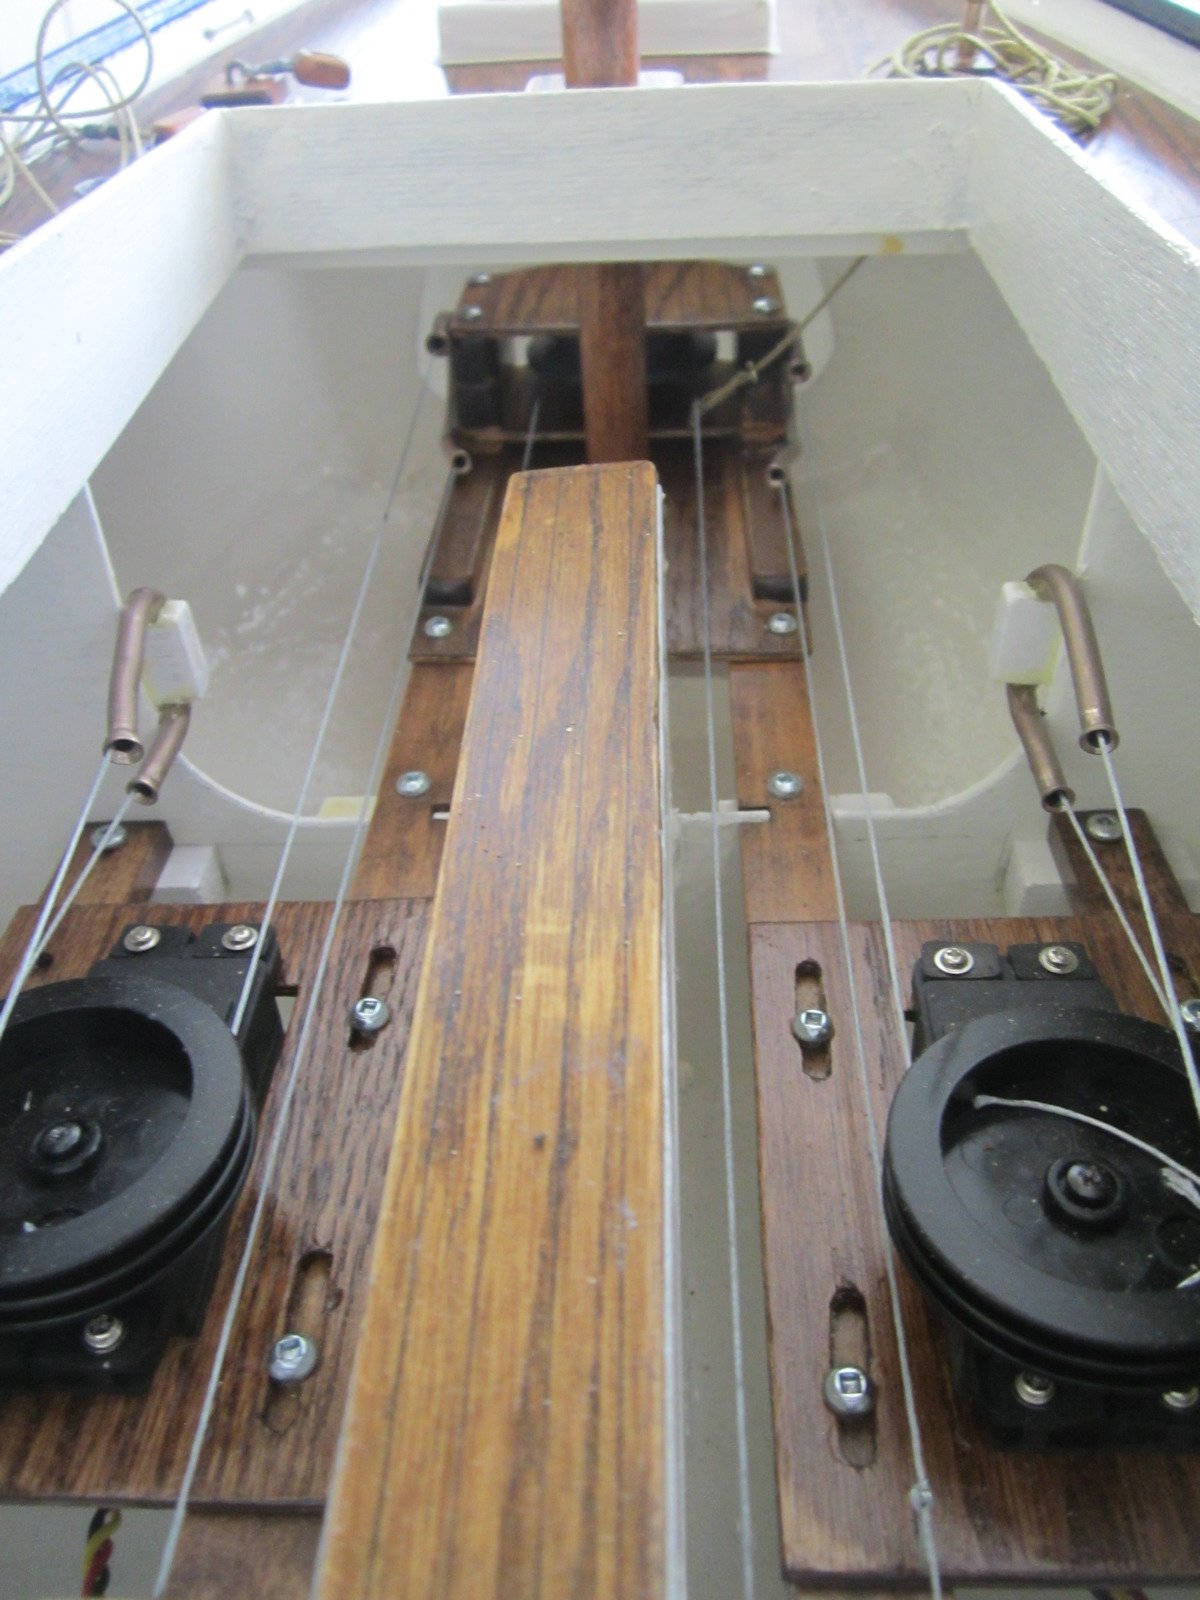
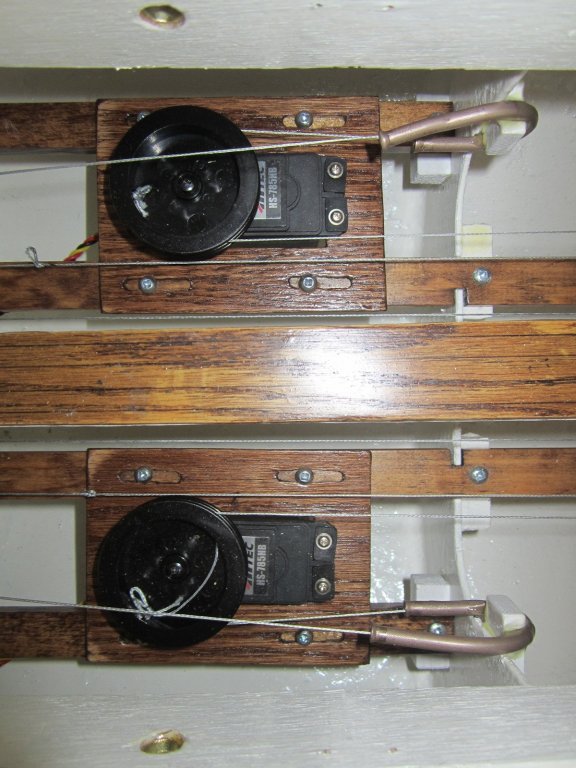
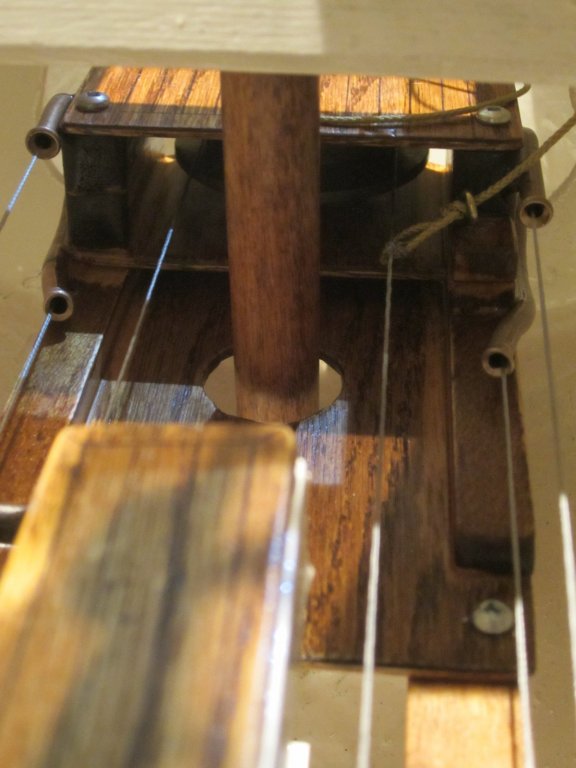
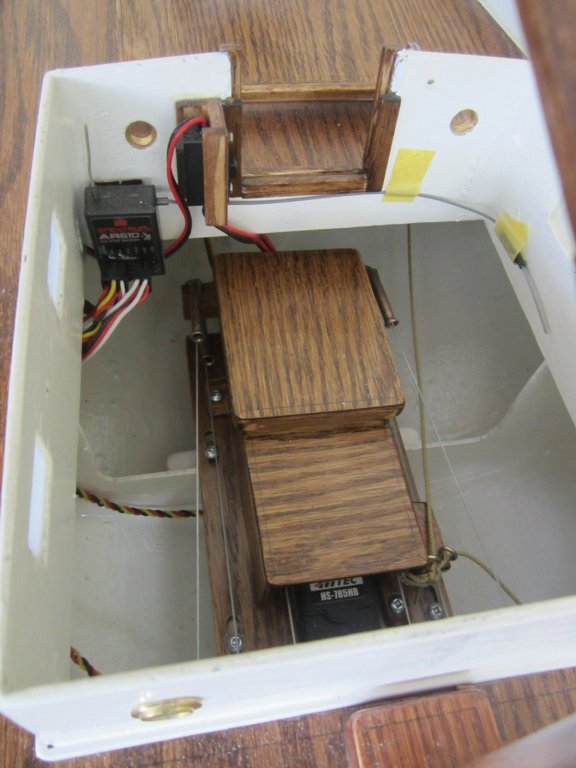
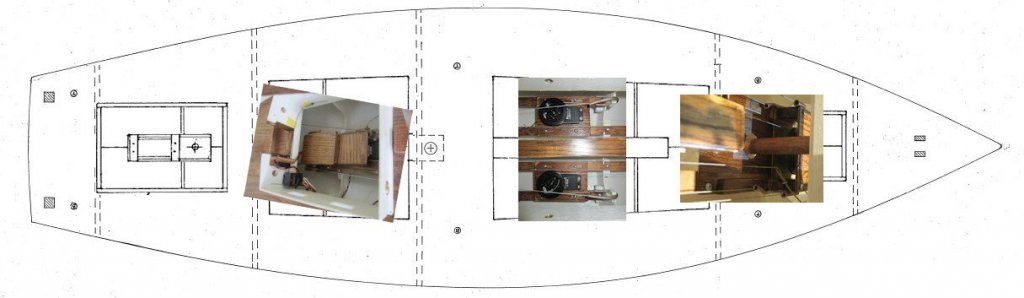
Previously the whole thing was controlled with just a two-channel system, one servo for the rudder, and one winch servo to simultaneously trim all three sail sheets. The new arrangement requires the addition of two more winch servos. One to trim the flying jibs, and another to tack the gaff topsails and the fisherman's staysail. Here's how the two new servos and winch lines were installed. I haven't yet hooked up the new sheeting system. That's still to come...

-
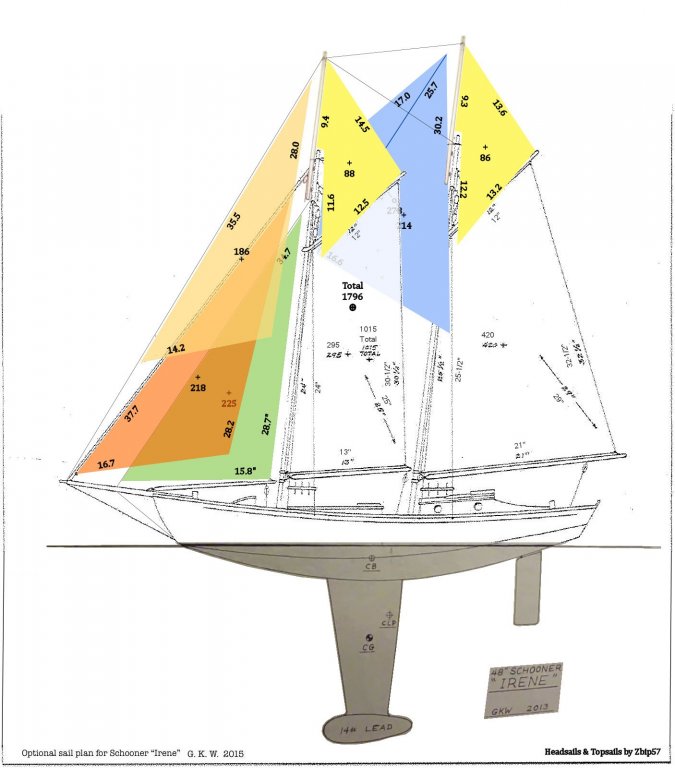
Well, in further news, I've finally decided to go ahead with my half-baked plans to add more sails to my model schooner. The plans are now fully-baked and I've taken the first steps to implement the changes. Here's what I have in mind with some, as yet, approximate dimensions. Total sail area will be increased from the original 1015 sq-in 3-sail configuration to a nearly double 1800 sq-in 8-sail arrangement!
-
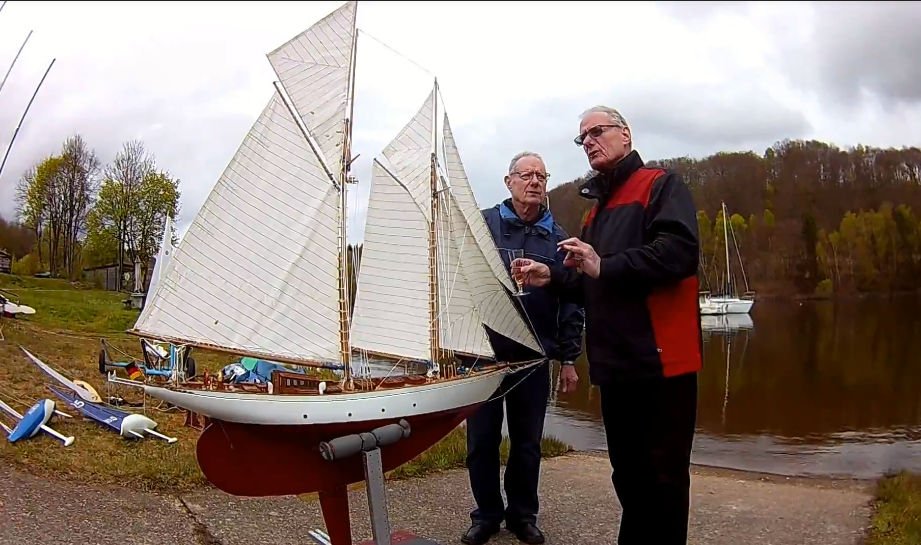
For any potential first-time builders interested in RC sailing, here is a video recently posted by yet another new builder of the "Irene" schooner showing the build steps for this relatively simple plywood design. The plans provide for two different sail layouts. The original "Irene" designed by Gary Webb featured a Bermuda rigged mainsail, as was also chosen by this particular builder. I went with the dual gaff-rigged layout for my Kamanik, which also sports a longer bowsprit. And here is a detailed look at Gary Webb's original "Irene".
-
Hey, I found a video of an RC model Altair on its (unfortunately less than graceful) first introduction to water. https://www.youtube.com/watch?v=XtS_SdAs4GQ (see at 1:50 in the video.)
-
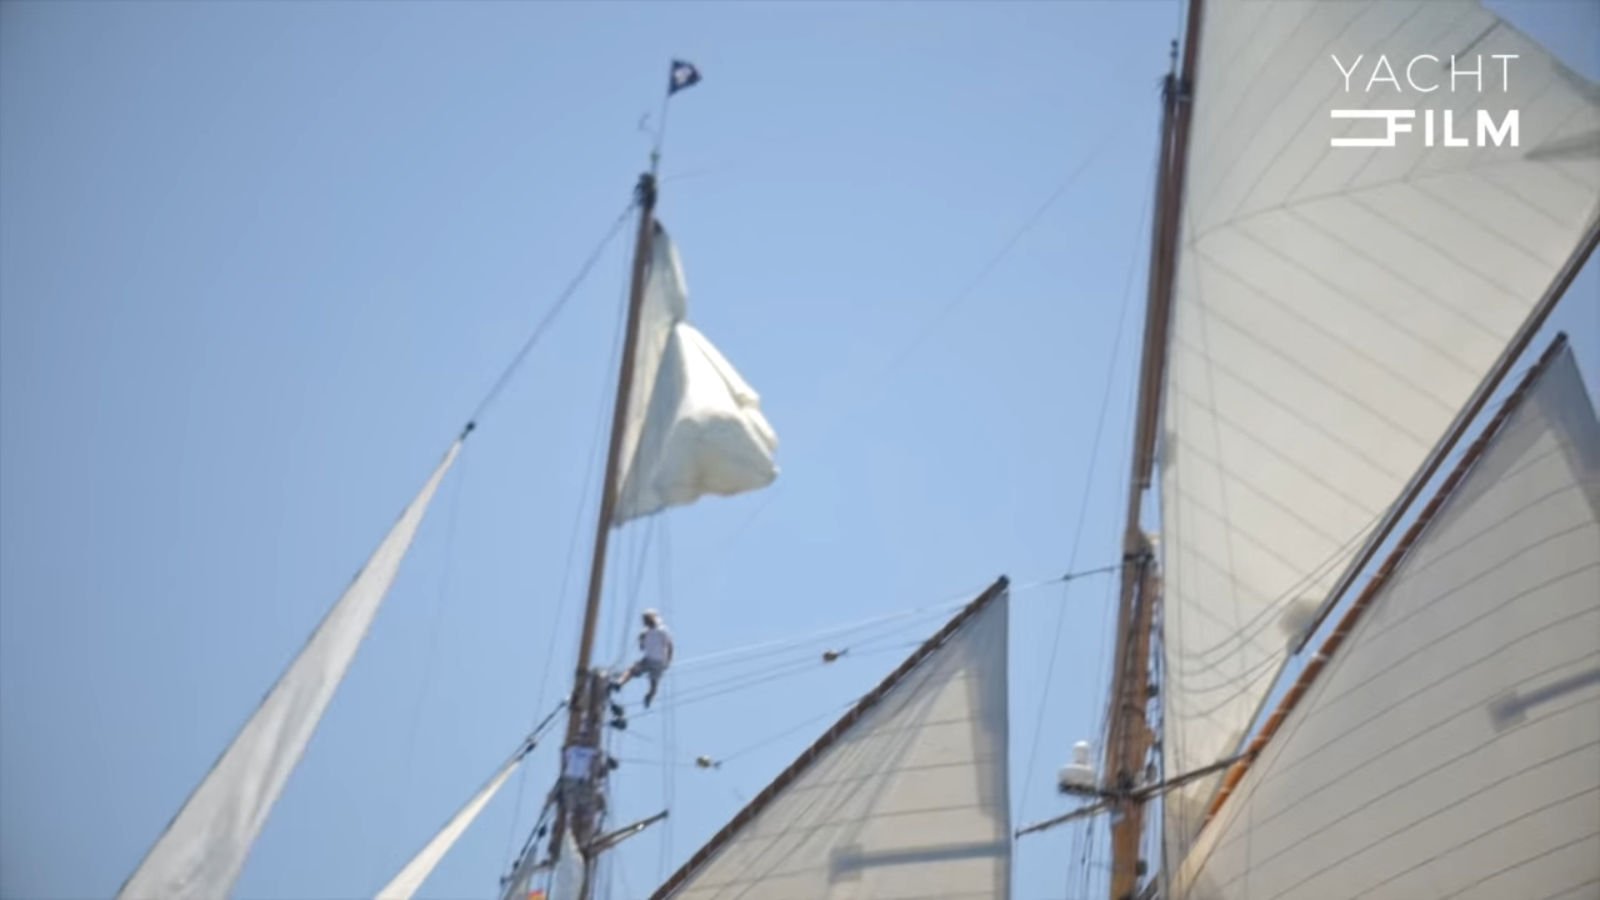
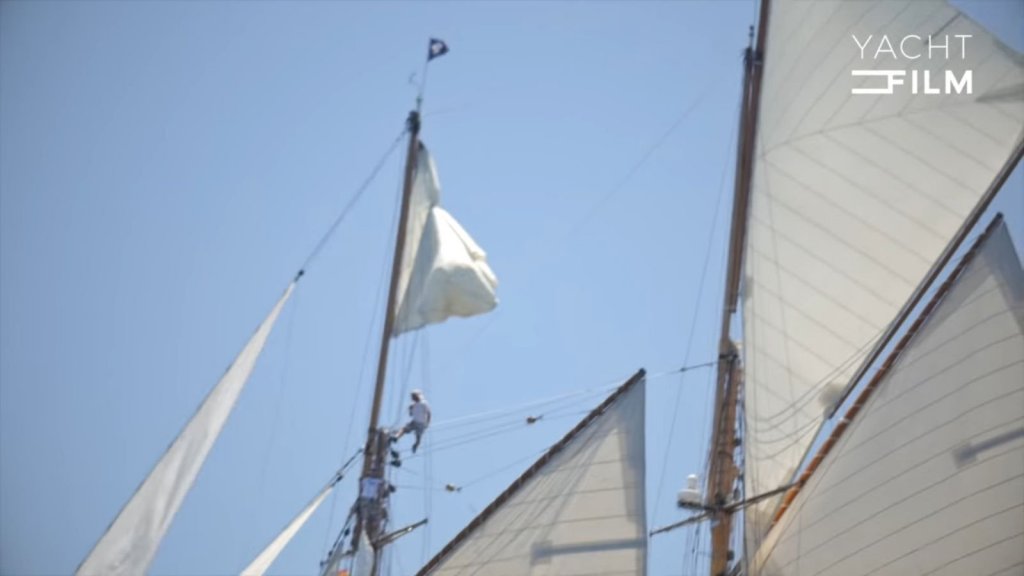
I just love the look of a gaff-rigged schooner. And more and more, I've become obsessed with the look of a fully dressed schooner with flying jibs and topsails. Like these... I've always found the music of Dexter Britain particularly inspiring, and have used his pieces in several of my drone videos. But this schooner video really really turns my crank! But check this out! Beginning at 1:45 in the video, as the stunningly beautiful Eleonora slices by in foreground, look past her to the boat in the far background and freeze the video at 1:53 as the boat becomes visible off the stern of the Eleonora. The fore topsail on that boat in the background has been furled using a clew line! You can see it again at 2:36 in a brief closeup, with a crewman perched precariously in the rigging at the top of the foremast, as shown in this screengrab. So that is how the topsail is brought across to the other side when tacking! Eureka! It looks like I'm on the right track now. I've since found another photo from here: https://www.youtube.com/watch?v=tTb_Tdo9jzI All that remains now (ha!), is to figure out how this process can be remotely accomplished on a radio-controlled model. Either that, or how to hire suicidal miniature crewman willing to climb the rigging for me.

-
In the absence of any actual demonstrations of how gaff topsails are tacked to the opposite side whenever required, I spent some time getting splinters in my fingers while scratching my head puzzling for hours over how it could be done. The main topsail is tricky enough, but the fore topsail is particularly awkward. When tacking, the foresail gaff can no longer swing freely under the stays joining the tops of the two mast if it is constrained by a topsail. A fore topsail therefore cannot be left fixed in place when tacking, unless the stays are deleted, or unless the topsail is also tacked across to the other side each time. I made this little video to illustrate how I think it can be accomplished (in theory):
-
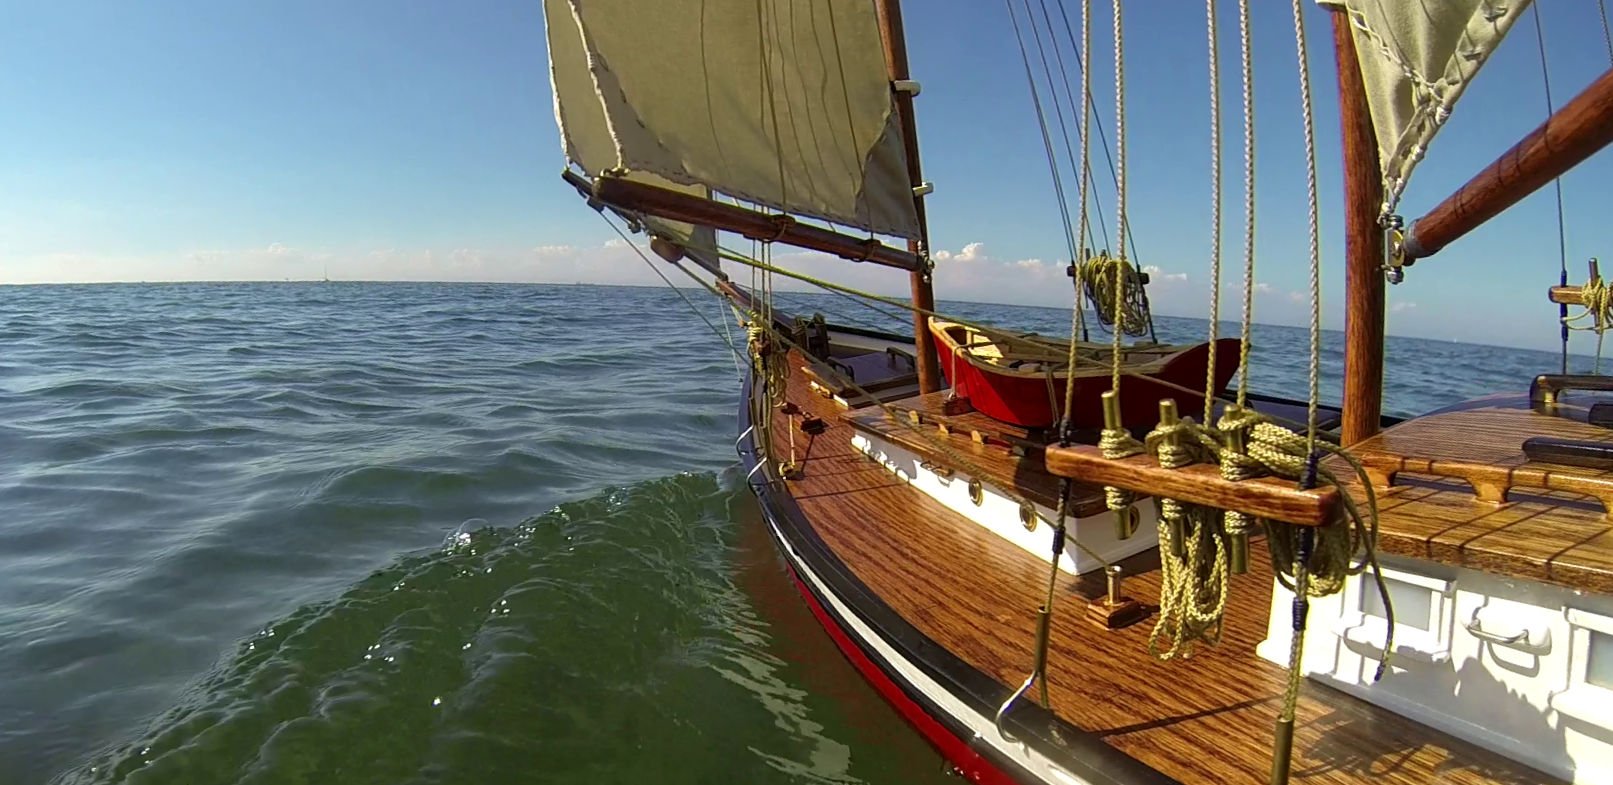
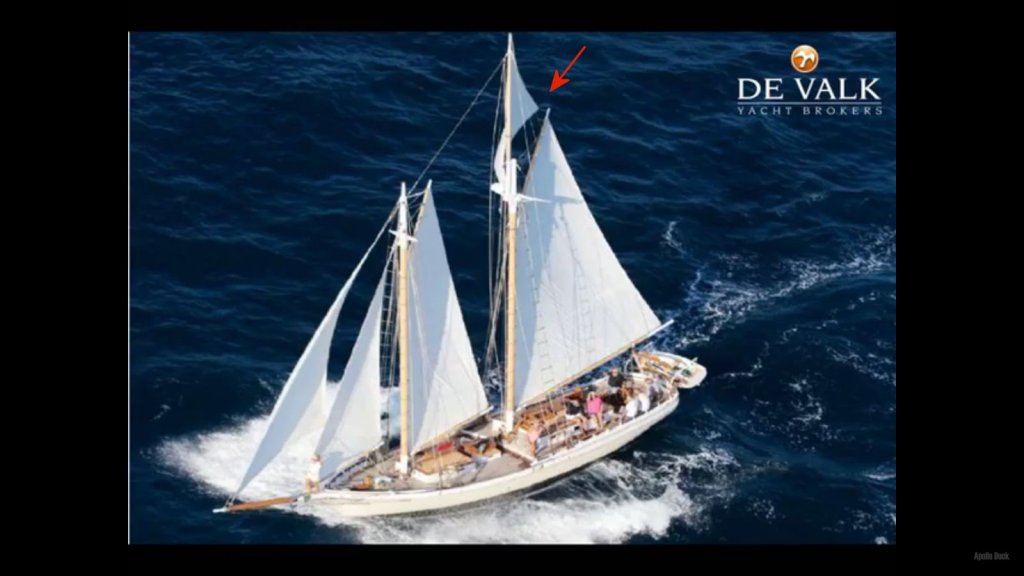
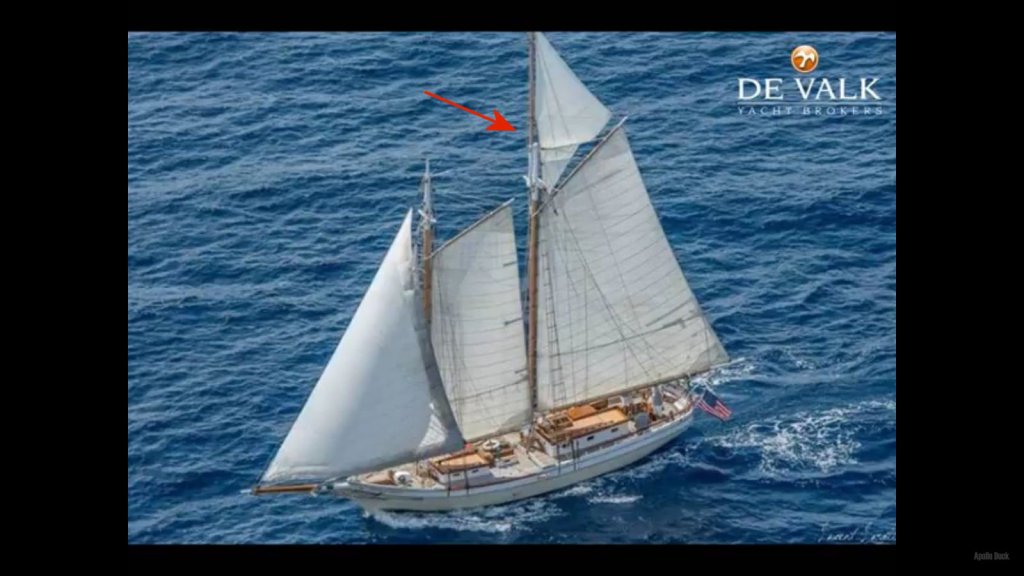
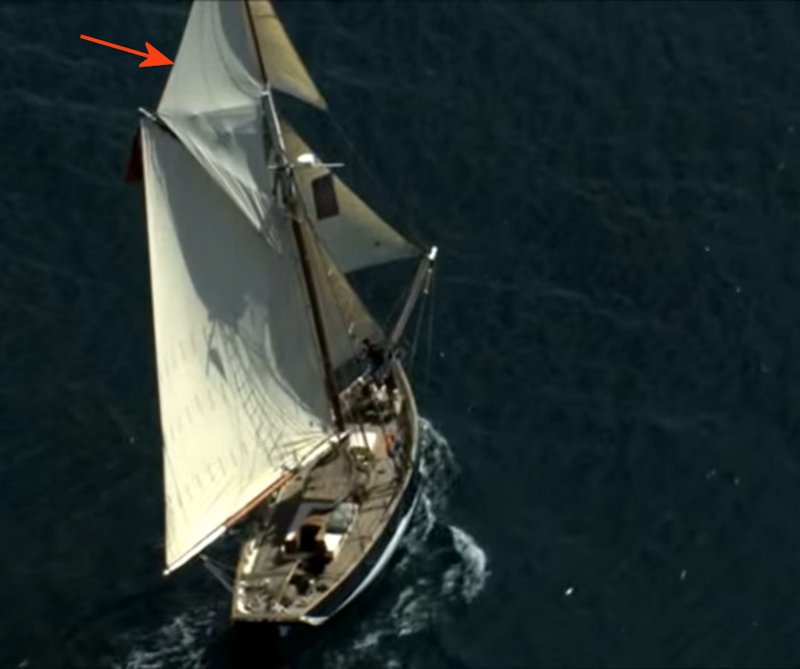
It's not just model boats either. Here are a couple of images taken from a sales video: https://www.youtube.com/watch?v=YmPXQ9EuYW8 In this first image, the topsail can be seen flying free and curved out behind the gaff halyard rigging. It is perhaps flying a little too freely and loose. The tack line could be pulled down tighter. This second image shows the boat on the opposite tack and now the (much too loose) topsail is draped in wrinkles across the gaff peak halyard.
-
Next I found this video of a gorgeous model of the Jolie Brise pilot cutter. It appears to have only a single-channel rudder control, with no remote sail trimming control. Nonetheless, it sails beautifully. The sails are self-tacking with fixed length sheets, and the gaff topsail is fixed. The topsail is nicely curved when the wind is coming from starboard, but is pressed against the gaff's peak halyard and blocks when the wind is coming from port. Fixed topsails seem to be the accepted method for every gaff-rigged topsail model sailboat I've found on YouTube.
-
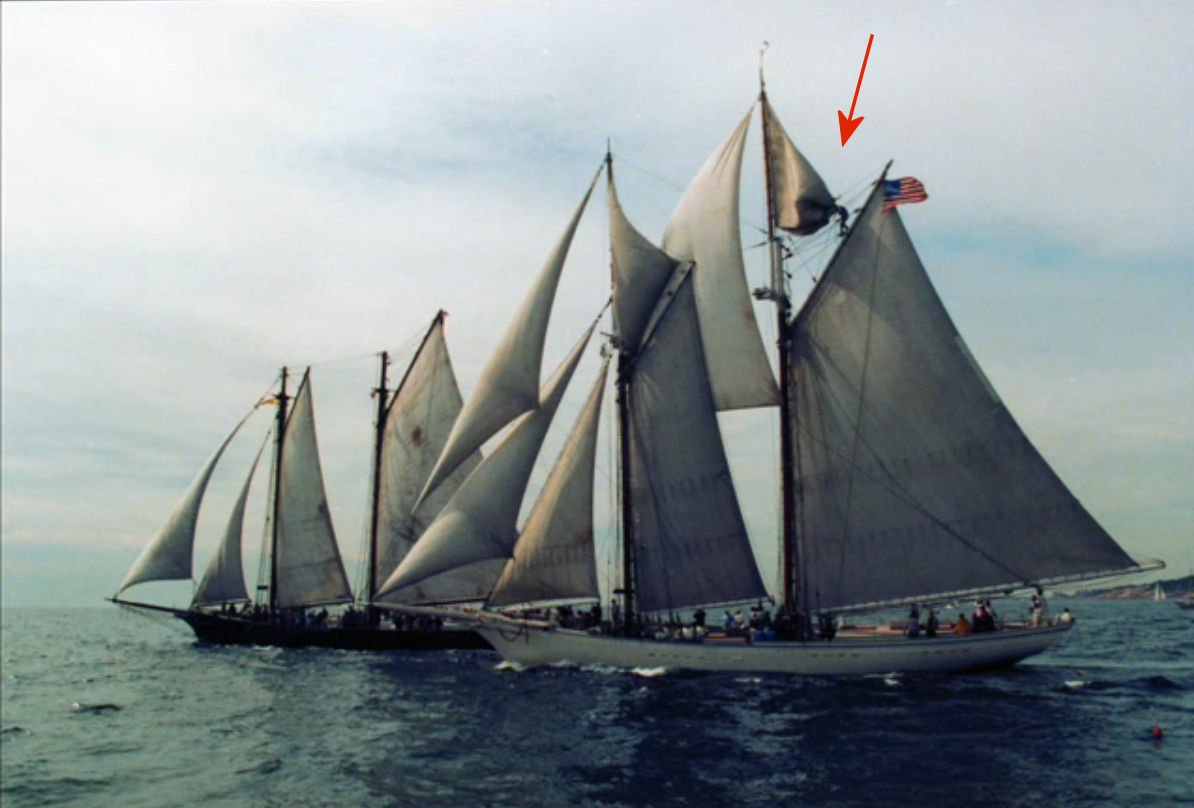
So, back to the questions in my first post above. I'm still wondering how one goes about re-positioning overlapping topsails on a gaff-schooner whenever changing tack? Ultimately I'd like to have the capability to do this by remote control on my model, but I'm equally curious to know how it's done for real on an actual schooner. I've been searching through many (far too many) YouTube videos of real schooners, and model schooners, and have yet to find a video demonstrating the process of tacking a gaff topsail. First off, a little theory for y'all. Take overlapping flying jibs for example. You could simply rig a single very large jib, as is currently the case on my model schooner. Or, you could rig three overlapping jibs, with each individual sail much smaller and easier to handle, but in total covering approximately the same sail area as a single large sail. Yet the combination of the three overlapping sails produces significantly greater power than a single large sail. Why is that? Well, it's not merely a question of total sail area. What matters is how the air flowing between the sails affects the total performance of the sail set. It's like the difference between plain flaps or slotted flaps on an aircraft wing. When the plain flaps (on the left) are lowered, it produces an increase in lift and drag. The more efficient slotted flaps (on right) allow air to flow between the flap and trailing edge of the wing, accelerating over the top surface of the flap. This produces even more lift, with less drag, allowing the aircraft to fly even slower before separation of flow over the top surfaces causes the wing to stall. So now have a look at this awesome video of the Pilot Cutter, Amelie Rose. You can feel the strong pull on those beautifully overlapped jibs. The jibs are perfect for sure, but what about that topsail? If you stop the video at the overhead view at 0:38 seconds, you can see the perfect curved shape of the gaff topsail, and how the airflow streaming from it feeds nicely through the gap (just like slotted flaps) down the backside of the mainsail. That aerial sequence gives me goosebumps! But then at 1:30 you see this (below) instead, and it's all wrong. Now the topsail is rigged on the wrong side. Sure, it's still providing power because its area combined with the mainsail produces a larger sail area. But in this configuration it's only acting like a plain flap, the slot between the two sails is closed. Not only that, but the shape of the topsail is distorted while it's pressed against the peak halyard and blocks supporting the gaff. Blech. I guess it's acceptable to just leave it as-is if you're frequently tacking back and forth beating upwind in a narrow channel. But that topsail is clearly not providing optimal performance if left set like this for longer duration. In the video, and this image, you can see a crewman climbing the ratlines. I was hoping to learn how he re-adjusts that topsail, but he's actually climbing down. So either he's already done whatever he needed to do up there, or he decided it's just too dangerous to be up there in these strong wind conditions. More to come...

-
True that. Also, merely possessing such sophisticated machine tools is no guarantee of success. One first needs a vision of what one is trying to achieve, and then possess the skill to actually use the required tools to produce the desired result. I'm lacking in at least two out of three of those requirements. I do have the occasional vague glimpse of what I'd like to achieve, but I'm not at all sure how to get there from here. What led me to this forum was a search for the schooner Altair. As I mentioned in my first post above, I'm interested in adding flying jibs and topsails, and possibly more sails, to my current R/C model gaff schooner. The Altair certainly has plenty of sails. I wondered if anyone had ever built a working RC model of her, and how they managed the sail controls. A Google search landed me on Keith Aug's Altair build log here. OMG!👁️👁️!!! It would be a colossal understatement to say that, compared to me, Keith operates on a significantly higher plane of skill level. More like a different planet! After reading through all 30 pages of his build log, I'm stunned. Early on he had intended to make this a working RC model. But somehow it instead turned into a museum quality masterpiece and he (understandably) changed his mind about actually sailing it.
-
I've had plenty of near-disasters, even some actual disasters, when flying my drones. On only its second ever flight, I dropped my brand new DJI Phantom-3 Pro into a river when I stupidly tangled with an overhanging tree branch. Amazingly it's flown fine ever since, after a couple of weeks of letting it dry out. It's funny how people are totally unconcerned with the fact that everyone now carries a cellphone equipped with a powerful camera, and people are constantly snapping selfies and photos of everything and posting them on Facebook for the world to see. Yet, if I fly a camera in the air on a drone, that's considered an invasion of privacy and I'm frequently accused of spying on people. Now everyone on our lake knows that my model sailboat carries a camera and, so far, nobody has complained. They've all seen my videos and think they're awesome. But, strangely enough, nobody seems to be skinny dipping anymore... 👀
-
Also check out my most recent video taken with a 360° spherical-view Insta360 One camera. The image is digitally stabilized. As the boat rocks and turns under it, the view stays level and fixed on one point on the horizon. However, as it's playing, you can Click-and-Drag the video image to rotate the view to any desired angle. How cool is that? The camera is suspended on the end of a 6-inch long rod mounted on the gunwale railing. The camera's software automatically deletes the camera itself and its mounting rod from the recorded image. You can still see the shadow it casts though. The effect is as if there is a drone flying alongside!
-
Funny you should mention that. What first got me hooked on the idea of building my own R/C model schooner was an invitation three years ago to fly my drone to record video of a friend's model schooner. That outing very nearly ended in catastrophe for both of us, when I crashed my drone into his schooner!! He didn't even have the hatch covers installed on his boat. Had I capsized the boat, both the drone and schooner would have gone to the bottom of the lake. Oops. I momentarily lost orientation when switching my view back and forth from my video monitor to line-of-sight. I thought the drone was going to pass behind his boat, when in fact it flew directly into his boat. D'oh! Check out the video:
-
That's a valid point. I'm very fortunate to have easy lake access, except it freezes over in the winter. That's understandable as well. Some of the models I've seen on here are worth a fortune! This boat (first time building one) was constructed on our kitchen table (bless my wife for permitting that) over the one previous winter. It's a very simple design. The hull is just four pieces of plywood, or five counting the transom. I don't have any fancy milling machines or a lathe, nor even a proper workshop yet. So the incredible metalwork I've seen in all the beauties posted here is far, far, far beyond my abilities. That's all in the realm of fantasy and dreams for me. Nonetheless, I'd still be devastated to see her sink. I first bought a cheap plastic ready-made Shunbo Monsoon just to experiment and see if I even enjoyed R/C sailing. I found a support forum for that model and was alarmed to see the many dire warnings not to even consider for a moment putting the thing in the water until first going through this long checklist of items to ensure it wouldn't sink on its first sailing. Sealing up all sorts of obscure bits that I would never have thought of on my own to prevent ingress of water, and packing every available space within the hull with styrofoam floatation. Sheesh. But, all good suggestions. Having completed the checklist, I felt much more confident when eventually sailing the thing. Having invested considerably more effort in constructing my schooner (not 5 years though), I approached the day of its first sailing with somewhat more trepidation. I asked Gary, the designer, whether it's worth considering the addition of floatation foam inside the hull, or even a bilge pump. He said as long as it's all sealed properly, he has never experience more than a few teaspoons of water in the bilge on his own boat. Then laughingly, he added that the risk of an actual sinking contributes to the authenticity of the sailing experience. Ha! The first few times I sailed mine, I strapped a Getterback to the mast. It pops a float to the surface on the end of 100-ft 10-lb fishing line. It wouldn't be strong enough to haul my 25-lb boat from the bottom of the lake, but at least it would mark the spot where it sank until I could hire a scuba diver to retrieve it.