
HOLIDAY DONATION DRIVE - SUPPORT MSW - DO YOUR PART TO KEEP THIS GREAT FORUM GOING! (Only 20 donations so far - C'mon guys!)
×

DarkAngel
-
Posts
243 -
Joined
-
Last visited
Content Type
Profiles
Forums
Gallery
Events
Everything posted by DarkAngel
-
 Thanks Jonesey for your input, I was thinking of using extra strong liquid nails glue However I may create something else to position the mast into place under the second deck, that is cut a hole in the second deck and put a thin base underneath to act as a seat for the mast.
 -
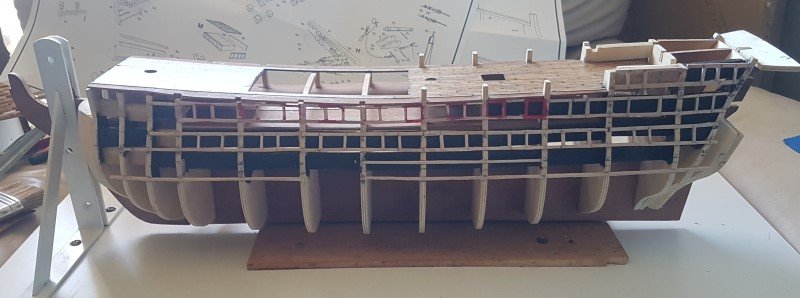
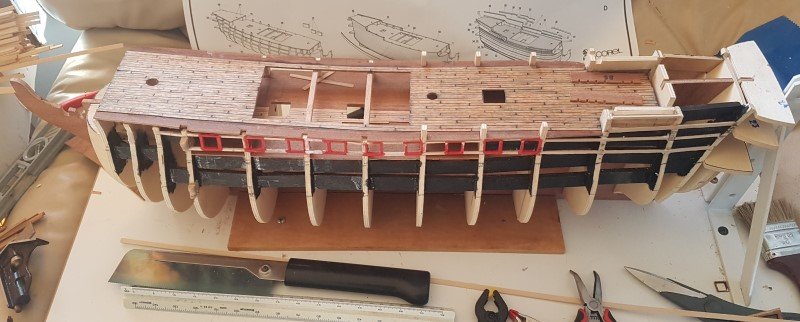
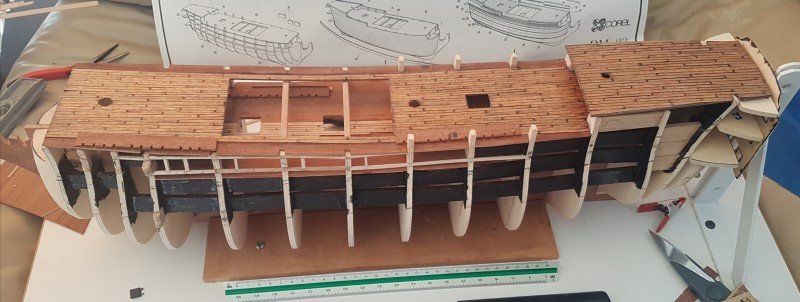
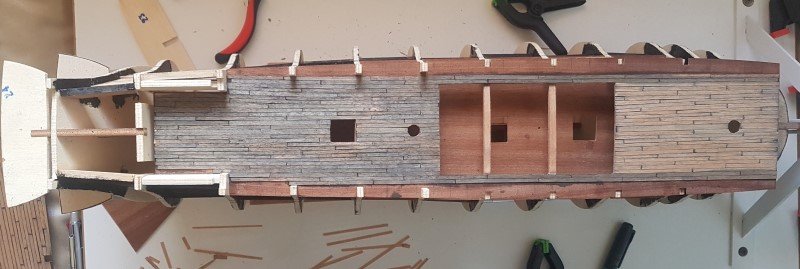
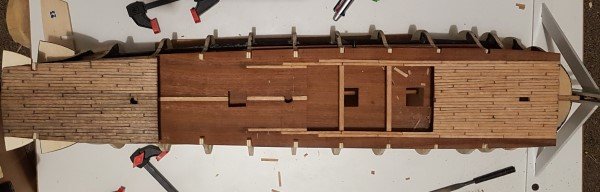
Port liners mapped Finally I have mapped out the three rows of cannon hatches, the laser level was useful in conjunction with measuring and marking the distances between rows on each bulkhead. I have found the front Bow section a bit tricky to fit in the final hatches, and can see why some builds have removed sections on the forward bulkheads there. I still need to smooth off the Bow and Stern sections so I will hold off and consider the last few hatches on each end. Hull : Wood Glue I'm thinking of using Clear 'Liquid Nails; wood glue for the hull planking, as it can be used for wet or dry wood binding. What does everyone else use and recommend ? Here is a pic of my progress.
-
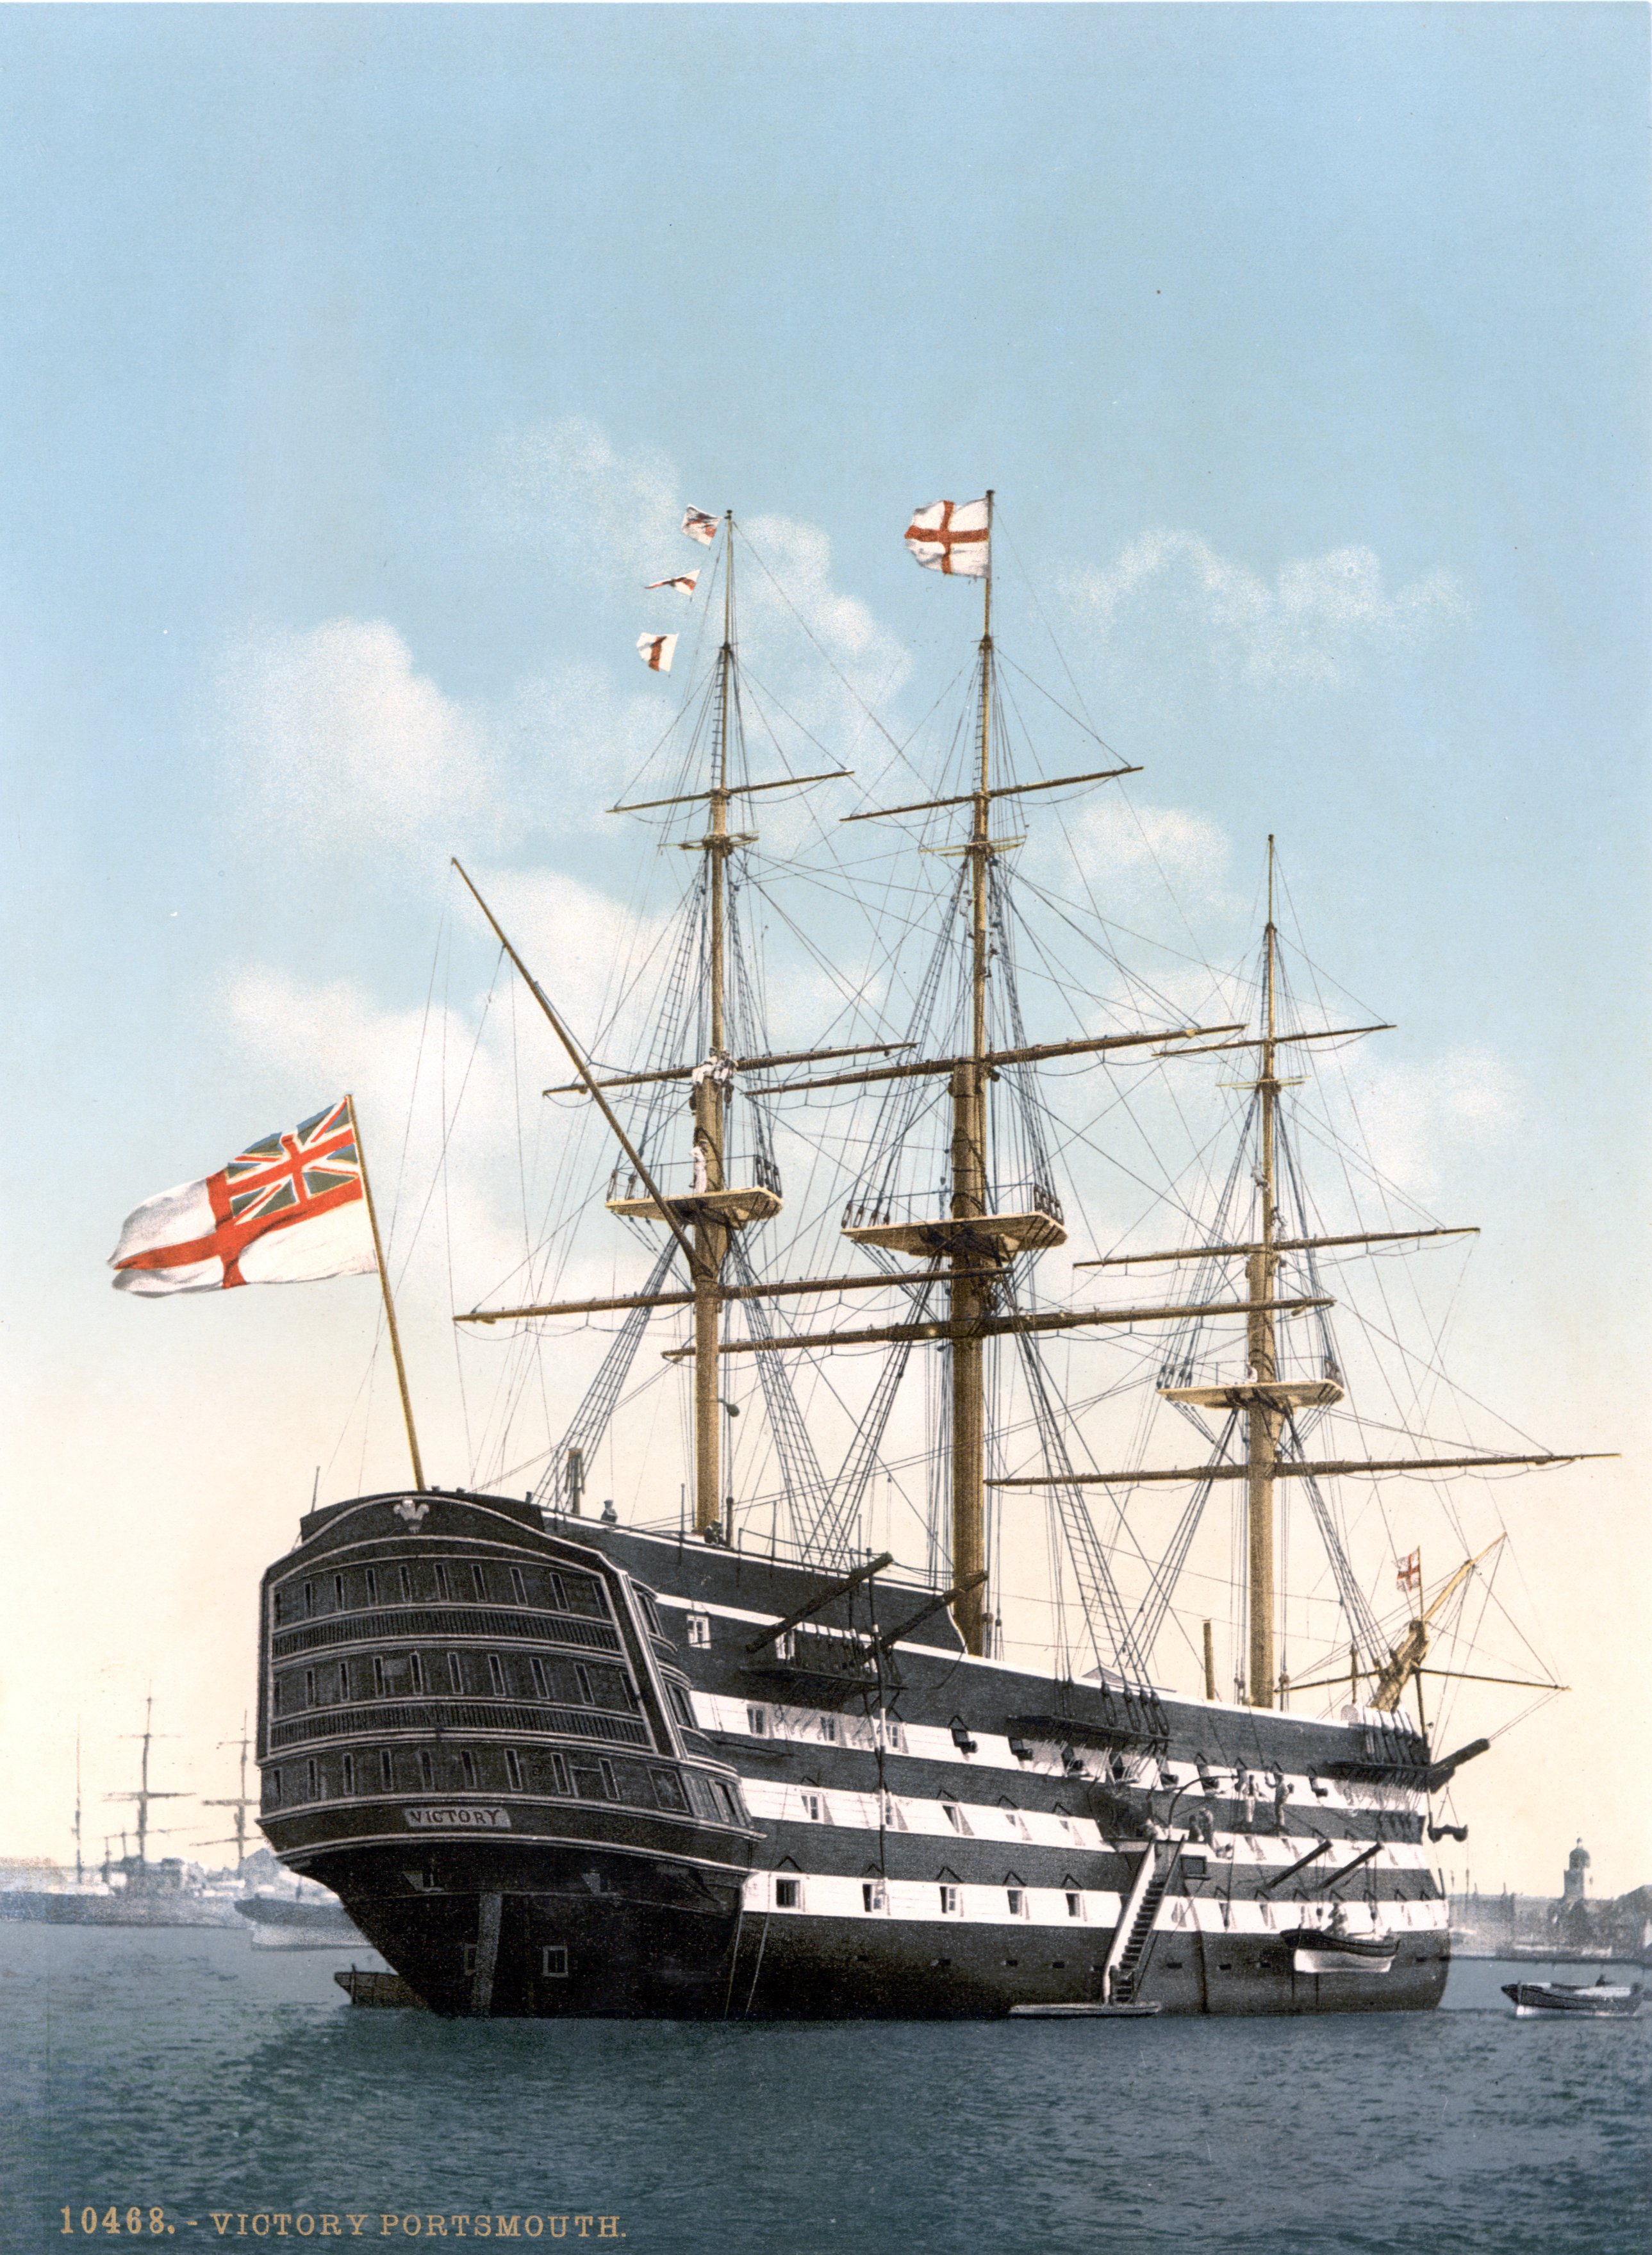
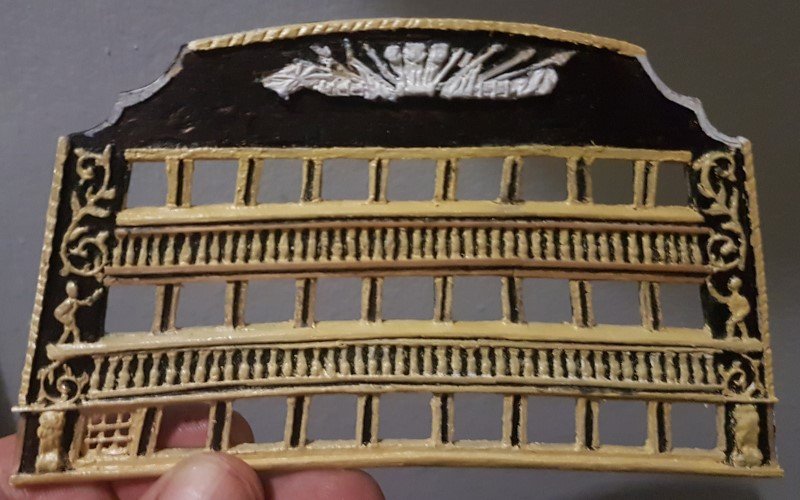
Rear Cabin update Settled on white pearl and yellow ochre 1:1 mix for painting the decorations and trim on the Stern section of the ship. Here's a pic of the work in progress. I'm thinking of extending the area directly above the top window line by cutting and adding another section to raise the upper area to be more inline with the original HMS Victory
-
Update I have pre painted the port liners red for ease of reference, and posted here for anyone to consider placement in their build (which was one of my pre build concerns ) more pics coming of completed port liner positioning for all 100 cannon hatches. notes: I have smoothed off the sides of the top deck to be flush with the bulkheads to facilitate good contacts when planking the hull later. Also will be filing off the port liners to be flush with the bulkheads too for the same reason, and marking the edges of the port holes on the hull planks as I go.
-
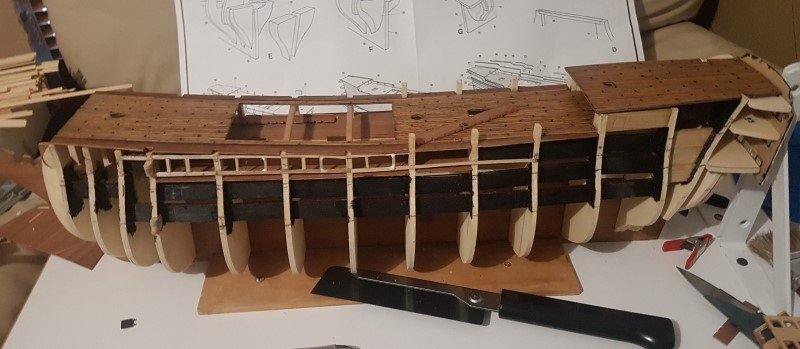
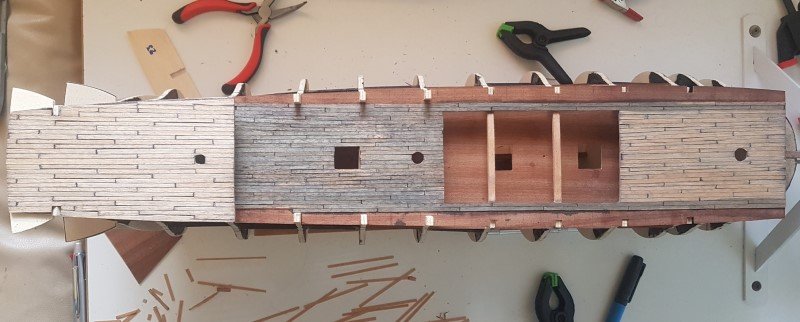
Port liners Here's an update on the build, there is quite a lot of work to do before I'm planning on planking the hull. My focus has been on planking the decks and now taking a break to switch over to another task. Currently I am working out where the cannon hatches are to be positioned and build port liners around them as part of the ships framing to plank onto later for the hull. A couple of blogs I have read recall the difficulty adding cannon hatch holes after planking, and finding sections of bulkheads that need removing. So I thought I would calculate this first and frame port liners as a guide while planking. Using the guides in parts #84, #85, & #86 (guides for rigging to deadeyes) the sections are marked out where the cannon hatches go. And from studying many images of the actual HMS Victory, the Corel plans and other models it is easy to place them from each mast hole in the deck. My first thought was that there was a bulkhead in the way in the front of the ship, so I endeavoured to remove sections of the bulkheads to facilitate locations for the cannons to be positioned. Upon further reflection of the plans however I discovered one of the gaps at the end of the rigging was not actually used for a hatch, but the area directly beyond. Plus by mathematical calculations I discovered the hatch if it had been there was not spaced out evenly from the other hatches. So with this consideration, I relooked at positioning the guide to avoid cutting through the bulkheads and discovered there was a way to position it around the Bulkheads... Which is more ideal for planking, So I plugged up the holes with wooden coffee stirrers stacked up to fill each hole. Now I am much happier with the positioning of the first row of cannons on the top deck. Check out the pic to see my progress, and a first look at the oiled decks. Position of port liners (spaced 25mm apart horizontally on the Corel 1:98 Scale, HMS VICTORY) From reading another Blog, I reccall someone mentioned that the position of the cannon hatches are located either side of the bulkheads. I have found this to be true from the 5th bulkhead from the front of the ship and on alternate bulkheads with the other bulkhead being spaced about one hatch from the bulkhead. The thickness of the bulkhead is not quite enough to make the positioning on the second deck cannon hatches to be centered from the gap above between the hatches, however it is pretty close. I shall provide an update with the second row port liners later when I progress that far.
-
Tung oil and Orange oil A 50 / 50 mix... the Orange oil is actually a natural kind of turpentine which has a nice smell of oranges I've been using this mix to penetrate my cedar greenland paddle which keeps the wood in good shape after going in sea water, so I figured I'd try this on my decking to add to the aged look. The idea is to rub it into the wood over a few light coats, waiting 24 hours for the wood to absorb the oil, however since the decking is so thin I think one light coat should be enough and rub off any excess surface oil. I'll take a pic after it has been absorbed into the wood.
-
Post #77 updated
-
Aha,,, that's a bit more than I anticipated. How do you age rigging ? Bleaching would be the aging at sea i would say.
-
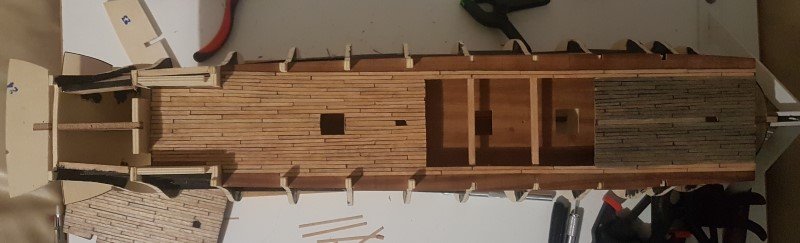
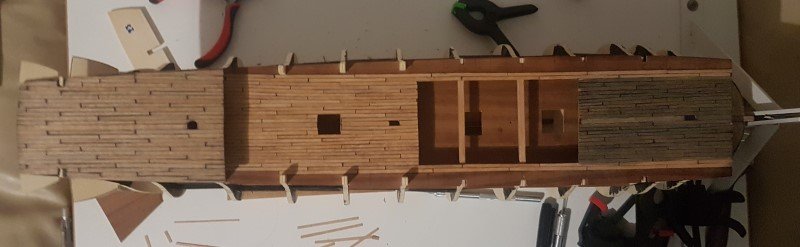
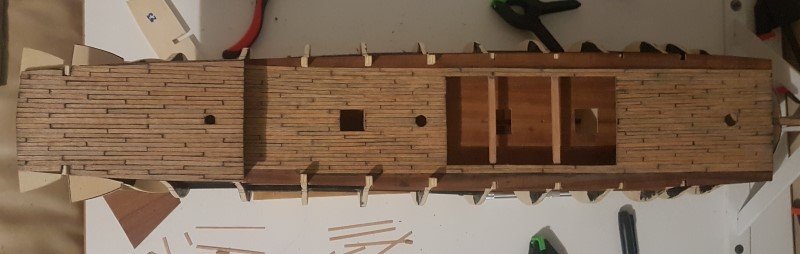
Completed top deck planking I took EJ's advice and left a bit off the edges to complete later once the bulkheads have been thinned for the deck wall. Up next, a whole lot of scraping off PVA and the dark gray aged decking at the front. Aging rest of deck Scraping down again Plank bottom deck Deck scraped and raw wood stained Compare these pics below with the one's above to get a pictorial idea of how the aging process steps work. Up next... alot more scraping or swabbing the deck
-
I was thinking of weathering the top deck more than the lower deck. But probably not much noticeable difference. Everything else is painted, except the cannon carriage wheels I noticed are left as raw aged wood which matches the deck on the HMS Victory in Portsmouth.
-
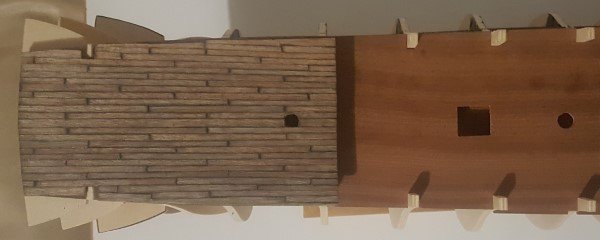
Three stages of aging the top deck Here's a pic highlighting the three stages of aging the wood. Stages Laying the raw wood and gluing into place Tea layer, then vinegar and steel wool infusion layer (dark area at front of deck) Scraping off the surface reveals aged wood beneath, as evident on the light gray top deck
-
Do you think the aged and scraped back looks better than the raw decking ?
-
It was time for the crew to swab the top deck Check out the top deck on the left. I have scraped off years of wood aging and oxidising. This is what probably happened when the HMS Victory was in service on the high sea's. Alot of crew to roster on deck swabbing duties.
-
The flat side of a sharp blade... A scalpel modeling knife is what I prefer. Also just scrape one direction along the length of the plank. One way is easier, that is going with the wood grain. Going against the wood grain can raise the wood fibers however I didn't find a problem.
-
Thanks for the info Phil.
-
Question for you HMS Victory Corel builders How much decking and hull planking was left over for you when you finished the build. Also is the cannon backing wood used for anything else ?... I have most of 1 long stick left 15mm x 5mm
-
Shipwrights Journal Build Plan Calendar July Complete decking with aged wood appearance lower deck to have less aging visible complete port lining framing for cannon hatches before planking hull Plank hull
-
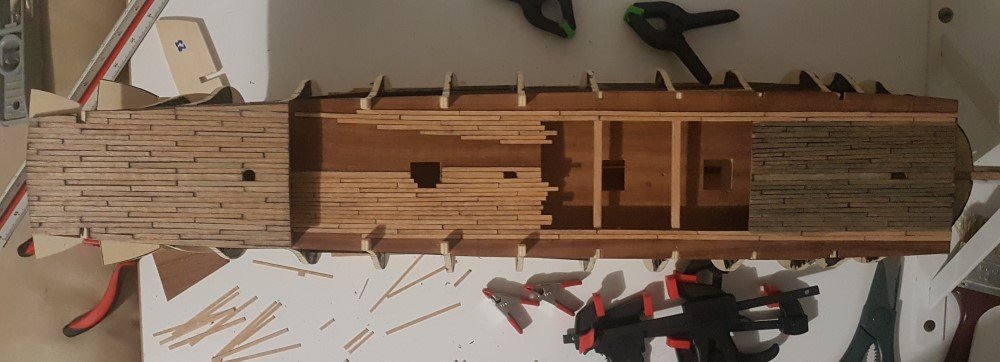
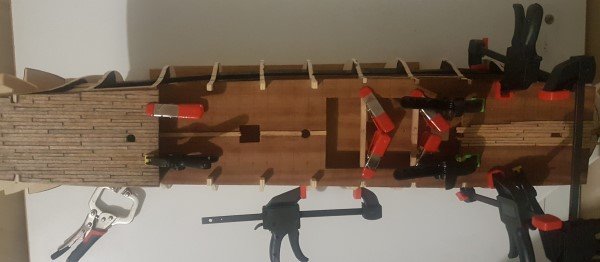
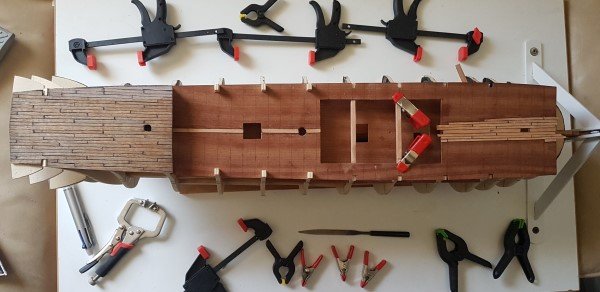
July update Here is a beginning of the month update on where I am, I'll try to include a beginning of the month update each month to show where I am at Last night I was considering greying the deck further, so I tried a small sample to take a look and see. I used acrylic titanium white paint with just a tiny hint of black added. Then I thinned down the paint with lots of water until it flowed enough to carry the color pigment. Painted on, and before it dried, I put a bit more water on the brush and painted over again, then wiped it off leaving the wood aging previously visible underneath and adding an opaque light graying... what do you think ? (check out the top deck top section on the 3rd pic) I'm not sure which way I'll go yet, the gray looks ok but makes the model look like it's been weathering in the sun for a few hundred years... lol I think I prefer the non graying,, just the aged timber effect. Also finished reinforcing the bulkheads with the cannon backing sections, I left the decks on the whole time to ensure a good fit and shape of the bulkheads and the decks. Here are some pic's of the next stage. Marking out the center line and 14mm graduations for my planking size Put down a center plank line to work out from Curving the decks and pva gluing onto the beams. Once deck is curved, I shall complete deck planking Aged Wood method mix vinegar and torn fine steel wool overnight, brew some strong tea and paint tea on the decking After tea has dried, paint on vinegar and steel wool solution wait until it dries repeat as necessary lightly scrape wood to finish Also I like to use the 0000 steel wool to smooth off the wood to a nice polish
-
Hey Kevin, The Caldercraft Victory is like the greatest model build ever. You are a lucky man. Maybe I'll do it too one day if I get sponsored by the local library or something
-
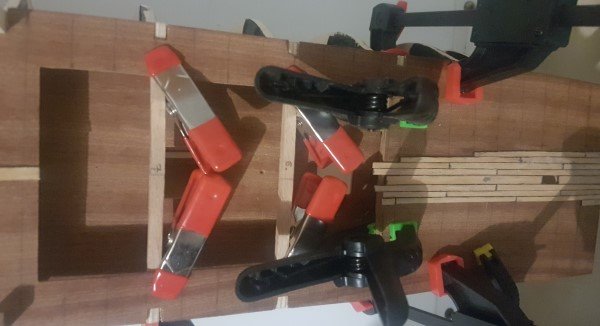
Good question Jonesy The 2 long beams that strengthen the hull in my box were warped, Luckily they were only warped one way and I used the warp angle to be the down side of the wood when I tried pressing them into place. I found them a bit of a tight fit, but with a whack of my fist they actually went in most of the bulkhead slots... so I whacked them some more and found them reluctantly going in. They weren't positioned well because I was just testing the fit... so I took them out with a bit of effort from the easy end first and then noted a few bulkheads on the hard side needed a bit of filing down. The fibres in the wood can sometimes make it hard to fit, even when lasercut, so smoothing the edges of the cuts with a file is always a good idea anyhow, Second fitting I made sure the lengths were flush to the ends of the bulkheads and put the warped wood in the same way with the warped curve going down. Then I decided to commit, whacking them in after aligning each bulkhead so the grooves were lined up. Then I looked around for my rubber mallet and settled with an old file with a flat end and pounded the wood into place. I think I needed to file a bit on the front end of one bulkhead groove to help it in a little better. It went in pretty tight, however that made the hull really firm and strong and the deck still lined up ok as there is a bit of give ontop of each bulkhead.
-
Thanks Wallace, I must say I got the idea after reading your blog Do you think the wood will grey further as time passes ? Now that the process has begun.
-
Aged Decking I tried the tea, vinegar and steel wool method to oxidise the wood to an aged gray color. Compare these pic's with the earlier deck pics above Quite happy with the results, I'm thinking of leaving the decking outside in the sun to encourage further graying

-
Ok thanks Mark, that's better than scrolling through 1000's of inappropriate search results on google. Updates Post's updated with pics to indicate progress Hull Build post #37 link Cabin carving and Build post #45 link
-
Does anyone know a good source for obtaining LED lights to illuminate tall ships ?
