HOLIDAY DONATION DRIVE - SUPPORT MSW - DO YOUR PART TO KEEP THIS GREAT FORUM GOING! (Only 20 donations so far - C'mon guys!)
×

DarkAngel
-
Posts
243 -
Joined
-
Last visited
Content Type
Profiles
Forums
Gallery
Events
Everything posted by DarkAngel
-
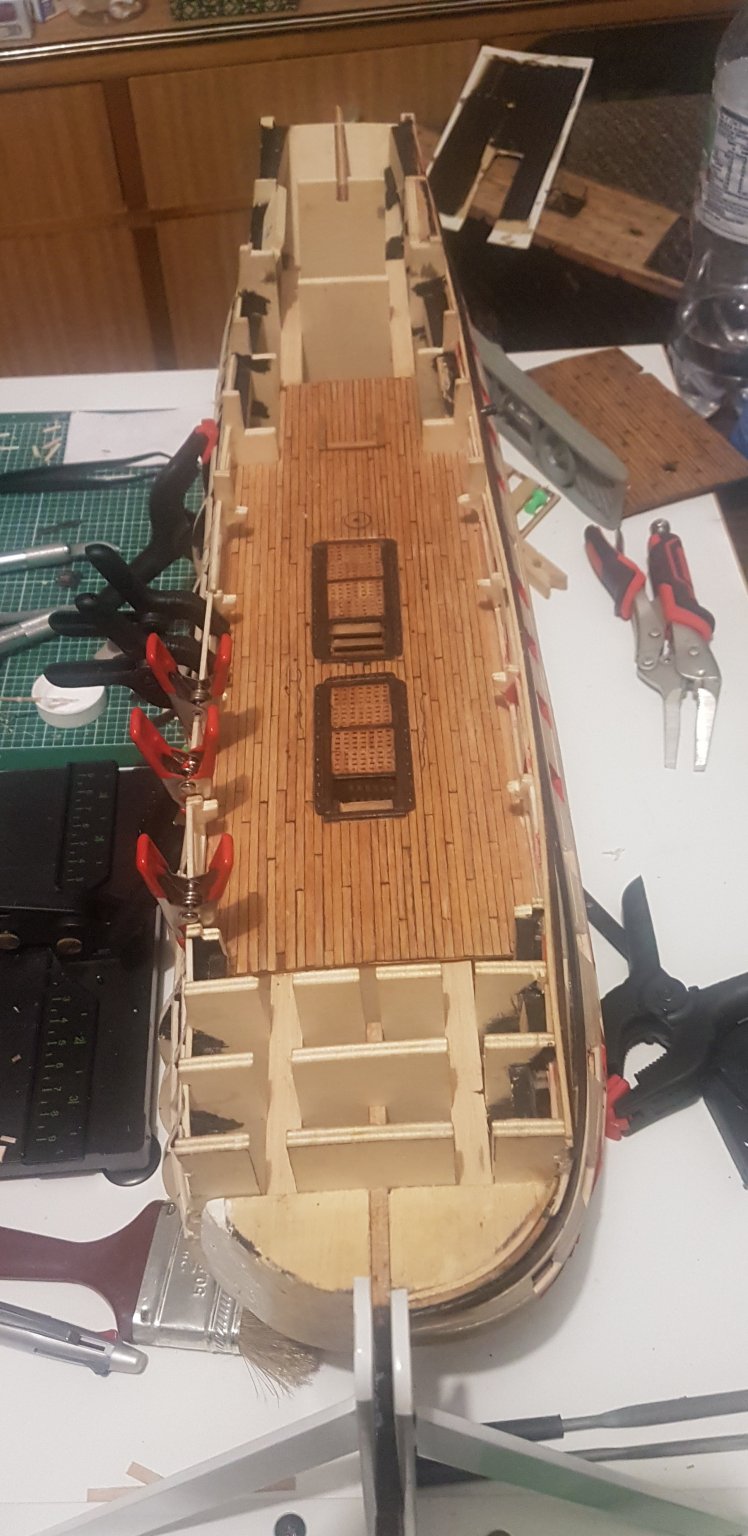
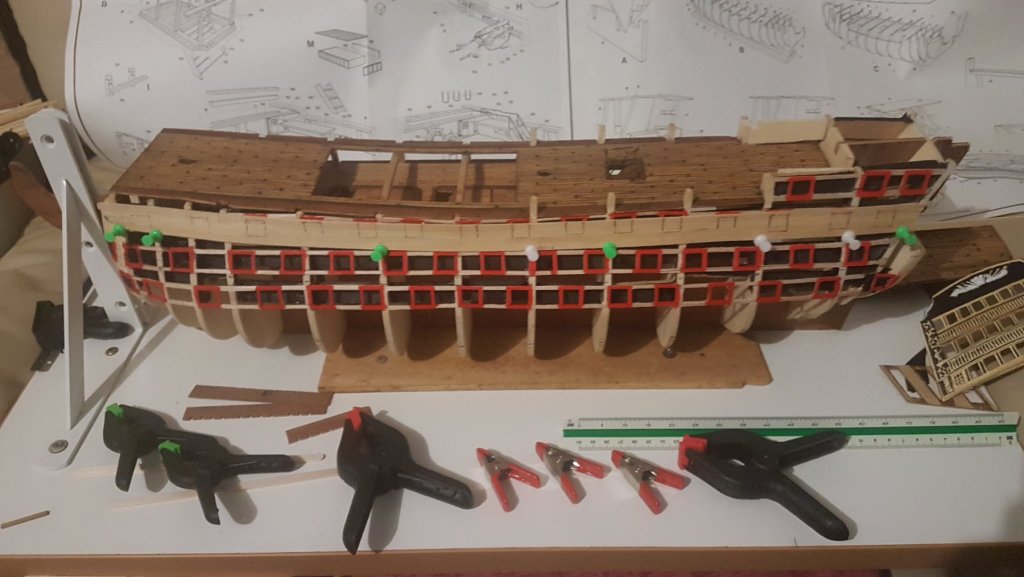
 Hull port liners and Plan Working on strengthening the other side of the hull by building a framework of port liners with a fresh load of timber (coffee stjrrers). Also completed deck planking for Upper Gun deck finally as fixed permanently into place. I've been doing further research on the plan layout for the Upper Gun deck and discovered the Corel guide is out of whack again. So I may end up redoing the stairs and hatches there. I'll draw up a diagram of what I have discovered along with how the mast fits in to the design.
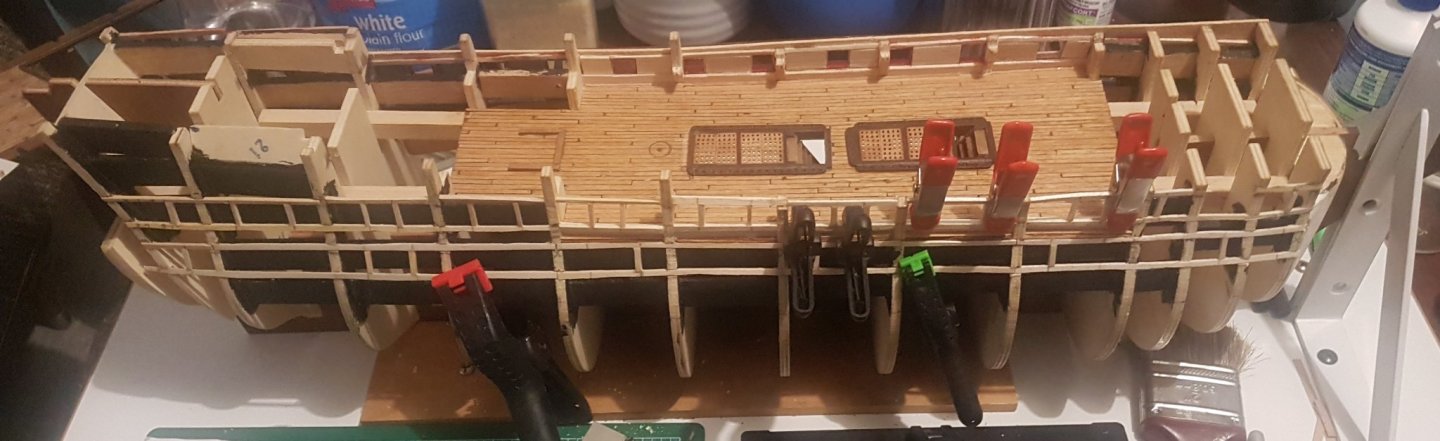

-
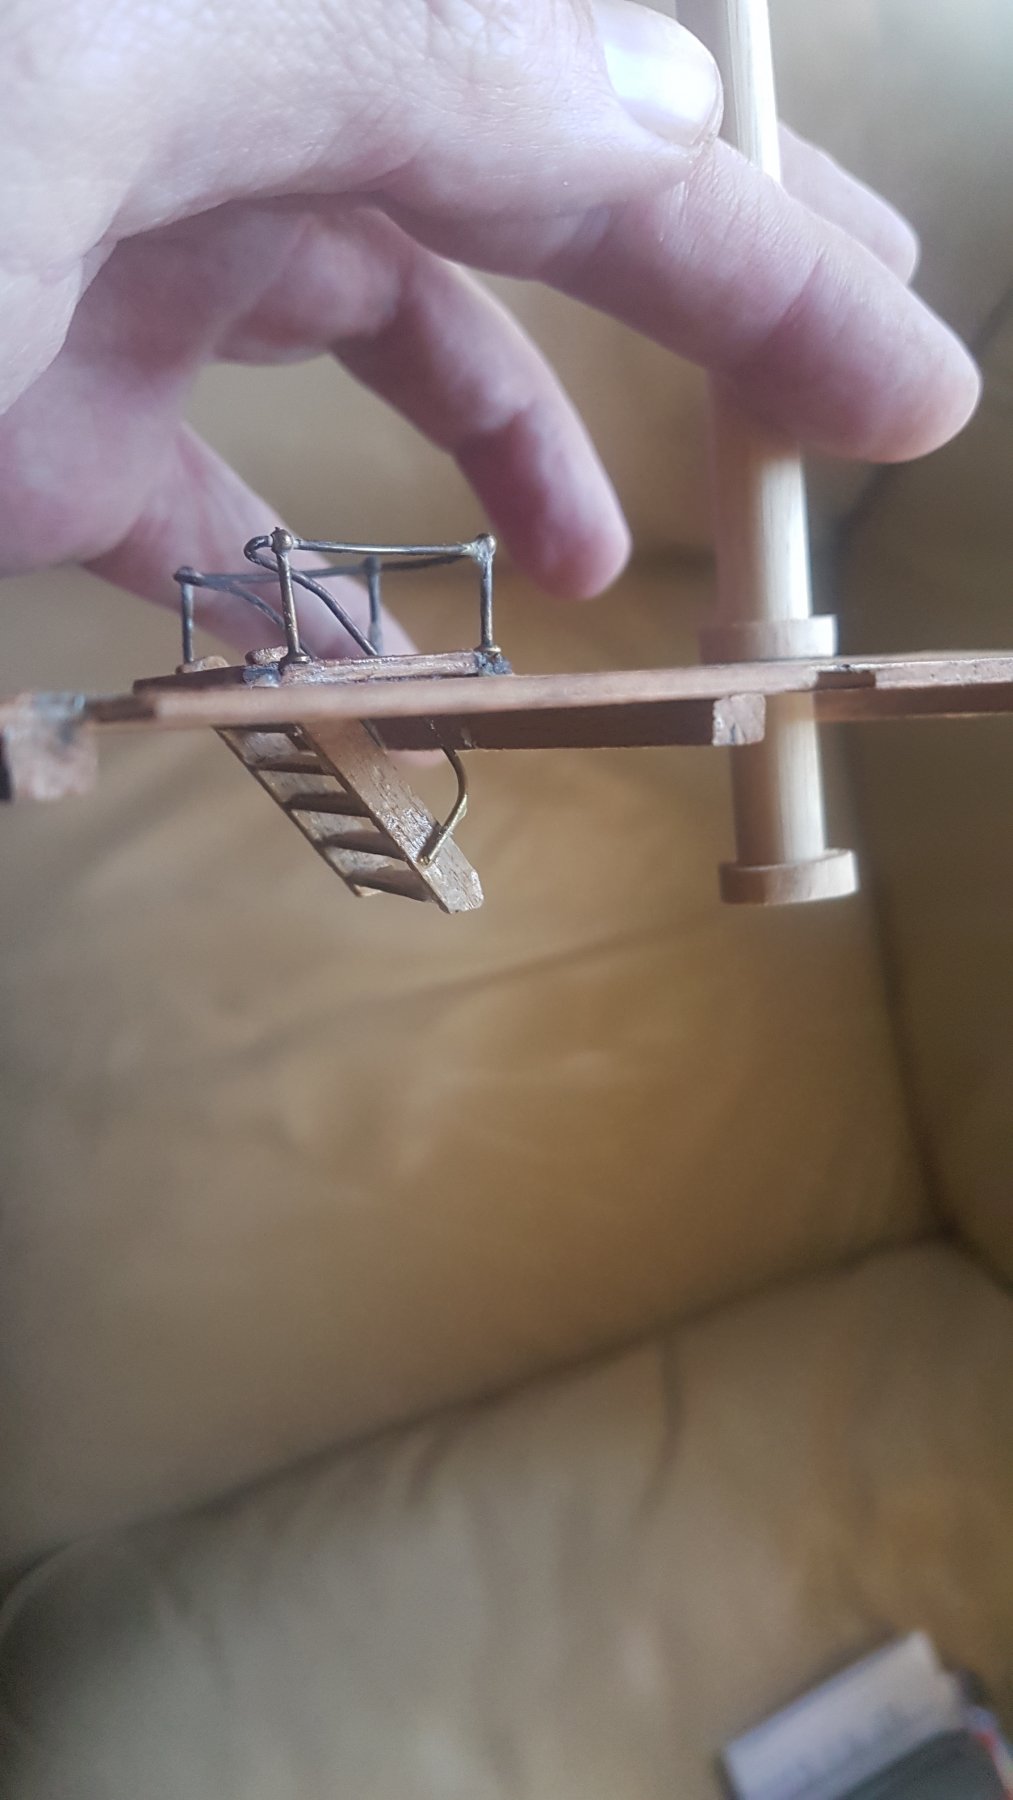
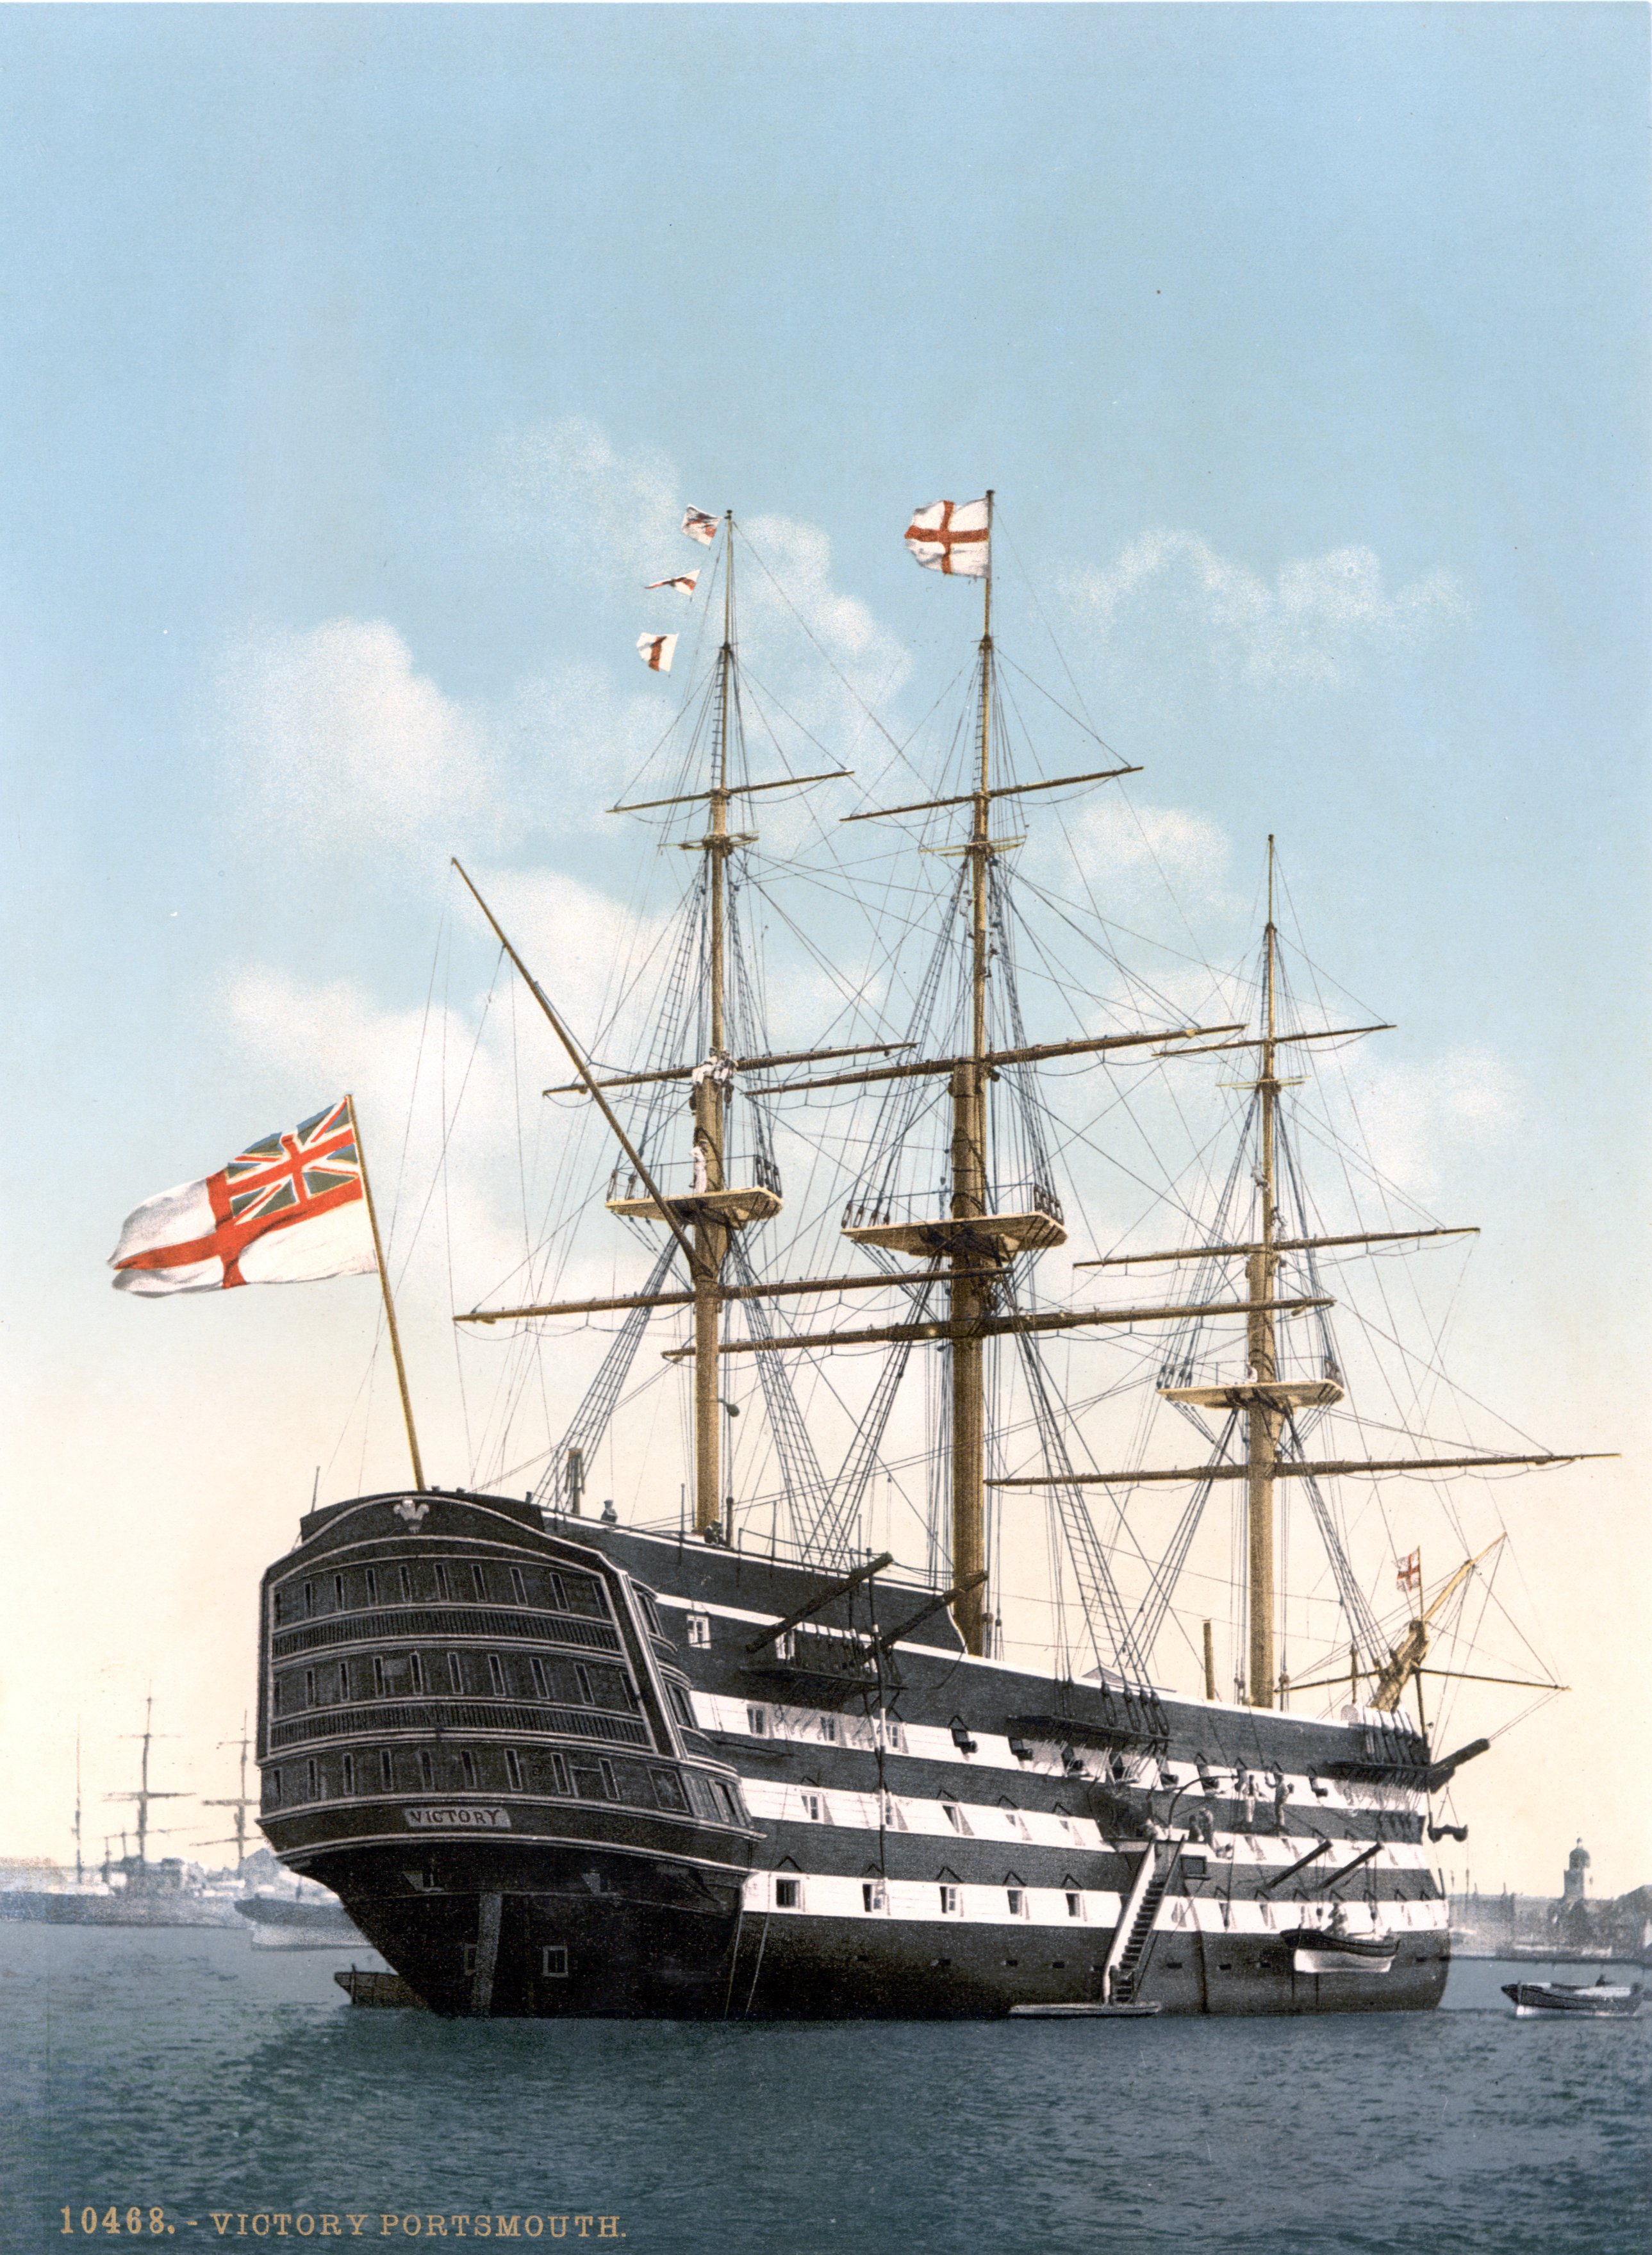
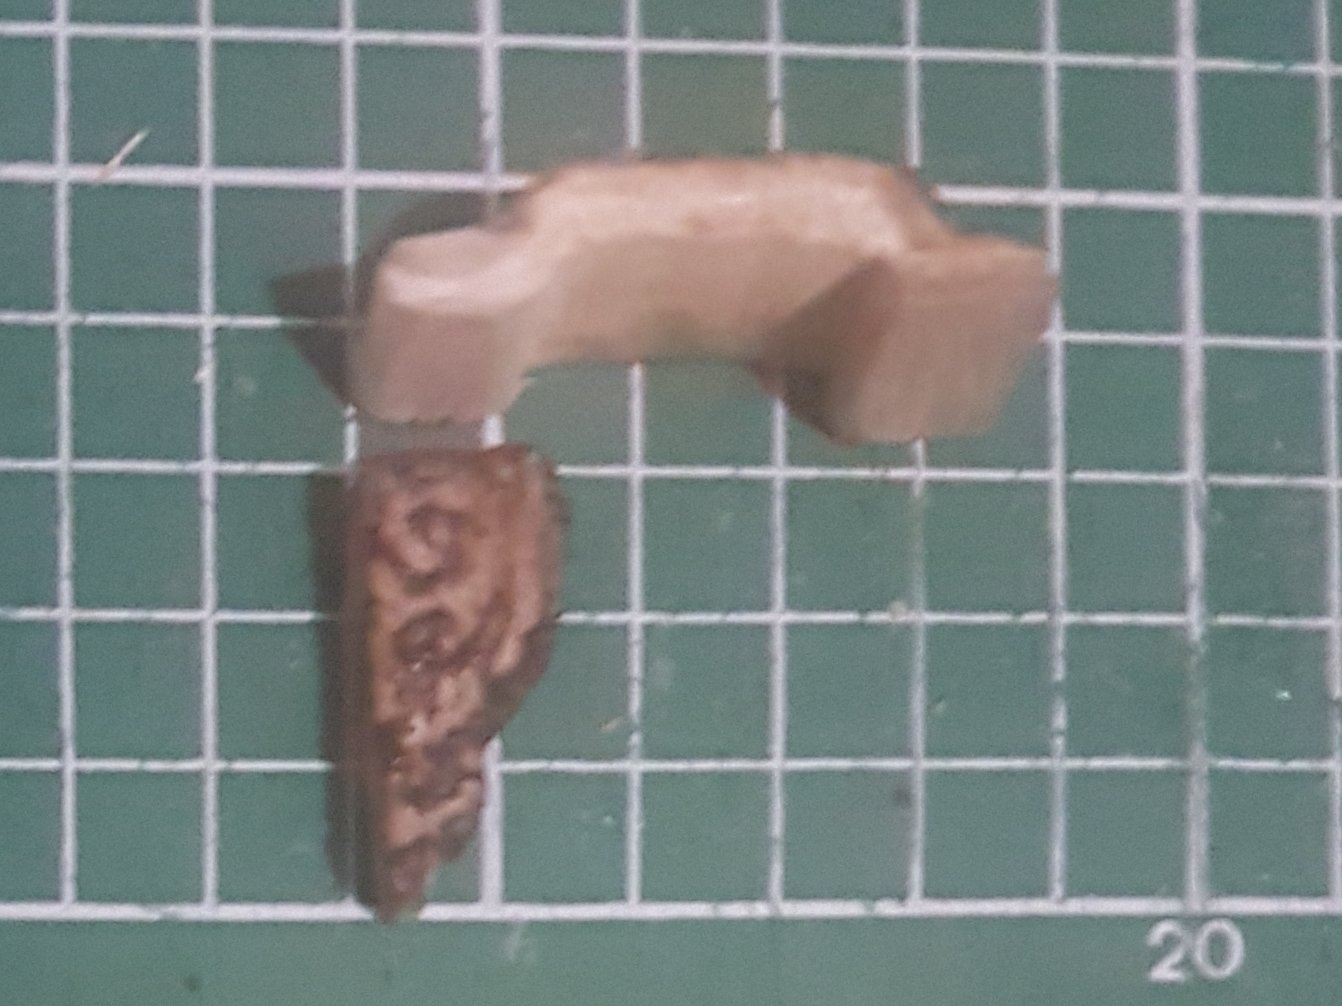
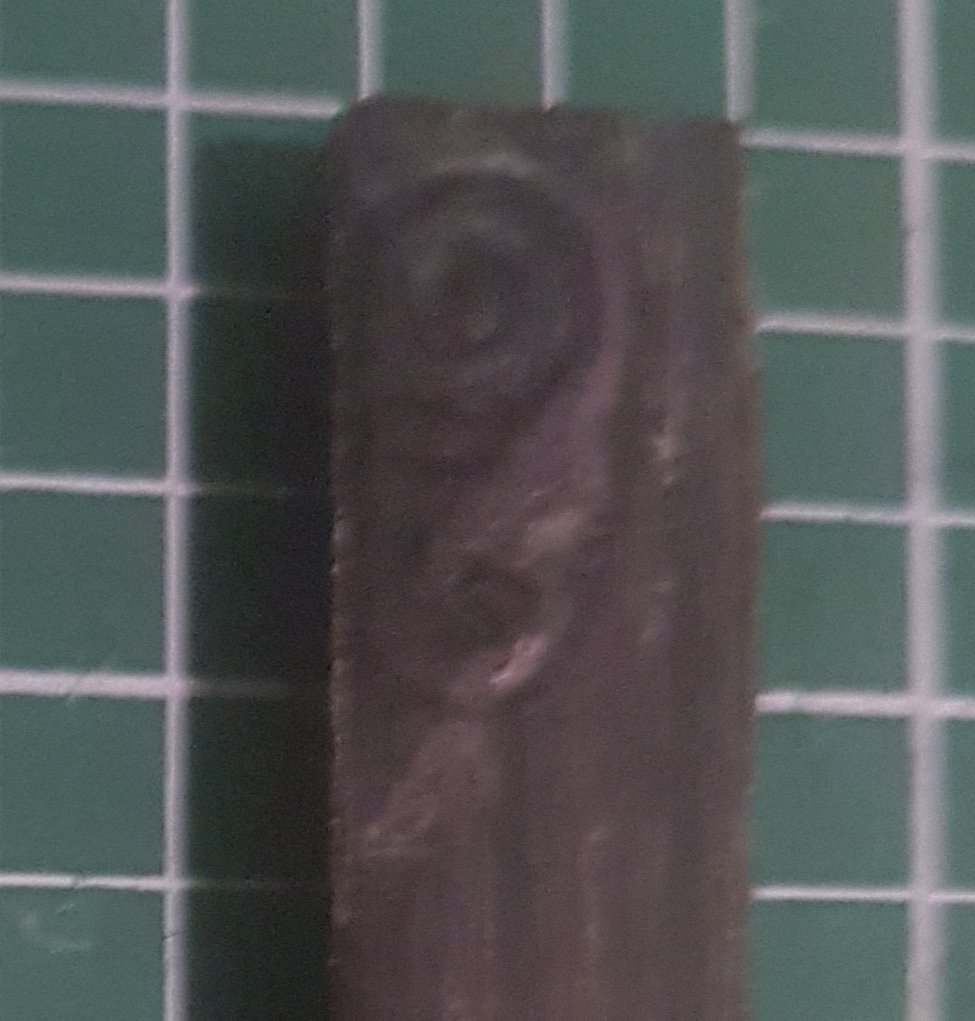
Wood carving Today I thought I would try something new Wood carving with my new Dremel. It's really small scale and I chose something intricate, the entryway awning and decorations for the HMS Victory. Anyway here's a work in progress I found some black buffalo horn, which carves much better than the grainy soft wood I had been using...
-
Inside the upper gundeck Here's a pic of the inside wall. Made with coffee stirrers

-
HMS Victory 1805 ships boats sourced from: Anatomy of the Victory (Peter Goodwin) p.77 The Victory carries six boats Launch: 34 ft (10.36 m) or 1:98 scale (10.5 cm) general working boat carries stores, marines, guns, gunpowder etc... can be fitted with an 18 lb cannonade at the bow Admirals barge: 28 ft (8.53 m) or 1:98 scale (8.75 cm) to carry Admiral, high ranking Officers and Dignitaries to other ships or ashore. Officers pinnace: 32 ft (9.75 m) or 1:98 scale (9.9 cm) carrying officers and also used for amphibious landings. Cutter: 24 ft (7.32 m) or 1:98 scale (7.5 cm) general working boat Yawl or Cutter: 24 ft (7.32 m) or 1:98 scale (7.5 cm) general working boat Cutter: 18 ft (5.48 m) or 1:98 scale (5.6 cm) carrying Officers and their baggage, also dispatches between ships So for my 2x Launches that are 12.3 cm... I'll shorten them appropriately for the 34 ft Launch and the 28 ft Admirals barge by cutting a section out of the middle of each before hulling.
-
Port Update Here's an update of the cannon ports with colour ! Also I'm scraping the top deck again as I like the grayish color the wood is going without the oil finish I'm also polishing the handrail where it would get used alot.

-
Wallace: Glad to be of help, I'd like to see your wooded over hatches some time
-
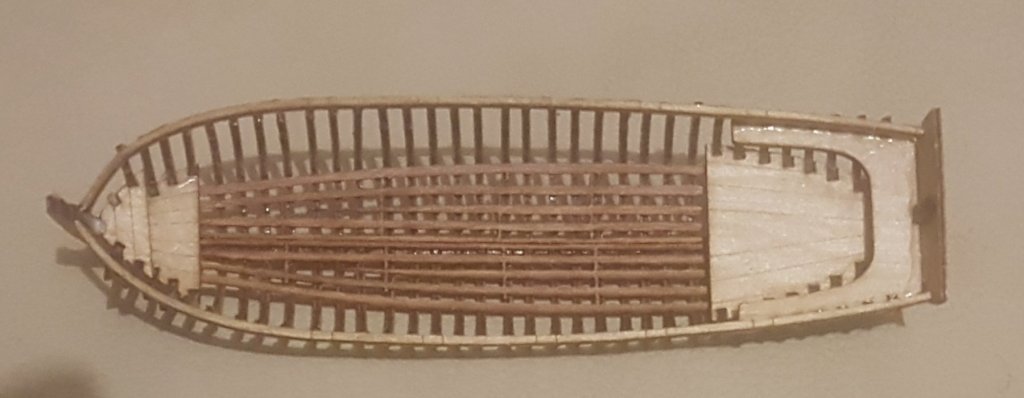
HMS Suprise launch 1:75 scale Here's where I am up to with one of two boat kits I acquired Do you guys think it could work on the HMS Victory 1:98 scale ? As mentioned previously it's 123 mm long and fits on the beams above the lower deck.
-
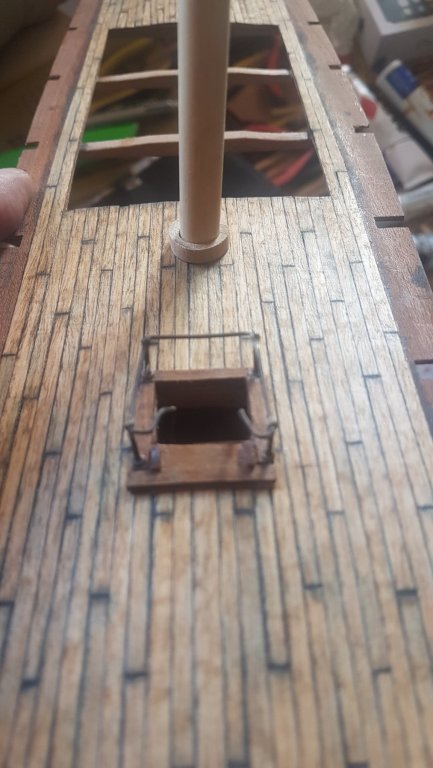
Thanks for the info Wallace Hatch mod as promised for Wallace I spent some time today playing around with a prototype hatch. Luckily for me when I trimmed down the deck planks to about 3mm I had lots of offcuts in my wood pile. I used some of these to frame a hatch with up to 2 layers in an effort to remove the indent around the htch when I glued the surround on. Then after supergluing the wood to metal, it was a matter of trimming down the edges and filing down to create a flush surface. I tried engraving lines into the metal to simulate planking lines to match the hull, however these are not as good as I anticipated. I'm thinking of coating the top of the hatch with glue, allowing to harden and cure, then cutting plank lines with a sharp blade and painting over. Here's some pics of the results (without the last step mentioned above) with an emphasis on being flush with the hull.

-
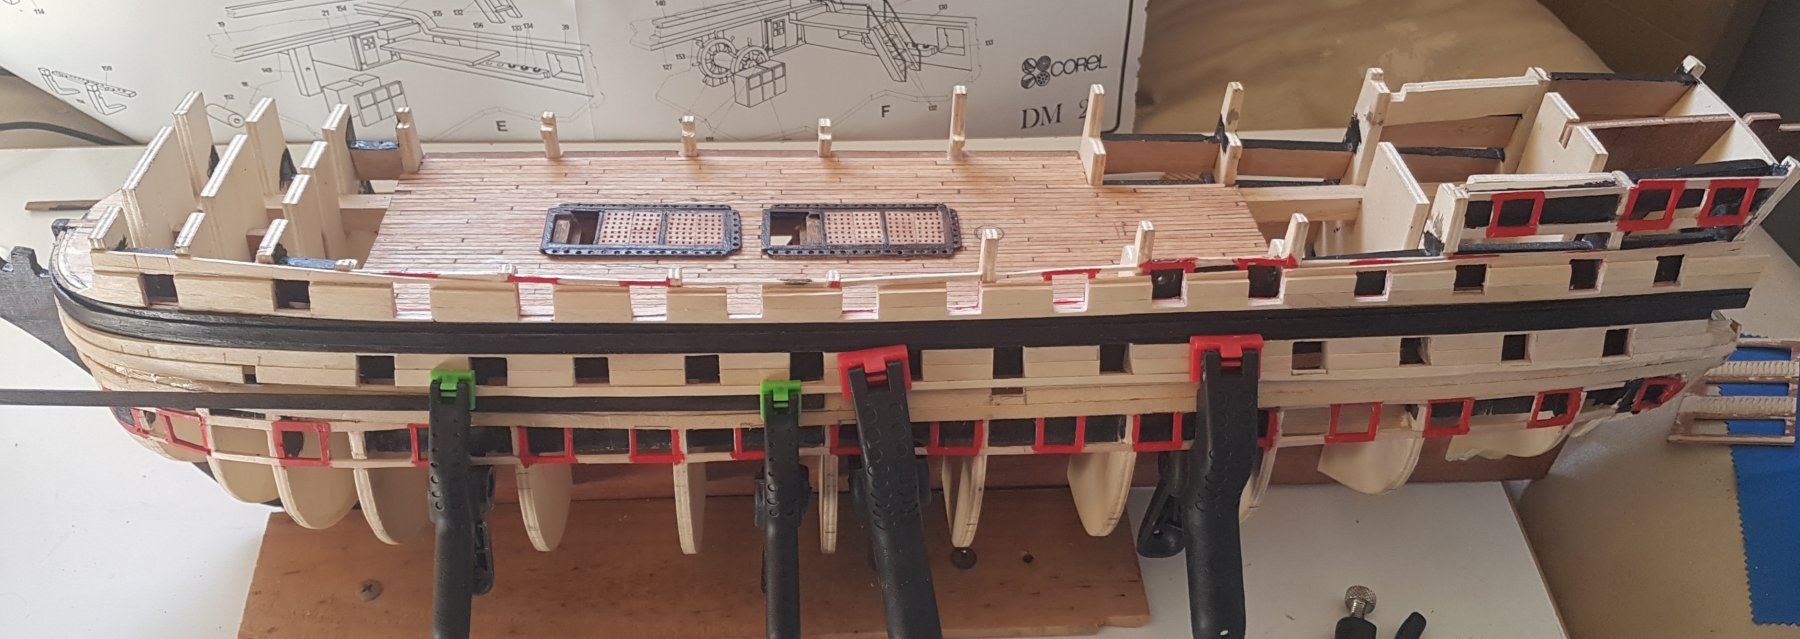
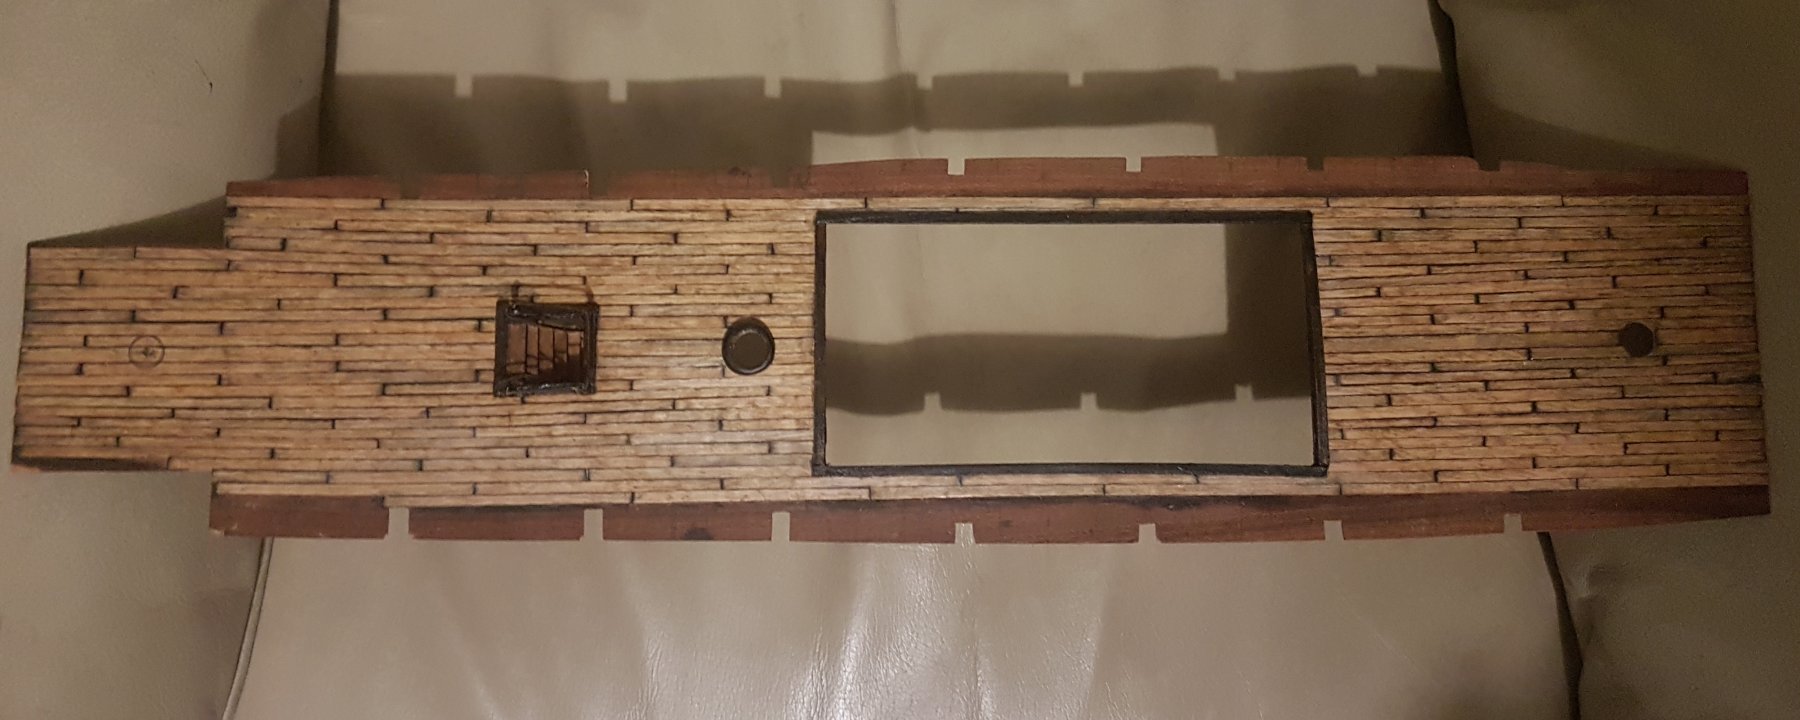
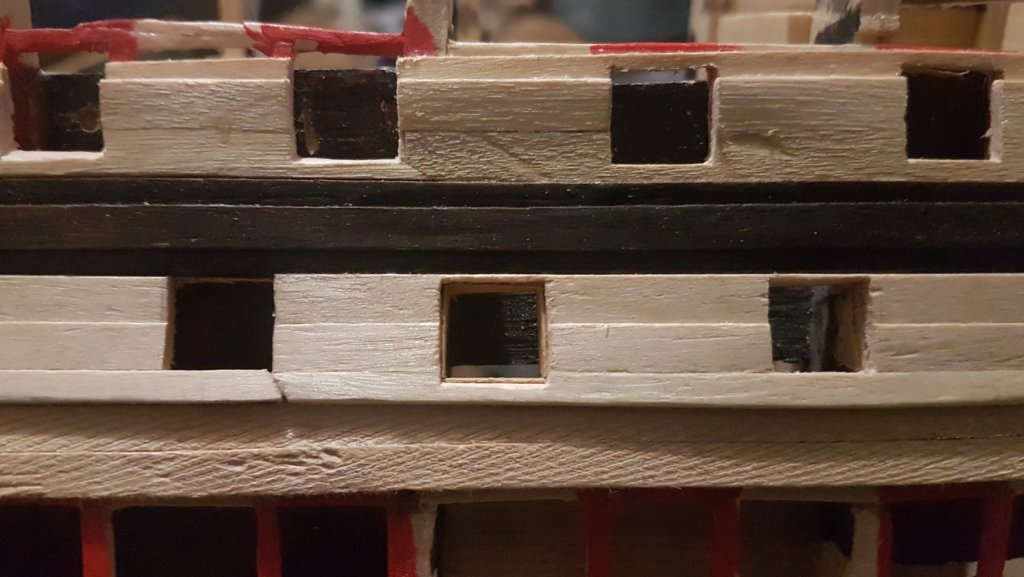
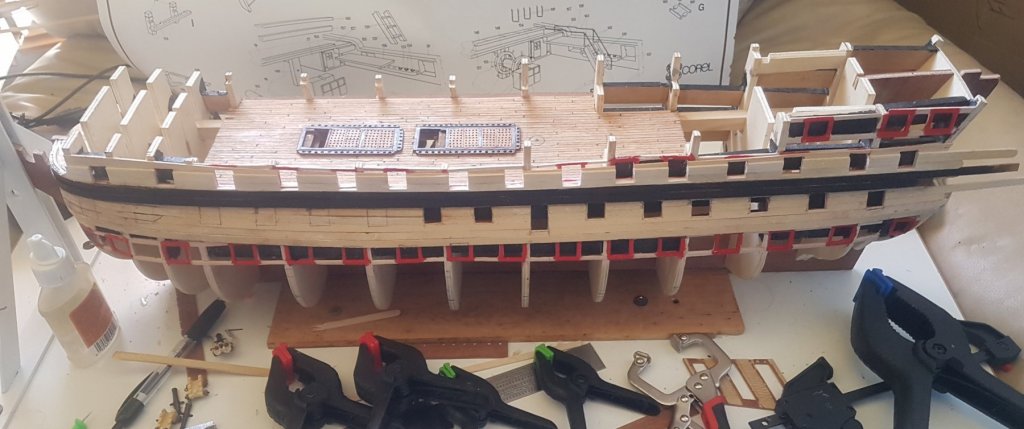
Build Update Hull Cannon Port's I've been using my time to focus on the port openings. Getting them square and somoothing off the layers of planking inside to mount the inner port linings. Once the port linings are in, they really make the port's look nice and square on the inside. Cutters and Launches When I purchased the 'Wasa' from a friend I also picked up two kits for the HMS Suprise Launches, these are 1:75 scale and 123mm long. I'm putting one together to see if it will work with the 1:98 scale of the HMS Victory. I'm thinking of adding more oars and seats to help modify the scale in line with 1:98. It will fit on the Victory, but there's a few mods to be made. I'm looking for reference pic's to see how the larger boats look and if they differ in anyway from the smaller 'cutters'. First look at the top deck with hull Check out the pic's... I need to trim the side of the top deck a little to get it flush with the hull planking, however it can be removed still while planking the hull. I put it back in place so I can check the hull ports on the other side of the ship. Also a laser level also proves to be really useful here for lining up the layers on each side of the hull pics Question: Has anyone on this build trimmed down the first bulkhead height to reduce the camber of the bow's top deck ?... it just looks a little off to me as pictured above.
-
I may also try engraving grooves into the front of the metal hatch to match the surrounding timber planks... I'll take pics of this when a sample done
-
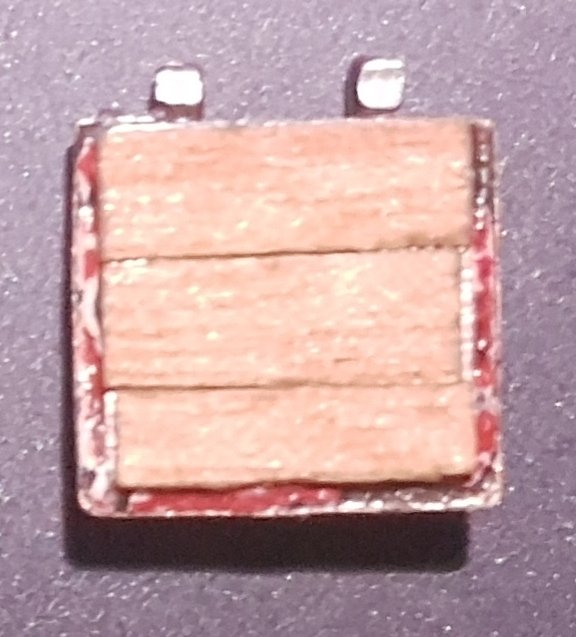
Wallace: Thats a nice pic Cannon hatches I was thinking of crafting hatches as you suggested, but that's alot of work to find suitable material to make hinges for alot of hatches. So my first thought was to try and use the kit hatches and see how they look. I have just added wood to the back of the kit hatch which will be painted red to match the port lining. Maybe I could glue wood on the front too... making the hatch even thicker but would look more like your pic above. here's an update pic of the back of the hatch. edit: Adding wood to the front would make the hinges look like they are carved into channels on the front. As my hatches are going to be mostly open, I think the focus on wood for the back is good enough 2nd edit: Another solution is to wood over just the surround that is inset to make it flat ontop. I may try this for a few hatches that will be closed and see how they look painted over.
-
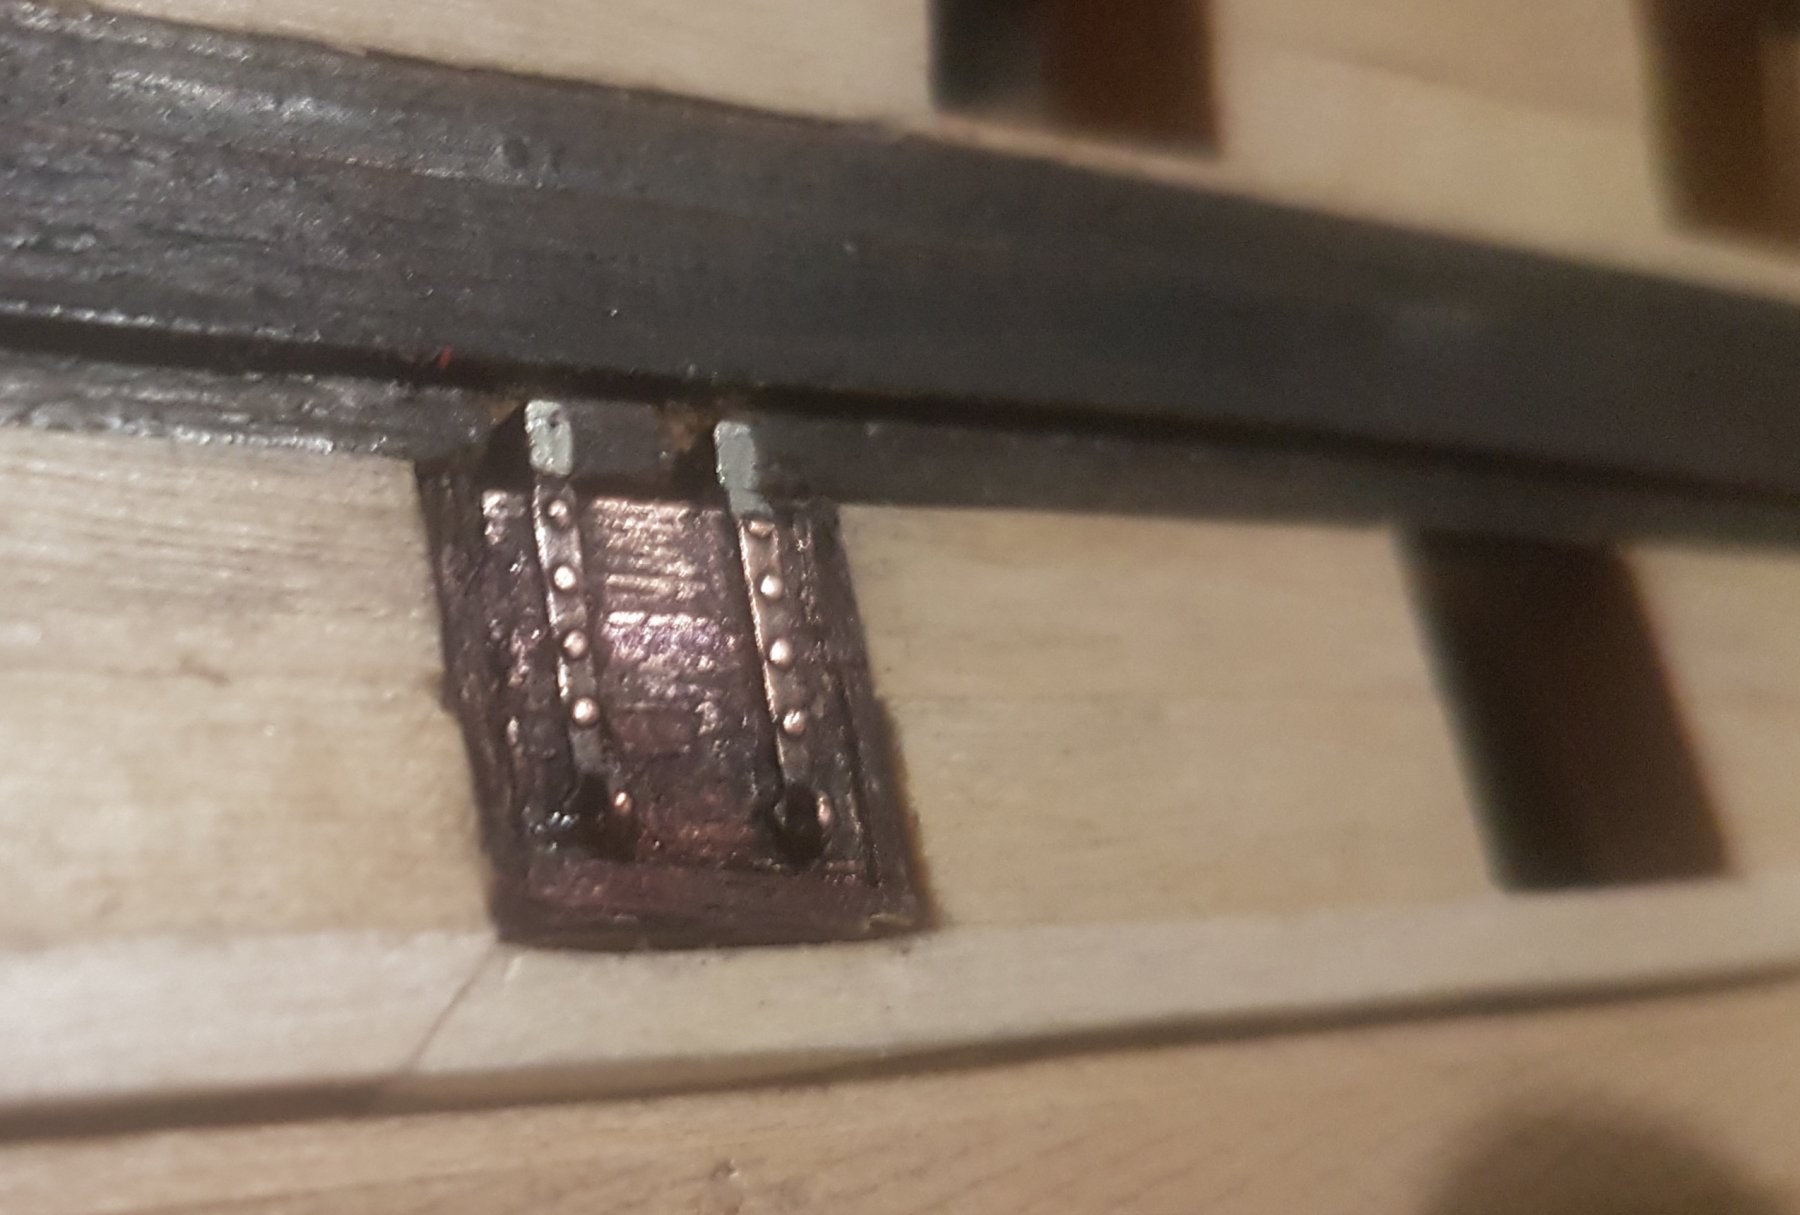
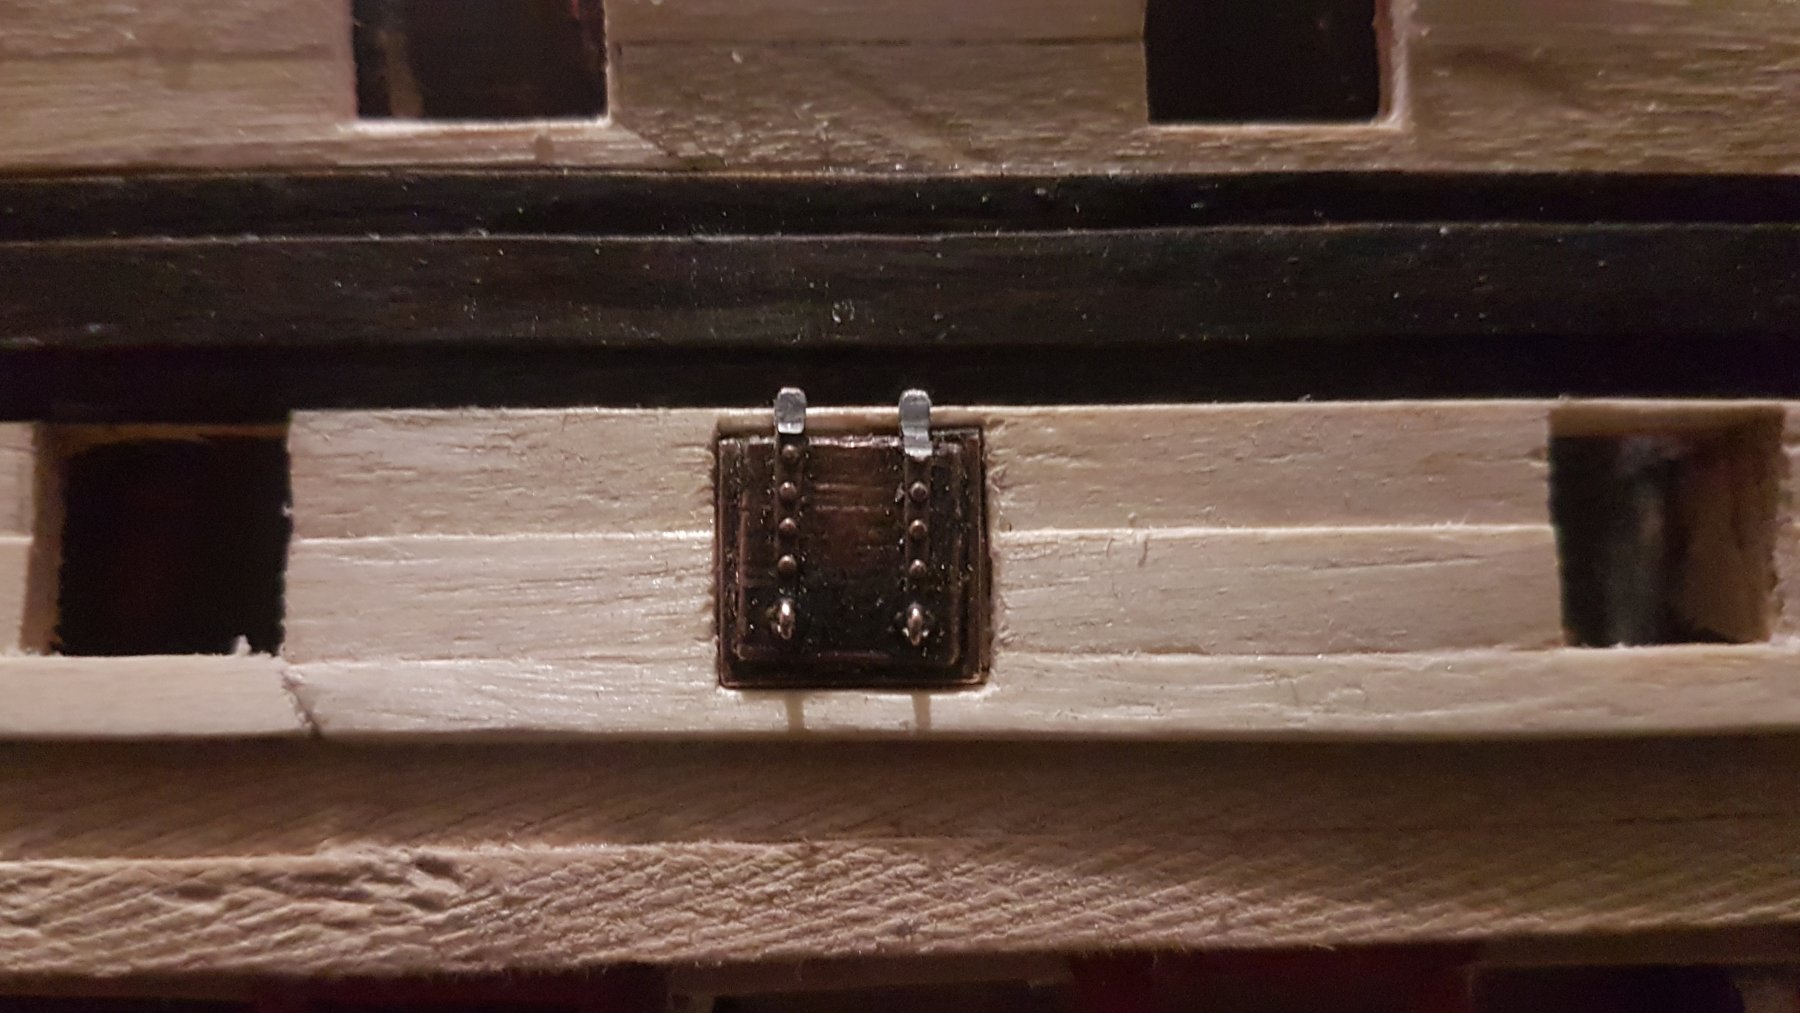
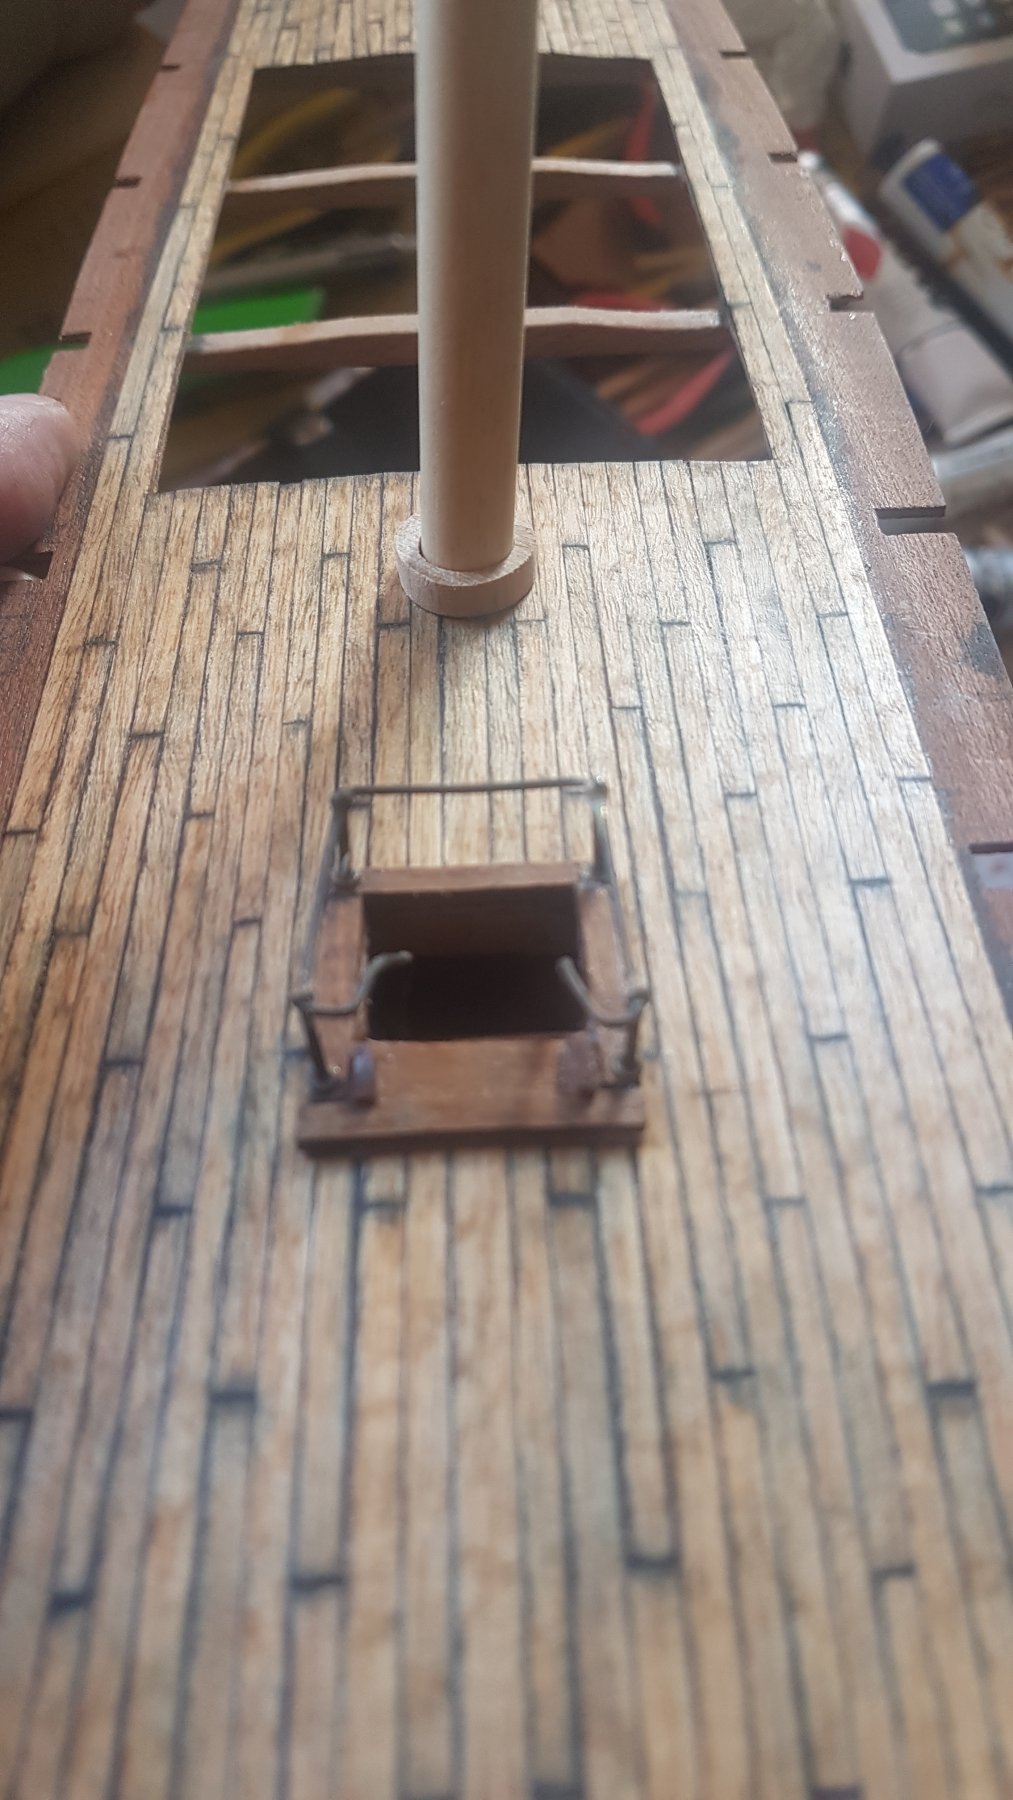
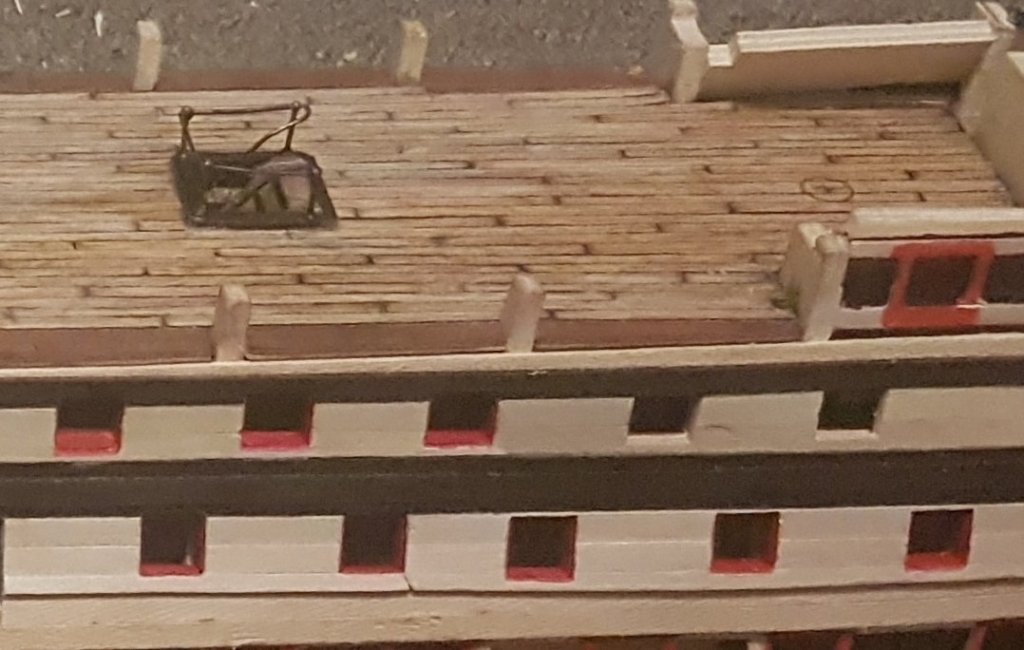
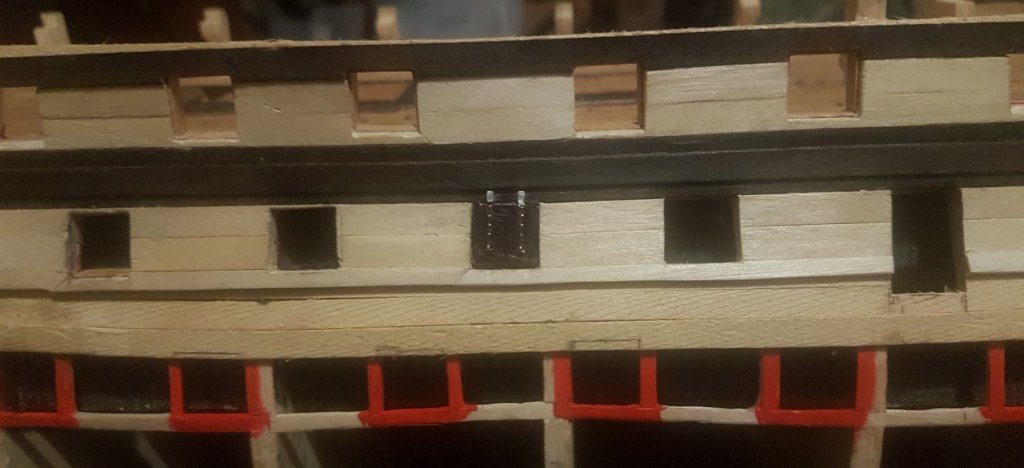
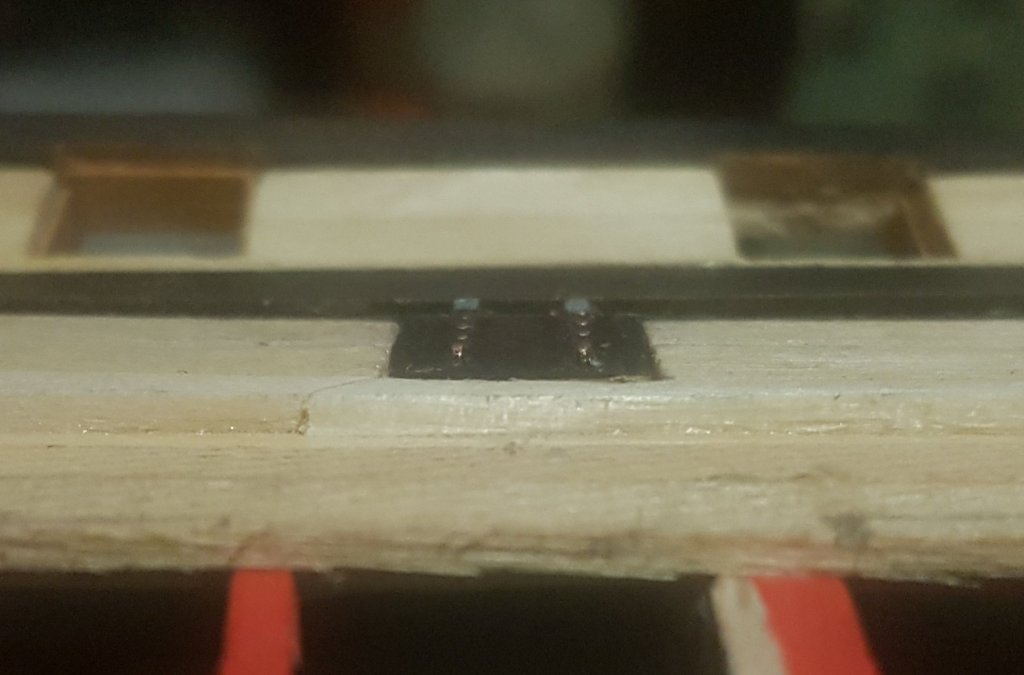
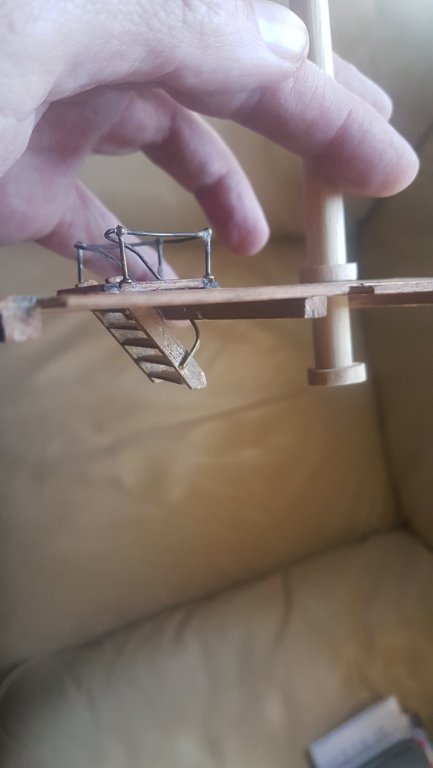
Update Port hatch internal frame Here's a look at the internal framing and a hatch fitted from the Corel kit. I have modified the hatch by gluing the surround onto the hatch and filing down the metal hinge part to make it look more like the original HMS Victory hatch hinges. I have also drilled two 0.5 mm holes in the metal bands to attach a 2 mm ring to tie onto a rope. I'm thinking of using the smallest heat shrink tube I can find to attach to the hull where the rope goes through to the inside.


-
Aha ! Thanks EJ as always for your sound advice. I shall indeed follow your advice and begin to strengthen the other side of the hull by adding port liners and planking
-
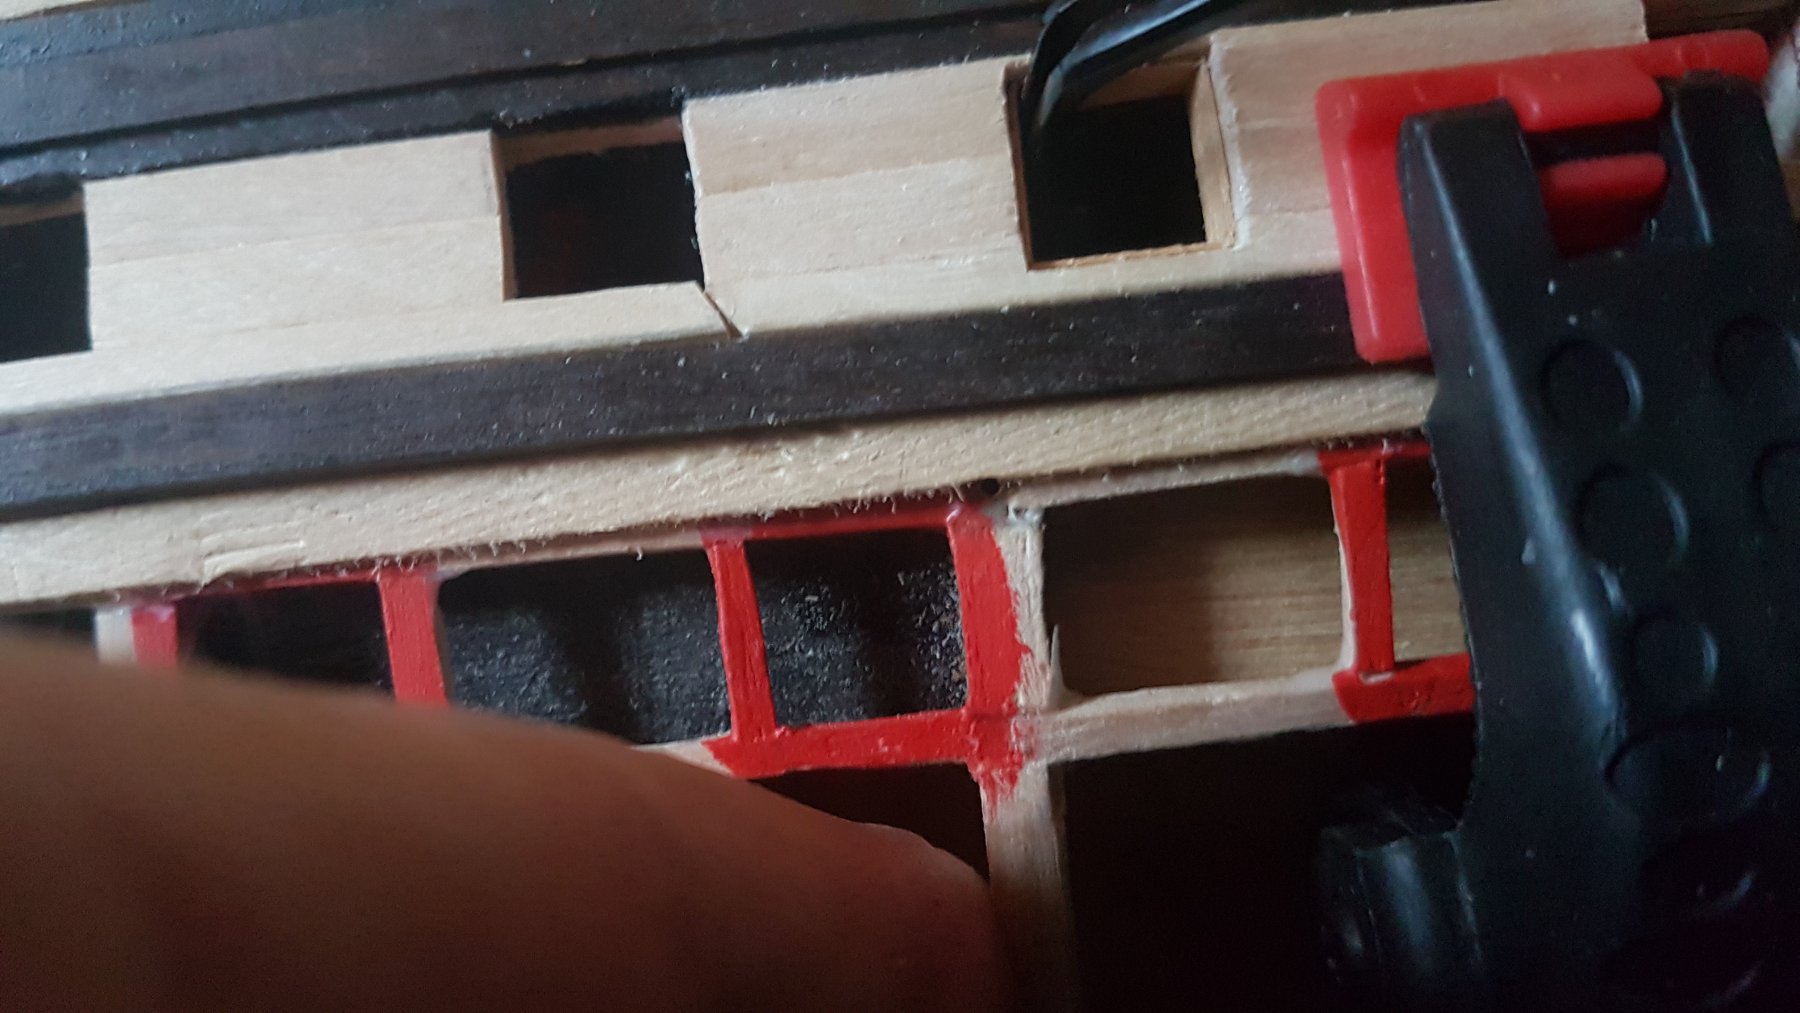
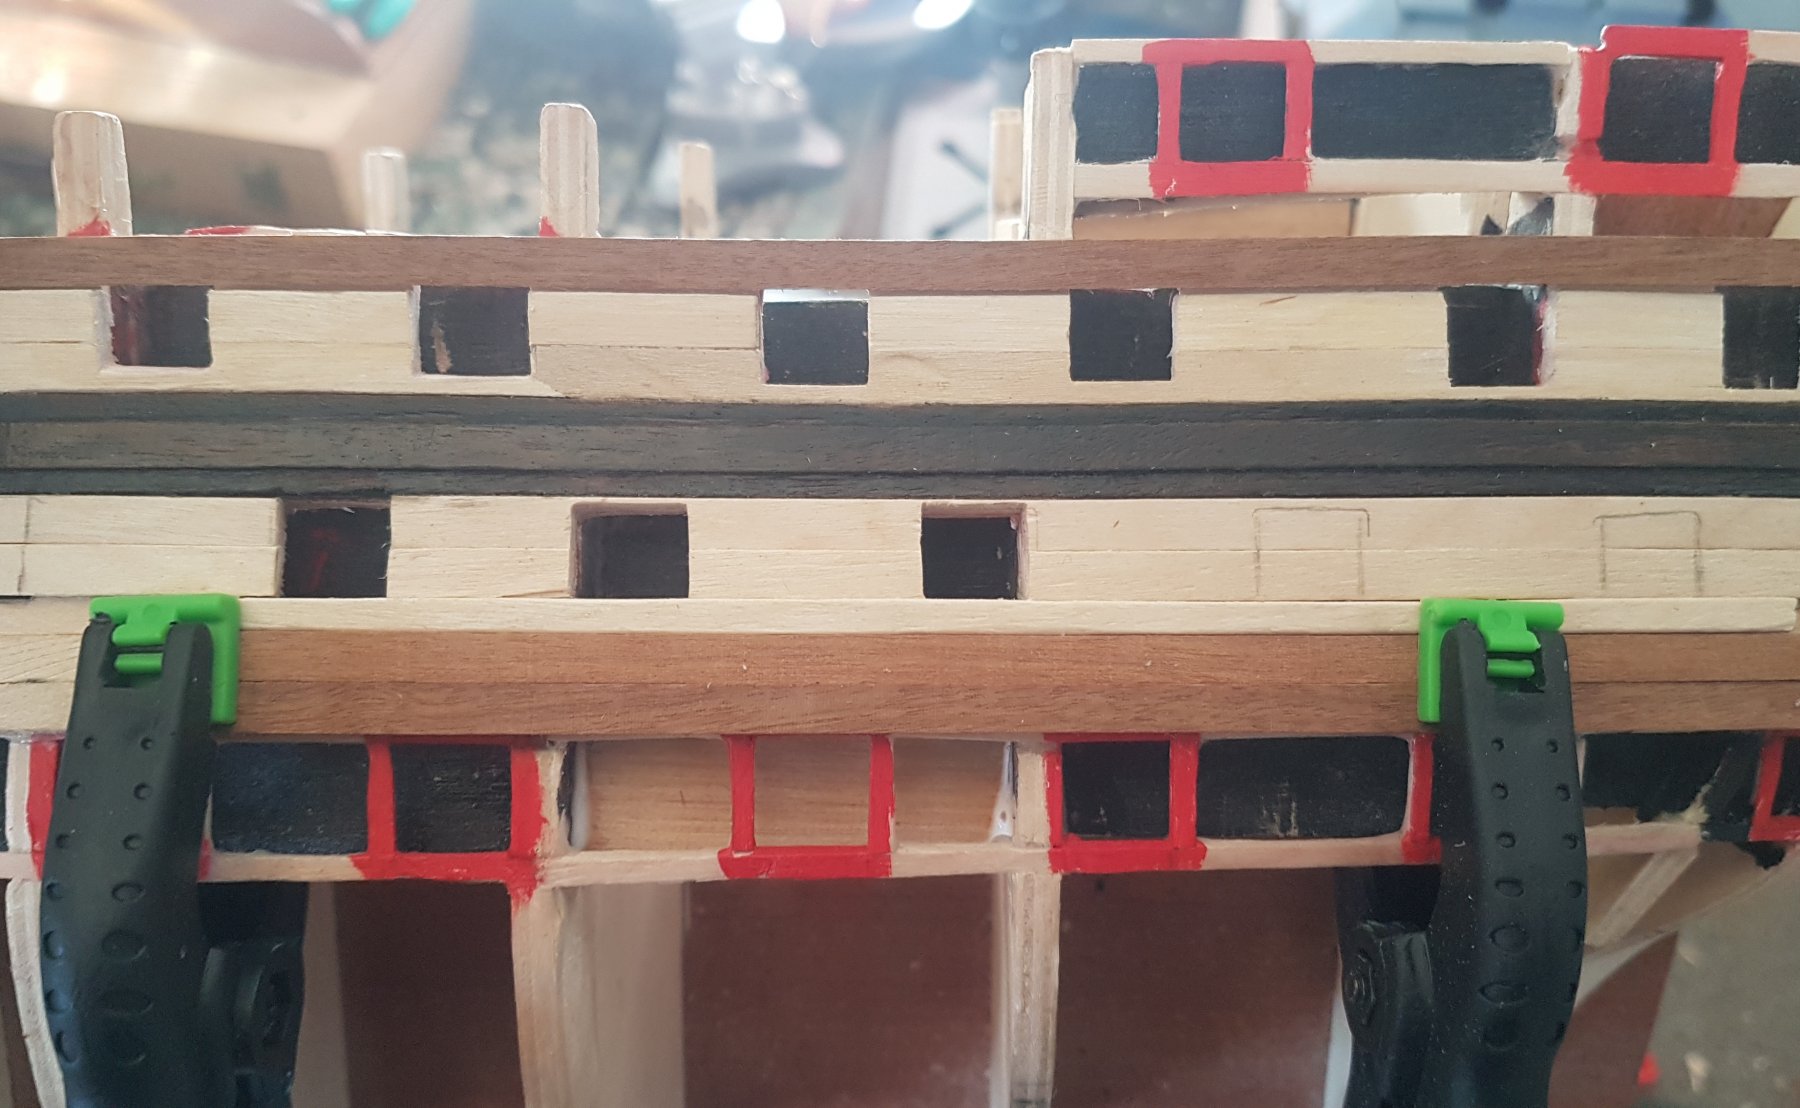
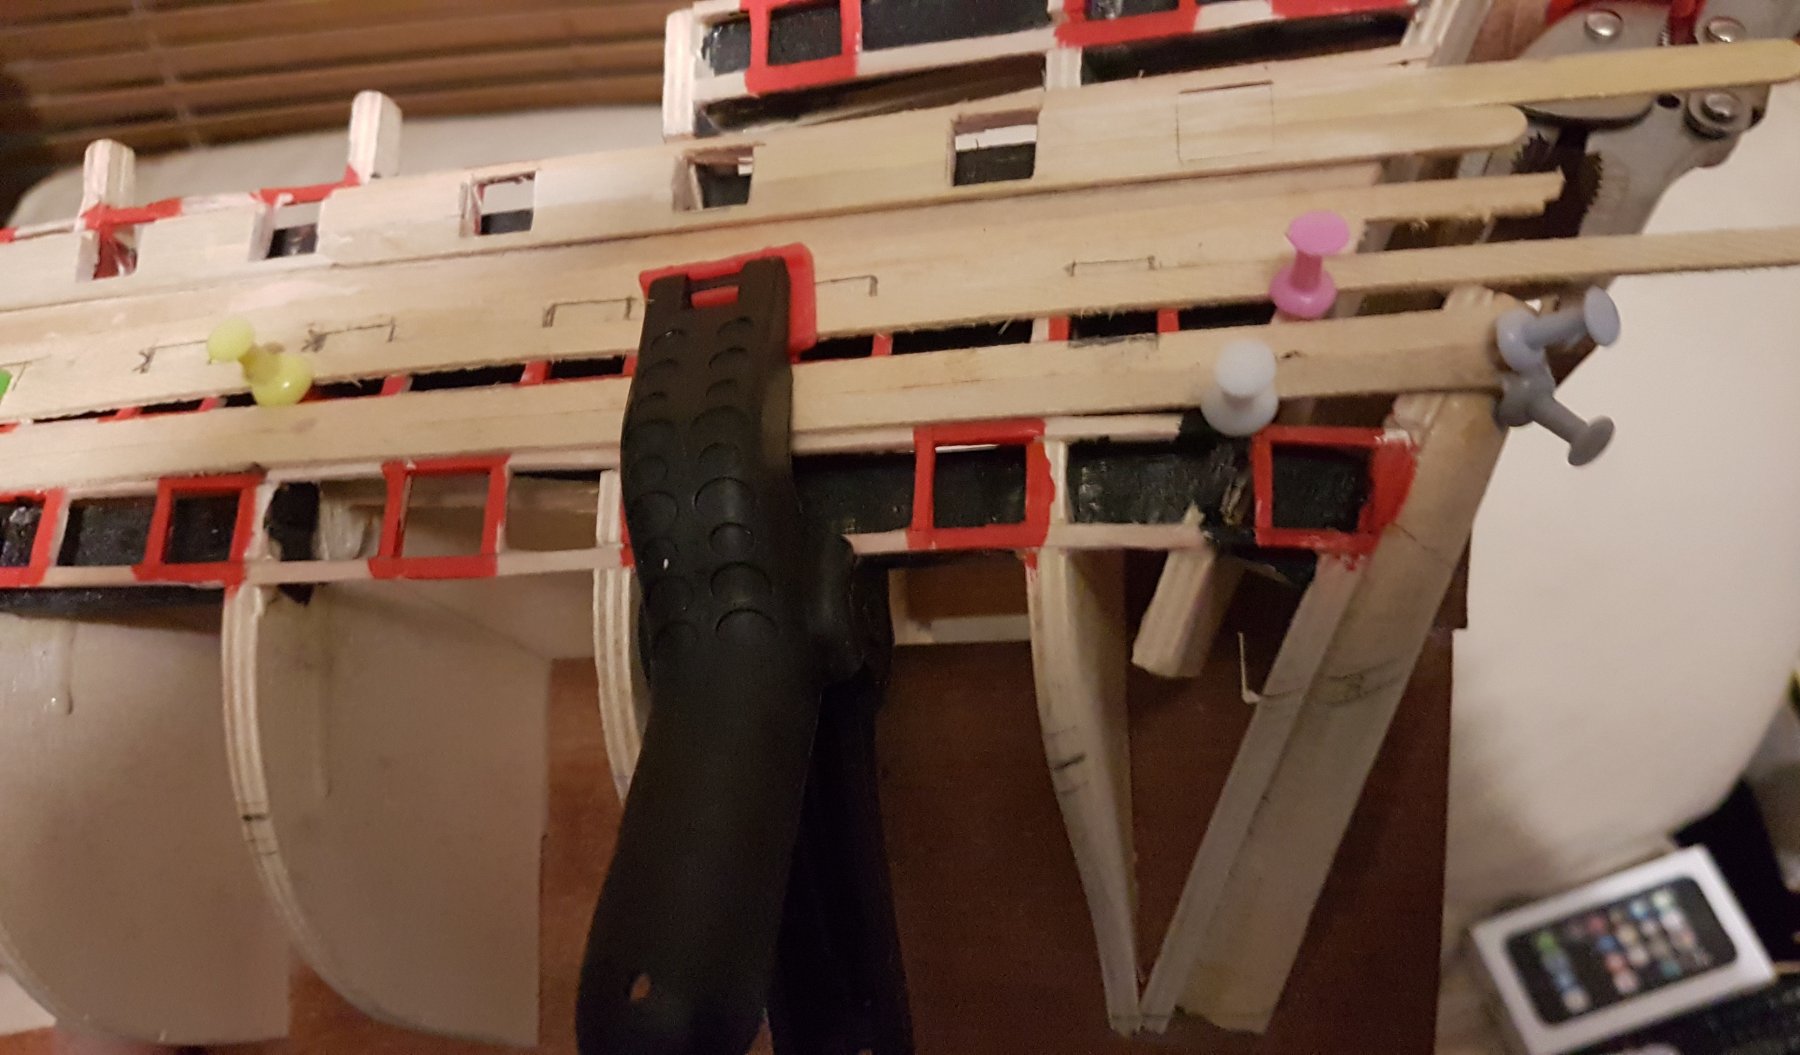
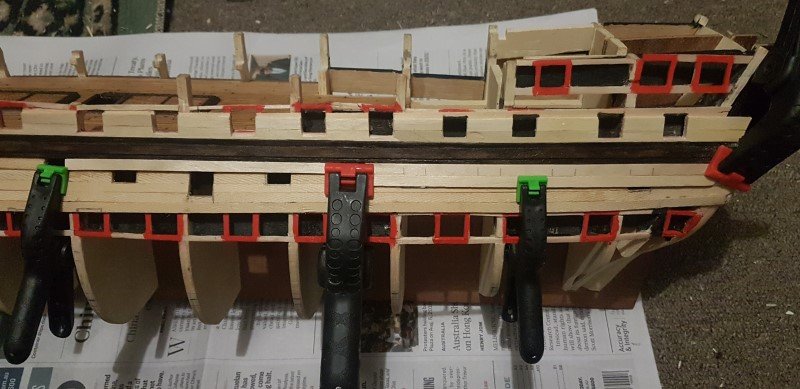
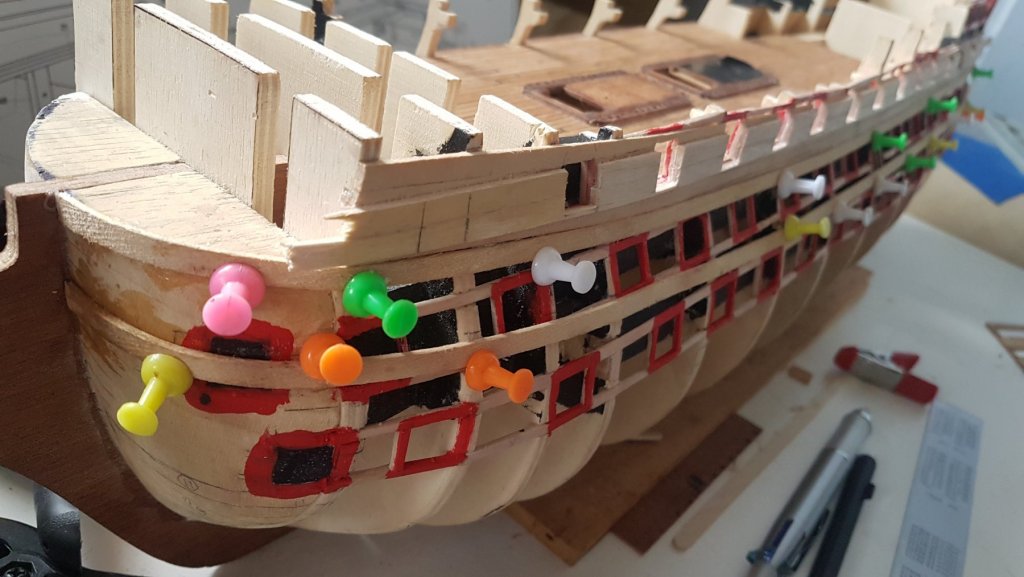
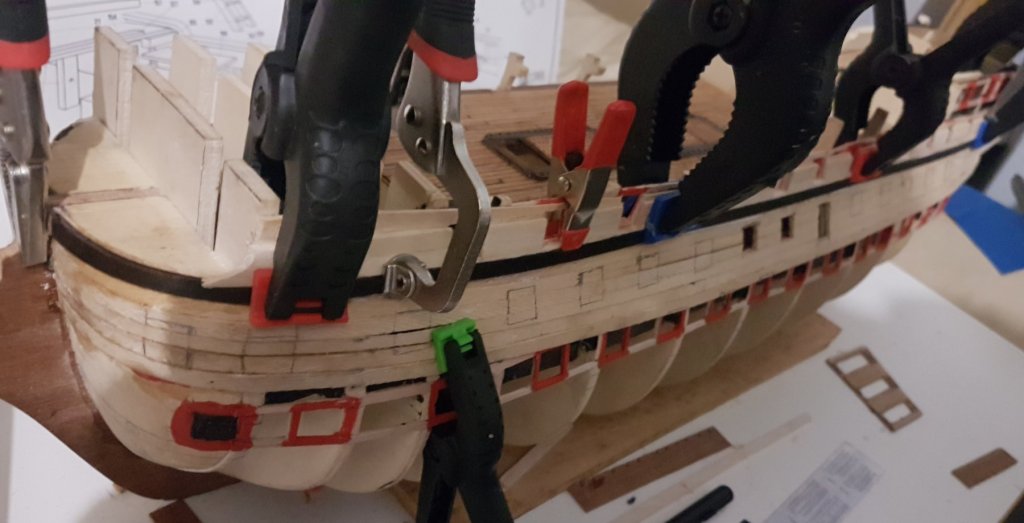
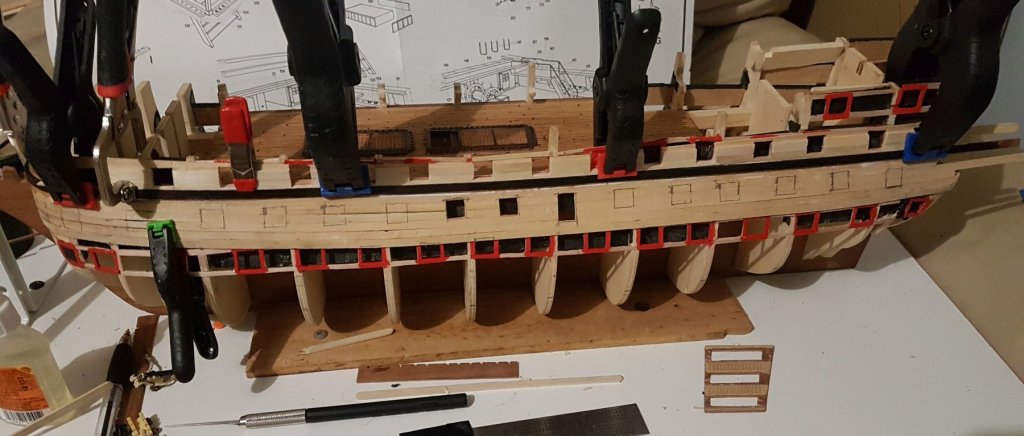
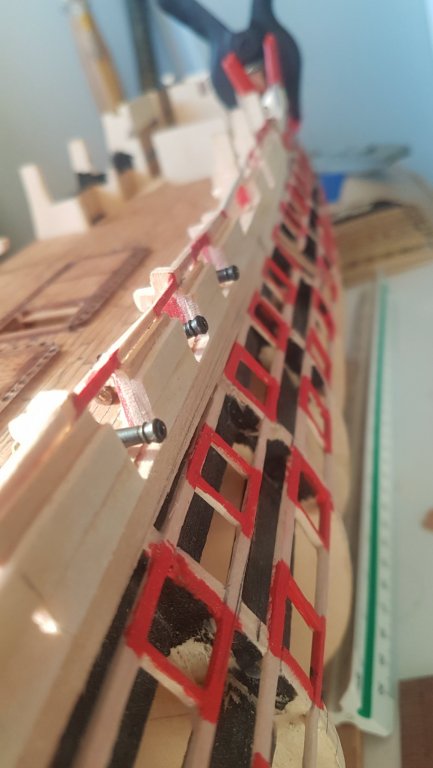
Hi Vane, nice to see you again I am planking the 1st and 2nd layer for the rows of cannons and cutting out the port hatches as I go. So my planning and progression on the hull planking was as follows. one: Build a frame or port lining for the cannon hatches onto the bulkheads to preplan the location and positioning of the cannon hatches with the following considerations: The locations of the bulkhead framing to avoid cutting into The number of hatches per row, spacing and overall number of cannons Ensuring the cannon rows are in line with the rear cabin side windows (on the cabin side template) The placement of the rigging in relation to the cannon hatches Location of the entry door, steps and vertical 'runners' around the hatches nearby two: Smooth off the bulkheads and port liners to allow hull planking to flow over everything smoothly three: Begin planking with the following considerations with the cannon hatches, and pre staining Japan Black on the walnut whales to avoid bleeding into the white pine wood (coffee stirrers) layer later Considerations Ensure I can add the top deck later by not planking over the top deck. This enables me the ability to complete the lower deck before adding the top deck After each plank has been added, mark where the cannon hatches are to be as the port lining is covered. The red paint outline helps with this. Cut out the cannon hatches after the glue has had time to cure on each layer of planking to ensure the correct size of the cannon hatch and that the marked out area matches the port framing precisely before starting the 2nd planking. Allow for the first planking and second planking to be placed differently to allow overlap of planking between the layers and strengthen the hull Mark and cut out the position of the hatches on the second layer of planking ensuring the size again of the hatches matches the port holes for the cannons four: Check the depth of the cannons extending beyond the hull is appropriate after adding the outer layers and inner layer of hull. To do this I have drilled one hole to do a test fit of a cannon into the backing board. This helps now incase I need to redo the backing boards for the lower cannon rows before they are planked over. This is where I am up to currently... five: Continue to plank over the lower hull with a focus on sectioning areas to calculate the tapering of planks required as I go. six: Repeat above steps for the other side of the ship. note: Still need to line the hatches with an offset internal thin frame a couple of mm in and paint red and paint pale yellow ochre on the 2nd layer of planking before adding the cannons,
-
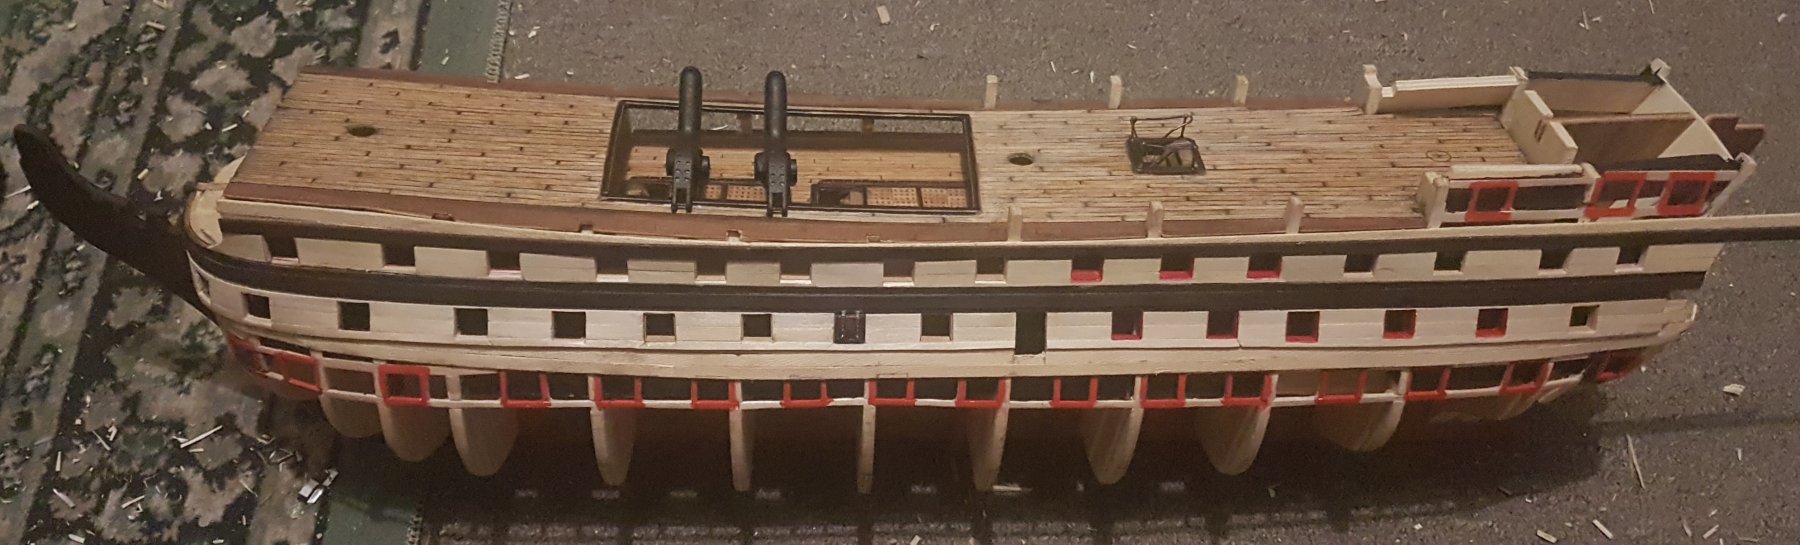
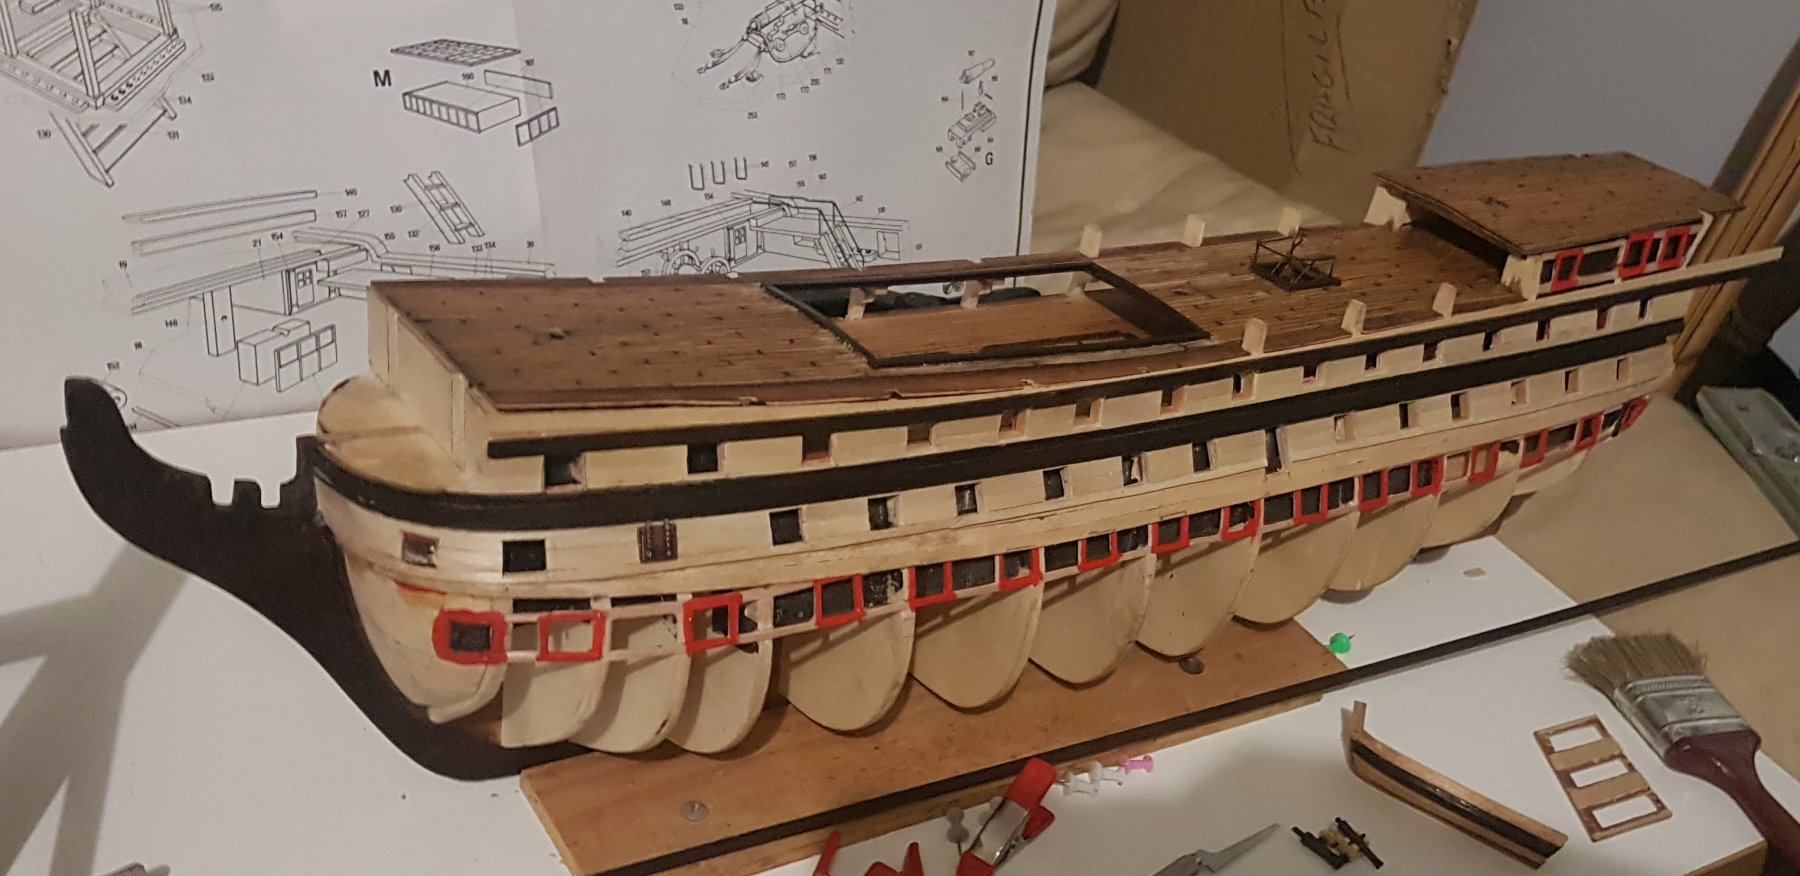
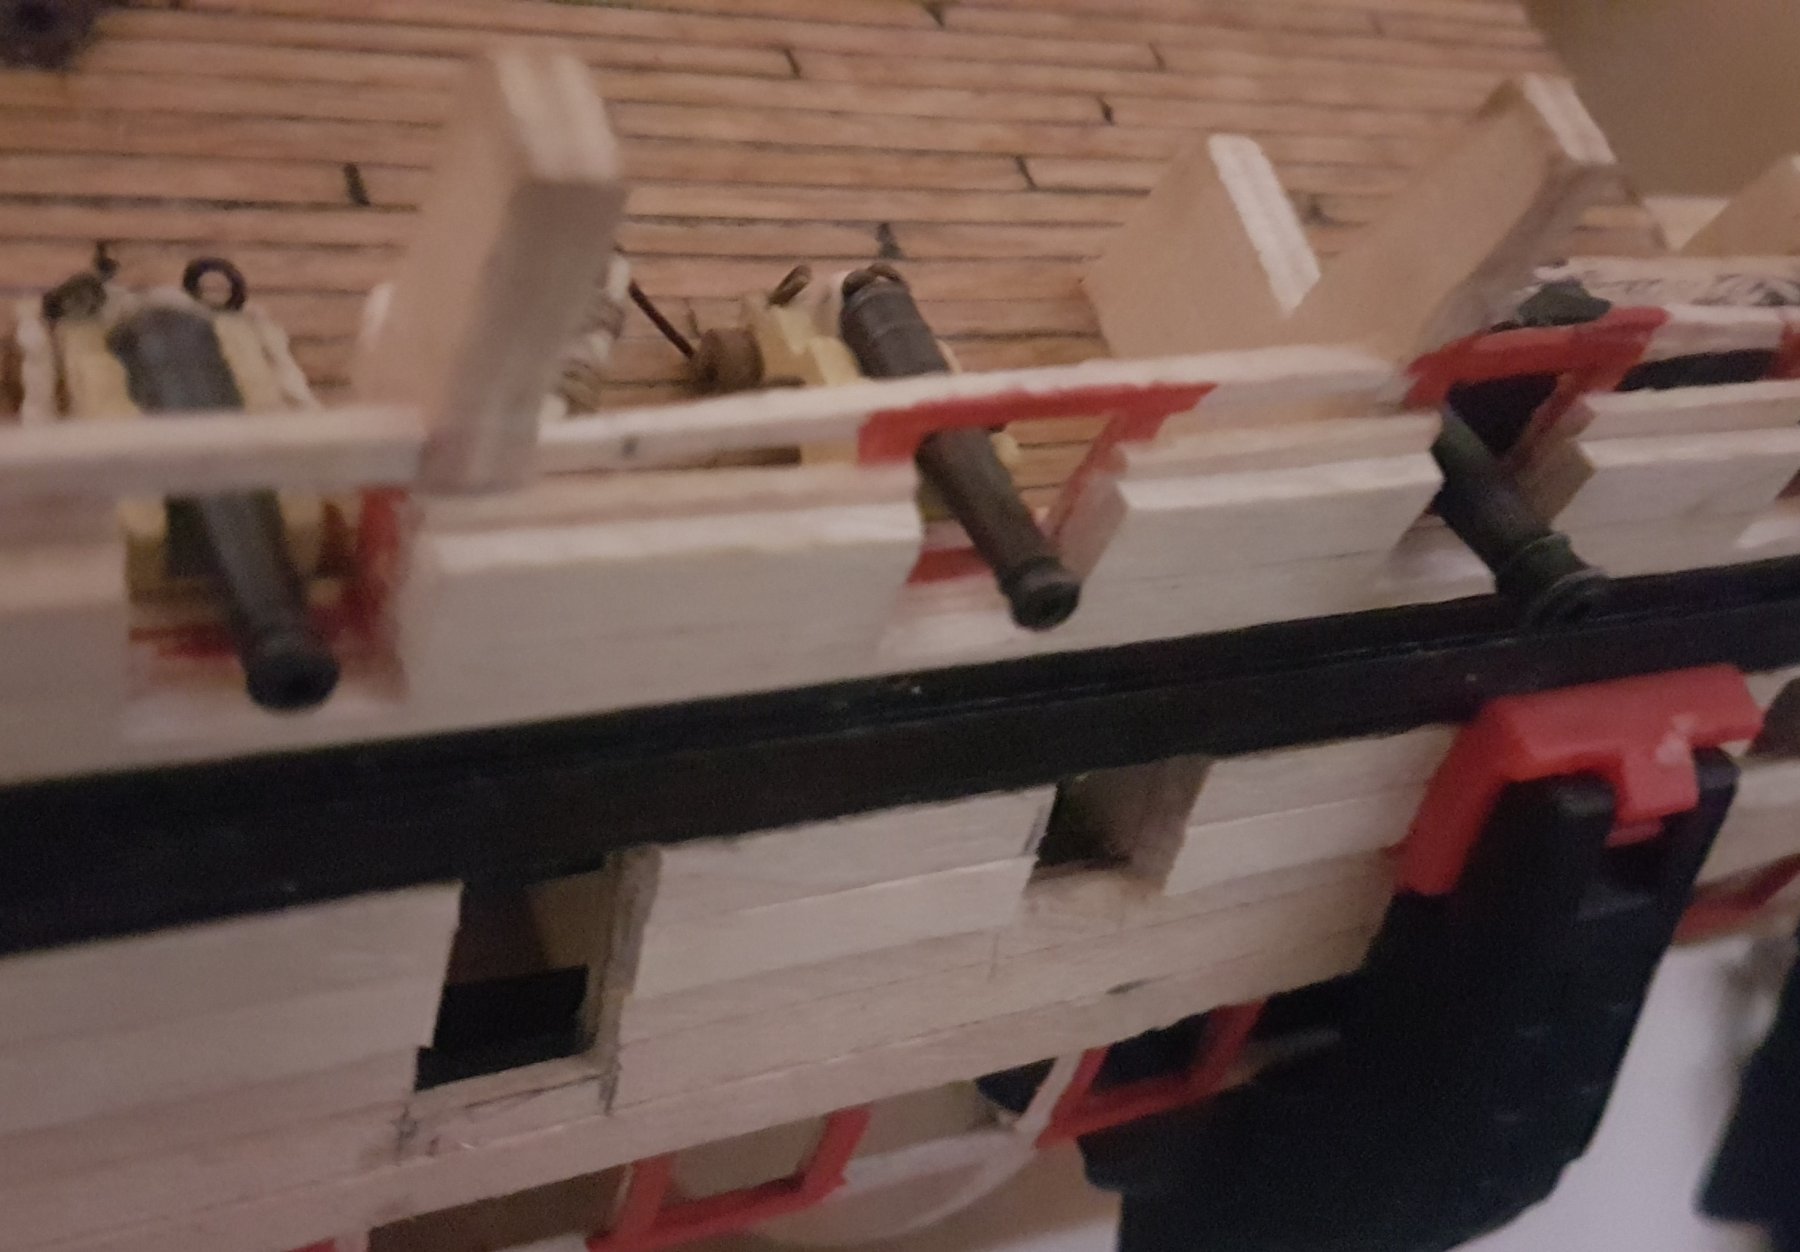
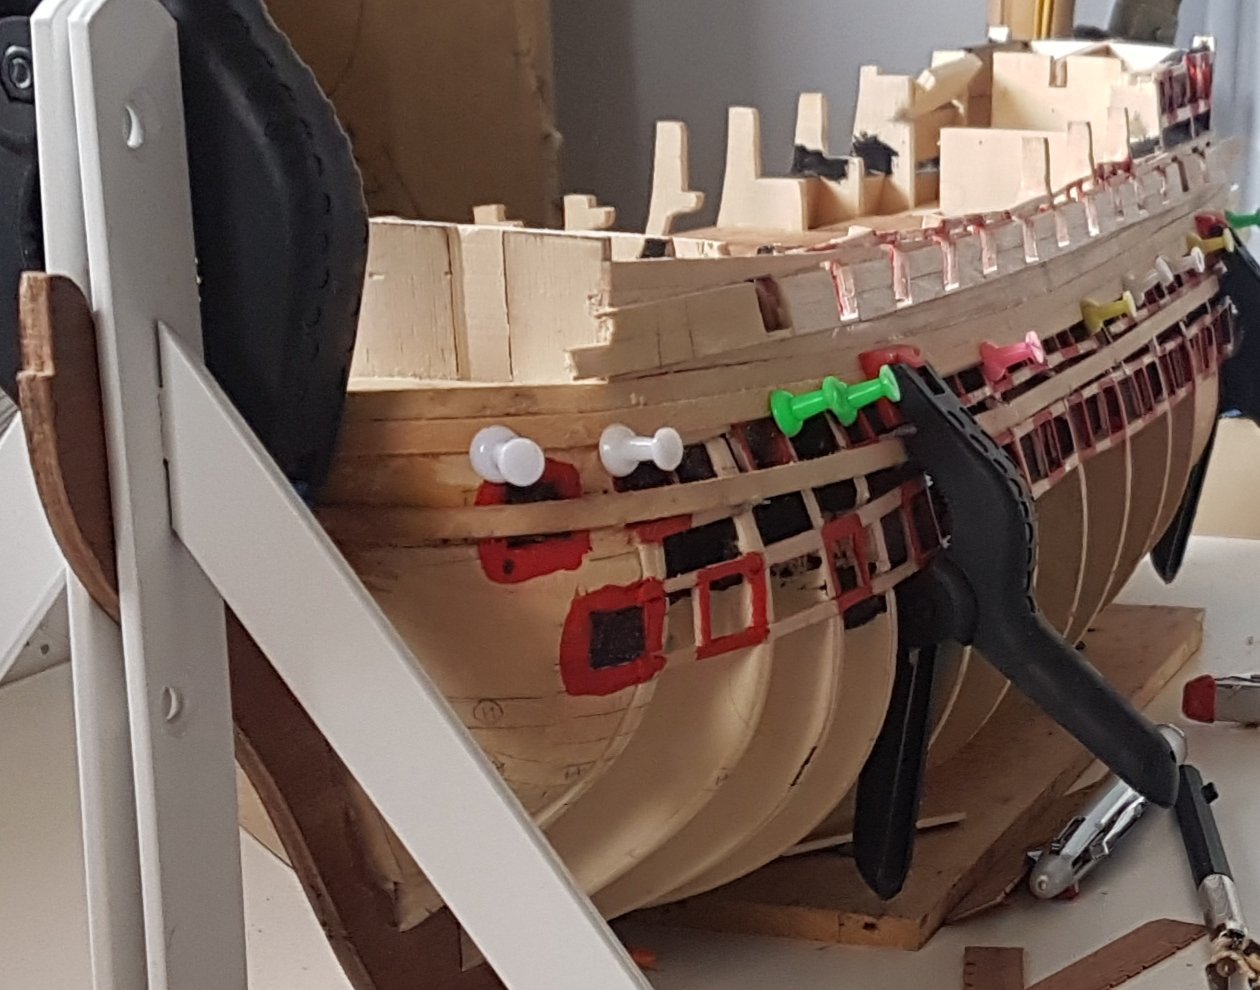
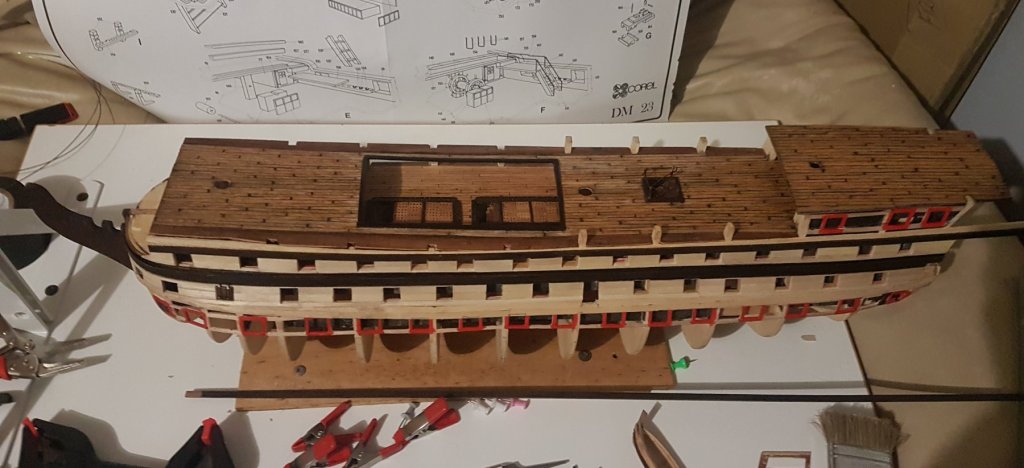
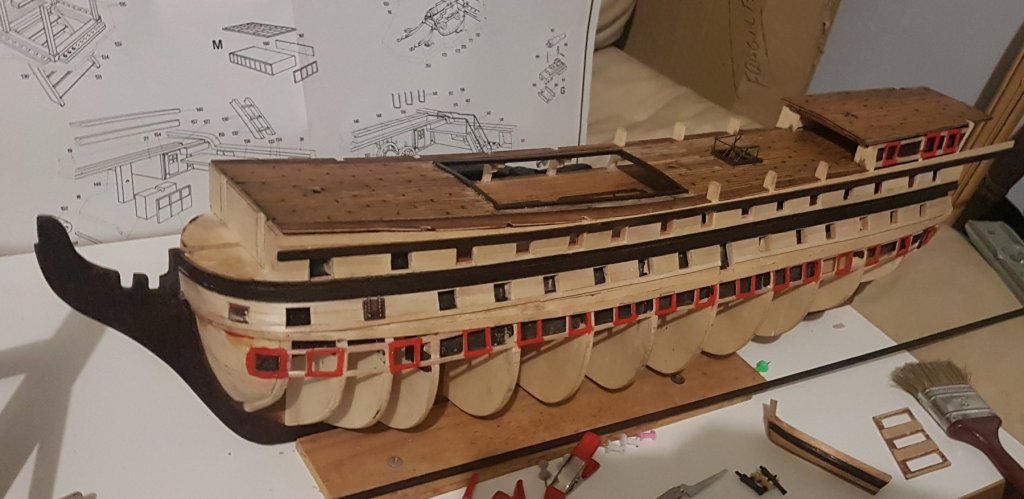
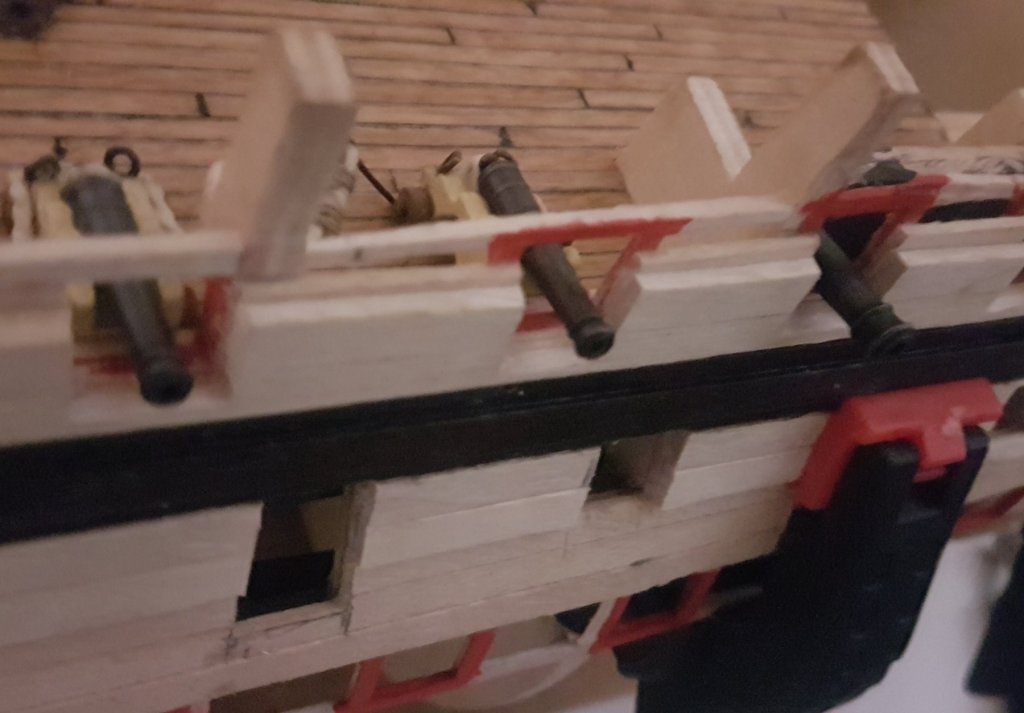
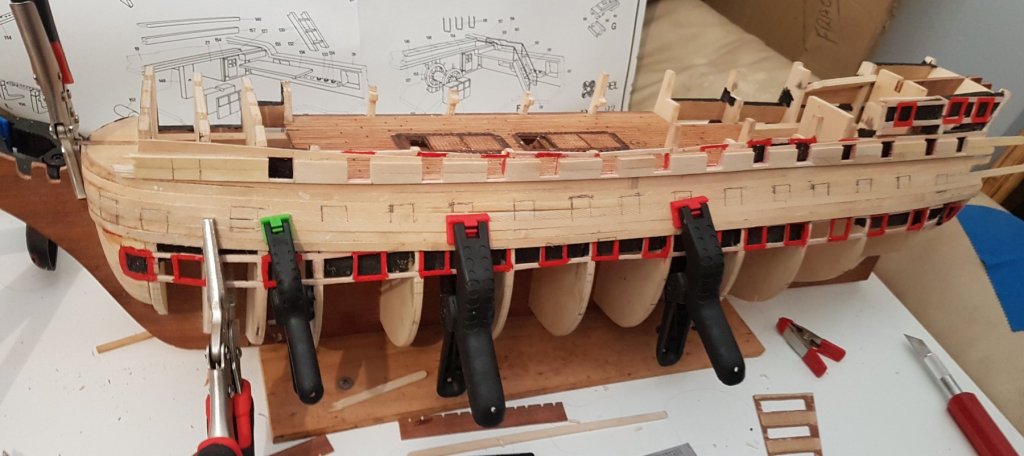
Updates: First look at various cannons mounted The hull is coming along nicely and I have had time to drill my first 2.5mm hole for the large cannon to be mounted in a hatch. The large cannon sticks out a bit more than the smaller carriage mounted cannons but I think it looks ok , Stain and ambient temperature The hull planking is going well and I'm pre staining the walnut whales black as I go. They require a 12 hour layover between coats and need 3 coats. I have also discovered the stain requires temperatures over 10 deg C to dry properly and it's winter here with temperatures much cooler than that overnight, so I need to reassess the time of day allocated for staining. Catching the noon sun outside seems to work better and gives me a chance to get some vitamin D. I have decided to go with a light acrylic wash instead of a weak yellow stain to keep the pale yellow ochre paint consistent throughout the ship. I have also stained more of the walnut timbers black for the same reason. Everything really *pops* with the Japanese Black accentuating the natural wood. Enjoy the pics edit: This next pic is a mockup with walnut whales as yet unstained. I have added a 3mm plank to widen the second (third) row of cannon hatches.


-
Coffee Stirrers Check out how naturally white these coffee stirrers are for hull planking !
-
Japan Black stain I have been using the Japan Black stain on the walnut wood with great results, three coats gives a nice deep black which does not come off when submerged in boiling water. This makes it easy to stain first and then apply to the hull. PVA glue doesn't stick well to the stain so I have only stained the outside, and is easy to clean off any PVA over spill with a wet cloth. I have stained over the oil infused walnut and the stain still absorbs and darkens the wood nicely. The nice thing about stain is that you can still see the wood texture beneath and feel the smooth wood on the outside. I plan on using a satin varnish however to protect the finish for years to come. pics
-
Stern pics for Jonsey


-
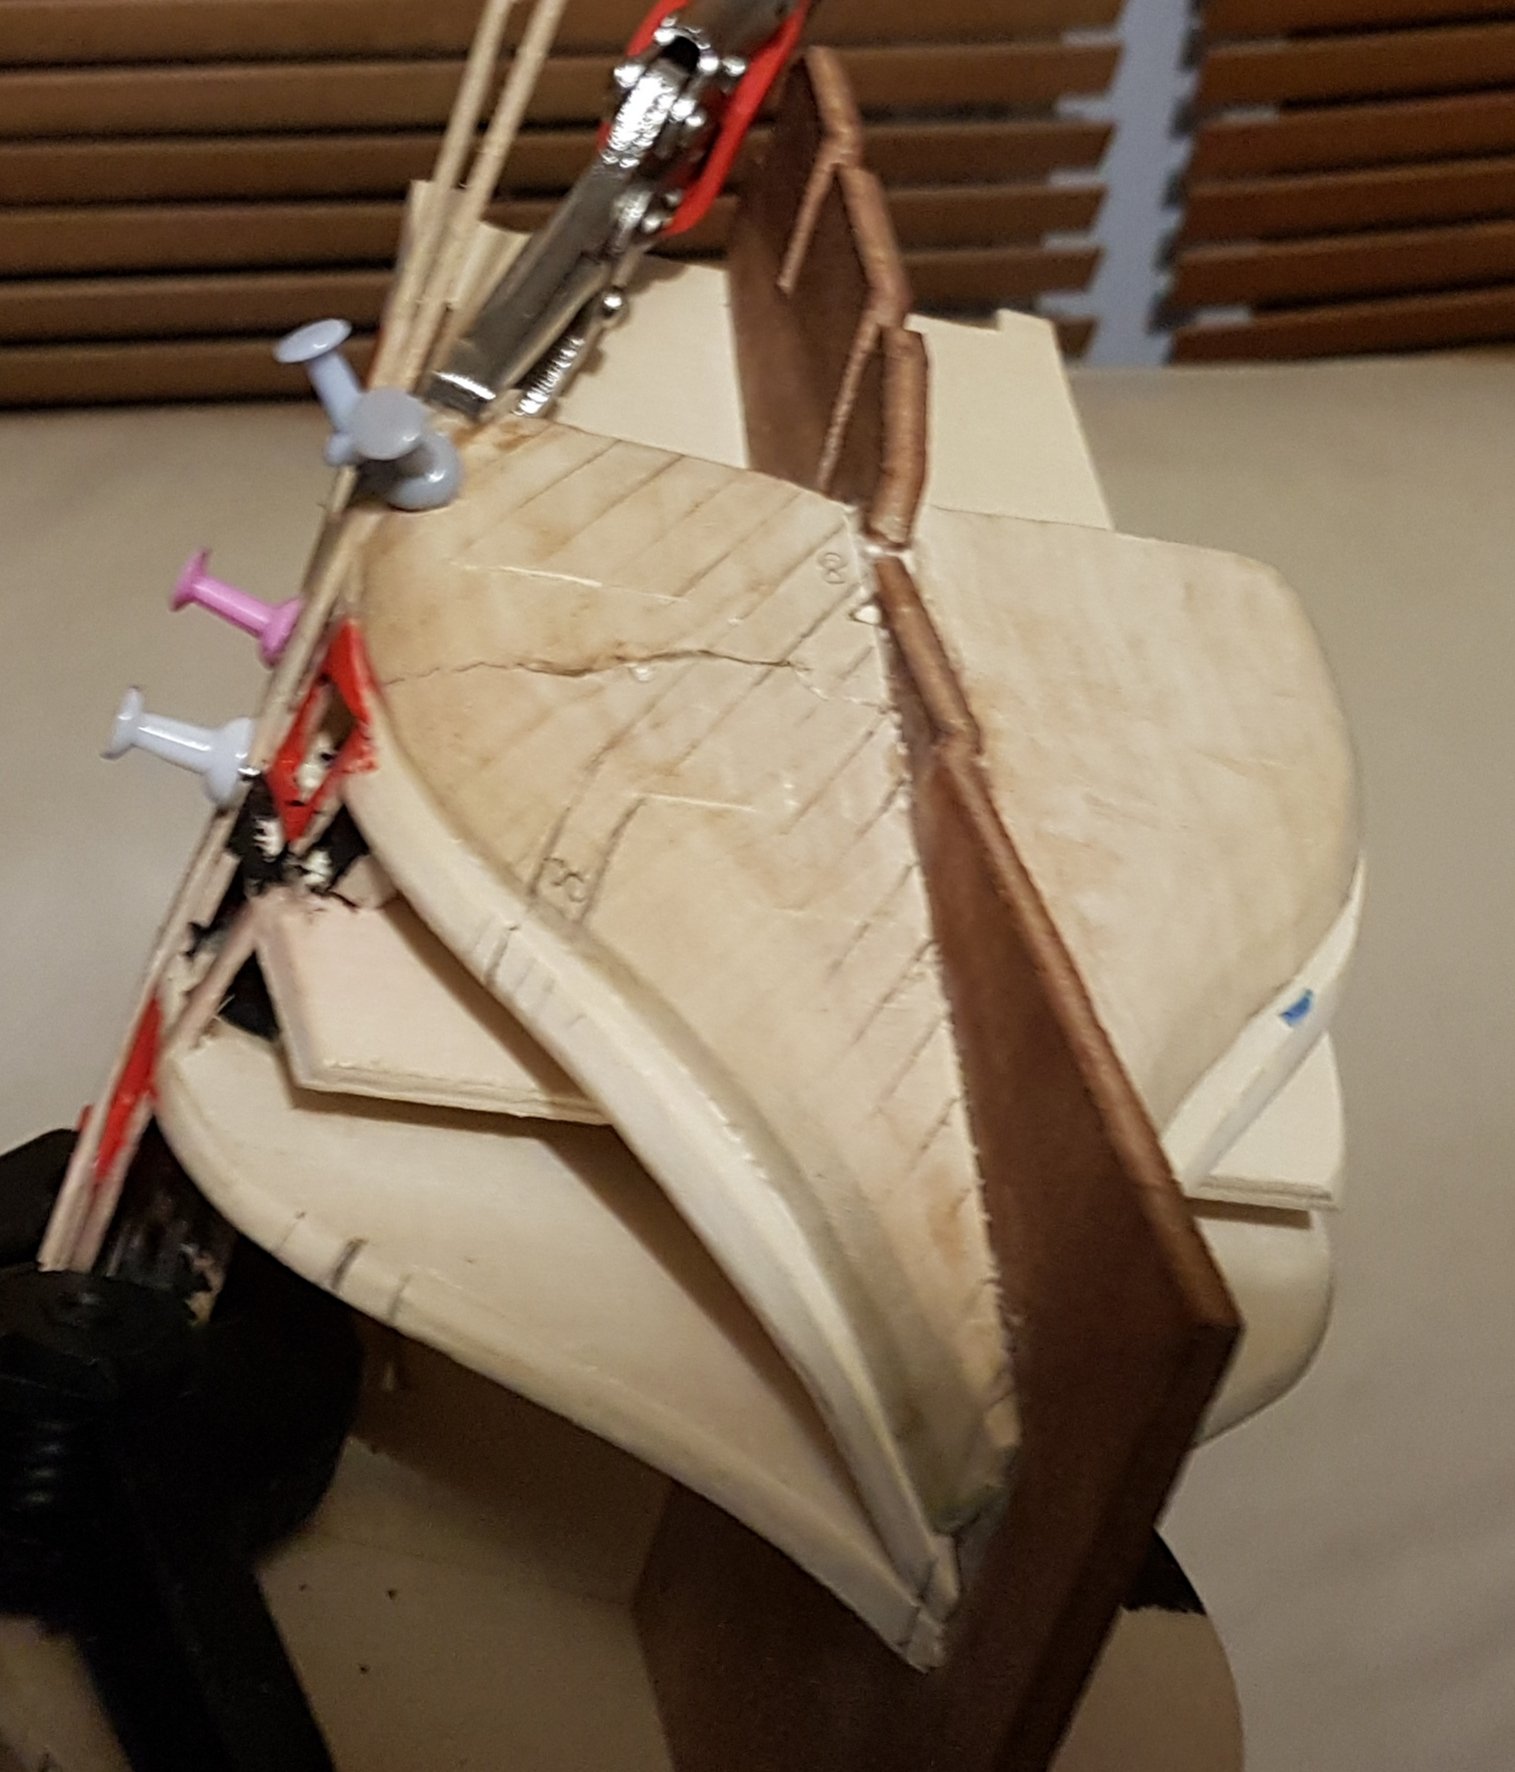
Sure can, the Stern is a little tricky to get it to fit and my first thought was to have to modify the bulkheads to get the pieces to sit flush. However what I found is that my second test fit made a much better connection without having to modify the bulkheads. The method I used was to not actually glue the bulkheads onto the frame to allow a bit of shuffling around to get all the pieces to fit together. Also the rear frame on mine had big gaps when it connected to the main frame. Later on the bulkhead sections are reinforced and glued into place as the build progresses with the cannon backing boards. My earlier blog entry #28 outlines and has photo's of the Stern section. You will see a gap there in the frame. I shall take some photo's as requested after the current planking job has cured. I shall be moving on to planking the hull from the Stern, and will need to undertake some more shaping and filing before planking some sections.
-
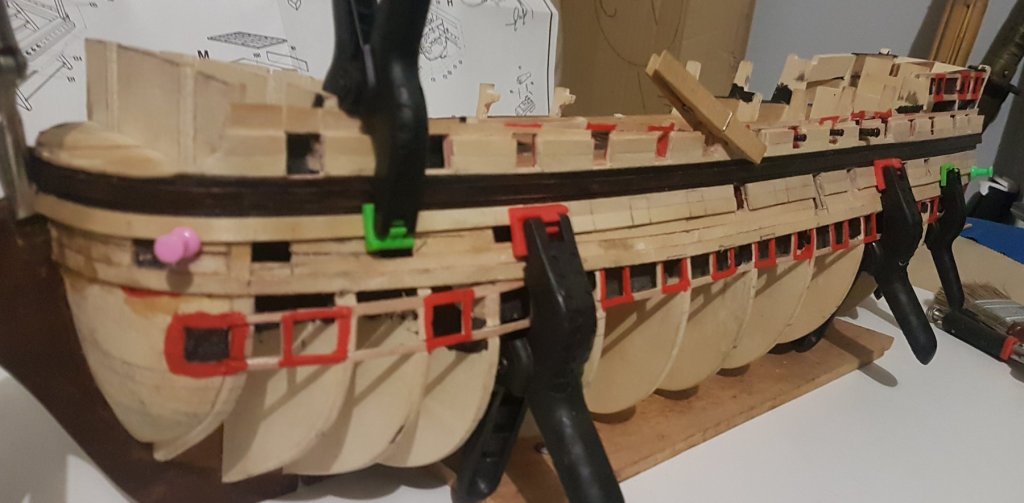
Planking around the hull Bending the planks for the hull has begin. I have snapped a few coffee stirrer sticks in an attempt to check how far they can be bent by pressure alone. Pretty good flexibility for 2mm thick pine. However using heat, boiling water and steam yields much better results. Looks like doing one plank at a time is the way for me to start, pinning into place, checking any movement as the wet bend section dries and readjust the pins and clamps to ensure wood warp or shrinkage is dealt with as time progresses. Thanks Jonsey for your input, now my focus is on ensuring the wood movement is managed. I have decided to bend the wood directly onto the hull, and work on one plank in each series. I plan on dividing up the hull into 25mm sections (horizontally) to allow 5 planks to be calculated for each section, tapering and recalculating the section after each plank is laid. This method enables me to lay one plank per section and allow to cure before beginning the next plank in each series. Pics thus far


-
Tip: Use Aluminium Pipe for hot steam bath for hull planks I visited another ship builder yesterday and got some good tips and gear from him. The tip I want to share with everyone is to use a long aluminium pipe with two stoppers and a small hole in the top. This is great for putting in straight lengths of hull planking after filling with boiling water. The chamber acts like a steamer and is about efficient as you can get for ergonomics. Also the small hole is important to relieve the steam pressure inside, without this it can become like a steam pressurized pipe bomb ! I'm going to give this a go Plus add some vinegar to the hot water to help soften the wood fibers. My plan is to bend directly onto the hull and use a glue that can bond wet... like Gorilla Glue or Liquid Nails. Do anyone else have any good tips for preparing the wood for bending ?
-
New Gear acquired I bought a Dremel 8220 cordless ion lithium battery model with heaps of accessories. I'd like to try some wood carving for base relief decorations at some point Also I have the circular saw attachment and some router bits. I think I'll get the hand grip accessory or maybe the flexible extender. Also picked up some threads from the sewing shop, using Mercer Crochet No. 40 thread in beige for the 0.8 - 1.0 mm rigging. It's top quality thread made in france and non frizzy, non kinking and tightly woven cotton.
-
Shipwrights Journal Build Plan Calendar August Complete hull planking on both sides Stain outer layers on hull complete lower deck, including satin vanish on walls and stained wood complete cannons and rigging for lower deck. considering adding another staircase leading to 3rd deck behind stairs near middle mast.
-
August update Just started planking the hull. This is the fun bit for many, it's good to see the ship starting to take shape and develop some nice curves. Here's some pics of where I am at including mast support brackets

-
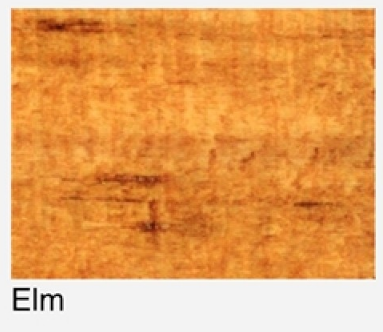
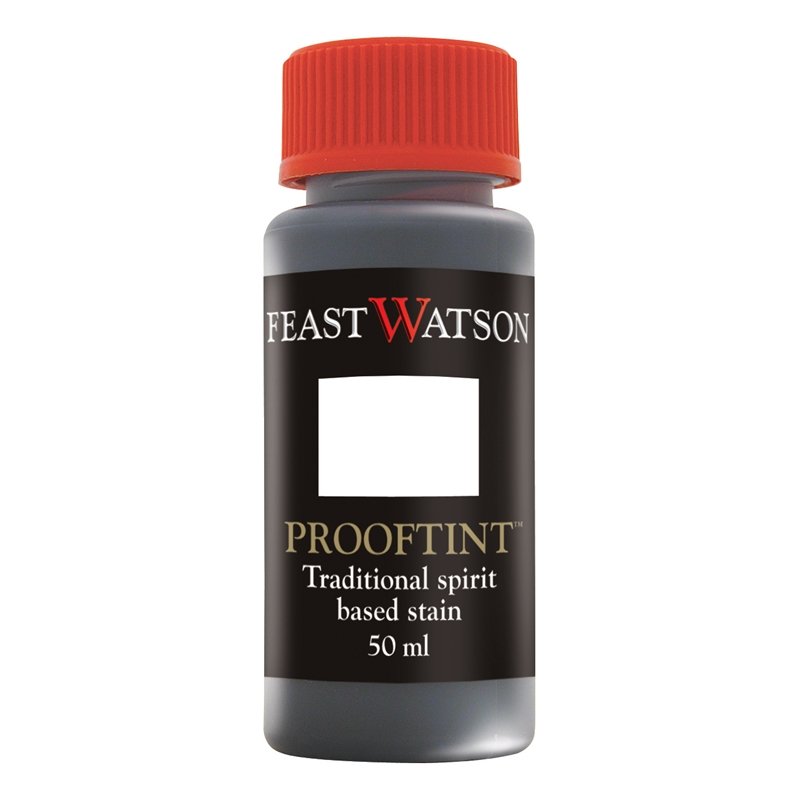
Stains I'm looking at stains for colouring the various parts of the ship that require black and yellow ochre. These are the options I am considering from a local supplier, which I can source in a 50ml proof tint I'm leaning towards using Golden Teak over the white pine coffee stirrer strips (2mm x 5mm) I have for the hull and Black Japan over the walnut strips (2mm x 5mm). Using a lime white wash over the Golden Teak may be a better pale yellow however.