klaasvg
-
Posts
17 -
Joined
-
Last visited
-
 ccoyle reacted to a post in a topic:
RMS Titanic 1912 by klaasvg - Amati - Scale 1:250
ccoyle reacted to a post in a topic:
RMS Titanic 1912 by klaasvg - Amati - Scale 1:250
-
yvesvidal reacted to a post in a topic:
RMS Titanic 1912 by klaasvg - Amati - Scale 1:250
-
drobinson02199 reacted to a post in a topic:
RMS Titanic 1912 by klaasvg - Amati - Scale 1:250
-
It's not going very fast but there is definitely new progress! I hope to finish it next year, and then it's been a long road since I started this model around 2009 or so!

-
klaasvg reacted to a post in a topic:
RMS Titanic 1912 by klaasvg - Amati - Scale 1:250
-
THanks for answering, I indeed tried to sand the ventilators in different sizes. One more thing: one of the next steps is applying the portholes as well as the nameplates (on the stern and two on the bow) and then painting the hull black and red. But I am pretty sure that both the portholes and the nameplate letters were not black on the real ship but more brass/gold like. Also they will be hardly readable when painted black. On the photos from the kit it seems that they are painted black. Maybe is this an error in the kit? I wonder whether it is better to apply the portholes and nameplates after giving the hull its black paint.
-
yvesvidal reacted to a post in a topic:
RMS Titanic 1912 by klaasvg - Amati - Scale 1:250
-
drobinson02199 reacted to a post in a topic:
RMS Titanic 1912 by klaasvg - Amati - Scale 1:250
-
ccoyle reacted to a post in a topic:
RMS Titanic 1912 by klaasvg - Amati - Scale 1:250
-
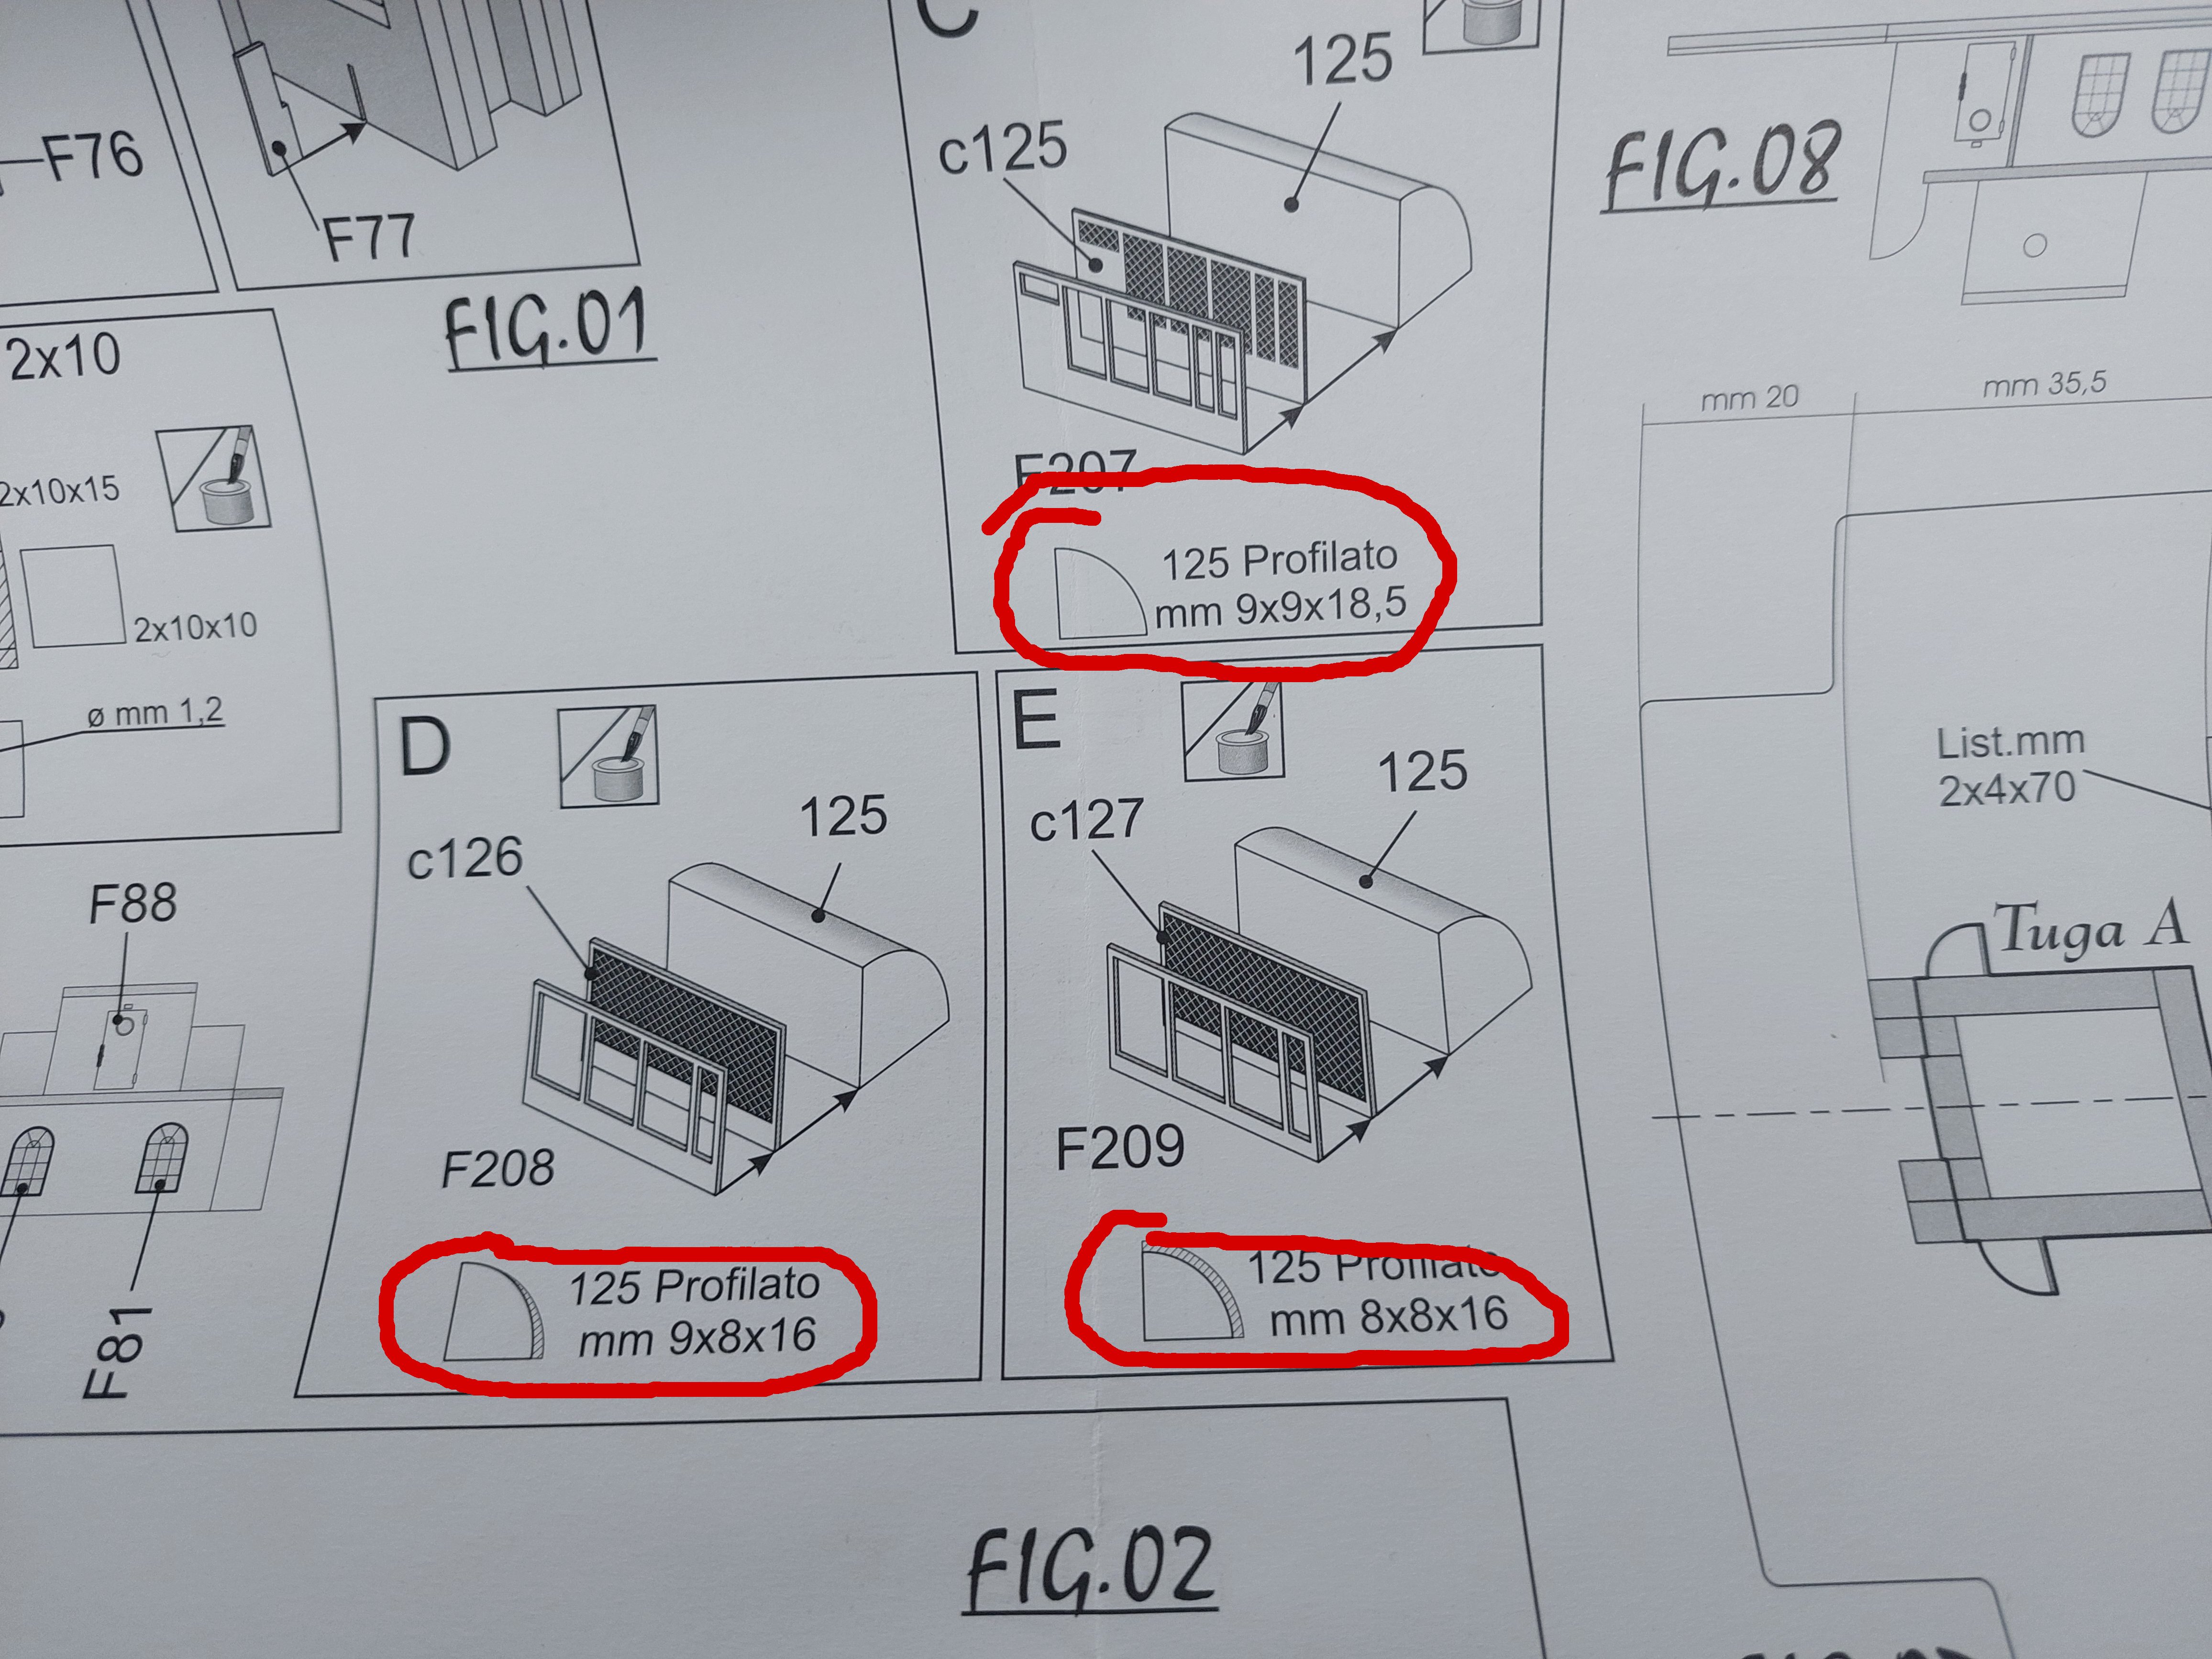
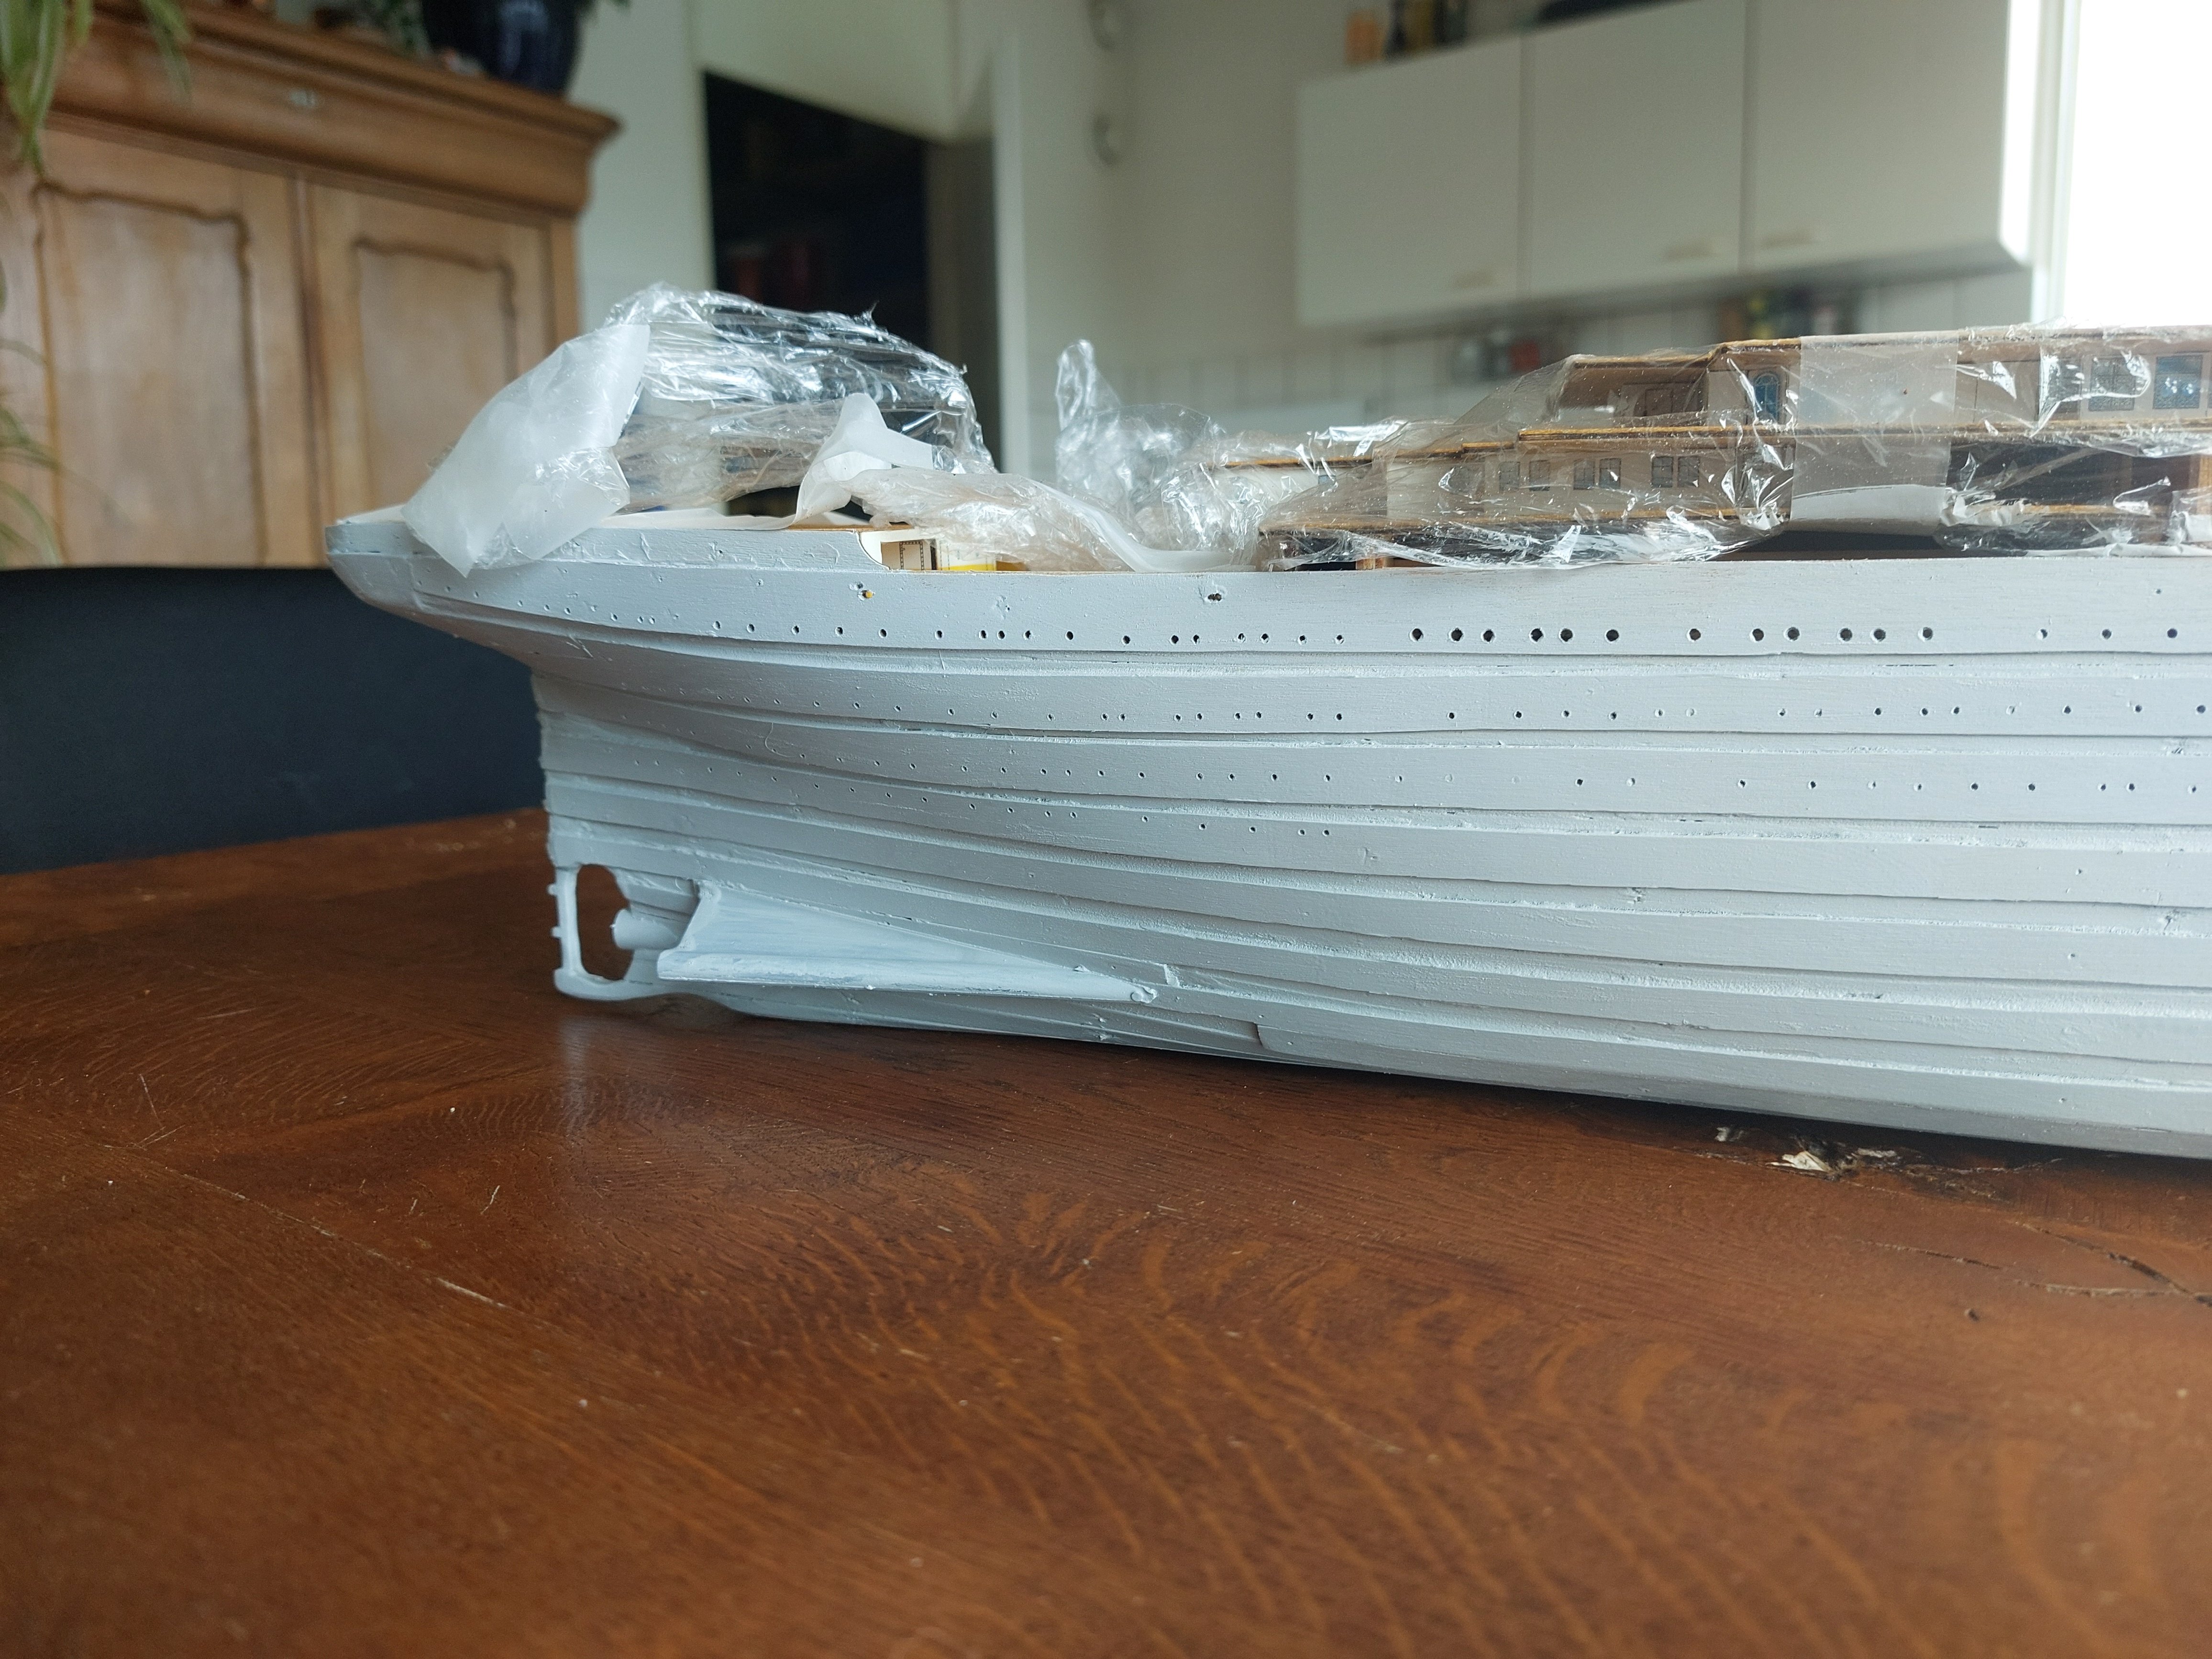
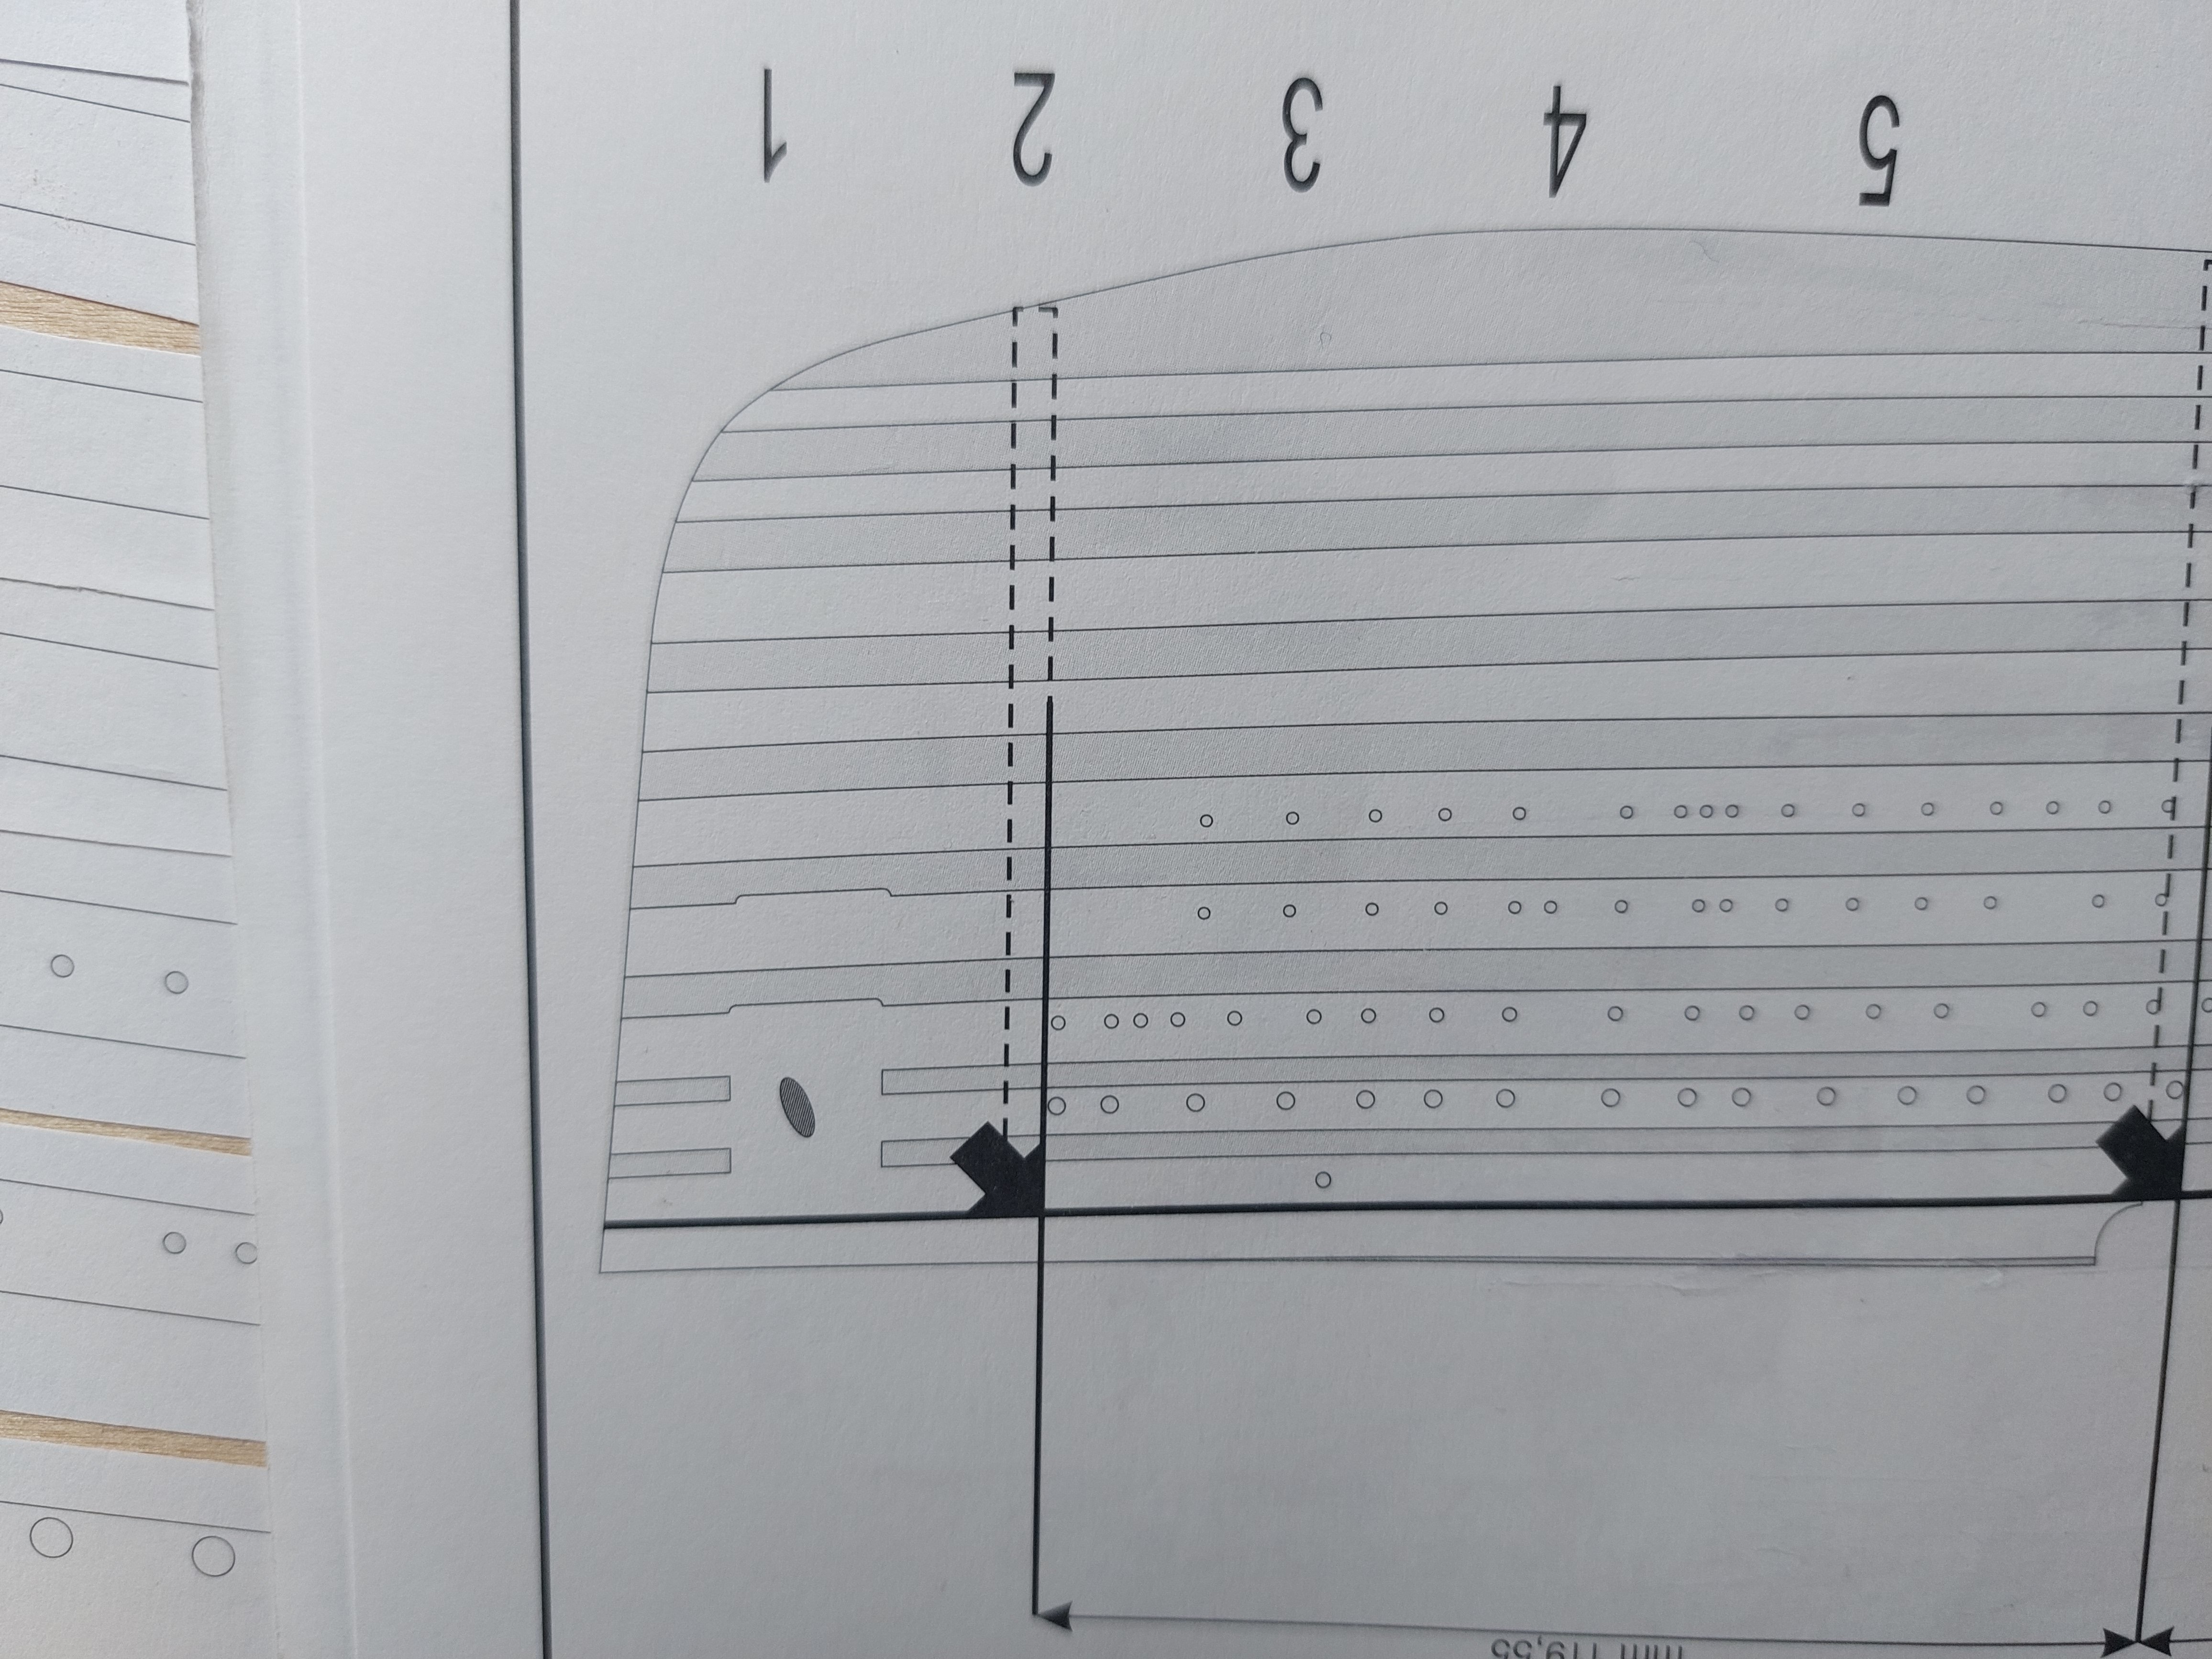
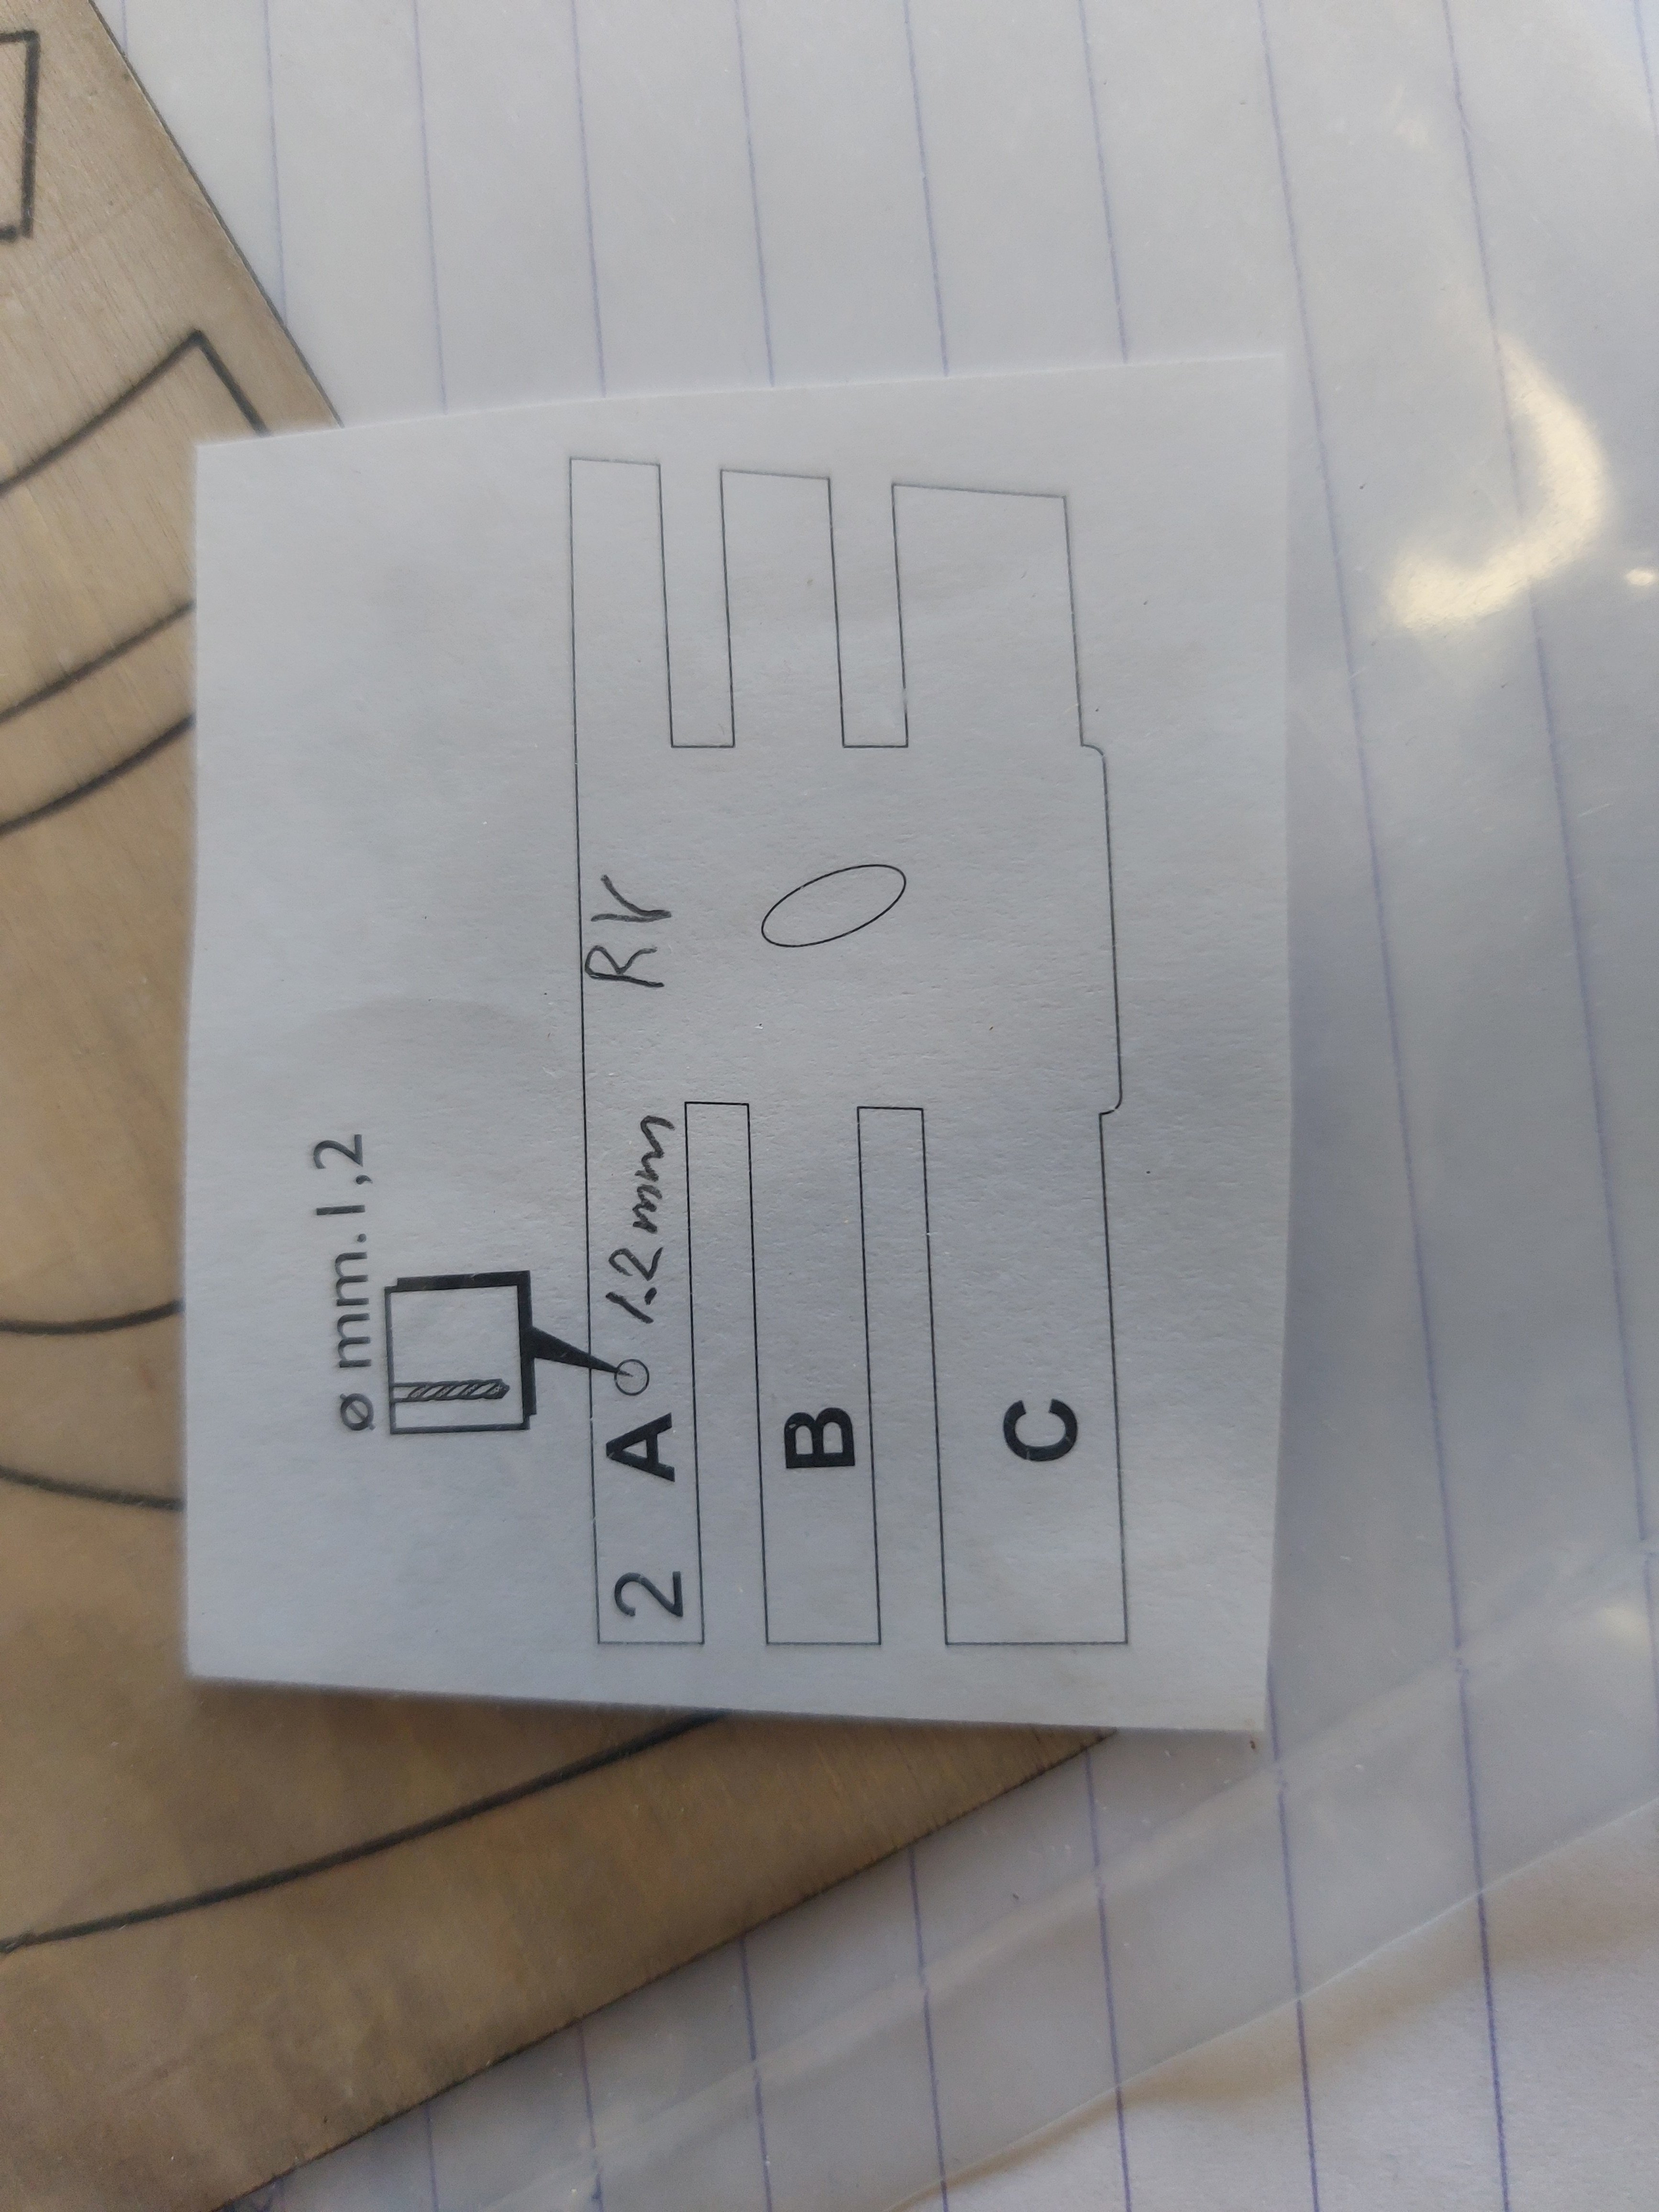
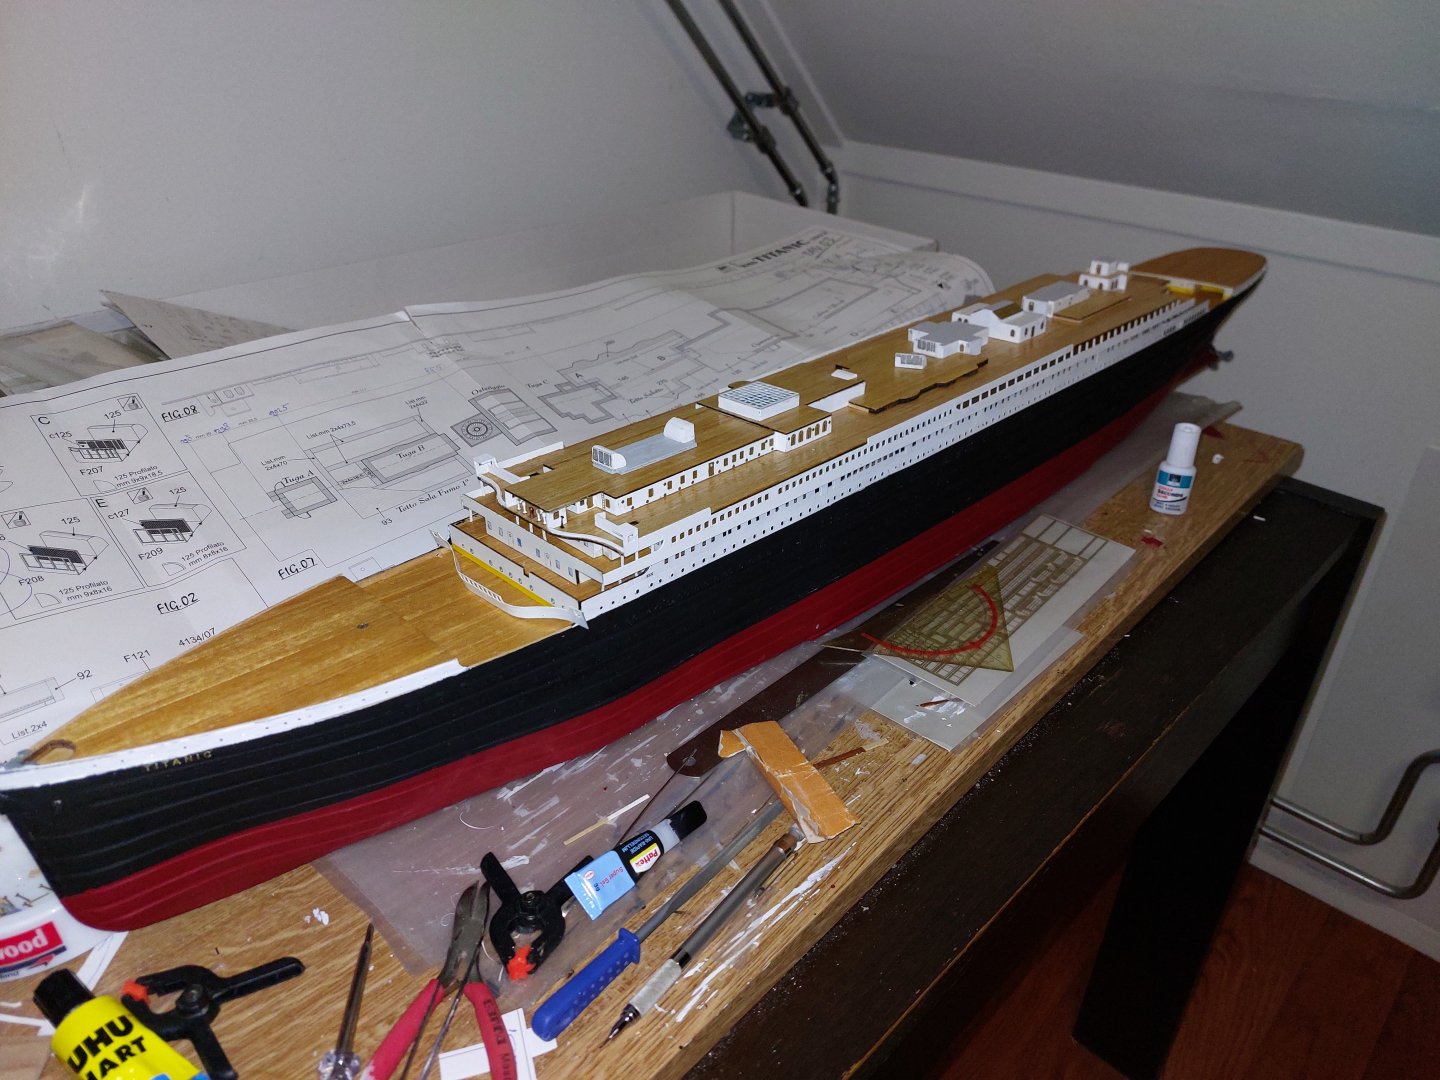
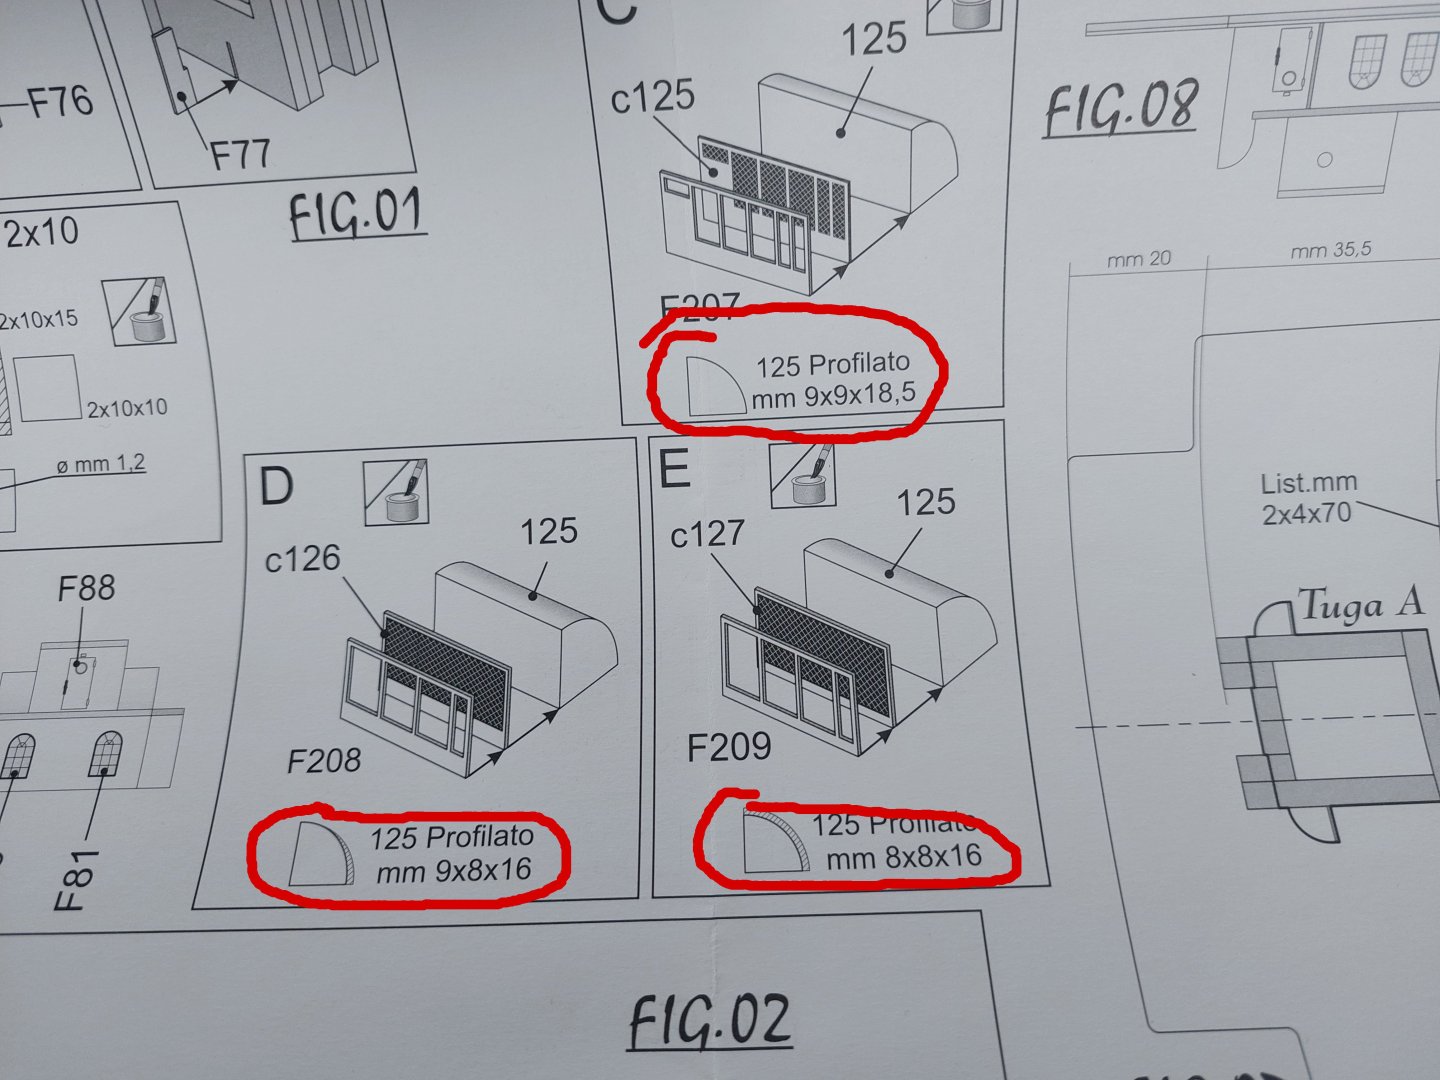
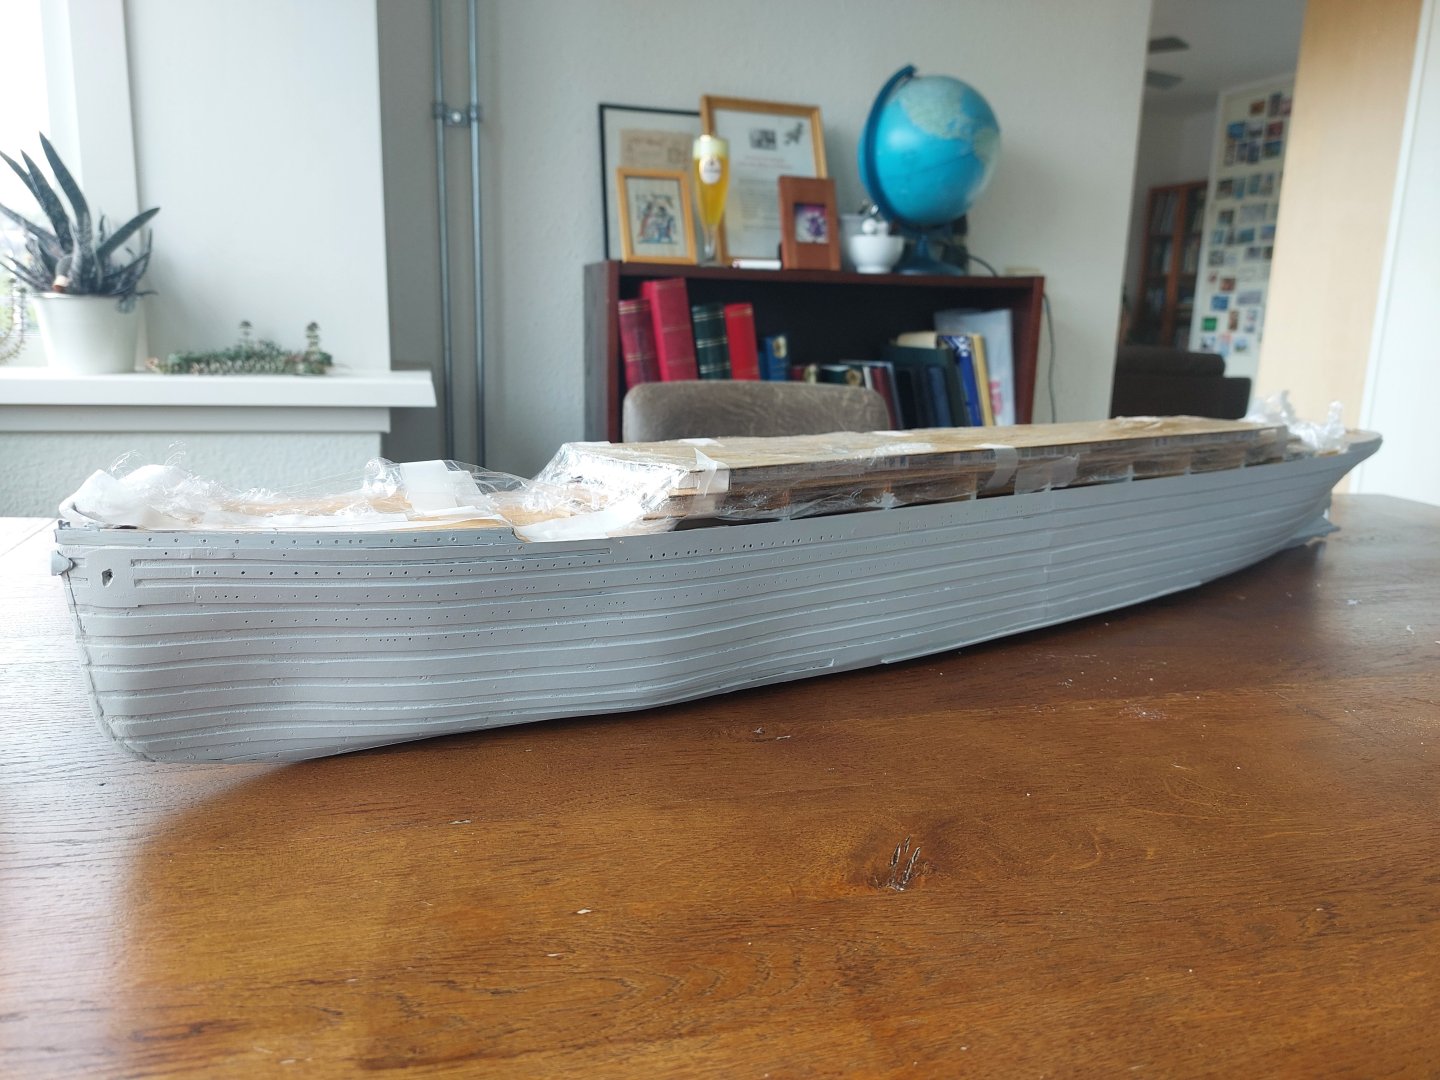
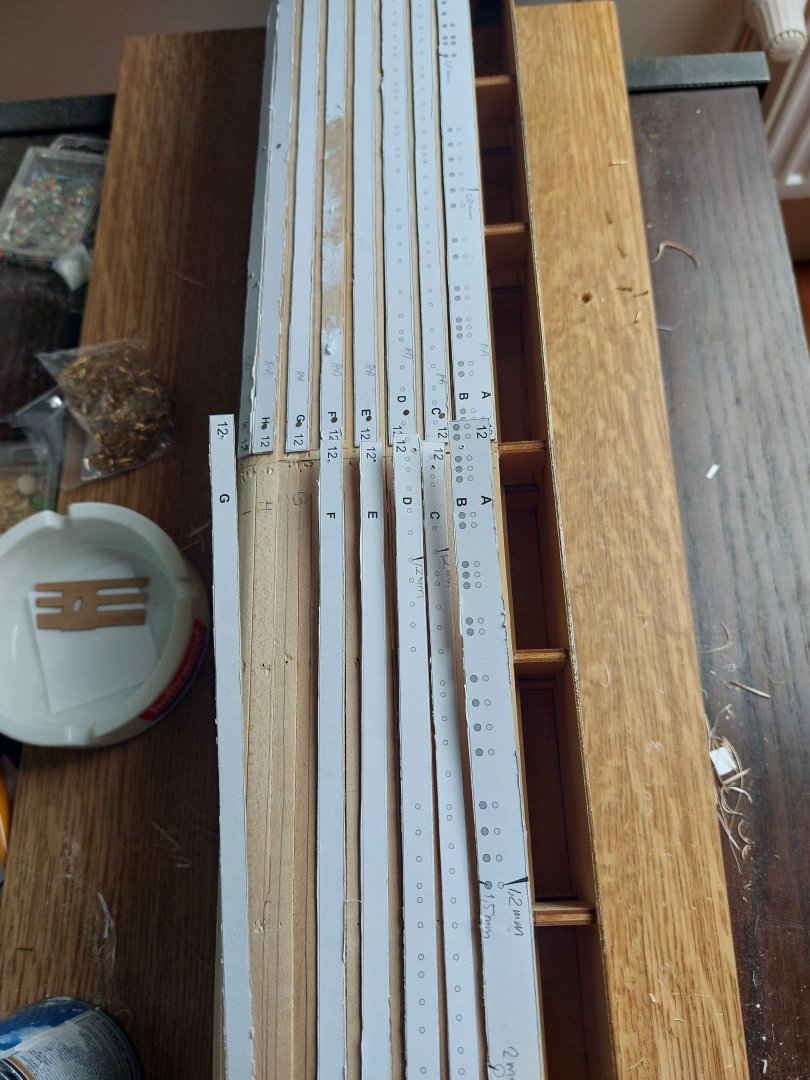
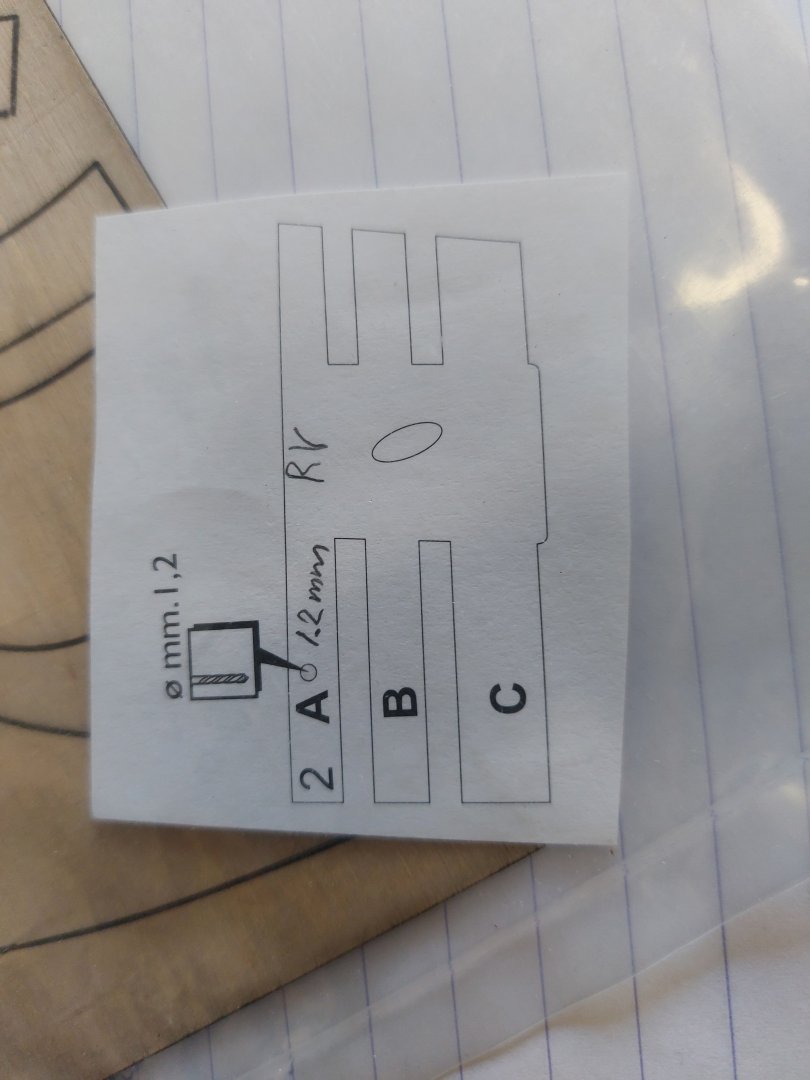
Some time has passed again and I am now really believing that I will finish the model at least in a year or so... I made progress with the deck houses, the top level deck and also painted the hull in grey two times. The bow is still not very great but I have to live with that I suppose. But for the rest I am rather confident about the progress. Next is painting the ventilators which I already cut to the right length. But I am confused about the drawings. When we compare C, D and E the sizes of the 125 Profilato segments seem to be slightly different although the images are very similar and I do not see any difference between D and E. It looks like the curved side of the pieces needs to be sanded 1 mm from one respectiveliy both side for D and E. But this seems not very logic to me. Or should I just following the instructions and are the ventilators just not equal in size? Greetz, Klaas


-
klaasvg reacted to a post in a topic:
RMS Titanic 1912 by klaasvg - Amati - Scale 1:250
-
Canute reacted to a post in a topic:
RMS Titanic 1912 by klaasvg - Amati - Scale 1:250
-
king derelict reacted to a post in a topic:
RMS Titanic 1912 by klaasvg - Amati - Scale 1:250
-
king derelict reacted to a post in a topic:
RMS Titanic 1912 by klaasvg - Amati - Scale 1:250
-
GrandpaPhil reacted to a post in a topic:
RMS Titanic 1912 by klaasvg - Amati - Scale 1:250
-
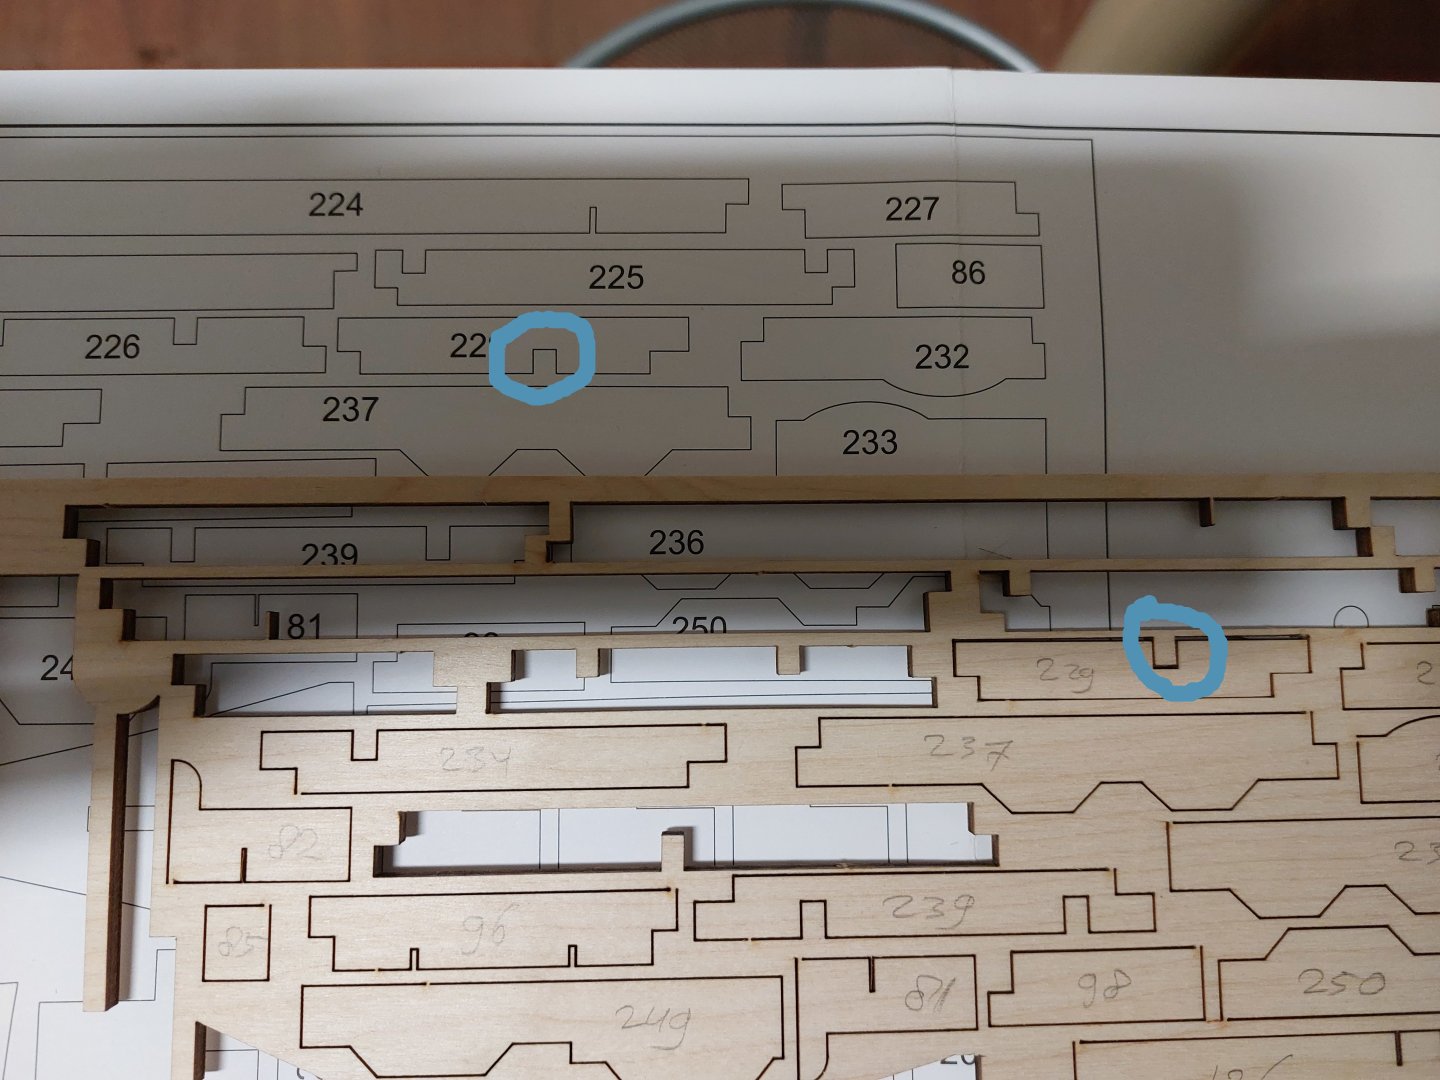
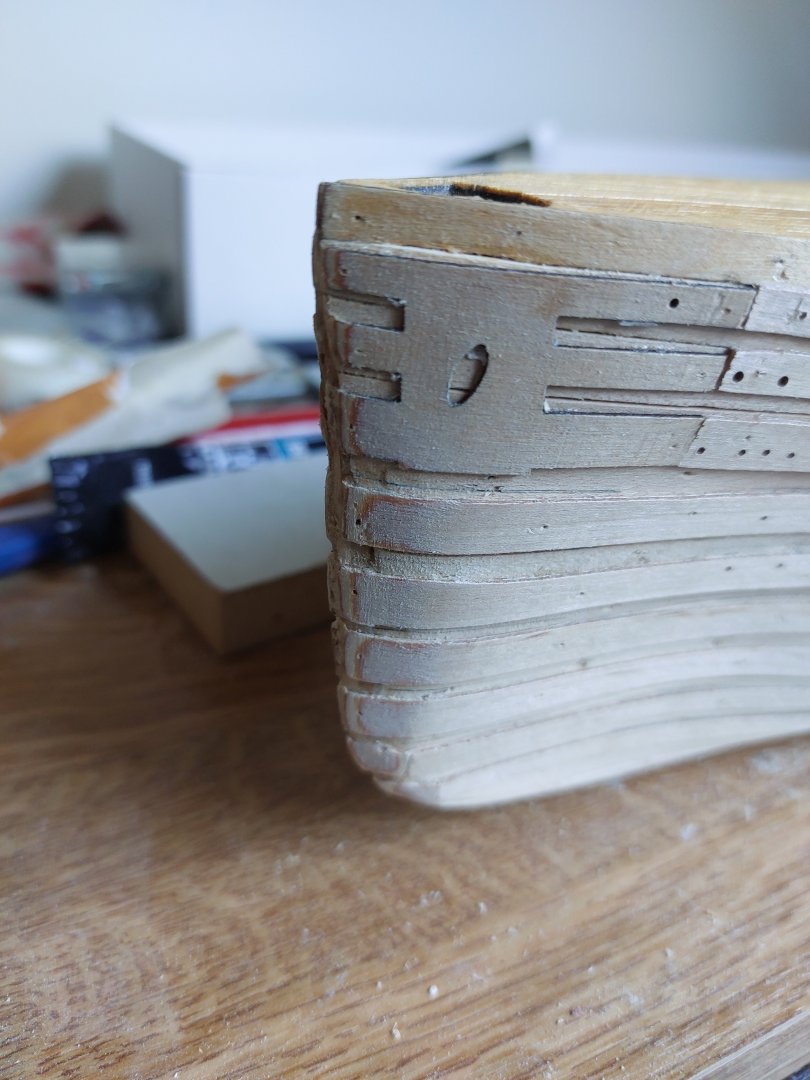
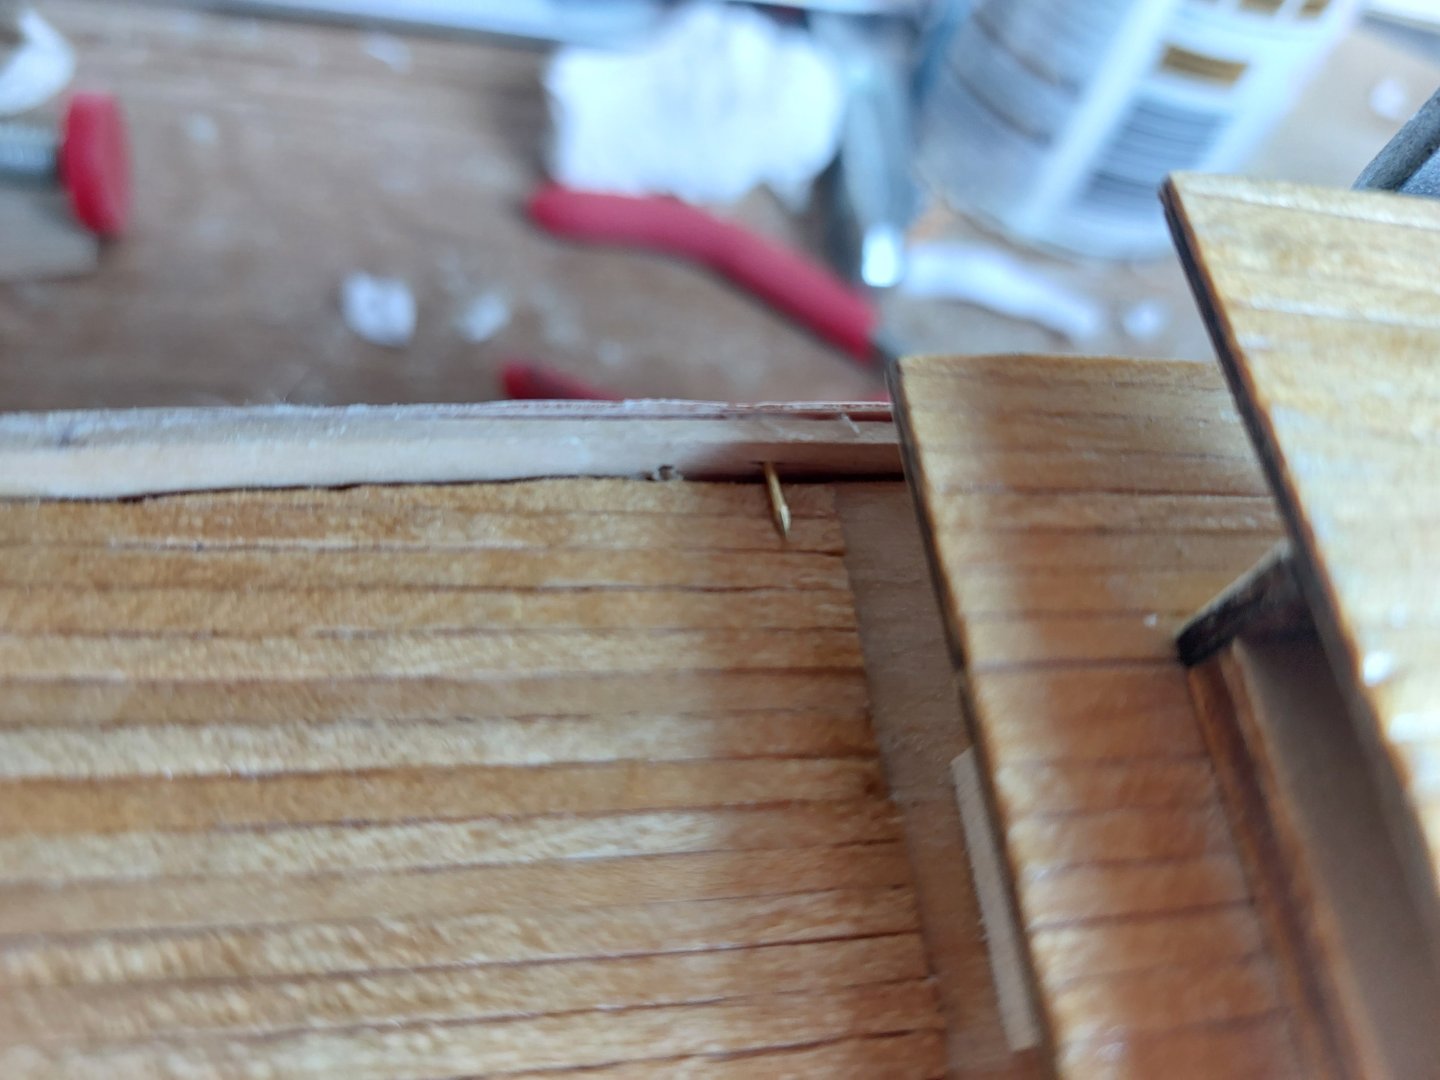
I am making a little more progress with my Titanic model! Unfortunately the bow will never be really sharp anymore but I managed in improving it a little. After applying the propeller shafts, now I am working on the next layer of cabins. And there I encounter an issue with the set , namely Part 229 from wooden plane 2233. I noticed that it cannot fit where it should belong because the notch of the component seems to be on the wrong site. When looking at the TAV. 06 print, we indeed see that this is the case. See screenshot. The notch should be on the short site but in the wooden plate it is on the long site. Anybody noticed this before and has a workaround instead of sawing it out myself in the correct format? I do not really have the tools to saw in perfect straight lines... I think it will be a better idea to remove the matching end of Part 231 so that part 229 can still be put in place. With some extra glue it will definitely stick. Because it will later be covered with the next deck, it won't be visible. Also I wonder whether I can expect more of those kind of flaws. Apparently the paper prints and the actual wooden plates are not the same, for example we can see that part 224 at the top is flipped vertically although this is not an issue... Hope for some hints! Regards, Klaas
-
klaasvg reacted to a post in a topic:
RMS Titanic 1912 by klaasvg - Amati - Scale 1:250
-
Maybe some hints about the bow because I am not fully confident that it looks good... 🤔
-
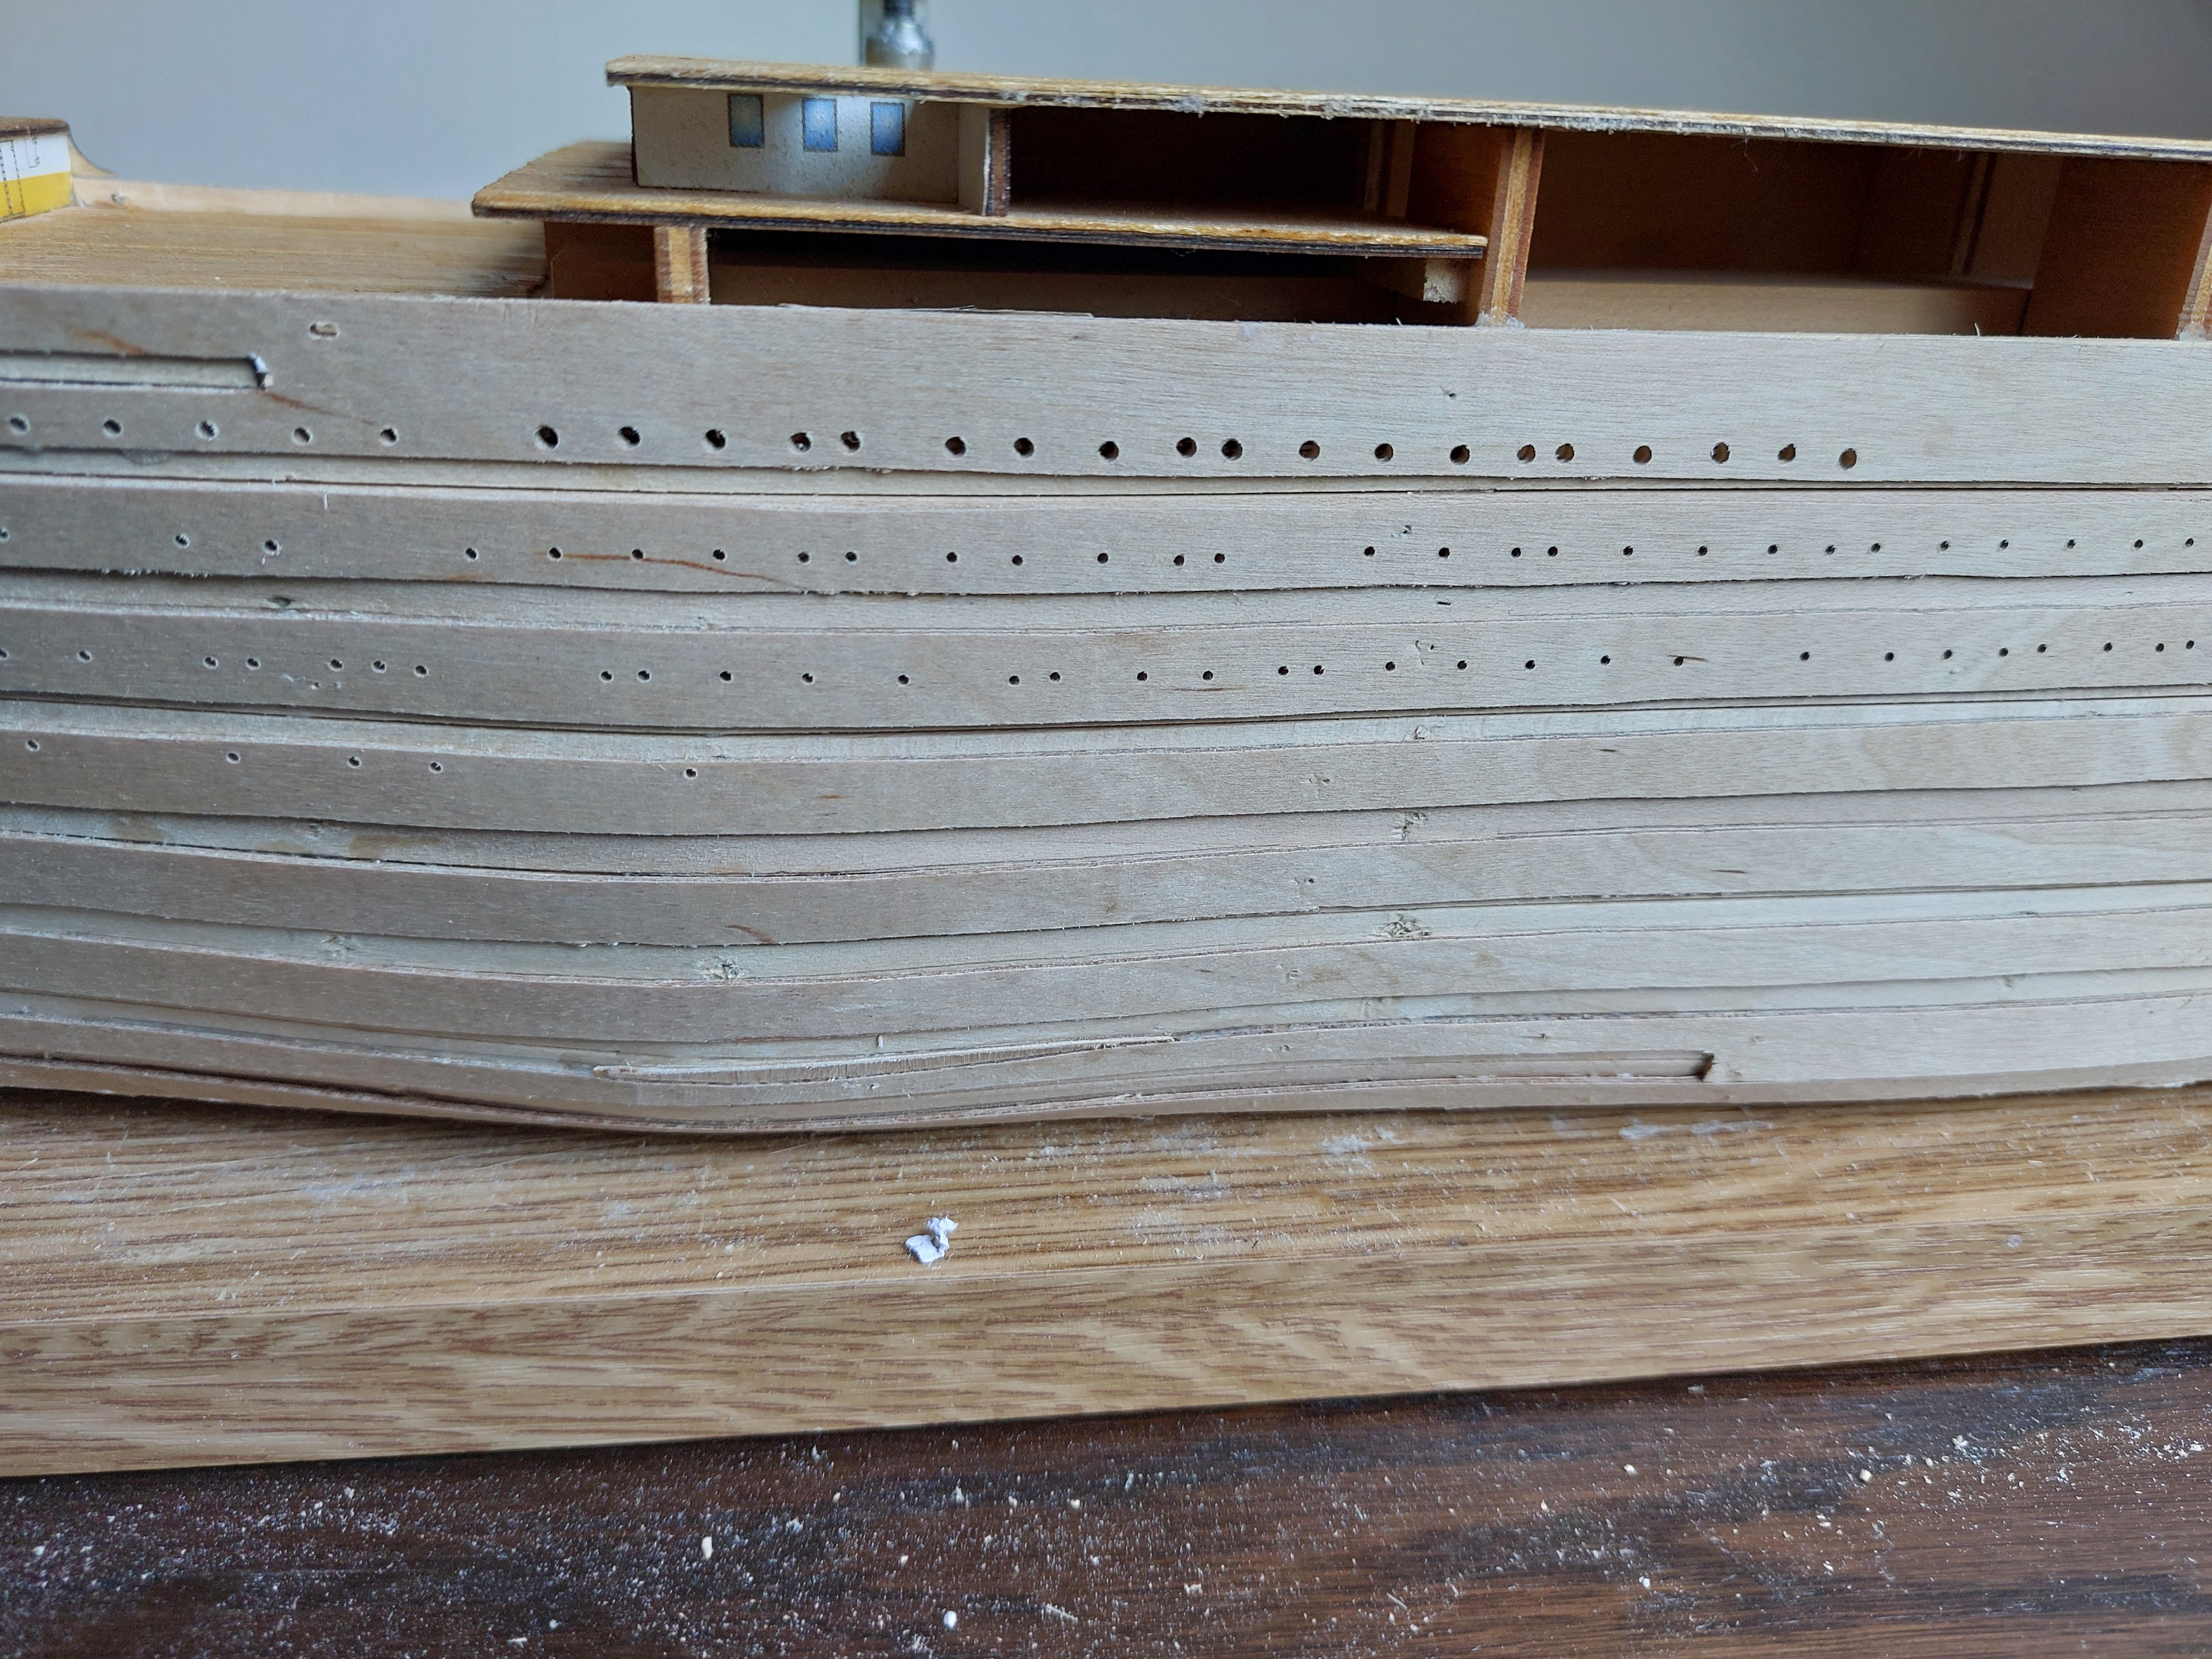
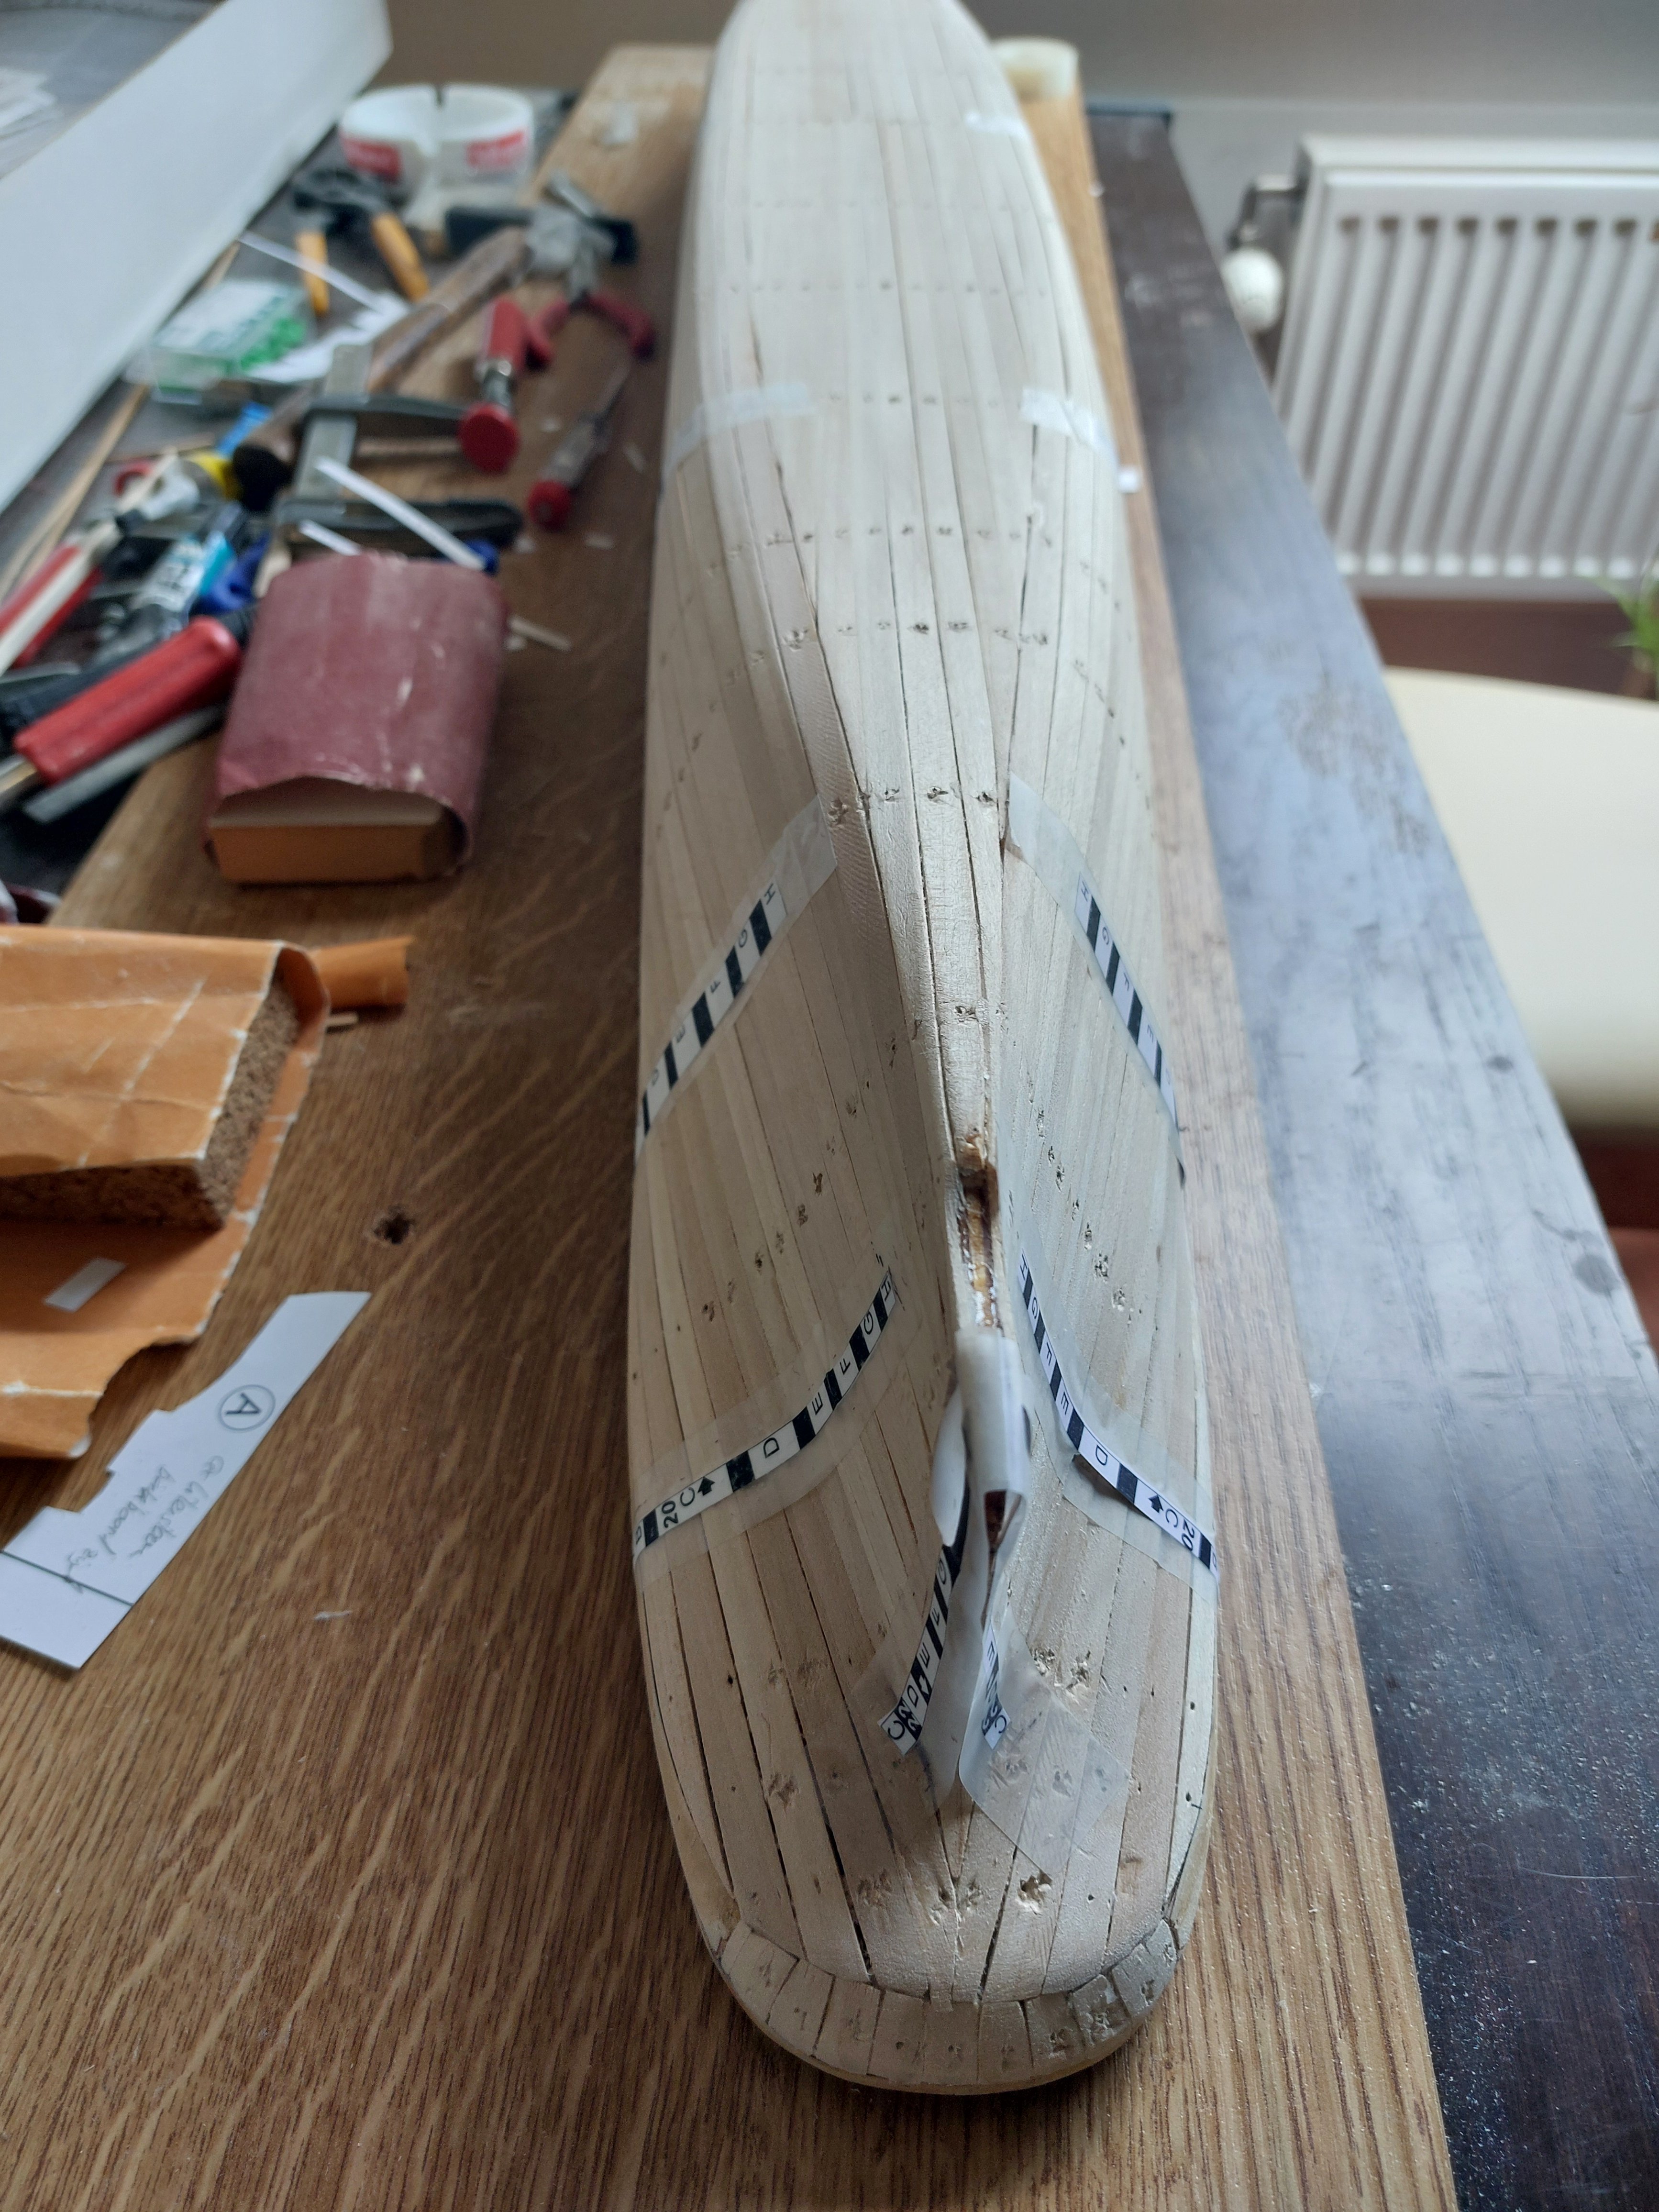
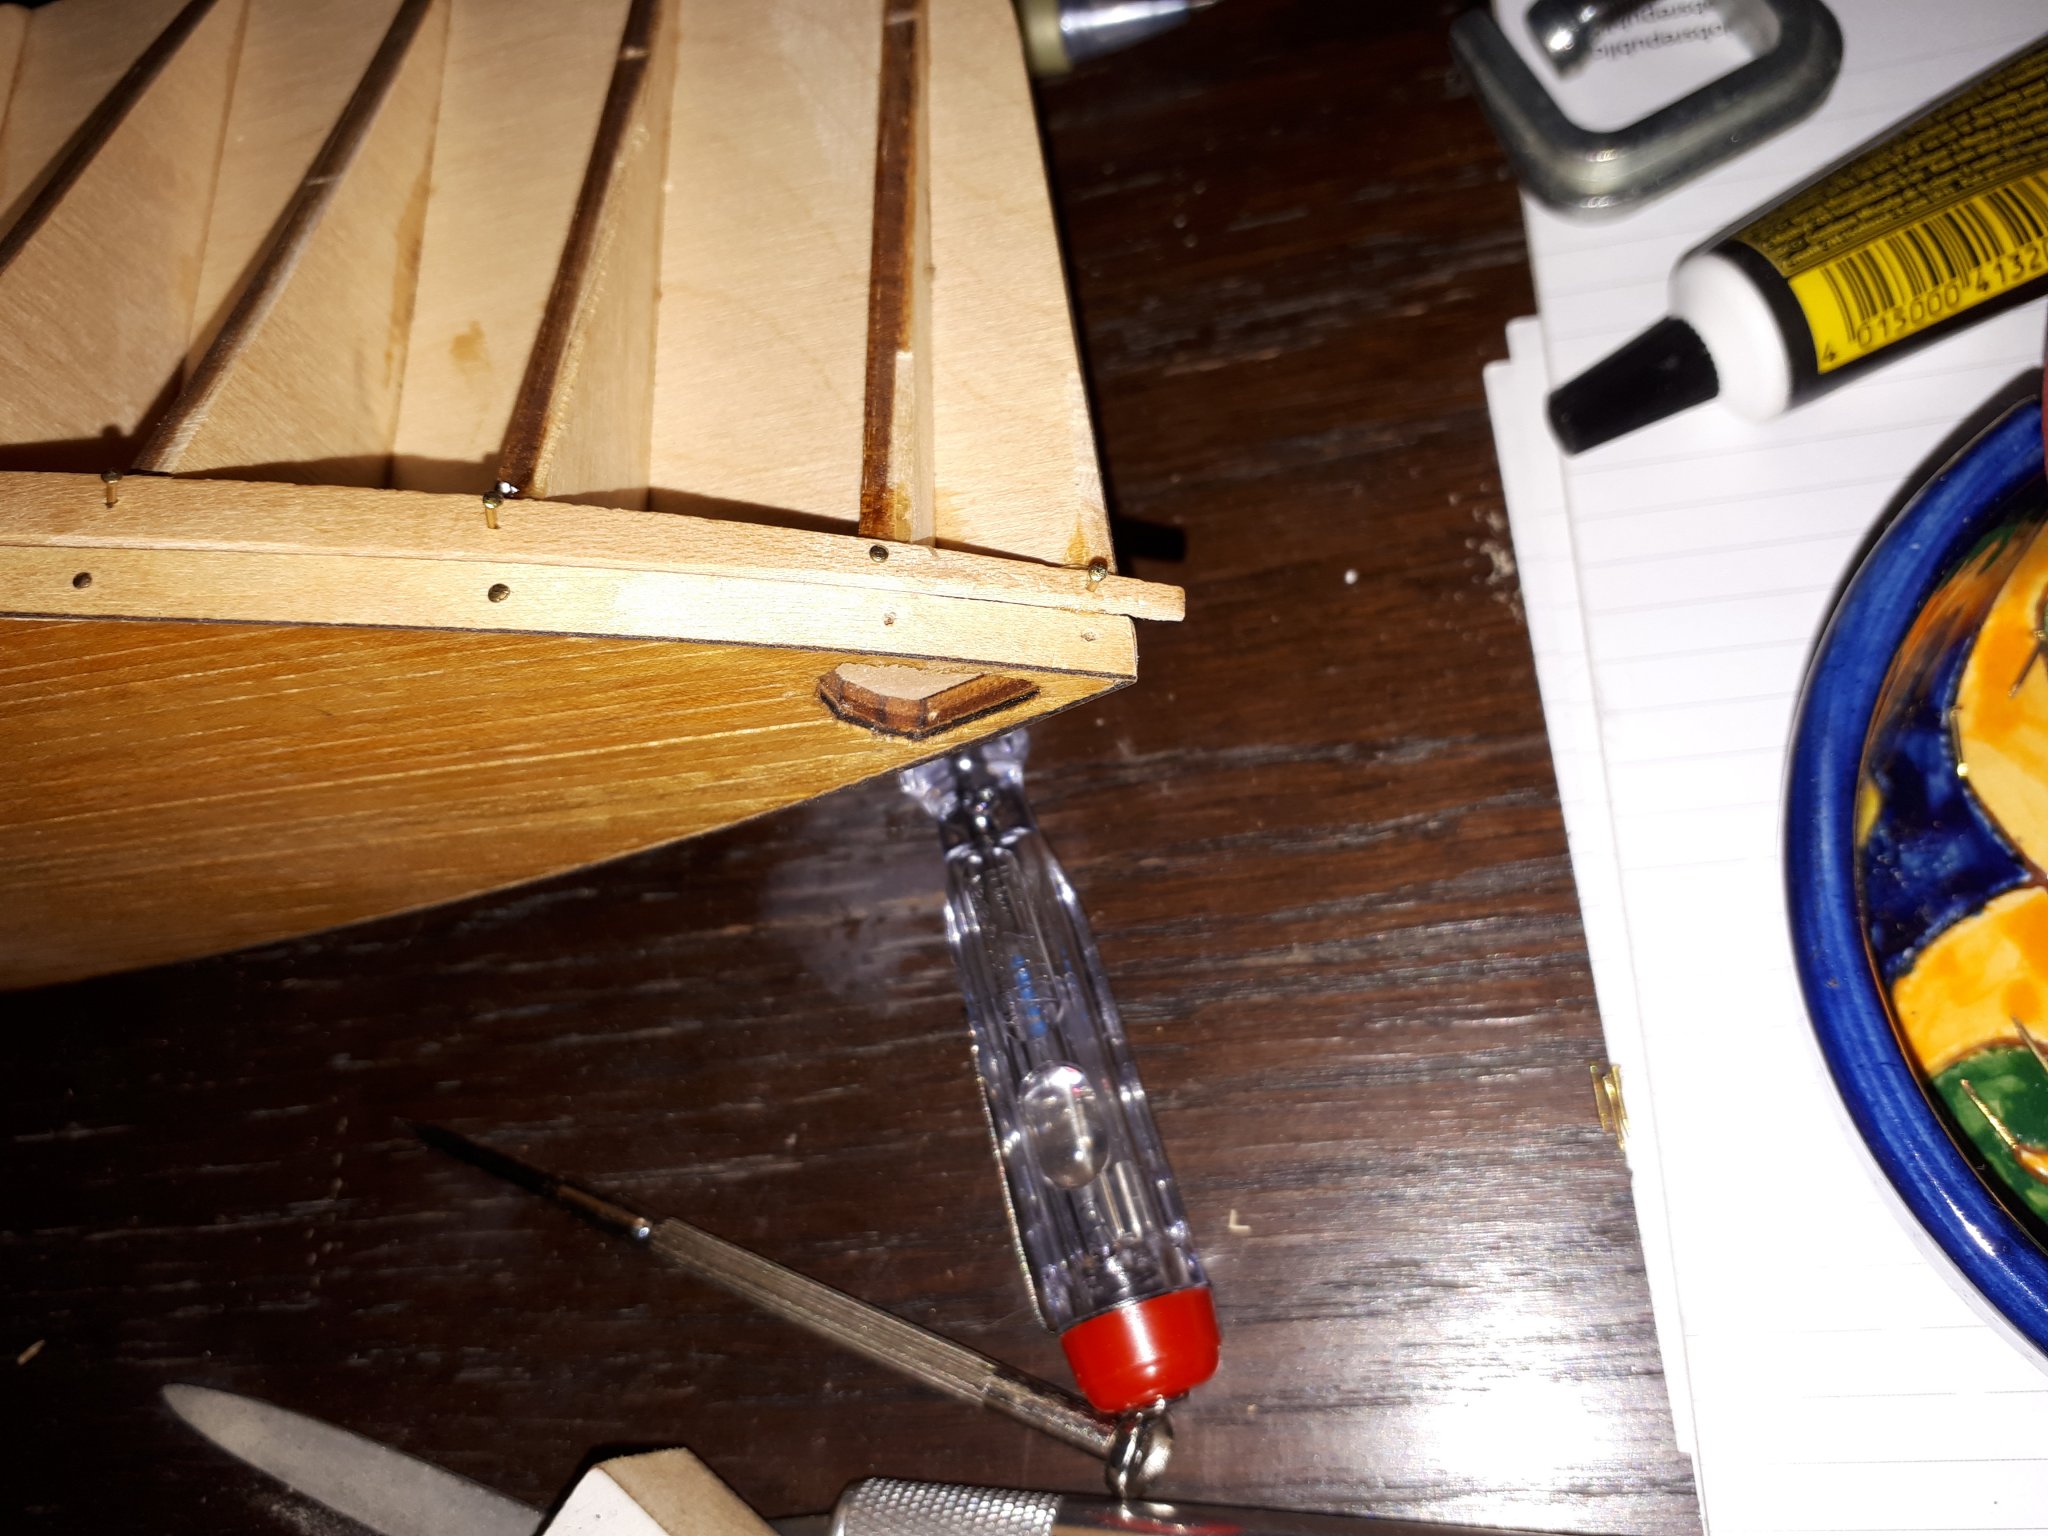
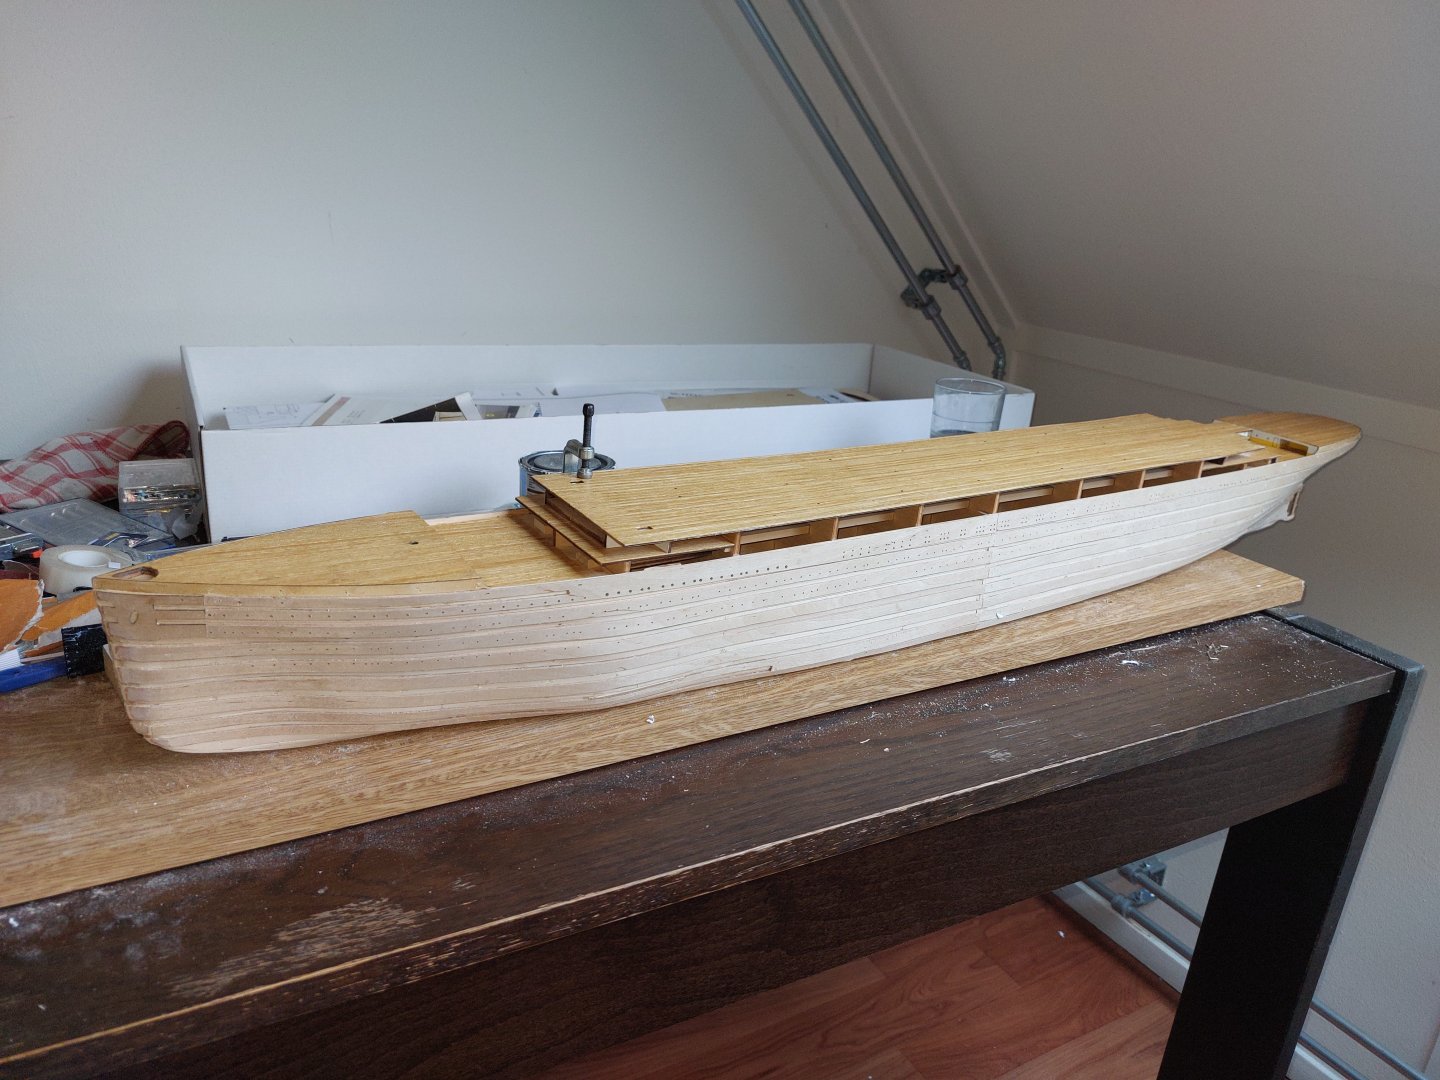
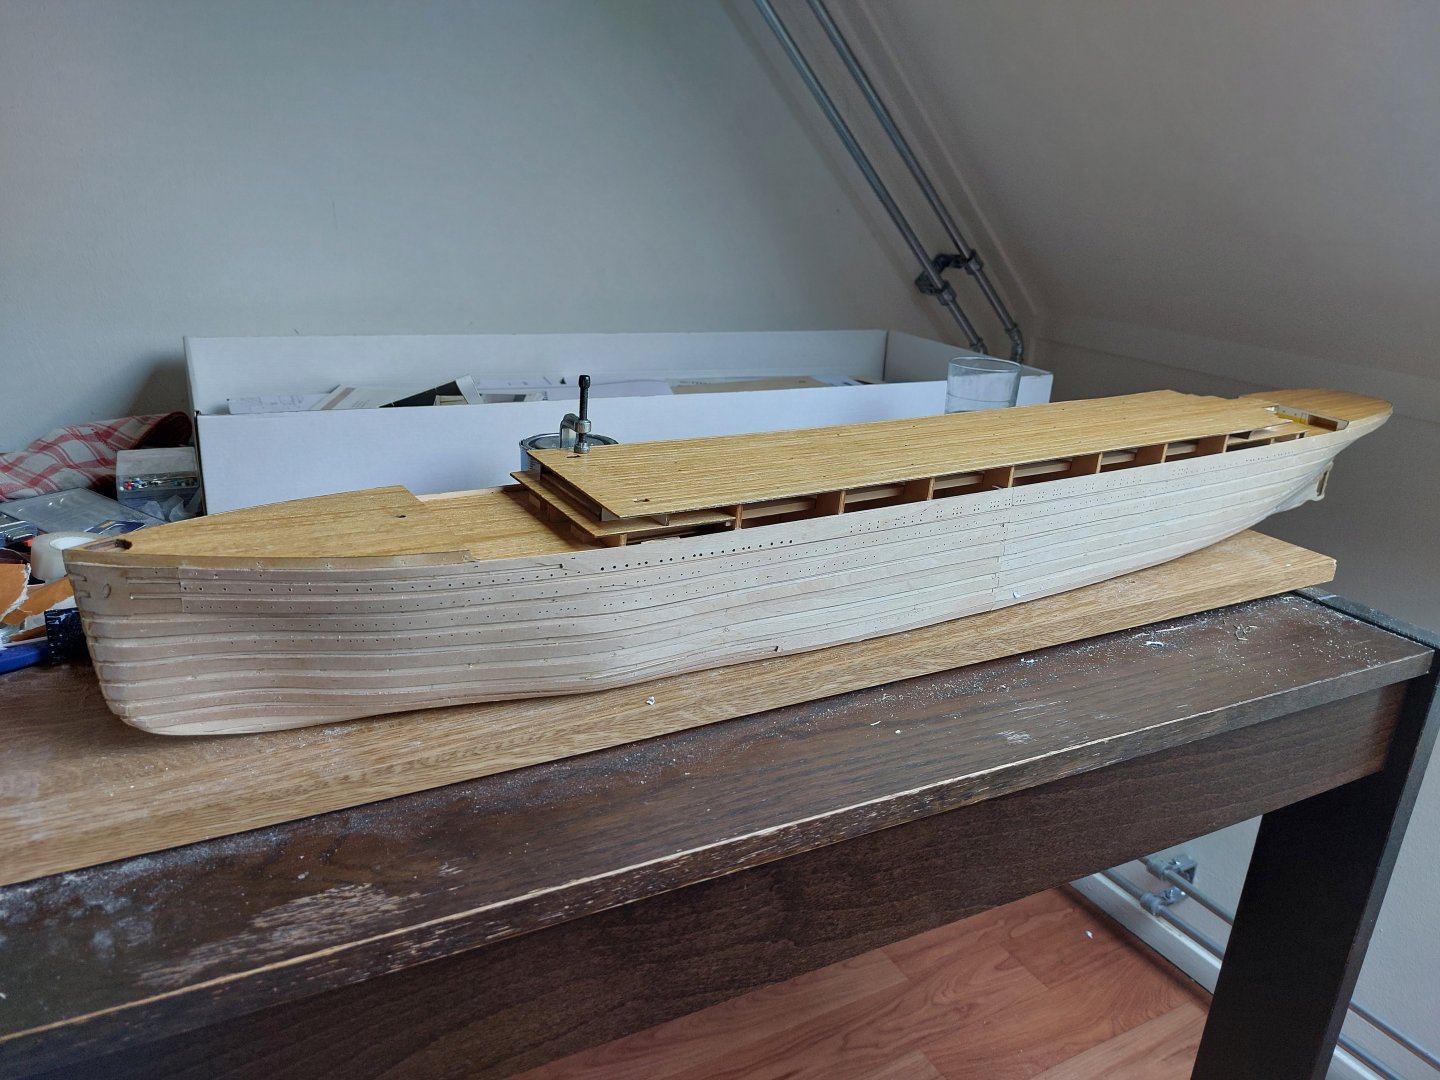
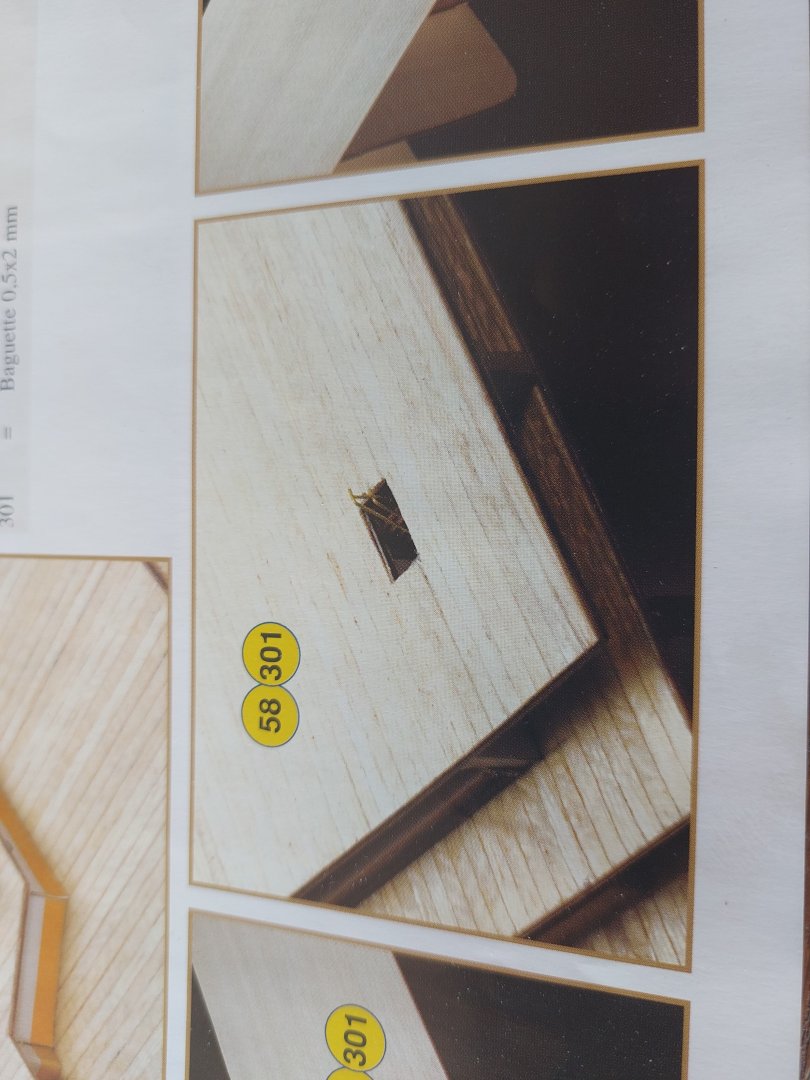
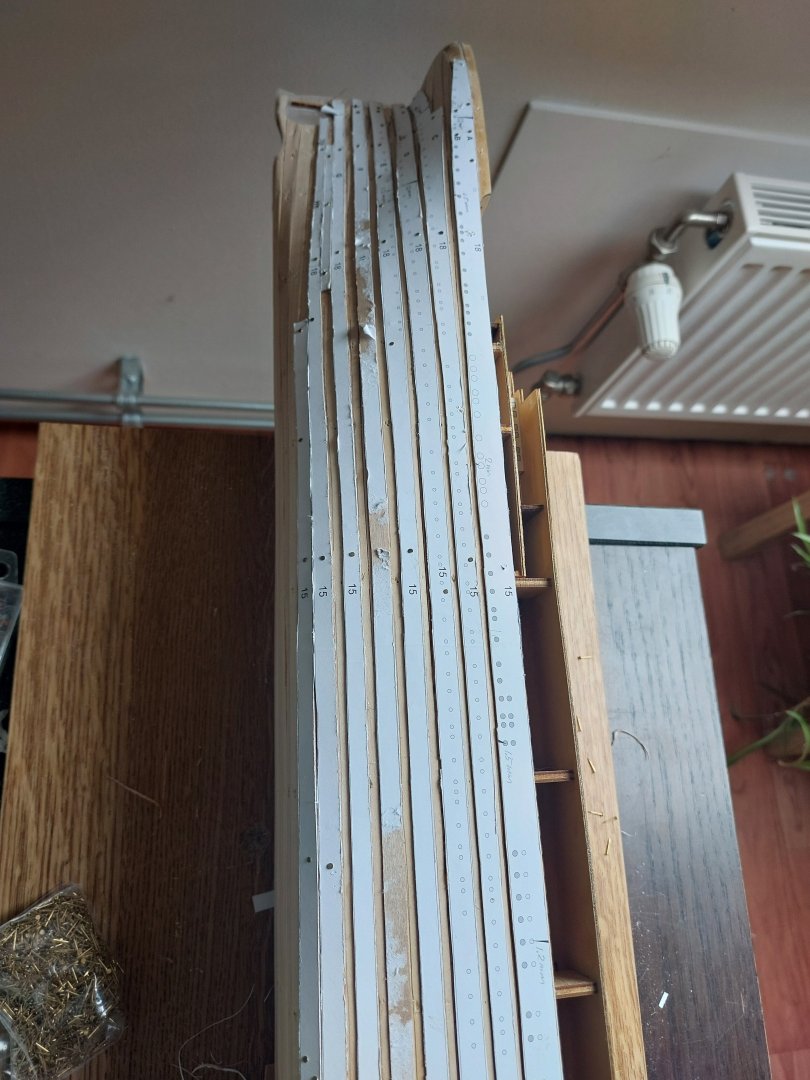
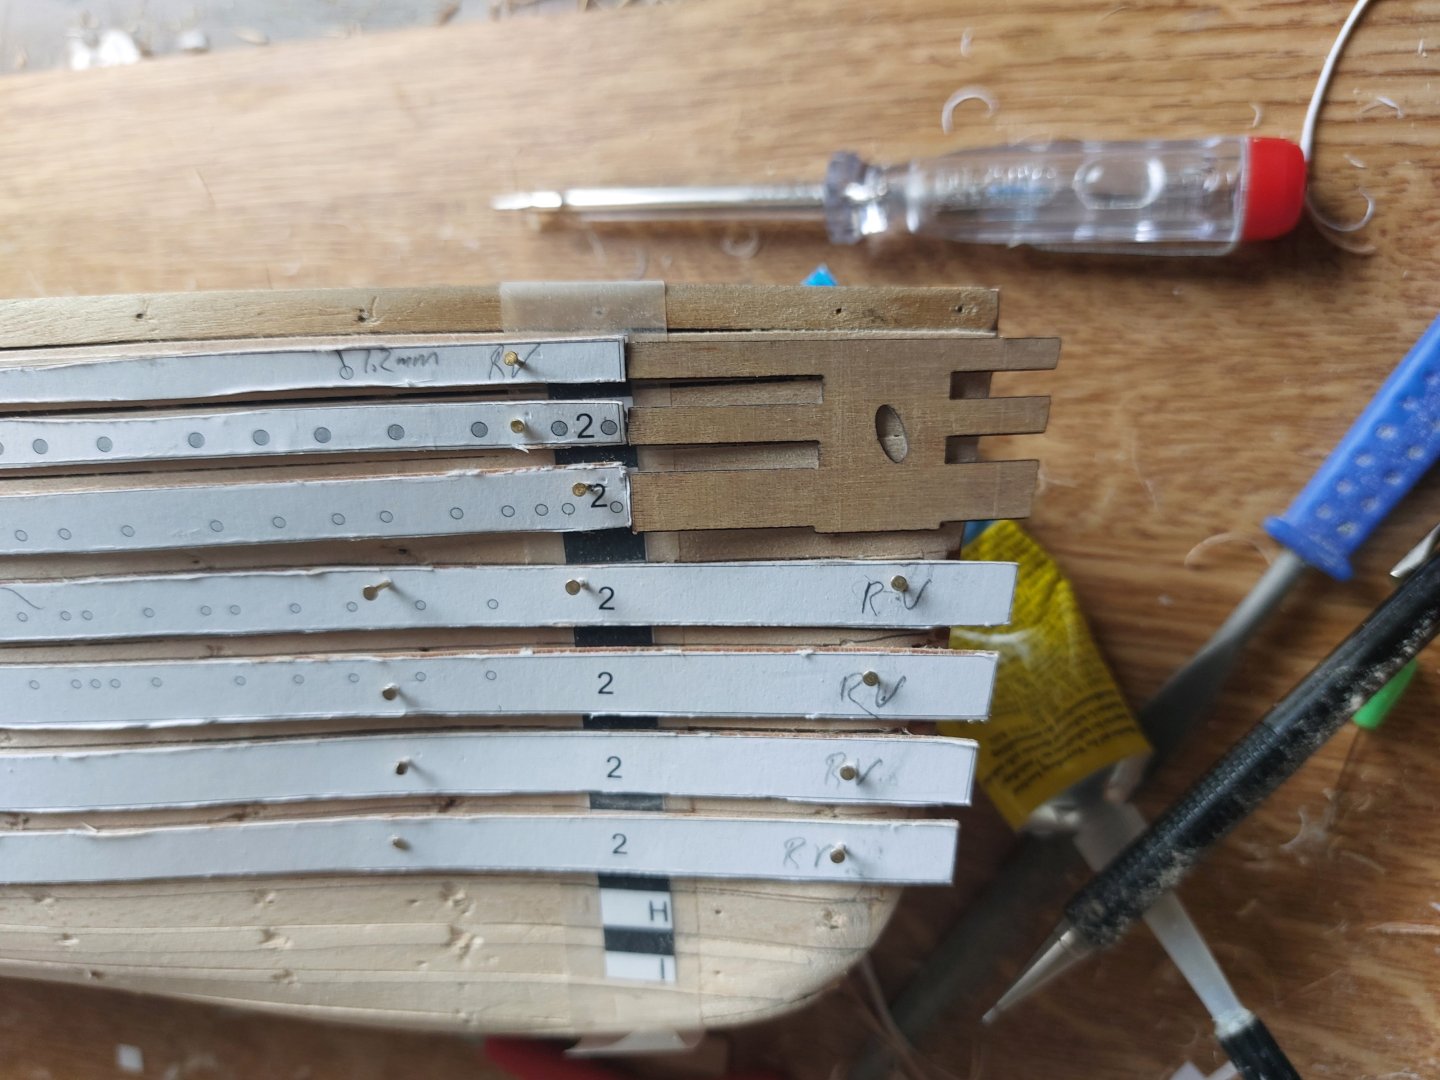
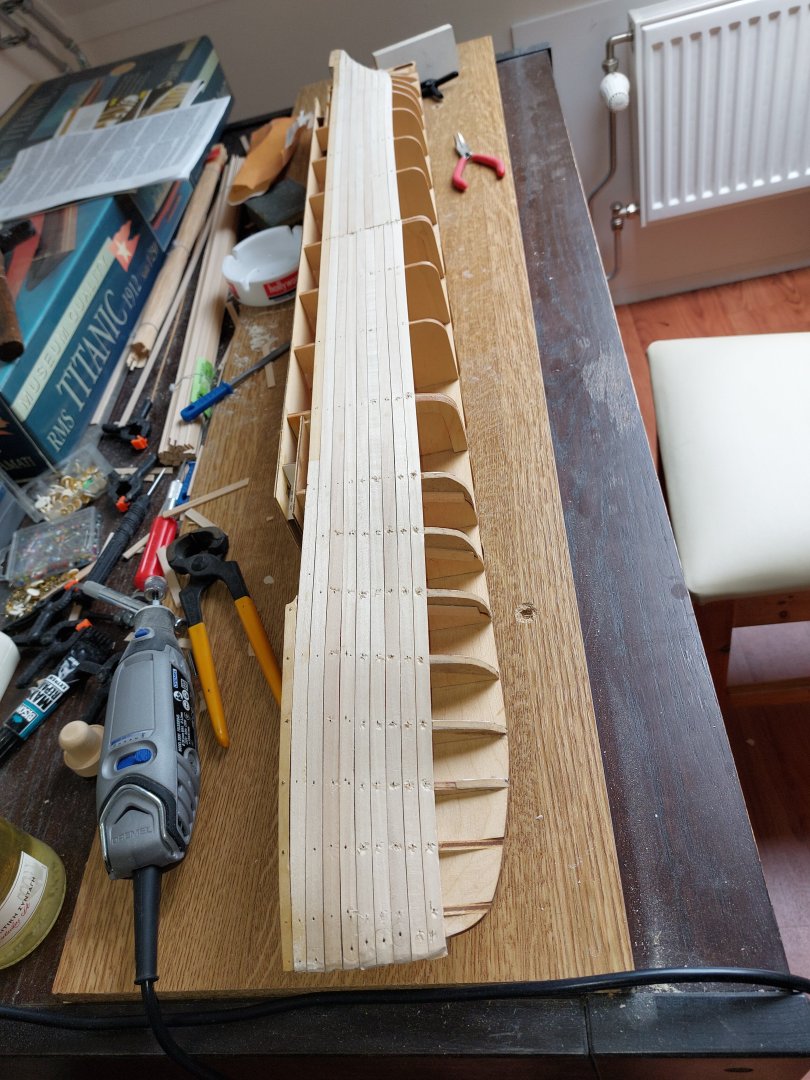
I finished the second layer of planking and it was a h*ll of a job with cutting the strips, drilling the holes and fix some anomalies. My Dremel drilling machine was really of much value here, especially for drilling the portholes! I still need to do some sanding work, also the pre-drilled oval scupper holes did not exactly match trhe corresponing holes on the upper paper strip. Or it was noty exactly in the right position... I filled the 4 holes I make with wood filler and will drill them again. Also the bow I am not totally content with. It is not really sharp so needs more sanding I think. But the distance from the anchor holes to the bow aloready looks too short. Buty probably not a real show stopper. Last issue are the tiny ladders which already should have been glued to the upper deck even before the planking started. See photo from the manual. But glueing those into position means the model cannot be put upside down anymore which would be very annoying during the planking so I postponed this to a later stage. Way to go... 😃


-
klaasvg reacted to a post in a topic:
RMS Titanic 1912 by klaasvg - Amati - Scale 1:250
-
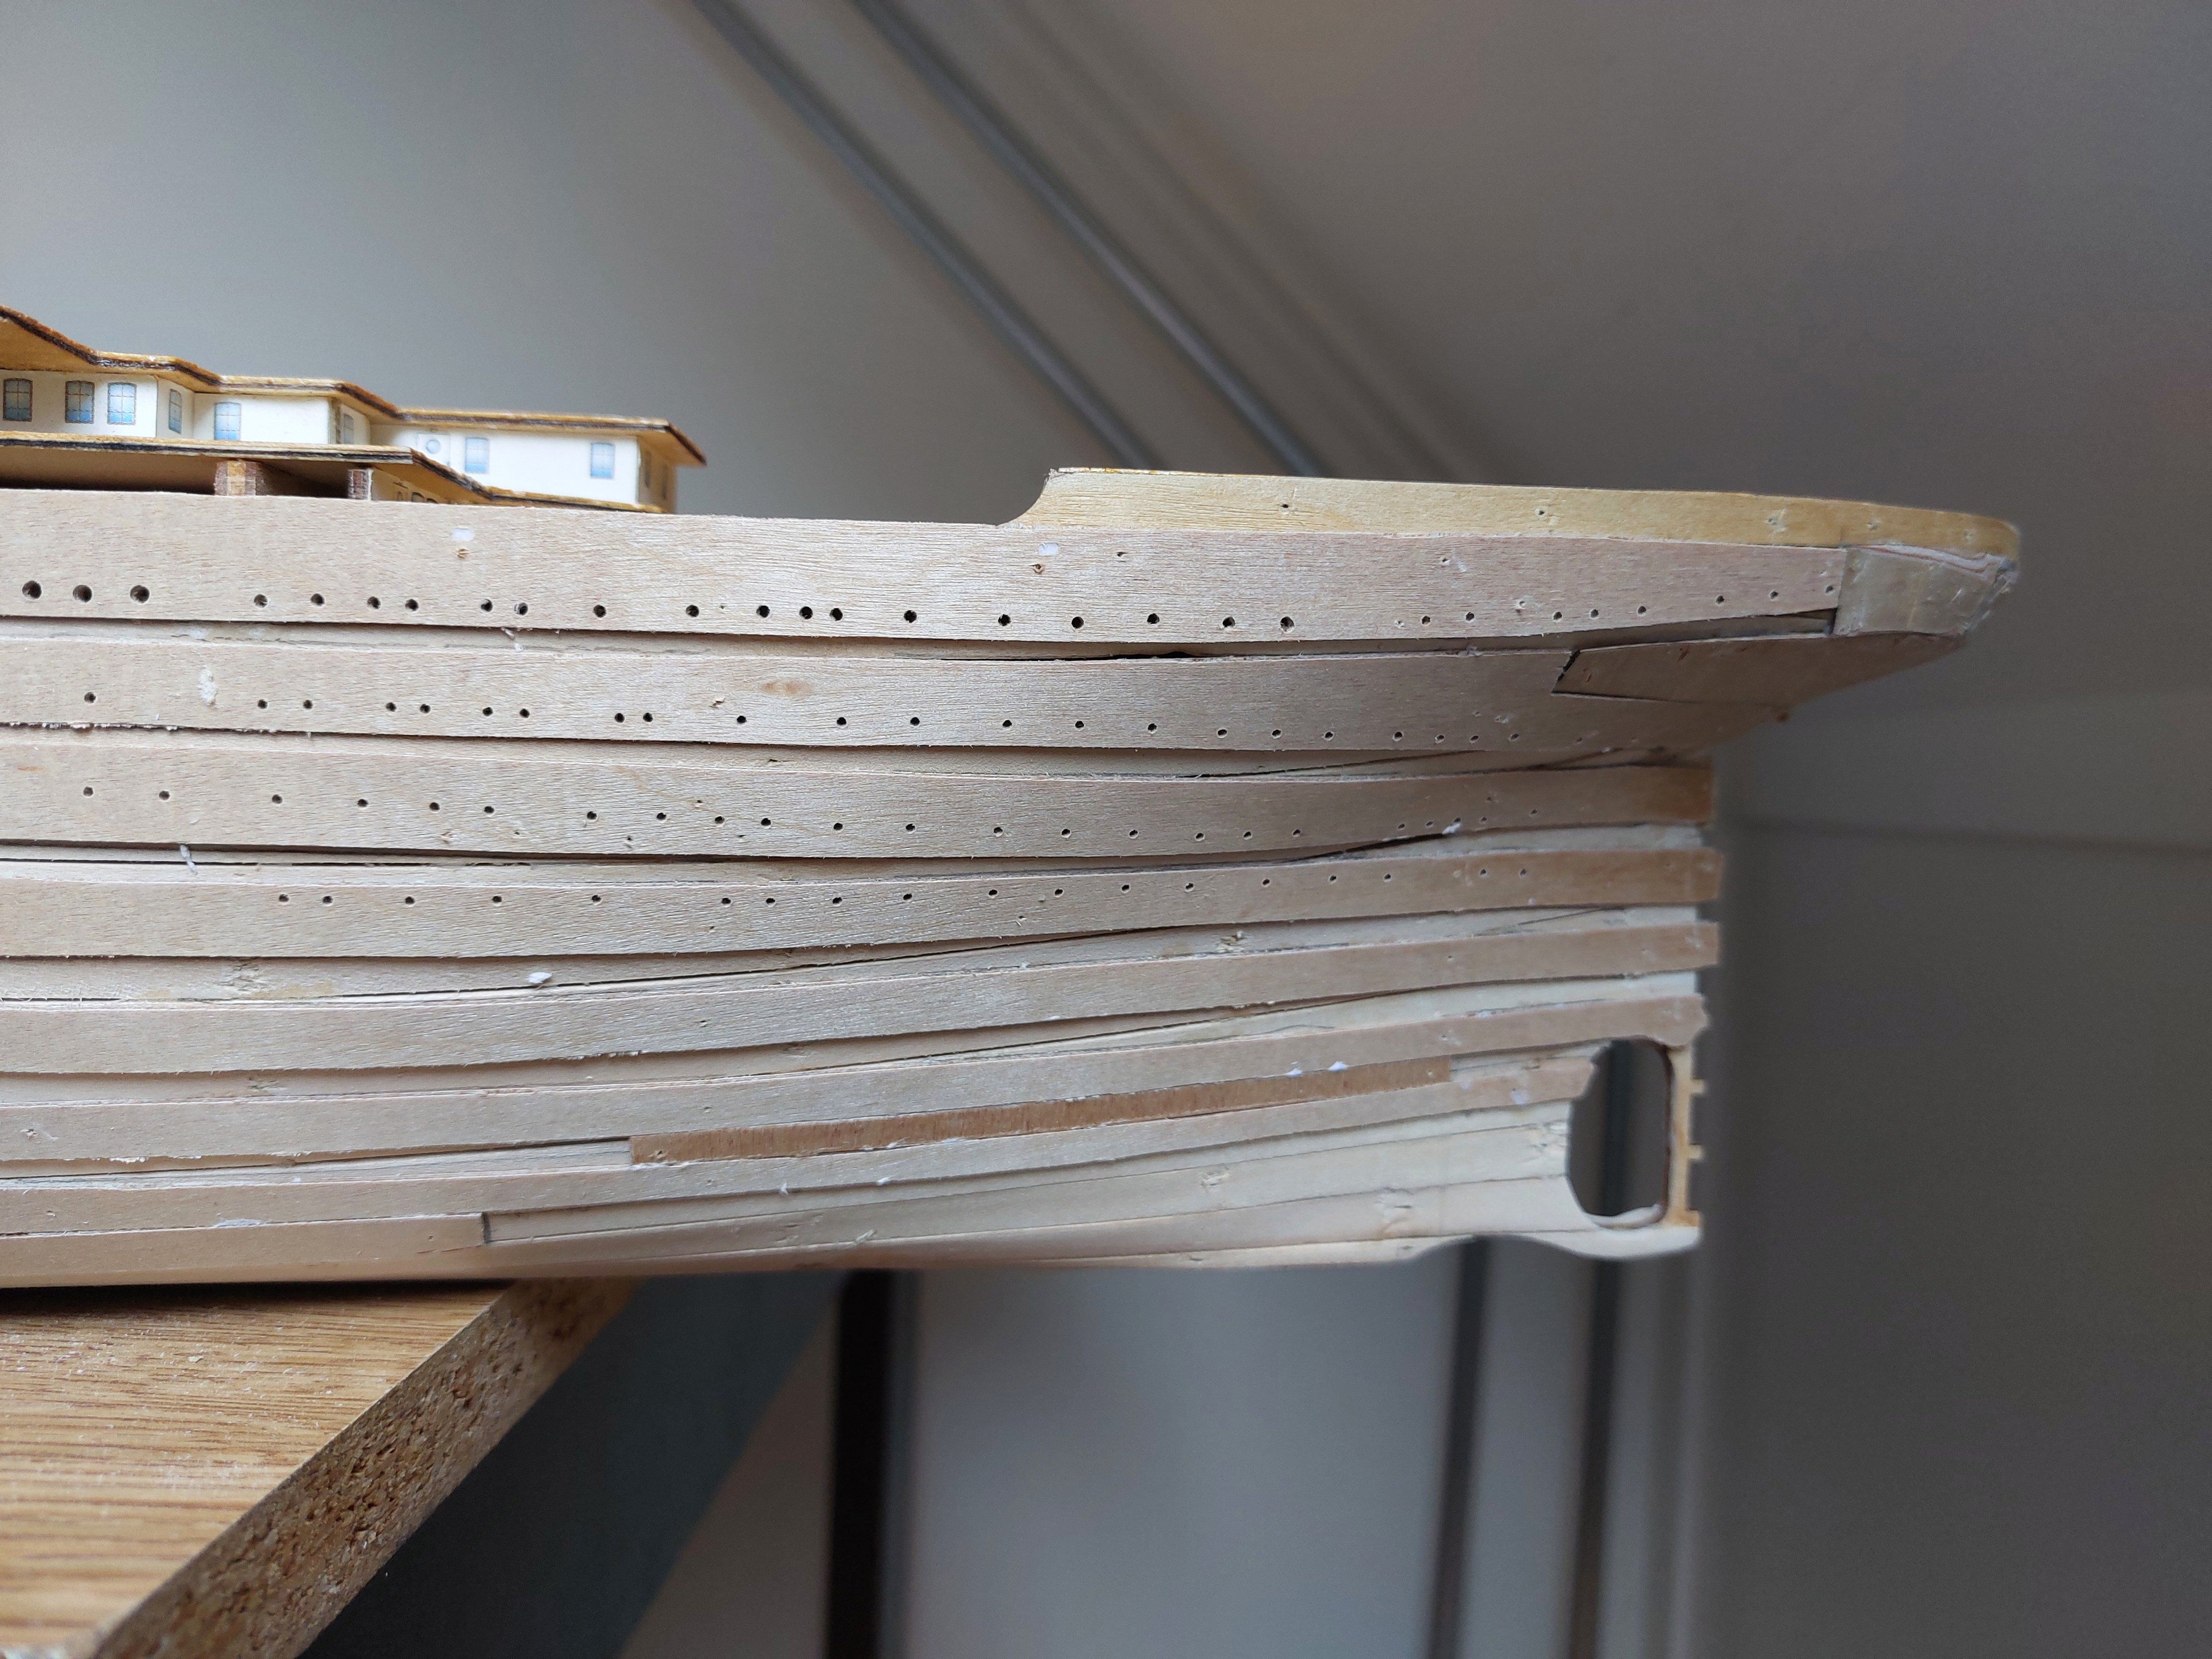
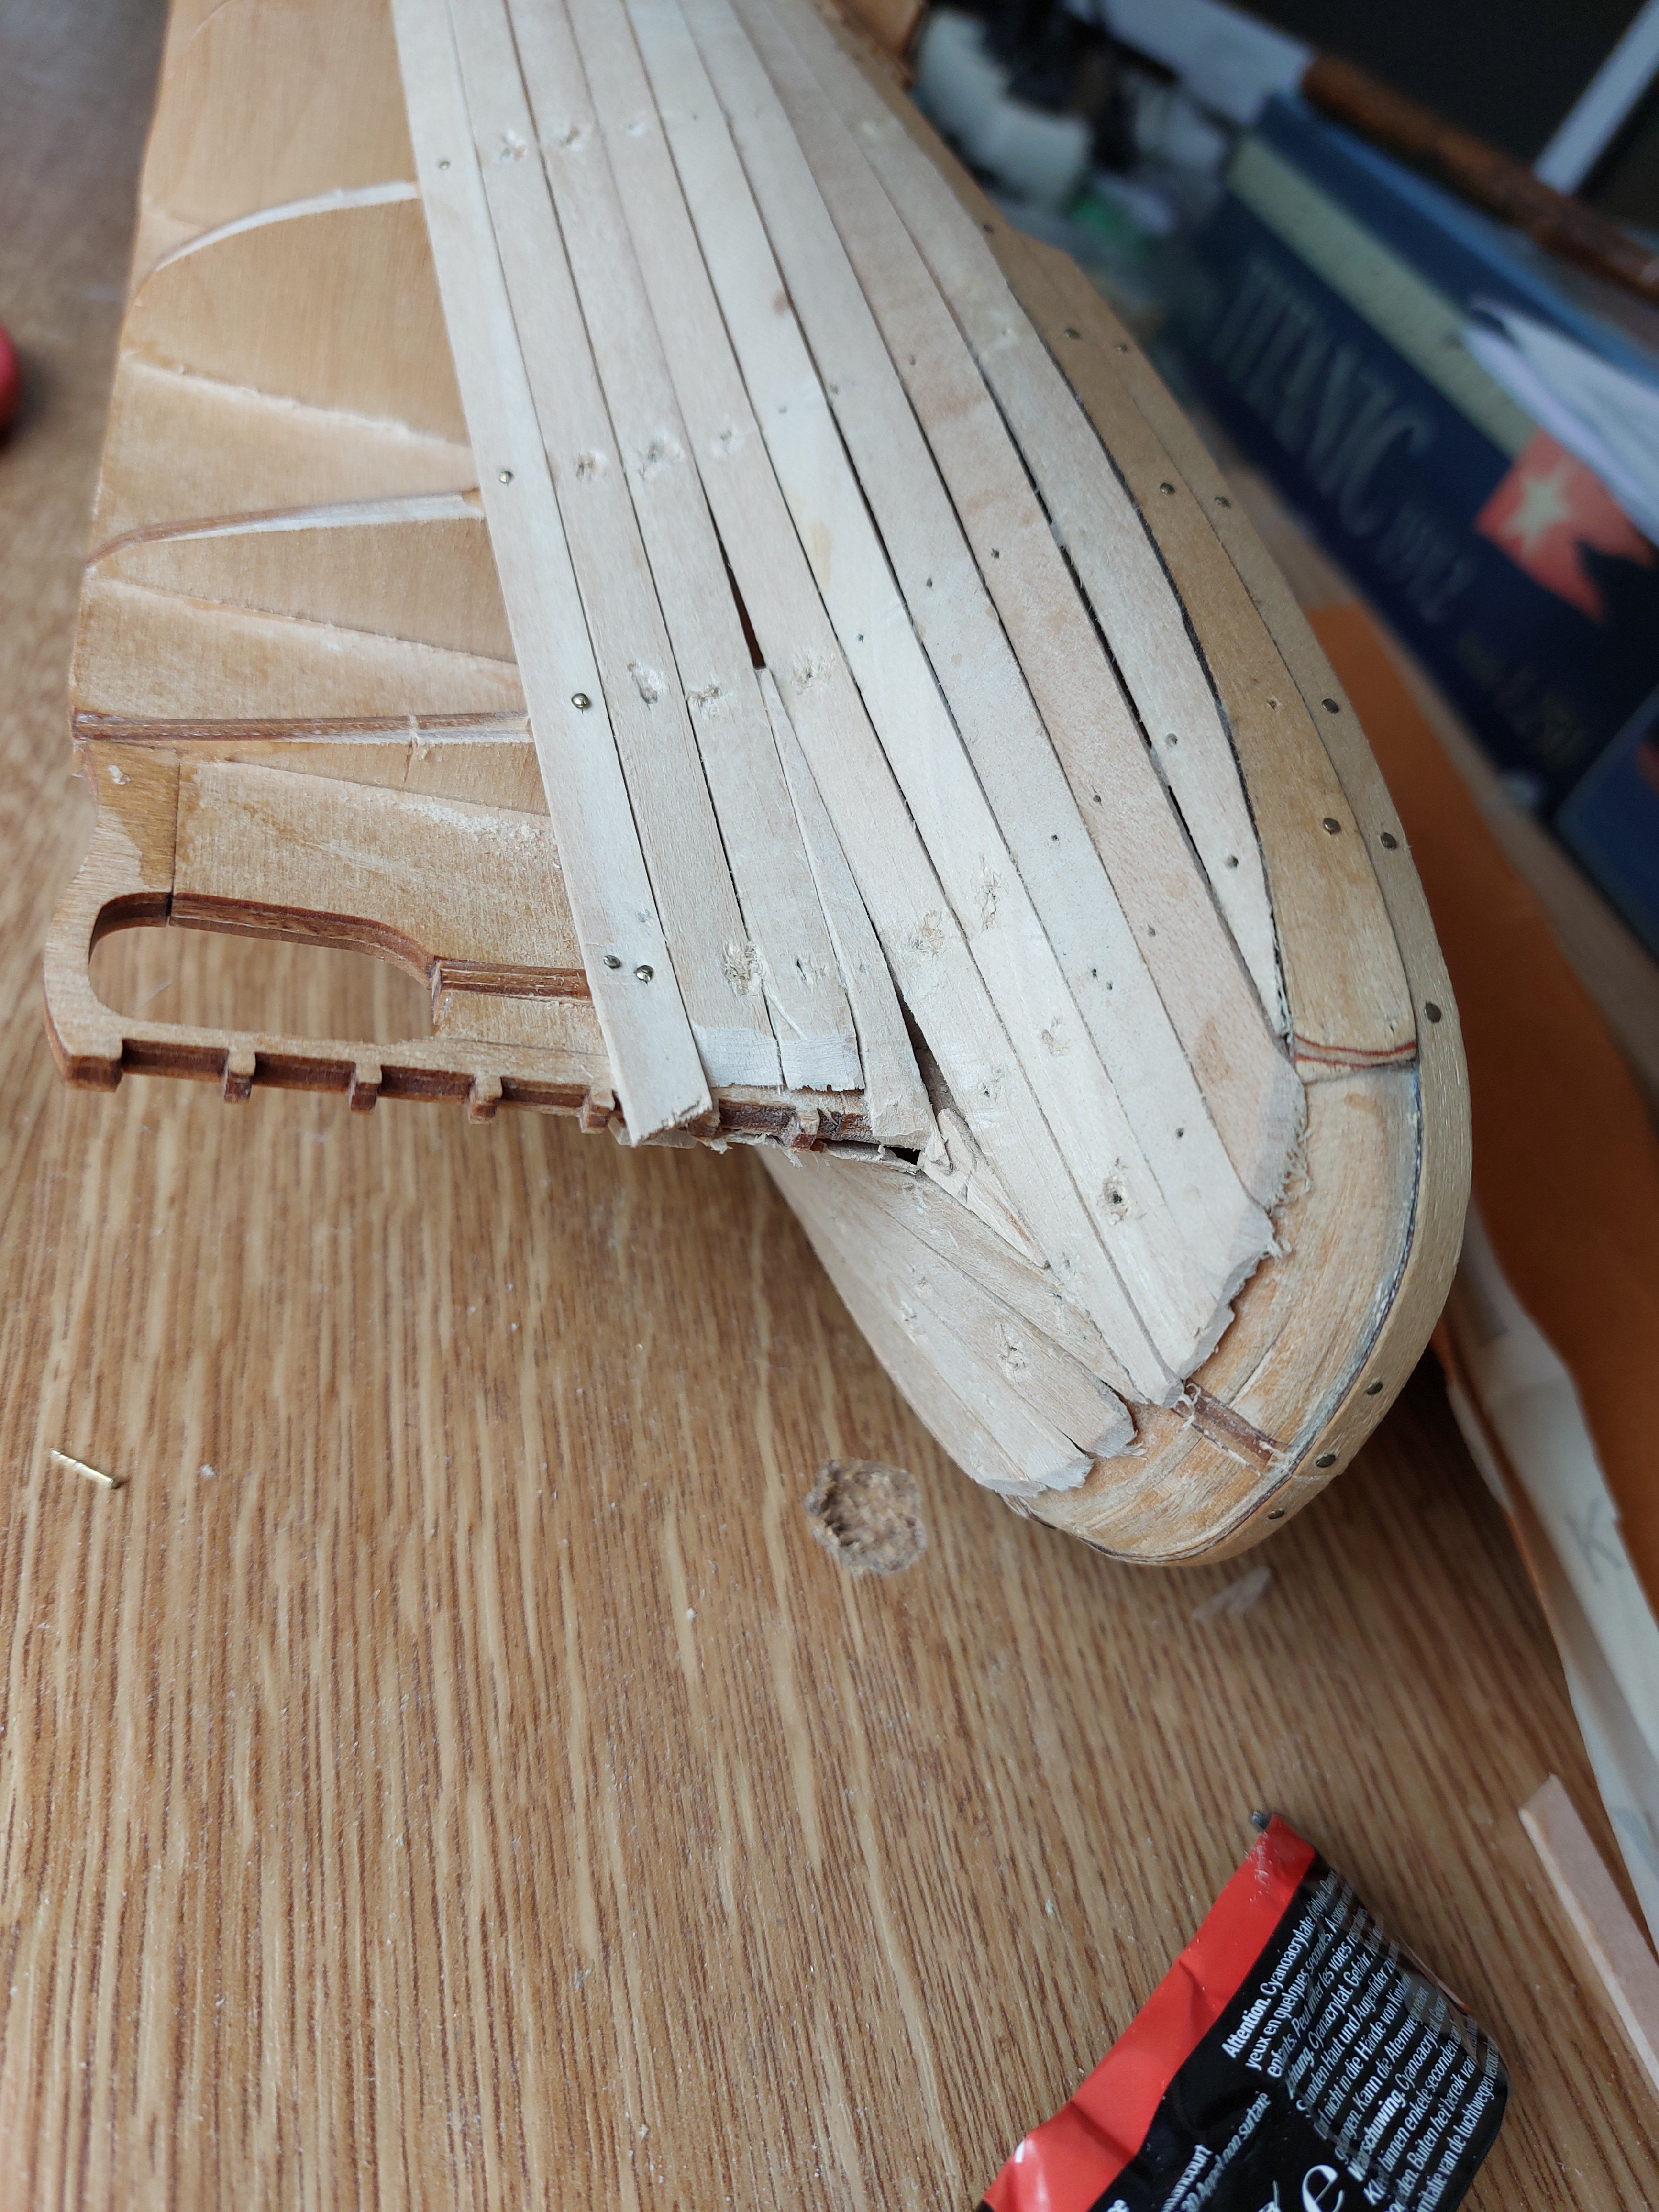
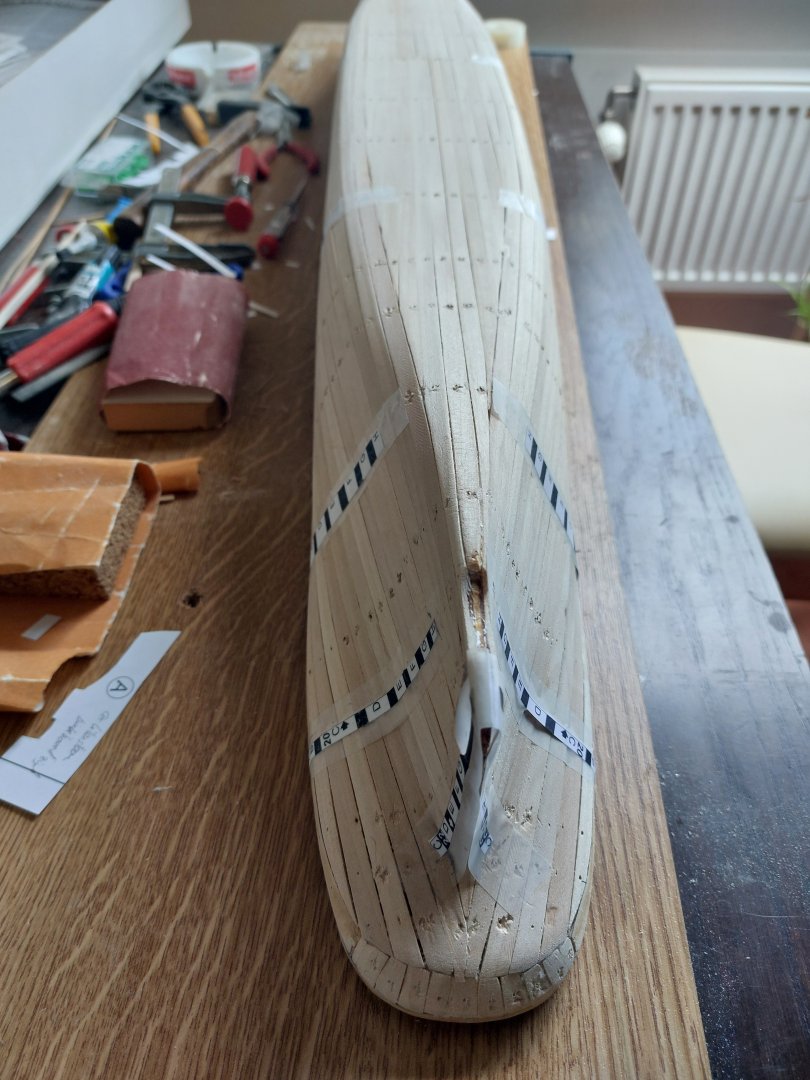
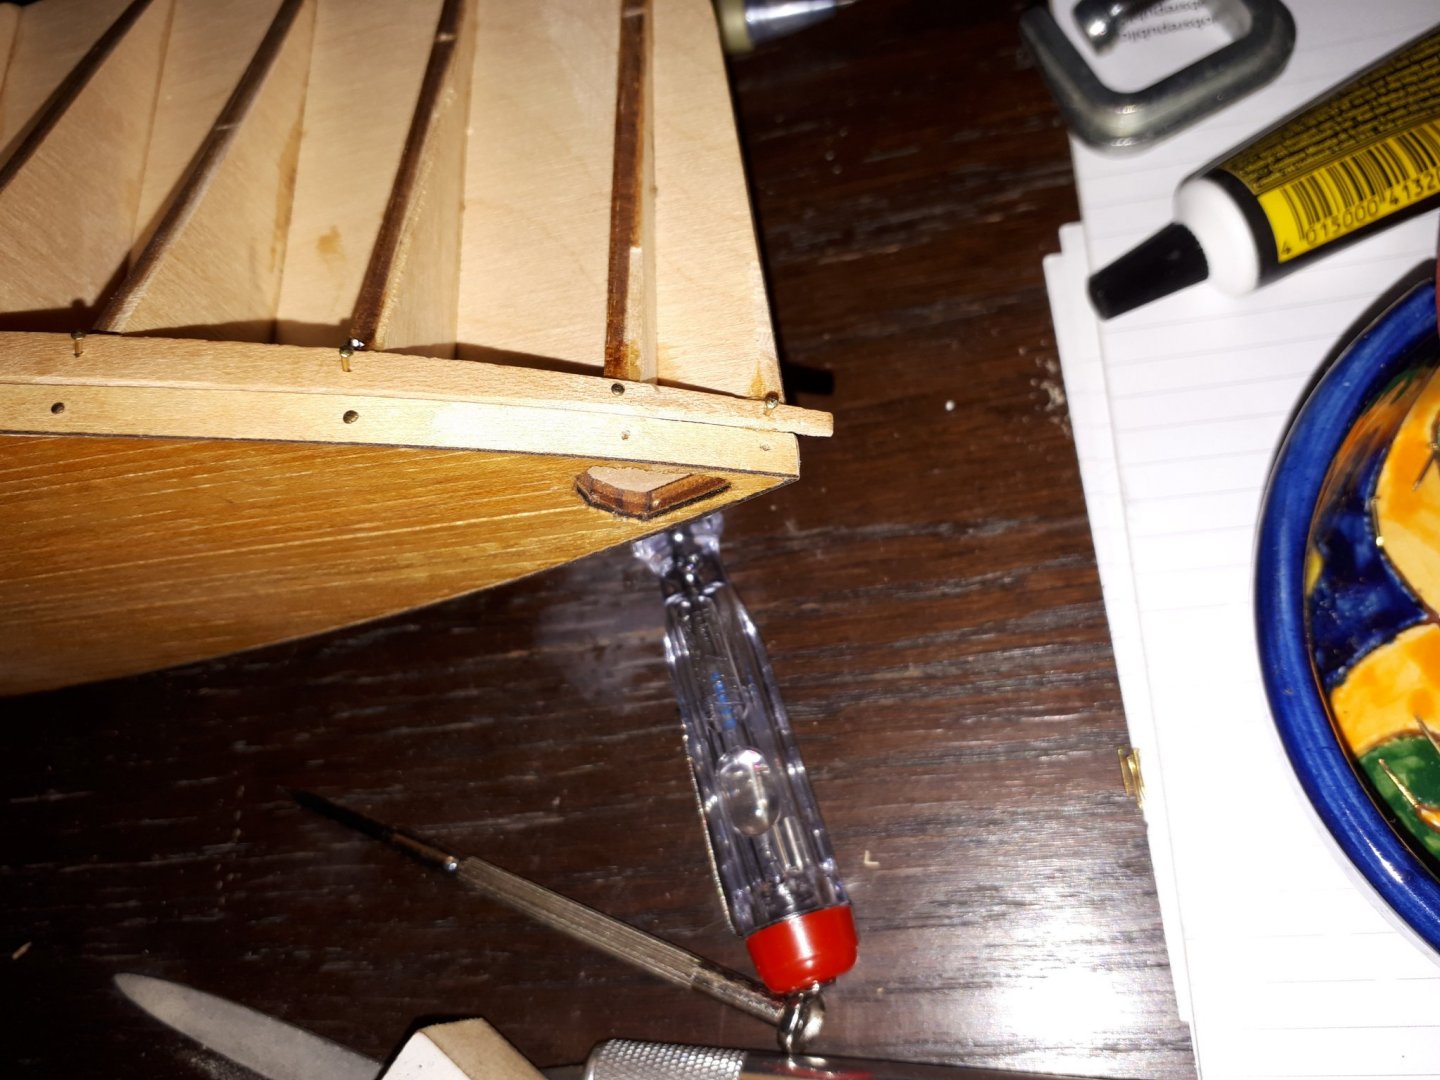
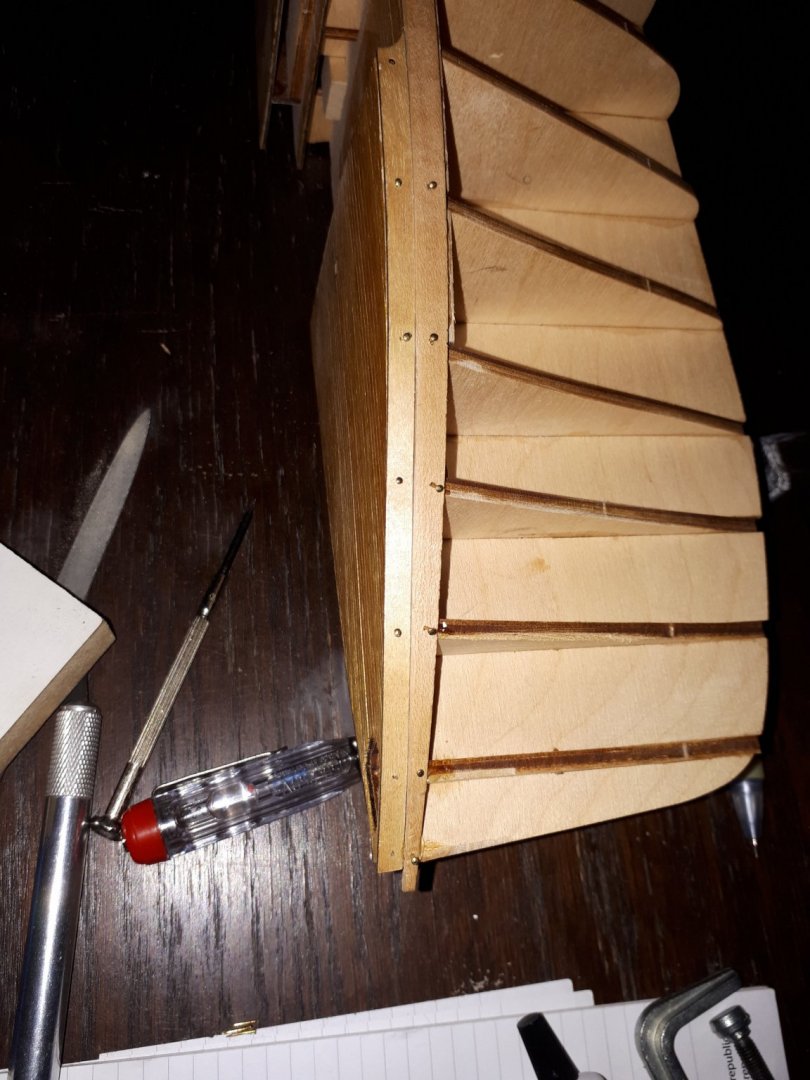
I am making progress with the second layer of planking and applied the planks of the starboard side. I already glued the planks from the stern side, but notice an issue with the bow planks. It seems that they are a little too long (or the bow a little too short) . Especially this can be a problem when applying the special wooden part containing the anchor hole which now comes almost 1 cm beyond the bow. Also the other planks are too long. I think the planks are applied correctly so can the maybe be related to the bow bulkhead issue from this kit? As mentioned before, I had corrected this with the bulkhead extensions from a PDF file. So what is the best option now? Cutting the planks or somehow lengthen the bow? I think tje last is not really possible... And what to do with the anchor hole part? Maybe cut the 3 pieces directing to the stern with a cm or so?

-
klaasvg reacted to a post in a topic:
RMS Titanic 1912 by klaasvg - Amati - Scale 1:250
-
klaasvg reacted to a post in a topic:
RMS Titanic 1912 by klaasvg - Amati - Scale 1:250
-
One additional question, I wonder what to do with this part of the paper print while this same part is already in the package as a cut out part.
-
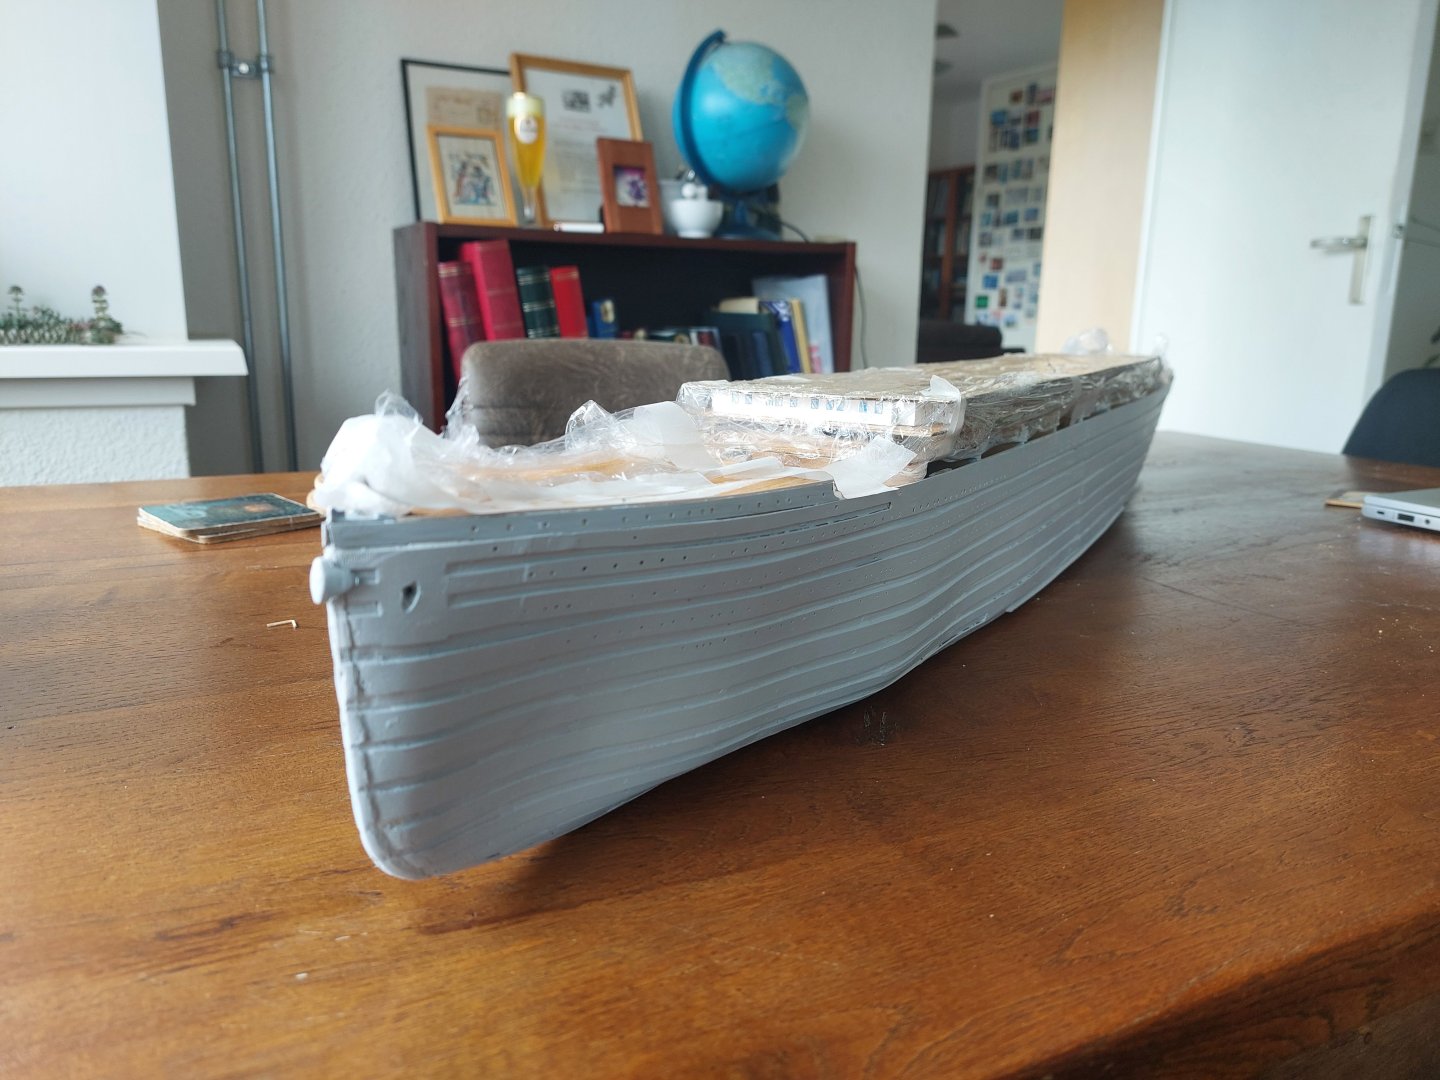
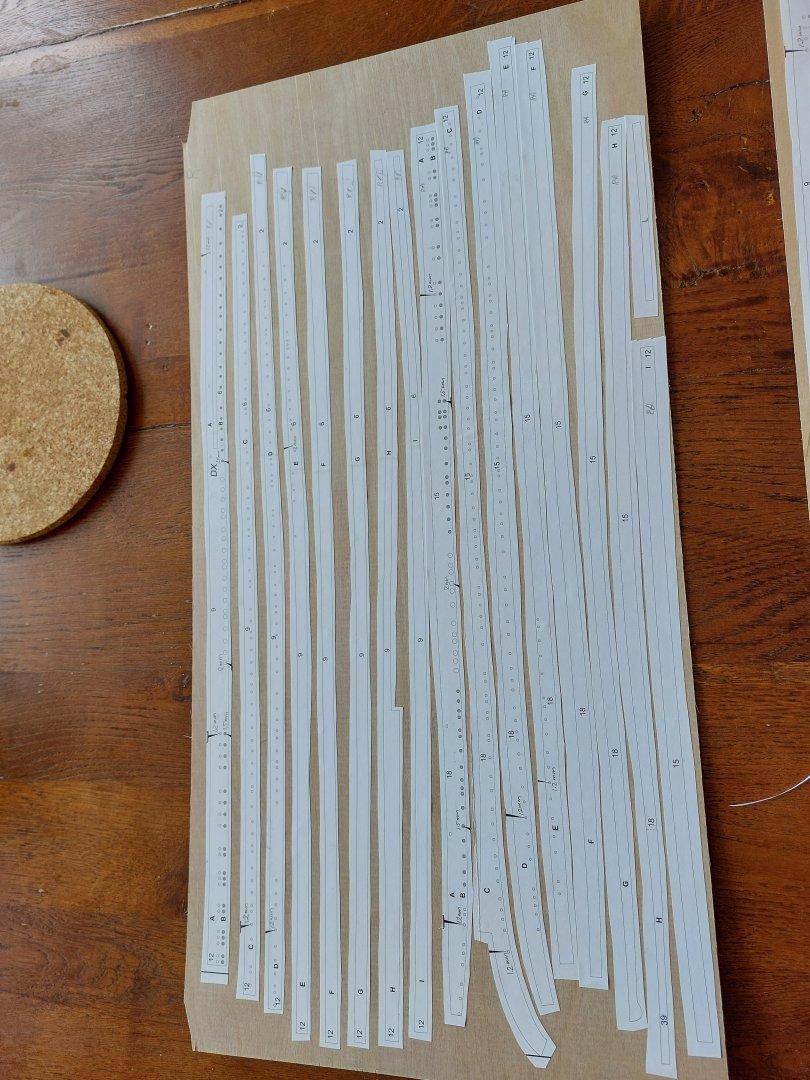
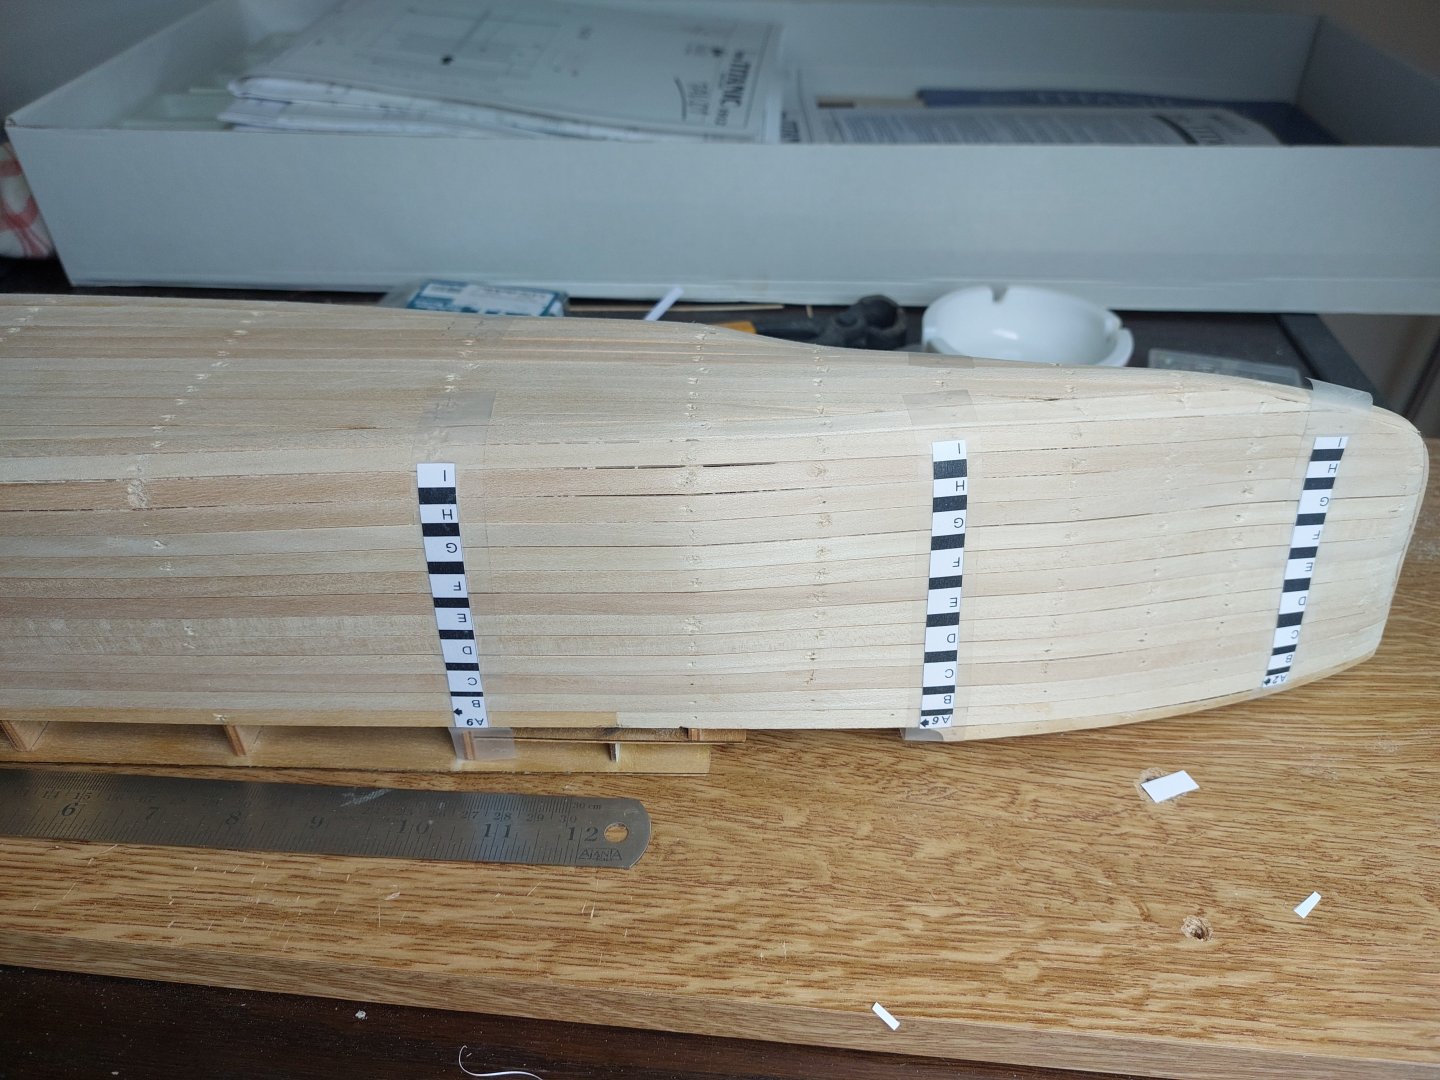
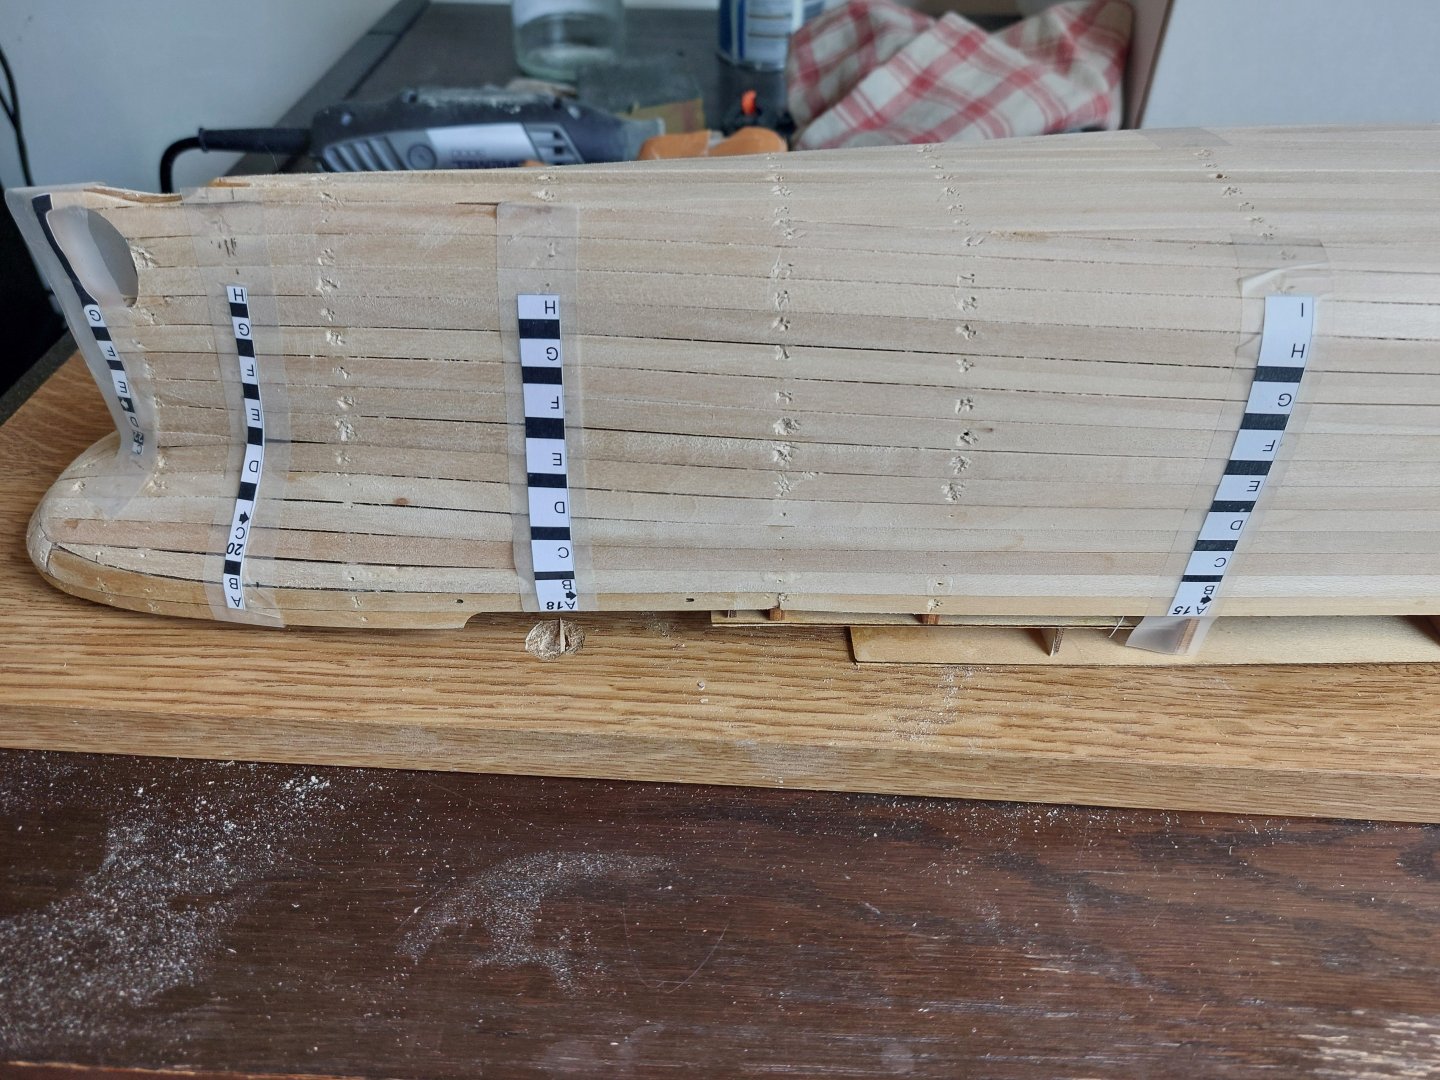
Hi, I also picked up the work at this model and finally made some significant process since the last 10 years or so! I finished the first layer of planking, using a bottle of water with some ammonia to soak and bent the planks. This worked pretty well. See my pictures. Now I am at the second layer of planking. I put the vertical markers on the hull and cut out the horizontal markers and glued them on the piece of wood for the second layer, as described in the manual. ACtually a nasty and time consuming job and it is very easy to mess it up when there occurs some folding in the paper and the planks are not in the right shape anymore. But I tihnk I glued them pretty carefully. But cutting them out is another thing! I only cut one shelf now and it did not go too well. A pair of scissors seems to be too crude and not always handy because I can only operator a scissor with my left hand. Also I tried to cut it out using a Stanley knife but even then it is difficult to exactly folllow the line it it is not straight. Any hints here? I have only one chance to do it well and not mess up the planks! Best regards! Klaas


-
THanks David, I think that the steamer will essentially have the same effect as the water and actually I have finished the planking now. But there are still some holes and cracks so using the wood filler is probably a good idea!
-
klaasvg reacted to a post in a topic:
RMS Titanic 1912 by klaasvg - Amati - Scale 1:250
-
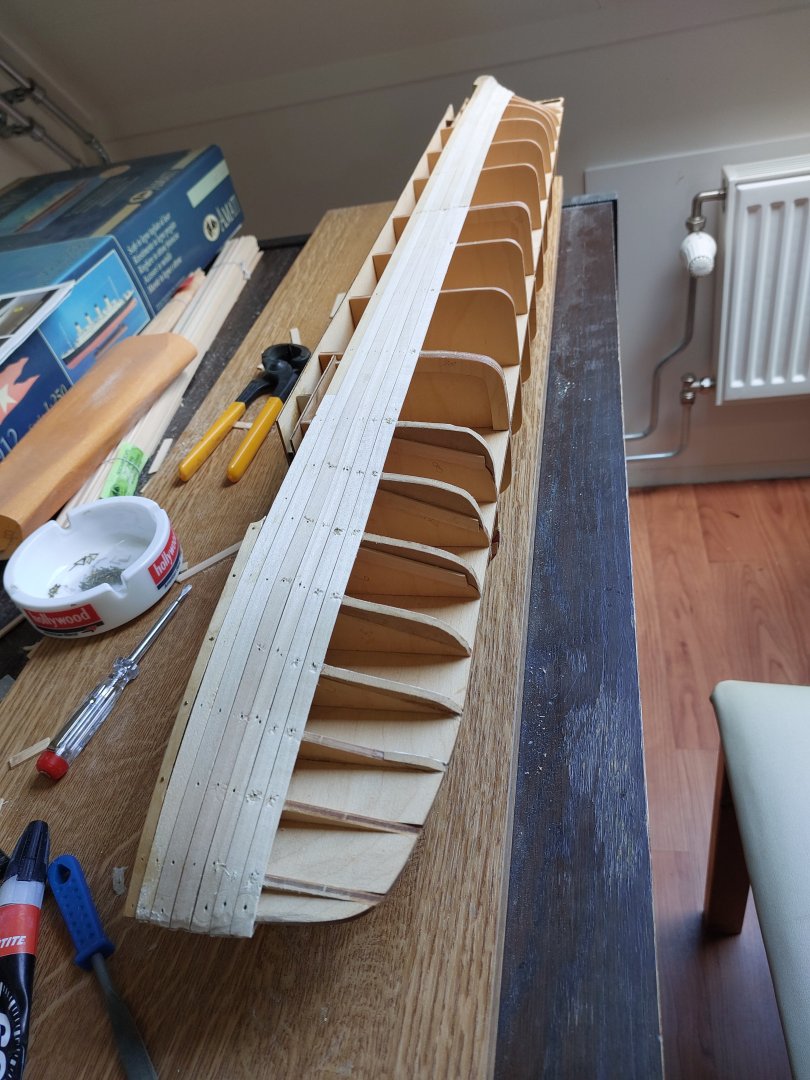
It is already a long time ago since my last post, again I postponed the project because of other priorities and the difficulties I encountered with the planking of the hull. I finally managed to apply the first planks, using water with some ammonia to soften the planks and bow them into position by first nailing them on the hull. I still have a way to go but will show my progress up until now. I still have some issues, the small nails used to attach the planks need to be removed later and than can be difficult and damaged the planks. But because it its the first layer, I think this is no a big problem yet. Also the planking on the stern site looks not so nice to me. I use some tools like sandpaper and an electric Dremel device but it still look a bit crude. Also things can become more difficult as I am approaching the bottom section of the hull. So any comments are welcome! Regards, Klaas

-
klaasvg reacted to a post in a topic:
RMS Titanic 1912 by drobinson02199 - FINISHED - Amati - Scale 1:250
-
klaasvg reacted to a post in a topic:
RMS Titanic 1912 by drobinson02199 - FINISHED - Amati - Scale 1:250
-
Ok thanks a lot again David, I will surely give that a try. Not sure whether I shall buy a Dremel sanding machine for this project only.... but good old sanding paper should do it too I suppose. It wll definately take some time and practice... One more (hopefully last) question about the bulkheads. I understand that bulkheads 3 to 8 are malformed, I have the PDF file which shows the missing parts in red. In my project they are definately also malformed but they are in place already. Is it really crucial to corret this? I do have a (very old) fretsaw and can possibly get a pieve of triplex of the right thickness so if it is really an essential step I will give this a try too. I suppose a very strong superglue will be needed to put them in place with only the small sides touching each other! Regards Klaas
-
Thanks again David for your quick reply! Indeed I an still in the early stage of the first layer of planking. I noticed already that the planks must be tailored to fit neatly when nearing the bow and stern. I do not yet have the best equipment but I gave it a first try using a stanley knife. I notived that the planks not only need to be tailored, but also are too think. Or maybe I need to file/sand the bulkheads of the bow and stern to make the planks lay a little deeper and also glue better? This will probably be a length operatino using only a file or some sand papter. Or can I use another tool for that? For now I stopped after the first plank, I can probably still choose another approach if this is not working. On my photos you cna see that the plank does not really aligns smoothly with the rest of the structure. If you have anyt advice on this it is surelyy welcome, tomorrow I can eventually buy some extra tools if needed Regards, Klaas
-
I think the hardest part is to make the hull planks fit by tailoring them in shape for the bow and stern. The manual mentions this very shortly on Photo Album Pages 10-11: 42) "As the planking neas the bow there will be the requirement to taper the planks to allow them to lay alongside each other, this also applines to the stern"". This is actually the part I got stuck some years ago, the planks are too thik to cut with a normal pair of scissors, is will probably be possible to cut them with a stanley knife but still you need to know exactly how to cut them. Did you use some big pair of scissors or another method?