MAGIC's Craig
-
Posts
135 -
Joined
-
Last visited
Content Type
Profiles
Forums
Gallery
Events
Everything posted by MAGIC's Craig
-
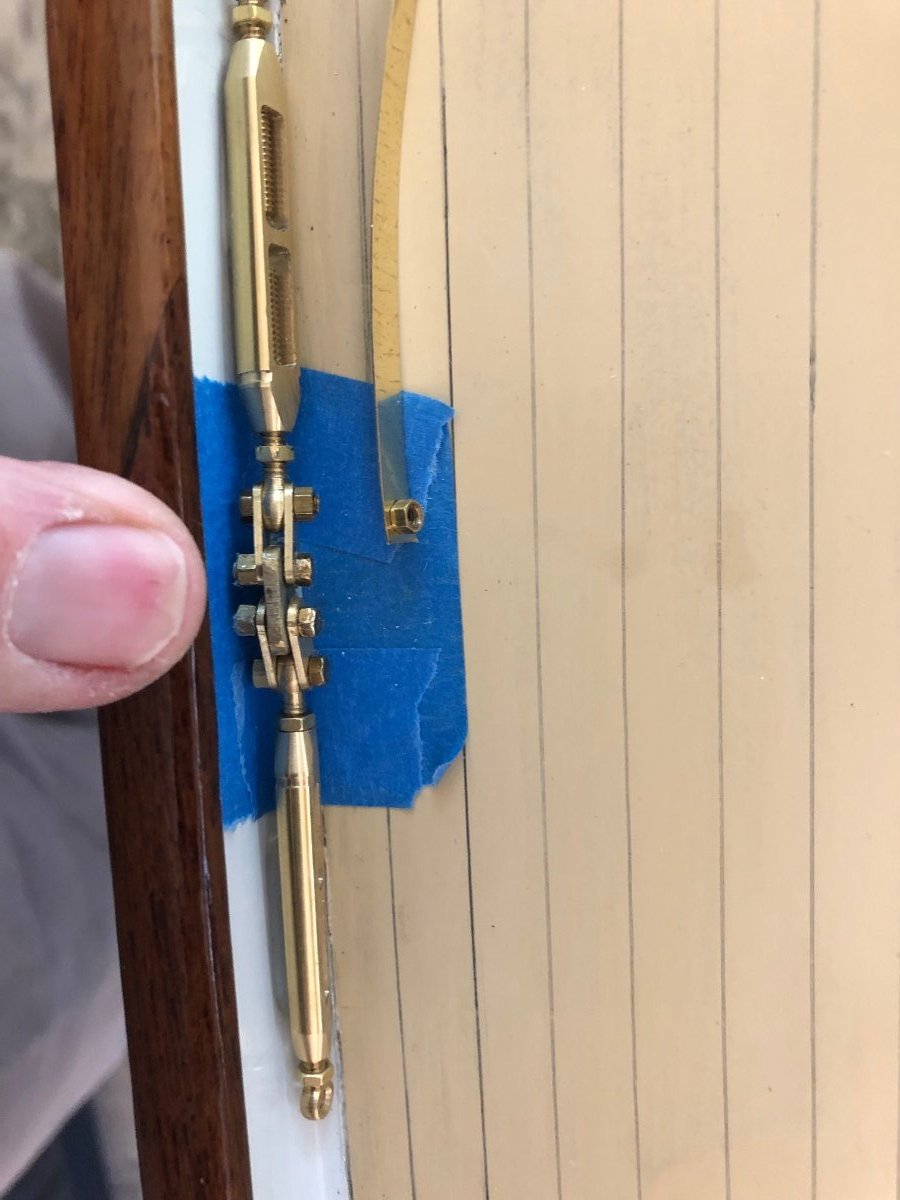
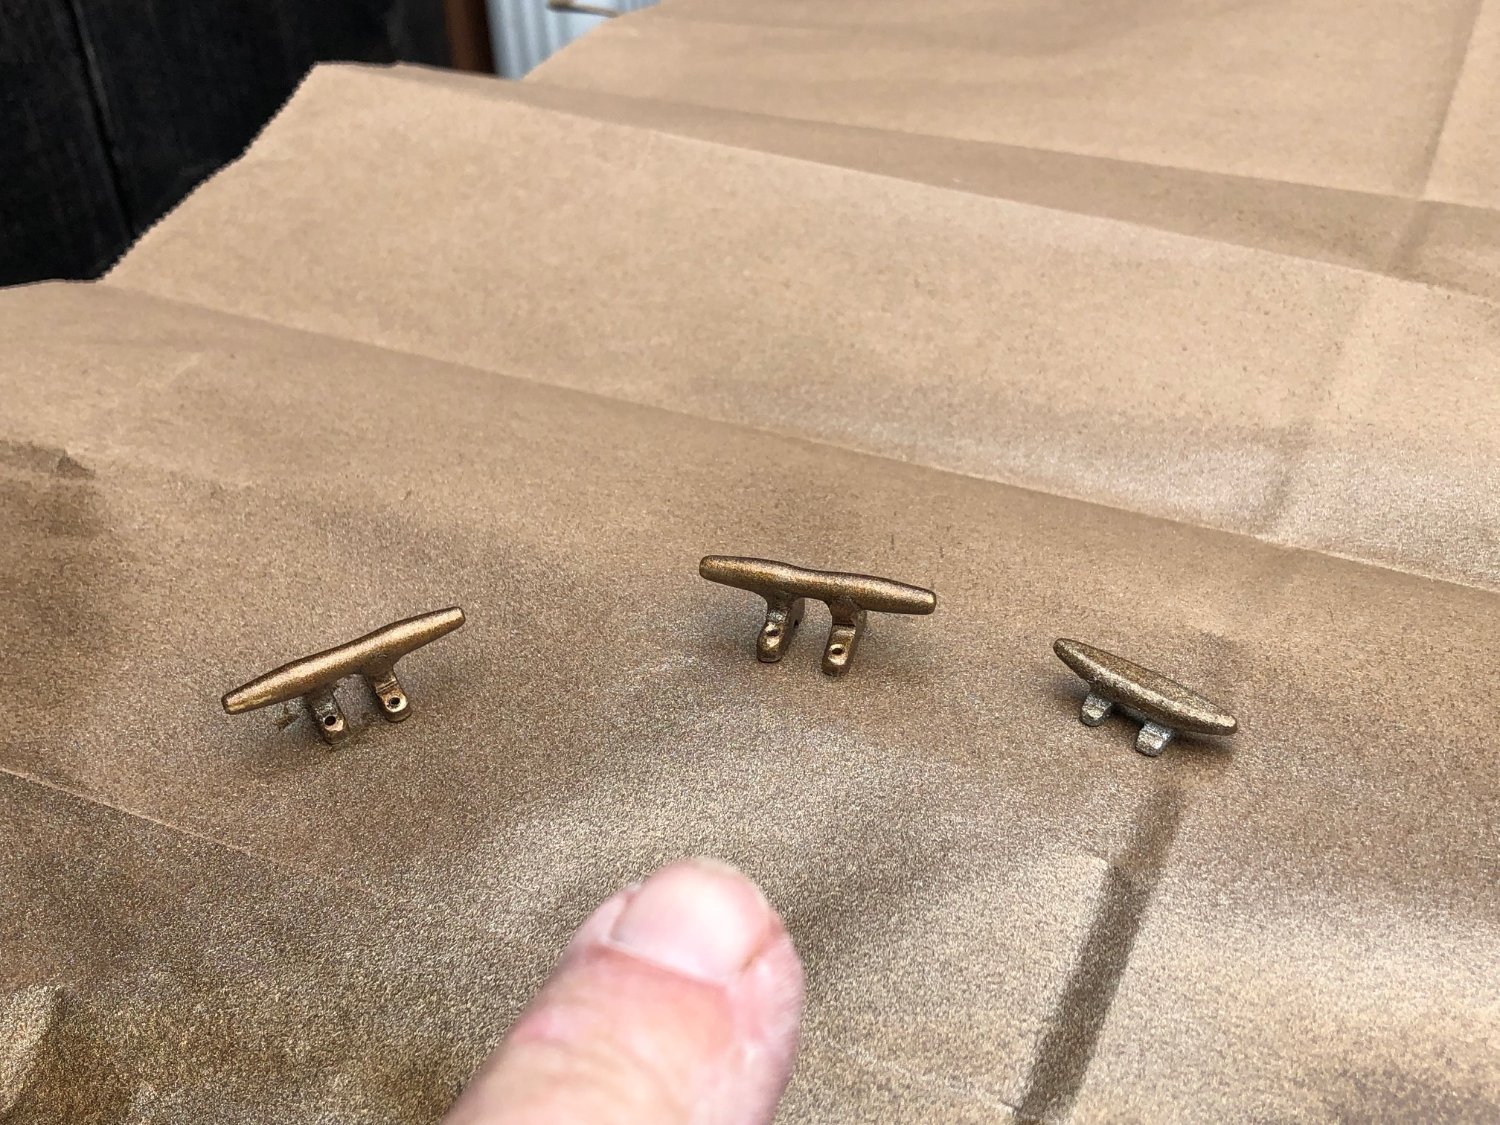
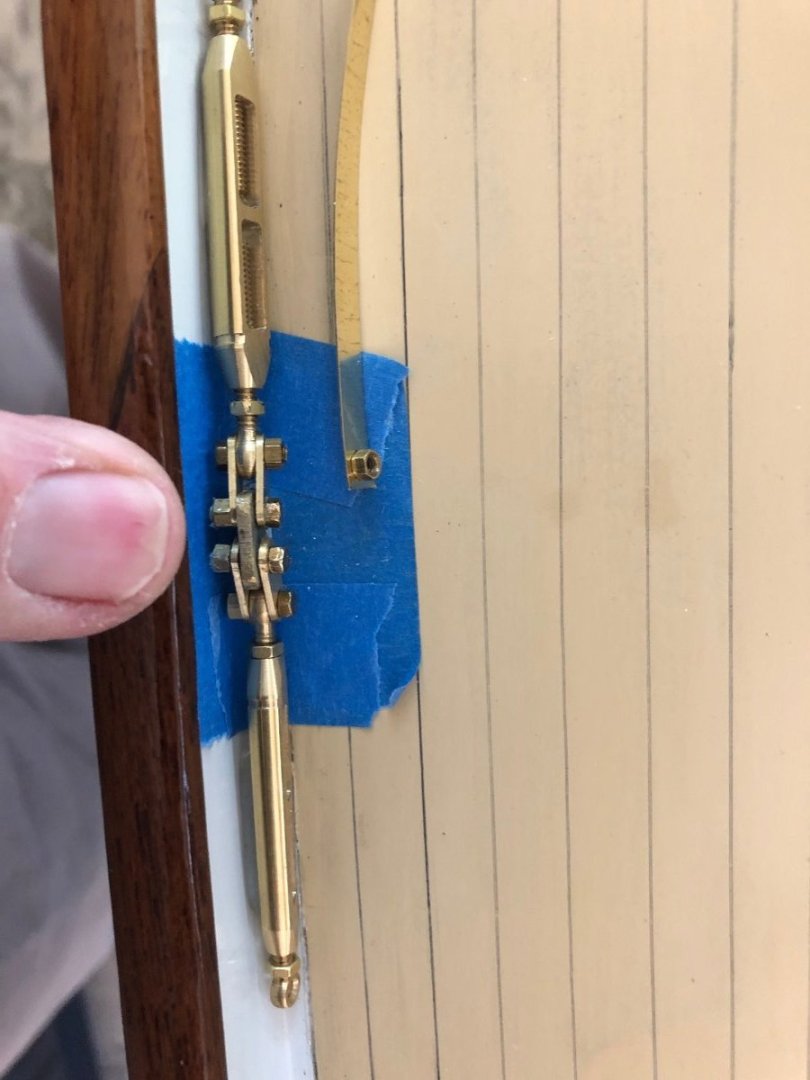
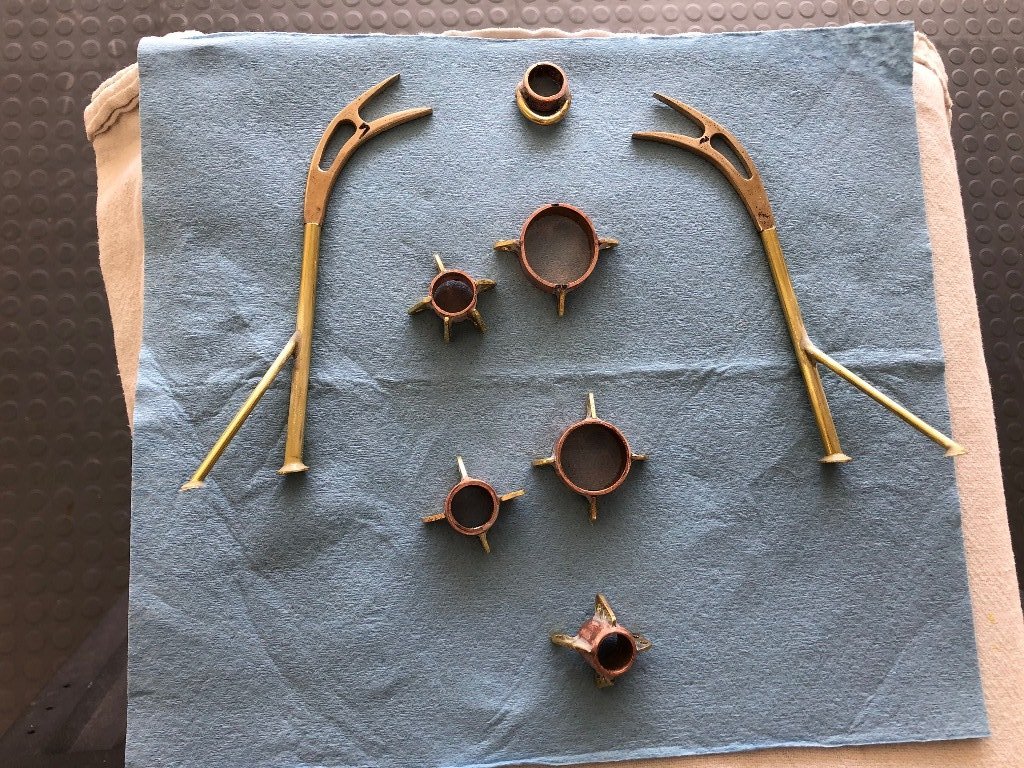
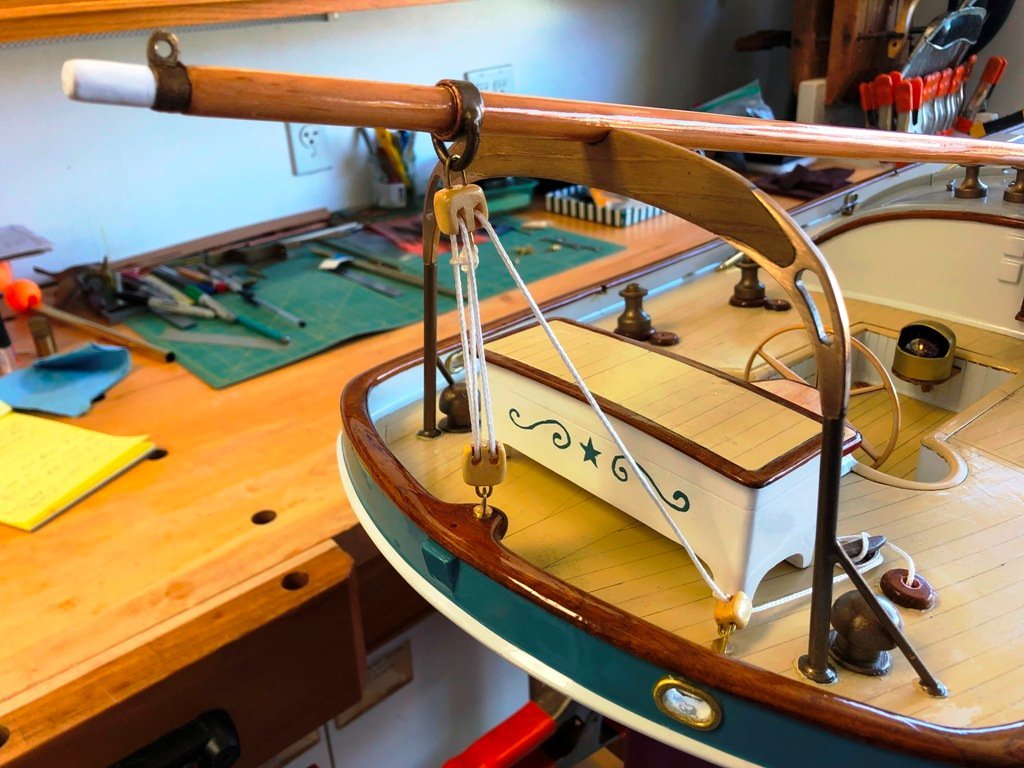
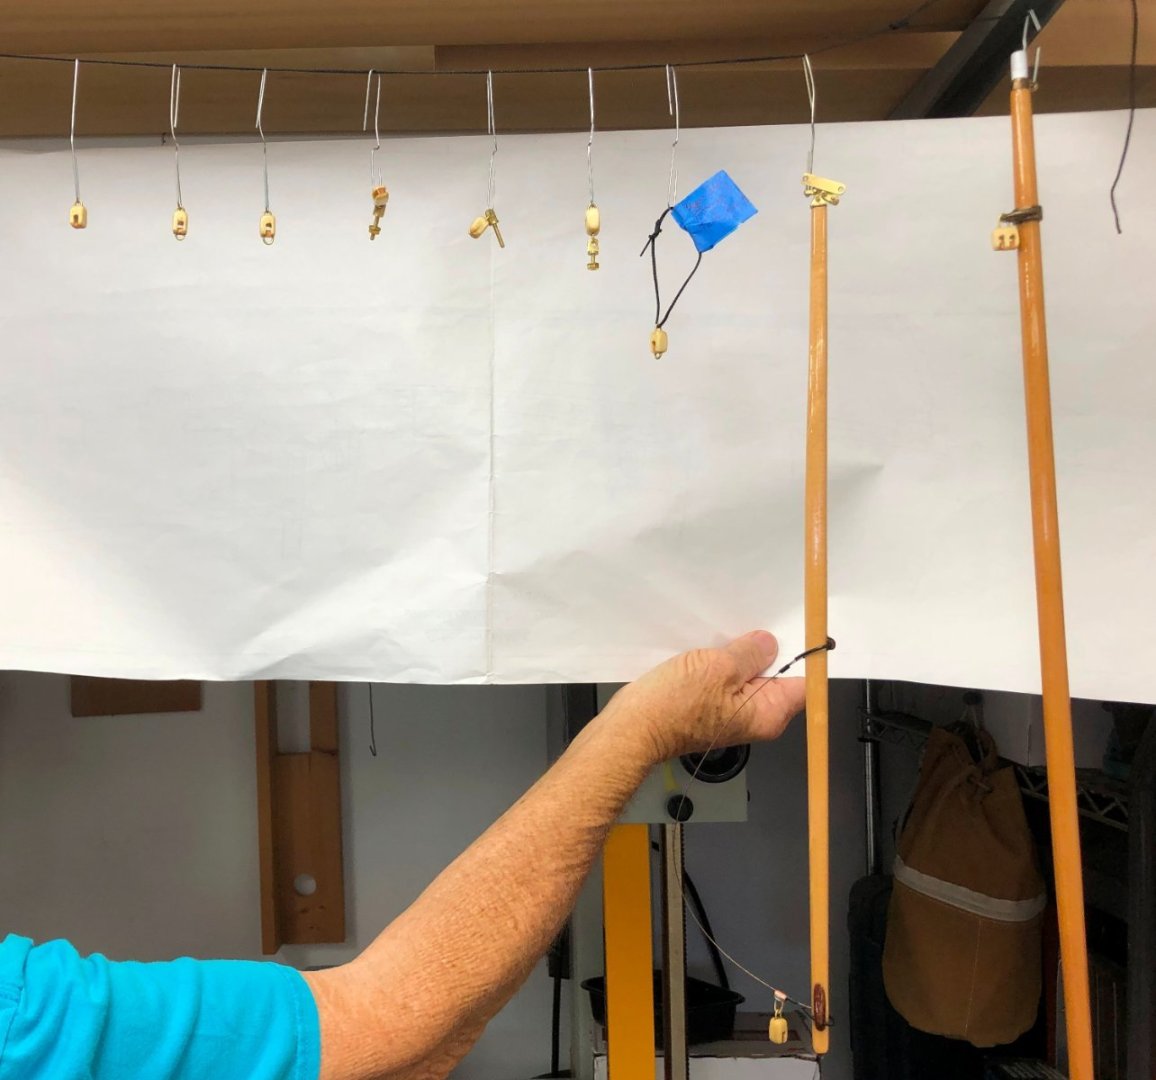
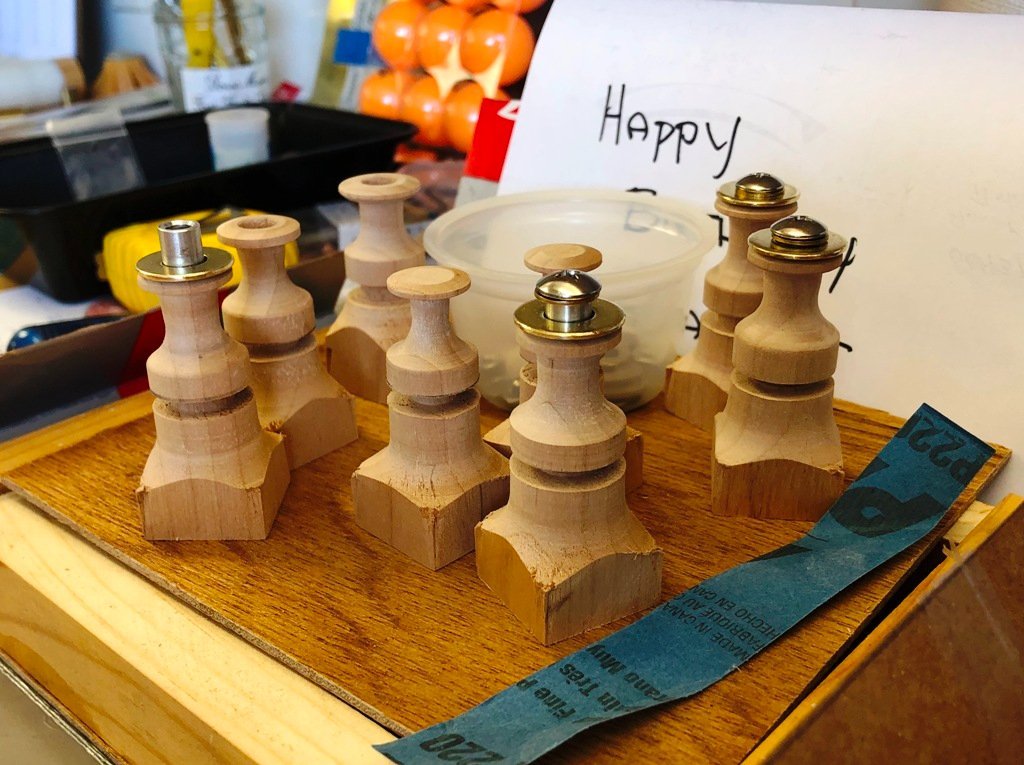
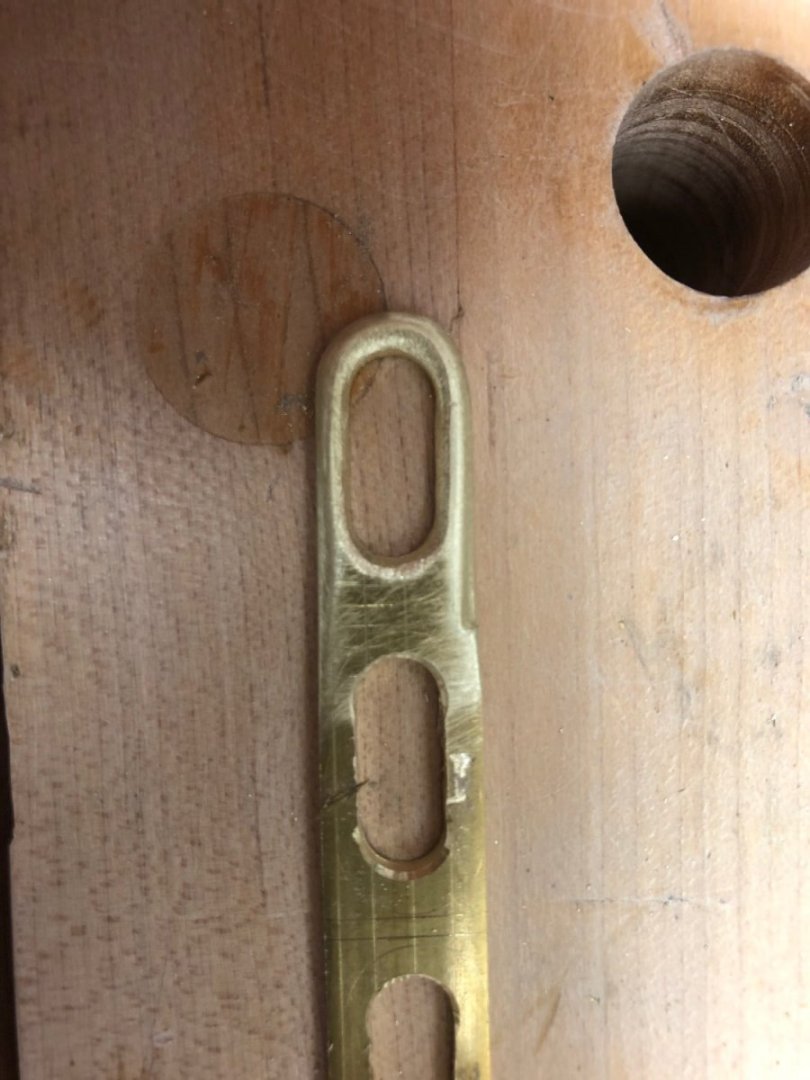
 To finish up today's posting, I will add some photos of hardware installation. The boom gooseneck (and later, the gaff car) came from a retired USCG man living in Florida who was manufacturing brass sailing hardware. The rest of the hardware, such as the pinrails, stanchions, sway hooks, tracks and sail cars were efforts on my part. (I certainly hope to acquire a small lathe prior to the next model...) I used a drop of CA glue on a brass strip to hold the #2 nuts in alignment while tightening the turnbuckle mounting bolts. I confess to a fair amount of frustrated swearing during this exercise in patience. Until again.
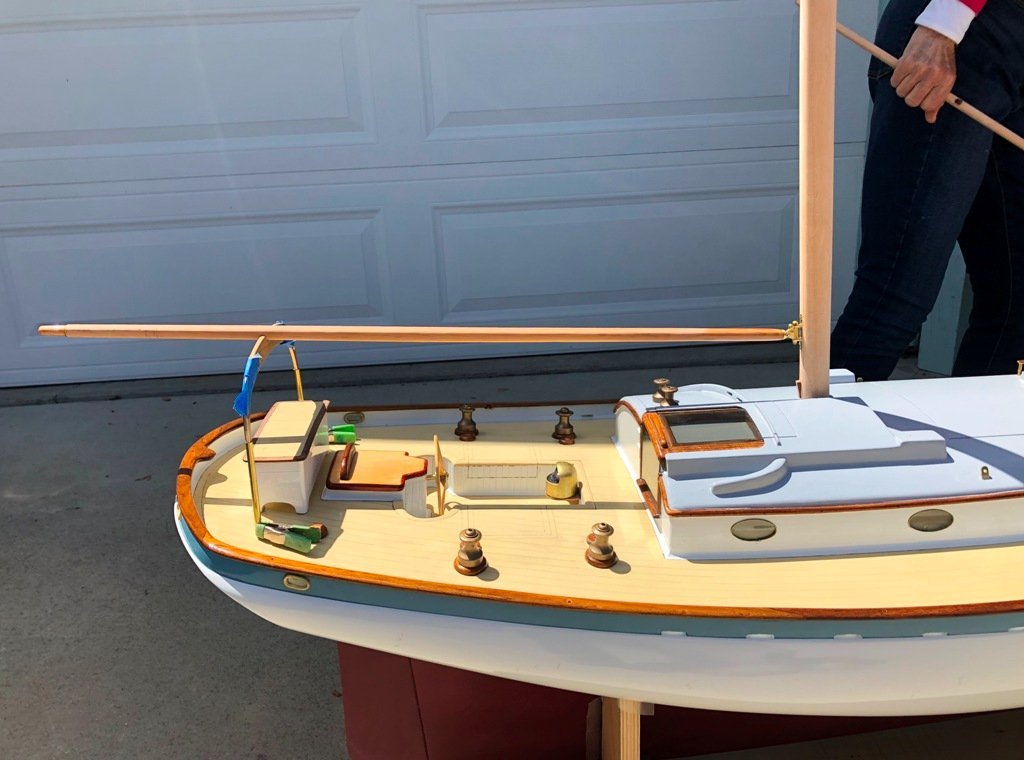
-
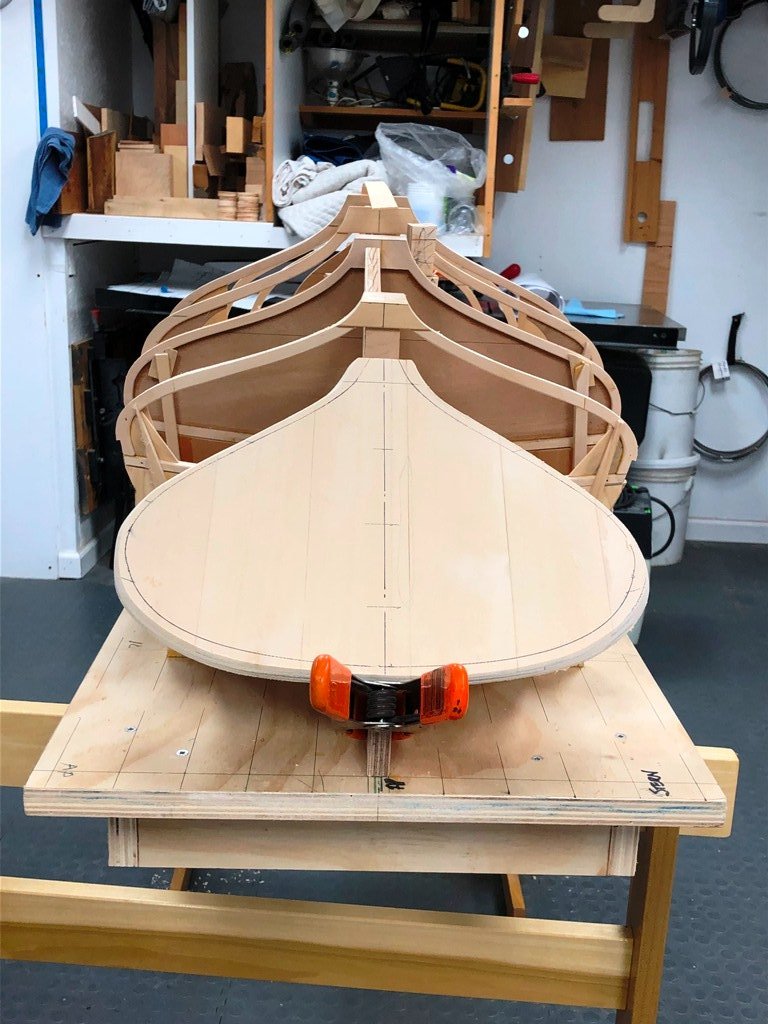
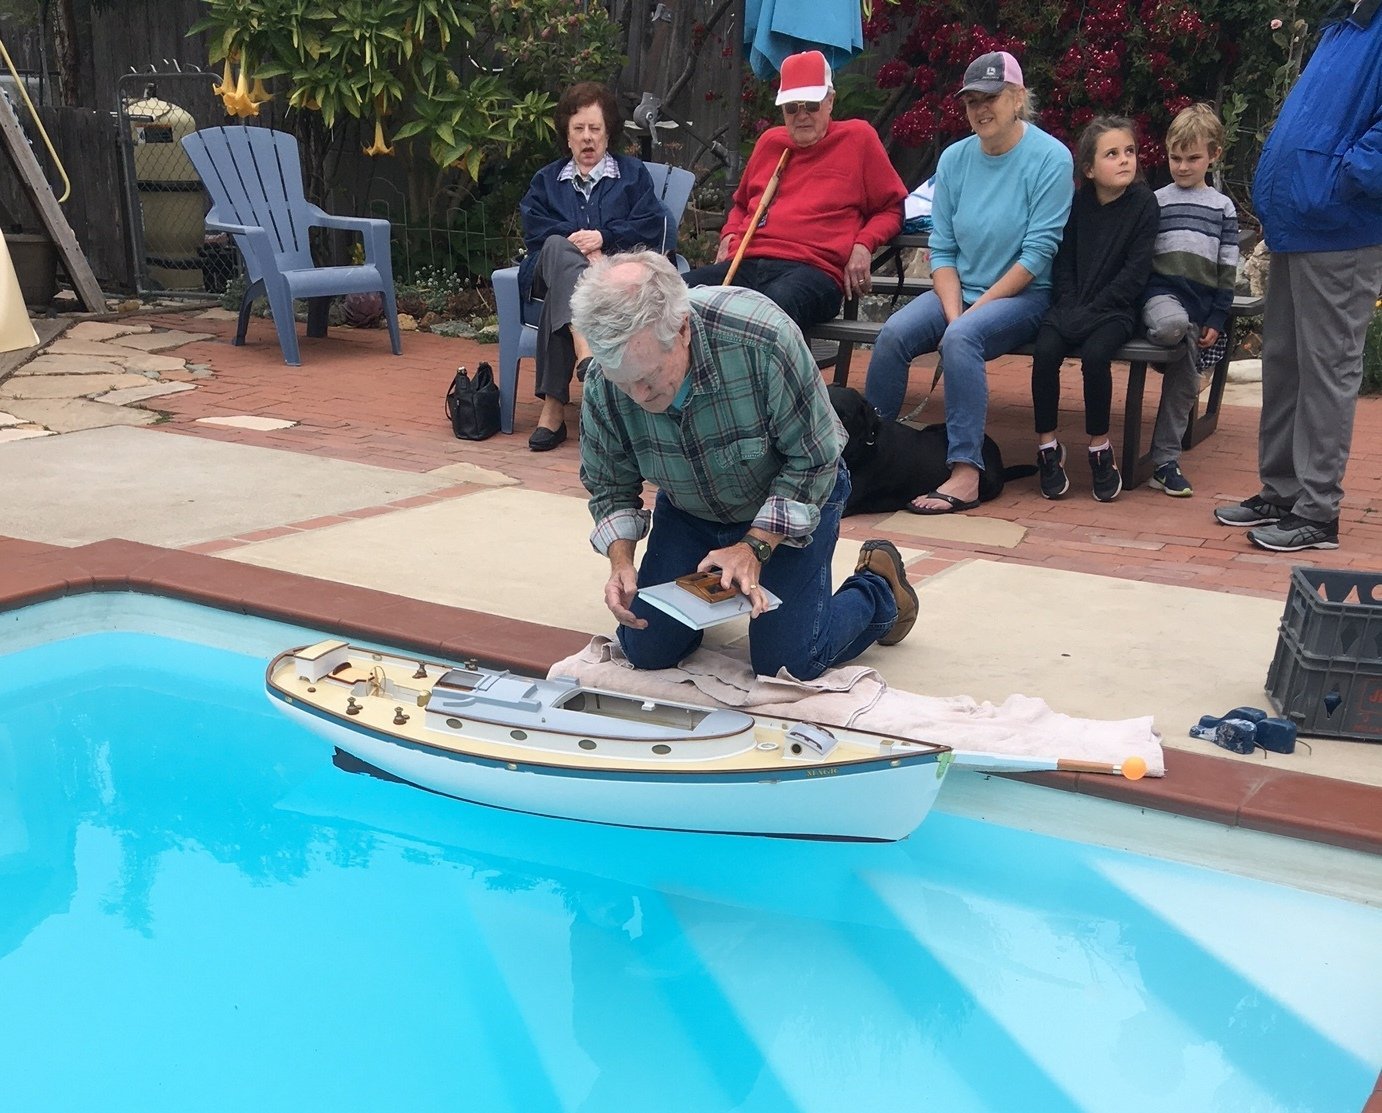
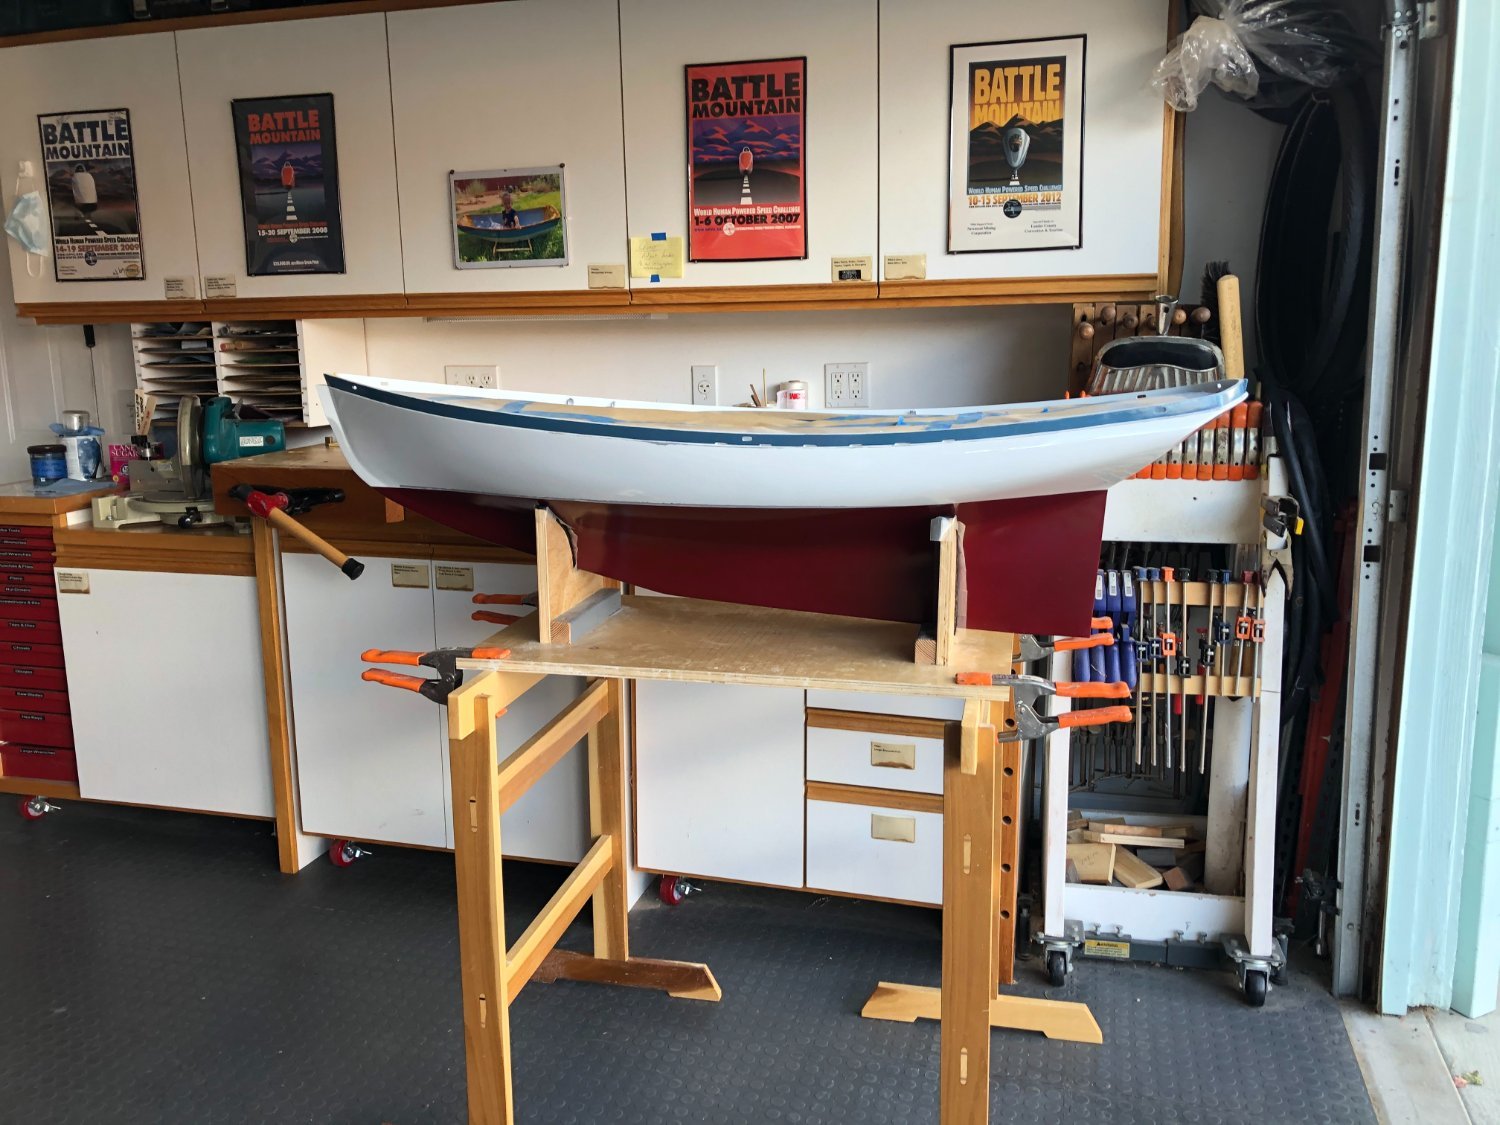
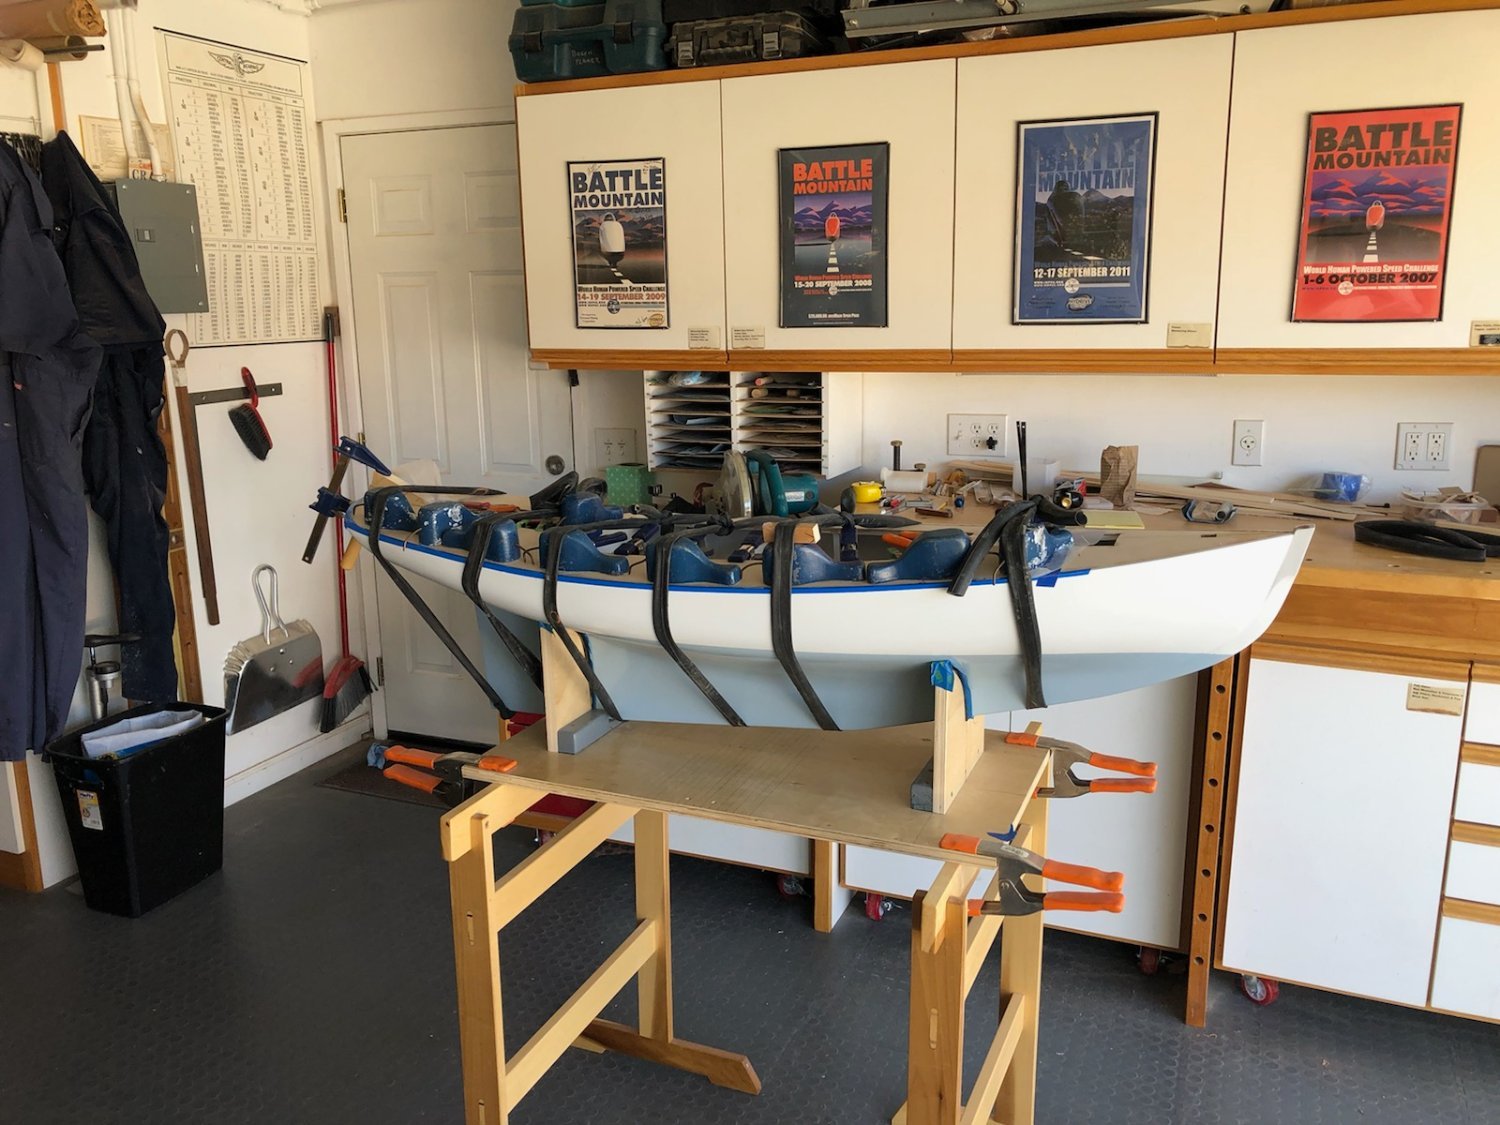
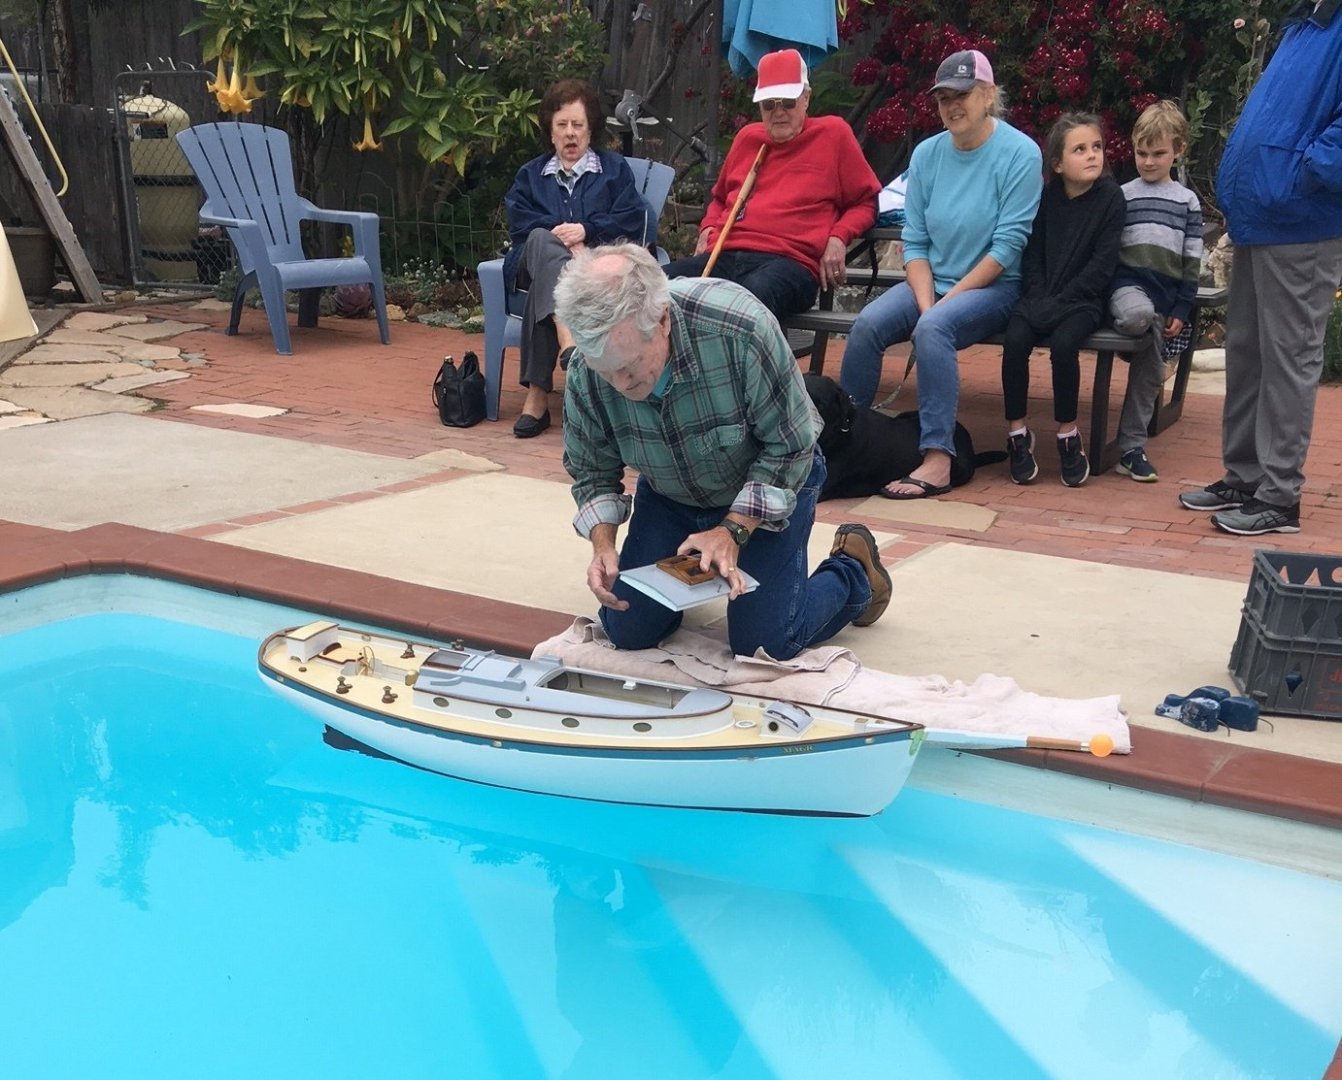
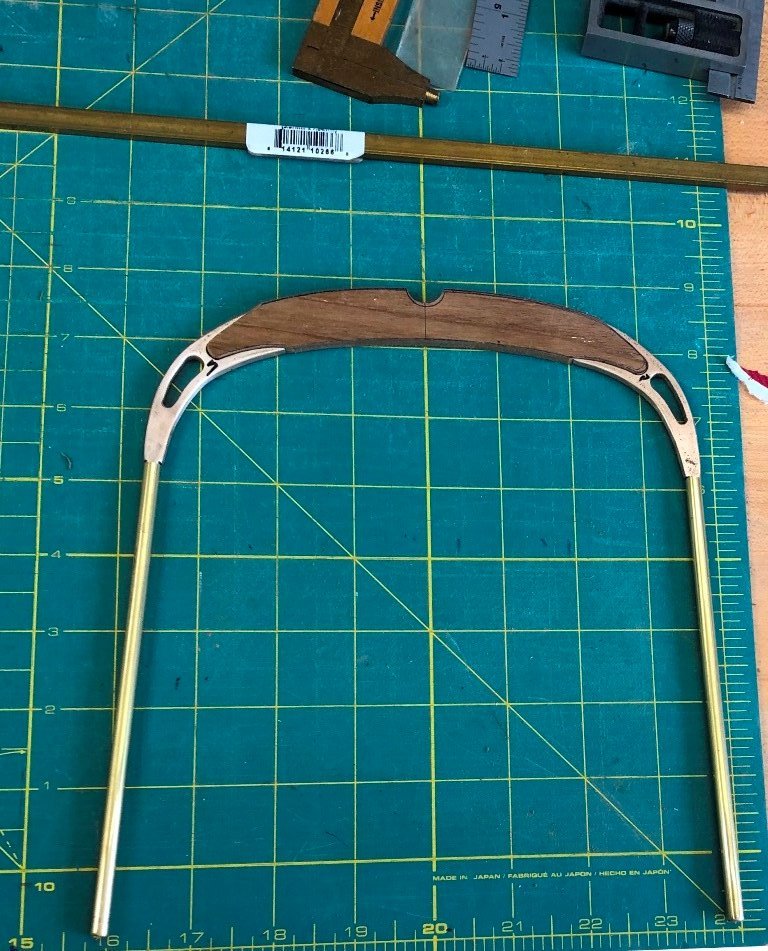
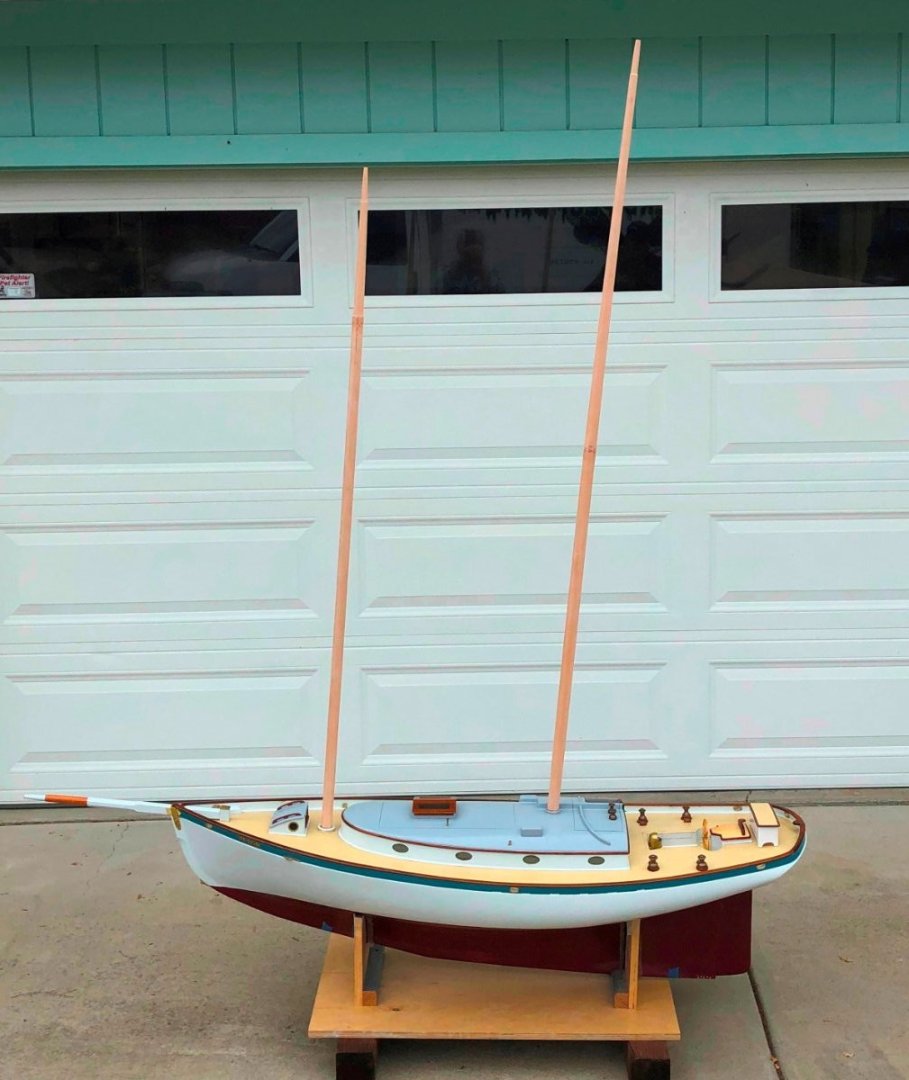
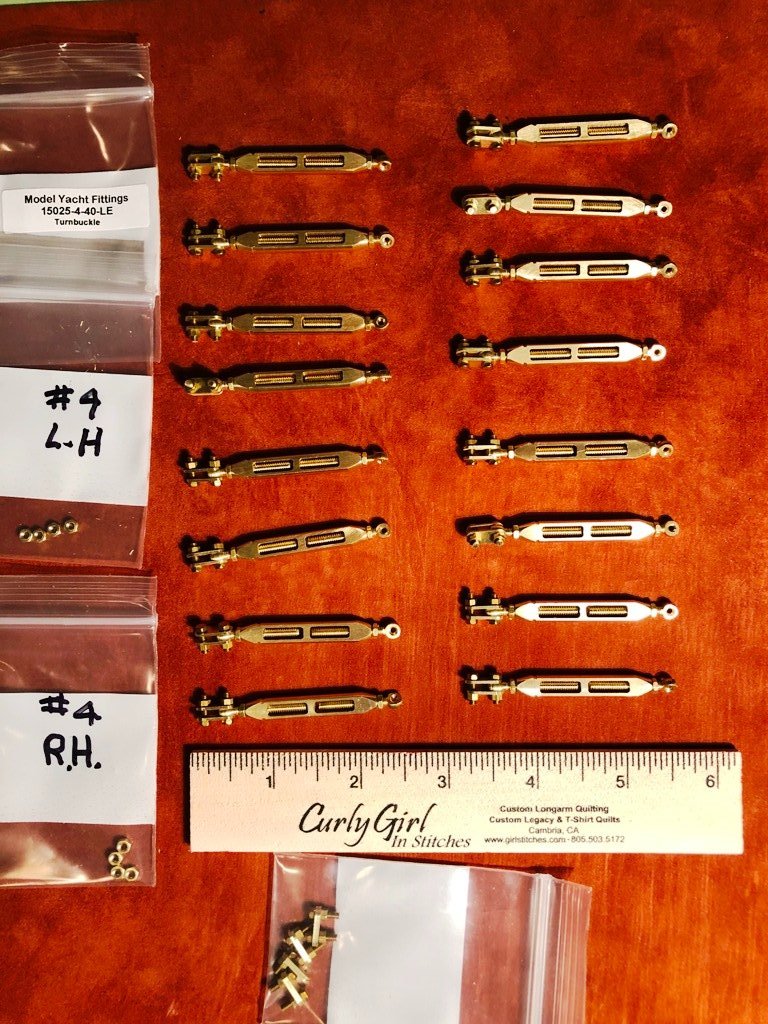
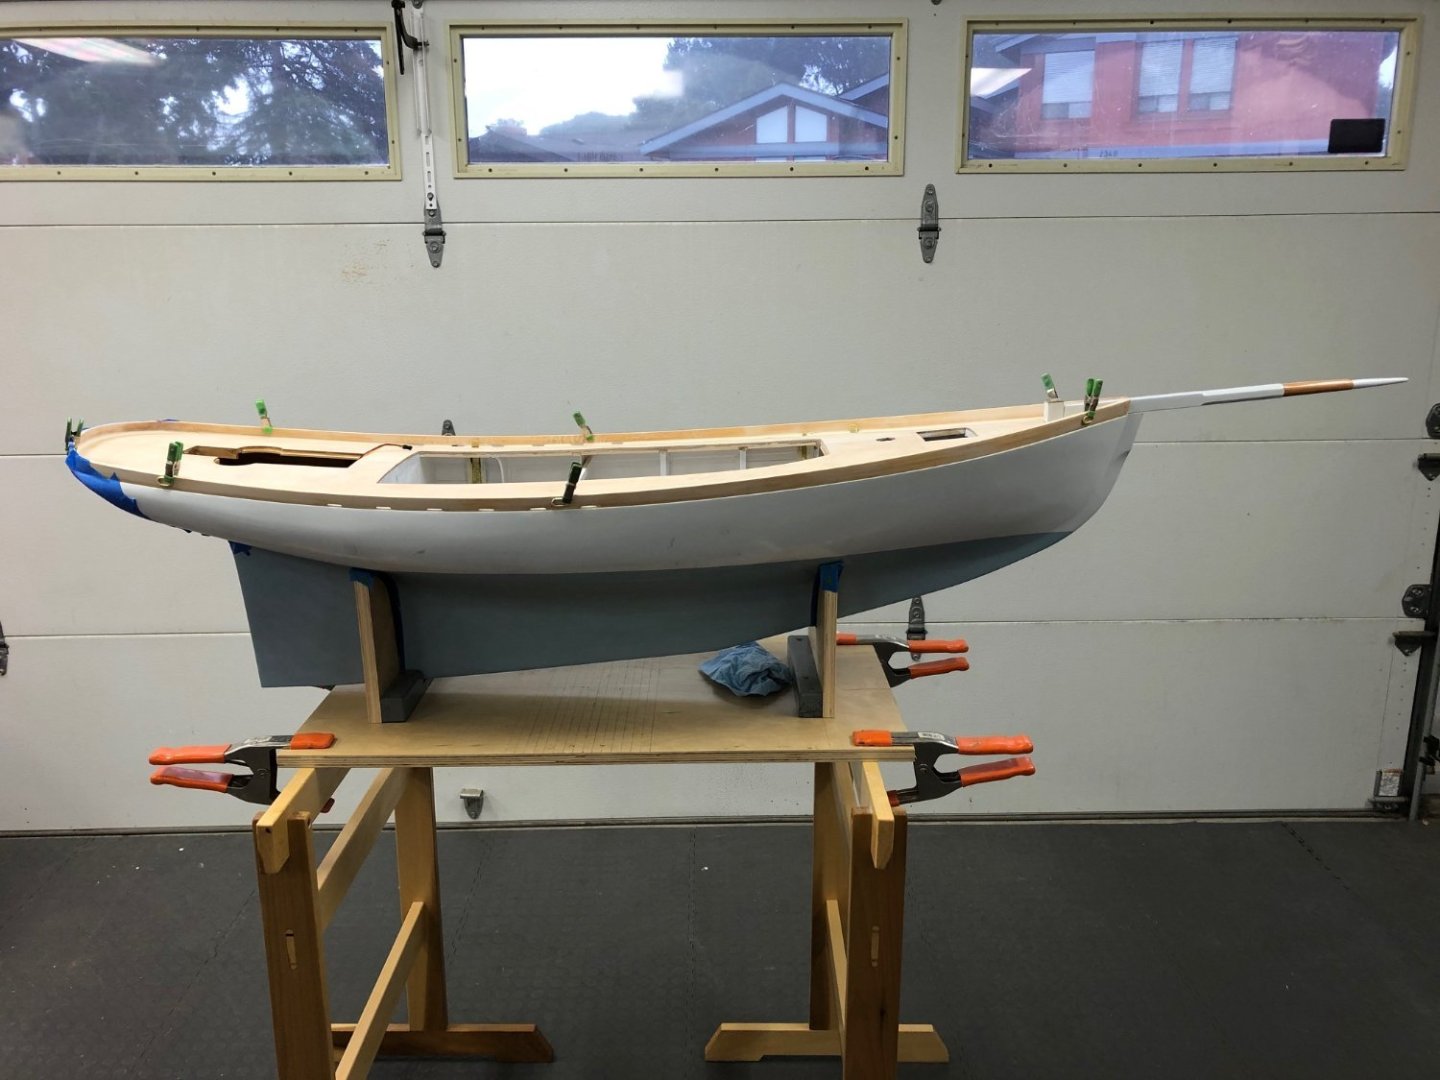
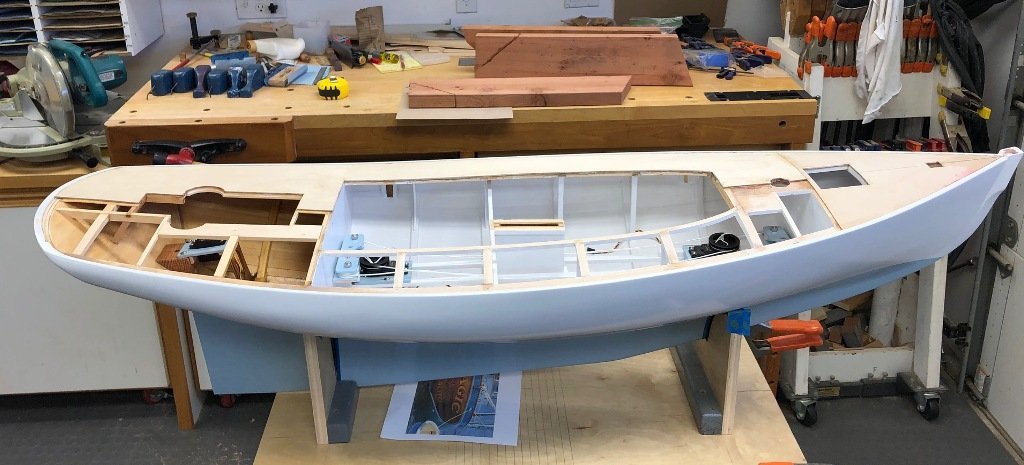
While Vicky continued with her detail varnishing, I made arrangements to visit a neighbor's pool to conduct a displacement and trim check. The boat was weighed on a scale beforehand without ballast or rig and then at the pool, calibrated weights were added into the bilge to bring her down to her waterline. Weights were also adjusted fore-and-aft to tweak the trim. Allowing weight for her rig and sails, most of the remainder would be configured into her ballast bulb. (Yes, I did factor in the difference between freshwater and salt water buoyancies.) The aft-mounted propane locker - carved from a block of AYC with teak trim - had been finished and mounted by this time. I was pleased that the location of the ballast keel trunk proved to be in the correct fore and aft position. After the float testing, MAGIC returned to the building cradle for more work. I built the hollow spruce masts and once shaped, we trial fitted them to check rake angles and standing rigging lengths. Here, the glued mainmast is curing and the early stages of the boom gallows fabrication from brass tubing, bronze plate and teak is shown. More bits of hardware The boom, gaff and a variety of blocks were made and varnished The turnbuckles arrived from Florida and the mainsheet arrangement was trial fitted. The first "raising of the masts" showed that the rake angles needed a bit of tuning.

-
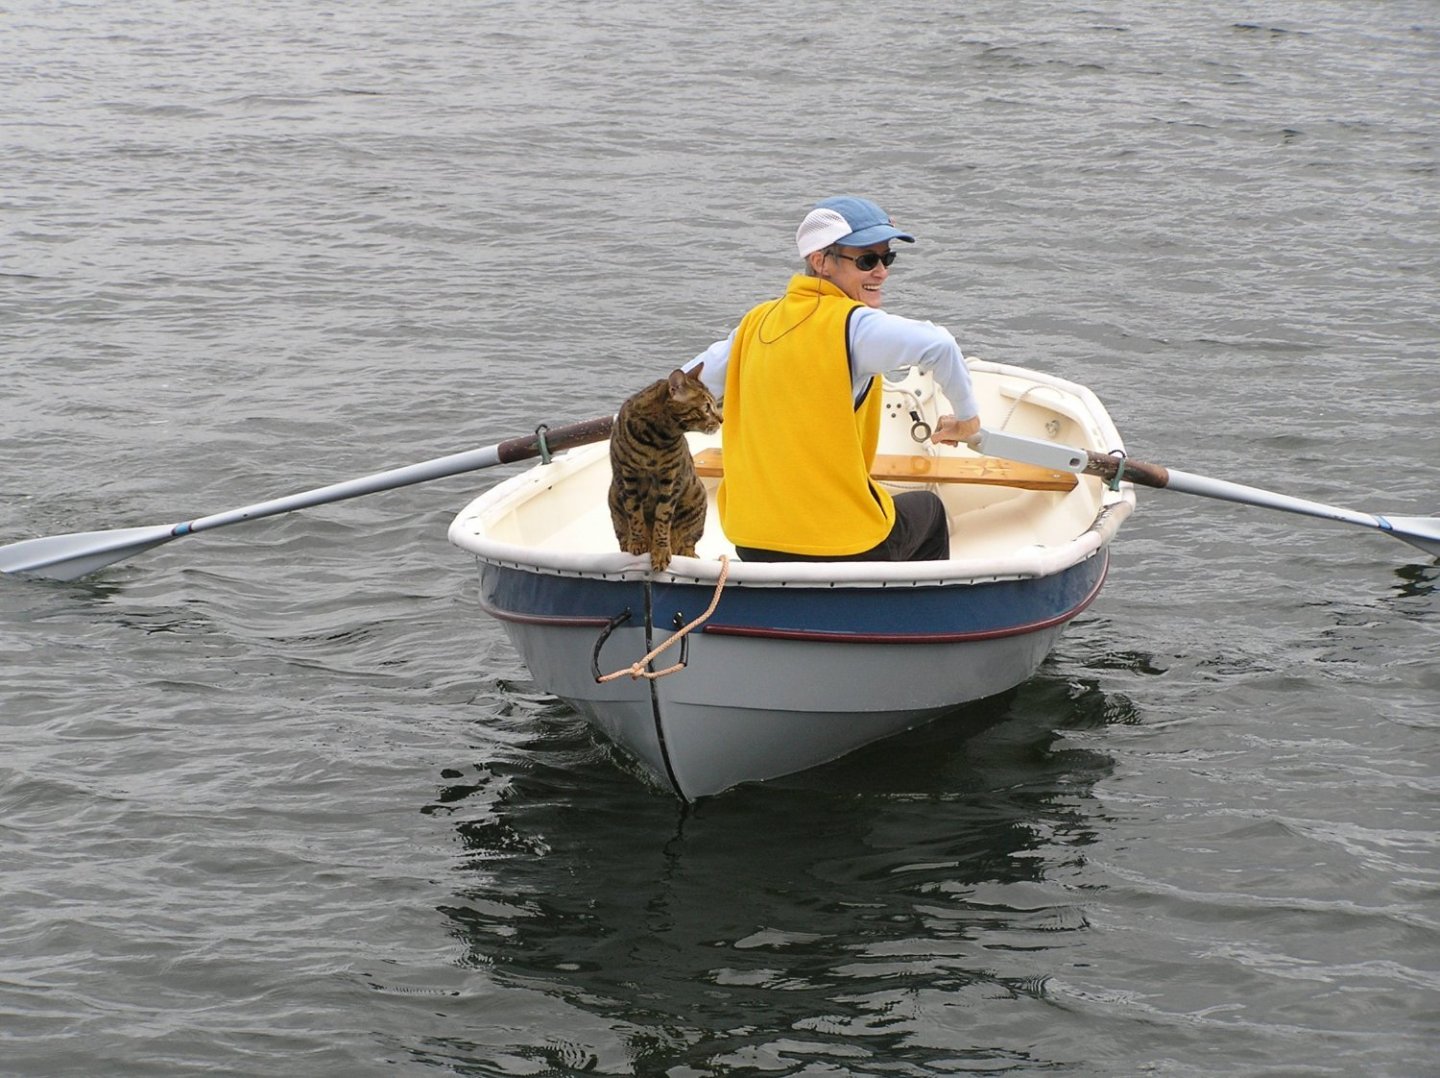
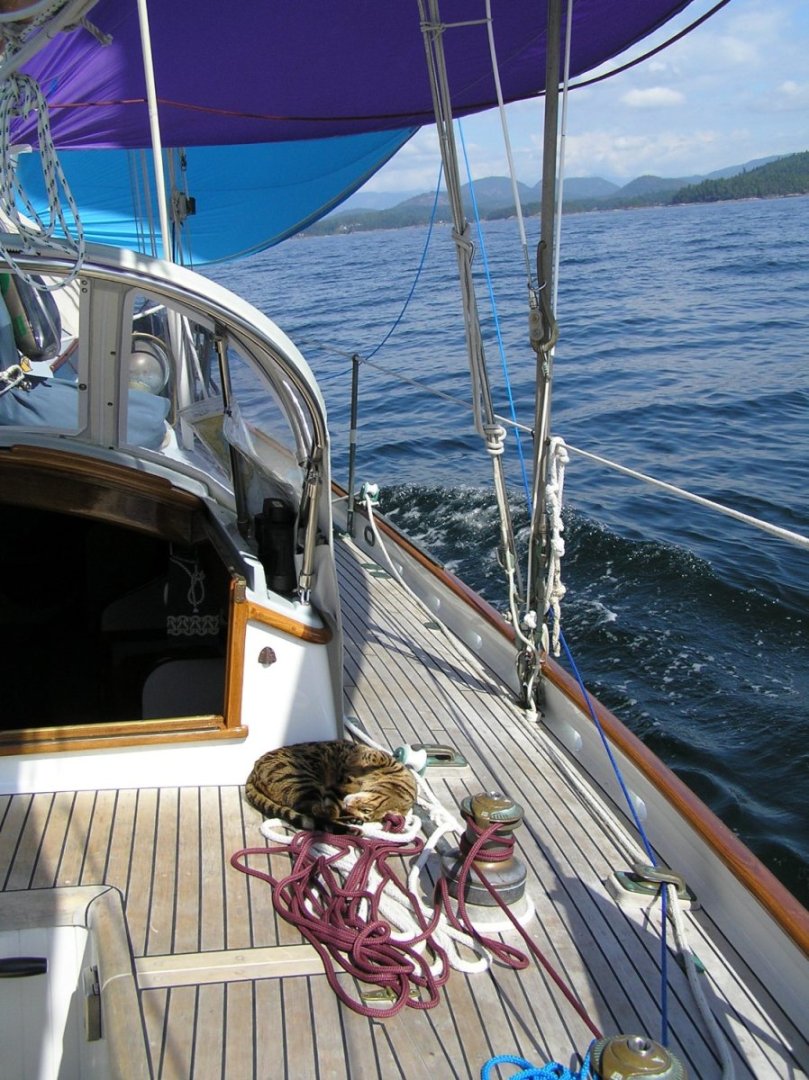
That character was Archie, a male Bengal who loved being on the boat, but also loved serving as a figurehead on the Shellback dinghy when Vicky would go for a row. A bit of a sensation in an anchorage.
-
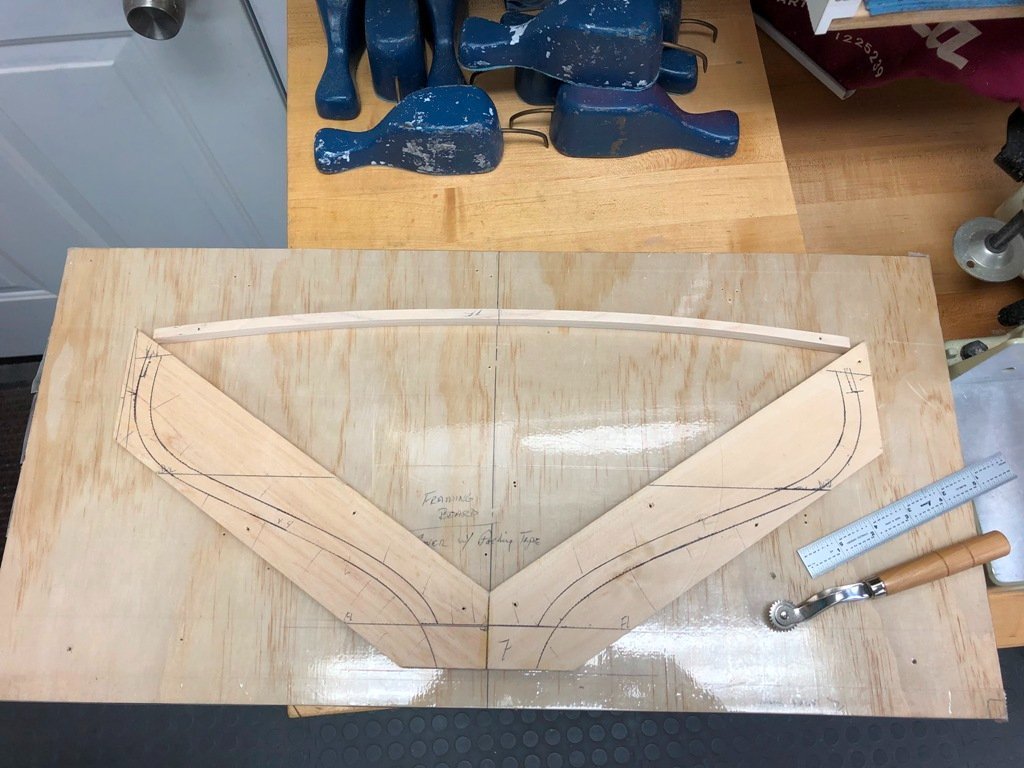
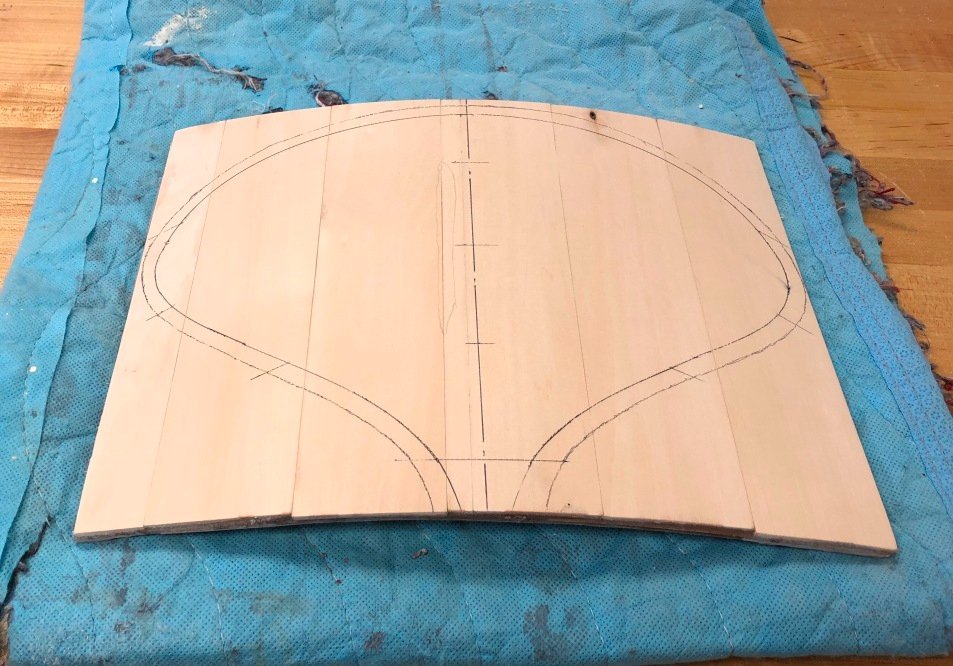
Hermann: I used an older plastic drafting spline (which happened to be the correct width) for inking the deck planking strakes. MAGIC's deck planking was laid to follow the curve of the sheer, intersecting the king plank at the end of the runs. The first line was drawn one spline width inboard of the covering board, with the spline held in position by lead "ducks". I did one side and then moved the spline to the opposite side of the deck to do the matching line. The longest lines were these outer lines. When the "permanent water proof" ink dried, I moved back to the first side and used the spline width to space for the next inboard "seam". Back and forth between the two sides. Before too long, the spline was too long to fit onto the deck without interference from the bulwark on one end or the other. So, I trimmed it shorter. Once the side decks had been marked, it was necessary to use shorter pieces for the bow and stern areas. Not too surprisingly, any small errors in width spacing were magnified from port to starboard as the longer angled ends met the king plank, so some subtle adjustments to the widths were made to minimize the visual discrepancies. While the finished lining out was lovely when new, I did not wholly trust the "permanent, waterproof" claims and decided to lay a thin coat of varnish over the painted, lined-out deck. Over time, the lines have faded noticeably. So, perhaps not the best choice for a deck planking lining-off method.
-
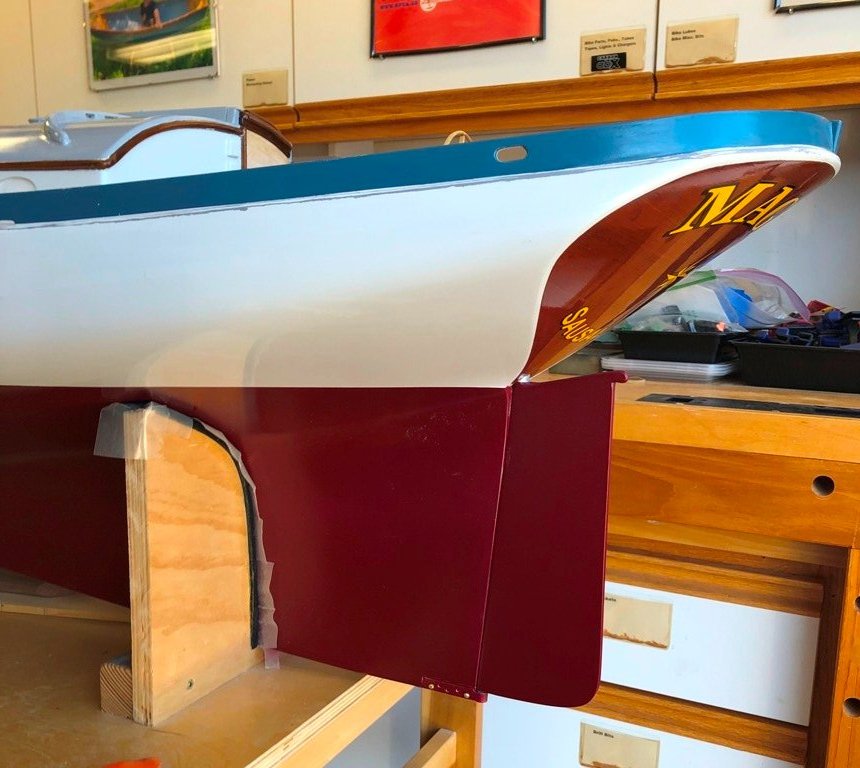
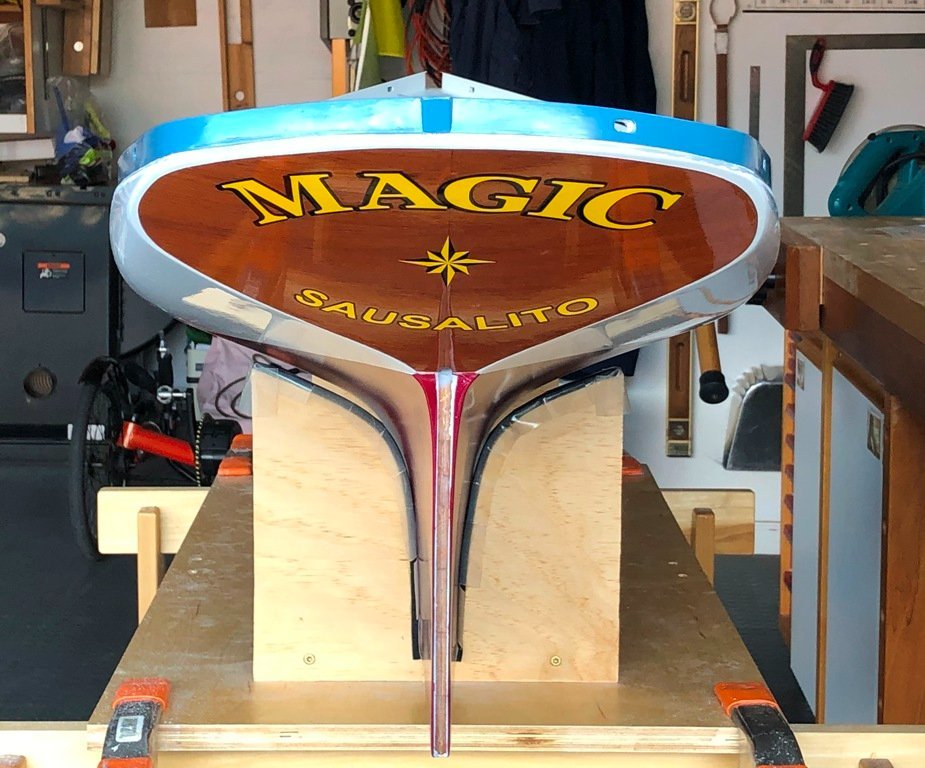
CCoyle: I grew up in Los Altos but the homeport was a quirk. Vicky and I had sold our home to pay for MAGIC but at the time the USCG required an actual seaport to be listed on the transom. Fortunately, my sister lived at that time in Sausalito and we used her address for documentation purposes. It seems that each of MAGIC's 3 subsequent owners don't want to change it.
-
Hang on, Bob. The answer shall become clear. Patience, my friend. 😉 (Yes to your question).
-
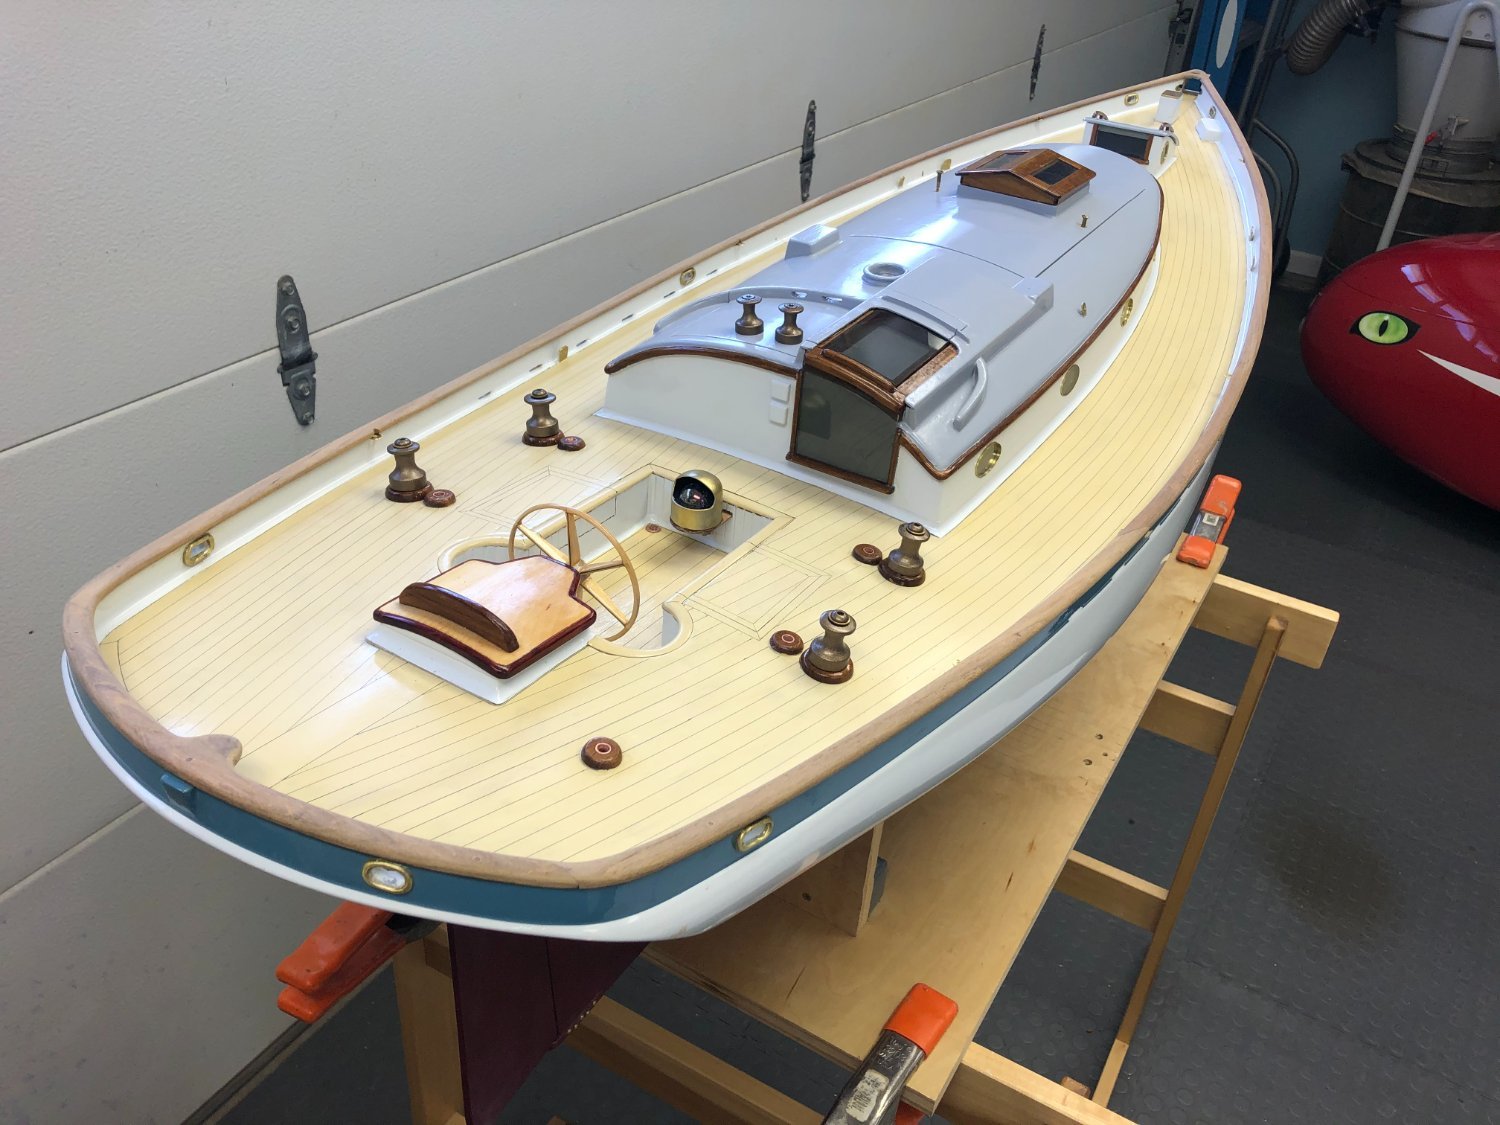
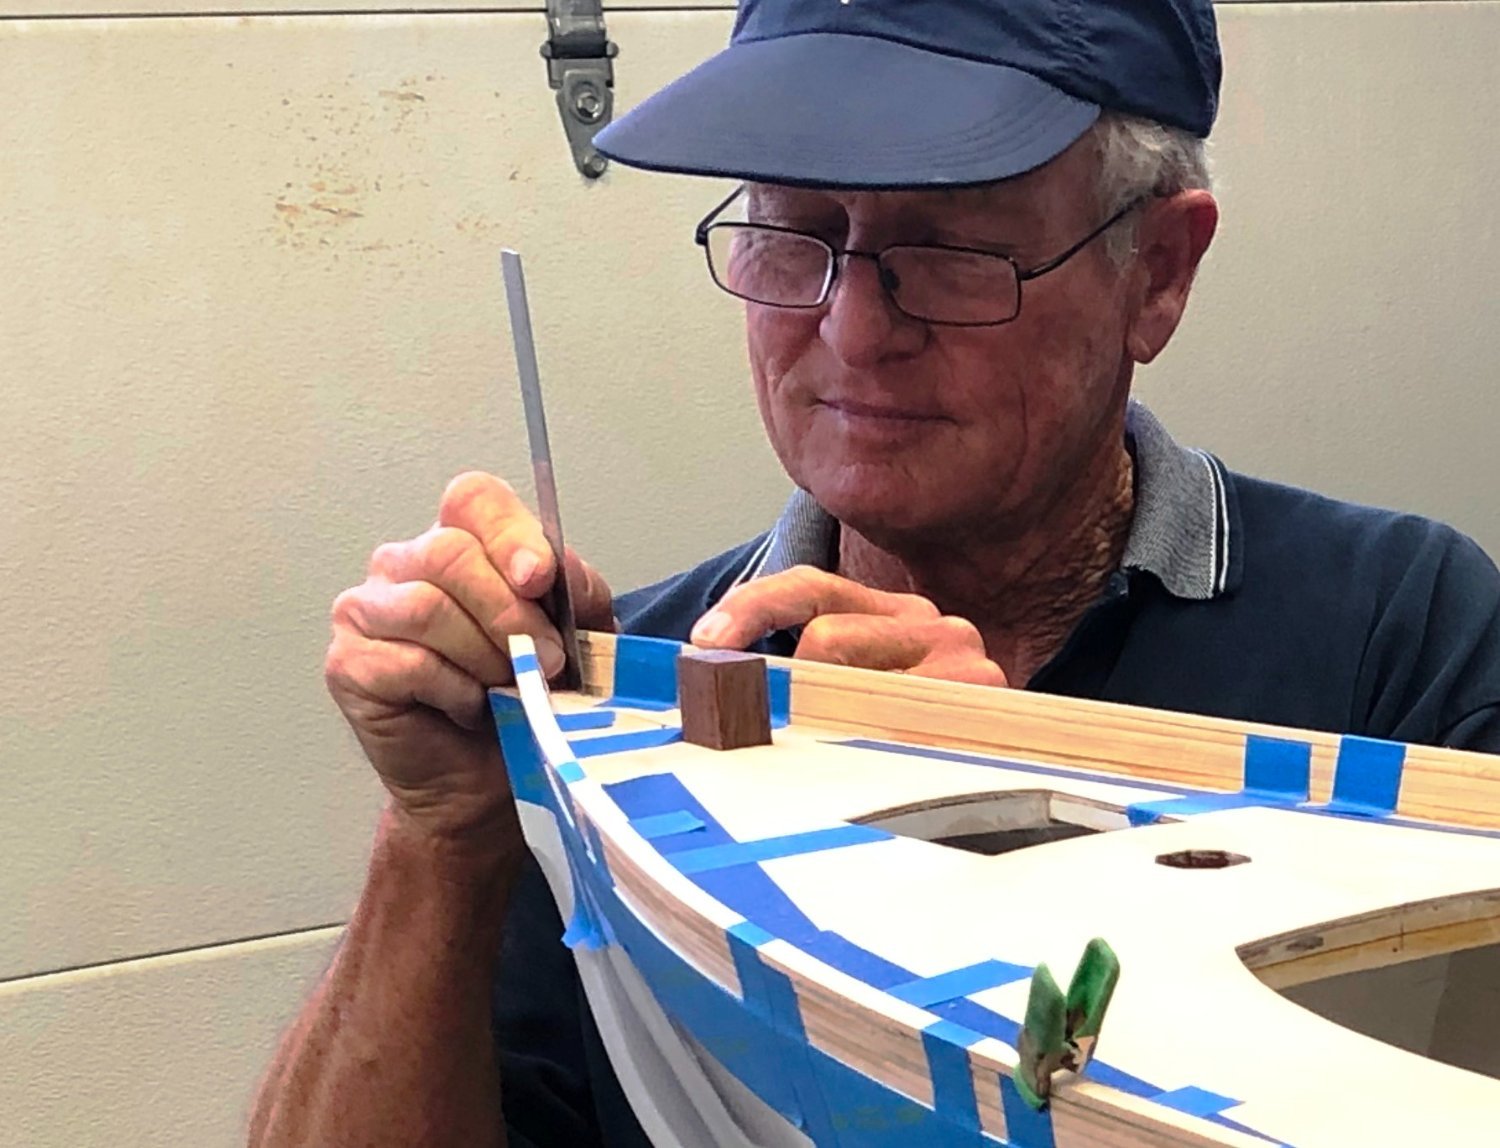
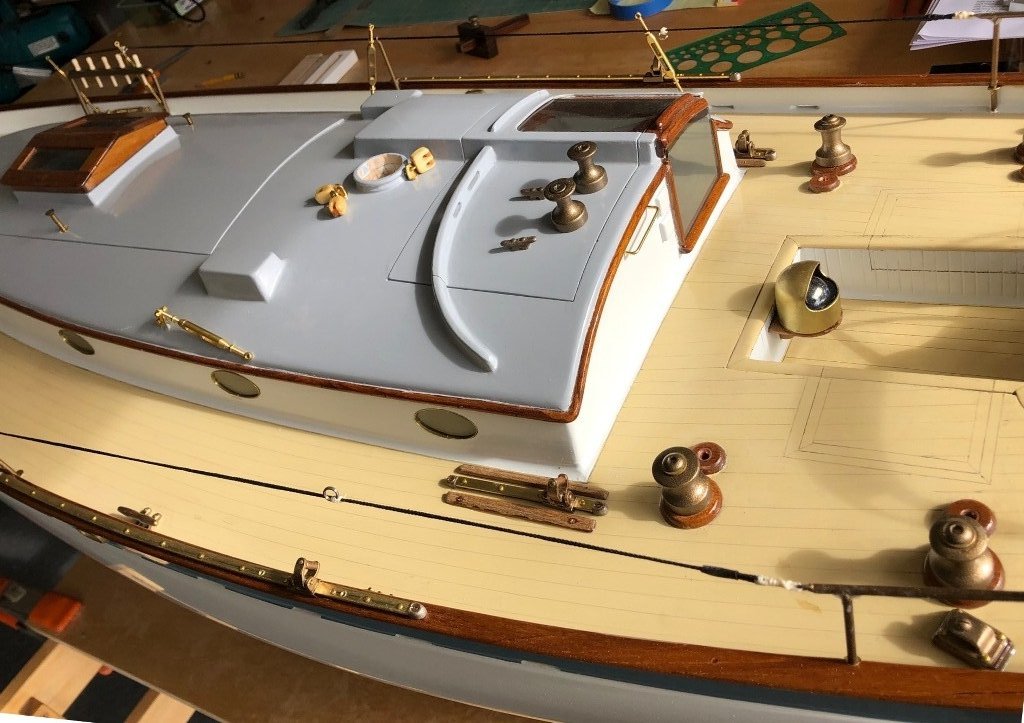
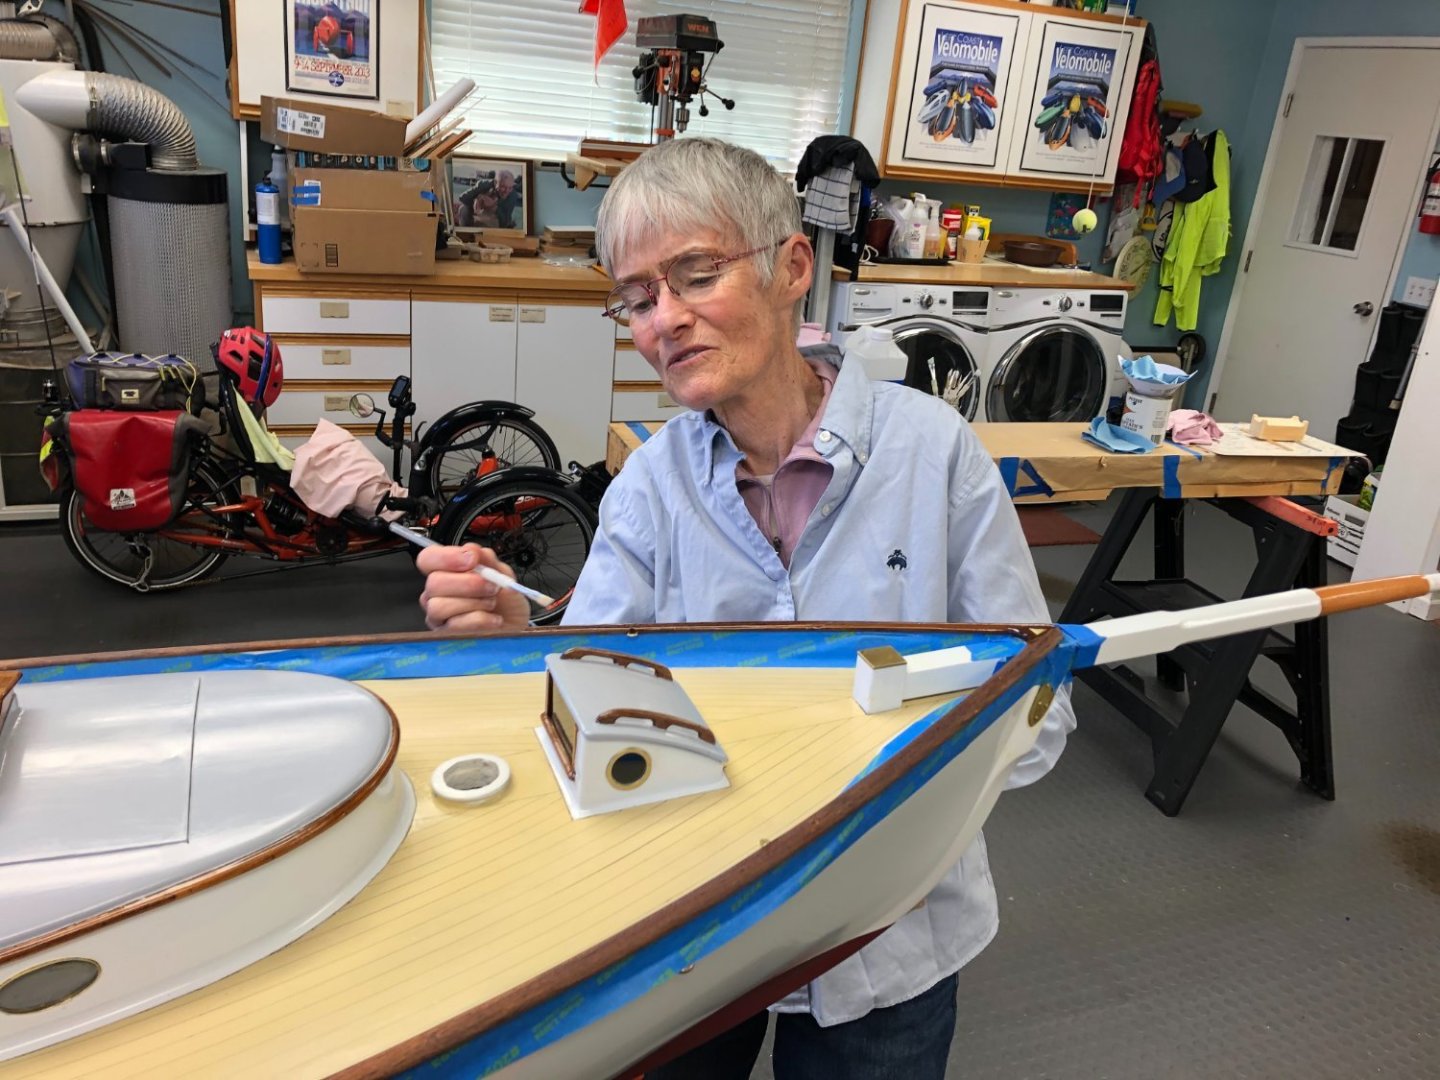
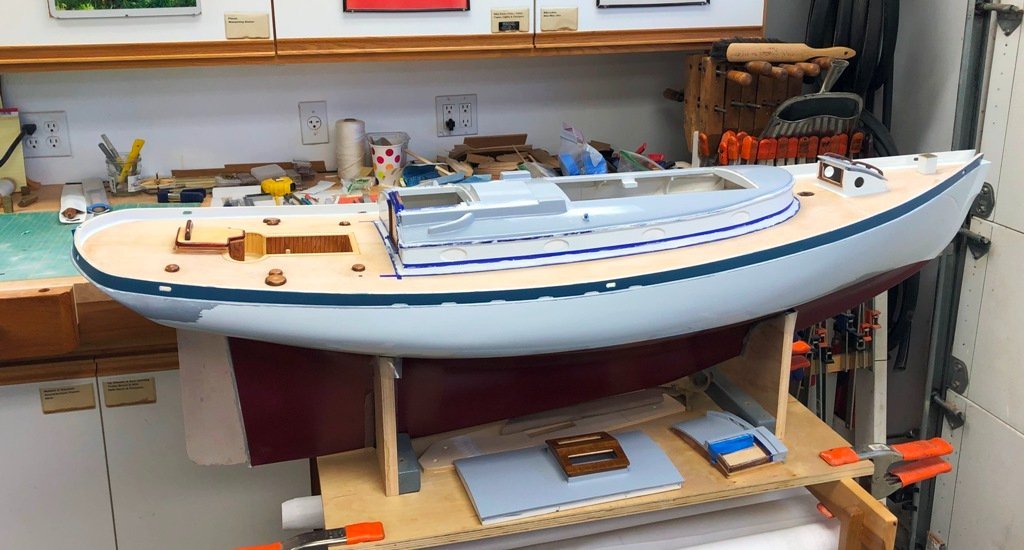
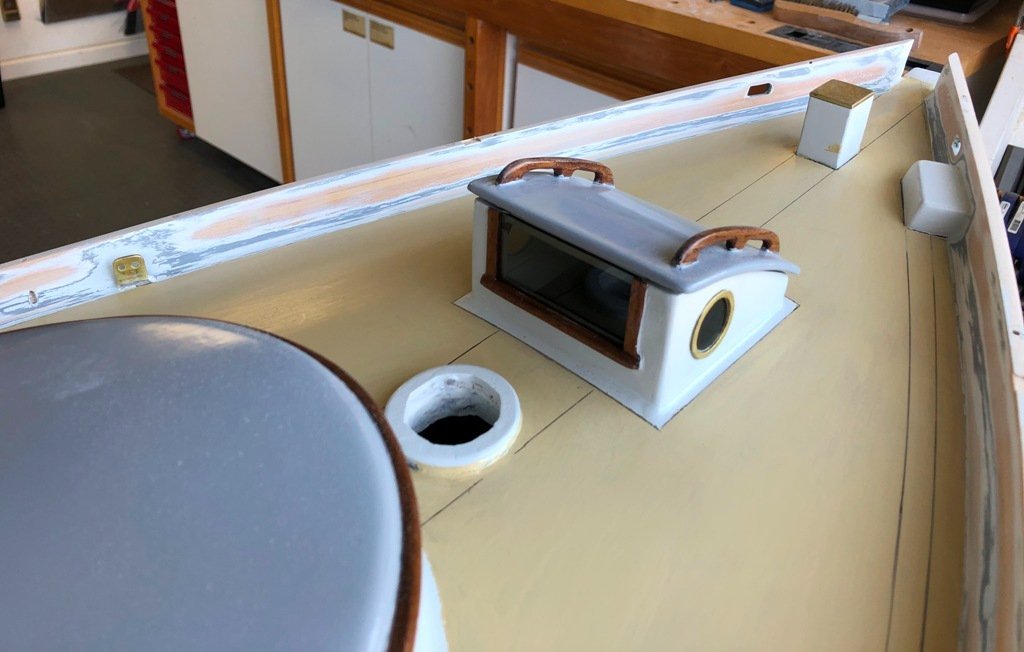
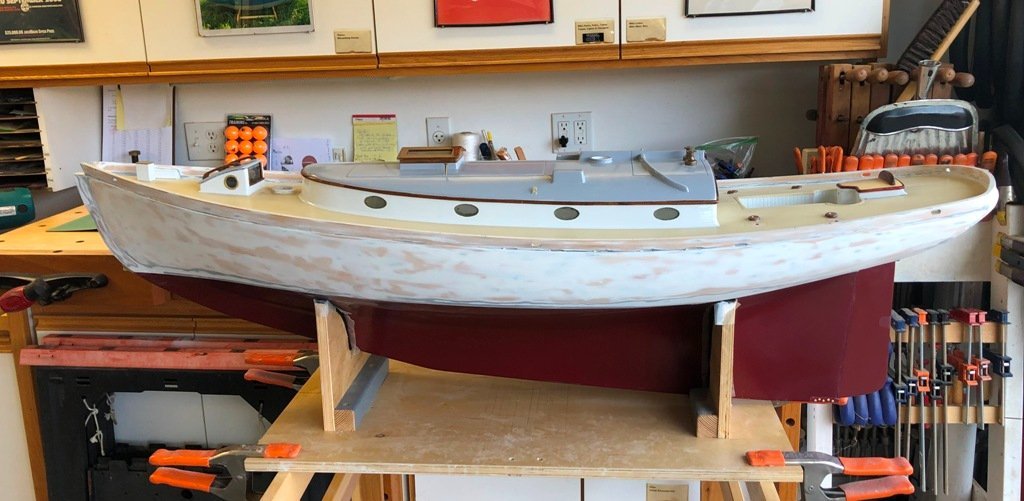
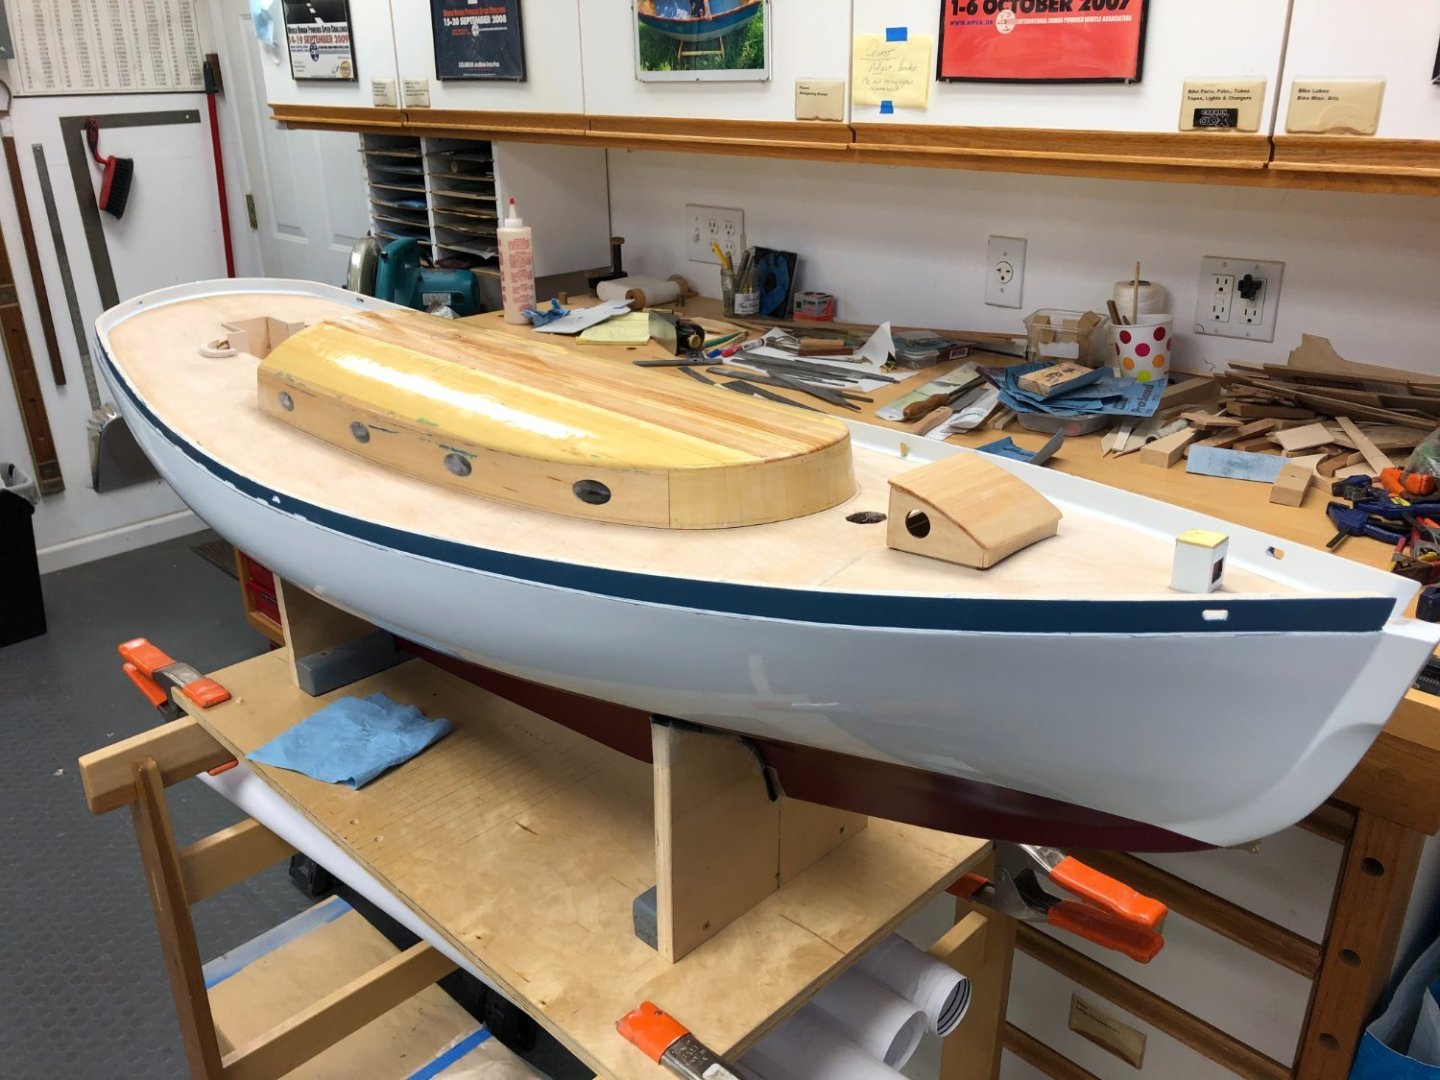
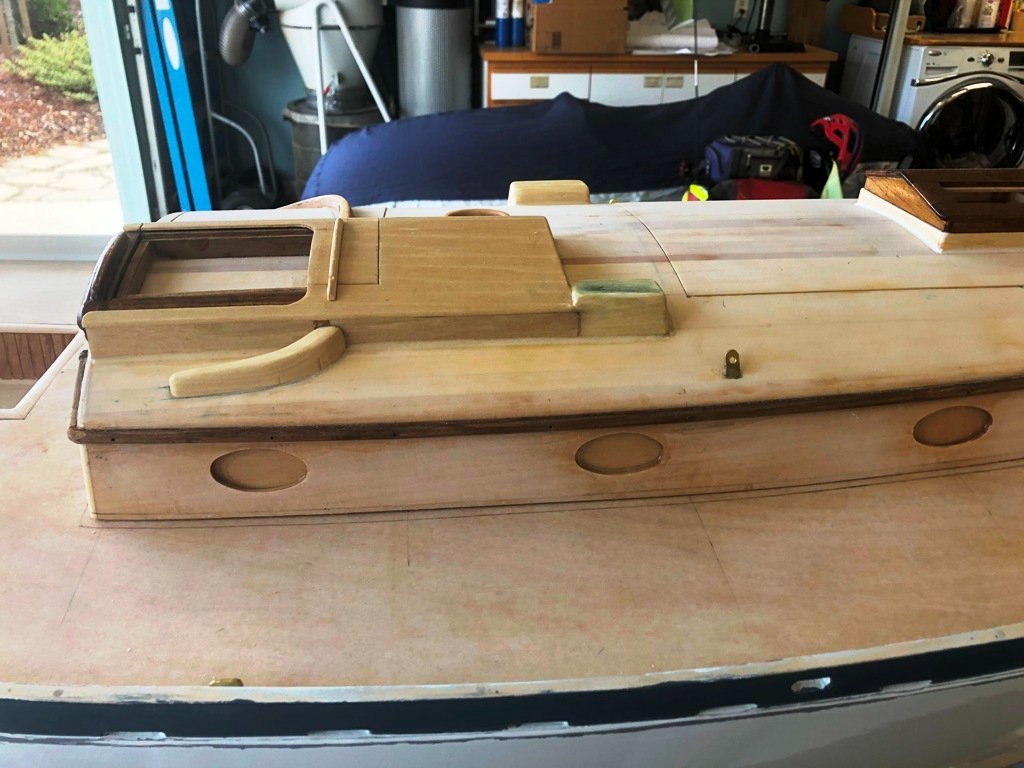
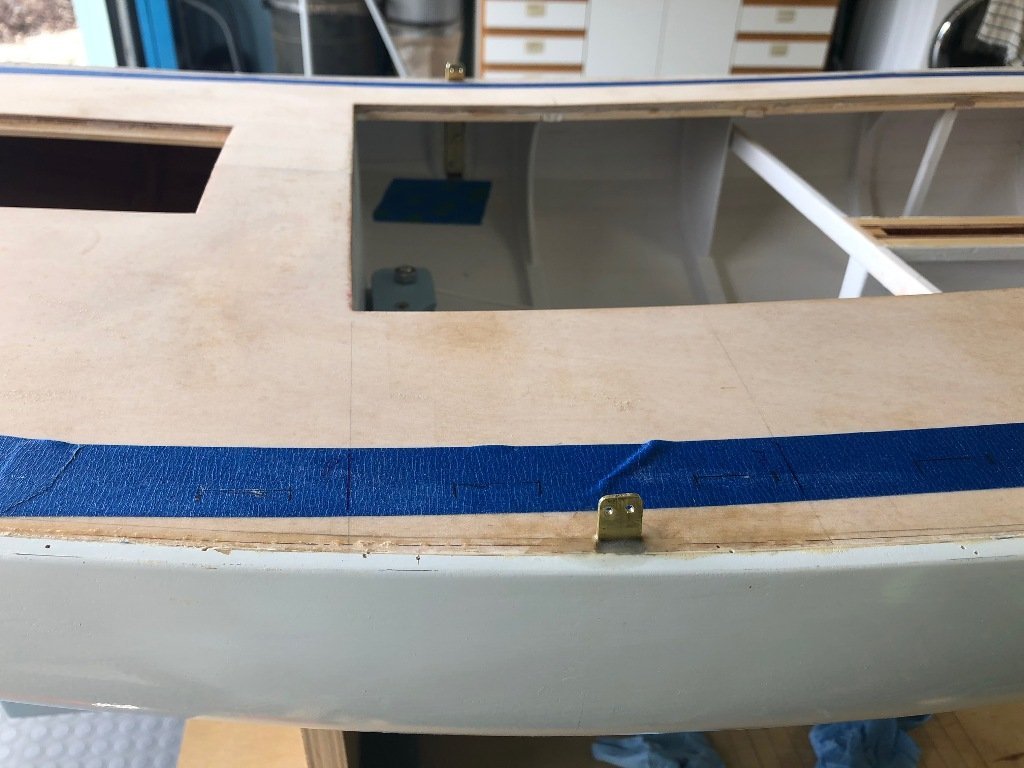
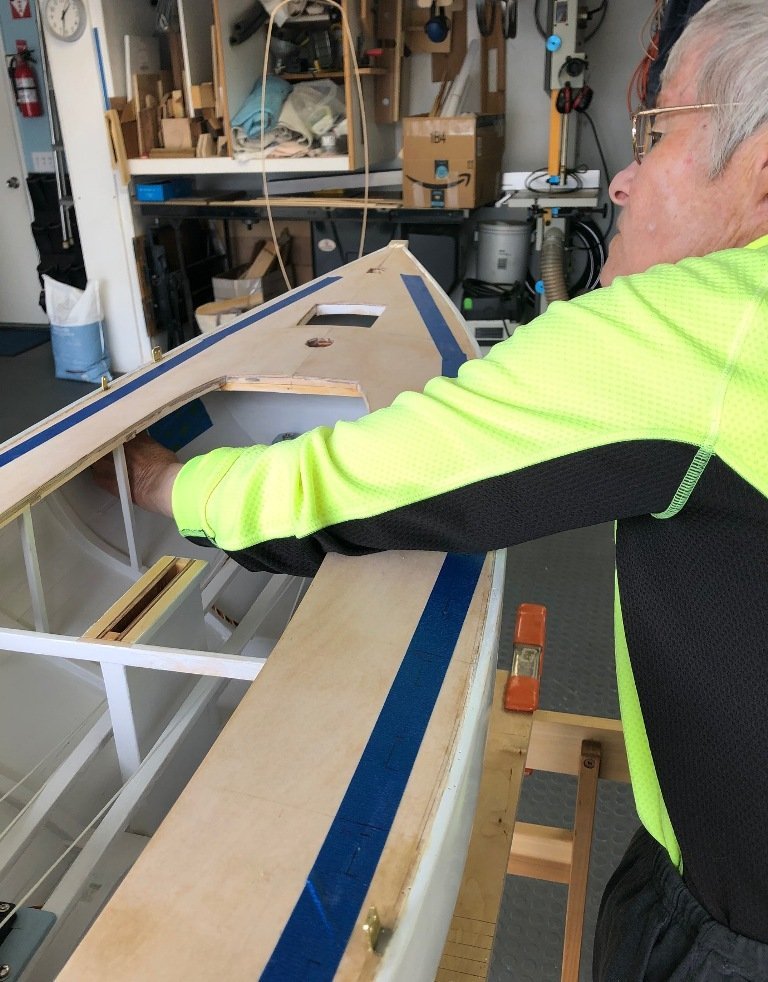
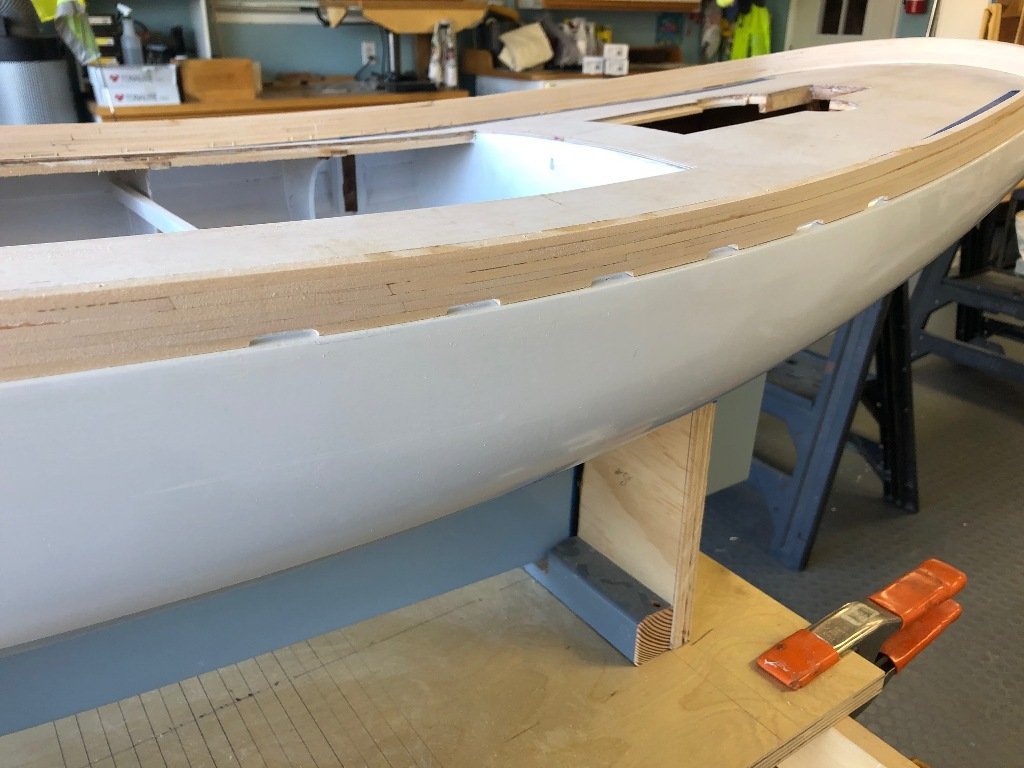
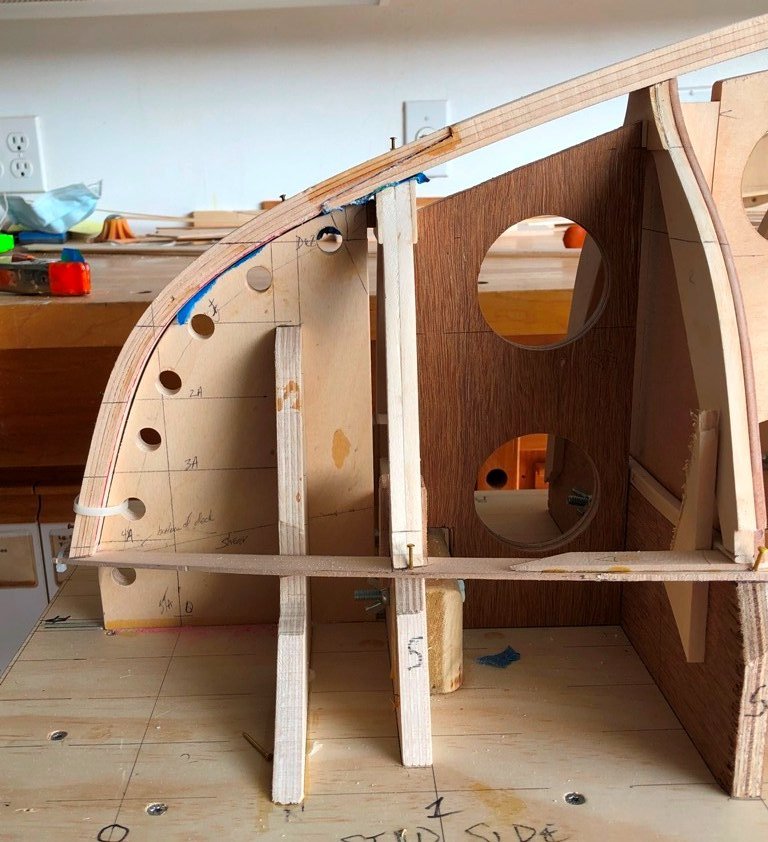
The next task in our sequence was to permanently glue down the house and work in a cove to transition from the deck upwards to the sides of the house. We also started painting the house and scuttle lid. Deck mounted winch bases were glued to the deck and a couple of "instrument" boxes were added to the aft face of the house. A rudder gudgeon was bent up and secured to the heel of the keel. And a mysterious box arrived from a cousin containing a selection of Barient-style winches which just needed a couple of coats of "antique bronze" paint. I decided that it made sense to refinish the topsides and bulwarks before we got too much further along, since the following step would be the installation of the bulwark cap rail. Prior to the refinishing, though, I took some time to fabricate the teak bulwark cap rail. This was scarfed together, shaped and then set aside until the sanding and painting was completed. These next two images show Magic in late February, 2021, with the cap rail in place, the deck painted "Alaskan yellow cedar", the plank seam lines inked on and a few extra bits of installed hardware. More to follow another day. Craig


- 67 replies
-
- 10
-

-

-
Thank you all for your kind words. Makes me almost want to do this sort of thing again... 😉
-
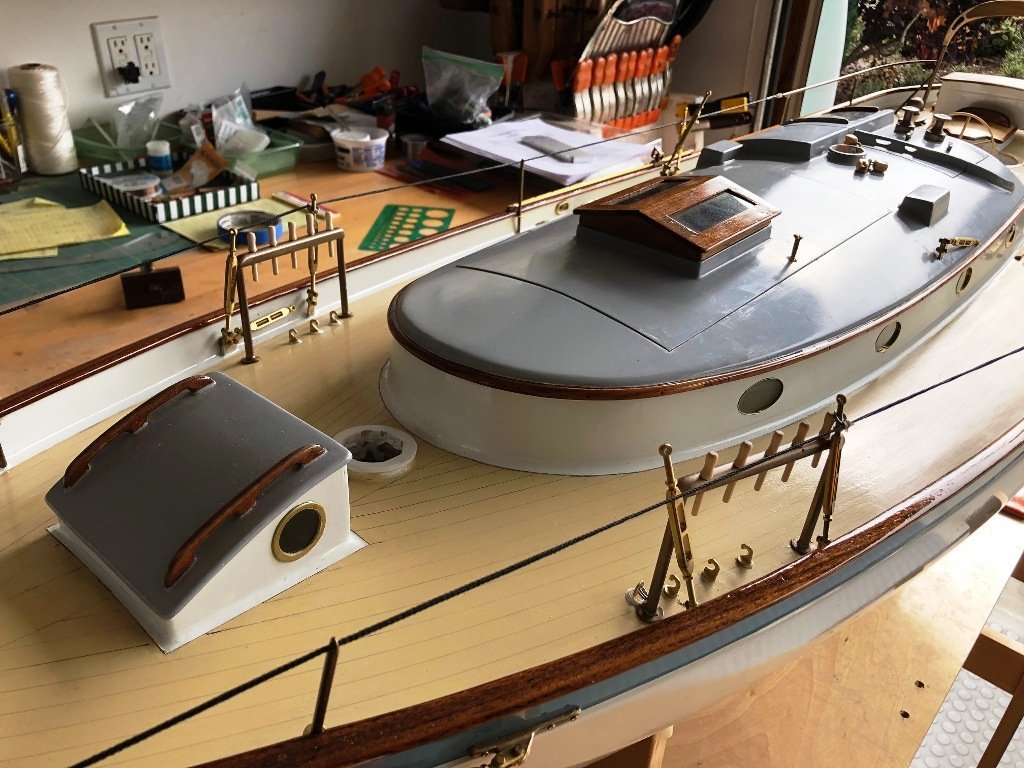
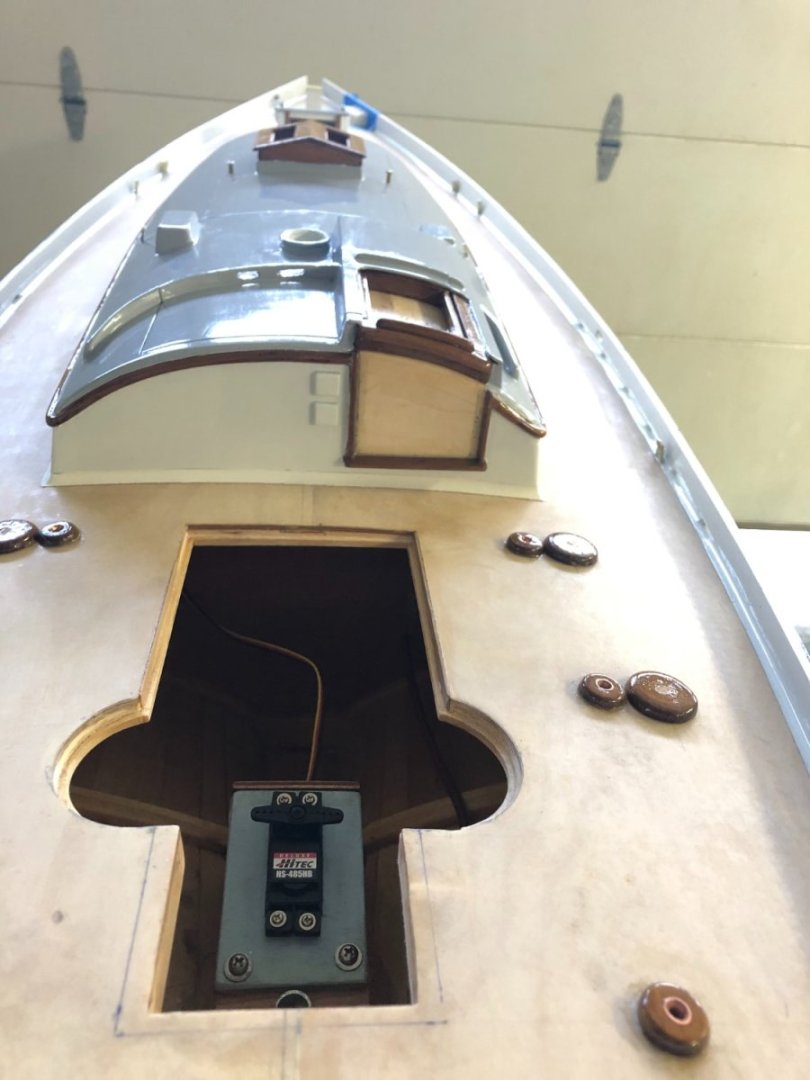
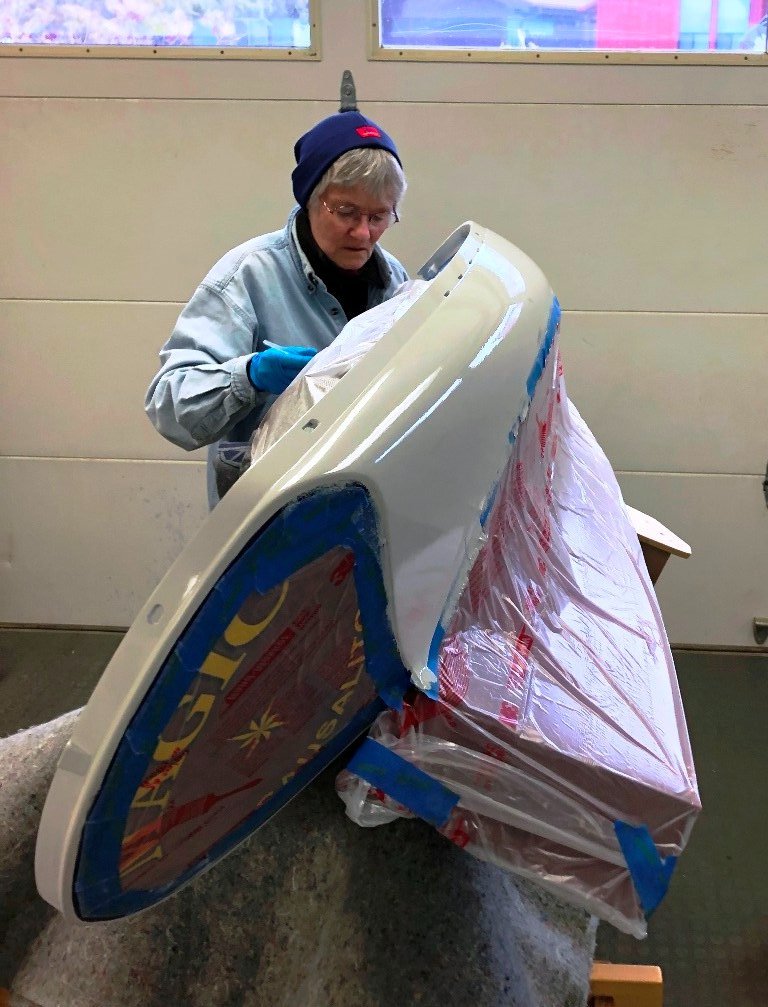
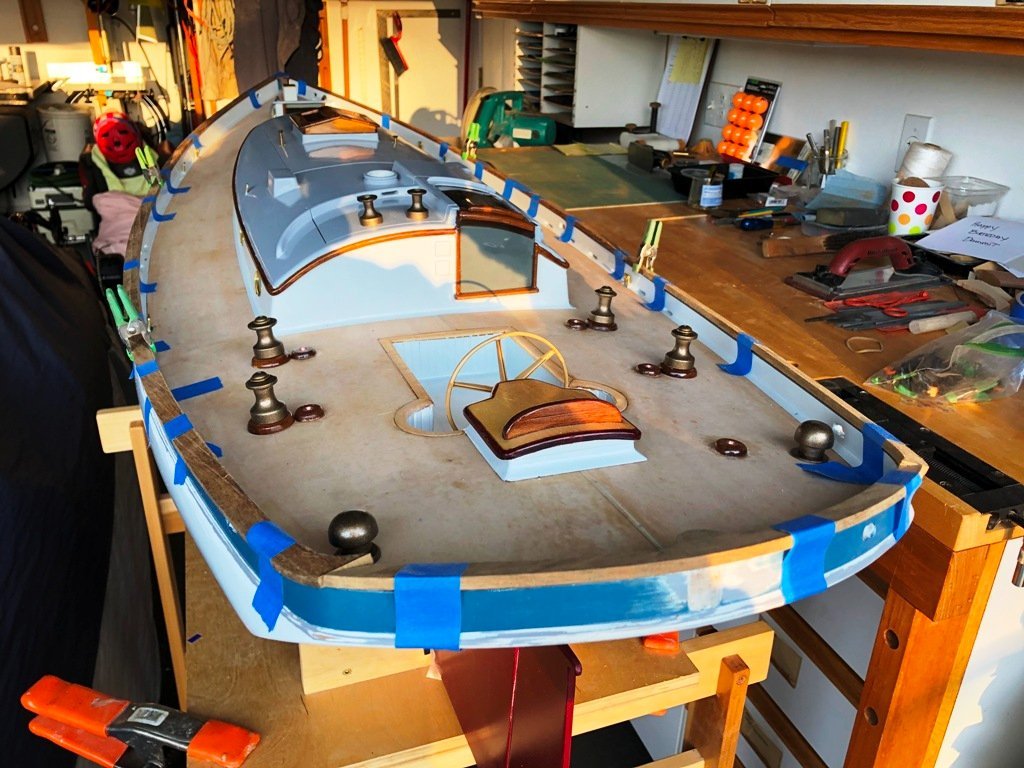
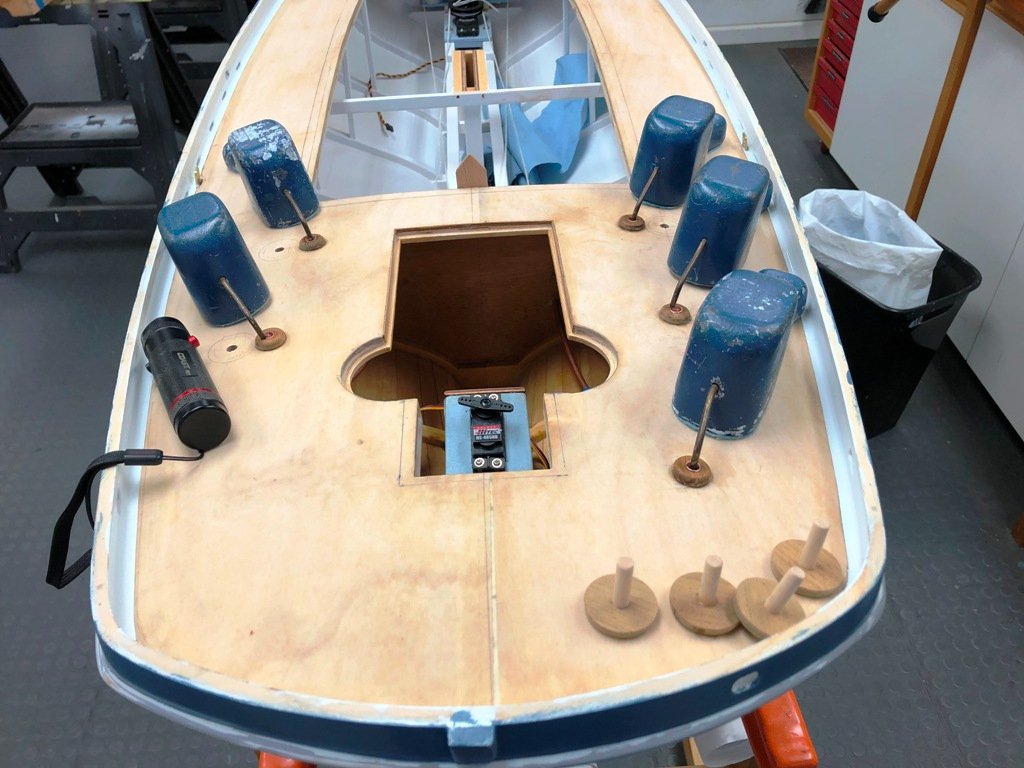
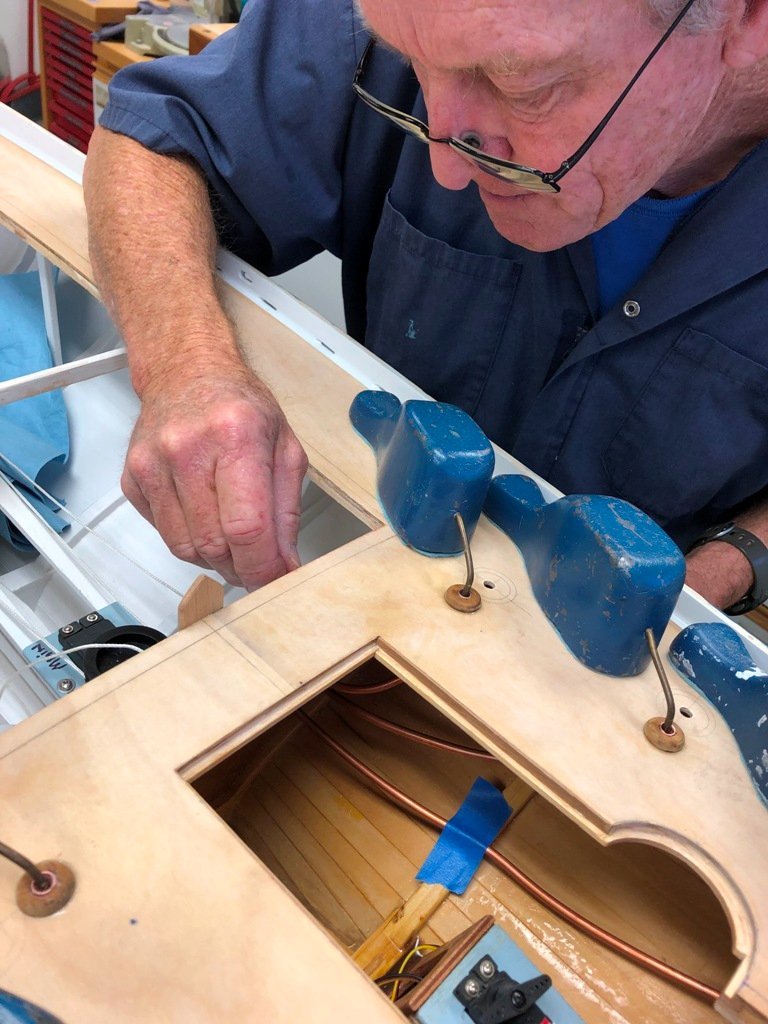
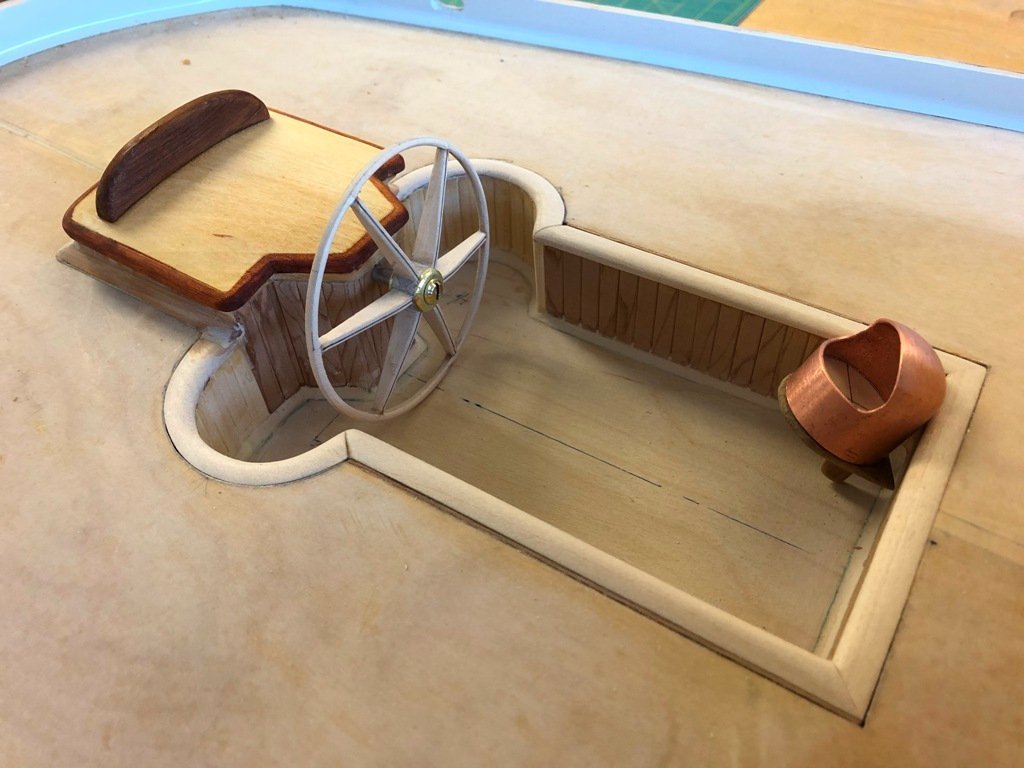
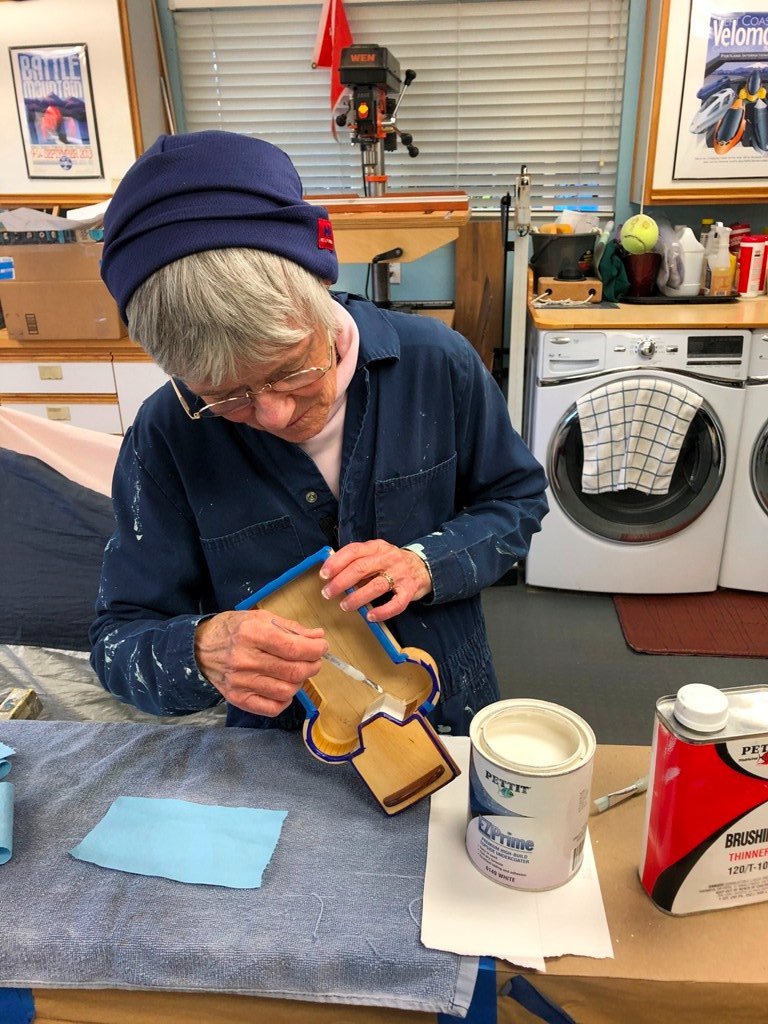
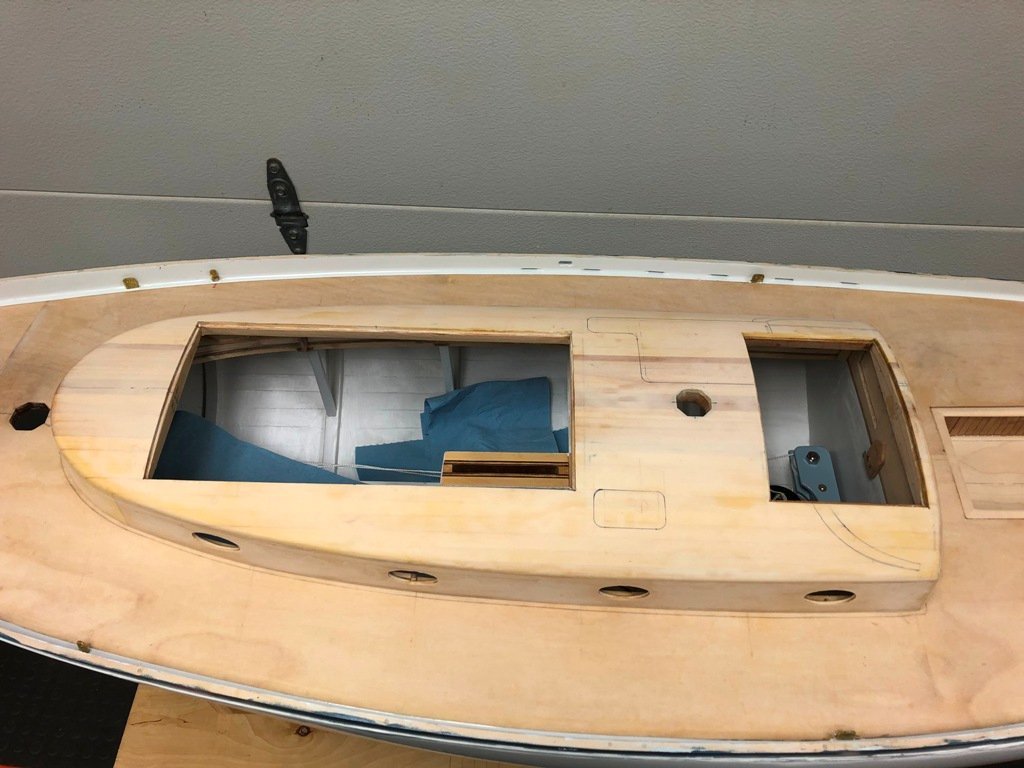
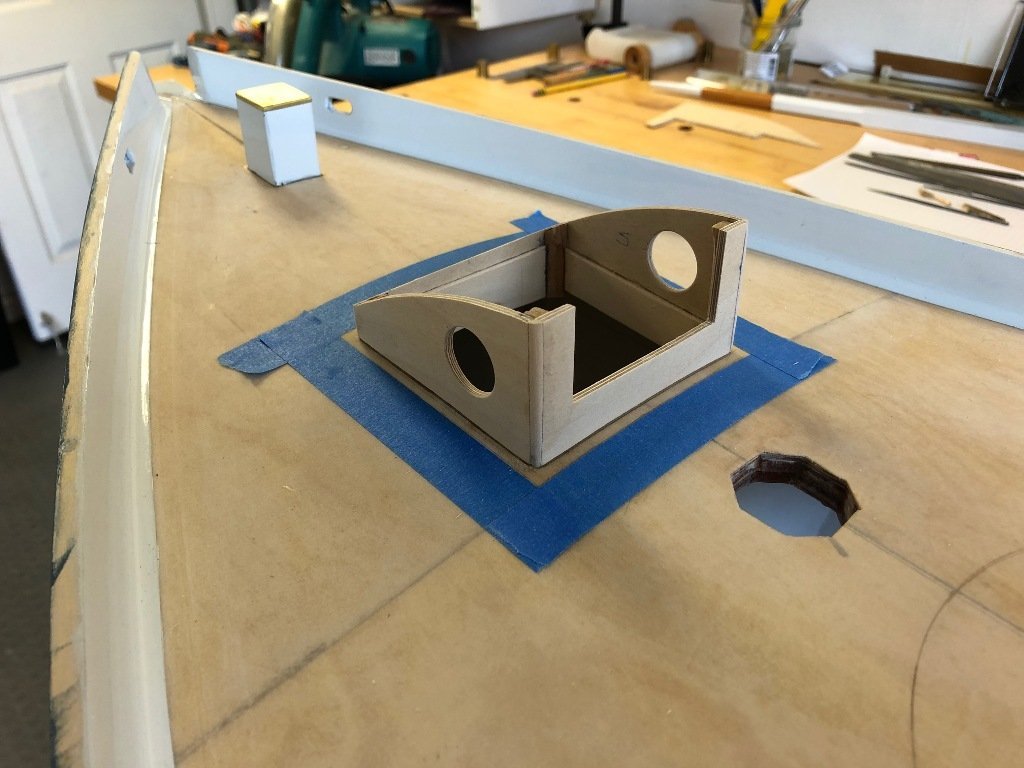
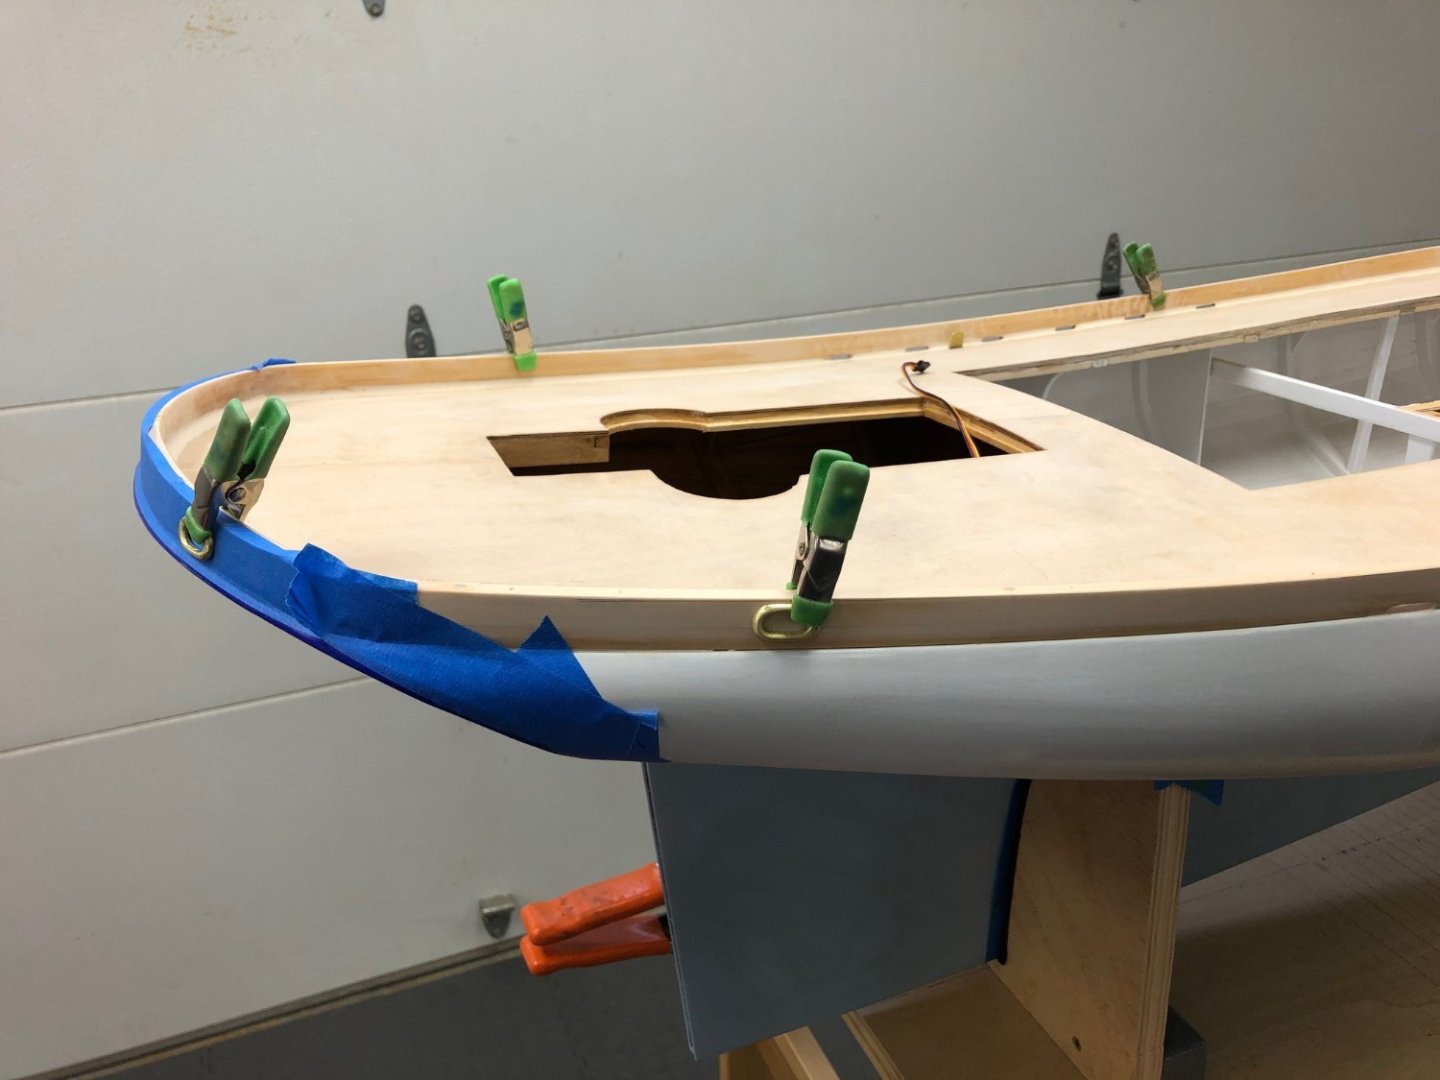
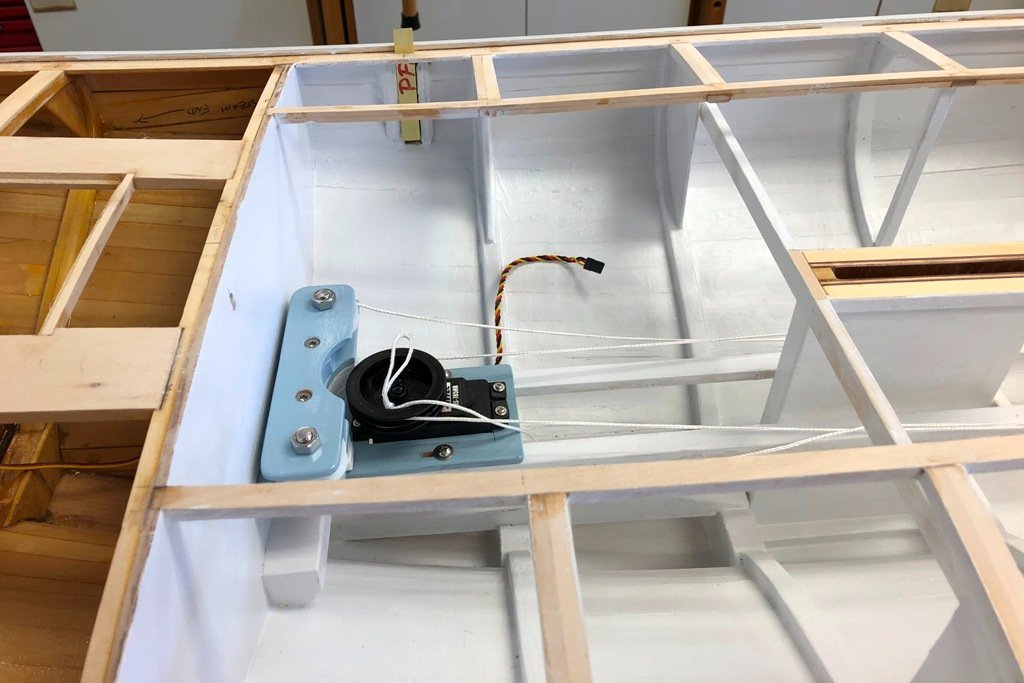
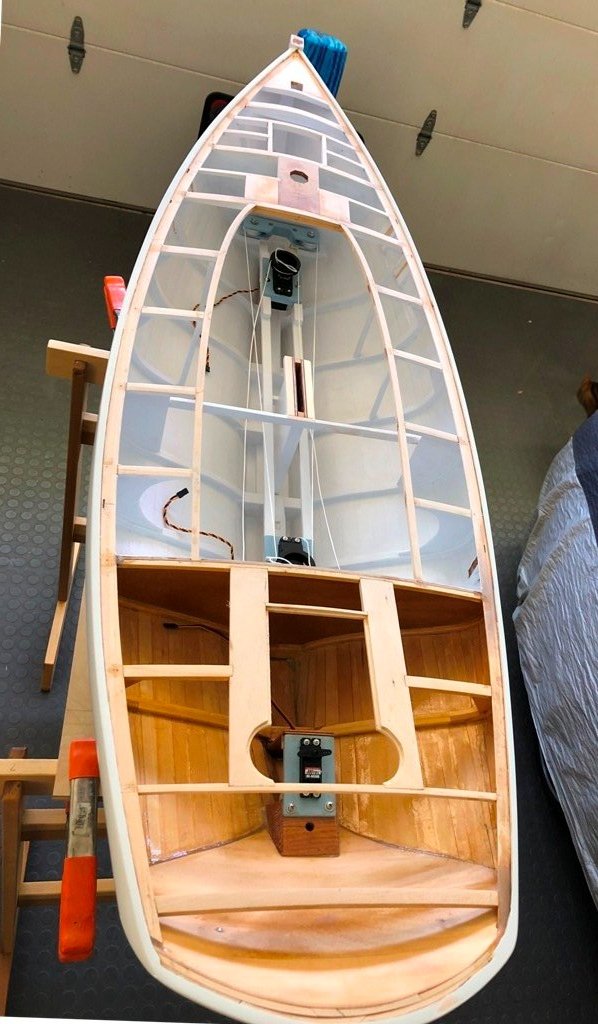
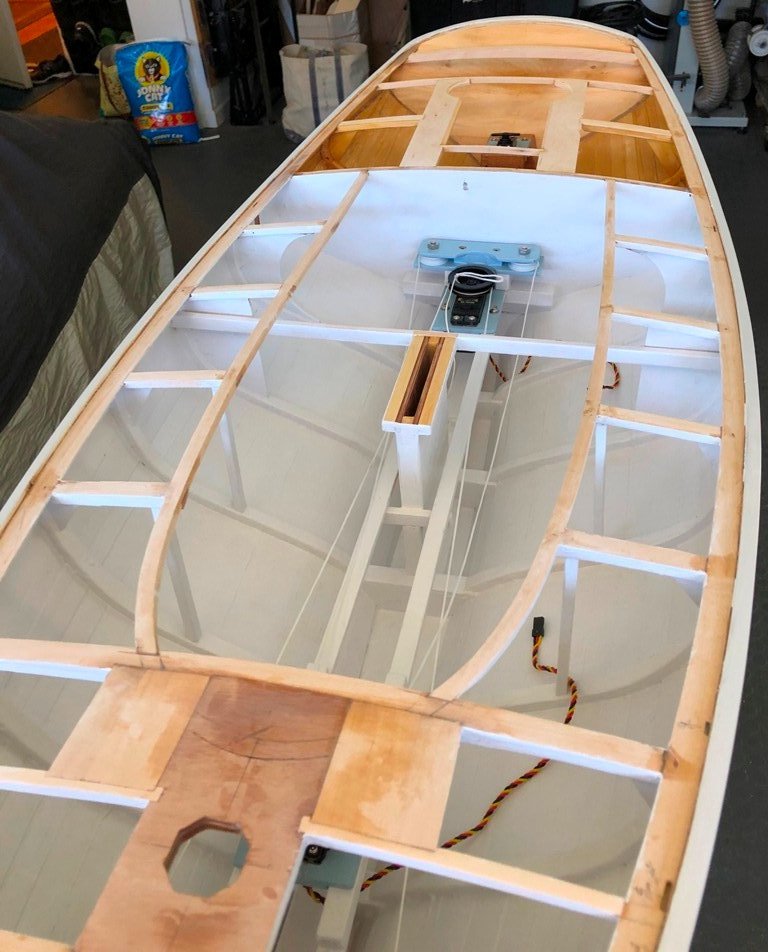
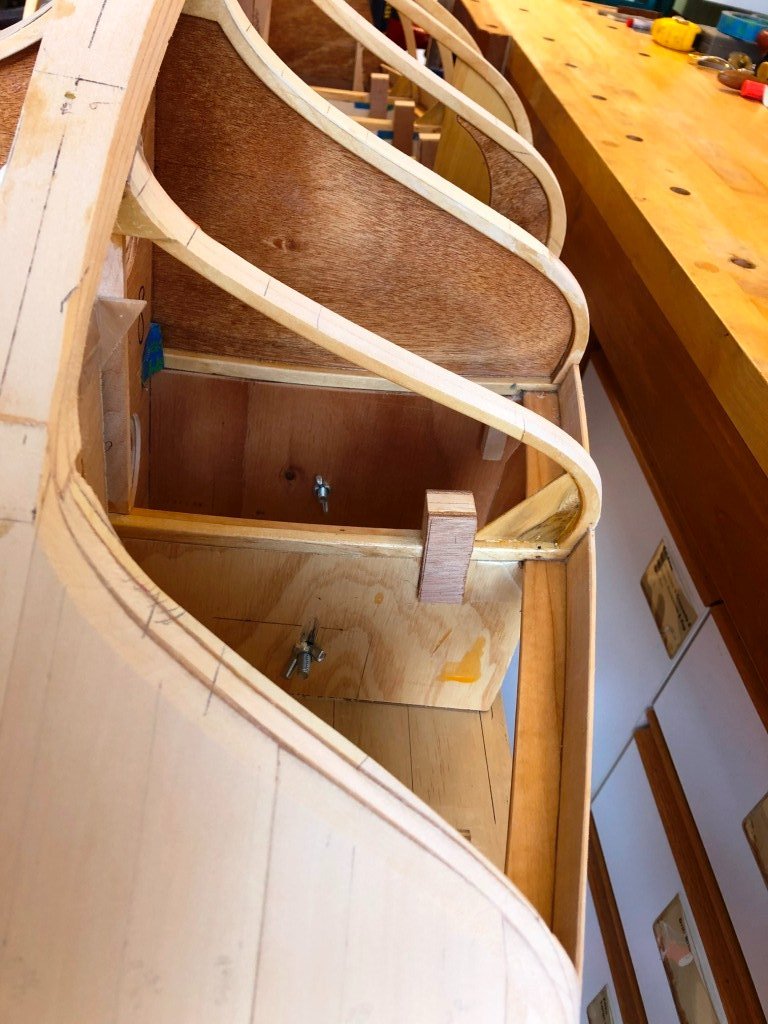
Before the house could be glued down, it was necessary to bend and fit copper tubes from the aft bulkhead up and through the deck near the future winch locations for the mainsheet, foresail and jib sheets to slide through. The cockpit is a removeable structure to permit access to the rudder and its servo. I strove to make it a watertight unit with a tight fit to the deck lip. The depth of the cockpit could not be scale directly down from the original schooner's "pit" due to clearance issues between the bottom of the cockpit and the rudder servo on the model. This also meant that the wheel needed to be slightly smaller. I took the inspiration for making the binnacle from Michael Mott's work on his lovely cutter, hammering this out from a copper plumbing cap and then finding a properly scaled marble to serve as the compass. Here it awaits a final positioning once the cockpit is finished. (She Who Has Steadier Hands is shown painting.) The rudder needed to be built and fitted up through the rudder trunk to check clearances: The topcoat-to-primer lack of adhesion can be seen above right. I eventually had to strip off the white top coat and a hard automotive grey primer before re-painting with a marine primer and topsides paint. So we learn.


-
Reggiemon: Your steam launch is exquisite! And the operator is one of the best figures I have seen. Much impressed I am. Thank you for the complements on MAGIC!
-
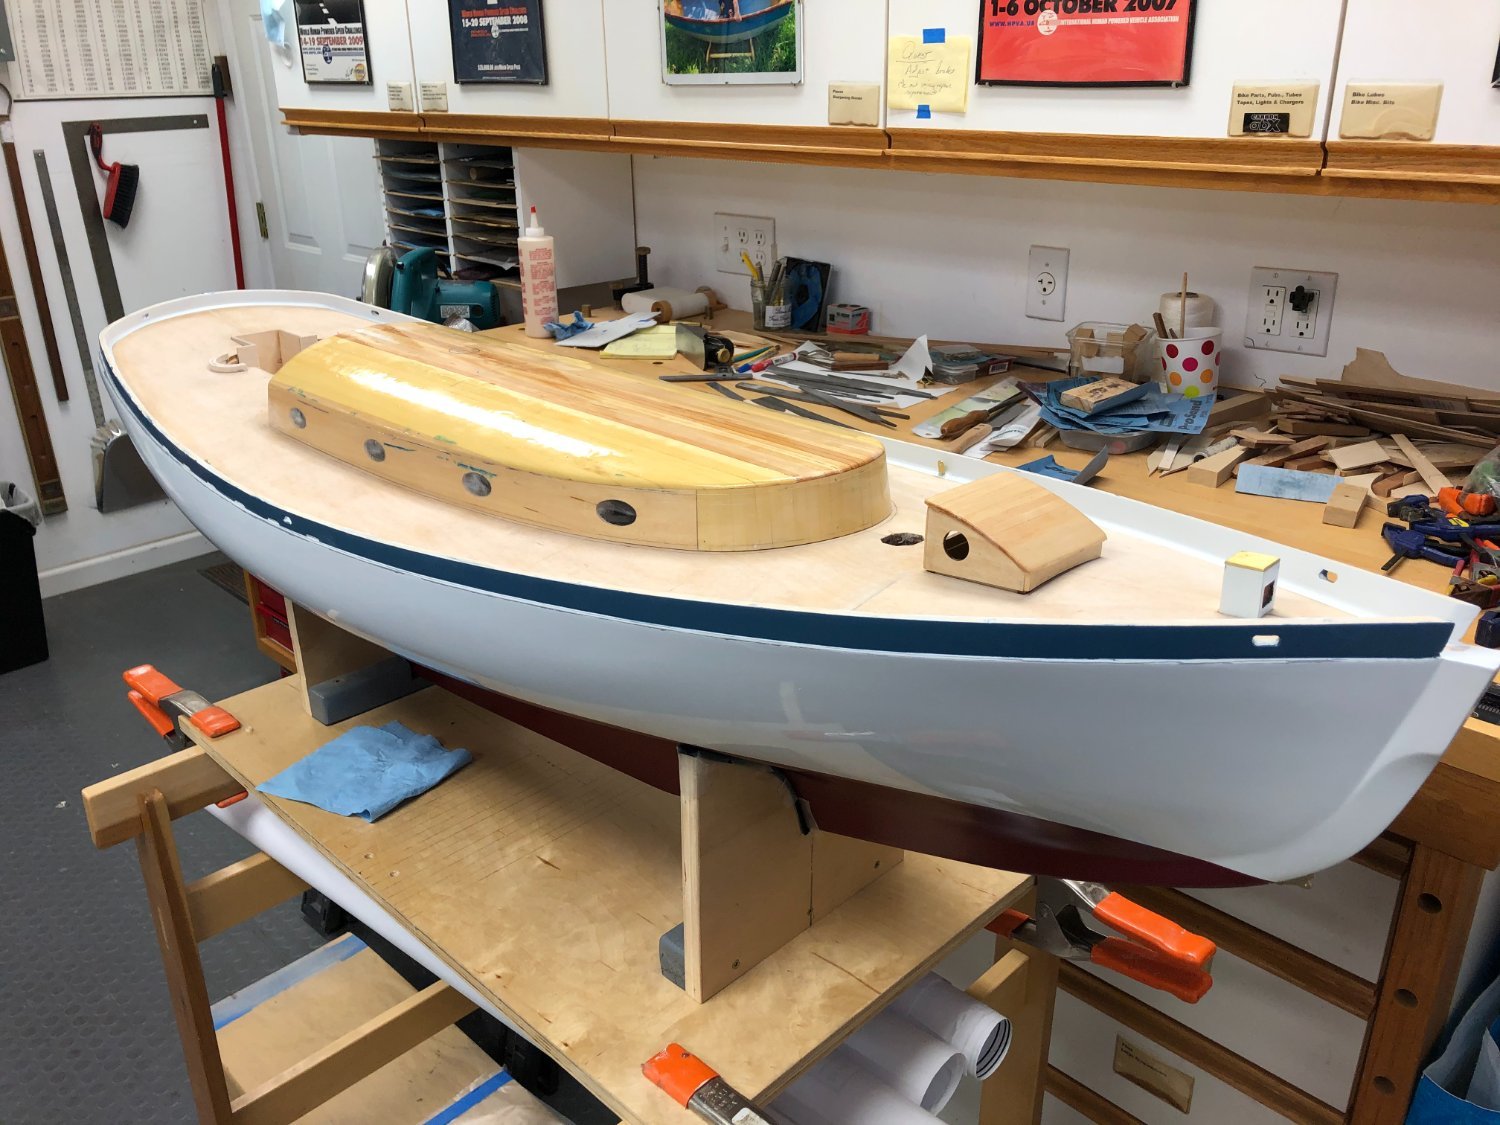
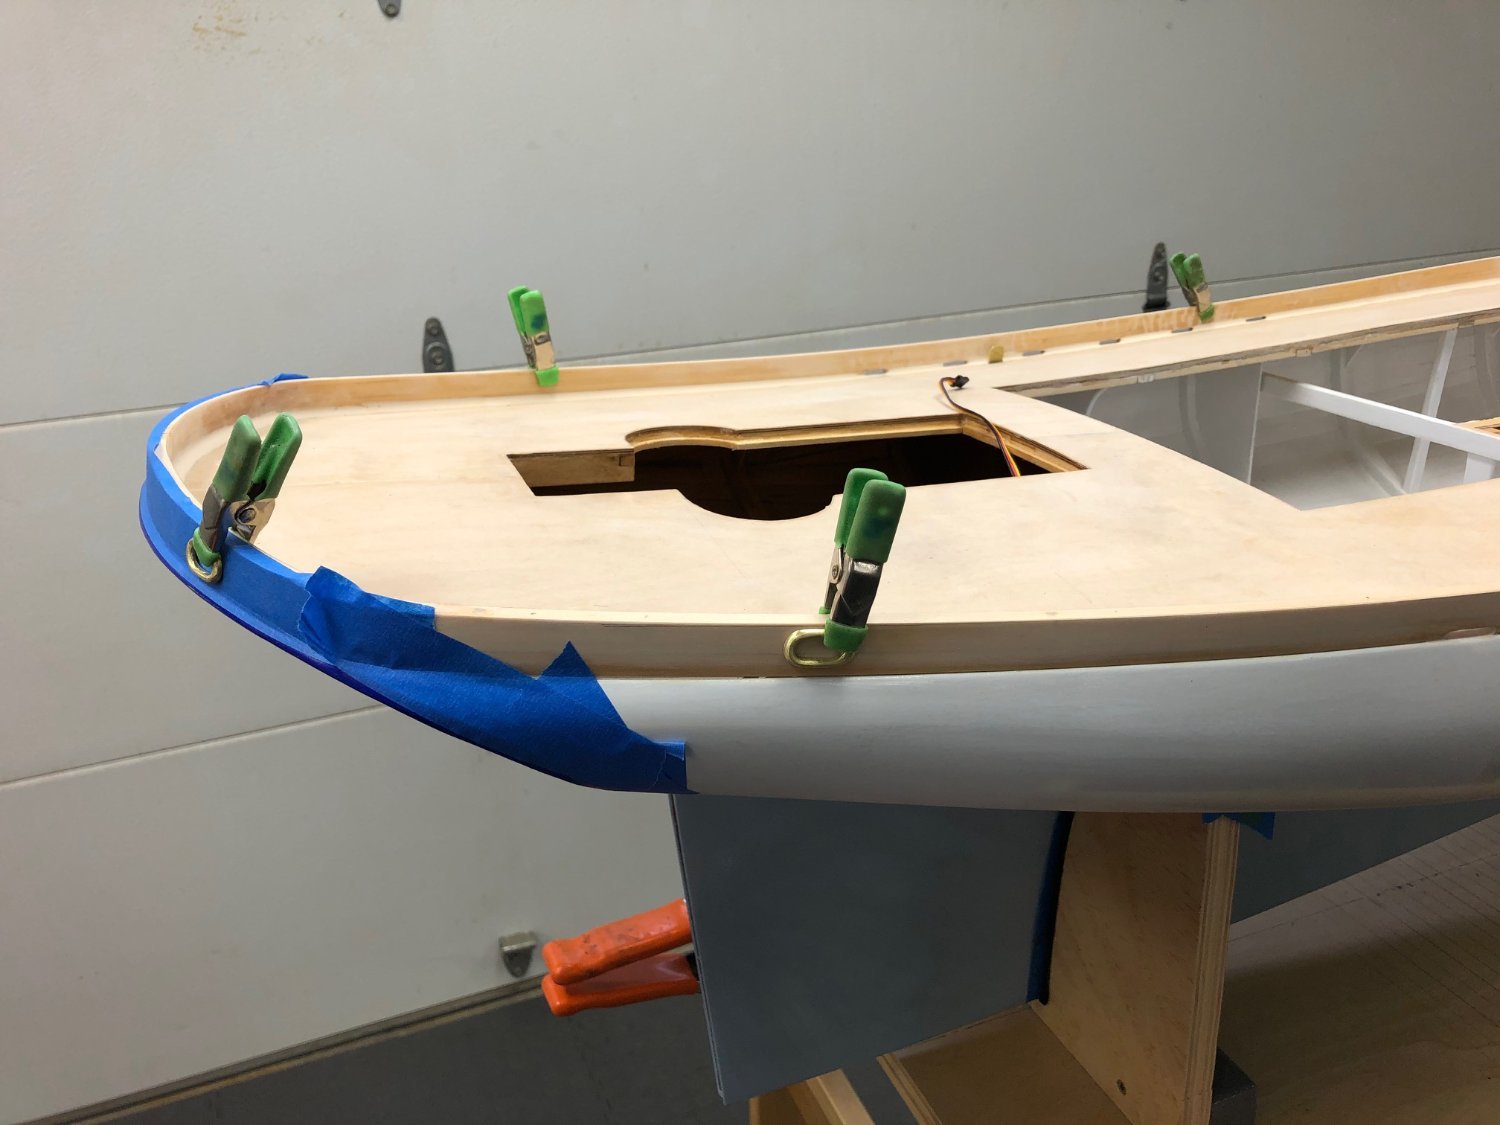
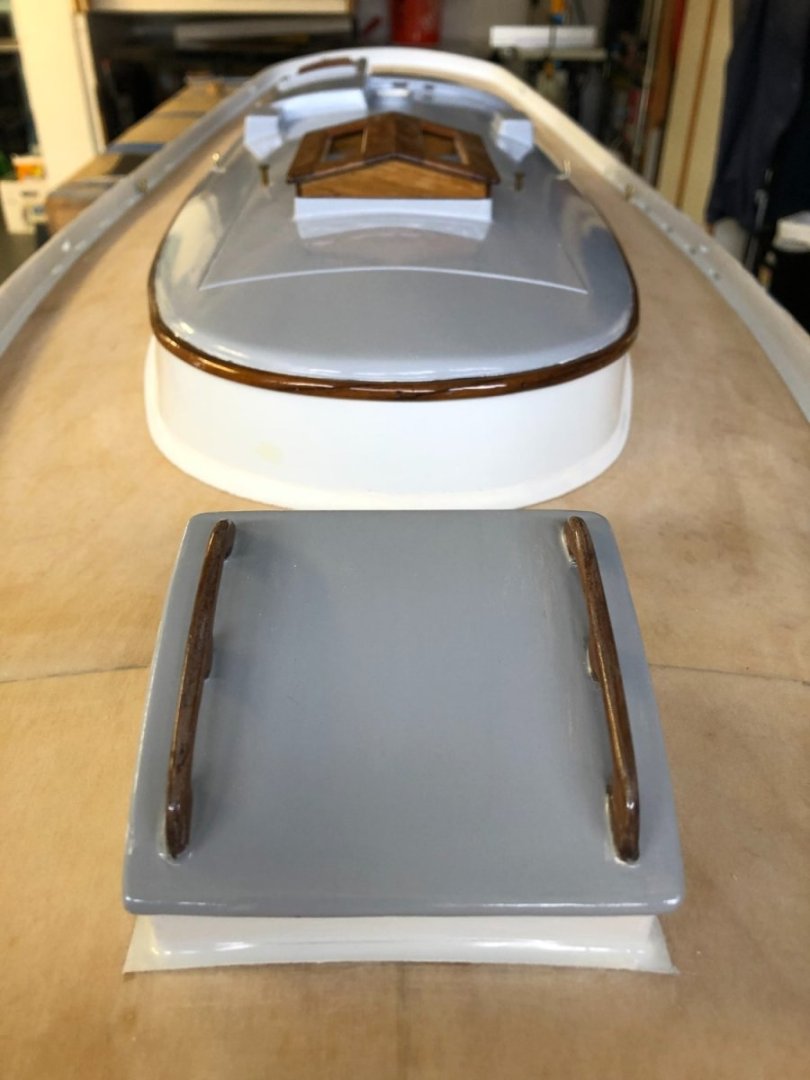
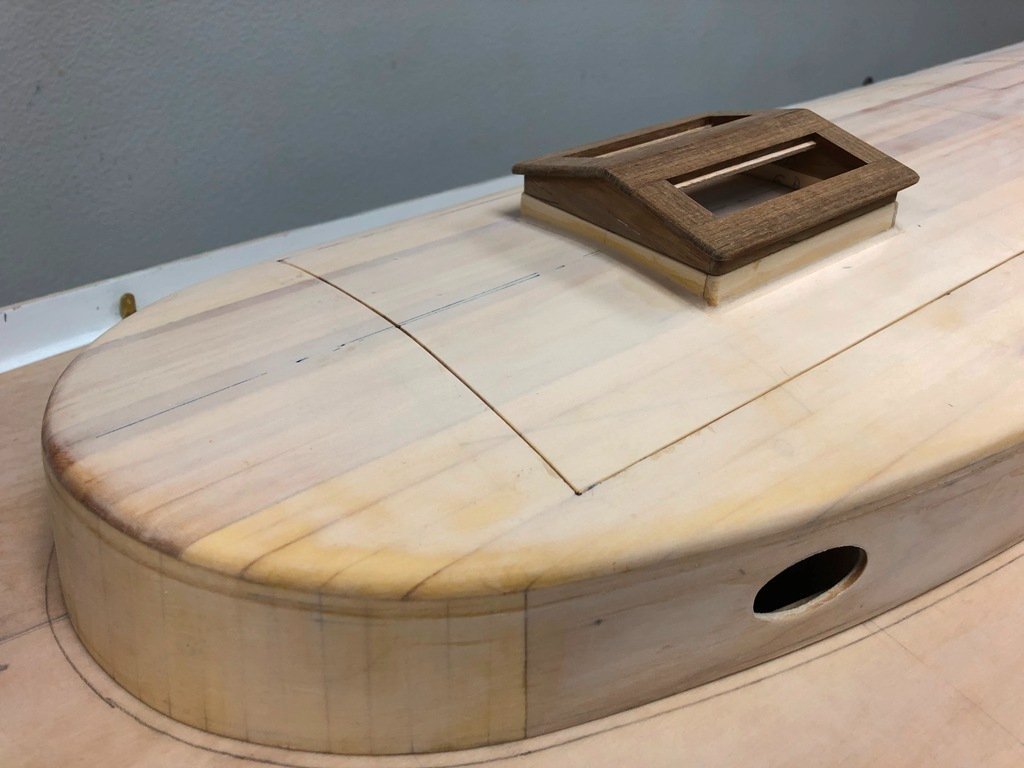
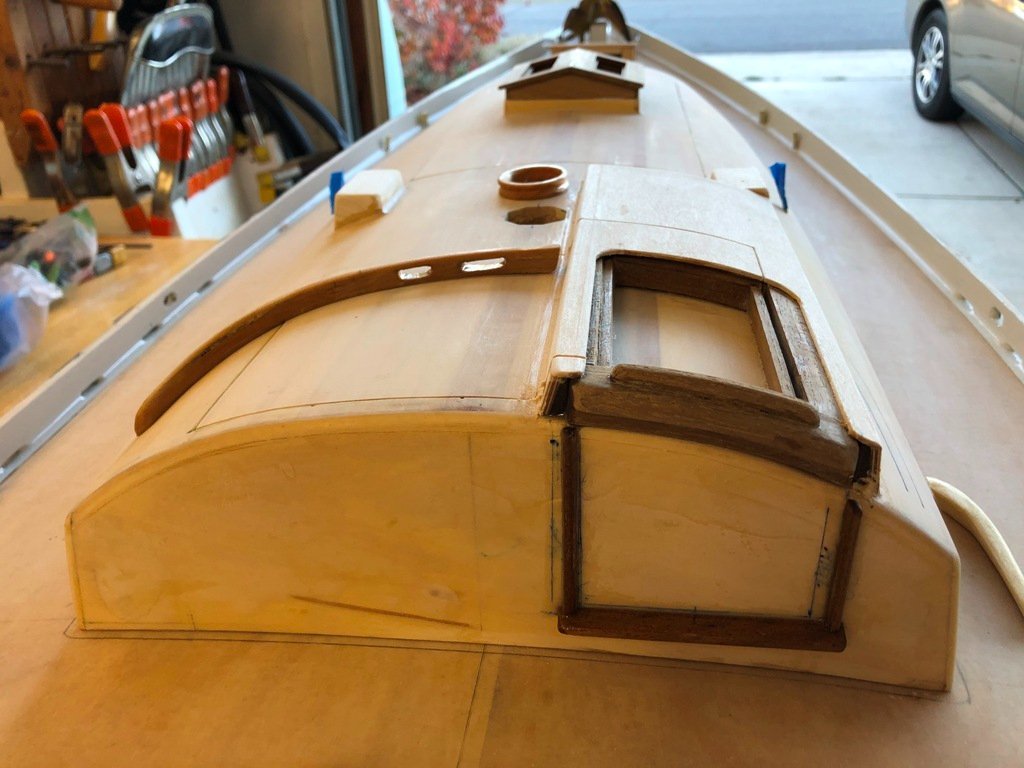
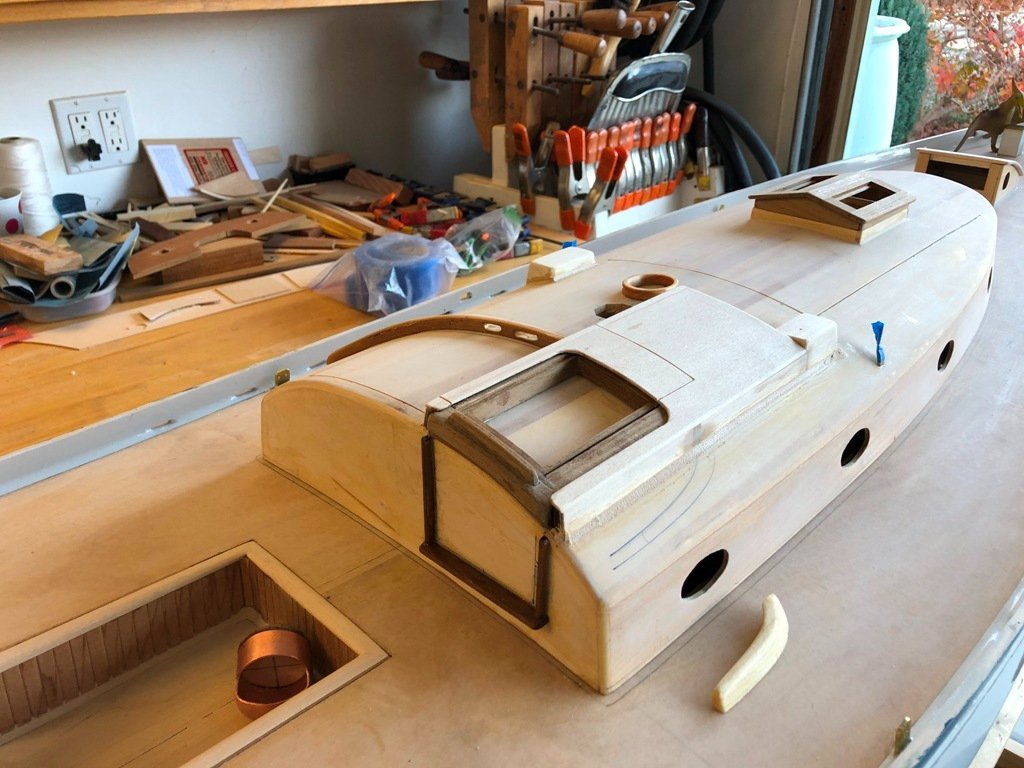
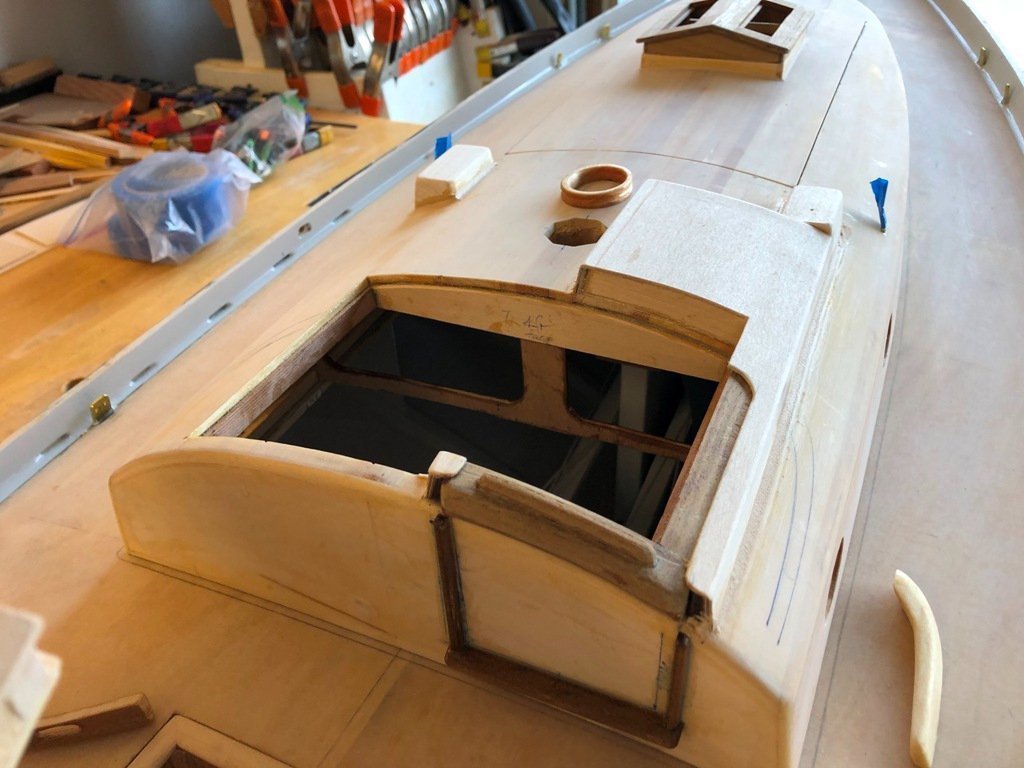
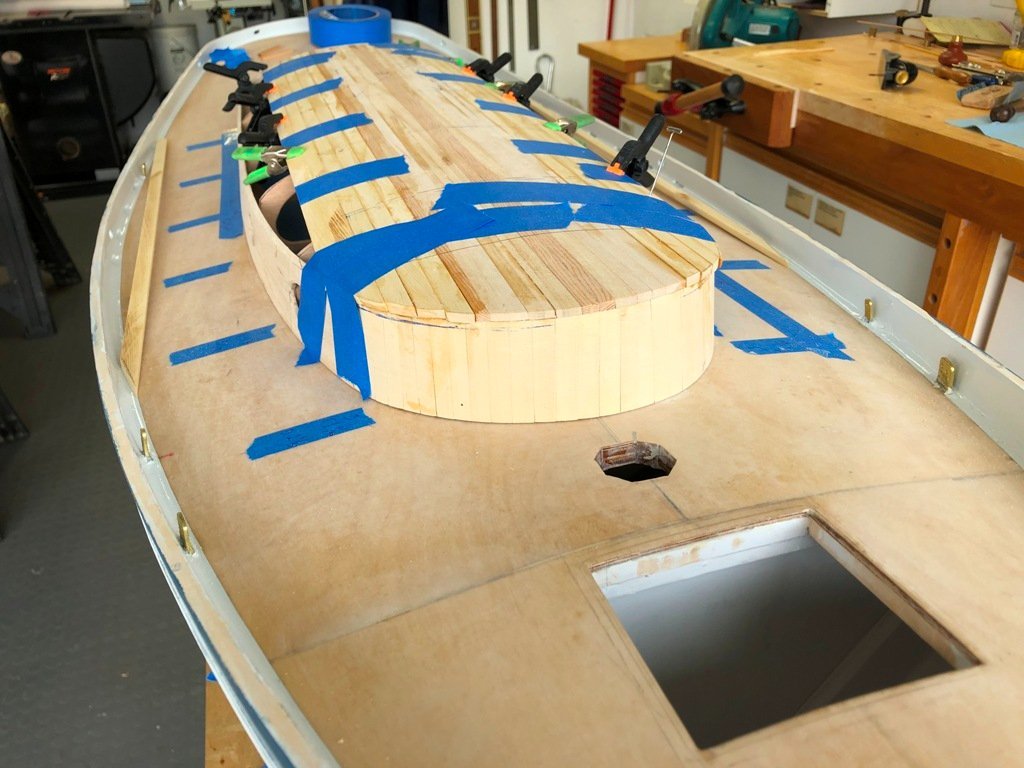
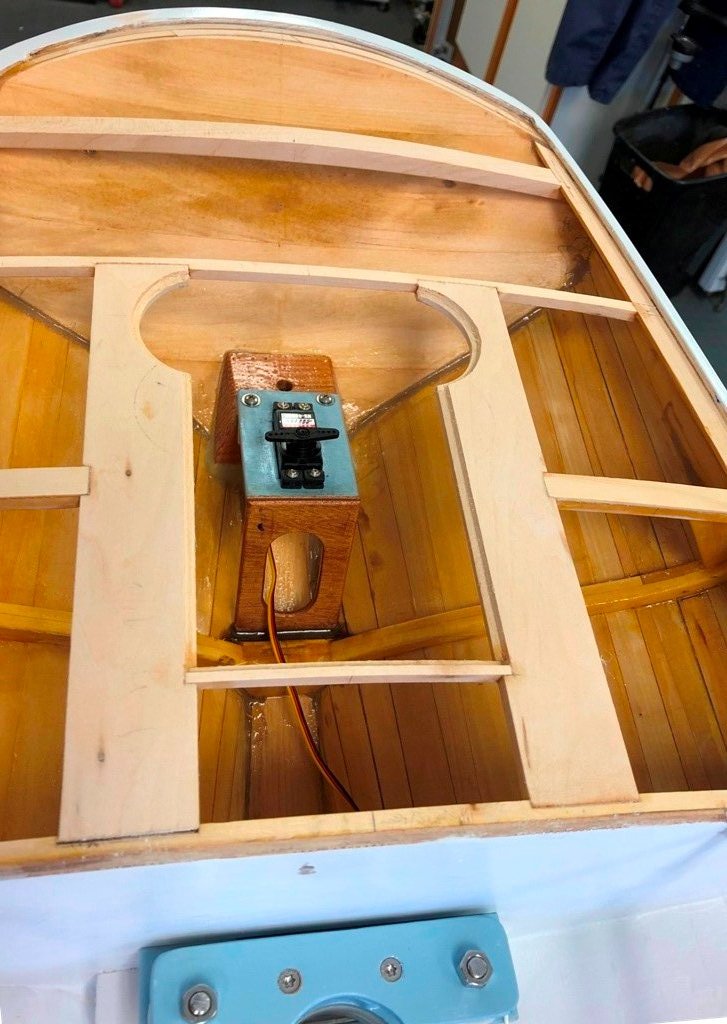
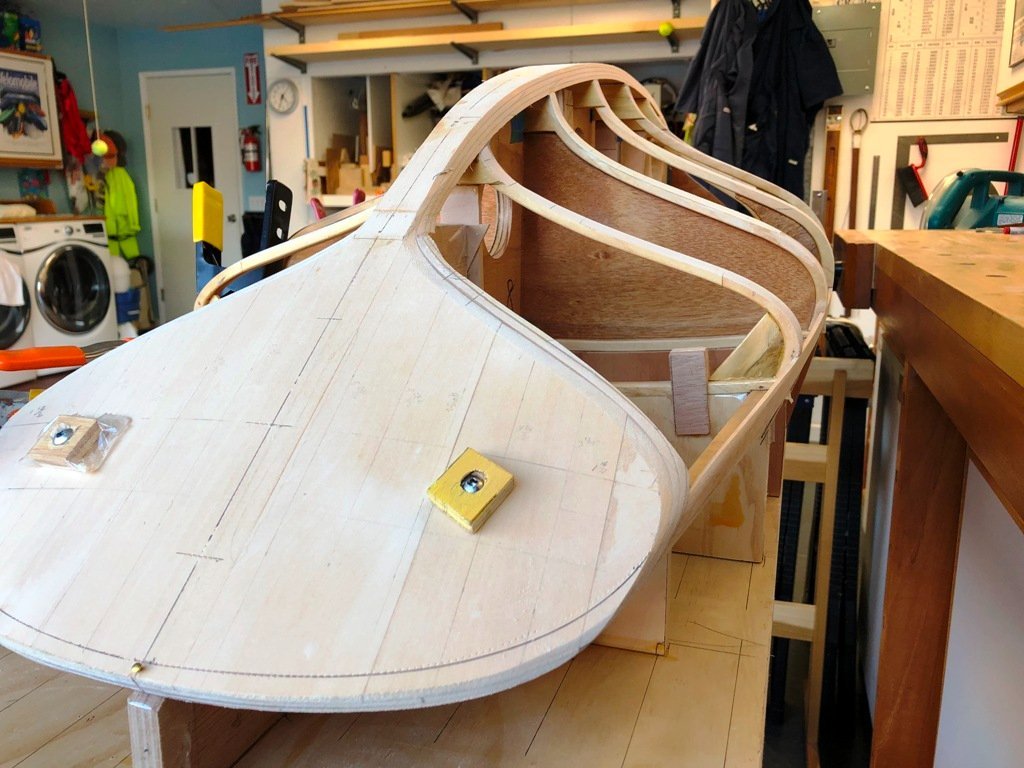
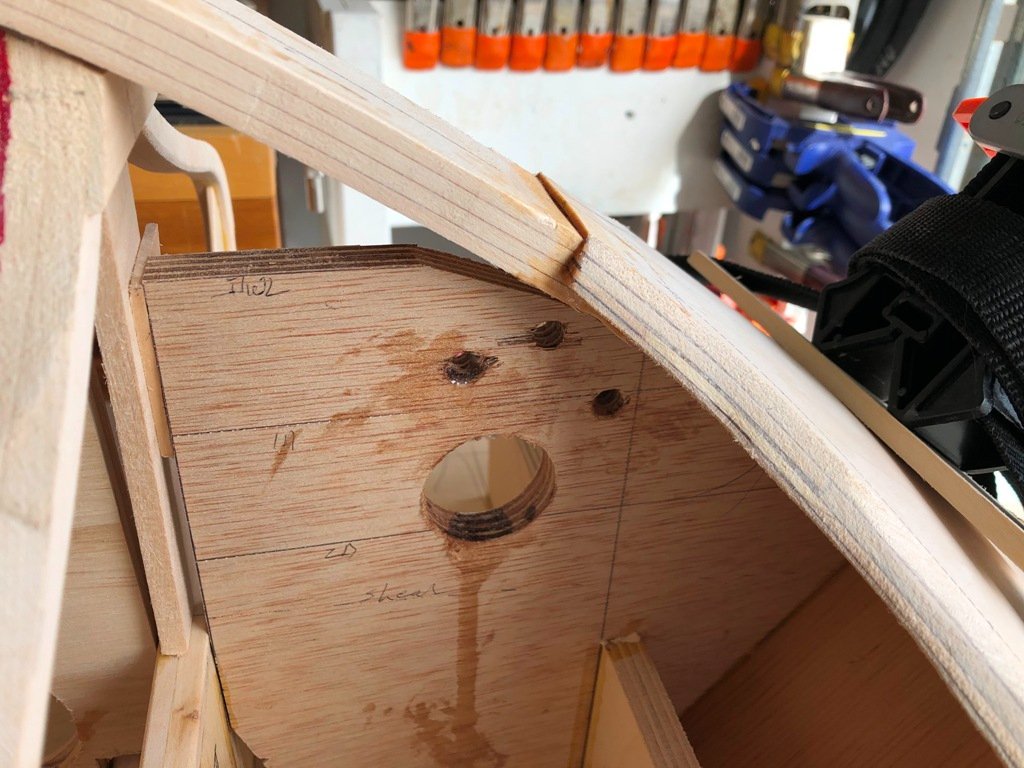
The cabin top was covered with the thin fiberglass fabric, set in epoxy and when this cured, it was lightly sanded. The layout for the locations of the necessary servo access hatches and the mainmast partner followed. Corners for the cutouts were marked using a #55 drill and connecting lines scribed. A fine-tooth pull saw was utilized to carefully cut out the hatches and the necessary carlin framing was fitted from the underside. The mainmast partner was carved from a block of basswood and glued to the underside of the cabin top. The skylight coaming was fashioned from basswood and glued to the cabin top. The teak skylight structure was glued up and would later have acrylic panes fitted. The after end of the house with its off center companionway, "turtle" housing for the companionway slide and the pieces making up the curved dodger mounting came together. Blocks were added for the future Dorades cowls and the chainplates for the main forward lower shrouds were mounted to the inside faces of the cabin sides. A laminated, half-round teak "eyebrow" was fabricated and glued to the cabin side just down from the intersection of house and curved top. This detail was designed to minimize the visual height of the crowned cabin top as well as to incidentally provide a edge for the color transition between house side and cabin top. During this phase of the build, the cockpit was also built up. The next post will go into that project.

-
Hi, John: "Very specky!" is a new expression to me. Thank you (I think)...what does it signify? Craig
-
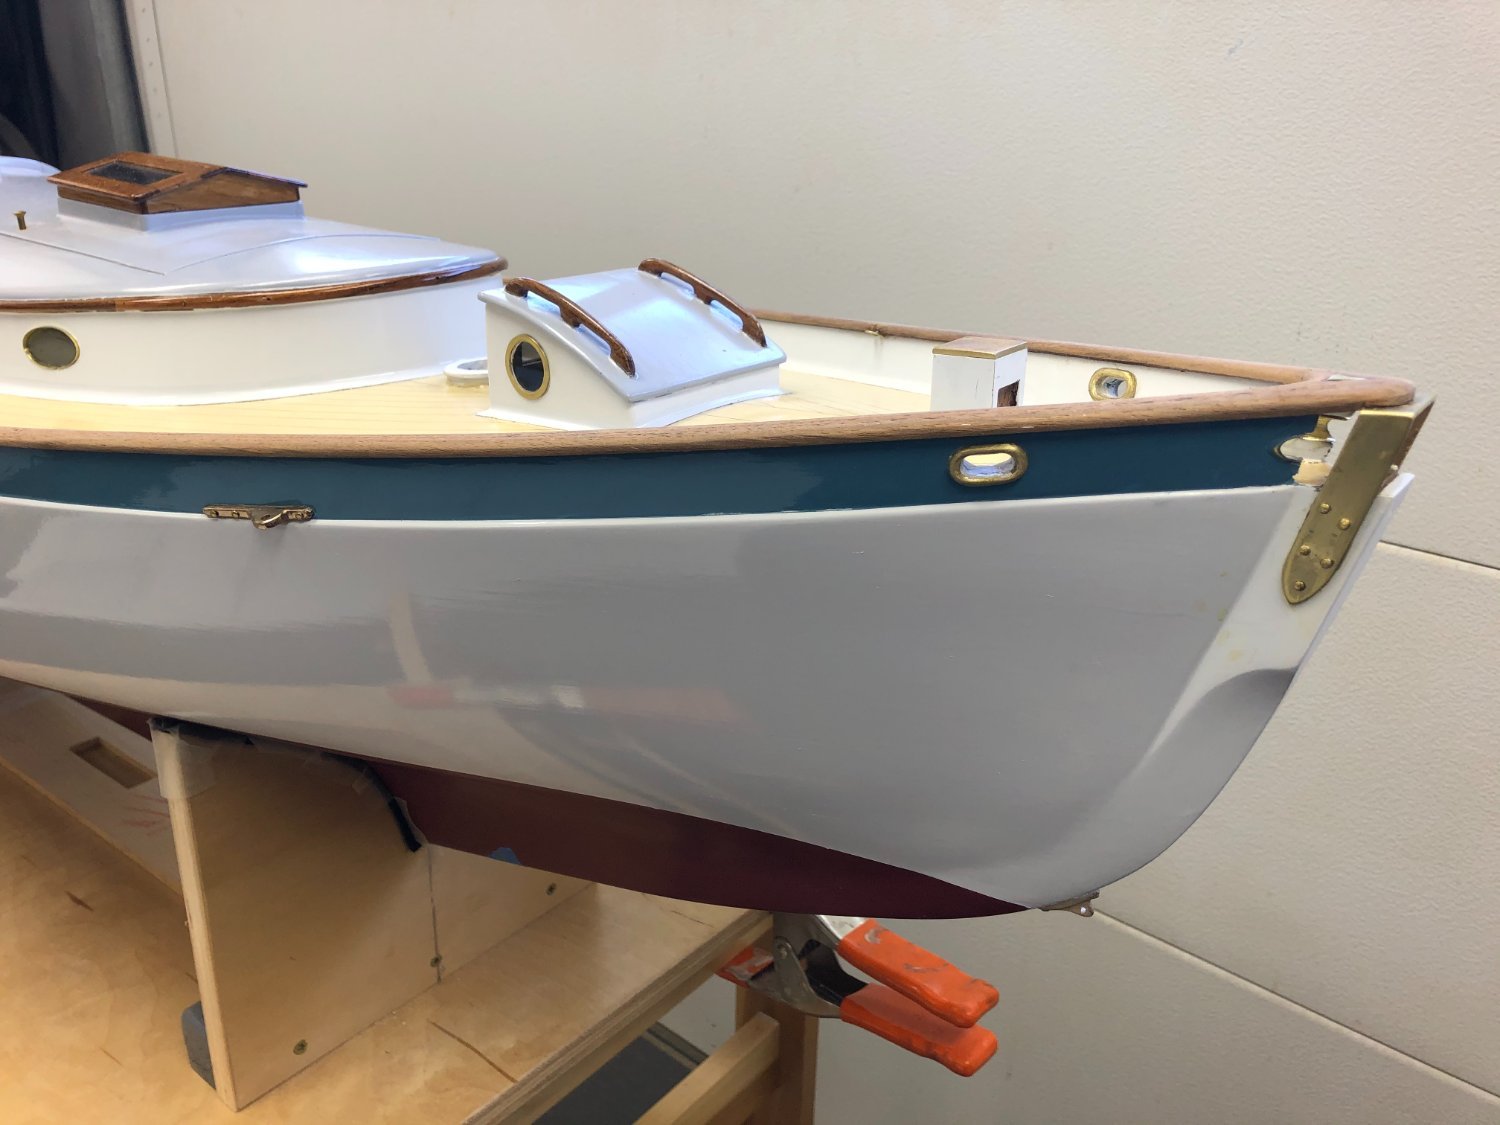
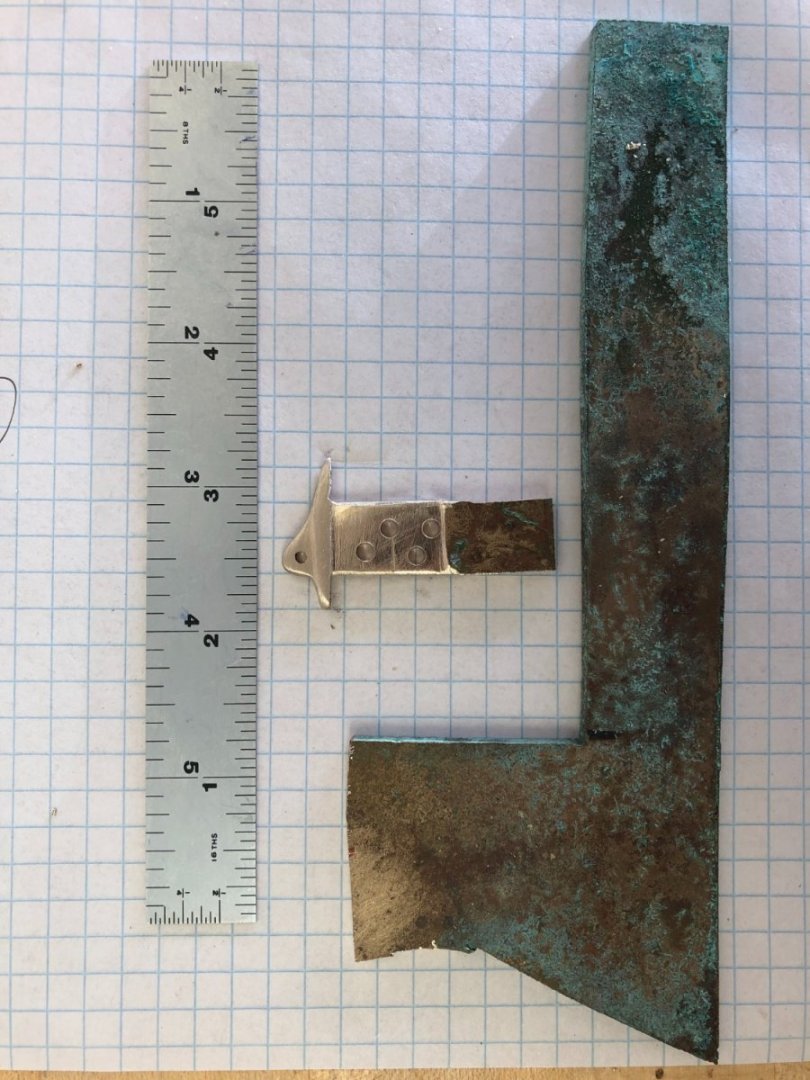
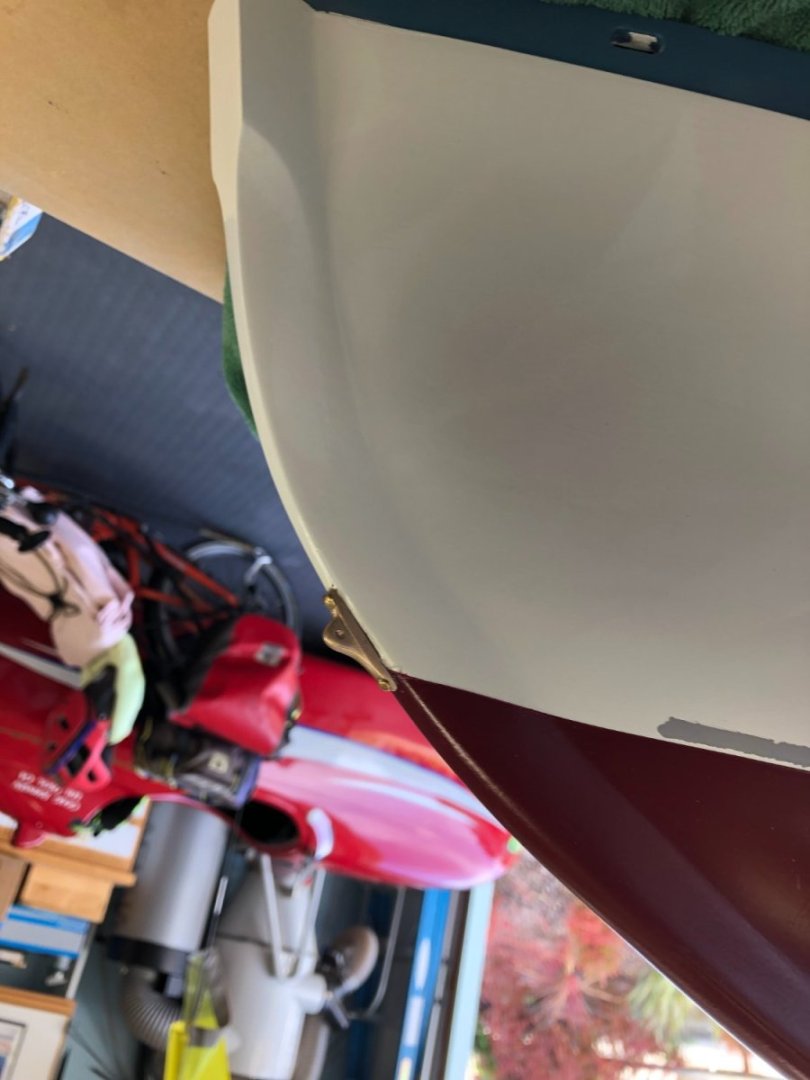
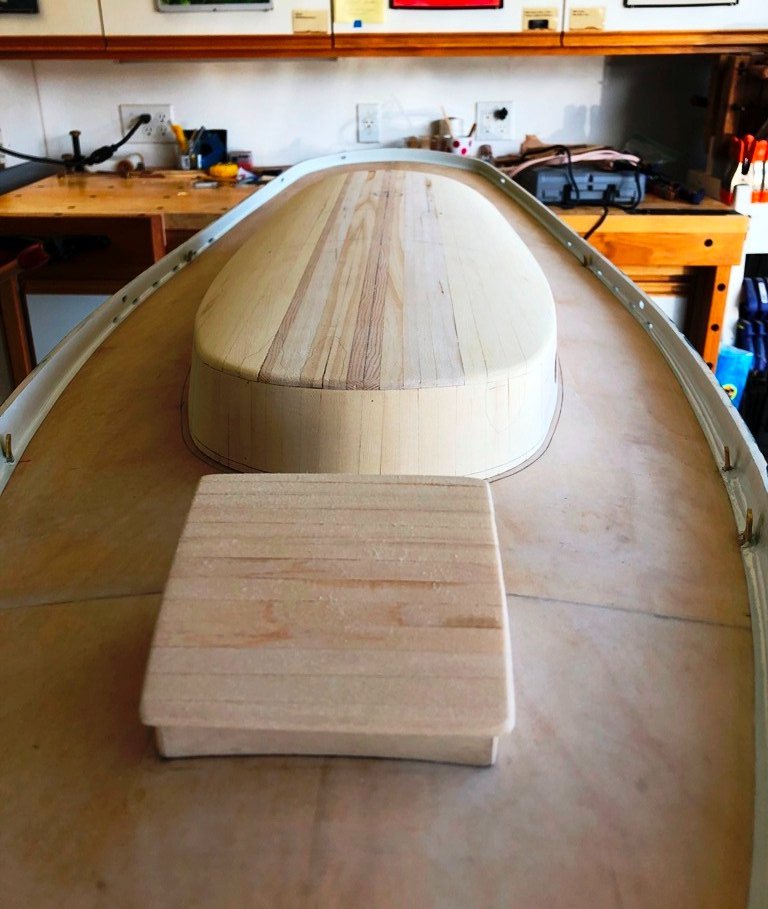
Over the next month or so, the bulwark was primed and painted, the bottom repainted with a bottom paint color, and a friend with a decal machine kindly made up the 2-color decals for the transom and bows. At the bow, I fitted a bobstay attachment fitting which had been cut out and filed from a scrap of 1/8" thick silicon bronze. The stem was morticed to take the tang and additional shear pins were fitted when the tang was glued in place. ( While the photo is upside down, it seems to make more sense in this attitude) The "deck furniture" began with the construction of the forward, curved-top scuttle for the forepeak access. This was built of bits of the 3/32" th. plywood, basswood and meranti. The main cabin began with the fitting of the plywood sides to the deck carlins and cabin beams (most of which would later be cut away). A rear bulkhead was attached to the lower bulkhead and to the cabin sides with shaped corner posts. Forward, vertical staving pieces of basswood were glued together, fitted to the curved deck carlins forward and the solid blocking at the upper edge. The elliptical port openings were cutout prior to assembly. The cabin top was planked fore-and-aft with 1/8" x 3/8" basswood strips And then sanded fair.


-
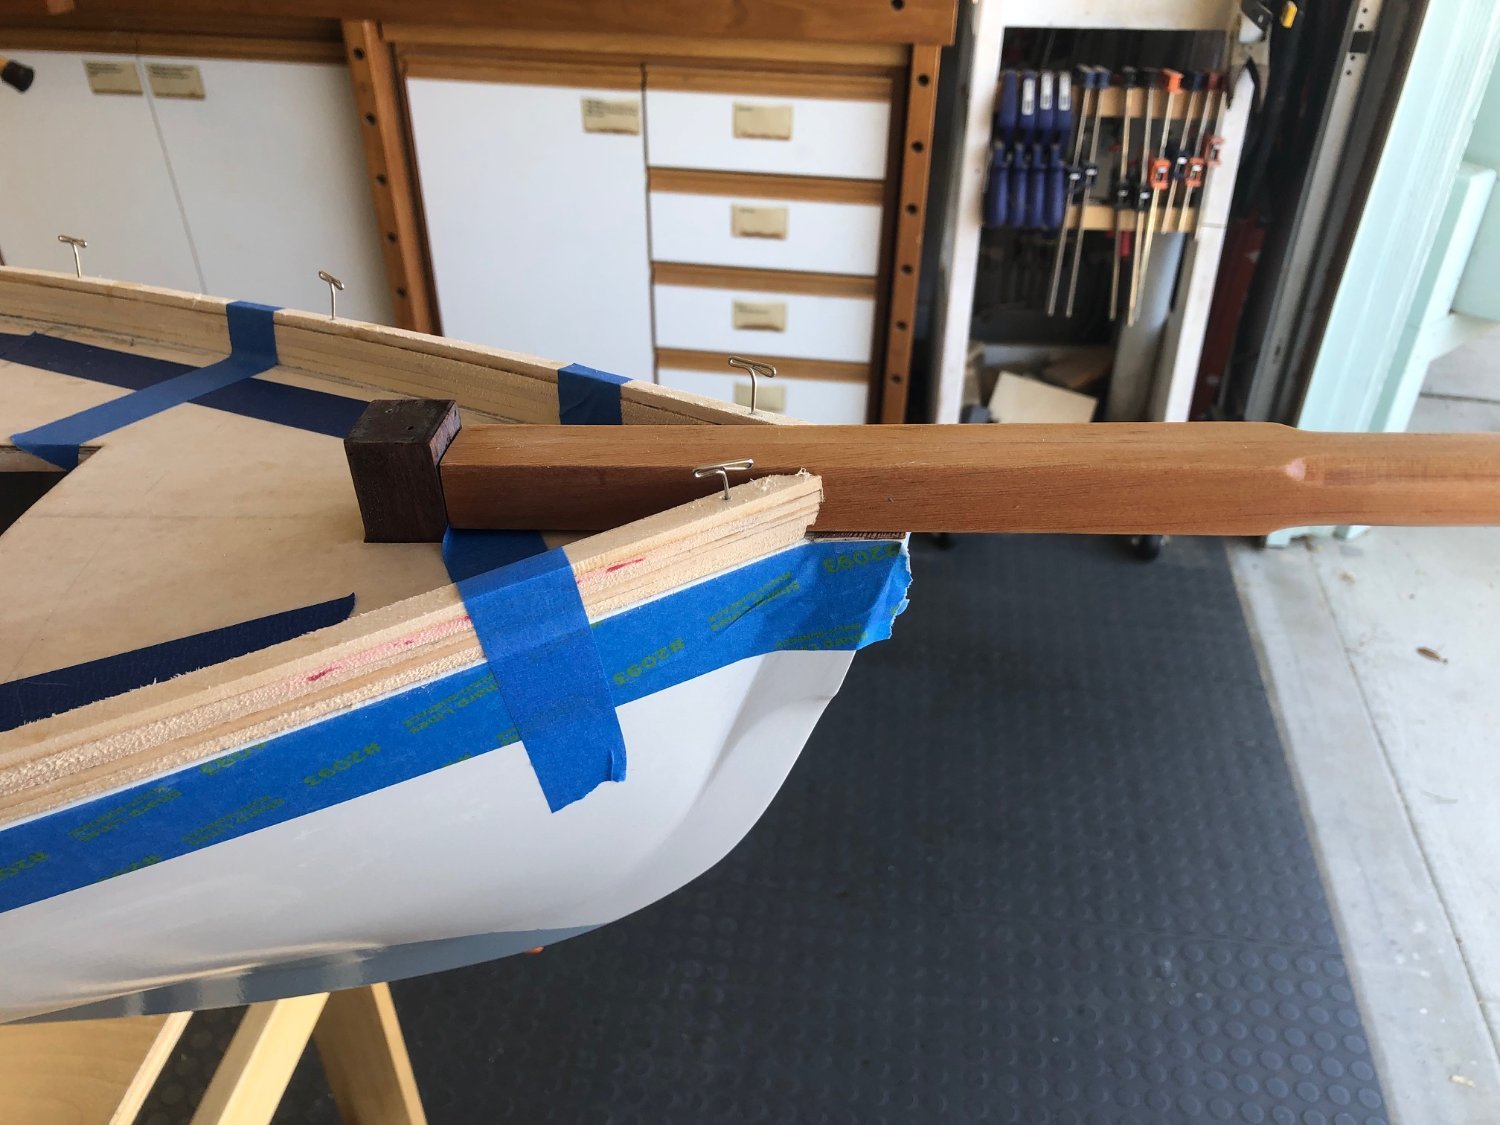
Hawses were drilled, filed and cut out from brass flat stock, then located on the bulwarks according to the outboard profile plan. Once bonded in place, the openings in the bulwarks were drilled out and sealed. A bowsprit of tight-grain Douglas fir had been previously fashioned to permit a careful fit with the bulwarks at the bow.


-
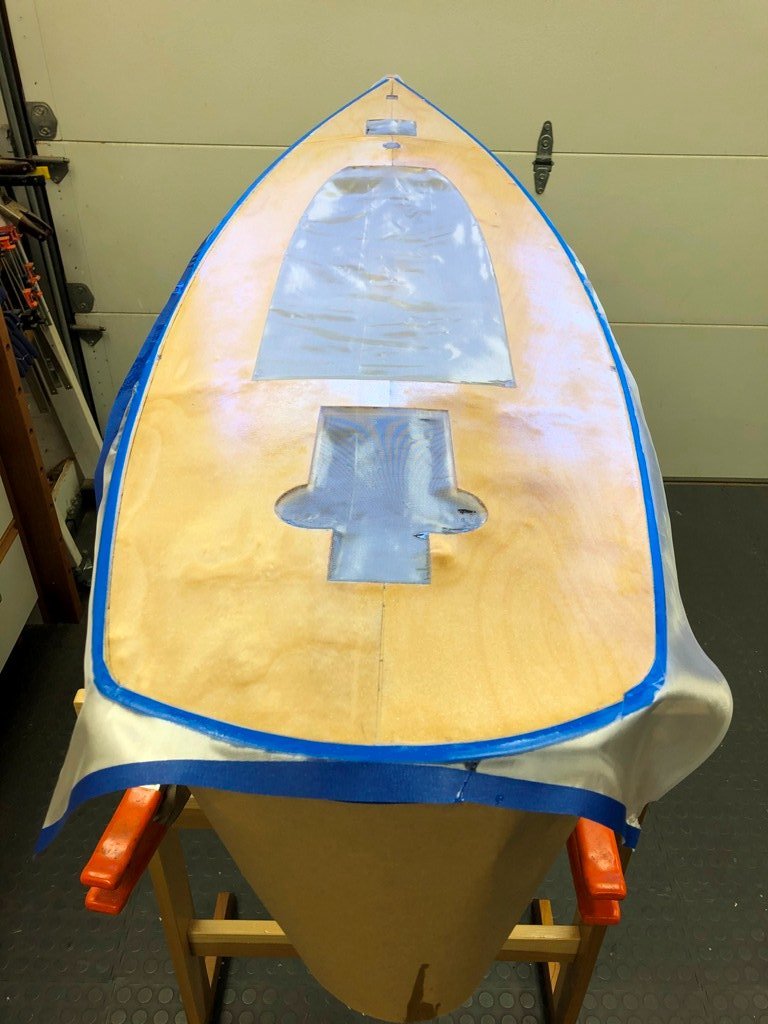
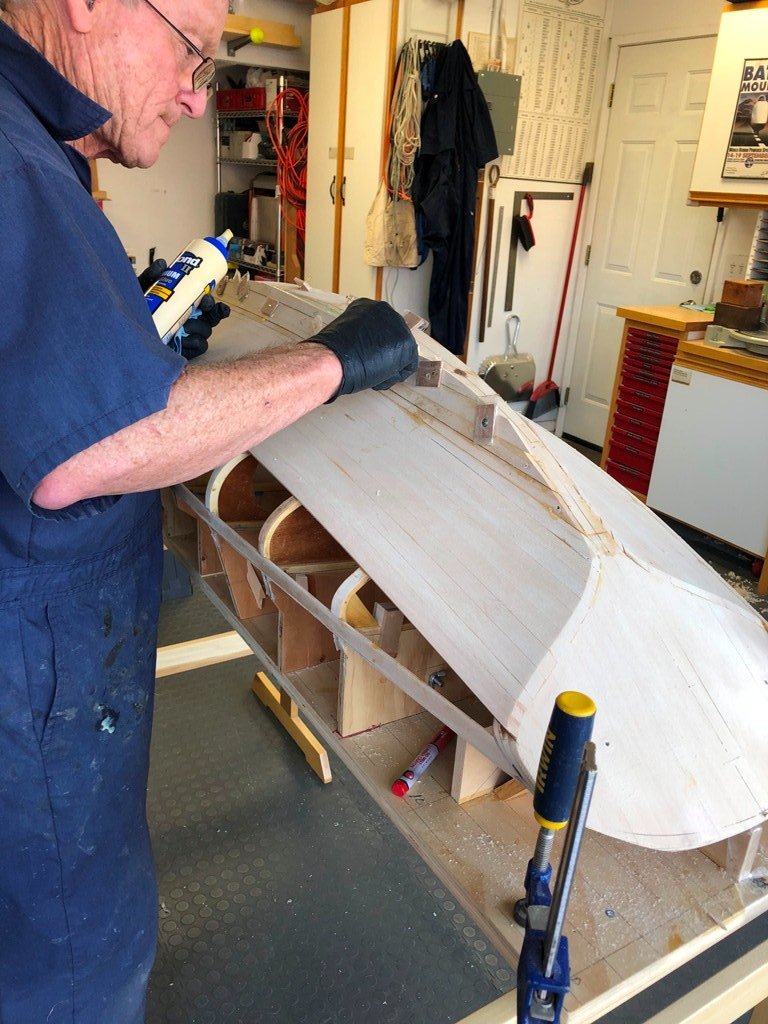
The deck covering was given a couple of coats of epoxy to fil the weave of the cloth, a light coat of fairing and then detailed along the sheer. The chainplates were glued and pinned in place below decks and they emerged inboard of where the bulwarks would be (mostly). The bulwarks were built up from 1/8" lifts in a similar manner to how Bent Jespersen laminated up the original's 1-1/2" lifts in 1992. Once the bulwarks were scarfed together and sanded, they were lifted off of the deck and given a layer of FG/epoxy on the inboard and out board faces before being bonded in place with a coved radius to the deck on the inboard face. To check

-
Tony : Yes, that article was a while ago! I hope you will find this build interesting as well. Thanks for checking in. Nils: Thank you for the compliments. I appreciate them especially in light of all of your modelling experience.
-
Thank you, Roger for the compliments. We are hardly objective about her, but grateful for those who appreciate such as MAGIC.
-
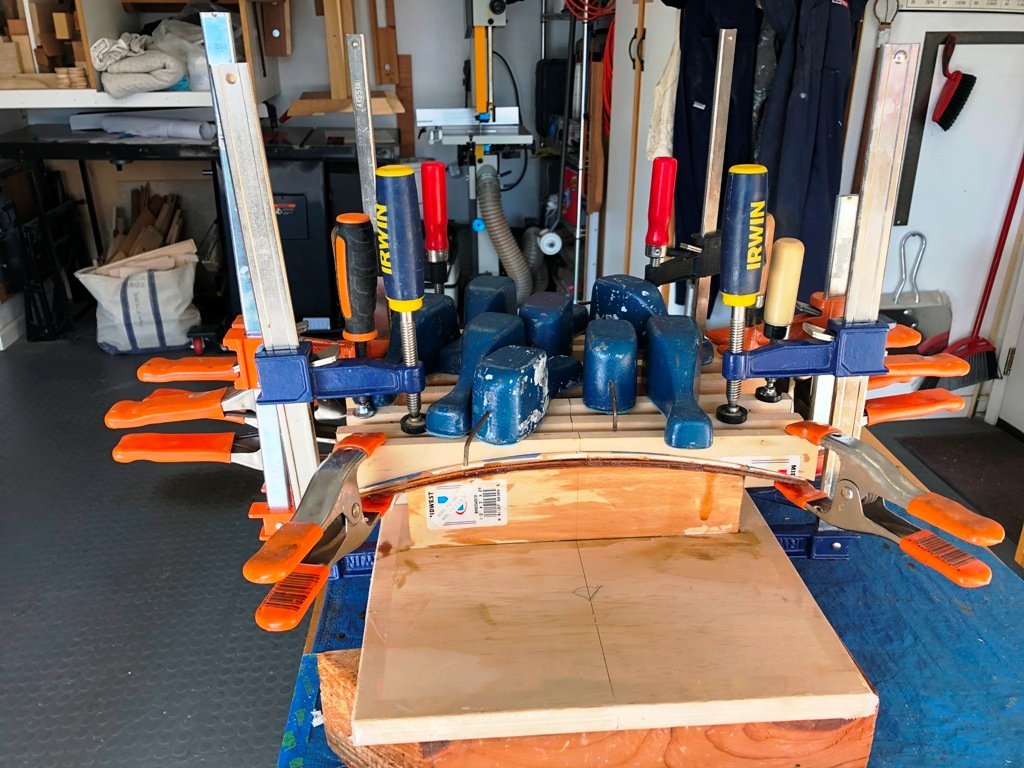
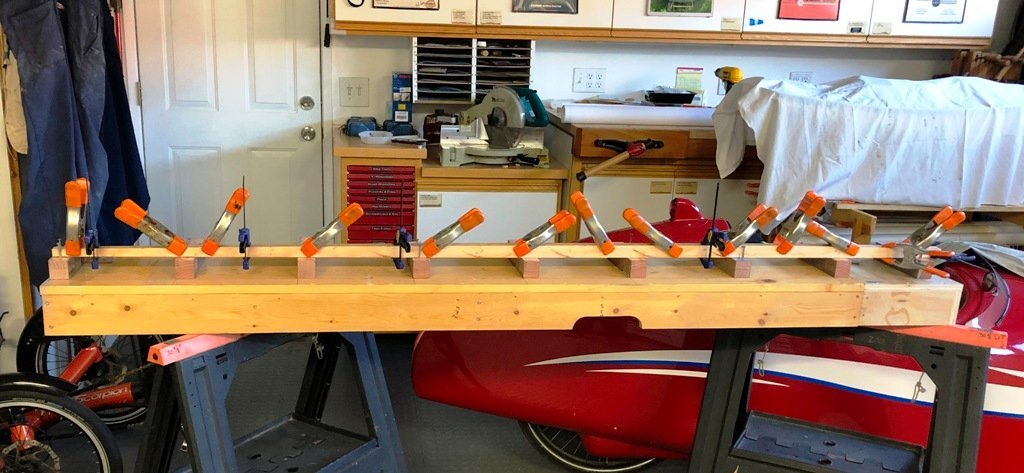
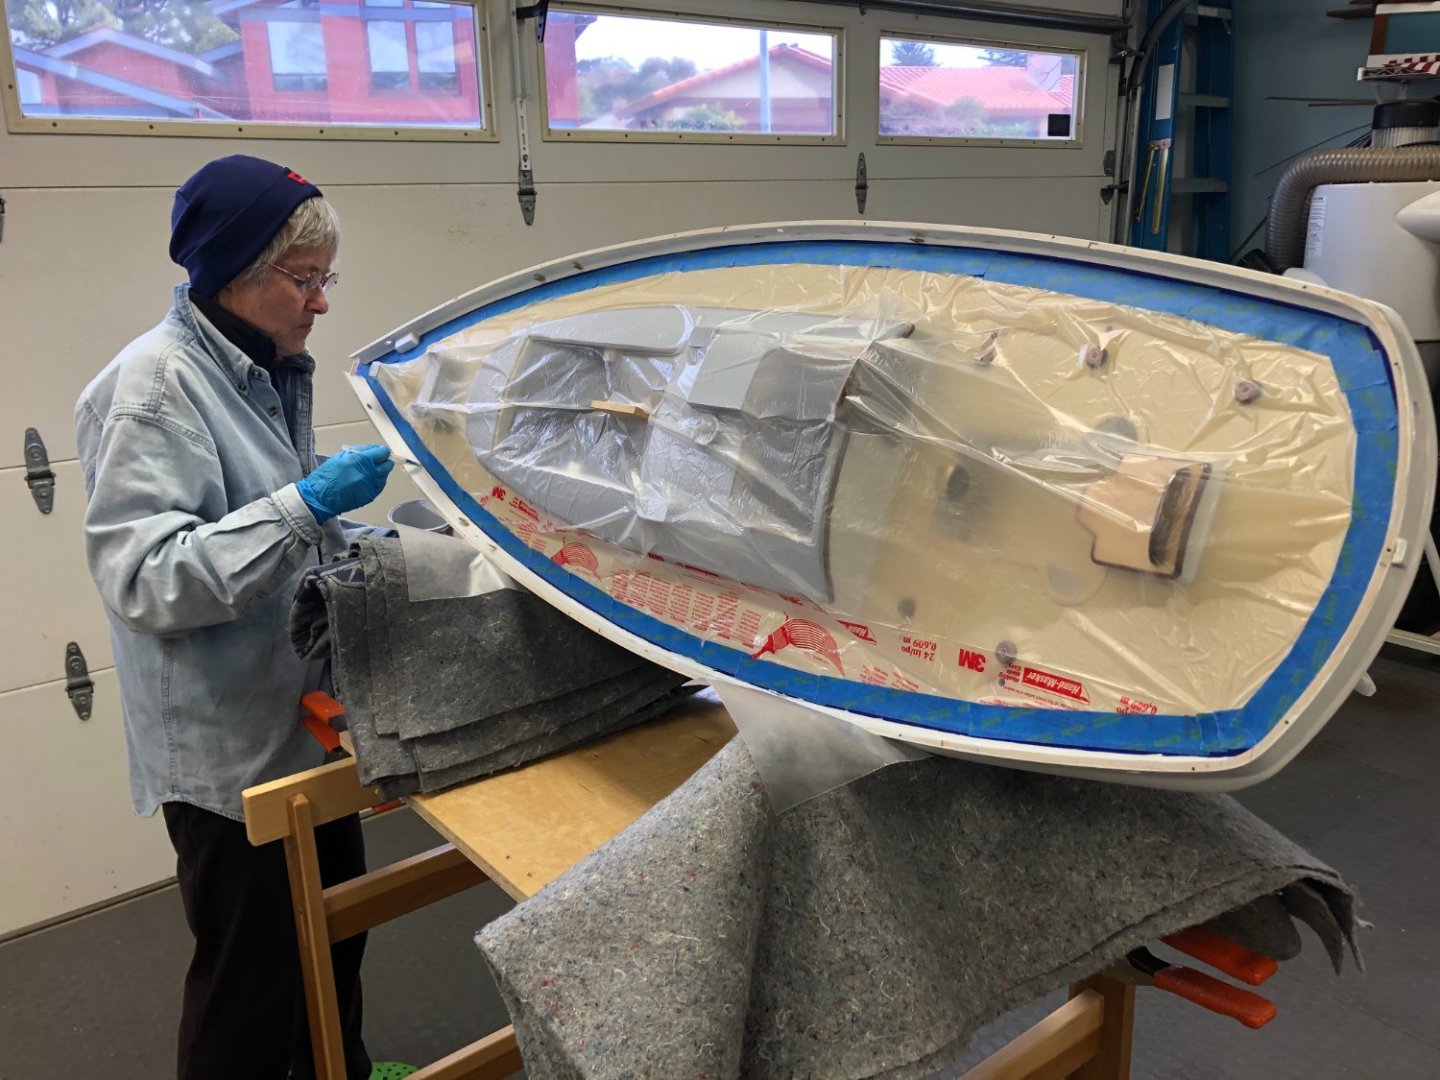
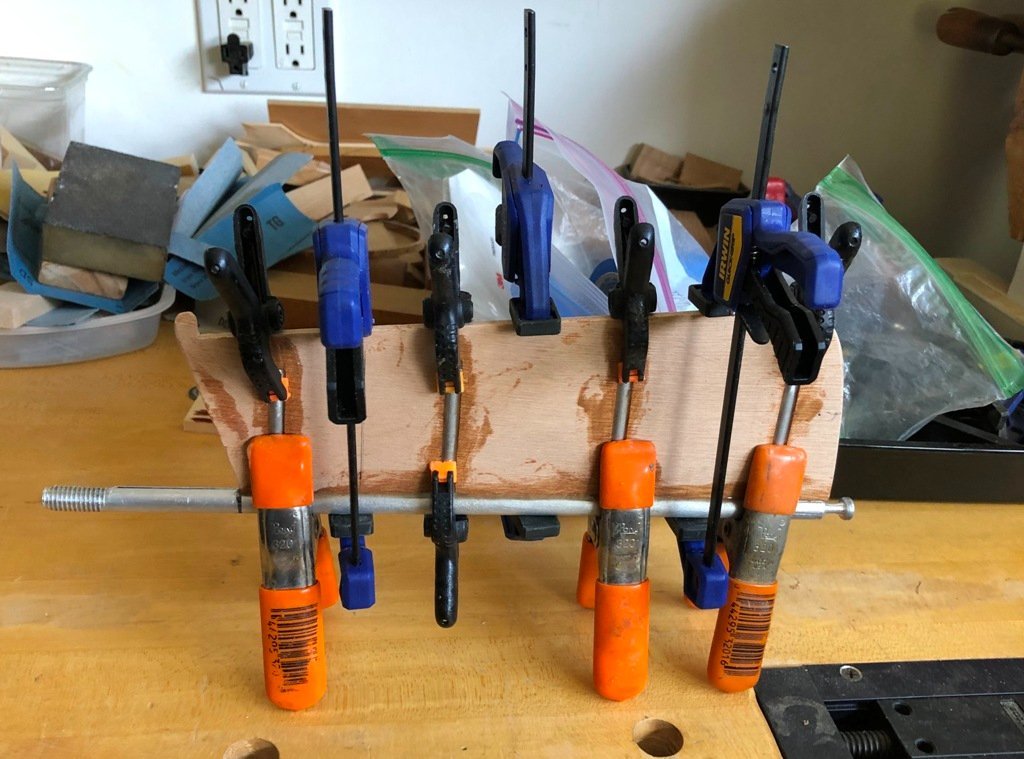
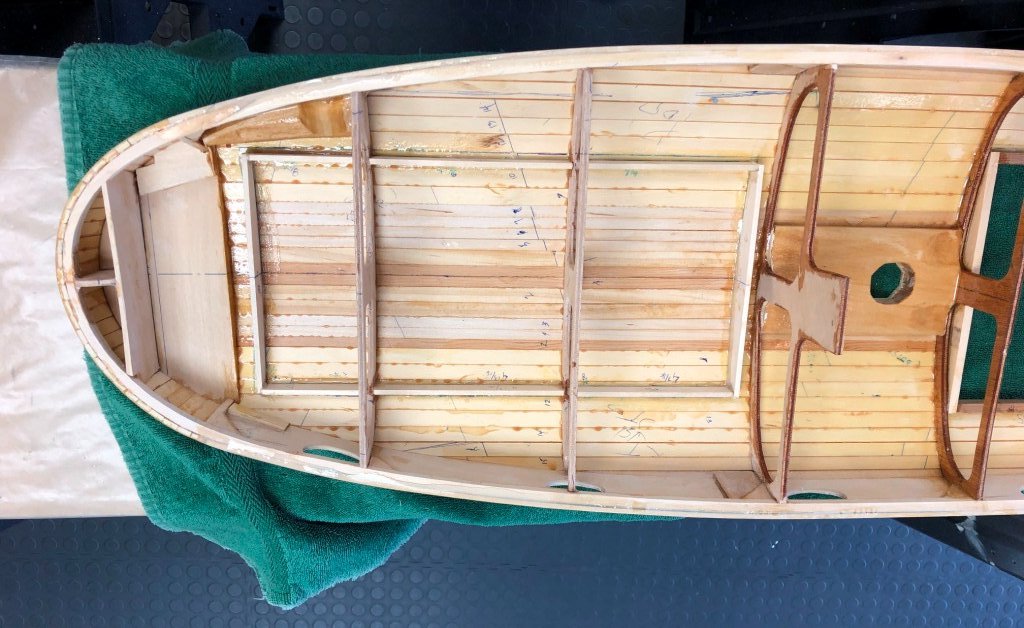
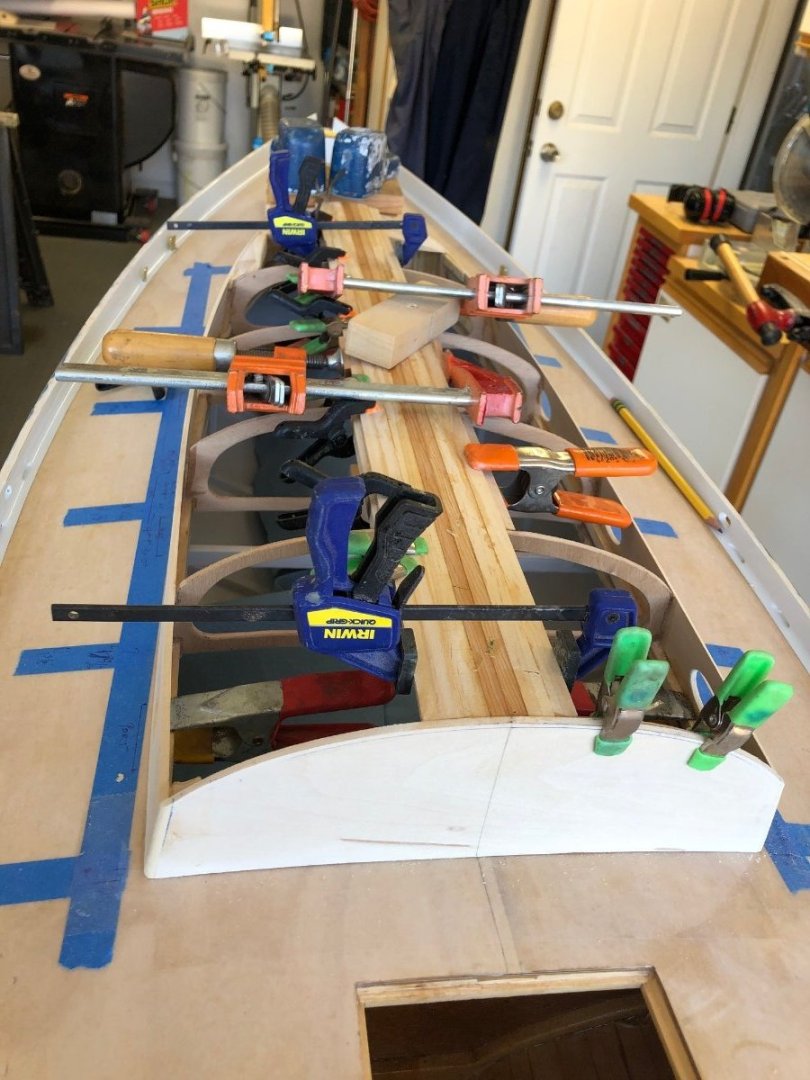
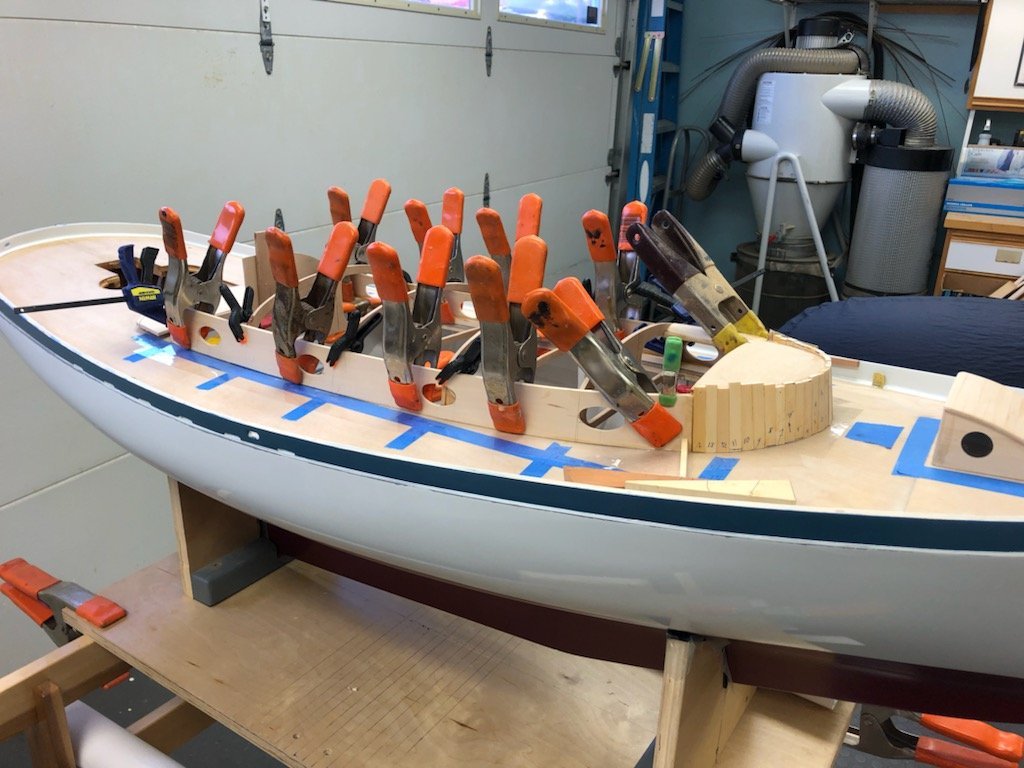
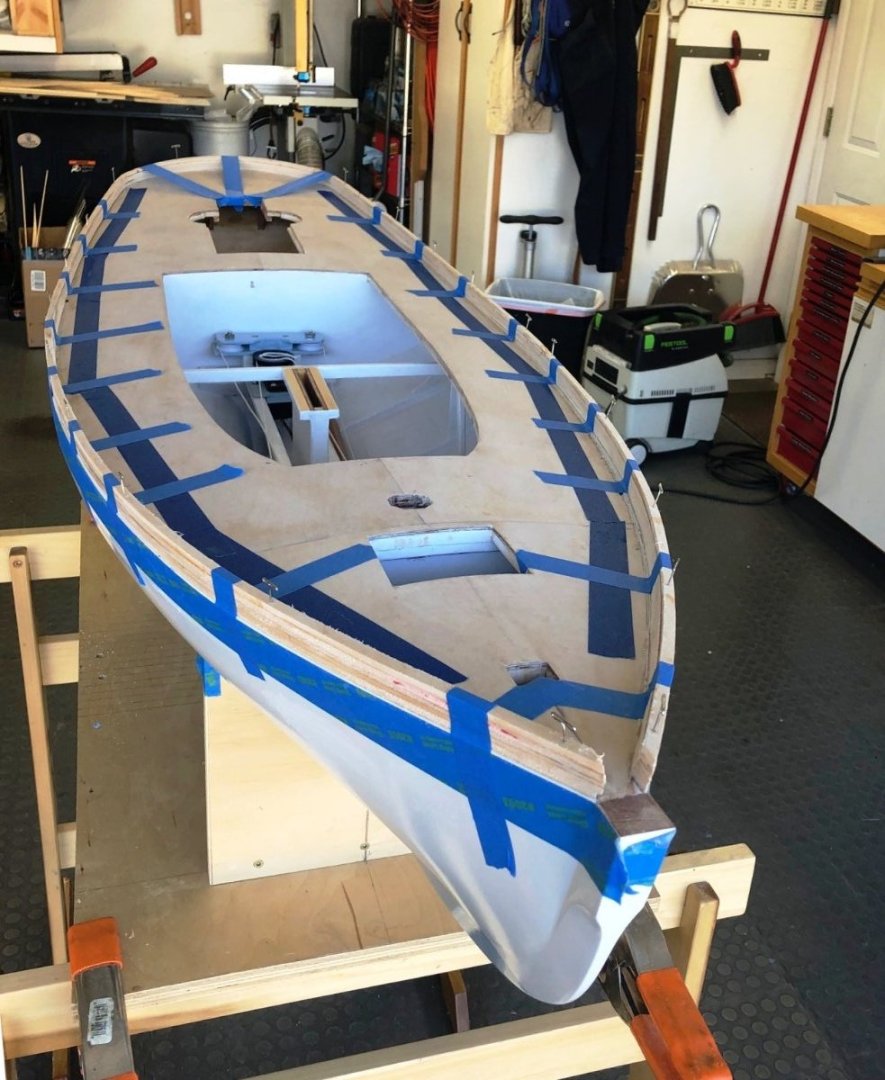
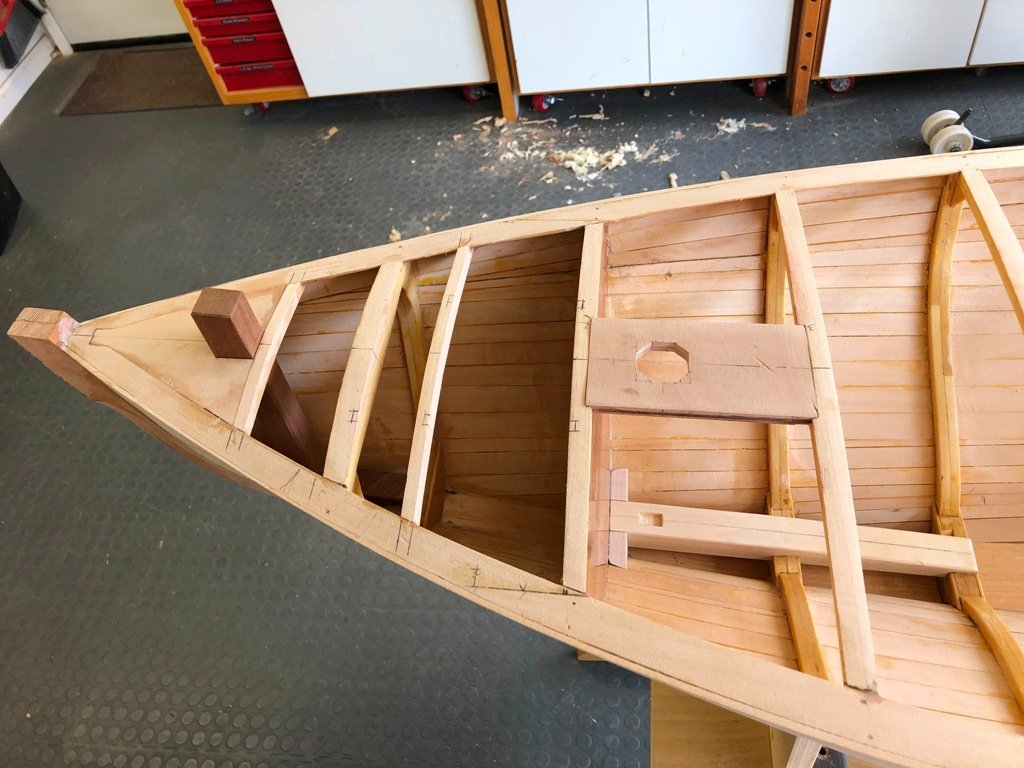
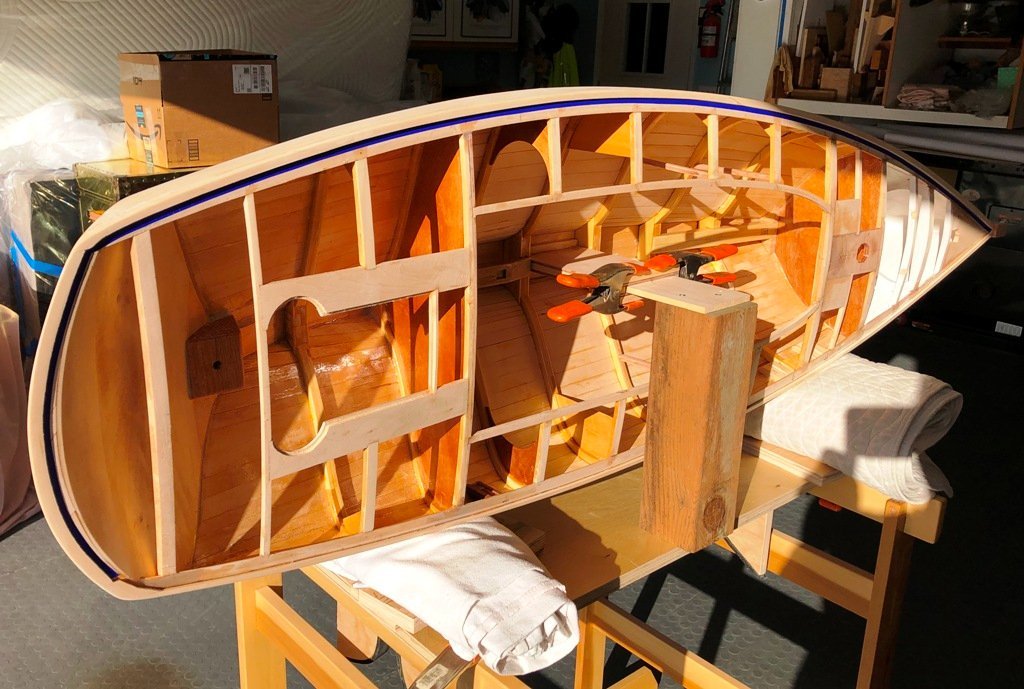
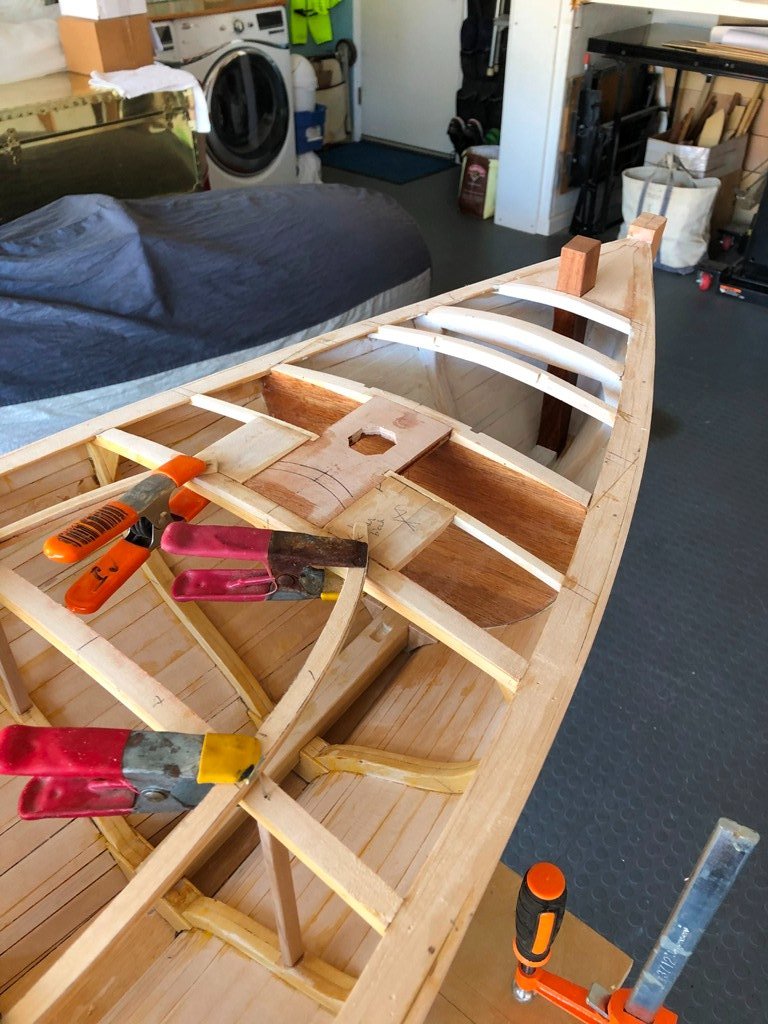
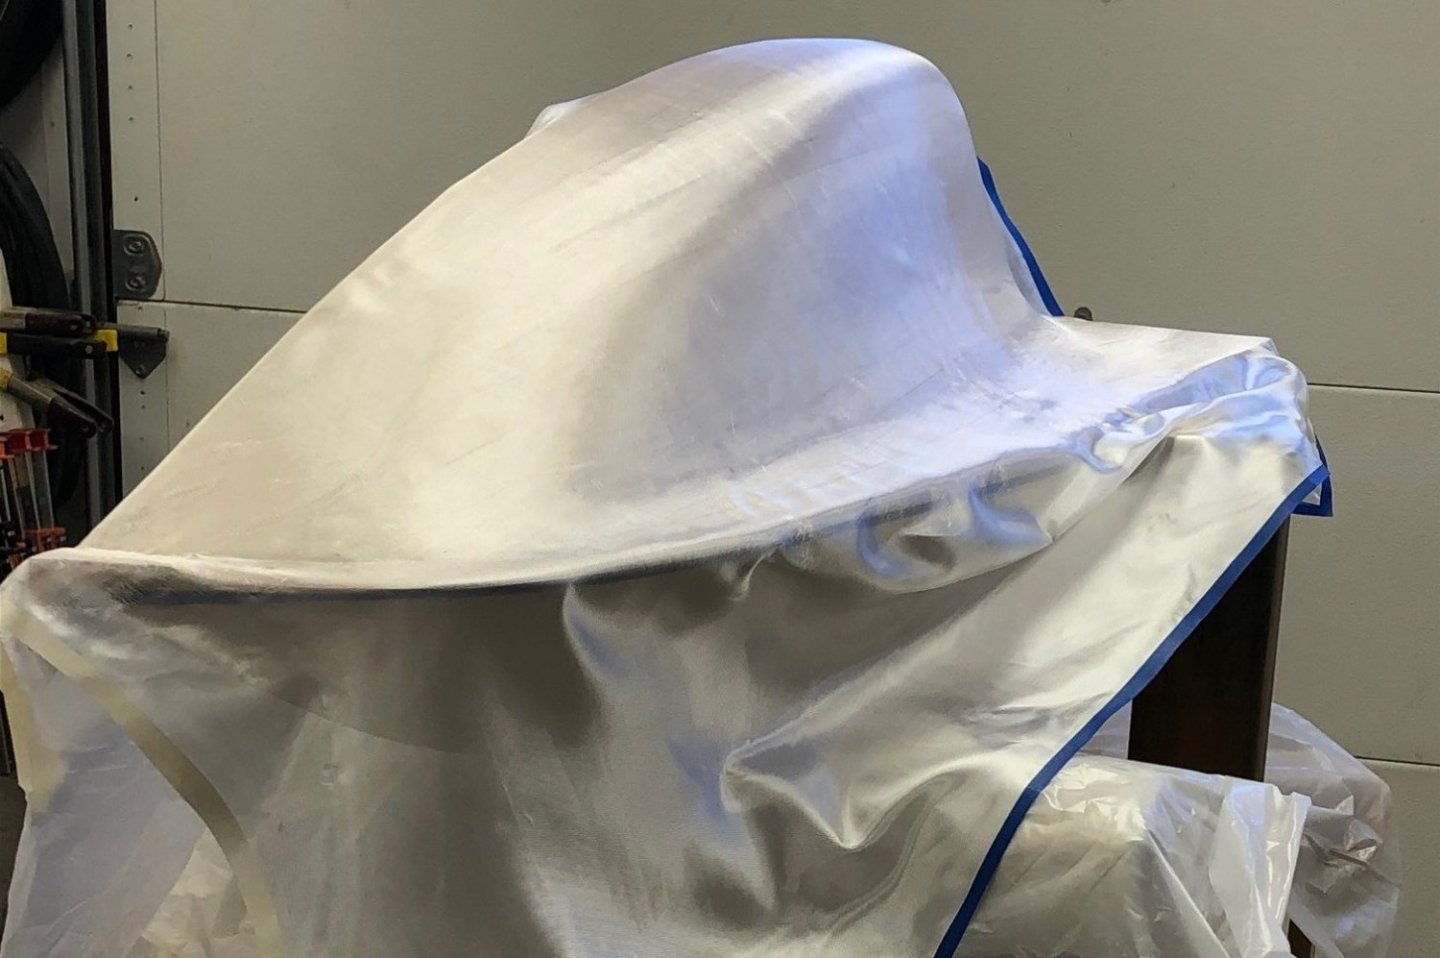
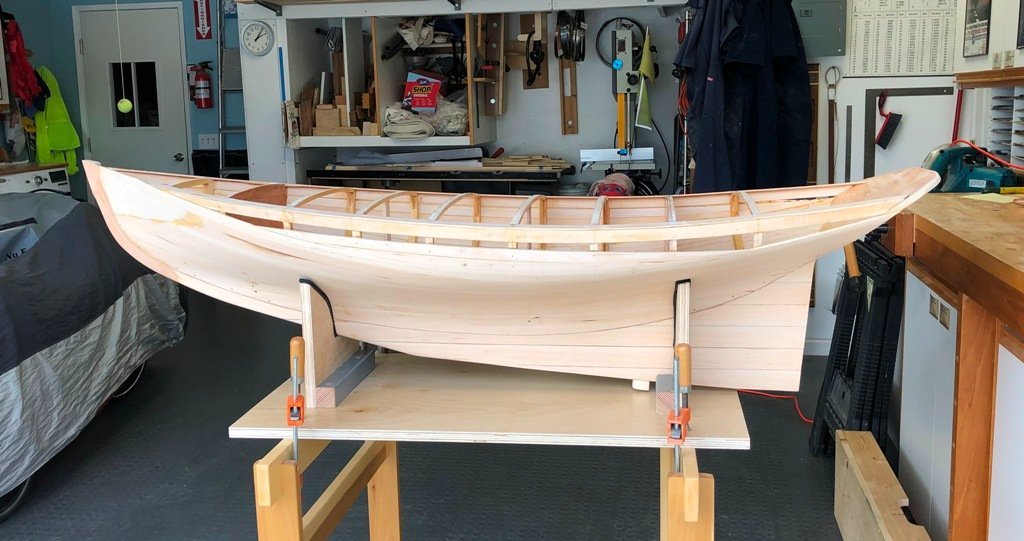
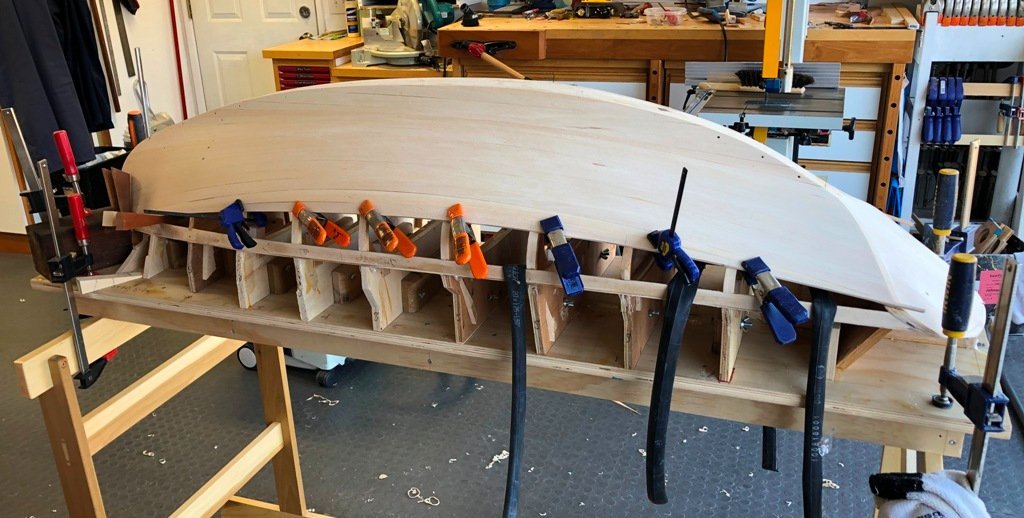
The summer of 2021 contained various interruptions to the building process, however some progress was made. Blocking was glued in belowdecks for the chainplate attachments as well as for the R/C sheet and rudder controls. The extra glue in the interior of the hull was scraped/sanded away to prep the hull to be sealed and painted. After a final bit of fairing of the deck structure, the 3/32" Baltic birch ply deck panels could begin to be glued down. The compound curvature required of the plywood did require additional clamping efforts: After the clamps, etc., were removed, the deck was given a light sanding and then glassed over for watertightness.

- 67 replies
-
- 10
-
-
-
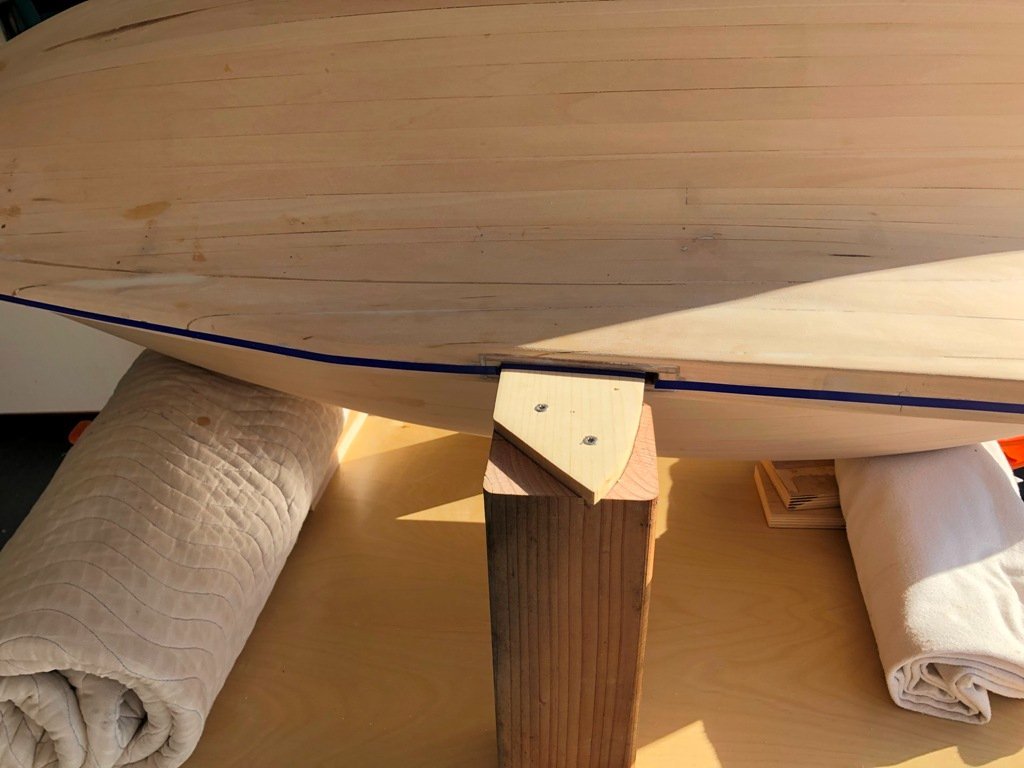
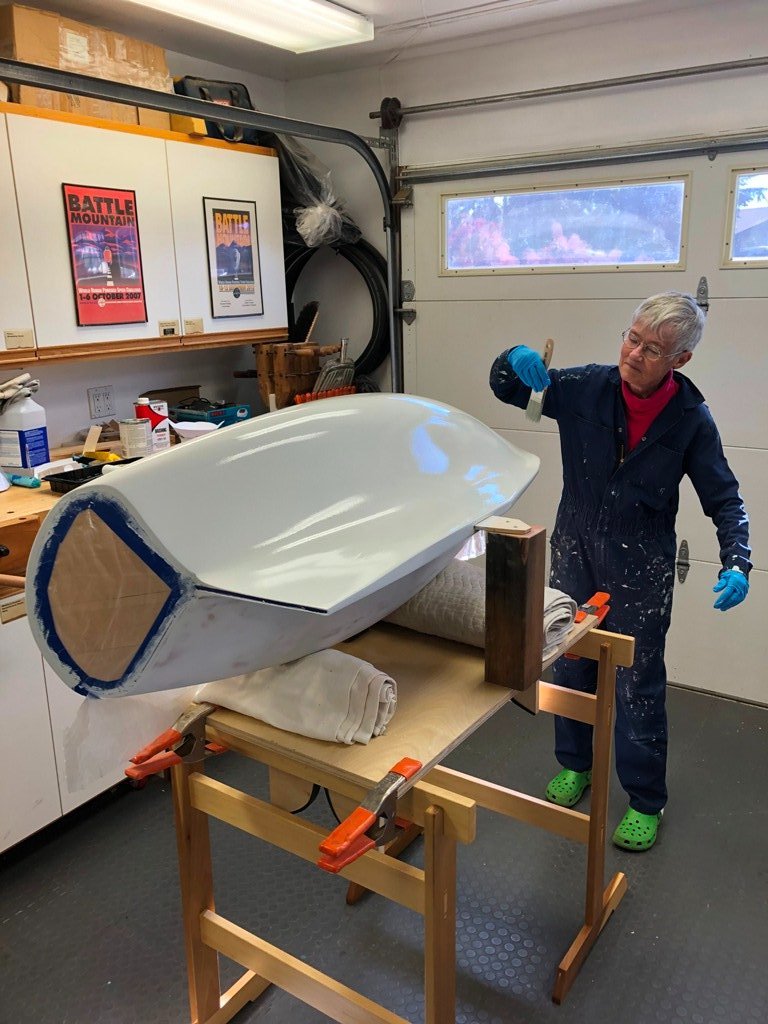
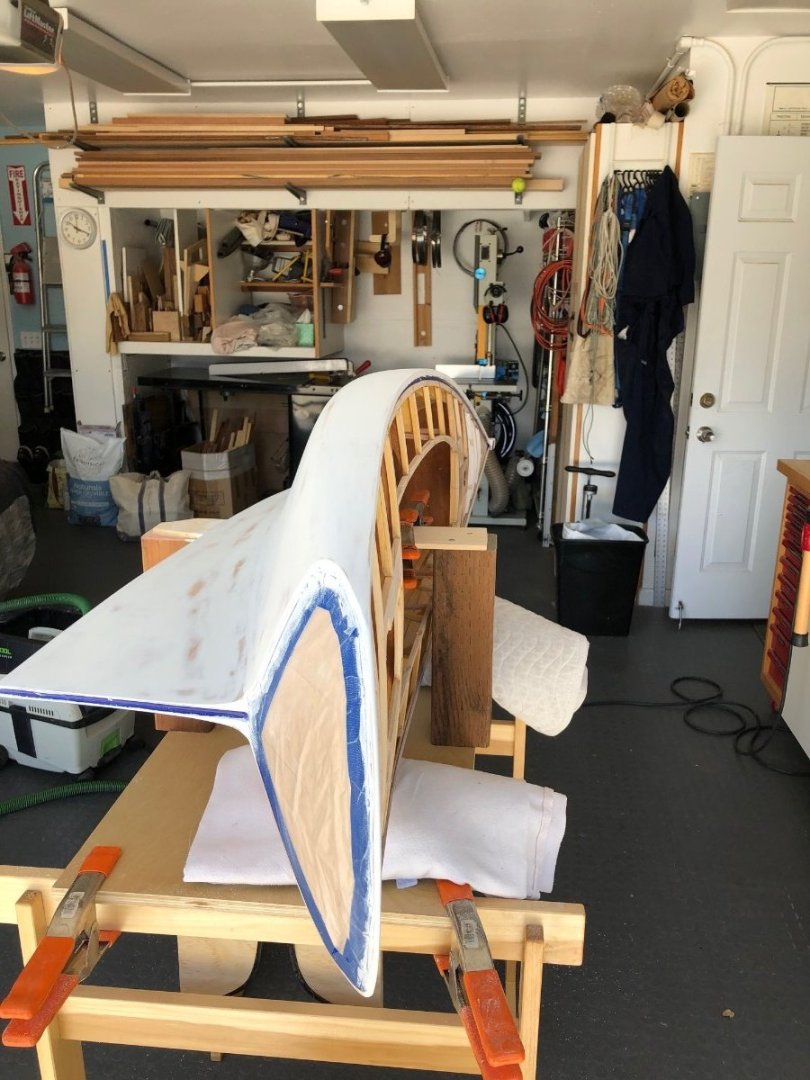
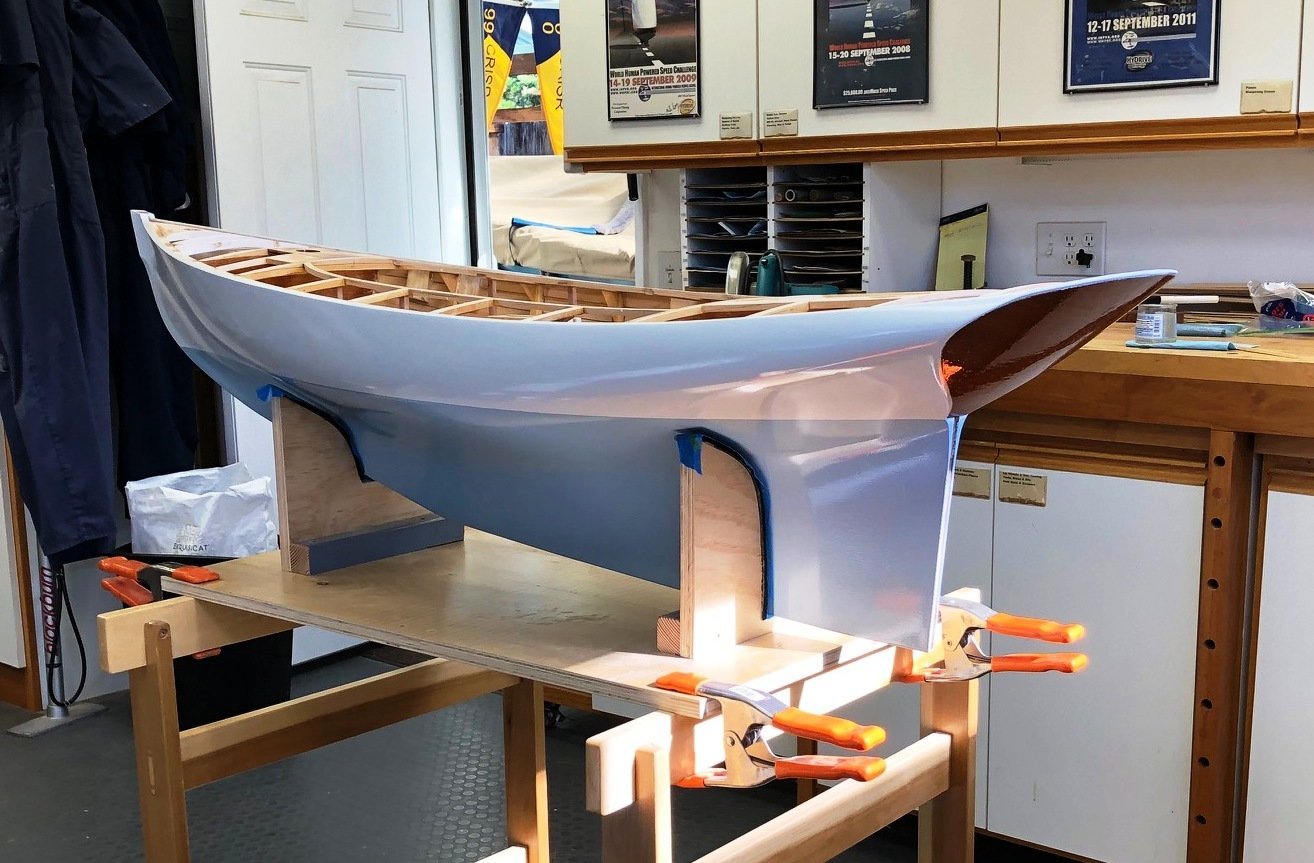
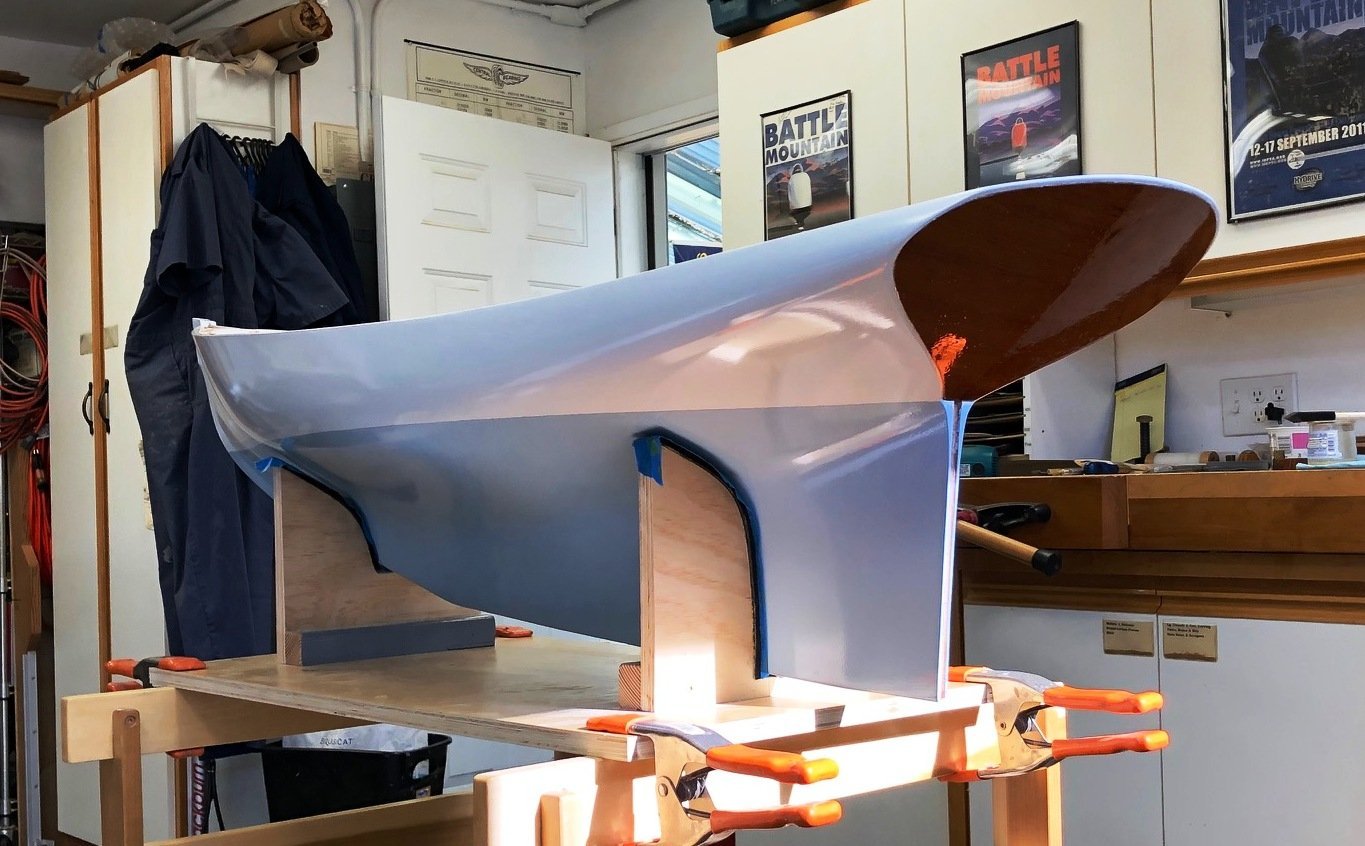
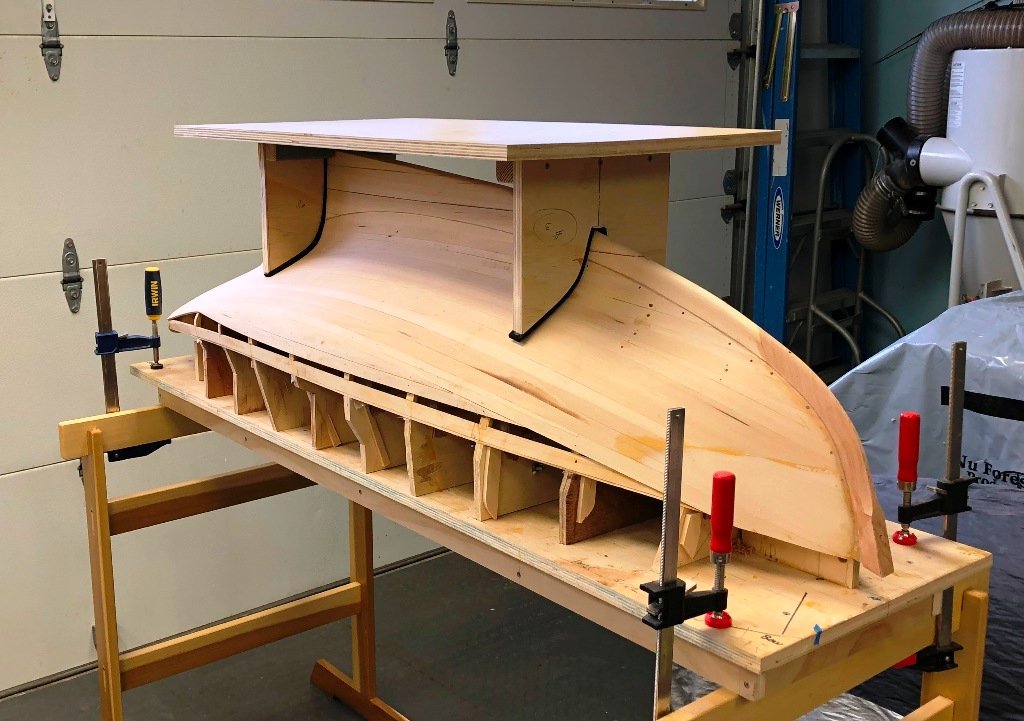
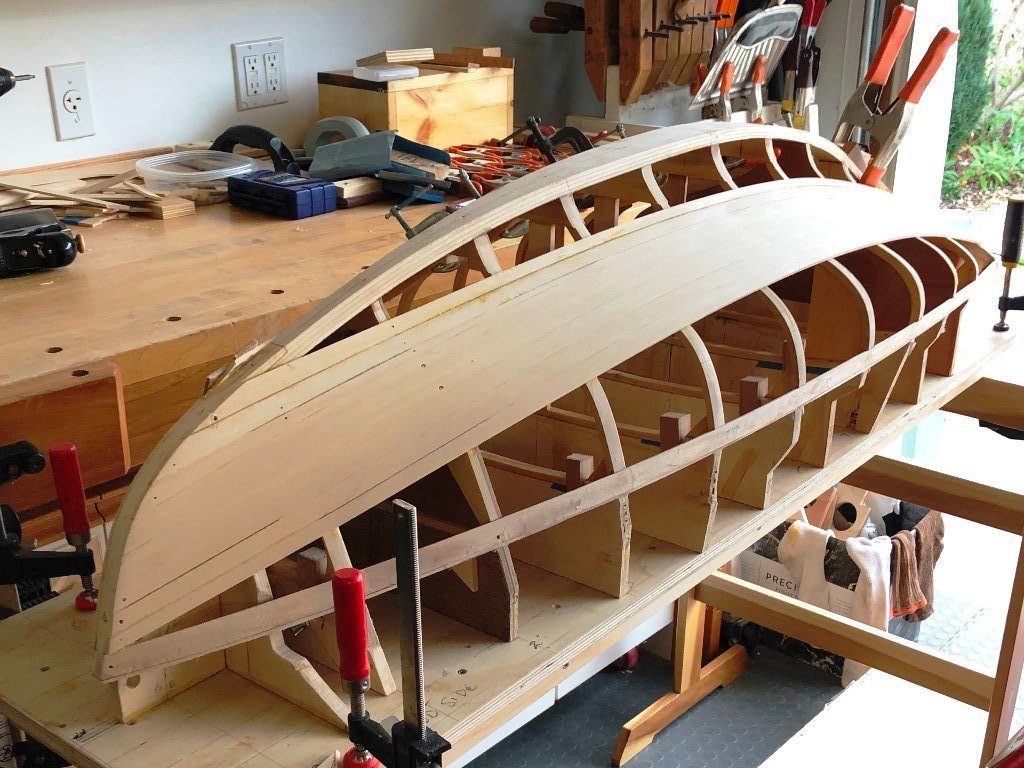
May , 2020 With the model upright, work began on additional deck framing, fitting the breasthook and the bowsprit bitt, mast partners and mast steps. Planking and fairing were completed on the hull and in preparation for the sheathing of the hull with fiberglass cloth set in epoxy, the future ballast keel blade slot was cut through the keel and a trunk epoxied in place. Using this trunk, a piece of scrap wood was slid through amd supported the hull on blocking when she was turn on her beam ends. The glassing of the hull was done with a light aircraft cloth wet out with marine epoxy, both side received two coats to fill the cloth weave. Once cured, this was given a light fairing coat, sanded and then 2 coats of primer before the initial coats of gloss were applied to the hull. And somewhen in this sequence, I laminated a thin veneer of African mahogany onto the transom, sealing it with 3 coats of clear epoxy. We then painted the hull, topsides and bottom with some contrast to see how mini-Magic was looking. And that will be enough for today's updating...
-
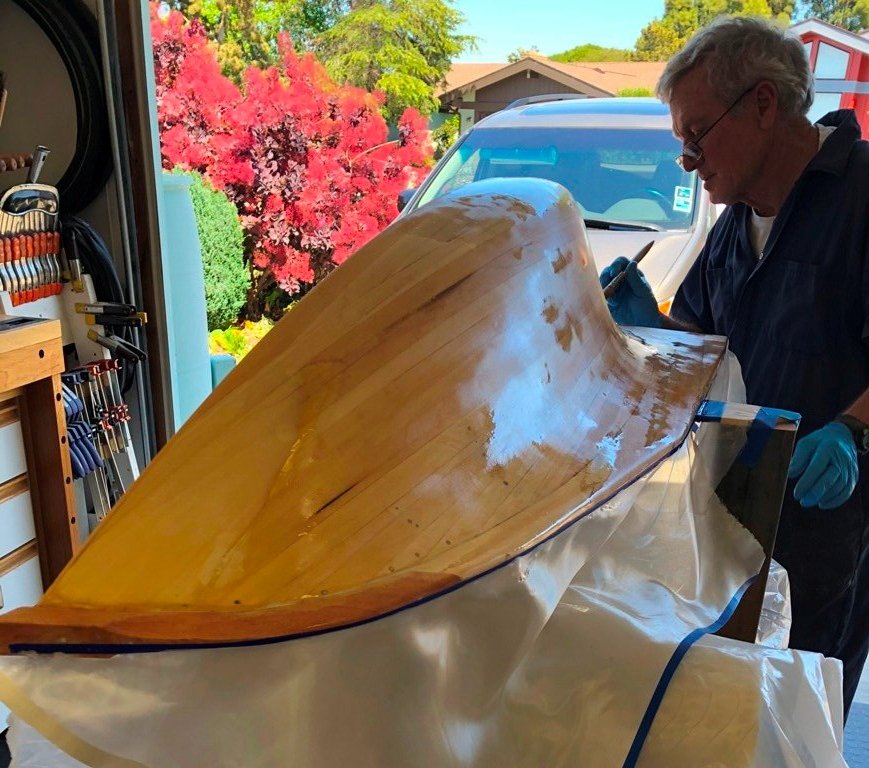
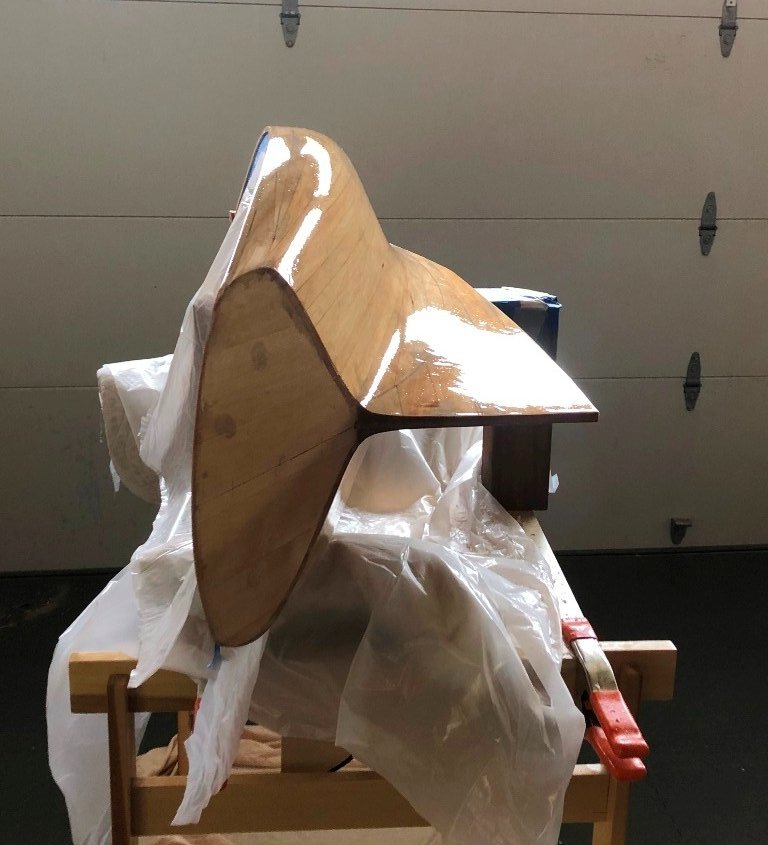
My next step involved laminating up the deadwood from 1/2" lifts of basswood and getting out the outer stem from some lovely, tight-grained old growth Douglas fir. More fairing followed of the deadwood and then it was time to build a new cradle to hold the hull "right-side up".
-
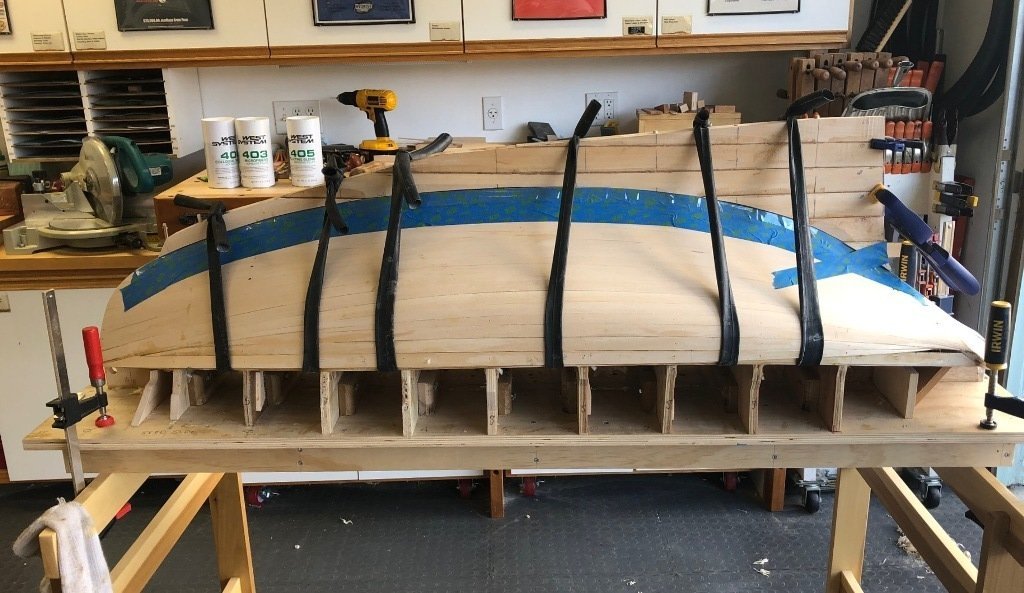
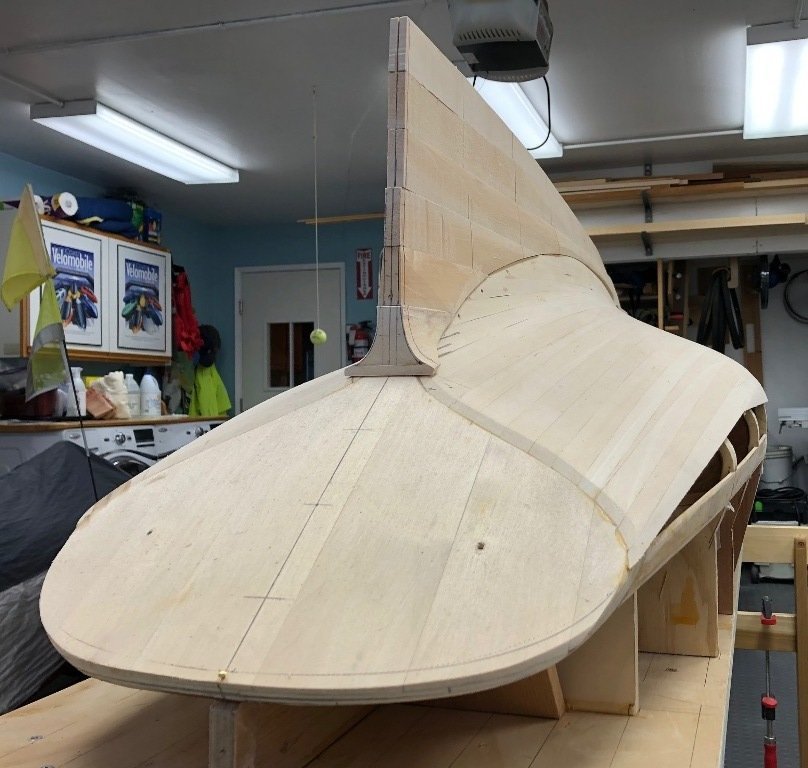
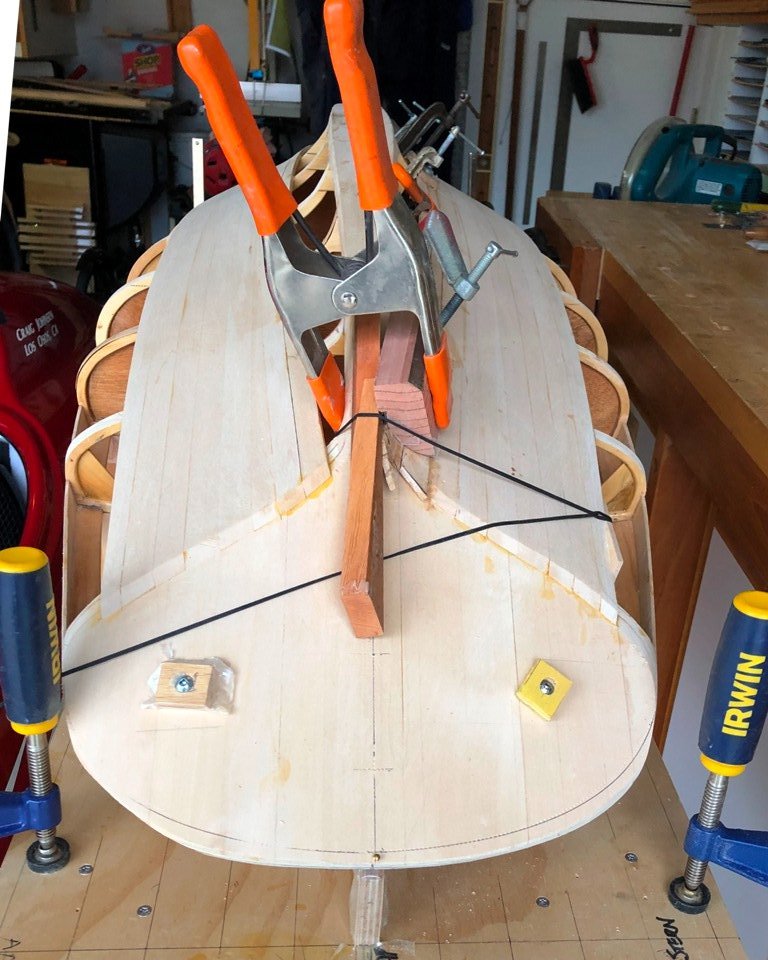
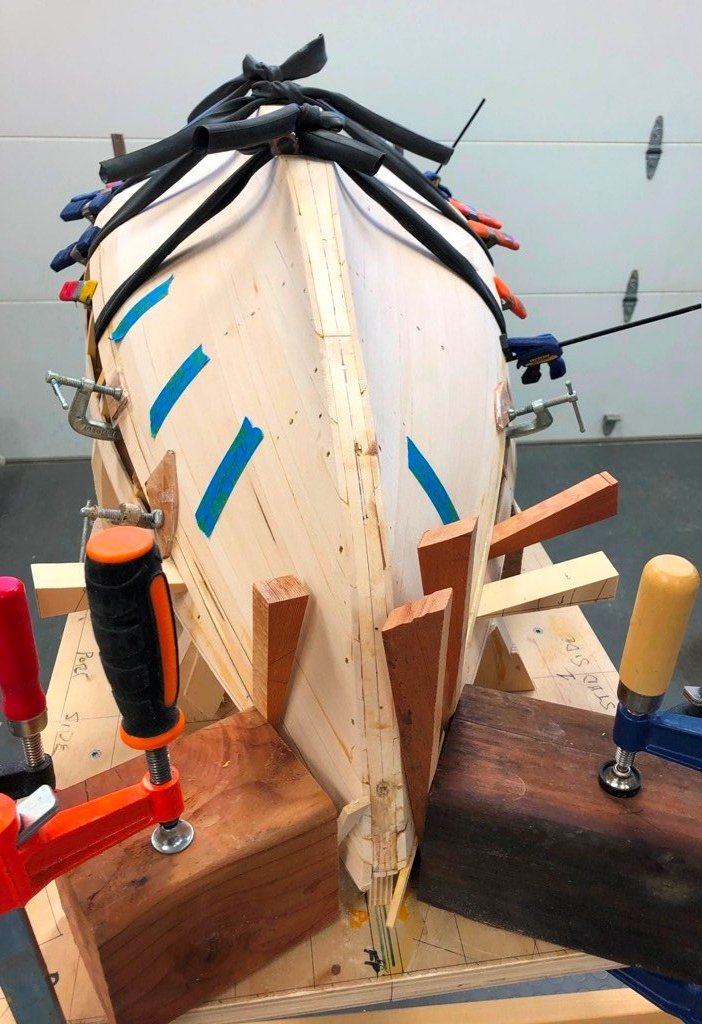
Planking was done using 1/8" th. basswood, spiled as necessary and edge-glued to the adjacent planking and frames. Knowing that the hull would ultimately be painted, I elected to start planking on the easier, "flatter" runs of the bilge. I realized that the reverse tuck near the deadwood/keel as well as the tumblehome in the quarters would be challenging.. Planking from the keelson "down" Working towards the sheer:

-
The model building time during the winter of 2019 - 2020 was a time spent carefully fairing the hull framework to prepare for planking as well as fitting the clamps into notches in the frames and gluing what would be their upper edges to the underside of the harpins. (Bent Jespersen, the builder of MAGIC, followed this West Coast practice with nearly all of his cold-molded hull builds.)

-
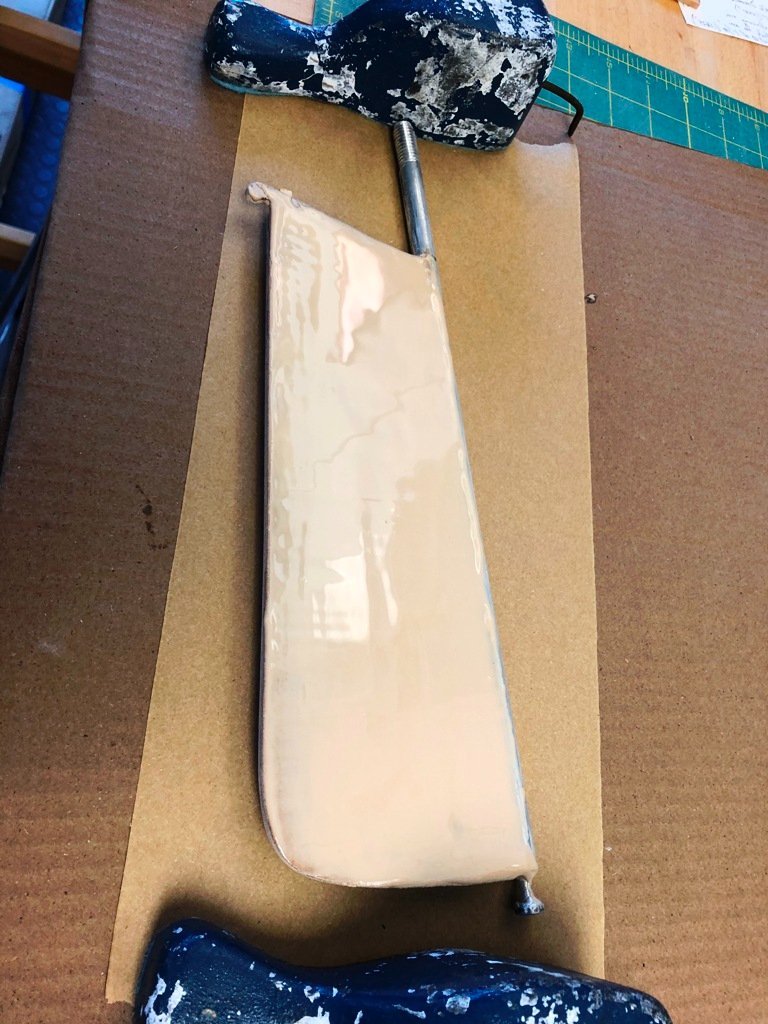
The keelson was made up from 4 layers of basswood and one inner layer of meranti. After the glue cured, the keelson was scarfed to the inner stem and mortised into the lower forward face of the transom.
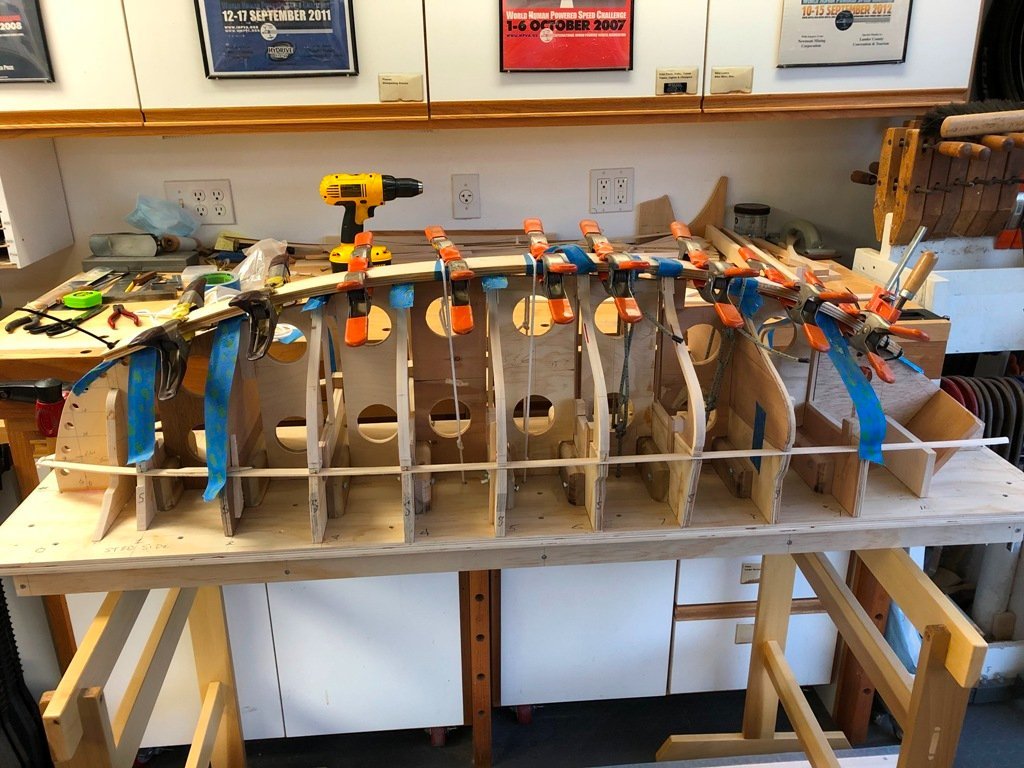

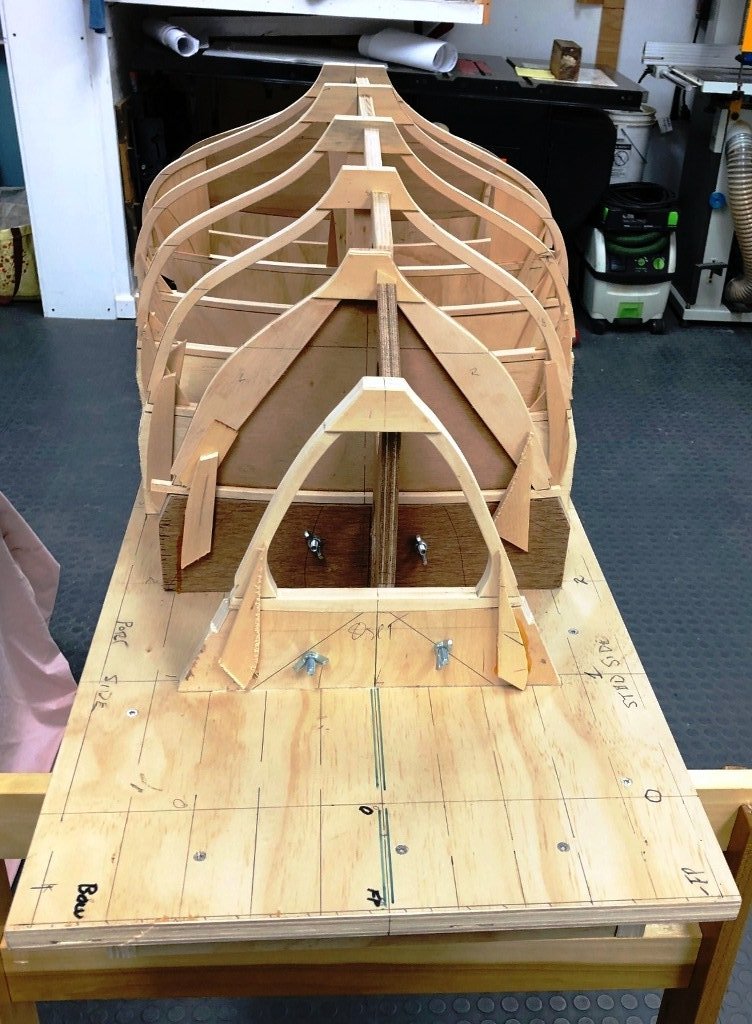
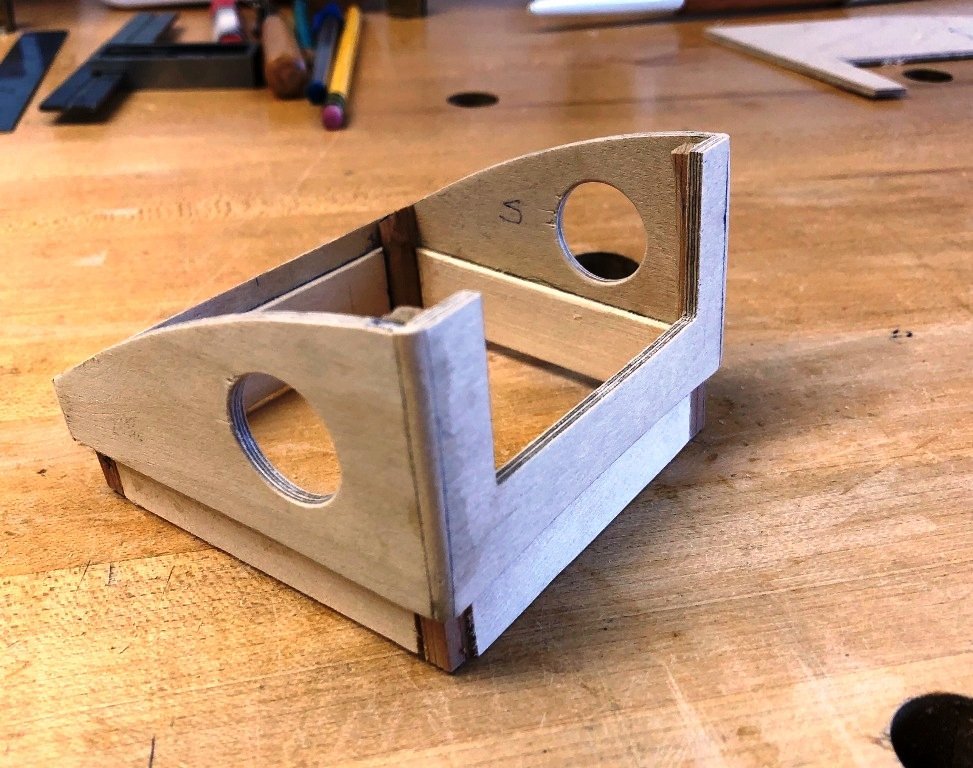
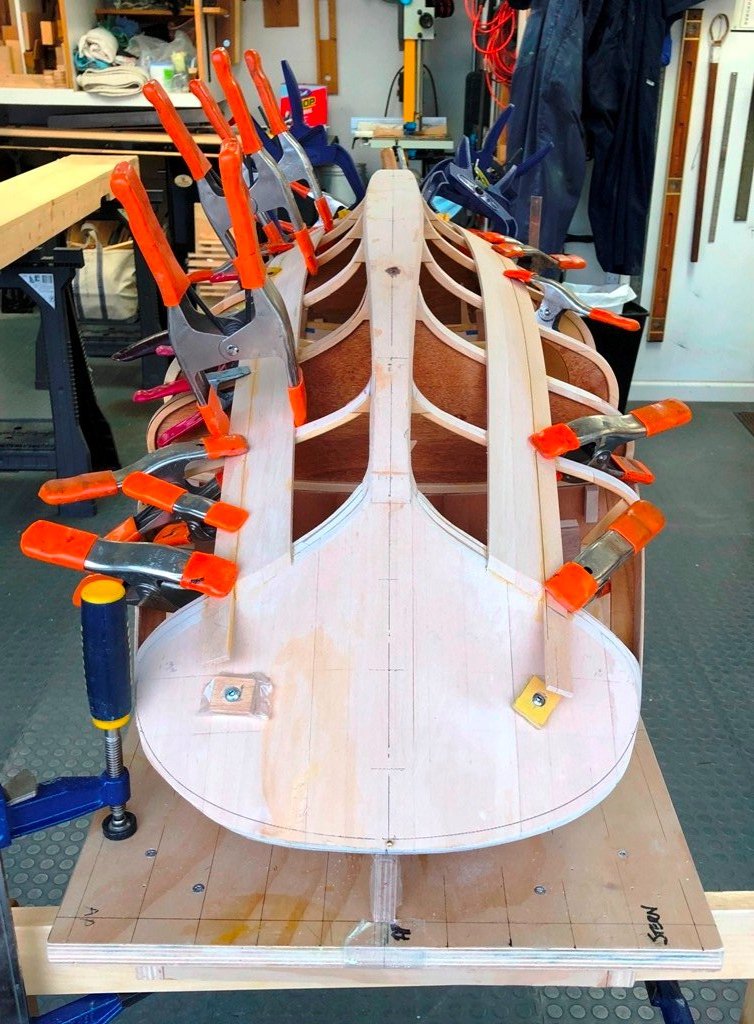
-
The model was built inverted with frames made from glued double futtocks of basswood, located on the stations. Frames #2 and #8 also incorporated 3mm ply bulkheads to create "watertight" compartments in the bow and stern. The deck beams rest atop the corresponding station molds and are held in place with small friction-fit wooden clamps The photos from here on out are by me unless otherwise noted. Fore-and-aft temporary blocking locked the stations vertically. Once all of the stations were situated, blocking for the transom and the inner stem were set up. A transom blank was laminated over a curved form, the inner stem was glued up around the lofted profile piece and port and starboard harbins were scarfed together to be fitted at the level of the bottom of the deck. Next chore was to laminate in place the keelson atop the frames.