HOLIDAY DONATION DRIVE - SUPPORT MSW - DO YOUR PART TO KEEP THIS GREAT FORUM GOING! (Only 24 donations so far out of 49,000 members - C'mon guys!)
×


Schooners
-
Posts
72 -
Joined
-
Last visited
-
 Colin B reacted to a post in a topic:
Bluenose II by Schooners - Scale 1:48 - POF - from L. B. Jenson measured drawings - first POF build
Colin B reacted to a post in a topic:
Bluenose II by Schooners - Scale 1:48 - POF - from L. B. Jenson measured drawings - first POF build
-
Colin B reacted to a post in a topic:
Bluenose II by Schooners - Scale 1:48 - POF - from L. B. Jenson measured drawings - first POF build
-
Colin B reacted to a post in a topic:
Bluenose II by Schooners - Scale 1:48 - POF - from L. B. Jenson measured drawings - first POF build
-
Colin B reacted to a post in a topic:
Bluenose II by Schooners - Scale 1:48 - POF - from L. B. Jenson measured drawings - first POF build
-
Colin B reacted to a post in a topic:
Bluenose II by Schooners - Scale 1:48 - POF - from L. B. Jenson measured drawings - first POF build
-
Colin B reacted to a post in a topic:
Bluenose II by Schooners - Scale 1:48 - POF - from L. B. Jenson measured drawings - first POF build
-
Colin B reacted to a post in a topic:
Bluenose II by Schooners - Scale 1:48 - POF - from L. B. Jenson measured drawings - first POF build
-
Colin B reacted to a post in a topic:
Bluenose II by Schooners - Scale 1:48 - POF - from L. B. Jenson measured drawings - first POF build
-
Colin B reacted to a post in a topic:
Bluenose II by Schooners - Scale 1:48 - POF - from L. B. Jenson measured drawings - first POF build
-
Schooners reacted to a post in a topic:
The Hayling Hoy 1760 by Seventynet - FINISHED - 1:48 scale - First fully framed model
-
Schooners reacted to a post in a topic:
La Créole 1827 by archjofo - Scale 1/48 - French corvette
-
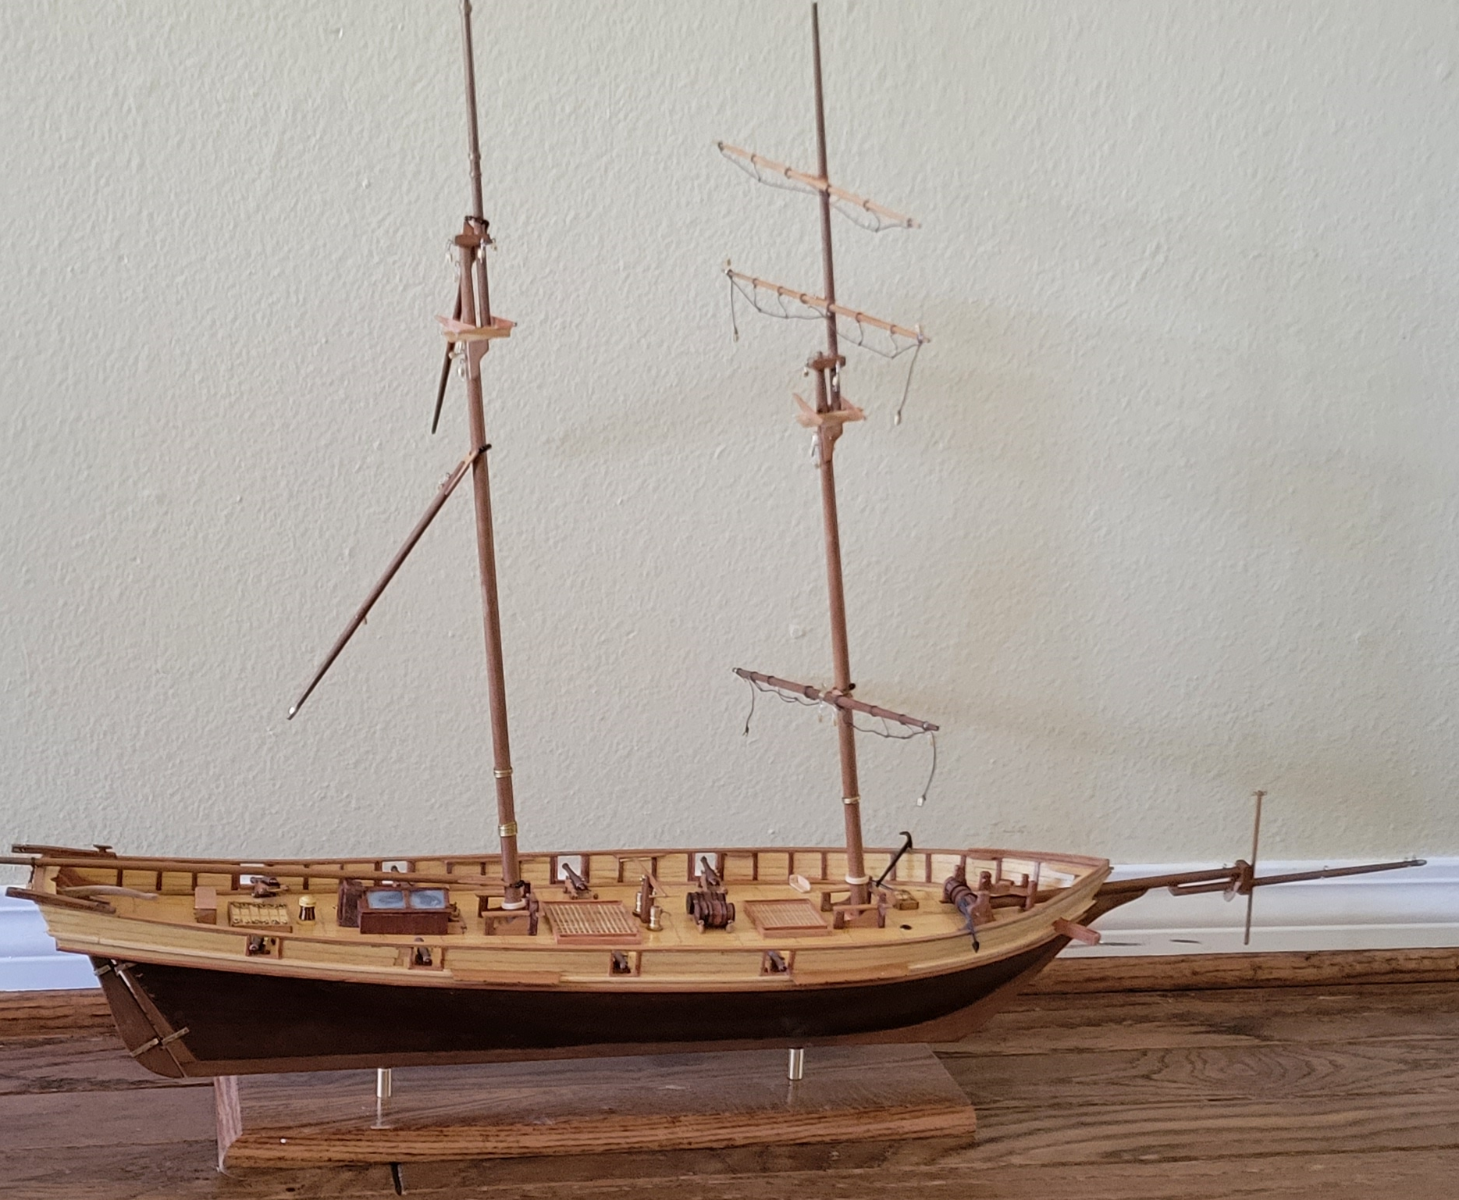
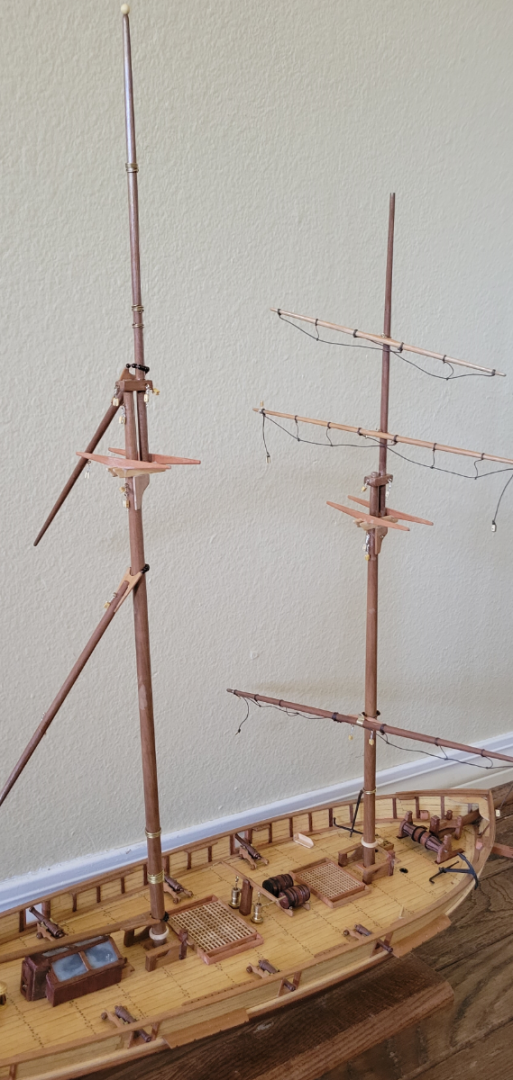
I have spent the last few days working on the masts and yards. "J Brent"'s youtube viedos have been most helpful as has Harold A. Underhill's "Plank on Frame Vol. II Scale Masting and Rigging". I have a few other books on the subject, but Underhill's is the easiest for me to understand. Many things are still not glued down, but it is time I commit to finalizing the furniture's position and bond in the masts and bowsprit. I have never rigged a model ship before; it looks really intimidating. but I felt that way about the masts and yards a few days ago, and now I look back and think that they were not that bad. the little blocks were a challenge, especially using the small steel wire.

- 36 replies
-
- 4
-
-
- Harvey
- Artesania Latina
- (and 1 more)
-
A little more work on the deck furniture, used Brass Black on the Windlass brass pieces.
- 36 replies
-
- 3
-
-
- Harvey
- Artesania Latina
- (and 1 more)
-
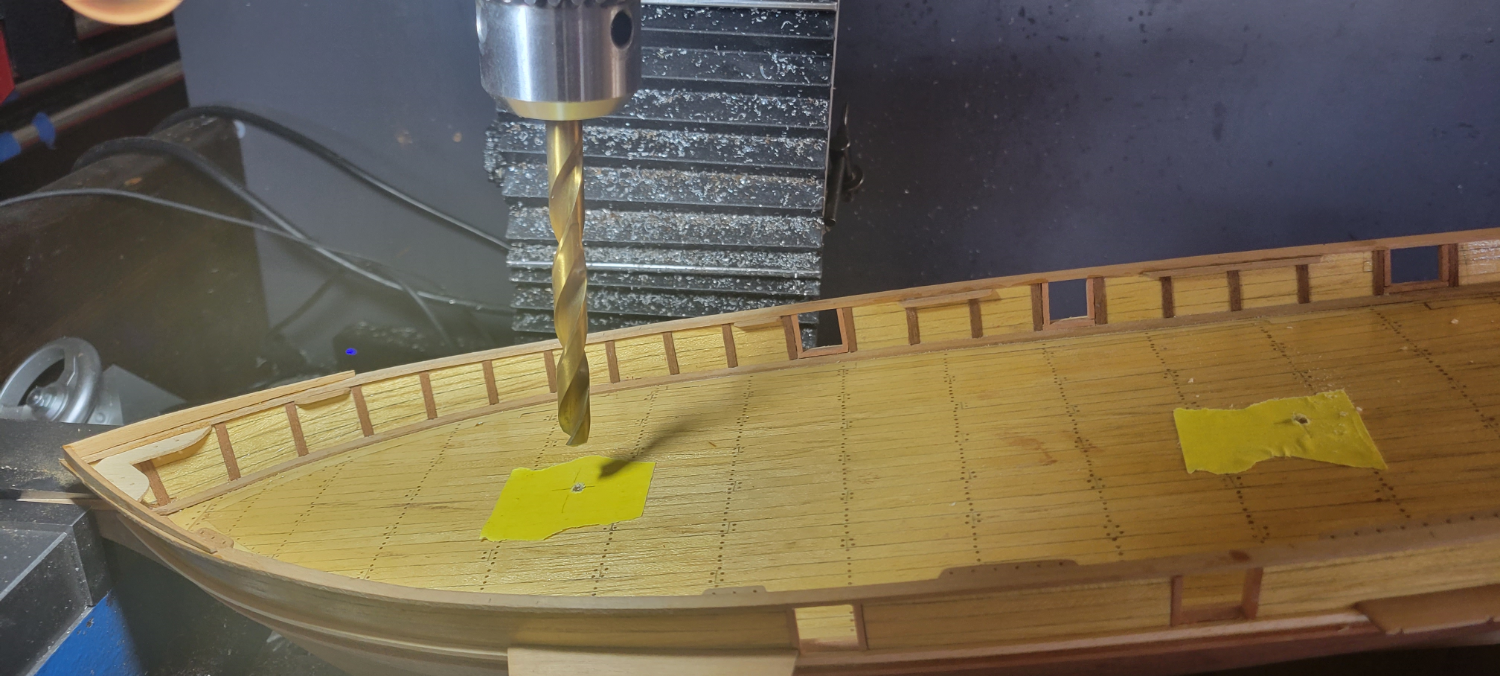
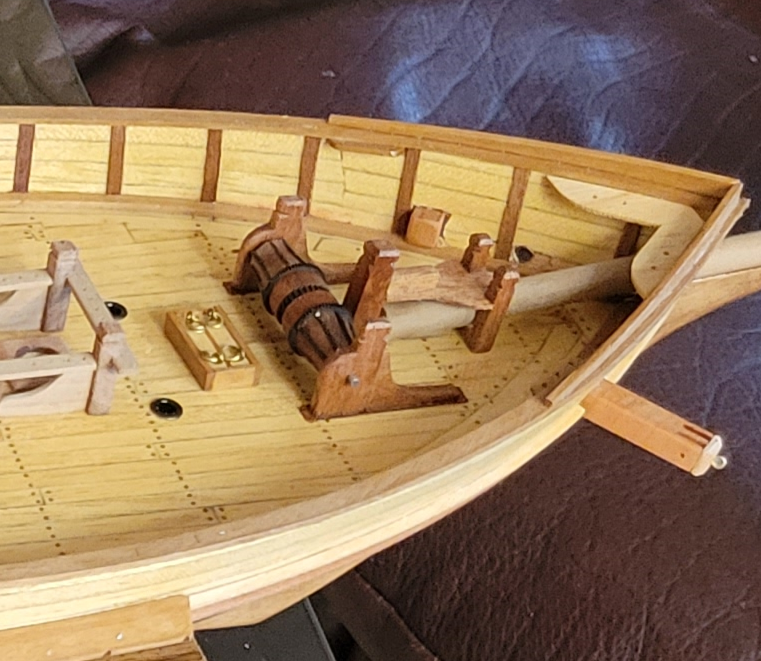
I worked on my cannon and continued with the Windlass. Below I am drilling the hole for the drum axel. This is the samson post and knight head: Then a test fit on deck. I ordered some 1mm brass wire from Amazon that will be used for the whelps.
- 36 replies
-
- 3
-
-
- Harvey
- Artesania Latina
- (and 1 more)
-
Harvey Baltimore Clipper – Windlass I am working on the deck furniture of the Harvey and I am a little disappointed in some of the kit’s smaller details; some of the parts are out of scale and others are just wrong. My biggest issue is with the Windlass. This is what the plans show: I can’t imagine seamen being able to weigh the anchor with this little hand winch. I really don’t want to go down a rabbit hole and end up not finishing the model because I redesign everything I feel is incorrect. But the Windlass is just so bad. I have decided I will limit myself to redesigning just the windlass and build the rest of the deck furniture as is. I am looking at a Windlass of this period something along these lines. I start by creating a 3D model in CAD I was thinking I would start with the simple wood parts: But I changed my mind and will make the Capstan Drum first. If I can’t make this look good, then it won’t matter how the rest of it turns out. I break the part down into smaller sections I can turn on the lathe Then use a bit of sandpaper to smooth out the cut lines. Then slice the part of the work piece with the mini mitre saw. The first two walnut pieces done. The capstan drum is no more difficult, just more points: I print the plan out and turn the stock down. Here is a close up before any sanding is done. then I take it over to the mill and use a .032″ saw to cut the slits for the iron whelps. and my progress so far. Next I will make the ratchet gears and the whelps. I take a sheet of .040″ brass and mark out the outlines for the ratchet wheels. Drill a 5mm hole in the middle and screw it to a sacrificial aluminum rod. Then I turn it down, first roughing, Then to the required diameter. This is taken over to the mill and the teeth are cut with a 30 degree engraving bit. There are 60 teeth cut to a depth of .025″ After a little finish work on a sheet of wet sand paper, they are done. The center ratchet wheel is made in the same manner, it has 30 teeth and they are cut offset to give them the ratchet profile. The finished ratchet and washers: And the rough out windlass assembled. I will use brass black on the brass and install brass wire for the whelps. I think this is the difficult part, the other components will be more straight forward.
- 36 replies
-
- 3
-
-
- Harvey
- Artesania Latina
- (and 1 more)
-
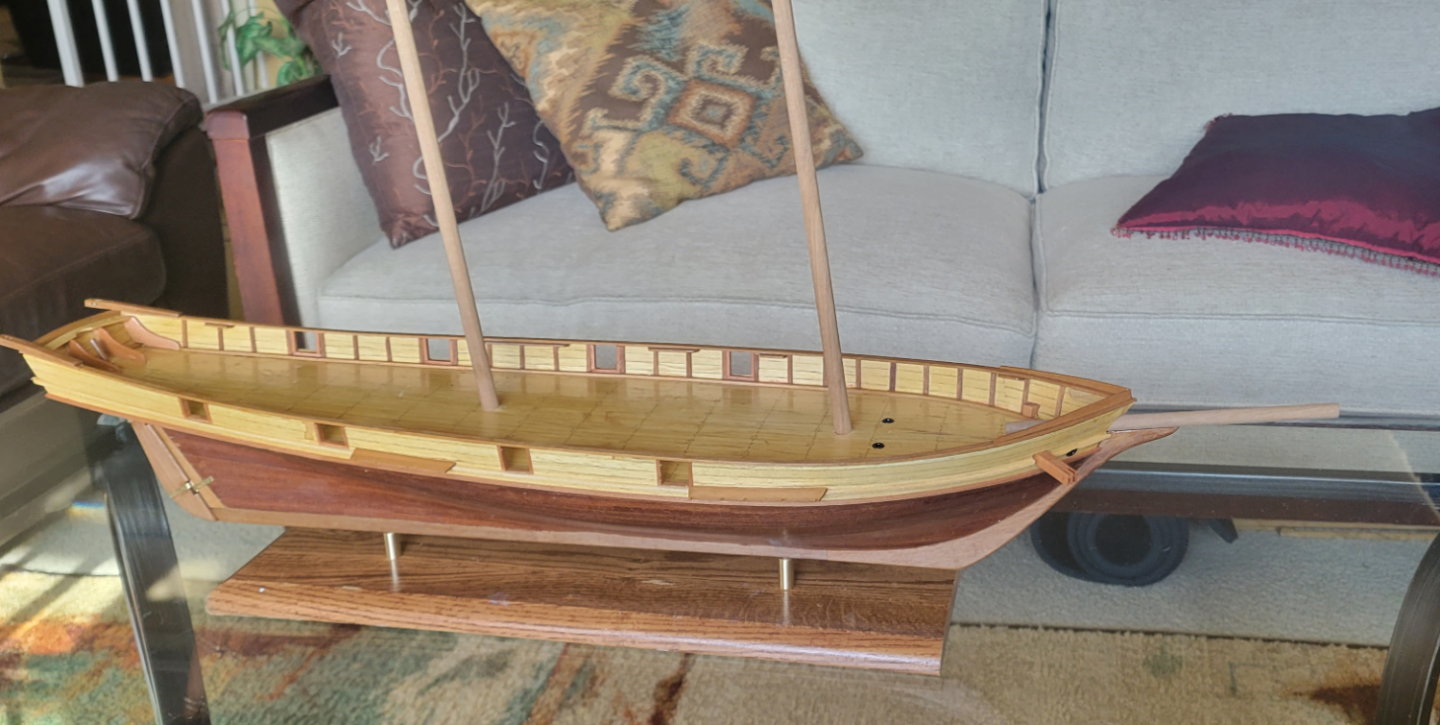
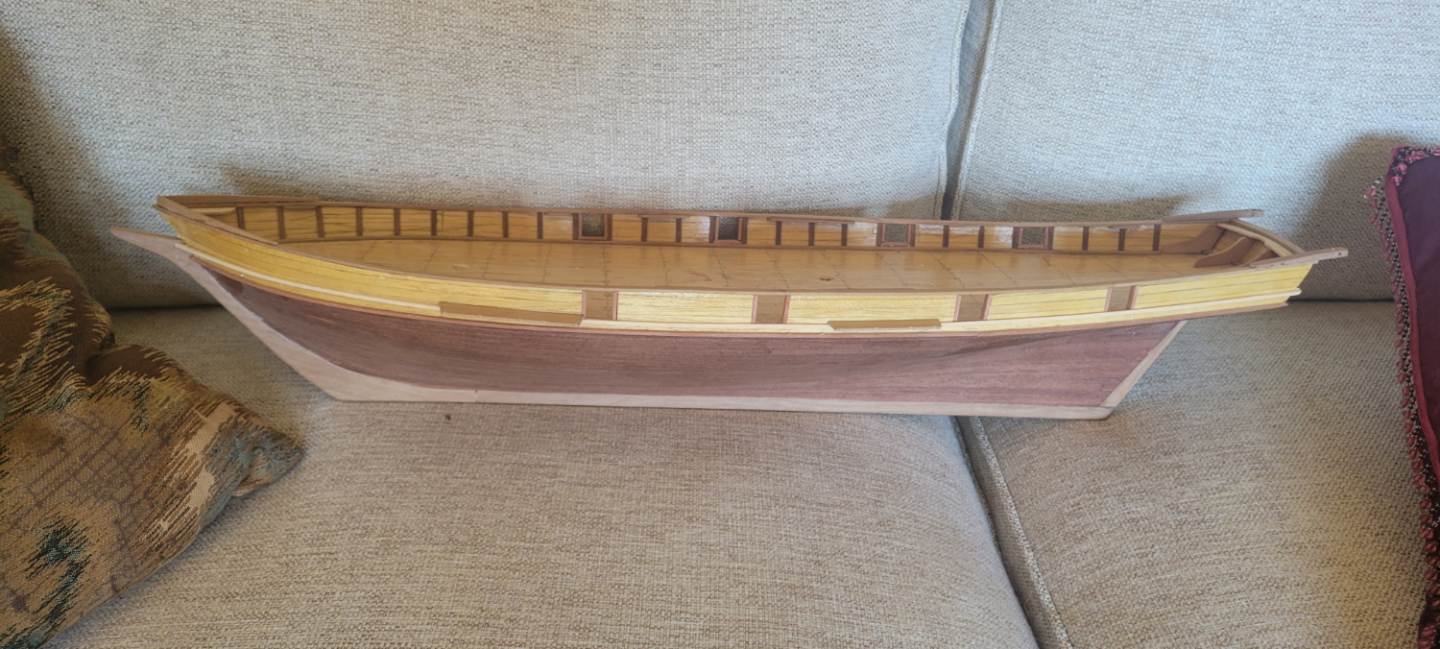
My hull is pretty much complete. Time to turn my attention to the deck furniture. the masks and bowsprit are only temorarily mounted and the base is also temporary, a peice of an old shelf, but it will serve me well supporting the ship as I add more components.
- 36 replies
-
- 4
-
-
- Harvey
- Artesania Latina
- (and 1 more)
-
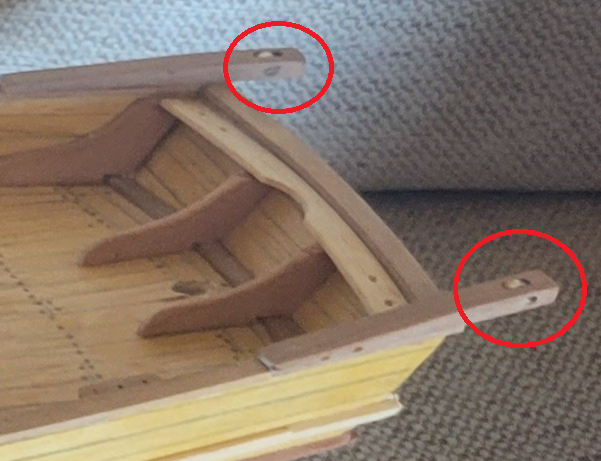
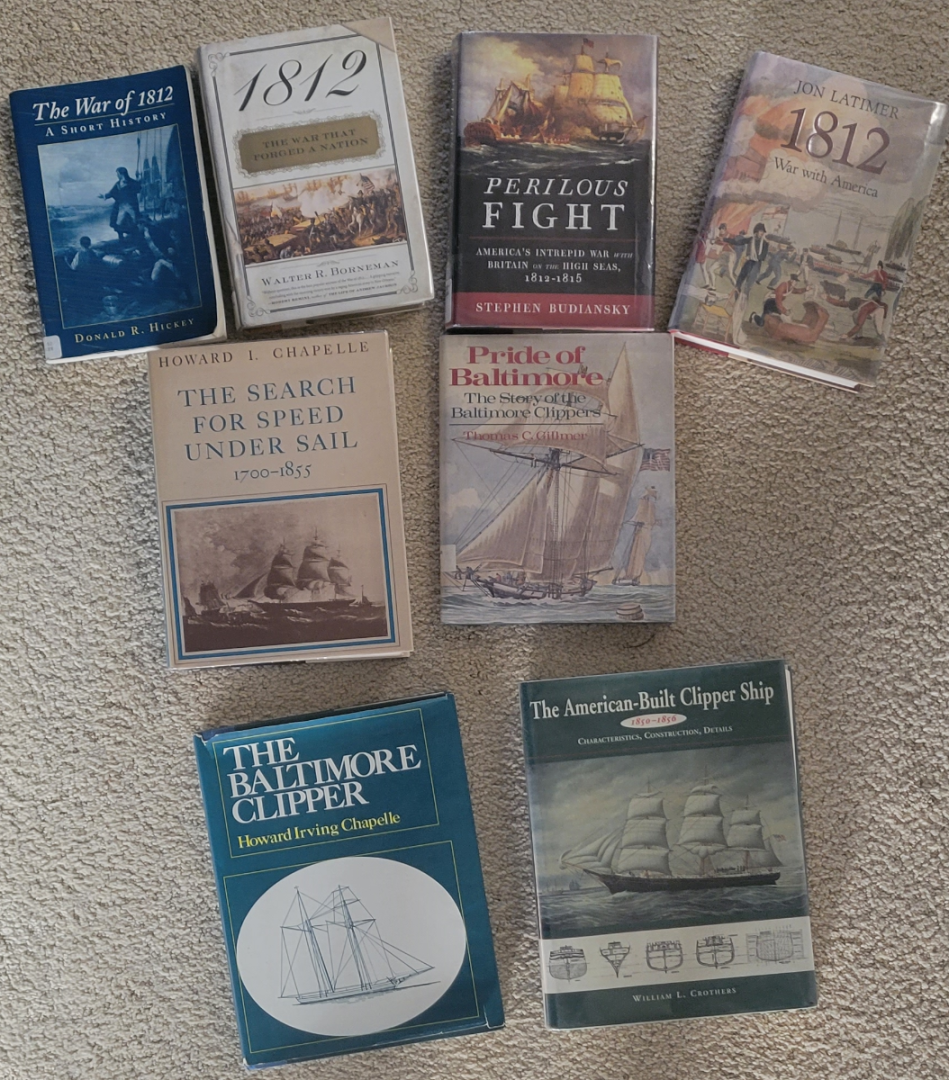
I am using the mill to drill the holes for the masts, I am striving to get no tilt side to side and 10 degrees rake. The second hole I drilled first with a smaller pilot drill and this worked better. I turned a couple of small brass pulleys for the Davits on the lathe. I need to install the rudder and then varnish the entire hull. Then I will move on to the deck furniture. I'll probably make the mounting pillars and mount the ship to a temporary stand to make it easier to work on. Below is my current reading list. I am on a War of 1812 kick.

- 36 replies
-
- 5
-
-
- Harvey
- Artesania Latina
- (and 1 more)
-
Schooners reacted to a post in a topic:
Harvey 1847 by Schooners - Artesania Latina - 1:50 - Baltimore Clipper
-
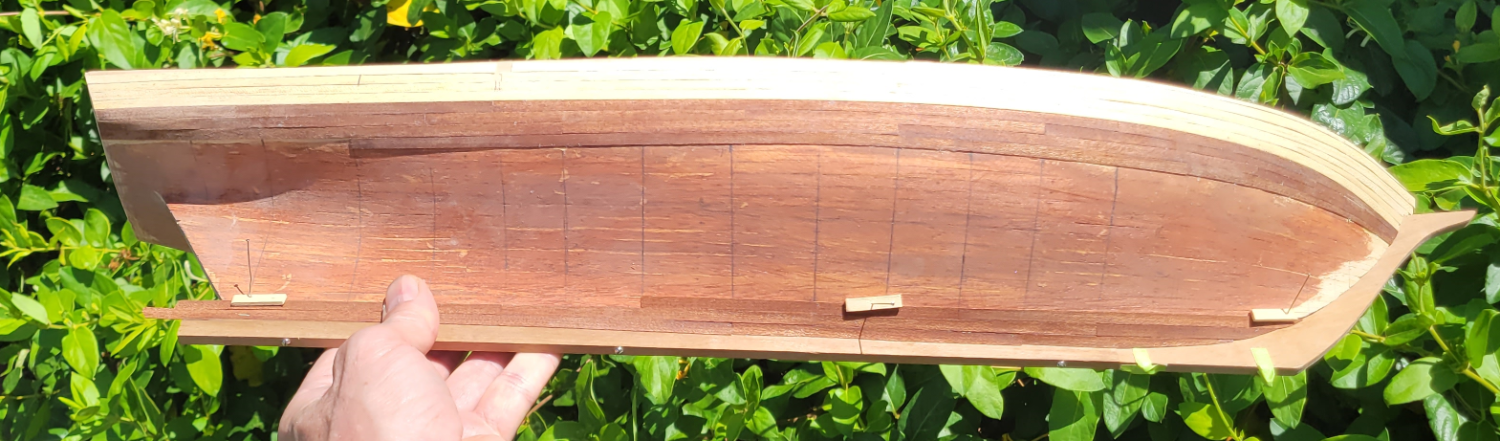
Harvey Baltimore Clipper – Bulwarks I am wrapping up the hull planking and am happy with my final side. I was able to plank the entire side with only two stealers and these were required at the stern. I hope I don’t forget the little tricks I learned here and there. I did sand the hull smooth, but sanded through in a few places and I have not decided whether I should attempt a repair or not. The area around the repair will probably get damaged during the repair of a strake and I don’t want it to end up looking worse. I am also trying to decide whether I should stain the stem/keel/stern members a darker walnut to match the hull planking. Oh, and one MAJOR lesson learned. Don’t use water to wipe off the saw dust on the hull when using this very thin veneer planking. Even a little water will soften the PVA glue and the planks will lift and warp. The glassy parts that you see on the hull are areas that I applied more glue in an attempt to reattach/flatten planks that lifted after a cursory wipe with a wet rag. Ughh. I also am getting much better at wielding the exacto knife. the first couple of gun ports I cut out from the gunnels were real hack jobs, but the last ones I cut were very precise and square (I used a square and a reverse tooth fret saw to good effect).
- 36 replies
-
- 1
-
-
- Harvey
- Artesania Latina
- (and 1 more)
-
Good day, This kit is 1:50 scale, it is 25" long as in the pictures above, just the hull. and 6 3/4" widest point abeam. The problem with the kit I am building is that it is no longer made and has not been for at least a couple of decades. You may be able to find a used one, I don't know. Model Shipways makes a kit for the Pride of Baltimore at 1:64 scale. Are you lookin for a kit to start with? or building from scratch. Good Luck.
-
I continue working on planking the hull, the second side is going much smoother than the first side. They say you are supposed to plank both sides at the same time, plank for plank. I did this for my first layer of hull planking to insure there were no offset forces placed on the structure, but I don’t think it matters with this second layer as the structure is very solid and these strips are so thin as to not impart any force of significance. I am finding that the key to get these really thin walnut strips to lay down flat is to use lots and lots of clamps. My clamps are made from a small strip of wood 1.5mm X 5mm with a .020″ hole drilled for a sewing pin. I then use strips of an old inner tube folded several times and run through the pin to provide the clamping force. I push the pin into the wood with a pair of pliers, then slide the rubber down against the wood strip. They are cheap and easy to make, so I can have lots of them. You can see that I have used filler to get a nice shape in the first layer of hull planking, and also stain to hid the cracks between the planks. I use the transparent Titebond glue. The other side is planked.
- 36 replies
-
- 3
-
-
- Harvey
- Artesania Latina
- (and 1 more)
-
Good discussion, thanks guys. I will sand enough to get a nice smooth finish. I understand about not sanding too much becasue I did sand through my deck planking in a couple of places and it was real difficult to repair--and can still be seen if you know where to look. I will not be painting the hull planking because I like to looks of the walnut. Yes this is my second layer of planking and I used wood filler on the first layer and am happy with the shape of the hull. It was good practice doing the first layer as my second layer came together much easier with fewer stealers.
-
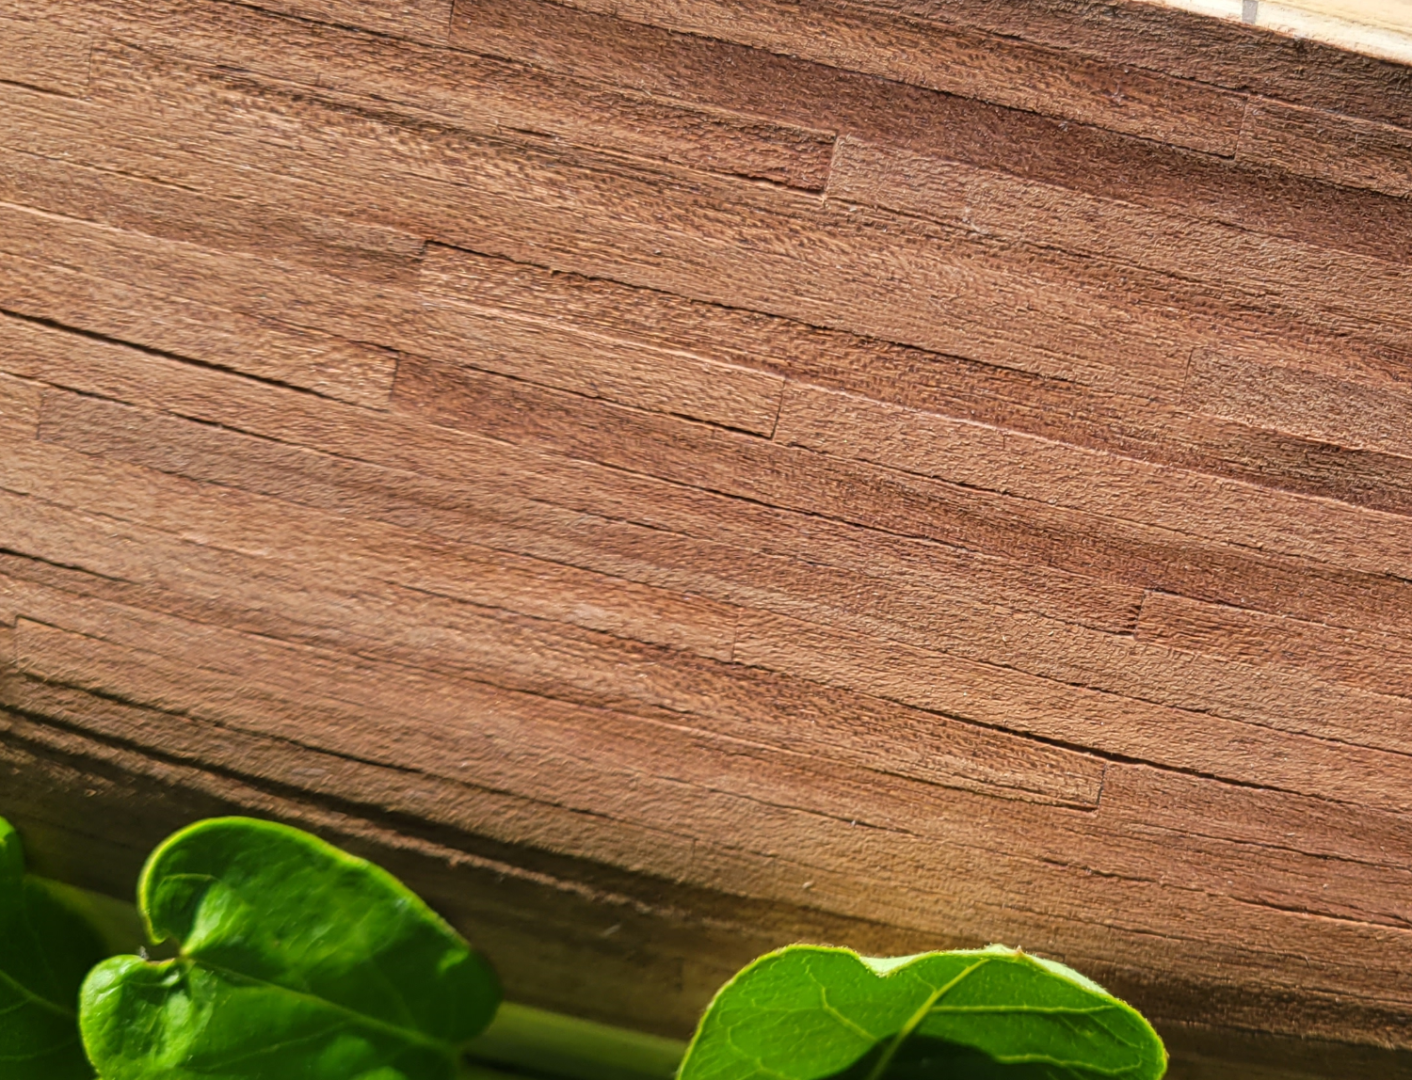
I know there is not a difinitive answer here, but do I need to be careful not to over sand the hull? Perhaps I need to do a little more than I have done, but I kind of like the look of the planks being a little uneven in their height. I think it looks more realistic when you can see the individual planks. But I also don't want the hull to look unfinished. Does anyone have a rule of thumb? Or is it just, "go with what you think looks good." My fear is later when the ship is done I will regret sanding too much or too little. Am I over thinking this? The photo above was taken with the light at an oblique angle to accentuate the unevenness of the planks.
-
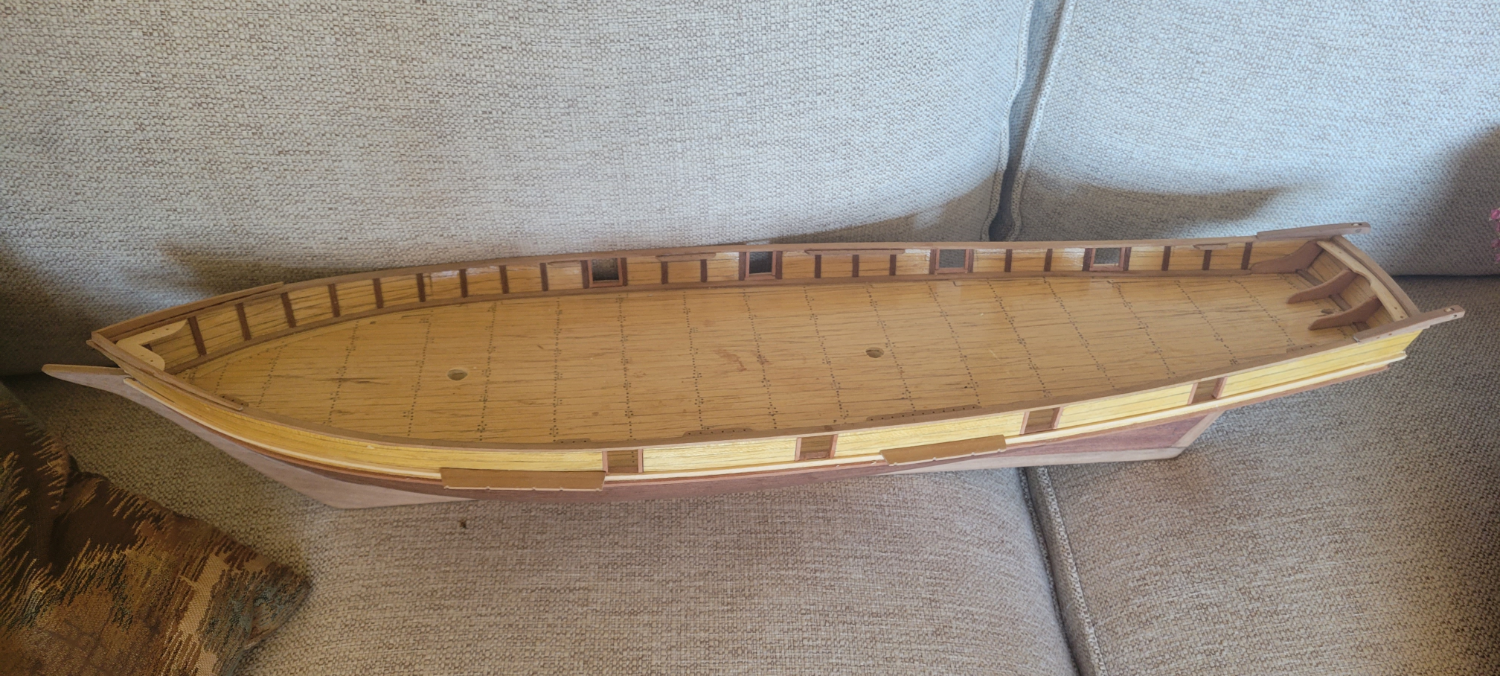
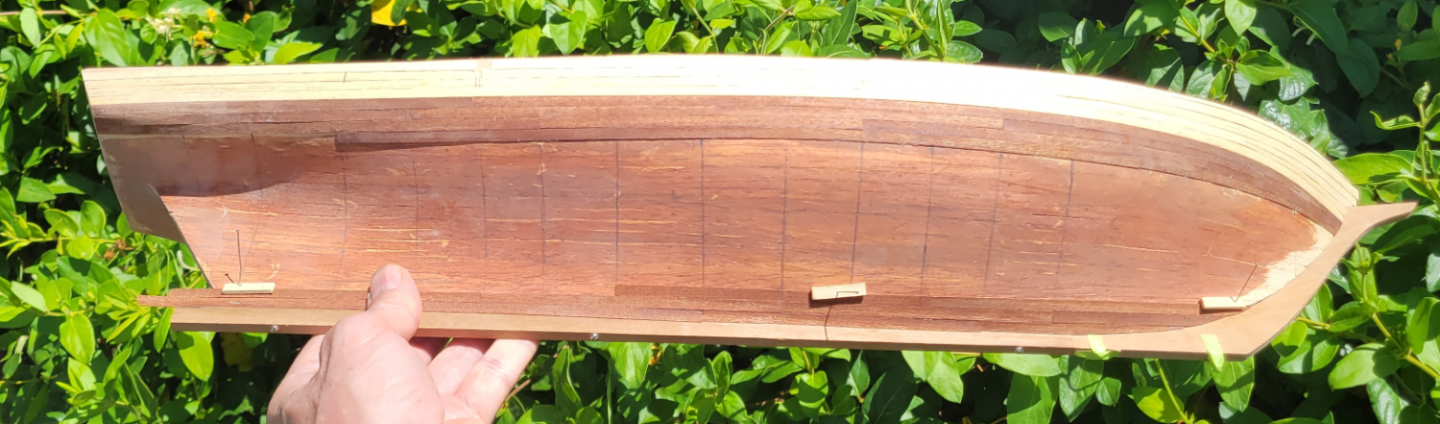
I have varnished the deck. The bulwarks are installed and planked. I have started planking the hull at both the garboard strake and at the bulwarks. The thin walnut strips that are supplied for the 2nd layer hull planking are tricky to use. I tried wetting them, but getting them to bend is very hard, but I found that if I plank in smaller strips bending is less of an issue. Also wetting them dilutes the glue and they do not stick very well. But if I apply the strips dry, they are so thin that when I apply the glue, the under side of the plank swells and I end up with curved board. I can sand them smooth, but I worry that they are so thin I might sand through. Soooo, I have found a technique that is working well for me. I wet the Outside of the plank with water, then apply glue to the Inside of the plank and apply it. This allows the plank to swell evenly and the glue adheres well. I also have stained the first hull layer under the walnut strips. the white wood underneath can show through if the planks are not absoluetly perfectly butted against each other. The dark stain allows the planking to be more forgiving in this regard. All for now................................................
- 36 replies
-
- 4
-
-
- Harvey
- Artesania Latina
- (and 1 more)
-
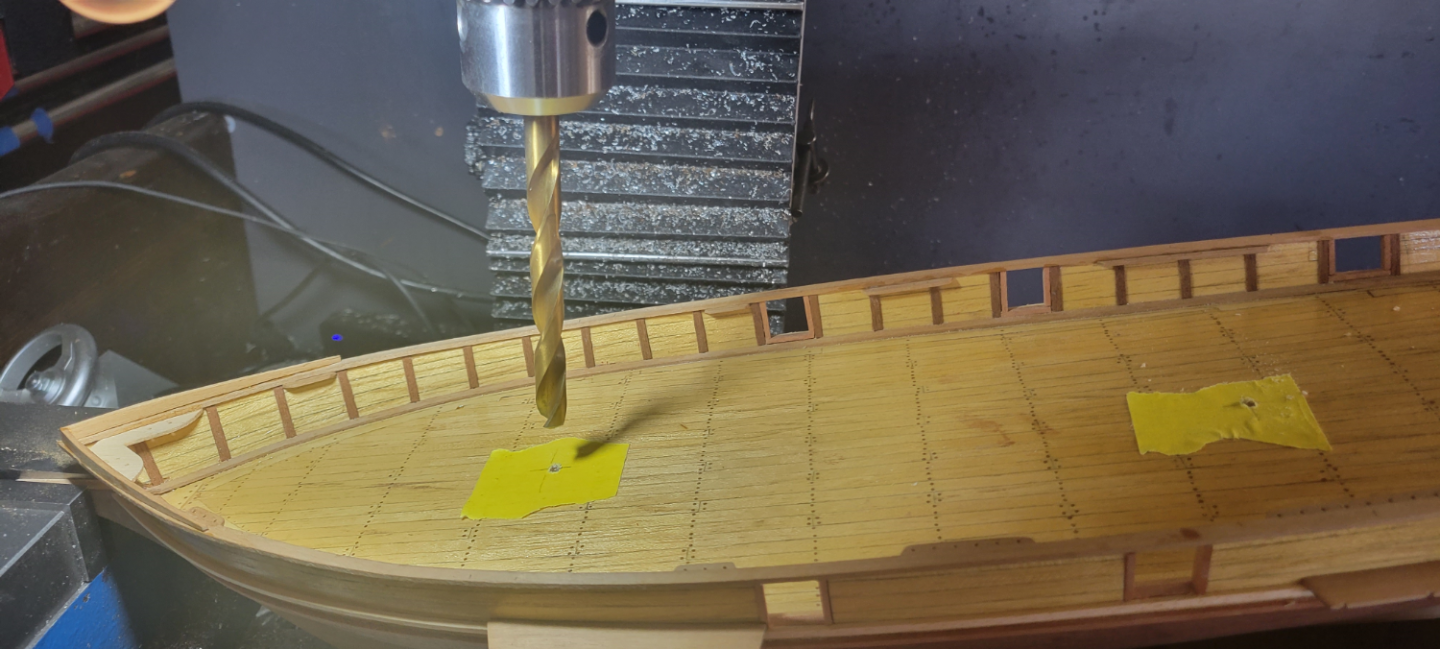
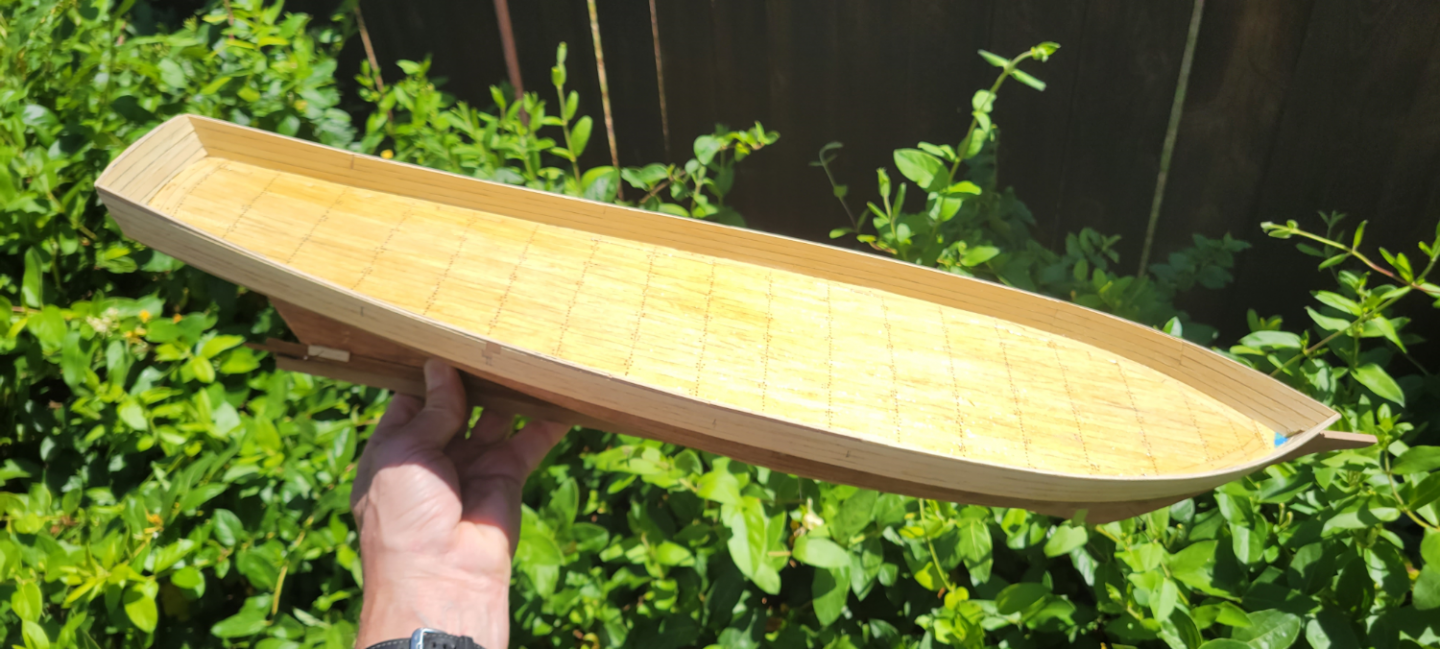
Deck is about complete after driving abunch of trennels. I am having boat loads of fun! 😁 At first I was drilling the holes, lining them up by eye. But I noticed that they were wondering a bit. So I decided to use a piece of masking tape to help keep the trunnels in line. I noticed my plank butts were not perfectly in line across the deck either. This is more noticalbe now that the trennels are in. Still learning a lot.
- 36 replies
-
- 4
-
-
- Harvey
- Artesania Latina
- (and 1 more)
-
Schooners reacted to a post in a topic:
Harvey 1847 by Schooners - Artesania Latina - 1:50 - Baltimore Clipper
-
Schooners reacted to a post in a topic:
Harvey 1847 by Schooners - Artesania Latina - 1:50 - Baltimore Clipper
-
Thanks guys this helps alot. I think what I am hearing is that you make the planks symetrical across the king plank. So at the king plank you break the rule that adjacent butts at a deck beam must have three planks between them, because to be symetrical you must have a butt on both sides of the king plank to maintain the mirror image. Also I need to rethink the order of operations when planking. I cut all my deck planks to the same length, marked the caulking on the sides, then laid all of the planking down from midships. The nibbling in the margin planks were done after all the planking was down so the deck planking did not meet them in a preplaned pattern. I like Phil's suggestion of starting at the bow and at the king plank so there are no short planks there. I would think the nib cuts would need to be perpendicular to the length of the plank as you want them to terminate parallel to the deck beam (minor point I guess). Lesson learned, thanks
- 36 replies
-
- 1
-
-
- Harvey
- Artesania Latina
- (and 1 more)