


Axel Viðar Hilmarsson
-
Posts
3 -
Joined
-
Last visited
Content Type
Profiles
Forums
Gallery
Events
Posts posted by Axel Viðar Hilmarsson
-
-
1 hour ago, Henke said:
Two months after I started second planking, port side is now also finished. The appearance of the planking on port side looks slightly better than on the starboard side. You gain experience as you plank on. No sanding done yet. I finished the day by tidying up the work bench. What has happened with the lining of the forth lower gun port from aft? It is not red. The answer is that I slipped with the scalpel and oups the lining disapeared into the hull. I had to prepare a new one and carefully insert it and glue it in place. I have not had time to paint it yet.
Aggy has gained weight. Each walnut strip probably weighs 10-20 g I guess. I have used up 90 out of 120. That is 900-1800 g plus glue. I must say the quality of the walnut strips has been very good. Thumbs up for Caldercraft/Jotika!
Kind regards Henrik

Looks great! I have been watching from the side line - I will hopefully start the second planking soon (it's been so many years since I finished the first planking (about 13 years!). I have been working on putting up some dedicated work space for the build. And putting up "the" ship yard. Will hopefully become active, and provide photos of the current status and the future progress. It's nice to have someone right in front
") ... leading the way.
... leading the way.
P.s. I notice that you have planked completely one side before planking the other (now I have never done any ship model building) but isn't one to plank few planks (3-4) on one side and do the same on the other - or is that not so? It would be so much easier to do it this way - if that is okay, could anyone provide an insight on this?
P.s. If one is going to have the ship rest (at the end) on embedded metal "stud" foundation - at what stage of the build is that to be accomplished? And can anyone point out a place where such "stud" foundation can be bought? /Any site with instruction, showing the work involved?/
Best Regards,
Axel
-
Great work!
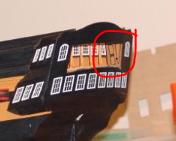
I finished the first planking 13 years ago (my first ship build) - and other things have had my focus since then. Working abroad, building me a house and other things. Now I will get back to working on the ship - Your blog has been an inspiration to start reworking on the model. Looking at your model I notice that you have that "end-top" piece orientated (the left side piece vs. the right side one) so that the cutting/recess is outward (see enclosed photo)- I made this so that it is inward. I have questioned for years how I made this, but trusted the instructions. Coming across your log, yesterday, I got more convinced that it was an error on my behalf until I looked at other builder's photos on this web Kusawa2000 (Mike Draper) - see enclosed photo. Possibly it is best for you to leave it "as is", instead of correcting - but others, with some experience could possibly provide their input.
Will definitely follow your blog here - it will be an inspiration and help for me to see the progress.
Best Regards/Kær kveðja/Med vänlig hälsning
Axel V. Hilmarsson

- FrankWouts, gieb8688, coxswain and 2 others
-
 5
5
HMS Agamemnon by Henke - Caldercraft - 1:64
in - Kit build logs for subjects built from 1751 - 1800
Posted
Hi Henrik - I'm still watching your progress. The restart of my build has not started "full blast" yet, but I will. There are some dilemma that I'm dealing with regarding painting and other similar issues. I bought all paint required when buying the model, 15 years ago, and it is all enamel paint tins. I think I will stick to those, even though I know about the disadvantages (drying time (24 hours for over-paint), smell, cleaning etc.) - what I like about the paint is the finish, and from various pictures I have seen some paint finishes are not to my liking. Let's talk about what I was going to talk about the sheating of the model - quickly on the internet I found what you require regarding the copper plates. "The introduction and use of copper sheating - a history" by Mark Staniforth. I got the document but I don't think I'm allowed to share it - but you can easily find it /if not contact me/. He states what was the method used by the Royal Navy " ... This system however only applied to British merchant vessels, the Royal Navy used a different method where the horizontal joints faced upwards. This was the same method adopted for use by the French and is illustrated in Fig 2." (see enclosed). From what I see this confirms the process you are using. In this article there are also other interesting information about the "shape" of the sheating and how the last row was done "Three methods were used to finish off the coppering pattern about 1 foot above the waterline. One method was to have a row of copper plates which ran parallel to the waterline which overlapped the ends of the curved rows of copper plates. The alternative methods were to replace the row of copper plates with a wooden batten 9-12" (23-30 cm) wide and a 1 1/2" (4 cm) thick or a roll of canvas nailed onto the hull". I think it is of interest for you to read this through. Best Regards from the rock in the North-Atlantic ocean, Axel