HOLIDAY DONATION DRIVE - SUPPORT MSW - DO YOUR PART TO KEEP THIS GREAT FORUM GOING! (Only 75 donations so far out of 49,000 members - C'mon guys!)
×


Richard in Missouri
-
Posts
16 -
Joined
-
Last visited
Content Type
Profiles
Forums
Gallery
Events
Everything posted by Richard in Missouri
-
Thanks, I read the review and comments. I'll be watching to see how the frames line up before planking. I was under the impression that the bow blocks ended up having planking over them. I thought they were there to provide more material to support the sharper curve of the wood. Reading the review and comments, it sounds more like it is an instead of planking the bow forward of the first frame. I didn't see any seem on your model suggesting that was the case. I like the tank and crates you added in your model.
-
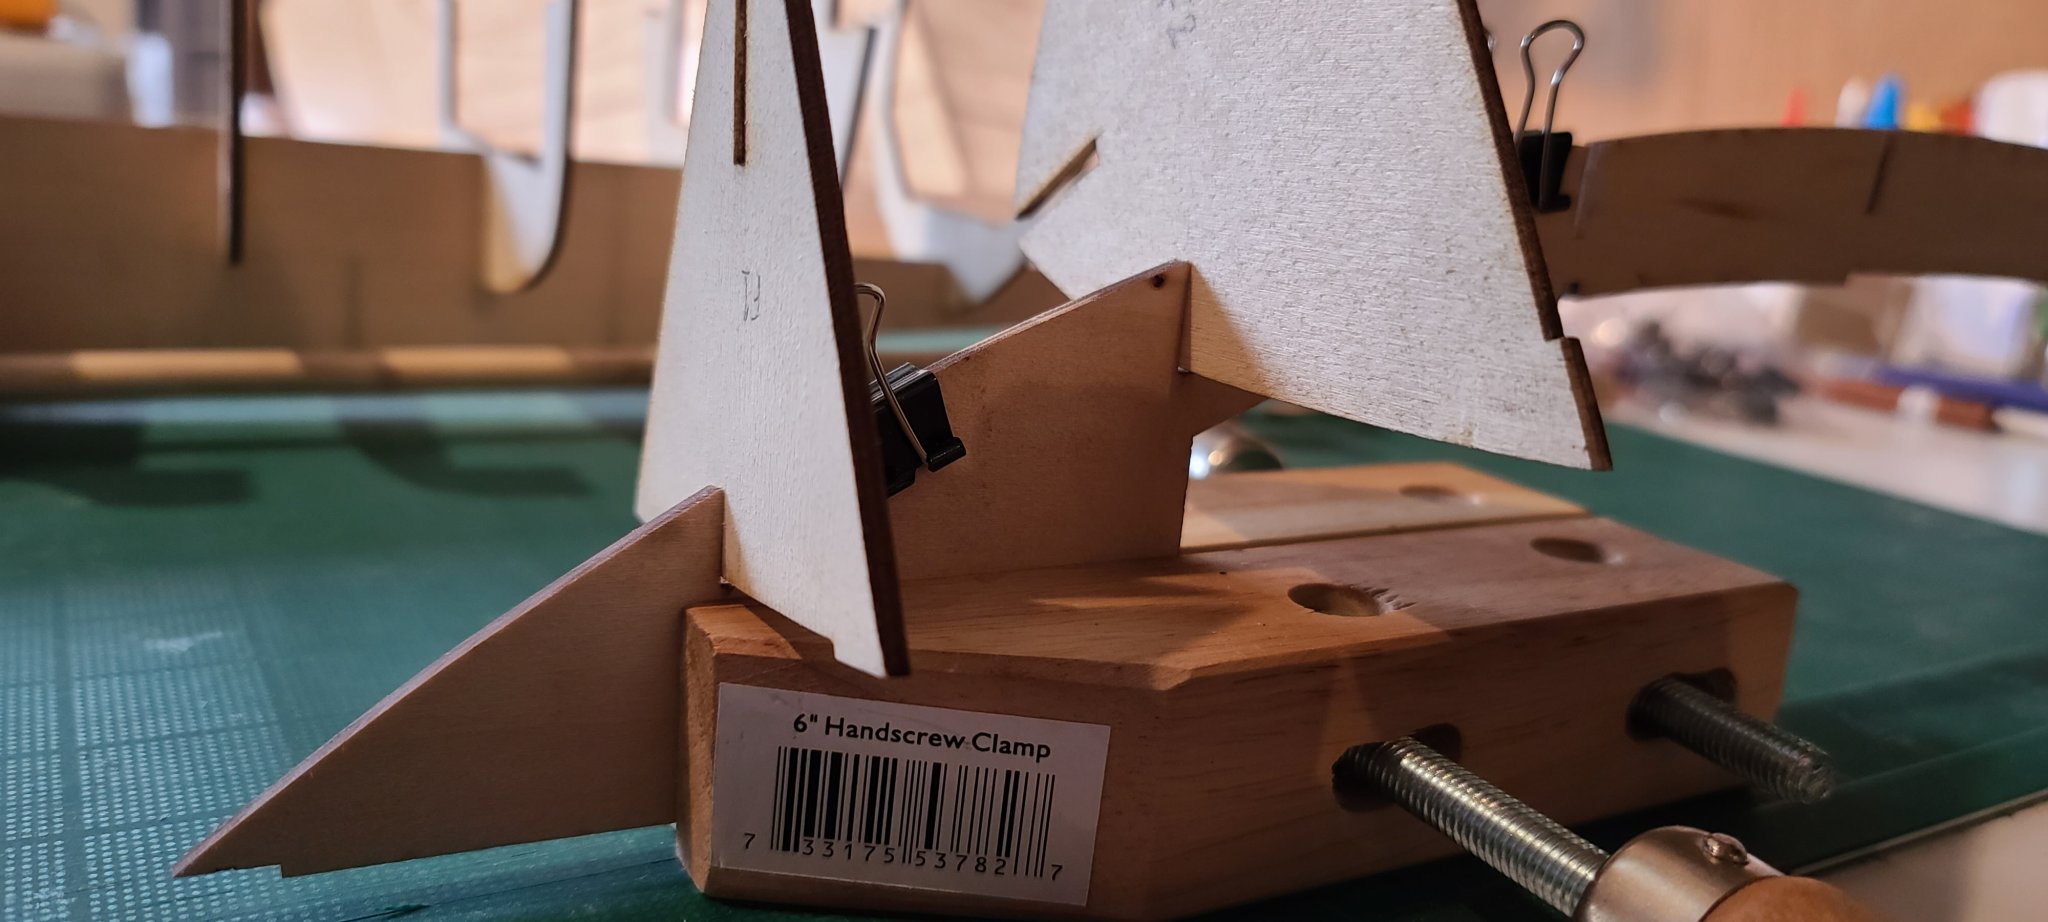
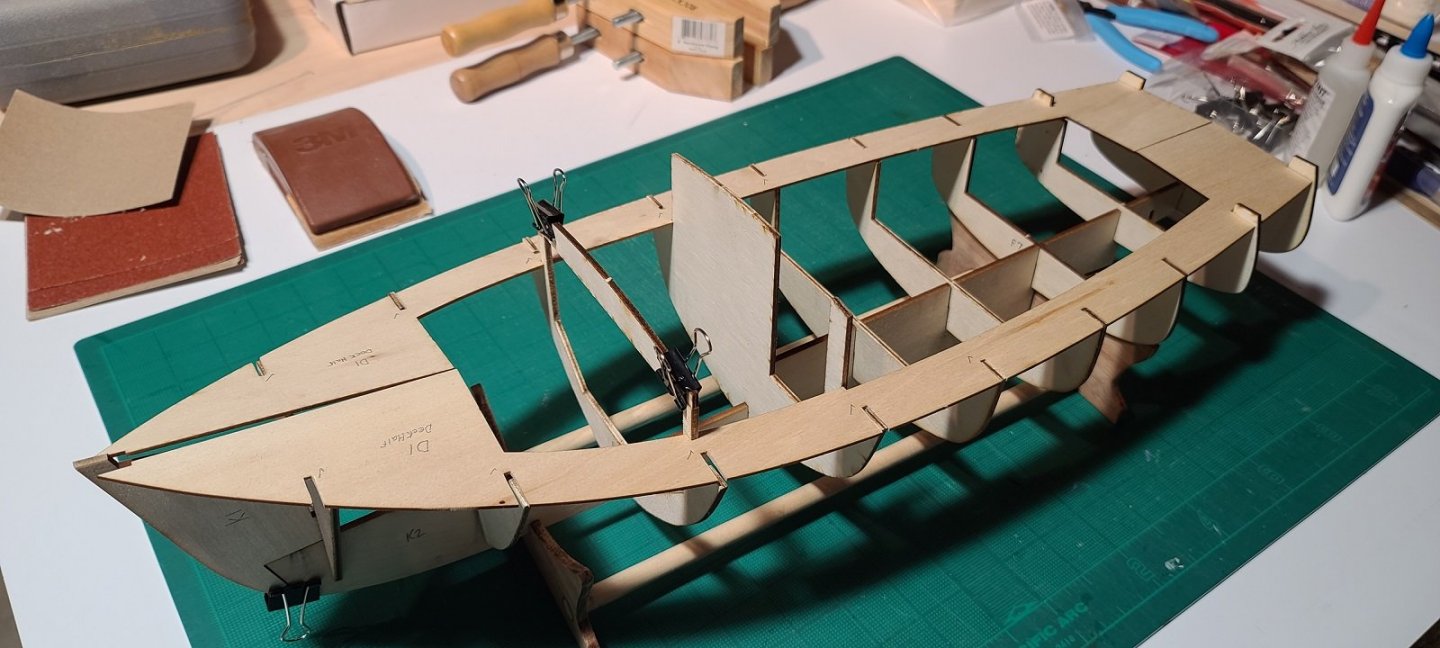
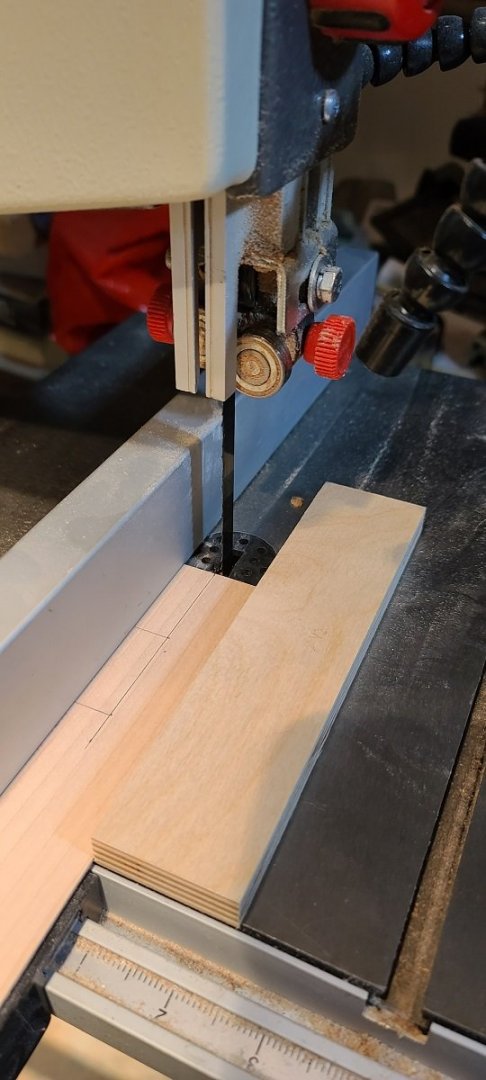
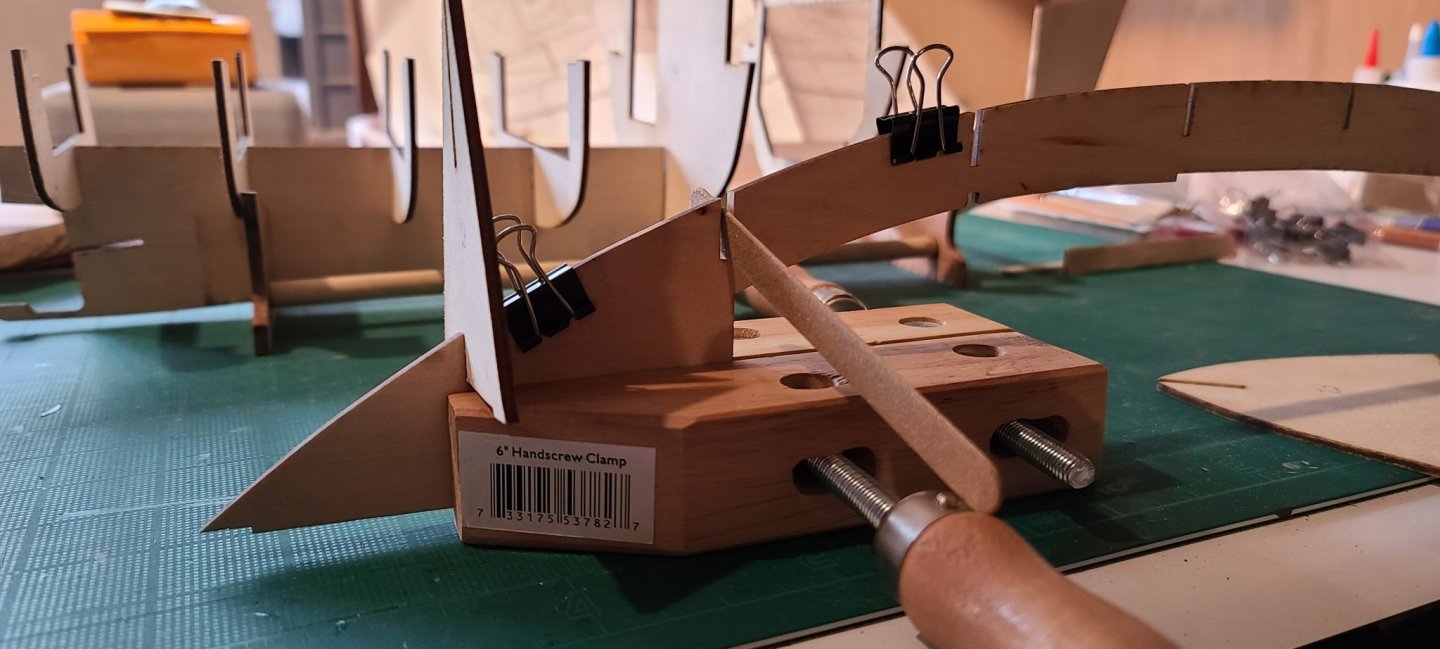
Finished sanding the slots for the frames and dry fitting together in the keel and deck. Today I glued the two halves of the deck together. the instructions have little balsa support pieces in the front and back in between where the frames would connect. I cut those out with a small bandsaw. I could have used something smaller, but it is good for these straight cuts. I have a little sled I am using for the cross cuts in the 3rd picture. It helps keep things straight and fingers away from the blade. For gluing I thought about how I could apply some light pressure to keep the halves together, I decided to use small cans of stain I had in the shop. just enough weight to keep things from moving. I lightly sanded and wiped the sides with tack cloth before gluing and then glued the small supports on top after aligning with the cans. I am using a silicon glue resistant mat from Rockler, other companies have similar products. I used TightBond wood glue as I am familiar with how it sets. I had also picked up some balsa model glue that I may try on other areas and have CA glue. I didn't think the mat would react well to the CA glue, and as I am gluing flat didn't want to use it here.
-
My experience the bandsaw has almost no vibration and the blade stays cooler. The motion of the blade is always down so it won't try to pick up the wood. My bandsaw, jet 10" can handle thicker wood than my scroll saw old Delta 14". The scroll saw cuts slower, but can cut much tighter curves. The scroll saw blade can be threaded into wood to cut inside cuts. Max thickness wood can cut on a scroll saw is going to be about 3 to 3.5 inches. The scroll saw is safer to use. Bandsaws can cut off fingers easy if you are not paying attention.
-
Drilling holes with crisp edges in wood
Richard in Missouri replied to laps's topic in Modeling tools and Workshop Equipment
I have been happy with the Fisch brad point bits. This is another premium bit. As previously mentioned having a scrap board on the waste side helps and if you have a drill press it can help. -
Thanks for the feedback and suggestions.
-
The cheaper emery boards worked good for sanding the slots wider and light sanding of nibs. I originally tried folding a small sheet of sand paper, but it wasn't firm enough. I found it helpful to clamp both sides of the deck together to keep alignment even as I sand the slots. Slow going, as I work on things a little take a step back and think and read a bunch before continuing, but I am not on any deadline.

-
I have a Jet 10" bandsaw. It is a good saw for working with small materials. I made a little sled to help with straight crosscuts, it has a fence for ripping small stock. The height is limited to about 4" so it it not a great saw for resawing or cutting veneer. For those functions you really need at least a 14". Rikon seems to have more height than the other models in this class, grizzly usually has a better price point.
-
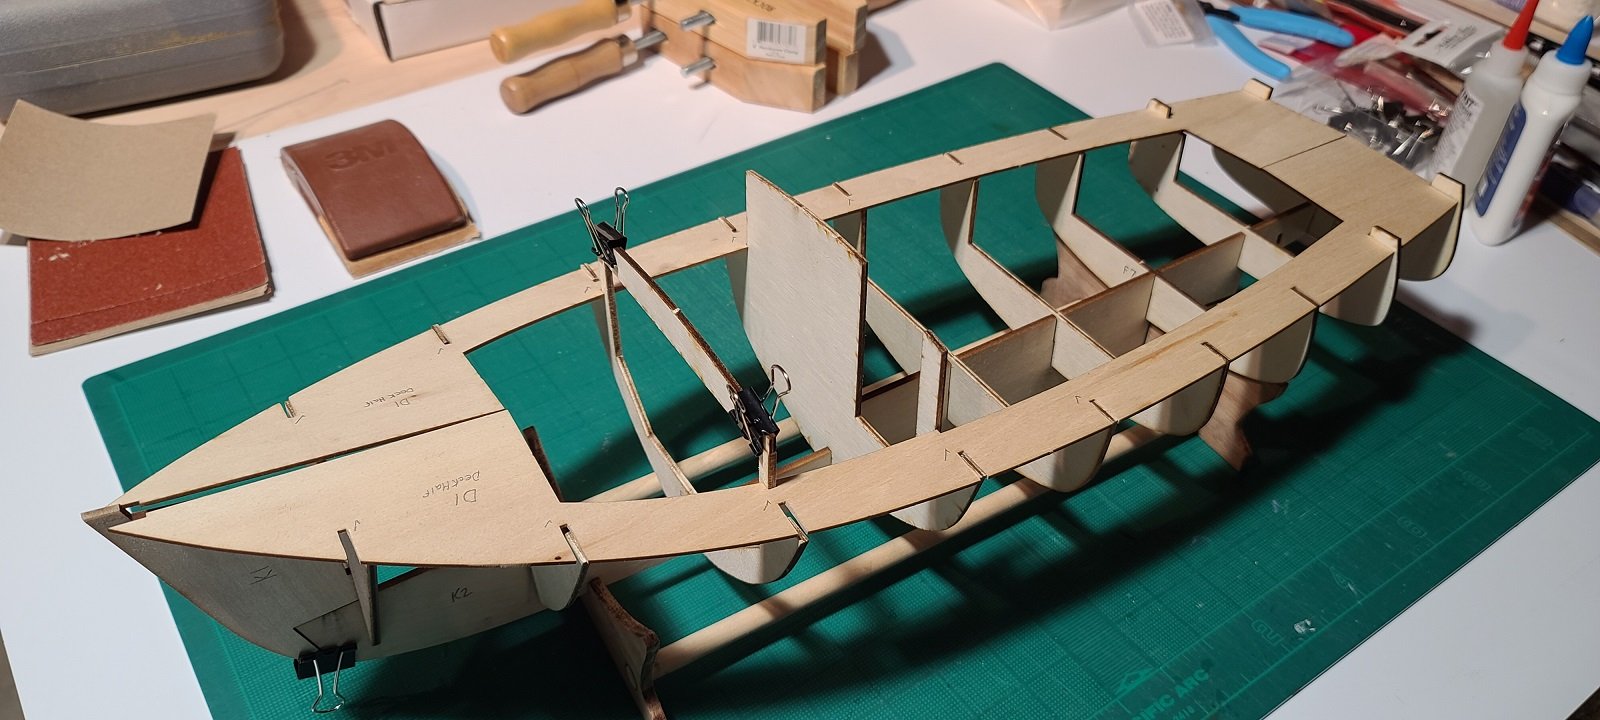
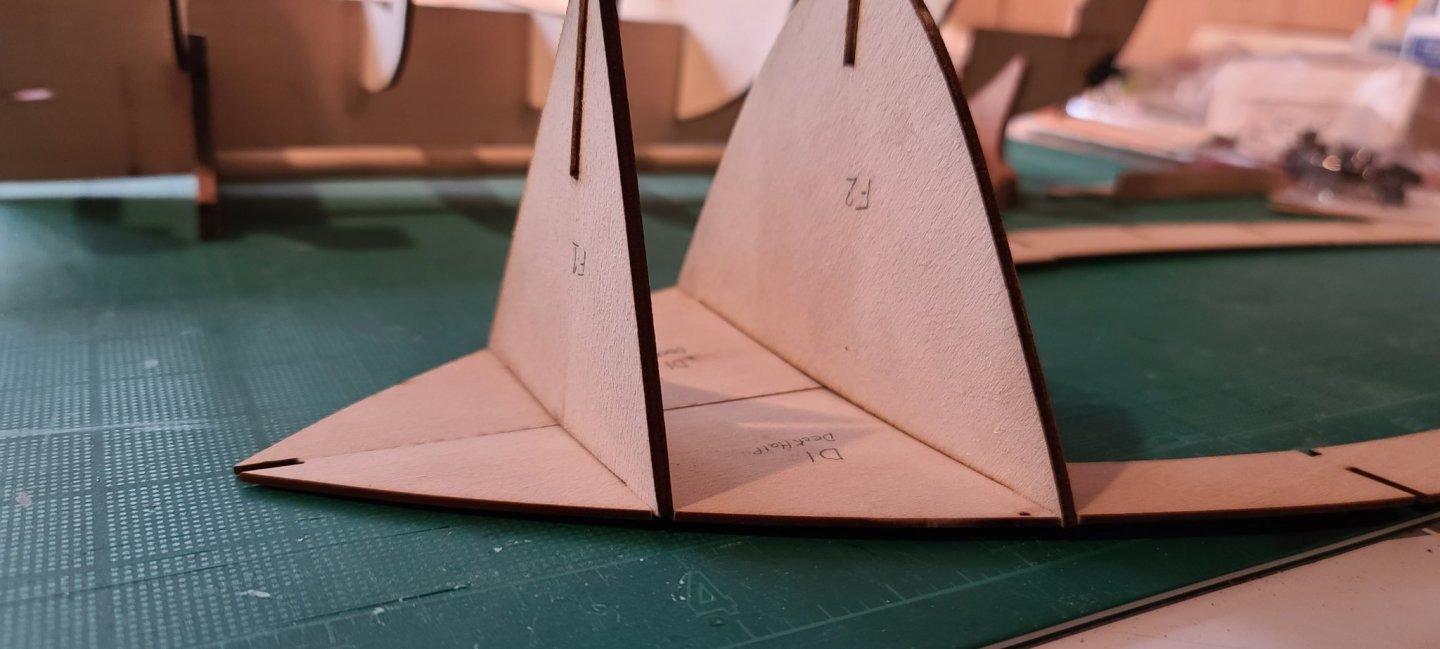
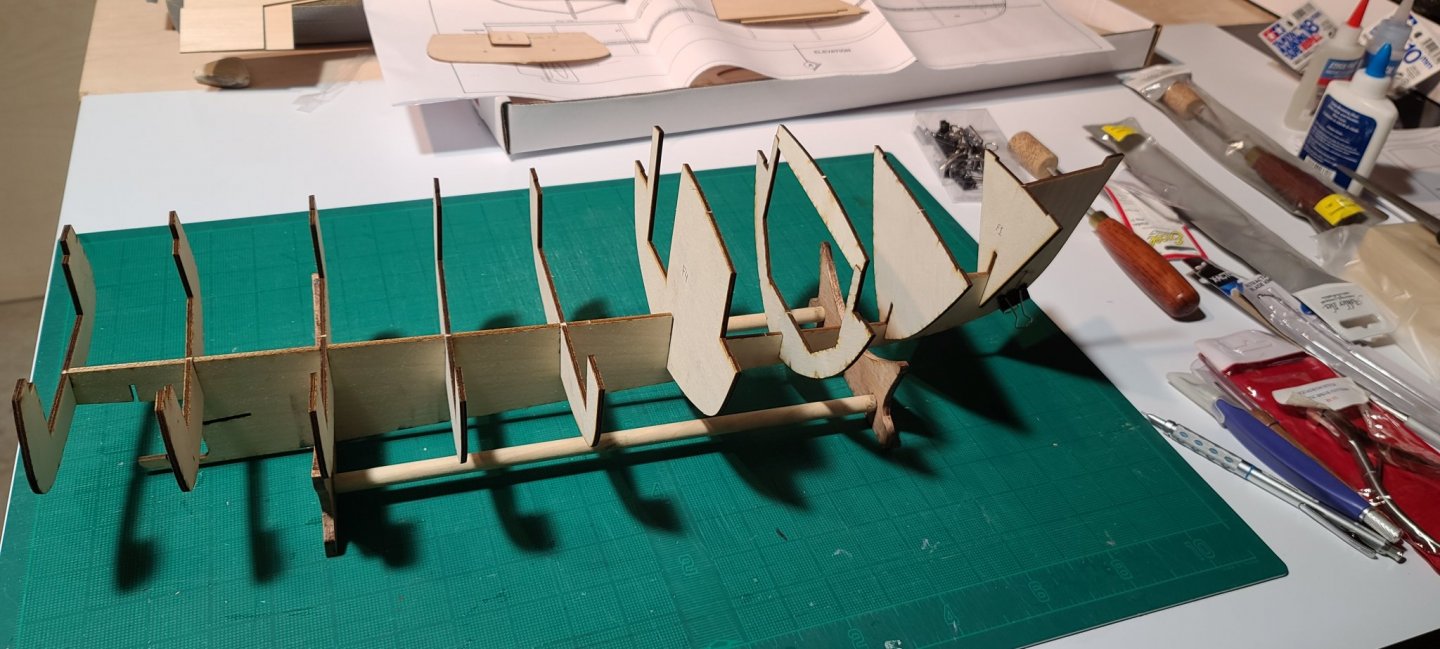
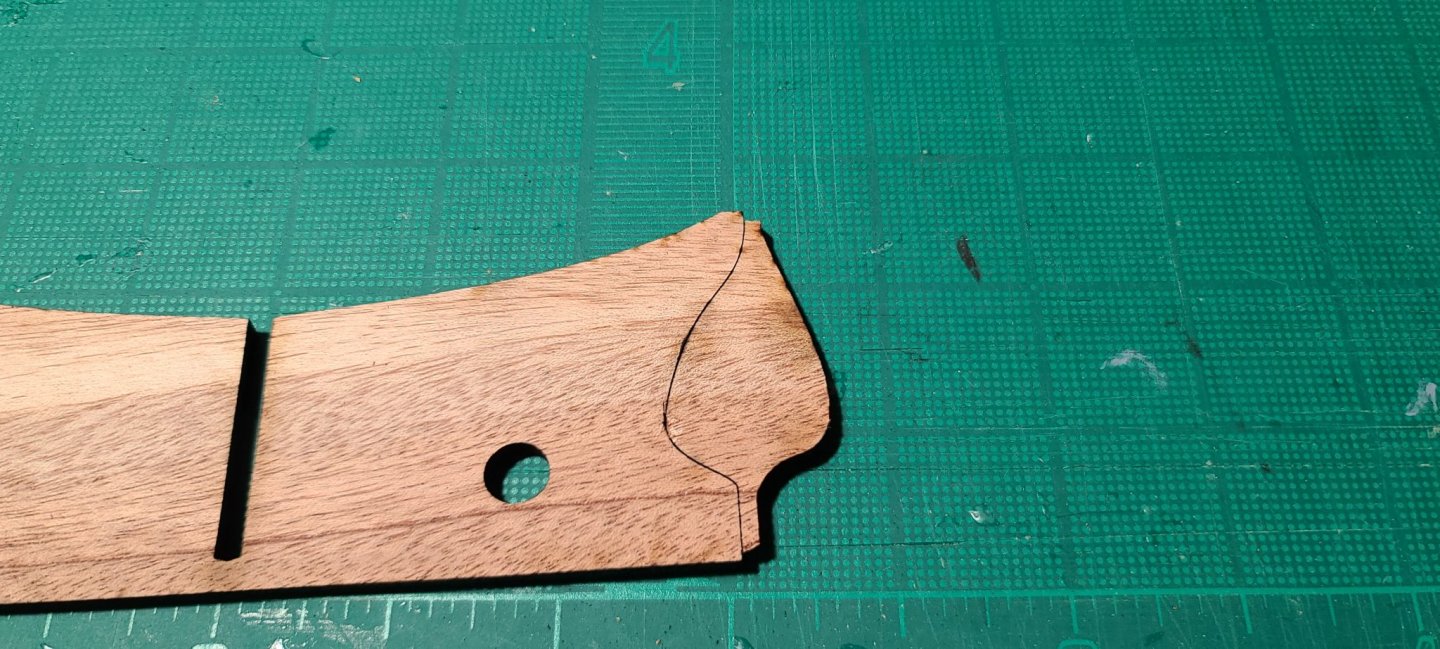
Dry fit of frames to keel. These were easier to separate from the sprues, the 1/16" chisel was fine for the ones that needed it. The keel seems deep compared to the the frames, but that might be the nature of this type of boat and/or the planking will make some of the difference. There are a few nibs need to sand on the frames. The slots for the deck pieces are a bit to tight to go onto the frames, so need to sneak up on that fit. I wrote in pencil the part numbers on the pieces. it just seemed easier to keep track that way.
-
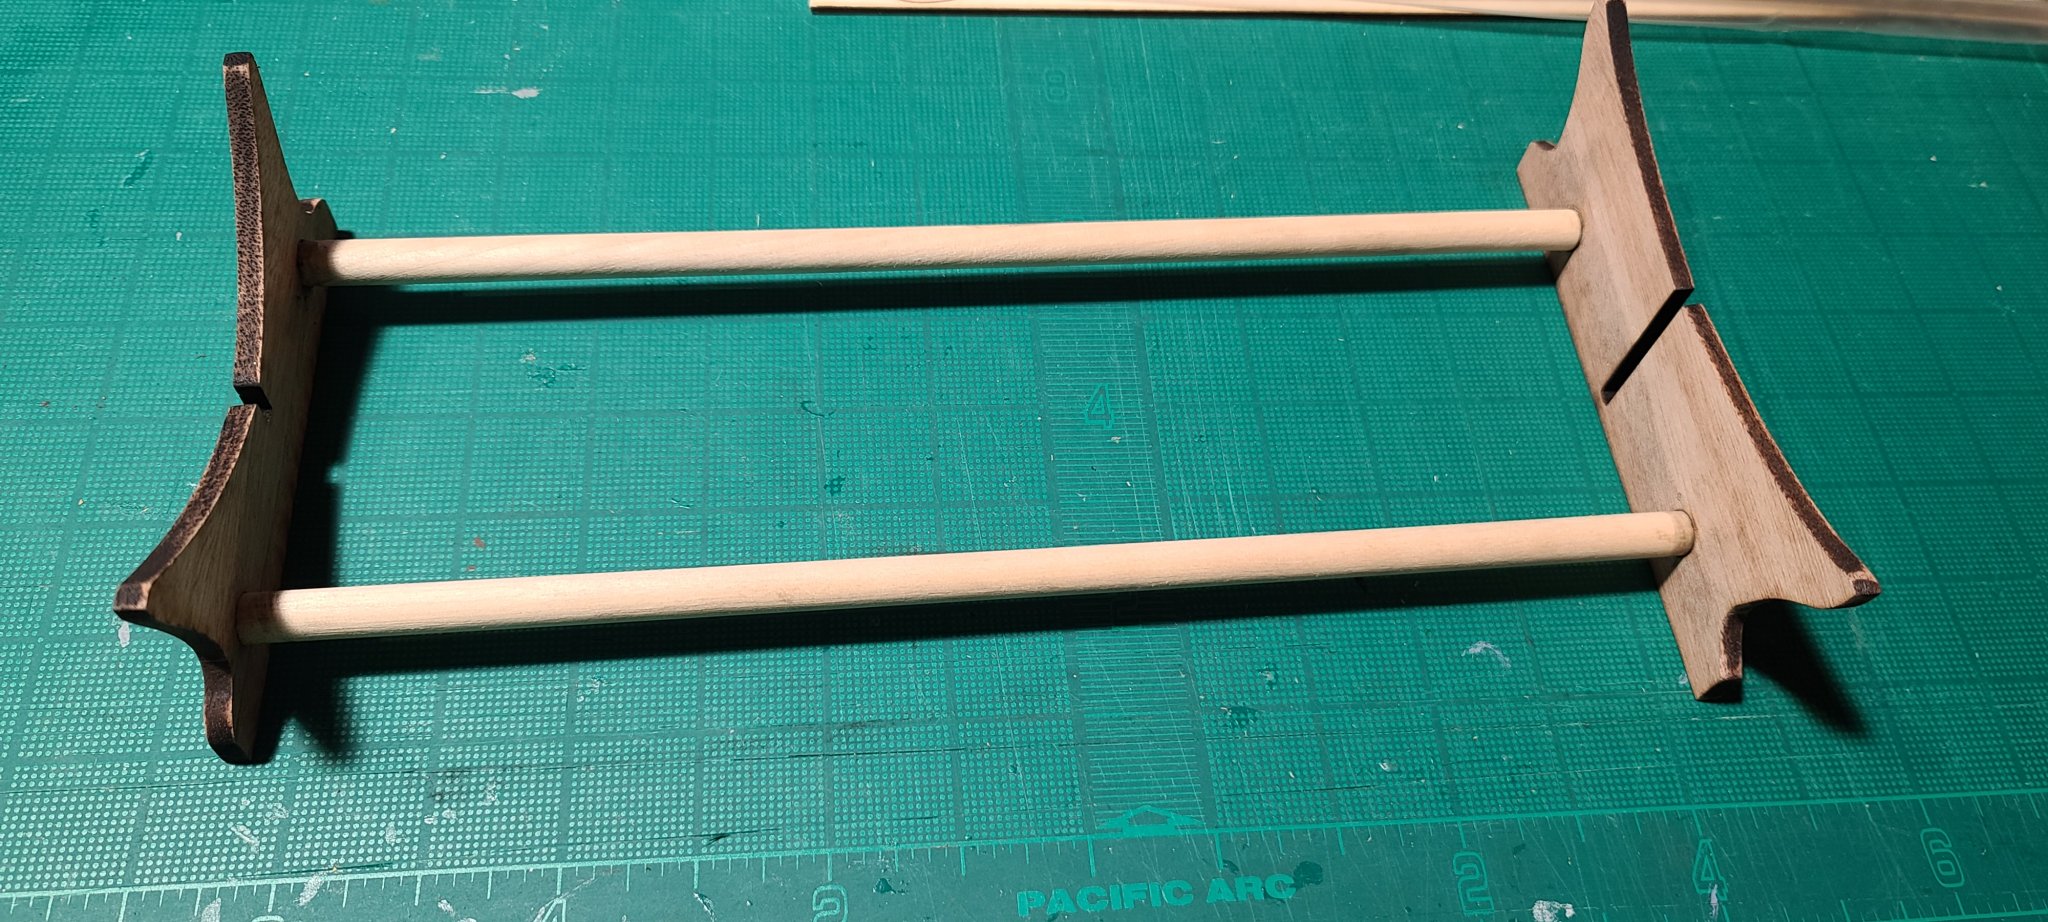
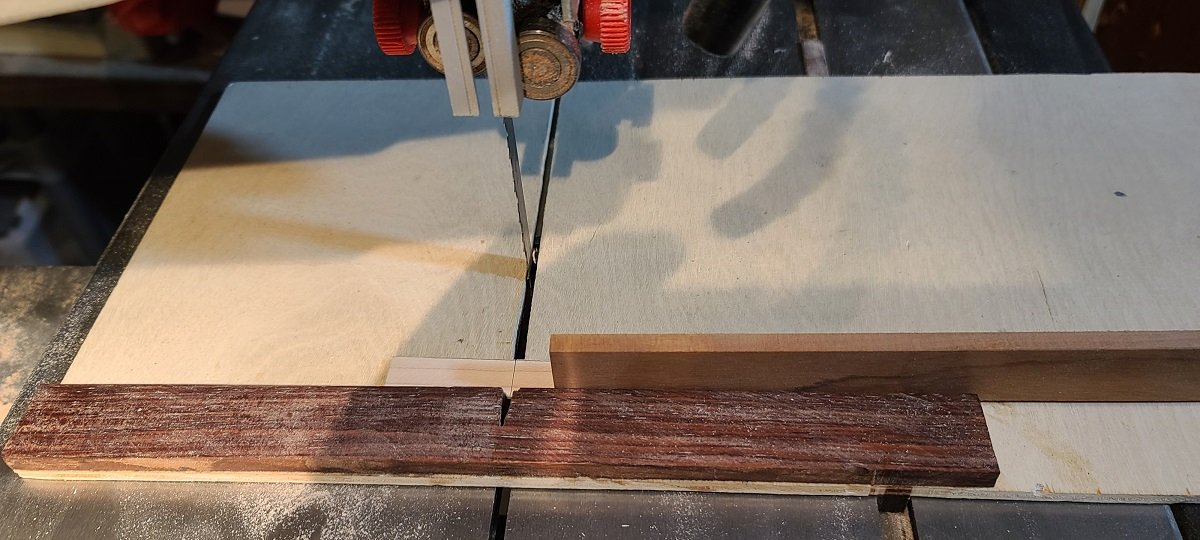
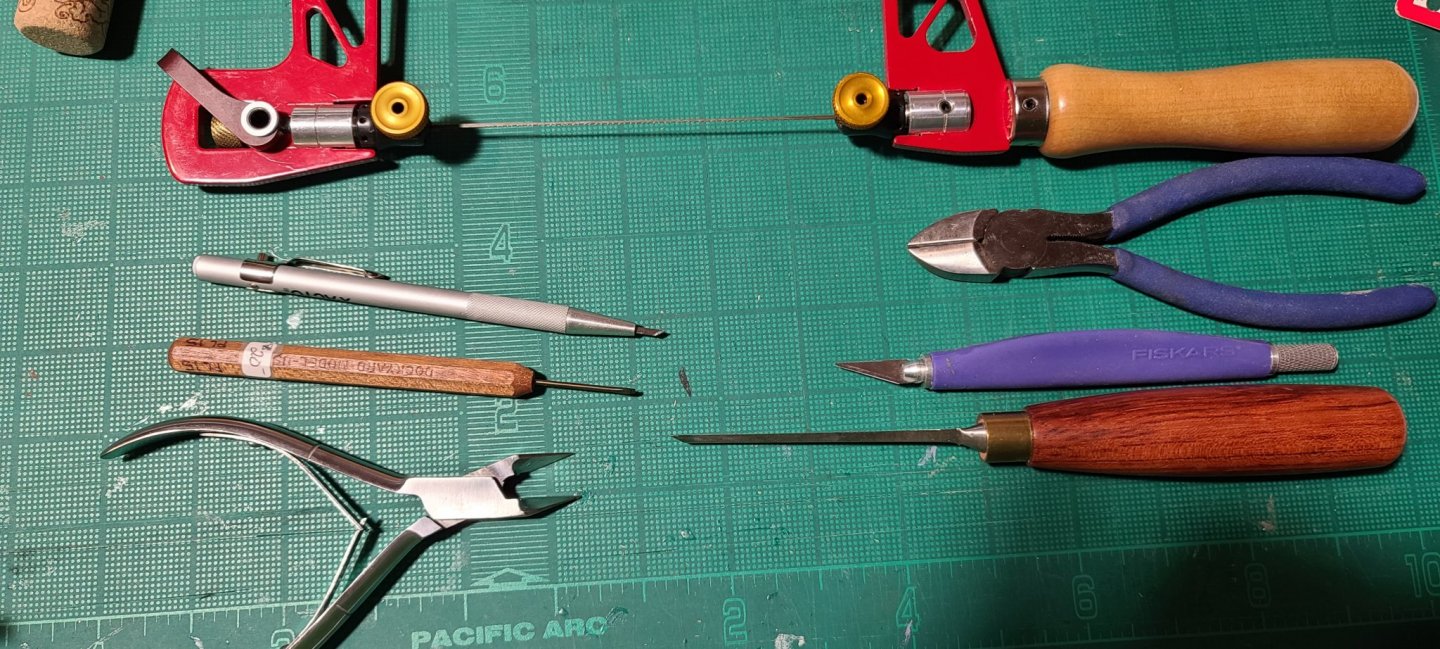
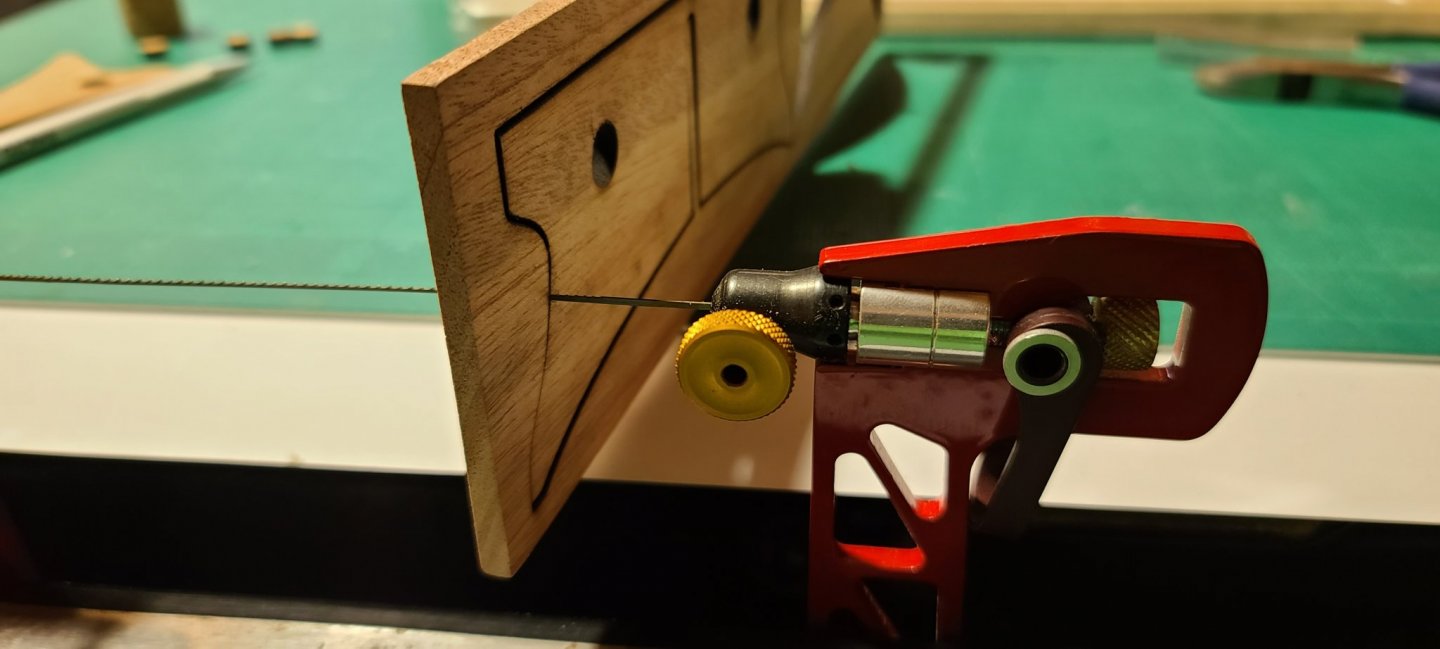
So what tool do people normally use to cut sprues from laser cut wood? The mahogany on the stand was a bit stubborn on one side. I tried a few different small blades and chisels before using a jewelers/fret saw. The small blades and chisels didn't seem to have the reach in the tight kerf to really use. The fret saw was awkward, but worked. I am pondering just cutting a fretsaw/scrollsaw blade to about an inch and a half and attaching it to the exacto handle if I run into this again. The rest of the kit is thinner birch plywood which I hope will come off or cut better. Once apart and sanded the stand went together fine. I test fitted each dowel end into different holes before gluing. After a little wiggling it sat flat.

-
Looking at the pictures of the Bryne and the MicroMark drum sander, they look very similarly externally. Do either have a crank or other fine adjustment to just take a small amount more off? That's a normal feature in regular wood working drum sanders.
-
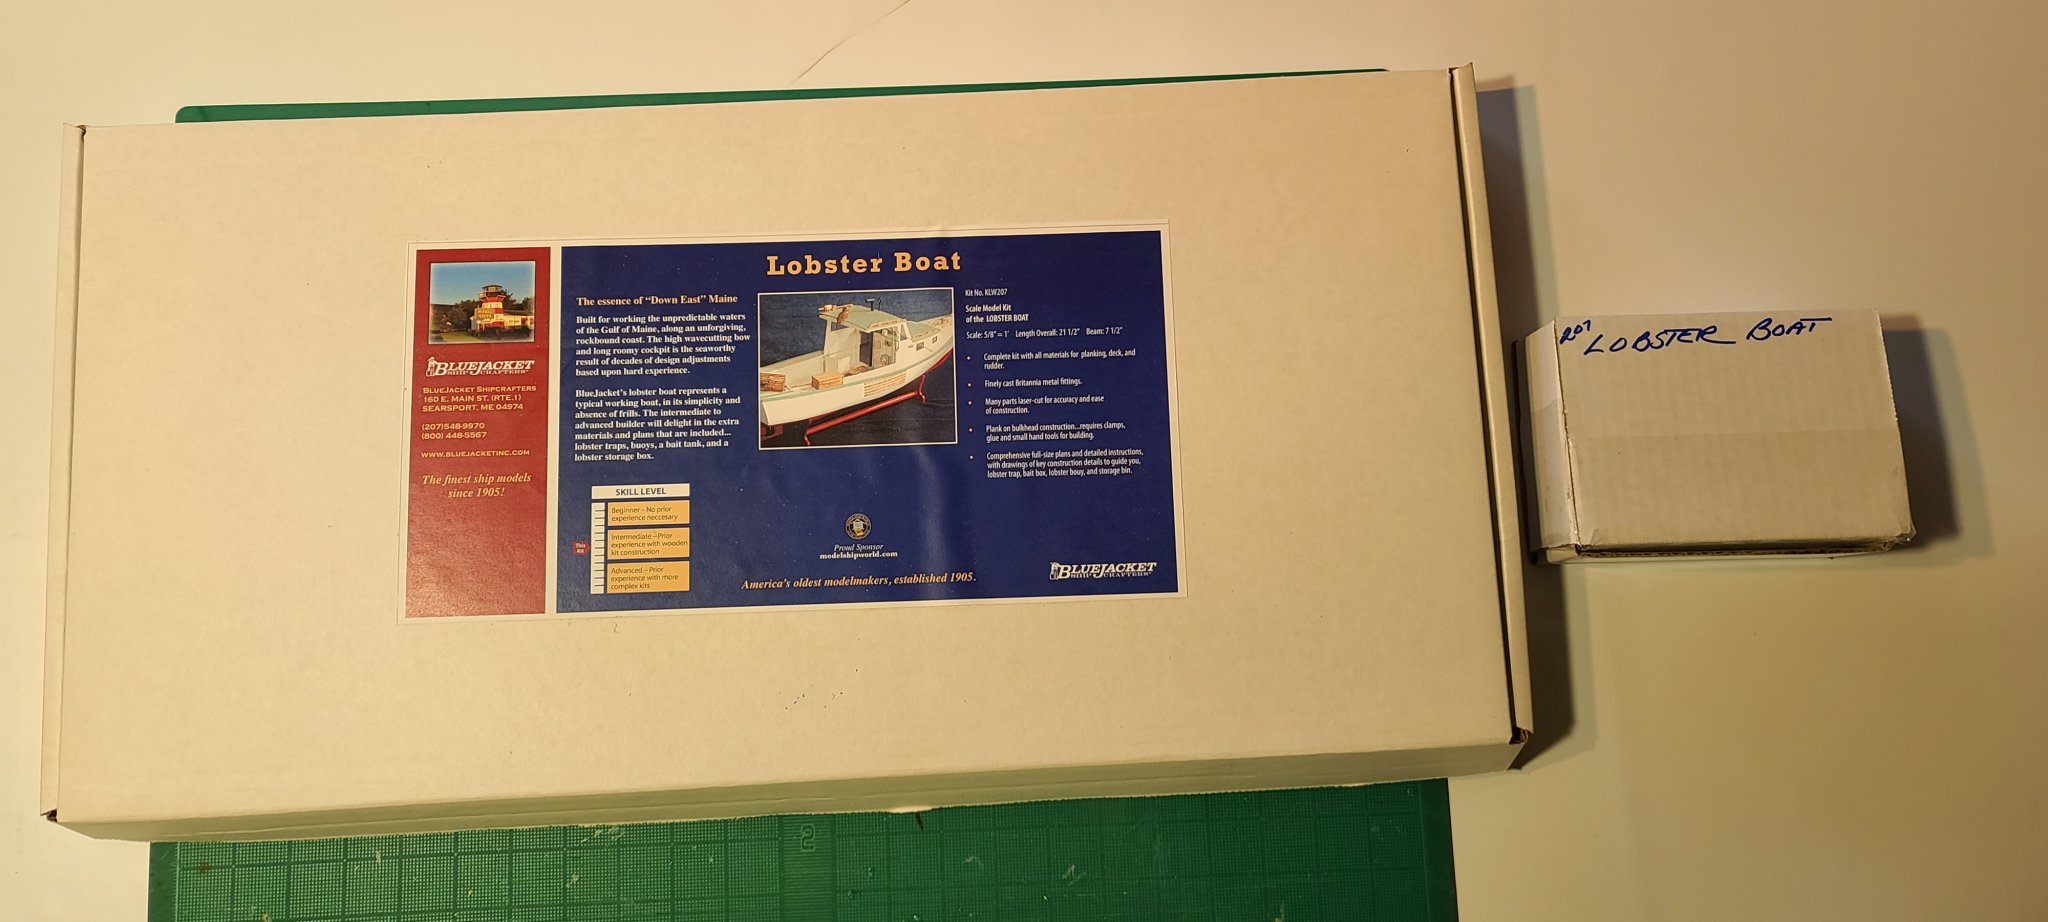
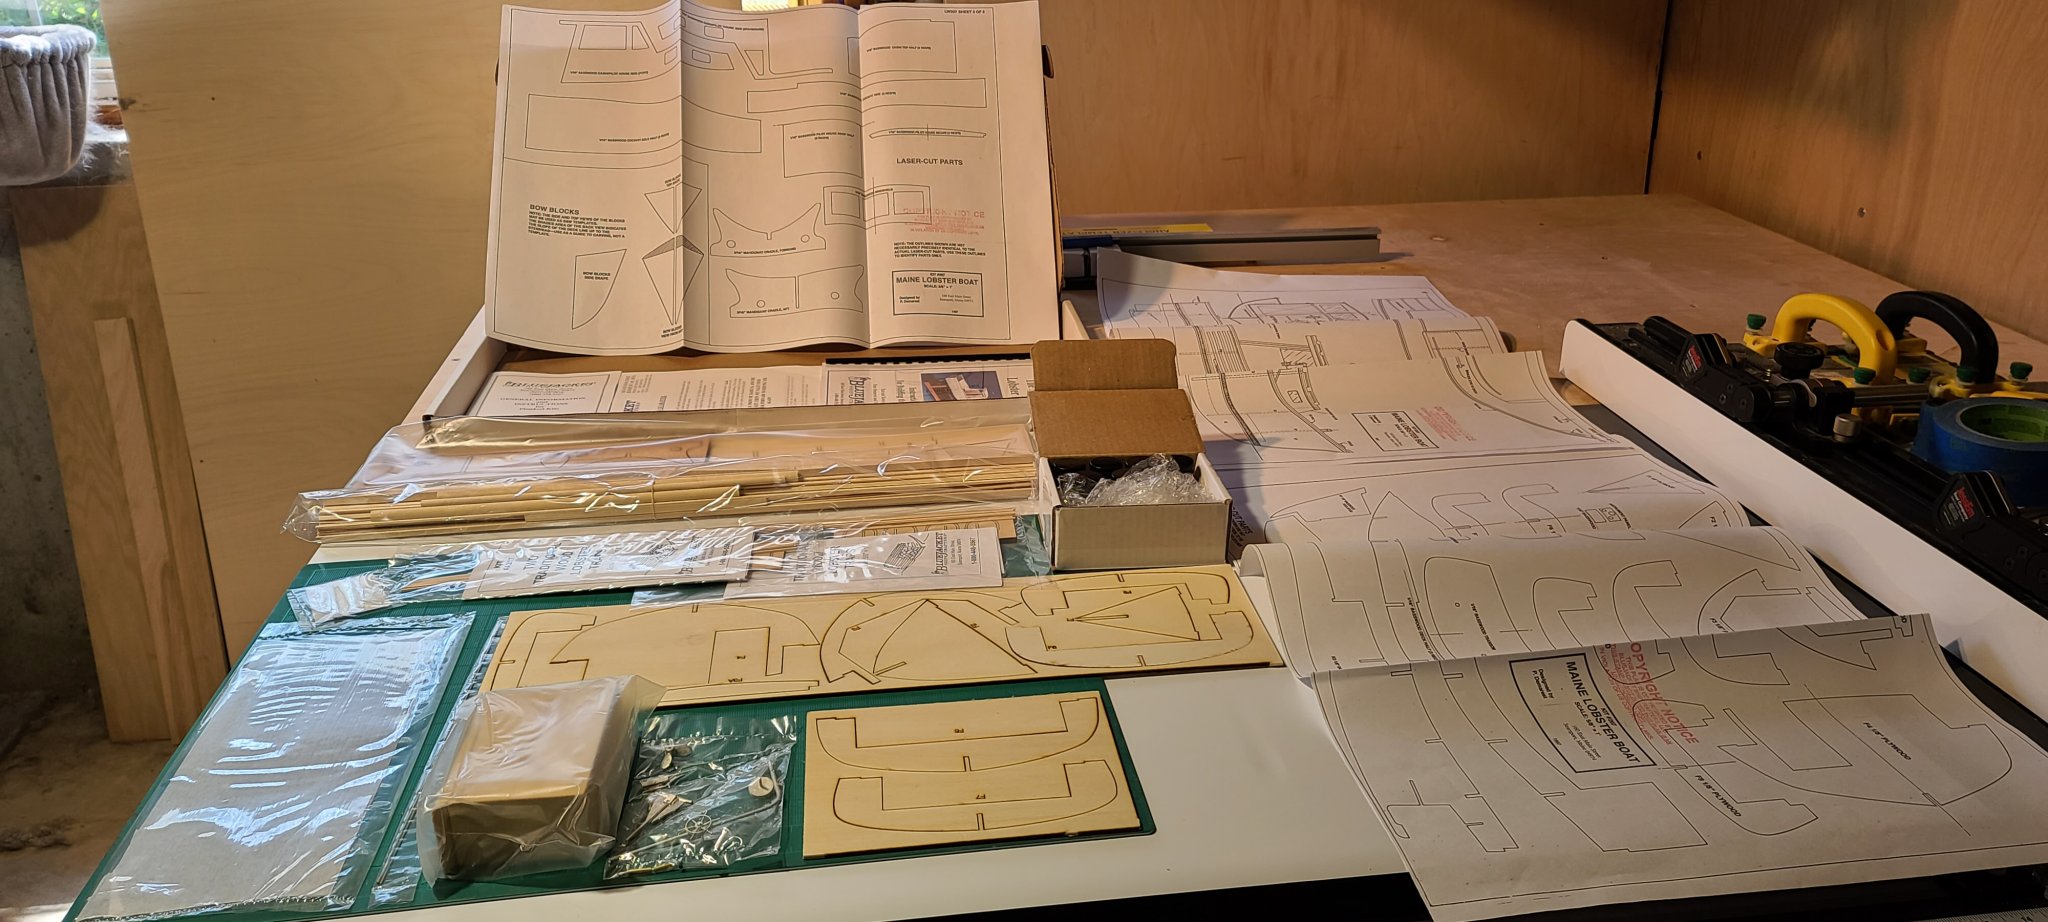
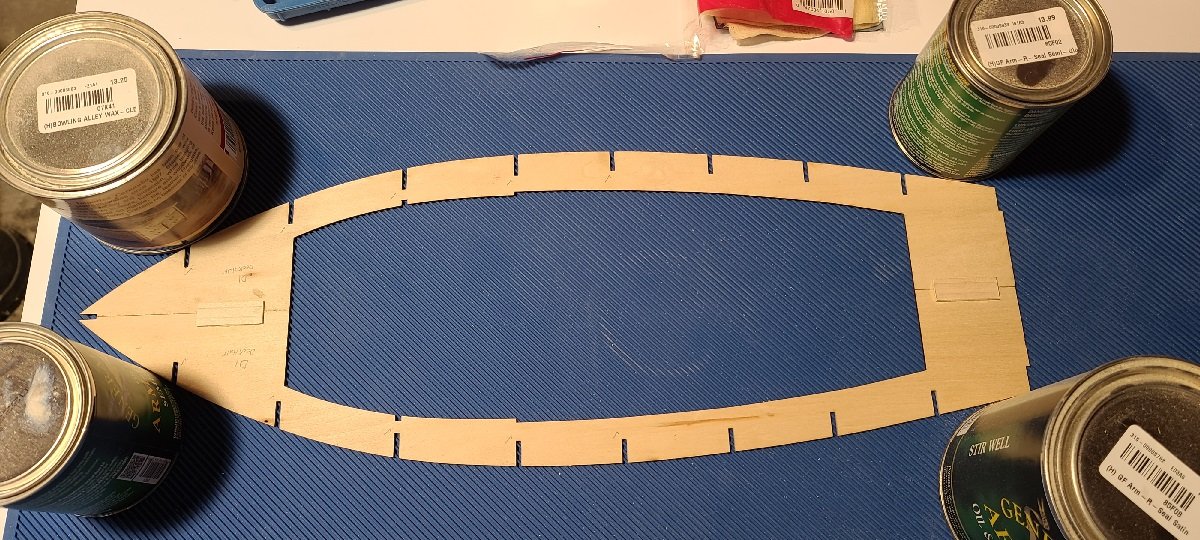
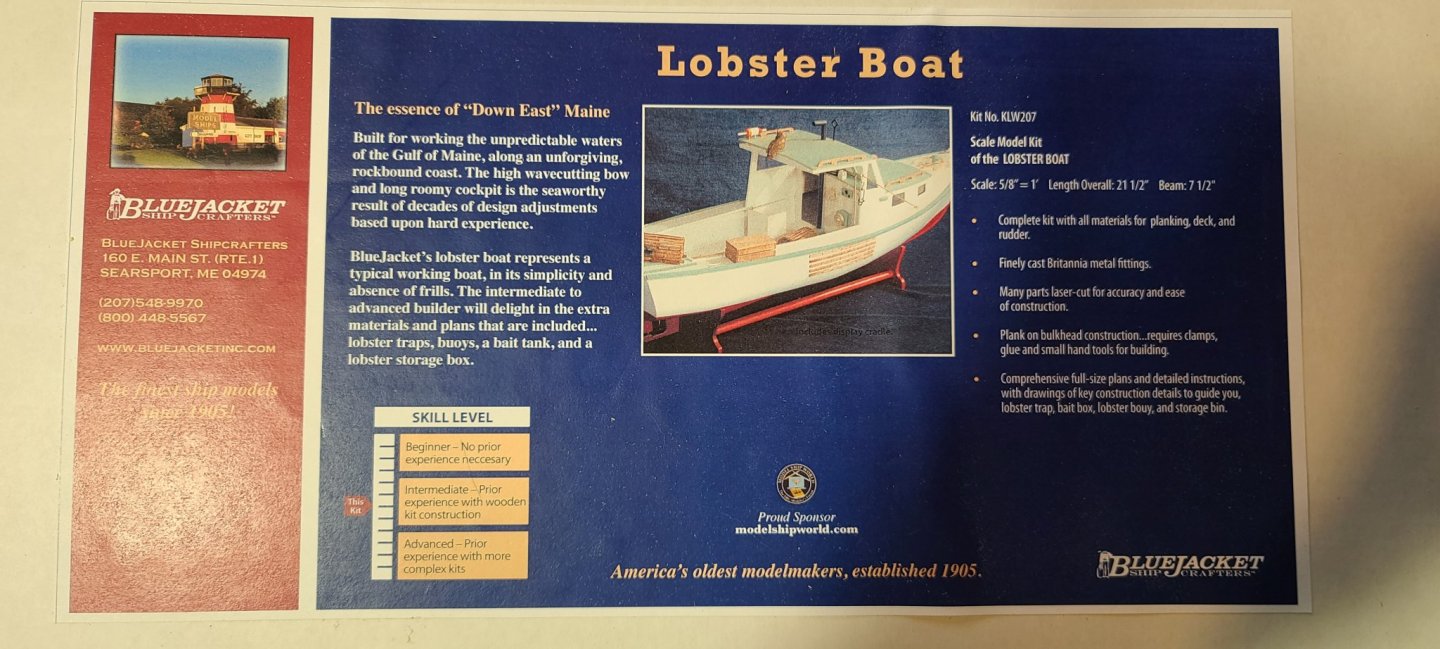
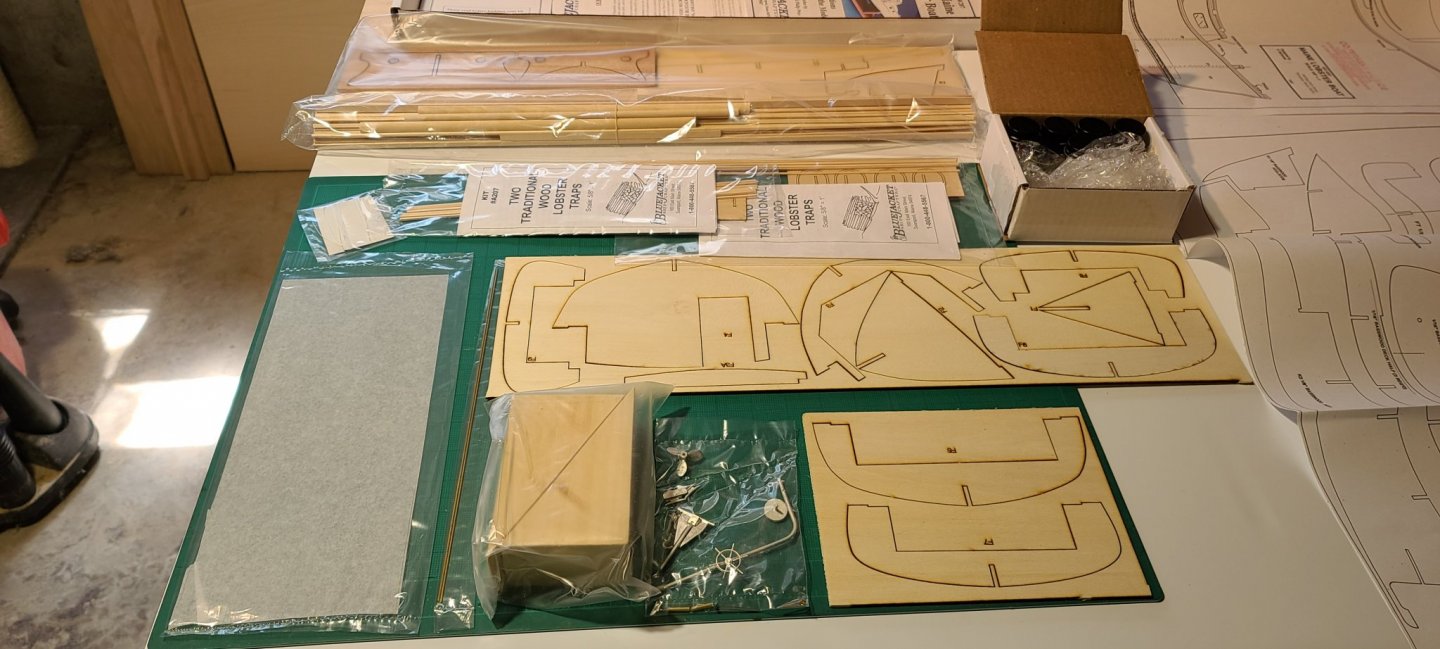
This is my first wooden "ship" model. I've been interested in them for some time. This seemed like a good entry point as it has planking and some wooden block shaping for the bow. It doesn't have masts and rigging. Blue Jacket rates thus as an intermediate model. The box contains laser cut parts, blocks for the bow, pewter fittings, flexible window/windshield material, some line and round brass stock. The small box is the optional paint kit.


-
My experience with gorilla glue was that it expanded significantly, but their wood glue may behave differently. Test it on some scrap pieces before trying it on a model.
- 9 replies
-
- 1
-

-
- new member
- wood ship
- (and 4 more)
-
Hello from Kansas City
Richard in Missouri replied to Richard in Missouri's topic in New member Introductions
I am in Belton -
Hi, I've been interested in wooden ships and models for a long time and am finally starting my first build. I have done a lot of general wood working and thanks to my wife a fair bit of doll house making/modifying so at least I am starting with many of the tools. I would consider myself intermediate in those hobbies, which should have some skill crossover. I am starting with the BlueJacket 5/8 scale Lobster boat which they list as an intermediate kit. The literature included pointed me to this site. I will work my way up to a tall ship in time. I did the plastic Constitution model that was widely available in my teens, but that was 35-40 years ago. I am in the Kansas City area. I know there was a small ship building club in the area that did a presentation at the KC woodworking guild a few years ago. My wife is from Maine and we travel out that way every few years. I was in the Navy when I was young, so am fairly well travelled in the US and many of the Countries in the northern Pacific.